Multi-Language Version Software Modification Use Guide V0.0.1
NC6.1 多语言安装指南
NC6.1多语言安装指南
UFIDA NC6.1支持多语言应用,最多支持5种语言,产品默认只有简体中文。
若要使用其他语言请购买相关语言包后进行安装。
多语言安装过程如下:
1、购买、获取多语安装盘
多语安装盘需要另外购买,购买后请将多语安装盘上传至NC应用服务器。
2、安装多语
3、多语安装与安装NC产品一样,运行ncsetup.bat(非windows服务器运行ncsetup.sh)即
可,安装多语
与安装NC产品一样,运行ncsetup.bat(非windows服务器运行ncsetup.sh),详细步骤如下:
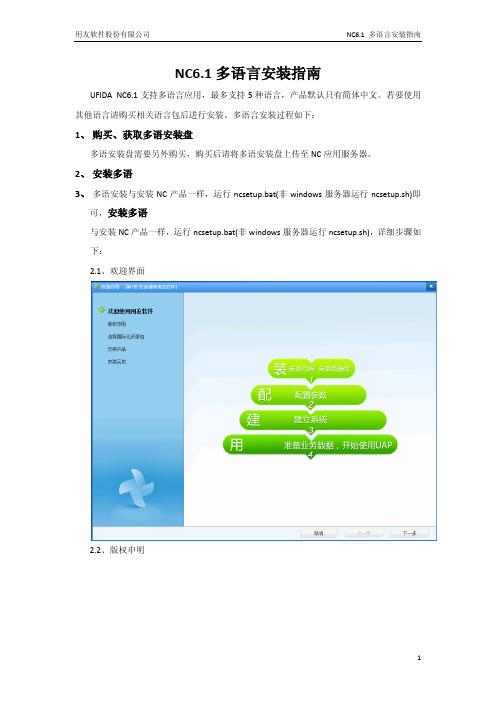
2.1、欢迎界面
2.2、版权申明
2.3、选择国际化资源包
2.4、完成安装
4、添加辅语种及升级多语言
以系统管理员登陆系统管理控制台,登陆地址为:http://hostip:port/admin.jsp。
3.1、打开系统管理节点,选中对应数据源,添加辅语种并保存
3.2、升级多语言
待多语言升级对话框消失后多语就安装完成了。
5、注意事项
安装多语时有以下注意事项:
4.1、安装多语前请先停止中间件
4.2、多机集群环境下注意代码同步,即每台服务器上都要安装一遍代码或一台安装完毕
后将代码同步到其他服务器
4.3、若多语是在系统初始化以后才安装,则部分系统已初始化的内容不能安装多语。
4.4、多语安装过程中会自动根据$nchome/ierp/bin/.installhistory.xml检测已安装产品从
而安装对应产品多语,所以安装多语前请检测该文件是否与实际使用产品一致。
EN55022-2006
认证之家 EUROPEAN STANDARDEN 55022 NORME EUROPÉENNEEUROPÄISCHE NORM September 2006CENELECEuropean Committee for Electrotechnical StandardizationComité Européen de Normalisation ElectrotechniqueEuropäisches Komitee für Elektrotechnische NormungCentral Secretariat: rue de Stassart 35, B - 1050 Brussels© 2006 CENELEC - All rights of exploitation in any form and by any means reserved worldwide for CENELEC members.Ref. No. EN 55022:2006 E ICS 33.100.10Supersedes EN 55022:1998 + A1:2000 + A2:2003English versionInformation technology equipment -Radio disturbance characteristics -Limits and methods of measurement(CISPR 22:2005, modified)Appareils de traitement de l'information - Caractéristiques des perturbationsradioélectriques -Limites et méthodes de mesure(CISPR 22:2005, modifiée)Einrichtungen der Informationstechnik - Funkstöreigenschaften - Grenzwerte und Messverfahren (CISPR 22:2005, modifiziert)This European Standard was approved by CENELEC on 2005-09-13. CENELEC members are bound to comply with the CEN/CENELEC Internal Regulations which stipulate the conditions for giving this European Standard the status of a national standard without any alteration.Up-to-date lists and bibliographical references concerning such national standards may be obtained on application to the Central Secretariat or to any CENELEC member.This European Standard exists in three official versions (English, French, German). A version in any other language made by translation under the responsibility of a CENELEC member into its own language and notified to the Central Secretariat has the same status as the official versions.CENELEC members are the national electrotechnical committees of Austria, Belgium, Cyprus, the Czech Republic, Denmark, Estonia, Finland, France, Germany, Greece, Hungary, Iceland, Ireland, Italy, Latvia, Lithuania, Luxembourg, Malta, the Netherlands, Norway, Poland, Portugal, Romania, Slovakia, Slovenia, Spain, Sweden, Switzerland and the United Kingdom.EN 55022:2006– 2 –ForewordThe text of the International Standard CISPR 22:2003 as well as A1:2004 and CISPR/I/136/FDIS (Amendment 3) and CISPR/I/128/CDV (Amendment 2, fragment 17), prepared by CISPR SC I "Electromagnetic compatibility of information technology equipment, multimedia equipment and receivers", together with the common modifications prepared by the Technical Committee CENELEC TC 210, Electromagnetic compatibility (EMC), was submitted to the CENELEC Unique Acceptance Procedure for acceptance as a European Standard.In addition, the text of CISPR/I/135A/FDIS (future A2, fragment 1) to CISPR 22:2003, also prepared by CISPR SC I "Electromagnetic compatibility of information technology equipment, multimedia equipment and receivers", was submitted to the CENELEC formal vote as prAD to prEN 55022:2005, with the intention of the two documents being merged and ratified together as a new edition of EN 55022.During the period of voting on these CENELEC drafts, the amendments CISPR/I/135A/FDIS and CISPR/I/136/FDIS (Amendments 2 and 3 respectively) made to CISPR 22:2003, resulted in the publication of a new (fifth) edition of CISPR 22, in accordance with IEC rules. The resulting CISPR 22:2005 was published in April 2005.This resulting version of EN 55022, which was ratified on 2005-09-13, is therefore identical to CISPR 22:2005 except for the common modifications that were included in the document submitted to the CENELEC Unique Acceptance Procedure. The common modifications include CISPR/I/128/CDV, as this draft was not implemented in the unamended CISPR 22:2005.This European Standard supersedes EN 55022:1998 and its amendments A1:2000 and A2:2003.The following dates were fixed:–latest date by which the EN has to be implementedat national level by publication of an identicalnational standard or by endorsement (dop) 2007-04-01–latest date by which the national standards conflictingwith the EN have to be withdrawn (dow) 2009-10-01This European Standard has been prepared under a mandate given to CENELEC by the European Commission and the European Free Trade Association and covers essential requirements of EC Directives 89/336/EEC, 2004/108/EC and 1999/5/EC. See Annex ZZ.__________– 3 – EN 55022:2006CONTENTS INTRODUCTION (6)1Scope and object (7)2Normative references (7)3Definitions (8)4Classification of ITE (9)4.1Class B ITE (9)4.2Class A ITE (10)5Limits for conducted disturbance at mains terminals and telecommunication ports (10)5.1Limits of mains terminal disturbance voltage (10)5.2Limits of conducted common mode (asymmetric mode) disturbanceat telecommunication ports (11)6Limits for radiated disturbance (11)7Interpretation of CISPR radio disturbance limit (12)7.1Significance of a CISPR limit (12)7.2Application of limits in tests for conformity of equipment in series production (12)8General measurement conditions (13)8.1Ambient noise (13)8.2General arrangement (14)8.3EUT arrangement (16)8.4Operation of the EUT (18)8.5Operation of multifunction equipment (19)9Method of measurement of conducted disturbance at mains terminals and telecommunication ports (20)9.1Measurement detectors (20)9.2Measuring receivers (20)9.3Artificial mains network (AMN) (20)9.4Ground reference plane (21)9.5EUT arrangement (21)9.6Measurement of disturbances at telecommunication ports (23)9.7Recording of measurements (27)10Method of measurement of radiated disturbance (27)10.1Measurement detectors (27)10.2Measuring receivers (27)10.3Antenna (27)10.4Measurement site (28)10.5EUT arrangement (29)10.6Recording of measurements (29)10.7Measurement in the presence of high ambient signals (30)10.8User installation testing (30)11Measurement uncertainty (30)EN 55022:2006– 4 –Annex A (normative) Site attenuation measurements of alternative test sites (41)Annex B (normative) Decision tree for peak detector measurements (47)Annex C (normative) Possible test set-ups for common mode measurements (48)Annex D (informative) Schematic diagrams of examples of impedance stabilization networks (ISN) (55)Annex E (informative) Parameters of signals at telecommunication ports (64)Annex F (informative) Rationale for disturbance measurements and methods (67)Annex ZA (normative) Normative references to international publications with their corresponding European publications (75)Annex ZZ (informative) Coverage of Essential Requirements of EC Directives (76)Bibliography (74)Figure 1 – Test site (31)Figure 2 – Minimum alternative measurement site (32)Figure 3 – Minimum size of metal ground plane (32)Figure 4 – Example test arrangement for tabletop equipment (conducted and radiated emissions) (plan view) (33)Figure 5 – Example test arrangement for tabletop equipment (conducted emission measurement – alternative 1a) (34)Figure 6 – Example test arrangement for tabletop equipment (conducted emission measurement – alternative 1b) (34)Figure 7 – Example test arrangement for tabletop equipment (conducted emission measurement – alternative 2) (35)Figure 8 – Example test arrangement for floor-standing equipment (conductedemission measurement) (36)Figure 9 – Example test arrangement for combinations of equipment (conductedemission measurement) (37)Figure 10 – Example test arrangement for tabletop equipment (radiated emission measurement) (37)Figure 11 – Example test arrangement for floor-standing equipment (radiated emission measurement) (38)Figure 12 – Example test arrangement for floor-standing equipment with vertical riserand overhead cables (radiated and conducted emission measurement) (39)Figure 13 – Example test arrangement for combinations of equipment (radiatedemission measurement) (40)Figure A.1 – Typical antenna positions for alternate site NSA measurements (44)Figure A.2 – Antenna positions for alternate site measurements for minimumrecommended volume (45)Figure B.1 – Decision tree for peak detector measurements (47)Figure C.1 – Using CDNs described in IEC 61000-4-6 as CDN/ISNs (49)Figure C.2 – Using a 150 Ω load to the outside surface of the shield ("in situCDN/ISN") (50)Figure C.3 – Using a combination of current probe and capacitive voltage probe (50)Figure C.4 – Using no shield connection to ground and no ISN (51)Figure C.5 – Calibration fixture (53)Figure C.6 – Flowchart for selecting test method (54)Figure D.1 − ISN for use with unscreened single balanced pairs (55)– 5 – EN 55022:2006 Figure D.2 − ISN with high longitudinal conversion loss (LCL) for use with either oneor two unscreened balanced pairs (56)Figure D.3 − ISN with high longitudinal conversion loss (LCL) for use with one, two,three, or four unscreened balanced pairs (57)Figure D.4 − ISN, including a 50 Ω source matching network at the voltage measuringport, for use with two unscreened balanced pairs (58)Figure D.5 − ISN for use with two unscreened balanced pairs (59)Figure D.6 − ISN, including a 50 Ω source matching network at the voltage measuringport, for use with four unscreened balanced pairs (60)Figure D.7 − ISN for use with four unscreened balanced pairs (61)Figure D.8 − ISN for use with coaxial cables, employing an internal common modechoke created by bifilar winding an insulated centre-conductor wire and an insulatedscreen-conductor wire on a common magnetic core (for example, a ferrite toroid) (61)Figure D.9 − ISN for use with coaxial cables, employing an internal common modechoke created by miniature coaxial cable (miniature semi-rigid solid copper screen or miniature double-braided screen coaxial cable) wound on ferrite toroids (62)Figure D.10 − ISN for use with multi-conductor screened cables, employing an internal common mode choke created by bifilar winding multiple insulated signal wires and an insulated screen-conductor wire on a common magnetic core (for example, a ferrite toroid) (62)Figure D.11 − ISN for use with multi-conductor screened cables, employing an internal common mode choke created by winding a multi-conductor screened cable on ferrite toroids (63)Figure F.1 – Basic circuit for considering the limits with defined TCM impedance of 150 Ω..70 Figure F.2 – Basic circuit for the measurement with unknown TCM impedance (70)Figure F.3 – Impedance layout of the components used in Figure C.2 (72)Figure F.4 – Basic test set-up to measure combined impedance of the 150 Ω and ferrites (73)Table 1 – Limits for conducted disturbance at the mains ports of class A ITE (10)Table 2 – Limits for conducted disturbance at the mains ports of class B ITE (11)Table 3 – Limits of conducted common mode (asymmetric mode) disturbanceat telecommunication ports in the frequency range 0,15 MHz to 30 MHz for class A equipment (11)Table 4 – Limits of conducted common mode (asymmetric mode) disturbance at telecommunication ports in the frequency range 0,15 MHz to 30 MHz for class B equipment (11)Table 5 – Limits for radiated disturbance of class A ITE at a measuring distance of10 m (12)Table 6 – Limits for radiated disturbance of class B ITE at a measuring distance of10 m (12)Table 7 – Acronyms used in figures (31)Table A.1 – Normalized site attenuation (A N (dB)) for recommended geometries with broadband antennas (43)Table F.1 – Summary of advantages and disadvantages of the methods described inAnnex C (68)EN 55022:2006– 6 –INTRODUCTIONThe scope is extended to the whole radio-frequency range from 9 kHz to 400 GHz, but limits are formulated only in restricted frequency bands, which is considered sufficient to reach adequate emission levels to protect radio broadcast and telecommunication services, and to allow other apparatus to operate as intended at reasonable distance.– 7 – EN 55022:2006 INFORMATION TECHNOLOGY EQUIPMENT –RADIO DISTURBANCE CHARACTERISTICS –LIMITS AND METHODS OF MEASUREMENT1 Scope and objectThis International Standard applies to ITE as defined in 3.1.Procedures are given for the measurement of the levels of spurious signals generated by the ITE and limits are specified for the frequency range 9 kHz to 400 GHz for both class A and class B equipment. No measurements need be performed at frequencies where no limits are specified.The intention of this publication is to establish uniform requirements for the radio disturbance level of the equipment contained in the scope, to fix limits of disturbance, to describe methods of measurement and to standardize operating conditions and interpretation of results.2 Normative referencesThe following referenced documents are indispensable for the application of this document. For dated references, only the edition cited applies. For undated references, the latest edition of the referenced document (including any amendments) applies.IEC 60083:1997, Plugs and socket-outlets for domestic and similar general use standardized in member countries of IECIEC 61000-4-6:2003, Electromagnetic compatibility (EMC) – Part 4-6: Testing and measurement techniques – Immunity to conducted disturbances, induced by radio-frequency fieldsCISPR 11:2003, Industrial, scientific, and medical (ISM) radio-frequency equipment – Electro-magnetic disturbance characteristics – Limits and methods of measurementCISPR 13:2001, Sound and television broadcast receivers and associated equipment – Radio disturbance characteristics – Limits and methods of measurementCISPR 16-1-1:2003, Specification for radio disturbance and immunity measuring apparatus and methods – Part 1-1: Radio disturbance and immunity measuring apparatus – Measuring apparatusCISPR 16-1-2:2003, Specification for radio disturbance and immunity measuring apparatus and methods – Part 1-2: Radio disturbance and immunity measuring apparatus – Ancillary equipment – Conducted disturbances 1Amendment 1 (2004)___________1There exists a consolidated edition 1.1 (2004) including edition 1.0 and its Amendment 1.EN 55022:2006– 8 –CISPR 16-1-4:2004, Specification for radio disturbance and immunity measuring apparatus and methods – Part 1-4: Radio disturbance and immunity measuring apparatus – Ancillary equipment – Radiated disturbancesCISPR 16-4-2:2003, Specification for radio disturbance and immunity measuring apparatus and methods – Part 4-2: Uncertainties, statistics and limit modelling – Uncertainty in EMC measurements3 DefinitionsFor the purposes of this document the following definitions apply:3.1information technology equipment (ITE)any equipment:a) which has a primary function of either (or a combination of) entry, storage, display,retrieval, transmission, processing, switching, or control, of data and of telecommuni-cation messages and which may be equipped with one or more terminal ports typically operated for information transfer;b) with a rated supply voltage not exceeding 600 V.It includes, for example, data processing equipment, office machines, electronic business equipment and telecommunication equipment.Any equipment (or part of the ITE equipment) which has a primary function of radio trans-mission and/or reception according to the ITU Radio Regulations are excluded from the scope of this publication.NOTE Any equipment which has a function of radio transmission and/or reception according to the definitions of the ITU Radio Regulations should fulfil the national radio regulations, whether or not this publication is also valid. Equipment, for which all disturbance requirements in the frequency range are explicitly formulated in other IEC or CISPR publications, are excluded from the scope of this publication.3.2equipment under test (EUT)representative ITE or functionally interactive group of ITE (system) which includes one or more host unit(s) and is used for evaluation purposes3.3host unitpart of an ITE system or unit that provides the mechanical housing for modules, which may contain radio-frequency sources, and may provide power distribution to other ITE. Power distribution may be a.c., d.c., or both between the host unit(s) and modules or other ITE3.4modulepart of an ITE which provides a function and may contain radio-frequency sources3.5identical modules and ITEmodules and ITE produced in quantity and within normal manufacturing tolerances to a given manufacturing specification– 9 – EN 55022:20063.6telecommunications/network portpoint of connection for voice, data and signalling transfers intended to interconnect widely-dispersed systems via such means as direct connection to multi-user telecommunications networks (e.g. public switched telecommunications networks (PSTN) integrated services digital networks (ISDN), x-type digital subscriber lines (xDSL), etc.), local area networks (e.g. Ethernet, Token Ring, etc.) and similar networksNOTE A port generally intended for interconnection of components of an ITE system under test (e.g. RS-232, IEEE Standard 1284 (parallel printer), Universal Serial Bus (USB), IEEE Standard 1394 (“Fire Wire”), etc.) and used in accordance with its functional specifications (e.g. for the maximum length of cable connected to it), is not considered to be a telecommunications/network port under this definition.3.7multifunction equipmentinformation technology equipment in which two or more functions subject to this standard and/or to other standards are provided in the same unitNOTE Examples of information technology equipment include–a personal computer provided with a telecommunication function and/or broadcast reception function; – a personal computer provided with a measuring function, etc.3.8total common mode impedanceTCM impedanceimpedance between the cable attached to the EUT port under test and the reference ground planeNOTE The complete cable is seen as one wire of the circuit, the ground plane as the other wire of the circuit. The TCM wave is the transmission mode of electrical energy, which can lead to radiation of electrical energy if the cable is exposed in the real application. Vice versa, this is also the dominant mode, which results from exposition of the cable to external electromagnetic fields.3.9arrangementphysical layout of the EUT that includes connected peripherals/associated equipment within the test area3.10configurationmode of operation and other operational conditions of the EUT3.11associated equipmentAEequipment needed to maintain the data traffic on the cable attached to the EUT port under test and (or) to maintain the normal operation of the EUT during the test. The associated equipment may be physically located outside the test areaNOTE The AE can be another ITE, a traffic simulator or a connection to a network. The AE can be situated close to the measurement set-up, outside the measurement room or be represented by the connection to a network. AE should not have any appreciable influence on the test results.4 Classification of ITE4.1 Class B ITEClass B ITE is a category of apparatus which satisfies the class B ITE disturbance limits. ITE is subdivided into two categories denoted class A ITE and class B ITE.EN 55022:2006 – 10 – Class B ITE is intended primarily for use in the domestic environment and may include:– equipment with no fixed place of use; for example, portable equipment powered by built-inbatteries;– telecommunication terminal equipment powered by a telecommunication network; – personal computers and auxiliary connected equipment.NOTE The domestic environment is an environment where the use of broadcast radio and television receivers may be expected within a distance of 10 m of the apparatus concerned.4.2 Class A ITE WarningThis is a class A product. In a domestic environment this product may cause radio inter-ference in which case the user may be required to take adequate measures.5 Limits for conducted disturbance at mains terminalsand telecommunication portsThe equipment under test (EUT) shall meet the limits in Tables 1 and 3 or 2 and 4, as appli-cable, including the average limit and the quasi-peak limit when using, respectively, an average detector receiver and quasi-peak detector receiver and measured in accordance with the methods described in Clause 9. Either the voltage limits or the current limits in Table 3 or 4, as applicable, shall be met except for the measurement method of C.1.3 where both limits shall be met. If the average limit is met when using a quasi-peak detector receiver, the EUT shall be deemed to meet both limits and measurement with the average detector receiver is unnecessary.If the reading of the measuring receiver shows fluctuations close to the limit, the reading shall be observed for at least 15 s at each measurement frequency; the higher reading shall be recorded with the exception of any brief isolated high reading which shall be ignored.5.1 Limits of mains terminal disturbance voltageTable 1 – Limits for conducted disturbance at the mains portsof class A ITE Limits dB(μV) Frequency rangeMHzQuasi-peak Average 0,15 to 0,5079 66 0,50 to 30 73 60NOTE The lower limit shall apply at the transition frequency.Class A ITE is a category of all other ITE which satisfies the class A ITE limits but not the class B ITE limits. The following warning shall be included in the instructions for use:Table 2 – Limits for conducted disturbance at the mains portsof class B ITE Limits dB(μV) Frequency rangeMHzQuasi-peak Average 0,15 to 0,5066 to 56 56 to 46 0,50 to 556 46 5 to 30 60 50NOTE 1 The lower limit shall apply at the transition frequencies.NOTE 2 The limit decreases linearly with the logarithm of the frequency in therange 0,15 MHz to 0,50 MHz.5.2 Limits of conducted common mode (asymmetric mode) disturbanceat telecommunication ports 2)Table 3 – Limits of conducted common mode (asymmetric mode) disturbanceat telecommunication ports in the frequency range 0,15 MHz to 30 MHzfor class A equipment Voltage limits dB (μV) Current limits dB (μA) Frequency rangeMHzQuasi-peak Average Quasi-peak Average0,15 to 0,597 to 87 84 to 74 53 to 43 40 to 30 0,5 to 30 87 74 43 30 NOTE 1 The limits decrease linearly with the logarithm of the frequency in the range 0,15 MHz to 0,5 MHz.NOTE 2 The current and voltage disturbance limits are derived for use with an impedance stabilization network (ISN) which presents a common mode (asymmetric mode) impedance of 150 Ω to the telecommunication port under test (conversion factor is 20 log 10 150 / I = 44 dB).Table 4 – Limits of conducted common mode (asymmetric mode) disturbanceat telecommunication ports in the frequency range 0,15 MHz to 30 MHzfor class B equipment Voltage limits dB(μV) Current limits dB(μA) Frequency rangeMHzQuasi-peak Average Quasi-peakAverage 0,15 to 0,584 to 74 74 to 64 40 to 30 30 to 20 0,5 to 30 74 64 30 20 NOTE 1 The limits decrease linearly with the logarithm of the frequency in the range 0,15 MHz to 0,5 MHz.NOTE 2 The current and voltage disturbance limits are derived for use with an impedance stabilization network (ISN) which presents a common mode (asymmetric mode) impedance of 150 Ω to the telecommunication port under test (conversion factor is 20 log 10 150 / I = 44 dB).6 Limits for radiated disturbanceThe EUT shall meet the limits of Table 5 or Table 6 when measured at the measuring distance R in accordance with the methods described in Clause 10. If the reading on the measuring receiver shows fluctuations close to the limit, the reading shall be observed for at least 15 s at each measurement frequency; the highest reading shall be recorded, with the exception of any brief isolated high reading, which shall be ignored.___________2) See 3.6.Table 5 – Limits for radiated disturbance of class A ITE at a measuring distance of 10 mFrequency rangeMHz Quasi-peak limits dB(μV/m)30 to 230 40230 to 1 000 47NOTE 1 The lower limit shall apply at the transition frequency.NOTE 2 Additional provisions may be required for cases where interference occurs.Table 6 – Limits for radiated disturbance of class B ITEat a measuring distance of 10 mFrequency rangeMHz Quasi-peak limits dB(μV/m)30 to 230 30230 to 1 000 37NOTE 1 The lower limit shall apply at the transition frequency.NOTE 2 Additional provisions may be required for cases where interferenceoccurs.7 Interpretation of CISPR radio disturbance limit7.1 Significance of a CISPR limit7.1.1 A CISPR limit is a limit which is recommended to national authorities for incorporation in national publications, relevant legal regulations and official specifications. It is also recom-mended that international organizations use these limits.7.1.2The significance of the limits for equipment shall be that, on a statistical basis, at least 80 % of the mass-produced equipment complies with the limits with at least 80 % confidence.7.2 Application of limits in tests for conformity of equipment in series production7.2.1Tests shall be made:7.2.1.1Either on a sample of equipment of the type using the statistical method of evaluation set out in 7.2.3.7.2.1.2Or, for simplicity's sake, on one equipment only.7.2.2Subsequent tests are necessary from time to time on equipment taken at random from production, especially in the case referred to in 7.2.1.2.7.2.3Statistically assessed compliance with limits shall be made as follows:This test shall be performed on a sample of not less than five and not more than 12 items of the type. If, in exceptional circumstances, five items are not available, a sample of four or three shall be used. Compliance is judged from the following relationship:x kS +≤n L wherex is the arithmetic mean of the measured value of n items in the sample()S n x x n 2n 211=−−∑x n is the value of the individual itemL is the appropriate limitk is the factor derived from tables of the non-central t -distribution which assures with 80 %confidence that 80 % of the type is below the limit; the value of k depends on the sample size n and is stated below.The quantities x n , x , S n and L are expressed logarithmically: dB(μV), dB(μV/m) or dB(pW). n3 4 5 6 7 8 9 10 11 12 k 2,04 1,69 1,52 1,42 1,35 1,30 1,27 1,24 1,21 1,207.2.4 The banning of sales, or the withdrawal of a type approval, as a result of a dispute shall be considered only after tests have been carried out using the statistical method of evaluation in accordance with 7.2.1.1.8 General measurement conditions8.1 Ambient noiseA test site shall permit disturbances from the EUT to be distinguished from ambient noise. The suitability of the site in this respect can be determined by measuring the ambient noise levels with the EUT inoperative and ensuring that the noise level is at least 6 dB below the limits specified in Clauses 5 and 6.If at certain frequency bands the ambient noise is not 6 dB below the specified limit, the methods shown in 10.5 may be used to show compliance of the EUT to the specified limits. It is not necessary that the ambient noise level be 6 dB below the specified limit where both ambient noise and source disturbance combined do not exceed the specified limit. In this case the source emanation is considered to satisfy the specified limit. Where the combined ambient noise and source disturbance exceed the specified limit, the EUT shall not be judged to fail the specified limit unless it is demonstrated that, at any measurement frequency for which the limit is exceeded, two conditions are met:a) the ambient noise level is at least 6 dB below the source disturbance plus ambient noiselevel;b) the ambient noise level is at least 4,8 dB below the specified limit.。
安装了品尼高V15版本

时间有限,没有把相关的内容截屏。
3、该为俄罗斯语言后,成功执行“Pinnacle Pixie Activation 500.exe”文件。
4、再安装Pinnacel 15,就是正式版本了。
5、Pinnacle 15安装后,没有30天限制,没有品尼高卡的要求(免卡)。
使用12时间比较长,最近闲些,就试试安装pinnacle 14。结果发现,安装起来还真是不顺。
下载的品尼高V15是3.2G的包,文件是“[品尼高视频编辑软件].Pinnacle.Studio.HD.Ultimate.Collection.v15.0.0.7593-Multilanguage”压缩包。
解压后,文件包中有“activation”文件夹,看这英文名称,大家就知道是什么了。
“activation”文件夹中有“Pinnacle Pixie Activation 500.exe”文件,这个就是我们需要的。
3、安装文件径路问题:这是我安装是出现的大问题,也被搞得莫名其妙的。安装开始后,中途就出现错误,安装失败。
关键是:我们需要将下载的文件包解压缩到文件夹,windows系统默认是“新建文件夹”。是中文的文件名,我们已经将系统改为俄罗斯语后,安装软件找不到安装文件径路。安装文件径路必须是英文,比如,Pinnacle 14。很多安装方法没有介绍这个问题(可能他们的文件径路碰巧是英文的)。
1、执行“Pinnacle Pixie Activation 500.exe”这个文件,系统提示错误,见下图:
2、按照安装Pinnacle 14的办法,将Windows语言改为俄罗斯语言。
researchdownload使用说明汇编
ResearchDownload User GuideVersion: 1.2.5DocCode: SW-BASE-UG-0051Date: 2011-04-21重要声明版权声明本文档中的任何内容受《中华人民共和国著作权法》的保护,版权所有© 2008,展讯通信有限公司,保留所有权利,但注明引用其他方的内容除外。
商标声明展讯通信有限公司和展讯通信有限公司的产品是展讯通信有限公司专有。
在提及其他公司及其产品时将使用各自公司所拥有的商标,这种使用的目的仅限于引用。
不作保证声明展讯通信有限公司不对此文档中的任何内容作任何明示或暗示的陈述或保证,而且不对特定目的的适销性及适用性或者任何间接、特殊或连带的损失承担任何责任。
保密声明本文档(包括任何附件)包含的信息是保密信息。
接收人了解其获得的本文档是保密的,除用于规定的目的外不得用于任何目的,也不得将本文档泄露给任何第三方。
前言文档说明本文档介绍了ResearchDownload内部版工具的使用方法。
阅读对象本文档适合测试人员等使用。
内容介绍本文档包括四个章节,分别为:•第一章:概述。
简单介绍了ResearchDownload工具的功能及文件组成、运行环境;•第二章:程序说明。
对ResearchDownload工具界面做了说明,并描述了简单的操作步骤;•第三章:使用指南。
详细描述了ResearchDownload工具的使用方法;•第四章:3G芯片平台下载说明。
介绍了在3G平台下ResearchDownload工具的使用方法。
文档约定本文档采用下面醒目标志来表示在操作过程中应该特别注意的地方。
注意:提醒操作中应注意的事项。
说明:说明比较重要的事项。
相关文档目录第1章概述................................................................................................................................................ 1-11.1 系统概述 ......................................................................................................................................... 1-11.2 文件组成 ......................................................................................................................................... 1-11.3 运行环境 ......................................................................................................................................... 1-2 第2章程序说明........................................................................................................................................ 2-12.1 界面说明 ......................................................................................................................................... 2-12.1.1 主界面 ................................................................................................................................... 2-12.1.2 工具栏说明 ........................................................................................................................... 2-12.1.3 状态窗口说明 ....................................................................................................................... 2-22.2 简要操作步骤 ................................................................................................................................. 2-32.2.1 运行程序 ............................................................................................................................... 2-32.2.2 设置下载参数 ....................................................................................................................... 2-32.2.3 开始下载 ............................................................................................................................... 2-42.2.4 下载完成 ............................................................................................................................... 2-52.2.5 退出程序 ............................................................................................................................... 2-5 第3章使用指南........................................................................................................................................ 3-13.1 程序设置 ......................................................................................................................................... 3-13.1.1 设置界面 ............................................................................................................................... 3-13.1.2 普通设置 ............................................................................................................................... 3-23.1.3 NAND Flash设置 .................................................................................................................. 3-33.1.4 Calibration 设置..................................................................................................................... 3-53.1.5 Flash Operations 设置 ........................................................................................................... 3-63.1.6 Multi-Language 设置............................................................................................................. 3-93.1.7 LCD Configure 设置 ........................................................................................................... 3-103.1.8 MCP Type设置 .................................................................................................................... 3-103.2 打包 ............................................................................................................................................... 3-113.3 设置配置文件 ............................................................................................................................... 3-123.3.1 添加产品 ............................................................................................................................. 3-12-i-3.3.2 增加新的备份项.................................................................................................................. 3-153.3.3 添加私有配置文件.............................................................................................................. 3-163.3.4 在私有配置文件中隐藏产品.............................................................................................. 3-17 附录A Revision History ............................................................................................................................ A-1-ii-图目录图2-1 ResearchDownload主界面........................................................................................................ 2-1 图2-2 状态窗口 ................................................................................................................................... 2-2 图2-3 “Passed”窗口............................................................................................................................ 2-3 图2-4 “Failed”窗口 ............................................................................................................................ 2-3 图2-5 “Waiting”窗口.......................................................................................................................... 2-3 图2-6 参数设置界面 ........................................................................................................................... 2-4 图2-7 程序下载界面 ........................................................................................................................... 2-4 图2-8 程序下载成功 ........................................................................................................................... 2-5 图2-9 程序下载失败 ........................................................................................................................... 2-5 图3-1 程序设置页面 ........................................................................................................................... 3-1 图3-2 串口设置 ................................................................................................................................... 3-2 图3-3 选择产品 ................................................................................................................................... 3-3 图3-4 选择文件 ................................................................................................................................... 3-3 图3-5 FLASH操作设置....................................................................................................................... 3-3 图3-6 NAND Flash设置界面.............................................................................................................. 3-4 图3-7 Calibration设置界面 ................................................................................................................. 3-5 图3-13 Packet设置界面..................................................................................................................... 3-12-i-表目录表1-1 文件组成 ................................................................................................................................... 1-1 表2-1 ResearchDownload软件主界面说明........................................................................................ 2-2 表2-2 状态界面说明 ........................................................................................................................... 2-2 表3-1 设置界面说明 ........................................................................................................................... 3-2-i-第1章概述1.1 系统概述ResearchDownload工具软件的用途是通过串口将手机软件写进硬件模块中。
萨福铝焊机说明书
B - 安装调试 ............................................................................................................10 1. 拆除包装 .......................................................................................................10 2. 送丝机连接...................................................................................................10 3. 主电源的电路连接 .....................................................................................10 4. 焊枪的连接...................................................................................................10
中文
目录
安全说明 .....................................................................................................................2
A - 总体介绍 ...............................................................................................................7 1. 装置简介 .........................................................................................................7 2. 焊接设备组成 ................................................................................................7 3. 前面板描述.....................................................................................................8 4. 选配件..............................................................................................................8 5. OPTIPULS i / i W技术规格 .............................................................................8 6. 尺寸和重量.....................................................................................................9 7. 冷却装置的技术规格......................................................................................9
Windows7光盘制作 向脱机映像添加补丁
Windows7光盘制作向脱机映像添加补丁所谓脱机(offline)映像就是WIM文件,install.wim就是脱机映像,有的install.wim里面有几个子映像,有的里面就只有一个。
我们install.wim中有多个映像的光盘叫做多合一光盘。
相对于经过安装一次的准备执行"sysprep /generalize “的系统可称为online映像,中文怎么说?联机映像?对于联机映像,整合补丁相对简单,把一个个补丁安装一下,然后再执行“sysprep/generalize ",为映像封装做准备工作。
下面要说的是如何给脱机映像整合补丁。
工具:Windows OPK For windows7 server2008 r2 7600 16385(微软官方部署工具,目前只看到英文版的)或者AIK工具/download/6/3/1/631A7F90-E5CE-43AA-AB05-EA82AEAA402A/KB3AIK_CN.iso,以及UltraISO点击这里。
必须得用这个新的OPK工具,旧工具是不行的。
操作系统:VISTA以上的Windows系统,H分区有较大的空闲空间,10G 以上。
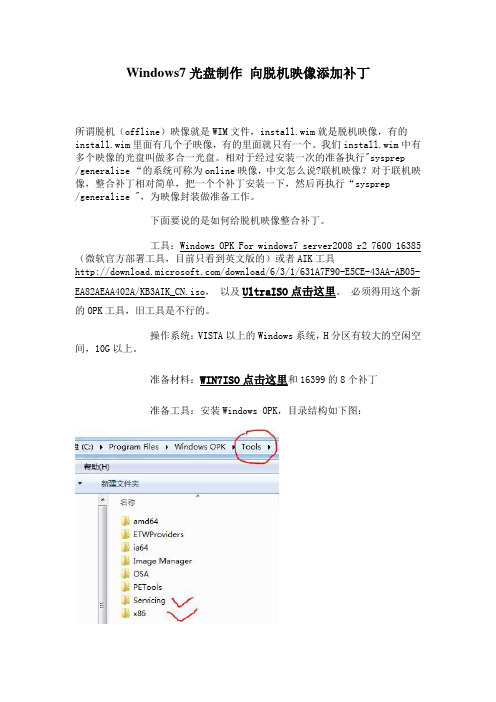
准备材料:WIN7ISO点击这里和16399的8个补丁准备工具:安装Windows OPK,目录结构如下图:1、用UltraISO工具将WIN7 ISO中的所有文件提取到H:\win7test目录下。
2、将下载到补丁(后缀为.msu)放在H:\x86目录下H:\x86Windows6.1-KB123334-x86.msuWindows6.1-KB123456-x86.msuWindows6.1-KB674103-x86.msuWindows6.1-KB675605-x86.msuWindows6.1-KB972636-x86.msuWindows6.1-KB973751-x86.msuWindows6.1-KB974039-v2-x86.msuWindows6.1-KB974138-x86.msu3、在C:\Program Files\Windows OPK\Tools\x86目录下建一个export.cmd文件,内容如下:imagex /export h:\win7test\sources\install.wim 5 h:\install.wim PAUSE注:install.wim后面的“5”是指Index : 5,install.wim中编号5是旗舰版(Ultimate)。
3dmax07英文翻译
中英文对照大全[一、File〈文件〉New〈新建〉Reset〈重置〉 Open〈打开〉 Save〈保存〉 Save As〈保存为〉 Save copy As<保存副本为> Save selected〈保存选择〉 XRef Objects〈外部参照物体〉 XRef Scenes〈外部照场景〉 File link Mananger <文件连接管理器> Merge〈合并〉 Merge Animation〈合并动画作〉 Replace〈替换〉 Load Animation<下载动画>Save Animation<保存动画> Import〈入〉 Export 〈输出〉 Export Selected〈导出选择对象〉 Asset Tracking资源追踪> Archive〈存档〉 Summary Info〈摘要信息〉 File Properties〈文件属性〉 View Image File〈查看图像文件〉 Exit 〈退出〉[二、Edit〈菜单〉] Undo Select<撤销选择> Redo〈重做〉 Hold <暂存> Fetch〈取回〉 Delete〈删除〉 Clone〈克隆〉 Select All〈全部选择〉 Select None〈不选择〉 Select Invert〈反向选择〉 Select By〈参考选择〉: Color〈颜色选择〉 Name〈名字选择〉 Rectangular Region〈矩形选区〉Circular Region〈圆形选区〉 Fabce Region〈围栏选区〉 Lasso Region〈套索选区〉 Region:〈区域选择〉:Window〈窗口〉 Crossing〈交叉〉 Edit Named Selection Sets〈编辑命名选择集〉 Object Properties〈对象属性〉[三、Tools〈工具〉] Transform Type-In〈键盘输入变换〉 Selection Floater〈选择浮动对话框〉Display Floater〈视窗浮动对话框〉Layer manager<图层管理> Light Lister〈灯光列表〉 Manage scene states<管理场景状态> Mirror〈镜像〉 Array〈阵列〉 Align〈对齐〉 Quick Align<快速对齐> Snapshot〈快照〉 Spacing Tool〈间距工具〉 Clone and Align<克隆并对齐> Normal Align〈法线对齐〉 Align Camera〈对齐摄影机〉 Align to View〈对齐视窗〉 Place Highlight〈放置高光〉 Isolate Selection〈孤立当前选择〉 Rename Objects〈物体更名〉 Assign vertex colors<指定顶点颜色> Color clipboard<颜色剪贴板> Camera Match <摄影机匹配> Grab viewport<取视口> Measure Distance<测量距离> Channel info<通道信息>[四、Group〈群组〉] Group〈群组〉 Ungroup〈撤消群组〉 Open〈打开组〉 Close〈关闭组〉 Attach 〈附加〉 Detach〈分离〉 Explode〈分散组〉 Assembly <集合>: Assemble<> Disassemble<分解> Open<打组> Close<关闭组> Attach<附加> Detach<分离> Explode<分散组>五、Views〈查看〉] Undo View Change<取消视窗变化> Redo View change〈重做视窗变化〉 Save Active left View<保存当前左视窗> Restore Active left View〈还原当前左视窗〉 Grids 〈栅格〉: Show Home Grid〈显示栅格〉 Activate Home Grid〈激活主栅格命令〉 Grid Object 〈激活栅格对象〉 Activate Grid to View〈栅格及视窗对齐命令〉Viewport Background〈视窗背景〉Update Background Image〈更新背景图像〉 Reset Background Transform〈重置背景变换〉 Show Transform Gizmo〈显示变换坐标系〉 Show Ghosting〈显示重像〉Show Key Times〈显示关键点时间〉 Shade Selected〈着色选择对象〉Show Dependencies〈显示从属关系〉Create Camera from View〈从视窗创建摄影机〉Add Default Lights To Scene〈添加默认灯光到场景〉 Redraw All Views〈重画所有视窗〉Activate All Maps〈显示所有贴图〉Deactivate All Maps〈关闭显示所有贴图〉 Update During Spinner Drag〈微调器实时显示〉:Adaptive Degradation〈自适应降级〉 Object display culling<对象显示消隐> Expert Mode〈专家模式〉Create〈创建〉] Standard Primitives〈标准图元〉: Box〈立方体〉 Cone〈圆锥体〉 Sphere 〈球体〉GeoSphere〈三角面片球体〉 Cylinder〈圆柱体〉 Tube〈管状体〉 Torus〈圆环体〉 Pyramid〈角锥体〉 Plane〈平面〉 Teapot〈茶壶〉Extended Primitives〈扩展图元〉: Hedra 〈多面体〉Torus Knot〈环面纽结体〉 Chamfer Box〈斜切立方体〉 Chamfer Cylinder〈斜切圆柱体〉 Oil Tank〈桶状体〉 Capsule〈角囊体〉 Spindle〈纺锤体〉L-Extrusion〈L形体按钮〉 Gengon〈导角棱柱〉C-Extrusion〈C形体按钮〉 RingWave〈环状波〉 Hose〈软管体〉 Prism 〈三棱柱>} AEC objects<>: Foliage<植物> Railing<栏杆> Wall<墙> Pivot door<枢轴门> Sliding door<推拉门> Biford door<折叠门> Straight stair<直线楼梯> L-type stair<L型楼梯> U-type stair<U型楼梯> Spiral stair<螺旋形楼梯> Awning window<遮蓬式窗> Casement window<平开窗> Fixed window<固定窗> Pivoted window<旋开窗> Sliding window<推拉窗> Projected window<伸出式窗> Compound<复合对象>: Morph<变形> Scatter<散布> Conform<一致> Connect<连接> Blobmesh<水滴网格> Shapemerge<图形合并> Boolean<布尔> Terrain<地形> Loft<放样> Mesher<网格化> Particles〈粒子系统〉:Particle Flow Source<粒子流源> Spary〈喷溅系统〉Snow〈雪花系统〉Blizzard<暴风雪系统> Parray<粒子阵列系统> Pcloud<粒子云系统> Super spray<超级喷射系统> Patch Grids<>:Quad patch<四边形面片> Tri patch<三角形面片> NURBS <nurbs曲线>: Cv surface <CV曲面> Point surface <点曲面> Cv curve <CV曲线> Point curve <点曲线> Dynamics<>: Damper <阻尼器> Spring <弹簧> Extended shapes<扩展图形>: Wrectangle <W矩形> Channel <通道> Angle <角度> Tee <三通> Wind Flange<宽法兰> Shapes〈形状〉: Line〈线条〉Rectangle〈矩形〉 Circle〈圆〉 Ellipse〈椭圆〉 Arc〈弧〉 Donut 〈圆环〉NGon〈多边形〉Star〈星型〉 Text〈文字〉 Helix〈螺旋线〉 Section〈截面〉Lights 〈灯光〉:Standard lights<标准灯光>: 【Target Spotlight〈目标聚光灯〉 Free Spotlight〈自由聚光灯〉 Target Directional〈目标平行光〉 Directional〈平行光〉 Omni〈泛光灯〉 Skylight 〈天光〉mr Area spot <mr区域聚光灯> mr Area omni <mr区域泛光灯>】Photometric lights <>:【Target Point〈目标指向点光源〉 Free Point〈自由点光源〉 Target linear〈指向面光源〉 Free linear <自由线光源> Free area〈自有面光源〉 Target area 〈目标面光源〉 Presets <预设>:()】Daylight system<日光系统> Camera〈相机〉: Free Camera〈自由相机〉 Target Camera〈目标相机〉Creat camera from view <从视窗创建相机>[七、Modifiers〈修改器〉] Selection Modifiers〈选择修改器〉: FFD Select〈自由变形选择修改器〉 Mesh Select〈网格选择修改器〉 Poly Select〈多边形选择修改器〉 Patch Select〈面片选择修改器〉 Select by channel<> Spline Select〈样条选择修改器〉 Volume Select〈体积选择修改器〉NURBS Surface Select〈NURBS表面选择修改器〉 Patch/Spline Editing〈面片/样条线修改器〉: Cross Section〈截面相交修改器〉 Delete Patch〈删除面片修改器〉 Delete Spline 〈删除样条线修改器〉 Edit Patch〈面片修改器〉 Edit Spline〈样条线修改器〉Fillet/Chamfer 〈圆切及斜切修改器〉 Lathe〈车床修改器〉Normalize Spline〈规格化样条线修改器〉 Rnderable spline modifier<> Surface〈表面生成修改器〉 Sweep <> Trim/Extend〈修剪及延伸修改器〉 Mesh Editing〈表面编辑〉: Cap Holes〈顶端洞口编辑器〉Delete Mesh 〈编辑网格物体编辑器〉 Edit Mesh <编辑网格物体编辑器> Edit Normals〈编辑法线编辑器〉 Edit ploy <> Extrude〈挤压编辑器〉Face Extrude〈面拉伸编辑器〉Multires <> Normal modifider〈法线编辑器〉 Optimize〈优化编辑器〉 Smooth〈平滑编辑器〉STL Check〈STL检查编辑器〉 Symmetry〈对称编辑器〉 Tessellate〈镶嵌编辑器〉Vertex Paint〈顶点着色编辑器〉 Vertex Weld〈顶点焊接编辑器〉 Conversion <>: turn to mesh <> turn to patch <> turn to ploy <> Animation Modifiers〈动画编辑器〉: attribute holder<> Flex〈伸缩编辑器〉 Morpher〈变体编辑器〉 Melt〈熔化编辑器〉Linked XForm〈连结参考变换编辑器〉 Patch Deform〈面片变形编辑器〉 Patch Deform (wsm) <> Path Deform〈路径变形编辑器〉 Path Deform (wsm)<> Skin〈皮肤编辑器〉 Skin morph〈〉 Skin warp〈〉 Skin warp path〈〉 splineIK control <> Surf Deform 〈表面变形编辑器〉Surf Deform (wsm)〈空间变形编辑器〉 Cloth <蒙皮>: Cloth<> Garment maker <> Hair and fur<>: Hair and fur(wsm)<> UV Coordinates〈贴图轴坐标系〉: Camera Map〈相机贴图编辑器〉Camera Map (wsm)〈环境相机贴图编辑器〉 Mapscaler(wsm)<> Projection <> Unwrap UVW〈展开贴图编辑器〉 UVW Map〈UVW贴图编辑器〉 UVW Maping add <> UVW Maping clear <> UVW Xform〈UVW贴图参考变换编器〉 Cache Tools〈捕捉工具〉: Point Cache〈点捕捉编辑器〉 Point Cache (wsm)〈点捕捉编辑器〉 Subdivision Surfaces〈表面细分〉: HSDS Modifier〈分级细分编辑器〉 MeshSmooth 〈表面平滑编辑器〉 TurboSmooth <> Free Form Deformers〈自由变形工具〉: FFD 2×2×2〈自由变形工具2×2×2〉 FFD 3×3×3〈自由变形工具3×3×3〉 FFD 4×4×4〈自由变形工具4×4×4〉 FFD Box〈盒体自由变形工具〉FFD Cylinder〈圆柱体自由变形工具〉 Parametric Deformers〈参数变形工具〉: Affect Region〈面域影响〉 Bend〈弯曲〉 Displac 〈置换〉 Lattice〈栅格〉 Mirror〈镜像〉 Noise〈噪声〉 physique<> Push〈推挤〉 Preserve 〈保持〉Relax〈松弛〉Ripple〈波纹〉Shell<> Slice〈切片〉 Skew〈倾斜〉 Stretch〈缩放〉Spherify 〈球形扭曲〉Squeeze〈压榨〉 Twist〈扭曲〉 Taper〈锥形化〉 Substitute <> XForm〈参变换〉 Wave〈波浪〉Surface〈表面编辑〉: Disp Approx〈近似表面替换〉Disp Mesh (ws 〈〉 Material〈材质变换〉Material By Element〈元素材质变换〉 NURBS Editing〈NURBS面编辑〉: Disp Approx〈近似表面替换〉 Surf Deform〈表面变形编辑器〉 Surface Select〈NURBS 表面选择〉 Radiosity〈光能传递修改器〉 : Subdivide〈细分〉Subdivide (wsm)〈超级细分〉Cameras 〈〉: Cameras correction〈〉[八、Character〈角色人物〉] Create Character〈创建角色〉 Destroy Character〈删除角色〉 Lock 〈锁住〉 Unlock〈解锁〉Insert Character〈插入角色〉 Save Character〈保存角色〉 Bone Tools 〈骨骼工具〉Set Skin Pose〈调整皮肤姿势〉 Assume Skin Pose〈还原姿势〉 Skin Pose Mode 〈表面姿势模式〉。
SIMATIC Energy Manager PRO V7.2 - Operation Operat
2 Energy Manager PRO Client................................................................................................................. 19
2.1 2.1.1 2.1.2 2.1.3 2.1.4 2.1.5 2.1.5.1 2.1.5.2 2.1.6
Basics ................................................................................................................................ 19 Start Energy Manager ........................................................................................................ 19 Client as navigation tool..................................................................................................... 23 Basic configuration ............................................................................................................ 25 Search for object................................................................................................................ 31 Quicklinks.......................................................................................................................... 33 Create Quicklinks ............................................................................................................... 33 Editing Quicklinks .............................................................................................................. 35 Help .................................................................................................................................. 38
Philips 空中音乐玩具 SLA5500 音乐控制器——让音乐无缝流入您的家庭设备 无线连接 高
PhilipsAdattatore musicalewirelessSLA5500Musica da una parte, PC dall'altra - senza filiCollegamento wireless da PC al sistema audioSta lontano dal PC. Ascolta la musica digitale del PC direttamente sul sistema audiodomestico; proprio come dovrebbe essere.Goditi la musica del PC in qualunque punto della casa•Per trasferire musica dal PC al sistema audio con un'alta qualità del suono•Per memorizzare la musica sul PC e ascoltarla in un'altra stanza•Ricerca di file musicali sul PC con il telecomando fornitoFacile accesso ai file musicali sul tuo PC•Integrazione del sistema audio nella rete domestica wireless•Scelta di raccolte musicali per artista, album, genere o playlistQualità audio digitale garantita•L'elaborazione digitale della musica offre la migliore qualità del suono•Connessione wireless affidabile che assicura l'alta qualità del suono•Supporto di formati musicali WMA, WMA-DRM e MP3Intelligente e semplice•Meno disordine. Meno fastidi: trasmissioni wireless senza fare fori.•Per disporre sempre degli ultimi aggiornamenti software•Display LCD blu retroilluminato per una navigazione facileSpecificheAdattatore musicale wirelessIn evidenzaCollegamento PC wireless per musicaCon il trasferimento della musica dal PC al sistema audio, è possibile ascoltare i file musicali memorizzati sul PC nel sistema audio, conservando l'alta qualità del suono e selezionando i brani dalla raccolta musicale in base all'artista, all'album o al genere.Ricerca di musicaÈ possibile ricercare, selezionare e riprodurre la musica dalla raccolta memorizzata sul PC. Il telecomando consente di accedere in modointerattivo alla musica sul PC e di riprodurre i brani desiderati sul sistema audio.Musica dalla rete domesticaÈ possibile estendere le possibilità della rete domestica ed estrarre da essa la musica dariprodurre sul sistema audio. L'interazione con la raccolta musicale consente di accedere alla propria musica preferita.Selezione della raccolta musicaleScelta di raccolte musicali per artista, album, genere o playlistElaborazione musicaLa musica digitale viene inviata in formato digitale al ricevitore ed elaborata tramite il processore audio digitale per offrire la migliore qualità del suono sul sistema audio.Connessione wireless affidabileLo standard wireless indica che non è necessario installare fili tra il PC e gli altri dispositivi elettronici. Tale standard assicura una connessione affidabile e protetta con una disponibilità della larghezza di banda ottimale per una trasmissione del suono di alta qualità.Supporto WMA-DRM e MP3È possibile memorizzare raccolte musicali e scaricare brani sul PC in uno dei vari formati audio supportati. Quindi, è possibile riprodurli dal sistema audio che supporta i formati WMA, WMA-DRM e MP3.Addio caviGrazie a un collegamento wireless da 2,4 GHz tra il ricevitore e il trasmettitore, non è necessario utilizzare cavi o effettuare dei fori alle pareti.PC aggiornabileIl prodotto è in grado di avvantaggiarsi di nuove avanzate funzionalità mediante gli aggiornamenti software. Ricercate le nuove versioni di software disponibili mediante la connessione Internet a banda larga. Ora, è possibile scegliere liberamente seeseguire gli aggiornamenti e utilizzare nuove funzioni. Il sito Web consente di essere sempre al corrente delle nuove avanzate funzionalità offerte per il prodotto ed con il software fornito è possibile eseguire gli aggiornamenti.LCD blu retroilluminatoIl display LCD blu retroilluminato locale facilita la navigazione nella raccolta musicale.Riproduzione audio•Formato di compressione: MP3, WAV, Windows Media™ Audio, WMA-DRM •Supporto ID3-tagConnettività•Crittografia/Sicurezza: WEP 128 bit, WEP 64 bit •Collegamenti wireless: LAN wireless (802.11b)•Ingresso CC: 9V•Uscita audio: Audio stereo (jack da 3,5 mm) 1 xAccessori•CD-ROM: Philips Media Manager & Manual •Accessori inclusi: Cavo audio, Batterie per telecomando, Telecomando, CD-ROM con software + manuale, Adattatore CA-CC •Telecomando: 32 tasti•Manuale dell'utente:Ing,ted,ola,fra,spa,itaSoftware•Philips Media Manager: Server contenutimultimediali UPnPRequisiti di sistema•Unità CD-ROM•Spazio su hard disk: 150 MB•SO PC: Windows® 98 SE, 2000, ME, XP •Processore: Pentium II o superiore •Memoria RAM: 64 MB•Rete PC necessaria: Rete wireless, Rete PC wireless o cablata•Connessione a Internet: Internet a banda larga (>256 kbps)Alimentazione •Tensione di rete: AC 100-240V 50-60Hz Dimensioni•Dimensioni del prodotto (LxPxA): 110 x 44 x 160 (mm)•Peso del prodotto: 1,3 KgData di rilascio 2009-08-05Versione: 4.0.612 NC: 9082 100 04282EAN: 87 10895 87924 8© 2009 Koninklijke Philips Electronics N.V.Tutti i diritti riservati.Le specifiche sono soggette a modifica senza preavviso I marchi sono di proprietà di Koninklijke Philips Electronics N.V. o dei rispettivi 。
indows 2000中的多语种支持
[GUIRunOnce]
带命令行参数运行MUISetup.exe 带命令行参数运行MUISetup.exe
运行Windows安装程序 运行Windows安装程序
Winnt32.exe /unattend:<unattend.txt>
/copysource: /copydir:
将MUI CD复制到\<install_share>\$OEM$ CD复制到 <install_share>\ 复制到\
无人参与安装 创建网络共享
自动安装需要一个网络安装
将MUI安装复制到本机上 MUI安装复制到本机上 中运行MUISetup.exe 在[GUIRunOnce] 中运行MUISetup.exe 删除MUI安装文件 删除MUI安装文件
创建应答文件
地区和UI如何获得安装? 地区和UI如何获得安装? 如何获得安装 [Regional Settings]
欲获取更多信息,请: 欲获取更多信息,
查阅TechNet网站 查阅TechNet网站,地址为 网站,
/technet/
Microsoft® Official教程 Official教程 /train_cert/ 访问我们的Windows 2000技术中心 访问我们的Windows 2000技术中心 /TechNet/win2000
手动安装
多语种版位于MUI CD#2上 多语种版位于MUI CD#2上 带以下命令参数运行MuiSetup.exe: 带以下命令参数运行MuiSetup.exe:
/i 0411 0409 0c0a /d 0411 安装日文、 安装日文、英文和西班牙文 将日文设置为默认值
所有ID号和命令都以列在帮助文件中 所有ID号和命令都以列在帮助文件中
ultimateedition翻译
ultimateedition翻译Ultimate Edition:终极版Ultimate Edition是一款借鉴Ubuntu操作系统定制而成的桌面发行版。
它包含安装了超过30,000个应用及其他工具的预装软件包,并具有庞大的兼容性。
它可以让用户在有限的计算资源上获得最佳的体验。
例句1:Ultimate Edition is a desktop release based on the Ubuntu operating system that comes pre-installed with over 30,000 applications and other utilities.Ultimate Edition是一款基于Ubuntu操作系统的桌面发行版,预装了超过30000个应用及其他工具。
例句2:Ultimate Edition enables users to get the best experience from limited computing resources.终极版可以让用户在有限的计算资源上获得最佳的体验。
例句3:Ultimate Edition provides exceptionalcompatibility for users.终极版为用户提供了卓越的兼容性。
例句4:Ultimate Edition's pre-installed software packages provide users with amazing utility and performance.终极版的预装软件包为用户提供了惊人的实用性和性能。
例句5:With Ultimate Edition, users are able to unlock the full potential of Ubuntu OS.使用终极版,用户可以解锁Ubuntu操作系统的全部潜力。
例句6:The tools of Ultimate Edition enable users to customize their Linux experience with ease.终极版的工具可以让用户轻松地定制他们的Linux体验。
HAUSER Punto dopo punto 自动针织机系列说明书
Punto dopo punto, con metodoReg. Nr. 36 38HAUSER -i’azienda dei sistemiI vostri vantaggi:Un’offerta completa: gli elementichiave dei nostri impianti sono il frutto della progettazione e della produzione interna. Il software sviluppato in azienda e il knowhow decennale nel settore tessile sono garanzia di prodotti d’altissima qualità apprezzati in tutto il mondo.Quadro comandiLe trapuntatrici della serie SNA 3000 3300 offrono tutte le varietà della lavorazione ad ago singolo: con telaio per trapunto dal rullo alla trapunta finita lavorazione di trapunte singole imbottite e bordateLa conformità CE e i requisiti di qualità ISO appartengono ormai ai nostri standard tecnici.meccanici, elettronici e softwareMaterassiImbottiture FiltriPellicole in gomma1Sistema di cucitura con struttura a portale fissa 2Sistema di cucitura con struttura a portale mobile 3Sistema di cucitura in con-tinuo construttura a porta-le mobileIl nucleo di un sistema di trapuntatura: il quadro elettrico con servoazionamenti digitaliUnità lineare HLETraVelopuntein fi bra di vertoConcetto modulareIn relazione alle esigenze specifi che è possibile personalizzare la con figurazione della macchina. L’avanzata dotazione di serie e la gamma degli optional esaudiscono tutti i desideri. Accessori quali le stampanti a getto d’inchiostro, laser, ecc. sono stati integrati già da tempo in sistemi messia punto per i nostri clienti con risultatiassolutamente positivi. Il nostro Ufficio Tecnico elaborerà una soluzionesu misura anche per le vostre esigenze specifi che.Cambiabobina (optional)Guardiafi lo per la bobina Cucitrice rapida Pfaff per materiali leggeri / sottili Cucitrice rinforzata per materiali pesanti / spessiGrande capacità della bobinacon cucitrice rinforzataMaggiore effi cienza con le macchine a doppia cucitriceLa programmazione Per essere in grado di soddisfare rapidamente le richieste dei clienti sullecaratteristiche del trapunto è necessario disporre di una piatta f orma diprogrammazione di facile uso.Nel volume della fornitura è com p resaanche la programmazione del computer di controllo della macchina. Con ilnostro software si può tras f ormare unnormale PC già in uso nella stazionedi programmazione a prescindere daltipo di trapuntatrice.Tutti i nostri impianti di trapuntaturavengono forniti completi della piattaforma di sistema Windows, che mettein condizione di creare, modifi care egestire i trapunti. Grazie alle funzioniattivate e sperimentate sul campo,l’impiego del computer non presentaalcuna diffi coltà anche per operatoriinesperti.Creazione di modelliÈ possibile convertire record di dati preela b orati per l’utilizzo nel nostro sistema Impostazione dei parametri da parte dell’operatoreMassima semplicità di impostazione con la tavo l etta digitale (optional)Creazione di modelli di trapuntoProgrammazione I parametri di trapunto possono essere impostati con la tastiera o conl’ausilio del mouse o della tavolettadigitale (optional). Grazie a funzionidi importazione intelligenti, è possibile convertire record di dati da altriformati per consentirne l’utilizzo sulnostro sistema..È possibile collegare in rete le singolemacchine con gestione centralizzata.Caratteristiche: possibilità di utilizzare unnormalePC come stazione di programmazione sistema operativo MS Windows importazione dei dati impostazione dei dati con latavoletta digitale (optional) possibilità di creare una biblioteca di programma per la raccoltadei modelliSemplicissima piattaforma di comandoLa creazione, la modifica e la gestionedei trapunti sono un gioco da ragazzigrazie alla piattaforma Windows.Possibilità di selezione della lingua didialogo, se disponibile.BordaturaCon cuscino d’aria Attuazione rapida esemplificata di soluzionipersonalizzateSNA 3000SNA 3060Il telaio multifunzionaleIl movimento longitudinale del telaio e il movimento trasversale della cucitrice permettono l’ese c uzione di qualsiasi tipo di trapun t atura sui bordi.Le caratteristiche tecniche in sintesi:Numero di punti: fino a 4500 punti/min Velocità di cucitura: fino a 23 m/minCorse a vuoto da cucitura a cucitura:fino a 65 m/min Campo standard:2780 x 2780 mm / 110“ x 110“ Dimensioni telaio standard: dimensioni d’ingombro3000 x 3000 mm / 118“ x 118“ Dimensioni maggiorate o speciali a richiestaSu richiesta tutti i modelli SNA possono essere forniti con cucitrice doppia.SNA 3000 con struttura a portale fissaIngombri della macchina standard: ca. 6600 x 4500 mm / 260“ x 178“ Dotazione standard:Guardiafilo e tagliafilo per il filo superiore e inferiore.Codifica telaio e protezione automatica anticollisione.Lubrificazione centrale automatica delle guide e delle viti senza fine.Optional:Cucitrice rapida o rinforzata CambiabobinaVersione a doppia cucitrice Accessori supplementariSNA 3100Le caratteristiche tecniche in sintensi:Numero di punti: fina a 4500 punti/min Velocità di cucitura: fino a 23 m/minCorse a vuoto da cucitura a cucitura:fino a 55 m/min Campo standard:2780 x 2780 mm / 110“ x 110“ Telaio standard:dimensioni d’ingombro3000 x 3000 mm / 118“ x 118“ Dimensioni maggiorate o speciali a richiestaIngombri della macchina standard: circa 5500 x 5000 mm / 216“ x 196“SNA 3100con struttura a portale mobileRisparmio di spazio grazie al movimento della testa in tutte le direzioni.Grazie al telaio fisso, questa macchina si presta in modo particolare per la lavorazione di tessuti di grandi dimensioni o poco scorrevoli.Dotazione standard:Guardiafilo e tagliafilo per il filo superiore e inferiore.Codifica telaio e protezione automatica anticollisione.Lubrificazione centrale automatica delle guide e delle viti senza fine.Optional:Cucitrice rapida o rinforzata CambiabobinaVersione a doppia cucitrice Accessori supplementariTelaio a ganci Telaio a pinze in diversi modelliVersione a doppia cucitriceMarcatura in movimentoUn futuro senza limitiLa macchina per la lavorazione auto m atica del tessuto dalla bobina alla trapunta finita. L’addetto si occupa della preparazione del materiale e controlla il funzionamento della macchina, che fa tutto il resto, per cui è in grado di occuparsi di più macchine contemporaneamente.Le caratteristiche tecniche in sintensi:Numero di punti: fino a 4500 punti/min Velocità di cucitura: fino a 23 m/minCorse a vuoto da cucitura a cucitura:fino a 55 m/min Campo standard:2770 x 2770 mm 109“ x 109“Superficie massima del materiale: 3000 x 3000 mm / 118“ x 118“ per unitàVelocità di avanzamento:fino a 24 m/minDimensioni maggiorate o speciali a richiestaDotazione standard:Guardiafilo e tagliafilo per il filo superiore e inferiore.Codifica telaio e protezione automatica anticollisione.Lubrificazione centrale automatica delle guide e delle viti senza fine.Sistema di taglio integratoOptional:Cucitrice rapida o rinforzata CambiabobinaVersione a doppia cucitrice Accessori supplementariIngombri della macchina standard: circa 10000 x 5000 mm / 393“ x 196“SNA 3200 dalla bobina alla trapunta finitaLe caratteristiche tecniche in sintesi:Numero di punti: a fino 4500 punti/min Velocità di cucitura: a fino 23 m/minCorse a vuoto da cucitura a cucitura:fino a 55 m/min Campo standard:2770 x 2670 mm / 109“ x 105.5“Dimensioni standard delle trapunte: Dimensioni d’ingombro3000 x 2900 mm / 118“ x 114“Velocità di avanzamento: fino a 24 m/minDimensioni maggiorate o speciali a richiestaIngombri della macchina standard: ca. 5500 x 5000 mm / 216“ x 196“Lavorazione senza telaio di trapunte singole imbottite e bordate. Posiziona m ento manuale della trapunta medi a nte 2 pinze laterali all’ingresso. Questa operazione è talmente rapida e veloce che l’addetto può occuparsi contemporaneamente di due mac c hine senza difficoltà. Avanzamento, allineamento, ten s ionamento e fissaggio automatico della trapunta su tutti i lati. Al termine della lavorazione le trapunte vengono trasportate auto m aticamente all’uscita della mac c hina. Per la movimenta z ione delle trapunte, su richiesta è possibile colle g are la macchina a un semplice piano inclinato, un nastro trasporta t ore o un sistema di trasporto.SNA 3300 per la lavorazione ditrapunte singoleDotazione standard:Guardiafilo e tagliafilo per il filo superiore e inferiore.Protezione automatica anticolli s ione.Lubrificazione centrale automatica delle guide e delle viti senza fine.Optional:Cucitrice rapida o rinforzata CambiabobinaVersione a doppia cucitrice Accessori supplementariSNA 3200 e 3300Uscita del tessuto Bloccaggio del tessuto su tutti i lati Sistema tenditessuto all’ingresso Coltello trasversaleTensionamento laterale regolabileFissaggio, tensionamento e allineamento automatico del tessuto all’uscitaPosizione di servizio nella versione a cucitrice singolaPreparazione del materiale all’alimentazione automaticaPosizione di servizio nella versione a cucitrice doppiaDettagli e optional11Messa in funzione:I nostri specialisti testano ilfunzionamento del vostro nuovoprodotto.Produzione:”Made in Germany” – Operai qualificati realizzano un prod otto hightech di qualitàe durata elevata.Assistenza sul posto:Rapidità, competenza e affidabilità – in qualsiasi momento. Per Hauser l’assistenza non è solo un argomento di vendita.EMD HAUSER Sede di Offenburg.Parker Hannifin GmbHSales and Service AutomationRobertBoschStraße 22D77656 Offenburg, GermanyTel.: +49 (0)781 / 5090Fax: +49 (0)781 / 50998176*************************** Con riserva di modifiche. I dati indicat rispecchiano lo stato della tecnica al momento della messa in stampa. 197490008 N4It. marzo 2010 © 2010 Parker Hannifin Corporation Siamo un partner efficiente –Parlatene con noi!I vostri referentiSfruttate l’esperienza e il knowhow deinostri specialisti. Approfittate di una tecnologia inno v ativa applicata a soluzionieconomiche per funzioni specifiche.Abbiamo risposte competenti anche persistemi di automazione personalizzati, realizzati a misura delle vostre esigenze.Parker Sales and Service AutomationTel.: +49 (0)7 81 / 5 094450 4455Fax: +49 (0)7 81 / 5 0998456EMail:*************************Web: www.parkerDesiderate altre informazioni?Richiedete i nostri opuscoli informativi!Oppure telefonateci per fissare un appuntamento.。
电脑软件的多语言支持设置指导

电脑软件的多语言支持设置指导一、引言在信息时代的今天,软件的多语言支持对于全球化市场至关重要。
随着全球化的发展,软件开发公司或个人开发者需考虑到用户来自不同的语言和文化背景。
本文旨在为软件开发者或使用者提供关于电脑软件多语言支持设置的指导。
二、多语言支持设置的重要性1. 提升用户体验多语言支持能够使用户更加方便地理解和操作软件,提高用户体验和满意度。
2. 拓展市场对于开发商来说,提供多语言支持能够帮助进入新市场,扩大用户群体,增加软件的竞争力。
3. 符合法律和法规某些国家或地区的法律法规要求软件必须提供本地化的界面和语言支持,以确保符合当地要求。
三、准备多语言支持所需的资源1. 翻译资源准备包括软件界面、错误提示、帮助文档等在内的各种文本资源的翻译,可以根据需求选择外部翻译公司或自行招募翻译人员。
2. 本地化测试资源为确保多语言支持的质量,需要准备本地化测试资源,如键盘布局、日期格式、货币单位等,以适应不同地区的使用习惯。
四、设计软件界面以支持多语言1. 国际化设计在软件设计时,要考虑将所有文本从源码中抽取出来,并使用标识符进行标记,以方便后续的翻译工作。
2. 动态布局考虑到不同语言的长度和字母表特点,要设计动态布局以适应各种文本长度和字母表,以确保界面完整显示。
3. 多语言切换在软件界面上提供明显的多语言切换选项,以方便用户根据自己的需求选择所需语言。
五、实施多语言支持1. 外部翻译将准备好的文本资源交给外部翻译公司进行翻译,确保翻译人员对软件领域和特定词汇有一定的了解。
2. 自动化翻译工具根据需求,可以使用一些自动化翻译工具,如机器翻译系统,来提高翻译效率和准确性。
3. 本地化测试将翻译好的软件界面进行本地化测试,以确保各个语言的显示正常,没有错别字或格式错乱等问题。
六、文档和支持的本地化1. 帮助文档本地化除了软件界面,还需要将帮助文档、使用手册等进行本地化,以便用户理解软件的使用方法和功能。
【参考文档】Win10设置UG中英文双启动方法有哪些-优秀word范文 (1页)

【参考文档】Win10设置UG中英文双启动方法有哪些-优秀word范文
本文部分内容来自网络整理,本司不为其真实性负责,如有异议或侵权请及时联系,本司将立即删除!
== 本文为word格式,下载后可方便编辑和修改! ==
Win10设置UG中英文双启动方法有哪些
具体方法如下:
1、经过对上述脚本进行优化,改良后的方法如下:
中文版方法:新建一个文本文档,内容是
setx UGII_LANG simpl_chinese
start “title” “%UGII_ROOT_DIR%”ugraf.exe%*
保存为bat文件。
英文版方法:新建一个文本文档,内容是
setx UGII_LANG english
start “title” “%UGII_ROOT_DIR%”ugraf.exe%*
保存为bat文件。
2、将上述bat文件发送到桌面快捷方式,并右键修改该快捷方式为ug软件的ico图标即可,下次就可以通过这两个快捷方式来分别启动中文或英文版本的ug了,如果你的电脑配置好,可以同时打开中文和英文版本的ug。
(ocr相关)老马提取的微软MODI独立安装包和21种语言包等(接口开放)
(ocr相关)老马提取的微软MODI独立安装包和21种语言包等(接口开放)展开全文(ocr相关)老马提取的微软MODI独立安装包和21种语言包等(接口开放)楼主axv<1811806>2012-07-04 13:09:23发表在网盘 2614人浏览 38人参与 2012-07-04 20:09:54 更新过LV20#【王牌和革命性效果】本地或云端等自动OCR后阅读的设想相关)老马提取的微软MODI独立安装包和21种语言包等(接口开放)含:#unicornviewer+0.22+绿色免注册版.rar#MODI中的OCR模块.pdf#用MODI OCR 21种语言.pdf#MODI-OCR-CHN.rar#modi 21种语言.rar#MODI2003.exeDownload Microsoft Office Document Imaging Visual Basic Reference (MODI) - Microsoft Download Center - Download Details.mht#modi-kor.rar#modi-jap.rar#modi-eur.rar#modi-cht.rar#jocr 1.0 繁体中文化版.rar#JOCR.rar补:#热卡文档拍照识别软件Android版Hotcard OCR Reader for Android.doc2011-11-2 12:59 就一股股票 | 二级具体看手机的功能,因为目前手机都有照相功能,安装一个识别软件就能解决,比如我的HTC Touch HD 通过汉王软件,就可以将整页文字进行识别/question/336527486.htmlMODI_OCR_CHN 压缩包用途:在未安装Office 2003/2007的机器上安装MODI的OCR 接口,供第三方软件的OCR功能调用。
内含简体中文、英文OCR模块,只能用于简体中文Windows XP/Vista/Win7。
MODI调用
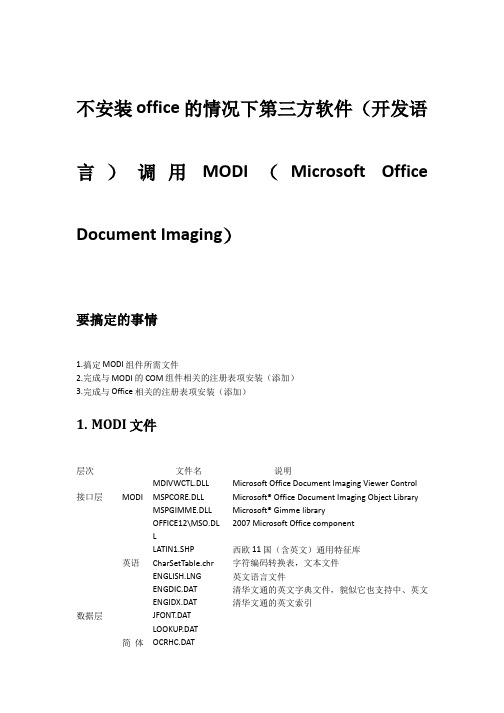
static extern IntPtr OCRpart(string file, int type, int startX, int startY, int width, int height);
[DllImport("AspriseOCR.dll", EntryPoint = "OCRBarCodes", CallingConvention = CallingConvention.Cdecl)]
static extern IntPtr OCRpartBarCodes(string file, int type, int startX, int startY, int width, int height);
#endregion
// 点击“转换”事件 private void button1_Click(object sender, EventArgs e) {
3 与 Office 相关的注册表项安装(添加)
[HKEY_CLASSES_ROOT\Installer\Components\61BA386016BD0C340BBEAC273D84F D5F] "2052"=hex(7):76,00,55,00,70,00,41,00,56,00,53,00,2e,00,7d,00,58,00,2 5,00,21,\ 00,21,00,21,00,21,00,21,00,4d,00,4b,00,4b,00,53,00,6b,00,4f,00,43,00, 52,00,\ 5f,00,32,00,30,00,35,00,32,00,3c,00,00,00,00,00
TIA Portal V17多语言
TIA Portal V17多语言一、简介随着中国经济的发展,我国的自动化设备越来越多的出口到国外。
在我们使用TIA Portal编程时,组态画面要求使用当地的语言。
同时,在国外进行设备改造时,国外的PLC编程工程师在程序注释中非英语注释,我们在阅读时存在一定的困难。
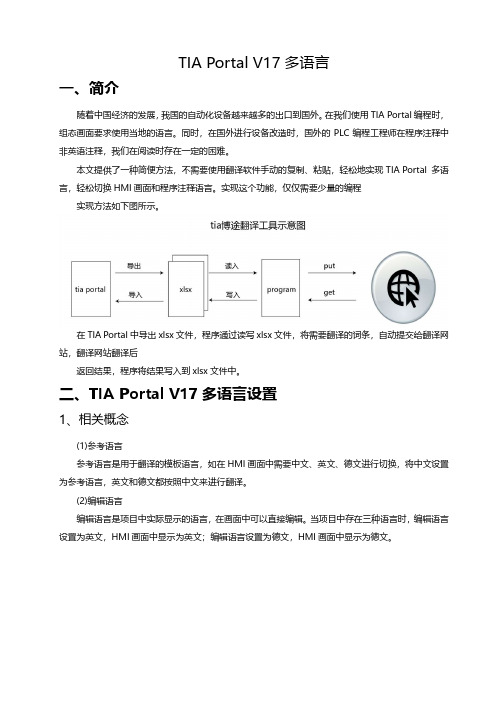
本文提供了一种简便方法,不需要使用翻译软件手动的复制、粘贴,轻松地实现 TIA Portal多语言,轻松切换HMI画面和程序注释语言。
实现这个功能,仅仅需要少量的编程实现方法如下图所示。
在TIA Portal中导出xlsx文件,程序通过读写xlsx文件,将需要翻译的词条,自动提交给翻译网站,翻译网站翻译后返回结果,程序将结果写入到xlsx文件中。
二、TIA Portal V17多语言设置1、相关概念(1)参考语言参考语言是用于翻译的模板语言,如在HMI画面中需要中文、英文、德文进行切换,将中文设置为参考语言,英文和德文都按照中文来进行翻译。
(2)编辑语言编辑语言是项目中实际显示的语言,在画面中可以直接编辑。
当项目中存在三种语言时,编辑语言设置为英文,HMI画面中显示为英文;编辑语言设置为德文,HMI画面中显示为德文。
2、设置方法1.单据项目树中“语言和资源”左侧箭头符号。
展开下一级元素。
2.双击“项目语言”。
3.在工作区,勾选要添加的语言,并设置“编辑语言”和“参考语言”。
4.双击“项目文本”,可以看到文本不同语言的词条。
在“语言和资源”条目中,可以很方便的设置显示语言。
我们需要编写一个自动化程序,将词条翻译为需要的语言,满足工程需要,同时减少重复劳动。
5.导出“项目文本”,点击“导出”按钮,根据需要选择导出的文本。
三、程序实现1、读写EXCEL文件python读写EXCEL文件,使用win32库。
from time import sleepimport win32com.client as win32建立win32 com对象:app ="Excel"file=r"TIAProjectTexts.xlsx"x1 = win32.gencache.EnsureDispatch("%s.Application"% app)file为TIA Portal导出的xlsx文件。
- 1、下载文档前请自行甄别文档内容的完整性,平台不提供额外的编辑、内容补充、找答案等附加服务。
- 2、"仅部分预览"的文档,不可在线预览部分如存在完整性等问题,可反馈申请退款(可完整预览的文档不适用该条件!)。
- 3、如文档侵犯您的权益,请联系客服反馈,我们会尽快为您处理(人工客服工作时间:9:00-18:30)。
Multi-Language Version Software Modification Use GuideVersion: 0.0.1 DocCode: E-SW-MOCOR-UG-2009-0004 Date: 2009-04-20www.spreadtr 重要声明版权声明本文档中的任何内容受 《中华人民共和国著作权法》 的保护, 版权所有 © 2009, 展 讯通信有限公司,保留所有权利,但注明引用其他方的内容除外。
商标声明展讯通信有限公司和展讯通信有限公司的产品是展讯通信有限公司专有。
在提及 其他公司及其产品时将使用各自公司所拥有的商标, 这种使用的目的仅限于引用。
不作保证声明展讯通信有限公司不对此文档中的任何内容作任何明示或暗示的陈述或保证,而 且不对特定目的的适销性及适用性或者任何间接、特殊或连带的损失承担任何责 任。
保密声明本文档(包括任何附件)包含的信息是保密信息。
接收人了解其获得的本文档是 保密的,除用于规定的目的外不得用于任何目的,也不得将本文档泄露给任何第 三方。
前文档说明 文档说明言本文主要介绍 ARM 端多国语言配置修改,模拟器环境多国语言配置修改和,多 国语言库相关配置说明介绍。
阅读对象本文档适合 MMI 应用开发人员多国语言开发阅读使用。
内容介绍本文档包括三个章节,分别为: 第一章: ARM 端多国语言配置修改 第二章: 模拟器环境多国语言配置修改 第三章 多国语言库相关配置说明介绍文档约定 文档约定本文档采用下面醒目标志来表示在操作过程中应该特别注意的地方。
注意: 提醒操作中应注意的事项。
说明: 说明比较重要的事项。
相关文档第1章如何编译生成 arm 端多语版本目录端多语版本...................................................................................................1-1 第 1 章 如何编译生成 arm 端多语版本 1.1 修改总工程 mk 中的 MULTI_LAN_SUPPORT 和 IM_HANDWRITING 宏 .............................1-1 1.2 在总工程 mk 中打开需要的语言宏...............................................................................................1-1 1.3 编译对应的资源 .............................................................................................................................1-2 1.4 编译工程 .........................................................................................................................................1-3 1.5 download 手机.................................................................................................................................1-3 1.6 Q/A 手机端相关问题注意...............................................................................................................1-3 1.6.1 手机开机无反映?................................................................................................................1-3 1.6.2 编译 link 错误? ...................................................................................................................1-3 第 2 章 如何编译生成模拟器端多语版本 ................................................................................................2-4 2.1 打开模拟器工程 msdevkernel_cstar_240x320_nor_ml.dsw..........................................................2-4 2.2 修改总项目 mk 中相应的宏 ..........................................................................................................2-4 2.3 编译生成模拟器资源......................................................................................................................2-4 2.4 打开模拟器 MSDEV 运行验证......................................................................................................2-4 2.5 Q/A:模拟器相关问题注意...............................................................................................................2-5 2.5.1 模拟器打开无反映?............................................................................................................2-5 2.5.2 模拟器开机 Assert?...............................................................................................................2-5 2.5.3 模拟器下编译和 arm 端编译的区别: ...............................................................................2-5 2.5.4 各个语言对应的字符表信息:............................................................................................2-5 多语言库介绍................................................................................................................................3-7 第 3 章 多语言库介绍 3.1 输入法库介绍 .................................................................................................................................3-7 3.2 显示库介绍 .....................................................................................................................................3-9 3.3 手写库介绍 ...................................................................................................................................3-13 3.4 库详细占用资源情况....................................................................................................................3-15 3.5 库补充说明 ...................................................................................................................................3-16 附录 A Revision History............................................................................................................................A-1-i-第1章 如何编译生成 arm 端多语版本 章1.1 修改总工程 mk 中的 MULTI_LAN_SUPPORT 和 IM_HANDWRITING 宏如果需要采用 S9 多国语言解决方案: MULTI_LAN_SUPPORT IM_HANDWRITING = S9 = S9如果需要采用 Cstar 多国语言解决方案: MULTI_LAN_SUPPORT IM_HANDWRITING = CSTAR = HANWANG文件路径:\MS_Code\project_rocky_3201.mk (以 3201 为例,其他工程类似路径) 注: :默认为标配解决方案: MULTI_LAN_SUPPORT IM_HANDWRITING = NONE = HANWANG1.2 在总工程 mk 中打开需要的语言宏以阿拉伯语为例,修改 IM_ARABIC_SUPPORT = TRUE 即可 表 1.1 详细语言控制宏表 IM_ARABIC_SUPPORT IM_THAI_SUPPORT IM_VIETNAMESE_SUPPORT 阿拉伯语 泰语 越南语1-1IM_PORTUGUESE_SUPPORT IM_RUSSIAN_SUPPORT IM_HINDI_SUPPORT IM_INDONESIAN_SUPPORT IM_GREEK_SUPPORT IM_PERSIAN_SUPPORT IM_MALAY_SUPPORT IM_FRENCH_SUPPORT IM_TAGALOG_SUPPORT IM_URDU_SUPPORT IM_HUNGARIAN_SUPPORT IM_ITALIAN_SUPPORT IM_TURKISH_SUPPORT IM_SPANISH_SUPPORT IM_GERMAN_SUPPORT葡萄牙语 俄语 印地语 印度尼西亚语 希腊语 波斯语 马来语 法语 塔加洛语 乌尔多语 匈牙利语 意大利语 土耳其语 西班牙语 德语1.3 编译对应的资源打开 CMD,进入到工程 MS_code 目录 输入如下命令:make PROJECT=rocky_3201 MODULES=resource 看 到 编 译 成 功 后 , 去 如 下 目 录 找 对 应 资 源\MS_Code\build\rocky_3201_builddir\img\mmi_res_240x320.bin 如果是其他工程就需要去相 ( 应的工程对应目录下查找)-1-2-1.4 编译工程输入命令:make PROJECT =rocky_3201 MODULES =“app gui” clean (同时清除 app, gui 所有的编译文件和对应库文件) 看到成功后,输入:make PROJECT =rocky_3201 update 看 到 编 译 成 功 后 , 去 如 下 目 录 找 对 应 的 \MS_Code\build\rocky_3201_builddir\img\SC6600R_rocky_3201.bin bin 文 件 。
