Visual Assist X介绍
Visual Assist使用详解

Visual Assist 6.0的用法Visual Assist X的用法open file in solution 打开文件中的解决办法open Corresponding file 打开相应文件list methods in current file 列表方法在当前文件file symbol 文件标记find references 找到参考资料find references in file 找到参考文件clone find references results 寻找克隆结果find previous by context 找到以前的前后关系goto implementation转到执行refactor重构paste粘贴insert VA snippet 插入VA片段surround with VA snippet环绕与VA片段(例如:if(){})tools工具enable/disable visual assist x启用/禁用视觉协助xvisual assist x options视觉协助x选项refactor重构add member 新增成员add similar member添加类似的成员create declaration 创建报单(声明)create implementation建立执行(实施)add include添加包括changs signature改变签字change visibility改变能见度document method文件方法encapsulate field封装字段extract method提取方法move implementation to source file移动执行源文件rename重命名tools工具VA outline -VA大纲VA View -VA视图find references results寻找参考资料的结果spell check拼写检查sort selected lines排序选定线reparse current file重当前文件JetBrains ReSharper【智能辅助编码和实时错误显示】v4.5.1231 注册版ReSharper是一款微软Visual Studio .NET 的插件,提供了智能C#辅助编码功能和实时错误显示功能,并支持重构。
cuda配置
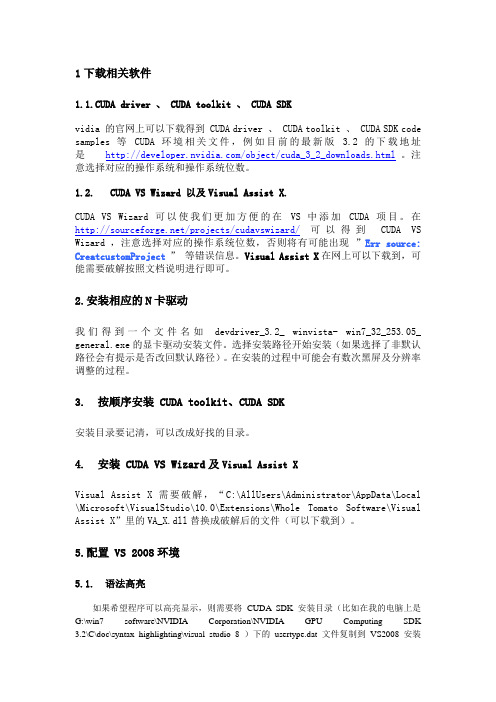
1下载相关软件1.1.CUDA driver 、 CUDA toolkit 、 CUDA SDKvidia 的官网上可以下载得到 CUDA driver 、 CUDA toolkit 、 CUDA SDK code samples 等CUDA 环境相关文件,例如目前的最新版 3.2 的下载地址是/object/cuda_3_2_downloads.html。
注意选择对应的操作系统和操作系统位数。
1.2. CUDA VS Wizard 以及Visual Assist X.CUDA VS Wizard 可以使我们更加方便的在VS 中添加CUDA 项目。
在/projects/cudavswizard/可以得到CUDA VS Wizard ,注意选择对应的操作系统位数,否则将有可能出现”Err source: CreatcustomProject” 等错误信息。
Visual Assist X在网上可以下载到,可能需要破解按照文档说明进行即可。
2.安装相应的N卡驱动我们得到一个文件名如devdriver_3.2_ winvista- win7_32_253.05_ general.exe的显卡驱动安装文件。
选择安装路径开始安装(如果选择了非默认路径会有提示是否改回默认路径)。
在安装的过程中可能会有数次黑屏及分辨率调整的过程。
3. 按顺序安装 CUDA toolkit、CUDA SDK安装目录要记清,可以改成好找的目录。
4. 安装 CUDA VS Wizard及Visual Assist XVisual Assist X需要破解,“C:\AllUsers\Administrator\AppData\Local \Microsoft\VisualStudio\10.0\Extensions\Whole Tomato Software\Visual Assist X”里的VA_X.dll替换成破解后的文件(可以下载到)。
VISUAL ASSIST使用详解
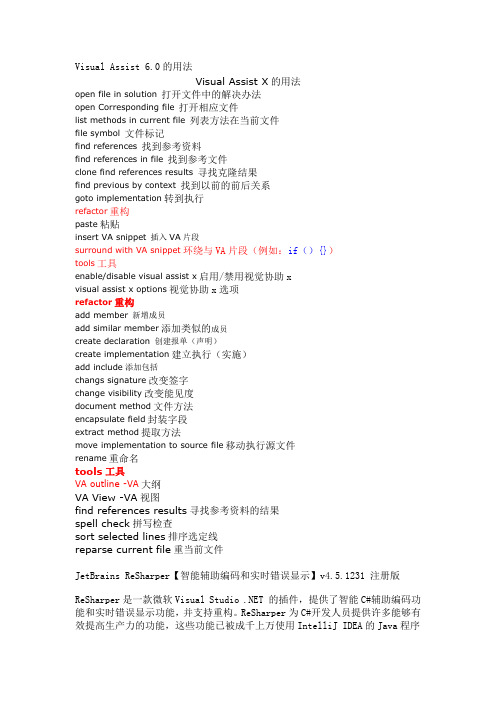
Visual Assist6.0的用法Visual Assist X的用法open file in solution打开文件中的解决办法open Corresponding file打开相应文件list methods in current file列表方法在当前文件file symbol文件标记find references找到参考资料find references in file找到参考文件clone find references results寻找克隆结果find previous by context找到以前的前后关系goto implementation转到执行refactor重构paste粘贴insert VA snippet插入VA片段surround with VA snippet环绕与VA片段(例如:if(){})tools工具enable/disable visual assist x启用/禁用视觉协助xvisual assist x options视觉协助x选项refactor重构add member新增成员add similar member添加类似的成员create declaration创建报单(声明)create implementation建立执行(实施)add include添加包括changs signature改变签字change visibility改变能见度document method文件方法encapsulate field封装字段extract method提取方法move implementation to source file移动执行源文件rename重命名tools工具VA outline-VA大纲VA View-VA视图find references results寻找参考资料的结果spell check拼写检查sort selected lines排序选定线reparse current file重当前文件JetBrains ReSharper【智能辅助编码和实时错误显示】v4.5.1231注册版ReSharper是一款微软Visual 的插件,提供了智能C#辅助编码功能和实时错误显示功能,并支持重构。
Visual Assist X 2010下载10.6.1819 破解版_VC助手
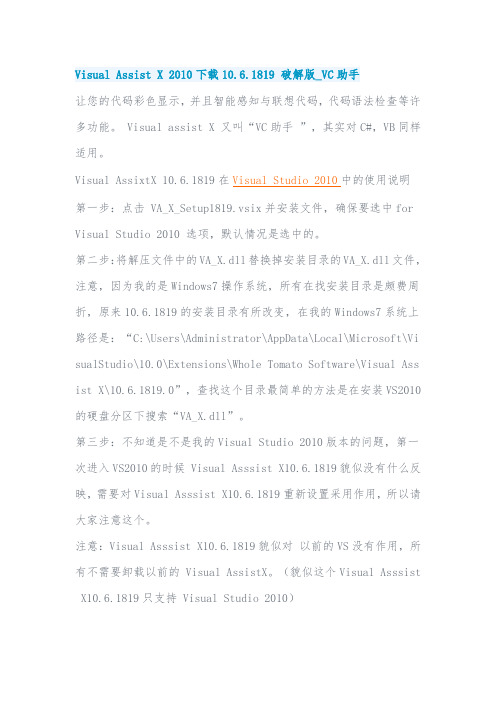
Visual Assist X 2010下载10.6.1819 破解版_VC助手让您的代码彩色显示,并且智能感知与联想代码,代码语法检查等许多功能。
Visual assist X 又叫“VC助手”,其实对C#,VB同样适用。
Visual AssixtX 10.6.1819在Visual Studio 2010中的使用说明第一步:点击VA_X_Setup1819.vsix并安装文件,确保要选中for Visual Studio 2010 选项,默认情况是选中的。
第二步:将解压文件中的VA_X.dll替换掉安装目录的VA_X.dll文件,注意,因为我的是Windows7操作系统,所有在找安装目录是颇费周折,原来10.6.1819的安装目录有所改变,在我的Windows7系统上路径是:“C:\Users\Administrator\AppData\Local\Microsoft\VisualSt udio\10.0\Extensions\Whole Tomato Software\Visual Assist X\10.6.1819.0”,查找这个目录最简单的方法是在安装VS2010的硬盘分区下搜索“VA_X.dll”。
第三步:不知道是不是我的Visual Studio 2010版本的问题,第一次进入VS2010的时候Visual Asssist X10.6.1819貌似没有什么反映,需要对Visual Asssist X10.6.1819重新设置采用作用,所以请大家注意这个。
注意:Visual Asssist X10.6.1819貌似对以前的VS没有作用,所有不需要卸载以前的Visual AssistX。
(貌似这个Visual Asssist X 10.6.1819只支持Visual Studio 2010)。
VisualAssist-x用法

Visual_Assist_x使用方法中文版open file in solution 打开文件中的解决办法open Corresponding file 打开相应文件list methods in current file 列表方法在当前文件file symbol 文件标记find references 找到参考资料find references in file 找到参考文件clone find references results 寻找克隆结果find previous by context 找到以前的前后关系goto implementation转到执行refactor重极paste粘贴insert VA snippet 插入VA片段surround with VA snippet环绕与VA片段(例如:if(){})tools工具enable/disable visual assist x启用/禁用视觉协助xvisual assist x options视觉协助x选项refactor重极add member 新增成员add similar member添加类似的成员create declaration 创建报单(声明)create implementation建立执行(实施)add include添加包括changs signature改变签字change visibility改变能见度document method文件方法encapsulate field封装字段extract method提取方法move implementation to source file移动执行源文件rename重命名tools工具VA outline -VA大纲VA View -VA视图find references results寻找参考资料的结果spell check拼写检查sort selected lines排序选定线reparse current file重当前文件Visual Assist X是开发环境的辅助工具,使用该工具可以让用户更加轻松地编写代码。
Visual Studio 用户指南说明书

Table of ContentsAbout1 Chapter 1: Getting started with Visual Studio2 Remarks2 Versions2 Examples3 Installation or Setup4 Chapter 2: Adding an extension5 Examples5 Adding an extension to visual studio using a `VSIX` file5 Adding an extension to visual studio from Visual Studio Gallery5 Chapter 3: Code Contracts9 Remarks9 Examples9 Standard precondition9 Precondition that throws a specific Exception9 Pre and postconditions9 Chapter 4: Connecting your visual studio project to Github10 Examples10 Publishing your project to a github repository removing sensitive data10 Chapter 5: Visual Studio tools18 Examples18 Code Lens18 Snippets18 Intoduction18 Using the code181. Header192. Snippet202.1 Imports202.2 Declarations212.3 References222.4 Code22 Import Snippet into Visual Studio25 Point of intrest27 Override merge/compare tools27 Entity Framework28 Credits29AboutYou can share this PDF with anyone you feel could benefit from it, downloaded the latest version from: visual-studioIt is an unofficial and free Visual Studio ebook created for educational purposes. All the content is extracted from Stack Overflow Documentation, which is written by many hardworking individuals at Stack Overflow. It is neither affiliated with Stack Overflow nor official Visual Studio.The content is released under Creative Commons BY-SA, and the list of contributors to each chapter are provided in the credits section at the end of this book. Images may be copyright of their respective owners unless otherwise specified. All trademarks and registered trademarks are the property of their respective company owners.Use the content presented in this book at your own risk; it is not guaranteed to be correct nor accurate, please send your feedback and corrections to ********************Chapter 1: Getting started with Visual Studio RemarksVisual Studio is an Integrated Development Environment (IDE) from Microsoft. It enables the developer to work project orientated with various types of projects, including Windows Forms, Console Applications, Office Plug-Ins, and Windows Universal Apps.The IDE supports various programming languages, the most common being Visual C#, Visual Basic, Visual F#, and Visual C++.There are several editions of Visual Studio: Community (free), Express (free), Professional, Enterprise, and Ultimate (However, not all are available for all versions).VersionsExamplesInstallation or SetupVisual Studio can be downloaded and installed for free in Comunity edition from the Microsoft site and can be also found in different versions. Just click on the Download button and run the executable, then follow the instructions.Read Getting started with Visual Studio online: https:///visual-studio/topic/972/getting-started-with-visual-studioChapter 2: Adding an extensionExamplesAdding an extension to visual studio using a `VSIX` fileIf you have a vsix file, you can install it by running the file.Get the vsix file (this is the extension installer)1.2.Run the file.3.In the window that opens, confirm the installation.Adding an extension to visual studio from Visual Studio GalleryIn Visual studio•go to Tools > Extensions and updates...•In the window that opens go to online•Select Visual Studio GalleryYou can search for an extension on the search box at the upper right corner••Select the extension you want to addClick on download.••Once download is complete, click on the Install button on the window that opened.•In order to use the extension, you might be requested to restart visual studioRead Adding an extension online: https:///visual-studio/topic/2257/adding-an-extensionChapter 3: Code ContractsRemarksIn order to fully benefit from Code Contracts you need to install the extension for Visual Studio. There's also a Code Contracts User Manual.ExamplesStandard preconditionusing System.Diagnostics.Contracts;public int DivideNumbers(int numerator, int denominator){Contract.Requires(denominator != 0);return numerator / denominator;}Precondition that throws a specific Exceptionusing System.Diagnostics.Contracts;public int DivideNumbers(int numerator, int denominator){Contract.Requires<ArgumentOutOfRangeException>(denominator != 0);return numerator / denominator;}Pre and postconditionsusing System.Diagnostics.Contracts;public int IncrementByRandomAmount(int input){Contract.Requires<ArgumentNullException>(input != null); // Don't allow null parameter. Contract.Requires<ArgumentOutOfRangeException>(input < int.MaxValue); // We can't do anything if we're given int.MaxValue.Contract.Ensures(Contract.Result<int>() > input); // Return value will be greater than input value.Random rnd = new Random();input += rnd.Next(1, 13); // Creates a number between 1 and 12 and adds it to input.return input;}Read Code Contracts online: https:///visual-studio/topic/6311/code-contractsChapter 4: Connecting your visual studio project to GithubExamplesPublishing your project to a github repository removing sensitive datathe steps in this example will use the following project structure as a demonstrationand we intend to export it to the "GHTuts" Repository [Note that the Repo doesn't exist yet on github] but leave the "SensitiveProject" without publish as it contains some passwords, keys, etc..1.First of all we make sure the source control plug in is set to "Git" in "Tools > Options > Plug-in Selection"If you can't see the "Team Explorer" tab, view it in visual studio like this 2. Go to your local solution folder and create a new file called ".gitignore.txt" [Note] this step is only important if you have some sensitive information in your project,otherwise, let visual studio create it for you1. Now open the ".gitignore.txt" file and paste this in it, this is a template for ignoring common visual studio files (check the links below)2. ## Ignore Visual Studio temporary files, build results, and## files generated by popular Visual Studio add-ons.# User-specific files*.suo*.user*.userosscache*.sln.docstates# User-specific files (MonoDevelop/Xamarin Studio)*.userprefs# Build results[Dd]ebug/[Dd]ebugPublic/[Rr]elease/[Rr]eleases/x64/x86/bld/ [Bb]in/[Oo]bj/[Ll]og/# Visual Studio 2015 cache/options directory.vs/# Uncomment if you have tasks that create the project's static files in wwwroot #wwwroot/# MSTest test Results[Tt]est[Rr]esult*/[Bb]uild[Ll]og.*# NUNIT*.VisualState.xmlTestResult.xml# Build Results of an ATL Project[Dd]ebugPS/[Rr]eleasePS/dlldata.c# DNXproject.lock.jsonproject.fragment.lock.jsonartifacts/*_i.c*_p.c*_i.h*.ilk*.meta*.obj*.pch*.pdb*.pgc*.pgd*.rsp*.sbr*.tlb*.tli*.tlh*.tmp*.tmp_proj*.log*.vspscc*.vssscc.builds*.pidb*.svclog*.scc# Chutzpah Test files_Chutzpah*# Visual C++ cache filesipch/*.aps*.ncb*.opendb*.opensdf*.sdf*.cachefile*.VC.db*.VC.VC.opendb# Visual Studio profiler*.psess*.vsp*.vspx*.sap# TFS 2012 Local Workspace$tf/# Guidance Automation Toolkit*.gpState# ReSharper is a .NET coding add-in_ReSharper*/*.[Rr]e[Ss]harper*er# JustCode is a .NET coding add-in.JustCode# TeamCity is a build add-in_TeamCity*# DotCover is a Code Coverage Tool*.dotCover# NCrunch_NCrunch_*.*crunch*.local.xmlnCrunchTemp_*# MightyMoose*.mm.*/# Web workbench (sass).sass-cache/# Installshield output folder[Ee]xpress/# DocProject is a documentation generator add-in DocProject/buildhelp/DocProject/Help/*.HxTDocProject/Help/*.HxCDocProject/Help/*.hhcDocProject/Help/*.hhkDocProject/Help/*.hhpDocProject/Help/Html2DocProject/Help/html# Click-Once directorypublish/# Publish Web Output*.[Pp]ublish.xml*.azurePubxml# TODO: Comment the next line if you want to checkin your web deploy settings# but database connection strings (with potential passwords) will be unencrypted*.pubxml*.publishproj# Microsoft Azure Web App publish settings. Comment the next line if you want to# checkin your Azure Web App publish settings, but sensitive information contained# in these scripts will be unencryptedPublishScripts/# NuGet Packages*.nupkg# The packages folder can be ignored because of Package Restore**/packages/*# except build/, which is used as an MSBuild target.!**/packages/build/# Uncomment if necessary however generally it will be regenerated when needed#!**/packages/repositories.config# NuGet v3's project.json files produces more ignoreable files*.nuget.props*.nuget.targets# Microsoft Azure Build Outputcsx/*.build.csdef# Microsoft Azure Emulatorecf/rcf/# Windows Store app package directories and filesAppPackages/BundleArtifacts/Package.StoreAssociation.xml_pkginfo.txt# Visual Studio cache files# files ending in .cache can be ignored*.[Cc]ache# but keep track of directories ending in .cache!*.[Cc]ache/# OthersClientBin/~$**~*.dbmdl*.dbproj.schemaview*.pfx*.publishsettingsnode_modules/orleans.codegen.cs# Since there are multiple workflows, uncomment next line to ignore bower_components # (https:///github/gitignore/pull/1529#issuecomment-104372622)#bower_components/# RIA/Silverlight projectsGenerated_Code/# Backup & report files from converting an old project file# to a newer Visual Studio version. Backup files are not needed,# because we have git ;-)_UpgradeReport_Files/Backup*/UpgradeLog*.XMLUpgradeLog*.htm# SQL Server files*.mdf*.ldf# Business Intelligence projects*.rdl.data*yout*.bim_*.settings# Microsoft FakesFakesAssemblies/# GhostDoc plugin setting file*.GhostDoc.xml# Node.js Tools for Visual Studio.ntvs_analysis.dat# Visual Studio 6 build log*.plg# Visual Studio 6 workspace options file*.opt# Visual Studio LightSwitch build output**/*.HTMLClient/GeneratedArtifacts**/*.DesktopClient/GeneratedArtifacts**/*.DesktopClient/ModelManifest.xml**/*.Server/GeneratedArtifacts**/*.Server/ModelManifest.xml_Pvt_Extensions# Paket dependency manager.paket/paket.exepaket-files/# FAKE - F# Make.fake/# JetBrains Rider.idea/*.sln.iml3.Now add your sensitive project folder to the ".gitignore.txt" file at any line that doesn't contain #, so just add it at the very end, and it should look something like this4.Right click on the solution and choose "Add Solution to Source Control..."[Note] it might ask you to save the solution before you continueNow you have a "LOCAL" git Repo on your pc , which VS will read from,but without a github 5.Repo, and you will see a small blue lock icon next to each file in the solution that was addedto git and a red circle at the ignored project[Note]for more information about .gitignore file, check these links•https:///articles/ignoring-files/•https:///github/gitignoreGo to the "Team Explorer" tab and then "Sync"7.Now we create a repo from vs to github like this, press the "Get Started" button8.Now fill in your information in github for the new Repo, then click "Publish"9. Now when we go to github we see our local repo got published to github without oursensitive project [Note]the url of the repo will look something like thishttps:///<user name>/<repo name>10. Read Connecting your visual studio project to Github online: https:///visual-studio/topic/3826/connecting-your-visual-studio-project-to-githubChapter 5: Visual Studio toolsExamplesCode LensCode lens is a simple way to know what happens with the code. Here you could find an image with the number of references of a method or class.If you can't see the code lens please see this question: Missing CodeLens references count in VS 2015 Community editionSnippetsIntoductionSince Visual Studio 2005 can you make Intellisense Code Snippets. This allow you to generate some code just by typing one keyword and press two times the tab key.Using the codeThe XML code you need for make an Intellisense Code Snippet stands below:<?xml version="1.0" encoding="utf-8"?><CodeSnippets xmlns="/VisualStudio/CodeSnippet"><CodeSnippet Format="1.0.0"> <!-- format attribute is required --><Header> <!-- 1 --><Title></Title><Author></Author><Shortcut></Shortcut><Description></Description><Keywords><Keyword>abc<Keyword><Keyword>def<Keyword></keywords></Header><Snippet> <!-- 2 --><Imports> <!-- 2.1 --><Import><Namespace>System</Namespace></Import></Imports><Declarations> <!-- 2.2 --><Literal Editable="true/false"> <!-- 2.2.1 --><ID>example</ID><Type>System.String</Type><ToolTip>A tip you can show</ToolTip><Default>default value</Default><Function></Function> <!-- 2.2.2 --></Literal><Object> <!-- 2.2.1 --><ID>example</ID><Type>System.String</Type><ToolTip>A tip you can show</ToolTip><Default>default value</Default><Function></Function> <!-- 2.2.2 --></Object></Declarations><References> <!-- 2.3 --><Reference><Assembly>System.Data.dll</Assembly></Reference></References><Code Language=""> <!-- 2.4 --><![CDATA[<!-- your code here if you use literals use dollar chars -->]]></Code></Snippet></CodeSnippet></CodeSnippets>In the snippet tag, you have two required tags named Header and Snippet. You can find more information in next headings. The number near the name are correspondents with the numbers in the code above.There can be zero or more CodeSnippet elements added into the CodeSnippets element.1. HeaderIn the Header-tag, you can place some specific information about the snippet and what he does. The important tags you can use inside this tag are:Source table (but edits): 2. SnippetIn the snippet tag, you can use three different tags. This can be:•Imports•Declarations•Code (required)•ReferencesThese are explained below.2.1 ImportsImports contain the needed namespaces you need for the code. Use the import-tag inside this tag and here you can place the needed namespaces each with the Namespace-tag.2.2 DeclarationsDeclarations can be used for declaring some literals or objects into your code in the Code-tag. The children are literals and objects.2.2.1 Literals and objectsLiterals and objects define the literals and objects of the code snippet that you can edit. Functionality are literals and objects are the same, but it has an additional type constraint.The Literal and object-tag can contain next children:•ID: The ID of the literal (required)•Type: The type of that object including namespace and class (required by objects)•ToolTip: Gives a tip•Default: A default value of that object (required)•FunctionsIn the snippets, there are some predefined literals. They are listed below:Functions in the Literal- or Object-tag means that you can use a function for generating code depending on another element. There are three functions that I know:1 only available in Visual Studio 2005.Source table: Attributes for the Literal and Object ElementsThe Literal and Object tags can have some optional attributes.Source table: 2.3 ReferencesGroups reference elements that contains information about assembly references for the code snippet. This can contain next elements:Assembly: Contains the name of the assembly by the code snippet (required)•Url: Contains a website that gives more information about the assembly•2.4 CodeCode is the code you will generate between <![CDATA[ and ]]>. Place the ID of your literal between dollar chars and Visual Studio will ask you for change these default value if the declarations are filled in. Here, you've an example for C# and VB for the shortcut propfull.<!-- ... Other code ... --><Declarations><Literal><Id>variablename</Id><Default>_myproperty</Default></Literal><Literal><Id>propertytype</Id><Default>int</Default></Literal><Literal><Id>propertyname</Id><Default>myproperty</Default></Literal></Declarations><Code Language="CSharp"><![CDATA[private $propertyvalue$ $variablename$;public $propertyvalue$ $propertyname${get { return $variablename$; }set { $Variablename$ = Value; }}]]></Code><!-- ... Other code ... --><Declarations><Literal><Id>variablename</Id><Default>_myproperty</Default></Literal><Literal><Id>propertytype</Id><Default>int</Default></Literal><Literal><Id>propertyname</Id><Default>myproperty</Default></Literal></Declarations><Code Language="VB"><![CDATA[Private $variablename$ As $propertyvalue$Public Property $propertyname$ As $propertyvalue$GetReturn $variablename$End GetSet (ByVal value As $propertyvalue$)$variablename$ = valueEnd SetEnd Property]]></Code><!-- ... Other code ... -->In the required Language attribute, you can define your language where you are making thesnippet. You can find the languages you can use in the next table.Other optional attributes are:The valid values for the kind variable are:Source tables: Import Snippet into Visual Studio1.Save the XML code and give it the extension .snippet.You can add the new made snippet into Visual Studio by pressing Control + K, Control + B or2.go to "Tools" → "Code Snippets Manager...". This open next window:Choose the language into the combo box for which language you've made the snippet. click on "Import..."and choose the file you've made.3. Click on "Finish". If the file name already has been used, Visual Studio go ask to override the existing file. You've three options:Overwrite: Overwrites the file. You can use this option if you will edit an old snippet.•Rename: Goes to rename the file to an unique name.•Skip: Cancels the import. Renames the file to a unique name.•4. You could also add a new location with all the snippets you've made by clicking on the "Add..." button on the first window and select the folder in the "select folder window". The advantage is now when a new valid snippet is added in that folder, you can use this directly in Visual Studio.Note: Test after importing your snippet for errors, so you don't have any problems when you usethe snippet. You can always remove or overwrite the snippet if there is an error.Point of intrestYou can also see the documentation on MSDN for more information.Override merge/compare toolsGot to Tools | Options | Source Control | Visual Studio Team Foundation Serverclick on the Configure User Tools:You can add separate overrides for 'Compare' and 'Merge' operations. Click on Add and select the operation you want to override. You'd need to type the path to the tool you use, and the exact arguments your tool expects. For example to use BeyondCompare, add the following Arguments " %1 %2 /title1=%6 /title2=%7":To Merge with BeyondCompare use the Arguments "%1 %2 %3 %4 /title1=%6 /title2=%7/title3=%8 /title4=%9"In a 2006 blog post MS employee James Manning surveyed the arguments as expected by various tools: WinDiff, DiffDoc, WinMerge, Beyond Compare, KDiff3, Araxis, Compare It!, SourceGear DiffMerge, TortoiseMerge and Visual SlickEdit. The post is a good starting point, but be sure to check the up to date documentation of your tool.It is highly recommended not to use for merge tools that are incapable of 3-way merges (e.g., WinMerge 2.x).Entity FrameworkEntity Framework (EF) is an object-relational mapper that enables .NET developers towork with relational data using domain-specific objects. It eliminates the need for mostof the data-access code that developers usually need to write.Entity Framework allows you to create a model by writing code or using boxes andlines in the EF Designer. Both of these approaches can be used to target an existingdatabase or create a new database.Source and more information: Entity Framework documentationRead Visual Studio tools online: https:///visual-studio/topic/2398/visual-studio-toolsCredits。
VS2008,Visual Assist X 快捷键
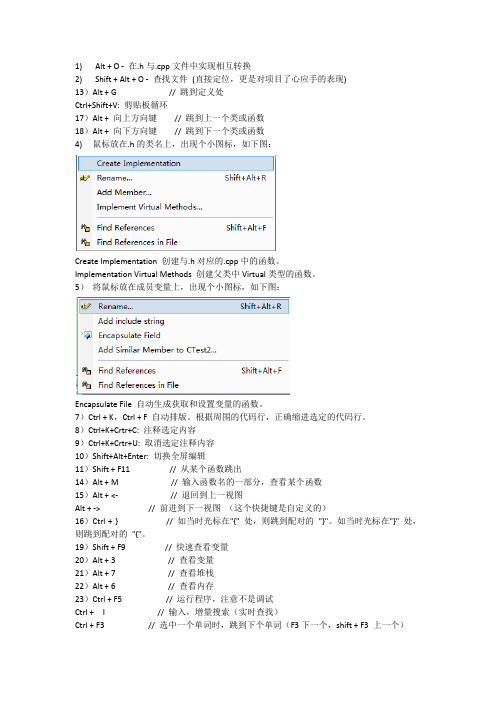
1) Alt + O - 在.h与.cpp文件中实现相互转换2) Shift + Alt + O - 查找文件(直接定位,更是对项目了心应手的表现)13)Alt + G // 跳到定义处Ctrl+Shift+V: 剪贴板循环17)Alt + 向上方向键// 跳到上一个类或函数18)Alt + 向下方向键// 跳到下一个类或函数4) 鼠标放在.h的类名上,出现个小图标,如下图:Create Implementation 创建与.h对应的.cpp中的函数。
Implementation Virtual Methods 创建父类中Virtual类型的函数。
5)将鼠标放在成员变量上,出现个小图标,如下图:Encapsulate File 自动生成获取和设置变量的函数。
7)Ctrl + K,Ctrl + F 自动排版。
根据周围的代码行,正确缩进选定的代码行。
8)Ctrl+K+Crtr+C: 注释选定内容9)Ctrl+K+Crtr+U: 取消选定注释内容10)Shift+Alt+Enter: 切换全屏编辑11)Shift + F11 // 从某个函数跳出14)Alt + M // 输入函数名的一部分,查看某个函数15)Alt + <- // 退回到上一视图Alt + -> // 前进到下一视图(这个快捷键是自定义的)16)Ctrl + } // 如当时光标在"{" 处,则跳到配对的"}"。
如当时光标在"}" 处,则跳到配对的"{"。
19)Shift + F9 // 快速查看变量20)Alt + 3 // 查看变量21)Alt + 7 // 查看堆栈22)Alt + 6 // 查看内存23)Ctrl + F5 // 运行程序,注意不是调试Ctrl + I // 输入,增量搜索(实时查找)Ctrl + F3 // 选中一个单词时,跳到下个单词(F3下一个,shift + F3 上一个)Ctrl + Shift + F // 在文件中查找关键字,当前工程,当前文档,打开的文档,自定义等Ctrl + F2 // 某行加书签再按一次测去掉书签F2 // 跳到一个书签,再按一下测跳到下一个书签Shift + F2 // 跳到上一个书签Ctrl + -> // 跳到一个单词最后Ctrl + <- // 跳到一个单词最前Ctrl + Shift + -> // 选择光标后的一个单词Ctrl + Shift + <- // 选择光标前的一个单词Shift + -> // 选择后的一个字母,每按一次增先一个字母Shift + <- // 选择前的一个字母,每按一次增先一个字母Ctrl + Shift + 空格// 当光标在函数参数时,则提示函数参数列表Ctrl + B // 加条件断点Ctrl + L // 删除一行Ctrl + Home // 跳到文档最前面Ctrl + End // 跳到文档最后面Ctrl+m+Crtr+o折叠所有大纲Ctrl+M+Crtr+P: 停止大纲显示Ctrl+J : 列出成员智能感知Ctrl+B,T / Ctrl+K,K: 切换书签开关Ctrl+B,N / Ctrl+K,N: 移动到下一书签Ctrl+B,P: 移动到上一书签Ctrl+B,C: 清除全部标签Ctrl+I: 渐进式搜索Ctrl+Shift+I: 反向渐进式搜索Ctrl+F: 查找Ctrl+Shift+F: 在文件中查找F3: 查找下一个Shift+F3: 查找上一个Ctrl+H: 替换Ctrl+Shift+H: 在文件中替换Alt+F12: 查找符号(列出所有查找结果)Ctrl+左右箭头键: 一次可以移动一个单词Ctrl+上下箭头键: 滚动代码屏幕,但不移动光标位置。
Visual Assist X介绍
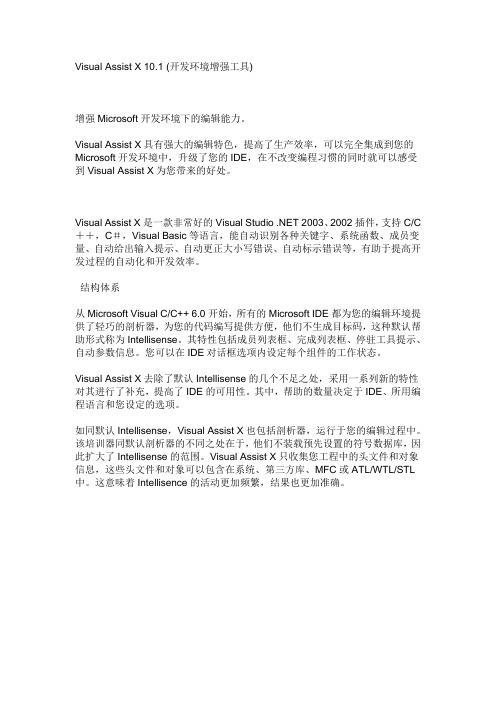
Visual Assist X 10.1 (开发环境增强工具)增强Microsoft开发环境下的编辑能力。
Visual Assist X具有强大的编辑特色,提高了生产效率,可以完全集成到您的Microsoft开发环境中,升级了您的IDE,在不改变编程习惯的同时就可以感受到Visual Assist X为您带来的好处。
Visual Assist X是一款非常好的Visual Studio .NET 2003、2002插件,支持C/C ++,C#,Visual Basic等语言,能自动识别各种关键字、系统函数、成员变量、自动给出输入提示、自动更正大小写错误、自动标示错误等,有助于提高开发过程的自动化和开发效率。
结构体系从Microsoft Visual C/C++ 6.0开始,所有的Microsoft IDE都为您的编辑环境提供了轻巧的剖析器,为您的代码编写提供方便,他们不生成目标码,这种默认帮助形式称为Intellisense。
其特性包括成员列表框、完成列表框、停驻工具提示、自动参数信息。
您可以在IDE对话框选项内设定每个组件的工作状态。
Visual Assist X去除了默认Intellisense的几个不足之处,采用一系列新的特性对其进行了补充,提高了IDE的可用性。
其中,帮助的数量决定于IDE、所用编程语言和您设定的选项。
如同默认Intellisense,Visual Assist X也包括剖析器,运行于您的编辑过程中。
该培训器同默认剖析器的不同之处在于,他们不装载预先设置的符号数据库,因此扩大了Intellisense的范围。
Visual Assist X只收集您工程中的头文件和对象信息,这些头文件和对象可以包含在系统、第三方库、MFC或ATL/WTL/STL 中。
这意味着Intellisence的活动更加频繁,结果也更加准确。
Visual Studio 2010教程06

这一章跟大家分享一些与c++项目管理、VAX、SVN、VS快捷键等方面的东西。
有效的在项目中组织C++文件,分配各种文件的目录对以后的维护会有好处的,至少不会出现不知道什么东西在什么地方,特别是大的项目,这里用TextSearcher来做例子。
使用SVN来管理项目会让我们的工作更轻松,工作也会更简单容易。
掌握常用的快捷键和常用的VS功能让我们的工作更有效。
合理的组织文件体系首先说在IDE中为我们的文件分类组织,如下图所示:我把不同功能的代码和文件放在不同的Filter下面,如何添加这样的Filter呢?这样就可以添加筛选器了,默认情况下VS为我们创建三个筛选器:头文件、源文件和资源文件,实际上我们可以再增加很多。
这样区分开的好处就是各个功能的代码被分开了,在文件很多的情况下不会造成混乱。
如TextSearcher,它的搜索算法、软件控制逻辑、自定义控件、GUI模块、线程化操作都是分开的,这样我可以很容易找到我想找的文件,而且还可以检视自己的模块划分是否合理等等。
接下来推荐大家在项目资源浏览器中为不同的文件划分目录。
比如上图将头文件和源文件、资源图标文件、本地化文件和配置文件分开组织,这样也是为了防止混乱。
值得注意的是当我们把文件用文件分开的时候,需要在项目属性设置里面包含我们的子目录,否则我们无法在源文件中直接用#include指令包含我们的头文件。
如下图所示这样的情况,如果不添加,无法找到头文件。
如下图所示,找到项目属性中,C++,常规中把我们的子目录作为附加路径添加到“附加包含目录”中。
使用SVN或其它源代码管理工具管理我们的项目如果你打算写一个比较大一点的项目,我推荐你使用源代码管理工具来管理你的C++项目,你可以选择SVN,也可以选择其它的,我推荐SVN,因为简单容易上手。
当你在做一个很复杂的东西的时候,花了两三天的时间去做修改,不过后来发现这个修改并不合适,想还原到三天以前,如果你没有用源代码管理工具管理自己的项目也没有自己手动的备份,那恭喜你,你得开始人肉还原了,这是多么悲剧的一件事情啊,然而如果你使用了SVN管理的话,只需要在三天前开始修改前的最后一次稳定版本Commit一次,三天之后如果要还原,只需要使用工具Revert就好了,而且不但可以回到三天前的版本,你甚至可以回到以前每一次Commit的版本,( ⊙o⊙)哇,这是多么好的工具啊!要使用SVN,首先需要SVN客户端,SVN服务器是可选的。
Visual Assist X 快捷键设置方法
Visual Assist X 快捷键设置方法
1.安装好Visual Assist X,安装方法什么的就不罗嗦了
2.打开Visual Studio(我还在用2008,因为在QT开发,而VS2010还要现编译)
3.选择“工具”菜单下的“选项”
4.在弹出菜单中找到“环境→键盘”
5.在右侧的设置页中找到“显示命令包含(C):”项
6.在其下方的输入框中输入“VassistX”,就会在其下方出现“VassistX.”的若干操作选项
7.选择你想要创建快捷键的操作,(我选择的是VassistX.RefactorCreateImplementation)
8.然后在下方的“新快捷键用于:”下拉菜单中选中“文本编辑”选项
9.之后在右侧的“按快捷键(P)”中编辑你想要为上面选择的操作对应的快捷键(这里我为
我之前选择的VassistX.RefactorCreateImplementation项编辑了ALT+R的快捷键)
10.之后,按下编辑快捷键对话框右侧的“分配”按钮
11.这时,在之前一直空白的“选定命令的快捷键(T):”项中就会出现我们编辑好的快捷键
了
12.看见右侧的“移除”了么?亲,不满意,还可以重来的。
13.。
visualassistx安装失败的解决方法

visualassistx安装失败的解决方法问题描述最近在安装V is ua lA s si st X时,我遇到了一些问题。
每次尝试安装该软件时,都会出现安装失败的提示。
我对此感到困惑,不知道应该如何解决这个问题。
通过搜索和尝试了一些方法后,我终于找到了解决V i su al As si st X安装失败的方法。
在这篇文档中,我将与大家分享这些方法,希望能够帮助到有同样问题的朋友们。
解决方法一:检查系统要求在安装V is ua lA ss is t X之前,我们需要确保我们的计算机满足系统要求。
未满足这些要求可能导致安装失败。
请确保您的计算机符合以下要求:-W in do ws操作系统(支持的版本如W ind o ws7、Wi nd ow s8、W i nd ow s10等)-V is ua lS tu di o(支持的版本如Vi su al S tu di o2017、V i su al St ud io2019等)解决方法二:禁用安全软件安装Vi su al As si stX时,可能会被一些安全软件误判为恶意软件而拦截安装过程。
为了避免这种情况,您可以尝试禁用暂时禁用安全软件,并重新运行安装程序。
在禁用安全软件之前,请确保您的计算机已经安装并使用了可靠的杀毒软件。
禁用安全软件的具体步骤可能因软件而异,请参考您使用的安全软件的文档或官方网站。
解决方法三:清理旧版本如果您之前曾经安装过V is ua lA ss is tX的旧版本,并且没有完全卸载干净,可能会导致新版本的安装失败。
在这种情况下,您需要彻底清理旧版本。
您可以按照以下步骤进行操作:1.在控制面板中,找到并打开“程序和功能”(或“应用程序和功能”)。
2.在已安装的程序列表中,找到Vi su al A ss is tX,并选择卸载。
3.根据卸载向导的提示,完成卸载过程。
4.重新运行Vi su alA s si st X的安装程序,进行新版本的安装。
VisualAssistX设置中文说明

VisualAssistX设置中⽂说明Visual Assist X 设置中⽂说明Quick Config:快速配置Fonts and Colors:字体和颜⾊Suggestions:建议Underlines:强调Corrections:修正Display:显⽰Overview:概述Use this page to change the general look and feel of Visual Assist X .Select the Advanced pages for control of individual option.使⽤此页可以改变⼀般的Visual Assist X设置。
选择⾼级页⾯进⾏详细设置。
Enable Enhanced Syntax Coloring:启⽤语法颜⾊识别Classes, structures and typede: 类,结构和类型Use defaults: 使⽤默认 Variables:变量preprocessor macros:预处理宏Methods:⽅法Apply coloring to:着⾊于Text Editors:⽂本编辑Tooltips:⼯具提⽰Listboxes:代码提⽰列表框Object Browser:对象浏览器Views:浏览Wizard Bar:向导条Text editor font attributes:⽂本编辑器的字体属性Local symbols in bold:局部变量加粗Stable symbols in italic:引⽤类型斜体Display filtering toolbar when hovering:悬停时显⽰过滤⼯具栏Shrink when possible:尽可能的收缩Allow Acronyms and Shorthand:允许缩略语和缩写Prefer Acronym matches:喜欢缩写匹配Selections committed with:选择⽅式Tab:Tab键Enter:回车键Any character not valid in a sym:在标记⾥任何字符⽆效get content from default intellisense:内容从默认intellisense来Member listboxes:成员列表框Bold non-inherited members:加粗⾮继承的成员List non-inherited entries first:⾸先列出⾮继承的项⽬Include suggestions in listboxes:在列表框中包含建议Include bits of code from surrounding lines:包含来⾃周围⾏代码位Include VA Snippets in listboxes:在列表框中包含VA代码段Edit VA Snippets:编辑VA代码段Underline spelling errors in comments and strings using:强调注释和字符串错误使⽤Underline mistyped symbols using:强调标志拼写错误使⽤Repair case:修复⼤⼩写 Format after paste:粘贴后格式化Convert dot to->(only in C/C++ files):转换 . 为->(只有C/C++⽂件)Insert _ after m and shift:在 m 后按 shift插⼊ _Insert ()and closing } )]': 插⼊()和截⽌括号})]'Closing brace is inserted:截⽌括号插⼊after a blank:在空⽩处 on the next line:在下⼀⾏on the same line:在同⼀⾏Highlight references using:⾼亮显⽰引⽤使⽤Show icon to open refactoring menu when hovering:当悬停时显⽰图标⽤于打开重构菜单Surround selection on:在输⼊选择…..时⾃动补充后⾯部分Double effective rate of key repeat:双击影响重复输⼊效率Enable context menu upon。
Visual?Assist?X?指定到特定的VS版本.
Visual Assist X 指定到特定的VS版本.Visual Assist X插件是一款强大vs插件,支持vs的绝大部分版本(高版本的vs对应高版本的VA),而且向下兼容.但是,问题来了.很多vs狂热支持者,电脑上可能会安装vs6.0到vs13甚至更多.而我们可能只需要针对vs6.0这个老古董.虽然ide有插件管理,但是VA被禁用后,下次打开依旧会属于启用状态.比较麻烦.如何才能限定VA,支持特定的VS版本呢?其实很简单,只要处理一下VS的插件注册表就可以了.HKEY_LOCAL_MACHINE\SOFTWARE\Wow6432Node\Micros oft\VisualStudio下面是有所vs的相关注册表.我们以vs2003 (vs7.0)为例:删除 HKEY_LOCAL_MACHINE\SOFTWARE\Wow6432Node\Microso ft\VisualStudio\7.1\Addins\VAssistNET.Connect 该注册表,接触vs 和va的绑定删除HKEY_LOCAL_MACHINE\SOFTWARE\Wow6432Node\Microsoft\ VisualStudio\7.1\InstalledProducts\Visual Assist X 该注册表,解除开启界面上的页面提示信息删除HKEY_LOCAL_MACHINE\SOFTWARE\Wow6432Node\Microsoft\ VisualStudio\7.1\Packages\{44630D46-96B5-488C-8DF9-26E21DB8C1A3} 该注册表,接触vs与va的插件关联此外,还有一个注册表:HKEY_LOCAL_MACHINE\SOFTWARE\Wow6432Node\Micros oft\VisualStudio\7.1Exp\Addins\VAssistNET.Connect 是在7.1 节点下的,叫7.1exp (8.0的话应该也有个8.0exp以此类推) 下面,也要清理下.。
VisualAssistX快捷键
VisualAssistX快捷键F11 // 进⼊某个函数Shift + F11 // 从某个函数跳出Shift+ Alt + O // 打开⽂件名搜索对话框Alt + G // 跳到定义处Alt + M // 显⽰当前⽂件的函数 List Methods In Current FileAlt + <- // 退回到上⼀视图Alt + -> // 前进到下⼀视图(这个快捷键是⾃定义的)Ctrl + } // 如当时光标在"{" 处,则跳到配对的 "}"。
如当时光标在"}" 处,则跳到配对的 "{"。
Alt + ↑ // 跳到上⼀个类或函数Alt + ↓ // 跳到下⼀个类或函数Ctrl + / // 加注释(这个快捷键是⾃定义的)Shift + F9 // 快速查看变量Alt + 3 // 查看变量Alt + 7 // 查看堆栈Alt + 6 // 查看内存Shift + F5 // 退出调试程序Ctrl + F5 // 运⾏程序,注意不是调试F7 // 编译(如果编译后,出现了很多警告和个别错误,可以再按⼀下,F7再编译⼀次,这个时候,就会只出现错误,⽅便定位错误。
)Ctrl + I // 输⼊,增量搜索(实时查找)Ctrl + F3 // 选中⼀个单词时,跳到下个单词(F3下⼀个,shift + F3 上⼀个)Ctrl + Shift + F // 在⽂件中查找关键字,当前⼯程,当前⽂档,打开的⽂档,⾃定义等 Ctrl + F2 // 某⾏加书签再按⼀次测去掉书签F2 // 跳到⼀个书签,再按⼀下测跳到下⼀个书签Shift + F2 // 跳到上⼀个书签Ctrl + -> // 跳到⼀个单词最后Ctrl + <- // 跳到⼀个单词最前Ctrl + Shift + -> // 选择光标后的⼀个单词Ctrl + Shift + <- // 选择光标前的⼀个单词Shift + -> // 选择后的⼀个字母,每按⼀次增先⼀个字母Shift + <- // 选择前的⼀个字母,每按⼀次增先⼀个字母Ctrl + Shift + 空格 // 当光标在函数参数时,则提⽰函数参数列表Ctrl + B // 加条件断点Ctrl + Home // 跳到⽂档最前⾯Ctrl + End // 跳到⽂档最后⾯Alt + <- //NavigateBack 后退Alt+O //OpenCurrespondingFile .h/.cpp切换Shift+Alt+O // OpenFileInSolutionDialog 打开解决⽅案⽂件对话框Shift+Alt+Q // RefactorContextMenu 弹出重构菜单Shift+Alt+C //RefactorCreateFromUsageShift+Alt+R //RefactorRename 改名Shift + Alt + F //Find References 查找引⽤Shift + Alt + S //FindSynbolDialog 打开查找符号对话框。
轻松学C语言扩展阅读之Visual AssistX安装教程

Visual Assist X 是一款非常好的Visual Studio 2010的插件,很受程序员欢迎,但是在书籍中没有介绍,这里算是一个额外补充吧1.简单介绍说他好是因为,它能自动识别各种关键字、系统函数、成员变量、自动给出输入提示、自动更正大小写错误、自动标识错误等。
基于以上各种优点,他使得开发过程更加自动化,让我们的编程更有效率。
2.开始安装大家一定要在安装visual studio 2010了之后,再按照visual assist x,后者自动识别了前者,并作为插件自动装载到了visual studio 2010中。
visual assist x的安装过程十分容易,仅需几步就可以了。
它的版本较多,这里以VisualAssistX_10.7.1912这个版本为例。
双击安装包“VA_X_Setup1912.exe”开始安装进入Visual Assist X的安装界面,选择你想要将此插件安装到那个IDE(集成开发环境)中,两个复选框分别表示:安装在Visual Studio 2010中安装在Visual Studio 2010之前的版本中,如经典的Visual C++ 6.0大家可以根据当前电脑中的版本进行选择。
这里选择安装在Visual Studio 2010中。
点击“Install”按钮后,马上就会显示“Installation complete”,即安装完成。
安装完成后,打开visual studio 2010,会出现“Visual Assist X Trial”,表示这是Visual Assist X的“试验版”,你只能免费使用它3天,当然还有其它的选择:选“try”按钮表示你愿意尝试3天,选“Enter Key”按钮表示你准备激活此Visual Assist X,选“Buy”按钮表示你打算购买这个软件的使用许可,最后一个按钮“Cancel”表示你不打算使用这个插件。
3.如何免费使用当然了,如果从网上查看的话,会发现这个软件是可以被破解的,破解后即使不购买也可以正常使用Visual Assist X 提供的所有功能。
VS2017番茄插件visualassist怎么下载安装?
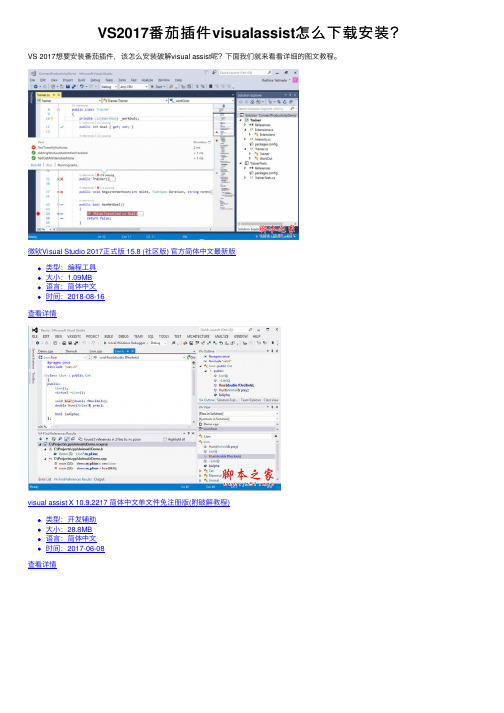
VS2017番茄插件visualassist怎么下载安装?VS 2017想要安装番茄插件,该怎么安装破解visual assist呢?下⾯我们就来看看详细的图⽂教程。
微软Visual Studio 2017正式版 15.8 (社区版) 官⽅简体中⽂最新版
类型:编程⼯具
⼤⼩:1.09MB
语⾔:简体中⽂
时间:2018-08-16
查看详情
visual assist X 10.9.2217 简体中⽂单⽂件免注册版(附破解教程)
类型:开发辅助
⼤⼩:28.8MB
语⾔:简体中⽂
时间:2017-06-08
查看详情
1、下载软件并解压visual_assist。
2、打开步骤1中的exe,出现下图的安装界⾯,默认会⾃动识别电脑已经安装vs的版本,需要安装的话就勾选,否则取消勾选,点击install
3、弹出的【Vusiual Assist Installer】窗⼝中选择【是】,最后弹出【VSIX Installer】窗⼝中提⽰安装完成
4、找到步骤1中解压的⽂件夹,选择【VA_X.dll】进⾏复制
5、搜索⽂件【VA_X.dll】⽂件所在的位置(本经验使⽤的是everything进⾏搜索),选择如图所⽰的⽂件路径并打开
6、复制替换⽂件,如图所⽰,替换完成后,打开vs软件即可以查看安装好的插件
以上就是VS2017番茄插件visual assist下载安装的教程,希望⼤家喜欢,请继续关注。
Visual Assist X 使用说明
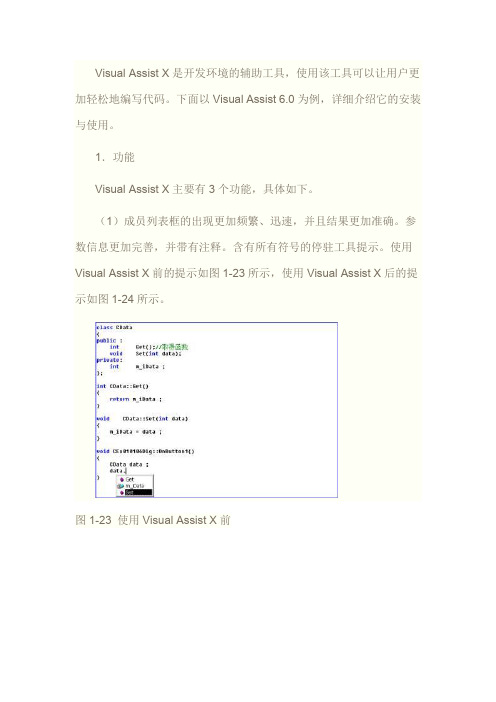
Visual Assist X是开发环境的辅助工具,使用该工具可以让用户更加轻松地编写代码。
下面以Visual Assist 6.0为例,详细介绍它的安装与使用。
1.功能Visual Assist X主要有3个功能,具体如下。
(1)成员列表框的出现更加频繁、迅速,并且结果更加准确。
参数信息更加完善,并带有注释。
含有所有符号的停驻工具提示。
使用Visual Assist X前的提示如图1-23所示,使用Visual Assist X后的提示如图1-24所示。
图1-23 使用Visual Assist X前图1-24 使用Visual Assist X后(2)智能提示。
输入“da”,Visual Assist X会自动给出一个提示“data”(如图1-25所示),如果提示正确,可直接按回车键使用提示的内容。
图1-25 智能提示(3)错误自动校正:监控您的IDE,对那些简单但耗时的错误进行即时校正。
在以下代码中,输入“Cdata”,再输入空格,“Cdata”会自动变成“CData”。
voidCEx010106Dlg::OnButton1(){Cdata}2.安装安装Visual Assist X的具体步骤如下。
(1)运行安装文件(如VA6Setup1079)。
在运行安装文件之前,必须关闭Visual C++及其同系列产品,否则会出现如图1-26所示的提示。
图1-26 错误信息(2)选中“I agree with the above terms and conditions”复选框,如图1-27所示,单击“Next”按钮。
图1-27 同意协议(3)选择安装路径,不必和Visual C++安装在一起,如图1-28所示。
图1-28 选择安装路径(4)单击“OK”按钮完成Visual Assist 6.0的安装,如图1-29所示。
图1-29 安装完成(5)打开Visual C++,由于Visual Assist 6.0还是试用版,所以启动时都会弹出如图1-30所示的对话框,单击“Quit”按钮关闭此对话框,Visual C++就自动具有Visual Assist 6.0的相关功能了。
Visual+Assist+X插件,VC6.0在win7环境下代码智能提示工具
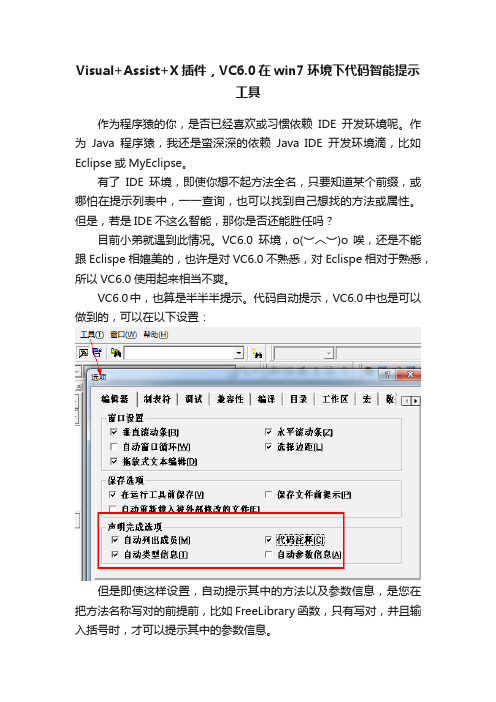
Visual+Assist+X插件,VC6.0在win7环境下代码智能提示工具作为程序猿的你,是否已经喜欢或习惯依赖IDE开发环境呢。
作为Java程序猿,我还是蛮深深的依赖Java IDE开发环境滴,比如Eclipse或MyEclipse。
有了IDE环境,即使你想不起方法全名,只要知道某个前缀,或哪怕在提示列表中,一一查询,也可以找到自己想找的方法或属性。
但是,若是IDE不这么智能,那你是否还能胜任吗?目前小弟就遇到此情况。
VC6.0环境,o(︶︿︶)o 唉,还是不能跟Eclispe相媲美的,也许是对VC6.0不熟悉,对Eclispe相对于熟悉,所以VC6.0使用起来相当不爽。
VC6.0中,也算是半半半提示。
代码自动提示,VC6.0中也是可以做到的,可以在以下设置:但是即使这样设置,自动提示其中的方法以及参数信息,是您在把方法名称写对的前提前,比如FreeLibrary函数,只有写对,并且输入括号时,才可以提示其中的参数信息。
o(︶︿︶)o 唉,这样是超级不爽的,因为对函数不熟悉的话,则是无法提示的。
继续向Eclipse学习。
VC6.0中,另一个问题是代码关键字没有高亮,即使是系统的函数,一眼望去,全都是白底黑字。
即使VC6.0中,也可以设置,但是却没有那么完美。
当然VC6.0也可以智能化,拿出其杀手锏Visual+Assist+X插件,此工具一出,即可与Eclipse环境那样智能优越。
与此同时,开发者的开发效率更上一层楼。
安装后的效果如下:每次启动时,提示信息:启动程序后,界面变化:安装此插件后,代码关键字高亮。
不同的代码字符不同的颜色,截个图给大家瞧瞧吧。
但是头疼的问题又来了,我本是win7系统,win7下VC6.0插件,代码提示功能是存在的,高亮功能也是有的。
但是奇怪的问题是:代码提示后,原来直接使用方向键以及Enter 直接可以选中自己想要的方法,但是在win7环境下竟然不可以的。
键盘中的上下键以及Enter键不管用,当然也有快捷键,CTRL+Enter 即可选中此方法。
visual assist使用方法

visual assist使用方法Visual Assist是一款用于辅助开发人员提高代码编写效率的软件工具。
它为开发人员提供了一系列强大的功能,可以帮助他们更快速、更准确地编写代码。
Visual Assist提供了代码自动补全功能。
当开发人员输入代码时,Visual Assist会根据上下文提供智能的代码补全建议,帮助开发人员快速选择合适的代码片段。
这样可以避免手动输入冗长的代码,并减少代码错误的可能性。
Visual Assist还提供了代码导航功能。
开发人员可以通过快捷键或者鼠标点击,快速跳转到代码文件的特定位置。
这对于大型项目来说尤为重要,因为它可以帮助开发人员更快速地定位到自己感兴趣的代码,提高阅读和理解代码的效率。
Visual Assist还提供了智能重命名功能。
当开发人员需要修改变量、函数或类名等标识符时,Visual Assist可以自动更新所有相关的代码,避免手动查找和修改代码带来的麻烦。
这对于重构代码或修改接口时非常有用,可以减少出错的可能性。
Visual Assist还提供了代码模板功能。
开发人员可以事先定义好一些代码模板,然后在需要的时候快速插入到代码中。
这对于频繁使用的代码片段或者固定的代码结构非常有用,可以减少重复劳动,提高开发效率。
Visual Assist还提供了代码分析功能。
它可以帮助开发人员找出代码中的潜在问题,如未使用的变量、不可到达的代码等,并给出相应的建议。
这对于提高代码质量和可维护性非常重要,可以帮助开发人员及时发现并修复代码中的问题。
Visual Assist是一款功能强大的代码辅助工具,可以帮助开发人员提高代码编写效率和质量。
通过自动补全、代码导航、智能重命名、代码模板和代码分析等功能,它使得开发人员能够更快速、更准确地编写代码,并及时发现和修复潜在问题。
如果你是一名开发人员,我强烈推荐你尝试使用Visual Assist,相信它会让你的开发工作更加轻松和高效。
- 1、下载文档前请自行甄别文档内容的完整性,平台不提供额外的编辑、内容补充、找答案等附加服务。
- 2、"仅部分预览"的文档,不可在线预览部分如存在完整性等问题,可反馈申请退款(可完整预览的文档不适用该条件!)。
- 3、如文档侵犯您的权益,请联系客服反馈,我们会尽快为您处理(人工客服工作时间:9:00-18:30)。
Visual Assist X 10.1 (开发环境增强工具)增强Microsoft开发环境下的编辑能力。
Visual Assist X具有强大的编辑特色,提高了生产效率,可以完全集成到您的Microsoft开发环境中,升级了您的IDE,在不改变编程习惯的同时就可以感受到Visual Assist X为您带来的好处。
Visual Assist X是一款非常好的Visual Studio .NET 2003、2002插件,支持C/C ++,C#,Visual Basic等语言,能自动识别各种关键字、系统函数、成员变量、自动给出输入提示、自动更正大小写错误、自动标示错误等,有助于提高开发过程的自动化和开发效率。
结构体系从Microsoft Visual C/C++ 6.0开始,所有的Microsoft IDE都为您的编辑环境提供了轻巧的剖析器,为您的代码编写提供方便,他们不生成目标码,这种默认帮助形式称为Intellisense。
其特性包括成员列表框、完成列表框、停驻工具提示、自动参数信息。
您可以在IDE对话框选项内设定每个组件的工作状态。
Visual Assist X去除了默认Intellisense的几个不足之处,采用一系列新的特性对其进行了补充,提高了IDE的可用性。
其中,帮助的数量决定于IDE、所用编程语言和您设定的选项。
如同默认Intellisense,Visual Assist X也包括剖析器,运行于您的编辑过程中。
该培训器同默认剖析器的不同之处在于,他们不装载预先设置的符号数据库,因此扩大了Intellisense的范围。
Visual Assist X只收集您工程中的头文件和对象信息,这些头文件和对象可以包含在系统、第三方库、MFC或ATL/WTL/STL 中。
这意味着Intellisence的活动更加频繁,结果也更加准确。
不止是C/C++,对于所有编程语言,Visual Assist X都含有可执行的轻载默认剖析器。
对于C/C++,您可以选择Visual Assist X专有Intellisense,也可以首选默认剖析器,只有当其不可用时,再采用Visual Assist X,这些工作方式都可以通过专门设置来实现。
Visual Assist X作为一种低优先度的后台线程插件,不影响您的IDE环境性能。
该线程在idle期间活动,当您开始输入代码时,又回复为静默状态。
并且它的剖析器不生成目标码,因此,同传统剖析器相比,占用更少的资源。
Visual Assist X提高了工作的自动化,简化了浏览,并且显示您开发过程的关键信息。
其功能完全集成到IDE中,实现了二者的充分融合。
为Microsoft Visual Studio .NET 2003和2002的所有编程语言提供编程助手,包括C/C++, C#, ASP, Visual Basic, Java 和HTML,另外,还为Microsoft Visual C++ 6.0和5.0的C/C++用户提供编程帮助。
产品特点改进了Intellisense:成员和完成列表框的出现更加频繁、迅速,并且结果更加准确。
参数信息更加完善,并带有注释。
含有所有符号的停驻工具提示。
代码输入更迅速:输入时观察suggestion列表框,其中将根据您的输入提供相应的备选字符。
为了更加方便的选择字符,还可以提前定义Atuotext和代码模板。
错误自动校正:监控您的IDE,对那些简单但耗时的错误进行即时校正。
信息获取更加快速:更加迅速了解代码信息,在新的VA View中观察当前的停驻类浏览器,可以获得当前符号的更多信息。
除此,资源窗口中还添加了小的内容和定义项,可以获取信息快照。
增加了色彩和格式:采用了更多的色彩和格式选项,代码解译更加迅速。
增强了IDE的基本语法色彩,在您输入代码的同时,突出匹配和不匹配条目。
另外,还添加了column indicator和print in color,将RTF置于剪切版内。
简化了查找和浏览:查找和浏览更加轻松。
通过内容查找可以快速跳到相同名称的符号处,在您工作台的任何地方都可以找到符号定义,还可以转入您代码中的符号执行处。
选择您文件的列表方式,锁定头文件和相应的cpp文件。
从您的工作台文件列表中打开文件。
含有最近行为列表,可以在代码的活动部分之间相互转换。
Move scope可以到达下一个方法,还包含往返浏览。
拼写检查:在您输入代码的同时进行检查,并且可以看到同Microsoft Word相似的红色下划线。
含有Spell check comments and strings,另外,Spell check code可以检查错误的输入符号。
拓展了基本编辑:对编辑器进行了增强,编辑代码更加迅速。
含有Surround selections,multiple clipboards. Sort lines。
适合您个人风格的配置特色:细化选项对话框,定义Visual Assist X特性以适应您的编程习惯。
内容菜单中含多个命令,设置快捷方式可以加快访问您所偏好的命令。
可以禁止或允许Visual Assist X,或者强制其重新剖析从而更加智能化。
程序员的超强外挂——Visual Assist .Net 2003源代码之光(杨冰)程序员的外挂?大家看见这个标题,都会有这样的疑问。
其实,这个外挂——Visual Assist .Net 2003(以下简称VAssist),只是程序员写代码的辅助工具,它非常有效的帮助程序员进行编码。
VAssist是针对使用Visual 2003(以下简称VS)的程序员辅助工具。
它改善了VS编程环境中一些东西。
下面,我们就开始介绍VAssist的功能和使用方法。
VAssist采用标准安装方式,安装完毕后,我们在VS里打开一个工程,会看见VS的界面多出一个工具条(图1),那就是VAssist。
图1从左向右第一个命令钮,里面是VAssist的选项设置。
第二个命令钮,是显示当前符号的定义处。
当选定一个函数或者变量,就可以通过他来看这个函数或者变量的定义位置。
第三个命令钮,竟然可以为我们写出一些固定格式的代码,比如声明一个类,我们不需要写class xxx和public等框架,只要轻轻一点,VAssist都可以为我们做到。
在写程序的时候,我们通常会建立多个工程,要打开其他工程的文件,用VS的解决方案资源管理器,就需要一层一层的选择,好麻烦。
如今,用VAssist的第四个按钮,就可以方便的浏览在这个解决方案下的所有文件,它会显示出一个大的文件列表,我们直接选择就可以了。
第五个命令钮,是我经常用到的。
我们通常要在.h和.cpp文件中不断的切换,虽然有VS的选项卡,但那也要选择一下对应的才可以。
用了第五个命令钮,直接就可以进入对应的h或者.cpp文件中。
第六个和第七个按钮,是可以恢复光标的位置,它可以记录我们历次使用光标的位置,这样,我们可以方便的用光标来进行定位。
第八个和第九个按钮很简单,就是向前或者向后搜索字符串。
做程序员的,难免会打错一些字,或者丢掉分号,括号等东西,如果让编译器在经过不长不短的编译时间后,检查出来,很是浪费时间。
这就是第十个按钮所要做的,它可以进行拼写检查,为我们节省大量的时间!第十二到十五的命令钮,是负责VAssist的拼写检查状态的,它可以在你写出一两字符后,就可以大致判断出你要写的函数名或者变量等东西,这个时候,你只要直接按回车就可以将字直接打出,根本不用再敲字,并且,它可以自动修复你的大小写错误,在有错的地方,比如你的变量没有声明就直接用了,它会在错误的地方,加上一条红色的下划线,提醒你一下。
最后一个命令钮,是VAssist的开关,你可以在不想用VAssist的时候,把它关闭。
VAssist还有一个不错的功能:VS的导航栏几乎是个废物,什么也不能干,我们不能通过它来到达任何函数,所以,VAssist提供了一个自己的导航栏,我们只要选择相应的函数,就可以快速定位,否则,在n多代码面前,还要慢慢定位,昏……另外,我们在粘贴代码的时候,免不了要进行代码格式重新排版,VAssist可以在粘贴的时候,自动为我们排版,我们就不需要按VS提供的热键了,偷一点懒嘛。
如果大家觉得用鼠标点击VAssist的命令钮有些不方便,可以设置一些热键。
在VS的菜单->选项->环境->键盘中可以设定.VAssist不愧是一个方便、智能的帮助程序员写代码的好工具,希望大家都来看看,嘿嘿。
如果谁想下载,可以去google搜索。
Visual Assist X是开发环境的辅助工具,使用该工具可以让用户更加轻松地编写代码。
下面以Visual Assist 6.0为例,详细介绍它的安装与使用。
1.功能Visual Assist X主要有3个功能,具体如下。
(1)成员列表框的出现更加频繁、迅速,并且结果更加准确。
参数信息更加完善,并带有注释。
含有所有符号的停驻工具提示。
使用Visual Assist X前的提示如图1-23所示,使用Visual Assist X后的提示如图1-24所示。
图1-23 使用Visual Assist X前图1-24 使用Visual Assist X后(2)智能提示。
输入“da”,Visual Assist X会自动给出一个提示“data”(如图1-25所示),如果提示正确,可直接按回车键使用提示的内容。
图1-25 智能提示(3)错误自动校正:监控您的IDE,对那些简单但耗时的错误进行即时校正。
在以下代码中,输入“Cdata”,再输入空格,“Cdata”会自动变成“CData”。
void CEx010106Dlg::OnButton1(){Cdata}2.安装安装Visual Assist X的具体步骤如下。
(1)运行安装文件(如VA6Setup1079)。
在运行安装文件之前,必须关闭Visual C++及其同系列产品,否则会出现如图1-26所示的提示。
图1-26 错误信息(2)选中“I agree with the above terms and conditions”复选框,如图1-27所示,单击“Next”按钮。
图1-27 同意协议(3)选择安装路径,不必和Visual C++安装在一起,如图1-28所示。
图1-28 选择安装路径(4)单击“OK”按钮完成Visual Assist 6.0的安装,如图1-29所示。
图1-29 安装完成(5)打开Visual C++,由于Visual Assist 6.0还是试用版,所以启动时都会弹出如图1-30所示的对话框,单击“Quit”按钮关闭此对话框,Visual C++就自动具有Visual Assist 6.0的相关功能了。
