飞利浦智芯IH电饭煲HD4568
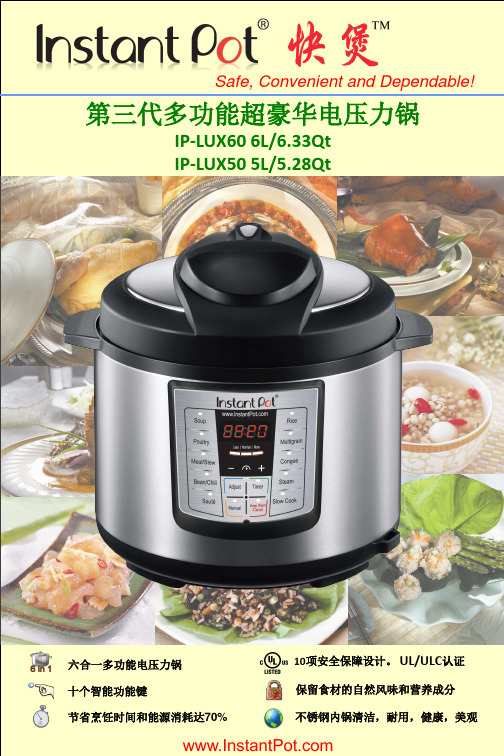
Instant Pot 快煲IP-LUX60 50 第三代六合一多功能电压力锅说明书
六合一多功能电压力锅十个智能功能键节省烹饪时间和能源消耗达70%保留食材的自然风味和营养成分10项安全保障设计。
UL/ULC认证不锈钢内锅清洁,耐用,健康,美观第三代多功能超豪华电压力锅IP-LUX60 6L/6.33QtIP-LUX50 5L/5.28Qt第三代多功能超豪华电压力锅IP-LUX60 6L/6.33Qt IP-LUX50 5L/5.28Qt商品特色InstantPot ● 11-300 Earl-Grey Dr. Suite 383, Ottawa, Ontario, K2T 1C1, Canada ● 1-800-828-7280Instant Pot 快煲IP-LUX60/50是第三代六合一多功能电压力锅。
集压力锅,电饭煲,慢烧锅,蒸锅,开盖炒,保温锅于一体。
轻点按键,就可以做出你最喜爱的菜肴。
快煲的智能程序使烹调变得简便,轻松。
烹调时不须时刻照看。
压力烹饪省时且美味。
各种全家人喜爱的菜肴只需15到45分钟就可完成。
杂粮稀饭可以在早晨定时做好。
快煲可节省烹饪时间和能源消耗达70%。
同时保留食材的自然风味和营养成分。
快煲在烹饪过程无噪音, 无蒸汽,是您清洁厨房里的好帮手。
三层复合底不锈钢内锅安全耐用,免除无粘塗层带来的健康隐患。
快煲是您日常,健康,环保的生活中不可缺少的时尚厨用电器。
•10项安全保障设计。
UL/ULC安全认证•10个智能烹饪程序:炖肉,烧汤,米饭,煲粥,杂粮米,开盖炒/收汁,豆类,蒸,家禽和慢炖。
•3种自选口感 •24小时预约定时 •高达120分烹调时间 •自动保温•节省烹饪时间达70% •健康烹调,口味更佳•菜肴效果一致,感谢智能压力和温度控制技术•高效节能高达70%•3层复合底不锈钢内锅消除健康隐患,传热更均匀•随带中英法文说明书及营养菜谱 •不锈钢蒸笼架及其它烹饪配件。
飞利浦HD3095 HD3195电饭锅用户手册说明书

用户手册产品设计和规格若有变更,恕不另行通知;所购买产品,请以实物为准。
©2018 Koninklijke Philips N.V.All rights reserved.HD3095_HD3195_UM_ZH-CN_V2.0HD3095HD31953 概览产品概览a可拆卸上盖f蒸汽阀b开盖按钮g内锅c控制面板h刻度线d发热元件i提手e煲体j插座控制面板概览k营养保温/关按键p开始烹调按键l定时按键q时按键m柴火烧按键r功能选择n预约按键s分按键o液晶屏功能概览程序默认烹调时间可定时可预约标准煮45分钟/24小时超快煮40分钟/24小时靓粥1小时30分钟1-4小时24小时老火汤2小时1-4小时24小时柴火烧40分钟/24小时煮蛋16分钟12-20分钟24小时煮速食10分钟10-30分钟/养生炖2小时1-4小时24小时营养蒸20分钟10-40分钟24小时五谷饭55分钟/24小时煲仔饭1小时10分钟/24小时再加热25分钟25-59分钟/蛋糕45分钟//蒸汽清洗25分钟//4 使用电饭煲首次使用前1 从内锅取出所有配件,拆取内锅的包装材料。
2 首次使用电饭煲前,彻底清洁电饭煲的部件(请参阅“清洁与保养”章节)。
提示•开始使用电饭煲前,确保所有部件完全干透。
使用前的准备使用电饭煲前,请遵循以下准备事项:1 使用随附的量杯量取米。
2 将米彻底洗干净。
3 将事先洗好的米放入内锅。
4 对应使用米量的杯数,将水加到内锅刻度注明的水位,然后铺平米的表面。
注•一杯米约 180 毫升,通常能煮出 2 碗饭。
煮最大米量时倒入内锅的水量请勿超过内锅内注明的最高水位。
•内锅内标有的水位线仅供参考。
您可根据不同米饭的品种及自己的喜好调节水位。
如居住地区的电压不稳定,电饭煲可能出现食物溢出的情况,这属于正常现象。
•除了遵循水位线指示之外,您还可以通过 1:1-1.2 的米水比例煮饭,以及 1:8 的米水比例煲粥。
请勿超出内锅内部注明的最高水位。
IH电饭锅哪家强?4款高端电饭煲体验对比

IH电饭锅哪家强?4款高端电饭煲体验对比作者:梁景裕来源:《消费电子》2017年第03期对于经常自己下厨的消费者而言,日常生活早已离不开电饭锅,其也算得上是家中必备的厨房电器。
在经历了早期的探索和混乱之后,高端电饭煲从传统功能的单一化到现在逐渐普及的智能化,为我们的生活带来了不少便捷。
而目前市场上,采用单循环IH加热技术使米饭受热更全面均衡的高端电饭锅便成为了很多消费者的首选。
本期《消费电子》评测室将挑选4款热销的高端电饭锅,希望大家在选购电饭锅时能够有所参考。
飞利浦 HD4566 IH售价:3180元飞利浦的IH电饭煲,主要有四个型号,HD3188/HD4558/HD4566/HD4568,除了单线圈的HD3188外,其他型号均拥有“智芯回漩IH”技术,也就是多线圈IH加热,至于单线圈和多线圈的区别,官方介绍称多线圈加热煮出来的米饭,在均匀度、含水量上有较大提升。
本期我们体验的是在性能、颜值、价格上做得比较平衡的HD4566电饭锅,其主要区别是把按钮改为了触摸式,支持6个米种21种预设菜单。
什么是IH电饭锅?目前依靠磁力线穿透锅体进行加热的电饭煲,称为IH电饭煲。
IH电饭煲具有强大的火力:快速升温,米粒迅速吸热,不会散架。
而且还具备优秀的热传导力,能帮助米粒充分吸水,每个炊煮阶段都能达到最适当的火力。
此外还有优秀的热对流性,让火力均匀,米饭全面充分受热。
目前市场上,包括所有日韩顶尖品牌在内,均采用单循环IH加热技术。
但值得注意的是飞利浦已经在国内推出更为先进的双向循环IH加热技术,可以说极具突破性,使米饭受热更全面均衡。
IH电饭煲的工作原理:通过电磁线圈接通交变电流,直接对金属内胆进行加热,越过了加热盘的热量传导过程,升温迅速;而且很多高端IH电饭煲引入多级线圈,实现了对整个内胆的环绕加热,实现了绝对的均匀加热;IH电饭煲还能对米饭焖制过程实现精准程序控制,根据米饭各个加热阶段的需要设定不同的加热方案,米饭口感和营养成分都提升到了前所未有的高度。
飞利浦大型显示器8816系列说明书

使用手冊Register your product and get support at/TVsupport55PUH8816/9670PUH8816/968816 系列大型顯示器目錄1 安裝4 1.1 閱讀安全指示4 1.2 顯示器底座4 1.3 壁面架設4 1.4 擺放位置提示41.5 電源線42 遙控器5 2.1 按鍵瀏覽5 2.2 將遙控器與顯示器配對6 2.3 語音搜尋6 2.4 IR 感應器6 2.5 電池62.6 清潔63 開啟和關閉8 3.1 開啟或待機83.2 顯示器上的按鍵84 連接裝置9 4.1 關於各種連接9 4.2 家庭劇院 - HTS9 4.3 智慧型手機和平板電腦10 4.4 藍光光碟播放器10 4.5 藍牙10 4.6 耳機11 4.7 遊戲機11 4.8 USB 鍵盤11 4.9 USB 隨身碟12 4.10 相機12 4.11 攝影機124.12 電腦125 連接您的 Android 顯示器13 5.1 網路和網際網路13 5.2 Google 帳戶145.3 「Philips TV 系列」應用程式156 應用程式16 6.1 關於應用程式16 6.2 Google Play16 6.3 開始或停止應用程式17 6.4 鎖定應用程式17 6.5 管理應用程式186.6 儲存187 網際網路19 7.1 啟動網際網路197.2 網際網路選項198 快速選單209 設定21 9.1 畫面21 9.2 聲音23 9.3 Ambilight (流光溢彩) 設定26 9.4 環保/節能設定279.5 一般設定27 9.6 時鐘、地區及語言設定29 9.7 Android 設定29 9.8 通用存取設定299.9 鎖定設定2910 影片、相片和音樂31 10.1 來自電腦或 NAS31 10.2 最受歡迎選單與上次播放選單31 10.3 來自 USB 連接裝置31 10.4 播放您的影片/視訊31 10.5 觀看您的相片3210.6 播放您的音樂3311 智慧型手機和平板電腦35 11.1 Philips TV Remote App3511.2 Google Cast3512 遊戲36 12.1 必要準備36 12.2 遊戲控制器3612.3 玩遊戲機的遊戲3613 Ambilight (流光溢彩)37 13.1 Ambilight (流光溢彩) 風格37 13.2 關閉 Ambilight (流光溢彩)37 13.3 Ambilight (流光溢彩) 設定37 13.4 Lounge Light 模式37 13.5 日出喚醒鬧鐘38 13.6 Ambisleep3813.7 Ambilight 延伸3814 Netflix4015 Alexa41 15.1 關於 Alexa4115.2 使用 Alexa4116 軟體42 16.1 更新軟體42 16.2 軟體版本42 16.3 自動軟體更新42 16.4 檢視軟體更新紀錄42 16.5 開放原始碼軟體42 16.6 開放原始碼授權4316.7 公告4317 規格44 17.1 環境保護44 17.2 電源44 17.3 作業系統44 17.4 接收44 17.5 顯示器類型44 17.6 顯示器輸入解析度44 17.7 連接45 17.8 聲音45 17.9 多媒體45464646464848494950515151515252525252525253535418 協助說明與支援18.1 註冊您的產品18.2 使用協助說明18.3 疑難排解18.4 線上協助說明18.5 支援及維修19 安全與照護19.1 安全性19.2 螢幕照護20 使用條款20.1 使用條款 - 顯示器20.2 使用條款 - Smart TV 20.3 使用條款 - Philips TV 系列21 版權21.1 HDMI 21.2 HEVC21.3 杜比視界及 Dolby Atmos 21.4 DTS-HD 21.5 DTS Play-Fi 21.6 Wi-Fi Alliance 21.7 Kensington 21.8 其他商標22 免責聲明1安裝1.1閱讀安全指示使用之前請先閱讀安全指示。
飞利浦多功能电饭煲说明书

HD2238User manual• Always put the inner pot in the appliance before you put the plug in the power outlet and switch it on.• Do not place the inner pot directly over an open fire to cook food.• Do not use the inner pot if it is deformed.• Make sure that the sealing ring is clean and in good condition.• The accessible surfaces may become hot when the appliance is operating. Take extra caution when touching the surfaces.• Beware of hot steam coming out of the floating valve and pressure regulator valve during cooking or when you open the lid. Keep hands and face away from the appliance to avoid the steam.• Do not lift and move the appliance while it is operating.• Do not exceed the maximum water level indicated in the inner pot to prevent overflow.• Do not place the cooking utensils inside the pot while cooking.• Only use the cooking utensils provided. Avoid using sharp utensils.• To avoid scratches, itis not recommendedto cook ingredients with crustaceans and shellfish. Remove the hard shells before cooking.• Do not place a magnetic substanceon the lid. Do not use the appliance near a magnetic substance.• Always let the appliance cool downto room temperature before you clean or move it.• Always clean theappliance after use. Donot clean the appliancein dishwasher.• Always unplug theappliance if not usedfor a longer period.• If the appliance isused improperly orfor professional orsemi-professionalpurposes, or if it isnot used accordingto the instructions inthis safety leaflet, theguarantee becomesinvalid and Philipsrefuses liability for anydamage caused.• Visit /support to downloadthe user manual.Electromagnetic fields (EMF)This Philips appliance complies with all applicablestandards and regulations regarding exposure toelectromagnetic fields.2 What’s in the box (fig. 1)Main unit Power cordRice & Soup ladle Steaming plateMeasuring cup Glass lidUser manual Recipe bookletWarranty card3 Overview (fig. 1)Product overviewa Lid handle h Control Panelb Top lid i Heating elementc Detachable inner lid j Power socketd Sealing ring k Locking pineWater levelindications l Floaterf Side handle m Pressure regulatorg Inner pot n Safety valveControls overviewo Heating indicator z Increase buttonp Power indicator{Cooking time buttonqKeep warm/Cancelbutton|Bake buttonr Slow cook button }Yogurt buttons Sauté/sear button ~Kaya buttontSauce thickeningbutton Display panelu Fried rice button€Stew buttonv Preset time button Start/Reheat buttonw Decrease button‚Keep warm indicatorxTemperature/Pressure indicatorƒMaintain pressureindicatoryTemperature/Pressure button…Start pressureindicatorFunctions overviewPressure cooking functionsCookingfunctionDefaultpressurekeeping time(minute)Pressure keepingtime regulatingrange (minute)Soup2020-59Porridge1515-59Rice14Not adjustableSteam83-20Chicken/Duck1515-59Beaf/Lamb3030-59Beans/Tendons3030-59Normal cooking functions(non-pressure)CookingfunctionDefaultcooking timeCooking timeregulating rangeSlow cook 6 hours 2 - 12 hoursSauté/sear(low /mid/hightemperature)3 minutes 2 - 59 minutesSaucethickening(low /mid/hightemperature)8 minutes 5 - 59 minutesFried rice11 minutes7 - 59 minutesBake45 minutes10 - 59 minutesYogurt8 hours 6 - 12 hoursKaya18 minutes 5 - 59 minutesStew 1 hour35 minutes -10 hoursReheat25 minutes20 - 59 minutes4 Using the All-in-one MultiCookerBefore first use1 Remove all packaging materials from theappliance.2 Take out all the accessories from the inner pot.3 Clean the parts of the All-in-one Multi Cookerthoroughly before using it for the first time (seechapter "Cleaning and Maintenance").Note•Make sure all parts are completely dry beforeyou start using the All-in-one Multi Cooker.Preparations before cooking(fig. 2)Before using the All-in-one Multi Cooker to cookfood, follow below preparation steps:1 Hold the lid handle and turn it anti-clockwiseuntil the top lid cannot move any more, then liftup the top lid.2 Take out the inner pot from the All-in-one MultiCooker and put the pre-washed food in the innerpot.3 Wipe the outside of the inner pot dry, then put itback into the All-in-one Multi Cooker.4 Place the top lid onto the All-in-one MultiCooker and turn it clockwise. You will hear a“click” sound when the top lid is properly locked.Note•Make sure the sealing ring is properlyassembled around the edge of the detachableinner lid.•Make sure the pressure regulator valve andfloating valve are clean and not blocked.•Make sure the outside of the inner pot is dryand clean, and that there is no foreign residueon the heating element.•Make sure the inner pot is in proper contactwith the heating element.Cooking food (fig. 3)Note•Do not fill the inner pot with less than 1/3 ormore than 2/3 full of food and liquid.•For food that expands during cooking, do notfill the inner pot with more than 1/2 full of foodand liquid.•For rice cooking, follow the water levelindications on the inside of the inner pot. Youcan adjust the water level for different types ofrice and according to your own preference. Donot exceed the maximum quantities indicatedon the inside of the inner pot.•Make sure the floater on the top lid dropsdown before cooking.•After the cooking process is started, you canpress Cancel/Warm to deactivate the currentwork, and the appliance goes to standbymode.Pressure cooking1 Follow the steps in “Preparations beforecooking”.2 Turn the pressure regulator to seal.3 Put the plug in the power socket.»The power indicator starts flashing.4 Press Pressure cook to choose one of thepressure cooking functions - Soup, Porridge,Rice, Steam, Chicken/Duck, Beaf/Lamb orBeans/Tendons.»The default pressure keeping time is displayedon the screen.Note•The pressure keeping time is not adjustablefor Rice.•You can adjust the pressure(Low. High) bypressing the Temp/kPa button.•When cooking 2 cups of rice (small amount),for better result, spread the rice evenly in theinner pot before cooking.5 To set a different pressure keeping time, pressCooking time.6 Press or to set the pressure keeping time.7 Press Start/Reheat to start the cooking process.8 When the All-in-one Multi Cooker reaches theworking pressure:»Maintain Pressure lights up;9 When the pressure keeping time has elapsed,the All-in-one Multi Cooker automaticallyswitches to keep warm mode.»The keep warm indicator (Keep warm) lightsup.10 Turn the pressure regulator to vent.»The All-in-one Multi Cooker starts releasingpressure.»The floater drops down when the pressure isreleased sufficiently.11 Hold the top lid handle and turn the lid anti-clockwise until it cannot move any more, then liftit up.Note•When cooking soup or viscous liquid, donot release pressure by turning the pressureregulator to vent, otherwise liquid might spurtfrom the pressure regulator valve. Wait untilthe pressure is naturally released and thefloater has dropped down to open the top lid.•The pressure keeping timer will start countingdown when the working pressure is reached.•After the cooking is finished and the pressureis released, you can press the cancel button(Warm/Cancel) and unplug the All-in-oneMulti Cooker to turn off the keep warmfunction or when not in use.Normal cookingNote•For normal cooking, you can cook foodwithout adding water in the inner pot. In thiscase, make sure to turn the pressure regulatorto bake.•Make sure to keep the top lid open for theentire time when you cook food in the Sauté/sear mode.•To choose the Reheat function, press Start/Reheat when the appliance is in standbymode.•You can press the Temp/kPa button to adjusttemparature (Low, Mid, High) for the followingfunctions: Sauté/sear and Sauce thickening.•The glass lid shall be used for non-pressurecooking functions.To cook food with normal pressure, press thecooking buttons and choose Slow cook, Sauté/sear, Fried rice, Sauce thickening, Stew, Yogurt,Kaya or Bake.1 Follow the steps in “Preparations beforecooking”.2 Turn the pressure regulator to bake or seal.• For Slow cook, Stew and Yogurt, turn thepressure regulator to seal.• For Bake, turn the perssure regulator to bake.3 Put the plug in the power socket.»The power indicator (Power) starts flashing.4 Press the desired cooking function button tochoose a cooking mode.5 To set a different cooking time, press Cookingtime.»The cooking time flashes on the screen.6 Press or to set the cooking time.7 Press Start/Reheat to start the cooking process.8 When the cooking time has elapsed, the All-in-one Multi Cooker automatically switches to keepwarm or standby mode.9 Turn the pressure regulator to vent.10 Hold the top lid handle and turn the lid anti-clockwise until it cannot move any more, then liftit up.Preset time for delayed cooking(fig.4)You can preset the delayed cooking time fordifferent cooking functions. The preset timer isavailable up to 24 hours.1 After the cooking function is selected, pressPreset timer.»The hour unit starts flashing on the display.2 Press or to set the hour unit.3 After the hour unit is set, press Preset timeragain.»The minute unit starts flashing on the display.4 Press or to set the minute button.5 Press Preset timer to confirm the preset time.6 Press Start/Reheat to start the cooking process.7 When the preset time has elapsed, the All-in-one Multi Cooker starts working automatically.Note•The preset function is not available in thefollowing modes: Sauté/Sear (both low andhigh temperatures), Reheat and Warm.Assembling and disassemblingthe pressure regulatorWarning•Do not disassemble the pressure regulatorduring cooking. Always unplug the All-in-oneMulti Cooker and wait until the pressure hasbeen released sufficiently to do so.• To disassemble the pressure regulator:1 Turn the lower screw anticlockwise until itbecomes loose.2 Pull it up and take out the pressure regulator.• To assemble the pressure regulator:1 Assemble the lower screw back to the regulator.2 Make sure the regulator points at the sealedposition ( ) and put it back to the steam valve.3 Turn the screw clockwise until it is fastened.5 Cleaning andMaintenanceNote•Unplug the All-in-one Multi Cooker beforestarting to clean it.•Wait until the All-in-one Multi Cooker hascooled down sufficiently before cleaning it.InteriorInside of the top lid, glass lid, and the main body:• Wipe with wrung out and damp cloth.• Make sure to remove all the food residuesstuck to the All-in-one Multi Cooker.Heating element:• Wipe with wrung out and damp cloth.• Remove food residues with wrung out anddamp cloth.Sealing ring:• Soak in warm water and clean with sponge.Inner lid:• Remove the detachable inner lid. Soak it inwarm water and clean with sponge.ExteriorSurface of the top lid, glass lid and outside of themain body:• Wipe with a cloth damped with soap water.• Only use soft and dry cloth to wipe the controlpanel.• Make sure to remove all the food residuesaround the pressure regulator valve andfloating valve.Pressure regulator valve and floating valve:• Disassemble the pressure regulator, soak it inwarm water, and clean with sponge.• Remove food residues in the pressureregulator valve and floating valve.AccessoriesMeasuring cup, rice & soup ladle, and inner pot:• Soak in hot water and clean with sponge.6 SpecificationsModel Number HD2238Rated voltage220-240VRated frequency50-60HzRated power input1370-1630WRated capacity8.0LWarm keeping temperature60-80°CNote•Always unplug the appliance if not used for alonger period.7 RecyclingDo not throw away the product with the normalhousehold waste at the end of its life, but hand it inat an official collection point for recycling. By doingthis, you help to preserve the environment.Follow your country's rules for the separatecollection of electrical and electronic products.Correct disposal helps prevent negativeconsequences for the environment and humanhealth.8 Guarantee and serviceIf you need service or information, or if you have aproblem, visit the Philips website at or contact the Philips CustomerCare Center in your country. You can find its phonenumber in the worldwide guarantee leaflet. If thereis no Customer Care Center in your country, go toyour local Philips dealer.9 TroubleshootingIf your All-in-one Multi Cooker does not function properly or if the cooking quality is insufficient, consult thetable below. If you are unable to solve the problem, contact a Philips service center or the Consumer CareCenter in your country.Problem Cause SolutionI have difficultiesopening the lid aftercooking.Need to release thepressure.PressureControl ValveFloater bakeventsealSet the pressure control valve to 'Vent'.And wait until the floater has dropped.Floater stuck in upposition.Set the pressure control valve to 'Vent'.And wait until the floater has dropped.I have difficultiesclosing the top lid.The sealing ring is not wellassembled.Make sure the sealing ring is well assembledaround the inside of the top lid.The floater stuck in upposition.The floater blocks the locking pin. Push down thefloater so that it does not block the locking pin.Leaking from under lid.Sealing ring missing.Sealing ringInner lidSealing ringInner lidPut sealing ring in place correctly on inner lid.Food or debris undersealing ring.Remove the sealing ring, clean and replace.Lid not correctly closed.Open and reclose the lid, checking for correctclosing.The pressure level insideof the appliance isabnormal.In this case the safety valve will be releasingsteam. Take the appliance to your Philips dealeror a service center authorized by Philips.Leaking from floaterSealing ring broken.Replace the sealing ring.Food or debris undersealing ring.Remove the sealing ring, clean and replace.Floater does not riseup after the appliancestarts pressurizing.Food&water are belowminimum level.Add food/water. Make sure there is enough foodand water in the inner pot.Leaking from lid orpressure control valve.Take the appliance to a Philips service dealer.E3 displays on thescreen.The temperature insidethe inner pot is too high.Wait until it falls down to room temperature.E1, E2, or E4 displayson the screen.The All-in-one MultiCooker has malfunction.Take the appliance to a Philips service center.。
Philips 5500系列Slim LED TV 32PHT5505产品说明书

Philips 5500 series Slim LED TV with Pixel Plus HD80 cm (32") LED TVDVB-T/T232PHT5505Slim LED TVwith Pixel Plus HDThe TV for today and tomorrow: Philips 5500 series Slim LED TV with Pixel Plus HD Experience vivid images, clear sound, and all the features you need-like handy extra USB and HDMI ports-to enjoy your TV at home.A clear, vivid picture every time•LED TV for images with incredible contrast•Pixel Plus HD gives you beautiful images you’ll loveTelevision viewing at your convenience•Two HDMI inputs and Easylink for integrated connectivity•USB for multimedia playbackIssue date 2021-01-27Version: 3.0.112 NC: 8670 001 73411EAN: 87 18863 02757 8© 2021 Koninklijke Philips N.V.All Rights reserved.Specifications are subject to change without notice. Trademarks are the property of Koninklijke Philips N.V. or their respective owners.SpecificationsSlim LED TV80 cm (32") LED TV, DVB-T/T2HighlightsLED TVWith LED backlight you can enjoy low powerconsumption and beautiful lines combined with high brightness, incredible contrast and vibrant colors.Pixel Plus HDPhilips Pixel Plus HD engine optimizes picture quality to deliver crisp images with beautiful contrast. So whether you’re streaming online or watching from a disc, you’ll enjoy sharper images with brighter whites and blacker blacks.Two HDMI inputs with EasylinkAvoid cable clutter with a single HDMI cable to carry both picture and audio signals from your devices to your TV. HDMI uses uncompressed signals, ensuring the highest quality from source to screen. Together with Philips Easylink, you’ll need only one remote control to perform most operations on your TV, DVD, Blu-ray, set top box or home theatre system.USB (photos, music, video)Share the fun. Connect your USB memory-stick, digital camera, mp3 player or other multimedia device to the USB port on your TV to enjoy photos, videos and music with the easy to use onscreencontent browser.Picture/Display•Display: LED HD TV•Panel resolution: 1366 x 768•Aspect ratio: 4:3/16:9•Picture enhancement: Pixel Plus HDSound•Output power (RMS): 10W•Sound Enhancement: Dynamic Bass Enhancement, Incredible Surround, Auto Volume Leveler, Clear SoundConnectivity•Number of HDMI connections: 2•Number of USBs: 1•Other connections: Antenna IEC75, Headphone out, CVBS+Audio L/R in, Digital audio out (optical)•EasyLink (HDMI-CEC): One touch play, Remote control pass-through, System audio control, System standbyMultimedia Applications•Video Playback Formats: MPEG-2, MPEG-4,Containers: AVI, MKV, H.264 (up to FHD), HEVC 265@FHD•Subtitles Formats Support: .SRT, .ASS, .SSA •Music Playback Formats: MP3, AAC, WAV •Picture Playback Formats: JPEG, BMP, PNG Supported Display Resolution•Computer inputs: up to 1366x768 @ 60Hz •Video inputs: 24, 25, 30, 50, 60 Hz, up to 1366x768pTuner/Reception/Transmission•MPEG Support: MPEG2, MPEG4•Video Playback: NTSC, PAL, SECAM •Analog TV: PAL, SECAM •Digital TV: DVB-T/T2Power•Mains power: AC 110-240V 50/60Hz •Ambient temperature: 5 °C to 35 °C•Power Saving Features: Auto switch-off timer Dimensions•Set dimensions (W x H x D): 732.5 x 436.5 x 77.3 mm•Set dimensions with stand (W x H x D): 732.5 x 450.6 x 166.6 mm •Product weight: 3.9 kg•Product weight (+stand): 4 kg •Box dimensions (W x H x D): 798 x 520 x 133 mm•VESA wall mount compatible: 100 x 100 mm •Weight incl. Packaging: 5.6 kgAccessories•Included accessories: Remote Control, 2 x AAA Batteries, Table top stand, Quick start guide, Legal and safety brochure, User ManualConvenience•Screen Format Adjustments: 16:9, 4:3, Automatic •Ease of Use: One-stop Home button•Electronic Program Guide: 8 day Electronic Program Guide•Firmware upgradeable: Firmware auto upgrade wizard, Firmware upgradeable via USB •Sleep timer*EPG and actual visibility (up to 8 days) is country and operator dependent.*The TV supports DVB reception for 'Free to air' broadcast. Specific DVB operators may not be supported. An up to date list can be found in the FAQ section of the Philips support website. For some operators Conditional Access and subscripction are required. Contact your operator for more information.*(Philips) only compatible with specific Philips player device.*Image depicted on the website are non-contractual pictures. Please always refer to the actual TV that are sold in the retail or stores.。
飞利浦咖啡机HD8768型号英文用户手册说明书
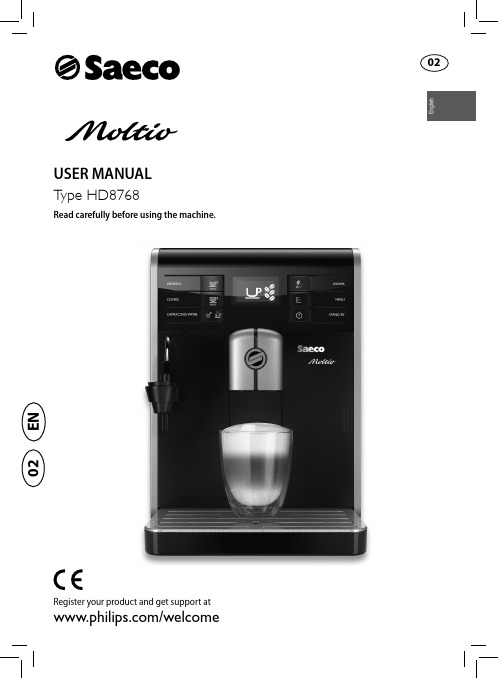
lis USER MANUALRead carefully before using the machine.Register your product and get support at/welcomeType HD8768E N0202IMPORTANT SAFEGUARDSWhen using electrical appliances, basic safety precautions should always be followed, including the following:1. Read all instructions.2. Do not touch hot surfaces. Use handles or knobs.3. To protect against fire, electric shock and injury to persons do not immerse cord, plugs, or appliance in water or other liquid.4. Close supervision is necessary when the appliance is used by or near children.5. Unplug from outlet when not in use and before cleaning. Allow to cool before putting on or taking off parts, and before cleaning the appliance.6. Do not operate any appliance with a damaged cord or plug or after the appliance malfunctions, or has been damaged in any manner. Return appliance to the nearest authorized service facility for examination, repair or adjustment.7. The use of accessory attachments not recommended by the appliance manufacturer may result in fire, electric shock or injury to persons.8. Do not use outdoors.9. Do not let cord hang over edge of table or counter, or touch hot surfaces.10. Do not place on or near a hot gas or electric burner, or in a heated oven.11. A lways attach plug to appliance first, then plug cord into wall outlet. To disconnect, turn any control to “off”, then remove plug from wall outlet.12. D o not use appliance for other than intended use.13. S ave these instructions.SAVE THESE INSTRUCTIONSCAUTIONThis appliance is for household use only. Any servicing, other than cleaning and user maintenance, should be performed by an authorized service center. Do not immerse machine in water. To reduce the risk of fire or electric shock, do not disassemble the machine. There are no parts inside the machine serviceable by the user. Repair should be done by authorized service personnel only.1. Check voltage to be sure that the voltage indicated on the nameplate corresponds with your voltage.2.Never use warm or hot water to fill the water tank. Use cold water only.3.Keep your hands and the cord away from hot parts of the appliance during operation.4.Never clean with scrubbing powders or harsh cleaners. Simply use a soft cloth dampened with water.5. For optimal taste of your coffee, use purified or bottled water. Periodic descaling is still recommended every 2-3 months.6.Do not use caramelized or flavored coffee beans. INSTRUCTIONS FOR THE POWERSUPPL Y CORDA. A short power-supply cord (or detachable power-supply cord) is to be provided to reduce risks resulting from becoming entangled in or tripping over a longer cord.B. Longer detachable power-supply cords or extension cords are available and may used if care is exercised in their use.C. If a long detachable power-supply cord or extension cord is used,1. The marked electrical rating of the detachable power-supply cord orextension cord should be at least as great as the electrical rating of the appliance2. If the appliance is of the grounded type, the extension cord should be agrounding-type 3-wire cord, and3. The longer cord should be arranged so that it will not drape over thecounter top or table top where it can be pulled on by children or tripped over.3ESPRESSO AND COFFEE BREWING (30)Espresso and coff ee brewing using coff ee beans (30)Espresso and coff ee brewing using pre-ground coff ee (31)MILK FROTHING/CAPPUCCINO BREWING (32)HOT WATER DISPENSING (34)CLEANING AND MAINTENANCE (36)Daily Cleaning of the Machine (36)Daily cleaning of the water tank (37)Daily Cleaning of the Automatic Milk Frother (38)Weekly Cleaning of the Machine (39)Weekly Cleaning of the Brew Group (39)Weekly cleaning of the coff ee bean hopper, the tray and the compartment (42)Monthly Lubrication of the Brew Group (42)Monthly Cleaning of the Automatic Milk Frother (44)Monthly Cleaning of the Brew Group with “Coff ee Oil Remover” (48)DESCALING (51)PROGRAMMING (55)The following parameters can be adjusted (55)How to program your machine (57)MEANING OF THE DISPLAY SYMBOLS (59)TROUBLESHOOTING (63)ENERGY SAVING (65)Stand-by (65)Disposal (65)TECHNICAL SPECIFICATION (66)GUARANTEE AND SERVICE (66)Warranty (66)Service (66)ORDERING MAINTENANCE PRODUCTS (67)MACHINE ACCESSORIES (68)4ENGLISHENGLISH56ENGLISH• Do not place the machine on a hot plate, directly next to ahot oven, heater or similar source of heat.• Only put coff ee beans into the coff ee bean hopper. Ifground coff ee, instant coff ee or any other substance is putin, it may damage the machine.• Allow the machine to cool before putting on or taking off .• Never use warm or hot water to fi ll the water tank. Usecold water only.• Never clean with scrubbing powders or harsh cleaners.Simply use a soft cloth dampened with water.• Descale your machine regularly. The machine indicateswhen descaling is needed. Not doing this will make yourappliance stop working properly. In this case repair is notcovered under your warranty!• Do not keep the machine at temperature below 0 degreeCelsius. Residue water in the heating system may freezeand cause damage.• Do not leave water in the water tank when the machineis not used over a longer period of time. The water canbecome contaminated. Use fresh water every time you usethe machine.ENGLISH7ll the water tank with warm, hot, sparkling water or any otherSwitch the power button to “I” to turn on the machine. The red led next to the “” button blinks. To turn on the machine, simply press the “” button. The control panelee bean hopper lid. Slowly pour the coff ee beans into ee bean hopper. ee bean hopper contains a tray which vibrates during grinding. ow of beans into the grinder. ee beans must be put into the coff ee bean hopper. Ground ee, caramelized coff ee or any other object may ee bean hopper lid on the coff ee bean hopper.2 Check that the machine shows this display.3 Select the pre-ground coff ee brewing function by pressing the “”button. The machine shows this display.Note:Do not add pre-ground coff ee into the compartment.4 Press the “” button. The machine starts dispensing water.5 When the dispensing has fi nished, empty the container. Repeat theoperations from step 1 to step 4 twice, then continue with step 6.6 Place a container under the steam wand.7 Press the “” button. The machine shows this display.8 Press the “” MENU button to start dispensing hot water.10 Repeat step 7 to 9 until the water tank is empty and the no water icon appears. Note: You can stop the manual rinsing by pressing the “” button. 11 At the end, fi ll the water tank again up to the MAX level. Now the ma-chine is ready for coff ee brewing. You will see the display as shown at the left.Note:When you haven’t used the machine for 2 or more weeks, the machine will automatically perform an automatic rinse/self-cleaning cycle after you switch it on. Thereafter you need to initiate the manual rinse cycle as described above.The automatic rinse/self-cleaning cycle is also initiated when the machine has been in stand-by mode, or switched off , for more than 15 minutes.After this cycle has been completed, you can brew a coff ee.9 Once the water has been dispensed, remove and empty the container.lter from its packaging, immerse it ver-lter according to the measurements per-lter:A = soft water – equals 1 or 2 on the test stripB = hard water (standard) – equals 3 on the test stripC = very hard water – equals 4 on the test striplter into the empty water tank. Press it Press the “” MENU button and scroll the pages by pressing the “”button until the following icon is displayed.ee bean hopper compartment.ee bean hopper into the compartment as shown on theSwitch the selector to the “” position.ee blend and switch to einated coff ee, still some caff eine traces might be present evenPress the “” button. The machine shows this display. Press the “” button to start frothing the milk.Press the “” button to stop pouring.2 Press the “” button. The machine shows this display.3 Press the “” MENU button to start dispensing hot water.4 The following icon is displayed during pre-heating time required bythe machine.5 Pour the desired amount of hot water. To stop the hot water dispens-ing, press the “” button.ee residues drawer.lter.ee grounds drawer.ee grounds drawer.The following icon will be displayed during dispensing. When the solution has been completely dispensed, press the “” button to stopll it with ½ litre of fresh water towater has been completely dispensed, press the “” button to stop。
新品看台
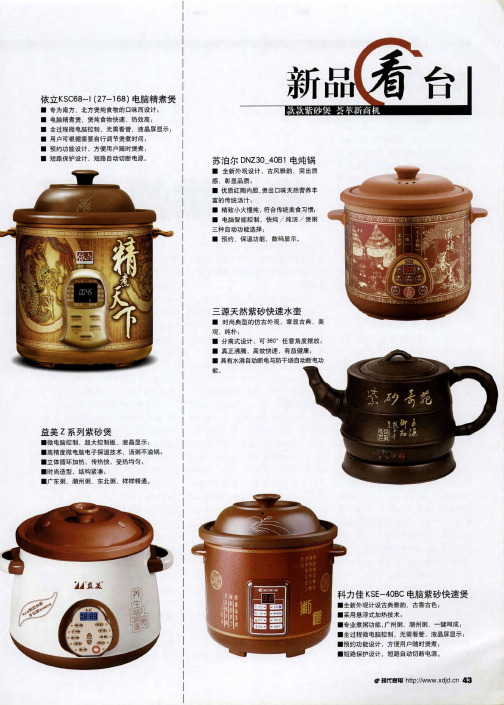
■ 微 电脑 控 制 , 超 大 控 制板 , 液 晶显 示 ; ● 高精 度微 电脑 电子 探温 技术 , 汤 粥不 溢 锅 ■立体循环 加热 . 传热快 , 受热均 匀 ; 一 时 尚造 型 , 结构 紧凑 ; ■广东粥 、 潮州粥 、 东北粥 . 样样精通 。
电脑 紫砂快速 煲
、 古香古色 ;
潮州粥 、 一 键呵成 ; 需看管 . 液晶屏显 示 户随时煲煮 ; 动切 断 电源 。
寸 t ll t t ]l t h t t p ://w w w j x d d c. n 4 3
依 立 K S C 6 8 一 l ( 2 7 - 1 6 8 ) 电脑 精 煮 煲
■ 专为南方 、 北 方煲炖食物的 口昧而设计 ; ■ 电脑精煮煲 . 煲炖食物快速 、 热效高 ; ■ 全 过程 微 电脑控 制 , 无 需 看 管 . 液 晶屏 显 示 ; ■ 用 户 可 根据 需 要 自行 调 节煲煮 时 间 i ■ 预 约功 能设 计 , 方便用 户随时煲煮 ; ■ 短 路 保 护设 计 , 短 功 能选择 :
一 预约、 保温功能 , 数码显 示 。
三 源天 然紫砂快速水壶
一 时 尚典 型 的仿 古外 观 , 章显 古典 、 美 观 、 纯朴 ; ■ 分 离式设 计 , 可 3 6 0 。 任意角度摆 放 ; ● 真正 沸腾 , 高效快速 , 一 具 有水 沸 自动断 电与防 能。
苏 泊 尔 D NZ 3 0 4 0 8 1 电炖 锅 —
■ 全 新外 观 设 计 , 古风 雅 韵 、 突 出质
感 、
彰显 品质 ;
■ 优质 红 陶 内胆 , 煲 出 口 味天 然 营养 丰
富的传统 汤 汁 ;
● 精致小火慢炖 , 符合传统美食 习惯;
内胆涂层测试:7款电饭煲均达标
内胆涂层测试:7款电饭煲均达标作者:张德荣来源:《消费者报道》2018年第03期出于热传导均匀、防黏不粘锅、耐腐蚀等需求,厂商会在电饭煲内胆加上涂层。
我们在购买页面上看到的“煮熟的米饭被干干净净一锅端”,主要依靠的就是内胆防黏涂层。
这些涂层是“三分钟热度”还是能满足长时间使用呢?涂层的脱落又会不会给食物带来安全风险呢?带着这些疑问,《消费者报道》委托第三方检测机构对7款电饭煲内胆进行了关于涂层耐久性的多项测试;并进行了一次关于内胆有害物质迁移的趣味对比实验。
结果显示,7款电饭煲内胆的涂层耐久性均符合标准。
另外我们发现一件值得消费者警惕的事情:涂层破损的内胆可能存在有害物质释出的风险。
为了检验涂层的附着力、耐磨强度、防粘性,《消费者报道》參照Q/CVC 0014-2016《优品电饭煲》中的“容器涂层的耐久性”对7款电饭煲进行了送检(项目描述如下表)。
结果显示,7款电饭煲内胆涂层均符合4个分项的评判要求,全部通过“涂层耐久性”测试。
值得一提的是,7款电饭煲均在说明书上标称涂层材料为聚四氟乙烯(又称:特氟龙)。
这种材料具有很好的稳定性,耐强酸强碱,几乎不溶于所有溶剂;摩擦系数低,表面张力小,是一种理想涂料;更重要的是,它的工作耐温环境为-190℃至250℃,这也意味着它在超过250℃以上的高温才会分解出对人体有害的物质,而电饭煲在使用过程中,温度一般不会超过100℃,即便是高压电饭煲,温度也不会超过130℃。
正因如此,聚四氟乙烯被广泛应用于内胆涂层。
电饭煲说明书上一般标有“铝合金材质、聚四氟乙烯涂层”等字样。
面对这些化学名词,我们都很担心涂层是否耐用?特别是长年累月使用后,涂层的脱落会不会释放出一些有毒有害物质呢?考虑及此,本刊参照GB 4806.10-2016《食品安全国家标准食品接触用涂料及涂层》,送检了飞利浦HD3060的原装内胆,并委托工程师用金属锐物将内胆刮花,通过对比内胆刮花前后的理化指标,去评价涂层脱落所造成的影响。
PHILIPS HD4775 说明书
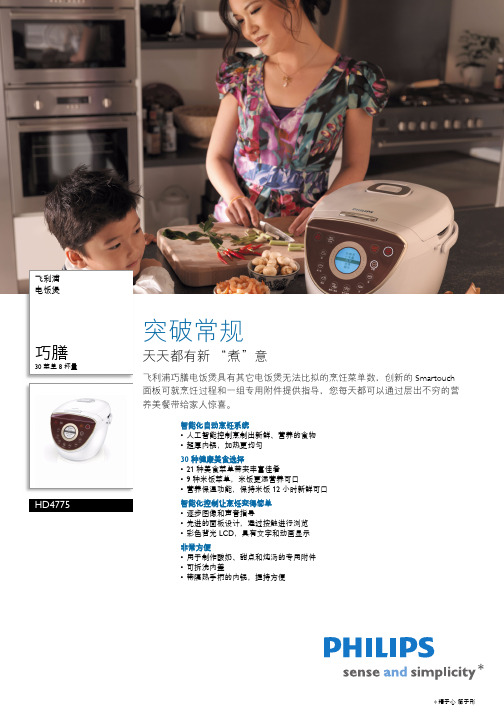
飞利浦电饭煲巧膳30 菜单 8 杯量HD4775突破常规天天都有新“煮”意飞利浦巧膳电饭煲具有其它电饭煲无法比拟的烹饪菜单数,创新的 Smartouch面板可就烹饪过程和一组专用附件提供指导,您每天都可以通过层出不穷的营养美餐带给家人惊喜。
智能化自动烹饪系统•人工智能控制烹制出新鲜、营养的食物•超厚内锅,加热更均匀30 种健康美食选择•21 种美食菜单带来丰富佳肴•9 种米饭菜单,米饭更添营养可口•营养保温功能,保持米饭 12 小时新鲜可口智能化控制让烹饪变得简单•逐步图像和声音指导•先进的面板设计,通过按触进行浏览•彩色背光 LCD,具有文字和动画显示非常方便•用于制作酸奶、甜点和炖汤的专用附件•可拆洗内盖•带隔热手柄的内锅,握持方便*精于心简于形产品亮点人工智能控制智能化加热机制和温度控制使得各种烹饪程序都能实现最佳烹饪效果超厚内锅涂层下超厚铸铁的铁铝合金特性可确保产生高水平的加热功率,并在内锅周围均匀加热9 种米饭菜单米饭菜单包括白米、快煮、小米量、寿司米、糙米、糯米、杂锦米、煲仔饭和泡饭。
21 种美食菜单它具有 21 种烹饪菜单,包括煮粥 - 稠粥、稀粥、绿豆粥、小米粥、鸡粥;意大利面;煲汤 - 菜汤、冬荫功、老火汤;燕麦;酸奶;甜品 - 绿豆汤、芝麻糊、木瓜雪耳糖水、莲子桂圆汤;蛋糕;焖/炖;蒸制;炖汤;鸡蛋/牛奶布丁。
12 小时自动保温使用保温功能,保持食物的营养与美味。
烹饪结束后,电饭煲自动切换到保温模式逐步指导设置和烹饪过程中,每个烹饪程序都伴随有逐步图像和声音指导。
用户只需遵照屏幕上显示的说明即可。
电饭煲为文本指导提供了三个语言设置选项。
触摸面板设计创新的触摸感应控件让用户可以轻松地浏览烹饪程序。
它由带 LED 按钮的触摸感应面板组成,中央的旋转式控件用于设置时间和浏览屏幕菜单。
彩色背光 LCD带彩色背光的 LCD 可清晰地指示各种烹饪状态(设置为白色;烹饪/翻热为红色;保温为绿色)。
飞利浦HD3081迷你电饭煲使用说明书

HD30811 ImportantPlease read this safety leaflet carefully before you use the Mini Rice Cooker with Induction Heating and save it for future reference.SafetyDanger• The appliance must not be immersed.Warning• This appliance shall not be used by children from0 year to 8 years.• This appliance can be used by children aged from 8 years and aboveif they are continuously supervised and they have been given supervision or instruction concerning use of the appliance in a safe way and understand the hazards involved.• This appliance is not intended for use by persons (including children) with reduced physical, sensory or mental capabilities,or lack of experienceand knowledge, unless they have been givensupervision or instruction concerning use of the appliance by a person responsible for their safety.• Children should be supervised to ensure that they do not play with the appliance.• Cleaning and user maintenance shall not be made by children unless they are older than 8 and supervised.• Cooking appliances should be positioned in a stable situation with the handles (if any) positioned to avoid spillage of the hot liquids.• This appliance is intended to be used in household and similar applications such as:• staff kitchen areas inshops, offices and otherworking environments; • farm houses;• by clients in hotels,motels and otherresidential typeenvironments;• bed and breakfast typeenvironments.4EN6EN open the lid. Keep hands and face away from the appliance to avoid the steam.• Do not lift and move the appliance while it is operating.• Do not exceed the maximum water level indicated in the inner pot to prevent overflow which might cause potential hazard.• Do not place the cooking utensils inside the pot while cooking, keeping warm or reheating rice.• Only use the cooking utensils provided. Avoid using sharp utensils.• To avoid scratches, it is not recommended to cook ingredients with crustaceans and shellfish. Remove the hard shells before cooking.• Do not insert metallic objects or alien substances into the steam vent.• Do not place a magnetic substance on the lid. Do not use the appliance near a magnetic substance.specifically recommend. Ifyou use such accessoriesor parts, your guaranteebecomes invalid.• Do not expose the appliance to hightemperatures, nor placeit on a working or still hotstove or cooker.• Do not expose the appliance to directsunlight.• Place the appliance on a stable, horizontal, andlevel surface.• Always put the inner pot in the appliance beforeyou put the plug in thepower outlet and switch iton.• Do not place the inner pot directly over an open fireto cook rice.• Do not use the inner pot if it is deformed.• The accessible surfaces may become hot whenthe appliance is operating.Take extra caution whentouching the appliance.• Beware of hot steam coming out of the steamvent during cooking or outof the appliance when you1 重要事项在使用IH电磁加热迷你电饭煲之前,请仔细阅读本安全手册,并妥善保管以备日后参考。
飞利浦智能电饭煲远程控制说明
飞利浦智能电饭煲远程控制说明在快节奏的现代生活中,人们对于厨房电器的智能化需求日益增长。
飞利浦智能电饭煲以其出色的性能和便捷的远程控制功能,为我们的烹饪生活带来了全新的体验。
接下来,就让我们详细了解一下这款电饭煲的远程控制功能。
一、远程控制的准备工作要使用飞利浦智能电饭煲的远程控制功能,首先需要确保您的电饭煲已正确连接到家庭无线网络。
在电饭煲的设置菜单中,您可以找到网络连接选项,按照提示输入您家中的 WiFi 密码,完成连接。
同时,您还需要在手机上下载并安装飞利浦官方提供的相关应用程序。
在应用商店中搜索“飞利浦智能电饭煲”,找到对应的应用并进行安装。
安装完成后,打开应用程序,按照引导进行注册和登录。
二、与电饭煲进行配对在应用程序中,点击“添加设备”或“配对新设备”的选项。
此时,应用程序会自动搜索附近已连接到同一网络的飞利浦智能电饭煲。
当您的电饭煲出现在设备列表中时,点击选择并进行配对。
配对过程中,可能需要您输入一些验证信息,例如电饭煲的序列号或验证码等。
这些信息通常可以在电饭煲的机身、说明书或包装盒上找到。
完成配对后,您的手机和电饭煲就成功建立了远程控制的连接。
三、远程控制的主要功能1、预约烹饪通过远程控制功能,您可以随时随地设置电饭煲的预约烹饪时间。
无论您是在上班途中、外出购物还是在外地出差,只要您能连接到网络,就可以提前安排好饭菜的烹饪时间。
例如,您知道自己晚上 7 点才能到家,那么您可以在下午 4 点的时候通过手机设置电饭煲在 6 点开始煮饭,这样您一回到家就能享用到热气腾腾的美味饭菜。
在预约烹饪功能中,您可以选择不同的烹饪模式,如煮饭、煮粥、煲汤等,还可以根据自己的需求调整烹饪的时长和温度。
2、实时监控在电饭煲工作过程中,您可以通过手机实时监控烹饪的进度。
应用程序会为您显示电饭煲当前的工作状态,包括剩余时间、温度变化等信息。
这让您能够更加精确地掌握烹饪情况,及时做出调整。
3、远程操作如果您在烹饪过程中突然改变了主意,想要调整烹饪模式或者延长烹饪时间,也可以通过远程控制功能轻松实现。
健康生活从米饭开始 飞利浦智芯IH电饭煲HD4568亮相

健康生活从米饭开始飞利浦智芯IH电饭煲HD4568亮相佚名
【期刊名称】《新潮电子》
【年(卷),期】2015(0)5
【摘要】相比一整套智能家居方案.绝大多数消费者接触智能家居都是从小家电产品开始的.而在众多小家电产品中·电饭煲无疑是同用户接触最为频繁的设备。
一款好的电饭煲不仅能够让每一颗米粒都均匀受热以实现米粒粘度和硬度含水量的黄金配备·更能凭借智能化的人机互动体验·真正成为用户家庭成员。
【总页数】1页(P125-125)
【关键词】电饭煲;健康生活;飞利浦;小家电产品;米饭;智能家居;家庭成员;消费者【正文语种】中文
【中图分类】TM925.52
【相关文献】
1.智芯回漩IH技术成就粒粒好米饭飞利浦留芯IH电饭煲,让你用“芯”做好饭[J], ;
2.飞利浦"创享人性科技"主题生活秀精彩亮相上海展示"健康舒适、优质生活"的理念和产品 [J], 关伟
3.飞利浦创享人性科技主题生活秀精彩亮相上海展示健康舒适、优质生活的理念和产品 [J],
4.绝不辜负每一粒米饭!米家压力IH电饭煲1S [J],
5.飞利浦智芯IH电饭煲HD4568 [J],
因版权原因,仅展示原文概要,查看原文内容请购买。
Philips/飞利浦 HD4536/00电饭煲智芯IH加热

Philips/飞利浦HD4536/00电饭煲智芯IH加热
可口的米饭为你的每一次用餐体验锦上添花。
飞利浦电饭煲,外形更出众,操作更简便,智能温控程序和超厚5层内锅,食物加热更均匀,让你每天轻松做出全家称赞的好米饭!现在就分享飞利浦电饭煲的使用方法,希望对你有帮助。
飞利浦Avance Collection触摸感应型电饭煲,使用了6毫米5层瑰金超厚内锅,提高内锅加热效果、传热绝佳、蓄能保温;3D加热技术,让每一粒米粒受热均匀,更加蓬松;强大的加热浮子、均匀加热和高效保温完美实现“柴灶”的效果,焖煮更全而!
此款电饭煲提供11种菜单选择,从面条到五谷饭,种类齐全,充分满足各种日常饮食需求。
根据个人喜好,更有软、适中、硬三种米饭口感可选,独家定制专属的米饭!
我们来试一试用它来煮米饭!先取出内锅淘好米。
放入适量的水,一般情况下,水要漫过米一手背,也可以参考刻度线,根据米量加入适量的水。
将内锅放饭煲内,盖上盖子,接上电源。
ispiral智芯ih说明书
ispiral智芯ih说明书
创新的电饭锅打破传统加热模式。
先进的Omnispiral lH技术交替切换加热功率,让热量可以从两个方向环绕每一颗米粒。
“智芯回漩""H技术
飞利浦技术,令饭煲底部双电磁线圈分开独立运作,智能芯片控
制两套线圈运作频率,强度及时长,令每一粒米都双向回漩电饭煲到手之后,首先检查下电饭煲所有的配件之类的是否完好,确定完好后就可以拆洗
按照说明书上的部件进行拆洗,一般包括蒸屉、内胆、上内胆和美味芯球,全部拆开后即可
除了内里的还有配件,比如饭勺、汤勺、量杯等,拆除里面的包装哦。
放入洗碗池,倒入冷水,可以加一些洗洁精,但不要过多,使用软抹布进行清洗。
清洗干净后选择厨房纸巾进行擦干。
将美味芯球和内胆都再次安装完毕哦。
锅内放刻度线4以下的冷水,标准煮沸,闷20分钟以上即可,
水掉再次清洗后即可使用。
飞利浦HD4530 电饭锅 用户手册

HD4530用户手册保留备用出版日期:2020-01-06©2020 Koninklijke Philips N.V.All rights reserved.HD4530_UM_China_v6.01 属于您的多功能电饭煲感谢您的惠顾,欢迎光临飞利浦!为了您能9 按开始烹饪按钮()启动烹饪程序。
»选定的功能指示灯保持常亮。
»烹饪初始阶段,显示屏显示。
»进入焖饭阶段后,显示屏以倒计时方式显示剩余烹饪时间。
注意•待机状态下若直接按开始烹饪按钮(),则会进入旋风煮工作状态。
10 完成烹饪时,您将会听到 4 下蜂鸣声。
电饭煲将会自动切换至保温模式。
»保温/取消指示灯亮起。
提示•为防止米饭结块影响口感,煮饭结束后请马上搅拌,使多余水分蒸发,避免米饭结块或发粘,保持米饭松软可口。
煮粥/杂粮粥/煲汤1 将需要烹饪的食材放入内锅。
2 完成“煮饭”中的步骤 6 和 7。
3 轻触功能选择按钮()来选择煮粥、杂粮粥或煲汤功能。
»选定的功能指示灯开始闪烁。
»如需调整烹饪时间,请参考章节“预约时间及烹饪时间调节”。
4 按开始烹饪按钮()启动烹饪程序。
»选定的功能指示灯保持常亮。
»屏幕上以倒计时方式显示剩余烹饪时间。
5 完成烹饪时,您将会听到 4 下蜂鸣声。
电饭煲将会自动切换至保温模式。
»保温/取消指示灯亮起。
注意•请勿超出内锅标注的最高水位线,否则可能令电饭煲内的食材溢出。
•由于各地方电压不稳定性,在煮粥过程中如有轻微米汤溢出,属正常情况。
•如果长时间处于保温模式,粥可能会较黏。
热饭1 翻松冷饭,使其均匀分布在内锅中。
2 在饭上倒入一些水,并充分搅拌。
以免米饭焦糊或变硬。
水量视饭的总量而定。
3 完成“使用多功能电饭煲”的准备步骤6 和 7。
4 轻触功能选择按钮(),选择热饭功能。
»如需调整烹饪时间,请参考章节“预约时间及烹饪时间调节”。
飞利浦 HD4768 00 智能电饭煲用户指南说明书
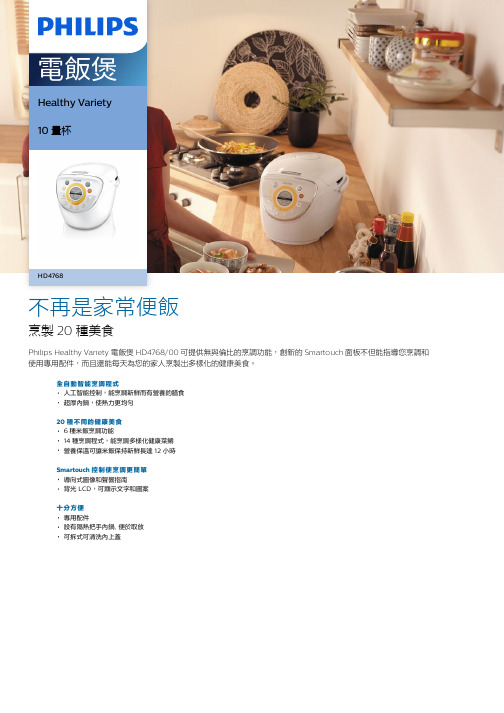
Healthy Variety10 量杯HD4768不再是家常便飯烹製 20 種美食Philips Healthy Variety 電飯煲 HD4768/00 可提供無與倫比的烹調功能,創新的 Smartouch 面板不但能指導您烹調和使用專用配件,而且還能每天為您的家人烹製出多樣化的健康美食。
全自動智能烹調程式人工智能控制,能烹調新鮮而有營養的膳食超厚內鍋,使熱力更均勻20 種不同的健康美食6 種米飯烹調功能14 種烹調程式,能烹調多樣化健康菜餚營養保溫可讓米飯保持新鮮長達 12 小時Smartouch 控制使烹調更簡單導向式圖像和聲響指南背光 LCD,可顯示文字和圖案十分方便專用配件設有隔熱把手內鍋, 便於取放可拆式可清洗內上蓋電飯煲HD4768/00產品特點規格人工智能控制電腦化的加熱軟件和溫度控制,讓您以不同的烹調程式實現最佳烹調效果超厚內鍋超厚鑄鋁合金內鍋,再配合內塗層,確保産生高溫加熱並使內鍋均勻導熱6種米飯烹調功能米飯選擇包括白米飯、快煮白米飯、小份白米飯、糯米飯、什錦飯和湯飯。
14 種烹調程式具備 14 種多樣化烹調程式,包括稠粥、稀粥、八寶粥、意大利粉、什菜湯、老火湯、乳酪、綠豆沙、甘筍蛋糕、蘿蔔糕、燕麥蛋糕;燉、蒸、蘿蔔糕、芋頭糕。
12小時保溫保溫功能可將米飯或食物長時間保溫,而無損食物的營養和美味。
完成烹調後,電飯煲將自動切換至保溫程式導向式指南在準備和烹調過程中,每種烹調程式都將採用導向式圖像和聲響指南。
用戶只需按照屏幕上的說明進行操作即可。
它提供了三種語言的文字指南設定選項。
背光 LCD背光 LCD ,可清楚指示烹調狀態。
它顯示文字和圖案,引導用戶使用所有烹調步驟。
專用配件它配備了適合獨特烹調程式的專用配件,如乳酪 可以將分離式設計的蒸架單獨作為支架,以滿足各種不同的烹調需求。
所有配件都可以堆疊,方便儲存。
設有把手內鍋烹調不同的美食時,可輕鬆拿取內鍋。
可拆式內上蓋需要經常清洗內層上蓋,以避免產生氣味。
飞利浦+HD3072+电饭煲+用户手册说明书

HD3072用户手册注意• 长按选择/取消触控区可取消正在进行的烹饪功能。
• 内锅的水位标记只是一个参考。
您始终可以根据谷物的品种及个人喜好调整水位。
• 除了以下水位指示,还可以在煮饭时按 1:(1.3-1.6) 的比例添加大米和水。
• 为了防止米饭结块影响口感,请在30分钟内将米饭翻松。
• 请勿超过标注的量或最高水位标示,否则可能导致产品发生溢漏。
粥和汤1 将原料放入内锅。
2 请遵循“烹饪前准备”中的步骤。
3 轻触选择/取消触控区可选择粥或汤。
»所选的烹饪功能指示灯闪烁,屏幕上将显示默认烹饪时间。
4 轻触开始触控区以所选模式开始烹饪过程。
5 烹饪完成后,您会听到 4 声哔声,选定的烹饪功能指示灯将熄灭。
6 电饭煲将自动进入保温模式。
»保温指示灯会亮起。
蛋糕1 搅拌好蛋糕原料。
2 用少许黄油涂抹内锅,然后将预先搅拌好的蛋糕原料倒入其中。
3 请遵循“烹饪前准备”中的步骤。
4 轻触选择/取消触控区可选择蛋糕功能。
5 轻触开始触控区开始烹饪。
6 烹饪完成后,您会听到 4 声哔声,选定的烹饪功能指示灯将熄灭。
»保温指示灯会亮起。
7 打开锅盖,小心地取出内锅以进行冷却。
8 待内锅冷却后,将盘子或蛋糕架放在锅上,然后翻转过来即可取出蛋糕。
酸奶1 将原料放入内锅。
2 请遵循“烹饪前准备”中的步骤。
3 轻触选择/取消触控区可选择酸奶。
»所选的烹饪功能指示灯闪烁,屏幕上显示默认烹饪时间。
4 轻触开始触控区以所选模式开始烹饪过程。
5 烹饪完成后,您会听到 4 声哔声,选定的烹饪功能指示灯熄灭。
6 电饭煲自动进入待机模式。
内部上盖及煲身内侧:• 用湿布擦拭。
• 确保清理掉黏在电饭煲上的所有食物残渣。
加热元件:• 用湿布擦拭。
• 用湿布去除食物残渣。
外部上盖表面和煲身外侧:• 用蘸有肥皂水的布进行擦拭。
• 只能使用柔软的干布擦拭控制面板。
• 确保清理掉所有食物残渣。
附件饭勺和内锅:• 浸泡到热水中并用海绵清洁。
Philips 5000 Series 口感智选 IH 电饭煲 用户手册说明书

Philips Philips Rice Cooker5000 Series Array口感智选 IH 电饭煲口感智选技术3D IH 加热技术麦饭石纹理精铁内胆定制米饭食谱HD4539/21精准智控烹饪,实现你对米饭的极致追求通过口感选择技术,满足全家人的偏爱从香糯到劲道,外加脆香煲仔饭,通过飞利浦精心打造的5档调节,定制您喜爱的米饭口感。
另外,我们提供4种不同的米种选择,依据米饭质地科学烹饪,激发粒粒原香。
广受好评的设计•iF 设计奖获得者耐用性设计•双层无毒陶瓷涂层•麦饭石纹理防刮擦涂层内胆•3D IH 加热系统,有效优化热能•4 升家庭用容量更多选择,轻松烹饪•便捷配件助力轻松烹饪•18 种经过优化的程序,无缝 UI每粒谷物都能彰显您的烹饪风格•智能烹饪曲线确保完美的烹饪效果•通过 Taste Select 技术,定制您的专属口感•5 级口味选择,打造您最喜爱的口感•精心定制,6 种最受欢迎的大米类型可选产品亮点智能烹饪曲线在烹饪过程中轻松控制温度和时间。
智能烹饪曲线能够管理和优化热能,针对您选择的米饭类型和质地提供极佳的香气、风味和口感。
Taste Select 技术Taste Select 技术可以管理和优化烹饪曲线和加热系统,以确保针对选择的每种米饭类型和口感提供精准的温度和烹饪时间。
是您制作喜爱的饭类菜品的完美选择。
5级口味选择从适合做寿司卷的软烂米饭,到适合翻炒的粒粒分明的硬米饭,您可以根据自己想要的口感,从 5 种米饭质地设置中任选一种。
自定义设置,始终打造您最喜爱的口感。
iF 设计奖获得者iF 奖是世界上最负盛名的设计奖之一,其奖章象征着对消费者和设计界有好处的设计。
这种获得认可的设计体现了 Philips 的和谐家居设计语言,以满足用户厨房的性能和耐用性要求。
带触摸按钮控件的先进用户界面进一步简化了烹饪过程。
6种大米类型选项可选择多种类型的大米,包括茉莉花米、籼米、东北大米、整粒米和糙米,我们的技术可以确保您每一次都能获得一致的口味和口感。
