我的世界0 13 1超级红石PVP地图存档
《我的世界》 知识清单

《我的世界》知识清单一、游戏基础1、游戏模式生存模式:玩家需要在游戏中收集资源、建造庇护所、抵御怪物的攻击,并保持生命值和饥饿值。
创造模式:玩家拥有无限的资源和创造力,可以自由建造和设计各种建筑和景观。
冒险模式:类似于生存模式,但玩家不能破坏方块,主要是按照预设的规则进行冒险。
旁观者模式:玩家可以自由穿越方块和生物,观察游戏世界。
2、操作方法移动:使用 W、A、S、D 键控制前后左右移动,空格键跳跃,Shift 键潜行。
视角控制:通过鼠标移动来改变视角,滚轮可以调整视角远近。
攻击和挖掘:鼠标左键攻击怪物或挖掘方块,右键使用物品或放置方块。
3、游戏界面生命值和饥饿值:显示在屏幕下方,生命值为 10 颗心,饥饿值为10 个鸡腿图标。
物品栏:快捷栏可以存放 9 种物品,背包可以存放更多物品。
合成栏:在工作台或背包中的合成界面,可以查看和制作各种物品。
二、方块世界1、常见方块土方块:最基础的方块,可以用于建造和填充地形。
石头方块:比土方块更坚硬,可用于制作工具和建筑。
木材方块:通过砍伐树木获得,可用于制作工具和家具。
沙方块:常见于沙漠地区,可以烧制玻璃。
砾石方块:在地下挖掘时常见,可获得燧石。
煤炭方块:可作为燃料,用于熔炉烧制物品。
2、特殊方块钻石方块:非常稀有且珍贵,用于制作高级工具和装备。
绿宝石方块:主要用于与村民交易。
红石方块:用于制作电路和自动化装置。
黑曜石方块:具有极高的防爆性,常用于制作下界传送门。
3、方块特性可堆叠性:大多数方块可以堆叠放置,节省空间。
可燃性:有些方块如木头、羊毛等可以被火点燃。
透明性:玻璃、冰等方块具有一定的透明效果。
三、生物群落1、森林树木种类丰富,包括橡树、白桦树、云杉树等。
常见生物有猪、牛、鸡等家畜,以及狼等野生动物。
2、沙漠沙子和仙人掌是主要特色。
可能会遇到蝎子和骷髅马等生物。
3、草原平坦开阔,有大量的草和野花。
马、羊等生物较为常见。
4、山脉地形陡峭,石头和矿石资源丰富。
我的世界超级指令大全
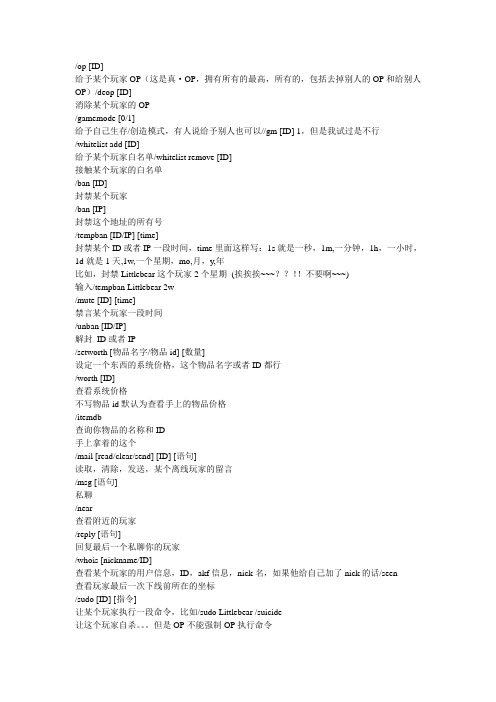
给予某个玩家OP(这是真·OP,拥有所有的最高,所有的,包括去掉别人的OP和给别人OP)/deop [ID]消除某个玩家的OP/gamemode [0/1]给予自己生存/创造模式,有人说给予别人也可以//gm [ID] 1,但是我试过是不行/whitelist add [ID]给予某个玩家白名单/whitelist remove [ID]接触某个玩家的白名单/ban [ID]封禁某个玩家/ban [IP]封禁这个地址的所有号/tempban [ID/IP] [time]封禁某个ID或者IP一段时间,time里面这样写:1s就是一秒,1m,一分钟,1h,一小时,1d就是1天,1w,一个星期,mo,月,y,年比如,封禁Littlebear这个玩家2个星期(挨挨挨~~~??!!不要啊~~~)输入/tempban Littlebear 2w/mute [ID] [time]禁言某个玩家一段时间/unban [ID/IP]解封ID或者IP/setworth [物品名字/物品id] [数量]设定一个东西的系统价格,这个物品名字或者ID都行/worth [ID]查看系统价格不写物品id默认为查看手上的物品价格/itemdb查询你物品的名称和ID手上拿着的这个/mail [read/clear/send] [ID] [语句]读取,清除,发送,某个离线玩家的留言/msg [语句]私聊/near查看附近的玩家/reply [语句]回复最后一个私聊你的玩家/whois [nickname/ID]查看某个玩家的用户信息,ID,akf信息,nick名,如果他给自己加了nick的话/seen查看玩家最后一次下线前所在的坐标/sudo [ID] [指令]让某个玩家执行一段命令,比如/sudo Littlebear /suicide让这个玩家自杀。
但是OP不能强制OP执行命令强制飞到某个玩家的身边/tphere [ID]让某个玩家强制飞到你身边/tpall [ID]让所有玩家飞到你身边,包括OP/tppos [x] [y] [z]传送到x,y,z/spawner [怪物的英文名]改变刷怪笼的刷新物,反正小熊试过是无用的- -/gamemode 【名字】10给某人创造或者生存现在更新最新版的命令打/gamemode之后会有提示/gamemode [survival/create/xxxx] [玩家名字]改变某玩家的游戏方式/money give * [钱数]给与全部人xxx钱*代表全部人,相反的,/give * xx xx也可以用/tppos X Y Z 传送到某个坐标/say [语句]让服务器发一段所有人可见的话,并且是紫色字体的/ping测试你的服务器的ping值/gc查看服务器信息/rules [数量]查看服务器第几页的规矩/essentials [reload/debug]显示插件版本或者重读/backup备份服务器。
我的世界工业2教程
一.入门1.挖矿工业MOD包含许多新的矿石,要挖到这些玩意儿你必须刷新你的地图,方法有2个,(1)跑出足够远的地方,这样新的地图会生成。
(2)再开个存档。
如果你比较留恋你之前辛苦搭建的房子的话,可以用MCEdit的导出与导入功能将房子装备材料都搬到新住址,这样你可以省下不少工夫。
好了,让我们从头讲起。
你新开了一个存档,驾轻就熟地撸倒一棵树,做了一个工具箱,然后是斧子、铲子、镐头,然后是你的第一间厕所。
OK,向地下进发,一顿猛挖之后,你好像发现了点新东西。
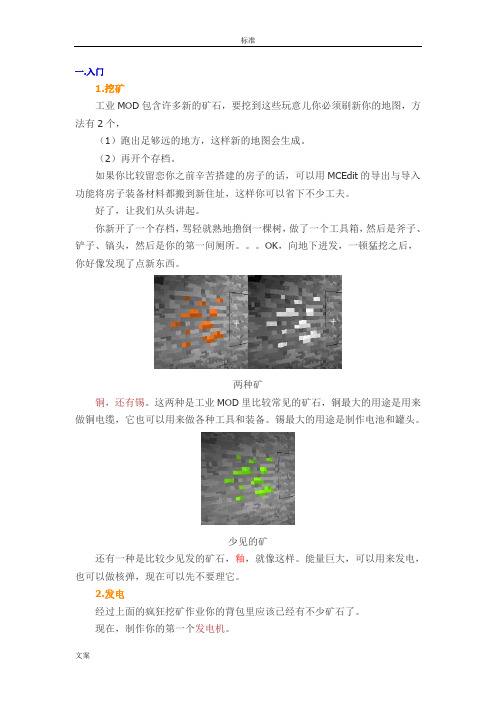
两种矿铜,还有锡。
这两种是工业MOD里比较常见的矿石,铜最大的用途是用来做铜电缆,它也可以用来做各种工具和装备。
锡最大的用途是制作电池和罐头。
少见的矿还有一种是比较少见发的矿石,釉,就像这样。
能量巨大,可以用来发电,也可以做核弹,现在可以先不要理它。
2.发电经过上面的疯狂挖矿作业你的背包里应该已经有不少矿石了。
现在,制作你的第一个发电机。
发电机制作发电机需要一个电池、一个机械方块以及一个石炉。
石炉不用我讲,先说说机械方块。
机械方块机械方块需要8个钢锭,铁矿放石炉里熔成铁锭,把铁锭在放回去熔一次就会变成钢锭。
电池做起来比较麻烦,以下是合成方法。
电池的合成你需要电缆、红石以及锡锭。
两种矿石比较容易得到,红石需要挖的深一些。
然后制作是电缆。
电缆铜锭用铜矿石熔就行。
橡胶是由树脂在石炉里烧制成的。
炼丹那坨黄色的东西就是树脂,找这东西你可能要费点劲,运气好的话,它就会在你家旁边,运气不好,找几个小时也找不到。
找树胶睁大眼睛去找吧,骚年。
要提取树脂你需要萃取器。
萃取器拿着它对着橡胶树有洞的那一块右键就得到树脂了。
PS:橡胶树难找,但是只要你找到一颗就好办了,砍倒一颗树会产生一粒以上的种子,拿上种子你就可以回家种一片橡胶林出来,然后你就不用愁没有橡胶用了。
OK,现在你已经做出了一个发电机了。
别急着发电,再做几个电池合成一个电池箱来储存电能,以免浪费电力。
电池箱电池箱可以储存40000EU的电能,有圆点的那一面是它的输出端,可以输出32EU/s的电流,EU代表电能的量,EU/s代表一秒内通过导线的电能,不过在游戏中好像并不是一秒,但是谁在乎呢?PS:要调整输出端朝向只需要用扳手右击你想要它朝的反向,输出端就会转过来。
我的世界合成表、新手教程、以及红石机关……

合成表新手指南鼠标左键 - 攻击/使用工具鼠标右键 - 打开箱子/放置物品W - 前进S - 后退A - 左平移D - 右平移空格 - 跳跃左Shift - 潜行Q - 丢弃物品I - 打开物品栏T - 聊天F - 雾化范围F5 - 切换第一/第三人称F11 - 切换全屏第一天攻略1.第一天白天疯狂打木头。
2.到了黑夜就可挖个小洞,然后在做工作台和木稿,然后挖石头(注意留几个木头做木炭)。
3.挖到了8个石头就做熔炉,靠木炭。
4.在挖石头,挖3+2+3=8(个)做石稿,做石剑,做石斧。
5第二天天亮后去找羊,顺便找一些动物斩杀。
6.找到羊的做床(没找到的像第一天一样)。
我的世界里面,房子是个非常重要的东西,也是生存必须的物品,很多时候可以抵挡住怪物的侵袭,不过对于房子的功能性,玩家可以通过后期的发展来完善,下面是游戏中最简单的房子制作方法。
最简单房子制作方法一个普通的房子几分钟搞定。
下面是制作方法先建宽9格长10格。
然后高4格,中间开两个洞放门。
红色方框里的自己随便换这是分解图,与完成图。
新手生存的时候,挖矿也是一个问题,所以有的新人就去洞窟。
但总被苦力怕炸死,也有人在地下漫无目的的挖。
给新手们提供一些挖矿技巧然后给不下洞窟的一些挖矿方法(轮回挖矿法太麻烦了)井字挖矿法可增长,木头是你的基地。
鱼骨挖矿法可增长,下洞窟的就小心了,如果胆小的可弄个小地图。
1.5后骷髅是很强的,遇到他就躲在角落等他来。
注意苦力怕偷袭,一听见SSS的声音就马上跑开。
煤炭是很常见的,上限128 铁矿64 金矿28 绿宝石31(高山下)青金石21 钻石和红石是15 (在14层看见钻石)。
(按F3 y=层数)如果要挖钻石,就先弄个水桶,浇浇岩浆有好处。
岩浆临界面11层,如果遇到石砖,请按下F3记下xyz 如果是天然的原石,敲开一个小洞就行(没装备) 有装备就冲进去擦火把,如果是天然木板,就是地下矿坑,小心毒蜘蛛,把火把擦在地上。
我的世界全物品英文id对照表

我的世界全物品英文id对照表石头 STONE 1草块 GRASS 2泥土 DIRT 3圆石 COBBLESTONE 4橡木木板 WOOD 5云杉木板 WOOD:1 5:1桦木木板 WOOD:2 5:2丛林木板 WOOD:3 5:3橡树树苗 SAPLING 6云杉树苗 SAPLING:1 6:1桦木树苗 SAPLING:2 6:2丛林树苗 SAPLING:3 6:3沙子 SAND 12沙硕 GRAVEL 13金矿石 GOLD_ORE 14铁矿石 IRON_ORE 15煤矿石 COAL_ORE 16橡木 LOG 17云杉木 LOG:1 17:1白桦木 LOG:2 17:2丛林木 LOG:3 17:3橡木树叶 LEAVES 18云杉树叶 LEAVES:1 18:1白桦树叶 LEAVES:2 18:2丛林树叶 LEAVES:3 18:3玻璃 GLASS 20青金石矿石 LAPIS_ORE 21青金石块 LAPIS_BLOCK 22发射器 DISPENSER 23沙石 SANDSTONE 24錾制沙石 SANDSTONE:1 24:1平滑沙石 SANDSTONE:2 24:2音符盒 NOTE_BLOCK 25动力铁轨 POWERED_RAIL 27探测铁轨 DETECTOR_RAIL 28粘性活塞 PISTON_STICKY_BASE 29 灌木 LONG_GRASS 31枯死的灌木 DEAD_BUSH 32活塞 PISTON_BASE 33白色羊毛 WOOL 35橙色羊毛 WOOL:1 35:1红色羊毛 WOOL:2 35:2蓝色羊毛 WOOL:3 35:3黄色羊毛 WOOL:4 35:4灰色羊毛 WOOL:5 35:5粉色羊毛 WOOL:6 35:6灰色羊毛 WOOL:7 35:7淡灰色羊毛 WOOL:8 35:8青色羊毛 WOOL:9 35:9紫色羊毛 WOOL:10 35:10蓝色羊毛 WOOL:11 35:11棕色羊毛 WOOL:12 35:12深绿色羊毛 WOOL:13 35:13红色羊毛 WOOL:14 35:14黑色羊毛 WOOL:15 35:15蒲公英 YELLOW_FLOWER 37玫瑰 RED_ROSE 38棕色蘑菇 BROWN_MUSHROOM 39红色蘑菇 RED_MUSHROOM 40金块 GOLD_BLOCK 41铁块 IRON_BLOCK 42石台阶 STEP 44沙石台阶 STEP:1 44:1木台阶 STEP:2 44:2圆石台阶 STEP:3 44:3砖台阶 STEP:4 44:4石砖台阶 STEP:5 44:5红砖 BRICK 45TNT TNT 46书架 BOOKSHELF 47苔石 MOSSY_COBBLESTONE 48黑曜石 OBSIDIAN 49火把 TORCH 50橡木楼梯 WOOD_STAIRS 53箱子 CHEST 54钻石矿石 DIAMOND_ORE 56钻石块 DIAMOND_BLOCK 57工作台 WORKBENCH 58熔炉 FURNACE 61梯子 LADDER 65铁轨 RAILS 66石楼梯 COBBLESTONE_STAIRS 67 拉杆 LEVER 69石压力板 STONE_PLATE 70木压力板 WOOD_PLATE 72红石矿石 REDSTONE_ORE 73红石火把 REDSTONE_TORCH_ON 76 石按钮 STONE_BUTTON 77冰 ICE 79雪 SNOW_BLOCK 80仙人掌 CACTUS 81粘土 CLAY 82唱片机 JUKEBOX 84栅栏 FENCE 85南瓜 PUMPKIN 86地狱岩 NETHERRACK 87灵魂沙 SOUL_SAND 88萤石 GLOWSTONE 89南瓜灯 JACK_O_LANTERN 91活板门 TRAP_DOOR 96石砖 SMOOTH_BRICK 98苔石砖 SMOOTH_BRICK:1 98:1裂石砖 SMOOTH_BRICK:2 98:2錾制石砖 SMOOTH_BRICK:3 98:3蘑菇 HUGE_MUSHROOM_1 99蘑菇 HUGE_MUSHROOM_2 100铁栅栏 IRON_FENCE 101玻璃板 THIN_GLASS 102西瓜 MELON_BLOCK 103藤蔓 VINE 106栅栏门 FENCE_GATE 107砖楼梯 BRICK_STAIRS 108石楼梯 SMOOTH_STAIRS 109菌丝 MYCEL 110睡莲 WATER_LILY 111地狱砖块 NETHER_BRICK 112地狱砖栅栏 NETHER_FENCE 113地狱砖楼梯 NETHER_BRICK_STAIRS 114附魔台 ENCHANTMENT_TABLE 116末地石 ENDER_STON 121龙蛋 DRAGON_EGG 122红石灯 REDSTONE_LAMP_OFF 123橡木台阶 WOOD_STEP 126云杉台阶 WOOD_STEP:1 126:1桦木台阶 WOOD_STEP:2 126:2丛林台阶 WOOD_STEP:3 126:3沙石楼梯 SANDSTONE_STAIRS 128绿宝石矿石 EMERALD_ORE 129末影箱 ENDER_CHEST 130拌线钩 TRIPWIRE_HOOK 131绿宝石矿石 EMERALD_BLOCK 133云杉木楼梯 SPRUCE_WOOD_STAIRS 134 桦木楼梯 BIRCH_WOOD_STAIRS 135丛林木楼梯 JUNGLE_WOOD_STAIRS 136 武器/工具物品名称物品英文ID 物品数字ID铁铲子 IRON_SPADE 256铁镐 IRON_PICKAXE 257铁斧 IRON_AXE 258打火石 FLINT_AND_STEEL 259弓 BOW 261铁剑 IRON_SWORD 267木剑 WOOD_SWORD 268木铲 WOOD_SPADE 269木镐 WOOD_PICKAXE 270木斧 WOOD_AXE 271石剑 STONE_SWORD 272石铲 STONE_SPADE 273石镐 STONE_PICKAXE 274石斧 STONE_AXE 275金剑 GOLD_SWORD 283金铲 GOLD_SPADE 284金镐 GOLD_PICKAXE 285金斧 GOLD_AXE 286木锄 WOOD_HOE 290石锄 STONE_HOE 291铁锄 IRON_HOE 292钻石锄 DIAMOND_HOE 293金锄 GOLD_HOE 294钻石剑 DIAMOND_SWORD 276 钻石铲 DIAMOND_SPADE 277 钻石镐 DIAMOND_PICKAXE 278 钻石斧 DIAMOND_AXE 279桶 BUCKET 325水桶 WATER_BUCKET 326岩浆桶 LAVA_BUCKET 327指南针 COMPASS 345钓鱼竿 FISHING_ROD 346钟 WATCH 347空地图 MAP 358剪刀 SHEARS 359火焰弹 FIREBALL 385粮食和种子物品名称物品英文ID 物品数字ID 苹果 APPLE 260碗 BOWL 281炖蘑菇 MUSHROOM_SOUP 282 小麦种子 SEEDS 295小麦 WHEAT 296面包 BREAD 297生猪排 PORK 319熟猪排 GRILLED_PORK 320金苹果 GOLDEN_APPLE 322牛奶 MILK_BUCKET 335生鱼 RAW_FISH 349熟鱼 COOKED_FISH 350糖 SUGAR 353蛋糕 CAKE 354曲奇 COOKIE 357西瓜 MELON 360南瓜种子 PUMPKIN_SEEDS 361西瓜种子 MELON_SEEDS 362生牛肉 RAW_BEEF 363牛排 COOKED_BEEF 364生鸡肉 RAW_CHICKEN 365熟鸡肉 COOKED_CHICKEN 366衣服物品名称物品英文ID 物品数字ID皮革帽子 LEATHER_HELMET 298皮革外衣 LEATHER_CHESTPLATE 299 皮革裤子 LEATHER_LEGGINGS 300皮靴 LEATHER_BOOTS 301铁头盔 IRON_HELMET 306铁盔甲 IRON_CHESTPLATE 307铁护腿 IRON_LEGGINGS 308铁靴 IRON_BOOTS 309钻石头盔 DIAMOND_HELMET 310钻石胸甲 DIAMOND_CHESTPLATE 311钻石护腿 DIAMOND_LEGGINGS 312 钻石靴 DIAMOND_BOOTS 313金头盔 GOLD_HELMET 314金护甲 GOLD_CHESTPLATE 315金护腿 GOLD_LEGGINGS 316金靴子 GOLD_BOOTS 317更多见下方!运输物品名称物品英文ID 物品数字ID矿车 MINECART 328鞍 SADDLE 329船 BOAT 330运输矿车 STORAGE_MINECART 342 动力矿车 POWERED_MINECART 343 更多见下方!矿石和锭物品名称物品英文ID 物品数字ID煤炭 COAL 263木炭 COAL:1 263:1钻石 DIAMOND 264铁锭 IRON_INGOT 265金锭 GOLD_INGOT 266青金石 INK_SACK:4 351:4更多见下方!炼药物品名称物品英文ID 物品数字ID萤石粉 GLOWSTONE_DUST 348水瓶 POTION 373恶魂之泪 GHAST_TEAR 370金粒~~~~~ GOLD_NUGGET 371地狱庞 NETHER_STALK 372玻璃瓶 GLASS_BOTTLE 374蜘蛛眼 SPIDER_EYE 375发酵的蜘蛛眼 FERMENTED_SPIDER_EYE 376 烈焰粉 BLAZE_POWDER 377岩浆膏 MAGMA_CREAM 378末影之眼 EYE_OF_ENDER 381闪烁的西瓜 SPECKLED_MELON 382更多见下方!装饰物品名称物品英文ID 物品数字ID画 PAINTING 321告示牌 SIGN 323木门 WOOD_DOOR 324铁门 IRON_DOOR 330红砖 CLAY_BRICK 336粘土 CLAY_BALL 337床 BED 355酿造台 BREWING_STAND_ITEM 379炼药锅 CAULDRON_ITEM 380绿宝石 EMERALD 388更多见下方!染料物品名称物品英文ID 物品数字ID墨囊 INK_SACK 351红色玫瑰 INK_SACK:1 351:1仙人掌绿 INK_SACK:2 351:2可可豆 INK_SACK:3 351:3青金石 INK_SACK:4 351:4紫色的染料 INK_SACK:5 351:5青色的染料 INK_SACK:6 351:6浅灰色的染料 INK_SACK:7 351:7灰色的染料 INK_SACK:8 351:8粉红色染料 INK_SACK:9 351:9黄绿色染料 INK_SACK:10 351:10蒲公英黄 INK_SACK:11 351:11浅蓝色的染料 INK_SACK:12 351:12 品红染料 INK_SACK:13 351:13橙色染料 INK_SACK:14 351:14骨粉 INK_SACK:15 351:15光盘物品名称物品英文ID 物品数字ID唱片C418-13 GOLD_RECORD 2256 唱片C418-cat GREEN_RECORD 2257 唱片C418-blocks RECORD_3 2258 唱片C418-chirp RECORD_4 2259唱片C418-far RECORD_5 2260唱片C418-mall RECORD_6 2261唱片C418-mellohi RECORD_7 2262 唱片C418-satl RECORD_8 2263唱片C418-strad RECORD_9 2264唱片C418-ward RECORD_10 2265 唱片C418-11 RECORD_11 2266唱片C418-wait RECORD_12 2267更多见下方! [spoiler]杂物[spoiler]物品名称物品英文ID 物品数字ID箭 ARROW 262木棍 STICK 280线 STRING 287羽毛 FEATHER 288火药 SULPHUR 289燧石 FLINT 318雪球 SNOW_BALL 332皮革 LEATHER 334甘蔗 SUGAR_CANE 338纸 PAPER 339书 BOOK 340粘液球 SLIME_BALL 341鸡蛋 EGG 344骨头 BONE 352腐肉 ROTTEN_FLESH 367末影珍珠 ENDER_PEARL 368火焰棒 BLAZE_ROD 369书与笔 BOOK_AND_QUILL 386 成书 WRITTEN_BOOK 387更多见下方!红石物品名称物品英文ID 物品数字ID 红石 REDSTONE 331红石中继器 DIODE 356红石比较器 0404。
Esri+CityEngine中文教程V1.0

1 基础内容 ..............................................................................................................1
1.1 基本操作.....................................................................................................1 1.2 教程与示例数据下载.................................................................................2 1.3 基本概念.....................................................................................................3
2.10 导出模型...................................................................................................17
我的世界合成表打印版(新手必备)
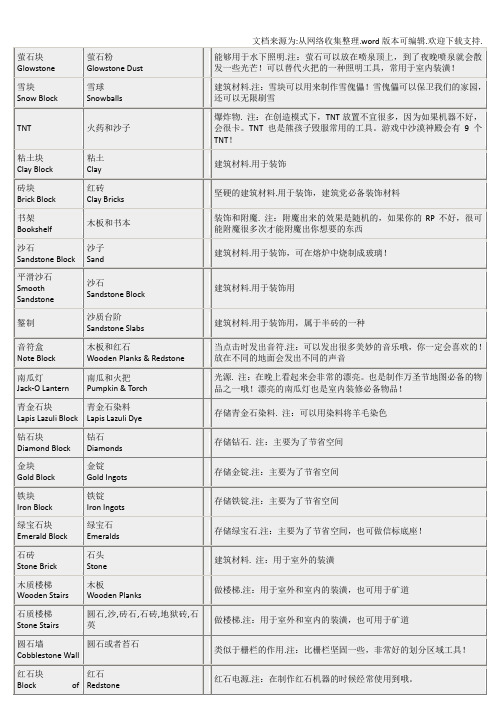
Chest & Tripwire Hook
打开箱子的适合发出红石信号.注:不同于普通箱子的是,如果在他前面铺红石,红石不会和他产生连接
测重压力板
Weighted Pressure Plates
铁锭或者金锭
Iron Ingots or Gold Ingots
类似普通的压力板,但是只能用物品激活.物品的数量绝对红石信号的强度.
充能铁轨
Powered Rail
金锭,木棍和红石
Gold Ingots & Stick & Redstone
被激活的时候加速矿车.注:当矿车经过时,会产生加速度的效果哦!
探测铁轨
Detector Rail
铁锭,石质压力板和红石
矿车在其上面经过时产生红石信号.可以用于激活一些红石装置
红石灯
Redstone Lamp
金苹果
Golden Apple
苹果和金粒
Apple & Gold Nuggets
恢复2点饥饿值.注:可以在不是满饥饿度的时候恢复生命,打末影龙和凋零必备食物!也是游戏中最好食材
附魔金苹果
苹果和金块
Apple & Gold Blocks
恢复2点饥饿值.同时给予30秒的抗火属性.注:金苹果的升级版,也是游戏中最好食材
中继器
Redstone Repeater
石头,红石火把,红石和石头
红石电路的二极管或者延时器.注:右击不同的次数,会产生不同的延迟!总共分三档
红石火把
Redstone Torch
木棍和红石
Stick & Redstone
不间断发送红石信号.
唱片机
Jukebox
我的世界工业教程讲解

一.入门1.挖矿工业MOD包含许多新的矿石,要挖到这些玩意儿你必须刷新你的地图,方法有2个,(1)跑出足够远的地方,这样新的地图会生成。
(2)再开个存档。
如果你比较留恋你之前辛苦搭建的房子的话,可以用MCEdit的导出与导入功能将房子装备材料都搬到新住址,这样你可以省下不少工夫。
好了,让我们从头讲起。
你新开了一个存档,驾轻就熟地撸倒一棵树,做了一个工具箱,然后是斧子、铲子、镐头,然后是你的第一间厕所。
OK,向地下进发,一顿猛挖之后,你好像发现了点新东西。
两种矿铜,还有锡。
这两种是工业MOD里比较常见的矿石,铜最大的用途是用来做铜电缆,它也可以用来做各种工具和装备。
锡最大的用途是制作电池和罐头。
少见的矿还有一种是比较少见发的矿石,釉,就像这样。
能量巨大,可以用来发电,也可以做核弹,现在可以先不要理它。
2.发电经过上面的疯狂挖矿作业你的背包里应该已经有不少矿石了。
现在,制作你的第一个发电机。
发电机制作发电机需要一个电池、一个机械方块以及一个石炉。
石炉不用我讲,先说说机械方块。
机械方块机械方块需要8个钢锭,铁矿放石炉里熔成铁锭,把铁锭在放回去熔一次就会变成钢锭。
电池做起来比较麻烦,以下是合成方法。
电池的合成你需要电缆、红石以及锡锭。
两种矿石比较容易得到,红石需要挖的深一些。
然后制作是电缆。
电缆铜锭用铜矿石熔就行。
橡胶是由树脂在石炉里烧制成的。
炼丹那坨黄色的东西就是树脂,找这东西你可能要费点劲,运气好的话,它就会在你家旁边,运气不好,找几个小时也找不到。
找树胶睁大眼睛去找吧,骚年。
要提取树脂你需要萃取器。
萃取器拿着它对着橡胶树有洞的那一块右键就得到树脂了。
PS:橡胶树难找,但是只要你找到一颗就好办了,砍倒一颗树会产生一粒以上的种子,拿上种子你就可以回家种一片橡胶林出来,然后你就不用愁没有橡胶用了。
OK,现在你已经做出了一个发电机了。
别急着发电,再做几个电池合成一个电池箱来储存电能,以免浪费电力。
电池箱电池箱可以储存40000EU的电能,有圆点的那一面是它的输出端,可以输出32EU/s的电流,EU代表电能的量,EU/s代表一秒内通过导线的电能,不过在游戏中好像并不是一秒,但是谁在乎呢PS:要调整输出端朝向只需要用扳手右击你想要它朝的反向,输出端就会转过来。
我的世界命令方块指令大全

我的世界命令方块指令大全在《我的世界》游戏中,命令方块是一种特殊的方块,可以通过输入指令来执行各种操作。
它们可以用于自动化、定制地图、创造互动等各种用途。
本文将为您详细介绍《我的世界》中常用的命令方块指令大全,帮助您更好地了解和利用这一功能。
1. /give @p command_block。
这个指令可以用来给予玩家一个命令方块。
在游戏中按下“T”键打开聊天栏,输入该指令并按下回车键,就可以得到一个命令方块了。
命令方块被放置后,可以右键点击来输入需要执行的指令。
2. /setblock ~ ~ ~ command_block。
这个指令可以在指定坐标处放置一个命令方块。
其中的“~”代表相对坐标,比如“~ ~1 ~”表示在当前位置上方一格放置命令方块。
这个指令可以用于自动化建造命令方块系统。
3. /fill x1 y1 z1 x2 y2 z2 command_block。
这个指令可以在指定区域内填充命令方块。
通过指定两个对角的坐标,可以在这个区域内一次性放置多个命令方块,非常适合用于大型建筑项目中。
4. /testfor @p[r=5] 。
这个指令可以检测玩家是否在一定范围内,并输出检测结果。
其中的“@p[r=5]”表示检测半径为5的范围内是否有玩家。
这个指令可以用于制作触发器和自动化系统。
5. /execute @e[type=armor_stand] ~ ~ ~ setblock ~ ~1 ~ redstone_block。
这个指令可以在指定实体(比如盔甲架)所在的位置放置一个红石方块。
通过结合不同的实体类型和坐标,可以实现各种有趣的效果。
6. /fill x1 y1 z1 x2 y2 z2 air。
这个指令可以在指定区域内清除所有方块,变成空气。
这在重置地图或者清理建筑时非常有用。
7. /clone x1 y1 z1 x2 y2 z2 x y z。
这个指令可以将一个区域内的方块复制到另一个位置。
我的世界怎么用红石点亮灯

我的世界怎么用红石点亮灯我的世界怎么用红石点亮灯1、进入游戏界面,在背包中先找到一个名为“红石灯”的道具。
2、将灯放在地上,发现并没有点亮,这是因为没有电路。
3、在背包中找到红石。
4、接着用红石连接一个电路,长度无所谓,美观就行。
5、接着在背包中找点拉杆道具。
6、将拉杆道具放置在红石的末端,这个时候发现灯也没有亮。
7、接下来,点击一下拉杆,即可看到开关打开,红石灯成功点亮。
8、需要注意的是,在铺电路的`时候,中间不能有中断,否则会导致无法正常使用电路。
【拓展】简介《我的世界手游》是一款由MojangAB开发、中国内由网易游戏代理的3D第一人称沙盒游戏。
玩家可以在三维空间中自由地创造和破坏不同种类的方块,用想象力建立并探索一个专属于玩家的世界。
游戏画风独特,主打积木马赛克风。
游戏里玩家可以在单人或多人模式中通过摧毁或创造方块以创造精妙绝伦的建筑物和艺术,或者通过收集物品探索地图来完成游戏的主线任务,通过自己创造的作品来体验上帝般的感觉。
行为方块排列成每个单元为1立方米的网格,并与其对齐,这意味着方块不能在多个单元中。
方块和流体一起构成游戏内的环境,并能以各种各样的方式被收集和利用。
一些方块,如泥土和砂岩是不透明方块,然而其他方块,如玻璃和冰,是透明的。
爆炸可以轻松摧毁透明方块。
一些方块,如火把和荧石,能发出光亮。
它们的亮度各不相同;参见该亮度值表获取更多信息。
大多数不透明方块会完全挡光,但透明方块要么对光亮没有影响,要么只微弱地挡光。
几乎所有方块都会无视重力排列在网格中,除了沙子、红沙、沙砾、铁砧、龙蛋、混凝土粉末、脚手架和雪(仅基岩版)。
材质方块表面的材质都是16×16像素的。
大多数方块默认为一立方米大小,但它们能使用模型来改变。
大多数方块都有静态的材质,但是水、熔岩、下界传送门、末地传送门、末地折跃门、火、海晶灯、海晶石、岩浆块、菌柄、海草、海带、灯笼、点燃的营火、点燃的灵魂营火、燃烧中的高炉、燃烧中的烟熏炉、切石机和命令方块有动画效果。
HIMA_ELOP_II_FirstSteps_CN

2 编写逻辑程序
双击program图标打开程序。
2.1 定义变量
所有变量在变量编辑器中定义。下面介绍一下变量类型: 普通变量(Local Variables ,VAR) 只是在某一Program/ Function/ Function block中定 义,而且只能在相应的Program/ Function/ Function block中调用。程序中的普通变量(Local variables )可以分配到硬件卡件通道中,如用作DI 或 AI。
5.1 程序编译..................................................................62 5.2 组态PC与HIMA系统之间的通讯.......................64 5.3 程序下装与系统启动t...............................................................74 6 在线测试..................................................................................80 7 对输入和输出信号强制......................................................85 8 系统组态生成的文档............................................................................91 9 如何备份一个工程...................................................................98 9.1 导出工程................................................................................98 9.2 恢复工程................................................................100
我的世界--合成表大全.
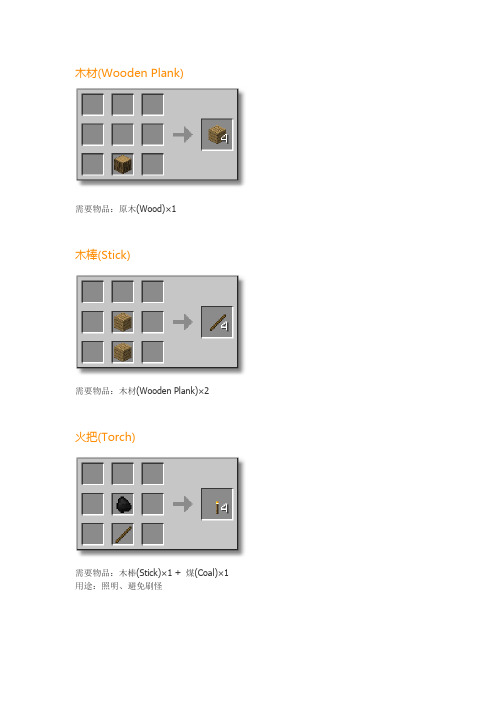
木材(Wooden Plank)需要物品:原木(Wood)×1木棒(Stick)需要物品:木材(Wooden Plank)×2火把(Torch)需要物品:木棒(Stick)×1 + 煤(Coal)×1 用途:照明、避免刷怪工作台(Crafting Table)需要物品:木材(Wooden Plank)×4用途:合成物品炉子(Furnace)需要物品:石材(Cobblestone)×8用途:烧制箱子(Chest)需要物品:木材(Wooden Plank)×4用途:存放物品、迷路时暂存身上物品Tip:两个箱子并排放可以增加存放空间矿物方块(Ore Block)需要物品:铁块(Iron Ingots)或金块(Gold Ingots)或青金石(Lapiz Lazuli Dyes)或钻石(Diamond)×9 地狱萤石(Glowstone Block)需要物品:地狱萤石碎块(Glowstone Dust)×9用途:照明、装饰羊毛(Wool)[不推荐此合成]需要物品:蛛丝(String)×9炸药(TNT)需要物品:沙子(Sand)×4 + 火药(Gunpowder)×5用途:爆破、开矿平板(Slab)需要物品:砂岩(Sand Stone)或木材(Wooden Plank)或石材(Cobblestone)或石头(Stone)×3 用途:台阶、屋檐、窗台等楼梯(Stairs)需要物品:木材(Wooden Plank)或石材(Cobblestone)×6用途:楼梯、屋顶等雪块(Snow Block)需要物品:雪球(Snowballs)×4 黏土块(Clay Blocks)需要物品:黏土(Clay)×4砖块(Brick)需要物品:砖头(Clay Brick)×4书架(BookShelf)总计需要物品:甘蔗(Sugar Cane)×9 + 木材(Wooden Plank)×6 用途:装饰砂岩(Sand Stone)需要物品:沙子(Sand)×4南瓜灯(Jack-O-Lantern)需要物品:南瓜(Pumpkin)×1 + 火把(Torch)×1 用途:照明、装饰炼砖炼金斧头(Axe)需要物品:木材(Wooden Plank)或石材(Cobblestone)或铁块(Iron Ingots)或金块(Gold Ingots)或钻石(Diamond 棒(Stick)×2用途:砍树镐(Pickaxe)需要物品:木材(Wooden Plank)或石材(Cobblestone)或铁块(Iron Ingots)或金块(Gold Ingots)或钻石(Diamond 棒(Stick)×2用途:挖掘矿物Tips:金矿、红石矿、钻石矿需要铁镐或更好的镐才能挖掘;铁矿需要石镐或更好的镐才能挖掘铲子(Shovel)需要物品:需要物品:木材(Wooden Plank)或石材(Cobblestone)或铁块(Iron Ingots)或金块(Gold Ingots)或钻石(Diamond)×1 + 木棒(Stick)×2用途:挖掘松软的方块Tips:手拿铲子点击雪地可获得雪球镰刀(Hoe)需要物品:需要物品:木材(Wooden Plank)或石材(Cobblestone)或铁块(Iron Ingots)或金块(Gold Ingots)或钻石(Diamond)×2 + 木棒(Stick)×2用途:采集种子、收割、耕地Tips:手拿镰刀右键点击草丛有机会获得种子(Beta1.6及以上);右键点击草地有机会获得种子(Beta1.6以下)取火器(Flint and Steel)需要物品:铁块(Iron Ingot) + 打火石(Flint)用途:点火铁桶(Bucket)需要物品:铁块(Iron Ingot)×3用途:舀水、舀岩浆指南针(Compass)需要物品:铁块(Iron Ingot)×4 + 红石(Redstone)×1 用途:指向出生点,防止迷路钟(Clock)需要物品:金块(Gold Ingots)×4 + 红石(Redstone)×1 用途:显示当前时段鱼竿(Fishing Rod)需要物品:木棒(Stick)×3 + 蛛丝(String)×2用途:钓鱼使用方法:鼠标右键甩杆,当看到浮标下沉,点右键收杆剑(Swords)需要物品:木材(Wooden Plank)或石材(Cobblestone)或铁块(Iron Ingots)或金块(Gold Ingots)或钻石(Diamond 棒(Stick)×1用途:杀怪(废话...)弓箭(Bow)需要物品:木棒(Stick)×3 + 蛛丝(String)×3用途:发射箭矢,进而杀怪箭矢(Arrows)需要物品:燧石(Flint)×1 + 木棒(Stick)×1 + 羽毛(Feather)×1Tips:玩家射出的箭矢可以收回,但是发射器(Dispenser)射出的不可以头盔(Helmets)需要物品:牛皮(Leather)或金块(Gold Ingots)或铁块(Iron Ingots)或钻石(Diamond Gems)或火焰*(Fire)(修改器提供(30%的防御)胸甲(Chestplates)需要物品:需要物品:牛皮(Leather)或金块(Gold Ingots)或铁块(Iron Ingots)或钻石(Diamond Gems)或火焰*(F 器获得)×8提供:护腿(Leggings)需要物品:需要物品:牛皮(Leather)或金块(Gold Ingots)或铁块(Iron Ingots)或钻石(Diamond Gems)或火焰*(F 器获得)×7提供:靴子(Boots)需要物品:需要物品:牛皮(Leather)或金块(Gold Ingots)或铁块(Iron Ingots)或钻石(Diamond Gems)或火焰*(F 器获得)×4提供:矿车(Minecart)需要物品:铁块(Iron Ingots)×5用途:运输人或动物Tips:动物经常自己跳进矿车,似乎动物们很喜欢坐矿车的样子动力矿车(Powered Minecart)需要物品:炉子(Furnace)×1 + 矿车(Minecart)×1用途:推动矿车Tips:前期中期用这个,后期果断用动力轨道(似乎Beta1.6版矿车摩擦加速BUG并没有被消除?偷笑~)货物矿车(Storage Minecart)需要物品:箱子(Chest)×1 + 矿车(Minecart)×1用途:运输物品铁轨(Rails)需要物品:铁块(Iron Ingots)×6 + 木棒(Stick)×1用途:搭建铁路网动力铁轨(Powered Rail)需要物品:金块(Gold Ingots)×6 + 木棒(Stick)×1 + 红石(Redstone)×1用途:为矿车加速侦测铁轨(Detector Rail)需要物品:铁块(Iron Ingots)×6 + 踏板(Pressure Plate)×1 + 红石(Redstone)×1 用途:额...景观车的事件激发......在火车站里也有点用......船(Boat)需要物品:木材(Wooden Plank)×5用途:渡海、探索底下暗河、激流勇进门(Doors)需要物品:木材(Wooden Plank)或铁块(Iron Ingots)×6用途:当门使、矿车启动装置元件之一、自动出船机元件之一Tips:铁门需要用按钮、拉杆或踏板等发出电信号开启陷阱门(Trapdoor)需要物品:木材(Wooden Plank)×6用途:做陷阱、给地道入口加盖踏板(Pressure Plate)需要物品:木材(Wooden Plank)或石头(Stone)×2 用途:机关启动Tips:当生物站到踏板上时踏板会发出一个电信号按钮(Button)需要物品:石头(Stone)×2用途:开门、矿车启动等Tips:按钮只能装在墙上红石火把(Redstone Torch)需要物品:红石(Redstone)×1 + 木棒(Stick)×1用途:电源、信号灯、照明(不推荐)Tips:红石火把可以发出持续的电信号拉杆(Lever)需要物品:石材(Cobblestone)×1 + 木棒(Stick)×1用途:开关音乐盒(Note Block)需要物品:木材(Wooden Plank)×8 + 红石(Redstone)×1 用途:红石音响、装饰Tips:音乐箱发出什么乐器的声音由垫在它下面的方块而定。
我的世界十大高手操作方法

我的世界十大高手操作方法我的世界是一款非常受欢迎的沙盒游戏,玩家可以在其中创造和探索自己的世界。
在游戏中,有一些高手玩家通过独特的操作方式,展现出非凡的技巧和创造力。
以下是我的世界的十大高手操作方法。
1. 自动农场:高手玩家善于利用红石电路和自动化机制,搭建起各种农场,包括作物农场、动物农场和经验农场等。
他们能够自动收割、种植和收集农作物,极大地提高了生产效率。
2. 复杂红石机器:高手玩家擅长使用红石电路来建造各种复杂的机器,如自动门、信号灯、地下铁路和自动物品分类器等。
他们能够通过编排精确的红石电路,实现各种复杂的功能,使游戏变得更加有趣。
3. PVP技巧:高手玩家在PVP(玩家对玩家)战斗中表现出色。
他们善于利用游戏中的各种武器和陷阱,如弓箭、陷阱箱和巨型草方块等,进行战术布局和攻击。
他们也了解不同武器的特点和使用方法,能够在战斗中灵活运用。
4. 速建技巧:高手玩家可以在很短的时间内建造出复杂的建筑。
他们善于利用游戏中的各种方块、红石设备和可编辑的世界生成特征等,将建筑工作效率最大化。
5. 探险技巧:高手玩家在探索新领域时表现出色。
他们善于利用游戏中的地图和导航工具,如指南针和地图标记,找到有趣的地点和强大的资源。
他们也善于利用游戏中的各种工具和陷阱,对抗敌对生物和其他玩家。
6. 精美纹理包和模组:高手玩家善于利用游戏的自定义资源包和模组来增加游戏的视觉效果和可玩性。
他们可以自己制作或下载精美的纹理包,以改变游戏的材质质感和外观。
他们也善于选择和安装各种模组,以增加游戏的功能和乐趣。
7. 战略建设:高手玩家在建设城市或玩自定义地图时表现出色。
他们善于规划和设计建筑区域、道路和公共设施,使整个城市或地图看起来统一而美观。
他们也善于利用不同的建筑风格和材料,营造出独特的游戏世界。
8. 精确创造:高手玩家在创造模式下展现出色的技巧。
他们能够精确地放置方块和物品,使建筑和装饰看起来非常细致和逼真。
他们也善于使用各种修改工具,如刷子和填空工具,提高创造效率和精确度。
installation_guide

Jason® Installation GuideApril 2, 2010C OPYRIGHT © F UGRO -J ASON 2010A LL NON -F UGRO -J ASON OR F UGRO NV TRADEMARKS ARE THE PROPERTY OF THEIR RESPECTIVE HOLDERS . A LL R IGHTS R ESERVEDN O PART OF THE J ASON G EOSCIENCE W ORKBENCH DOCUMENTATION MAY BE REPRODUCED , STORED IN A RETRIEVAL SYSTEM , OR TRANSMITTED , IN ANY FORM OR BY ANY MEANS , ELECTRONIC , MECHANICAL , PHOTOCOPYING , RECORDING , OR OTHERWISE , WITHOUT PRIOR WRITTEN PERMISSION FROM F UGRO -J ASON N ETHERLANDS BV.F UGRO -J ASON N ETHERLANDS BV ASSUMES NO RESPONSIBILITY OR LIABILITIES DIRECT OR INDIRECT FOR ANY ERRORS OR INACCURACIES THAT MAY APPEAR IN THIS DOCUMENT OR FROM THE USE OF THE J ASONG EOSCIENCE W ORKBENCH . T HE SOFTWARE DESCRIBED IN THIS DOCUMENT IS FURNISHED UNDER LICENSE AND MAY ONLY BE USED OR COPIED IN ACCORDANCEFugro-Jason Please see our web site for a list of our offices, addresses, and contact numbers. For general information please send an email with your request to info@If you have any suggestions about this documentation, please contact us at ae.qatt@ .T ABLE OF CONTENTS (3)I NTRODUCTION (6)C ONVENTIONS USED IN THIS GUIDE (6)Q UICK START (7)L INUX (7)W INDOWS (7)H ARDWARE /S OFTWARE REQUIREMENTS (8)G ENERAL (8)DVD reader (8)OpenGL (8)Disk space requirements (8)H ARDWARE REQUIREMENTS: (8)Hardware Requirements (8)Additional Hardware Support (9)S OFTWARE REQUIREMENTS (10)Linux/x86, x86_64 (10)Windows (10)Nvidia drivers (10)C ALCULATION OF MEMORY REQUIREMENTS (11)Model Builder (11)EarthModel Model & Well Curve Generator and InverMod (11)EarthModel Model Interpolator (11)CSSI (InverTrace-Plus / RockTrace) (12)MCMC (StatMod MC / RockMod) (12)R EMOTE D ISPLAY (13)L INUX (13)No Machine (NX) (13)ThinAnywhere® (13)Exceed®/Exceed 3D® (13)CygWin-X (13)W INDOWS (13)C OMPATIBILITY (14)Hardware compatibility (14)Simultaneous usage of different versions (14)I NSTALLING J ASON ON L INUX (15)1:C REATE THE PRODUCT INSTALLATION ACCOUNT AND DIRECTORY (15)2:I NSTALLING J ASON (16)3:I NSTALL THE LICENSE FILE (16)4:C ONFIGURE THE INSTALLATION (17)5:E NABLE THE J ASON LICENSE MANAGER (18)Sharing the license between different release versions (19)6:T EST THE INSTALLATION (20)7:M AKING THE J ASON LAUNCHER AVAILABLE TO USERS (20)8:D EFINE LOCAL SETTINGS (21)Define local cache directory (21)Define global spool directory (22)Define site-wide CGM previewer (22)I NSTALLING J ASON ON W INDOWS (23)1:R UN THE INSTALLER (23)2:I NSTALL THE LICENSE FILE (23)3:C ONFIGURE THE LICENSE MANAGER (23)4:T EST THE INSTALLATION (23)C HANGING DEFAULT SETTINGS IN J ASON (25)C USTOMIZING LOCAL DEFAULTS (25)Rules (25)H ARDCOPY OUTPUT (26)D ISABLE SYSTEM ERROR REPORTING DIALOGUES (26)C ONFIGURING THE M ULTI CPU ENVIRONMENT (27)I NSTALLATION (27)1: Prepare the installation (28)2: Set up remote shell without a password (28)3: Enable RSH daemon on all hosts (29)4: Quick test (29)5: Configuring Jason to use Multi-CPU (29)6: Validation of the installation and setup (29)I MPLEMENTATION DETAILS (29)PVM version (30)Hints and Tips (30)E XTERNAL SCHEDULERS (30)Modifying the Jason installation to use an external scheduler (32)T ROUBLESHOOTING (33)U SING SSH (34)Getting PVM to work with passphrase-less SSH (34)A PPENDIX I-FLEX LM LICENSE MANAGER (35)O PERATION OF THE LICENSE MANAGER (35)Terms (35)Components of the license management system (36)Configuring the license management system (36)S TARTING THE LICENSE MANAGER FOR L INUX (37)Starting the license manager using the jason script (37)Starting the license manager manually (37)S TARTING THE LICENSE MANAGER FOR W INDOWS (37)T HE LICENSE REQUEST PROCESS (39)I F THE LICENSE MANAGER GOES DOWN (39)U PDATING THE LICENSE MANAGER FILE (39)Perpetual license (39)Lease, Rental, or Demo license (40)D EBUGGING THE SYSTEM (40)Where to start (40)FLEXlm error codes (40)More about the license manager (42)Troubleshooting checklist (42)F REQUENTLY ASKED QUESTIONS (43)A PPENDIX II:J ASON DIRECTORY STRUCTURE (47)I NTRODUCTIONIn this version we renamed the main launcher Jason; this launchercombines all Fugro-Jason software modules: JGW, EarthModel FT andPowerLog.The 8.2 version of the Jason software is available both on Linux andWindows. PowerLog is available as an additional module on Windows only.For a simple or temporary installation you can refer to the Quick start onpage 7. Otherwise we recommend you follow the procedure that isdescribed from page 15 (Linux) or page 23 (Windows) onwards.This installation guide is meant for installing the Jason launcher and thelicensed modules, including EarthModel FT. PowerLog can be installed asan additional module for Windows; please refer to the PowerLog releasenotes for more detailed information on installing the software. Conventions used in this guideNotation conventions used in the command syntax and examples in thisguide:Notationterminal This font is used for user input, program output, or errormessages in text. Example: tar xv<topdir> Identifies a generic element that must be replaced by the valueappropriate for your installation.Italics To emphasize a statement.NOTE To indicate information that you should read before proceeding.B UTTON To indicate you have to look for a button with that name.Menu To indicate you have to select a menu option.M ODULE To indicate the name of a software module.Q UICK STARTThis installation sheet can be used for simple and/or temporary installations.Otherwise please follow the full instructions as described on page 8onwards.Linux1. Change to the directory where you want to install the software.2. Check available disk space; this should be 2 GB.3. Make a subdirectory where the software is to be installed.4. Change to the newly created directory.5. Mount the DVD. (See page 16 for more instructions.)6. Execute the install script from the root directory of the DVD and follow theon-screen instructions.7. When finished unmount the DVD.8. Change directory to the license directory and copy the license file into thatdirectory.9. Run the post-installation script (../jgsetup) and select option 1, configurethe installation. Use option 98 first, to set a network path so all necessarysystems can “see” the Jason installation.10. Make a symbolic link from the ‘system bin’ directory to the jason startupscript: type: ln -s <inst_dir>/jason /usr/local/bin where<inst_dir> is the directory where you installed the software.11. The software can now be started by typing: jason. It may be required totype ‘rehash’ to refresh the cached search path.NOTE:When starting the Jason launcher, the Jason license manager will be started automatically. This means you have to be logged-on tothe machine listed as the license server. We strongly recommendto add the Jason License Manager startup to the system bootsequence. See page , 5: Enable the Jason license manager. Windows1. Insert the Jason DVD in your computer.2. Double click the Jason setup icon and follow the on-screen instructions toinstall the software.• Select Typical install when asked and click on I NSTALL.H ARDWARE /S OFTWARE REQUIREMENTSThe Jason modules can all be opened from the Jason launcher. The Jasonlauncher is available for Linux and Windows. This chapter informs you aboutthe hardware and software requirements for running the software. GeneralDVD readerThe software is being distributed on DVD, therefore the machine thesoftware has to be installed on, needs to be capable of reading DVDs. OpenGLJason uses hardware accelerated OpenGL graphics for all viewers.Therefore you are strongly recommended to use up-to-date graphicshardware and associated drivers.Disk space requirementsThe installed Jason software on Linux or Windows will take up 2 GB of diskspace.Hardware requirements:Jason runs on PC’s, laptops and servers running Intel/AMD CPUs with anNvidia graphics card.The Intel Itanium and Itanium2 architectures are not supported!Hardware RequirementsJason consists of various types of software modules, each with their ownhardware requirements. If a machine is used for a combination of thesemodules, the superset of recommended hardware should be used. Belowyou will find a description of the types.Jason Core/ViewersAs this environment is used for visualizing data, the recommended hardwareis geared towards fast data access, and good quality visualization hardware.Recommended configuration:• A dual-CPU (or dual-core) system, with 4GB of memory, 2x 500 GB SATA-II harddrive and an Nvidia quadro class graphis adapter.•For more efficient use we recommend to run Jason in a “dual screen”configuration (preferably 1600x1200 or 1680x1050 resolution).InverTrace-Plus/Rocktrace/StatModMC/RockModI NVERTRACE-P LUS, R OCK T RACE, S TAT M OD MC and R OCK M OD are gearedtowards processing large amounts of data, in a single-threaded fashion. Assuch, a fast, single core CPU will give better performance then a quad-coreCPU with lower clock-speed. Since these modules work on blocks of data inmemory, we recommend an available memory of 2 GB per core. Fast harddisks (SATA-II) will also improve processing speedRecommended configuration:• A fast CPU, 4GB of memory, 2 x 500 GB SATA-II harddisks.MCPU workers (Linux only)R OCK T RACE, I NVER T RACE-P LUS,S TAT M OD MC and R OCK M OD can be run inparallel mode and make use of additional machines in the network for extraCPU power. For this you need a seperate MCPU license.MCPU allows mixing and matching of different classes of machines tocooperate on the same task; for efficient use the machines should be ofcomparable specifications; they should have the same amount of memoryper thread (core or CPU) and the CPUs should be of roughly equalperformance.NetworkThe worker nodes will access their input data over the network (using NFS),and as such will benefit from having a high-speed, low-latency network(GigE or better).MemoryThe maximum amount of data a worker process can handle is determinedfor the whole process, and therefore the lowest amount of memory availableon any one of the workers, will determine the maximum amount available foreach process. Having 6 workers with 2GB available and 2 workers with 1GBwill usually lead to a longer overall runtime, then just using 6 workers with2GB of memory.CPUA good rule of thumb is that the speed difference between the fastest andslowest CPU should be less then 50%Multi-Threading (StatModMC/RockMod only)S TAT M OD MC and R OCK M OD can be run in multi-threaded mode. For thisyou need a separate MCMC-MT license. Multi-Threading makes use of allthe available cores in your machine.We recommend 2.4 GB of memory per thread.Additional Hardware SupportAs of JGW 8.0, all batch modules are available as native 64bit Linux for the64-bit Intel and AMD hardware.Please note that the Intel Itanium and Intel Itanium2 Processor architectureis not supported.Software requirementsLinux/x86, x86_64Fugro-Jason currently supports recent versions of both SuSE and RedHatEnterprise, both for x86 and x86_64 architectures, with the latest patchesinstalled. Xorg and Nvidia graphics drivers are also required.Commentwith latest updates appliedSuSE 10.X, 11.x, Enterprise(SLES10)RedHat Enterprise 4.8 or 5.4 with latest updates appliedKnown LimitationsThe known limitations specific for the Linux platform are listed below. KnownLimitations for each of the Jason modules are listed at the end of theirrespective sections in the help file (Help > Known limitations)Error!Bookmark not defined..•PowerLog does not run on Linux.WindowsFugro-Jason currently supports the English language versions of WindowsXP (professional), Windows Vista (business and ultimate) and Windows 7(professional and ultimate), both 32 and 64 bit versions, with the latestservice packs installed.Non-English language versions are not supported.Known LimitationsThe known limitations specific for the Windows platforms are listed below.Known Limitations for each of the Jason modules can be found under Help >Known Limitations from the menu of the specific module Error! Bookmark notdefined..•Datafiles generated with JGW 5.0 (released in 2000) or older can not be written to. It is recommended to upgrade those files on Linux, beforeusing them on Windows.•Remote display is not supported.•Rockmod /StatMod MC is not supported.•MCPU is not supported.Nvidia driversTo ensure proper functioning of the viewers (both on Linux and Windows),you should use a recent Nvidia card and software. The Jason software hasbeen tested using recent versions of the Nvidia drivers (180 or newer).Using older versions of this driver may give display artifacts in the JasonCore/Viewers modules.You can download the Nvidia driver from the Nvidia website: .After installing the NVidia drivers for Linux, you have to configure X-windowsso that it can use the Nvidia driver. For this you can use the nvidia-settingsprogram. A detailed description can be found in the Nvidia READMEdocument. Make sure to configure your display for 24bpp color-depth. Calculation of memory requirementsWith the formulas presented below, you can estimate the memoryrequirements for the following memory intensive batch modules:E ARTH M ODEL, I NVERMOD, I NVER T RACE-P LUS, R OCK T RACE and S TAT M ODMC.HINT:You should always leave some memory available (150-200MB) for the operating system and other system applications. Alwaysdesign the blocks such that they can be held in memory.Swapping to disk will cause serious performance degradation.NOTE: 1 Mbyte = 1024 * 1024 bytes; 1 GByte = 1024 * 1 Mbyte.Model BuilderMinimum memory requirements for M ODEL B UILDER can be calculated asfollows:(13 * nframe + 8 * nhor + 20) * ntrace + 16 *non_conformable_non_faulted_layers * ntracewherentrace = number of selected traces.nframe = number of entries framework table.nhor = number of primary/secondary/trend horizons inframework table.This memory is required in case of conformable non-faulted layers. Morememory will be needed in case of non-conformable and/or faulted layers. EarthModel Model & Well Curve Generator and InverModMinimum memory requirement for E ARTH M ODEL M ODEL G ENERATOR,E ARTH M ODEL W ELL C URVE G ENERATOR, I NVER M OD P RINCIPAL C OMPONENTA NALYSIS, I NVER M OD W AVELET E STIMATION, I NVER M OD M ODEL E STIMATIONcan be calculated as follows20 * ntraceWhere:ntrace = number of selected tracesEarthModel Model InterpolatorThe E ARTH M ODEL M ODEL I NTERPOLATOR has the E ARTH M ODEL partly inmemory for both the input and output trace gate:(8 * nlayer + 20) * ntrace1It also reads the input model file for the selected layers and input trace gatein the form of vertical components. The vertical component samplingdepends on the requested approximate vertical interval per layer:(8 * nlayer * nz) * ntrace2Minimum memory requirements for EarthModel Interpolator can becalculated as follows:(8 * nlayer + 20) * ntrace1 + (8 * nlayer * nz) * ntrace2where:ntrace1 = # of selected input and output tracesntrace2 = # of selected input traces with non-empty inputmodel tracesnlayer = # of selected layersnz = mean_layer_thickness / selected_vertical_intervalThe result is in bytes. The second part is usually the bottle neck. Roughly, ifthe requested vertical interval is chosen equal to the model file sampleinterval and the input trace gate encompasses the full model file extent, therequired memory will be twice the size of the model file.NOTE:If you request to internally over-sample by choosing a vertical interval that is much smaller than the model file sample interval,the required memory will grow proportionally. The requestedvertical intervals are the ones that are set from the Input/Layersdialogue box. The mean_layer_thickness can be found in theEarthModel thicknesspars file.Also, a temporary output horizon file will be created, requiring disk space:(4 * nlayer * nz) * ntrace1In general the output trace gate will contain more traces than the input tracegate, therefore ntrace1 may be much larger than ntrace2.CSSI (InverTrace-Plus / RockTrace)In the Output > Generate results dialog box you find a button T EST REQUIREDMEMORY. If you click on it, you’ll be given an estimate of the free memoryand swap space needed to run your job. When using MCPU, this memoryrequirement applies to all the selected machines. If one machine being usedin MCPU runs out of memory and begins swapping, the entire job will slowdown substantially.To test the amount of memory required you should first select a small tracegate in the area of interest (approximately 4 times the selected block size).The size of the selected trace gate is displayed in the main CSSI window. MCMC (StatMod MC / RockMod)MCMC allows you to set the maximum amount of memory to use. Refer tothe help file in StatMod MC or RockMod for more information.No Machine (NX)If you would like to run Jason modules over low-bandwidth connections youcan use an NX connection. For more information on NX see.NX does support 3D graphics graphics and should be able to run V OLUMEVIEW. Please note that performance will be suboptimalThinAnywhere®To run Jason modules over low-bandwidth connections, you can alsochoose to use ThinAnywhere. See .ThinAnywhere does support 3D graphics graphics and should be able to runV OLUME VIEW. Please note that performance will be suboptimalExceed®/Exceed 3D®Jason software is not certified for Hummingbird Exceed, or any other X-emulator.CygWin-XJason software is not certified for CygWin-X, or any other X-emulator. WindowsRunning on a remote display is not supported under Windows.C OMPATIBILITYBefore installing an updated version of any software, it is important to knowhow compatible that version is with previous versions.Files and projects saved in version 8.2 are compatible with older Jasonversions up to 7.1, with the exception of the E ARTH M ODEL FT modules.Significant updates have been made to the E ARTH M ODEL FT modules, andas a result the software is not backward compatible. This means that savedE ARTH M ODEL FT files in 8.2 cannot be retrieved in earlier versions ofE ARTH M ODEL FT.Hardware compatibilityJason data is fully compatible between the different hardware platforms.There is one exception: session files for FunctionMod that are saved on oneplatform, cannot be read back on the other platform.Simultaneous usage of different versionsYou can keep all previous Jason installations available, therefore werecommend that you install any new version in its own directory. This assistsin smoother migration to the new software version. Please see Sharing thelicense between different release versions on page for more information on howto setup the license manager for such a configuration.I NSTALLING J ASON ON L INUXWhether you want to install this version as an update or as a new software,the steps to do so are identical. This is because we recommend that youinstall the update in a new directory, which will enable you to keep thecurrent version running as well. This might be important with respect tocertain compatibility issues (see page for more information).In this chapter the actual software installation is described. Below you findthe steps for the software installation and the order in which they should betaken:1: Create the product installation account and directory2: Installing Jason3: Install the license file4: Configure the installation5: Enable the Jason license manager6: Test the installation7: Making the Jason launcher available to users8: Define local settingsConfiguring the Multi CPU is described on page .1: Create the product installation account and directoryThe Jason software can be made available to all workstations on yournetwork by exporting the applicable partition. Please ensure that the path tothe software installation is the same on all machines, preferably by using theautomounter.We also recommend you create a user account with the name jason anduse that account to install the software. This has the following advantages:•Avoid potential security risks, which may occur when the software is installed as root.•Patches can be installed without the need for the root password.Follow your company procedures to create the account jason.To create the installation directory proceed as follows:1. Switch to the root account by typing: su root2. Type: df -k to check for available disk-partitions and space (2 GB), anddecide where to install the Jason software.3. Create a directory to install the software in on the selected partition. Grantthe user jason access to this directory.4. Login as user jason to proceed with the installation procedure.2: Installing JasonNow that you created the product installation account, you can continue withreading the DVD:1. Mount the DVDThe DVD is mounted automatically, the location differs for the variousoperating systems.OSSuSE Linux /media/dvdRedHat Linux /mnt/dvdNOTE:Please ensure the DVD has been mounted with executepermission. RHES5 by default mounts DVDs with no executepermission. If you get a permission denied error when trying torun the install script this usually indicates the DVD has not beenmounted with execute permissions.If the DVD is not mounted automatically, or is not mounted with executepermission please refer to your OS documentation. The table below givesdirections for the most common cases.OSSuSE Linux Switch to the root accountType: mount /media/dvdRedHat Linux Switch to the root accountType: mount –t auto /mnt/dvd2. Run the install script from the mounted DVD:OSSuSE Linux /media/dvd/installRedHat Linux /mnt/dvd/install3. Start the installation by typing O (for OK).3: Install the license file1. Prior to receiving a license file, you must provide Fugro-Jason with thehostname and hostid of the system that acts as the license manager. Thehostname and hostid of the current host can be found in various ways:• By typing ./jlmhostinfo from the license directory in the Jason installation.• By selecting L, License manager host information from theinstallation script on the DVD.•By querying the hostname and hostid from the system as follows:♦For the hostname, type: hostname -s♦For the hostid, type: /sbin/ifconfig eth0 and remove colons fromthe “HWaddr” result. In other words, a HWaddr of 00:40:05:16:E5:25becomes a host-id of 00400516e5252. After supplying Fugro-Jason with the requested information, you will receivean email with the license file. This email contains instructions on theinstallation procedure.The license keys are maintained by the files license.dat and/orlicense.demo. Follow the steps below to install the license file.• Login as jason.• Go to the directory that contains the license manager-files. cd <inst_dir>/license•Install the license file, for instructions on how to do this, refer to the email you received with the license file.Note that:•It is Fugro-Jason’s policy to issue license keys for the maximum period of one year. A new license file will be sent automatically before theexpiration date of the current license.•Neither the hostname nor the TCP/IP port number (the last number of the first line in the license file) is used in the encryption algorithm. If thehostname of your computer has been changed, modify the license.datfile accordingly.•The TCP/IP port number must be changed if the port is already in use.(This will be reported in the debug log file).4: Configure the installationNow that you installed the license file, the installation must be configured foryour environment:1. Go to the installation directory (type: cd <inst_dir>).2. Run the configuration script (type: ./jgsetup).HINT:If running the automounter, the installation directory should be changed. To do so, type C followed by the correct path.3. Select option 1 to configure the installation.This will update the full directory path to the current installation in severalconfiguration files and will set the file permissions for all files and directories.HINT:If you are installing an update, you can select option 7 to use the customization files from the previous version. These customizedfiles are then copied to the new installed version. (You can findcustomized files in the directory <instdir>/local/...)5: Enable the Jason license managerThe Fugro-Jason products are equipped with a license manager (FLEX lmversion 10.8) to control the client specific setup as stated in the licenseagreement. Typical client settings are: number of tokens, expiration date,and customized interfaces.If problems are experienced with the license management system, pleasecheck Appendix I - FLEXlm license manager.IMPORTANT:Never set back the system date! The Jason license manager will detect this, and prevent the Jason software to run!! Even whenyou reset the system date to the correct date, the software maystill not run. In that case you may have to reload the completeoperating system.NOTE:Never change the system date while the X-Server is running.Doing so may significantly confuse the X-Server. It has beenobserved that pull-down menus “hang”, and many otherunexpected behaviors are also likely to happen. A commonmistake is to call ntpdate (or related programs) to synchronizethe time with other systems driven by the crontab.NOTE:The Jason license manager will NOT conflict with otherapplications that use FLEXlm. Jasons license file should not bemerged with other license files.Follow the steps below to install the license manager.1. Go to the directory that contains the license manager-files. (by typing cd<inst_dir>/license).2. Make sure there is no license manager daemon running. (type: ./jlmdown-c license.dat).3. Start the license manager daemon (type: ./jasonstartjlm -clicense.dat).The program jasonstartjlm starts the daemon processes jasongrd andjasonlm. This can be inspected by typing: ps -ef | grep jason4. Inspect the debug log-file /tmp/jasonlicense.log to ensure the licensemanager has been started correctly, by typing: more/tmp/jasonlicense.log5. Ensure that the license management daemon will be started automaticallywhenever the system is rebooted. For this you can use one of the followingoptions:• The script etc/jasonlm in the installation directory contains the basics for a suitable script and you should adapt this to the set-up you areworking with.•Create the jason license manager startup script. (You need root privileges) by typing vi /etc/rc5.d/S85lmgrd.jasonAdd:#!/bin/sh## Start Jason license manager demon# ( Uses FLEXlm from Globetrotter software)#if [ -f <instdir>/license/jasonstartjlm ]then<instdir>/license/jasonstartjlm \-c <instdir>/license/license.dat \-l /tmp/jasonlicense.log -u jason &fiPlease note the following:•With the option -l <filename>, name and place of the debug log file can be specified. This can be changed to line-up with the environment inwhich the install is performed.•It is recommended that you use the option -u <user>. With this option the license manager will not run with root privilege, to prevent possiblesecurity leaks.Sharing the license between different release versionsIn most cases you will want to support multiple versions of the Jasonsoftware, to enable this do as follows:1. Install the license manager for the latest version as described above.。
RPG游戏图文教程
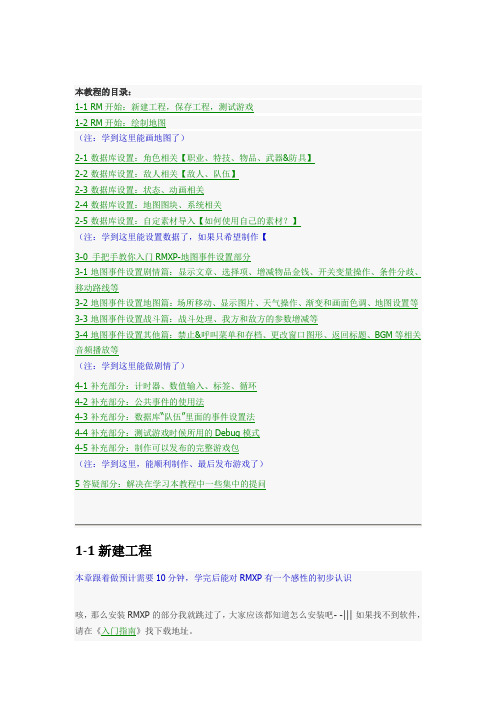
本教程的目录:1-1 新建工程本章跟着做预计需要10分钟,学完后能对RMXP有一个感性的初步认识咳,那么安装RMXP的部分我就跳过了,大家应该都知道怎么安装吧- -||| 如果找不到软件,请在《入门指南》找下载地址。
打开RMXP之后,可以在左上角看到一个白纸图标,它代表新建一个RMXP工程,也就是你制作的的游戏。
当然,你也可以通过“文件”菜单里面的“新建工程”来完成这个功能:选择了新建工程之后,就会弹出这样的窗口:其中,“文件夹名”代表你放游戏的那个文件的名称,可以随意自己取一个,方便自己找就行了,不过建议是和你游戏的名字一样比较好。
然后,“标题”代表你这个游戏的名字,比如《勇者大冒险》之类的……= =||| 你也可以自己定义一个比较容易找的工程位置(使用右边那个“...”的按钮来设定路径)。
建好的新工程大概就是这样子:新建工程之后,就会出现这样的界面。
当你在游戏工程里做了设置之后,可以单击左数第三个图标——“保存”你的设定。
当然,在“文件”菜单下选择保存,或按快捷键ctrl+s也可以。
制作游戏过程中,请养成经常保存工程的好习惯。
当你新建了你的工程以后,就可以在设定好的路径下看到你的游戏文件夹了,如下图:其中,画红圈的那个Game.exe文件是你的游戏执行程序,只要打开它就可以直接进行游戏。
而蓝圈的那个是你的工程文件,当你需要编辑这个游戏工程的时候,就打开这个。
不过,你不需要每次都通过点击Game.exe文件测试你做好的游戏,因为RMXP自带游戏测试功能——你只要按图标面板上最右边那个绿色三角形就可以测试游戏(快捷键F12)。
(在测试游戏的时候,无法编辑工程。
但是如果是直接点击Game.exe进行测试就可以。
)新建完工程,测试游戏的时候,你会发现角色在一片小小的空空的草地上晃来晃去,什么都没有发生-。
-虽然按下ESC可以调出菜单,但是也仅此而已……不用着急,因为这只是个开始而已。
接下来我会教大家怎么绘制比较基本的地图,然后通过数据库、事件等,将你们的第一个游戏丰满起来,成为一个真正的游戏。
我的世界综合测试题
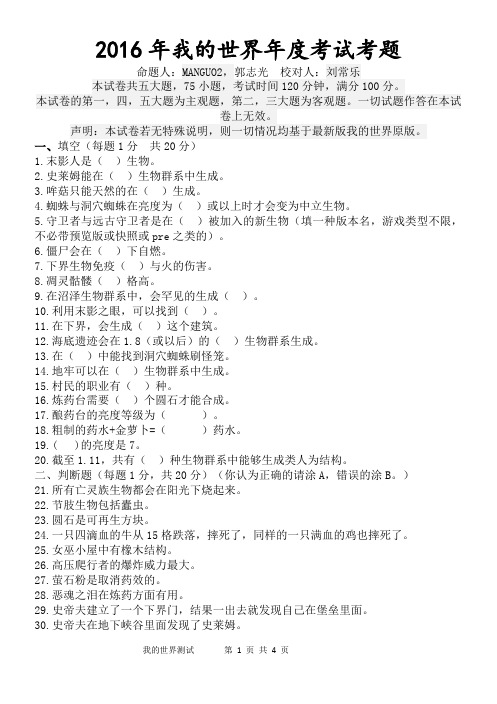
2016年我的世界年度考试考题命题人:MANGUO2,郭志光校对人:刘常乐本试卷共五大题,75小题,考试时间120分钟,满分100分。
本试卷的第一,四,五大题为主观题,第二,三大题为客观题。
一切试题作答在本试卷上无效。
声明:本试卷若无特殊说明,则一切情况均基于最新版我的世界原版。
一、填空(每题1分共20分)1.末影人是()生物。
2.史莱姆能在()生物群系中生成。
3.哞菇只能天然的在()生成。
4.蜘蛛与洞穴蜘蛛在亮度为()或以上时才会变为中立生物。
5.守卫者与远古守卫者是在()被加入的新生物(填一种版本名,游戏类型不限,不必带预览版或快照或pre之类的)。
6.僵尸会在()下自燃。
7.下界生物免疫()与火的伤害。
8.凋灵骷髅()格高。
9.在沼泽生物群系中,会罕见的生成()。
10.利用末影之眼,可以找到()。
11.在下界,会生成()这个建筑。
12.海底遗迹会在1.8(或以后)的()生物群系生成。
13.在()中能找到洞穴蜘蛛刷怪笼。
14.地牢可以在()生物群系中生成。
15.村民的职业有()种。
16.炼药台需要()个圆石才能合成。
17.酿药台的亮度等级为()。
18.粗制的药水+金萝卜=()药水。
19.( )的亮度是7。
20.截至1.11,共有()种生物群系中能够生成类人为结构。
二、判断题(每题1分,共20分)(你认为正确的请涂A,错误的涂B。
)21.所有亡灵族生物都会在阳光下烧起来。
22.节肢生物包括蠹虫。
23.圆石是可再生方块。
24.一只四滴血的牛从15格跌落,摔死了,同样的一只满血的鸡也摔死了。
25.女巫小屋中有橡木结构。
26.高压爬行者的爆炸威力最大。
27.萤石粉是取消药效的。
28.恶魂之泪在炼药方面有用。
29.史帝夫建立了一个下界门,结果一出去就发现自己在堡垒里面。
30.史帝夫在地下峡谷里面发现了史莱姆。
31:耕地可以吸收其周围任何地方的水。
32:你不可能徒手获得石制压力板。
33:压力板的侧面可以放置画。
- 1、下载文档前请自行甄别文档内容的完整性,平台不提供额外的编辑、内容补充、找答案等附加服务。
- 2、"仅部分预览"的文档,不可在线预览部分如存在完整性等问题,可反馈申请退款(可完整预览的文档不适用该条件!)。
- 3、如文档侵犯您的权益,请联系客服反馈,我们会尽快为您处理(人工客服工作时间:9:00-18:30)。
我的世界0.13.1超级红石PVP地图存档搞趣网小编为大家分享我的世界手机版0.13.1超级红石PVP地图存档下载,希望这个我的世界0.13.1超级红石PVP地图存档大家能喜欢。
我的世界超级红石PVP地图:下载地址
游戏内截图:
我的世界手机版地图存档简易安装教程:
1、我们首先要解压我们找到并且下下来的地图文件。
2、我们找到我们minecraft文件中的SAVES文件夹。
3、然后将下下来的地图文件放入到./minecraft/save文件夹中并解压缩。
4、然后我们就可以启动游戏,然后在游戏中就可以找到我们所放入的地图文件了。
以上就是搞趣网小编为诸位玩家带来的我的世界0.13.1超级红石PVP地图存档下载,希望大家喜欢。
小编推荐:
下载更多我的世界攻略,敬请关注搞趣网我的世界专区。
