海尔a精编a a系列冰箱管理操作手册
海尔冰箱使用方法
海尔冰箱使用方法
使用海尔冰箱的方法如下:
1. 插通电源:将冰箱的电源插头插入电源插座,并确保电源开关处于打开状态。
2. 调节温度:在冰箱控制面板上找到温度调节按钮或旋钮,根据需要将温度调节到合适的级别。
通常,冰箱的温度范围为0到10,冷冻室的温度范围为-15到-18。
3. 等待制冷:打开冰箱门后,需要等待一段时间让冰箱内部的温度降至设定的温度。
在此过程中,尽量避免频繁开关冰箱门,以免破坏制冷效果。
4. 储存食物:将要储存的食物放入冰箱内,根据需要将其放在不同的区域。
通常,冷藏室适合储存新鲜食物如蔬菜、水果和饮料;冷冻室适合存放冷冻食品如肉类、冰淇淋等。
5. 维护和清洁:定期清理冰箱内外部的污垢和灰尘,可以使用温和的清洁剂和湿布进行清洁。
另外,还可以定期检查冰箱的密封性能,确保门密封良好,以节省能源和保持食物的新鲜度。
以上是使用海尔冰箱的基本方法,具体操作还需要根据各个型号的冰箱进行相应调整和参考使用说明书。
海尔电冰箱说明书
ഺޘອ安全与警告提示 (2)产品特点 (3)处理旧冰箱的注意事项 (4)搬运和放置 (4)电器联接 (5)产品标准 (5)安装尺寸 (6)各部件名称 (7)ဧ使用前的准备 (8)控制面板 (8)开机 (8)温度调节 (9)冷藏室 (9)冷却能力 (10)速冷 (11)冷冻室 (11)冷冻能力 (11)速冻............................12制作冰块 (12)冷冻食品的储存期 (13)功能的使用和设置 (13)༹ஈᎧᆒઐ除霜 (16)清洁 (16)节能 (16)其他事项 (15)ऻ৺ᑇሚሷૺᄂၐሚሷࡼॊᇜᎧ߹非故障现象 (17)特殊现象的分析与排除 (18)ఱઓॲᇗ保修指南 (19)务必使用单独的、带可靠接地线的三芯电源插座。
避免挤压、折叠、打结或损坏电源软线。
如果电源软线损坏,为避免危险,必须由制造厂或其维修部或类似的专职人员来更换。
更换电源线后冰箱才可通电使用,否则易造成触电甚至引发火灾。
拔电源插头时,不要直接拉拔电源软线,以防拉断。
应看管好幼儿,确保其不要玩耍和攀爬冰箱,另外不要让任何人爬、坐、站或依在冰箱的门上,以防造成人身伤害及冰箱损坏。
维修或清洁冰箱时,必须拔下电源插头。
本冰箱为家用冷藏冷冻箱,主要用于食物的储存和冷冻,不适用于对温度有严格要求的物品(如疫苗、菌种及化学试剂等)。
ᆉሙ-冰箱附近切勿存放或使用易燃性物品,如煤气,涂料,汽油等,并且禁止将易燃、易爆物品如酒精、汽油等放在冰箱中,以防爆炸及火灾的发生。
ᆉሙ-盛液体的玻璃瓶或罐不可放在冷冻室,因为完全冰冻后有爆炸的危险。
ဧ۾૦༄请仔细阅读使用说明书!它包含有冰箱放置、使用和保养的重要信息。
请为以后的使用保存好所有资料。
ڔཝᎧவসᄋာᆉሙ-不要将冰箱安放在潮湿和容易溅到水的地方。
ᆉሙ-勿用湿手触摸冷冻室的食品或金属容器,否则,易因低温而造成冻伤。
வস-本产品为家用电冰箱,只适用于储藏食品,不能用于其它用途,如储藏血液及制品,药品,生物制品,化学物品和技术资料等。
海尔 电冰箱 说明书(7)
封底装箱单抽屉刮霜板透孔销蛋盒冰盒保湿盒隔板保湿盒保湿盖板搁物架保修证合格证使用说明书名称数量产品型号装箱单111211112113BCD-168K/A BCD-188K/A BCD-208K/A111311112113111311112114地址:青岛市四方区重庆南路99号电话:(0532)5847220 传真:(0532)5847038 邮编:266032(2003年第4版)技术数据·线路图技术数据线路图售后服务1.保修证:当您需要正常咨询或维修时,请持保修证和购机发票与我公司当地售后服务中心联系,并将保修证妥善保管。
2.保修期内整机免费保修一年,主要零部件免费保修三年。
(自购买日起,以发票日期为准)维修之前请确认如下事项售后服务的保证冷藏室后壁结露严重●温度设定不当,参阅“开始使用”一节●门未关严或食品将门顶住未能关上●门开启太频繁●天气炎热●湿度过大●有气味的食品应该严密包住●检查有无变坏食品●冰箱内部需要清洁冰箱内有异味售后服务如果冰箱工作不正常,请按下述方法检查处理。
如还不能改变情况,请及时联系当地售后服务中心。
一定要详细提供型号名称、附件明细和冰箱编号等。
(见冰箱铭牌中有关内容)维修之前请确认如下事项外出度假时●若是短期度假,请将易变质的食物取出,设定到合适的温度档位,确认后将冰箱门完全关好。
●若您长时间在外度假,需将家中电源切断时,请将食物取出,待霜溶化后,清洁内部,擦干后把冰箱门打开,以免微量食物残渣产生不良气味。
搬运时●拔下电源插头,切断电源。
●取出冰箱内所有食品。
●用胶带固定冷藏室搁物架、保湿盒及冷冻室抽屉等活动部件。
●关紧冰箱门,用胶带固定,以免移动时被打开。
●搬运冰箱时,最大倾斜角度不能超过45度(与垂直方向之间的夹角),以免造成制冷系统故障,影响正常使用。
停电时的处理停电后即使是夏季,几个小时之内,仍可以毫无问题地保存食品。
●停电后,不要再放入新食品,尽量不开冰箱门。
海尔冰箱使用说明书
海尔冰箱使用说明书海尔冰箱bcd195wt,矛盾的说明书2017-6-2417:46冰箱内的温度是通过温控器调节旋钮①来调节的。
旋钮上的刻度“0”是关机位臵,“1,2,3,4,5,6,7”不代表具体的温度,数字越小,箱内温度越高;数字越大,则箱内温度越低。
推荐:1~3档环境温度≥30℃3~5档环境温度16~30℃5~7档环境温度≤16℃外界温度高室内冰箱才应该调低温度,比如外界30度冰箱内调为5度。
如果冬天外界温度15度,冰箱要调成0度。
这是什么逻辑?难道冰箱里温度越低越省电?那这样一年四季调零度好了2017-6-2419:17满意回答首先要解释一下机械冰箱的控温原理,机械冰箱是通过冷藏室的温控器来控制整个冰箱的温度的,制冷剂从冷冻流向冷藏,再回压机.就是说,冷冻室是间接通过冷藏来控制的,冷藏温度达到后,制冷剂不再流动,冷冻室也不会再单独制冷。
明白了上面的原理后,就好解释你提的问题了.1.夏天调低档是因为节电和保护压机。
举例说,如果你夏天调到5~7档,代表冰箱冷藏要维持一个很低的温度才会停机,而夏天环境温度高,要维持这个温度很难,所以压机会一直长时间运转,不但于压机不利,而且也不节能。
2.冬天调高档是为了保持冷冻室内食物不容易变坏.冬天,环境温度低,如果我们设定为低档,冰箱冷藏很容易就达到设定档位对应的温度,所以压机会长时间不运转,而这个结果就导致了冷冻室温度上升,我们知道,一般冷冻室温度都在-12度以下,在这个温度下很多食物可存放很久,而如果压机很少运转的话,就很难维持这个温度了。
所以我们要设定为高档.这也是为什么冬天要求打开冷藏室的温度补偿开关的原因,就是想让冷藏室传感器附近的温度升高,这样压机就会启动,来维持冬天的时候冷冻室的温度.如果理解了我上面的话,你就明白说明书的意思了,说明书并没有错.2017-6-2418:03没错的,冰箱其实就是一个能量转换过程,如果室内外温度相差太大,冰箱是很难进入最佳工作状态。
海尔aa、a系列冰箱管理操作手册
(一)、188A、208A、218A系列冰箱培训教材一.产品特点介绍(包括衍生关系)1.-7度保鲜:独创软冷冻保鲜室(-7度保鲜温区),食物保鲜期延长(2-3周),食物加工前无需化冻,切取容易,有效锁定营养,保鲜更有效,生活更方便。
2.人工智慧,自动调温:在人工智慧状态下,该冰箱能够随环境温度变化自动调节温度档位,无需人为调节,便能达到最佳制冷效果,使您更加省心、省力。
3.温度显示功能:能够显示所有设定的温度及冰箱冷藏室与冷冻保鲜室内部的温度,使您随时可以了解冰箱的工作状态,及时判别故障现象,用起来更放心。
4.冷冻功能;5.抗菌保健康;6.内藏式制冷系统,双色门体,整洁美观。
二.产品外观结构特征图(包括颜色)BCD-208A BCD-218A此主题相关图片如下:此主题相关图片如下:三.产品使用说明及产品改进介绍a、新构造1.增加软冷冻保鲜室(-7度保鲜):是国内独创软冷冻保鲜室(-7度保鲜温区),食物保鲜期延长(2-3周),食物加工前无需化冻,切取容易,有效锁定营养,保鲜更有效,生活更方便。
b、有针对性改进的问题点冷藏室与软冷冻保鲜室分别控制(双系统,带电磁阀);有三个蒸发器:分别有冷藏蒸发器,软冷冻保鲜室蒸发器和冷冻蒸发器。
三.技术数据及铭牌线路图此主题相关图片如下:此主题相关图片如下:五.具体控制、工作原理及参数此主题相关图片如下:本控制板由控制板、电源板两部分组成。
1. 基本参数1.1额定频率50Hz1.2额定电压220-240A.C1.3额定功率4W1.4控制电流a. 压机控制电流不大于2A(启动电流不大于10A)b. 电磁阀控制电流不大于1Ac. 加热丝控制电流不大于1A2.外观和结构2.1主控制板、显示板、电源板应符合相应图纸的要求,标记、印刷字样应完整、清晰。
2.2 显示板布局如附图所示,其中各灯的定义和按键定义如下:2.2.1 指示灯定义a 人工智慧指示灯:指示冰箱工作在人工智慧状态。
海尔 电冰箱 说明书(6)
!!JJJJJJJJJJJJJJJJJJJJJJJJJJJJJJJJJJJJJJN !"#$=JJJJJJJJJJJJJJJJJJJJJJJJJJJJJO !"#JJJJJJJJJJJJJJJJJJJJJJJJJJJJJPúR !JJJJJJJJJJJJJJJJJJJJJJJJJJJJJJJJJJJJJJS !JJJJJJJJJJJJJJJJJJJJJJJJJJJJJJJJJJJJJJT !JJJJJJJJJJJJJJJJJJJJJJJJJJJJJJJJJJJJJJU !"#$%!"JJJJJJJJJJJJJJJJJJJJJJJJJJJJJJJJJJJV !"#$JJJJJJJJJJJJJJJJJJJJJJJJJJJJNM !"#$%JJJJJJJJJJJJJJJJJJJJJJJJJJNN !"JJJJJJJJJJJJJJJJJJJJJJJJJJJJJJJJJJNO !"#$%!"#$%JJJJJJJJJJJJJJJJJJJJJJJJJJNP !" #$JJJJJJJJJJJJJJJJJJJJJJJJJJJJJJJJJJJJJJJJJJNQ JJJJJJJJJJJJJJJJJJJJJJJJJJJJJJJJJJJJJJJJJJNR JJJJJJJJJJJJJJJJJJJJJJJJJJJJJJJJJJJJJJNSúNT !"#$%&!JJJJJJJJJJJJJJJJJJJJJJJJJJJJJJJNUúNV !JJJJJJJJJJJJJJJJJJJJJJJJJJJJJJJOMúON !"#$%!"#$%"&'(JJJJJJJJJJJJJ=OO !"#$%&'()*+,-./& ==== !"#$%&'()*+,-!"#$%&'()*!"#!"#$%&'()*+,-!!"#$%&'()*+,!"#$%& '()*+,-.#/012(3456789: !"#$%&'()*!"#$%&!'# ()*+!"#===== !"#$%&'()*+%*,-.&/&01234!"===== !"#$%&' !()*(+,-./&012345!"#===== !"#$%&'()*'+!"#$!"#$%======== !"#$%&'()*======== !"#$%&'()*+,-./01234567891:;<789=>?======== !"#$%&'()*+,-./012"3456789:;<"=>?@A !"#$%&'()*+,-./012======== !"#$%&①搁物架②低温补偿开关③温度调节旋钮④果菜盒⑤门栏杆⑥瓶座⑦出水口!"#$%&'()d_=QTMSKNJNVVU========= !"# $%&'()=== !"#$%&'d_=QTMSKNPJNVVU====== !"# $%&'()=== !"#$% &' ()*+,-.d_Lq=UMRVKOJNVVR===== !"#$=== !"d_QPQP======================= !"# $%&'%()*+%&,*-."#%)/0%12345678!======================================== !d_NTSORKN================== !"#!$%&'()*+!,-./!!"#$%!"#$%&'()*+,-./!"#$%&!"#$ % &'()*+,- !"#$%&'()!"#$%&'(E !"#$%&'()F!"#$%&'()*+,-./0 !"#$P M !"#$%& !"#$%&'()!"#$%&'E !"#$%&'()*+,F!!"#$!"#$%&'()"#*+,- !"#$%&'()*#+,-NI OIPIQIRISIT !"#$%&'()* !"#$ %&'( ) !"# !"#$%&'()*+,P R !"#$%&'()*JNU ! !"#$%P S !"#$% !"#$%&' ()*!"#NS !"#$ %&!"#$% &'()*+,PO NSúPO NS!"#!"#$%P= !"#$%& '()*%+=P R=!"#$ %&"'()*+,-.(/0& !"#$%&'()*#+!"#$O P !"#$%&'()*+ !"#$%&' ()*+,-.!"#$%&'()*+,-./NJO !"#$%&'()*+ , !"#$%&'()*+,!"!"#$%&'()* !"#!"#$%"#&'()*+,-./ !"#$%&'()*M NM ! !"#$%&'()*+,-./01 !"#$%&!"#$%&'(!"#$%&'()* !"+,-# !"#$%&'()*+(&,$-. !"#$% &'()!"#$%&!'()!"#$%&!"#$%&'()!"#$%&'()*+,-.!"#$%!"#!$%&!"#$%&!"#$%!"#$%&'()*+,-./0 !"#$%&'()*+,-.! !"#$%&'()#*+,-#./!"!"#$!"#OOMJOQMs NRtbNQ=E !"#$%&NRt F !"#$!"#$%&'!"(!"#$%&'()*+,-./*!"#$%&'()*+,-.!"#$%&'()!"#$%&'()*+,-./0 !"#$%&' ()*+,-. / !"#$%&'()#*+,-./0 !!"#$%&'()*+,-./01 !"#$%&'()*!"#$!"#$%!"!"#$!"!"#$%&'()*%+!,-., !"#$%&'()*+,-./01 !"#$%&'()*+,-./01 !"#$% &'( )*+,-.!"!"#$%&'()*+,-./0 !"#$%&'()*+,- .- !"#$%&'()*+,-). !"#$%&'()*+,-./01 !"#$!"#$%&'()*"+,'("- !"#$%&'()!*+,-. !"#$%&'()* +,-!" !"#$%&'()*+,!"#$%&'()*+,-./0 !"#$%!"#$%&'()*+$, !"#$%&'()*!"#$%&'()*+,-!"#$%&'()*+,-./!"#!"#$%&'()*+,&-./0 !"#$%&!"#$%&'()*"+,#-./!"#$%&'()*+,-./(0 !"#$%&'()*+,-./!!"#$%&'()*+,-./01 !"#$ %&'()*+,-./0!"#$%&' ()*+ ,-. !"#$%&'(!"!"#$%&'()*+,-./% !"#$!%&'()*+,-. !"#$%&!"#$%&'()*+,-./0 !"#$% &'()* +,- !"#$%&'( )*+,-. !"#$%&!"#$%&'!"(!"#$%&'(!"#$%&'()*+,-.$/& !"#$%&!"#$%&'()$*+,-./0!"#$%&'()*+,-.QR E!"#$%&'()*+,-./0 !"#$%&'!!!"#$%&'()*+,-./012 3$45678'(9:;<=>?@AB !"#$%&'()*+,-./%0123)4 E !"#$%&'F!"#$%&'(NK ! !"#$%&'()*+,-(./01234==== !"#$%&'()*+,-./012.34OK !"#$% &'()*+,-E !F !" E !"#$%&!'()F!"#$%&'(!"#$!"# $%&'()*+',-)./01234!"#$%&'()*+,-&./012345+NMúPO!"EâtKÜLOQÜF !EâÖLOQÜF ! !"ãã EâÖF !!_`aJNPMe _`aJNPMeMKUU MKUUoSMM~==PTÖoNRO~LoOO==SMÖP PQMQMRSMñQTRñNNRU RSMñQTRñNNRUv v!"_`aJNPMe _`aJNPMeN NN NN NQ QN NN NLLN NN N!"#$%&'()*VVEMRPOFRUQTOOM== EMRPOFRUQTMPU=== OSSMPOEOMMP Q F。
海尔超低温你保存箱教学提纲
海尔超低温冰箱操作规程1.目的:规范海尔超低温冰箱的相关使用操作、以及维护操作,保证实验及储存样本安全。
2.适用范围:此SOP适用于中国疾病预防控制中心传染病预防控制所无形体室使用海尔超低温冰箱人员。
3.操作方法3.1要进行设定值的调整操作,首先必须进行解锁。
先按“△”或“▽”,温度设定值闪烁,按“△”或“▽”,输入数字“06”,然后一直按下“功能选择”键5秒,“锁定”灯灭,进入解锁状态,可进行以下各项设定,按“功能选择”键可循环选择箱内温度设定、高温报警设定、低温报警设定,相应指示灯亮。
3.2“温度设定”时设定温度显示区闪烁。
此时按“△”或“▽”键可改变温度设定值。
调定后10s不进行操作自动锁定。
温度停止闪烁表示数值已经输入电脑,否则无效。
温度设定范围为:-10~-86℃.3.3在“高温报警”设定时,设定温度显示区闪烁显示温度设定值。
此时按移位及调节键可调整报警设定值。
调定后不操作10s 自动锁定,温度停止闪烁表示数值已经输入电脑,否则无效。
设定高温报警时设置温度不得高于最高限制温度,不得低于设定温度+5℃。
3.4在“低温报警”设定时,设定温度显示区闪烁显示温度设定值。
此时按“△”或“▽”可调整报警设定值。
调定后不操作10s自动锁定,温度停止闪烁表示数值已经输入电脑,否则无效。
设定低温报警时设置温度不得低于最低限制温度,不得高于设定温度-5℃。
否则无法设置。
3.5密码设定:初次使用密码为“06”,解锁后同时按“功能选择”与“蜂鸣取消”键5s,显示”06”,然后通过按“△”或“▽”键来调节密码值,密码值可在05、06、07……29、30之间选择。
5s 内不操作自动锁定,密码值有效。
3.6开机延时设定3.6.1为降低断电后恢复电力是的电源负载,本设备能更改压缩机的延时启动时间。
在解锁状态下,同时按下“功能选择”和“▽”键,设定延时时间01、02、03——09、10(1—10分钟可选)。
3.6.2如果延时5min以上,设备再冷却下来可能会花比较长的时间。
海尔冷藏食品准备桌面服务、安装和照顾手册说明书

Refrigerated Sandwich/Salad Prep TableService, Installation and Care ManualPlease read this manual completely before attempting to install or operate this equipment. Notify carrier of damage! Inspect all components immediately. See page 2.IMPORTANT INFORMATIONREAD BEFORE USEPLEASE SAVE THESE INSTRUCTIONSService and Installation Manual2 RECEIVING & INSPECTING EQUIPMENT (2)SPECIFICATIONS (3)INSTALLATION (4)OPERATION (5)MAINTENANCE (7)WIRING DIAGRAM (9)All rights reserved. Reproduction without written permission is prohibited.The serial numbers of all self-contained refrigerators and freezers is located inside the unit on the left hand panel near the top.Always have the serial number of your unit available when calling for parts or service.This manual covers standard units only. If you have a custom unit, consult the customer service department at the number listed on the last page.Even though most equipment is shipped crated, care should be taken during unloading so the equipment is not damaged while being moved into the building.1. Visually inspect the exterior of the package and skid or container. Any damage should be noted and reportedto the delivering carrier immediately.2. If damaged, open and inspect the contents with the carrier.3. In the event that the exterior is not damaged, yet upon opening, there is concealed damage to the equipment,notify the carrier. Notification should be made verbally as well as in written form.4. Request an inspection by the shipping company of the damaged equipment. This should be done within 10 days from receipt of the equipment.5. Be certain to check the compressor compartment housing and visually inspect the refrigeration package. Besure lines are secure and base is still intact.6. Freight carriers can supply the necessary damage forms upon request.7. Retain all crating material until an inspection has been made or waived.Service and Installation Manual3Service and Installation Manual4LocationUnits represented in this manual are intended for indoor use only. Be sure the location chosen has a floor strong enough to support the total weight of the cabinet and contents. A fully loaded unit can weigh as much as 1500 pounds. Reinforce the floor as necessary to provide for maximum loading. For the most efficient refrigeration, be sure to provide good air circulation inside and out .Inside cabinetDo not pack the units so full that air cannot circulate. The refrigerated air is discharged at the top rear of the unit. It is important to allow for proper air flow from the top rear to the bottom of the unit. Obstructions to this air flow can cause evaporator coil freeze ups and loss of temperature or overflow of water from the evaporator drain pan. The shelves have a rear turn up on them to prevent this. However, bags and other items can still be located to the far rear of the cabinet. Air is brought into the evaporator coil with fans. Prevent obstruction by locating large boxes and tall stacks of product to the outlet or inlet of air flow.Outside cabinetBe sure that the unit has access to ample air. Avoid hot corners and locations near stoves and ovens. It is recommended that the unit be installed no closer than 2" from any wallLevelingA level cabinet looks better and will perform better because the doors will line up with the frames properly; the cabinet will not be subject to undue strain and the contents of the cabinet will not move around on the shelves. Use a level to make sure the unit is level from front to back and side to side. Units supplied with legs will haveadjustable bullet feet to make the necessary adjustments. If the unit is supplied with casters, no adjustments areavailable. Ensure the floor where the unit is to be located is level.StabilizingAll models are supplied with casters for your convenience, ease of cleaning underneath and for mobility. It is very important, however, that the cabinet be installed in a stable condition with the front wheels locked while in use.Should it become necessary to lay the unit on its side or back for any reason, allow at least 24 hours before start-up so as to allow compressor oil to flow back to the sump. Failure to meet this requirement can cause compressor failure and unit damage.Unit repairs will not be subject to standard unit warranties due to improper installation procedures.Electrical connectionRefer to the amperage data on page 3, the serial tag, your local code or the National Electrical Code to be sure the unit is connected to the proper power source. A protected circuit of the correct voltage and amperage must be run for connection of the line cord or permanent connection to the unit.The ON/OFF switch must be turned to OFF and the unit disconnected from the power source whenever performing service, maintenance functions or cleaning the refrigerated area.Service and Installation Manual5Do not throw items into the storage area. Failure to heed these recommendations could result in damage to the interior of the cabinet.Refrigerated cabinetsTemperature range for the internal cabinets is 28° F to 50° F for all food prep, undercounter and worktop refrigerator units; and -11° F to -1° F for undercounter and worktop freezers. Food Prep units should operate with pans in place. Operating without pans and/or pan covers in place will decrease the efficiency and may damage the unit due to continuous running.Continuous opening and closing of the door will prevent the unit’s ability to maintain optimum refrigeration temperature.Top section is not intended for overnight storage. Product should be removed from pans. Pans can remain in cabinet while empty. Defrosting:Every 6 hours, the unit will turn off to let the ice on the evaporator coil clear up. The control will display the defrost symbol. When the coil temperature reaches the terminal temperature or after 20 minutes (whichever comes first), the unit will turn on again. On/Off Switch:An on/off switch is located on the front of the bottom panel and on the condenser compartment door for the Pizza prep tables. When the unit is on, the switch will glow green.SOLID-STATE THERMOSTAT DESCRIPTIONSTo display target set point. In programming mode, select a parameter or confirm an operation.T o start a manual defrostTo see the last temperature alarm occurrence. In programming mode, it browses the parametercodes or increases the display valueT o see the last temperature alarm occurrence. In programming mode, it browses the parameter codes or decreases the display valueKEY COMBINATIONT o lock & unlock the keyboard T o enter in programming modeT o return to the room temperature display62. MAIN FUNCTIONS2.1 HOW TO VIEW THE SET POINT1. Push and immediately release the SET key. The display will show the set point value.2. Push and immediately release the SET key or wait for 5 seconds to display the sensor value again.2.2 HOW TO CHANGE THE SET POINT1. Push the SET key for more than 2 seconds to change the set point value.2. The value of the set point will be displayed and the LED starts blinking.3. To change the set value, push the or key within 10s.4. To set a new point value, push the SET key again or wait 10s. 2.3 HOW TO START A MANUAL DEFROST Push the key for more than 2 seconds and a manual defrost will start 2.4 HOW TO LOCK THE KEYBOARD 1. Keep pressed the and keys for more than 3s.2. The “POF ” message will be displayed and the keyboard will be locked. At this point, it will be possible only to see the set point or the MAX or Min temperature stored.3. If a key is pressed more than 3s, the ”POF ” message will be displayed. 2.5 HOW TO UNLOCK THE KEYBOARD Keep pressed the and keys together for more than 3s until the “Pon ” message is displayed. 3. ALARM SIGNALSHOW TO VIEW THE ALARM AND RESET THE RECORDED ALARM 1. Push the or key to display the alarm signals.2. When the signal is displayed, hold the SET key until the “rst ” message is displayed, and push the SET key again. The “rst” message will start blinking and the normal temperature will be displayed again.Service and Installation Manual7The power switch must be turned to OFF and the unit disconnected from the power source whenever performing service, maintenance functions or cleaning the refrigerated area.Refrigerated cabinetsThe interior and exterior can be cleaned using soap and warm water. If this is not sufficient, try ammonia and water or a nonabrasive liquid cleaner. When cleaning the exterior, always rub with the "grain" of the stainless steel to avoid marring the finish.Do not use an abrasive cleaner because it will scratch the stainless steel and plastic and can damage the breaker strips and gaskets.Cleaning the Condenser CoilThe condenser coil requires regular cleaning and the recommendation is every 90 days. In some instances, you may find that there is a large amount of debris and dust or grease accumulated prior to the time frame of 90 days. In these cases the condenser coil should be cleaned every 30 days.If the build-up on the coil consists of only light dust and debris, the condenser coil can be cleaned with a simple brush. Heavier dust build-up may require a vacuum or even compressed air to blow through the condenser coil.If heavy grease is present, there are de-greasing agents available for refrigeration use and specifically for the condenser coils. The condenser coil may require a spray with the de-greasing agent and then blown through with compressed air.Failure to maintain a clean condenser coil can initially cause high temperatures and excessive run times. Continuous operation with dirty or clogged condenser coils can result in compressor failures. Neglecting the condenser coil cleaning procedures will void any warranties associated with the compressor or cost to replace the compressor.Never use a high- pressure water wash for this cleaning procedure as water can damage the electrical components located near or at the condenser coil.In order to maintain proper refrigeration performance, the condenser fins must be cleaned of dust, dirt andgrease regularly. It is recommended that this be done at least every three months. If conditions are such that the condenser is totally blocked in three months, the frequency of cleaning should be increased. Clean the condenser with a vacuum cleaner or stiff brush. If extremely dirty, a commercially available condenser cleaner may be required.Stainless Steel Care and CleaningT o prevent discoloration of rust on stainless steel, there are several important steps to be taken. First, we need to understand the properties of stainless steel. Stainless steel contains 70-80% iron which will rust. It also contains 12-30% chromium which forms an invisible passive film over the steel ’s surface which acts as ashield against corrosion. As long as the protective layer is intact, the metal is still stainless. If the film is broken or contaminated, outside elements can begin to breakdown the steel and begin to form rust of discoloration.Proper cleaning of stainless steel requires soft cloths or plastic scouring pads. NEVER USE STEEL PADS, WIRE BRUSHES OR SCRAPERS!Service and Installation Manual8Cleaning solutions need to be alkaline based or non-chloride cleaners. Any cleaner containing chlorides will damage the protective film of the stainless steel. Chlorides are also commonly found in hard water, salts, and household and industrial cleaners. If cleaners containing chlorides are used, be sure to rinse repeatedly and dry thoroughly upon completion.Routine cleaning of stainless steel can be done with soap and water. Extreme stains or grease should be cleaned with a non-abrasive cleaner and plastic scrub pad. It is always good to rub with the grain of the steel. There are also stainless steel cleaners available which can restore and preserve the finish of the steels protective layer. Early signs of stainless steel breakdown can consist of small pits and cracks. If this has begun, clean thoroughly and start to apply stainless steel cleaners in attempt to restore the passivity of the steel.Never use an acid based cleaning solution !Many food products have an acidic content which can deteriorate the finish. Be sure to clean the stainless steel surfaces of ALL food products. Common acidic items include tomatoes, peppers and other vegetables.Gasket MaintenanceGaskets require regular cleaning to prevent mold and mildew build up and also to keep the elasticity of the gasket. Gasket cleaning can be done with the use of warm soapy water. Avoid full strength cleaning products on gaskets as this can cause them to become brittle and prevent proper seals. Also, never use sharp tools or knives to scrape or clean the gasket which could possibly tear the gasket and rip the bellows.Gaskets can easily be replaced and don ’t require the use of tools or authorized service persons. The gaskets are "Dart" style and can be pulled out of the groove in the door and new gaskets can be "pressed" back into place.Doors/HingesOver time and with heavy-use doors, the hinges may become loose. If it is noticed that the door is beginning to sag, it may become necessary to tighten the screws that mount the hinge brackets to the frame of the unit. If the doors are loose or sagging, this can cause the hinge to pull out of the frame which may damage both the doors and the door hinges. In some cases, this can require qualified service agents or maintenance personnel.Drain MaintenanceEach unit has a drain located inside the unit which removes the condensation from the evaporator coil and evaporates it into an external condensate evaporator pan. Each drain can become loose or disconnectedfrom moving or bumping the drain. If you notice excessive water accumulation on the inside of the unit, be sure the drain tube is connected from the evaporator housing to the condensate evaporator drain pan. If water is collected underneath the unit, you may want to check the condensate evaporator drain tube to be sure it is still located inside the drain pan. The leveling of the unit is important as the units are designed to drain properly on a level surface. If your floor is not level, this can also cause drain problems. Be sure all drain lines are free of obstructions. Typically, food product is found blocking drain lines causing water to back up and overflow the drain pans.Service and Installation ManualMODEL: PSU48-129Service and Installation Manual MODEL: PSU48-1210。
海尔白马王子冰箱操作方法

海尔白马王子冰箱操作方法
1. 打开冰箱门:轻推或握住冰箱门把手,用适当力度向外拉开冰箱门。
2. 调节温度:根据需要,选择合适的温度调节按钮或旋钮来调节冰箱的温度。
通常可以在冰箱内侧的控制面板或者冰箱顶部找到温度调节按钮。
3. 存放食物:将需要冷藏的食物或饮料放入冰箱内。
确保将食物摆放整齐,不要堆积过高或堵塞通风口。
4. 控制湿度:如果冰箱内有湿度控制功能,可以根据食物是否需要保持湿润来调节湿度控制开关。
将湿度调节开关调至适当位置,例如高湿度或低湿度。
5. 清洁冰箱:定期清洁冰箱,包括内部和外部的清洁工作。
可以使用温和的肥皂水或专用冰箱清洁剂擦拭冰箱内外表面。
还应经常清洁冰箱门的密封条,确保其清洁和无阻碍。
6. 注意用电安全:使用冰箱时,请确保电源线插头牢固连接到电源插座。
避免电源线被绊倒或受到压力。
7. 维护冰箱:需要定期除霜的冰箱,可以使用冰箱除霜功能或手动除霜。
此外,还应定期清洁冰箱的防霉、防臭胶囊,以避免异味和细菌滋生。
8. 避免过度装载:不要过度装载冰箱,确保有足够的空间进行空气流通,并保持冷藏效果的最佳状态。
请注意,以上是一般的操作方法,具体步骤可能会因为不同型号的冰箱而有所不同。
建议您在使用前仔细阅读冰箱的使用说明书,并按照说明进行操作。
Supera 冰箱说明书
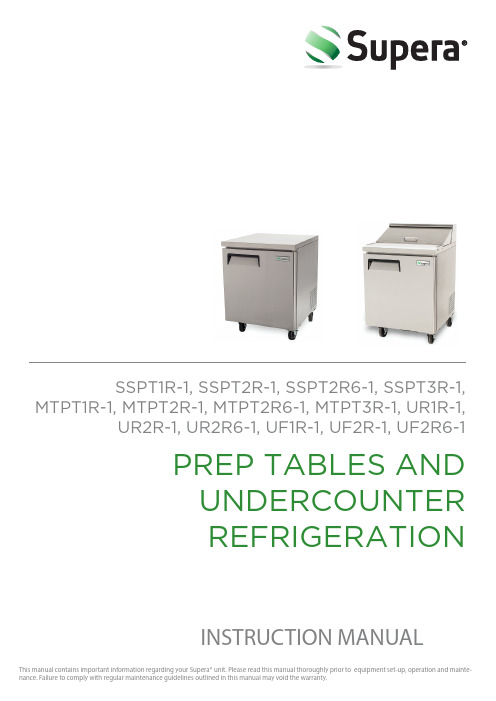
SSPT1R-1, SSPT2R-1, SSPT2R6-1, SSPT3R-1, MTPT1R-1, MTPT2R-1, MTPT2R6-1, MTPT3R-1, UR1R-1, UR2R-1, UR2R6-1, UF1R-1, UF2R-1, UF2R6-1PREP TABLES ANDUNDERCOUNTERREFRIGERATIONINSTRUCTION MANUALI N S T R U C T I O N M A N U A L1.I ntroductionC arefully read the instructions and observe all the recommendations in this manual, which contains useful and detailed information about the equipment.By following these recommendations, you will experience the extended trouble-free operation of the equipment.2.M anufacturer ’s R etained R ights and R esponsibilityIt is forbidden to reproduce, partially or totally, these instructions without the authorization of the manufacturer (Supera).The manufacturer denies all responsibility to third parties in the event of:▪Non-observance of the warnings and instruction contained in the manual▪Non-observance of the technical parameters when using the equipment ▪Unreasonable or wrongful utilization by untrained personnel ▪Not conforming to local statutes▪Unauthorized modifications and/or repairs undertaken by non-trained or authorized personnel▪Utilization of non-original parts or accessories ▪Exceptional occurrences▪Imprecise instructions contained for whatever reason in the current manualThe manufacturer reserves the right to introduce any modification deemed necessary without warning.3.T ransportation and S torageThe equipment is wrapped in absorbent material and secured on a wood p allet.T hese cabinets should be stored within a protected and covered environment at a temperature between -25ºC/+55ºC, with environmental humidity between 30-95%. Do not stack more than four items.I N S T R U C T I O N M A N U A L4.C ommissioningCarefully read the label on the equipment, do not cover for any reason, and replace them immediately if damaged. Do not remove protection or paneling that require the usage of tools.4a. P ositioningEnsure that the space reserved for the equipment has the correctdimensions and is being properly utilized. After carefully unpacking the display case, remove the white PVC protective film and all of the manufacturer's material. Place the cabinet on a flat surface and level it by screwing and adjusting the leveling legs to ensure its efficient operation. The cabinet must be lifted only from the exterior of the base to avoid the possibility of damage.Do not move the cabinet by applying of pressure to the surface. If the device has been positioned horizontally (integral condensing unit). Wait two hours before activating it.The equipment must not be installed near flammable materials , in the open air or exposed to rain. Keep distant from direct heat sources (radiators, direct lighting, etc.) and protect from direct sunlight and draughts. Air circulation must be freely maintained around the condensing unit, be it integral or remote.Non-observance of these specific conditions will detrimentally affect the cabinet s.4b. I nitial C leaningBefore use , all parts of the cabinet should be cleaned. For the walls and all the internal parts , use an antibacterial detergent. For the plastic parts use a moistened cloth. Dry with a soft clean cloth and use little or no water.Do not use harsh or abrasive solvents or detergents. During cleaning do not approach barehanded those parts whichcould cut (evaporator, condenser, etc.) and always use protective gloves.I N S T R U C T I O N M A N U AL4c. E lectrical C onnectionCheck that the supply conforms to the requirements listed on the factory label and that it is provided with a fa il -safe protection or automatic circuit breaker with an efficient ground connection.Please have the table in stalled by a qualified person .Use a n omnipolar switch as indicated in the safety regulations with a minimum clearance of 3 mm. If the cabinet has to beinstalled at some distance from the electrical source, ensure that it conforms to local regulations. Cabinets supplied with integral condensing units are provided with an appropriate plug fitted with a neutral and ground. T he supply cord must be stretched taut (avoid coiling and superimposition).I t should not be in contact with liquids, water or heat sources, in the event of damage it must be replaced by qualified personnel. Always avoid the use of reducers or adapters.4d. C onnection to D rainsThe defrost feature is automatic in all models with integral condensing units.Ground Terminal5.T echnical C haracteristics5a. N oise and V ibrationThe sound level of the equipment fitted with integral hermetic condensing unit does not exceed 70 dB; therefore it is not necessary to provide sound insulation. Under normal conditions the equipment does not generate vibrations that affect surroundingsI N S T R U C T I O N M A N U AL5b.Possible UsagesDo not utilize the equipment to store medical supplies . T he optimum operational temperatures are between +10ºC /+4CTC with relative humidity within 55%. The possible applications are refrigeration, food preparation, and sale of salads, fruits, vegetables and cold dishes.6.U sage6a. ActivationConnect the power cord and adjust the thermostat.6b. S torage of F oodstuffsIn order to obtain the best functioning of the case it is necessary to observe the following instructions:▪Place the merchandise into the unit only after it has reached the desired operating temperature given on the digital display ▪Do not place uncovered hot foods or liquids inside the unit ▪Package or protect foods when possibleDo not limit the circulation of air inside the wall with superfluous obstacles▪Avoid frequent or prolonged openings of the door/drawers▪Wait a few moments before reopening the door/drawer just after it has been closed▪While stocking product, only open and fill a drawer one-at-a-time to eliminate the risk of over-balancing.6c. Defrosting6c.1 D efrost T imerThe defrost timer automatically defrosts four times in 24 hours. The timer will reset to the time of the initial first start-up.I N S T R U C T I O N M A N U AL7.M aintenance7a. P eriodic C leaningFor hygienic reasons and improved performance , clean the interior at least once a week. Make sure to switch off the power supply before cleaning.7b. C leaning of CondenserFor improved performance clean the condenser at least once a month. Before beginning cleaning, turn off the equipment, and disconnect the plug. Close and protect the unit.▪Unscrew, rotate and remove protective grill▪Remove the dust deposited on the front surface of the condenser using a brush and a vacuum cleaner to restore to previous condition.7c. P eriod of I nactivity of C abinetDuring periods of inactivity, remove the products from the cabinet and then follow these directions:▪Remove the plug out from the outlet and carefully clean the unit as per periodic cleaning▪Cover the cabinet with a cloth that allows air circulation in the interior8.T roubleshootingOften, the malfunction of a unit is due to simple causes, which can easily be eliminated without contacting a technician. Therefore execute the following controls:8a. If the cabinet does not operate, make sure that: ▪The plug has been correctly inserted into the socket ▪The supply cord is not damagedI N S T R U C T I O N M A N U AL8b. If the required temperature is not achieved, make sure that: ▪The power switch is turned on▪The thermostat range is correctly regulated▪The cabinet is neither in the defrosting phase nor in the post-defrosting phase▪The evaporator is not covered with frost ▪The condenser is not blocked with dust▪The cabinet is not located near heat sources or its condensing unit has uninterrupted air flow▪The stored foods or other objects do not inhibit proper closing of the unit.▪The cabinet is not working in anomalous conditions (overloaded, Ioaded with hot food, or loaded in a way that prevents proper air circulation)8c. If the cabinet leaks water, make sure that:▪The collecting container or the device for condensing waterelimination is not damaged▪The discharge outlets are not blocked or obstructed ▪The cabinet has been properly leveled8d. If the cabinet is unacceptably noisy, make sure that: ▪The frame does not have loose screws or bolts▪The cabinet has been installed in a stable position and correctly leveled If, after all these controls, the malfunctioning continues, it is advisable to contact technical assistance at 866-953-3288. Be prepared to supply the followinginformation: The model trade name and the serial number (both can be found on the technical data plate)8e. Possible fire risks:In case of fire, unplug the cabinet, if possible, and use a powder fire extinguisher.9.S ubstitution of PartsBefore beginning any service or maintenance work, disconnect the cabinet from the electrical supply. Always fit original parts , which may be obtained from an authorized supplier.I N S T R U C T I O N M A N U AL10.D ismantlingThe scrapping of the cabinet is require d to be undertaken by a specialized company licensed by the local authorities, and observing local statutes. Polyurethane foaming material should be disposed according to local laws and statutes. The cabinet consists of: ▪Structure in steel plate▪Electrical components and c ords ▪Electrical compressor ▪Plastic materials▪Refrigerant fluid, which must not be discharged into the atmosphereALL THE RESPONSIBILITY FOR THE FAILURE TO RESPECT THE EXISTING LOCAL STATUTES IS THE RESPONSIBILITY OF THE OWNER.Do not dispose of electrical appliances as unsorted municipal waste, use separate collection facilities. Contact your local government for information regarding the collection systems available. If electrical appliances are disposed of in landfills or dumps, hazardous substances can leak into thegroundwater and get into the food chain, damaging your health and well being.I N S T R U C T I O N M A N U A LC ircuitD iagramO fficial A pprovals-Conforms to UL STD. 471 -Conforms to NSF 7-Certified to CSA STD. C22.2 NO. 12OI N S T R U C T I O N M A N U A LTechnical Parameters © SUPERA, 2014Version 5 | May 2014 LIMITED WARRANTYSUPERA REFRIGERATION EQUIPMENT MODELS:Reach-In Refrigerators & Freezers [R1R-1, R2R-1, R3R-1, F1R-1, F2R-1, F3R-1]Undercounter Refrigerators & Freezers [UR1R-1, UR2R-1, UR2R6-1, UF1R-1, UF2R-1, UF2R6-1]Sandwich/Salad Prep Tables, Mega-Top Prep Tables & Pizza Prep Tables [SSPT1R, SSPT2R-1, SSPT2R6-1, MTPT1R-1, MTPT2R-1, MTPT2R6-1, PPT1R-1, PPT2R-1, PPT3R-1]Glass Door Merchandisers [G1M-12-B-1, G1M-12-W-1, G1M-16-B-1, G1M-16-W-1, G1M-23-B-1, G1M-23-W-1, G2M-SW-48-B-1, G2M-SW-48-W-1, G3M-70-B-1, G3M-70-W-1]Claims:All claims for parts or labor must be made directly through SUPERA, LLC. All claims should include: model number of the unit, the serial number of the cabinet, proof of purchase, date of installation, and all pertinent information supporting the alleged defect. In case of compressor replacement under warranty, either compressor or compressor tag must be returned to SUPERA, LLC along with above listed information. Failure to comply with warranty policies will result in voiding claims. Any service provided without authorization from Supera, LLC will not be covered by Supera, LLC.Two-Year Parts & Labor Warranty: SUPERA, LLC warrants all new refrigerated components, the cabinet and all parts, to be free from defects in materials or workmanship, under normal and proper use and maintenance service as specified by SUPERA, LLC and upon proper installation (indoor building only) and start-up in accordance with the instruction packet supplied with each SUPERA, LLC unit. SUPERA, LLCʼs obligation under this warranty is limited to a period of two (2) years from the date of original purchase.Any part, covered under this warranty that is determined by SUPERA, LLC to have been defective within two (2) years of original installation date is limited to the repair or replacement, including labor charges, of defective parts or assemblies. The labor warranty shall include ONLY pre-authorized time and up to sixty miles of travel for the service company.Additional Three-Year Compressor Warranty: In addition to the two (2) year warranty stated above, SUPERA, LLC warrants its hermetically sealed compressor to be free from defects in both material and workmanship under normal and proper use and maintenance service for a period of three (3) additional years from the date of original installation, but not to exceed five (5) years and three (3) months after purchase.Compressor determined by SUPERA, LLC to have been defective within this extended period will, at SUPERA, LLCʼs discretion, be either repaired or replaced with a compressor or compressor parts of similar design and capacity.The three (3) year extended compressor warranty applies only to hermetically sealed parts of the compressor and does not apply to any other parts or components, including, but not limited to, cabinet, paint finish, temperature control, refrigerant, metering device, driers, motor starting equipment, fan assembly or and other electrical components, etcetera.Compressor Warranty: The five-year compressor warranty detailed above will be void if the following procedure is not carefully adhered to:1.This system contains R404A or R134a refrigerant and Polyol Ester lubricant. The Polyol Ester lubricant has rapid moisture absorbingqualities.2.Drier replacement is very important and must be changed when a system is opened for servicing. A620 copper drier or better is highlyrecommended.3.Micron level vacuums must be achieved to insure low moisture levels in the system. 500 microns or lower must be obtained.4.When compressor is grounded, suction drier and 620 drier or better must be replaced.pressor must be obtained through SUPERA, LLC, unless otherwise specified in writing, through SUPERA, LLCʼs warranty department. Not Covered Under This Warranty: SUPERA, LLCʼs sole obligation under this warranty is limited to either repair or replacement of parts, subject to the additional limitations below. This warranty neither assumes nor authorizes any person to assume obligations other than those expressly covered by this warranty.Warranty does not cover service requests for free replacement and/or recall parts.SUPERA, LLC HAS FINAL DESCRETION ON ALL WARRANTY REQUESTS.NO CONSEQUENTIAL DAMAGES. SUPERA, LLC IS NOT RESPONSIBLE FOR ECONOMIC LOSS; PROFIT LOSS; OR SPECIAL, INDIRECT, OR CONSEQUENTIAL DAMAGES, INCLUDING WITHOUT LIMITATION, LOSSES, SERVICE TECHNICAN ERRORS, OR DAMAGES ARISING FROM FOOD OR PRODUCT SPOILAGE REGARDLESS OF WHETHER OR NOT THEY RESULT FROM REFRIGERATION FAILURE. WARRANTY IS NOT TRANSFERABLE, This warranty is not assignable and applies only in favor of the original purchaser/user to whom delivered. ANY SUCH ASSIGNMENT OR TRANSFER SHALL VOID THE WARRANNTIES HEREIN AND SHALL VOID ALL WARRANTIES, EXPRESS OR IMPLIED, INCLUDING ANY WARRANTY OF MERCHANTABILITY OR LABOR COVERAGE FOR COMPONENT FAILURE OR OTHER THE WARRANTY PACKET PROVIDED WITH THE UNIT. ALTERATION, NEGLECT, ABUSE, MISUSE, ACCIDENT, DAMAGE DURING TRANSIT OR INSTALLATION, FIRE, FOOD, ACTS OF GOD. SUPERA, LLC is not responsible for the repair or replacement of any parts that SUPERA, LLC determines have been subjected after the date of manufacture to alteration, neglect, abuse, misuse, accident, damage during transit or installation, fire, flood, or act of GOD. IMPROPER ELECTRICAL CONNECTIONS. SUPERA, LLC IS NOT RESPONSIBLE FOR THE REPAIR OR REPLACEMENT OF FAILED OR DAMAGED COMPONENTS RESULTING FROM ELECTRICAL POWER FAILURE, THE USE OF EXTENSION CORDS, LOW VOLTAGE, OR VOLTAGE DROPS TO THE UNIT. NO IMPLIED WARRANTY OF MERCHANTABILITY OR FITNESS FOR A PARTICULAR PURPOSE; THERE ARE NO OTHER WARRANTIES, EXPRESSED, IMPLIED OR STATUTORY, EXCEPT THE TWO (2) YEAR PARTS & LABOR WARRANTY AND THE ADDITIONAL THREE (3) YEAR COMPRESSOR WARRANTY AS DESCRIBED ABOVE. THESE WARRANTIES ARE EXCLUSIVE AND IN LIEU OF ALL OTHER WARRANTIES, INCLUDING IMPLIED WARRANTY AND MERCHANTABILITY OR FITNESS FOR A PARTICULAR PURPOSE. THERE ARE NO WARRANTIES, WHICH EXTEND BEYOND THE DESCRIPTION ON THE FACE HEREOF. Outside U.S. and Canada; This warranty does not apply, and SUPERA, LLC is not responsible for, any warranty claims made on products sold or used outside the continent of the United States and Canada. Installation in a residential application will void all warranties.Supera Customer Care Toll-Free Service Line:1-866-953-3288For additional product and warranty information, please visit our website at:。
海尔冰箱说明书
海尔冰箱说明书海尔冰箱说明书篇一:海尔太空王子系列冰箱说明书 BCD-208SDA/BCD-218S DA/BCD-238S DA 太空王子系列冰箱产地:BCD-218S DA 中二事业部BCD-208S DA/ BCD-238S DA 未上市一、型号及解释三、产品外观、内部结构、随机附件,产品外观:内部结构随机附件四、控制部分介绍A1 冷藏温度调节按键:调节冷藏温度/锁定下按下3秒开关冷藏室;A2 –7℃温度调节按键:调节–7℃室温度/持续按下3秒开关变温室速冷功能/锁定下持续按下3秒开关–7℃室;A3 冷冻温度设置按键:调节冷冻温度/锁定下按下3秒设置或退出速冻; A4 人工智慧按键:按下3秒设置人工智慧功能/锁定下按下3秒设置或退出假日功能;A3+A4:同时按下3秒锁定与解除锁定;注:每进行一次按键操作,伴有一声蜂鸣。
功能: 1.初始状态初次上电的运行状态为初始状态:分别显示冷藏室、-7℃室和冷冻室的温度;冰箱自动设定为人工智慧状态;速冻图形指示不显示,即不进入速冻状态;锁定图形指示不显示,处于解锁状态;若冷冻室温度超温,则冷冻温度闪烁。
显示当前的环境温度;时间缺省值为12:00。
初次上电时,若冰箱内温度处于开机点和关机点之间则不开机,直到温度回升至开机点时才开机。
2.冷藏温度设置解锁状态下,按一下冷藏温度调节按键,原冷藏设定温度开始闪烁,进入温度设置状态,以后每按一下该键,冷藏温度加1,冷藏温度在02—10之间循环。
若超出5秒钟不进行按键操作,则温度设定值确认,并停止闪烁。
3.2.2 冰箱-7℃室温度设置解锁后,按下-7℃室调节键,-7℃室温度原设定值并开始闪烁,进入冰箱-7℃室温度设置状态,每按一下该键,温度值减少见下表1,直至“-18 ” ,再按则回到“-3 ”,依次循环。
若设定5秒内没有其它按键操作,则温度值停止闪烁并确定。
3.冷冻温度设置解锁状态下,按一下冷冻温度调节按键,原冷冻设定温度开始闪烁,进入温度设置状态,以后每按一下该键,冷冻温度减1,冷冻温度在-16—-26之间循环。
海尔冰柜说明书正确使用方法讲解
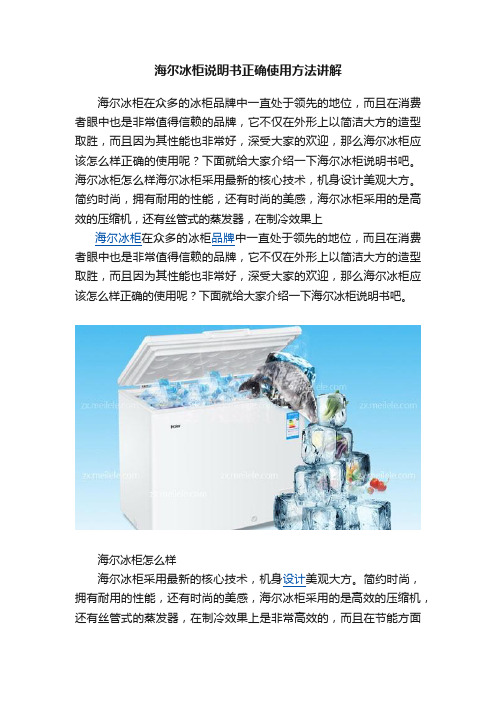
海尔冰柜说明书正确使用方法讲解海尔冰柜在众多的冰柜品牌中一直处于领先的地位,而且在消费者眼中也是非常值得信赖的品牌,它不仅在外形上以简洁大方的造型取胜,而且因为其性能也非常好,深受大家的欢迎,那么海尔冰柜应该怎么样正确的使用呢?下面就给大家介绍一下海尔冰柜说明书吧。
海尔冰柜怎么样海尔冰柜采用最新的核心技术,机身设计美观大方。
简约时尚,拥有耐用的性能,还有时尚的美感,海尔冰柜采用的是高效的压缩机,还有丝管式的蒸发器,在制冷效果上海尔冰柜在众多的冰柜品牌中一直处于领先的地位,而且在消费者眼中也是非常值得信赖的品牌,它不仅在外形上以简洁大方的造型取胜,而且因为其性能也非常好,深受大家的欢迎,那么海尔冰柜应该怎么样正确的使用呢?下面就给大家介绍一下海尔冰柜说明书吧。
海尔冰柜怎么样海尔冰柜采用最新的核心技术,机身设计美观大方。
简约时尚,拥有耐用的性能,还有时尚的美感,海尔冰柜采用的是高效的压缩机,还有丝管式的蒸发器,在制冷效果上是非常高效的,而且在节能方面也是达到了国家的一级能效,绿色环保,低噪音运行,使用更安心,适合多个环境和气候使用。
海尔冰柜说明书1.海尔冰柜说明书首先就介绍了冰柜应该使用的电流和注意事项等等,这些都是必读的内容。
2.对于海尔冰柜说明说来说,其中还包含了冰柜的各个部件和说明情况,比如说档位的设置以及冷藏室的使用说明等等。
3.海尔冰柜说明书中还包括了冰柜的清洁和保养说明,其中有一些清洁时候的注意事项,还有需要除霜与否等等。
4.还有一些海尔冰柜的常见问题及其解决方法的介绍,比如说产品的噪声太大,或者产品不工作了,冷气泄漏等等。
海尔冰柜使用方法1.首先检查一下海尔冰柜的电源线,看看是否完好,确定之后再将电源接通。
2.接通电源之后,在对海尔冰柜的温度进行调节,对于档位的调节大家一定要注意,虽然有7个档位可以选择,但还是要根据当时的环境温度进行调节。
3.将温度调节好之后,就可以将需要冷冻的食物放进海尔冰柜了,如果是首次使用,那么就应该让冰柜里的温度达到了设定的数值之后再将食物放进去。
海尔冰柜说明书介绍,教你正确使用海尔冰柜海尔社区

海尔冰柜说明书介绍,教你正确使用海尔冰柜海尔社区冰柜是我们现在生活中必不可少的家用电器之一了,随着社会的发展,冰柜行业也在不断的发展中,现在市面上出现了很多的冰柜品牌,而不同品牌的冰柜,它们的种类和型号、功能都有所不同。
海尔冰柜作为我国冰柜行业的领先品牌,它的冰柜说明是怎样的呢?今天大家就和小编一起来看看海尔冰柜说明介绍和海尔冰柜正确使用方随着科技的发展,冰柜已在我们生活中起到了重要的作用,现在市面上也出现了很多的冰柜品牌,海尔冰柜作为行业的龙头品牌之一,它的冰柜值得消费者信赖的。
但是许多人在购买海尔冰柜以后,不看说明书就直接乱用,导致冰柜在一段时间后就出现了问题。
今天大家就和小编来看看海尔冰柜说明介绍及怎样正确使用海尔冰柜的信息吧。
海尔冰柜说明书介绍1、海尔冰柜说明书首先是介绍冰柜的使用电流、注意事项和警告说明。
2、冰柜的使用说明,其中包括冰柜的各个部件说明,档位说明,档位设置及冷冻说明、冷藏微冻室使用注意事项和冷冻室注意事项。
3、冰柜的清洁保养说明,其中包括有清洁时的注意事项,除霜时注意事项和方法,停止使用时的注意事项。
4、冰柜常见问题介绍及解决方法,其中有噪声过大,冰柜内发出声音,冰柜不工作,门体关不严、冷气泄漏,压缩机时间保持运转,冷柜不能很好的制冷,冷柜内有异味,冷柜内结霜不均匀、结霜少是什么原因及玻璃门上出现凝露等说明。
5、介绍冰柜的规格及技术数据和注意要素。
6、冰柜的装箱单和报修政策及说明。
海尔冰柜使用方法1、检查连接线,接通冰柜的电源。
2、对冰柜进行温度设置与调节,冰柜一般都有1-7个档位,根据环境温度选择合适的档位。
3、将食物放进冰柜中(注意:首次使用前先通电,冰箱正常运转且箱内温度已经降低后再放入食物)。
4、根据食物特点分类存放,一些肉类需冷冻,新鲜蔬菜保鲜就好。
5、如长期不在家的时,需将冰柜食物取出,以免食物因停电变质产生不良气味。
海尔冰柜保养介绍冰柜要定时的清洗和保养,一般都是一个月清洗一次,以便冰柜内部有异味。
海尔冰箱用户手册说明书
Seagate FireCuda 游戏扩展坞用户手册单击这里以访问本文档的最新在线版本。
您还将找到最新的内容,以及可扩展的说明、更轻松的导航和搜索功能。
. . . . . . . . . . . . . . . . . . . . . . . . . . . . . . . . . . . . . . . . . . . . . . . . . . . . . . . . . . . . . . . . . . . . . . . . . . . . . . . . . . . . . . . .. . . . . . . . . . . . . . . . . . . . . . . . . . . . . . . . . . . . . . . . . . . . . . . . . . . . . . . . . . . . . . . . . . . . . . . . . . . . . . . . . . . . . . . . . . . . . . . . . . . . . . . . . . . . . . . . . . . . . . . . . .. . . . . . . . . . . . . . . . . . . . . . . . . . . . . . . . . . . . . . . . . . . . . . . . . . . . . . . . . . . . . . . . . . . . . . . . . . . . . . . . . . . . . . . . . . . . . . . . . . . . . . . . . . . . . . . . . . . . . . . . . .. . . . . . . . . . . . . . . . . . . . . . . . . . . . . . . . . . . . . . . . . . . . . . . . . . . . . . . . . . . . . . . . . . . . . . . . . . . . . . . . . . . . . . . . . . . . . . . . . . . . . . . . . . . . . . . . . . . . . . . . . .. . . . . . . . . . . . . . . . . . . . . . . . . . . . . . . . . . . . . . . . . . . . . . . . . . . . . . . . . . . . . . . . . . . . . . . . . . . . . . . . . . . . . . . . . . . . . . . . . . . . . . . . . . . . . . . . . . . . . . . . . . . . . . . . . . . . . . . . . . . . . . . . . . . . . . . . . . . . . . . . . . . . . . . . . . . . . . . . . . . . . . . . . . . . . . . . . . . . . . . . . . . . . . . . . . . . .. . . . . . . . . . . . . . . . . . . . . . . . . . . . . . . . . . . . . . . . . . . . . . . . . . . . . . . . . . . . . . . . . . . . . . . . . . . . . . . . . . . . . . . . . . . . . . . . . . . . . . . . . . . . . . . . . . . . . . . . . .. . . . . . . . . . . . . . . . . . . . . . . . . . . . . . . . . . . . . . . . . . . . . . . . . . . . . . . . . . . . . . . . . . . . . . . . . . . . . . . . . . . . . . . . . . . . . . . . . . . . . . . . . . . . . . . . . . . . . . . . . .. . . . . . . . . . . . . . . . . . . . . . . . . . . . . . . . . . . . . . . . . . . . . . . . . . . . . . . . . . . . . . . . . . . . . . . . . . . . . . . . . . . . . . . . . . . . . . . . . . . . . . . . . . . . . . . . . . . . . . . . . . . . . . . . . . . . . . . . . . . . . . . . . . . . . . . . . . . . . . . . . . . . . . . . . . . . . . . . . . . . . . . . . . . . . . . . . . . . . . . . . . . . . . . . . . . . .. . . . . . . . . . . . . . . . . . . . . . . . . . . . . . . . . . . . . . . . . . . . . . . . . . . . . . . . . . . . . . . . . . . . . . . . . . . . . . . . . . . . . . . . . . . . . . . . . . . . . . . . . . . . . . . . . . . . . . . . . .. . . . . . . . . . . . . . . . . . . . . . . . . . . . . . . . . . . . . . . . . . . . . . . . . . . . . . . . . . . . . . . . . . . . . . . . . . . . . . . . . . . . . . . . . . . . . . . . . . . . . . . . . . . . . . . . . . . . . . . . . .. . . . . . . . . . . . . . . . . . . . . . . . . . . . . . . . . . . . . . . . . . . . . . . . . . . . . . . . . . . . . . . . . . . . . . . . . . . . . . . . . . . . . . . . . . . . . . . . . . . . . . . . . . . . . . . . . . . . . . . . . . . . . . . . . . . . . . . . . . . . . . . . . . . . . . . . . . . . . . . . . . . . . . . . . . . . . . . . . . . . . . . . . . . . . . . . . . . . . . . . . . . . . . . . . . . . .. . . . . . . . . . . . . . . . . . . . . . . . . . . . . . . . . . . . . . . . . . . . . . . . . . . . . . . . . . . . . . . . . . . . . . . . . . . . . . . . . . . . . . . . . . . . . . . . . . . . . . . . . . . . . . . . . . . . . . . . . .. . . . . . . . . . . . . . . . . . . . . . . . . . . . . . . . . . . . . . . . . . . . . . . . . . . . . . . . . . . . . . . . . . . . . . . . . . . . . . . . . . . . . . . . . . . . . . . . . . . . . . . . . . . . . . . . . . . . . . . . . . . . . . . . . . . . . . . . . . . . . . . . . . . . . . . . . . . . . . . . . . . . . . . . . . . . . . . . . . . . . . . . . . . . . . . . . . . . . . . . . . . . . . . . . . . . .. . . . . . . . . . . . . . . . . . . . . . . . . . . . . . . . . . . . . . . . . . . . . . . . . . . . . . . . . . . . . . . . . . . . . . . . . . . . . . . . . . . . . . . . . . . . . . . . . . . . . . . . . . . . . . . . . . . . . . . . . .. . . . . . . . . . . . . . . . . . . . . . . . . . . . . . . . . . . . . . . . . . . . . . . . . . . . . . . . . . . . . . . . . . . . . . . . . . . . . . . . . . . . . . . . . . . Contents1欢迎使用包装内容最低系统要求视图2使用入门连接电源连接到计算机设置 FireCuda 游戏扩展坞3使用 Toolkit 自定义 RGB 以及更多内容自定义 RGB 颜色设置启动备份计划(仅限 Windows )设置镜像文件夹4格式化和分区(可选)选择文件系统格式格式化说明5从您的计算机安全移除设备Windows Mac 6常见问题解答. . . . . . . . . . . . . . . . . . . . . . . . . . . . . . . . . . . . . . . . . . . . . . . . . . . . . . . . . . . . . . . . . . . . . . . . . . . . . . . . . . . . . . . . . . . . . . . . . . . . . . . . . . . . . . . . . . 端口. . . . . . . . . . . . . . . . . . . . . . . . . . . . . . . . . . . . . . . . . . . . . . . . . . . . . . . . . . . . . . . . . . . . . . . . . . . . . . . . . . . . . . . . . . . . . . . . . . . . . . . . . . . . . . . . . . 操作系统. . . . . . . . . . . . . . . . . . . . . . . . . . . . . . . . . . . . . . . . . . . . . . . . . . . . . . . . . . . . . . . . . . . . . . . . . . . . . . . . . . . . . . . . . . . . . . . . . . . . . . . . . . . . . . . . . . 最低可用磁盘空间:. . . . . . . . . . . . . . . . . . . . . . . . . . . . . . . . . . . . . . . . . . . . . . . . . . . . . . . . . . . . . . . . . . . . . . . . . . . . . . . . . . . . . . . . . . . . . . . . . . . . . . . . . . . . . . . . . . 前面. . . . . . . . . . . . . . . . . . . . . . . . . . . . . . . . . . . . . . . . . . . . . . . . . . . . . . . . . . . . . . . . . . . . . . . . . . . . . . . . . . . . . . . . . . . . . . . . . . . . . . . . . . . . . . . . . . 上一步. . . . . . . . . . . . . . . . . . . . . . . . . . . . . . . . . . . . . . . . . . . . . . . . . . . . . . . . . . . . . . . . . . . . . . . . . . . . . . . . . . . . . . . . . . . . . . . . . . . . . . . . . . . . . . . . . . 在这里开始. . . . . . . . . . . . . . . . . . . . . . . . . . . . . . . . . . . . . . . . . . . . . . . . . . . . . . . . . . . . . . . . . . . . . . . . . . . . . . . . . . . . . . . . . . . . . . . . . . . . . . . . . . . . . . . . . . 注册您的设备. . . . . . . . . . . . . . . . . . . . . . . . . . . . . . . . . . . . . . . . . . . . . . . . . . . . . . . . . . . . . . . . . . . . . . . . . . . . . . . . . . . . . . . . . . . . . . . . . . . . . . . . . . . . . . . . . . 下载 Toolkit . . . . . . . . . . . . . . . . . . . . . . . . . . . . . . . . . . . . . . . . . . . . . . . . . . . . . . . . . . . . . . . . . . . . . . . . . . . . . . . . . . . . . . . . . . . . . . . . . . . . . . . . . . . . . . . . . . 安装 Toolkit . . . . . . . . . . . . . . . . . . . . . . . . . . . . . . . . . . . . . . . . . . . . . . . . . . . . . . . . . . . . . . . . . . . . . . . . . . . . . . . . . . . . . . . . . . . . . . . . . . . . . . . . . . . . . . . . . . 同时兼容 Windows 和 Mac . . . . . . . . . . . . . . . . . . . . . . . . . . . . . . . . . . . . . . . . . . . . . . . . . . . . . . . . . . . . . . . . . . . . . . . . . . . . . . . . . . . . . . . . . . . . . . . . . . . . . . . . . . . . . . . . . . 针对 Windows 优化性能. . . . . . . . . . . . . . . . . . . . . . . . . . . . . . . . . . . . . . . . . . . . . . . . . . . . . . . . . . . . . . . . . . . . . . . . . . . . . . . . . . . . . . . . . . . . . . . . . . . . . . . . . . . . . . . . . . 针对 macOS 优化性能. . . . . . . . . . . . . . . . . . . . . . . . . . . . . . . . . . . . . . . . . . . . . . . . . . . . . . . . . . . . . . . . . . . . . . . . . . . . . . . . . . . . . . . . . . . . . . . . . . . . . . . . . . . . . . . . . . 了解更多. . . . . . . . . . . . . . . . . . . . . . . . . . . . . . . . . . . . . . . . . . . . . . . . . . . . . . . . . . . . . . . . . . . . . . . . . . . . . . . . . . . . . . . . . . . . . . . . . . . . . . . . . . . . . . . . . . 通过 Finder 窗口退出. . . . . . . . . . . . . . . . . . . . . . . . . . . . . . . . . . . . . . . . . . . . . . . . . . . . . . . . . . . . . . . . . . . . . . . . . . . . . . . . . . . . . . . . . . . . . . . . . . . . . . . . . . . . . . . . . . 通过桌面退出444444445667889991111111112121212121313141414141415. . . . . . . . . . . . . . . . . . . . . . . . . . . . . . . . . . . . . . . . . . . . . . . . . . . . . . . . . . . . . . . . . . . . . . . . . . . . . . . . . . . . . . . . . . . . . . . . . . . . . . . . . . . . . . . . . . . . . . . . . . . . . . . . . . . . . . . . . . . . . . . . . . . . . . . . . . . . . . . . . . . . . . . . . . . . . . . . . . . . . . . . . . . . . . . . . . . . . . . . . . . . . . . . . . . . . . . . . . . . . . . . . . . . . . . . . . . . . .. . . . . . . . . . . . . . . . . . . . . . . . . . . . . . . . . . . . . . . . . . . . . . . . . . . . . . . . . . . . . . . . . . . . . . . . . . . . . . . . . . . . . . . . . . . . . . . . . . . . . . . . . . . . . . . . . . . . . . . . . .. . . . . . . . . . . . . . . . . . . . . . . . . . . . . . . . . . . . . . . . . . . . . . . . . . . . . . . . . . . . . . . . . . . . . . . . . . . . . . . . . . . . . . . . . . . . . . . . . . . . . . . . . . . . . . . . . . . . . . . . . . . . . . . . . . . . . . . . . . . . . . . . . . . . . . . . . . . . . . . . . . . . . . . . . . . . . . . . . . . . . . . . . . . . . . . . . . . . . . . . . . . . . . . . . . . . .. . . . . . . . . . . . . . . . . . . . . . . . . . . . . . . . . . . . . . . . . . . . . . . . . . . . . . . . . . . . . . . . . . . . . . . . . . . . . . . . . . . . . . . . . . . . . . . . . . . . . . . . . . . . . . . . . . . . . . . . . .所有用户Windows Mac 7Regulatory Compliance China RoHS Taiwan RoHS . . . . . . . . . . . . . . . . . . . . . . . . . . . . . . . . . . . . . . . . . . . . . . . . . . . . . . . . . . . . . . . . . . . . . . . . . . . . . . . . . . . . . . . . . . . . . . . . . . . . . . . . . . . . . . . . . . 问题:我的文件传输速度很慢. . . . . . . . . . . . . . . . . . . . . . . . . . . . . . . . . . . . . . . . . . . . . . . . . . . . . . . . . . . . . . . . . . . . . . . . . . . . . . . . . . . . . . . . . . . . . . . . . . . . . . . . . . . . . . . . . . 问题:我的计算机只有 USB-C 端口. . . . . . . . . . . . . . . . . . . . . . . . . . . . . . . . . . . . . . . . . . . . . . . . . . . . . . . . . . . . . . . . . . . . . . . . . . . . . . . . . . . . . . . . . . . . . . . . . . . . . . . . . . . . . . . . . . 问题:我必须对 USB 设备使用 USB 集线器. . . . . . . . . . . . . . . . . . . . . . . . . . . . . . . . . . . . . . . . . . . . . . . . . . . . . . . . . . . . . . . . . . . . . . . . . . . . . . . . . . . . . . . . . . . . . . . . . . . . . . . . . . . . . . . . . . 问题:提供的 USB 电缆太短. . . . . . . . . . . . . . . . . . . . . . . . . . . . . . . . . . . . . . . . . . . . . . . . . . . . . . . . . . . . . . . . . . . . . . . . . . . . . . . . . . . . . . . . . . . . . . . . . . . . . . . . . . . . . . . . . . 问题:我收到了文件传输错误消息. . . . . . . . . . . . . . . . . . . . . . . . . . . . . . . . . . . . . . . . . . . . . . . . . . . . . . . . . . . . . . . . . . . . . . . . . . . . . . . . . . . . . . . . . . . . . . . . . . . . . . . . . . . . . . . . . . 问题:计算机中未显示硬盘图标. . . . . . . . . . . . . . . . . . . . . . . . . . . . . . . . . . . . . . . . . . . . . . . . . . . . . . . . . . . . . . . . . . . . . . . . . . . . . . . . . . . . . . . . . . . . . . . . . . . . . . . . . . . . . . . . . . 问题:我的桌面上未显示硬盘图标15151515161616161717181818欢迎使用包装内容®®Seagate FireCuda游戏扩展坞电源适配器USB 3.0 电缆(USB micro-B 转 USB-A)快速入门指南最低系统要求端口您可以使用 USB-A(USB 3.0 或 USB 2.0)端口将 Seagate 设备连接到计算机。
美国海尔冰箱说明书
COUNTER TOP DISPLAY CASE FREEZER REFRIGERATED COUNTER TOP DISPLAY CASE Service, Installation and Care ManualPlease read this manual completely before attempting to install or operate this equipment. Notify carrier of damage! Inspect all components immediately. See page 2.IMPORTANT INFORMATIONREAD BEFORE USEPLEASE SAVE THESE INSTRUCTIONS!Service and Installation Manual2 RECEIVING & INSPECTING EQUIPMENT (2)SPECIFICATIONS (3)INSTALLATION (4)OPERATION (5)MAINTENANCE (6)WIRING DIAGRAM (9)All rights reserved. Reproduction without written permission is prohibited.The serial number of all self-contained refrigerators and freezers is located inside the unit on the left hand side near the top on the wall.Always have the serial number of your unit available when calling for parts or service.This manual covers standard units only. If you have a custom unit, consult the customer service department at the number listed in the back cover.Even though most equipment is shipped crated, care should be taken during unloading so the equipment is not damaged while being moved into the building.1. Visually inspect the exterior of the package and skid or container. Any damage should be noted and reportedto the delivering carrier immediately.2. If damaged, open and inspect the contents with the carrier.3. In the event that the exterior is not damaged, yet upon opening, there is concealed damage to the equipmentnotify the carrier. Notification should be made verbally as well as in written form.4. Request an inspection by the shipping company of the damaged equipment. This should be done within 10 days from receipt of the equipment.5. Be certain to check the compressor compartment housing and visually inspect the refrigeration package. Besure lines are secure and base is still intact.6. Freight carriers can supply the necessary damage forms upon request.7. Retain all crating material until an inspection has been made or waived.Service and Installation Manual3Service and Installation Manual4LocationUnits represented in this manual are intended for indoor use only. Be sure the location chosen has a floor strong enough to support the total weight of the cabinet and contents. A fully loaded unit can weigh as much as 1500 pounds. Reinforce the floor as necessary to provide for maximum loading. For the most efficient refrigeration, be sure to provide good air circulation inside and out.Inside cabinet:Do not pack refrigerator so full that air cannot circulate. The refrigerated air is discharged at the top rear of the unit. It is important to allow for proper air flow from the top rear to the bottom of the unit. Obstructions to this air flow can cause evaporator coil freeze ups and loss of temperature or overflow of water from the evaporator drain pan. The shelves have a rear turn up on them to prevent this. However, bags and other items can still be located to the far rear of the cabinet. Air is brought into the evaporator coil with fans mounted to the front of the coil.Prevent obstruction by locating large boxes and tall stacks of product to the bottom of the cabinet.Outside cabinet:Be sure that the unit has access to ample air. Avoid hot corners and locations near stoves and ovens.It is recommended that the unit be installed no closer than 2" from any wall with at least 12" of clear space above the unit. Should it become necessary to lay the unit on its side or back for any reason, allow at least 24 hours before start-up so as to allow compressor oil to flow back to the sump. Failure to meet this requirement can cause compressor failure and unit damage.LevelingA level cabinet looks better and will perform better because the doors will line up with the frames properly, the cabinet will not be subject to undue strain and the contents of the cabinet will not move around on the shelves. Use a level to make sure the unit is level from front to back and side to side. Units supplied with legs will have adjustable bullet feet to make the necessary adjustments. If the unit is supplied with casters, no adjustments are available. Ensure the floor where the unit is to be located is level.Stabilizing Models are supplied on casters for your convenience, ease of cleaning underneath and for mobility. It is very important, however, that the cabinet be installed in a stable condition with the front wheels locked while in use.Standard warranties will be voided due to improper installation procedures.Electrical connectionRefer to the amperage data on page 3, the serial tag, your local code or the National Electrical Code to be sure the unit is connected to the proper power source. A protected circuit of the correct voltage and amperage must be run for connection of the line cord, or permanent connection to the unit.The ON/OFF switch must be turned to OFF and the unit disconnected from the power source whenever performing service, maintenance functions or cleaning the refrigerated area .Service and Installation Manual5Do not throw items into the storage area. Failure to heed these recommendations could result in damage to the interior of the cabinet.Refrigeration cycleRefrigerators:The factory setting of the temperature range is 38-40F .Freezers:1.Anti-Condensation heaters on the door frames work in conjunction with the compressor.2.The factory setting of the temperature range is 0 to -10F On/Off Switch:An on/off switch is located on the front of the bottom panel. When the unit is on, the switch will glow green. Light Switch:A light switch is located next to the on/off switch on the front of the bottom panel.SOLID-STATE THERMOSTAT DESCRIPTIONSService and Installation Manual6The power must be turned OFF and the unit disconnected from the power source whenever performing service, maintenance functions or cleaning the refrigerated area.Refrigerators and FreezersThe interior and exterior can be cleaned using soap and warm water. If this isn't sufficient, try ammonia and water or a nonabrasive liquid cleaner. When cleaning the exterior, always rub with the "grain" of the stainless steel to avoid marring the finish.Do not use an abrasive cleaner because it will scratch the stainless steel and plastic and can damage the breaker strips and gaskets.Cleaning the Condenser CoilThe condenser coil requires regular cleaning. Recommended cleaning is every 90 days. In some instances, you may find that there is a large amount of debris and dust or grease accumulated prior to the 90 day time frame. In these cases the condenser coil should be cleaned every 30 days.If the build up on the coil consists of only light dust and debris, the condenser coil can be cleaned with a simple brush. Heavier dust build-up may require a vacuum or even compressed air to blow through the condenser coil.If heavy grease is present, there are de-greasing agents available for refrigeration use and specifically for the condenser coils. The condenser coil may require a spray with the de-greasing agent and then blown through with compressed air.Failure to maintain a clean condenser coil can initially cause high temperatures and excessive run times. Continuous operation with dirty or clogged condenser coils can result in compressor failures. Neglecting the condenser coil cleaning procedures will void any warranties associated with the compressor or cost to replace the compressor.Never use a high pressure water wash for this cleaning procedure as water can damage the electrical components located near or at the condenser coil.In order to maintain proper refrigeration performance, the condenser fins must be cleaned of dust, dirt and grease regularly. It is recommended that this be done at least every three months. If conditions are such that the condenser is totally blocked in three months, the frequency of cleaning should be increased. Clean the condenser with a vacuum cleaner or stiff brush. If extremely dirty, a commercial-grade condenser cleaner may be required.Stainless Steel Care and CleaningT o prevent discoloration of rust on stainless steel several important steps need to be taken. First, we need to understand the properties of stainless steel. Stainless steel contains 70-80% iron which will rust. It also contains 12-30% chromium which forms an invisible passive film over the steels surface which acts as a shield against corrosion. As long as the protective layer is intact, the metal is still stainless. If the film is broken orcontaminated, outside elements can begin to breakdown the steel and begin to form rust of discoloration.Proper cleaning of stainless steel requires soft cloths or plastic scouring pads,NEVER USE STEEL PADS, WIRE BRUSHES OR SCRAPERS!Service and Installation Manual7Cleaning solutions need to be alkaline based or non-chloride based. Any cleaner containing chlorides will damage the protective film of the stainless steel. Chlorides are commonly found in hard water, salts, and household and industrial cleaners. If cleaners containing chlorides are used, be sure to rinse repeatedly and dry thoroughly.Routine cleaning of stainless steel can be done with soap and water. Extreme stains or grease should be cleaned with a non-abrasive cleaner and plastic scrub pad. It is always good to rub with the grain of the steel. There are also stainless steel cleaners available which can restore and preserve the finish of the steels protective layer.Early signs of stainless steel breakdown can consist of small pits and cracks. If this has begun, cleanthoroughly and start to apply stainless steel cleaners in attempt to restore the passivity of the steel.Never use an acid based cleaning solution !Many food products have an acidic content which can deteriorate the finish. Be sure to clean the stainless steel surfaces of ALL food products.Gasket MaintenanceGaskets require regular cleaning to prevent mold and mildew build up and also to keep the elasticity of the gasket. Gasket cleaning can be done with the use of warm soapy water. Avoid full strength cleaning products on gaskets as this can cause them to become brittle and prevent proper seals. Never use sharp tools or knives to scrape or clean the gasket which could possibly tear the gasket and rip the bellows. Gaskets can easily be replaced and don ’t require the use of tools or authorized service technicians. The gaskets are "Dart" style and can be pulled out of the groove in the door and replaced by pressing the new one back into place.Doors/HingesOver time and with heavy usage, door hinges may become loose. If the door begins to sag, tighten the screws that mount the hinge brackets to the frame of the unit. If the doors are loose or sagging, this can cause the hinge to pull out of the frame which may damage to both the doors and the door hinges. In some cases, a qualified service agent or maintenance personnel is required to do this.Drain MaintenanceEach unit has a drain located inside the unit which removes the condensation from the evaporator coil and and drains the excess water into an evaporator pan. Each drain can become loose or disconnected frommoving or bumping the drain. If you notice excessive water accumulation on the inside of the unit, be sure the drain tube is connected from the evaporator housing to the condensate evaporator drain pan. If water iscollected underneath the unit you may want to check the condensate evaporator drain tube to be sure it is still located inside the drain pan. The leveling of the unit is important as the units are designed to drain properly when on a level surface, if your floor is not level this can also cause drain problems. Be sure all drain lines are free of obstructions because obstructions may cause water to back up and overflow the drain pans.Service and Installation Manual Swing Door Replacement and Adjustment1. Open the bottom panel and hold the door. Then loosen the bottom hinge screw and take off the old door.2. Prepare new door; insert top pin into top hinge, get one bottom hinge to hold the door with the bottom pin. Fasten bottom hinge securely to the door frame with three screws.3. Allow the door to freely swing, making sure it swings closed by itself with no restriction.4. Plug the unit in and make sure the lock works well.5. If not, adjust the door height by adding the plastic spacer/washer provided with the bottom hinge pin. Remove the bottom panelLoosen and remove the top screws, slide the panel up and outLight Bulb Replacement1. Upper light bulb replacement: Loosen the screws in the bottom of the top panel and swing the panel up until the light bulb is exposed. Light bulb can then be changed.2. LED light bulb replacement: Take the cover off to replace the LED light bulb.8Service and Installation ManualMODEL: MXM1-2R/MXM1-3.5RMODEL: MXM1-2.5R/MXM1-4R9Service and Installation Manual MODEL: MXM1-2F/MXM1-3.5FMODEL: MXM1-2.5F/MXM1-4F10。
冰箱整理收纳技巧使用指南

冰箱整理收纳技巧使用指南冰箱整理收纳技巧使用指南一、清洁与消毒1.1 清洗冰箱外部:使用温和的清洁剂和柔软的布,擦拭冰箱外部表面,注意不要使用酸性或腐蚀性的清洁剂。
1.2 清洁冰箱内部:将储物格、冷冻室和冷藏室内部的食品取出,使用温和的清洁剂清洗,注意不要使用带有刺激性气味的清洁剂,以免食物受到污染。
1.3 消毒冰箱:使用一些食品安全认证的消毒液或消毒喷雾,按照说明进行冰箱内部的消毒处理,可以杀灭细菌和,确保食品安全。
二、食品分类和储存2.1 食品分类:将食品按照种类和使用频率分类,例如,将牛奶和酸奶放在一起,将肉类和海鲜放在一起,将果蔬放在一起等等。
2.2 储存温度区域:根据食品的储存温度要求,将冰箱区域划分为不同的温度区域,如冷藏室、低温冷冻室和常温储存室。
2.3 真空封存食品:对于易变质的食品,可以使用真空封存机将其封装起来,减少氧气接触,延长保鲜时间。
2.4 使用透明容器:使用透明的食品储存容器,可以清晰地看到食品的类型和数量,方便管理和避免食品浪费。
2.5 标记食品保存时间:将食品放入冰箱之前,使用标签或贴纸标记上食品的保存日期,方便掌握食品的新鲜度。
2.6 避免交叉污染:将生食和熟食分开储存,避免交叉污染,减少食品安全风险。
三、优化储物空间3.1 调整储物格高度:根据不同食品的高度和大小,合理调整储物格的高度,最大限度地利用冰箱储物空间。
3.2 利用冰箱门上的储物格:将常用的调料、饮料等放在冰箱门上的储物格中,方便取用,减少打开冰箱门的频率。
3.3 使用储物盒和分隔板:使用储物盒和分隔板将食品整理成不同的区域,方便管理和防止食品杂乱。
3.4 储存食品前整理:在将食品放入冰箱前,先将其整理好,去掉多余的包装和包装材料,减少冰箱内的占用空间。
3.5 储存食品前缩小容积:对于大型的食品包装或容器,可以将其分割成更小的部分,减小体积,方便储存。
3.6 定期整理:定期清理冰箱内的过期食品和变质食品,整理储存格和储物盒,保持冰箱内的整洁和有序。
海尔 24英寸双深冬冰箱双层拉储生活用品指令册说明书
10/22/2021
5
Part No. W11577192 Rev. A
LOWER DRAWER PARTS
10/22/2021
6
Part No. W11577192 Rev. A
LOWER DRAWER PARTS
Illus. No. Part No. Description
Illus. No. Part No. Description
17 W11360595 Compressor, Rubber
18 4344780 Bolt, Compressor 19 4344779 Grommet,
Compressor
20 W11498145 Cord, Power REFRIGERANT CHARGE
46 grams (R600A)
10/22/2021
17 W11312450 Cover, LED
18
Cabinet (Not a
Servicable Part)
10/22/2021
3
Part No. W11577192 Rev. A
UPPER DRAWER PARTS
10/22/2021
4
Part No. W11577192 Rev. A
UPPER DRAWER PARTS
W11576925 Complete, Door Assembly
10/22/2021
7
Part No. W11577192 Rev. A
UNIT PARTS
10/22/2021
8
Part No. W11577192 Rev. A
UNIT PARTS
Illus. No. Part No. Description
- 1、下载文档前请自行甄别文档内容的完整性,平台不提供额外的编辑、内容补充、找答案等附加服务。
- 2、"仅部分预览"的文档,不可在线预览部分如存在完整性等问题,可反馈申请退款(可完整预览的文档不适用该条件!)。
- 3、如文档侵犯您的权益,请联系客服反馈,我们会尽快为您处理(人工客服工作时间:9:00-18:30)。
(一)、188A、208A、218A系列冰箱培训教材一.产品特点介绍(包括衍生关系)1.-7度保鲜:独创软冷冻保鲜室(-7度保鲜温区),食物保鲜期延长(2-3周),食物加工前无需化冻,切取容易,有效锁定营养,保鲜更有效,生活更方便。
2.人工智慧,自动调温:在人工智慧状态下,该冰箱能够随环境温度变化自动调节温度档位,无需人为调节,便能达到最佳制冷效果,使您更加省心、省力。
3.温度显示功能:能够显示所有设定的温度及冰箱冷藏室与冷冻保鲜室内部的温度,使您随时可以了解冰箱的工作状态,及时判别故障现象,用起来更放心。
4.冷冻功能;5.抗菌保健康;6.内藏式制冷系统,双色门体,整洁美观。
二.产品外观结构特征图(包括颜色)BCD-208A BCD-218A此主题相关图片如下:此主题相关图片如下:三.产品使用说明及产品改进介绍a、新构造1.增加软冷冻保鲜室(-7度保鲜):是国内独创软冷冻保鲜室(-7度保鲜温区),食物保鲜期延长(2-3周),食物加工前无需化冻,切取容易,有效锁定营养,保鲜更有效,生活更方便。
b、有针对性改进的问题点冷藏室与软冷冻保鲜室分别控制(双系统,带电磁阀);有三个蒸发器:分别有冷藏蒸发器,软冷冻保鲜室蒸发器和冷冻蒸发器。
三.技术数据及铭牌线路图此主题相关图片如下:此主题相关图片如下:五.具体控制、工作原理及参数此主题相关图片如下:本控制板由控制板、电源板两部分组成。
1. 基本参数1.1额定频率50Hz1.2额定电压220-240A.C1.3额定功率4W1.4控制电流a. 压机控制电流不大于2A(启动电流不大于10A)b. 电磁阀控制电流不大于1Ac. 加热丝控制电流不大于1A2.外观和结构2.1主控制板、显示板、电源板应符合相应图纸的要求,标记、印刷字样应完整、清晰。
2.2 显示板布局如附图所示,其中各灯的定义和按键定义如下:2.2.1 指示灯定义a 人工智慧指示灯:指示冰箱工作在人工智慧状态。
b 报警指示灯:指示冷冻室内温度超出规定范围或传感器故障。
c 锁定指示灯:亮起时指示按键功能被锁定。
d 网络功能指示灯:指示网络通讯功能。
(预留,暂时不显示)e 速冻调节指示:指示冰箱工作在速冻状态。
f 温度指示:温度设定及显示功能。
2.2.2 按键定义a 冷藏调节按键:调节冷藏室温度;b -7℃调节按键:调节-7℃室温度 / 锁定下按一下显示-7℃室温度;c 速冻设定按键:设置速冻功能;d 人工智慧按键:设置人工智慧功能 / 锁定下按3秒黑屏;e 速冻设定按键+人工智慧按键:锁定 / 解除锁定;f 冷藏调节按键+ -7℃调节按键(锁定下):显示冷冻室温度。
注:每进行一次按键操作,伴有一声蜂鸣。
注:按键定义为冷藏调节 -7℃调节速冻设定人工智慧3. 功能要求3.1 初始状态初次上电的运行状态为初始状态:冰箱自动设定为人工智慧状态;速冻指示灯不亮,速冻档位设定在0档(即不进入速冻状态);锁定指示灯灭,处于解锁状态;初次上电时,若冰箱内温度处于开机点和关机点之间则不开机,直到温度回升至开机点时才开机。
初次上电,-7℃室优先制冷,直到冷藏室达到关机点温度(或冷藏连续工作3小时不停机而关冷藏,或压缩机连续工作5小时不停机而关机)才取消-7℃室优先制冷。
冷藏室空间传感器降到2℃、进入速冻状态、传感器故障时都取消-7℃室优先制冷。
3.2 控制面板的锁定与解除锁定功能非锁定情况下,同时按下速冻设定按键和人工智慧按键,锁定指示灯亮,进入锁定状态(进入锁定状态后,原相关设定停止闪烁);锁定状态下,只能进行显示控制和冷冻室温度、-7℃室温度显示等操作。
锁定情况下,同时按下速冻设定按键和人工智慧按键,锁定指示灯灭,解除锁定,可进行以下各种控制设置。
3.3 温度设置与控制功能解锁后,按下冷藏调节键,冷藏温度原设定值开始闪烁,进入冷藏温度设置状态,每按一下该键,温度值增加1,直至“8”,再按则回到“3”,依次循环。
若设定5秒内没有其它按键操作,则温度值停止闪烁并确定。
3.3.2 冰箱-7℃室温度设置解锁后,按下-7℃室调节键,-7℃室温度原设定值并开始闪烁,进入冰箱-7℃室温度设置状态,每按一下该键,温度值减少见下表1,直至“-18 ” ,再按则回到“-3 ” ,依次循环。
若设定5秒内没有其它按键操作,则温度值停止闪烁并确定。
此主题相关图片如下:注:冷藏蒸发器传感器决定冷藏室的开关,且上述开关机参数要根据环境温度T进行调整:℃时,不能进行温度设定,冷藏温度显示“FF” ,以冷冻室传感器控制开停(开:-16℃/ 关:-24℃)3.3.4 电磁阀、压缩机的关系(见表2)此主题相关图片如下:注1:-7℃室单独制冷并到达关机点时,若冷藏室没有达到开机点,则压缩机停机,而电磁阀延时5分钟掉电。
注2:正常温度控制下的稳定运行状态,若在电磁阀不带电的情况下压机连续运行3h不停机,则强制冷藏关机,待后背蒸发器感受的温度达到4℃时,再开机。
在3h强制冷藏关机时,检测-7℃室温度是否达到开机点,若达到开机点,则电磁阀上电,压缩机继续工作。
3.4速冻设置功能此主题相关图片如下:℃室要求开机,则压机不停机,电磁阀带电,压机给-7℃室、冷冻制冷。
℃时,再开机。
℃时则停止加热)。
℃时,冷藏蒸发器传感器停机固定在-22℃, 当环境温度低于8℃(含8℃)时,冷藏蒸发器传感器停机点固定在-24℃。
在速冻设定时间内,压缩机的开机仍由冷藏蒸发器传感器控制,每次压缩机开机后,在环境温度大于4℃(含4℃)的情况下,不管冷藏蒸发器传感器是否到停机点,只要冷藏空间传感器温度低于2℃(含2℃),均强制冷藏室停机,每次冷藏室停机进入5分钟延时,每次压缩机停机,并不退出速冻状态。
当冷藏蒸发器传感器温度高于开机点,压缩机重新开始运转,直到到了速冻设定时间后,才自动退出速冻状态,进入正常温度控制。
℃室可以进行调节。
3.5 人工智慧功能按下人工智慧按键持续3秒,人工智慧图标亮起,进入人工智慧状态,若要退出人工智慧状态,则再次按下人工智慧按键持续3秒,人工智慧图标灭,即退出人工智慧状态。
℃室温度的设置,开关机参数由环境温度决定(见表4)此主题相关图片如下:3.5.2 在人工智慧状态下,若在电磁阀不带电的情况下压机连续运行3h不停机,则强制冷藏关机5分钟,待后背蒸发器感受的温度达到4℃时,再开机。
在3h强制冷藏关机时,检测-7℃室温度是否达到开机点,若达到开机点,则电磁阀上电,压缩机继续工作。
3.6 超温报警功能当冷冻室内温度高于-3℃(含-3℃)——至少经过2次开停都是如此时,报警指示灯亮起,一旦冷冻室内温度低于-5℃,报警指示灯灭。
超温报警时,VFD显示屏上的报警区中的波形图形顺次递增。
初次上电时,只要检测到冷冻室温度高于-3℃(含-3℃),即报警。
3.7面板显示控制功能操作完成后10分钟,VFD亮度减弱50%,3小时后自动黑屏。
若在锁定状态下一直按下“人工智慧”键超过3秒钟,则强制黑屏。
在VFD亮度减弱或黑屏的情况下,按任一按键即恢复原亮度显示。
若冰箱出现超温报警或传感器报警时,VFD自动点亮,亮度为50%。
注:手动强制黑屏功能在锁定或解锁状态下都可操作。
3.8 断电记忆功能当冰箱运行过程中断电,再次上电时,冰箱仍按断电前的工作状态运行。
3.9 延时保护功能压缩机每次停机5分钟后方能再次开机,5分钟延时结束后才能进入对压缩机和电磁阀的正常控制。
3.10 按键伴音功能每按一下按键(有效操作),蜂鸣器响一下(响声持续0.2秒,f=2.63kHz)。
3.11 传感器故障处理及故障显示3.11.1 冷藏蒸发器传感器故障处理及故障显示当冷藏蒸发器传感器故障(短路或断路),温度值显示区显示“F1” (注:在冷藏温度显示区显示);-7℃室控制正常时,冷藏室不要求单独开机,每次-7℃室开机时,冷藏室先制冷10分钟后(即压缩机ON、电磁阀OFF),电磁阀带电,-7℃室制冷。
3.11.2 环境传感器故障处理及故障显示当环境传感器故障(短路或断路),温度值显示区显示“F2” ;冰箱不能进入人工智慧状态,冰箱不能进入人工智慧状态和速冻状态运行;不能进行自动低温补偿功能。
3.11.3 冷藏空间温度传感器故障处理及故障显示当冷藏空间温度传感器故障(短路或断路),温度值显示区显示“F3”;冰箱不能进入人工智慧、速冻状态。
3.11.4 冷冻温度传感器故障处理及故障显示当冷冻传感器故障(短路或断路),温度值显示区显示“F4” ;超温报警及冷冻温度显示功能不能执行,报警灯常亮。
3.11.5 -7℃室温度传感器故障处理及故障显示当-7℃室传感器故障(短路或断路),温度值显示区显示“F5” ; -7℃室温度设置显示功能不能执行。
冷藏室控制正常时,在每次冷藏室要求停机时,电磁阀带电,-7℃室制冷15分钟后停机。
3.11.6 冷藏蒸发器传感器、-7℃室传感器两个传感器都损坏时,进入开机30分钟(电磁阀前20min不带电,后10min带电),停机20分钟的固定循环。
3.12冷藏温度保护功能在环境温度不低于3℃的情况下,每次压缩机开机后,如果冷藏空间传感器温度下降至2℃(含2℃)以下时,则无论冷藏传感器温度是否达到当前温控的停机点,都强制冷藏停止制冷,之后冷藏进入5分钟延时,延时过后再根据情况判断是否开冷藏。
4 优先级顺序自动低温补偿>黑屏显示控制>正常显示控制>5分钟延时>人工智慧>速冻>正常控制F1显示>F5显示>F2显示> F3显示> F4显示>温度显示六、制冷循环示意图:此主题相关图片如下:(二)、258A冰箱培训教材一、产品特点介绍(包括衍生关系)1.-7度保鲜:独创软冷冻保鲜室(-7度保鲜温区),食物保鲜期延长(2-3周),食物加工前无需化冻,切取容易,有效锁定营养,保鲜更有效,生活更方便。
2.人工智慧,自动调温:在人工智慧状态下,该冰箱能够随环境温度变化自动调节温度档位,无需人为调节,便能达到最佳制冷效果,使您更加省心、省力。
3.温度显示功能:能够显示所有设定的温度及冰箱冷藏室与冷冻保鲜室内部的温度,使您随时可以了解冰箱的工作状态,及时判别故障现象,用起来更放心。
4.冷冻功能;5.抗菌保健康;6.内藏式制冷系统,双色门体,整洁美观。
二.产品外观结构特征图(包括颜色)此主题相关图片如下:此主题相关图片如下:三.产品使用说明及产品改进介绍b、新构造1.增加软冷冻保鲜室(-7度保鲜):是国内独创软冷冻保鲜室(-7度保鲜温区),食物保鲜期延长(2-3周),食物加工前无需化冻,切取容易,有效锁定营养,保鲜更有效,生活更方便。
b、有针对性改进的问题点冷藏室与软冷冻保鲜室分别控制(双系统,带电磁阀);有三个蒸发器:分别有冷藏蒸发器,软冷冻保鲜室蒸发器和冷冻蒸发器。