2.2 JVC-TS
JVC 彩色视频摄像机 TK-C1430EC 说明书
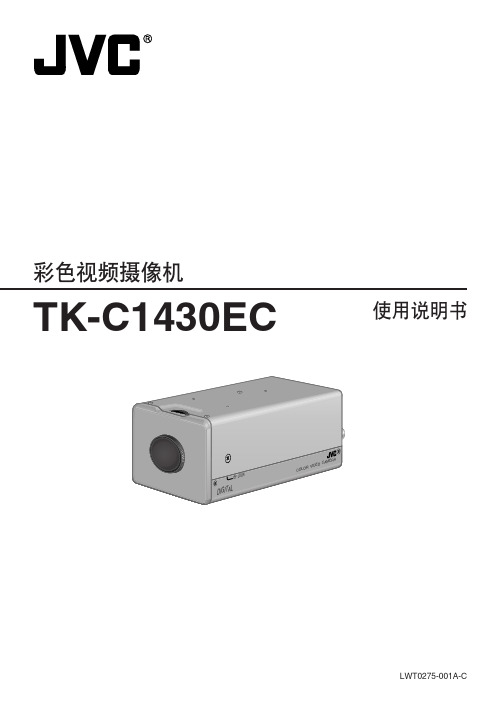
TK-C1430EC使用说明书彩色视频摄像机警告∶为避免火灾及电击,请勿使此设备遭受雨淋或受潮。
因设计变动,本说明书中的数据如有所变化,恕不另行通知。
安全注意事项承蒙惠购本产品。
(本说明书用于 TK-C1430EC)使用本机之前,请仔细阅读本使用说明书以保证其发挥最佳性能。
介绍功能 (4)操作注意事项 (5)控制器、插座和指示灯 (6)连接/安装RM-P2580 系统 (10)步骤 (12)安装镜头 (13)安装铁氧体磁芯 (14)后部的连接 (14)安装摄像机 (16)镜头调整 (18)后焦点调整 (19)自动白平衡控制调整 (20)菜单设置设置菜单 (21)菜单画面结构 (22)SYNC ADJUST 画面 (24)ALC SETTINGS 画面 (24)VIDEO ADJUST 画面 (29)MODE SELECT 画面 (30)MOTION DETECT 画面 (32)COMMUNICATION 画面 (33)MAINTENANCE 画面 (33)FACTORY SETTINGS 画面 (33)BLC EDITTING 画面 (34)白平衡的手动调整 (35)CAMERA TITLE 设置 (36)设置 MOTION DETECT 功能 (37)黑白/彩色切换信号输出 (38)由外部黑白/彩色切换信号进行控制 (39)白点补偿 (40)其他规格 (41)ⅢDSP(数字信号处理器)具有扩展动态范围(ExDR)功能,可在光线明亮和黑暗的地方进行拍摄。
Ⅲ采用具备 SENSE UP(32 倍)功能的CCD,可感受最小光通量密度为 0.9 1x(F1.2, 50%, AGC 20dB)和 0.03 lx(SENSE UP × 32)的被摄物。
另外,得益于 B/W 模式,可感受到 0.03 1x(F1.2, 50% AGC 20dB)的光通量密度。
Ⅲ运动检测功能可检测图像中的运动并发出告警信号。
JVC摄像机 GZ-E245 GZ-E208 GZ- E205 详细用户使用指南说明书
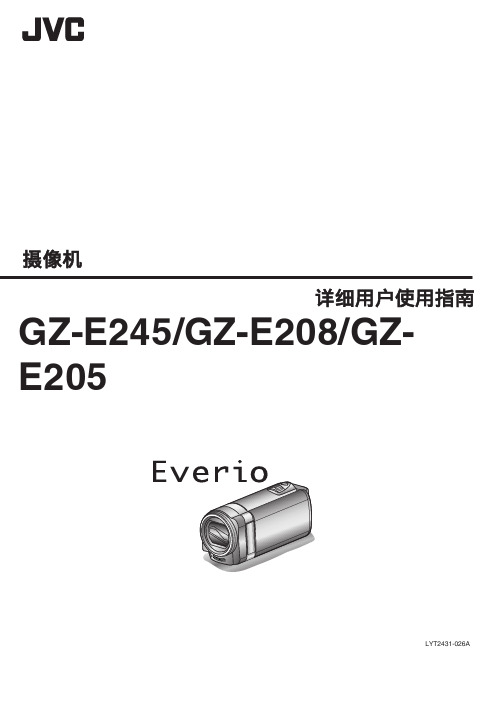
摄像机LYT2431-026A详细用户使用指南GZ-E245/GZ-E208/GZ-E205目录表入门指南 (4)充电 (4)录制 (4)播放 (4)拍摄提示 (4)节假日/圣诞节 (5)婚礼 (6)旅行 (7)游乐园 (9)入门核对附件 (11)连接核心过滤器 (12)电池充电 (13)握带调整 (14)使用手带 (14)插入SD卡 (14)可以使用的SD卡类型 (15)使用触屏 (16)液晶监视器上的按键名称和功能 (17)时钟设定 (18)重设时钟 (19)更改显示语言 (20)握住本机 (20)安装三脚架 (20)在海外使用本机 (21)在海外给电池充电 (21)旅行期间按当地时间设置时钟 (21)设置夏时制 (22)备选附件 (22)录制在自动模式下拍摄视频 (23)变焦 (25)在视频录制过程中捕捉静像 (25)在自动模式下拍摄静像 (26)变焦 (28)手动录制 (28)根据场景(被摄体)进行拍摄 (30)手动调整聚焦 (31)调整亮度 (32)设置白平衡 (33)设置背光补偿 (34)拍摄特写镜头 (35)带效果录制 (36)带动画效果录制 (37)清楚地捕捉被摄体(触摸优先AE/AF) (39)自动捕捉笑脸(笑脸拍摄) (40)显示选定脸部的放大视图期间进行录制(脸部子窗口) (41)登记人脸个人认证信息 (43)设置笑脸%/名称显示 (45)编辑登记的脸部信息 (46)减轻相机振动 (48)间隔录制(延时录制) (48)通过感应动作自动录制(自动录制) (50)拍摄集体照(自拍定时器) (51)带日期和时间录制视频 (53)查看剩余录制时间 (53)播放播放视频 (55)快速查看视频内容(摘录播放) (57)播放管理信息不完整的视频 (58)播放静像 (58)幻灯片播放 (60)按日期搜索特定的视频/静像 (60)连接电视机并在电视机上观看 (61)经由HDMI迷你接口连接 (61)经由AV接口连接 (62)播放播放列表 (63)播放在本机上创建的DVD或蓝光光盘 (63)在蓝光或DVD播放机上摘录播放 (63)编辑删除不需要的文件 (64)删除当前播放的文件 (64)删除选定的文件 (64)保护文件 (65)保护/取消保护当前显示的文件 (65)保护/取消保护选定文件 (66)在播放过程中,在视频中捕捉静像 (67)结合以无缝记录录制的影片(GZ-E245) (67)捕捉视频中的需要部分(修剪) (68)捕捉要上传到YouTube的视频 (69)从录好的视频中创建播放列表 (71)用所选文件创建播放列表 (71)按日期创建播放列表 (72)编辑播放列表 (73)删除播放列表 (74)复制用DVD刻录机刻录光盘 (75)准备DVD刻录机(CU-VD3) (76)准备DVD刻录机(CU-VD50) (76)创建光盘 (77)用DVD刻录机播放 (81)用外置蓝光驱动器刻录光盘 (82)准备一台外置蓝光驱动器 (82)创建光盘 (83)用外置蓝光驱动器播放 (88)通过连接蓝光录像机刻录光盘 (88)连接DVD录像机,将文件复录到光盘上 (89)连接VCR,将文件复录到VHS磁带上 (89)用USB外部硬盘驱动器复制文件 (90)准备USB外部硬盘驱动器 (90)复制所有文件 (91)播放USB外部硬盘驱动器中的文件 (92)删除USB外部硬盘驱动器中的文件夹 (92)格式化USB外部硬盘驱动器 (93)从USB外部硬盘驱动器导入文件 (93)把文件复制至SD卡(GZ-E245) (94)把文件移动至SD卡(GZ-E245) (95)复制到 Windows PC (97)核对系统要求(指引) (97)安装随附软件(内置) (98)备份所有文件 (99)组织文件 (100)把视频录制到光盘上 (101)在不用随附软件的情况下备份文件 (103)文件和文件夹列表 (104)复制到Macintosh电脑 (105)菜单设定操作菜单 (106)操作捷径菜单 (106)操作主菜单 (107)操作共用菜单 (107)录制菜单(视频) (108)场景选择 (110)FOCUS (110)调节亮度 (110)白平衡 (110)背光补偿 (110)近拍 (110)触摸优先AE/AF (110)光源 (110)2增亮 (111)风声消除 (111)动画效果 (112)慢速录制 (112)自动录制 (112)日期/时间记录 (112)脸部子窗口 (112)笑脸拍摄 (112)笑脸%/ 名称显示 (112)面部登记 (112)视频质量 (112)变焦 (113)无缝录制(GZ-E245) (113)变焦麦克风 (114)录制菜单(静像) (115)场景选择 (117)FOCUS (117)调节亮度 (117)白平衡 (117)背光补偿 (117)近拍 (117)触摸优先AE/AF (117)光源 (117)自拍 (118)增亮 (118)自动录制 (118)快门模式 (119)笑脸拍摄 (119)笑脸%/ 名称显示 (119)面部登记 (119)图像大小 (120)播放菜单(视频) (121)搜索日期 (122)显示时间/日期 (122)摘要播放 (122)播放列表 (122)编辑播放列表 (122)保护/取消 (122)复制(GZ-E245) (122)移动(GZ-E245) (122)修剪 (122)上传设置 (122)播放其他文件 (122)无缝录制控制(GZ-E245) (122)K2 TECHNOLOGY (123)播放菜单(静像) (124)搜索日期 (124)幻灯片放映效果 (125)保护/取消 (125)复制(GZ-E245) (125)移动(GZ-E245) (125)共用菜单 (126)时钟设定 (128)日期显示样式 (128)LANGUAGE (128)监视器亮度 (128)视频记录媒体(GZ-E245) (129)图像记录媒体(GZ-E245) (129)操作声音 (130)静音模式 (130)自动关机 (131)快速重启 (131)演示模式 (132)触屏调节 (132)在电视机上显示 (133)视频输出 (134)HDMI输出 (134)HDMI控制 (135)出厂前预设值 (135)更新 (135)格式化内存(GZ-E245) (136)格式化SD卡 (136)删除内存(GZ-E245) (137)零部件名称正面 (138)背面 (138)底部 (139)内部 (139)液晶监视器 (140)液晶显示器上的显示常见录制显示 (141)视频录制 (141)静像录制 (142)视频播放 (142)静像播放 (143)故障排除本机不能正常工作时 (143)电池 (144)录制 (144)卡 (145)播放 (145)编辑/复制 (146)电脑 (146)画面/图像 (147)其他问题 (147)错误字样? (148)维护规格3充电0参阅详细用户使用指南显示中的操作说明。
DLP投影机用户手册说明书

版权本出版物(包括所有照片、插图和软件)受国际版权法律的保护,保留所有权利。
未经作者书面同意,不得复制本手册及其包含的任何资料。
© 版权2022免责声明本文档中的信息如有变更,恕不另行通知。
制造商对于本文档中的内容不提供任何表述或担保,特别放弃对于适销性或特定用途适用性的任何隐含担保。
制造商保留修订本出版物和不定期更改本文档内容且无须向任何人通知此类修订或更改的权利。
商标Kensington 是 ACCO Brand Corporation 的美国注册商标,并已在其它国家(地区)注册或正在申请注册。
HDMI、HDMI标识、以及High-Definition Multimedia Interface是HDMI Licensing LLC在美国和其他国家(地区)的商标或注册商标。
MHL、HDMI标识、以及Mobile High-Definition Link是MHL licensing, LCC的商标或注册商标。
HDBaseT™和HDBaseT Alliance标志是HDBaseT Alliance的商标。
本手册中使用的所有其他产品名称分别是其各自所有者的资产,并得到公认。
版本:1DLP投影机 – 用户手册重要安全信息重要:强烈建议您在使用投影机之前仔细阅读此部分。
这些安全和使用说明可确保您安全地使用投影机许多年。
妥善保管本手册,以备日后参考。
使用的符号机器和本手册中使用的警告符号旨在提醒您危险情形。
本手册使用下面的样式来提醒您重要信息。
注意:在主题旁边提供主题的附加信息。
重要:提供不应忽视的附加信息。
小心:提醒您可能损坏机器的情形。
警告:提醒您可能损坏机器、造成危险环境或导致人员受伤的情形。
在整部手册中,OSD 菜单中的组件部分和项目以粗体显示,如此例所所示:“按遥控器上的Menu按钮打开主菜单。
”一般安全信息请勿打开机壳。
机器内没有用户可维修的部件。
如需维修,请与有资质的维修人员联系。
惠威HR70遥控器使用说明书
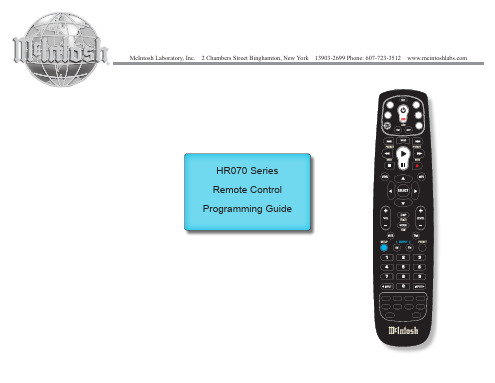
HR070 Series Remote Control Programming Guide
6. Repeat steps 1 to 5 for the other components you want to control. For future reference, write down each working component code below:
HR Series Remote Control Programming
Assigned Push-button Component Program Code
TV
CBL
SAT
AUX
DVR
Push-buttons available for Programming
Flashes during Programming
4
Used to activate Programming Mode
with the most popular code first. If the component
responds, go to step 7.
6. If the component does not respond, press LEVEL+
Push-button and the Remote Control will test
The HR70 Series Remote Controls have stored in permanent memory the necessary information to send the correct commands to the component to be controlled. By entering a five digit numeric code the commands for controlling the component is activated.
看高清M2TS 三款播放器谁更好

看高清M2TS 三款播放器谁更好作者:吴青网络上流传的蓝光高清片源以BD-Rip居多,目前BD-Rip资源主要有M2TS、TS、MKV、RMVB、AVI等格式。
相比之下,M2TS不仅是最接近蓝光原片的封装格式,而且拥有全程时间戳印记、便于音画和字画同步、适合网络传输等优势。
且M2TS本身就是标准蓝光BDMV的主文件,其高清影像最接近蓝光碟片,那么这类高清格式文件该如何播放呢?我们该如何选取高清M2TS播放器呢?不妨跟随笔者的步伐,一起来看看吧!M2TS是BD-Rip片源中最接近蓝光原碟的视频格式,大多采用“X264+AC3”或“X264+LPCM”的视音频组合方式,需要在PC端安装终极解码等解码器包,方能被播放器识别。
那么究竟怎样的高清播放器才能满足大家的不同需求呢?笔者就这一问题为大家推荐三款好用的高清M2TS播放器。
本文所有软件及工具下载地址:/download/200913.html。
只要能播放就可以,傻瓜化操作的“超级马力”只对正常播放M2TS有要求的读者不妨考虑“超级马力”,只需打开M2TS文件即可正常播放,即使系统中没有任何解码包或解码器发生错乱,它依然能依靠自带解码器正常播放M2TS文件,易用性和稳定性较为突出。
主要特点是自带解码器、资源消耗低、智能化程度高,能自动分析音视频文件并调用解码器。
但该软件不能手动设置解码器和分离器,这使得其无法选用画质或音质解码效果更好的解码器和分离器,而且更新的版本无法直接使用,局限性明显。
但就正常播放需求而言,“超级马力”能够胜任普通用户的一般要求,经实测,在拥有集成显卡、主机配置价格在2000元以下的经济型PC端上,也可获得不错的播放效果。
平衡易用、硬解码、截字幕,需简易设置的POTPlayer更注重性能平衡性的读者不妨考虑POTPlayer,它改进了KMPlayer截图等功能,简化了设置,增加了DXVA硬解码等功能。
从资源占用水平来看,POTPlayer占用内存较小,在很多低端PC机上也能获得流畅的播放效果。
JVC 液晶显示器 使用手册说明书

親愛的客戶:我們非常感謝您購買JVC 液晶顯示器與對本產品的支持。
為了讓您完全享有產品的優點,請在調整任何設定前先閱讀下列指示,並保存相關指示以供日後參照。
我們希望在未來的日子,您能持續享用產品為您帶來的歡樂。
我們建議您為所購買的液晶顯示器進行註冊,或填妥保固卡後郵寄給我們。
如有產品上的疑問請洽詢我們的經銷商或瀏覽我們的網站或與服務專線40555088 (行動電話請加02) 聯絡。
The terms HDMI and HDMI High-Definition Multimedia Interface,and the HDMI logo are trademarks or registered trademarks of HDMI Licensing LLC in the United States and other countries.Manufactured under license from Dolby Laboratories.Dolby and the double-D symbol are trademarks of Dolby Laboratories.This product is manufactured, distributed, serviced, and warranted by WUSH INC. under license by JVC KENWOOD Corporation.PRODUCT SPECIFICATIONS ARE SUBJECT TO CHANGE WITHOUT NOTIVE1第1章注意安裝事項根據本產品之設計與製造,您必須在特定的設計限制內操作,若有誤用則可能導致觸電或火災。
為了防止產品損壞,在安裝、使用及維護產品的過程中請遵守下列規定。
操作顯示器前,請先閱讀下列安全指示。
請妥善保存指示,以便日後參照。
●為了避免發生觸電或組件損壞的風險,請先關閉電源,然後才將組件連接JVC系列液晶顯示器。
录像机磁带记录标准概述
从1956年美国Ampex(安培克斯)公司制成第一台可录制视频信号的录像机开始,录像机的发展经历了两个阶段:从模拟到数字。
发展到现在,录像机的核心技术主要掌握在日本公司手中,在模拟时代基本是SONY(索尼)、Panasonic (松下)和JVC(胜利)公司,在家用磁带格式方面JVC公司的VHS格式基本是一家独大,到了数字时代JVC公司逐渐被SONY和Panasonic超越并被远远的甩在了后面。
所以录像机磁带格式的发展分为两个阶段和两个系列,两个阶段就是模拟到数字,两个系列就是SONY和Panasonic各自的产品线。
模拟录像机的磁带格式(模拟格式来啥录啥,格式就是如何将分量信号如何复合,以及磁迹的方式):1.U(U-matic)格式在1973年由SONY、Panasonic、JVC三家公司共同推出的专业级磁带记录格式,3/4英寸氧化物磁带,采用亮度信号调频,色度信号降频的频分复用的方式,有三种方式U-matic低带、U-MaticH高带以及U-maticSP超高带模式,这几种格式的区别为:a 亮度信号载频不同;b 色度信号载频不同。
提高载频必须缩短头带系统所能录放的最短记录波长。
2.VHS和S-VHS格式(模拟时代,家用的最主流格式,JVC公司2002年以前主要靠着这个格式的专利费活着,可能也是导致其落伍的原因吧)VHS是JVC公司1976年推出的家用各式,采用1/2英寸磁带。
量度调频和色度降频的处理方式,声音信号可以纵向记录,也可以记录在更深层的磁性层内。
S-VHS是在VHS上发展的用与专业级的录放质量。
不知道市场怎么样。
3.8毫米和超8毫米格式SONY、Panasonic、JVC和飞利浦于1983年联合推出的基于家用的磁带记录格式,应用一般,可能是另外三家想摆脱JVC的VHS格式,好像没有成功,要不然也不会VHS一直那么牛。
4.Betacam1982年索尼公司推出的采用1/2氧化物磁带的磁带记录格式,录制的还复合信号,推出的目的是减小录像机磁芯和磁带盒的体积,使得更方便的ENG设备成为可能。
JVC 摄像机 GZ-MS110 GZ-MS118 详细用户使用指南
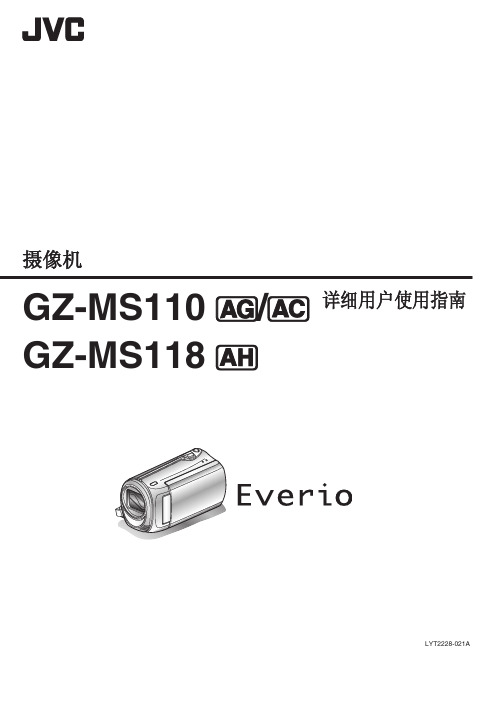
GZ-MS110 D /C GZ-MS118E摄像机 详细用户使用指南LYT2228-021A目录入门指南 (4)充电 (4)录制 (4)播放 (4)拍摄提示 (4)有用的拍摄技巧节假日/圣诞节 (5)婚礼 (6)旅行 (7)游乐园 (9)入门核对附件 (10)电池充电 (11)握带调整 (12)使用手带 (12)插入SD卡 (12)可以使用的SD卡类型 (13)时钟设定 (13)重设时钟 (14)更改显示语言 (15)握住本机 (15)安装三脚架 (15)在海外使用本机 (16)在海外给电池充电 (16)旅行期间按当地时间设置时钟 (16)设置夏时制 (17)备选附件 (17)录制在自动模式下拍摄视频 (18)变焦 (19)手动录制 (19)场景选择 (20)手动调整聚焦 (21)调整亮度 (22)设置快门速度 (23)设置白平衡 (24)设置背光补偿 (25)设置测光区 (25)拍摄特写镜头 (26)间隔录制(慢速录制) (27)通过感应动作自动录制(自动录制) (29)剩余录制时间/电池电量 (30)播放播放视频 (31)播放管理信息不完整的视频 (32)搜索特定的视频 (32)连接电视机并在电视机上观看 (33)编辑删除不需要的文件 (34)删除当前播放的文件 (34)删除选定的文件 (34)删除所有文件 (35)保护文件 (36)保护当前显示的文件 (36)保护所选文件 (37)保护所有文件 (37)取消所有文件的保护 (38)复制把文件复录至DVD录像机或VCR (38)复制到 Windows PC (39)核对系统要求(指引) (39)安装随附软件 (39)备份所有文件 (40)组织文件 (41)把视频录制到光盘上 (42)JVC 软件许可权合约 (43)在不用随附软件的情况下备份文件 (44)文件和文件夹列表 (44)复制到Macintosh电脑 (45)菜单设定操作菜单 (46)录制菜单 (47)视频质量 (48)变焦 (48)手动补偿 (49)增亮 (49)慢速录制 (50)自动录制 (50)选择纵横比 (50)风声消除 (50)手动设置菜单 (51)场景选择 (51)FOCUS (51)调节亮度 (51)快门速度 (51)白平衡 (51)背光补偿 (51)测光区 (51)近拍 (51)播放菜单 (52)删除 (52)搜索 (52)播放MPG文件 (52)保护/取消 (52)显示在屏幕上 (53)显示设置菜单 (54)LANGUAGE (54)日期显示样式 (54)监视器亮度 (55)监视器背光 (55)时钟设定 (55)基本设置菜单 (56)演示模式 (57)自动关机 (57)操作声音 (58)快速重启 (58)更新 (59)出厂前预设值 (59)连接设置菜单 (60)在电视机上显示 (60)视频输出 (60)格式化SD卡 (61)零部件名称正面 (62)背面 (62)底部 (63)内部 (63)2液晶显示器上的显示录制 (64)播放 (64)故障排除电池 (65)录制 (65)卡 (65)播放 (65)电脑 (65)画面/图像 (66)其他问题 (66)错误字样? (67)维护 (68)规格 (69)3充电●参阅详细用户使用指南显示中的操作说明。
JVC Monitor Calibration 2 说明书

JVC Monitor Calibration 2 User's Guide Table of Contents1. What is JVC Monitor Calibration 2?2. System Requirement3. Installation (JVC Monitor Calibration 2)4. Uninstall5. Installation (EyeOne Display 2 Device Driver)6. Getting Started7. GUI Control8. Report Window9. Troubleshooting1. What is JVC Monitor Calibration 2?JVC Monitor Calibration 2 software is a dedicated for the GD-X1 series monitor.You can calibrate the Gamma value and White Balance for the X1 monitor, using this software with PC and photometer.2. System RequirementsOperating Systems: Windows XP (32 Bit), Vista (32 Bit)Screen Resolutions:1024 x 768 and upDisplay Monitor:JVC GD-42X1Photometer:X-Rite EyeOne Display 2Monitor Interface:Serial port or USB-to-Serial adapter for monitorcommunicationPhotometer Interface:USB port for EyeOne Display 23. Installation (JVC Monitor Calibration 2)The installation procedure about JVC Monitor Calibration 23.1. "MonitorCalibration2.zip" Unzip, please make sure that the following files:・Setup-MonitorCalibration2.msi・setup.exe・Readme.txt・DotNetFX\dotnetfx.exe・DotNetFX\instmsia.exe・DotNetFX\WindowsInstaller-KB893803-v2-x86.exe3.2. Run "setup.exe" or "Setup-MonitorCalibration2.msi"3.3. If you have not installed .net Framework2.0 and later in your PC,you will install the .net Framework2.0 redistributable package.3.4. Follow the screen instructions (shown below) to complete the installation process.3.5. Run the application:Double click the "Monitor Calibration" shortcut on the desktop;or, select the "Monitor Calibration" on the program menu.Note;The operation of this software, EyeOne Display 2 is connected, you must install the driver.EyeOne Display 2 installation instructions please see the installation instructions.4. UninstallJVC Monitor Calibration 2 uninstall repair procedure4.1. Run "setup.exe" or "Setup-MonitorCalibration2.msi" of JVC Monitor Calibration 2.4.2. Setup dialogue appears, to repair the 'Repair JVC Monitor Calibration 2', if you uninstall'Remove JVC Monitor Calibration 2' and select 'finish' button.Note; When you run the uninstall process, EyeOne Display 2 driver "EyeOne.dll" and "EyeOneCtrl.dll" is not removed.5. Installation (EyeOne Display 2 Device Driver)EyeOne Display 2 device driver installation procedureConnect the 'EyeOne Display 2' to the USB port on your PC. Then ‘Found New Hardware Wizard’ appears.Select "No, not this time".Click “Next” button.Select "Install from a list or specific location [Advanced]". Click ‘Next’ button.Select "Search for the best driver in these locations".Check "Search removable media …"Insert EyeOne Display install media, or check "Include this location ..."Input the folder name "C:\Program Files\JVC\JVC Monitor Calibration 2\EyeOne USB Driver" Click ‘Next’ button to start installation.6. Getting StartedImportant Notice;This software “JVC Monitor Calibration 2” correspond to the X1 Monitor.To calibrate the color temperature is the following.Other color temperature mode will be calculated from both 9300K and 6500K calibration.You should calibrate the both for the proper result.For better calibration results:•Warm up the monitor for 30 minutes before starting the calibration.•Place the photometer on the rectangular window at the center of the monitor and lightly press against the monitor screen.•Carry out the calibration in a dark room or with a thick black cloth covering the monitor and photometer to shield them from the ambient light.If you do not have stable measurements, adjust the backlight to brighten again.6.1. Run the applicationDouble click the "Monitor Calibration 2" shortcut on the host PC's desktop;or, select the "Monitor Calibration 2" in the program menu.The following application window will show up.6.2 Connect a display monitor to the host PCSet up a display monitor and turn the monitor on.Connect a crossover serial cable or through the USB-to-Serial cable from the host PC to the subject monitor.Click "Connect" button, which is situated under the monitor icons.If the connectivity has been going on for awhile and not yet successful, the user should check if the cable is connected properly. Exit the calibration program and turn the monitor off fora number of seconds and then back on, that would usually solve the problem when theapplication program was previously terminated abnormally.•After successful connection icon changes.6.3. Connect a photometer to the host PCSet up a photometer (X-Rite EyeOne Display 2) and turn the photometer on.If you have not installed install the device driver.Click "Connect" button, which is situated under the photometer icon.Dialog encourages the calibration of the photometer.Block the light entering the photometer.Click the “OK” button.After successful connection icon changes.If the connectivity has been going on for awhile and not yet successful, the user should check if the cable is connected properly and if the device is listed on the USB icon (in the Windows system tray). If the device is not listed on the USB icon, most likely the device driver is not installed properly. In such case, please reinstall the device driver and try again.6.4. Set the calibration parameters"Gamma" is a fixed value of 2.2.Select the Color Temperature within the "White Balance" group.▪Default is "9300K".▪"9300K" and "6500K" are available.6.5. Start calibrationClick the "Calibrate" button to start the calibration process.If the monitor or/and photometer have not yet been connected, the connectingprocess will be initiated for the monitor and then for the photometer after a successfulconnection to the monitor.The following dialog will pop up to prompt for the setting place of photometer.Place the photometer on the rectangular window at the center of the monitor and lightly press against the monitor screen.A dialog will prompt if to save the current NVRAM to a file,if it is selected 'Please ask at thebeginning of calibration' at the "Backup Option".Choose 'Yes' to back up the data or 'No' to proceed directly to the calibration process. The calibration process will start.The following status window will pop up;If the 'Cancel' button is clicked during calibration, then it will stop.When all of the steps are completed, the following dialog will show up.Click “Finished” button, the report window will pop up.6.6. Display Calibration results of the report, save, print•After the calibration run, or when you click the 'Report' button ‘Report window’ will be displayed.•If after running the calibration, the graph displays the results.•After the calibration run, click the “Save” button, then the calibration results will be saved asa CSV file.•Click “Load” button, then will load a stored CSV file and display a graph.•Click “Print” button, then will print a graph currently displayed to a printer, image file, or PDF.6.7. Update NVRAM•After the calibration run, and close the ‘report window‘, NVRAM update dialogue will pop up.•Click “Yes” button, then will save the calibration result. Calibrated to reflect the content.•Click “No” button, then it will abort the calibration result.6.8. Exiting the programThe menu bar "File" → 'Exit' in the main window, or 'Close Box' ( 'X' button) Click to close this application.7. GUI ControlGUI layout of this application software;7.1 Monitor Control7.2 Sensor Control7.3 Gamma7.4 White Balance7.5 Calibration Button7.6 Measurement Button7.7 Report Button7.8 File Menu7.9 Extension Menu7.10 Help Menu7.1. Monitor control"Monitor""Monitor" to display the connection status of the monitorIcon color when connected, you see black and white when not connected.When the connection button 'Disconnect', when not connected to the 'Connect' to display.You can not operate during the connection process.In each, when connected to a corresponding status, yet when the connection is' N / A 'to display.'Monitor ID'The monitor displays the connection ID. ID range is 0 to 127.'COM Port'Displays the COM port connection. Range of ports is COM0-COM16.'COM Protocol'Displays the protocols used in communication. 'JVC' or 'Beacon' will appear.'COM State'Displays the connection status. When connecting the 'Connect', during the connection process is 'Connecting' to display.7.2. Sensor control"Sensor""Sensor" to display the connection status of the photometer.Icon color when connected, will be displayed in black and white when not connected.Button when not connected to the 'Connect' to see, you will not be able to manipulate the connection. Lost communication with the end application.'Name'Displays the name photometer. When the connection is 'EyeOneDisplay2' view, when not connected to the ' N/A ' to display.7.3. Gamma"Gamma""Gamma", gamma adjustment to see the target. This software is fixed in 2.2 can not bechanged.7.4. White Balance"White Balance""White Balance" So, 9300K and 6500K from the two select a single color temperature, you can make adjustments.This software “JVC Monitor Calibration 2” correspond to the X1 Monitor.To calibrate the color temperature is the following.Other color temperature mode will be calculated from both 9300K and 6500K calibration.You should calibrate the both for the proper result.7.5. Calibration button'Calibration' and click the button to start the calibration.For more work, "Getting Started" of '5. To start the calibration' please refer to.7.6. Measurement buttonUsers 'Measurement' by press the button, it is possible to measure the color temperature and luminance of the monitor.If the monitor or/and photometer have not yet been connected, the connecting process will be initiated for the monitor and then for the photometer after a successful connection to the monitor.In measuring the progress in the status bar.Measured after 'OK' and click, displays the results with the graphs as 'Calibration' like.The graph is 'Report Window ' Please refer to.7.7. Report Button'Report' and click the button to show the report window.If you run the previous calibration graph to display the background only if the calibration run, and then re-display the results.More work on 'Report Window' Please refer to.7.8. File Menu"File""File" menu in the 'Write NVRAM', 'Read NVRAM', 'Exit', there are three sub-menus.'Write NVRAM'Specified binary data (.dat) to send the Monitor, RAM and flash writes to a color temperature.Display a progress bar while writing.'Read NVRAM'Read from the monitor color temperature information, the received binary data (. dat) then save as. Loading will display a progress bar.'Exit'Quit the software.7.9. Extension Menu"Extension""Extension" in the menu, 'Monitor' and 'Backup Option', there are two sub-menus.'Monitor''Monitor' is a set of communication with the monitor. Choose from the pull-down menuitems, OK to reflect.'Monitor ID'Communication unit to be used to monitor individual ID code set.'AUTO' if you are looking for the ID that can communicate and connect.'0 '-'127' If you select one of the selected ID in the communication process.AUTO may take time to connect and select.'Port'Set the COM port to connect. 'AUTO' if the communication is possible to find the COM port connection.'COM0'-'COM16' if you select one, the selected COM port and communication.AUTO may take time to connect and select.'Protocol'Select the protocol to connect to. Communication with the monitor mode 'JVC' or 'Beacon' Please select either.'Backup Option'When you start the calibration, the current NVRAM to save the data processing (in themenu bar 'Read NVRAM' similar process) to either set.7.10. Help Menu“Help""Help" menu, 'Help' and 'About' There are two sub-menu.'Help'Displays the software's help documentation.'About''About' dialog is displayed when you click the software name, description, copyright, and then display the version.8. Report WindowType of graphReport window, you can see by the chart below to switch tab.・Luminance & CCT・Achromatic color trackingLuminance & CCTGraphs show the luminance and color temperature.Achromatic color trackingCIE coordinates of the graph to display the Diagram is represented by a color coordinate system.Work on graphWhen you click the left mouse in the graph area to determine the starting point of the expansion area of the graph.By left-clicking the mouse again to the state, left-click at the beginning of the coordinates, and then enlarge the range of coordinates for the second time you click on the left. When you right-click to enlarge, zoom is reset.Button operationWindow exists on the report button below.1. Save2. Load3. PrintSaveGraph data as a report file that you're currently in the report window, then save.Report file will be saved "*.rpt" extension that is stored. Basically, it assumes the load on the report window.LoadSave the file saved reports and view its content.Readable files are saved by window reports "*.rpt" files only.PrintThe reporting window, you can print the current graph is displayed."Luminance & CCT", "Color tracking (Achromatic)" displays a graph of the currently selected one.9.TroubleshootingTroubleshooting1.Why the monitor fails to connect?•Check if the power cord is plugged in and the power switch is on.•Check if the serial cable is the crossover type.•Check if the monitor is a supported model.•Check if the computer operating system is supported.•If USB-to-Serial interface is used, please check if the interface is listed on the USB icon in the system tray. Also if necessary, please update itsdriver.If all the above items are checked and correct, and especially if the monitorhas been connected before with the same setup, please turn off the monitorand unplug its power cord. Wait for a few seconds, and then reconnect thepower cord to the monitor and turn the monitor on. This will solve theconnection problem if the application program was terminated abnormally atthe previous time when it was run.2.Why the photometer fails to connect?•Check if the cable is plugged into both the photometer and the host PC.•Check if the photometer is a supported model.•Check for the latest photometer driver, download and install the driver if necessary.•Check if the interface is listed on the USB icon in the system tray. Often a check for loose cable or a device driver update would solve the problem.3.Why the NVRAM data cannot be loaded?•Check if the monitor is a supported model.•Check if the monitor is connected.•The NVRAM data can only be loaded onto the same monitor model as when the NVRAM data was previously saved.•The NVRAM data has possibly been corrupted4.Why would the color temperature not match exactly to the user specifiedvalues?•Photometer has its physical limitations in precision, resolution, and repeatability.•It is especially difficult to match the color temperature at the lower luminance levels due to the physical limitations of photometer and theback light leakage of monitor.JVC Monitor Calibration 2 ver. 1.0 User's Guide•Conversion error when converting from CCT to CIExy and then back from CIExy to CCT due to the imperfection in the conversion equations at the higher color temperatures.•Numerical round off errors in the computation process.31。
JVC投影仪校正软件12使用说明书

D-ILA Projector“JVC Projector Calibration Software 12”INSTRUCTIONSAbout the marks being used in this manualrefers to as explanations/instructions for DLA-NX9/NX7 series.refers to as explanations/instructions for DLA-NX5 series.Items without markings are for all models.“JVC Projector Calibration Software” is a tool that enables you to use the projector in an optimal condition at all times with the use of a commercially available optical sensor.ⅥCalibration FeatureBy performing a precise calibration with easy procedures in optimizing the projected images, which changes depending on the installation conditions, such as installation position of the main unit, lens shift/zooming position, you can enjoy high-quality images that are suitable for the installation conditions. Y ou can also maintain the projector in an optional state by correcting distortions, such as those in the color balance, which are caused by the prolonged use of the projector.ⅥEnvironment SettingsAdjusts the video settings according to the installation environment to minimize any influence on the image quality by objects, such as white walls or indirect illumination.ⅥImport/Export Image Quality Adjustment DataEnables you to save the image setting data to a PC from the projector, or imported from a PC to the projector via the LAN terminal.ⅥGamma Data Adjustment FeatureAllows you to adjust the gamma curve of the projector according to your preference.*“JVC Projector Calibration Software” is designed to adjust gamma and color display by changing the settings of the projector.*Please note that setting of the projector is changed by using this software.●Projectors that support calibrationModels supported:DLA-NX9/NX7 series: DLA-NX9, DLA-NX7, DLA-N11, DLA-N8, DLA-N7, DLA-RS3000, DLA-RS2000DLA-NX5 series: DLA-NX5, DLA-N6, DLA-N5, DLA-RS1000●PC (computer)●LAN cable●Optical sensorModels supported:SpyderX Elite/Pro by Datacolori1 Pro2 by X-Rite*SpyderX Elite/Pro sensor is required when using the Environment Settings feature.To make use of this software, your hardware and software must meet the following specifications.*1When using Windows 8 and Windows 10, install .NET Framework 3.5 SP1 or enable the function from the Control Panel. For details on how to install, refer to the Microsoft website.ⅥCautionThe above requirements do not guarantee that this software will work on your computer.Macintosh systems are not supported.1Install the software on your PC (P . 3)2Connect the main unit and your PC via LAN cable 3Projector and PC Setup (P. 4)4Start up the software (P. 7)5Connect the optical sensor 6Calibration (P. 8)PC (Computer)OS supported Windows 7 (32-bit, 64-bit)Windows 8 (32-bit, 64-bit)Windows 10 (32-bit, 64-bit)Memory 1 GB or more HDD256 MB or moreRequired functions.NET Framework 3.0 / 3.5 *1USB port LAN portInstalling the SoftwareⅥPre-installation CheckࡗBefore starting the installation, ensure that no program is running.ࡗDuring installation or calibration, set the PC to the administrator mode, and disable the screen mode and energy-saving mode of the PC.ࡗDo not connect the optical sensor to the PC before installing the driver.ⅥInstalling SoftwareDouble-click the download file “JVC_PJ_Calibration**_en_v***.zip” to start installation. Download the file to a directory, and unzip the file.The following file is created.●“JVC_PJ_Calibration**_v***.msi”Double-click “JVC_PJ_Calibration**_v***.msi” to start installation.1“Welcome to the JVC Projector Calibration Software Setup Wizard” window appears. Click the [Next] button. 2“Select installation Folder” window appears. You can proceed to the next step with the destination unchanged, or designate a folder if necessary.3“Confirm installation” window appears. Click the [Next] button.4After installation is complete, an “Installation complete” window appears. Click the [Close] button to exit the wizard. Check to ensure that short-cut icons are automatically created both in the Start menu and on theDesktop.ⅥCaution*This software does not run on its own. To run the program, you need to connect the optical sensor to a PC via USB cable, and the PC to a projector via LAN cable.ⅥInstalling the Optical Sensor DriverInstall the driver of the optical sensor to be used.Do not run the software supplied with the optical sensor when using this calibration software.Connect the projector to a PC via LAN cable.Set the TCP/IP for the PC and “Network” of the projector.●Network Settings of the ProjectorOpen the “Network” item under the “Function” tab in the menu.Set “DHCP Client” to “Off”.Set the “IP Address” of the projector to an address different from that of the PC.Example: PC[192 168 0 1 ]Projector[192 168 0 2 ]Set “Subnet Mask” and “Default Gateway” of the projector to the same values as the PC.Example: Subnet Mask[255 255 255 0 ]Default Gateway[192 168 0 254 ]After pressing “Set”, press OK to apply new settings.*For details on the PC settings, refer to the instruction manual of the PC. Procedures for setting up Windows7 are described in P. 19.*If the DHCP server is running on the PC that is directly connected to the projector, set “DHCP Client” to “Off”, and then press “Set”.Projector and PC SetupConnect the projector to a network connection device (hub, etc.) via LAN cable. Open the “Network” item under the “Function” tab in the menu.“Set”. Acquisition of the IP address starts automatically.“Subnet Mask”, and “Default Gateway” to the designated values.After pressing “Set”, press OK to apply new settings.*For details on the PC settings, refer to the instruction manual of the PC. Procedures for setting up Windows7 are described in P. 19.*related books.*the network to be connected.*DHCP server is allowed, consult your network administrator.ⅥPrecautions Prior to Use of Calibration•Calibrated result might be different from the factory default data, depending on the operating environment.•During calibration, set the PC to the administrator mode, and disable the screen mode and energy-saving mode of the PC.•After turning on the power of the projector, set to the Picture Mode for performing calibration. Start calibration after waiting for about 30 minutes.•Make sure the brightness of the ambient light in the room is the same as that of the operating environment where the projector is used.•Do not cast a strong ambient light directly on the screen.•Set the “ECO Mode” of the projector to “Off” when the calibration software isrunning.•Do not use the remote control and the operation panel when the calibration software is running.•Do not set to the HIDE mode when the calibration software is running.•The calibration does not work when displaying 3D image.•Calibration does not work when Picture Mode has been set to Frame Adapt HDR. Set to another Picture Mode.•Calibration does not work when Color Profile has been set to Off. Set to another Color Profile before performing the calibration.•Calibration does not work when Lens Aperture has been set to “Auto 1” or “Auto 2”. Set the lens aperture to “Manual” before performing the calibration.•If an error message is prompted while using the calibration software, close the application and restart the projector. Wait at least 5 minutes before restarting.•If the application is ended due to the error message while backup, importing or exporting is in progress, restart the PC, and perform the operations again.*Upon saving the data after performing calibration, a backup file will be saved automatically to the folder selected in “Setting”. All data of the projector set prior to this process will be overwritten.Double-click the “JVC Projector Calibration software” icon on the Desktop.ⅷ12*Upon saving the data after performing calibration, a backup file will be saved automatically to the selected folder.File name “Serial No._Set Picture mode_Y ear-Month-Date-Time.cbd”Note that the factory default data will be saved as “Serial No._init_Y ear-Month-Date-Time.cbd”. Be careful not to delete this file.3Be sure to click the “OK” button at the bottom right to save the settings before proceeding to the next step.ⅥRecovering Backup Data1Click the “IMPORT” button.2Select the backup data file from the folder, and click “Open”.3The backup data is imported to the projector.Starting up the SoftwareClick(*1) Calibration Type - Gamma+ColorCalibrate gamma and color.- GammaCalibrate gamma only.- ColorCalibrate color only - Log onlyLog the current status.1234*The Profile Name being created and saved won’t be displayed when Custom 1 to 4 is selected, but shown as Custom 1 to 4 instead.*Click the “<<” button to go back to the previous screen if Picture Mode does not appear. Proceed to this screen again.*Filter is set automatically in accordance to the selected Color Profile.*Set to the actual Picture Mode for image viewing before performing calibration. However, even if another Picture Mode has been selected, the calibration result for Color is reflected when the settings of Aperture, Lamp Power and Filter are the same.*Calibration does not work in Frame Adapt HDR mode. Set to another Picture Mode and calibrate using the same Aperture, Lamp Power and Filter settings.Calibration ProcedureClickClickClick after installingClick after settingDouble-Click5Calibration in progress.While calibration is in progress, make sure that the surrounding light does not fluctuate.Otherwise, it may affect the calibration results.*Noise may appear on the screen when data writing is in progress.6The results for each Calibration Type are displayed.GammaCalibration results are shown in a white line.The state before calibration is performed is shown in a blue line.The green line represents Gamma 2.2.ColorCalibration results are shown in a white line.The state before calibration is performed is shown in a blue line.The pink line indicates the color gamut of Rec. 709.The chromaticity of each color is indicated using x-y coordinates.*The Profile Name being created and saved won’t be displayed when Custom 1 to 4 is selected, but shown as Custom 1 to 4 instead.Color TempThe chromaticity of the color temperature for each gray level is indicated by ● of the respective gray levels.The red circle indicates the intended chromaticity xy ± 0.01.7Save the results if these are in order.Click the “SAVE” button.After saving is complete, below message is displayed.Click “OK” (to return to the top menu).To exit without saving the result, click (to return to the topmenu).ⅥCautionThe calibration result includes the characteristics of the screen.It is recommended to set the Screen Adjust function of the projector to off after calibration.GammaColorColor TempClickUse this feature to create a color profile that contains the color space, color temperature, and gamma information.1Click the “Create” button.2Create a color profile.Select a Color Space and a Color T emp setting from the pull-down menu.Y ou can also enter a numerical value directly.After Information is displayed, follow the instructions to select a Filter Type.Filter Type selection is not necessary. (Fixed at Normal)Select a Gamma setting from the pull-down menu.3Enter a profile name.(Not more than 10 one-byte ASCII characters. Extension of the created profile is “prof”.)Click the “START” button after entering the profile name.*To apply the color profile data to the projector, import it to the projector by using the Import feature.Enter a file name and click “Save”.You can enter the name of the creator in “Author”.To exit, click (to return to the top menu).Creating a Color ProfileClickInformationProfile NameClickUse this feature to adjust the gamma data.1Click the “Gamma Data Adjustment” button.2Select the custom gamma table to be adjusted.3Select the gamma setting value to be set as the base value.4Select the color to be adjusted.5Use the mouse to adjust the gamma curve.Adjustment can also be made using the scroll bars at the bottom left.6Click the “SAVE” button to save the newly created gamma data on the PC.7After the adjustment is complete, click(to return to the top menu).Gamma Data Adjustment ProcedureClickCustom Gamma TableGamma Setting Gamma Curve AdjustmentColorScroll BarUse this feature to save/import picture quality setting data, or to import color profiles or gamma data.1Click the “Import/Export” button.ⅥImport/Export Picture Data ●Export ProcedureA Click the pull-down menu, and select “Picture Data (*.jpd)”.B Double-click the Picture Mode (User 1 to 6), and select the Picture Mode (User 1 to 6) to be exported from the pull-down menu. Click the “EXPORT” button.*Click the “<<” button to go back to the previous screen if Picture Mode does not appear. Proceed to this screen again.C Select the destination for saving, and save the file after specifying the file name. (Extension “.jpd” is added upon saving the file.)To exit, click(to return to the top menu).●Import ProcedureA Click the pull-down menu, and select “Picture Data (*.jpd)”.Import/Export ProcedureClickClickDouble-ClickClickClickB Double-click the Picture Mode (User 1 to 6), and select thePicture Mode (User 1 to 6) to be imported from the pull-downmenu. Click the “IMPORT” button.*Click the “<<” button to go back to the previous screen if Picture Mode does not appear. Proceed to this screen again.C Select the file (***.jpd) from the location where it is stored.D Click the “START” button.To exit, click (to return to the top menu).ⅥImport Color ProfileA Click the pull-down menu, and select “Color Profile (*.prof)”.B Double-click the Color Profile (Custom 1 to 4), and select theColor Profile (Custom 1 to 4) to be imported from the pull-downmenu.C Click the “IMPORT” button.Double-ClickClickClick ClickDouble-ClickClickD Select the file (***.prof) from the location where it is stored.E Click the “START” button.To exit, click (to return to the top menu).ⅥImport Gamma DataA Click the pull-down menu, and select “Gamma Data (*.jgd)”.B Double-click Gamma (Custom 1 to 3), and select the Gamma(Custom 1 to 3) to be imported from the pull-down menu.C Click the “IMPORT” button.D Select the file (***.jgd) from the location where it is stored.Click ClickDouble-ClickClickE Click the “START” button.To exit, click (to return to the top menu).ClickEnvironment SettingsClickClickambient light, place the optical sensorwhere light from the projector does notsame time, make sure the ambient lightClick6After installation is complete, click the “>>” button.7Enter a Screen Size (width across corner, inch) and Viewing Distance, and click the “START” button.8The recommended settings are displayed.Picture T one -W Dark Level Bright Level ColorTo view images in these settings, click the “AFTER” button. The recommended setting is applied to the projector.To save these settings, press the button while the “BEFORE” button is displayed on the screen.To restore to the original settings, click the “BEFORE” button.The settings of the projector will be restored to the original settings.If the settings are inappropriate, take the measurements again.To exit, click(to return to the top menu).ClickClickScreen SizeViewing DistanceRecommended Settings1Return to the top menu, and click the “EXIT” button.ⅥWhen the following messages are displayedIf you encounter with the following messages, follow the instructions being explained in the following:Exiting the SoftwareMessage Solution (Details)Error in detecting the model.Go back to the previous screen and check the input signal. After that,proceed to the error message screen.*This software can only be used on compatible models.Could not set up the LAN connection. Please try again.Proceed to the setting screen from the top menu and check the LAN connection by clicking the “CHECK” button.If “NG” is displayed, perform the LAN setting again.Click1Click the “Start” button on the lower left corner of the desktopscreen, and select “Control Panel”.If the screen on the right is displayed, select “Small Icon (S)” from “View by:”. => Proceed to 2).2Select “Network and Sharing Center” when the screen on theright is displayed.3Select “Local Area Network”. (Or, select “Wireless NetworkConnection” if the connection is made by the wireless LAN.)4Select “Properties”.5After choosing “Internet Protocol Version 4 (TCP/Ipv4)”, select“Properties”.6Proceed to 7) for LAN connection via router and complete thesetup in 11).Proceed to 12) if the projector and PC are directly connected by LAN cable and complete the setup in 15).7Check the boxes for “Obtain an IP address automatically” and “Obtain DNS server address automatically”.=> Click “OK”, and then close all the windows by clicking the “x”button.8Turn on the power of the projector.Select “MENU” => “Function” => “Network”, and proceed to 9). 9Set “DHCP Client” to “On”After choosing “Set”, select “Yes” in “Apply network setting?”10Write down the value in “IP Address” (192 168 0 2 in the example) after returning to the screen in 9).11Start the “JVC Projector Calibration Software” on your PC, andselect “Setting” on the right side of the screen.Enter the value from 10) in the “IP address” field on the screen on the right.Click “CHECK”. If “OK” appears on the right of the button, complete the setting by clicking the “OK” button at the bottom right corner.12Check “Use the following IP address:”. Enter the values shown onthe right in the “IP address”, “Subnet Mask” and “DefaultGateway” fields. Check “Use the following DNS serveraddresses:” to enter the value shown on the right in the“Preferred DNS server:” field.=> Click “OK”, and then close all the windows by clicking the “x”button.13Turn on the projector.Select “MENU” => “Function” => “Network”, and proceed to 14). 14Set “DHCP Client” to “Off”.Enter the values shown on the right in the “IP Address”, “Subnet Mask” and “Default Gateway” fields.After choosing “Set”, select “Yes” in “Apply network setting?”15Start the “JVC Projector Calibration Software” on your PC, and select “Setting” on the right side of the screen.Enter the value in the “IP address” field on the screen on the right.Click “CHECK”. If “OK” appears on the right of the button, complete the setting by clicking the “OK” button at the bottom right corner.The specifications of this product is subject to change without prior notice.21Trademarks●Spyder and SpyderPro are either registered trademarks or trademarks of Datacolor in the United States and other countries.●i1 is either registered trademark or trademark of X-Rite in the United States and other countries.●Microsoft and Windows are either registered trademarks or trademarks of Microsoft Corporation in the United States and other countries.●Other company names and product names mentioned in this instruction manual are trademarks and/or registered trademarks of the respective companies.© 2019 JVCKENWOOD Corporation 0919NOH-SW-XX。
JVC GZ-MS230 MS215 使用指南
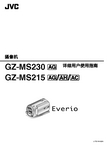
GZ-MS230 DGZ-MS215 D /E /C摄像机详细用户使用指南LYT2116-023A目录入门指南 (4)充电 (4)录制 (4)播放 (4)拍摄提示 (4)有用的拍摄技巧节假日/圣诞节 (5)婚礼 (6)旅行 (7)游乐园 (8)入门核对附件 (10)把核心过滤器装到直流电电线上 (11)电池充电 (12)握带调整 (13)手带 (13)插入SD卡(GZ-MS230) (13)可以使用的SD卡类型 (14)插入SD卡(GZ-MS215) (14)可以使用的SD卡类型 (15)时钟设定 (15)重设时钟 (16)更改显示语言 (16)使用操作键 (16)使用滑块 (16)握带调整 (17)安装三脚架 (17)在海外使用本机 (17)在海外给电池充电 (17)旅行期间按当地时间设置时钟 (18)设置夏时制 (18)备选附件 (19)录制在自动模式下拍摄视频 (20)变焦 (21)在视频录制过程中捕捉静像 (21)减轻相机振动 (22)立即查看捕捉到的图像 (22)在自动模式下拍摄静像 (22)变焦 (24)立即查看捕捉到的图像 (24)手动录制 (24)场景选择 (25)手动调整聚焦 (26)调整亮度 (27)设置快门速度 (27)设置白平衡 (28)设置背光补偿 (28)设置测光区 (29)带效果录制(GZ-MS230) (29)拍摄特写镜头 (29)录制前,按事件登录文件 (30)用YouTube格式拍摄视频 (31)用iTunes格式拍摄视频 (32)间隔录制(慢速录制) (32)通过感应动作自动录制(自动录制) (34)剩余录制时间/电池电量 ......................................................... 35播放播放视频 (37)快速查看视频内容 (38)播放管理信息不完整的视频 (38)播放静像 (39)幻灯片播放 (39)搜索特定的视频/静像 (40)组搜索 (40)日期搜索 (40)事件和日期搜索 (41)连接电视机并在电视机上观看 (41)播放播放列表 (42)编辑删除不需要的文件 (43)删除当前播放的文件 (43)删除选定的文件 (44)删除所有文件 (45)保护文件 (45)保护当前显示的文件 (45)保护所选文件 (46)保护所有文件 (47)取消所有文件的保护 (47)更改视频的事件登录 (48)更改当前显示的文件的事件 (48)更改所选文件的事件 (49)在播放过程中,在视频中捕捉静像 (50)在视频中捕捉所需部分 (50)捕捉要上传到YouTube的视频 (51)准备要传送到iTunes的视频 (52)从录好的视频中创建播放列表 (53)用所选文件创建播放列表 (53)按组创建播放列表 (54)按日期创建播放列表 (55)按事件创建播放列表 (56)编辑播放列表 (57)删除播放列表 (58)复制把文件复制到卡上 (59)复制所有文件 (59)复制选定的文件 (60)移动文件 (61)移动所有文件 (61)移动选定的文件 (62)把文件复录至DVD录像机或VCR (63)复制到 Windows PC (64)核对系统要求(指引) (64)安装随附软件 (64)备份所有文件 (65)组织文件 (66)把视频录制到光盘上 (67)JVC 软件许可权合约 (68)文件和文件夹列表 (69)复制到Macintosh电脑 (69)菜单设定操作菜单 (71)录制菜单(视频) (72)光源 (73)登记事件 (73)视频质量 (73)变焦 (74)增亮 (74)慢速录制 (74)2自动录制 (74)自动切换录制媒体 (75)选择纵横比 (75)风声消除 (76)录制菜单(静像) (77)光源 (78)自拍 (78)快门模式 (79)图形质量 (79)增亮 (80)自动录制 (80)手动设置菜单 (81)场景选择 (81)FOCUS (81)调节亮度 (81)快门速度 (81)白平衡 (81)背光补偿 (81)测光区 (81)效果(GZ-MS230) (81)近拍 (81)播放菜单(视频) (82)删除 (83)搜索 (83)播放播放列表 (83)编辑播放列表 (83)播放MPG文件 (83)编辑 (83)显示在屏幕上 (84)播放菜单(静像) (85)删除 (85)搜索日期 (85)编辑 (85)幻灯片放映效果 (86)显示在屏幕上 (87)显示设置菜单 (88)LANGUAGE (88)日期显示样式 (88)监视器亮度 (88)监视器背光 (89)时钟设定 (89)基本设置菜单 (90)演示模式 (91)自动关机 (91)操作声音 (92)录制按钮 (92)快速重启 (93)更新 (93)出厂前预设值 (93)连接设置菜单 (94)在电视机上显示 (94)视频输出 (94)媒体设置菜单 (95)视频记录媒体(GZ-MS230) (95)视频插槽选择(GZ-MS215) (95)图像记录媒体(GZ-MS230) (96)图像插槽选择(GZ-MS215) (96)格式化内存(GZ-MS230) (97)格式化SD卡 (97)删除内存(GZ-MS230) (98)零部件名称正面 (99)背面 (99)底部 (100)内部 (100)液晶监视器 .......................................................................... 101液晶显示器上的显示常见录制显示 (102)视频录制 (102)静像录制 (103)视频播放 (103)静像播放 (104)故障排除电池 (105)录制 (105)卡 (105)播放 (105)编辑/复制 (105)电脑 (106)画面/图像 (106)其他问题 (106)错误字样? (106)维护 (108)规格 (109)3充电●参阅详细用户使用指南显示中的操作说明。
JVC DLA-RS4810 高清投影机使用说明书

晼㯡婌♟㒷ContentsGetting StartedSafety Precautions (2)Accessories/Optional Accessories (11)Check the Accessories (11)Optional Accessories (11)Main Features (12)Controls and Features (14)Main Unit Front (14)Main Unit Bottom (14)Main Unit Rear (15)Main Unit Input Terminals (16)Remote Control (17)Loading Batteries into the Remote Control (18)Effective Range of Remote Control Unit (18)Set upInstalling the Projector (19)Precautions during Installation (19)Precautions during Mounting (20)Adjusting the Position (21)Connecting the Projector (22)Connecting to the HDMI Input Terminal (DigitalInput) (22)Connecting to the Component Video Input Terminal (Analog Input) (23)Connecting to the LAN Terminal (24)Connecting to the RS232C Terminal (24)Connecting to the REMOTE Terminal (24)Connecting to the TRIGGER Terminal (25)Connecting the Power Cord (Supplied Accessory) (25)OperateViewing Videos (26)Adjusting the Projector Screen (28)Adjusting the Lens According to the ProjectionPosition (28)Saving and Retrieving Adjustment Settings (29)Adjusting Image Quality Automatically According to the Viewing Environment (31)Setting Screen Correction (32)Adjusting the Screen Size (Aspect) (33)Viewing 3D Movies (34)Installing the 3D SYNCHRO EMITTER (34)Viewing 3D Movies (35)Converting 2D Movies to 3D Movies for Viewing (35)Adjusting 3D Movies .......................................... 36Adjust/SetSelecting an Image Quality According to the Video Type (37)Setting the Picture Mode (37)Setting the Color Profile (38)Adjusting Movies for Increased Expressiveness (Multiple Pixel Control) (39)Finetuning the Image Quality (40)Adjusting the Output Value of the Projected Image(Gamma) (40)Adjusting to the Preferred Gamma Setting (Custom Gamma) (41)Compensating Highlights and Shadows (Dark/Bright Level) (42)Adjusting to the Preferred Color (ColorManagement) (43)Reducing the Afterimage of Fastmoving Images(Clear Motion Drive (C.M.D.)) (44)Adjustments and Settings in the Menu (45)LIst of Menu Items (45)Picture Adjust (47)Input Signal (51)Installation (53)Display Setup (59)Function (60)Information (62)MaintenanceReplacing the Lamp (63)Lamp Replacement Procedure (63)Resetting the Lamp Time (65)Maintaining the Cabinet and Remote Control (65)Cleaning and Replacing the Filter (66)TroubleshootingTroubleshooting (67)When the following messages appear... . (69)OthersExternal Control (70)RS232C Specifications (70)TCP/IP Connection (70)Command Format (71)Remote Control Code (72)Communications Example (73)Specifications (74)Index (82)103840×21604K 3840×2160Full HDFull HD 1920×10801920×1080The photos are for illustrative purposes only.environmentThe photos are for illustrativepurposes only.The photos are for illustrative purposes only.(C.M.D.)Sharp depiction of details with minimal blurThe photos are for illustrative purposes only. ABCD ABCD Before adjustmentAfter adjustmentThe photos are for illustrative purposes only.unit inclined withinwithin ±are required for Make sure that you specialist to install it.Adjustment menu displayAnalysis screen Highlighted color Adjustment resulting in effects Blue, greenRed, yellow ContrastBlack SmoothingTo display the adjustment menu, operate any of the keys while the analysis screen is displayed.No adjustment can be while the analysis screen is displayed. Make adjustments after returning to the adjustment screen.The photos are for illustrative purposes only.original image, creating a greater sense of depth.The photos are for illustrative purposes only.Press the [GAMMA] buttonPressing the [GAMMA] button time switches the setting in sequence. The setting value varies with the model in use, as well as the input Picture mode.adjustment settingsSignal DescriptionRecommended setting normal viewing.Places more emphasis gradation compared to thesetting.Image with a sense of that is characteristic of films.BACK0000MagentaBlue BackPicture AdjustRedColor Selection Reset OffPause Custom 3Custom 2Custom 1Color ManagementInterpolation EnabledIntermediate Frame Generation。
JVC GZ-MS125B 视频录像机用户手册说明书
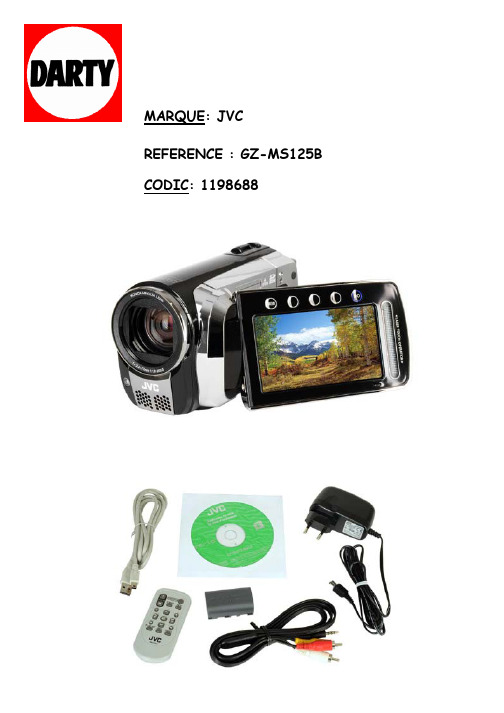
MARQUE: JVC REFERENCE : GZ-MS125B CODIC: 1198688ATTENTION• Assurez-vous d’utiliser des batteries de JVC. Si vous utilisez des batteriesd’autres fabricants, les performances et la sécurité ne peuvent pas être garanties.Guide de démarrageChargez la batterie avant l’enregistrementÉteignez le caméscope et fixez la batterie.BatterieAdaptateur secteur Sur une prise secteur (110 V à 240 V)Voyant de alimentation/recharge Clignote: en cours de charge S’éteint: charge terminéeVoyant d’accèsClignote: Accès aux fichiersLa batterie n’est pas chargée lors de l’achat.1. Le caméscope doit être éteint lors de l’insertion ou du retrait d’une carte SD. Sinon, les données de la carte peuvent être corrompues.2. Formatez une carte SD lors de sa première utilisation.Insérez la carte SdAppuyez sur la touche Power () pour mettre le caméscope sous tension.()Emplacement B Emplacement AInsérez fermement la carte.Ouvrez le volet de protectionNe retirez pas l’adaptateur secteur, la batterie ou la carte SD lorsque le voyant clignote.Ajuster la poignéeSerrerPoignée ceinturéeTaquet• Ne tirez pas sur la poignée pour ouvrir l’attache. Tirer le taquet pour l’ouvrir.• Serrez la dragonne autour de la main en saisissant le caméscope.• Évitez de laisser tomber lecaméscope lors de son utilisation.Ajustez la dragonne et serrez.FRANÇAISRégler la date et l’heureOuvrez l’écran LCd pour allumer le caméscopeQSélectionnez [OUI] dans un délai de 10 secondesRDéplacez votre doigt le long du capteur.T ouchez alors OK. (Z p. 9).Sélectionnez [REGLAGE dE L ’HORLOGE]SRéglez la date et l’heureVREGLAGE DE L'HORLOGE16551120091T ouche marche/arrêt ()Écran LCD• Lorsque le message disparaît, appuyezau moins 2 secondes sur la touche marche/arrêt pour éteindre l’appareil; appuyez alors de nouveau sur la touche au moins 2 secondes.•T ouchez les capteurs avec votre doigt. Les capteurs ne fonctionnent pas si vous les touchez avec un ongle ou avec des gants.Sélectionnez une villedans la région danslaquelle vous vous trouvezTSélectionnez [MARCHE] ou [ARRET]USélectionnez [MARCHE] si l’heure d’été est en vigueur.REGLER L 'HEURE D 'ETE1.11.2009 16:55ETABLI POUR L'HEURE D'ETEHEURE D'ETEARRETCapteur tactile: Règle la date et l’heure : Déplace le curseur vers la droite OK: L ’horloge démarreEnregistrement vidéo• Avant d’enregistrer une scène importante, il est recommandé d’effectuerun enregistrement test.ATTENTIONdéplacez le commutateur de mode pour sélectionner le mode ! (vidéo)Q0:04:01[4h 59m ]RECLe mode change lorsque vous appuyez sur la touche.Appuyez sur la touche START/STOP pourlancer l’enregistrement ; appuyez de nouveau sur la touche pour arrêter.Commencez à enregistrerSEspace restant sur la carte SDPauseQualité vidéoEnregistrementSélectionnez le mode d’enregistrementRL ’indicateur du mode d’enregistrement automatique apparaît.FRANÇAISLectureSélectionnez le mode de lectureQLe mode change lorsque vous appuyez sur la touche.Sélectionnez le fichier désiréR01.11.2009 16:551/2Écran d’indexÉcran de lectureL Pour effectuer des opérations de recherches avants/arrières (Z p. 22)L Pour visualiser des fichiers sur un téléviseur (Z p. 25)N’oubliez pas de faire des copies après l’enregistrement !• Pour copier des fichiers sur des disques DVD (Z p. 29)• Pour copier des fichiers à l’aide d’un magnétoscope/enregistreur DVD (Z p. 34)• Pour lire un disque créé (Z p. 28)• Pour éditer des fichiers sur votre ordinateur (Z p. 29)ATTENTIONSélectionnez (Touchez OK)SCAssurez-vous de ne pas obstruer lors de la prise de vue.Vous pouvez aussi utiliser le caméscope avec seulement l’adaptateur secteur.Refermer la couverture de la fente dedevient vert lorsqueFINEZoom arrière Zoom avantDIGESTLECTURE VIDEO1/201.11.2009 16:55’écran d’index apparaît.Pour passer à la page précédente ouPour supprimer une vidéolorsque la lecture est arrêtée.Pour changer le nombre de miniatures(6 miniatures/20 miniatures)Déplacez la commande de zoom sur [W]’écran d’index apparaît.01.11.2009 16:551/2DIGESTCâble AVSuivez les instructions sur l’écran. Cliquez sur [Suivant].Cliquez sur [Terminer].’icône Everio MediaBrowser est créée surPour vérifier le mode d’emploi sur Everio MediaBrowserCliquez deux fois sur l’icône d’Everio Cliquez sur [Aide] puis sur [AideCliquez sur [Tout le volume du camescope] puis sur [Suivant].Cliquez sur [demarrer].La sauvegarde démarre.Pour déconnecter le caméscope de1) Cliquez avec le bouton droit de la sourissur l’icône (Retirer le périphérique entoute sécurité) sur la barre des tâcheset sélectionnez [Périphériques destockage de masse USB].2) Suivez les instructions sur l’écran etassurez-vous que le périphérique peutSélectionnez [Videos seulement]. Cliquez sur [+].Entrez le nom de la nouvelle liste et cliquez sur [OK].Les fichiers enregistrés le jour sélectionné déplacez le fichier sur la liste.Pour ajouter d’autres fichiers dans la liste, répétez les étapes 5 et 6.Cliquez sur [Selectionner fichiers individuellement] puis sur [Suivant]. Pour ajouter tous les fichiers sur des disques DVD, cliquez sur [Selectionner tous les fichiers affiches], puis passez à l’étape 4.déplacez le fichier sur la partieinférieure et cliquez sur [Suivant].Entrez le nom du disque,sélectionnez le style de menu principal et cliquez sur [Suivant].Pour plus de détails sur Everio MediaBrowser, cliquez sur [Aide] et consultez [Aide MediaBrowser].® doit être installé survotre ordinateur pour visualiser [Aide MediaBrowser]. Vous pouvez télécharger® depuis le site Web d’Adobe : Pour toute assistance sur l’opérationREGLAGES PODCASTLIB.FINVERIF.1/3Pour vérifier le contenu du fichier,ous les fichiers avec le réglaged’exportation activé sont transférés sur Impossible d’exporter le fichier vers Référez-vous à «A&Q»,«Dernières informations»,«Informations de。
jvc 2010 Everio 系列 数位硬碟 记忆卡 记忆体式摄影机 说明书

2010 Everio 系列數位硬碟/記憶卡/記憶體式攝影機閃亮你的精彩生活智慧型手機能可能無預警中止,耳機聲音品質可能會有所減損,或是傳輸距離可能縮短到10公尺以下。
更多詳情與相容裝置,請詢問當地JVC經銷商或是上JVC網站查詢。
智慧型手機需搭載Windows mobile 6.1以上版本,並自GZ-HM550有內建藍芽Bluetooth ®無線傳輸科技。
結合選購的藍芽裝置,你可以享受多樣無線便利功能。
擴大Everio跨世代的無限可能僅限GZ-HM550臉部追蹤對焦與影片圖場臉部搜尋功能HD Everio系列上所配備的臉部追蹤對焦系統再進化。
在影片拍攝的同時,它會智慧的偵測同一個場景最多達16個人臉,並且同步準確地調整聚焦與曝光。
這個功能在拍攝影片與相片時都可使用。
特別是在影片播放瀏覽模式時,影片圖場臉部搜尋功能可放大影片中當時所拍攝偵測到的人臉,讓你可以輕易地找出影片檔案中拍攝的人物主角。
放影時:自動放大每段影片偵測到的人臉拍攝時:偵測多達16個人臉搭載全新最先進的機身性能,照亮生活的每一刻Super LoLux 超級低照度感應系統(部份機種無此功能)低光源環境之下的攝影表現是高品質影片的關鍵因素之一。
全新Everio的Super LoLux感應系統設計,確保卓越的低光源敏感度。
為了提供這個功能,Everio部份高解析度機種搭配了背照光源式設計CMOS感應器,而標準解析度機種亦配備了大型1/6”英吋高感度CCD感應器,能獲取比以往機型更多的光源。
能呈現更清晰明亮的影像與準確色彩表現,所以即使在低光源環境下。
無需擔心你身處在室內或昏暗環境之中。
過去機種全新 Everio過去機種全新 EverioA.I.S 先進式影像防手震系統*Everio另一個跨世代的進化是它的防震表現設計。
一種稱為A.I.S先進式影像防手震的新科技,相較於過去的機種,能擴展運用影像感應器的廣角有效圖素區域達4倍之多,在攝影機體震動時,能提供強而有力的圖素影像補償。
JVC J4221 前置揚聲器 重低音喇叭 快速操作指南说明书

ࠠࠅτΌ༟ৃႭ
本機是以在規定設計限制內操作為前提,誤用可能會造成觸電或火災。為防本機受損,請 務必在安裝、使用和維護時遵守以下規定。操作本機前,請先詳閱下列安全資訊說明。請 將本說明書保管於安全處以供未來參考。
• 詳閱說明書。
• 保管說明書。
• 注意各項警告。
• 遵循所有說明。
• 請勿在水邊使用本裝置。
• 僅可使用乾布進行清潔。
• 請勿使通風口堵塞。依照製造商的指示說明進行安裝。
• 請勿安裝在散熱器、暖氣出風口、火爐或其他生熱裝置(包括擴大機)等熱源周遭。
• 請勿破壞定極或接地型插頭的安全作用。定極插頭有兩片一寬一窄的銅片,接地型插頭 則有兩片銅片及另一個接地叉,寬銅片或接地叉是用來確保人身安全。若隨附的插頭無 法插入插座,請洽詢電氣技師更換舊型插座。
* 本產品附件袋中未隨機附送的線材,請用戶自行購買。
多媒體播放器
平板電腦 /MP3 播放機 / 筆記型電腦
** 使用任一個數位輸入時,若無音源 :(A) 請試著將播放設備輸出設定為 PCM 或 (B) 直接連接到 藍光 / 其它設備訊號源,以確保輸入音源是系統可接受的數位音源進行傳輸。
注意 : 本機台(J4221) 數位輸入 : 僅支援杜比或數位 PCM 音源格式輸入。 USB 輸入 : 僅支援固定附檔名 (.wave) 格式。
• 請將所有維修工作委由合格維修人員處理。凡裝置受損皆需進行維修,如電源線或插頭 受損、液體潑灑或物體掉入裝置中、裝置遭雨淋或受潮、無法正常操作或裝置摔落。
• 為降低觸電或元件損壞的風險,請先關閉電源再將其他元件連接至本機。
• 清潔本機前,請先拔下電源線。使用濕布便足以進行清潔,請勿使用液體或在本機上噴 灑清潔器,亦請勿使用腐蝕性清潔劑。
JVC HD550投影机
JVC HD550投影机
启明
【期刊名称】《现代音响技术》
【年(卷),期】2010(000)005
【摘要】JVC的高清投影机在笔者心目中一直都是出色的佳作之一,从HD-1到最新的HD-990。
经历了几次技术的更新换代,JVC凭借出色的D—iLA芯片的投影技术,已经稳占高清投影机市场的头几位。
全新的HD550高清投影机继续担起高清投影普及风潮中的中端主流机型的角色,成为上承高端HD990、下接入门级HD330的中级畅销机型,
【总页数】4页(P88-91)
【作者】启明
【作者单位】
【正文语种】中文
【相关文献】
1.JVC DLA-SC5800RB:标准的JVC 4K&3D投影机 [J],
2.感受JVC HD550 D-ILA投影机的高清魅力 [J], 怡思
3.JVC在中国市场投放的家用旗舰级3D投影机新型e-shift显示器件支持4K级超高清2D影像 [J], 赵聪
4.4K“芯”基准 JVC联合优声美影举行JVC LX-UH1 DLP电影投影机发布会 [J], 无
5.8K投影全球领先--JVC发布家用型8K激光投影机 [J],
因版权原因,仅展示原文概要,查看原文内容请购买。
JVC LX

JVC LX
日前,JVC 杰伟世(中国)投资有限公司正式发布新款DLP 电影投影机
LX-UH1,配备新研发的0.47TRP DMD 技术的4K 分辨率(3840*2160),配合2,000 流明亮度和自动光圈技术实现超过100,000:1 的动态对比度,结合100% REC.709(兼容BT.2020)色域和HDR(HDR10&HLG)展现通透逼真的电影级别画质。
覆盖上下60%、左右23%的镜头位移和1.6 倍短焦镜
头,加上紧凑的设计,让安装变得极其容易。
这一切让LX-UH1 成为这个级
别唯一的4K 芯基准。
一直秉承聚焦最佳音画的深圳优声美影有限公司,为LX-UH1 中国大陆
地区独家总代理。
1.电影级别的画质
1.美国德州仪器的DLP 技术毫无争议的成为最好的电影放映技术,目前
最好的IMAX、杜比电影院都使用该技术,LX-UH1 使用了德州仪器最新研
发的0.47(DLP470TE)DLP 芯片,结合JVC 独特的调校,呈现出电影级别的4K 影像品质。
- 1、下载文档前请自行甄别文档内容的完整性,平台不提供额外的编辑、内容补充、找答案等附加服务。
- 2、"仅部分预览"的文档,不可在线预览部分如存在完整性等问题,可反馈申请退款(可完整预览的文档不适用该条件!)。
- 3、如文档侵犯您的权益,请联系客服反馈,我们会尽快为您处理(人工客服工作时间:9:00-18:30)。
TS/JBP 4 steps wheel
How does it work? Step 1:
Assessment
•Customer •Shopper •P&G
• Shopper
Assessment
– Target Shopper – Penetration x loyalty x spending index = Value Share – Shopper Trends
T2T – Make it strategic
Ext With CEO / COO With Finance Directors With Logistics Managers Leverage b3/b4 + MFT
Int.
How does it work? Step 2:
True Scorecard What makes a Scorecard be a TRUE Scorecard ?
needs
合作的核心是对更高价值的认同, 购物者需求是创造价值的基础
From Strategy to FMOT- where TS/JBP fits in
What CBD Strategy Is
What We Do How We Do It Internally
Where We Do It
Where Shoppers See It
P&G Multi-functional Core Competencies
• • • • • Shopper/Consumer Insights #1 Customer Service Strategic Financial Planning Shopper Based Design Human Resources
Commercial Strategy
Joint Value Creation
EBP
Externally
True Scorecard /JBP
Customers & Innovation Centers
First Moment of Truth
How does TS/JBP work?
• Multi-step, sequenced process, Shopper based • Leverages our Scale & Portfolio of Brands • Offers holistic integrated solutions that are differentiated • Defines how to Create – Capture - Commercialize • Maximizes P&G multi-functional core competencies
True Scorecard
• Always comes BEFORE Joint Business Planning
• Aligned at VITO level • Reflect jointly agreed targets put in retailer’s financial terms • Seek for stretch targets
New Store Expansion
-New store Plan
+7%
+2%
+1%
+1%
+15%
Multifunctional JBP
• When to do it ? Nov / Dec – period (as most customers starts CY in Jan)
• With Whom ?
Int.
How does it work? Step 3:
Develop a Multifunctional JBP
• Base business :
– FMOT opportunities (leverage SBD) – Shopper marketing (MBCI, Campaigns, Loyalty) – Differentiation (Line up, logistics, systems, HR)
Measure True Scorecard
• When to do it ? Monthly, quarterly and semiyearly • With Whom ? Ext With CEO minimum semiyearly With Merchandize Head quarterly with operation team every Month Share with w. Finance / Logistics Managers
-CRM -”Secret Code of Young” campaign
Shopper Based Design
-Hair Center -Oral center -Other Design coop
Supply Chain Optimization
-Anti Shrinkage -Palletization -Supply Term update
切忌!!! Don’t !!!
• JBP不是“盖房子”
切忌!!! Don’t !!!
• JBP不是“走过场”
切忌!!! Don’t !!!
Set TS Work JBP
Deliver JVC!
• Retailer
– Objectives & Strategies (growth, expansion, share, positionning, image, …) – Financial Goals (sales, profit, shareholder return, cash, service
• New Business
– New initiatives – New Stores – New Ideas
Comp Store Sales xx Total Store Sales xx Total Store Profit xx Drive TBFF Category by Innovation -NI speed to shelf -Holistic launch model CRM and Shopper Marketing
• P&G
– What is our strategic interest – Our targets (sales, share, cash, spendings) – How will P&G brands help?
Assessment
• When to do it ? Sept / Oct (if customer is operating on calendar year) • With Whom ?
By every means, nice or hard, beautiful or ugly, we need align big numbers in JBP day
TRUE Scorecard
• When to do it ? Oct / Nov – when assessment is completed • With Whom ? Make it Specific Ext With Merchandize Head / Head Buyers With Finance Directors / Logistics Managers Div Mgrs and Team Leaders + MFTs
How does it work? Step
• Ensure everyone knows who does what
– Internal / External
• Make sure you have an int/ext owner for each plan • Leverage MFT and Beyond (NRO, BO, MSP…)
TS/ JBP
Rita Ren Matt Chen
Today’s agenda
• TS/JBP 4 steps wheel • Understand how TS-JBP work
• Case sharing
What is JVC?
• Joint Value Creation (JVC) is a strategic framework to elevate the strategic collaboration with our customers focused on jointly creating value by better meeting shopper
Int. Team Leader is the owner • How ? Monthly face 2 face review + E-Mail to reach Top Level
Case SharingRD TS/JBP
Case SharingWatson’s-P&G TS/JBP
• JBP不能“走客户的路,让客户无路可走”
Make it Real Ext With Merchandize Head / Head Buyers With Finance Directors / Logistics Managers Div Mgrs and Team Leaders + MFTs
Int. • Where ?
In AIC – highly recommended
