Toolchain安装、hello.c
linux交叉编译环境搭建步骤
linux交叉编译环境搭建步骤在Linux系统下搭建交叉编译环境主要涉及以下几个步骤:2. 配置环境变量:将交叉编译工具链的路径添加到系统的环境变量中以便于使用。
可以在用户的`.bashrc`或`.bash_profile`文件中添加如下行:```bashexport PATH=<path_to_toolchain>/bin:$PATH```其中`<path_to_toolchain>`是指交叉编译工具链所在的路径。
3.设置目标平台的系统根目录:交叉编译时需要使用目标平台的系统库和头文件,因此需要设置目标平台的系统根目录。
可以通过以下方式设置:```bashexport SYSROOT=<path_to_sysroot>```其中`<path_to_sysroot>`是指目标平台的系统根目录。
4.编写一个简单的交叉编译项目:为了验证交叉编译环境是否搭建成功,可以编写一个简单的交叉编译项目进行测试。
例如,编写一个简单的C程序,将其交叉编译为ARM平台下的可执行文件。
```c#include <stdio.h>int maiprintf("Hello, world!\n");return 0;```将上述代码保存为`hello.c`文件。
然后,使用以下命令进行交叉编译:```basharm-linux-gnueabi-gcc -o hello hello.c```编译完成后,会生成一个名为`hello`的可执行文件。
在ARM平台上执行该可执行文件,将输出`Hello, world!`。
以上就是在Linux系统下搭建交叉编译环境的基本步骤。
根据具体的需求,可能还需要进行其他的配置和设置。
linux中添加编译工具链的方法
linux中添加编译工具链的方法### Linux中添加编译工具链的方法在Linux系统中,编译工具链是开发者进行软件编译和开发的重要工具。
通常,它包括编译器、链接器和其他用于程序构建的工具。
最常见的编译工具链之一是基于GCC(GNU编译器集合)。
以下是详细说明如何在Linux系统中添加编译工具链的步骤。
#### 导语在开始安装编译工具链之前,请确保您的系统已更新到最新版本,以便拥有最新的软件包列表和依赖项。
此外,以下步骤可能需要管理员权限。
#### 步骤一:更新系统在终端中执行以下命令,更新您的系统。
```bashsudo apt update && sudo apt upgrade```或者,如果您使用的是基于RPM的系统,比如Fedora或CentOS,可以使用以下命令:```bashsudo dnf update```#### 步骤二:安装编译工具链对于基于Debian的系统(如Ubuntu),可以使用以下命令安装基本的编译工具链:```bashsudo apt install build-essential```这将安装包括gcc、g++和make在内的基础编译工具。
对于基于RPM的系统,可以使用以下命令:```bashsudo dnf groupinstall "Development Tools"```或者:```bashsudo yum groupinstall "Development Tools"```#### 步骤三:安装额外的编译器如果您需要其他编译器,如Clang或Fortran编译器,您可以单独安装它们:```bashsudo apt install clang gfortran```对于其他特定的编译器或工具,您可能需要添加额外的仓库或下载预编译的二进制文件。
#### 步骤四:验证安装安装完成后,验证编译工具链是否已正确安装:```bashgcc --versiong++ --versionclang --versionmake --version```这些命令应显示已安装工具的版本信息。
QtCreator安装和helloworld程序编写

封面作者:PanHongliang仅供个人学习一、Qt Creator的安装和hello world程序的编写我们这里讲述windows下的Qt Creator,在Linux下基本相同。
本文先讲述基本的下载、安装和最简单程序的编写,然后在附录里又讲解了两种其他的编写程序的方法。
1.首先到Qt的官方网站上下载Qt Creator,这里我们下载windows版的。
下载地址:如下图我们下载:Download Qt SDK for Windows* (178Mb)下载完成后,直接安装即可,安装过程中按默认设置即可。
2.运行Qt Creator,首先弹出的是欢迎界面,这里可以打开其自带的各种演示程序。
3.我们用File->New菜单来新建工程。
4.这里我们选择Qt4 Gui Application。
5.下面输入工程名和要保存到的文件夹路径。
我们这里的工程名为hello world。
6.这时软件自动添加基本的头文件,因为这个程序我们不需要其他的功能,所以直接点击Next。
7.我们将base class选为QDialog对话框类。
然后点击Next。
8.点击Finish,完成工程的建立。
9.我们可以看见工程中的所有文件都出现在列表中了。
我们可以直接按下下面的绿色的run按钮或者按下Ctrl+R快捷键运行程序。
10.程序运行会出现空白的对话框,如下图。
11.我们双击文件列表的dialog.ui文件,便出现了下面所示的图形界面编辑界面。
12.我们在右边的器件栏里找到Label标签器件13.按着鼠标左键将其拖到设计窗口上,如下图。
14.我们双击它,并将其内容改为hello world。
15.我们在右下角的属性栏里将字体大小由9改为15。
16.我们拖动标签一角的蓝点,将全部文字显示出来。
17.再次按下运行按钮,便会出现hello world。
到这里hello world程序便完成了。
Qt Creator编译的程序,在其工程文件夹下会有一个debug文件夹,其中有程序的.exe可执行文件。
交叉编译工具链的制作

交叉编译⼯具链的制作交叉编译⼯具链的制作前⾔及准备本笔记制作的交叉编译⼯具已通过简单验证,对初次有需求需要搭建交叉⼯具链有⼀定的指导意义,制作⼯具链⽐较耗时,需做好花费⼀整天时间的准备。
资料学习链接linux⼯具、软件安装的基本步骤:下载,配置,编译,安装crosstool-ng下载或使⽤指令新建 arm-linux-tool ⽂件夹⽤于制作⼯具链mkdir arm-linux-toolcd arm-linux-toolwget /download/crosstool-ng/crosstool-ng-1.23.0.tar.bz2tar -xvjf crosstool-ng-1.23.0.tar.bz2新建mkdir crosstool-build crosstool-install src⼀、安装crosstool-ng1.编译依赖sudo apt-get install gperf flex bison texinfo gawk libtool automake libncurses5-dev g++ help2mangperf是完美哈希函数⽣成器;bison和flex是⽤来⽣成语法和词法分析器;texinfo和man类似,⽤来读取帮助⽂档;automake是帮助⽣成Makefile的⼯具;libtool帮助在编译过程中处理库的依赖关系,⾃动搜索路径;gawk是linux下⽤于⽂本处理和模式匹配的⼯具;2.配置、安装cd crosstool-ng-1.23.0./configure --prefix /home/wangh/workspace/wh_tools/arm-linux-tool/crosstool-install/配置过程中出现的缺少安装项通过安装解决配置正常⽣成 makefile 后,进⾏编译安装makemake install验证安装是否成功在 crosstool-install/bin ⽬录下执⾏ ./ct-ng -v为了后⾯使⽤⽅便,配置临时环境变量export PATH=$PATH:/home/wangh/workspace/wh_tools/arm-linux-tool/crosstool-install/bin/⼆、配置交叉编译⼯具链对于常见的架构,⽐如arm,mips,powerpc等等,都有了很多的,已经帮我验证过,可以正常编译的⽰例配置了,所以我们接下来,主要就是:搞懂⾃⼰借⽤哪个配置,然后调⽤默认配置,然后再确认⼀下配置,根据⾃⼰的情况去改⼀改,就差不多,就配置好了。
Linux_3_编译工具链
编译工具链前面我们写程序的时候用的都是集成开发环境(IDE: Integrated Development Environment),集成开发环境可以极大地方便我们程序员编写程序,但是配置起来也相对麻烦。
在 Linux 环境下,我们用的是编译工具链,又叫软件开发工具包(SDK: Software Development Kit)。
Linux 环境下常见的编译工具链有:GCC 和 Clang,我们使用的是 GCC。
1编译gcc、g++分别是 gnu 下的 c 和 c++编译器。
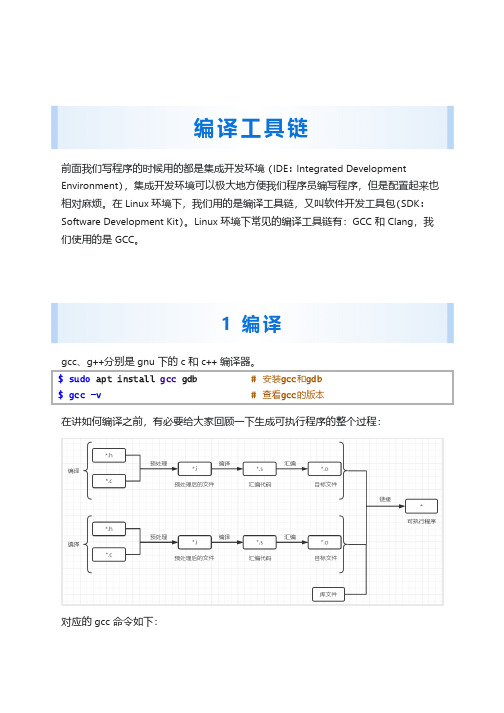
$ sudo a pt inst a ll g cc gd b# 安装g cc和gd b$ g cc-v# 查看g cc的版本在讲如何编译之前,有必要给大家回顾一下生成可执行程序的整个过程:对应的 gcc 命令如下:g cc-E hello.c-o hello.i# -E激活预处理,生成预处理后的文件g cc-S hello.i-o hello.s# —S激活预处理和编译,生成汇编代码g cc-c hello.s-o hello.o# -c激活预处理、编译和汇编,生成目标文件g cc hello.o-o hello# 执行所有阶段,生成可执行程序其实没必要指定每一个步骤,我们常常会这样用:g cc-c hello.c# 生成目标文件,g cc会根据文件名hello.c生成hello.og cc hello.o-o hello# 生成可执行程序hello,这里我们需要指定可执行程序的名称,否则会默认生成a.out甚至有时候,我们会一步到位:g cc hello.c-o hello# 编译链接,生成可执行程序hello1.1G C C其它选项选项含义-Wall生成所有警告信息-O0,-O1,-O2,-O3编译器的4个优化级别,-O0表示不优化,-O1为缺省值,-O3的优化级别最高-g指示编译器在编译的时候产生调试相关的信息。
(调试程序必须加上这个选项)-Dmacro相当于在文件的开头加了#define macro-Dmacro=value相当于在文件的开头加了#define macro value-Idir对于#include "file",gcc/g++会先在当前目录查找你所指定的头文件,如果没有找到,他会到系统的 include 目录找.如果使用-I 指定了目录,他会先在你所指定的目录查找,然后再按常规的顺序去找。
crosstool安装详解
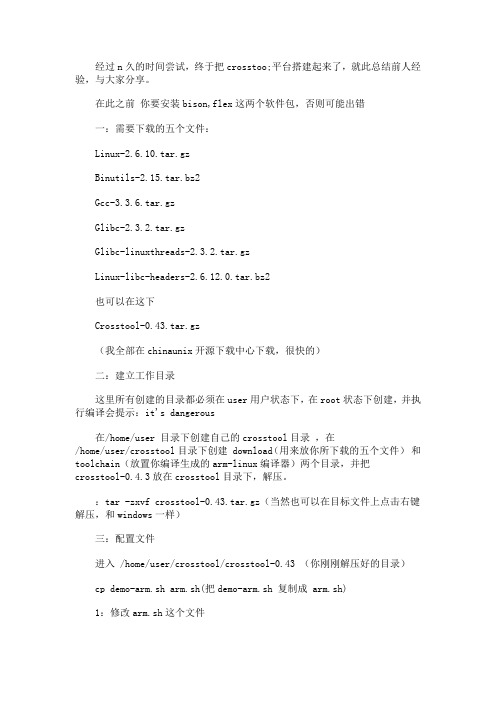
察看crosstool目录中的contrib/inbox.txt文件,有关于这个问题的邮件描述:
> checking build system type... i686-pc-linux-gnu
> checking host system type...mipsel-unknown-linux-gnu
在/home/user 目录下创建自己的crosstool目录 ,在/home/user/crosstool目录下创建 download(用来放你所下载的五个文件) 和toolchain(放置你编译生成的arm-linux编译器)两个目录,并把crosstool-0.4.3放在crosstool目录下,解压。
export PATH = /home/user/crosstool/toolchain/gcc-3.3.6-glibc-2.3.2/arm-linux/bin:$PATH
保存退出,source /etc/profile 就OK了
然后随便进入一个目录创建hello.c
#include<stdio.h>
> checking version ofgcc... 4.0.0, bad
> checking forgnumake... no
> checking forgmake...gmake
> checking version ofgmake... 3.80, ok
> configure: error:
> *** These critical programs are missing or too old:gcc
> checking for a BSD-compatible install... /usr/bin/install -c
交叉编译实验报告

一、实验目的本次实验旨在通过交叉编译,了解并掌握交叉编译的基本原理和操作方法,提高在嵌入式系统开发中对编译器配置和编译过程的掌握能力。
交叉编译是指在一个平台上编译生成可在另一个平台上运行的程序,这对于嵌入式系统开发尤为重要,因为嵌入式设备通常资源有限,而开发环境与运行环境可能不同。
二、实验环境1. 主机平台:Windows 102. 目标平台:Linux(假设为Raspberry Pi)3. 编译工具:GCC4. 软件包:交叉编译工具链(如交叉工具链crosstool-ng)三、实验步骤1. 安装交叉编译工具链(1)在主机上安装crosstool-ng。
```bashsudo apt-get install crosstool-ng```(2)使用crosstool-ng生成交叉编译工具链。
```bashcrosstool-NG-1.22.0/src/crosstool-NG-1.22.0/configure --toolchain-build=x86_64-build --toolchain-target=arm-linux-gnueabihf --sysroot=/path/to/raspberry-pi/rootfsmake```(3)安装交叉编译工具链。
```bashsudo make install```2. 编写测试程序(1)创建一个简单的C程序,如`hello_world.c`。
```c#include <stdio.h>int main() {printf("Hello, World!\n");return 0;}```3. 交叉编译程序(1)使用交叉编译器编译程序。
```basharm-linux-gnueabihf-gcc hello_world.c -o hello_world ```(2)检查编译生成的可执行文件。
```bashls -l hello_world```4. 将可执行文件传输到目标平台(1)使用SSH将可执行文件传输到目标平台。
mips_toolchain_guide_EN
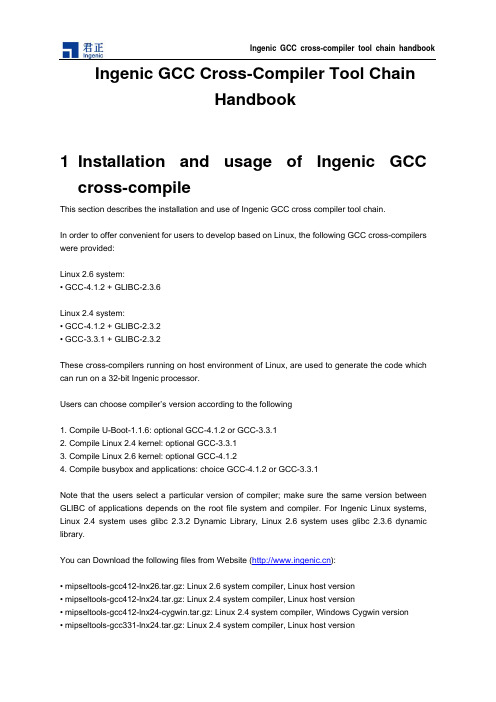
Ingenic GCC cross-compiler tool chain handbook Ingenic GCC Cross-Compiler Tool ChainHandbook1 Installation and usage of Ingenic GCCcross-compileThis section describes the installation and use of Ingenic GCC cross compiler tool chain.In order to offer convenient for users to develop based on Linux, the following GCC cross-compilers were provided:Linux 2.6 system:• GCC-4.1.2 + GLIBC-2.3.6Linux 2.4 system:• GCC-4.1.2 + GLIBC-2.3.2• GCC-3.3.1 + GLIBC-2.3.2These cross-compilers running on host environment of Linux, are used to generate the code which can run on a 32-bit Ingenic processor.Users can choose compiler’s version according to the following1. Compile U-Boot-1.1.6: optional GCC-4.1.2 or GCC-3.3.12. Compile Linux 2.4 kernel: optional GCC-3.3.13. Compile Linux 2.6 kernel: optional GCC-4.1.24. Compile busybox and applications: choice GCC-4.1.2 or GCC-3.3.1Note that the users select a particular version of compiler; make sure the same version between GLIBC of applications depends on the root file system and compiler. For Ingenic Linux systems, Linux 2.4 system uses glibc 2.3.2 Dynamic Library, Linux 2.6 system uses glibc 2.3.6 dynamic library.You can Download the following files from Website ():• mipseltools-gcc412-lnx26.tar.gz: Linux 2.6 system compiler, Linux host version• mipseltools-gcc412-lnx24.tar.gz: Linux 2.4 system compiler, Linux host version• mipseltools-gcc412-lnx24-cygwin.tar.gz: Linux 2.4 system compiler, Windows Cygwin version• mipseltools-gcc331-lnx24.tar.gz: Linux 2.4 system compiler, Linux host version• mipseltools-gcc331-lnx24-cygwin.tar.gz: Linux 2.4 system compiler, Windows Cygwin versionUsers should use Linux host as a development environment which is recommended, use the GCC-3.3.1 compiler based on the Linux 2.4 kernel, use the GCC-4.1.2 compiler based on the Linux 2.6 kernelInstall Linux 2.6 compiler, the following steps:1, install the GCC compiler to the working directory, for example as follows:#c d/o p t#t a r x z f m i p s e l t o o l s-g c c412-l n x26.t a r.g z2, set the GCC compiler’s path:#e x p o r t P A T H=/o p t/m i p s e l t o o l s-g c c412-l n x26/b i n:$P A T HInstall Linux 2.4 compiler, the following steps:1, the GCC compiler is installed to the working directory, for example as follows:#c d/o p t#t a r x z f m i p s e l t o o l s-g c c331-l n x24.t a r.g z2, set the GCC compiler path:#e x p o r t P A T H=/o p t/m i p s e l t o o l s-g c c331-l n x24/b i n:$P A T HThen the compiler has installed. MIPS cross-compiler prefix is "mipsel-linux-", now you can use the mipsel-linux-gcc and mipsel-linux-g++ to compile the procedure.The syntax of Ingenic GCC cross compiler tool chain isompatible with the GNU GCC, please refer to the GNU GCC’s user manual.The following are examples of helloworld.c:#i n c l u d e<s t d i o.h>i n t m a i n(v o i d)(p r i n t f("H e l l o w o r l d!\n");r e t u r n0;)Compiler generates helloworld:Ingenic GCC cross-compiler tool chain handbook #m i p s e l-l i n u x-g c c-O2-o h e l l o w o r l d h e l l o w o r l d.cIf you can correctly build helloworld, shows the compiler has been installed properly you can normally use.2 Ingenic Linux 2.6 compilerIngenic Linux 2.6 compiler uses GCC 4.1.2 and GLIBC 2.3.6, now introdues how to produce the source package which is needed by compiler and steps .Souce package needed:• linux-2.6.24.3 headers• binutils-2.17• gcc-4.1.2• glibc-2.3.6• glibc-ports-2.3.6• glibc-linuxthreads-2.3.6• gdb-6.0• e2fsprogs-1.40.4• zlib-1.2.3• jpeg-6b• lcms_1.16• libpng-1.2.24• libmng-1.0.10you can get above pachage and patch from the blow website.ftp:///3sw/01linux/00toolchain/jz-gcc412-glib236-src.tar.gzthere are four steps to produce cross-compiler:• Compile binutils•Compile gcc of bootstrap,generate glibc tool.• Compile glibc,need to specify kernel header files.•Compile the complete gcc和g++.Next, produce the script.#!/b i n/s h########################################################M o d i f y f o l l o w i n g v a r i a b l e s t o y o u r sT A R B A L L_P A T H=/h o m e/j l w e i/w o r k-g c c/t a r b a l lP A T C H E S_P A T H=/h o m e/j l w e i/w o r k-g c c/p a t c h e sL I N U X_H E A D E R S_P A T H=/h o m e/j l w e i/w o r k-g c c/l i n u x-h e a d e r s-2.6.24.3I N S T A L L_P A T H=/o p t/m i p s e l t o o l s-g c c412-l n x26Ingenic GCC cross-compiler tool chain handbook B U I L D_P A T H=`p w d`#######################################################B I N U T I L S_V E R=b i n u t i l s-2.17G C C_V E R=g c c-4.1.2G L I B C_V E R=g l i b c-2.3.6G L I B C_P O R T S_V E R=g l i b c-p o r t s-2.3.6G L I B C_L I N U X T H R E A D S_V E R=g l i b c-l i n u x t h r e a d s-2.3.6G D B_V E R=g d b-6.0u n s e t C F L A G Su n s e t C X X F L A G Se x p o r t P A T H=${I N S T A L L_P A T H}/b i n:$P A T He c h o"----------------------------------"e c h o"@@B u i l d i n g b i n u t i l s..."e c h o"----------------------------------"#p r e p a r e b i n u t i l s s o u r c ec d${B U I L D_P A T H}r m-r f${B I N U T I L S_V E R}b i n u t i l s-b u i l dt a r j x f${T A R B A L L_P A T H}/${B I N U T I L S_V E R}.t a r.b z2#c o n f i g u r e a n d b u i l d b i n u t i l sm k d i r-v b i n u t i l s-b u i l dc d b i n u t i l s-b u i l d../${B I N U T I L S_V E R}/c o n f i g u r e--t a r g e t=m i p s e l-l i n u x--p r e f i x=${I N S T A L L_P A T H}m a k e C F L A G S="-O2"#i n s t a l l b i n u t i l sm a k e i n s t a l le c h o"----------------------------------"e c h o"@@B u i l d i n g b o o t s t r a p g c c..."e c h o"----------------------------------"#p r e p a r e g c c s o u r c ec d${B U I L D_P A T H}r m-r f${G C C_V E R}g c c-b u i l dt a r j x f${T A R B A L L_P A T H}/${G C C_V E R}.t a r.b z2c d${B U I L D_P A T H}/${G C C_V E R}/l i b i b e r t yc a t s t r s i g n a l.c|s e d-e's/#i f ndef H A V E_P S I G N A L/#i f0/g'>j u n k.c c p-f s t r s ig n a l.c s t r s i g n a l.c.f i x e d;m v-f j u n k.c s t r s i g n a l.c#c o n f i g u r e a n d b u i l d g c cc d${B U I L D_P A T H}m k d i r-v g c c-b u i l dc d g c c-b u i l d../${G C C_V E R}/c o n f i g u r e--t a r g e t=m i p s e l-l i n u x\--h o s t=i686-p c-l i n u x-g n u--p r e f i x=${I N S T A L L_P A T H}\--d i s a b l e-s h a r e d--d i s a b l e-t h r e a d s--d i s a b l e-m u l t i l i b\--e n a b l e-l a n g u a g e s=cm a k e C F L A G S="-O2"a l l-g c c#i n s t a l l g c cm a k e i n s t a l l-g c ce c h o"----------------------------------"e c h o"@@B u i l d i n g g l i b c..."e c h o"----------------------------------"#p r e p a r e g l i b c s o u r c ec d${B U I L D_P A T H}r m-r f${G L I B C_V E R}g l i b c-b u i l dt a r j x f${T A R B A L L_P A T H}/${G L I B C_V E R}.t a r.b z2c d${G L I B C_V E R}t a r j x f${T A R B A L L_P A T H}/${G L I B C_L I N U X T H R E A D S_V E R}.t a r.b z2t a r j x f${T A R B A L L_P A T H}/${G L I B C_P O R T S_V E R}.t a r.b z2m v${G L I B C_P O R T S_V E R}p o r t s#a p p l y p a t c hp a t c h-N p1-i${P A T C H E S_P A T H}/${G L I B C_V E R}-j z.p a t c h#r e m o v e n p t lr m-r f n p t l n p t l_d b#c o n f i g u r e a n d b u i l d g l i b cc d${B U I L D_P A T H}m k d i r-v g l i b c-b u i l dc d g l i b c-b u i l de x p o r t C C="m i p s e l-l i n u x-g c c"e x p o r t l i b c_c v_f o r c e d_u n w i n d=y e sIngenic GCC cross-compiler tool chain handbook e x p o r t l i b c_c v_c_c l e a n u p=y e s../${G L I B C_V E R}/c o n f i g u r e\--h o s t=m i p s-l i n u x\--b u i l d=i686-p c-l i n u x-g n u\--e n a b l e-a d d-o n s\--e n a b l e-s h a r e d\--w i t h-c p u=m i p s32\--p r e f i x=/u s r\--w i t h-h e a d e r s=${L I N U X_H E A D E R S_P A T H}m a k e C F L A G S="-O2"#i n s t a l l g l i b ce x p o r t G L I B C_I N S T A L L=${B U I L D_P A T H}/g l i b c-i n s tc d$B U I L D_P A T Hr m-r f g l i b c-i n s tm k d i r-v g l i b c-i n s tc d g l i b c-b u i l dm a k e i n s t a l l_r o o t=${G L I B C_I N S T A L L}i n s t a l lc d${G L I B C_I N S T A L L};t a r z c f$B U I L D_P A T H/g l i b c-b u i l d/g l i b c-l i b.t g z l i bc d${I N S T A L L_P A T H};t a r z x f$B U I L D_P A T H/g l i b c-b u i l d/g l i b c-l i b.t g zc d${G L I B C_I N S T A L L}/u s r;t a r c f z$B U I L D_P A T H/g l i b c-b u i l d/g l i b c-u s r.t g z.c d${I N S T A L L_P A T H}/m i p s e l-l i n u x;t a r x z f$B U I L D_P A T H/g l i b c-b u i l d/g l i b c-u s r.t g zt a r x f z$B U I L D_P A T H/g l i b c-b u i l d/g l i b c-l i b.t g z#i n s t a l l l i n u x k e r n e l h e a d e r sc d${L I N U X_H E A D E R S_P A T H}c p-a f r{a s m,a s m-m i p s,a s m-g e n e r i c,l i n u x,m t d,s c s i,s o u n d}${I N S T A L L_P A T H}/m i p s e l-l i n u x/i n c l u d e#f i x e d l i b c.s o a n d l i b p t h r e a d.s os e d-i-e's/\/u s r\/l i b\///g'${I N S T A L L_P A T H}/m i p s e l-l i n u x/l i b/l i b p t h r e a d.s os e d-i-e's/\/u s r\/l i b\///g'${I N S T A L L_P A T H}/m i p s e l-l i n u x/l i b/l i b c.s os e d-i-e's/\/l i b\///g'${I N S T A L L_P A T H}/m i p s e l-l i n u x/l i b/l i b p t h r e a d.s os e d-i-e's/\/l i b\///g'${I N S T A L L_P A T H}/m i p s e l-l i n u x/l i b/l i b c.s o#i n s t a l l l o c a l e d a t ac d${B U I L D_P A T H}/g l i b c-b u i l dc p-v${P A T C H E S_P A T H}/${G L I B C_V E R}-l o c a l ed a t a-M a kef i l e${B U I L D_P A T H}/${G L I B C_V E R}/l o c a l e d a t a/M a k e f i l ec p-v${P A T C H E S_P A T H}/${G L I B C_V E R}-l o c a l ed a t a-S U P P O R T E D${B U I L D_P A T H}/${G L I B C_V E R}/l o c a l e d a t a/S U P P O R T E Dm a k e l o c a l e d a t a/i n s t a l l-l o c a l e s i n s t a l l_r o o t=${I N S T A L L_P A T H}e c h o"----------------------------------"e c h o"@@B u i l d i n gf i n a lg c c..."e c h o"----------------------------------"#p r e p a r e g c c s o u r c ec d$B U I L D_P A T Hr m-r f${G C C_V E R}g c c-b u i l dt a r j x f${T A R B A L L_P A T H}/${G C C_V E R}.t a r.b z2c d${B U I L D_P A T H}/${G C C_V E R}/l i b i b e r t yc a t s t r s i g n a l.c|s e d-e's/#i f ndef H A V E_P S I G N A L/#i f0/g'>j u n k.cc p-f s t r s i g n a l.c s t r s i g n a l.c.f i x e d;m v-f j u n k.c s t r s i g n a l.c#a p p l y p a t c h e sc d${B U I L D_P A T H}/${G C C_V E R}p a t c h-p0<${P A T C H E S_P A T H}/g c c-4.1_b u g27067.p a t c h#c o n f i g u r e a n d b u i l d g c cc d${B U I L D_P A T H}m k d i r-v g c c-b u i l dc d g c c-b u i l de x p o r t C C="g c c"../${G C C_V E R}/c o n f i g u r e--t a r g e t=m i p s e l-l i n u x\--h o s t=i686-p c-l i n u x-g n u--p r e f i x=${I N S T A L L_P A T H}\--d i s a b l e-m u l t i l i b--e n a b l e-s h a r e d--e n a b l e-l a n g u a g e s=c,c++\ --w i t h-h e a d e r s=${I N S T A L L_P A T H}/m i p s e l-l i n u x/i n c l u d em a k e C F L A G S="-O2"#i n s t a l l g c cm a k e i n s t a l l#r e m o v e s y s-i n c l u d eIngenic GCC cross-compiler tool chain handbook r m-r f${I N S T A L L_P A T H}/m i p s e l-l i n u x/s y s-i n c l u d ec d$B U I L D_P A T H#f i x s y m l i n ke c h o"F i x s y m l i n k..."c d${I N S T A L L_P A T H}/m i p s e l-l i n u x/l i br m l i b a n l.s ol n-s l i b a n l.s o.1l i b a n l.s or m l i b B r o k e n L o c a l e.s ol n-s l i b B r o k e n L o c a l e.s o.1l i b B r o k e n L o c a l e.s or m l i b c r y p t.s ol n-s l i b c r y p t.s o.1l i b c r y p t.s or m l i b d l.s ol n-s l i b d l.s o.2l i b d l.s or m l i b m.s ol n-s l i b m.s o.6l i b m.s or m l i b n s l.s ol n-s l i b n s l.s o.1l i b n s l.s or m l i b n s s_c o m p a t.s ol n-s l i b n s s_c o m p a t.s o.2l i b n s s_c o m p a t.s or m l i b n s s_d n s.s ol n-s l i b n s s_d n s.s o.2l i b n s s_d n s.s or m l i b n s s_f i l e s.s ol n-s l i b n s s_f i l e s.s o.2l i b n s s_f i l e s.s or m l i b n s s_h e s i o d.s ol n-s l i b n s s_h e s i o d.s o.2l i b n s s_h e s i o d.s or m l i b n s s_n i s p l u s.s ol n-s l i b n s s_n i s p l u s.s o.2l i b n s s_n i s p l u s.s or m l i b n s s_n i s.s ol n-s l i b n s s_n i s.s o.2l i b n s s_n i s.s or m l i b r e s o l v.s ol n-s l i b r e s o l v.s o.2l i b r e s o l v.s or m l i b r t.s ol n-s l i b r t.s o.1l i b r t.s or m l i b t h r e a d_d b.s ol n-s l i b t h r e a d_d b.s o.1l i b t h r e a d_d b.s or m l i b u t i l.s ol n-s l i b u t i l.s o.1l i b u t i l.s o#i n s t a l l m x u_a s a n d j z_m x u.hc p-v${P A T C H E S_P A T H}/m x u_a s${I N S T A L L_P A T H}/b i nc h m o d+x${I N S T A L L_P A T H}/b i n/m x u_a sc p-v${P A T C H E S_P A T H}/j z_m x u.h${I N S T A L L_P A T H}/m i p s e l-l i n u x/i n c l ud ee c h o"----------------------------------"e c h o"@@B u i l d i n g G D B..."e c h o"----------------------------------"c d$B U I L D_P A T Hr m-r f${G D B_V E R}g d b-b u i l dt a r j x f${T A R B A L L_P A T H}/${G D B_V E R}.t a r.b z2m k d i r-v g d b-b u i l dc d g d b-b u i l de x p o r t C C="g c c"../${G D B_V E R}/c o n f i g u r e--t a r g e t=m i p s e l-l i n u x--p r e f i x=${I N S T A L L_P A T H}m a k em a k e i n s t a l le c h o"@@B u i l d i n g b i n u t i l s,g l i b c,g c c a n d g d b O K"Ingenic GCC cross-compiler tool chain handbook The below is a script to compile dynamic library from the third party:#!/b i n/s h#######################################################################M o d i f y t h e s e v a r i a b l e s t o y o u r sT H I R D P A R T Y_P A T H=/h o m e/j l w e i/w o r k-g c c/t h i r d p a r t yI N S T A L L_P A T H=/o p t/m i p s e l t o o l s-g c c412-l n x26/m i p s e l-l i n u xB U I L D D I R=`p w d`e x p o r t P A T H=/o p t/m i p s e l t o o l s-g c c412-l n x26/b i n:$P A T H#m i p s e l-l i n u x-g c c######################################################################e c h o"@@B u i l d i n g e2f s p r og s..."c d${B U I L D D I R}t a r x z f${T H I R D P A R T Y_P A T H}/e2f s p r o g s-1.40.4.t a r.g zc d e2f s p r o g s-1.40.4./c o n f i g u r e--p r e f i x=${I N S T A L L_P A T H}--h o s t=m i p s e l-l i n u x--e n a b l e-e l f-s h l i b s--d i s a b l e-t l s C C=m i p s e l-l i n u x-g c c L D=m i p s e l-l i n u x-l dm a k em a k e i n s t a l l-l i b s#f i x s y m b o l l i n k sc d${I N S T A L L_P A T H}/l i br m l i b b l k i d.s ol n-s l i b b l k i d.s o.1l i b b l k i d.s or m l i b c o m_e r r.s ol n-s l i b c o m_e r r.s o.2l i b c o m_e r r.s or m l i b e2p.s ol n-s l i b e2p.s o.2l i b e2p.s or m l i b e x t2f s.s ol n-s l i b e x t2f s.s o.2l i b e x t2f s.s or m l i b s s.s ol n-s l i b s s.s o.2l i b s s.s or m l i b u u i d.s ol n-s l i b u u i d.s o.1l i b u u i d.s oe c h o"@@B u i l d i n g z l i b..."c d${B U I L D D I R}t a r x z f${T H I R D P A R T Y_P A T H}/z l i b-1.2.3.t a r.g zc d z l i b-1.2.3C C="m i p s e l-l i n u x-g c c"A R="m i p s e l-l i n u x-a r c r"R A N L I B="m i p s e l-l i n u x-r a n l i b"./c o n f i g u r e--p r e f i x=${I N S T A L L_P A T H}m a k em a k e i n s t a l lC C="m i p s e l-l i n u x-g c c"A R="m i p s e l-l i n u x-a r c r"R A N L I B="m i p s e l-l i n u x-r a n l i b"./c o n f i g u r e--s h a r e d--p r e f i x=${I N S T A L L_P A T H} m a k em a k e i n s t a l le c h o"@@B u i l d i n g l i b j p e g..."c d${B U I L D D I R}t a r x z f${T H I R D P A R T Y_P A T H}/j p e g s r c.v6b.t a r.g zc d j p e g-6bC C=g c c./c o n f i g u r e--p r e f i x=${I N S T A L L_P A T H}--e n a b l e-s h a r e d--e n a b l e-s t a t i cs e d-i-e's/C C=g c c/C C=m i p s e l-l i n u x-g c c/g'M a k e f i l es e d-i-e's/A R=a r r c/A R=m i p s e l-l i n u x-a r r c/g'M a k e f i l es e d-i-e's/A R2=r a n l i b/A R2=m i p s e l-l i n u x-r a n l i b/g'M a k e f i l em a k em k d i r-p${I N S T A L L_P A T H}/m a n/m a n1m a k e i n s t a l le c h o"@@B u i l d i n g l c m s..."c d${B U I L D D I R}t a r x z f${T H I R D P A R T Y_P A T H}/l c m s_1.16.t a r.g zc d l c m s-1.16Ingenic GCC cross-compiler tool chain handbook./c o n f i g u r e--p r e f i x=${I N S T A L L_P A T H}--t a r g e t=m i p s e l-l i n u x--h o s t=m i p s e l-l i n u xC C=m i p s e l-l i n u x-g c cm a k em a k e i n s t a l le c h o"@@B u i l d i n g l i b p n g..."c d${B U I L D D I R}t a r x z f${T H I R D P A R T Y_P A T H}/l i b p n g-1.2.24.t a r.g zc d l i b p n g-1.2.24./c o n f i g u r e--p r e f i x=${I N S T A L L_P A T H}--h o s t=m i p s e l-l i n u x C C=m i p s e l-l i n u x-g c cC F L A G S="-I${I N S T A L L_P A T H}/i n c l u d e"LD F L A G S="-L${I N S T A L L_P A T H}/l i b"m a k em a k e i n s t a l le c h o"@@B u i l d i n g l i b m n g..."c d${B U I L D D I R}t a r x z f${T H I R D P A R T Y_P A T H}/l i b m n g-1.0.10.t a r.g zc d l i b m n g-1.0.10c p m a k e f i l e s/m a k e f i l e.l i n u x m a k e f i l e#r e p l a c e g c c t o m i p s e l-l i n u x-g c cs e d-i-e's/C C=g c c/C C=m i p s e l-l i n u x-g c c/g'm a k e f i l e#r e p l a c e a r t o m i p s e l-l i n u x-a rs e d-i-e's/a r r c/m i p s e l-l i n u x-a r r c/g'm a k e f i l e#r e p l a c e r a n l i b t o m i p s e l-l i n u x-r a n l i bs e d-i-e's/R A N L I B=r a n l i b/R A N L I B=m i p s e l-l i n u x-r a n l i b/g'm a k e f i l e#r e p l a c e/u s r/l o c a l t o${I N S T A L L_P A T H}s e d-i-e's/\/u s r\/l o c a l/\/o p t\/m i p s e l t o o l s-g c c412-l n x26\/m i p s e l-l i n u x/g'm a k e f i l em a k em a k e i n s t a l le c h o"@@B u i l d i n g t s l i b..."c d${B U I L D D I R}t a r x z f${T H I R D P A R T Y_P A T H}/t s l i b-j z.t a r.g zc d t s l i b-j z/t s l i b-0.1.1./a u t o g e n.s he c h o"a c_c v_f u n c_m a l l o c_0_n o n n u l l=y e s">c o n f i g.c a c h e./c o n f i g u r e--p r e f i x=${I N S T A L L_P A T H}--h o s t=m i p s e l-l i n u x--c a c h e-f i l e=c o n f i g.c a c h em a k em a k e i n s t a l le c h o"@@B u i l d i n g a l s a..."c d${B U I L D D I R}t a r x z f${T H I R D P A R T Y_P A T H}/a l s a-t o o l s.t a r.g zc d a l s a-t o o l s/a l s a-l i b-1.0.15./c o n f i g u r e--p r e f i x=${I N S T A L L_P A T H}A R=m i p s e l-l i n u x-a r C C=m i p s e l-l i n u x-g c cC X X=m i p s e l-l i n u x-g++C X X=m i p s e l-l i n u x-g++--h o s t=m i p s e l-l i n u x--e n a b l e-s h a r e d=y e s--e n a b l e-s t a t i c=n o--t a r g e t=m i p s-l i n u x--w i t h-d e b u g=n o--w i t h-a l s a-d e v d i r=/d e v--w i t h-s o f t f l o a t L D F L A G S="-l m"m a k em a k e i n s t a l le c h o"B u i l d t h i r d p a r t y l i b s d o n e."Network resource:/:GNU homepage/gnu/binutils/:binutils download website/:GCC homepage/gnu/glibc/:glibc download website/:e2fsprogs homepage/:zlib homepage/:libjpeg homepage/downloads.htm:lcms download website/:libpng homepage/:libmng homepage。
openwrt toolchain的编译详解
openwrt toolchain的编译详解OpenWrt是一个为嵌入式Linux系统设计的开源操作系统,它提供了强大的工具链,使得开发者能够轻松地编译和部署各种软件包。
在OpenWrt的开发过程中,toolchain的编译是至关重要的一步。
本文将详细介绍OpenWrt toolchain的编译过程和注意事项。
一、准备工作在开始编译OpenWrt toolchain之前,你需要确保你的开发环境已经配置好。
这包括安装了必要的工具和库,如GCC、Make、Git等。
同时,你还需要下载OpenWrt的源代码,可以从官方网站上下载。
二、配置环境在下载和解压OpenWrt源代码后,你需要进行一些环境配置。
这包括设置交叉编译器、确定目标设备的架构等。
这些设置将直接影响toolchain的编译结果。
三、开始编译在配置好环境后,你可以开始编译OpenWrt toolchain了。
你可以使用以下命令进行编译:`make`这个命令将启动编译过程,并输出详细的编译进度。
在编译过程中,你可能会遇到各种问题,如依赖关系未解决、编译错误等。
此时,你可以使用以下命令来解决这些问题:`make menuconfig`这个命令将打开一个配置界面,让你选择需要编译的软件包和选项。
通过这个界面,你可以有针对性地解决问题,提高编译效率。
四、注意事项在编译OpenWrt toolchain的过程中,有一些注意事项需要引起你的注意。
首先,要确保你的开发环境干净,没有残留的旧版本或损坏的软件包,以免影响编译过程。
其次,要定期更新你的工具和库,以确保它们与OpenWrt源代码兼容。
最后,对于复杂的编译错误,要仔细阅读错误信息,找出问题的根源,并尝试使用相应的解决方案。
五、总结总的来说,OpenWrt toolchain的编译需要一定的时间和精力,但只要你按照上述步骤进行操作,你就可以成功地编译出适合你目标设备的toolchain。
这对于开发OpenWrt系统中的应用程序和设备驱动程序来说是必不可少的。
QtCreator的安装和helloworld程序的编写
一、Qt Creator的安装和hello world程序的编写我们这里讲述windows下的Qt Creator,在Linux下基本相同。
本文先讲述基本的下载、安装和最简单程序的编写,然后在附录里又讲解了两种其他的编写程序的方法。
1.首先到Qt的官方网站上下载Qt Creator,这里我们下载windows版的。
下载地址:如下图我们下载:Download Qt SDK for Windows* (178Mb)下载完成后,直接安装即可,安装过程中按默认设置即可。
2.运行Qt Creator,首先弹出的是欢迎界面,这里可以打开其自带的各种演示程序。
3.我们用File->New菜单来新建工程。
4.这里我们选择Qt4 Gui Application。
5.下面输入工程名和要保存到的文件夹路径。
我们这里的工程名为hello world。
6.这时软件自动添加基本的头文件,因为这个程序我们不需要其他的功能,所以直接点击Next。
7.我们将base class选为QDialog对话框类。
然后点击Next。
8.点击Finish,完成工程的建立。
9.我们可以看见工程中的所有文件都出现在列表中了。
我们可以直接按下下面的绿色的run按钮或者按下Ctrl+R快捷键运行程序。
10.程序运行会出现空白的对话框,如下图。
11.我们双击文件列表的dialog.ui文件,便出现了下面所示的图形界面编辑界面。
12.我们在右边的器件栏里找到Label标签器件13.按着鼠标左键将其拖到设计窗口上,如下图。
14.我们双击它,并将其内容改为hello world。
15.我们在右下角的属性栏里将字体大小由9改为15。
16.我们拖动标签一角的蓝点,将全部文字显示出来。
17.再次按下运行按钮,便会出现hello world。
到这里hello world程序便完成了。
Qt Creator编译的程序,在其工程文件夹下会有一个debug文件夹,其中有程序的.exe可执行文件。
编译Hello
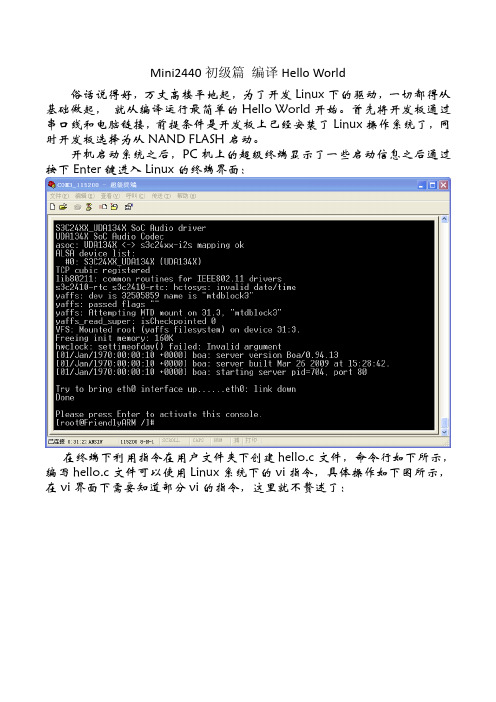
Mini2440初级篇编译Hello World俗话说得好,万丈高楼平地起,为了开发Linux下的驱动,一切都得从基础做起,就从编译运行最简单的Hello World开始。
首先将开发板通过串口线和电脑链接,前提条件是开发板上已经安装了Linux操作系统了,同时开发板选择为从NAND FLASH启动。
开机启动系统之后,PC机上的超级终端显示了一些启动信息之后通过按下Enter键进入Linux的终端界面:在终端下利用指令在用户文件夹下创建hello.c文件,命令行如下所示,编写hello.c文件可以使用Linux系统下的vi指令,具体操作如下图所示,在vi界面下需要知道部分vi的指令,这里就不赘述了:接下去就是要编译源文件了,在文件所在目录下利用指令arm-linux-gcc –o hello hello.c 最后利用make 生成hello 可执行文件:到了这里发现原来板上的没有gcc的,为了装上gcc,将文件拷到U盘,然后接上开发板,利用cp指令想把文件复制到开发板上,突然发现:囧!!!突然发现开发板上的空间是64M啊,一个gcc就把它塞爆了,毕竟还只是学习的板子啊,为了解决问题,还是调用虚拟机上的Ubuntu 来做吧。
在虚拟机上按照以上流程进行操作,内容如下图所示:执行完arm-linux-gcc –o hi hi.c后再输入make生成hi可执行文件,到这里的时候发现出现了错误,显示cannot execute binary file,囧!!继续百度,终于找到了一个解决方案,原来是编译指令有问题,改为gcc hi.c–o hi就可以了,然后直接调用./hi就可以实现了:最后只要将生成的可执行文件通过介质转移到开发板上就可以执行了。
Author:Hot BloodContact:394011495@School of Electronic and Information EngineeringSouth China University of Technology。
cmaketoolchain用法
cmaketoolchain用法CMake Toolchain是一个用于配置和构建CMake项目的工具。
它可以帮助开发人员在不同的平台上使用不同的编译器和工具链。
本文将介绍cmaketoolchain的用法和相关技巧。
使用cmaketoolchain的步骤如下:1. 创建一个新的工程,并在工程根目录下创建一个cmakelists.txt文件。
2. 在cmakelists.txt文件中输入以下内容:```# CMake最低版本号要求cmake_minimum_required(VERSION 3.5)# 工程名称project(HelloWorld)# 设置编译器和工具链set(CMAKE_TOOLCHAIN_FILE "/path/to/toolchain.cmake")# 添加源文件add_executable(hello main.cpp)```3. 在工程根目录下创建一个toolchain.cmake文件,并输入以下内容:```# 设置编译器set(CMAKE_C_COMPILER "gcc")set(CMAKE_CXX_COMPILER "g++")# 设置编译选项set(CMAKE_C_FLAGS "-Wall")set(CMAKE_CXX_FLAGS "-Wall")# 设置链接选项set(CMAKE_EXE_LINKER_FLAGS "-static")# 设置CPU架构set(CMAKE_SYSTEM_NAME Linux)set(CMAKE_SYSTEM_PROCESSOR arm)```4. 运行cmake命令生成Makefile:```cmake .```5. 运行make命令进行编译:```make```下面是一些cmaketoolchain的技巧:1. 设置环境变量可以通过设置环境变量来改变cmaketoolchain的行为。
Moxa DA-660A Series 产品说明书

P/N: 1802006620022 *1802006620022*DA-660A SeriesQuick Installation GuideVersion 3.0, March 2020Technical Support Contact Information/supportMoxa Americas:Toll-free: 1-888-669-2872 Tel: 1-714-528-6777 Fax: 1-714-528-6778 Moxa China (Shanghai office): Toll-free: 800-820-5036 Tel: +86-21-5258-9955 Fax: +86-21-5258-5505 Moxa Europe:Tel: +49-89-3 70 03 99-0 Fax: +49-89-3 70 03 99-99 Moxa Asia-Pacific:Tel: +886-2-8919-1230 Fax: +886-2-8919-1231 Moxa India:Tel: +91-80-4172-9088 Fax: +91-80-4132-10452020 Moxa Inc. All rights reserved.OverviewDA-660A computers are Arm-based, ready-to-run embedded computers designed for industrial data acquisition applications. The computers come with 8 to 16 RS-232/422/485 serial ports, 4 Ethernet ports, and 2 USB 2.0 ports, all based on the Moxa Macro communication processor. In addition, the DA-662A-I-8/16-LX’s serial ports support 2k digital isolation and 8 kV contact, 15 kV Air ESD protection and 2 kV line-to-line, as well as 4 kV line-to-ground surge protection. The casing is a standard 1U, 19-inch wide rack-mounted rugged enclosure. The robust,rack-mountable design provides the hardened protection needed for industrial environment applications, and makes it easy for users to install the DA-660A Series on a standard 19-inch rack. The DA-660A computers are ideal for applications that require a distributed embedded technology, such as SCADA systems, plant floor automation, and power electricity monitoring applications.Package ChecklistBefore installing your DA-660A computer, verify that the package contains the following items:• 1 DA-660A Series computer• 6 jumper caps•19-inch Rackmount Kit: 2 L-shaped metal plates and 8 screws •Cross-over Ethernet cable•CBL-RJ45M9-150: 150 cm, 8-pin RJ45 to DB9 (M) serial port cable •CBL-RJ45F9-150: 150 cm, 8-pin RJ45 to DB9 (F) console port cable •Quick installation guide (printed)•Warranty cardNotify your sales representative if any of the above items are missing or damaged.Panel LayoutFront ViewRear ViewLED IndicatorsThe following LED indicators are located on the front panel of the DA-662A Series. LED Name LED Color LED FunctionReadyGreen Power is on and functioning normally LAN1, LAN2, LAN3, LAN4 Orange 10 Mbps Ethernet connection Green 100 Mbps Ethernet connection P1-P16 (Tx) Green Serial port is transmitting data OffSerial port is not transmitting data P1-P16 (Rx)Orange Serial port is receiving data OffSerial port is not receiving dataInstalling Your ComputerDesktop MountingPlace the DA-660A on a clean, flat, well-ventilated desktop. For better ventilation, attach the 4 pads from the desktop kit to the bottom of the DA-660A, and leave some space between the DA-660A and otherequipment. Do not place equipment or objects on top of the DA-660A, since doing so could damage it. Rack MountingThe DA-660A can be mounted on a standard 19-inch rack. Use theenclosed pair of L-shaped metal plates and screws to fasten the DA-660A to the rack cabinet. You can lock either the front panel or the rear panel of the DA-660A to the front side of the rack. Each L-shaped plate has 6 holes, leaving two outer or inner holes open for your convenience.Connecting Your ComputerPower ConnectorConnect the 100-240 VAC power line to the DA-660A’s power connector. The Ready LED on the front panel will glow a steady green when the OS is ready.Ethernet PortsPin Signal 1 ETx+ 2 ETx- 3 ERx+ 6ERx-Serial PortsThe DA-660A models have 8 or 16 serial ports that use RJ45 connectors. The ports can be configured independently for RS-232, RS-422, or RS-485 by software. PinRS-232RS-422RS-4851 DSR – –2 RTS TXD+ –3 GND GND GND4 TXD TXD- –5 RXD RXD+ Data+6 DCD RXD- Data-7 CTS – – 8DTR––Serial Ports (DA-662A-I-8/16-LX only) Pin RS-2321 -2 RTS3 GND4 TXD5 RXD6 –7 CTS 8–Console PortsThe console port is an RJ45 RS-232 port. The pin definitions are the same as for the serial ports. Reset ButtonPress the “Reset” button on the front panel continuously for at least 5 seconds to load the factory default configuration. After the factory default configuration has been loaded, the system will reboot automatically. The Ready LED will blink for the first 5 seconds, and then maintain a steady glow once the system has rebooted. LCD ScreenThe DA-660A has an LCD screen on the front panel. The LCD screen displays 16 columns and 2 rows of text. On boot-up, the LCD screen displays the model name and firmware version, as shown here: D A - 6 6 2 A - 1 6VER.1.There are four push buttons on the DA-660A’s front panel. The buttons are used to enter text onto the LCD screen. The buttons are MENU, (up cursor), (down cursor), and SEL: Button ActionMENUDisplays the main menuScrolls up through a list of items shown on the LCD screen’s second lineScrolls down through a list of items shown on the LCD screen’s second lineSELSelects the option listed on the LCD screenReal-time ClockThe DA-662A’s real-time clock is powered by a lithium battery. Westrongly recommend that you do not replace the lithium battery without help from a qualified Moxa support engineer. If you need to change the battery, contact the Moxa RMA service team.Powering on Your ComputerTo power on the DA-660A, connect the power line to the DA-660A’s AC power connector (located on the right side of the rear panel), and then turn on the power switch. It takes about 30 seconds for the system to boot up. Once the system is ready, the Ready LED on the front panel will light up, and the DA-660A will display the model name and firmware version on the LCD screen.Connecting to the DA-660A From a PCThere are two ways to connect to the DA-660A from a PC: through the serial console port or by Telnet over the network. The COM settings for the serial console port are: Baudrate = 115200 bps, Parity = None, Data bits = 8, Stop bits = 1, Flow Control = None.When using Telnet, you need to know the DA-660A’s IP address and netmask. The default LAN settings are shown below. For first-time configuration, you may find it convenient to use a crossover Ethernet cable to connect directly from the PC to the DA-660A.Default IP Address NetmaskLAN 1 192.168.3.127 255.255.255.0LAN 2 192.168.4.127 255.255.255.0LAN 3 192.168.5.127 255.255.255.0LAN 4 192.168.6.127 255.255.255.0Once the DA-660A is powered on, the Ready LED will light up, and a login page will open. Use the following default Login name and Password to proceed.Login: rootPassword: rootConfiguring the Ethernet InterfaceIf you are using the console cable for first-time configuration of the network settings, use the following commands to edit the interface file: # ifdown –a//Disable LAN1/LAN2 interface first, before you reconfigure the LAN settings. LAN 1 = eth0, LAN 2= eth1// # vi /etc/network/interfaces//check the LAN interface first//After the boot settings of the LAN interface have been modified, use the following commands to activate the LAN settings to take effect immediately:# sync ; ifup –aDeveloping Your ApplicationInstalling the ToolchainThe PC must have the Linux operating system preinstalled to install the DA-662A GNU toolchain. Redhat 7.3/8.0/9.0 Fedora Core 1/2/3/4/5Debian 7 and later compatible versions are recommended. The toolchain will use about 1 GB of your PC’s hard disk space. Download the software package from the Resources tab on the DA-660A product page and use the following command to install it.#sh arm-linux_x.x.x-Vx_Build_YYMMDDHH.sh arm-linux_x.x.x-Vx_Build_YYMMDDHH.shCompiling and Running Hello.cThe path to the toolchain is:#export PATH=“/usr/local/arm-linux-4.4.2-v4/bin:$PATH”The DA-660A software package also includes several example programs. Here we use hello.c as an example to show you how to compile and run your applications. Type the following commands on your PC:#unzip moxa-da-660a-series-library-v1.2.zip #cd ExamplesNext, go to the hello subdirectory and type the following command to finish compiling hello,c:# makeFinally, run the executable file that was created to generate hello-release and hello-debug .Install GNU cross compiler on PC Linux Power on target and connect to PC LinuxInstall Glibc on PC Linux Install GDB client on PC Linux (optional)Set up cross compiler and Glibc environment variables Codeprogram & CompileDownload to target to run and testDevelop end-user applicationProgram Debugged?NewProgramYesNoEnvironmental SpecificationsPower requirements 100 to 240 VAC auto ranging(47 to 63 Hz for AC input)Dimensions (W×D×H) With rack-mount ears: 480 × 237 × 45 mmWithout rack-mount ears: 440 × 237 × 45 mm Operating temperature -10 to 60°C (14 to 140°F), 5 to 95% RH Storage temperature -20 to 80°C (-4 to 176°F), 5 to 95% Regulatory approvals UL 60950-1,EN 55022/24,CISPR 22, FCC Part 15B Class A,IEC 61000-4-2 ESD: Contact 8 kV; Air 15 kV,IEC 61000-4-3 RS: 3 V/m (80 MHz to 1 GHz)IEC 61000-4-4 EFT: Power 1 kV; Signal 0.5 kV,IEC 61000-4-5 Surge: Power 2 kV; Signal 4 kV,IEC 61000-4-6 CS: 3 VIEC 61000-4-8IEC 61000-4-11Warranty 5 years。
unrealtoolchains的使用 概述及解释说明
unrealtoolchains的使用概述及解释说明1. 引言1.1 概述在当今游戏开发领域,使用合适的工具链对于项目的成功和效率至关重要。
Unreal T oolchains是一款被广泛应用于Unreal Engine的工具集合,为开发者提供了强大的功能和便利性。
本文旨在介绍Unreal Toolchains的使用方法、背景和发展历程,并通过实例分析展示其在项目开发中的价值。
1.2 文章结构本文共分为五个部分来探讨Unreal T oolchains的使用。
首先是引言部分,对文章进行概述并说明目的;接着是Unreal Toolchains简介,介绍Unreal Engine 概况、工具链定义和作用以及Unreal T oolchains的背景和发展历程;第三部分是Unreal T oolchains的使用方法,包括安装、配置和设置环境以及编译和构建项目等内容;第四部分则是通过实例分析演示如何使用Unreal Toolchains进行项目开发,包括选择合适案例、需求分析、开发流程规划以及解决实际问题和优化效率等;最后一部分为结论与展望,总结了Unreal T oolchains的应用价值和优势,并展望未来其可能的发展方向。
1.3 目的本文旨在向读者介绍Unreal Toolchains的使用方法和技巧,帮助开发者更好地理解和应用这一强大工具集合。
通过详细的教程和实例分析,读者将能够掌握Unreal T oolchains的安装、配置与环境设置,了解如何使用它来编译和构建项目,并从优化效率的角度探索其在项目开发中的实际应用。
通过阅读本文,读者将对Unreal T oolchains有更清晰全面的认识,并可以将其运用于自己的游戏开发工作中。
2. Unreal T oolchains简介2.1 Unreal Engine概述Unreal Engine是一款强大的游戏开发引擎,被广泛用于创建高质量的实时交互内容。
clion toolchain 介绍说明
clion toolchain 介绍说明
Clion是一种集成开发环境(IDE),专门用于C和C++编程。
它为开发人员提供了一个强大的工具集,可以帮助他们更轻松地创建、调试和测试他们的代码。
Clion的一个重要特点是它的toolchain集成。
Toolchain是一组工具,用于将源代码转换为可执行文件。
在Clion中,您可以选择不同的toolchain,以便根据特定的需求和平台进行编译和构建。
Clion支持多种不同的toolchain,包括GCC、Clang和Microsoft Visual C++。
这些toolchain提供了各种编译器、调试器和其他工具,使开发人员能够更轻松地进行代码开发和调试。
使用Clion的toolchain,开发人员可以根据自己的需求选择不同的编译器。
例如,如果您希望在Linux上开发C++代码,您可以选择GCC作为您的编译器。
如果您在Windows上进行开发,您可以选择Microsoft Visual C++作为您的编译器。
Clion还提供了强大的调试功能。
开发人员可以使用Clion的调试器来跟踪代码的执行,查找错误并进行修复。
调试器还提供了一些高级功能,如设置断点、观察变量和执行代码行。
Clion的toolchain集成使开发人员能够更轻松地进行C和C++编程。
它提供了一个强大的工具集,可以帮助开发人员更高效地开发和调试他们的代码。
无论是初学者还是经验丰富的开发人员,Clion都是
一个值得考虑的选择。
无论您是开发Linux应用程序、Windows应用程序还是嵌入式系统,Clion都可以满足您的需求。
交叉工具链的安装与使用
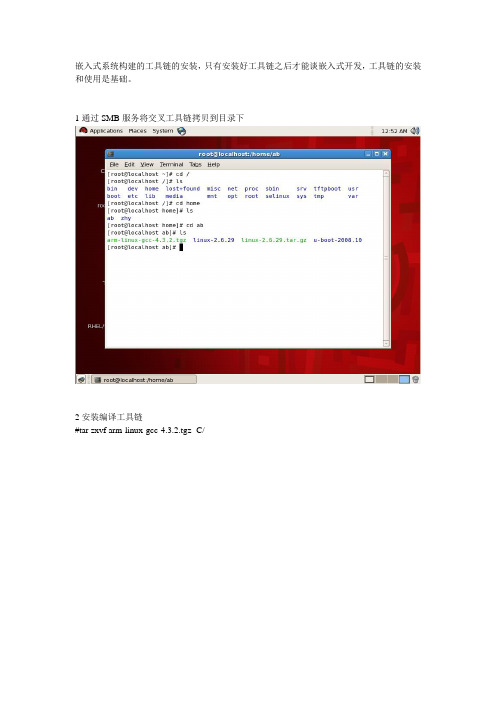
嵌入式系统构建的工具链的安装,只有安装好工具链之后才能谈嵌入式开发,工具链的安装和使用是基础。
1通过SMB服务将交叉工具链拷贝到目录下
2安装编译工具链
#tar zxvf arm-linux-gcc-4.3.2.tgz -C/
3为了在整个文件系统下都能使用交叉编译命令,需要将目录/usr/local/arm/4.3.2/bint添加到环境变量PA TH中。
以下就是我修改的代码
添加pathmunge/usr/local/arm/4.3.2/bin
4执行source/etc/profile
5编写应用程序hello.c
6交叉编译应用程序
命令#arm-linux-gcc hello.c –o hello
上图hello为交叉编译后生成的可执行程序
7通过file命令查看可执行文件格式
命令#file hello
通过file命令可以看出该可执行文件是ARM格式的动态链接的ELF。
clion toolchain 介绍说明
clion toolchain 介绍说明
CLion是一款专为开发C及C++所设计的跨平台IDE,基于IntelliJ平台,具备许多智能功能,旨在提高开发人员的生产力,从而提升工作效率。
以下是关于CLion Toolchain的介绍:
CLion的Toolchain是其集成开发环境的一个重要组成部分,它包括编译器、调试器和其他用于构建和调试C/C++项目的工具。
这些工具与CLion紧密
集成,使得开发人员能够更方便地构建、调试和运行他们的项目。
在CLion中,Toolchain的设置和管理非常简单。
用户可以在IDE的偏好设置中轻松配置和管理Toolchain。
这包括选择编译器、调试器和其他相关工具的版本,以及设置它们的工作路径和其他相关选项。
此外,CLion还提供了许多强大的工具和功能,用于更有效地使用Toolchain。
例如,它具有自动代码补全、语法高亮、代码导航、代码重构
和调试器等功能。
这些工具和功能可以帮助开发人员更快速、更有效地编写高质量的C/C++代码。
总的来说,CLion的Toolchain是一个强大的工具集,它可以帮助开发人员更高效地构建和调试C/C++项目。
通过使用CLion的Toolchain,开发人员可以更快速地编写、测试和调试他们的代码,从而提高开发效率和质量。
cmaketoolchain用法
cmaketoolchain用法CMake是一个跨平台的开源构建工具,它可以自动生成Makefile、Visual Studio等IDE的项目文件,使得项目的构建变得更加简单和高效。
CMakeToolchain是CMake的一个重要组成部分,它可以帮助我们在不同的平台上构建项目,本文将介绍CMakeToolchain的用法。
CMakeToolchain是一个CMake的模块,它可以帮助我们在不同的平台上构建项目。
在使用CMakeToolchain之前,我们需要先了解一些基本概念。
首先,我们需要知道什么是交叉编译。
交叉编译是指在一台主机上编译出在另一台不同架构的目标平台上运行的程序。
例如,在x86架构的主机上编译出在ARM架构的嵌入式设备上运行的程序。
其次,我们需要知道什么是工具链。
工具链是指一组编译器、链接器、调试器等工具的集合,用于编译和构建程序。
在使用CMakeToolchain时,我们需要先创建一个toolchain文件,该文件包含了我们所需要的工具链信息。
例如,我们可以在toolchain文件中指定编译器、链接器、头文件路径、库文件路径等信息。
下面是一个toolchain文件的示例:```set(CMAKE_SYSTEM_NAME Linux)set(CMAKE_SYSTEM_PROCESSOR arm)set(CMAKE_C_COMPILER /usr/bin/arm-linux-gnueabi-gcc)set(CMAKE_CXX_COMPILER /usr/bin/arm-linux-gnueabi-g++)set(CMAKE_FIND_ROOT_PATH /usr/arm-linux-gnueabi)set(CMAKE_FIND_ROOT_PATH_MODE_PROGRAM NEVER)set(CMAKE_FIND_ROOT_PATH_MODE_LIBRARY ONLY)set(CMAKE_FIND_ROOT_PATH_MODE_INCLUDE ONLY)```在上面的示例中,我们指定了目标平台的系统名称和处理器架构,以及编译器和链接器的路径。
- 1、下载文档前请自行甄别文档内容的完整性,平台不提供额外的编辑、内容补充、找答案等附加服务。
- 2、"仅部分预览"的文档,不可在线预览部分如存在完整性等问题,可反馈申请退款(可完整预览的文档不适用该条件!)。
- 3、如文档侵犯您的权益,请联系客服反馈,我们会尽快为您处理(人工客服工作时间:9:00-18:30)。
3.3.2 Toolchain安装
注意:XSBase在本手册中在Redhat 9.0进行测试。
如果在其它版本的Linux中出现问题,请联系我们的技术支持或者访问我们的网站。
移动到/XSBASE的Toolchain目录下。
hybus-arm-linux-R1.1.tar.gz是Toolchain的压缩文件。
复制到/usr/local目录下解压。
解压完后生成hybus-arm-linux-R1.1目录。
然后设置路径,用VI编辑器打开/root/.bash_profile文件并添加上述的路径。
现在在任何的目录下都能执行/usr/local/-arm-linux-R1.1/bin。
文件夹下的可执行文件。
如arm-linux-gcc编译器。
3.3.3 测试
arm-linux-gcc这个编译器生成ARM的二进制代码,不同于在X86系列的GCC生成的二进制代码。
所以请参考专门的编译过程和选项的文档。
现在用一个简单的程序测试这个编译器。
请分别使用gcc and arm-linux-gcc 编译下面一个短小的例子。
#include <stdio.h>
int main()
{
printf(“Hello World”);
}
[root$super ]# gcc –o hello hello.c
[root$super ]# arm-linux-gcc –o hello-arm hello.c
用”file”命令检查生成的二进制代码。
[root$super ]# file hello
hello: ELF 32-bit LSB executable, Intel 80386, version 1, dynamically linked (uses shared libs), not stripped
[root$super ]# file hello-arm
hello-arm: ELF 32-bit LSB executable, Advanced RISC Machines ARM, version 1, dynamically linked (uses shared libs), not stripped
下载hello-arm这个二进制文件到板子,执行。
"Hello World" 将出现。
