EE2007.2dxdatabook中文配置手册
方正(常用中间件)ES2007安装手册

ES2007安装帮助———————方正国际软件有限公司目录1 ES2007 for java (1)1.1 运行环境 (1)1.2 安装 (1)1.3 运行 (16)2 ES2007 for .net (20)2.1 运行环境 (20)2.2 安装 (20)2.3 运行 (34)3 ES2007 DTS (39)3.1 DTS安装 (39)3.2 DTS更新 (41)3.3 oracle安装和更新 (44)1 ES2007 for java1.1 运行环境1、硬件要求服务端:客户端:2、软件要求服务端:WindowsNT4.0/2000 Server或更高版本;SQLServer 2000以上数据库操作系统客户端: Windows9X/Me或者Windows NT4.0 Workstation/2000或更高版本;浏览器: IE6.0 或更高版本1.2 安装安装ES2007 for java 软件(1)将安装光盘放入光驱,打开光盘,双击其中的setup.exe文件运行安装向导;系统经过一段时间的初始化后,会自动弹出如图1-1界面:(2)点击【下一步】,弹出如下图1-2界面:图1-2(3)仔细阅读Founder软件协议内容,勾选接受协议中的内容,点击【下一步】,进入下图1-3界面:图1-3(4)安装类型有多种,根据需要选择一种类型升级完全安装仅安装WEB引擎仅安装设计器自定义安装完全安装(1)如下图1-4所示,安装类型选择完全安装,表示安装全部ES2007所有组件和工具选择Java开发组件:JDK为Java开发包,包括了Java的运行环境和开发环境,如果您的系统没有JDK,需要把JDK 5.0这一项选择上。
Eclipse是Java开发的一个集成环境,做为开发机时,要把Eclipse 3.1选择上。
Tomcat是一个小型的轻量级应用服务器,要启动WEB就要先运行Tomcat,所以做为WEB服务器机时要把Tomcat.5.0选择上。
Microsoft Office Project Professional 2007 产品说明书
Microsoft Office Project Professional 2007m/office/project.Microsoft ® Office Project Professional 2007 為一套健全的專案管理工具,它完美地結合了可用性、功能性與極佳的彈性,因此,可以協助使用者更有效率的管理專案。
除了可以獲得即時資訊、控制專案作業排程與財務、保持專案小組同步性之外,當此應用程式與熟悉的 Microsoft Office System 應用程式、功能強大的報表工具、引導式的規劃及彈性的工具相互整合時,將產生更高的生產力。
並包含了與 Microsoft Office Project Server 2007 的整合運用,以提供使用者具備企業專案管理的能力,諸如:中央控管的追蹤專案資源可用性之能力、各種橫跨專案的技巧,以及遍及整個企業的通訊與協同作業的運用。
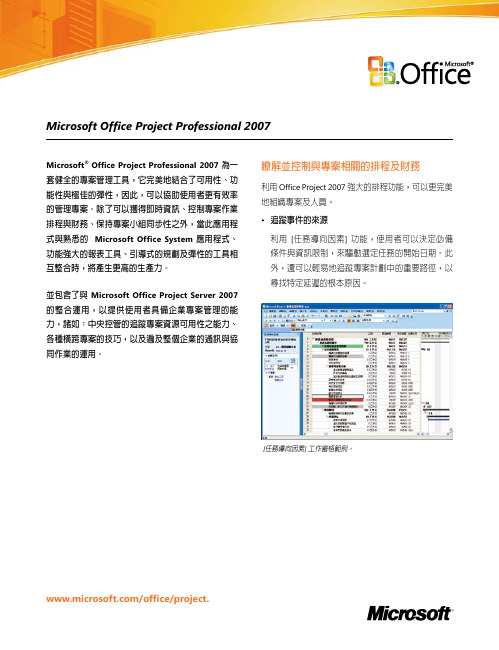
[任務導向因素] 工作窗格範例。
瞭解並控制與專案相關的排程及財務利用 Office Project 2007 強大的排程功能,可以更完美地組織專案及人員。
• 追蹤事件的來源利用 [任務導向因素] 功能,使用者可以決定必備條件與資訊限制,來驅動選定任務的開始日期。
此外,還可以輕易地追蹤專案計劃中的重要路徑,以尋找特定延遲的根本原因。
• 回復變更使用 [多層次復原] 可以查看各種情境實例之假設分析的呈現效果。
此項功能將允許使用者復原及取消復原檢視、資料及選項的變更。
使用者可以復原剛剛執行的動作,或者復原多組來自巨集或其他協力廠商的自訂化程式,因此,可以深入瞭解各種變更的連帶關係。
• 查看變更的效果透過[變更醒目提示]功能,可以裁決在所有依存任務上所進行之某項變更的影響。
對於因為使用者近期進行之變更而受到影響的項目,Project 會自動地醒目顯示這些項目。
綠色的醒目顯示指出編輯的效果。
• 控制專案財務指定專案及方案的預算,以分配預算金額及追蹤成本。
Digi-Star EZ2 7.A平衡器设置与校准指南说明书

EZII/3 - Direct Access NumbersFor the Setup / Calibration SettingsThis method allows direct access to individual Setup & Calibration Settings.Enter the Direct Access Number of the setting you would like to change on thenumeric keypad and then press the "Select "key. The display will show thesetting name and then allow the value to be changed. Pressing the ON or Enterkey will return the scale to weighing.LONG FORM - SETUP/CALIBRATION SETTINGSPlease note: Settings will only be displayed if their feature is found in the indicator model.M ENU 1-B ASIC FEATURES IN MOST SCALESLANGUAGE {LANGAG}..................................101 Select Language to be displayed.DISPLAY RATE {D RATE}.............................102 Update Display 1, 2, 3, or 4 Times per Second.MOTION {MOTION}........................................103 If ON - motion arrow flashes for unstable weight.ZERO TRACK {ZTRACK}...............................104 If ON - zero track adjust balance for build up of snow & mud.WEIGH METHOD {W MTHD}..........................105 Select weigh method 1-General 2-Slow 3-Fast 4-Lock OnLOCK ON {LOCKON}......................................106 Lower number if lock-on does not repeat-Raise to lock-on fasterTR HOLD {TR HLD}.......................................107 Display gross weight if TR key is held for 3 seconds.SCALE ID SETUP {SCALID}..........................108 Identity of scale location (Truck ID or Mixer Number).LOCK-N-HOLD {LKNHLD}.............................109 If ON - lock weight is held until next animal is weighed.AUTO OFF {AUTOFF}....................................111 Indicator turns off after selected minutes of stable weight.LOCK ON STORE {L STORE}........................112 Select lock on storage method.LSTORE SEND MODE {LSSEND}................113 ON=sends data with animal on scale. OFF=when animal leavesEID STORE {E STORE}.................................114 If ON - records are stored to internal memory.1 PRESS ZERO {1 ZERO}.............................115 If ON - Press and hold the Zero key to Zero/Balance scale.POWER LOSS MESS {PWRLOS}...................116 If ON - Display time & date of power loss if preset/recipe active.EID AUTO RECORD{EIDAUT}.......................117 If ON - Immediately records eid tag.SCROLL DELAY {SCROLL}...........................118 Slow scroll rate for cold temperatures, 0=normal to 9=slowest.FORCE PREMIS ENTRY{GINPIN}................123 If ON - Operator MUST enter Group & Premis to use scale.SW4600 DEVIATION{SW DEV}.....................124 If ON – Enables standard deviation screens on SW4600 EID.M ENU 2-C LOCK,P RINTER,C OMMUNICATIONS &E STIMATED W EIGHT F EATURESTIME FORMAT {TIME F}...............................201 Select time format - AM/PM or 24 hourTIME {TIME}..................................................202 Select key changes time, Function key choses hh:mm:ss.DATE FORMAT {DATE F}.............................203 Select date format 1-mm-dd 2-mm/dd/yy 3-mm/dd/yyyy 4-dd-mm 5-dd/mm/yy 6-dd/mm/yyyy 7-ddmoyy 8-ddmoyyyy.DATE {DATE}................................................204 Select key changes date - Function key choses mm/dd/yyTARE AUTO PRINT {TAREAP}......................211 If ON - tare will auto-print displayed weight.ONE LINE PRINT {1L PRT}...........................212 If ON - scale data will be printed on one line.SCOREBOARD MODE{SCOREM}..................213 Select scoreboard output.AUTO PRINT {APRINT}.................................214 If ON - pressing keys will auto-print weight values.COMPUTER IN MODE {COM IN}...................215 DOWNLD = Data Down Loader, EZ CMD = Original EZ Commands & EZ2CMD =EZII Escape Commands.PRINT FORMAT{PRTFMT}............................216 Select alternate & comma (CSV) formats.MEDIA TYPE{MEDIA}....................................217 Select DDL, Datakey or Serial PC for data storage.REMOTE{REMOTE}........................................218 If ON - Indicator can communicate with a Cab Control Display.ZERO OUTPUT {ZEROUT}.............................219 Perform the Zero/Balance for the SCOREM #11 weight output and the Analog OutputOption (4-20mA).COM 1 DELAY {C1 DLY}................................221 Select seconds to delay before advancing to next line.COM 2 DELAY {C2 DLY}...............................222 Select seconds to delay before advancing to next line.PRINT ACCUMULATION{PRTACC}...............223 Shows a running total of the weights printed.SCALE NUMBER{SCL NO}............................231 Select Scale Number for Cab Control communications.REMOTE DISPLAY{RMDISP}........................234 Select type of Remote Display.PRINT KEY OPERATION{TARPRT}..............235 Reverse operation of Print/Tare key on the CC400 or EZ400.BAR GRAPH MODE{BARGRP}......................236 Select output for bar graph display.BAR GRAPH WEIGHT{BAR WT}...................237 Enter the Full Scale Gross weight for the bar graph display.PRINT BUFFER{BUFFER}…………………….238 If ON- printed records are stored in internal memory.PB SCROLL BY LINES{PBLINE}...................239 Scroll through print buffer record memory PBLINE lines at a time. Select 1-3. ANALOG LOW WEIGHT{LOW WT}................241 Enter Analog weight value to equal 4mA or 0 Volts.ANALOG HIGH WEIGHT{HIGHWT}................242 Enter Analog weight value to equal 20mA or 5 Volts.ANALOG SELECT {ANAOUT}........................243 Select 0-5V, 4-20ma or 0-20ma output.ESTIMATE WEIGHT {EST WT}......................299 Adjust Gross weight of scale by changing the zero/balance.(Continued)Doc. # D3586 Rev W.doc © Copyright Digi-Star, LLC Updated for software ver. “EZ2 7.A" on Mar. 1, 2010M ENU 3-S CALE C ALIBRATION S ETTINGSDISPLAY COUNT {COUNT}...........................301 Select display count size of weigh values.AUTO RANGE {ARANGE}..............................302 If ON - Auto increases the display count value by 1 count size at 300 lbs/kgs and 1more count size at 600 lbs/kgs.DISPLAY UNIT {LB-KG}................................303 Display pounds - lb or kilograms - kgCAPACITY {CAP}.........................................304 Enter MAXIMUM weight measurable on scale.WM1 ADJUST 1 {WMA1-1}.............................305 Increase this number to smoothen weighing (2 to 100)WM1 ADJUST 2 {WMA1-2}.............................306 0=OFF. Use value less than WMA1-1 for quick weight response.WM1 ADJUST 3 {WMA1-3}.............................307 Enter the weight to activate quick weight response.WM2 ADJUST 1 {WMA2-1}.............................311 Increase this number to smoothen weighingWM2 ADJUST 2 {WMA2-2}............................312 0=OFF. Use value less than WMA2-1 for quick weight response.WM2 ADJUST 3 {WMA2-3}............................313 Enter the weight to activate quick weight response.MIMIC TYREL {TC1300}...............................321 If ON - Records preset weights like a Tyrel TCX-1300 Indicator.APPLICATION UNITS {A UNIT}....................323 Enter application units in English or Metric.APPLICATION RATE {RATE }......................324 Enter the desired rate in Tons per Acre (or Tonnes / Hectare).APPLICATION WIDTH {WIDTH }...................325 Enter the spread width in feet (or meters).TOTAL ACRES {ACRES }..............................327 Shows a running total of acres spread on the selected field.APP RATE ESTIMATE {ARATE1}..................331 The number of weight samples used for the application rate estimate. Increase valueto smoothen (2 to10).APP RATE AVERAGE {ARATE2}..................332 The number of rate samples averaged. Increase value to smoothen (1 to 5).APP RATE WINDOW {ARATE3}....................333 Determines range for minimum or maximum samples. Uses minimum samples whenoutside of window. 0 = ‘OFF’, 1 = RATE +/- RATE, 9 = RATE +/- 1/9 RATE.APP MINIMUM SAMPLES {ARATE4}............334 Minimum samples used in APP RATE WINDOW. Decrease for faster response.APP RATE EQUAL WEIGHTS {AWEQUL}.....335 Increase value for low application rates.APP RATE SPEED ADJUST {ARATE55}.......336 Select FAST for faster response when beginning to unload.M ENU 4-P RESET,B ATCHING &R OTATION C OUNTER F EATURESPRE ALARM {P MTHD} & {P-ALM}...................401 Select weight or percentage method, then enter a value to activate an early warningthat scale is reaching the preset.REMOTE INPUT {RM INP}............................402 Set function of remote input line on the power cord.ALARM OUTPUT {AL OUT}...........................403 Select Preset OR TR to control Relay, Horn & Lamp. Switch to control Lamp.BUZZER {BUZZER}........................................404 ALARM BUZZER–Alarm Horn can be shortened or turned OFF.PRELOAD TARE {PRETAR}..........................405 If ON - tare weights can be entered using the numeric keypadRELAY {RELAY}............................................406 Select OFF, PRESET or SET POINT for +12VDC Alarm Output.UNLOAD ALARM{U ALRM}...........................407 UNLOAD ALARM BUZZER- Alarm duration can be shortened or turned OFF.REMOTE SWITCH MESSAGE {RI MSG}......411 Message that is displayed for remote input switch condition.REMOTE SWITCH STATE {RISTAT}............412 Set remote input line state that displays message and/or illuminates alarm lamp.Open or Closed.REMOTE SWITCH MSG {RITIME}.................413 Set how often the remote switch message is displayed. Once every 1-9 seconds.TIMER/COUNTER {TMRCTR}........................421 Select time or mixer revolutions to decrement mix timer/counter.DRIVE RATIO {DRATIO}................................422 Enter the number of input pulses that equal 1 mixer revolution.SET POINT {SETPNT}...................................423 Enter set point at which 12V Alarm output changes.CHANGE WEIGHT {SETCHG}........................424 Enter the weight below the set point for output to change.CHANGE DELAY {SETDEL}..........................425 Time 12V Alarm output remains constant before it changes.SET OVER UNDER {SETOUT}......................426 Select ON for +12VDC ALARM when Over or UNDER set point.SET POINT COUNTER {SETCTR}.................427 Counts how many times set point is activated.RECIPE KEYS {RECKEY}..............................438 If ON - disables certain keys when Loading / Unloading Recipe.PROGRAM RECIPE {PROGRM}.....................439 Selects program method, PC or at SCALE.ENTRY METHOD {E MTHD} .........................441 Select batching 1-amount/animal 2-percent/load 3-amount/load.TOLERANCE {TOLER}..................................442 Select tolerance weight percentage to accept ingredient.INGR.ADVANCE DELAY{DELAY}.................443 Select seconds to delay before advancing to next ingredient.INGREDIENT NAMES {INGRNM}...................444 If ON - displays ingredient names while batching.ACCUMULATION {ACCUM}...........................445 If ON - ingredient weights are accumulated while batching.FORCE USER ID {USERID}...........................446 If ON - operator MUST enter User ID to use scale.MEDIA STORAGE{MSTORE}.........................447 Select MANUAL, AUTO or Quick START methods for transferring recipe informationwith the DDL or Datakey.RESIZE 3500 RECIPE{RESIZE}....................448 If ON - operator can change EZ3500 recipe size.INGREDIENT RE-SIZING {INGSIZ}...............449 Selects Automatic Ingredient Re-Sizing mode.RECIPE TOTAL {RECTOT}.............................451 Selects Total amount to be displayed when starting recipe.DISPLAY SCOOP % {SCOOP%}...................452 If ON - displays scoop percentage to load.TOLER OVER LOCK {OVERLK}...................453 If ON - prevents auto-advancing if preset exceeds toleranceFEED ZONE {FDZONE}..................................454 Select feed zone for recipe deliveries.UNDONE RECIPES {UNDN I }......................455 If ON - displays all incomplete recipes.DISPLAY RECIPE PENS {RECPEN}..............456 If ON - pens are displayed when selecting recipes.(continued)Doc. D3586 Rev W.doc © Copyright Digi-Star, LLC Updated for software ver. “EZ2 7.A" on Mar. 1, 2010M ENU 4-P RESET,B ATCHING &R OTATION C OUNTER F EATURES (CONT)RANGE TEST {R TEST}................................457 If ON - Feedlines sent from DataLink are marked "done".AUTO START PENS {AUTPEN}.....................458 If ON - Starts Pens List after Recipe is loaded.ERASE DONE FEEDLINE{ERASFD}.............459 If ON -Erases done feedlines after the EZ->DK transfer.MANUAL PEN ADVANCE{MANPEN}.............461 If ON -Overrides Automatic advance for Pens.PEN TOL {T MTHD} & {PENTOL}.......................462 Select weight or percentage method, then enter pen tolerance.PEN WEIGHT {PEN WT}................................463 Select method for displaying pen weight - Net, Load, or Gross.BATCH NUMBER {BATNUM}.........................464 Select either PC or EZ to control the batch number.DOUBLE KEY {DBLKEY}...............................465 Ignore extra INGR ADVANCE keys while feeding.RECIPE REMAIN ACTIVE{RE-USE}.............466 Allows recipes to be RE-USED for another load.RECIPE STARTED WEIGHT{RSTART}.........467 This weight value determines if the recipe has been started.RECIPE ENTRY METHOS{ RENTRY}...........468 Select recipe start method - recipe name or batch number.CALIB-C ALIBRATIONTEMP CALIBRATION {T CALB}....................801 If ON - scale adjust for temperature changes.DEAD WEIGHT CAL {CAL}..........................802 Calibration method using weights.SHORT FORM - CALIBRATION SETTINGSSETUP NUMBER {SETUP}...........................871 Quick entry value to select weigh method (1-4 lb) (5-8 kg), gain (1-9), display counts(0-9), and capacity (*1000)CALIBRATION NUMBER {CAL} ..................872 Weight displayed at 0.4mV/V for these loadcells.Doc. # D3586 Rev W.doc © Copyright Digi-Star, LLC Updated for software ver. “EZ2 7.A" on Mar. 1, 2010。
中文版Access2007实用教程

1.3 数据库系统管理
数据库管理系统(Database Management System)是从图书馆的管理方法改进而来的。人们将越来越多的资料存入计算机中,并通过一些编制好的计算机程序对这些资料进展管理,这些程序后来就被称为“数据库管理系统〞,它们可以帮我们管理输入到计算机中的大量数据,就像图书馆的管理员。 数据库管理系统的概念 数据库管理系统的组成
中文版Access2007实用教程
教学重点与难点
数据库根本知识 数据库系统的组成与分类 数据库管理系统的概念和类型 常用的数据模型
数据库简介
数据库(Data Base)是计算机应用系统中的一种专门管理数据资源的系统。数据有多种形式,如文字、数码、符号、图形、图像以及声音等。 数据库的概念 数据处理
2.3.2 自定义工作环境
2.4 Access中的对象
表是Access数据库的对象,除此之外,Access 2007数据库的对象还包括查询、窗体、报表、宏以及模块等。 “表〞对象 “查询〞对象 “窗体〞对象 “报表〞对象 “宏〞对象 “模块〞对象
整个数据库开发活动从对系统的需求分析开场。系统需求包括对数据的需求和对应用功能的需求两方面内容。该阶段应与系统用户互相交流,理解他们对数据的要求及已有的业务流程,并把这些信息用数据流图或文字等形式记录下来,最终获得处理需求。
1.4.1 需求分析
由于逻辑设计与详细的数据库管理系统有关。以Microsoft Office Access为例,逻辑构造设计主要完成两个任务: 按照一定的原则将数据组织成一个或多个数据库,指明每个数据库中包含哪几个表,并指出每个表包含的字段。 确定表间关系。通俗地说,就是设计一种逻辑构造,通过该逻辑构造可以导出与用户需求一致的结果。假如不能到达用户的需求,就要反复修正或重新设计。
迈克罗姆电子 MixWizard 2007系列说明书

2007INTRODUCTION ............................................................................................................................................................................1MODULE SELECTION ..................................................................................................................................................................3MODULE CATEGORIES MODEL NUMBERS SIGNAL LEVELSINSTALLATION NOTESMODULE SELECTION CHART ........................................................................................................................................................5MUTING ........................................................................................................................................................................................7MICROPHONE INPUT MODULES .. (9)ML-11T Microphone/Line Input with Mute Send/Receive ......................................................................................................9M-01 Series Microphone Input ............................................................................................................................................9M-11S Microphone Input with Mute-Receive ......................................................................................................................10M-21S Microphone Input with Remote Volume Control........................................................................................................10M-41S Microphone Input with Mute-Send ..........................................................................................................................11M-51 Series Microphone Input with Voice Gate ..................................................................................................................11M-61 Series Microphone Input with Compressor................................................................................................................12M-03P High Impedance Microphone Input ..........................................................................................................................12LINE INPUT MODULES . (13)ML-11T Microphone/Line Input with Mute Send/Receive.........................................................................................................13B-01 Series Balanced Line Input ........................................................................................................................................13B-11S Balanced Line Input with Mute-Receive....................................................................................................................14B-21S Balanced Line Input with Remote Volume Control ....................................................................................................14B-41S Balanced Line Input with Mute-Send........................................................................................................................15L-01 Series Line Matching Input ........................................................................................................................................16L-11S Line Matching Input with Mute-Receive....................................................................................................................17L-41S Line Matching Input with Mute-Send........................................................................................................................17U-01 Series Unbalanced Line Input ....................................................................................................................................18U-03 Series Unbalanced Line Input with High/Low Cut Filters ............................................................................................19U-11 Series Unbalanced Line Input with Mute-Receive ......................................................................................................19U-12S Unbalanced Line Input with Variable Mute-Receive Depth ........................................................................................20U-13 Series Unbalanced Line Input with High/Low Cut Filters and Mute-Receive................................................................20U-14R Dual Input Priority with AGC......................................................................................................................................21U-21S Unbalanced Line Input with Remote Volume Control..................................................................................................21U-43 Series Unbalanced Line Input with High/Low Cut Filters and Mute-Send ....................................................................22U-61S Unbalanced Line Input with Compressor ..................................................................................................................23SPECIAL FUNCTION MODULES ..................................................................................................................................................24LINE OUTPUTT-01S Balanced Line Output................................................................................................................................................24T-02S Unbalanced Line Input with Music-On-Hold Output ..................................................................................................24T-12S Unbalanced Line Input with Music-On-Hold Output and Input Mute-Receive..............................................................25TONE GENERATORS-20S Digital Message/Tone with USB.................................................................................................................................25S-01S 1 kHz Sine Wave Test Tone ......................................................................................................................................26S-02S Buzzer/Yelp Tone......................................................................................................................................................26S-04S Switch-Selectable Tone............................................................................................................................................27REMOTE VOLUME CONTROLV-01S Remote Master Volume Control (VCA)........................................................................................................................27SPEAKER PROCESSORE-03Equalizer For F-121....................................................................................................................................................28E-04Equalizer For H-1........................................................................................................................................................28E-05Equalizer For H-2........................................................................................................................................................28E-06Equalizer For H-3........................................................................................................................................................28E-07Low Pass Filter For FB-100/HB-1.. (28)TABLE OF CONTENTSPAGE II TABLE OF CONTENTSTABLE OF CONTENTS PAGE III APPLICATIONS (30)1.Paging Over Background Music (30)2.Telephone Paging and Music-On-Hold (30)3.Banquet Room Sound System (30)4.School Gymnasium Sound System (31)5.Mute Send and Receive Combination Using Two Modules (31)FREQUENTLY ASKED QUESTIONS (31)General1.Which module should I use for a microphone?2.Which module should I use for a wireless microphone receiver?3.Which module should I use for an AM/FM tuner,cassette deck,CD player,computer sound card,juke box,mixer or satellite receiver?4.Which modules should I use for telephone or microphone paging with priority over a music source?5.Which module should I use for Music-On-Hold (MOH)?6.What type of potentiometer do I need for a Remote Volume Control module?7.How do I use one of the 900 Series processor modules?8.What is the proper wiring for the screw terminal type input modules?9.What’s the difference between the “L”Series and “B”Series modules?10.Which modules are for “mute send”?11.Which modules are for “mute receive”?Troubleshooting12.Why won't the M-11 (Microphone Input with Mute-Receive) pass signal?13.Why won't my paging source override my music source?14.Why isn't my condenser microphone working with an M Series module?15.Why is my signal level low with an L Series module?MODULAR PRODUCTS REFERENCE CHART (33)MODULE CROSS-REFERENCE CHART (34)JUMPER SETTINGS CHART (35)CONNECTOR WIRING CHART (36)INTRODUCTION PAGE 1INTRODUCTION Welcome to the TOA 900 SeriesModule Guide!In this guide,you'll find everything you need to takeadvantage of the powerful flexibility of 900 Seriesmodular products — function descriptions; signalflow and wiring diagrams; specifications; jumpersettings; application examples; and other usefulinformation.Understanding the modules will give you thefreedom to configure custom systems FAST without complicated modifications.And as your customers’needs change,you can easily add more inputs ornew functions by simply changing or addingmodules.An electronic version of the guide is also availablefor download at .Ifyou have any questions,please contact TOA ProductSupport at 1-800-733-4748 — we're here to help!TOA Electronics,Inc.Dedicated to Bob Sweet,author of the original 900Series Module Guide,1990.MODULE SELECTION PAGE 3 MODULE SELECTIONMODULE SELECTION CHART PAGE 5 MODULE SELECTION CHARTMUTING PAGE 7 MUTINGMICROPHONE INPUT MODULES PAGE 9M-01ML-11TMICROPHONE INPUT MODULESM-11M-21MICROPHONE INPUT MODULESPAGE 10M-41M-51MICROPHONE INPUT MODULES PAGE 11M-61 M-03MICROPHONE INPUT MODULES PAGE 12B-01ML-11T LINE INPUT MODULES:BALANCED PAGE 13LINE INPUT MODULESB-11 B-21LINE INPUT MODULES:BALANCED PAGE 14B-41LINE INPUT MODULES:BALANCED PAGE 15L-01LINE INPUT MODULES:LINE MATCHING PAGE 16LINE INPUT MODULES:LINE MATCHING PAGE 17L-11L-41U-01LINE INPUT MODULES:UNBALANCEDPAGE 18U-03U-11LINE INPUT MODULES:UNBALANCED PAGE 19U-12 U-13LINE INPUT MODULES:UNBALANCED PAGE 20U-21U-14LINE INPUT MODULES:UNBALANCEDPAGE 21LINE INPUT MODULES:UNBALANCED PAGE 22U-43U-61LINE INPUT MODULES:UNBALANCED PAGE 23T-01 T-02SPECIAL FUNCTION MODULES:LINE OUTPUTPAGE 24SPECIAL FUNCTION MODULEST-12S-20SPECIAL FUNCTION MODULES:LINE OUTPUT PAGE 25SPECIAL FUNCTION MODULES:TONE GENERATORS-01 S-02SPECIAL FUNCTION MODULES:TONE GENERATOR PAGE 26S-04V-01SPECIAL FUNCTION MODULES:TONE GENERATOR PAGE 27SPECIAL FUNCTION MODULES:VOLUME CONTROLE-03 E-04 E-05 E-06 E-07E Series Processor Modules for TOA SpeakersSPECIAL FUNCTION MODULES:SPEAKER PROCESSORPAGE 28E-03E-04E-05E-06E-07SPECIAL FUNCTION MODULES:SPEAKER PROCESSOR PAGE 29E SeriesProcessor Modules for TOA SpeakersAPPLICATIONSPAGE 30APPLICATIONSAPPLICATIONS PAGE 31FREQUENTLY ASKED QUESTIONSFREQUENTLY ASKED QUESTIONSPAGE 32FREQUENTLY ASKED QUESTIONS (continued)MODULAR PRODUCTS REFERENCE PAGE 33MODULE CROSS-REFERENCEPAGE 34Notes:• H Series microphone modules do not provide phantom power.• Original mute-type modules (pre-1994) connect to Mute Bus #1 only.Newer "MK2" mute-type modules connect to both Mute Bus #1 and Mute Bus #2 and have a "MK2" label on the module faceplate.JUMPER SETTINGS PAGE 35Note:1.In many applications,NO jumper changes are required.Mute-Receive and Mute-Send modules connect to both Mute Bus #1 and Mute Bus #2by default.2.Configure the M-11S Mute Response Mode before use - it will not pass signal out-of-the-box.CONNECTOR WIRING PAGE 36TOA E LECTRONICS, I NC.TEL: 800-733-7088FAX: 800-733-9766TOA C ANADAC ORPORATIONT EL: 905-564-3570F AX: 905-564-3569© 2007, TOA Electronics, Inc.。
Access2007使用说明(齐全)
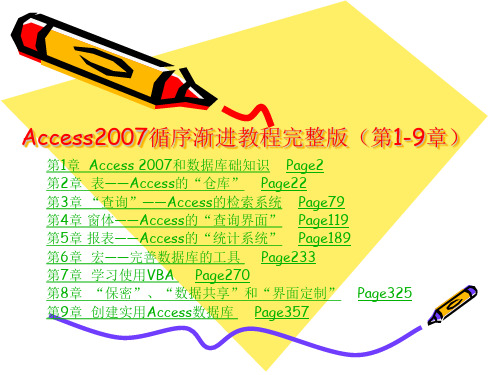
打开“联系 人管理”素 材
打开的“报表”
• 1.2.5 宏
宏是若干个操作的组合,用来简化一些经常性的 操作。 通过触发一个宏可以更为方便地在窗体或报表中 操作数据,如它可以执行打开表或窗体、运行查 询、运行打印等操作。 当数据库中有大量重复性的工作需要处理时,使 用宏是最佳的选择。 宏没有具体的实体显示,只有一系列操作的记录。 所以宏只能显示它本身的设计视图。关于宏的设 计和制作,将在第7章中详细讲述。
1
在格式栏中输入:“所在部 门是:&&&&&[蓝色] ” 通过这些设置 就会实现上边 的效果了
2
2.数字与货币型数据“格式”的设置方法
右击“部 门表”, 选择“设 计视图” 命令打开 此表的设 计视图窗 口 添加此字段,并 将数据类型设置 为“数字”
1
单击格式旁的下 拉箭头,可以选 择所要设置的货 币格式
单击“创建”
1 4
设置主键
单击“表设计”
2
3
按要求输入相应的“字 段名称” ,并设置字 段的”数据类型“
选中“性 别”字段
8
按照相同的步骤设置其 它字段的“常规”属性。 设置完毕后将此对话框 关闭,并选择保存为 “人事表”后,即可完 成此表的创建
5
设置字段大 小为2
在“有效性规则” 属性中输入: “男“Or “女”
1.7 Access 2007、VB、ASP和SQL
VB(Vasual Basic)是一种可视化的应用程序开发工具, 简单方便,容易入门。用在Access 2007中的VBA语 言,从某种意义上说是VB语言的子集,其主要作用是 使现有的应用程序自动化。
ASP是一种编写网页的语言,在ASP中有一种主要的 脚本语言VBScript,能够实现与Access数据库的交互。 SQL则是SQL Server数据库的一种查询语言,在 Access中也使用此语言进行查询
《迅闪2007》使用手册

目录欢迎 ............................................................................................................................ - 3 -1.说明 ..................................................................................................................... - 4 -1.1.需求说明. (4)1.2.准备工作 (5)1.3. 改进 (6)2.软件安装 .............................................................................................................. - 7 -2.1. 服务器端的安装.. (7)2.2.客户端的安装 (8)3.软件配置 ............................................................................................................ - 10 -3.1.初始设置.. (10)3.2. 基本设置 (12)3.2.1.常规设置 ..................................................................................................... - 12 -3.2.2.更新设置 ..................................................................................................... - 17 -3.2.3.公告设置 ..................................................................................................... - 18 -3.2.4.清理磁盘 ..................................................................................................... - 19 -3.2.5.分类设置 ..................................................................................................... - 20 -3.2.6.批量添加 ..................................................................................................... - 21 -3.2.7.功能设置 ..................................................................................................... - 22 -3.2.8.附加功能 ..................................................................................................... - 23 -3.2.9.警告设置 ..................................................................................................... - 24 -3.2.10.显示设置 ..................................................................................................... - 25 -3.2.11.设置密码 ..................................................................................................... - 26 -3.2.12.免费注册 ..................................................................................................... - 27 -3.2.13.关于............................................................................................................. - 28 -3.2.14.背景设置 ..................................................................................................... - 29 -3.3.插件设置.. (30)3.4. 自动升级说明 (32)4.软件卸载 ............................................................................................................ - 34 -5.常见问题与解答.................................................................................................. - 35 -欢迎欢迎使用《迅闪2007 正式版正式版》系统使用手册,本手册将指导您安装和使用《迅闪2007 正式版》系统,建议网吧业主或技术人员在实际使用《迅闪2007 正式版》系统前详细阅读本文档。
AutoCAD2007基本知识及操作
第1章AutoCAD 2007基本知识及操作Autodesk公司在2006年初推出了新版本AutoCAD 2007,其功能增强了很多。
AutoCAD 2007将直观强大的概念设计和视觉工具结合在一起,促进了2D设计向3D设计的转换。
新的AutoCAD 2007软件能够帮助用户在一个统一的环境下灵活地完成概念和细节设计,并且在一个环境下进行创作、管理和分享设计作品。
它的概念设计特点使得用户可以更快更轻松地寻找到适合的设计方式,然后将这种信息作为进行设计的基础。
AutoCAD 2007非常适合那些用手工进行概念设计的专业人员,它能够加快设计进程。
本章重点介绍AutoCAD 2007的一些基础知识,包括安装该软件的硬件要求和增强功能,绘图环境的设置,对图形文件操作的常识以及如何控制图形文件的显示。
本章学习目标:了解AutoCAD 2007的工作环境及新增功能学会设置界面知识学会操作AutoCAD文件掌握控制文件显示的技巧1.1 AutoCAD基本知识Autodesk公司从1982年推出AutoCAD的第一个版本至今,已经对AutoCAD进行了若干次的升级。
AutoCAD 2007是该公司于2006年初最新推出的一款平面及三维绘图软件,与以前的版本相比较,AutoCAD 2007在三维方面有了飞越性的改进。
在使用AutoCAD 2007时,如果仅仅使用此版本的二维绘图功能,则对系统配置的要求基本上与AutoCAD 2006一样;如果要使用AutoCAD 2007的全部新增功能,则对系统配置的要求会比2006版本高很多。
这一点,用户通过使用一块专业显卡,就能体会到AutoCAD 2007表现出的强大功能。
表1-1列出了AutoCAD 2007对系统配置的要求。
表1-1使用AutoCAD 2007的系统要求Windows XP Home SP1或SP2Windows XP for Tablet PCSP2,或Windows 2000SP3 or SP4续表Internet Explorer 6.0 Service Pack1或更高版本CPU PentiumIII 或IV (建议Pentium IV )800Mhz 3.0GHz 或更快的处理器内存 建议512MB 的内存 建议2GB 或者更大显卡 建议64MB 或者更大 要求128MB 或者更大硬盘 750MB 2GB鼠标 3D 或光电鼠标及其他设备 3D 或光电鼠标及其他设备可选硬件 Open GL 兼容三维视频卡 打印机或绘图仪 数字化仪 调制解调器或其他访问 Internet 连接的设备 网络接口卡Open GL 兼容三维视频卡打印机或绘图仪数字化仪调制解调器或其他访问 Internet连接的设备网络接口卡光驱 CD-ROM 任意速度 CD-ROM 任意速度 在安装AutoCAD 2007时,如果机器上已经安装了AutoCAD 2006或者更低版本,并不会影响到新版本软件的安装。
德普达最新2007系统说明书

1/4扫描方式.........................
1/2扫描方式.........................
静态扫描方式.........................
菜单栏................................ .......
工具栏................................ .......
第三章 节目单的制作
选择屏幕类型和节目窗口类型....................
[节目单]介绍................................ .......
第二章 系统安装
发行包清单.............................. ....... ....
硬件安装........................... ....... .......
嵌入式控制器图例............................. ......
第一章 硬件认识
系统要求
一、内置式安装:
* 主机:1个空PCI插槽
1个可用的USB接口
* 硬盘:安装完操作系统后不少于100M的剩余空间
* 内存:不低于32M
* 软件环境:Windows95/98/NT/2000/XP。
二、外置式安装:
???德普达一直秉承“用户至上,技术领先,质量可靠,服务一流”的宗旨。在生产管理、技术研发、产品质量、售后服务等方面不断超越自我。奉献给新老客户一如既往的真诚和友谊,将每一天都作为德普达发展的新开端,以高品质的产品和优质的服务升华企业信誉。
超级电子商务:Seagate梆空 drew raaid array说明书

The Power of OneThe Seagate ® Desktop HDD (formerly Barracuda ® hard drive) is the industry standard hard drive for mainstream desktop computing, delivering bothexceptional reliability and performance. A host of refined technologies helps boost performance further than ever before. The Desktop HDD is perfect for desktop performance towers or all-in-one computers, consumer-grade NAS devices and desktop RAID arrays. In fact, the Desktop HDD gives you one hard drive platform for every desktop storage application. One drive with trusted performance, reliability and simplicity in capacities up to 4TB.1TB-per-disk technology incorporates 340,000 unique tracks in the width of a single inch. This incredible storage density drives new capacity possibilities and lowers your total storage costs.Perpendicular recording technology increases performance and reliability by aligning the data bits vertically on the disk. Additionally, Seagate OptiCache ™technology helps boost overall performance by as much as 45% over the previous generation, and Seagate AcuTrac ™ technology provides reliable performance, even in tough environments. The free Seagate DiscWizard™ software allows you to install 3TB and 4TB hard drives in Windows, including XP , without UEFI BIOS.11 This high-capacity drive may require a special driver for Windows to access disk capacity above 2TB.Visit /beyond-2TB for more information.HARD DISK DRIVE Data SheetHARD DISK DRIVE1 This high-capacity drive may require a special driver for Windows to access disk capacity above 2TB. Visit /beyond-2TB for more information.2 One gigabyte, or GB, equals one billion bytes and one terabyte, or TB, equals one thousand billion bytes when referring to drive capacity.AMERICAS Seagate Technology LLC 10200 South De Anza Boulevard, Cupertino, California 95014, United States, 408-658-1000ASIA/PACIFIC Seagate Singapore International Headquarters Pte. Ltd. 7000 Ang Mo Kio Avenue 5, Singapore 569877, 65-6485-3888EUROPE, MIDDLE EAST AND AFRICA Seagate Technology SAS 16–18, rue du Dôme, 92100 Boulogne-Billancourt, France, 33 1-4186 10 00© 2013 Seagate Technology LLC. All rights reserved. Seagate, Seagate Technology and the Wave logo are registered trademarks of Seagate Technology LLC in the United States and/or other countries. AcuTrac, Barracuda, DiscWizard and OptiCache are either trademarks or registered trademarks of Seagate Technology LLC or one of its affiliated companies in the United States and/or other countries. All other trademarks or registered trademarks are the property of their respective owners. When referring to hard drive capacity, one gigabyte, or GB, equals one billion bytes and one terabyte, or TB, equals one trillion bytes. Your computer’s operating system may use a different standard of measurement and report a lower capacity. In addition, some of the listed capacity is used for formatting and other functions, and thus will not be available for data storage. Actual quantities will vary based on various factors, including file size, file format, features and application software. Complying with all applicable copyright laws is the responsibility of the user. Seagate reserves the right to change, without notice, product offerings or specifications. DS1774.2 1304 AMER。
中文版Access2007的实用教程.pptx
中文版Access 2007实用教程
2.4.5 “宏”对象
宏是一个或多个命令的集合,其中每个命令都可以实现特定的功能,通过 将这些命令组合起来,可以自动完成某些经常重复或复杂的操作,如图所示。
中文版Access 2007实用教程
2.4.6 “模块”对象
模块就是所谓的“程序”,Access虽然在不需要撰写任何程序的情况下 就可以满足大部分用户的需求,但对于较复杂的应用系统而言,只靠Access 的向导及宏仍然稍显不足。所以Access提供VBA(Visual Basic for Application)程序命令,可以自如地控制细微或较复杂的操作。
2、Our destiny offers not only the cup of despair, but the chalice of opportunity. (Richard Nixon, American President )命运给予我们的不是失望之酒,而是机会之杯。二〇二〇年八月五日 2020年8月5日星期三
中文版Access 2007实用教程
2.2 Access 2007的工作界面
Access 2007是Microsoft Office 2007的组成部分,Office 2007展现了一 个开放式的、充满活力的新外观,如图所示。
中文版Access 2007实用教程
2.2.1 标题栏
“标题栏”位于窗口的顶端,是Access应用程序窗口的组成部分,用来 显示当前应用程序名称、编辑的数据库名称和数据库保存的格式。标题栏最右 端有3个按钮,分别用来控制窗口的最大化/还原、最小化和关闭应用程序,如 图所示。
Access 2007定义了10种数据类型:文本(Text)、备注(Memo)、数字 (Number)、日期/时间(Date/Time)、货币(Currency)、自动编号(Auto Number)、 是/否(Yes/No)、超级链接(Hyperlink)、OLE对象(OLE Object)、查询向导 (Lookup Wizard)。
中文版Office 2007实用教程

3 美化Word文档
3.4.1 绘制 形状
3.4.2 设置 形状的格式
3.4 插入形状
06 4 排版Word文档
4 排版Word文档
4.1 使用 Word模板
4.2 使用样 式
4.3 特殊排 版方式
4.6 上机练 习
4.5 文档排 版技巧
4.4 长文档 排版技巧
4 排版Word文 档
4.7 习题
6.1.1 工作 簿的基本操 作
6.1.3 单元 格的基本操 作
6.1 Excel基本操作
6 Excel 2007基本操作
6.2.1 输入文本
A
6.2.2 输入数字数 据
B
6.2.3 设置输入数 据的类型
C
6.2 输入数据
6 Excel 2007基本操作
01
6.3.1 更改 数据
02
6.3.2 删除 数据
2.6.1 设置自动 更正选项
A
2.6.2 自动更正 词条
B
05 3 美化Word文档
3 美化Word文档
3.1 格式化 文档
3.2 插入图 片
3.4 插入形 状
3.5 插入 SmartArt图形
3.3 插入艺 术字
3.6 上机练 习
3 美化Word文 档
3.7 习题
3 美化Word文档
3.1.1 设置文本 格式
C
1.4 习题
DHale Waihona Puke 1 Office 2007简介
1.1.1 文档处理软件 Word 2007
1.1.3 演示文稿设计软 件PowerPoint 2007
1.1.5 电子邮件处理 软件Outlook 2007
欧姆龙ZX2操作手册最终版 中文
高度 高度差、 突起、 翘曲 2片 进料
厚度
定位
偏芯、 表面弯曲
熟练使用
出现如下 情况时
规格
索引
设定 变化图
测量准备
该部分的名称、功能和构成. . . . . . . . . . . . . . . . . . . . . . . . . . . . . . . . . . . . . . . . 16 基本构成 . . . . . . . . . . . . . . . . . . . . . . . . . . . . . . . . . . . . . . . . . . . . . . . . . . . . . . . 16 放大器单元. . . . . . . . . . . . . . . . . . . . . . . . . . . . . . . . . . . . . . . . . . . . . . . . . . . . . . 17 传感器探头. . . . . . . . . . . . . . . . . . . . . . . . . . . . . . . . . . . . . . . . . . . . . . . . . . . . . . 20 演算单元 . . . . . . . . . . . . . . . . . . . . . . . . . . . . . . . . . . . . . . . . . . . . . . . . . . . . . . . 20
各测量内容的设定
高度. . . . . . . . . . . . . . . . . . . . . . . . . . . . . . . . . . . . . . . . . . . . . . . . . . . . . . . . . . 40 高度差、突起、翘曲 . . . . . . . . . . . . . . . . . . . . . . . . . . . . . . . . . . . . . . . . . . . . . 45
BB2007中文使用手册

PG Music 公司授权协议 12007 版使用手册 PG Music 公司版权所有1989-2007。
保留一切权利。
PG Music 公司授权协议安装和使用 Band-in-a- Box之前,请仔细阅读以下条款。
一经安装和使用本软件,就证明您已经同意并接受了以下的授权协议。
A.只在一台机器上使用本系统;B.在他方接受本协议的条款和条件的前提下,将本系统及许可协议转手给另一方使用。
如若发生转手,原文档及其伴随文文件的所有拷贝必须一并转交对方,或将未转交的拷贝全部销毁;C.您可能接收到存放在多种媒体上的程序,不论它们的类型和大小如何,您只能在一台机器上安装和使用;D.本程序(包括组合在程序中的任何图像、小程序、照片、动画、视频、音频、音乐和文字)为 PG Music 公司或其厂商所拥有,并受到国际版权法和国际供货商条约的保护。
严禁拷贝或转交本系统的全部或部分,但本协议中明文规定的除外。
您将本系统或拷贝的全部或局部转手给另一使用方之时,您的权限即自行终止。
补充限定以下情况 PG Music 负全责,您将得到专门的补偿:A.任何送回 PG Music 或授权经销商处替换的盘片所带程序拷贝不受以上条款约束。
B.如果 PGMusic 及其授权经销商不能提交材质或工艺都没有缺点的替换盘片,您可以终止本协议,并得到退款。
无论遵循本协议与否,就使用本系统而产生的利润损失、储蓄消失、或其它附带、间接的损失,即使 PG Music 及其授权经销商已经提出过警告的,本公司概不负责。
商标Band-in-a-Box®、GuitarStar®、PG Music®、以及PowerTracks Pro® 是PG Music公司在美国、加拿大和其它国家的注册商标;Microsoft® 和 Windows® 是Microsoft 公司在美国、加拿大和其它国家的注册商标;Apple®, Apple标识, Macintosh®, Mac®, Panther®,Power Mac®, QuickTime®, Tiger™, 和 TrueType® 是Apple 计算机公司在美国和其它国家的注册商标;IBM® 是International Business Machines 公司的注册商标。
康耐视2007产品指南说明书

ID Readers
DVT XS
• Only dedicated ID reader capable of reading 1D bar codes and 2D Data Matrix codes and reading and verifying OCR strings
• Easily set up mark quality assessment to ensure codes are readable to industry standards • Built in compliance with 21 CFR Part 11 • High speed reading at 300ppm for OCR and up to 2000ppm on 1D bar codes • Now includes a suite of position tools for tracking OCR codes
New Color Models
• New DVT 535C (entry-level) and DVT 545C (mid-range) vision sensors
• Full range of color vision sensors (entry-level, high speed and high resolution)
• Capable of super high resolution images for gauging and label inspection
• Continuous mode allows inspection of very long parts and spooled products
2
Color Vision Sensors
中文版Office 2007实用教程 第一章
:::::《计算机基础与实训教材系列》 :::::《计算机基础与实训教材系列》系列丛书官方网站
/edu /edu :::::
1.1.5 电子邮件处理软件Outlook 2007 电子邮件处理软件Outlook
/edu /edu :::::
1.2 Office 2007界面介绍 2007界面介绍
在了解Office 2007中各组件的功能后 本节将详细介绍Office 2007的界 在了解Office 2007中各组件的功能后,本节将详细介绍Office 2007的界 中各组件的功能后, 面。
:::::《计算机基础与实训教材系列》 :::::《计算机基础与实训教材系列》系列丛书官方网站
/edu /edu :::::
1.1.3 演示文稿设计软件PowerPoint 2007 演示文稿设计软件PowerPoint
:::::《计算机基础与实训教材系列》 :::::《计算机基础与实训教材系列》系列丛书官方网站
/edu /edu :::::
1.3.2 退出Office 2007 退出Office
用户在使用完Office 2007后 就需要退出Office 2007。退出Office 用户在使用完Office 2007后,就需要退出Office 2007。退出Office 2007 各组件程序的操作方法相似 。
1.3.1 启动Office 2007 启动Office
用户若要使用Office 2007,首先必须启动Office 2007程序 用户若要使用Office 2007,首先必须启动Office 2007程序。Office 2007 程序。 各组件程序的启动方法基本相同。 各组件程序的启动方法基本相同。
:::::《计算机基础与实训教材系列》 :::::《计算机基础与实训教材系列》系列丛书官方网站
winccflexible2007中文手册
winccflexible2007中文手册1.软件的安装程序已开始运行。
The installation program for the software has started running.2.在安全警告对话框中点击“是”。
Click "Yes" in the security warning dialog box.3.这将安装所需的组件。
This will install the required components.4.在向导中,按照屏幕上的提示进行操作。
Follow the prompts on the screen in the wizard.5.请为水泵创建一个新的项目。
Please create a new project for the water pump.6.输入项目名称并选择项目路径。
Enter the project name and select the project path.7.单击“下一步”继续。
Click "Next" to continue.8.选择要创建的项目类型。
Select the type of project to create.9.为PLC集成项目选择S7-300。
Select S7-300 for the PLC integration project.10.设置备用项目。
Set up the backup project.11.单击“完成”完成向导。
Click "Finish" to complete the wizard.12.打开创建的新项目。
Open the new project that was created.13.在"硬件配置"中配置PLC。
Configure the PLC in "Hardware Configuration".14.添加模块并设置参数。
- 1、下载文档前请自行甄别文档内容的完整性,平台不提供额外的编辑、内容补充、找答案等附加服务。
- 2、"仅部分预览"的文档,不可在线预览部分如存在完整性等问题,可反馈申请退款(可完整预览的文档不适用该条件!)。
- 3、如文档侵犯您的权益,请联系客服反馈,我们会尽快为您处理(人工客服工作时间:9:00-18:30)。
首先说明下,由于我也是初学,所以在有些概念上可能理解出错。
说的不对的地方还请大家指出。
还有dxdatabook的作用以及使用它的优势我不是很明确,还请哪位大虾来给讲讲。
我的联系方式是:lofeng@
lofeng 2009年3月6日
在EE2007.2中,就我所知,有两种方法可以进行dxdatabook的配置。
第一种方式:是在library manager对某个中心库进行dxdatabook设置;
第二种方式:在DX中画原理图时调出dxdatabook窗口,在这里也可以添加dxdatabook配置。
删除某个中心库的dxdatabook配置时,只需要删除中心库目录下后缀为.dbc的文件即可。
第一种,是在library manager对某个中心库进行dxdatabook设置,我做的过程如下:1.右键弹出的菜单,在弹出的菜单中选择“Edit DxDatabook Configuration”
2.在弹出的对话框中保持默认的选择——Create an empty configuration
3.弹出的对话框中“Symbol Attribute for PDB Part”需要填写,但是不知道该怎么填写
“它说的是否是Symbol中用哪个属性对应PDB Part的?也就是用哪个属性对应PDB Part 的Part Number属性的?
但是在做symbol时,我只添加了Ref Designator属性(有的sym可能多个value属性),那我用什么属性来对应”
上面的是我曾有的困惑。
Enter a value in the Symbol Attribute for PDB Part Number field to define which DxDesigner property is equivalent to an Expedition part number. The software uses this information in the DxDatabook Configuration to determine what column in the DxDatabook table is equivalent to the Expedition part number.
上面一段文字是从lm_proc_gd.pdf中的摘录出来的,它的意思是说这里填写的属性是用来对应Expedition中part的Part Number属性,而填写的东东又是在DxDatabook中的(我认为在sym 中有没有添加属性都无所谓,如果使用了dxdatabook的话,这样在dxdatabook中添加的每列都会成为画在原理图中component的属性的)。
譬如我用excel来作为数据源,其具体内容如下所示:
上图中的DEVICE是用来跟PDB 的Part Number属性对应的,所以按照lm_proc_gd.pdf中说的,“Symbol Attribute for PDB Part”中应该填写DEVICE,但是在实践中发现这个根本不靠谱,配置过后DEVICE还是对应DEVICE,所以如果不去修改,那么画好原理图package时会报错,而且错误的原因是因为在中心库中找不到对应的Part。
配置好dxdatabook后还可以修改“Symbol Attribute for PDB Part”,如下图所示:
4.在弹出的对话框中,Component Libraries下面的library对应着中心库中的part partition。
可以给每个library添加对应的table,也就是相应excel文件。
也可以在中心库中选中某个part partition,右键,在弹出的菜单中选择insert table。
至于ODBC的配置,请参照wang1jin的一篇教程。
5.选中需要添加table的library,右键,弹出的菜单如下图所示:
6.添加table完成后,一定要注意下图中DEVICE对应的还是DEVICE,按照我的实践,在这里如果不手动修改的话是不行的,在画好原理图package时会报错,并且是找不到对应的part,所以我都是将Property Name栏手动修改成Part Number的。
还有一点需要说明的是,在DxDesigner中通过该dxdatabook配置文件来放置component时,Property Name栏下面的DEVICE、PKG_TYPE、ALT_PKG_LST、Value、Description都会成为该component的属性,所以PKG_TYPE也要进行手动修改。
这里要注意右图中的SYMBOL是用来说明用的是那个sym,填写sym的名称就OK了。
需要注意的是,在配置时,需要按左图所示进行配置。
一定要选择symbol。
作图是package前某component的属性,右图是package后的属性,而我的sym是没有添加任何属性的。
Package后多了个Ref Designator属性。
不过有个问题就是如下图所示的那样,属性中设置是该显示Ref Designator和R1的,但是原理图中什么都没有显示。
虽然package已经成功。
7.在配置好dxdatabook的中心库中,选择有配置library的partition,右键,弹出的菜单如下图所示。
Edit parametric data后弹出的对话框,因为是excel,所以是只读的:
Edit database tables后弹出的对话框,这里看到的是我已经修改后的:
至此,第一种方式已经完结。
按照上述过程,可以配置出好用的dxdatabook。
第二种方式:在DxDesigner中画原理图时调出dxdatabook窗口,在这里也可以添加dxdatabook配置。
1.在DxDesigner中的dxdatabook的add-in窗口中右键,弹出如图所示菜单,选择New。
2.弹出的对话框,默认选择
3.这里填写的是library的名字
4.下一步,选择数据源为ODBC,并且连接方式选择为Excel Files
5. 添加tables
6.同第一种方式中的类似
7.同第一种方式类似,这里还可以在mapping栏选择流程为expedition还是netlist。
这里我做的时候好像已经将DEVICE映射为Part Number了,如果没有,请手动修改。
这里的Viewdraw Property是不是指part的属性?这个有待确认。
8.收工。
