交互式投影系统及其交互式输入方法
交互式投影技术在教育和娱乐中的应用
交互式投影技术在教育和娱乐中的应用随着科技的飞速发展,交互式投影技术已经悄然走进了我们的生活。
这种技术以其独特的魅力和广泛的应用前景,正在逐渐改变着我们的学习和娱乐方式。
本文将探讨交互式投影技术在教育和娱乐领域的应用,并分析其带来的积极影响。
首先,让我们来了解一下什么是交互式投影技术。
简单来说,它是一种将计算机生成的虚拟图像与现实世界中的物体相结合的技术。
通过使用特殊的投影设备和传感器,我们可以在现实世界中创建出令人惊叹的互动体验。
这种技术就像是一扇通往未来世界的大门,为我们打开了一个全新的视觉和感官世界。
在教育领域,交互式投影技术的应用可以说是革命性的。
传统的教学方法往往依赖于教科书和黑板,而这种新技术则为学生提供了一个更加生动、直观的学习环境。
例如,地理老师可以利用交互式投影技术将地球仪投射到教室的墙面上,让学生亲身感受地球的自转和公转;生物老师则可以通过投影技术展示细胞分裂的过程,使学生更加直观地理解生物学知识。
这种教学方式不仅提高了学生的学习兴趣,还培养了他们的空间想象力和创造力。
此外,交互式投影技术还可以用于模拟实验和实践操作。
化学实验中的化学反应过程可以通过投影技术进行演示,避免了实际操作中可能存在的安全隐患。
医学专业的学生也可以通过交互式投影技术进行手术模拟训练,提高手术技能。
这些应用不仅降低了学习成本,还为学生提供了更多的实践机会。
在娱乐领域,交互式投影技术同样展现出了巨大的潜力。
电影院已经开始尝试使用交互式投影技术来增强观影体验。
观众可以通过手中的控制器与电影中的角色互动,参与到故事情节中去。
这种沉浸式的观影体验让观众仿佛置身于电影世界中,增强了观影的趣味性和参与感。
此外,交互式投影技术还在游戏领域得到了广泛应用。
虚拟现实游戏和增强现实游戏都离不开交互式投影技术的支持。
玩家可以通过头戴式显示器或手持设备与虚拟世界中的角色进行互动,享受身临其境的游戏体验。
这种游戏方式不仅增加了游戏的可玩性,还为玩家提供了一种全新的娱乐方式。
交互式多媒体教学一体机的功能应用

交互式多媒体教学一体机的功能应用正文:一、引言交互式多媒体教学一体机是一种集合了交互式教学和多媒体教学功能的综合性设备。
它不仅具备传统的教学一体机功能,如显示教材内容、播放课件等,还具备了交互式教学的特点,可实现教师与学生之间的互动交流。
本文详细介绍了交互式多媒体教学一体机的功能应用。
二、基本功能1、显示教材内容:交互式多媒体教学一体机可通过连接投影仪或大屏幕显示器,将教材内容清晰地显示出来,供学生观看。
2、播放课件:教师可在交互式多媒体教学一体机上制作或导入各种课件,如PPT、视频、音频等,并通过一键操作进行播放。
3、互动交流:交互式多媒体教学一体机配备了触控屏幕和音频输入输出设备,学生可以通过触摸屏幕进行互动,教师可以通过话筒和扬声器与学生进行语音交流。
4、录制回放:交互式多媒体教学一体机支持课堂录制功能,教师可以将课堂内容录制下来,方便学生回放。
5、多人连接:支持多用户同时连接使用,学生可以通过自己的终端设备,如方式、平板电脑等,与交互式多媒体教学一体机进行连接和操作。
三、高级功能1、远程协作:通过网络连接,不同地点的教师和学生可以进行实时远程协作,方便教学和学习资源的共享。
2、课堂测验:交互式多媒体教学一体机提供了课堂测验功能,教师可以通过设备上的测验模块进行答题、评分等操作。
3、电子白板:交互式多媒体教学一体机的触摸屏可以作为电子白板使用,教师可以在屏幕上书写、标注,实现实时的讲解效果。
4、统计分析:交互式多媒体教学一体机能够收集学生在课堂中的互动数据,并进行统计和分析,为教师提供课堂效果反馈。
四、应用场景1、学校课堂:交互式多媒体教学一体机可以用于学校各个年级和学科的教学课堂,提供丰富多样的教学资源和互动平台。
2、远程教育:交互式多媒体教学一体机可在远程教育领域发挥重要作用,为学生提供高质量的教学体验,并与教师进行实时互动。
3、企业培训:一体机可用于企业的内部培训活动,方便教师与员工之间的互动交流,提高培训效果。
交互式触控投影屏幕产品介绍(教育系统)

小尺寸成本便宜 比较昂贵
超大尺寸显示,价格 合理
交互式触控投影屏幕成功案例
广州中山大学
成都工业大学
交互式触控投影屏幕成功案例
西安电子科技大学
广东医科大学
交互式触控投影屏幕成功案例
中南林业科技大学
武汉民族大学
交互式触控投影屏幕成功案例
陕西师范大学
广西师范大学
交互式触控投影屏幕成功案例
江西宜春学院
在PPT上进行圈点、标注、翻页
随时切换到白板进行书写
手机、平板大小屏互动
教学工具软件方便操作:新增页面、屏幕延伸、选择放大、 文字移动、圆规、直尺、擦除、复制、保存等等 标注PPT课件、上课板书内容都可以保存在本地电脑,通过 微信或QQ推送给学生,更好的复习和巩固。
交互式触控投影屏幕使用场所
使用交互式触控投影屏幕好处
交互式触控投影屏幕外观二:配万向黑板
高科技研发成果:触控投影显示终端,完全拥有自主知识产权发明专利,全球独创。
交互式触控投影屏幕安装外观三
贴墙安装画框幕
电动悬臂、带磁铁架
目前教学使用的教学设备普通多媒体Fra bibliotek传统黑板
目前培训讲师使用的设备
用纸板书写重点
用手机拍照保存
互动多媒体强大功能展现
互动多媒体功能
株洲特校
交互式触控投影屏幕成功案例
衡阳师范大学
遂宁射洪中学
交互式触控投影屏幕成功案例
企业会议室
江西财经大学
交互式触控投影屏幕成功案例
沈阳工业大学
黑龙江职业技术学院
交互式触控投影屏幕成功案例
陕西渭南中学
深圳职业技术学院
成功案例:四川大英中学阶梯教室150吋
交互式电子白板的使用方法

交互式电子白板的使用方法
交互式电子白板是一种现代化的教学工具,可以使教学更加生动有趣。
以下是交互式电子白板的使用方法:
1. 打开电子白板软件,连接电脑和投影仪。
2. 在投影仪上显示出白板屏幕。
3. 使用电子白板的特殊笔,在白板上书写、绘画。
4. 利用电子白板的工具栏,执行各种操作,如清除、橡皮擦、添加图片等。
5. 利用投影仪、电子白板和电脑的联动,进行授课演示、实时交流等。
其中,值得注意的是,在使用电子白板的过程中,需要:
1. 电子白板和投影仪的连接顺序为先连接电脑,再连接投影仪和白板。
2. 在使用电子白板的特殊笔进行书写、绘画时,需要更换笔尖,以保持笔触感。
3. 严格控制投影仪的光源亮度,以保护出现眼睛不受损伤的情况下,更好地作业。
总之,掌握交互式电子白板的使用方法,可以使教学过程更加高效、生动,满足学生对多样化教育的需求。
交互式全息投影技术的研究与应用

交互式全息投影技术的研究与应用交互式全息投影技术是一种新型的投影技术,能够实现在三维空间中呈现真实、逼真的图像。
它结合了虚拟现实技术和全息投影技术,可以为用户带来沉浸式的体验和交互效果。
本文将详细介绍交互式全息投影技术的研究与应用。
一、交互式全息投影技术的研究1.基本原理:交互式全息投影技术的基本原理是通过使用激光光源、振镜、光栅等元件,将计算机生成的三维图像投射到特定位置的空间介质上,再由空间介质发生干涉和散射,形成透明且立体的图像。
用户可以自由观察、操控这些投影出来的图像。
2.技术挑战:交互式全息投影技术的研发过程中面临一些技术挑战。
首先,实现高分辨率与高亮度的全息图像仍然是一个难题,需要更加先进的光学元件和材料。
其次,实时计算和传输大量三维数据的需求对硬件设备和计算能力提出了更高的要求。
此外,还需要解决全息图像的呈现和交互方式,使用户能够方便、自由地与图像进行互动。
3.研究进展:目前,交互式全息投影技术在研究和发展过程中取得了一些重要的进展。
例如,有学者提出了使用光学伪像技术来增强全息图像的分辨率和亮度。
此外,还有学者提出了使用多通道光源和多光束投影技术,增加全息图像的显示效果。
另外,还有学者提出了使用可变焦距和变形镜头等技术来实现实时交互和动态变化的全息图像。
二、交互式全息投影技术的应用1.教育领域:交互式全息投影技术在教育领域中有广泛的应用前景。
通过使用该技术,教师可以将各种复杂的知识点以立体图像的形式展示给学生,提高学生的学习兴趣和理解能力。
例如,在生物学课程中,可以通过全息投影技术呈现各种细菌、细胞等微观结构;在地理学课程中,可以通过全息投影技术展示地球的内部结构和地质现象。
2.娱乐领域:交互式全息投影技术在娱乐领域中有广泛的应用潜力。
通过使用该技术,用户可以与虚拟角色进行互动,参与到虚拟世界的故事中。
例如,在游戏中,玩家可以通过手势和语音控制虚拟角色的动作和行为;在电影院中,观众可以通过全息投影技术实现电影场景的互动和参与感。
交互式投影系统介绍

交互式投影系统介绍1.投影仪:交互式投影系统使用高亮度的投影仪来显示图像。
投影仪通常采用DLP或LCD等技术,可以将图像投射到大屏幕、墙壁或其他平面上。
2.交互设备:交互设备包括触摸屏、红外线传感器、摄像头等技术。
触摸屏可用于手势或触摸交互,红外线传感器可捕捉用户手势和动作,摄像头可用于人脸识别和姿势追踪等功能。
3.计算机:计算机是交互式投影系统的核心,用于控制投影仪和交互设备,并处理用户输入的数据。
计算机可以运行特定的软件或应用程序来实现不同的交互功能,如游戏、教育、商业展示等。
4.投影表面:交互式投影系统可以将图像投射到各种表面上,如墙壁、桌面、地面等。
通常,投影表面需要具备高反射性,以确保投影图像的清晰度和亮度。
1.真实感体验:交互式投影系统可以提供更加真实和沉浸式的体验。
用户可以通过手势、触摸等方式直接与投影画面进行互动,使其更加身临其境。
2.灵活性:交互式投影系统可以在不同的环境中使用,并适应不同的应用场景。
它可以用于教育、商业、娱乐等领域,为用户提供多种多样的交互方式。
3.创新性:交互式投影系统可以促进创新和创造力的发展。
它可以通过游戏、互动教学等方式激发用户的兴趣和想象力,提高学习和工作效果。
4.可定制性:交互式投影系统可以根据用户的需求进行定制。
用户可以根据自己的实际情况选择投影仪、交互设备和软件等,以满足特定的功能需求。
交互式投影系统在各个领域中都有广泛应用。
在教育领域,它可以用于教学辅助和虚拟实验等,提高学生的学习兴趣和参与度。
在商业领域,它可以用于商业展示、广告推广等,提升产品或品牌的宣传效果。
在娱乐领域,它可以用于游戏、娱乐设施等,为用户提供丰富多样的娱乐体验。
总体而言,交互式投影系统是一种创新的投影设备,它不仅可以实现图像的显示功能,还能与用户进行互动。
随着科技的不断发展,交互式投影系统将会在各个领域中得到更广泛的应用,并为用户带来更多的便利和乐趣。
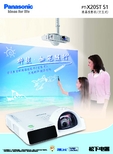
松下 PT-X20ST S1 液晶投影机(交互式) 说明书
S1
液晶投影机(交互式)
) (交互式 机 影 投 适应力 的液晶 境 变 环 多 的 灵活 出色
PT-X20ST
液晶投影机(交互式)
S1
3000 lm
集人机对话、短焦优势、 互动白板功能于一身的革命性产品!
3个 “1” 人机交互对话
高灵敏度红外电子笔,在投影处直接控制电脑。 实现 1 台 PC、1 台投影机、1 支电子笔交互式 人机对话。 减少往返于幕布与黑板间的不便,拒 绝粉尘, 引领教育新变革, 成就卓越讲演!
专用通信电缆
电子笔
电子笔头套
PT-X20ST S1
PT-X20ST S1
当使用环境温度高, 或者有油烟、 烟雾时, 可能出现使用时间不满一年时, 需要更换灯泡和液晶板、 偏光板等光学部件的情况。 如果短时间内频繁开关, 或者连续 12 小时以上使用, 灯泡的更换周期 可能会缩短。 详情请询问销售代表。
广告经营者:上海联智会展服务有限公司
地址:上海市合肥路 315 号海文商务楼 5 楼
邮编:200025
发行日期 2011 年 10 月 [11ADI1001]
PT-X20ST S1
短焦显真彩
PT-X20ST S1 全面缩减光线危害 , 短程 投影, 色彩依旧。流畅教学从更少阴影开始!
出色的环境适应力
内置互动白板功能 , 多种光滑介质都可以充当 幕布 ( 例如 : 墙壁、普通黑 / 白板 )。 远离眩光, 还原清晰视界!
PT-X20ST S1
PT-UX71NT
致力于环保设计
1.3W
PT-X20STS1
交互接口
PT-X20ST S1
1.3W
3000lm 600:1
多媒体数字展厅的七大设备简版
多媒体数字展厅的七大设备多媒体数字展厅的七大设备数字展厅是一种通过多媒体技术打造的展示空间,利用图像、视频、音频等多种媒体形式,以生动、直观的方式展示展品和信息。
它集合了现代科技和媒体艺术的特点,使观众可以更深入地了解展示内容。
在建设数字展厅时,选择合适的设备是非常重要的。
下面了七种常用的设备:1. 大型投影仪大型投影仪是数字展厅最基础的设备之一。
它可以将图像或视频投射到展厅的大屏幕上,实现高清晰度的展示效果。
大型投影仪通常具有高亮度、高对比度和广色域等特点,能够呈现细腻、饱满的图像效果。
2. 触摸屏显示设备触摸屏显示设备是数字展厅中互动性最强的设备之一。
观众可以直接通过触摸屏操作展示内容,如放大、缩小、拖动等,与展品进行互动交流。
触摸屏显示设备通常具有响应速度快、触控精准的特点,能够提供良好的用户体验。
3. 环绕声音系统环绕声音系统是数字展厅中重要的音频设备之一。
它通过多个扬声器将声音环绕全方位地传达给观众,营造出逼真的声音效果。
环绕声音系统通常具有高保真度、高动态范围和低失真等特点,能够提供身临其境的听觉体验。
4. VR设备VR设备是数字展厅中的先进技术设备之一。
它通过虚拟现实技术,使观众可以身临其境地沉浸在展示内容中。
观众可以戴上VR头显,使用手柄等设备与虚拟环境进行互动,提供更加逼真、沉浸的展示体验。
5. 交互式投影系统交互式投影系统是数字展厅中创新的设备之一。
它将投影仪和交互技术相结合,实现触摸、手势识别等交互方式。
观众可以通过手势或触控进行操作,与展品进行互动。
交互式投影系统通常具有高灵敏度和多点触控功能,能够提供更加灵活、直观的操作方式。
6. 云存储服务器云存储服务器是数字展厅中的重要设备之一。
它可以提供稳定的数据存储和传输服务,保障展示内容的可靠性和安全性。
云存储服务器通常具有高品质的数据加密和备份机制,能够提供高效、可靠的数据管理服务。
7. 控制系统控制系统是数字展厅中的关键设备之一。
基于虚拟现实技术的交互式全息投影系统设计与实现

基于虚拟现实技术的交互式全息投影系统设计与实现虚拟现实技术的发展为许多领域带来了革命性的进步,其中之一就是交互式全息投影系统。
本文将探讨基于虚拟现实技术的交互式全息投影系统设计与实现,介绍其原理、应用领域和技术挑战,并提出相应的解决方案。
一、交互式全息投影系统的原理交互式全息投影系统利用虚拟现实技术和光学原理实现了真实感和交互性的全息投影。
其原理主要包括数据采集、计算、传输和投影四个步骤。
首先,通过传感器(如摄像头或深度摄像头)采集现实世界中的物体或人体的形状和位置信息,并将其转换为数字数据。
其次,计算机分析处理这些数据,生成3D模型,并参考用户交互的输入,计算并确定投影光束的方向和强度。
然后,计算机将处理后的信息传输给光学设备,通过激光或液晶面板等方式产生相应的光束。
最后,光束通过投影系统投影到特定的介质上(如透明玻璃或者空气中的悬浮颗粒),形成悬浮的全息图像,用户可以通过手势或其他交互方式与其进行交互。
二、交互式全息投影系统的应用领域交互式全息投影系统在多个领域具有广泛的应用前景。
以下列举几个典型的应用领域:1、教育与培训:通过全息投影系统,教师可以将虚拟场景直观地呈现给学生,使学生更好地理解抽象概念。
例如,化学老师可以展示分子结构的三维模型,物理老师可以演示力学原理。
2、医学与手术:全息投影系统可以用于医学诊断和手术培训。
医生可以通过全息图像观察病人的内部结构,进行更准确的诊断和手术规划。
在手术培训中,学生可以通过全息投影系统模拟真实手术环境,提高操作技能。
3、设计与建筑:设计师和建筑师可以利用全息投影系统实时模拟设计方案,并在不同角度观察和修改。
此外,可以在建筑工地上使用全息图像来指导施工。
4、娱乐与游戏:交互式全息投影系统在娱乐和游戏行业也有很大的应用潜力。
用户可以通过手势和身体动作参与到虚拟场景中,与虚拟角色进行互动。
三、交互式全息投影系统的技术挑战虽然交互式全息投影系统具有广泛的应用前景,但仍面临一些技术挑战。
交互式多媒体教学一体机的功能应用(2023版)
交互式多媒体教学一体机的功能应用正文:引言:交互式多媒体教学一体机是一种集成了投影仪、电脑、音响、触摸屏等功能的教学设备。
它的出现极大地提升了教学效果和教学体验。
本文将详细介绍交互式多媒体教学一体机的功能和应用。
⒈触摸屏功能交互式多媒体教学一体机配备了触摸屏技术,可以通过触摸屏进行操作。
触摸屏具有多点触控、手写笔输入、手势操作等功能,能够方便教师和学生进行互动。
教师可以通过触摸屏操作一体机上的各种教学资源,学生可以通过触摸屏进行答题、写字等活动。
⑴多点触控交互式多媒体教学一体机支持多点触控技术,可以实现多个触摸点的同时操作。
教师可以同时在触摸屏上进行多点操作,例如放大、缩小、旋转等。
学生可以通过触摸屏上的多点触控进行合作学习,提高互动性和团队合作能力。
⑵手写笔输入交互式多媒体教学一体机配备了手写笔,教师和学生可以通过手写笔在触摸屏上进行书写和绘图。
手写笔输入具有高精度和高灵敏度,可以实现真实的书写和绘图效果。
教师可以在触摸屏上批注和标记教学内容,学生可以通过手写笔进行作业和答题。
⑶手势操作交互式多媒体教学一体机支持手势操作,可以通过手势进行一些特殊的操作。
例如,教师可以通过手势来切换教学模式或者进行画面切换,学生可以通过手势来进行页面翻转或者控制音量。
⒉教学资源应用交互式多媒体教学一体机支持多种教学资源的应用,包括教学课件、教学视频、教学游戏等。
⑴教学课件交互式多媒体教学一体机可以通过电脑功能加载和显示各种教学课件。
教师可以在教学课件中插入文字、图片、音频、视频等元素,实现多媒体教学。
学生可以通过触摸屏进行互动,例如、拖拽、填空等,提高学习效果和兴趣。
⑵教学视频交互式多媒体教学一体机可以通过投影仪功能播放教学视频。
教师可以通过触摸屏控制视频的播放进度、音量等,学生可以通过触摸屏观看视频并进行互动。
教学视频可以丰富教学内容,提供直观的视觉体验。
⑶教学游戏交互式多媒体教学一体机支持教学游戏的运行和展示。
交互式投影系统介绍

交互式投影系统介绍交互式投影系统(Interactive Projection System)是一种结合投影技术和交互技术的先进显示系统。
它可以实现在墙壁、地板或其他平面上投射出来的图像进行交互操作。
与传统的投影系统相比,交互式投影系统可以提供更多的互动性和参与感,使用户能够更直接地与图像进行互动和操作。
交互式投影系统主要由投影仪、投影平面、交互设备和控制系统组成。
投影仪用于将图像投射到指定的平面上,通常采用数字投影技术,包括DLP(Digital Light Processing)和LCD(Liquid Crystal Display)等。
投影平面可以是墙壁、地板或者专门的交互屏幕,其作用是接收投射出来的图像并进行显示。
交互设备是实现用户与图像交互的关键部件,通常包括触摸屏、摄像头、红外线传感器等。
触摸屏可以通过用户的触摸操作实现对投影图像的控制和操作,包括点击、拖动、放大缩小等。
摄像头和红外线传感器则可以用来感知用户的动作和位置,实现手势识别和体感控制。
控制系统是交互式投影系统的大脑,负责整个系统的运行和管理。
控制系统通常由计算机和软件组成,通过图像处理和算法分析,实现对用户操作的识别和响应。
同时,控制系统还可以提供丰富的功能和效果,比如多点触控、虚拟现实等,增强用户的体验和参与感。
交互式投影系统具有广泛的应用领域和潜力。
在教育领域,它可以用于幼儿园、小学和高中的教学活动,提供更生动、互动的教学内容和方式。
教师和学生可以通过交互设备进行操作,实时呈现课件、展示实验和开展互动游戏,增加学习的趣味性和参与度。
在商业和展示领域,交互式投影系统可以用于展示厅、博物馆和商场等场所。
通过交互设备,访客可以与展品进行互动、操作游戏或者查询信息,增加观众的参与度和娱乐性。
同时,商家还可以将其用于广告宣传和产品展示,吸引顾客的眼球和购买兴趣。
在娱乐和娱乐场所,交互式投影系统可以用于游乐园、电影院和主题公园等场所。
EPSON 交互式投影功能介绍

EPSON confidential
爱普生交互式环境
EPSON confidential
交互式功能安装步骤
1, 确认操作系统 2, 安装驱动软件 2-1, 确认电脑的性能 2-2, 安装 “ Easy Interactive Driver” 3, 安装“Easy Interactive Tools” (选配) 4, 校准
<断开>
电源开 USB线 USB 线 未连接
电源关
EPSON confidential
3. 校准交互式功能
EPSON confidential
校准交互式功能
为了使互动笔在墙面触碰的位置准确,以下情况必须校准交互式功能
第一次安装驱动; 调整电脑显示的分辨率; 新使用电脑的分辨率同最后一次校准时电脑的分辨率不同; 投影机做了功能调整
Flashing!!
•校准49个点 •显示分辨率为UXGA或更高; •用户需要高的反应精度
EPSON confidential
校准交互式功能
3. 校准完成开始使用.
EPSON confidential
End
EPSON Highly Confidential
Windows PC
EPSON confidential
安装 “Easy Interactive Driver”
EPSON confidential
安装“Easy Interactive Driver”
4. 安装完成后,图标的显示状态;
Easy Interactive Driver 状态图标显示在任务栏; <连接>
EPSON confidential
交互式投影仪原理

交互式投影仪原理
交互式投影仪作为一种新型的多媒体交互展示设备,已经广泛应用于教育、商业等领域。
其主要原理是通过投影设备投射出的光线对触摸屏幕或者纸质反射板进行反射,然后由反射波反射回来形成映像,实现多媒体交互展示的效果。
具体来讲,交互式投影仪包括主要的投影设备、反射板或触摸屏幕等几个核心部件。
首先是投影设备,如:液晶电视、激光电视、DLP 电视等,这些都是可以将图像投射在屏幕表面的设备。
其次是交互输入设备,主要有触摸屏幕和反射板两种,前者通过电容式或者电阻式感应触摸精准感应屏幕位置,后者通过反射波进行交互反馈,提高了交互体验的质量。
对于触摸屏幕来讲,交互式投影仪主要通过手指等物体与触摸屏幕表面产生的电容差异来判断用户的位置,然后进行相应的显示和操作反馈。
而对于反射板来讲,则是通过反射波的形成来实现交互效果。
反射板设计成专门的表面,可以将投影设备投出的光线进行反射,并且获得一定的反射波,然后交互式投影仪根据反射波的反馈信息来判断用户的位置、姿态、动作等信息,从而实现对反射板上映射框的动态跟踪。
总体来说,交互式投影仪原理主要是基于投影设备的光线反射和触摸屏幕或反射板的反射波交互反馈来实现的。
通过这种方式,交互式投影仪就可以实现更为智能化的交互效果,提供更加便捷、直观的用户操作体验。
这一原理现在已经得到了广泛应用,包括各类商业广告、教育展示、理财展示等领域,也为未来更加走向智能化和灵活多样的互动技术提供了有益的借鉴意义。
戴尔 交互式投影机 S560T 触摸设置指南说明书

Dell | Interactive ProjectorS560TTouch Setup GuideAbout NotesNOTE: A NOTE indicates important information that helps you make better use of your projector.CAUTION: A CAUTION indicates potential damage to hardware or loss of data ifinstructions are not followed.WARNING: A WARNING indicates a potential for property damage, personal injury, or death.__________________Information in this document is subject to change without notice.©2016Dell Inc.All rights reserved.Reproduction of these materials in any manner whatsoever without the written permission of Dell Inc. is strictly forbidden.Trademarks used in this text: Dell and the DELL logo are trademarks of Dell Inc.; Microsoft, Windows 7, and Windows Vista are trademarks or registered trademarks of Microsoft Corporation in the United States and/or other countries.Other trademarks and trade names may be used in this document to refer to either the entities claiming the marks and names or their products. Dell Inc. disclaims any proprietary interest in trademarks and trade names other than its own.June 2016Set Up Touch on Your Projector3Usage NoticePlease follow all warnings, precautions and maintenance as recommended in this user's manual.WARNING: Do not disassemble Touch Unit.WARNING: Do not use, store, or leave the Touch Unit near fire, or in places with a high temperature, e.g., in direct sunlight, or in sun-heated cars.WARNING: Use standard USB cable (maximum length: 0.2 inch (5 m )). To extend USB cable length over 5m, a certified active extension USB cable is required.WARNING: Do not allow liquids or foreign materials enter the Touch Unit.PrecautionsThe Infrared (IR) camera on the projector receives infrared signal from the Touch Unit which is attached to the whiteboard.To operate normally:•The IR camera should face the projected image area on the wall.•Remove any obstacle in between IR camera and Touch Unit.•Do not place other infraredcommunication devices, such as IR microphone; lighting equipments; or residential heating equipments etc, nearby.•Use only the interactive cable from the accessory kit, with the L side connector plugged into the Touch Unit.Maintenance: Gently clean the optical port with a dust blower.Set Up Touch on Your ProjectorSet Up Touch on Your ProjectorHow it works•The Touch Unit covers the entirewhiteboard with a thin invisible IR light.•When a finger or stylus breaks into the light curtain, the IR light reflects on tothe IR camera.•The camera module tracks multiple touch points and reports the positionsto a computer via USB.•To optimize the touch function, the screen non-flatness should be less than0.2 inch (5 mm).4Set Up Touch on Your Projector SpecificationsI. Touch Unit (S560T Only)Laser Safety Class 1Touch Unit to Screen Distance0.79 inch ~3.94 inch (20 mm~100 mm) @81"~100" 1080pLED Indicator Blue/RedI/O Port Interactive Jack x1Touch sensor adjustment 2-knob adjustment and with visible lightID Size(W*L*H) 5.91 (W) x 1.97 (L) x 1.57 (H) inch(150.0 (W) x 50.0 (L) x 40.0 (H) mm)Weight< 330 gPower Consumption12V/0.3AOperation Temperature0 °C~+40 °C (without cooling fan)Storage Temperature -20 °C~+60 °CII. General SpecificationsScreen Non-flatness <0.2 inch (5 mm)5Set Up Touch on Your Projector6Display mode Supports ceiling mode onlyCalibration 1. Manual Calibration :9 points manual calibration ,1080p model: +/- 6 pixels (screen non-flatness <0.2 inch (5mm))2. Auto calibration :1080p model:+/- 8 pixels (screen non-flatness <0.2 inch (5mm))3. Supports one-key calibration Aspect ratio correction Auto- calibration to different display resolutions and aspect ratiosMulti-touchWindows 7/8/10: 10 touch points Mac : Single-point touch ChromeBook: 10 touch pointsMulti-touch Min. Distance ≥1.57 inch (40mm)Trouble Shooting ViewerUtility support real-time image for trouble shooting.Working Projection Image Size 81"~100" @1080P(co-operate with S560T projector)Set Up Touch on Your Projector7*1 : Get S560x Interactive Utility from provided CD or download it from Dell Support*2 : S560T requires first-time alignment and calibration, ensure you complete setup process before use*3 : .NET Framework 4.0 installation is required *4 : Mac OS support 1 touch point onlyIII. OS requirement System RequirementsProcessor Type Intel Core™ i3 (or above) or same level of AMD Core.RAM2 GB or MoreOperating SystemNumber of touch points supported Installation of S560x Interactive Utility *1For first-time setup *2For subsequent useWindows 7/8/1010 touch points Supported *3Not required Mac OS X (10.7-10.11)1 touch point *4Supported Required, please install thesetup utility on all Mac OS computers, to use them with the S560TChromebook 10 touch points Not supported, please use a Windows OS or Mac OS computer to complete first-time setup for the S560T Not requiredSet Up Touch on Your Projector8Step 1: Environment CheckA Make sure the projector is installed under the following conditions:-The wall should be strong enough to avoid projection image flickering.-Do no install the projector or screen in a location subject to direct sunlight. If the projector or the screen is subjected to direct sunlight, the interactive function may not operate correctly.-The surface shall be suitable for the Touch Unit to be secured with screws.-The projection image on screen must be sharp and visible with no light reflections or hot spots.-The screen surface should be flat, non-flatness less than 0.2 inch (5mm). The surface can either be a flat wall or awhiteboard. For details on how to check surface flatness see page 10.-Keep at least 2 inch (50 mm) clearance boundary of the projection image to avoid reflection interference.-Other IR devices are not allowed because they will interfere the touch function. For example, IR microphone.-Use standard USB cable with a maximum length of 16.4 ft (5 m). If the USB cable is longer than 16.4 ft (5 m), a USB Hub or a certificated active extension USB cable is required.-The projected image is a rectangular shape.If the projection surface meets the criteria above, the Touch Unit can then be installed in one of the following ways1Mount the Touch Unit on a whiteboard.Set Up Touch on Your Projector92Mount the Touch Unit on a wall surface.NOTE: The Touch Unit must be mounted on the same surface as the projected image.B S560T Whiteboard size guidance When mounting the Touch Unit on awhiteboard please follow the guidelines below:C Measuring projection surface flatness -Criteria: overall whiteboard flatness <0.2 inch (5 mm), flatness requirement is <0.12 inch (3 mm) at Touch Unit mounting area.-Equipment: leveling instrument 3.94~4.92 Ft (1.2~1.5 m) and thickness gauge.D-1) Split projection area into 16 segmentsequally as below chart. Place leveling instrument on whiteboard.Spaces of a & b are reserved to cater for touch unit.• Dimension a = 50 mm • Dimension b = 77 mm* inch [mm]S1W1W281.0 [2057]≥ 44.7 [1136]≥ 74.5 [1893]85.0 [2159]≥ 46.7 [1186]≥ 78.0 [1982]89.1 [2263]≥ 48.7 [1237]≥ 81.6 [2073]90.0 [2286]≥ 49.1 [1248]≥ 82.4 [2092]95.0 [2413]≥ 51.6 [1310]≥ 86.7 [2203]100.0 [2540]≥ 54.0 [1372]≥ 91.1 [2314]1080p (16:9) imageSet Up Touch on Your Projector10D-2) Insert 0.2 inch (5mm) thickness gauge atpoint 1~9 positions in the following order:Horizontal:-Measure point 1, 2 & 3.-Measure point 4, 5 & 6.-Measure point 7, 8 & 9.Vertical:-Measure point 1, 4 & 7.-Measure point 2, 5 & 8.-Measure point 3, 6 & 9.D-3) If 0.2 inch (5 mm) thickness gauge cannotbe inserted, it means whiteboard flatness is less than 0.2 inch (5 mm) and capable for finger touch.Step 2: Installing the Touch Unit1Open top cover by Phillips screwdriver (model: number 1).2Mount base plate to whiteboard or wall.Keep distance to image area:-2.17~5.31 inch (55~135 mm) from bottom of the base plateSet Up Touch on Your Projector11-0.79~3.94 inch (20~100 mm) from bottom of the Touch Unit2-1. Clean the surface.2-2. Apply the double-sided tape (enclosed inaccessory box) onto base plate, and then paste onto the whiteboard or wall.2-3. Use the black screws to fix the base plateonto whiteboard or wall:-Drill tip: ∅O=0.09 inch (2.3 mm)-Screw type: M3x6L-Screw head: ∅O<0.22 inch (5.5 mm), thickness <0.1 inch (2.5 mm)2-4. The two black screws included are tappingscrews, suitable for aluminum honeycomb board which is the typical whiteboard material.NOTE: For other surfaces such as wood or concrete wall, use suitable screw types.3white screws.Set Up Touch on Your Projector124Connect the power cord to the Touch Unit.NOTE: The L-side connector should be connected to the Touch Unit.Set Up Touch on Your Projector13Step 3: Install Utility SoftwareA System requirementsTo ensure normal operation of the touch function, follow below requirements to check your system condition.*1 : Get S560x Interactive Utility from provided CD or download it from Dell SupportSystemrequirement Processor Type Intel Core™ i3 (or above) or same level of AMD Core.RAM2 GB or higherOperating SystemNumber of touch points supported Installation of S560x Interactive Utility *1For first-time setup *2For subsequent useWindows 7/8/1010 touch points Supported *3Not required Mac OS X (10.7-10.11)1 touch point *4Supported Required, please install thesetup utility on all Mac OS computers, to use them with the S560TChromebook 10 touch points Not supported, please use a Windows OS or Mac OS computer to complete first-time setup for the S560T Not requiredSet Up Touch on Your Projector14*2 : S560T requires first-time alignment and calibration, ensure you complete setup process before use*3 : .NET Framework 4.0 installation is required *4 : Mac OS support 1 touch point onlyB Install software utility from CD. Utility icon statuses are as below:C Please launch Utility:D Environment settings:For better accuracy, you should set to "Projector Only" display mode before calibration.Finger/Stylus Active Pen DisconnectedSet Up Touch on Your Projector15Step 4: Setup WizardPlease follow S560T Setup Wizard to complete Touch Unit installation procedure.Step 5: Adjust Touch Sensor1Press button to switch the Touch Unit to alignment mode: red light will be blinking at the indicator.LED indicator Mode BlueLEDRed LED DescriptionIR Laser modeSolid --IR laser ONAlignmentMode SolidBlinking Visible light ON(IR Laser OFF,touch disabled) Error --Solid Error of LDmoduleoccurred.Set Up Touch on Your Projector162Set computer to project in "Projector Only"mode. Connect USB cable from projectorto computer.NOTE: Make sure the Touch Unit hasalready been switched to alignment mode(Step 1) before connecting the USB cablefrom projector to computer to avoidinterference or unwanted touch triggersduring first-time setup, prior propercalibration.3Turn both adjustment knobs clockwisecompletely.4Turn gray knob counterclockwise, untilboth beams are symmetrical at the samelevel.5Turn black knob counterclockwise, untilboth beams reach bottom edge ofwhiteboard.6Use the alignment stickers provided, checkthat each beam is on the sticker's grayzone, which is at 4mm to 6mm away fromwhiteboard surface.Set Up Touch on Your Projector17If not, turn the black and grey knobs to adjust each beams. (Step 4 & 5)Black knob : to move visible light on the light stickersGrey knob : to adjust visible light symmetrically at the same level.The visible light should be located within grey zone.7Press button to exit alignment mode, red blinking light will go off, leaving the indicator light blue.8Replace the top cover.Set Up Touch on Your Projector18Step 6: Touch Area SettingA Select Auto Touch Area Setting:NOTE:•Quit all software applications•Reduce ambient light•Do not obstruct or shake lens duringTouch Area Setting•Check if projection image is clear. If not,adjust focus to sharpen the imageIf fail message pops up, switch to ManualTouch Area Setting.B Select Manual Touch Area Setting:B-1.After the camera captures the projectionimage, a Touch Area window will pop up.If the captured image is not clear enough,please re-select "Ambient light modeselection" from "Auto" to "Bright" or "Dim"according to actual ambient lightcondition.Set Up Touch on Your Projector19Remark: Captured image shows the actual camera view, which is reversed from projection image. For example: P1 is lower right corner, P2 is lower left corner and so on.B-2.Touch Area Boundary Fine-tuningStep 1:Click on P1, use mouse to drag P1to upper left corner. Align adjustable green zone with projected white frame.Step 2: Adjust P2 to P4 accordingly;adjustable green zone should completely overlaps the projected white frame.Step 3:Finally, check again if the greenframe completely overlaps the projected white frame. If not, fine-adjust again.B-3. When the Touch Area is correctly locatedthen click exit button.Set Up Touch on Your Projector20Step 7: CalibrationA Auto Calibration:NOTE: If the fail message pops up, followbelow steps to trouble-shoot and do AutoCalibration again.•Close all software application•Reduce ambient light•Do not obstruct or shake lens duringcalibration•Check if projection image is clear. If not,adjust focus to sharpen the imageIf the 'Auto Calibration Fail' message stillpops up on screen, switch to ManualCalibration.B Select Manual Calibration:NOTE: Manual Calibration is suggested forbetter accuracy.Set Up Touch on Your Projector21 Step 8: Trouble-shootingViewerSometimes infrared red light (IR light) fromambient light sources may interfere with touchperformance. The troubleshooting viewershows real time image for debugging purposes.Any light interference is marked in green. Ifgreen obstacles appear within image area,please remove to secure proper interactivity.NOTE: Interactive function is disabledunder trouble-shooting viewer, click toexit.Step 9: Operation ModeUsers can switch to Pen Mode ( ) whileusing the IR pen.Set Up Touch on Your Projector 22Step 10: Touch SensitivityWhen touch function is unresponsive or writingis intermittent, you can adjust the sensitivity byadjusting the Touch Sensitivity level:-Default: 4-Max.: 10 (most sensitive)-Min.: 0 (least sensitive)NOTE: Touch Sensitivity is not adjustable under Pen Mode.Troubleshooting 23TroubleshootingQ1What to do when Touch function is not accurate?A:For better accuracy, you should set to "Projector Only" display mode before calibration.A-1:Touch accuracy may be impacted if Windows default display setting has been changed.A-1-1 : Go to the setting page: Start menu > Control Panel > Appearance and Personalization A-1-2 : Select "Smaller - 100%(Default) " and click "Apply".A-2:Troubleshooting 24If you adjust the computer's resolution or connect a different computer.Failure symptom : In the center of the board the cursor and pen are aligned. As you move left or right the pen and cursor begin to separate. This issue maybe from graphics card driver setting.For Intel graphics cards, do the following:1Confirm the graphic card output resolution is same as projector information.2The "Scaling" Setting of Intel HD Graphics control panel should be "Maintain Display Scaling". Without this option enabled, it outputs to LCD monitor native aspect ratio. The projection image is scaled, resulting in inaccurate projection.Troubleshooting Q2What to do when touch function is not accurate or not working when using a different display mode (duplicate/ extension)?A-1:Duplicate mode: It will be accurate if the laptop and the projector are in the same resolution. Set the "Scaling" Setting to "Maintain Display Scaling" followed by Q1 A-2, and use calibration function again.Extended mode: Set to "Only projector" mode and use the calibration function. Then follow Q3Q3-1Why does touch function not work in extension mode (Laptop: primary, projector: extension)?Q3-2How to enable touch function from one computer to multiple projectors?A:The answer of these 2 questions are the same:1The functions of interactive utility only support on primary screen. Using the "Tablet PC settings" to let the touch function worked on extended screen:25Troubleshooting26Go to "Control panel" -> "Tablet PC settings" -> "Setup" and follow the touch screen settings.Q4What to do when projection area corner is insensitive or intermittent lines are observed? A:1Adjust the level of Touch Sensitivity to enhance sensitivity. See Step 10 Touch Sensitivity for trouble-shooting.2If Touch function remains insensitive, please check the optical port condition. If dust or particles are observed, gently clean the optical port with a dust blower.Troubleshooting 27Q5Why cannot the computer boot when the USB cable which connects PC and projector isalready plugged in?A:1Unplug USB cable from computer, and then re-boot computer.2Go to BIOS setup page of computer and modify the "Boot Sequence" Choose Hard disk as top priority, save the change and reboot computer.Q6What to do when Windows system cannot identify the USB device?A:A-1Unplug/re-plug in the USB cable and check again.A-2Switch to another USB port and check again.A-3Restart your computer and check again.Troubleshooting 28A-4Go to Power Options in Control Panel, check USB selective suspend settings status in USBsettings under Advance Settings. Switch to "Disabled".A-5Go to official website of the laptop/PC manufacturer, and update USB driver to latest version. A-6Use the USB cable included with your projector and check again. If an USB extension isneeded, a USB Hub or a certificated active extension USB cable is required.A-7The USB port of your computer maybe not working. Please contact your IT staff.Troubleshooting29 Q7What to do when the mouse is blocked?A:1Open the curtain cover by screwdriver.2Press the button to switch to visible light mode (See step 5: Adjust Touch Sensor) and the mouse will be unblocked. Then follow step 5: Adjust Touch Sensor as in page15.Q8Why utility icon ( ) is red, not green ( / )?A:Red icon ( ) indicates a failed connection. This may be caused by following:1Check if interactive function is enabled via OSD selection2Unplug/re-plug in the USB cable and check again.3Switch to another USB port and check again.4Restart your computer and check again.Troubleshooting 305Control Panel > Hardware and Sound > Power Options > Change plan settings > Changeadvanced power settings > USB settings > USB selective suspend setting. Switch to "Disabled".6Go to official website of the laptop/PC manufacturer, and update USB driver to latest version.7Go to official website of the laptop/PC manufacturer, and update BIOS driver to latest version.8Use the USB cable included with your projector and check again. If an USB extension is needed, please contact your distributor.9The USB port of your computer maybe not working. Please contact your IT staff.Q9When should Touch Area Setting and Calibration be done?A:Please perform Touch Area Setting and Calibration during first installation. If projector or whiteboard is moved, Touch Area Setting and Calibration should be performed again.Troubleshooting 31-For better accuracy, please do Manual Calibration.-If an overlarge offset is observed, please perform Manual Calibration and see step 7:Calibration as in page 20.Q10What to do when Auto Calibration and Auto Touch Area Setting both fail?A:1Check "Ceiling Mount" OSD setting first. The interactive function supports Ceiling Mode only.When projector OSD message is shown, Auto Calibration and Auto Touch Area Setting functions won't work. Please wait until OSD message disappears before performing Auto Calibration and Auto Touch Area Setting.Please follow below trouble-shooting steps to perform Auto Calibration and Auto Touch Area Setting again.Troubleshooting32a Quit all software applicationsb Reduce ambient lightc Do not obstruct or shake lens during calibrationd Check if projection image is clear. If not, adjust focus to sharpen the image.e If the "Auto Touch Area Setting failed" or "Auto Calibration failed" message pops up on screen again, please switch to Manual Mode to do Touch Area Setting and Calibration.2Please check Projector Lamp Power Mode selection. Lower brightness (ECO mode) may affect both Auto Touch Area Setting and Auto Calibration. Please switch to Normal mode tocomplete Touch Area Setting and Calibration.Troubleshooting 333Please check Projector Color Mode selection. To ensure accuracy of both Auto Touch Area Setting and Auto Calibration, it is suggested to switch Color mode to Bright Mode.Q11What to do when the mouse cursor ( ) flashes or jumps on screen, or when Touch functiondoes not work well at certain projected area?A:1Please confirm the Touch sensor had been adjusted and Laser Beam is parallel to the screen. Refer to Step 5 Adjust Touch Sensor for detailed procedures.2Refer to Step 6 Touch Area Setting for detailed procedures, check if Manual Touch Area boundary is located properly.3Check if there is strong light shown on the screen. If yes, turn off the light.4Check if there is any foreign object on the screen. If yes, remove the object.Troubleshooting5To keep at least 2 inch (50 mm) clearance boundary of the projected image to avoid reflection interference.Q12What to do when there is only a single touch point?A:1Mac computers support single touch point only.2For WINDOWS computer, please refer to below suggestions2.1 Re-plug USB cable from computer and check again.2.2 Go to "Control Panel" and make sure "Tablet PC Components" is selected.34Appendix B: Accessory 35Black Screw M3x6 (to fix base plate)4Interactive cable 15Alignment sticker 26TOUCH UNIT base plate 2Appendix B: Accessory16.4 Ft (5 m) USB A to mini USB B cable Passive Pen 10CD for User Manual andUtility Software236Printed in China.Printed on recycled paper. /support。
AI智能投影AI交互式投影技术
AI智能投影AI交互式投影技术AI智能投影:探索AI交互式投影技术的未来随着科技的不断发展,AI智能投影技术已经成为了新一代投影技术的代表。
AI智能投影技术的应用范围非常广泛,不仅可以用于商业展示、教育培训等领域,还可以改变人们日常生活的方方面面。
本文将探讨AI交互式投影技术在可扩展性、实时性和创造性方面的应用,以及对我们生活的潜在影响。
AI智能投影技术的最大特点是其出色的可扩展性。
传统的投影设备只能在固定的屏幕上进行显示,而AI智能投影技术可以通过智能算法和感应器,将投影内容智能地扩展到指定的任何平面上。
这种可扩展性使得企业在展示产品时可以选择更加创新和灵活的方式,将产品投影到各种奇特的物体上,使得观众可以更好地理解产品的特点和优势。
与此同时,AI交互式投影技术也让人们的生活更加便捷。
传统的投影设备只能实现单向的信息传递,而AI交互式投影技术可以通过智能感应器和手势识别技术,实现与投影内容的双向互动。
无论是商场导览、展会互动还是教育培训,AI交互式投影技术都可以让用户更加沉浸和参与其中,极大地提高学习和体验的效果。
AI智能投影技术的应用范围不仅局限于商业和教育领域,还可以发挥巨大的创造性。
例如,在城市规划中,可以使用AI智能投影技术将设计方案直接投影到实际的街区中,让人们通过实时的投影图片感受到未来城市的样貌。
在医学领域,AI智能投影技术可以将医学影像投影到患者的身上,让医生在手术操作时能够更加准确地定位和诊断。
然而,AI智能投影技术的发展也面临一些挑战和问题。
首先,智能算法和感应器的精确度和稳定性需要不断提高,以保证投影内容的准确度和流畅性。
其次,由于投影内容必须与环境进行交互,因此对于光照、反射等因素的影响也需要做更加精细的处理。
最后,AI智能投影技术涉及到用户隐私和数据安全等方面的问题,相关法律和规范的建立也是必要的。
综上所述,AI智能投影技术在可扩展性、实时性和创造性方面的应用潜力巨大。
交互式投影仪原理
交互式投影仪原理引言交互式投影仪是一种用于教育和演示目的的先进设备,它结合了投影仪和交互技术,使用户可以在投影的画面上进行互动操作。
本文将深入探讨交互式投影仪的原理及其应用。
交互式投影仪的工作原理交互式投影仪的工作原理可以简单分为以下几个步骤:1. 投影交互式投影仪首先通过投影技术,将要显示的内容投射到屏幕或者其他平面上。
投影技术通常采用液晶或DLP(数字光处理)技术,通过将强光透过液晶面板或者微镜投影到显示介质上,形成可见光的图像。
2. 互动感应交互式投影仪可以配备多种互动感应技术,例如红外线、电容触摸等。
这些技术可以感应到用户的操作,并将操作信号转化成电信号。
3. 信号处理交互式投影仪通过内置的信号处理器对收集到的电信号进行处理。
信号处理的目的是将用户的操作转化成计算机可以理解的指令。
4. 计算机处理交互式投影仪内部搭载了计算机系统,该系统负责接收信号处理器传递过来的指令,并进行相应的计算和反馈。
5. 反馈显示最后,交互式投影仪将计算机处理后的结果通过投影技术进行反馈显示。
用户可以看到自己的操作产生的效果。
交互式投影仪的应用领域交互式投影仪在教育、商务和娱乐领域有着广泛的应用。
1. 教育交互式投影仪在教育中起到了革命性的作用。
教师可以利用交互式投影仪将教材内容投影到屏幕上,通过手指或者特制的笔进行操作和标注。
学生可以通过触摸屏幕或者使用特制的笔进行互动,增强了学习的趣味性和参与感。
2. 商务在商务领域,交互式投影仪可以用于会议和演示。
与传统的幻灯片相比,交互式投影仪能够通过直接操作屏幕上的内容,帮助演讲者更加生动地展示和解释自己的观点。
与此同时,与会者也可以通过交互式投影仪进行实时的笔记和标注,促进交流和合作。
3. 娱乐交互式投影仪在娱乐领域也有着丰富的应用。
例如,有些游戏厅提供了交互式投影仪游戏,让玩家可以通过身体的动作进行游戏操作。
此外,交互式投影仪还可以用于虚拟现实和增强现实的体验,带给用户更加身临其境的感觉。
交互投影原理

交互投影原理
交互投影原理是一种广泛应用于虚拟现实和增强现实技术的原理,它可以将计算机生成的图像投影到实际物体表面上,使得用户可以与虚拟对象进行互动交互。
交互投影是通过使用激光投影仪或其他合适的投影设备,将图像投射到物体表面上。
这个过程中,计算机会根据用户的动作和手势输入对投影进行实时更新和控制。
通过识别用户的手势和动作,系统可以根据用户的需求,调整投影图像的位置、尺寸和形态。
交互投影原理的实现需要计算机视觉和图像处理技术的支持。
首先,计算机需要能够识别用户的手势和动作。
可以使用深度摄像头或其他传感器设备来获取用户的图像信息,并通过算法处理这些信息,从而实现对用户动作的识别。
其次,计算机需要能够根据用户的输入生成相应的图像。
这就需要进行实时的图像渲染和投影操作。
计算机需要准确地计算投影的位置、角度和形状,以及与实际物体表面的交互效果。
交互投影原理的应用非常广泛。
例如,在虚拟现实游戏中,交互投影可以将游戏场景投影到用户周围的环境中,使得用户可以在真实的物理空间中进行游戏操作。
在教育、医疗和工业领域,交互投影可以用于模拟操作、培训和设计等方面。
总结来说,交互投影原理是一种将计算机生成的图像投影到物体表面上,并实现用户与虚拟对象进行互动的技术。
它依赖于
计算机视觉和图像处理技术,能够识别用户的手势和动作,并生成相应的投影效果。
这种技术在虚拟现实和增强现实领域具有广泛的应用前景。
BenQ MP780ST交互式投影机 让教学演示变成快乐的互动体验
BenQ MP780ST交互式投影机让教学演示变成快乐的互动
体验
佚名
【期刊名称】《《个人电脑》》
【年(卷),期】2011(017)001
【摘要】BenQ MP780ST采用明基智能点控技术,专为让学生上课集中注意力而设计。
通过互动让学习变得充满挑战和乐趣。
与目前普通投影机不同,它利用明基创新的智能点控技术,除了投影系统外,还提供交互式电子白板的互动功能。
它能兼容所有支持标准USB鼠标的计算机系统,也能完美搭配您现有的交互式电子白板系统,但更可以让你省去电子白板的昂贵投入和复杂设置,直接在屏幕上甚至墙壁上实现所有电子白板的交互功能。
而且,不需要系统校准,交互笔可以远距离操作便于学生和老师互动。
【总页数】2页(P48-49)
【正文语种】中文
【中图分类】TP391
【相关文献】
1."好色"有理"瘦身"快乐--BenQ商务投影机PB6245& PB2255打造完美商务搭档 [J],
2.家用投影机本土化促产业——见证BenQ明基家用投影机产线转移苏州 [J], 无
3.无线分享无限快乐——BenQ W1500体验会广州站 [J],
4.投影机 Philips LC3631/Panasonic PT-M1S11 BenQ PB6105/BenQ PB6205
[J], 吕华威
5.BenQ投影机10年,从量变到质变——专访明基中国营销总部投影机事业部总监黄振宇先生 [J], 夏松
因版权原因,仅展示原文概要,查看原文内容请购买。
