Spring使用入门示例
Spring参考手册
第一部分 Spring框架的概述Spring框架是一个轻量级的解决方案和为构建企业级应用程序潜在的一站式服务。
然而,Spring是模块化的,允许你只使用那些你需要的部分,而忽略其他部分。
你可以在使用Struts时用Spring的IoC 容器,但你也可以只使用Hibernate 集成代码或JDBC抽象层。
Spring框架支持声明式事务管理、通过RMI或web服务远程访问你的逻辑,还有多种方式处理数据的持久化。
它还提供一个全能的MVC框架,并且能将AOP移植进你的软件。
Spring被设计为非侵入式的,意味着你的逻辑代码完全不必依赖于此框架。
虽然一些基于数据访问技术和Spring的库会存在于你的集成层(例如数据访问层),但是你的其他代码很容易隔离这些依赖。
1.开始使用Spring这篇手册提供了关于spring框架的详细信息,不仅有全面的特性,还有一些关于spring包含的潜在的概念(例如“依赖注入”)的背景知识。
如果你才刚刚开始,也许你应该从低级版的"Getting Started" 手册开始,从bbb://spring.io.访问。
为了更容易消化,这篇手册是专注于任务式。
2.Spring框架的介绍Spring框架是一个支持开发Java应用程序而提供全面的基础设施的Java平台,Spring处理基础部分从而你可以专注于你的应用。
spring 让你能够通过POJOs和向POJOs应用无侵入的企业服务就可以构建你的应用。
这些不仅能应用到Java SE而且还能应用到Java EE.一些作为一个开发者能够使用spring平台优势的例子●使Java方法可以执行数据库事务而不用去处理事务API●使本地Java方法可以执行远程过程而不用去处理远程API●使本地Java方法可以拥有管理操作而不用去处理JMXAPI●使本地Java方法可以执行消息处理而不用去处理JMSAPI2.1 依赖注入和控制反转Java应用程序——一个宽松的专业术语,小到一个Appletes大到运行在n层服务器上的企业级程序—通常由互相协作的对象而形成的适当的应用程序。
SpringSession的使用示例

SpringSession的使⽤⽰例⽬录SessionSession常⽤解决⽅案Spring-Session测试代码基于数据库的Spring-Session基于Redis的Spring-Session总结SessionHttp协议是⽆状态的,这样对于服务端来说,没有办法区分是新的访客还是旧的访客。
但是,有些业务场景,需要追踪⽤户多个请求,此时就需要Session。
关于session的百度百科sessionSession:在计算机中,尤其是在⽹络应⽤中,称为“会话控制”。
Session对象存储特定⽤户会话所需的属性及配置信息。
这样,当⽤户在应⽤程序的Web页之间跳转时,存储在Session对象中的变量将不会丢失,⽽是在整个⽤户会话中⼀直存在下去。
当⽤户请求来⾃应⽤程序的 Web页时,如果该⽤户还没有会话,则Web服务器将⾃动创建⼀个 Session对象。
当会话过期或被放弃后,服务器将终⽌该会话核⼼特点:1. 服务端存储2. 会过期Session常⽤解决⽅案对于Session的常⽤解决⽅案,可以划分为三种。
负载均衡⽅式借助负载均衡设备或者模块,将指定的Session始终路由到同⼀台机器即可,如Nginx。
副本复制⽅式利⽤服务器节点间的副本复制⽅式,保证集群所有节点拥有的Session数据⼀致。
集中存储⽅式引⼊第三⽅存储,将Session数据集中存储到外部存储中,如Redis或者数据库等。
本⽂介绍的Spring-Session是采⽤第三种,集中存储的⽅式。
Spring-Session核⼼组成模块Spring Session Core提供Spring Session核⼼的功能和APISpring Session Data Redis提供基于Redis的SessionRepository以及配置Spring Session JDBC提供基于关系型数据库的SessionRepository以及配置Spring Session Hazelcast提供基于Hazelcast的SessionRepository以及配置测试代码controller提供三个接⼝,分别对应Session的获取、保存和清理@GetMapping("/")public String process(Model model, HttpSession session) {@SuppressWarnings("unchecked")List<String> messages = (List<String>) session.getAttribute("springSession");if (messages == null) {messages = new ArrayList<>();}model.addAttribute("sessionMessages", messages);return "sessionTest";}@PostMapping("/persistSession")public String persistMessage(@RequestParam("msg") String msg, HttpServletRequest request) {@SuppressWarnings("unchecked")List<String> messages = (List<String>) request.getSession().getAttribute("springSession");if (messages == null) {messages = new ArrayList<>();request.getSession().setAttribute("springSession", messages);}messages.add(msg);request.getSession().setAttribute("springSession", messages);return "redirect:/";}@PostMapping("/destroySession")public String destroySession(HttpServletRequest request) {request.getSession().invalidate();return "redirect:/";}sessionTest.html对应页⾯操作<!DOCTYPE html><html lang="en" xmlns:th=""><head><meta charset="UTF-8"><title>Spring Boot Session Example</title></head><body><div><form th:action="@{/persistSession}" method="post"><textarea name="msg" cols="40" rows="2"></textarea><br> <input type="submit" value="保存" /></form></div><div><h2>session列表</h2><ul th:each="message : ${sessionMessages}"><li th:text="${message}">message</li></ul></div><div><form th:action="@{/destroySession}" method="post"><input type="submit" value="清空" /></form></div></body></html>基于数据库的Spring-Session1.引⼊maven依赖使⽤MySQL存储,所以引⼊了MySQL。
【SpringFramework】Spring入门教程(三)使用注解配置
【SpringFramework】Spring⼊门教程(三)使⽤注解配置本⽂主要介绍四个⽅⾯:(1) 注解版本IOC和DI(2) Spring纯注解(3) Spring测试(4) SpringJDBC - Spring对数据库的操作使⽤注解配置Spring⼊门说在前⾯学习基于注解的IoC配置,⼤家脑海⾥⾸先得有⼀个认知,即注解配置和xml配置要实现的功能都是⼀样的,都是要降低模块间的耦合度。
仅仅只是配置的形式不⼀样。
关于实际的开发中到底使⽤xml还是注解,每家公司有着不同的使⽤习惯。
所以这两种配置⽅式我们都需要掌握。
基于注解配置的⽅式也已经逐渐代替xml配置。
所以我们必须要掌握使⽤注解的⽅式配置Spring。
配置步骤注意:如果使⽤Eclipse需要先安装了STS插件,或者使⽤STS开发⼯具创建项⽬。
本⽂使⽤IDEA进⾏演⽰。
1.2.1. 第⼀步:拷贝必备jar包到⼯程的lib⽬录。
注意:在基于注解的配置中,我们还要多拷贝⼀个aop的jar包。
如下图:1.2.2. 第⼆步:在类的根路径下创建⼀个任意名称的xml⽂件(不能是中⽂)注意:基于注解整合时,Spring配置⽂件导⼊约束时需要多导⼊⼀个context命名空间下的约束。
<?xml version="1.0" encoding="UTF-8"?><beans xmlns="/schema/beans"xmlns:xsi="/2001/XMLSchema-instance"xmlns:context="/schema/context"xsi:schemaLocation="/schema/beans/schema/beans/spring-beans.xsd/schema/context/schema/context/spring-context.xsd"></beans>1.2.3. 第⼆步:创建⼀个服务类创建⼀个测试的服务类,并且加⼊使⽤@Component注解,声明该类允许注⼊到Spring容器package org.cjw.service;import ponent;/*使⽤注解配置时,需要将Spring框架启动就创建对象的类表⽰为组件类表⽰组件类使⽤@Component注解*/@Componentpublic class CustomerService {public void save() {System.out.println("-保存数据-");}}1.2.4. 第四步在spring的配置⽂件加⼊扫描注解<?xml version="1.0" encoding="UTF-8"?><beans xmlns="/schema/beans"xmlns:xsi="/2001/XMLSchema-instance"xmlns:context="/schema/context"xsi:schemaLocation="/schema/beans/schema/beans/spring-beans.xsd/schema/context/schema/context/spring-context.xsd"><!-- 声明扫描包及其⼦包的类,如果发现有组件注解的类,就创建对象并加⼊到容器中去 --><context:component-scan base-package="org.cjw" /></beans>1.2.5. 第五步:测试调⽤代码package org.cjw.test;import org.cjw.service.CustomerService;import org.junit.Test;import org.springframework.context.ApplicationContext;import org.springframework.context.support.ClassPathXmlApplicationContext;public class CustomerServiceTest {@Testpublic void testSave() {ApplicationContext context = new ClassPathXmlApplicationContext("applicationContext.xml");CustomerService customerService = context.getBean(CustomerService.class);customerService.save();}}--测试结果,如果可以调⽤服务⽅法,测试成功。
Spring使用RestTemplate模拟form提交示例

Spring使⽤RestTemplate模拟form提交⽰例RestTemplate是⽤来在客户端访问Web服务的类。
和其他的Spring中的模板类(如JdbcTemplate、JmsTemplate)很相似,我们还可以通过提供回调⽅法和配置HttpMessageConverter类来客户化该模板。
客户端的操作可以完全使⽤RestTemplate和HttpMessageConveter类来执⾏。
1.声明RestTemplate的bean@Beanpublic RestTemplate restTemplate(){return new RestTemplate();}2.模拟调⽤@Servicepublic class SmsService {//注⼊RestTemplate@AutowiredRestTemplate restTemplate;public String sendMsg(String phoneNum,String text){//请求头设置HttpHeaders headers = new HttpHeaders();headers.setContentType(MediaType.APPLICATION_FORM_URLENCODED);//提交参数设置MultiValueMap<String,String> p = new LinkedMultiValueMap<>();p.add("username","xxx");p.add("password","yyy");p.add("phoneNum",phoneNum);p.add("content",text);//提交请求HttpEntity< MultiValueMap<String,String>> entity = new HttpEntity< MultiValueMap<String,String>>(p,headers);String result = restTemplate.postForObject("http://....",entity,String.class);return result;}}以上就是本⽂的全部内容,希望对⼤家的学习有所帮助,也希望⼤家多多⽀持。
详解springsecurity之httpSecurity使用示例

详解springsecurity之httpSecurity使⽤⽰例httpSecurity类似于spring security的xml配置⽂件命名空间配置中的<http>元素。
它允许对特定的http请求基于安全考虑进⾏配置。
默认情况下,适⽤于所有的请求,但可以使⽤requestMatcher(RequestMatcher)或者其它相似的⽅法进⾏限制。
使⽤⽰例:最基本的基于表单的配置如下。
该配置将所有的url访问权限设定为⾓⾊名称为"ROLE_USER".同时也定义了内存认证模式:使⽤⽤户名"user"和密码“password”,⾓⾊"ROLE_USER"来认证。
@Configuration@EnableWebSecuritypublic class FormLoginSecurityConfig extends WebSecurityConfigurerAdapter {@Overrideprotected void configure(HttpSecurity http) throws Exception {http.authorizeRequests().antMatchers("/").hasRole("USER").and().formLogin();}@Overrideprotected void configure(AuthenticationManagerBuilder auth) throws Exception {auth.inMemoryAuthentication().withUser("user").password("password").roles("USER");}}配置基于openId的认证⽅式basic⽰例,不使⽤attribute exchange@Configuration@EnableWebSecuritypublic class OpenIDLoginConfig extends WebSecurityConfigurerAdapter {@Overrideprotected void configure(HttpSecurity http) {http.authorizeRequests().antMatchers("/").hasRole("USER").and().openidLogin().permitAll();}@Overrideprotected void configure(AuthenticationManagerBuilder auth) throws Exception {auth.inMemoryAuthentication()// the username must match the OpenID of the user you are// logging in with.withUser("https:///accounts/o8/id?id=lmkCn9xzPdsxVwG7pjYMuDgNNdASFmobNkcRPaWU").password("password").roles("USER");}}下⾯展⽰⼀个更⾼级的⽰例,使⽤attribute exchange@Configuration@EnableWebSecuritypublic class OpenIDLoginConfig extends WebSecurityConfigurerAdapter {@Overrideprotected void configure(HttpSecurity http) {http.authorizeRequests().antMatchers("/").hasRole("USER").and().openidLogin().loginPage("/login").permitAll().authenticationUserDetailsService(new AutoProvisioningUserDetailsService()).attributeExchange("https:///.").attribute("email").type("/contact/email").required(true).and().attribute("firstname").type("/namePerson/first").required(true).and().attribute("lastname").type("/namePerson/last").required(true).and().and().attributeExchange(".").attribute("email").type("/contact/email").required(true).and().attribute("fullname").type("/namePerson").required(true).and().and().attributeExchange(".").attribute("email").type("/contact/email").required(true).and().attribute("fullname").type("/namePerson").required(true);}}public class AutoProvisioningUserDetailsService implementsAuthenticationUserDetailsService<OpenIDAuthenticationToken> {public UserDetails loadUserDetails(OpenIDAuthenticationToken token) throws UsernameNotFoundException {return new User(token.getName(), "NOTUSED", AuthorityUtils.createAuthorityList("ROLE_USER"));}}增加响应安全报⽂头默认情况下当使⽤WebSecuirtyConfigAdapter的默认构造函数时激活。
【SpringFramework】Spring入门教程(一)控制反转和依赖注入
【SpringFramework】Spring⼊门教程(⼀)控制反转和依赖注⼊参考资料说在前⾯什么样的架构,我们认为是⼀个优秀的架构?判断准则:可维护性好,可扩展性好,性能。
什么叫可扩展性好?答:在不断添加新的代码的同时,可以不修改原有代码,即符合开闭原则。
如何让程序的可维护性好,可扩展性好呢?业界有⼀个公认的标准:⾼内聚,低耦合。
⾼内聚:就是尽量将代码写在与之功能描述⼀致的模块中。
如User表的操作写在UserDAO⾥⾯,不要写在⾮UserDAO的类⾥⾯。
低耦合:就是尽量减少类与类之间的直接关系。
(重点)直接关系:Controller层依赖Service层,在Controller层直接new Service层的类的对象。
Service层依赖Dao层,在Service层直接new Dao层的对象。
Spring框架就是通过IoC/DI(控制反转/依赖注⼊)实现程序的解耦。
从⽽提⾼程序的维护性和扩展性。
Spring概述Spring是什么Spring是⼀个JavaEE轻量级的⼀站式开发框架。
JavaEE: 就是⽤于开发企业级(B/S)应⽤的技术。
轻量级:使⽤最少代码启动框架,然后根据需求选择需要使⽤的模块。
重量级:早期的EJB,开发⼀个HelloWorld程序都需要引⼊EJB的全部模块。
⼀站式:提供了表⽰层,服务层,持久层的所有⽀持。
Spring框架出现的背景世界上第⼀套由Java官⽅Sun公司推出的企业级开发框架EJB瞬间风靡全球,被各⼤公司所应⽤。
Spring之⽗,Rod Jonhson是⼀个⾳乐博⼠,在Sun公司的⼤⼒推⼴下,也成为EJB框架的使⽤者。
在深⼊研究完EJB框架(由Sun主导开发的⼀个JavaEE开发框架),⽆法接受这么⼀个框架被吹成世界第⼀,具体查看他吐槽EJB的书《Expert one on one J2EE design and development》。
其中突出被他吐槽最厉害的⼀个点就EJB的重量级,就是只要使⽤EJB⾥⾯任何⼀个组件。
Spring简单实例

Spring 实例入门本文结合实例理解解容器,DI,IOC,耦合,解耦等Spring所涉及的概念,同时了解Spring 的最基本也是最核心的使用方法。
1.Spring容器Spring容器负责对象的实例化,对象生命周期的管理,被Spring管理的对象称之为Bean。
Spring默认使用单例的方式创建对象。
可以通过修改<bean>的配置改变成其它创建方式。
这个属性为Scope,称之为作用域或生命周期,它的值为singleton(单例,默认值),prototype2.注入方式有setter注入,构造注入方式,接口注入(不需掌握)。
建议多使用Setter注入方式。
Setter注入:Soldier类中有一个属性name,如何在创建Soldier的时候使name的值变为”RANBO”?配置如下:这样创建的Soldier对象的name属性就有值了,测试代码:构造注入:配置如下:测试结果同上。
3.依赖当A对象使用了B对象的方法,A对B产生依赖,称之为A依赖B。
下面的例子中Soldier当HandGun发生变化时,必然导致Soldier必须做相应修改,同时,当Soldier需要使用OtherGun时也必须重新编写代码,导致代码重用度不高。
当对象之间的依赖关系很强时(耦合),会使程序代码死板,不利于后期的维护和扩展。
降低对象之间的依赖关系称之为解耦。
Spring能够很好的解决这一问题。
4.控制反转(Inversion of Control,简称IOC)和依赖注入(Dependence Inject简称DI)我们运用Spring的setter注入方式解决HandGun和Soldier的耦合问题。
修改Soldier的代码,将HandGun定义为Soldier的属性并提供setter方法:package com.hb;/***士兵类*/public class Soldier {private HandGun handGun;public void setHandGun(HandGun handGun) {this.handGun = handGun;}/***打仗*/public void fight(){handGun.killEnemy();}}配置如下己去实例化HandGun了。
spring成神之路第三篇:Spring容器基本使用及原理(ApplicationCont。。。

spring成神之路第三篇:Spring容器基本使⽤及原理(ApplicationCont。
1. jdk1.82. idea3. maven-3.6.14. spring-5.2.3.RELEASEIOC容器是具有依赖注⼊功能的容器,负责对象的实例化、对象的初始化,对象和对象之间依赖关系配置、对象的销毁、对外提供对象的查找等操作,对象的整个⽣命周期都是由容器来控制。
我们需要使⽤的对象都由ioc容器进⾏管理,不需要我们再去⼿动通过new的⽅式去创建对象,由ioc 容器直接帮我们组装好,当我们需要使⽤的时候直接从ioc容器中直接获取就可以了。
那么spring ioc容器是如何知道需要管理哪些对象呢?需要我们给ioc容器提供⼀个配置清单,这个配置⽀持xml格式和java注解的⽅式,在配置⽂件中列出需要让ioc容器管理的对象,以及可以指定让ioc容器如何构建这些对象,当spring容器启动的时候,就会去加载这个配置⽂件,然后将这些对象给组装好以供外部访问者使⽤。
这⾥所说的IOC容器也叫spring容器。
由spring容器管理的对象统称为Bean对象。
Bean就是普通的java对象,和我们⾃⼰new的对象其实是⼀样的,只是这些对象是由spring去创建和管理的,我们需要在配置⽂件中告诉spring容器需要创建哪些bean对象,所以需要先在配置⽂件中定义好需要创建的bean对象,这些配置统称为bean定义配置元数据信息,spring容器通过读取这些bean配置元数据信息来构建和组装我们需要的对象。
1. 引⼊spring相关的maven配置2. 创建bean配置⽂件,⽐如bean xml配置⽂件3. 在bean xml⽂件中定义好需要spring容器管理的bean对象4. 创建spring容器,并给容器指定需要装载的bean配置⽂件,当spring容器启动之后,会加载这些配置⽂件,然后创建好配置⽂件中定义好的bean对象,将这些对象放在容器中以供使⽤5. 通过容器提供的⽅法获取容器中的对象,然后使⽤spring内部提供了很多表⽰spring容器的接⼝和对象,我们来看看⽐较常见的⼏个容器接⼝和具体的实现类。
Spring中表达式语言spring-expression简单使用

Spring 中表达式语⾔spring-expression 简单使⽤前⾔Spring Expression Language (简称 SpEL )是⼀个⽀持查询和操作运⾏时对象导航图功能的强⼤的表达式语⾔,它的语法类似于传统 EL(如jsp 中的EL 表达式),但提供额外的功能,最出⾊的就是函数调⽤和简单字符串的模板函数。
SpEL 作为Spring 框架的基础,但并不依赖于Spring 容器,可以独⽴使⽤。
简单使⽤引⼊maven 依赖简单字⾯量⽀持字符串,⽇期,数值(整型,浮点型,⼗六进制),布尔等类型输出结果为变量引⽤通过#'变量名'的⽅式来使⽤变量<dependency><groupId>org.springframework</groupId><artifactId>spring-context</artifactId><version>5.2.1.RELEASE</version></dependency>//创建表达式解析器ExpressionParser expressionParser = new SpelExpressionParser();//解析表达式并获取结果System.out.println(expressionParser.parseExpression("'hello'").getValue());System.out.println(expressionParser.parseExpression("123").getValue());System.out.println(expressionParser.parseExpression("12.34").getValue());System.out.println(expressionParser.parseExpression("10e2").getValue());System.out.println(expressionParser.parseExpression("true").getValue());System.out.println(expressionParser.parseExpression("new java.util.Date()").getValue());hello12312.341000.0trueSat Sep 25 19:39:38 CST 2021//创建表达式解析器ExpressionParser expressionParser = new SpelExpressionParser();//创建数据上下⽂StandardEvaluationContext evaluationContext = new StandardEvaluationContext();//设置变量evaluationContext.setVariable("a", 12);evaluationContext.setVariable("b", 34);evaluationContext.setVariable("c", 56);//解析表达式System.out.println(expressionParser.parseExpression("#a+#b-#c").getValue(evaluationContext));输出为-10对象的属性和⽅法定义⼀个普通beanpublic class User {private String name;public User(String name) { = name;}public void setName(String name) { = name;}public String getName() {return name;}}通过对象.属性的⽅式来引⽤//创建表达式解析器ExpressionParser expressionParser = new SpelExpressionParser();//创建数据上下⽂StandardEvaluationContext evaluationContext = new StandardEvaluationContext(); evaluationContext.setVariable("user", new User("lisi"));System.out.println(expressionParser.parseExpression("#").getValue(evaluationContext)); System.out.println(expressionParser.parseExpression("#user.getName()").getValue(evaluationContext));输出为lisilisi数组,集合,map//创建表达式解析器ExpressionParser expressionParser = new SpelExpressionParser();//创建数据上下⽂StandardEvaluationContext evaluationContext = new StandardEvaluationContext();//设置数组变量evaluationContext.setVariable("users", new User[]{new User("Tom")});//设置集合变量evaluationContext.setVariable("userList", Collections.singletonList(new User("Mary")));//设置map变量evaluationContext.setVariable("userMap", Collections.singletonMap("u123", new User("u123")));System.out.println(expressionParser.parseExpression("#users[0].name").getValue(evaluationContext)); System.out.println(expressionParser.parseExpression("#userList[0].name").getValue(evaluationContext)); System.out.println(expressionParser.parseExpression("#userMap['u123'].name").getValue(evaluationContext));输出为TomMaryu123普通⽅法调⽤和在Java中使⽤没有区别//创建表达式解析器ExpressionParser expressionParser = new SpelExpressionParser();System.out.println(expressionParser.parseExpression("'hello'.substring(2)").getValue());输出为llo操作符⽀持关系操作符(⼤于⼩于等于),逻辑操作符(and or not),算数操作符(加减乘除)//创建表达式解析器ExpressionParser expressionParser = new SpelExpressionParser();System.out.println(expressionParser.parseExpression("1 < 4").getValue());System.out.println(expressionParser.parseExpression("1 < 4 and 5 > 9 ").getValue());System.out.println(expressionParser.parseExpression("1 + 3 - 5").getValue());引⽤IOC容器中的bean定义bean的配置⽂件import org.springframework.context.annotation.Bean;import org.springframework.context.annotation.Configuration;@Configurationpublic class BeanConfig {@Beanpublic User user() {return new User("lisi");}}默认⽀持#{}的格式来引⽤bean//创建表达式解析器ExpressionParser expressionParser = new SpelExpressionParser();//创建数据上下⽂StandardEvaluationContext evaluationContext = new StandardEvaluationContext();//创建IOC容器上下⽂ApplicationContext context = new AnnotationConfigApplicationContext(BeanConfig.class);//创建bean表达式上下⽂BeanExpressionContext beanExpressionContext = new BeanExpressionContext((ConfigurableBeanFactory) context.getAutowireCapableBeanFactory(), null); evaluationContext.setRootObject(beanExpressionContext);//添加属性访问器从IOC容器中获取beanevaluationContext.addPropertyAccessor(new BeanExpressionContextAccessor());System.out.println(expressionParser.parseExpression("#{}", new TemplateParserContext()).getValue(evaluationContext));输出为lisi@Value注解我们在项⽬中很多地⽅都会⽤到@Value注解@Value("${name}")private String name;@Value("#{}")private String personName;解析@Value注解的过程就会使⽤到SpELpublic class DefaultListableBeanFactory extends AbstractAutowireCapableBeanFactoryimplements ConfigurableListableBeanFactory, BeanDefinitionRegistry, Serializable {@Nullablepublic Object doResolveDependency(DependencyDescriptor descriptor, @Nullable String beanName,@Nullable Set<String> autowiredBeanNames, @Nullable TypeConverter typeConverter) throws BeansException {InjectionPoint previousInjectionPoint = ConstructorResolver.setCurrentInjectionPoint(descriptor);try {Object shortcut = descriptor.resolveShortcut(this);if (shortcut != null) {return shortcut;}Class<?> type = descriptor.getDependencyType();Object value = getAutowireCandidateResolver().getSuggestedValue(descriptor);if (value != null) {//字符串类型就表⽰是@Value注解注⼊if (value instanceof String) {// 使⽤StringValueResolver处理${}占位符String strVal = resolveEmbeddedValue((String) value);BeanDefinition bd = (beanName != null && containsBean(beanName) ?getMergedBeanDefinition(beanName) : null);//处理bean表达式,#{}这种格式value = evaluateBeanDefinitionString(strVal, bd);}TypeConverter converter = (typeConverter != null ? typeConverter : getTypeConverter());try {return converter.convertIfNecessary(value, type, descriptor.getTypeDescriptor());}catch (UnsupportedOperationException ex) {// A custom TypeConverter which does not support TypeDescriptor resolution...return (descriptor.getField() != null ?converter.convertIfNecessary(value, type, descriptor.getField()) :converter.convertIfNecessary(value, type, descriptor.getMethodParameter()));}}......}@Nullableprotected Object evaluateBeanDefinitionString(@Nullable String value, @Nullable BeanDefinition beanDefinition) { if (this.beanExpressionResolver == null) {return value;}Scope scope = null;if (beanDefinition != null) {String scopeName = beanDefinition.getScope();if (scopeName != null) {scope = getRegisteredScope(scopeName);}}return this.beanExpressionResolver.evaluate(value, new BeanExpressionContext(this, scope));}}默认使⽤的beanExpressionResolver为StandardBeanExpressionResolver。
实验4 Spring使用基础
实验4 Spring开发基础一、实验目的1.掌握Spring框架的概念、特点及结构。
2.学会利用MyEclipse开发Spring的过程和方法。
3.熟悉applicationContext.xml配置bean的方法。
4.掌握Spring框架的核心技术IoC(DI)、AOP。
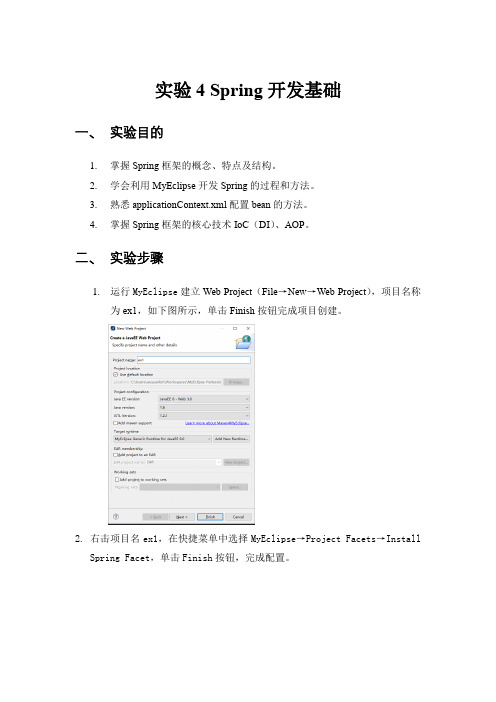
二、实验步骤1.运行MyEclipse建立Web Project(File→New→Web Project),项目名称为ex1,如下图所示,单击Finish按钮完成项目创建。
2.右击项目名ex1,在快捷菜单中选择MyEclipse→Project Facets→InstallSpring Facet,单击Finish按钮,完成配置。
3.通过这些步骤,项目中增加了Spring 3.1.1库,项目src文件夹下添加了applicationContext.xml的配置文件。
请查看这些改变。
4.在项目的src文件夹下面建立test包,在该包下面建立Person接口,内含go方法,再建立类Student和Teacher,分别实现Person接口,代码如下:5.在applicationContext.xml中添加如下两个bean的定义:6.在包test中建立Test类,从应用程序上下文中获得对象,并调用对象方法,其中main方法的代码如下:7.运行主类Test,观察并分析运行结果。
8.通过Set方法注入依赖。
修改Student类和Teacher类,分别在其中添加私有字符串属性name和set、get方法(设置姓名,自动生成set、get方法),Teacher 类可以不要getName方法,修改go方法,在输出原有字符串前增加name的输出,代码如下:9.修改applicationContext.xml中的两个bean元素,设置name属性值,修改如下:10.再次运行主类Test,观察并分析运行结果。
11.引用其他bean,在Spring容器中将bean注入需要调用的实例。
Spring Web Flow 2.0 入门

Spring Web Flow 2.0 入门本教程分析了 Spring Web Flow 2.0 的技术要点,并且通过创建一个示例应用程序,展示了 Spring Web Flow 2.0 的基本知识。
开始之前关于本教程本教程通过一个简化的购物车应用,介绍了如何使用 Spring Web Flow 2.0 来构建 Web 应用程序。
本教程以讲解实例为主,为了读者更好地理解 Spring Web Flow ,也有部分理论的解释。
先决条件本教程要求读者具备 Java Web 应用的基本知识、熟悉 Spring Framework 的应用。
系统要求运行本教程中的示例,需要下列工具:∙JDK 1.6.0+∙Spring Framework 2.5.4+ 及其依赖项∙Spring Web Flow 2.0.2∙Tomcat 6.0.0+ (为支持 EL , Tomcat 须 6.0 及以上版本)∙eclipse 3.2.2+Spring Web Flow 2.0 新特性Spring Web Flow 是 Spring 的一个子项目,其最主要的目的是解决跨越多个请求的、用户与服务器之间的、有状态交互问题。
最新版本为 2.0 ,相比于 1.x 版的 Spring Web Flow ,有以下几个值得注意的新特性。
∙与 Spring MVC 深度整合Spring Web Flow 1.x 是个自成体系的框架,可与 Spring Web MVC 、Struts 、 JSF 等 Web 框架整合。
最新的 Spring Web Flow 2.0 则明确声明是基于 Spring Web MVC 的一个扩展。
∙提供了处理 Ajax 事件的能力Ajax 事件的处理与 Web Flow 事件的处理相一致,在处理完成后, flow 即可刷新客户端相关界面代码。
∙与 JSF 整合通过将 JSF 层层包装,最终可在 Spring Framework 和 Spring Web Flow 中使用 JSF 的各种组件。
SpringAop实例@Aspect、@Before、@AfterReturning@Ar。。。

SpringAop实例@Aspect、@Before、@AfterReturning@Ar。
⽤过spring框架进⾏开发的⼈,多多少少会使⽤过它的AOP功能,都知道有@Before、@Around和@After等advice。
最近,为了实现项⽬中的输出⽇志和权限控制这两个需求,我也使⽤到了AOP功能。
我使⽤到了@Before、@Around这两个advice。
但在,使⽤过程中,却对它们的执⾏顺序并不清楚。
为了弄清楚在不同情况下,这些advice到底是以怎么样的⼀个顺序进⾏执⾏的,我作了个测试,在此将其记录下来,以供以后查看。
前提对于AOP相关类(aspect、pointcut等)的概念,本⽂不作说明。
对于如何让spring框架扫描到AOP,本⽂也不作说明。
情况⼀: ⼀个⽅法只被⼀个Aspect类拦截当⼀个⽅法只被⼀个Aspect拦截时,这个Aspect中的不同advice是按照怎样的顺序进⾏执⾏的呢?请看:添加 PointCut类该pointcut⽤来拦截test包下的所有类中的所有⽅法。
package test;import ng.annotation.Pointcut;public class PointCuts {@Pointcut(value = "within(test.*)")public void aopDemo() {}}package test; import ng.annotation.Pointcut; public class PointCuts { @Pointcut(value= "within(test.*)") public void aopDemo() { } }添加Aspect类该类中的advice将会⽤到上⾯的pointcut,使⽤⽅法请看各个advice的value属性。
package test;import ng.JoinPoint;import ng.ProceedingJoinPoint;import ng.annotation.*;import ponent;@Component@Aspectpublic class Aspect1 {@Before(value = "test.PointCuts.aopDemo()")public void before(JoinPoint joinPoint) {System.out.println("[Aspect1] before advise");}@Around(value = "test.PointCuts.aopDemo()")public void around(ProceedingJoinPoint pjp) throws Throwable{System.out.println("[Aspect1] around advise 1");pjp.proceed();System.out.println("[Aspect1] around advise2");}@AfterReturning(value = "test.PointCuts.aopDemo()")public void afterReturning(JoinPoint joinPoint) {System.out.println("[Aspect1] afterReturning advise");}@AfterThrowing(value = "test.PointCuts.aopDemo()")public void afterThrowing(JoinPoint joinPoint) {System.out.println("[Aspect1] afterThrowing advise");}@After(value = "test.PointCuts.aopDemo()")public void after(JoinPoint joinPoint) {System.out.println("[Aspect1] after advise");}}添加测试⽤Controller添加⼀个⽤于测试的controller,这个controller中只有⼀个⽅法,但是它会根据参数值的不同,会作出不同的处理:⼀种是正常返回⼀个对象,⼀种是抛出异常(因为我们要测试@AfterThrowing这个advice)package test;import test.exception.TestException;import org.springframework.http.HttpStatus;import org.springframework.web.bind.annotation.*;@RestController@RequestMapping(value = "/aop")public class AopTestController {@ResponseStatus(HttpStatus.OK)@RequestMapping(value = "/test", method = RequestMethod.GET)public Result test(@RequestParam boolean throwException) {// case 1if (throwException) {System.out.println("throw an exception");throw new TestException("mock a server exception");}// case 2System.out.println("test OK");return new Result() {{this.setId(111);this.setName("mock a Result");}};}public static class Result {private int id;private String name;public int getId() {return id;}public void setId(int id) {this.id = id;}public String getName() {return name;}public void setName(String name) { = name;}}}测试正常情况在浏览器直接输⼊以下的URL,回车:http://192.168.142.8:7070/aoptest/v1/aop/test?throwException=false我们会看到输出的结果是:[Aspect1] around advise 1[Aspect1] before advisetest OK[Aspect1] around advise2[Aspect1] after advise[Aspect1] afterReturning advise测试异常情况在浏览器中直接输⼊以下的URL,回车:http://192.168.142.8:7070/aoptest/v1/aop/test?throwException=true我们会看到输出的结果是:1.[Aspect1] around advise 12.[Aspect1] before advise3.throw an exception4.[Aspect1] after advise5.[Aspect1] afterThrowing advise结论在⼀个⽅法只被⼀个aspect类拦截时,aspect类内部的 advice 将按照以下的顺序进⾏执⾏:正常情况:情况⼆: 同⼀个⽅法被多个Aspect类拦截此处举例为被两个aspect类拦截。
快速入门使用SpringBoot进行Java开发

快速入门使用SpringBoot进行Java开发第一章:引言SpringBoot是一个开源的Java开发框架,旨在简化Java应用程序的开发过程。
它基于Spring框架构建,并提供了很多便利的功能和工具,使Java开发变得更加高效和快速。
本章将介绍SpringBoot的背景和特点,并帮助读者建立对SpringBoot的初步认识。
第二章:环境准备在开始使用SpringBoot之前,首先需要准备好相应的开发环境。
本章将介绍如何安装Java开发工具包(JDK)和集成开发环境(IDE),以及如何配置和测试环境,确保开发环境的正常运行。
第三章:快速入门本章将带领读者通过一个简单的示例来快速入门使用SpringBoot进行Java开发。
首先,我们将创建一个空白的SpringBoot项目,并添加必要的依赖。
然后,我们将编写一个简单的控制器类,并配置相应的路由映射。
最后,我们将运行和测试我们的应用程序,确保一切正常。
第四章:Web开发SpringBoot提供了强大且简单易用的Web开发功能,可以轻松构建RESTful API和Web应用程序。
本章将介绍如何使用SpringBoot开发Web应用程序,并演示常见的Web开发技术和实践,如URL映射、HTTP请求处理、数据绑定、表单处理等。
第五章:数据库操作大多数Java应用程序都需要与数据库进行交互,进行数据的读取、写入和修改。
SpringBoot提供了多种数据库访问方式,并且对常见的数据库操作进行了封装和简化。
本章将介绍如何使用SpringBoot进行数据库操作,并演示常用的数据库访问技术,如JDBC、JPA和MyBatis。
第六章:缓存管理在高并发的应用场景下,为了提高系统的性能和响应速度,使用缓存是一个常见且有效的方式。
SpringBoot提供了丰富的缓存管理功能,包括内存缓存、分布式缓存等。
本章将介绍如何使用SpringBoot进行缓存管理,并演示基于Redis的缓存实践。
spring调用方法(接口和多个实现类的情况)

spring调用方法(接口和多个实现类的情况)在Spring框架中,我们可以使用依赖注入(Dependency Injection)的方式来调用方法。
依赖注入是指由框架负责创建对象并管理对象之间的依赖关系,以达到松耦合的目的,使得代码更加可维护和可测试。
在接口和多个实现类的情况下,Spring提供了多种方式来调用具体的方法。
```javapublic interface MyInterfacevoid myMethod(;public class MyImplementationA implements MyInterfacepublic void myMethoSystem.out.println("MyImplementationA");}public class MyImplementationB implements MyInterfacepublic void myMethoSystem.out.println("MyImplementationB");}public class MyClassprivate MyInterface myInterface;public void doSomethinmyInterface.myMethod(;}``````javapublic class MyClassprivate MyInterface myInterface;public void doSomethinmyInterface.myMethod(;}``````javapublic class MyImplementationA implements MyInterface public void myMethoSystem.out.println("MyImplementationA");}public class MyImplementationB implements MyInterface public void myMethoSystem.out.println("MyImplementationB");}```4.使用XML配置文件除了使用注解方式,还可以使用XML配置文件的方式来调用方法。
SpringFramework5.0入门教程
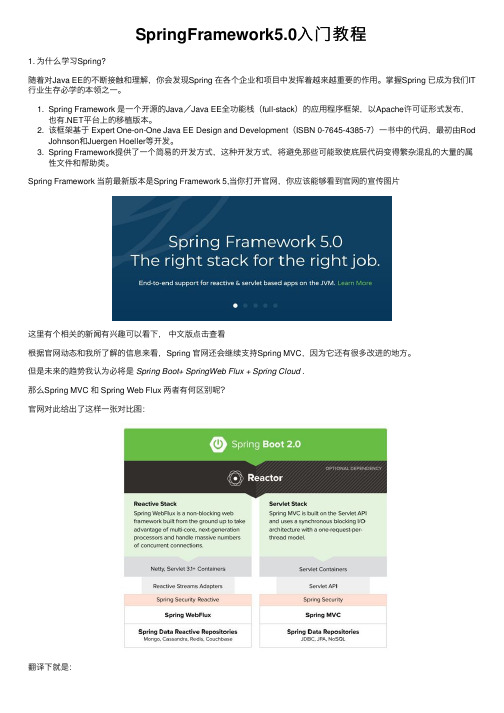
SpringFramework5.0⼊门教程1. 为什么学习Spring?随着对Java EE的不断接触和理解,你会发现Spring 在各个企业和项⽬中发挥着越来越重要的作⽤。
掌握Spring 已成为我们IT ⾏业⽣存必学的本领之⼀。
1. Spring Framework 是⼀个开源的Java/Java EE全功能栈(full-stack)的应⽤程序框架,以Apache许可证形式发布,也有.NET平台上的移植版本。
2. 该框架基于 Expert One-on-One Java EE Design and Development(ISBN 0-7645-4385-7)⼀书中的代码,最初由RodJohnson和Juergen Hoeller等开发。
3. Spring Framework提供了⼀个简易的开发⽅式,这种开发⽅式,将避免那些可能致使底层代码变得繁杂混乱的⼤量的属性⽂件和帮助类。
Spring Framework 当前最新版本是Spring Framework 5,当你打开官⽹,你应该能够看到官⽹的宣传图⽚这⾥有个相关的新闻有兴趣可以看下,中⽂版点击查看根据官⽹动态和我所了解的信息来看,Spring 官⽹还会继续⽀持Spring MVC,因为它还有很多改进的地⽅。
但是未来的趋势我认为必将是Spring Boot+ SpringWeb Flux + Spring Cloud .那么Spring MVC 和 Spring Web Flux 两者有何区别呢?官⽹对此给出了这样⼀张对⽐图:翻译下就是:1. Spring MVC基于servlet API构建,并使⽤⼀个同步阻塞I / O体系结构和⼀个单线程请求线程模型的Web 框架2. Spring WebFlux是⼀个⾮阻塞的Web框架,从该组建⽴起,利⽤多核,下⼀代处理器和⼤量并发连接。
总结:1. Spring MVC 是基于Servlet API 构建的同步阻塞式I/O 的Web 框架。
Spring切入点表达式常用写法

Spring切⼊点表达式常⽤写法Spring切⼊点表达式常⽤写法⾃从使⽤AspectJ风格切⾯配置,使得Spring的切⾯配置⼤⼤简化,但是AspectJ是另外⼀个开源项⽬,其规则表达式的语法也稍稍有些怪异。
下⾯给出⼀些常见⽰例的写法:⽐如,下⾯是⼀个对Service包上所有⽅法的切⾯配置<aop:config><aop:pointcut id="serviceOperation"expression="execution(* *..service*..*(..))"/><aop:advisor pointcut-ref="serviceOperation"advice-ref="txAdvice"/></aop:config>表达式所处位置如上pointcut的位置。
配置这个为了更好控制切⾯上的事务,下⾯是⼀个事物配置的简单例⼦:<tx:advice id="txAdvice"transaction-manager="transactionManager"><tx:attributes><tx:method name="delete*"rollback-for="Exception"/><tx:method name="save*"rollback-for="Exception"/><tx:method name="update*"rollback-for="Exception"/><tx:method name="*"read-only="true"rollback-for="Exception"/></tx:attributes></tx:advice>通过切⾯、通知的配置,就为所有的delete/save/update开头的⽅法添加上了⼀致性事务,对其他⽅法添加上了只读事务。
Springspel表达式使用方法示例

Springspel表达式使⽤⽅法⽰例spring in action第三版读书笔记spring3.0引⼊了spring expression language(spel)语⾔,通过spel我们可以实现1.通过bean的id对bean进⾏引⽤2.调⽤⽅法以及引⽤对象中的属性3.计算表达式的值4.正则表达式的匹配5.集合的操作spel最终的⽬标是得到表达式计算之后的值,这些表达式可能是列举的⼀些值,引⽤对象的某些属性,或者是类中的某些常量,复杂的spel表达式通常都是由⼀些简单的元素构成的。
最简单的仅仅是得到⼀些给出元素的值,例如:<property name="count" value="the value is #{5}"/>。
这种情况貌似很傻,根本就不需要⽤到spel,但是复杂的表达式都是由简单的构成的对其他bean的引⽤通过spel我们也可以对context中其他的bean进⾏引⽤<property name="instrument" value="#{saxophone}"/>等同于<property name="instrument" ref="saxophone"/>引⽤另外⼀个id为saxophone的bean作为instrument的值对其他bean中某个属性的引⽤<bean id="carl" class="com.springinaction.Instrumentalist"><property name="song" value="#{kenny.song}"/></bean>取id为kenny的bean的song字段的作为song的value对其他bean中某个⽅法的引⽤<property name="song" value="#{songSelector.selectSong().toUpperCase()}"/>调⽤id为songSelector的bean的selectSong()⽅法,使⽤其返回值作为song的值,这也带来⼀个问如果selectSong()⽅法返回⼀个null,那么会抛出⼀个空指针异常<property name="song" value="#{songSelector.selectSong()?.toUpperCase()}"/>,表达式(?.)可以确保在selectSong()返回不为空的情况下调⽤toUpperCase()⽅法,如果返回空那么不继续调⽤后⾯的⽅法对类进⾏引⽤如果某个类是外部类,⽽不是spring中定义的bean,那么怎么进⾏引⽤呢?使⽤表达式T(),例如:<property name="randomNumber" value="#{T(ng.Math).random()}"/>spel计算表达式的值spel表达式⽀持各种各样的运算符,我们可以可以运⽤这些运算符来计算表达式的值使⽤spel从集合中筛选元素:使⽤spring的util namespace中的元素<util:list>定义⼀个集合<util:list id="cities"><bean class="com.habuma.spel.cities.City"p:name="Chicago" p:state="IL" p:population="2853114"/><bean class="com.habuma.spel.cities.City"p:name="Atlanta" p:state="GA" p:population="537958"/><bean class="com.habuma.spel.cities.City"p:name="Dallas" p:state="TX" p:population="1279910"/><bean class="com.habuma.spel.cities.City"p:name="Houston" p:state="TX" p:population="2242193"/></util:list>使⽤spel对集合进⾏筛选<property name="chosenCity" value="#{cities[2]}"/>,[]操作符也可以对Map进⾏筛选,假设citis是⼀个Map类型<property name="chosenCity" value="#{cities["keyName"]}"/>[]对Properties类型进⾏操作<util:properties id="settings"location="classpath:settings.properties"/>使⽤<util:properties>标签读取⼀个properties⽂件<property name="accessToken" value="#{settings['twitter.accessToken']}"/>基于某个属性对集合中的元素进⾏过滤<property name="bigCitis" value="#{cities.?[population gt 10000]}"/>选中⼈⼝⼤⼀10000的cities中的元素作为bigCitis的值,同操作符(.?[])类似,操作符(.^[]选取满⾜要求的第⼀个元素, .$[]选取满⾜要求的最后⼀个)选中已有集合中元素的某⼀个或⼏个属性作为新的集合<property name="cityNames" value="#{cities.![name + ", " + state]}"/>总结以上就是本⽂关于Spring spel表达式使⽤⽅法⽰例的全部内容,希望对⼤家有所帮助。
Springboot获取ymlproperties文件中的值并在工具类和普通类中使用简单示例

Springboot获取ymlproperties⽂件中的值并在⼯具类和普通类中使⽤简单⽰例嗯我遇到的暂时就这么多情况,⾃定义properties⽂件名,静态⼯具类中使⽤,和⾃定义properties⽂件位置1. self-config.propreties这⾥是配置⽂件config.taskUrl=http://localhost:1314/task/config.filePath=C:/dev/terminal/files/2. SelfConfig.propreties接收配置⽂件,另外⽹传的获取配置⽂件⼯具类⼀般不建议使⽤,如果在配置⽂件中修改属性名很难在使⽤的地⽅进⾏同步修改package com.self.config;import lombok.Data;import org.springframework.boot.context.properties.ConfigurationProperties;import org.springframework.context.annotation.PropertySource;import ponent;/*** @author Xiaoyan* @date 2019/10/10 17:14*/@Component@ConfigurationProperties(prefix = "config")// ⾃定义位置&⽂件名@PropertySource("classpath:/self-config.properties")@Datapublic class SelfConfig {private String taskUrl;private String filePath;}3. 正常使⽤:不⽤详细介绍了吧@Autowiredprivate SelfConfig config;4. ⼯具类中使⽤:package com.self.util;import com.self.config.SelfSimpleFieldConfig;import org.springframework.beans.factory.annotation.Autowired;import ponent;/*** @author Xiaoyan* @date 2019/9/23 18:47*/@Componentpublic class FileUtil {private static SelfSimpleFieldConfig config;@Autowiredpublic void setConfig(SelfSimpleFieldConfig config) {FileUtil.config = config;}public static void printConfig() {System.out.println("config.toString() = " + config.toString());}}。
- 1、下载文档前请自行甄别文档内容的完整性,平台不提供额外的编辑、内容补充、找答案等附加服务。
- 2、"仅部分预览"的文档,不可在线预览部分如存在完整性等问题,可反馈申请退款(可完整预览的文档不适用该条件!)。
- 3、如文档侵犯您的权益,请联系客服反馈,我们会尽快为您处理(人工客服工作时间:9:00-18:30)。
SPRING使用入门示例
在Java世界有一件事情需要习以为常,就是经常会跑出一堆缩写、概念出来,什么Spring、Struts、Hibernate等等等等,这种情况谈不上好,你得花时间熟悉;也不能说是缺点,毕竟它带来新鲜跟乐趣。
最近稍微接触了一些Spring的皮毛,写了个例子,希望对初初初学者有用,高手指正。
1.Spring是什么
网上对Spring以及使用Spring的好处的解释铺天盖地,常常是各个网站之间互相拷贝,而且还引入了一堆的缩写,什么IoC、AOP……
我觉得对跟我一样的初学者而言,可以这么理解:Spring是基于反射机制写的一些包,有了它以后你可以将类的实例化写到一个配置文件里,由相应的Spring包负责实例化。
假设你有一个类A,以前你实例化时要写A a = new A(),现在不用了,你只要写一个xml文件,并按Spring指定的格式配置好,它就能通过反射机制将A的实例返回给你。
至于使用Spring的好处,我会在下面的实例中提到。
2. 下载Spring
/download,目前最新的版本是3.0.2。
进入下载页面可以看到:spring-framework-3.0.3.RELEASE-dependencies.zip(sha1)155.7 MB
spring-framework-3.0.3.RELEASE-with-docs.zip(sha1)45.0 MB
spring-framework-3.0.3.RELEASE.zip(sha1)21.4 MB
我第一次下载的是with-docs.zip,觉得解压后看了一下,Spring自身的jar应该是都有了,不过在后面的程序编译时出现:
Exception in thread "main" ng.NoClassDefFoundError:
org/apache/commons/logging/LogFactory
没有找到相关的jar包,后来尝试下载dependencies.zip并在里面找到了
mons.logging-1.1.1.jar包。
总而言之,我也不知道它们这些release包是怎么组织起来的,汗。
3. 编写示例
示例包含一个接口IProgrammingLanguage,用于表示编程语言,两个类JavaLanguage 跟PerlLanguage实现该接口用于表示特定的编程语言Java跟Perl。
另外有一个Developer类,用于表示IT开发者。
最后,是程序入口所在的Main类。
3.1.接口IProgrammingLanguage.java
package example;
public interface IProgrammingLanguage {
public String whoAmI();
}
3.3.JavaLanguage.java
代码
package example;
public class JavaLanguage implements IProgrammingLanguage {
@Override
public String whoAmI() {
// TODO Auto-generated method stub
return "Java";
}
}
3.3.PerlLanguage.java
代码
package example;
public class PerlLanguage implements IProgrammingLanguage {
@Override
public String whoAmI() {
// TODO Auto-generated method stub
return "Perl";
}
}
3.4.Developer.java
(这个类用于描述一个开发人员,它包含一个IProgrammingLanguage类型的成员,用于表示该开发人员所使用的编程语言。
在Eclipse中选中该成员,右键—Source—Generate Getters and Setters…则可以自动生成相应的get、set方法,一开始我并没有去生成这些,但在运行时出错,提示缺少get、set方法。
)
代码
package example;
public class Developer {
public IProgrammingLanguage language;
/**
* @return the language
*/
public IProgrammingLanguage getLanguage() {
return language;
}
/**
* @param language the language to set
*/
public void setLanguage(IProgrammingLanguage language) { nguage = language;
}
public String getCurrentUsingLanguage() {
return language.whoAmI();
}
}
3.5.添加引用
org.springframework.core-3.0.2.RELEASE.jar
org.springframework.beans-3.0.2.RELEASE.jar
mons.logging-1.1.1.jar
3.6.hellospringworld.xml
代码
<?xml version="1.0" encoding="UTF-8"?>
<!DOCTYPE beans PUBLIC "-//SPRING/DTD BEAN/EN" "http://www.springfram /dtd/spring-beans.dtd">
<beans>
<bean id="LanguageBean" class="example.PerlLanguage">
</bean>
<bean id="DeveloperBean" class="example.Developer">
<property name="language" ref="LanguageBean"/>
</bean>
</beans>
3.7.Main.java
代码
package example;
import org.springframework.beans.factory.BeanFactory;
import org.springframework.beans.factory.xml.XmlBeanFactory;
import org.springframework.core.io.FileSystemResource;
import org.springframework.core.io.Resource;
public class Main {
public static void main(String[] args) {
// TODO Auto-generated method stub
Resource r = new FileSystemResource("hellospringworld.xml"); BeanFactory f = new XmlBeanFactory(r);
Developer d = (Developer) f.getBean("DeveloperBean");
String s = d.getCurrentUsingLanguage();
System.out.println("The developer is currently using: "+s); }
}
运行此程序可以看到输出是:
The developer is currently using: Perl
现在,假设有一天这个Developer不使用Perl而改用Java了,我们需要做什么?我们并不需要改程序,只需要修改xml文件就行了。
<bean id="LanguageBean" class="example.PerlLanguage"></bean>
改成
<bean id="LanguageBean" class="example.JavaLanguage"></bean>
这就是我目前所理解的使用Spring的好处,即解耦,减少不同的类之间的耦合性。
当然,现在的Spring已经日渐复杂跟强大,其中很多特性我并没有使用过,上面所说都是些粗浅的理解,等待以后使用的过程中有更加深入的认识。
4.源码下载
hellospringworld.zip。
