徕卡V-LUX 2照相机(中文)说明书 - 1-50
Leica IP S 产品说明书
我们没有义务根据最新技术发展定期和持续不断地更新当前使用说明书,或为客户提供本使用 说明书的更多副本、更新等。
在按照国家法律制度适用于每宗个案允许的范围内,我们对本使用说明书中所含的错误的陈述 图画、技术图示不承担法律责任。需要特别指出的是,对于因遵从本使用说明书的陈述或其他 信息所造成的任何直接或间接经济损失或损害,我们概不承担责任。
Leica IP S
3
目录
1. 重要信息 ............................................................................................................................................... 6
4. 仪器安装 .............................................................................................................................................24
2.1 安全说明 ...............................................................................................................................................................................11 2.2 警告 .........................................................................................................................................................................................12
LEICA V-LUX 20 使用说明
5
使用前
先请阅读
■首先进行试验拍摄!
■某些照片可能不能播放
首先确认是否能成功地拍摄照片和录 • 在计算机上编辑的照片
制声音(动态影像/带有声频的图像)。 • 在另外的相机上拍摄或编辑的照片
■本公司对因拍摄失败或丢失拍摄内容 或因直接以及间接损坏造成的任何损
(在此相机上拍摄或编辑的照片也 可能不能在其他相机上播放)
高级(查看)
按列表查看 (多张播放/日历播放)........... 106 观看动态图像/有声照片......... 107 不同的回放方法[回放模式]..... 108
[幻灯片放映]............ 109 [GPS区域播放]........... 111 [旅行播放].............. 112 [类别回放].............. 114 [收藏夹回放]............ 115 使用[回放]菜单.............. 116 [日历]/ [编辑标题]... 116 [地名编辑].............. 117 [文字印记].............. 118 [调整大小].............. 120 [剪裁]/ [倾斜补正]... 121 [高宽比转换]/ [旋转显示].............. 122 [收藏夹]................ 123 [打印设定].............. 124 [保护].................. 125 [个人识别编辑].......... 126 [复制].................. 127
LEICA V-LUX 20
使用说明
快速入门指南
相机出厂时电池没有充 电。使用前请给电池充电 和设定时钟。 不使用卡(另售)时,可 在内置内存上记录照片或 播放内存上的照片(→14)。
徕卡S2中文说明书

imported or sold in the People’s Republic of China
徠卡 S2
订货编号 10 801
徠卡 S2-P
订货编号 10 802
部件名称
Part Name
有毒有害物质和元素
Toxic and Hazardous Substances and Elements
铅 汞 镉 六价铬 多溴联苯 多溴二苯醚
㉂動及固定設定項目 ...................................................29 直接設定色溫 ...............................................................29 透過測量手動設定 .......................................................29 ISO感光度 ........................................................................30 影像㊕性(對比、銳利度、色彩飽和度) ........................31 影像色彩空間..................................................................31 儲存相片資料/記憶卡管理 ................................................31
莱卡使用说明

Leica FlexLine plus快速操作指南版本 2.0中文2 FlexLine plus, 仪器重要信息1仪器重要信息请在使用仪器或附件前,先阅读USB存储器中的用户手册,并按照手册说明进行操作。
妥善保管,供日后参考!使用范围•测量水平角和垂直角。
•测量距离。
•可见的方向和竖轴照准。
FlexLine plus , 仪器重要信息3激光产品仪器包含以下激光产品:*可选激光产品•EDM 和激光对点器的分类符合IEC 60825-1(2007-03)。
•EGL 分类符合IEC 62471 (2006-07).ƽ小心从安全角度看,3R 预防:1)避免眼睛直视激光束。
2)不要用激光束照射他人。
激光产品激光类别EDM (电子距离测量)模块•使用棱镜测量1类•无棱镜测量3R 类EGL (电子导向光)*无害激光对中器2类4 FlexLine plus, 仪器重要信息ƽ小心从安全角度,2类激光产品对眼睛是有危害。
预防:1)避免凝视激光束。
2)避免将激光束打向他人。
激光孔径位置a)LED激光红色(EGL)b)LED激光黄色(EGL)c)激光光束(EDM)d)激光光束(激光对点)e)激光光束出口(激光对点)符合国家规定符合国家规定在此,Leica Geosystems AG,申明仪器符合欧洲执行标准中所要求的要点及其他相关的规定。
对规范遵守的声明可在网站/ce中查询。
•FCC 第15部分 (仅适用于美国)•在此,Leica Geosystems AG,申明产品符合1999/5/EC 执行标准中的要点及其它相关规定。
对规范遵守的声明可在网站 /ce中查询。
依照欧洲执行标准 1999/5/EC (R&TTE) 1 级设备可以无限制地在任何欧洲经济区成员国的市场中销售及维修。
15部分或欧洲执行标准 1999/5/EC 没有包含某些国家的规定,则在这些国家使用时应首先取得批准。
FlexLine plus, 仪器重要信息56 FlexLine plus, 仪器构成2仪器构成仪器部件(1/2)a)粗瞄器b)装有螺钉的可分离式提把c)集成电子测距模块(EDM)的物镜 EDM激光束发射口d)竖直微动螺旋e)开关键f)触发键g)水平微动螺旋h)显示屏幕i)第二面键盘*;与第一面键盘相同*对于TS02 plus可选仪器组件(2/2)j)望远镜调焦环k)目镜;调节十字丝l)电池盖m)RS232串口n)脚螺旋o)显示屏幕p)键盘FlexLine plus, 仪器构成78 FlexLine plus, 仪器构成仪器部件(1/2)a)USB存储器和USB电缆接口b)蓝牙天线c)粗瞄器d)装有螺钉的可分离式提把e)电子导向光(EGL)*f)集成电子测距模块(EDM)的物镜。
徕卡测距仪使用说明书12页word

徕卡测距仪使⽤说明书12页word徕卡测距仪使⽤说明书:⼀、使⽤前的准备(⼀)电池的装⼊/更换打开仪器尾部的固定挡板。
向前推卡钮,向下将底座取下。
按住红⾊的卡钮推开电池盒盖。
安装或更换电池。
关闭电池盒盖,安装底座和卡扣。
当电池的电压过低时,显⽰屏上将持续闪烁显⽰电池的标志{B,21}。
此时应及时更换电池。
1、按照极性正确装⼊电池。
2、使⽤碱性电池(建议不要使⽤充电电池)。
3、当长时间不使⽤仪器时,请取出电池,以避免电池的腐蚀。
更换电池后,设置和储存的值都保持不变。
(⼆)多功能底底座固定挡板可以在下⾯的测量情况下使⽤:1、从边缘测量,将固定挡板拉出,直到听到卡⼊的声⾳。
2、从⾓落测量,将固定挡板拉出,直到听到卡⼊的声⾳,轻轻将固定挡板向右推,此时固定挡板完全展开。
仪器⾃带的传感器将辨认出固定挡板的位置,并将⾃动设置测量其准点。
(三)内置的望远镜瞄准器在仪器的右部有⼀个内置的望远镜瞄准器。
此望远镜瞄准器为远距离测量起到辅助的作⽤。
通过瞄准器上的⼗字丝可以精确地观察到测量⽬标。
在30⽶以上的测量距离,激光点会显⽰在⼗字线的正中。
⽽在30⽶以下的测量距离,激光点不在⼗字线中间。
(四)⽓泡⼀体化的⽔泡使仪器更容易调平。
(五)键盘1、开/测量键2、第⼆级菜单功能3、加+键4、计时(延迟测量)键5、等于[=]键6、⾯积/体积键7、储存键8、测量基准边键9、清除/关键10、菜单键11、照明键12、间接测量(勾股定律)键13、减-键14、BLUETOOTH(六)显⽰屏1、关于错误测量的信息2、激光启动3、周长4、最⼤跟踪测量值5、最⼩跟踪测量值6、测量基准边7、调出储存值8、储存常数9、主显⽰10、单位,包括乘⽅⽴⽅(2/3)11、顶的⾯积12、墙⾯积13、3个额外显⽰(如:测量中间值)14、BLUETOOTH蓝⽛开/关15、第⼆级菜单功能开16、硬件故障17、间接测量-利⽤勾股定律18、间接测量-利⽤勾股定律-部分⾼度19、⾯积/体积20、带常数的测量21、电池充电量显⽰⼆、菜单功能(⼀)设置在菜单中可以改变设置,并将其长久保存,并在关机和更换电池后不改变。
LEICA C-LUX 使用说明说明书

LEICA C-LUX 使用说明在这些说明中,您可从以下页面找到所需信息。
有关如何使用本手册的详细说明,请参阅下一页。
拍摄模式图标拍摄模式在显示黑色图标的拍摄模式下,您可以选择并执行所示的菜单和功能。
■关于文本中的符号表示按[MENU/SET]按钮可以设置菜单。
表示按[Wi-Fi]按钮可进行Wi-Fi设置。
[AE|AF LOCK]、[DISP]、[ ]等表示所分别标示的按钮。
技巧使用提示和拍摄要点。
(→00)表示参考页。
•作:。
• 控制环、转盘和拨杆的操作如下所示。
■查找所需信息.....................................2 ■如何使用本手册 (3)■使用之前...........................................12 ■附件...................................................14使用之前■可选件...............................................14 ■主要部件的名称和功能 . (15)准备■系上手带...........................................17 ■给电池充电.......................................18插入电池 . (19)给电池充电 (20)■插入和取出卡 (24)■关于卡...............................................25对卡进行格式化(初始化).. (26)估计的拍摄容量(图像数量/拍摄时间) (26)■设置语言、时间和日期 (28)■功能目录...........................................10 ■握持相机 ...........................................30 ■拍摄时使用的按钮/控制环/转盘/拨杆 (31)切换取景器和显示屏 ....................31如何使用镜头的变焦功能 ............32拍摄图像 ........................................33拍摄动态影像 ................................33如何使用模式旋钮 ........................34控制环/后拨盘 ............................35光标按钮/[MENU/SET ]按钮 (选择/设置项目) ........................36[DISP ]按钮(切换显示信息) .. (36)■触摸屏(触摸操作) .........................39聚焦触摸位置的主体 (触摸AF 、触摸快门) ....................40匹配触摸位置的亮度 ([触摸AE ]) (41)基本操作■菜单控制...........................................42 ■快捷菜单...........................................44将快捷菜单项修改为您偏好 使用的菜单项 ................................45 ■将频繁使用的功能指定给按钮 (功能按钮) .......................................46拍摄期间使用功能按钮 ................47回放期间使用功能按钮 . (48)■改变指定给控制环/ 后拨盘的设置 (49)■输入文字 (50)拍摄模式■快照模式 (51)[快照模式]菜单 (53)设置色彩 (54)设置背景亮度(曝光)/模糊度(散焦控制功能) (55)■设置光圈值和快门速度后拍摄图像 (56)程序AE模式 (56)光圈优先AE模式 (57)快门优先AE模式 (58)手动曝光模式 (59)查看光圈值和快门速度的效果 (预览模式) (62)轻松设置光圈值/快门速度以获得合适的曝光(一键AE) (63)■拍摄全景图像(全景拍摄模式)...............................64■按场景拍摄图像(场景指南模式) (67)场景引导模式类型 (68)■使用不同的图像效果拍摄图像 (创意控制模式) (71)图像效果类型 (72)■创意视频模式 (77)拍摄慢速动态影像([高速摄影]) (78)在相机位置固定的情况下实现平移或变焦的拍摄效果[4K 实时裁剪] (79)■注册您自己的设置和拍摄(自定义模式) (81)注册您自己的设置([自定义设置存储]) (81)使用已注册自定义设置进行拍摄 (82)4K照片和驱动设置■使用4K照片功能拍摄并选择图像进行保存 (108)使用4K照片功能拍摄 (108)从4K连拍文件中选择图像并保存 (111)有关4K照片功能的注意事项 (116)■拍摄后调节聚焦位置([后对焦]/[焦点合成]) (119)使用[后对焦]拍摄 (119)选择聚焦点并保存图像([后对焦]) (121)通过合成多帧创建单张照片来决定要聚焦的主体([焦点合成]) (122)有关[后对焦]/[焦点合成]的说明 ..........................................123■选择驱动模式 .. (124)连拍功能 (125)用自拍定时器拍摄图像 (127)■拍摄图像时自动调整设置(括弧式曝光拍摄) (128)括弧式曝光 (129)光圈括弧式曝光 (130)聚焦括弧式曝光 (130)■每隔一段时间自动拍摄图像[定时拍摄] (131)■创作定格动画[定格动画] (134)焦距、亮度(曝光)和色调设置■使用自动聚焦拍摄图像 (83)设置半按快门钮时要执行的聚焦操作(AFS、AFF、AFC) (84)切换[AF 模式] (85)更改AF区域的位置和大小 (91)通过触摸板设置AF区域位置 (94)优化所触摸位置的聚焦和亮度 .....95■近拍图像 . (96)■使用手动聚焦拍摄图像 (97)■通过锁定聚焦和/或曝光来拍摄图像 (99)■用曝光补偿拍摄图像 (100)■设置ISO感光度 (101)■调整白平衡 (103)回放和编辑图像■查看图像 (156)■查看动态影像 (157)从动态影像抽取照片 (158)■切换回放方法 (159)放大并查看“回放变焦” (159)查看一列图像“多张播放” (159)通过拍摄日期“日历播放”查看图像 ......................................160■查看分组图像 .. (161)■删除图像 (163)稳定器、变焦和闪光灯■纠正手震 (137)■使用变焦 (139)变焦类型和使用 (139)通过触摸操作使用变焦(触摸变焦)..................................142■使用闪光灯拍摄图像 .. (143)更改闪光模式 (144)设置后帘同步 (147)调整闪光输出 (147)拍摄动态影像■拍摄动态影像/4K动态影像 (148)设置尺寸和帧率 (150)在拍摄动态影像过程中调整聚焦([连续AF])..................................151■录制动态影像时拍摄照片 (152)■拍摄视频快照 (153)Wi-Fi/Bluetooth■使用Wi-Fi®/Bluetooth®功能可以做些什么 (223)■Wi-Fi/Bluetooth功能 (224)■将相机连接到智能手机 (227)安装智能手机/平板电脑应用程序“Leica C-Lux” (227)将相机连接到支持BluetoothLow Energy的智能手机 (228)将相机连接到不支持Bluetooth Low Energy的智能手机 (230)■用智能手机控制 (235)用智能手机打开/关闭相机 (235)使用智能手机操作相机快门钮 (遥控拍摄) (236)回放或保存相机中存储的图像,或将其上传到社交媒体网站 (240)将拍摄的图像自动传送到智能手机 (241)在拍摄的图像上写入智能手机的定位信息 (243)将相机的时钟与智能手机同步 ...244■将图像发送到智能手机 . (245)■关于Wi-Fi连接 (249)通过无线接入点进行连接([通过网络]) (249)直接连接([直接]) (252)使用以前所用的相同设置快速连接([从历史记录中选择目标]/[从收藏夹中选择目标]) (253)■[Wi-Fi设置] (255)使用菜单功能■菜单列表 (164)[拍摄] (165)[动态影像] (180)[自定义]......................................182[设置] (196)[我的菜单] (206)[回放] (207)连接其他设备■享受4K动态影像 (256)存储4K动态影像 (257)■在电视机屏幕上观看 (258)拍摄时监看相机影像 (260)HDTV Link(HDMI)(HDAVI Control™)......................261■将拍摄的影像数据复制到计算机中 (262)复制照片和动态影像 (263)■将所拍摄的照片和动态影像存放在刻录机中 (265)■打印 (266)带日期和文字打印 (268)其他■显示屏/取景器显示内容列表 (269)■信息显示 (275)■问&答故障排除 ........................................277■使用警告和注意事项 .. (285)■Leica的服务地址 (293)拍摄拍摄模式 ..........................................34[预览] ..............................................62全景拍摄模式...................................64微距拍摄 ..........................................96括弧式曝光拍摄 .............................128[定时拍摄] ....................................131[定格动画] ....................................134[静音模式] ....................................176[多重曝光] ....................................1794K 照片[4K 照片] ........................................108[后对焦]拍摄 ...............................119聚焦(AF /MF )自动聚焦 ..........................................83AF 模式 ..............................................85调整AF 区域位置 ..............................91手动聚焦 ..........................................97AF /AE 锁定 ....................................99驱动驱动模式 ........................................124连拍功能 ........................................125[自拍定时器].................................127曝光[触摸AE ] ..........................................41[一键AE ] ..........................................63AF /AE 锁定 ....................................99曝光补偿 ........................................100ISO 感光度 .......................................101括弧式曝光 ....................................129[测光模式] (172)拍摄画质和色调白平衡 ............................................103[图像尺寸] ....................................166[质量] ............................................167[照片格调] ....................................168[滤镜设置] ....................................170[色彩空间] ....................................171[突出显示/阴影] ..........................173[智能动态范围] .............................174[智能分辨率].................................174[慢速快门降噪] .............................175[绕射补偿] ....................................176[HDR ] .............................................178闪光灯[闪光模式] ....................................144后帘同步 ........................................147[闪光调整] ....................................147监看拍摄时监看相机影像 (260)动态影像创意视频模式...................................77[高速摄影] ......................................78[4K 实时裁剪] ................................79[录制质量] ....................................150录制动态影像时拍摄照片 .............152[视频快照] (153)动态影像音频[风噪消减] ....................................181画面设置[单色Live View 模式] .....................188[中心标记] ....................................189[斑纹样式] (190)回放图像回放 ........................................156动态影像回放.................................157回放变焦 ........................................159多张播放 ........................................159删除 ................................................163[自动回放] ....................................187[幻灯片放映].................................208[旋转]/[旋转显示] ...........220、222编辑[后对焦] ........................................121[焦点合成] (122)回放[编辑标题] (211)[RAW 处理] .....................................212[4K 照片批量保存] ........................214[光线组合] ....................................215[序列合成] ....................................216[清除修饰] ....................................217[文字印记] ....................................218[调整大小] ....................................219[剪裁] ............................................220图像设置[保护] ............................................210[等级] .. (210)智能手机/平板电脑应用程序“Leica C-Lux ”Leica C-Lux 应用程序 .....................227遥控启动 ........................................235遥控拍摄 ........................................236自动传送 . (241)Wi-Fi /Bluetooth计算机将拍摄的影像数据复制到 计算机中 ........................................262电视机在电视上回放图像 .........................258[HDTV Link ] .. (261)连接其他设备刻录机复制 ................................................265打印机PictBridge (266)基本设置[格式化] ..........................................26[时钟设置] ......................................28屈光度调节 ......................................31快捷菜单 ..........................................44[操作音] . (198)设置/自定义[经济] (199)[重设](初始化) ...........................205自定义功能按钮 ..........................................46自定义模式 ......................................81[自定义]菜单 . (182)使用之前■关于本相机的使用不要剧烈震动或撞击本相机,或对本相机施加压力。
LEICA SL2相机说明书

LEICA SL2简要说明可从下列链接下载详细的使用说明书: https:///Service-Support/Support/Downloads 在以下链接注册可免费预订印刷成册的详细使用说明书:各部件名称1快门按钮轻击:–自动对焦–激活曝光测量及曝光控制完全按下:–触发快门–开始和结束视频拍摄在待机模式下:–再次激活相机2前设定转轮在菜单中:–浏览菜单页在拍摄模式下:–取决于曝光操作模式,可配置(参见表格“转轮分配”)在播放模式下:–放大/缩小照片3FN键**在拍摄模式下:–照片:ISO–视频:ISO (Cine: Exposure Index) 4FN键**在拍摄模式下:–照片/视频模式切换在播放模式下:–标记/定级照片5顶部面板显示–设置的操作模式–照片信息–相机信息6配件靴座推荐的闪光灯:Leica SF 40、SF 64和SF 587麦克风可实现立体声录音8扬声器9FN键**在拍摄模式下:–照片:放大–视频:麦克风增益10FN键**在拍摄模式下:–自动对焦测量方法设置11镜头解锁按钮17取景器目镜18眼传感器可设置:仅显示屏/仅电子取景器/自动切换202122在拍摄模式下:–取决于曝光操作模式,可配置2324252627显示屏3.2” TFT LCD,1080 x 720像素,约2 332 800像点(Dots),触摸屏30多功能手柄的触头0105060807 27262829091420152116221723182419251011121303020401焦距02所用的存储卡03剩余存储容量04电池电量05菜单区:照片06菜单区:视频07光平衡08曝光补偿值刻度09曝光作业模式10光圈值11快门速度12ISO感光度13曝光补偿值14拍摄模式(连拍)15自动对焦操作模式16自动对焦测距方法17自动对焦设置18曝光测光方法19白平衡操作模式20文件格式/压缩率/分辨率21格式化存储卡22用户配置文件23锁定/解锁设定转轮24Leica FOTOS 25主菜单26麦克风录音电平27拍摄时长28拍摄音量水平29耳机音量手势控制BFN键4Leica FOTOS App体验新的Leica FOTOS App。
LEICA_X2 简体中文说明书

A. 电 池 LEICA BP-DC8 (订 单 号 18 706)
B. 电 池 盒 (订 单 号 423-089.003-012)
C. 电 池 充 电 器 BC-DC8, 含 可 转 换 插 头 (订 单 号 423-089.803-008)
D. U SB 线 (订 单 号 423-089.003-022)
1.35 1.36 1.37
LEICA X2
使用说明书
English instructions on pages 82 - 164
前言
提供配件
亲爱的顾客:
第 一 次 使 用 LEICA X2之 前 , 先 检 查 所 提 供 的 配 件 是 否 完 整 。
希 望 您 的 全 新 LEICA X2能 为 您 带 来 无 比 的 乐 趣 与 成 就 , 高 性 能 LEICA DC ELMARIT 1: 2.8/24 mm ASPH. 镜 头 将 为 您 提 供 绝 佳 的 照片品质。 LEICA X2 的 全 自 动 程 设 曝 光 控 制 模 式 和 自 动 闪 光 功 能 , 能 让 您轻松享受拍照乐趣。您也可以随时使用手动设定,自行完 成构图。 如果在曝光难度非常高的条件下拍照,您可以选择各种不同 的特殊功能改善照片品质。 请 仔 细 阅 读 本 手 册 , 充 分 掌 握 LEICA X2 的 所 有 功 能 。
最重要的设定 / 控制 开 启 / 关 闭 相 机 ....................................24 设 定 录 影 及 检 视 模 式 ...........................25 快 门 释 放 钮 .............................................27 选 单 控 制 .................................................28
莱卡CL快速入门指南说明书

LEICA CLQUICK START GUIDEThe comprehensive instructions are available at:https:///Service-Support/Support/DownloadsIf you wish to receive a printed copy of the comprehensive instructions, please register at:2322247Accessory shoeRecommended fl ash units:Leica system fl ash units SF 40, SF 64, and SF 588Main switchTurning the camera on and off9Shutter buttonPressing to the fi rst pressure point acti-vates:–autofocusing–exposure metering and controlPressing all the way down: takes a picture/ starts/stops video recordingIn standby mode:The camera is reactivated 10/13Setting wheels–in the menu:10 scrolls within the menu lists–in review mode:10 enlarges/reduces the recording and13 browses–in recording mode:see tablecalls up the right setting wheel’ssecondary function or the FN menu andcalls up the exposure mode1617FN ButtonDirect access to menu funktions–in recording mode:Direct access to assignable menu itemlist–in recording and playback modes:Direct delete function18PLAY ButtonSwitching between picture and review mode 19Viewfi nderResolution: 1024 x 768 pixels (2.36 MP)Magnifi cation 0.74x20Eye sensorAutomatic switching between viewfi nderand monitor21Dioptre setting wheelSetting range from -4 to +4 dioptr.22232425Monitor3“ TFT LCD, 1.04 MP, touch controlAll settings are indicated in the monitor 26Door over battery compartment andFAVORITES menu / FN Button / right setting wheel buttonFACTORY SETTING Main MenuFN Button menu listFAVORITES Menu Right setting wheel button menu list FVCan be assigned to the FAVORITES menu list FNCan be assigned to the FN Button menu list RWCan be assigned to the right setting wheel button menu list FVFV FVFV FV FVFV FN RW FV FN RW FV FN RW FV FN RW FV FN RW FV FN RW FV FN RW FV FN RW FV FN RW FV FN RW FV FN RW FV FN RW FV FN RW FV FN RW FV FN RW FV FN RW FV FN RW FV FN RW FVFNRWSAFETY NOTES• Always store small parts (e.g. the accessory shoe cover) as follows:–out of reach of children–in a location where they will not get lost and will not be stolen• Modern electronic components react sensitively to electrostatic discharge. As people can easily pick up charges of tens of thousands of volts by walking on synthetic carpets for example, a discharge can occur when you touch your camera, particularly if it is placed on a conductive surface. If only the camera housing is affected, this discharge is harmless to the electronics. However, despite built-in safety circuits, outer contacts such as those in the accessory shoe should not be touched if at all possible for safety reasons.• For any cleaning of the contacts, do not use an optical micro-fiber cloth (synthetic); use a cotton or linen cloth instead! Before touching the contacts, you can make sure you discharge any electrostatic charge by deliberately touching a heating or water pipe (conductive, grounded material). Dirt deposits and oxidation on the contacts can be avoided by storing your camera in a dry location with the lens cap and flash shoe and viewfinder cap on.• Use only the recommended accessories to prevent faults, short circuits or electric shock.• Do not attempt to remove parts of the housing (covers). Repairs must be done at authorized service centers only.• Do not use your camera in the immediate vicinity of devices with powerful magnetic, electrostatic or electromagnetic fields (e.g. induction ovens, microwave ovens, television sets or computer monitors, video game consoles, cell phones, radio equipment).• If you place the camera on or very close to a television set, or use it nearby mobile phones, image recording may be disturbed.• Strong magnetic fields, e.g. from speakers or large electric motors, can damage the stored image data.• If the camera malfunctions due to the effects of electromagnetic fields, turn it off, remove the battery, and then turn it on again. Do not use the camera in the immediate vicinity of radio transmitters or high-voltage power lines. Their magnetic fields can also interfere with recordings.• Protect the camera from contact with insect sprays and other aggressive chemicals. Petroleum spirit, thinner and alcohol may not be used for cleaning.• Certain chemicals and liquids can damage the camera body or the surface finish.• As rubber and plastics sometimes emit aggressive chemicals, they should not remain in contact with the camera for a long time.• Ensure that sand and dust cannot get into the camera, e.g. on the beach. This is the case especially when inserting and removing the memory card.• Ensure that water cannot get into the camera, e.g. when it is snowing or raining and on the beach. Moisture can cause malfunctions and even permanent damage to the camera and the memory card.• If salt water spray gets onto the camera, wet a soft cloth with tap water, wring it out thoroughly and wipe the camera with it. Then wipe down thoroughly with a dry cloth.• If condensation has formed on or in the camera, you should turn it off and leave it to stand at room temperature for around an hour. Once the camera temperature has adjusted to room temperature, the condensation will disappear by itself.• Use carrying straps only for their intended purpose as a carrying strap on a camera / on binoculars. Any other use carries the risk of injury and may possibly result in damage to the carrying strap and is therefore not permitted.• Carrying straps are usually made of strong material. Keep the carrying strap away from children. It is not a toy and potentially dangerous to children due to a risk of strangulation.• For the same reason, carrying straps should not be used for cameras/binoculars during sporting activities where there is a high risk of getting caught by the carrying strap (e.g. climbing in the moun-tains and comparable outdoor sports).Important:Use only the accessories specified and described in these instructions or by Leica Camera AG with the camera. If the camera is exposed to significant temperature fluctuations, condensation can form on the monitor. Wipe it off carefully with a soft dry cloth.• If the camera is very cold when turned on, the monitor image will initially be slightly darker than normal. As soon as the monitor warms up, it will reach its normal level of brightness.• Cosmic radiation (e.g. during flights) can cause pixel defects.The monitor is manufactured using a high-precision process. This ensures that of the total of around 1,040,000 pixels more than 99.995% work correctly and only 0.005% remain dark or are always bright. However, this is not a malfunction and it does not impair the reproduction of a recording. LEGAL INFORMATION• Please ensure that you observe copyright laws. The recording and publication of pre-recorded media such as tapes, CDs, or other published or broadcast material may contravene copyright laws.• This also applies to all of the software supplied.• With regard to videos created using this camera: This product is licensed under the AVC Patent Portfolio license for the personal use of a consumer or other uses in which the consumer does not receive remuneration to (i) encode video in compliance with the AVC standard (“AVC video”) and/or (ii) decode AVC video that was encoded by a consumer engaged in a personal activity and/or was obtained from a video provider licensed to provide AVC video. No license is granted or shall be implied for any other use. Any other use, including but not limited to providing AVC video in exchange for remuneration, may require a separate license agreement with MPEG LA, L.L.C. For more information please visit the MPEG LA, L.L.C. website at: • The SD logo is a registered trademark.• Other names, company and product names referred to in these instructions are trademarks or registered trademarks of the respective companies.Disposal of electrical and electronic equipment(Applies within the EU, and other European countries with segregated waste collection systems) This device contains electrical and/or electronic components and must therefore not be disposed of in general household waste! Instead, it should be disposed of at a recycling collection point provided by the local authority. This costs you nothing. If the device contains standard or rechargeable batteries, these must be removed first and also be disposed of in line with relevant regulations. Further information on the subject is available from your local administration, your local waste collection company, or in the store where you purchased this device.Declaration of Conformity (DoC)Hereby, “Leica Camera AG” declares that this product is in compliancewith the essential requirements and other relevant provisions of Direc-tive 2014/53/EU. Customers can download a copy of the original DoCto our RE products from our DoC server: In case of further questions, please contact:Leica Camera AG, Am Leitz-Park 5, 35578 Wetzlar, GermanyWireless Transmitter:Frequency range used: 2412 MHz to 2462 MHz (Central frequencyWLAN)Max. output power: 13dBM (EIRP)The CE identification of our products documentscompliance with the fundamental requirementsof the applicable EU directives.For United Arab Emirates only:TRAREGISTERED No:ER57270/17DEALER No:DA0112968/13For US and Canada only:A recyclable lithium ion/polymer battery powersthis camera. Please call 1-800-8-BATTERY forinformation on how to recycle this battery.This is a Class B product based on the standard of the Voluntary Control Council for Interference from Information Technology Equipment (VCCI). If this is used near a radio or television receiver in a domestic environment, it may cause radio interference. Install and use the equipment according to the instruction manual.FCC Note:This equipment has been tested and found to comply with the limits for a Class B digital device, pursuant to Part 15 of the FCC Rules. These limits are designed to provide reasonable protection against harmful interfer e nce in a residential installation. This equipment generates, uses, and can radiate radio frequency energy and, if not installed and used in accordance with the instructions, may cause harmful interference to radio communications. However, there is no guar a ntee that interference will not occur in a particular installation. If this equipment does cause harmful interference to radio or television reception, which can be determined by turning the equipment off and on, the user is encouraged to try to correct the interference by one or more of the following measures:• R eorient or relocate the receiving antenna.• I ncrease the separation between the equipment and receiver.• C onnect the equipment into an outlet on a circuit different from that to which the receiver is connected.• C onsult the dealer or an experienced radio/TV technician for help.FCC Caution:To assure continued compliance, follow the attached installation instructions and use only shielded inter f ace cables with ferrite core when connecting to com p ut e r or peripheral devices. Any changes or modifications not expressly approved by the party responsible for compliance could void the user’s authority to operate this equip-ment.Trade Name:LEICAType No. 7323Responsible party/Support contact:L eica Camera Inc.1 Pearl Count, Unit A, Allendale, New Jersey 07401Tel.: +1 201 995 0051/ Fax: +1 201 995 1684********************************This device complies with Part 15 of the FCC Rules. Operation is subject to the following two conditions: (1) This device may not cause harmful interference, and (2) this device must accept any interference received, including interference that may cause undesired operation.FOR HOME OR OFFICE USEContains FCC ID: VPYLBXN604This transmitter must not be co-located or operated in conjunction with any other antenna or transmitter. This equipment complies with FCC radiation exposure limits set forth for an uncontrolled environment and meets the FCC radio frequency (RF) Exposure Guidelines. This equipment has very low levels of RF energy that are deemed to comply without testing of specific absorption ratio (SAR).For Canada only:CAN ICES-3 (B)/NMB-3(B)This device complies with RSS-210 of the IC Rules.Operation is subject to the following two conditions:(1) This device may not cause harmful interference,(2) This device must accept any interference received, including interference that may cause undesired operation of the device. This equipment complies with IC radiation exposure limits set forth for an uncontrolled environment and meets RSS-102 of the IC radio frequency (RF) Exposure rules. This equipment has very low levels of RF energy that are deemed to comply without testing of specific absorption ratio (SAR).For Singapore onlyComplies withIDA StandardsDA106734TECHNICAL DATACamera nameLeica CLCamera typeDigital APS-C system cameraType no.7323Order no.19 301 (black)Lens mountLeica L bayonet with contact strip for communication between lens and cameraCompatible lensesLenses with Leica L bayonet, Leica M/R lenses using the Leica M-Adaptor-L/Leica R-Adapter L SensorAPS-C-sized CMOS sensor (23.6 x 15.7 mm) with 24.96/24.24 million pixels (total/effective), aspect ratio: 3:2Storage mediaUHS-II, UHS-I, SD-/SDHC-/SDXC-memory cardsViewfinderResolution: 1024 x 768 pixels (2.36 MP), magnification 0.74x, aspect ratio 4:3, exit pupil 20 mm, setting range -4 to +4 dioptr., with eye sensor for automatic switching between viewfinder and monitorTop displayResolution: 128 x 58 pixelMonitor3“ TFT LCD, 1.04 MP, touch control availablePower supplyLeica BP-DC12 lithium-ion battery, rated voltage: 7.2 V (DC), capacity: 1200 mAh (min.), (based on CIPA standards): approx. 220 pictures, charging time (after total discharge): approx. 140 min, manufacturer: Panasonic Energy (Wuxi) Co. Ltd., made in ChinaChargerLeica BC-DC12, input: AC 100–240 V, 50/60 Hz, automatic switching, output: DC 8.4 V 0.65 A, manufacturer: Shin Tech Engineering Ltd., Made in ChinaBodyTop and bottom panels: milled and anodized aluminum, front and rear panels: magnesium Dimensions (WxHxD)approx. 131 x 78 x 45 mmWeightapprox. 403 g/353 g (with/without battery)The production date of your camera can be found on the stickers in the Guarantee Card and/or on the packaging. The format is year/month/day. Subject to changes in design and production.93 813 XI/17/FX/D。
徕卡放样使用说明

徕卡放样使用手冊1号键:用作开机及关机2号键:回车确定键3号键:返回及电子整平4号键:数子及功能5号键;翻页[测存] 是把测量数据存入仪器。
[覆盖]是把仪器中已存入的数据覆盖6号键;7号键;对中8号键;照明9号键;左,右,上,下,翻页放样的操作顺序按1#开机,按3#进入仪器整平,整平后按3#进入操作页面。
一常规测量1.光标移动到测量面,按回车进入页面,按F4下翻页面选测距照准目标后按F1,测量,页面显实测量结果,按5#两次能找到该点的坐标等.说明:进入下一界面(下转)。
1 后方交会定向的设定2 按3#返回,光标右移动到程序面按回车,进入界面后,按F1设站下转,按F4开始,下转按9#键左右翻页,选后方交会下转,按F2选确定,下转,按F2选新点。
下转,按F3下转输入点号,输入后按回车,下转,按F3,后输入坐标,输完后按F4选确定,页面出现(该点已径存在确认要覆盖该点数据吗),按F4选[是]下转,按F3输入棱镜高后按回车,对准目标按F1测存。
以上操作完成了第一点的设制按F2,测量更多点,同第一点操作顺序相同,完成第二点的输入,页面进入结果面,检查无误按F1计算,页面进入设站结果面,记录设站结果后,按F4设定,定向完成。
进入下一步放样续上;程序进入程序1/4,[F1设站F2测量F3放样F4参考元素] 按5#键翻页,查找内容,在第3页,F2是道路放样,F4是隧道测量,普通放样,选1/4面F3,按F3进入放样面台按F4开始,再按F4下翻两次,,进入页面[F1坐标F2极坐标F3放点] ,按F3放点,输入坐标后,按F4确定,转动仪器把△H(水平角)转到0°0´0",指挥棱镜进入视线,对准棱镜中心后按F1测距,当水平距离为0.000 m 时,该点就是所放点,放点结束2 坐标定向的操作顺序1选[程序] 按回车,按F1[设站] ,转页按F4 [开始] ,按9#左右翻页至坐标定向,选F2 [确定] ,转页按F2 [新点] ,认意输入个点号按回车,输入X.Y .Z坐标,输完后按F4 [确定] ,问是否覆盖?按F4选[是] 。
LEICAX2数码相机说明书

LEICAX2数码相机说明书【规格指标】| TOP产品型号Leica X2订购编号 18450(经典黑)、18452(闪耀银)镜头种类 Leica Elmarit 24mm f/2.8ASPH.,6组8枚,含1枚非球面镜片焦距 24mm(等效焦距为35mm)光圈 2.8到16(每1/3EV调整)对焦范围 30cm到无限远对焦模式单点对焦、11点对焦、点对焦、人脸辨识感光组件 APS-C尺寸CMOS,实际画素1650万,有效画素1620万曝光模式程序自动(P)光圈先决(A)快门先决(S)手动模式(M)曝光补偿 1/3 EV调整,最大范围±3 EV白平衡自动、钨丝灯、日光、闪电、阴天、阴影、闪灯、二组手动设定、手动设定色温值感光度自动ISO、100、200、400、800、1600、3200、6400、12500连拍张数每秒3张或5张,最多连续8张(DNG+JPEG精细)拍摄模式标准、艳丽、自然、黑白/自然、黑白/高对比液晶屏幕 2.7英吋TFT-LCD,230,000像素,视野率100%内建内存大约110MB记忆卡 SD、SDHC、SDXC尺寸 (LxHxD)约124 x 69 x 51.5mm重量不含电池约316g、含电池约345g标准配备锂电池(BP-DC8)、充电器(BC-DC8)、电池盒、真皮背带、 USB 连接线、镜头盖、说明书附赠软件 Adobe? Photoshop?Lightroom?(注册相机后可免费下载)【详细介绍】| TOP徕卡X2拥有超过1650 万像素(有效像素为1620万)新研发的、专业的APS-C格式CMOS图像传感器,并结合了高性能的徕卡24mm f/2.8 ELMARIT-ASPH镜头。
这种用于新闻摄影的经典焦距,最大限度地确保了图像质量和光泽度。
自动对焦系统也得到了改进,很好的灵活性以及快速、极其精确和几乎无声地对焦,使徕卡X2可以适应各种拍摄情况。
这款相机的配置文件增加了众多的设置选项,从全手动控制到自动功能以及直观的操作方式。
LEICA V-LUX20数码相机 使用说明

订购编号
电池组
原产地 :中国
BP-DC7-U
18 702
BP-DC7-E
18 701
电池充电器
原产地 :中国
BC-DC7-U
423-082.001-010
BC-DC7-E
423-082.001-012
电源线
原产地 :中国
EU/AS
423-068.801-019
UK
423-068.801-020
J
423-068.801-022
约300张 约150分钟 约300分钟
CIPA标准的拍摄条件
• CIPA是“日本影视器材工业协会(Camera & Imaging Products Association)”的缩写。
•[程序 AE]模式 • [GPS设定] 设为[OFF] • 温度 :23℃/湿度 :50%(液晶显示器开启时)。∗ • 使用32 MB的SD记忆卡。 • 使用随机附送的电池。 • 开启相机30秒钟后开始拍摄。(当手震修正功能设为[AUTO]时。) • 每隔30秒拍摄一次,每隔一次拍摄使用完全闪光。 • 每次拍摄时,进行变焦操作(从远摄到广角、从广角到远摄)。 • 每拍摄10次关闭相机,并放置相机直至电池温度降低。
AV电源线
423-082.001-022
原产地 :中国
电池携带盒
423-082.001-024
按钮标签
423-082.805-003
(加拿大/ 台湾) (在美国、加拿大、台
湾和日本出售的相机)
简易说明书
93 289 -295
(根据出售国家而有不同)
保修卡
439-399.100-026
皮套 HDMI短电源线-E 小型三脚架 桌上三脚架 珠窝式云台
最新徕卡测距仪使用说明书

徕卡测距仪使用说明书徕卡测距仪使用说明书:一、使用前的准备(一)电池的装入/更换打开仪器尾部的固定挡板。
向前推卡钮,向下将底座取下。
按住红色的卡钮推开电池盒盖。
安装或更换电池。
关闭电池盒盖,安装底座和卡扣。
当电池的电压过低时,显示屏上将持续闪烁显示电池的标志{B,21}。
此时应及时更换电池。
1、按照极性正确装入电池。
2、使用碱性电池(建议不要使用充电电池)。
3、当长时间不使用仪器时,请取出电池,以避免电池的腐蚀。
更换电池后,设置和储存的值都保持不变。
(二)多功能底底座固定挡板可以在下面的测量情况下使用:1、从边缘测量,将固定挡板拉出,直到听到卡入的声音。
2、从角落测量,将固定挡板拉出,直到听到卡入的声音,轻轻将固定挡板向右推,此时固定挡板完全展开。
仪器自带的传感器将辨认出固定挡板的位置,并将自动设置测量其准点。
(三)内置的望远镜瞄准器在仪器的右部有一个内置的望远镜瞄准器。
此望远镜瞄准器为远距离测量起到辅助的作用。
通过瞄准器上的十字丝可以精确地观察到测量目标。
在30米以上的测量距离,激光点会显示在十字线的正中。
而在30米以下的测量距离,激光点不在十字线中间。
(四)气泡一体化的水泡使仪器更容易调平。
(五)键盘1、开/测量键2、第二级菜单功能3、加+键4、计时(延迟测量)键5、等于[=]键6、面积/体积键7、储存键8、测量基准边键9、清除/关键10、菜单键11、照明键12、间接测量(勾股定律)键13、减-键14、BLUETOOTH(六)显示屏1、关于错误测量的信息2、激光启动3、周长4、最大跟踪测量值5、最小跟踪测量值6、测量基准边7、调出储存值8、储存常数9、主显示10、单位,包括乘方立方(2/3)11、顶的面积12、墙面积13、3个额外显示(如:测量中间值)14、BLUETOOTH蓝牙开/关15、第二级菜单功能开16、硬件故障17、间接测量-利用勾股定律18、间接测量-利用勾股定律-部分高度19、面积/体积20、带常数的测量21、电池充电量显示二、菜单功能(一)设置在菜单中可以改变设置,并将其长久保存,并在关机和更换电池后不改变。
徕卡全站仪使用说明书(两篇)

引言概述:本文是徕卡全站仪使用说明书的二部分,主要介绍了徕卡全站仪的使用方法和技巧。
徕卡全站仪作为一种先进的测量工具,具有高精度、高效率和多功能等优点,在土木工程和建筑工程等领域得到了广泛的应用。
通过深入了解本文的内容,读者将能够熟练操作徕卡全站仪,并正确应用于实际工作中。
正文内容:一、基本操作方法1. 开机和关机操作:详细介绍如何正确地开机和关机,包括如何检查电池电量、连接蓝牙等操作。
2. 仪器校准和配置:介绍仪器的校准方法和配置步骤,包括设置仪器的坐标系统、单位和显示方式等。
3. 测量模式选择:详细介绍不同的测量模式,在测量前根据需要选择合适的模式。
4. 数据存储与传输:介绍如何将测量数据保存在仪器内存中,并通过USB或蓝牙传输到计算机或其他设备。
5. 其他基本操作:包括调整仪器的亮度、对焦、触摸屏操作等。
二、测量技巧1. 放样测量:介绍如何使用徕卡全站仪进行放样测量,包括放样点的选择、放样方法和放样误差控制等。
2. 面积和体积测量:详细说明如何使用徕卡全站仪进行面积和体积测量,包括扫描测量和多边形测量两种方法。
3. 地形测量:介绍如何使用徕卡全站仪进行地形测量,包括地形点的选择、测量方法和数据处理等。
4. 坡度测量:详细说明如何使用徕卡全站仪进行坡度测量,包括单点坡度测量和连续坡度测量两种方法。
5. 高程测量:介绍如何使用徕卡全站仪进行高程测量,包括单点测高、隔测法和测高网法等方法。
三、高级功能应用1. 自动追踪:介绍徕卡全站仪的自动追踪功能,包括目标点的选择、追踪参数的设置和使用技巧等。
2. 视野图像:详细讲解徕卡全站仪的视野图像功能,包括如何拍摄和处理视野图像,并应用于测量和设计中。
3. 遥控功能:介绍如何通过遥控器对徕卡全站仪进行控制,包括遥控器的使用方法和常见问题解决。
4. 数据处理与导出:详细说明如何对测量数据进行处理和分析,包括数据导入和导出、数据转换和处理等。
5. 配套软件的使用:介绍徕卡全站仪配套的软件使用方法和技巧,包括数据管理、测量规划和报告生成等功能。
LEICA Q2快速入门指南说明书
LEICA Q2QUICK START GUIDEDownload the full scope instruction manual here:https:///Service-Support/Support/DownloadsPlease register via the following link if you would like to receive a printedcopy of the full scope instruction manual:5Thumbwheel button–in the menu:Confirming the selection 6Delete function 16MENU button–in the menu:LCD panel3” TFT LCD, 1 040 000 dots, touch panel Status LEDoptions and allows the photographer to get more out of his Leica camera than ever before. You can now link all your WLAN-capable Leica cameras via a single app to transfer images easily and instantly, capture the essence of unforgettable moments, manage, optimize and share your photos – anytime, anywhere.35 mm 50 mm 75 mmTOUCH CONTROL & FUNCTIONS GESTURE CONTROLTECHNICAL DATACAMERADesignationLeica Q2Camera typeDigital 35 mm compact cameraType no.4889Order No.19 050 EU/JP/US, 19 051 ROW (black) Buffer memoryDNG™: 14 recordingsJPG: 25 recordingsStorage mediumUHS-II (recommended), UHS-I, SD/SDHC/SDXC memory cardMaterialFull metal housing: Magnesium die-cast, leather coveringOperating conditions0/+40°CDimensions (WxHxD)130 x 80 x 87 mmWeightapprox. 718 g/637 g (with/without battery) SENSORSensor sizeCMOS sensor, 50.4/47.3 MP (total/actual) Picture resolutionDNG™: 8368 x 5584 pixels (46.7 MP)JPG: 8368 x 5584 pixels (46.7 MP),6000 x 4000 pixels (24 MP),4272 x 2848 pixels (12 MP)LENSDesignationLeica Summilux 28 f/1.7 ASPH., 11 lenses in9 segments, 3 aspherical lens areasLens filter threadE49VIEWFINDER/LCD PANELViewfinder (EVF)Resolution: 3.68 MP, 120 fps, magnification: 0.76x, aspect ratio: 4:3, exit pupil position: 20 mm, setting range +3/-4 diopters, with eye sensor for automatic switchover between viewfinder and LCD panel LCD panel3” TFT LCD, 1 040 000 dots, touch control available EQUIPMENTWLANThe Leica FOTOS app is required to use the WLAN function. The Leica app is available from the Apple App Store™ or the Google Play Store™. Complies with Wi-Fi IEEE802.11b/g/n, 2.4 GHz, chan-nel 1-11 (2412-2462 MHz) and Wi-Fi IEEE802.11ac, 2.4 GHz & 5 GHz, channel 39-48 (5180-5240 MHz), channel 52-64 (5260-5320 MHz), channel 100-140 (5500-5700 MHz) (standard WLAN protocol), encryption method: WLAN-compatible WPA™/ WPA2™BluetoothBluetooth v4.2 (Bluetooth low Energy (BLE)), 2402 to 2480 MHzMenu languagesEnglish, German, French, Italian, Spanish, Russian, Japanese, Simplified Chinese, Traditional Chinese, KoreanPOWER SUPPLYRechargeable battery (Leica BP-SCL4) Lithium-ion rechargeable battery, rated voltage: 7.2 V (DC); capacity: 1860 mAh (min.), approx. 370 recordings (based on CIPA standard, without EVF); charging time: approx. 140 min (after deep discharge); manufacturer: Panasonic Energy (Wuxi) Co. Ltd., Made in ChinaCharger (Leica BC-SCL4)Input: AC 100–240 V, 50/60 Hz, 0.25 A, automatic switchover; output: DC 8.4 V 0.85 A; manufacturer: Salom Electric (Xiamen) Co., Ltd., Made in ChinaYou will find the manufacturing date of your camera on the stickers in the Warranty Card and/or on the packaging. The date format is year/month/day. Subject to changes in design and production.93 948 III/19/DSAFETY REMARKSGENERAL INFORMATION• Do not use your camera in the immediate vicinity of devices with powerful magnetic, electrostatic or electromagnetic fields (e.g. induction ovens, microwave ovens, television sets or computer monitors, video game consoles, cell phones, broadcasting equipment). Their electromagnetic fields can interfere with recordings.• Image recording may be affected if you place the camera on a television set or operate the camera in its vicinity or near a cell phone.• Strong magnetic fields, e.g. from speakers or large electric motors can damage the stored picture data or disrupt recording.• Switch off the camera, remove the battery and switch the camera back on in case of a camera malfunction due to the effects of electromagnetic fields.• Do not use the camera in the immediate vicinity of radio transmitters or high-voltage power lines. Their electromagnetic fields may interfere with recordings.• Always store small parts e.g. the accessory shoe cover as follows:–out of the reach of children–in a safe location, where they will not get lost or stolen• State-of-the-art electronic components are sensitive to static discharge. You can easily pick up charges of several 10,000 volts by simply walking on synthetic floor coverings. A static discharge can occur when you touch the camera and especially if it is placed on a conductive surface. A static discharge on the camera housing poses no risk for the electronics. Despite built-in safety circuits, you should avoid direct contact with external camera contacts like those in the flash shoe.• Take care not to soil or scratch the sensor for lens detection (6-bit encoding) in the bayonet. You must similarly prevent direct contact of the bayonet with grains of sand or similar particles, as these could cause irreparable damage. This component must only be cleaned with a dry cloth (in system cameras).• Use a cotton or linen cloth instead of a microfiber cloth from an optician’s (synthetic) when cleaning the contacts. Make sure to discharge any electrostatic charge by deliberately touching a heating or water pipe (conductive, grounded material). Dirt deposits and oxidation on the contacts can be avoided by storing your camera in a dry location with the lens cap and the flash shoe/viewfinder cap (in system cameras) attached.• Only use accessories specified for this model to prevent faults, short circuits or electric shock.• Do not attempt to remove parts of the housing (covers) yourself. Repairs must be done at authorized service centers only.• Protect the camera against contact with insect sprays and other aggressive chemicals. Petroleum spirit, thinner and alcohol must not be used for cleaning. Some chemicals and liquids can damage the camera housing or the surface finish.• Rubber and plastics are known to expel aggressive chemicals and should therefore not be kept in contact with the camera for extended periods of time.• Prevent any sand or dust or water penetration into the camera, e.g. during snowfall or rain or on the beach. Be extra careful when changing the lens (in system cameras) and when inserting or removing the memory card and rechargeable battery. Sand and dust can damage the camera, the lens, the memory card and the battery. Moisture can cause malfunctions and irreparable damage to the camera and memory card. LENS• A camera lens can have the effect of a magnifying glass when exposed to direct frontal sunlight. The camera must therefore be protected against extended exposure to direct sunlight. Using the lens cap and keeping the camera in the shade or ideally in its camera case will help prevent damage to the interior of the camera. RECHARGEABLE BATTERY• Improper use of the batteries or the use of unapproved battery types may result in an explosion!• Do not expose the rechargeable battery to sunlight, heat, humidity or moisture for prolonged periods of time. Likewise, the batteries must not be placed in a microwave oven or a high-pressure container as this would pose a fire or explosion hazard.• Do not under any circumstances charge or insert a damp or wet battery into the camera!• A safety valve in the battery ensures that any excess pressure caused by improper handling is discharged safely. It is nevertheless important to dispose of a bloated battery immediately. It may pose an explosion hazard!• Keep the battery contacts clean and easily accessible. Although lithium-ion batteries are secured against short circuits, they should still be protected against contact with metal objects like paper clips or jewelry. A short-circuited battery can get very hot and cause severe burns.• When a battery is accidentally dropped, make sure to check the housing and the contacts immediately for any damage. A damaged battery can damage the camera.• The battery must be removed from the camera or charger and must be replaced immediately in case of a strange smell, discoloration, deformation, overheating or leakage. Continued use of the battery may result in overheating, which can cause fire and/or explosion!• Never throw batteries into a fire as they might explode!• Keep the battery away from sources of heat in case of a leak or a smell of burning. Leaked fluid can catch fire!• The use of other chargers not approved by Leica Camera AG can cause damage to the batteries – and in extreme cases – cause serious or life-threatening injuries.• Make sure that the power socket is freely accessible at all times.• Do not attempt to open the battery or the charger. Repairs must only be carried out by authorized service centers.• Keep batteries out of the reach of children. Batteries can cause suffocation when swallowed. CHARGER• U sing the charger in the vicinity of broadcasting receivers may interfere with reception. Ensure a distance of at least 1 m (3 ft) between the charger and the receiver.• W hen the charger is in use, it may emit a buzzing sound – this is normal and not a malfunction.• D isconnect the charger from the mains when it is not in use, because it consumes some a very small amount electricity, even when no battery is inserted.• A lways keep the charger contacts clean, and never short circuit them.MEMORY CARD• Never remove the memory card during a datasave or card reading process. The camera must not be switched off or be subjected to impact or vibrations while working.• Do not open the compartment or remove the memory card or battery while the status LED is flashing to indicate camera memory access. Data on the card may otherwise be destroyed and camera malfunctions may occur.• D o not drop or bend memory cards as this will cause damage and result in the loss of stored data.• D o not touch the connections on the reverse of the memory card and keep them clean and dry.• Keep memory cards out of the reach of children. Swallowing a memory card may cause suffocation. SENSOR• Cosmic radiation (e.g. during flights) may cause pixel defects.CARRY STRAP• Once you have attached the carry strap, please make sure that the clips are mounted correctly to prevent the camera from falling.• Carry straps are usually made of very robust material. You should therefore keep it out of the reach of children. A carry strap is not a toy and poses a strangulation risk.• Use the carry strap only for its intended purpose on a camera or on binoculars. Any other use poses the risk of injury and may possibly result in damage to the carry strap and is therefore not permitted.• Carry straps should also not be used for cameras/binoculars during sports activities with a high risk of getting entangled in the carry strap (e.g. mountain climbing and similar outdoor activities). WARRANTYIn addition to your statutory warranty rights regarding your dealer, you will receive an additional Leica Camera AG product warranty valid from the date of purchase at an authorized Leica retailer. For more information regarding the warranty scope, services and limitations, please visit: warranty.leica-cam Camera Information in the main menu ▸Select Regulatory Information in the submenuDISPOSAL OF ELECTRICAL AND ELECTRONIC EQUIPMENT separately in accordance with local regulations. Please contact your local authorities, waste disposal collection point or the retailer, from whom you purchased the device for more information on correct waste disposal.REGULATORY INFORMATION See the stickers on the packaging. Direct current (DC) Class II devices (the product has a double-insulated design)For United Arab Emirates only:REGISTERED No:ER67985/18 DEALER No: DA0112968/13 For US and Canada only:A recyclable lithium ion/polymer battery powers this camera. Please call 1-800-8-BATTERY for information on how to recycle this battery.For Singapore only:Complies with IMDA Standards DA106734FCC Note:This equipment has been tested and found to comply with the limits for a Class B digital device, pursuant to Part 15 of the FCC Rules. These limits are designed to provide reasonable protection against harmful interfer e nce in a residential installation. This equipment generates, uses, and can radiate radio frequency energy and, if not installed and used in accordance with the instructions, may cause harmful interference to radio communications. However, there is no guar a ntee that interference will not occur in a particular installation. If this equipment does cause harmful interference to radio or television reception, which can be determined by turning the equipment off and on, the user is encouraged to try to correct the interference by one or more of the following measures:• R eorient or relocate the receiving antenna.• I ncrease the separation between the equipment and receiver.• C onnect the equipment into an outlet on a circuit different from that to which the receiver is connected.• C onsult the dealer or an experienced radio/TV technician for help.REGULATORY INFORMATION Specific regional approvals for this device can be found in the camera menu. ▸Select Camera Information in the main menu▸Select Regulatory Information from the submenu(Applies within the EU and for other European countries with active waste separation policies)This device contains electric and/or electronic components which must not be disposed of in general household waste. Instead, it should be disposed of at a recycling collection point provided by your local authority. This service is free of charge. Any standard or rechargeable batteries used in this device must be removed and disposed of separately in accordance with local regulations. Please contact your local authorities, waste disposal collection point or the retailer, from whom you purchased the device for more information on correct waste disposal.FCC Caution:To assure continued compliance, follow the attached installation instructions and use only shielded inter f ace cables with ferrite core when connecting to com p ut e r or peripheral devices. Any changes or modifications not expressly approved by the party responsible for compliance could void the user’s authority to operate this equipment.Trade Name:LEICAType No. 4889Responsible party/Support contact:L eica Camera Inc.1 Pearl Count, Unit A, Allendale, New Jersey 07401Tel.: +1 201 995 0051/ Fax: +1 201 995 1684********************************Contains FCC ID:VPYLB1JS955This transmitter must not be co-located or operated in conjunction with any other antenna or transmitter. This equip-ment complies with FCC radiation exposure limits set forth for an uncontrolled environment and meets the FCC radio frequency (RF) Exposure Guidelines. This equipment has very low levels of RF energy that are deemed to comply without testing of specific absorption ratio (SAR).For Canada only:CAN ICES-3 (B)/NMB-3(B)HMN: 4889Contains IC: 772C-LB1JS955This device complies with Industry Canada licence-exempt RSS standard(s). Operation is subject to the following two conditions:(1) this device may not cause interference, and (2) this device must accept any interference, including interference that may cause undesired operation of the device. The available scientific evidence does not show that any health problems are associated with using low power wireless devices. There is no proof, however, that these low power wireless devices are absolutely safe. Low power Wireless devices emit low levels of radio frequency energy (RF) in the microwave range while being used. Whereas high levels of RF can produce health effects (by heating tissue),。
禄来 禄莱双反相机介绍
有关“禄莱”禄莱系列双镜头反光相机,在四五十年代乃至七十年代初,曾风靡世界一时。
在五六十年代,曾经是专业的象征。
当时能背着“禄莱”双反在街上走的人,不是专业摄影记者,就是公安人员。
对于价格昂贵的“禄莱”,平民百姓只能“望机兴叹”。
禄莱厂生产的多种双反相机,其中:禄莱康特[即Rollekonter],禄莱可得[Rolleicord]是作为普及简易型供应市场,但也具备了相当水准的机械及光学素质,而禄莱弗来克斯[Rolleiflex]的市场定位是高级专业型,追求的是“百年有形”,一直按照高级专业水准而设计制造。
几经改进后的“禄莱弗来”双反,生产在五十年代中叶,六七十年代。
其中:E、F 、T等机种型号,在机械结构,生产工艺,制造技术,产品配套及性能上均达到较高水平,在国际市场上曾经畅销一时。
一般说,“禄莱弗来”双反其特色在于两个镜头,上镜头取景,下镜头摄影,摇把卷片,微传感滚筒式自动停片,与上弦连动并可多次曝光,也可防止重拍。
采用结构,性能及用材方面均非常优良的康般镜间快门并有M、X、V 装置,采用强度较好的铝合金模铸机身,外围部件多为铝合金或黄铜,卷片机构等传动齿轮和有运动摩擦、藕合等部件零件,多采用优质黄铜或合金钢材,快门主力弹簧则采用优质钴基不锈钢,所以只要使用保管得当,“禄莱”有较长的使用寿命。
关于“禄莱”配套的摄影镜头,一般说,2.8D、E、F各型相机多使用蔡司普兰那,五片四组变高斯结构,并使用优质光学玻璃材料,其优秀的成像素质被摄影界推崇备至,有口皆碑。
后期生产的2.8F,采用了七片五组结构[变高斯型普兰那],被誉为蔡司的顶级极品头。
2.8双反中也有部分装有F2.8/80mm五片四组变高斯结构的施耐得仙农塔摄影镜头,其本质同样优秀,只不过实拍感觉反差稍嫌柔和。
3.5双反,A、B、O、T 等型多使用著名的蔡司天塞F3.5/75m 四片三组头。
该头具有结构简单、成熟,素质优良的特点,成像质量倍受摄影人员赞赏,与普兰那相比,除了最高分辨率稍次和大光圈时边缘像质有所下降和不便于作到2.8口径外,并无明显差异。
leica说明书

STEPS TO BE FOLLOWED FOR MICROSTRUCTURAL ANALYSIS USING LEICA INVERTED METALLURGICAL MICROSCOPEMagnification 50X to 500X5. On the new Leica Microscope Optics window do the following:a) In Turret select Incident.b) In Objective Lens select the corresponding value from the zoom being used in the microscope and click accordingly (on 5x or 10x or 20x or 50x ).c) In Magnification changer: i) Click on 1x.ii) Do not select 0.32x. d) Click OK on the same screen.e) Click on Image set up from the menu bar asshown in step 2. Then click on Preview as shown in step 3.6. Set the curve by dragging the left most pointer tothe zero position of the curve. Next drag the right most pointer to the end point of the curve. Then adjust the middle pointer to set the reading as 0.5. Note: a) In case the pointers overlap on each other,then right click near the curve and click on Reset Gamma.b) Do not disturb the Exposure Time setting.7. Click on the Automatic white balance . Click on Acquire .8. Save the image in the TIFF [*.tif] format in USER DIRECTORY in D-Drive . Do not SAVEyour file in Desktop or in C-Drive.9. FOR MANUAL MEASUREMENTS AND SKETCHING :Click the Measure icon from the menu bar and select any options, example Measure Interactive . In the new appeared Interactive Measurements window, do the following. • In Mode & Settings, click on the options required such as Draw Arc, Draw Line, etc and do the necessary operations and then click OK .10. Click on Show Annotation Tools (second icon in Annotation Tool bar ).Note: If the above tool bar has not appeared on the screen, then right click on the menu bar to get the following window and select the required tool bars.17. From the new Grey Detect window, do the following: a) In Adjust select Grey (preferable).b) Set the Black and White values to zero. Then adjustthe intensity of White until the phases are clearly distinguished (as per requirement). c) In Output Binary select Binary 1d) Increase the intensity of Black to the previously setWhite value as carried out in 17(b). e) Then increase the White intensity as per requirement. f) Then set the Output Binary as Binary 2. g) Repeat the above procedure from 17(b) to 17(f)depending upon the number of phases and set the corresponding output Binary .Click OK.18. Click Measure on the menu bar and click Measure field .19. In the Measure Field windowa) Select Binary 0 and click on Measure to get the Areafor first phase.b) Repeat the above steps for the remaining phases(Binary 1,2, …etc.). c) Click OK .20. To measure the GRAIN SIZE of each detected phase , Click on Measure and go to Measure Feature .21. In the Measure Feature window click on SelectParameters . Select the required parameter from Select Feature Parameters window and click OK .22. Click MEASURE on the M easure Feature window as shown in 21 to get the results.23. Repeat the above steps as per 19 to 22 for the remaining phases by changing the values inBinary Image. 24. Grain size can be measured also manually by interactive measurement option as per 9.25. To get the histogram of the above obtained data click toFeature Histogram .26. To distinguish the grain from one another click on Binaryand click Segment (after phase detection) and take the measurement of the segmented phases as per 19 to 23.27. To edit on individual grain click on Binary Edit with different options like Draw, Keep ,Cut etc, and take the measurement as per 19 to 23.28. To sketch the microstructure image, go to Annotation Tools as per 10 to 13.29. Save the image in the TIFF [*.tif] format in USER DIRECTORY in D-Drive . Do not SAVE your file in Desktop or in C-Drive.。
徕卡说明书汇总
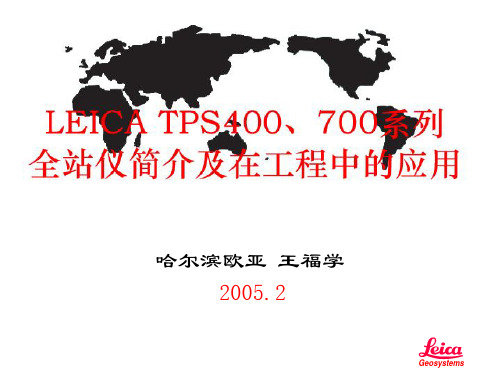
哈尔滨欧亚 王福学 2005.2
Geosystems
400、700系列全站仪应用领域
测站与测量点(放棱镜点)连线的
角度距离偏差.优点是可以直接定
义被放样点的方向.
2019/2/21 6
Geosystems
全站仪测量术语说明
• 4、 正交法放样:被放样点相对于测站与测量 点(放棱镜点)连线的水平距离偏差. • 5、 坐标差放样:以上站点与定向点为X轴建立 的虚拟坐标系统,被放样点相对于测量点 (放棱镜点)的坐标偏差. • 6、 参考线放样:按照参考线 放样.参考线来源于基线(放 样参照物)的径向或平行位 移,或相对于基准点的旋转.
2019/2/21 7
Geosystems
全站仪测量术语说明
• 四、ppm 介绍 ppm:Parts Per Million(百万分之几) 1、 测距精度中的ppm
TC402的标称精度为2mm+2ppm,其中ppm前的系数为 比例误差,由频率误差、大气折射率等引起,即每 公里产生2mm的比例误差.其中第一部分2mm为固定误 差,由加常数、对中误差等引起,与距离无关.如2公 里时测距误差为2+2*2=6mm 注意:此值属于偶然误差,并不是仪器的系统误差, 它只表示仪器的误差小于该指标,徕卡的仪器在实 测中都优于该指标,只有其标称精度的一半左右.
2019/2/21 15
Geosystems
测量前的准备工作
将仪器的误差降到最小. • 11 、用精确的温湿表、气压表对测区温度、气 压的进行精确测量并对仪器进行改正.