海量HDC300操作说明书
CG300多功能控制器操作说明
重新设定量程或者清除多余的物料,保证最大计量的物料不超过设定的量程
t2
卸料延迟时间
3.0秒
0.1秒-9.9秒
数字设定键
卸料到零位范围以后延迟此时间关门
T3
延迟启动时间
2.0秒
0.1秒-9.9秒
数字设定键
下一罐料启动的间隔时间
d.p
小数点选择
0
0、1、2、3、4
“配置”键
PL
零点跟踪
U
卸料控制方式
0
0、1
“配置”键
0表示用线控按钮盒控制;1表示用行程开关控制
常见故障处理
左侧数码管显示
故障定义
故障原因
排除措施
E1
校秤错误
1.传感器接线不正确
检查传感器接线,重新校秤后仍显示E1,更换传感器
2.校秤操作不正确
重新进行校秤操作
3.控制器故障
返厂维修
E2
设定值不正确
设定值总和超量程或者定值大于落差
重新输入设定值或修改落差
OL
超量程
1.还未进行校零、校秤操作
按步骤进行校零和校秤
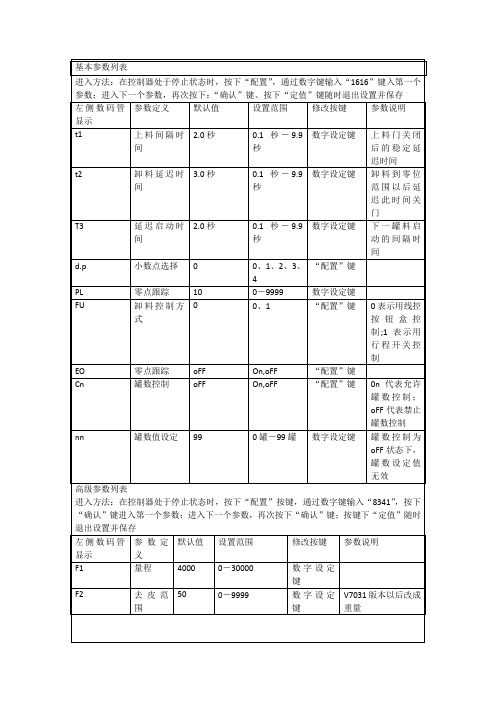
基本参数列表
进入方法:在控制器处于停止状态时,按下“配置”,通过数字键输入“1616”键入第一个参数;进入下一个参数,再次按下:“确认”键、按下“定值”键随时退出设置并保存
左侧数码管显示
参数定义
默认值
设置范围
修改按键
参数说明
t1
上料间隔时间
2.0秒
0.1秒-9.9秒
数字设定键
上料门关闭后的稳定延迟时间
设定值及落差
进入方法:在控制器处于停止状态时,按下“定值”按键,进入定值设定操作:再次按下“定值”键随时退出设置并保存。
CHE-HD300 Pro AV IT HDMI扩展器的PDF文件说明书
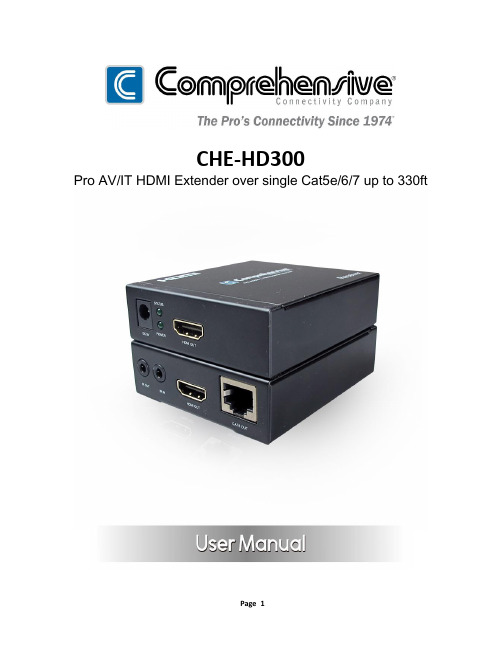
CHE-HD300Pro AV/IT HDMI Extender over single Cat5e/6/7 up to 330ftContents■Product Overview (3)■Product Features (3)■Specifications (4)■Package Contents (4)■Panel Descriptions (5)■Installation and Operations (6)■Troubleshooting and Maintenance (7)■Warning and Precaution (7)◼Product Overview:Comprehensive’s CHE-HD300 HDMI extender can transmit HDMI signals using a single networking cable and supports HDMI 1.3v. The transmission distance between the sending and receiving units can be up to 330ft. It supports infrared extension function and HDMI loop out function. When the HDMI signal enters to TX unit, the signal is transmitted to the RX unit by 100 networking cable, then transferred into HDMI signals to the TV. At the same time, it can transmit the HDMI signal from the TX unit to TV, so that it is convenient to observe the DVD setting. The video format supports 1080p*60Hz.◼Features:1.Product Overview TX:RX:2. Character:● Supports 1080P 3D@60HZ,720P video output format.● Transmission distance up to 100M(328ft) over CAT 5E or CAT6 network cable.● Supports HDMI loop out function.● Low power consumption.● Supports Two-Way IR control.● Easy installation and operation.◼Specifications:Operating Temperature range-5 to +35°C (-41 to +95 °F)Operating Humidity Range 5 to 90 % RH (no condensation)Input Video Signal 2.4V to 3.6VExternal input DC power supply5V/1.2AInput DDC signal-0.5 to 6VMax transmit rate3Gbit/sVideo Format Supported1080p 3D/1080i/720p/576p/480p/576i/480i Audio Format Supported DTS-HD/ Dolby true HDOutput Video format1080p @60hz,Backward compliantHDMI Max transmit distance100MMax Power consumption TX: 1.5W RX: 1.95WDimensions 3.23” x 2.28 x 0.89”Net Weight(Main Unit)0.9lbs◼Package Content:Packing includingItem Name QtyCHE-HD300 Extender 1 set (include TX and RX)5V/1.2A Power supply 2 pcsIR Receiver 1 pcsIR transmitter 1 pcsUsual Manual 1 pcs◼Panel DescriptionTX:①DC 5V—DC 5V power supply input Interface②POWER—Power indicator③STATUS—Input signal indicator④HDMI IN—HDMI signal input Interface⑤Cat5e/a OUT—TX network output port, support CAT5E or CAT6 Cable⑥HDMI OUT—HDMI signal looping output Interface⑦IR-TX—IR TX Interface⑧IR-RX—IR RX InterfaceRX:①DC 5V—DC 5V Power Input Interface②POWER—Power Indicator③STATUS—Input signal Indicator④HDMI OUT— HDMI output Interface of 100M signal extension⑤Cat5e/a OUT—TX network output port, support CAT5E or CAT6 cable⑥IR-TX—IR TX Interface⑦IR-RX—IR RX Interface◼Installation and Operation:1)Connecting Cables•CHE-HD300HDMI extender TX HDMI INPUT connects to the signal source (like DVD/PSS) via HDMI cable.•CHE-HD300HDMI extender TX HDMI OUTPUT connects to the display device with HDMI interface (like TV) via HDMI cable.•CHE-HD300HDMI extender RX HDMI OUTPUT connects to the display device with HDMI interface (like TV) via HDMI cable.•Use Cat5e/6 network cable to connect TX Cat5e/6 OUT and RX Cat5e/6 IN.•Plug in IR RX cable into IR-RX interface on both TX and RX side.•Plug in IR TX cable into IR-TX interface on both TX and RX side.•Plug in 5V DC power supply into the power jack of both the RX unit and TX unit.•Make TX unit IR TX point to DVD, make RX unit IR TX point to TV, and fix them well.Refer to below picture:2) Operation:A. IR Control function---When the connection above is finished and all devices power on, users can control the DVD at the TV side by using the DVD remote controller via the IR-RX cable on the RX unit and control the TV to be turn ON/OFF at the DVD side via the IR-RX cable on the TX unit.◼Troubleshooting and Maintenance:1)If the connected display device has a noisy point, maybe the cable quality is not up tostandard, shielded HDMI cable and Ethernet cable is suggested.2)If color is distorted or no video signal output: a) check the corresponding input signal, ifthere is no input signal, please check the wire connection, b) Check the output interface is consistent with the right controlled one.3)If the front panel LED light is with no shine and operating unresponsive, please ensure thepower or HDMI input is in well connection.◼Warning and Precaution:1)Keep away from dust, humidity, heat source and direct sunlight.2)To ensure proper heat dissipation, avoid poorly ventilated spaces and do not block thevents.3)To prevent electrical shock and fire, do not keep the device in rain or wet places.4)Do not be connected to power supplies when installing or moving the device.5)Do not touch the power adapter plug with wet hands.6)Do not spill liquid on the device, as it may cause internal short circuit or fire.7)Do not attempt to open the cabinet. Please contact qualified service personnel formaintenance.80 Little Falls Road, Fairfield, NJ 07004800.526.0242。
DTC300中文操作说明
QUICKLINE -10 TM保护热流计法导热仪操作手册4.0 版本2003年6月第一章简介QuickLine-10热导仪可以用于测量固体材料在室温附近的导热系数。
由于QuickLine-10的操作简便、实验的样品量少与实验所需的时间短等优点,所以非常适合用于材料性质的测定与例行性的质量控制。
金属、陶瓷、塑胶、复合材料、玻璃、橡胶与石墨等材料都能够准确的得到测量。
QuickLine-10也能够量测纸或者塑胶薄膜类厚度的样品。
QuickLine-10热导仪具有多种的型号可供选择。
受测样品的截面必须固定为边长25 mm 的矩形,或者是直径25 mm的圆形,或者是直径50 mm的圆形。
可供选择的使用电源为115、230以及110伏特交流电。
请确认您所收到的仪器与您所订购的型号是否相符,本手册适用于各种使用电源,配备或者未配备冷却水源的QuickLine-10-[3]。
QuickLine-10-[3]所适用的是直径50 mm的圆形试片。
第二章测量方法2.1 ASTM E1530测试标准QuickLine-10是依照ASTM E1530来测量导热系数。
其测试标准是:以具有再现性的压力,将受测样品夹在两个不同温度、经过抛光的金属表面之间。
下半部的金属接触平面是属于热流传感器的一部分,当热流从上半部平面经过样品到下半部平面时,一个垂直的温度梯度存在于上述系统中。
通过测量样品厚度、样品两端的温度差异与热流传感器所探测的热流量,就能够测定样品的导热系数。
在热平衡时,被测样品会符合下列Fourier热流方程式:Rs = [(T u━T l) / Q]━R int (1)式中 Rs 为测样品的热阻T u为上面板的表面温度T l 为下面板的温度Q 为通过样品的热流量R int 为样品与上下面板表面的总的接触热阻受测样品的热阻值定义如下:Rs = d /λ (2)where d = sample thicknessλ = thermal conductivity方程式(1)是包括界面间的热阻值,因为QuickLine-10并不是直接量测受测样品本身的实际温差,而是量测和样品接触的上下金属表面间的温差。
★CJ-HLC300说明书_1.0_

注意:
本仪器要求每年必须进行一次校准,当需要校准时请直接与供应商联系。
iv
四川川嘉电子有限公司
目录
使用说明书
1. 产品概述 …………………….…………………………………
开箱验收……………………………………………………………………. 主要技术指标………………………………………………………………. 功能特点 ……………………………………………………………………
4
四川川嘉电子有限公司
使用说明书
选 件:温湿度传感器 执行标准:
美 国 ASTM F649 - 01 标 准 :“ Standard Practice for Secondary Calibration of Airborne Particle Counter Using Comparison Procedures”
3. 测量………………………………………………………………
随机附件的安装使用……………………………………………………… 位置区分…………………………………………………………………… 打印…………………………………………………………………………
四川川嘉电子有限公司
使用说明书
四川川嘉电子有限公司
使用说明书
该粒子计数器按照国际通用标准设计(空气采样流量为 2.83 升/分), 能同时对设定的两个粒径档进 行检测,采样时间可根据用户需要任意设定,最长不超过 59 分 59 秒,采样数据可储存在内置的闪存内。 该仪器在引进美国的技术上进一步创新, 具有测量精度高, 性能稳定, 功能强, 体积小, 操作简单方便, 达到和超过了国际同类产品的性能指标。
VHC-300弧压调高使用说明书
VHC-300数控弧压高度控制器使用说明书Shenzhen Mycutcnc TECH Co.,LTD深圳市迈卡特数控技术有限公司感谢您选用迈卡特公司的产品为便于使用及维护,请将此说明书交到最终用户手中。
安装及安全注意事项★发货及运输时,请保护好调高面板上的3个电位器,以免损坏★本调高盒的电源是AC24V★使用本调高器前,请仔细阅读说明书,以免安装及调试过程中造成不必要的损失★安装及调试过程中如有任何疑惑,请及时与本公司联系★不使用时,请关闭调高盒电源★不要随意调整调高板上的任何可调电阻★非专业人士或未经许可,不允许打开本产品进行维修★在高温,潮湿,粉尘或有腐蚀性气体的地方请做好相应的保护措施★注意防尘,当调高盒外或调高盒内积聚太多的粉尘,可用压缩空气将其吹干净★调高器标明接地的位置需良好接地★请安全使用本产品,对您的工作环境的安全情况,本公司不提供任何人身及财产担保技术支持★公司网址:电子邮件:★公司电话:7★公司地址:深圳市宝安二十四区商业楼7栋502售后服务自出厂之日起,一年内免费保修,终生维护。
但以下情况不在保修范围内:★产品标签上的序列号模糊不清或撕毁★未经允许擅自改变使用范围或用途的★人为损坏★自然灾害造成的损坏★改装及抄袭等原因造成的损坏特别声明:★由于产品升级更新,如有变动恕不另行通知。
★版权所有,翻版必究。
目录1、简介 (3)1.1产品型号 (3)1.2中文名 (3)1.3适用范围 (3)1.4工作原理 (3)1.5基本功能 (3)2、技术参数 (3)3、功能介绍 (4)4、主控板 (5)5、分压板 (6)6、初始定位 (7)6.1初始定位简介 (7)6.2保护帽定位方式………........................................................ (7)6.3接近开关定位方式 (7)7、接口电路 (7)8、调高盒设定 (11)9、供货范围 (11)10、故障维护 (11)1、简介产品型号:VHC-300中文名:弧压高度控制器适用范围:数控切割机上等离子割炬的自动高度控制,适用于进口或国产等离子。
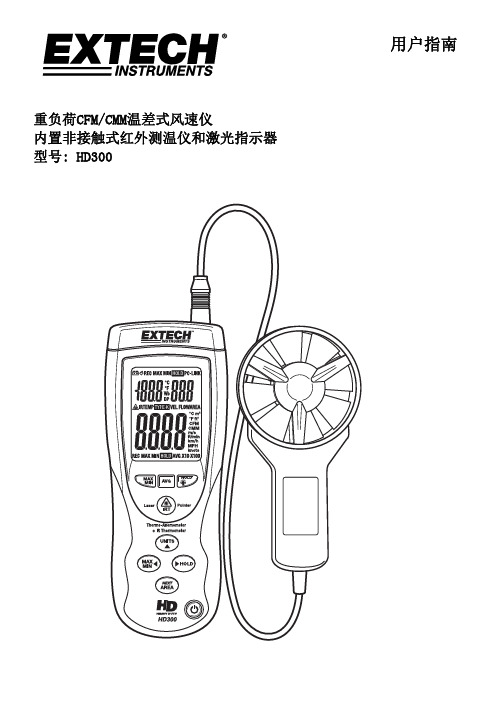
EXTECH温差式风速仪HD300特点
9
HD300-zh-CN_V2.3 4/15
方程式和转换公式 矩形或正方形管路的面积公式
宽度(W)
高度(H)
面积(A)=宽度(W)x 高度(H)
圆形管路的
面积公式
半径
面积(A)= x r2
其中=3.14,r2 =半径x半径
体积公式
CFM (ft3/min) =空气流速(ft/min) x 面积 (ft2)
警告:不要直接看激光指示器,或者把激光指示器指向眼睛。低功率的可见激光通常没有危险,但是 如果注视一段时间,还是可能会造成危害的。
数据保持 1. 通过键盘上方的保持按钮可以冻结显示的翼片温度读数。 再次按下,解冻显示值。 2. 通过键盘下方的保持按钮可以冻结所显示的空气流速或空气流量测量值。 再次按下可解冻显示值。
重负荷CFM/CMM温差式风速仪 内置非接触式红外测温仪和激光指示器 型号: HD300
用户指南
简介
感谢您购买 Extech HD300 型 CFM 温差式风速仪。 这款手持式风速仪测量并显示风速,气 流量,气温和表面温度(采用内置非接触式红外线温度计)。 这款仪表在出厂前完成了全 部的测试和校验,如精心使用,将保证多年的可靠服务。.
现IR TEMP和 。激光指示器将启动,帮助仪表确定目标。 5. 在液晶显示屏上将出现红外线表面的温度测量值。 所显示的温
度是点内区域的温度值。 6. 在释放IRT按钮后,激光指示器将关闭,在显示器上读数将冻结
(数据保持)大约7秒钟。 7. 在保持大约7秒钟后,仪表将返回到空气流速/流量和空气温度
模式。
值必须乘以10或100,才能得到正确的流量测量值。
4
HD300-zh-CN_V2.3 4/15
HCE300使用说明书

前言说明书简介欢迎使用华测HCE300Android手簿使用说明书。
本说明书以HCE300 Android手簿为例,对如何设置和使用该系列产品进行描述。
修订版本修订日期修订编次修订说明2015年11月I HCE300Android手簿使用说明书安全须知使用该产品前,请仔细阅读本节内容,以确保正确和安全地使用该产品。
有关更详细的信息,请参阅本指南中的“安全警告和注意事项”内容。
在禁止使用该产品的场所,或者使用该产品会引起干扰或危险时,请关闭该产品。
请勿将该产品及附件放置于具有强大电磁场的器具中。
请勿在高温处、有易燃气体的地方(如加油站)附近使用该产品。
请将该产品远离磁性设备,该产品的辐射会抹掉磁性设备上存储的信息。
登机时请关闭该产品,以免无线信号干扰飞机控制信号。
请使用本公司指定的电池和充电器,否则,可能引起爆炸。
请勿擅自拆卸该产品及附件,只有授权的机构才可维修该产品。
使用该产品时,请遵守相关法律法规,并尊重他人隐私及合法权利。
免责声明华测公司致力于不断改进产品功用和性能,后期产品规格和手册内容可能会随之变更,恕不另行通知,敬请谅解!若说明书中图标、图片等与实物有差异,请以产品实物为准。
本公司保留对所有技术参数和图文信息的最终解释权。
使用本产品之前,请务必仔细阅读本说明手册,对于未按照使用说明书的要求或未能正确理解说明书的要求而误操作本产品造成的损失,华测公司不承担任何责任。
技术与服务如您有任何问题而产品文档未能提供相关信息,请联系您本地的办事处技术。
另外华测网站()开辟了“技术支持”版块,用户可以在该版块了解到华测产品的最新动态、下载有关产品的最新版本及相关技术资料。
用户也可以通过网站留言,发送电子邮件至support@,拨打24小时免费热线:400-620-6818联系我们,我们将竭诚为您服务。
相关信息您可以通过以下途径找到本说明书:1、购买华测HCE300Android手簿后,仪器箱里会配赠一本《HCE300Android手簿使用说明书》,方便您操作仪器。
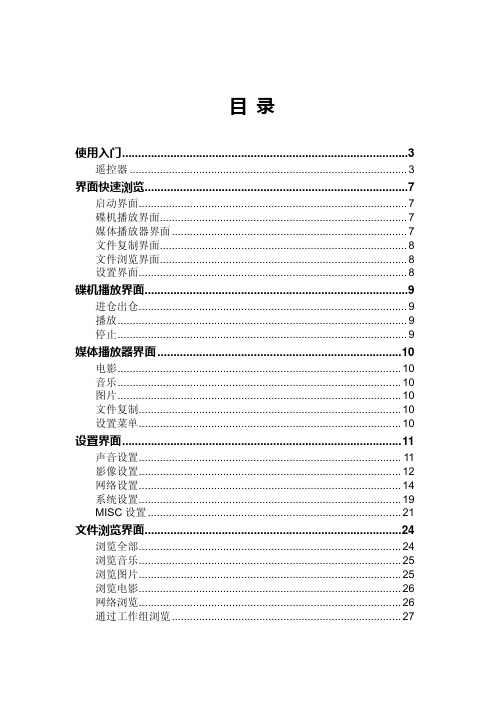
HD300高清媒体播放机说明书-2.0
4
DVD 键:
快捷键,按此键直接进入碟机播放模式。(HD300 有两种模式,
碟机模式和媒体播放器模式。 碟机模式,完全类似普通家用 DVD
操作, 媒体播放器模式,则为硬盘播放机模式,通过浏览文件,
再选择需要的文件播放)
5
CARD 键:
快捷键,按此键直接进入 CARD 目录浏览。
6
HDD 键:
快捷键,按此键直接进入内置硬盘目录浏览。(仅在带内置硬盘
设置界面.......................................................................................11 声音设置....................................................................................... 11 影像设置....................................................................................... 12 网络设置....................................................................................... 14 系统设置....................................................................................... 19 MISC 设置 .................................................................................... 21
比重仪说明书
2.1 主体的构成----------------------------------------------------------------------4 2.2 按键功能------------------------------------------------------------------------5 2.3 控制面板-----------------------------------------------------------------------5
5.1 如何进行水温补偿及溶液补偿-----------------------------------------------8
六、操作方法-----------------------------------------------------------------------------9
6.1 如何测量固体-----------------------------------------------------------------10 6.2 如何测量浮体-----------------------------------------------------------------11 6.3 如何测量颗粒-----------------------------------------------------------------12
4
2.2 按键功能介绍 按键
按键功能说明
A
打印、切换位数
数量增加、在完成比重测试后按 B 键可显示水中重量、
电子比重计
0.99985
18
0.99860
28
0.99624
38
0.99297
9
0.99978
19
0.99841
29
0.99595
39
0.99260
10
0.99970
20
0.99821
30
0.99565
40
0.99222
9
六、操作方法
为避免误差,密度愈大的样品测试时所需的重量需愈重,正确密度测量 所需重量,请参考下列表格而准备足够的样品重量。
8
4) 更 改 完成 后 按【ENTER】键 记 忆,确 认 修改 并 回 到 待 测模 式 。
A1:水的温度
25℃
A2:溶液比重
0.99704 ( 水 )
A3:标准比重值 19.32
水温对照表:
Tem p . (℃)
Density (g/cm3)
Tem p . (℃)
Density (g/cm 3)
二、 仪器介绍-----------------------------------------------------------------------------5
2.1 主体的构成----------------------------------------------------------------------5 2.2 按键功能------------------------------------------------------------------------6 2.3 控制面板-----------------------------------------------------------------------6
起重和提升使用手册

FC300系列变频器起重和提升应用使用手册丹佛斯(上海)自动控制有限公司李亮一、 起重和提升应用简介起重和提升是国民经济中广泛应用的机械类型,涉及到工业,特别是重工业的方方面面,在冶金、港口、采矿、造船、汽车等领域有着大量的应用需求。
起重和提升行业的控制在早期主要是以简单的电气和机械控制为主,随着电力电子技术和计算机技术的发展,目前已经逐渐过渡到以“PLC+变频器”控制方式。
其运行有如下特点:(1) 起动转矩大,通常要超过额定转矩的150%,若考虑提升时加速上升和起吊空中悬停125%负载的要求,至少应在起动加速过程中提供200%的转矩。
(2) 对变频器低频下的转矩要求高,要求低频下变频器出力平稳,均匀,无转矩脉动和跳变。
有些机械甚至要求变频器0速时负载空中悬停。
(3) 使用环境对变频器要求高,在冶金行业一般都在高温环境,空气中的化学物质、粉尘、湿度等会对变频器造成腐蚀,此外,起吊工作过程中产生机械的振动,也会对变频器的接线、机械牢固度进行考验。
(4) 安全性要求高,起吊的物体重量大,一旦出现安全事故,后果不堪设想。
必须要求变频器和PLC有十分完善的抱闸时序控制和完备的保护功能。
(5) 当重物下放过程中,物体的势能将转化为动能,而这部分能量需要通过制动电阻或直接回馈电网的方式将能量耗散掉或直接回馈回电网。
起重设备的电气控制和拖动系统早期采用的是串电阻调速系统或直流调速继电器控制系统,到后来发展的交流定子调压、直流晶闸管调速系统,再到现在的变频器调速和PLC控制系统。
如今,变频器应用技术已经成熟,是起重和提升行业主要的执行控制机构,采用变频器有如下优点:(1) 目前很大一部分起重机都是采用的绕线式电机转子串电阻的有级调速方案,起动电流大,对设备冲击严重,提供的制动力矩也不足,下放时容易出现“溜车”现象。
(2) 如果采用直流调压调速方案虽然可以平滑无级的调速,但直流电机体积大,维护成本高,价格贵。
(3) 采用定子调压的方案现在在冶金提升领域还有着广泛的应用,优点是安全系数高,低速下运行平稳。
海量HDC300操作说明书
海量数码摄像系统安装/操作说明书深圳市海量光电有限公司产品介绍海量HDC300是300万象素CMOS高分辨率数码显微镜。
高速USB2.0接口,数字图像直接输入PC显示图像,远离视觉疲劳,实现多人共享高清画面;配套软件界面友好,操作轻松方便,可大大提高工作效率。
产品特点z高速USB2.0接口,无需外接电源;z采用300万象素1/3〞工业级CMOS图像传感器,输出图像具有超高性噪比;z独具30f/s的高清高速图像预览,可实现同步镜下操作;z增强型AWB算法,色彩真实、艳丽;性能参数产品型号HDC300产品名称海量数字摄像机图像传感器 1/3”彩色CMOS图像传感器像素尺寸 5.2μm×5.2μm光谱响应 400nm~1000nm灵敏度 1.8V/lux-sec@550nm扫描方式逐行扫描曝光方式 ERS(Electronic rolling snap)分辨率 1280×1024/2560×1536 传输速率 30f/s@1280×1024白平衡支持自动/手动曝光控制手动图像输出 USB2.0,480Mb/s电源 USB2.0供电动态范围 62dB可编程控制图像尺寸、图像质量、亮度、增益、数字位移、曝光时间、对比度、工作温度 0°C~50°C 推荐配置z奔4 CPU以上z512 M内存以上z64M显存以上z USB2.0接口z1024*768分辨率以上显示器z Windows 2000 或 Windows XP 操作系统驱动程序安装说明 WindowsXP系统下的安装步骤安装前的准备工作打开光盘,复制一个文件到系统桌面上去,如图:连接好摄像机USB线后1.右键单击我的电脑图标,选择属性一栏2.选择硬件下“设备管理器”3.双击图标出现如图:4.点击出现“硬件安装向导”,如图:然后选择单击“下一步”5.选择后单击“下一步”,如图:6.选中下图中位置然后单击“浏览”指定路径到hipower文件夹下的DRIVER,如图:7.选中驱动程序后单击“确定”,如图:8.安装中会跳出提示,单击仍然继续,如图:9.安装完毕后,点击“完成”。
DH-300电子密度计说明书
测结果的准确是来自于重量的准确量测。视密度测试仪的特性,摆放位置的不同其重量也将不同。所以它
需要使用校正砝码加以校正。
需要使用校正砝码加以校正的情况:
■当视密度测试仪首次使用
■当视密度测试仪被移动至别处
■当四周环境位置改变时
■定期的调整
如何校正: 以 DH-300 使用 100g 砝码校正
插上电源,暖机 30 分钟(针对北方较冷地区)
1、放抗浮架在水中的吊栏上,按 →○← 扣除重量。
2、得到空气中重量之后,放样品在抗
浮架底下避免样品翻覆,假如样品
密度是小于 1.000g/㎤,则此样品
将在抗浮架底下且重量显示负值为
浮体。
3、按 MEMORY 计算视密度值。
C、如何量测颗粒
准备工作:
1、改变液体媒介为酒精,如:乙醇表面张力较低
(或媒介不变仍然为水,但在测完空重后,要放入酒精里洗一下,可以减少水中气泡产生)。
苏州凯特尔仪器设备有限公司
DH-300/DH-600 密度计
一、 概 论
(一)、原理:
一般型视密度测试仪 DH-300 / DH-600 是根据 ASTM D297-93、D792-00、D618、D891 采用阿基米得
的水中置换法原理。完全针对不吸水材料和产品以二个变量为主,来测量相关的密度值而所制作而
(二)、如果数字出现 ---------- 或 -E 排除方法:先按 →○←,试着看会不会稳定归零,如果不归零,先清除测量台上之物体,再联络 供货商相关人员前来维修。
(三)、如果出现不能自行排除之故障,切勿擅自打开机台,须及时联络供货商相关人员前来维修。
4
成。且以温度在 4℃时之密度 1.000 g/㎤为基础。
HC-300 DEHUMIDIFIER操作与维护手册说明书

91761-09 91761-01 91761-02
QTY REQ
(1)
(1)
(1)
(1)
(1) (1)
(2)
(1) (1) (1)
-03 -02 -01 REV
CHANGED 30146-11 TO 30146-12 PER ECR 12-00129MA DRIVE MOTOR WAS 92054-02, HEATERS WERE 91719 SERIES.
13. REPEAT STEPS 8 THROUGH 12 FOR THE SECOND REPLACEABLE FUSE. 14. BOTH FUSE ASSEMBLIES MUST BE INSIDE THE INNER REACTIVATION CHAMBER BEFORE REINSTALLING THE METAL MESH FILTER. 15. REASSEMBLY: REVERSE STEPS 1 THRU 6.
OPERATING AND MAINTENANCE MANUAL
MODEL: HC-300 / DEW-300
Section 1 a) Operating and Maintenance Text
Section 2 a) General Arrangement Drawing ................................................................................... 74119 b) Wiring Diagram 208-240 /1/ 50/60 .............................................................................. 50339 c) Wiring Diagram 208-240 /3/ 50/60 .............................................................................. 50340 d) Wiring Diagram 380-415 /3/ 50/60 .............................................................................. 50341 e) Wiring Diagram 460 /3/ 50/60 ..................................................................................... 50342 f) Wiring Diagram 208-240 /3/ 50/60 .............................................................................. 50344
DTC300中文操作说明

DTC300中文操作说明
第一步:安装DTC300
第二步:创建新的操作说明
双击打开DTC300应用程序,点击“新建”按钮创建一个新的操作说明。
在弹出的窗口中,你需要填写一些基本信息,如操作说明的名称、版本号等。
完成后,点击“确定”按钮。
第三步:添加章节和子章节
对于每个章节,你可以再次点击“添加章节”按钮来添加子章节。
子章节可以用于更详细地描述一个特定的步骤或操作。
你可以给每个章节和子章节添加标题和描述。
第四步:添加内容
在每个章节和子章节下,你可以添加具体的内容。
点击“添加内容”按钮,在弹出的窗口中填写内容的标题和描述,并点击“确定”按钮。
你可以重复此步骤来添加多个内容。
对于每个内容,你可以为其添加图片、视频或其他媒体文件。
点击“添加媒体”按钮,在弹出的窗口中选择你要添加的媒体文件,并点击“确定”按钮。
第六步:导出和发布
导出完成后,你可以将操作说明发布给你的用户或客户。
你可以选择将操作说明以电子邮件或其他方式发送给他们,或者将操作说明上传到你的网站或应用程序中。
总结。
HILLSTONE HIRE PowerBank HPB30-300 使用说明书

OPERATING & MAINTENANCEMANUALforTYPE HPB30 – 300HILLSTONE HIREPowerBankISSUE 2CONTENTSINTRODUCTIONDescription2 SAFETY CONSIDERATIONS2CONNECTION PROCEDURES2LOAD BANK OPERATION3SPECIFICATIONGeneral3Specification notes4 APPLICATION NOTESLead acid battery discharge testing5A general guide to a capacity test.5PERFORMANCE TABLES6MAINTENANCE PROCEDURES7FAULT FINDING PROCEDURESFan cooling fault7Output load fault7Insufficient load fault.7The information contained in this document is considered correct at the time of printing and given in good faith. Hillstone Products bears no responsibility for the accuracy of the data given or any responsibility resulting from the use of the equipment.HILLSTONE PRODUCTS UNIT 2,PORTLAND STREET IND ESTPORTLAND STREETCHESHAM, BURYLANCASHIRE. ENGLANDBL9 6EY.Tel:0161 763 3100Fax:0161 763 3158Email:*****************.ukINTRODUCTIONDescriptionThe Hillstone HPB30-300 load bank is designed to provide high power load testing of DC generators or for manually controlled constant current discharge testing of 24 volt lead acid battery systems.The unit incorporating light weight, force cooled high power resistor elements.The design includes the unique Hillstone PowerBank controller which provides accurate manual adjustment of the load current throughout the test with current control over the total current range. The unit includes shrouded voltmeter and current sockets for direct measurement of the battery voltage and discharge current via external multimeters.The load bank incorporate contactor isolation which in the event of mains interruption will automatically terminate the test.All units are light weight, robust, portable and come complete with mains cable swivel castors and carrying handle and include DC power cables.SAFETY CONSIDERATIONS1.The equipment is designed for use in a clean, dry, indoor environment and should only beoperated by competent electrical engineers who are completely familiar with the operation and specification of the load bank.2.Operators must ensure that interconnecting cables are correctly rated to carry the required loadcurrent and adequately insulated to prevent the possibility of electric shock3.When in use the load bank should be cordon off using safety barriers.4.The load bank should only be operated in an area with adequate ventilation.5.During operation the rear air exhaust outlet and outer case may be hot.6.At the end of a test do not switch off the mains supply. Always run the cooling fans for 5 minswith zero load current to cool the resistor elements.7.Operators working with electricity should not wear rings, jewellery or metal watch straps.8.As with any electrical equipment the load bank should not be used in close proximity to recentlycharged batteries where a build up of explosive gases may have occurred9.Only insulated tools should be used when working on battery connections.10.Refer to the battery manufacturers operating instructions for additional safety precautions.11.Ensure all personnel are familiar with the location of the nearest safety kit and eye wash facility.12.During operation the load bank should not be covered or positioned to restrict air flow CONNECTION PROCEDUREA.Ensure the power source or battery to be tested is compatible with the load bank operatingvoltage.B.Do not attempt to operate the load bank above the maximum operating voltage.C.Check the power source or battery is isolated before connecting to the load bank.D.Check the mains supply switch is in the OFF position.E.Check the control switches are in the OFF position.F.Connect a digital multimeter ( DC volts range ) to the voltage socketsG.Connect a digital multimeter ( DC mV range ) to the shunt sockets. Note 1mv = 4 ampsH.Turn the variable control to the minimum position ( fully anti-clockwise )I.Connect the load bank to the mains supply.J.Insert the DC battery cable socket into the front of the load bank.K.Connect the DC output cable to the power source or battery terminals, ensuring correct polarity.L.Check the DC output cable connections are secure.OPERATING INSTRUCTIONSOperators should read the SAFETY CONSIDERATIONS and CONNECTION PROCEDURE before carrying out the following operating instructions1.Ensure all switches are in the OFF position.2.Turn on the mains switch and ensure the fan rotates correctly.3.Press the green START push button control.4.Switch on the appropriate load current channels and adjust the variable control to the requiredload current.5.During battery discharge testing, as the battery voltage falls, the load current can bemaintained at a constant current by manual adjustment of the variable control and selection of the load current switches.6.At the end of the test switch off the load current switches and press the red STOP push button.7.Do not switch off the mains supply8.Ensure the fan is kept running for 5 mins to cool the resistor elements9.The power source or battery may be disconnected while the resistor elements are cooling10.Switch off the mains supply when the resistor elements are coldSpecificationSpecification Notes1)The maximum current is stated at the maximum operating voltage.2)Battery discharges can be achieved below 21 volts with proportionally reduced output current ( seeperformance tables )3)Units are designed for indoor use only in a clean, dry and well ventilated environment.4)Rated at 30 volt maximum5)The HPB Series load banks are designed for DC generator testing, battery discharge testing andbattery charger testing at 30V maximum.6)External digital multimeters are not supplied with the load bank.7)Information in technical literature, quotations or data sheets are intended to be correct at the time ofpublication, however, Hillstone Products Ltd bears no responsibility for the accuracy of any information given.8)We reserve the right to make detail changes to specification, components, dimensions or weights at thetime of design or manufacture without prior notice.9)All information in this data sheet is the copyright of Hillstone Products Ltd.10)All designs and software are the intellectual property of Hillstone Products Ltd.Application notesLead acid battery discharge testingAll types of lead acid batteries ( with the exception of Plante cells ) fall in capacity during their service life. The end of life is normally determined when the battery falls to 80% of its original capacity.This assumes the battery is float charged at the correct voltage and operated in the correct ambient temperature between 20 – 25 degC.Incorrect charging voltage may reduce service life and high ambient temperature ( without adjustment of the charge voltage ) will seriously reduce capacity and service life. An increase of 10 deg C ambient could reduce the service life by half.It is therefore important to determine the actual capacity of a standby battery, periodically during its service life, so that the end of life can be estimated and any premature failure can be detected. This procedure ensures reliability of the emergency system and provides information to allow financial allocation of resources prior to battery replacement.A general guide to carrying out a full capacity testBattery capacity tests on lead acid batteries are normally carried out at the 3 hour rate of discharge and should be at a constant current down to 1.8 volts per cell.When testing 12 lead acid cells this equates to 21.6 volts at the battery terminals, at the end of the discharge test. Ideally a capacity discharge test should be carried out annually.It is important to perform the discharge until the battery voltage reaches 21.6 volts, this may be greater than three hours. The actual battery capacity is calculated by multiplying the constant discharge current by the time taken to reach 21.6 volts.This capacity figure should then be recorded and compared during the service life to determine if the capacity is reducing at the expected rate. The fall in capacity is approximately linear, i.e. 90% capacity after 5 years ( for a 10 year service life battery )Note : 1)ensure the battery is fully charged prior to a capacity test.2)refer to the battery manufacturers performance data to determine the requireddischarge current.3)discharge performance should be corrected dependant on temperature4)Alternative discharge rates can be used to determine capacity, howevercomparisons should only be made at the same discharge rate and end voltage.Performance TablesThe HPB30-300 load banks can be used to test DC gen-sets and discharge test a wide range of lead acid cells at different system voltages.The performance data below details the current available for each switch step at different gen-set voltages plus the available constant current load during battery discharge testing down to different end voltages.Load bank rating tableHPB30-300 Battery discharge performance table for lead acid cellsHPB30-300 Battery discharge performance table for ni-cad cellsMAINTENANCE PROCEDURESThe load bank should not require any special maintenance, however as with any electrical equipment periodic checks should be carried out to ensure the equipment is in a safe and satisfactory condition.The following periodic checks are recommended;1)Check the inlet and outlet grills are free from obstruction.2)Check the controls, battery socket and battery cables are undamaged.3)Check the fan rotates freely without obstruction.4)Check all interconnection cables are undamagedFAULT FINDING PROCEDURESThe following fault finding procedure is intended to identify simple operational errors and has been categorised into four possible problem areas as follows;.FAN COOLING FAULTCheck the power source is available.Check the mains switch is in the ON position.Check the mains fuse in the load banks input socket.Check the mains fuse in the plug lead.Check the fan motor operates and is free from obstructionsOUTPUT LOAD FAULTCheck the Control switch is in the ON position.Check no alarms are presentCheck the isolation contactor energises.INSUFFICIENT LOAD FAULTCheck the battery is at the required voltage.Check the expected discharge current against the performance tables.Check the operation of the controls..Note:Any identified faults should be reported to the manufacturerRemoving the covers is not recommended.If any covers are removed to inspect internal components, the load bank must be isolated from the mains and batteryTesting the load bank with the covers removed is not recommended.Repair or replacement should only be carried out by the manufacturer.。
HCB-300 说明书
简介Bluetooth™ 蓝牙车载免提HCB-300 设计为可在车内使用,并为在驾驶时拨打或接听电话提供了一种安全而便捷的方式。
在使用车载免提式装置之前,请阅读本用户指南的安全有效使用 和有限担保 部分。
如何使用车载免提式装置?当您拧动点火开关时,车载免提式装置将识别您的手机,并且它们将自动连接。
设备即已就绪,可供拨打和接听电话。
可以将车载免提式装置与多达五台话机一起使用。
车载免提式装置可用于何种话机?可以使用任何启用了蓝牙功能的话机。
本车载免提式装置与索尼爱立信公司(以及,举例来说,诺基亚、摩托罗拉和西门子公司)提供的启用了蓝牙功能的话机兼容。
附件本车载免提式装置支持使用一系列附件,用以增强您的用户体验:• 高级音乐静音装置 HCE-16 - 用于将声音从话机连接到车载音响扬声器。
• 鹅颈式话筒 HCE-14 - 使话筒更靠近您的嘴。
如果将索尼爱立信话机用于车载免提式装置,则可以使用以下附件:• 专用的车载手机座(例如,用于 K700 的 HCH-38 型)以及天线连接线接头 HCE-12,以获得更好的网络接收效果。
• 点烟器适配器 CLA-11 - 用于为话机充电。
操作指南本用户指南中的操作指南基于车载免提式装置按钮和话机按键。
例如,您可以使用车载免提式装置上的按钮或话机上的按键来接听电话。
一些安装工程师。
请参阅第 96页的“安装”。
汉世威c ar co m控制面板概述首次使用首次将车载免提式装置与话机一起使用之前,您需要确保:• 正确安装并开启了车载免提式套装组件。
• 在话机上启用了蓝牙功能。
• 已将车载免提式装置添加到话机中的设备列表。
添加车载免提式装置将车载免提式装置添加到话机中的设备列表后,举例来说,它们将在开启点火开关时自动相互识别。
可为用于车载免提式装置的每台话机选择一个特定的颜色标识。
也可以为特定颜色标识将一台话机替换为另一台话机。
缓慢闪动的颜色标识表示未使用的颜色。
快速闪动的颜色标识表示已在使用的颜色。
DH-CG300使用说明书

置
1 . 4 . 2 D H - C G M P E G 工作原理框图
音频 1 视频 1 音频 2
CG300 视频 音频
CG300 视频 音频
MPEG-V
P
主
C
机
I
内
桥
存
视频 2
MPEG-V
3
1 . 5 数据格式
RGB32(RGB8:8:8:8)
Pixel Data[31:0]
DWORD
Byte 3
Byte 2
Byte 1
[31:24]
[23:16] [15:8]
DW0
Alpha
R
G
RGB24(RGB8:8:8)
Pixel Data[31:0]
DWORD
Byte 3
Byte 2
Byte 1
[31:24]
目录
目 录
1 概述· · · · · · · · · · · · · · · · · · · · · · · · · · · · · · · · · 1 1.1 DH-CG300 技术性能及指标 · · · · · · · · · · · · · · · · · · · 1 1.2 DH-QP300 技术性能及指标 · · · · · · · · · · · · · · · · · · · 1 1.3 DH-CGMPEG 技术性能及指标 · · · · · · · · · · · · · · · · · · 2 1.4 基本结构及工作原理· · · · · · · · · · · · · · · · · · · · · · · 2 1.4.1 DH-CG300/QP300 工作原理框图 · · · · · · · · · · · · · · · · 2 1.4.2 DH-CGMPEG 工作原理框图 · · · · · · · · · · · · · · · · · · 3 1.5 数据格式 · · · · · · · · · · · · · · · · · · · · · · · · · · · · · 4 2 安装· · · · · · · · · · · · · · · · · · · · · · · · · · · · · · · · · 7 2.1 产品清单 · · · · · · · · · · · · · · · · · · · · · · · · · · · · · 7 2.2 运行环境 · · · · · · · · · · · · · · · · · · · · · · · · · · · · · 7 2.2.1 显示卡 · · · · · · · · · · · · · · · · · · · · · · · · · · · · · 7 2.2.2 主机板 · · · · · · · · · · · · · · · · · · · · · · · · · · · · · 8 2.3 安装图像卡硬件· · · · · · · · · · · · · · · · · · · · · · · · · 10 2.3.1 注意事项 · · · · · · · · · · · · · · · · · · · · · · · · · · · 10 2.3.2 图像卡的输入 输出端口 · · · · · · · · · · · · · · · · · · 10 2.3.3 安装步骤 · · · · · · · · · · · · · · · · · · · · · · · · · · · 13 2.4 安装图像卡设备驱动程序 · · · · · · · · · · · · · · · · · · · 14 2.4.1 文件目录 · · · · · · · · · · · · · · · · · · · · · · · · · · · 14 2.4.2 Windows9x/2000 环境下 · · · · · · · · · · · · · · · · · · · 14 2.4.3 WindowsXP 环境下 · · · · · · · · · · · · · · · · · · · · · · 20
DGS-300管理机操作使用说明

f)通话过程可按‘*’键挂机。
g)通话过程若对方挂机将显示“对方已挂机”。
(3)未处理事件
a)当系统记录中出现新的‘报警记录’或‘未接来电’时,系统空闲状态下将显示“存在未处理事件”。
b)在显示“存在未处理事件”界面下,按‘#’键查看未处理事件,或按‘*’键忽略这些事件返回空闲界面;未被查看的事件可在‘查询——待处理事件’菜单中找到,已查看的事件可在‘查询——通讯记录’或‘查询——报警记录’菜单中找到(视未处理事件的类型而定)。
1)煤气报警
2)烟雾报警
3)红外报警
4)门磁报警
5)紧急报警
6)防撤报警
7)挟持报警
8)密码错误
9)指纹无效
可按‘#’键选择显示其中某类型的报警记录。
d)‘查询——报警记录——限定时间’,按‘#’键确认后进入时间范围输入界面,输入时间的上下限,如要查询2000年1月1日至2000年2月1日间出现的报警记录,则输入20000101(起始时间)20000201(结束时间),然后按‘#’键确认。
a)系统在空闲状态按下‘查询’键显示查询菜单,选择‘通讯记录’。在该菜单下的所有记录都是此前被查阅过的,实际上是已被查阅的‘未接来电’记录。
b)当记录条数较多时,可选择显示全部记录或根据时间范围筛选,当限定时间后,那么显示具体报警记录时所有记录都是该时间范围内的,范围外的记录将不显示。
c)‘查询——通讯记录——限定时间’,按‘#’键确认后进入时间范围输入界面,输入时间的上下限,如要查询2000年1月1日至2000年2月1日间出现的报警记录,则输入20000101(起始时间)20000201(结束时间),然后按‘#’键确认。
- 1、下载文档前请自行甄别文档内容的完整性,平台不提供额外的编辑、内容补充、找答案等附加服务。
- 2、"仅部分预览"的文档,不可在线预览部分如存在完整性等问题,可反馈申请退款(可完整预览的文档不适用该条件!)。
- 3、如文档侵犯您的权益,请联系客服反馈,我们会尽快为您处理(人工客服工作时间:9:00-18:30)。
海量数码摄像系统
安装/操作说明书
深圳市海量光电有限公司
产品介绍
海量HDC300是300万象素CMOS高分辨率数码显微镜。
高速USB2.0接口,数字图像直接输入PC显示图像,远离视觉疲劳,实现多人共享高清画面;配套软件界面友好,操作轻松方便,可大大提高工作效率。
产品特点
z高速USB2.0接口,无需外接电源;
z采用300万象素1/3〞工业级CMOS图像传感器,输出图像具有超高性噪比;
z独具30f/s的高清高速图像预览,可实现同步镜下操作;
z增强型AWB算法,色彩真实、艳丽;
性能参数
产品型号HDC300
产品名称海量数字摄像机
图像传感器 1/3”彩色CMOS图像传感器
像素尺寸 5.2μm×5.2μm
光谱响应 400nm~1000nm
灵敏度 1.8V/lux-sec@550nm
扫描方式逐行扫描
曝光方式 ERS(Electronic rolling snap)
分辨率 1280×1024/2560×1536 传输速率 30f/s@1280×1024
白平衡支持自动/手动
曝光控制手动
图像输出 USB2.0,480Mb/s
电源 USB2.0供电
动态范围 62dB
可编程控制图像尺寸、图像质量、亮度、增益、数字位移、曝光时间、对比度、
工作温度 0°C~50°C 推荐配置
z奔4 CPU以上
z512 M内存以上
z64M显存以上
z USB2.0接口
z1024*768分辨率以上显示器
z Windows 2000 或 Windows XP 操作系统
驱动程序安装说明 WindowsXP系统下的安装步骤
安装前的准备工作
打开光盘,复制一个文件到系统桌面上去,如图:
连接好摄像机USB线后
1.右键单击我的电脑图标,选择属性一栏
2.选择硬件下“设备管理器”
3.双击图标出现如图:
4.点击出现“硬件安装向导”,如图:然后选择单击
“下一步”
5.选择后单击“下一步”,如图:
6.选中下图中位置然后单击“浏览”指定路径到hipower文件夹下的DRIVER,如图:
7.选中驱动程序后单击“确定”,如图:
8.安装中会跳出提示,单击仍然继续,如图:
9.安装完毕后,点击“完成”。
注意事项
1. 安装数字相机之前,请仔细阅读说明书。
数字相机属于高科技产品,操作不当可能
会导致损坏。
2. 从包装中取出相机,轻拿轻放,以免碰坏相机的器件。
3. 相机镜头的安装及相机位置的固定应在USB2.0电缆线连接前进行。
4. 不要在相机采集图像的状态下,直接断开USB2.0电缆线。
5. 相机具有USB设备的热插拔和即插即用的特性安装简便,不需要关闭计算机和重新
开机。
6. 使用USB2.0电缆线连接相机端口和主机的USB2.0端口即可
操作说明
使用前的准备工作
打开文件夹,并发送图标到桌面快捷方式。
1.捕捉图像
1.1 双击桌面摄像头图标,进入主页面,如图:
1.2 单击之后,工具栏中出现(连续采集图标),如图所示:
1.3 点击连续采集图标,马上出现所拍样品画面,如图所示:
2.属性调节
2.1设置栏下拉菜单中有项“Bayer”选择“使能(RGBG)”
2.2设置栏下拉菜单中有项“插值算法”选择“中”
2.3选择设置下拉菜单中“属性”项,在视频栏下的“视频格式”中选择”F7M1_CUSTOM”,然后点击“应用”、此时相机视频采集分辨率为1024×768保存图像的分辨率为2048×1536,如果选择”F7M0_CUSTOM” 、此时相机视频采集分辨率和保存图像的分辨率都为2048×1536。
如图:
2.4在初次安装时界面上的属性调节栏里会有6项,其中只有“曝光时间”、“增益”、“数字位移”3项是使用中会经常用到的,为避免使用中的误调节而影响图像质量建议隐藏其他调节项;
步骤:在摄像机页面下,选择设置下拉菜单中“属性”项,在特性栏中选中要隐藏的项后点击“从调节窗口移除”这样该项目就隐藏好了
此时页面中只留有3项如图:
2.5查看栏下拉菜单中有各项栏目选项,选中即显示否则隐藏,如想全屏显示画面可关闭“属性调节窗口”、“设备列表”和“显示标尺”三项,如图:
3. 功能调节
3.1 白平衡的使用
如何使用好白平衡功能,关键提示:在显微镜下放置好一张白纸,或者把显微镜亮度调到
白亮状态,调整好亮度和最佳清晰度,然后点击“白平衡”按钮,软件自动获得最佳图像效果。
注意:同等光照环境下只需调节一次白平衡。
3.2图像质量调节
在属性栏里供有三项是供调节画面质量的,分别是;曝光时间、增益、和数字位移,如图:
其中:曝光时间调节一般在50以内,可根据实际图像明暗调节,太大会影响速度;
增益调节一般在1或2,可根据实际图像调节,太大噪点增加;
数字位移根据图像质量调节。
3.3对比度调节
在设置栏下拉菜单中有项“对比度调节”点击后出现调节栏,如图:
选中“对比度使能”后方可应用对比度调节。
4. 保存图片
4.1点击停止采集图标冻结画面
4.2点击图标(保存JPEG)或(保存位图)分别保存不同格式的图片
出现下面界面,选择您保存到哪一个文件夹,文件命名,点击保存,OK !
4.3 打开保存好的图像,请找到您保存的文件夹地址,点击您保存的文件名,点击打开,OK。
