微控数显 EG系列电热板
氢化物发生原子荧光光谱法测定自来水中Pb
氢化物发生原子荧光光谱法测定自来水中Pb侯炳江;林建奇【摘要】在大量实验研究基础上,探索了氢化物发生原子荧光光谱法测定自来水中Pb的方法体系,提出了盐酸羟氨-碱性铁氰化钾-盐酸的铅氢化物发生方法,在优化实验条件下,Pb的方法检出限为0.39 mg・L -1,相对标准偏差为1.92%(Pb :4 mg・L -1,n=11),加标回收率:(84~108)%。
该方法可用于自来水中Pb的测定。
%The detection limit(3 s) is 0 .39 mg .L -1 .The relative standard deviations is 1 .92% (Pb:4 m g .L -1 ,n=11) .The recovery rate is 84% 108% .This method can be used for the determination of Pb in tap water.【期刊名称】《分析仪器》【年(卷),期】2015(000)004【总页数】4页(P62-65)【关键词】Pb;自来水;氢化物发生原子荧光光谱法【作者】侯炳江;林建奇【作者单位】黑龙江省水文局,哈尔滨 150001;北京海光仪器有限公司,北京100015【正文语种】中文自来水作为日常饮用水重要水源,是人类赖以生存的物质基础,饮用了受过污染的自来水,会直接影响人体的健康,导致各种疾病发生[1]。
铅是可在人体和动物组织中积蓄的有毒金属,铅的主要毒性效应是贫血症、神经机能失调和肾损伤。
水中铅的主要污染源是蓄电池、冶炼、涂料、电镀工业等废水的排放[2],自来水的铅污染主要来自水源净化过程以及自来水输送过程的管路(塑料材质、金属材质等)[3]。
所以,对于自来水的Pb测试显得尤为重要。
铅的测试方法较多,有石墨炉原子吸收法[2、4、5]、双硫腙分光光度法[6]、阳极溶出伏安法[7,8]和示波极谱法[9]等。
由于自来水中Pb含量一般处在痕量级别,对灵敏度和检出限有较高要求,通过大量实验研究,笔者探索了氢化物发生原子荧光光谱法测定自来水中Pb的方法体系。
京墨中有害元素的含量测定及挥发油成分分析

京墨中有害元素的含量测定及挥发油成分分析旺杰次仁; 尕藏卓玛; 次卓玛; 刘剑桥; 党艺航; 王晓玲; 达娃卓玛【期刊名称】《《中国民族民间医药》》【年(卷),期】2019(028)003【总页数】4页(P34-37)【关键词】京墨; 重金属; 挥发油; ICP-AES; 微波消解; GC-MS; 多环芳烃【作者】旺杰次仁; 尕藏卓玛; 次卓玛; 刘剑桥; 党艺航; 王晓玲; 达娃卓玛【作者单位】西藏自治区食品药品检验研究院西藏拉萨 850000; 西南民族大学药学院四川成都 610041【正文语种】中文【中图分类】R284京墨又称“京香墨”、“青墨”或“香墨”,由松烟末和胶质制成。
京墨药用历史悠久,首载于唐代《本草拾遗》[1],同时京墨也是常用藏药[2]。
经由历代各民族本草记载可知京墨味辛,性温,无毒,归肝、肾经[3-4]。
其药用功效丰富,不仅可止血消肿,还能治鼻衄、产后血晕、飞丝入目等,现代研究表明京墨亦可用于治疗带状孢疹[5-6]。
微量元素在人体中的含量直接影响人体生理功能,与机体的活动状态及疾病密切相关[7],药物中过量的微量元素尤其是重金属的含量超标会损害人的健康,需要制定严格的标准来限制[8]。
京墨作为传统口服类药物,目前有关京墨的各项质量控制标准均未见研究报道。
而当今制墨所用的原料与工艺与古制京墨皆有差别[9-10]。
为保证京墨的品质及入方药用安全,本试验以电感耦合等离子体-原子发射光谱法(ICP-AES法)测定7批京墨样品中Sb、As、Pb、Cr、Cd、Cu元素的含量,并以原子荧光光度法测定其中Hg元素含量;同时以GC-MS法对京墨中的挥发油化学成分的组成进行分析,为规范完善京墨的质量控制标准及临床应用提供科学依据。
1 仪器与材料1.1 材料京墨药材(批号:JM1、JM2、JM3、JM4、JM5、JM6、JM7,四川天利和药业有限公司和安徽徽州)。
镉标准液(批号:GSB 04-1721-2004)、铬标准液(批号:GSB 04-1723-2004(a))、锑标准液(批号:GSB 04-1735-2004(a))、铜标准液(批号:GSB 04-1725-2004)均购于国家有色金属及电子材料分析测试中心;铅标准液(批号:211035050)、汞标准液(批号:212075009)购于美国Accu Standard公司;砷标准液(批号:00009335632)购于美国Agilent Technologies公司。
EHEG电热板操作规程
EH/EG电热板操作规程
操作步骤:
1.插上电源插头(必须具有安全接地装置)
2.按电源开关接通电源,调节温度控制旋钮,设定需要的温度,等待仪器升温。
3.将被加热物体放置在加热板上加热。
4.实验结束后,按电源开关关闭电源。
注意事项:
1.请在规定的温度范围内使用该仪器,严禁超温使用,否则造成电热板控制系统的损坏,从而引起故障。
2.该设备工作时禁止罩在小的物体内,以免控制系统因温度过高而造成损坏。
3.设备工作时,及工作完后电热板面未完全冷却到室温时切勿触摸电热板面。
4.勿将该仪器放置在潮湿的场所,这会降低绝缘性,从而引起触电事故。
艾默生UPS用户手册
屹晶 EG1163 芯片数据手册说明书

2. 描述
ELECTRONIC GIANT
EG1163 芯片用户手册
高压大电流降压型开关电源芯片
2018 © 屹晶微电子有限公司 版权所有
REV 1.0
屹晶微电子有限公司
EG1163 芯片数据手册 V1.0
高压大电流降压型开关电源芯片
版本变更记录
版本号 日期
描述
V1.0
2018 年 05 月 15 日 EG1163 数据手册初稿
2018 © 屹晶微电子有限公司 版权所有
1/1
屹晶微电子有限公司
EG1163 芯片数据手册 V1.0
高压大电流降压型开关电源芯片
EG1163 芯片数据手册 V1.0
1. 特性
同步续流方案,支持高压大电流方案。 外接一个电容可设置工作频率(0-300KHz) UVLO 欠压锁定功能:
2018 © 屹晶微电子有限公司 版权所有
1/10
屹晶微电子有限公司
4. 引脚
4.1 引脚定义
EG1163 芯片数据手册 V1.0
高压大电流降压型开关电源芯片
图 4-1. EG1163 管脚定义
2018 © 屹晶微电子有限公司 版权所有
2/10
屹晶微电子有限公司
EG1163 芯片数据手册 V1.0
高压大电流降压型开关电源芯片
4.2 引脚描述
引脚序号 引脚名称
1
EIB智能控制系统配置样板

开关驱动器
TXA208A TXA208B TXA208C TXA208D 开关模块,8路4A 开关模块,8路10A 开关模块,8路16A 开关模块,8路16A,适用于容性负载
开关驱动器
TXA207A TXA207B TXA207C TXA207D 开关模块,10路4A 开关模块,10路10A 开关模块,10路16A 开关模块,10路16A,适用于容性负载
Tebis EIB智能控制系统 智能控制系统
序号 型号 TXA111 TXA112 TA008 TG008 TG019 名称 数量
系统模块
电源模块,320mA 电源模块,640mA 线路耦合器 总线接线端子 EIB/KNX通讯总线 (米)(不能与强电线共管)
开关驱动器
TXA201A TXB202A 开关输出模块,1路4A 开关输出模块,2路4A
人体感应器
TX510 TX511 WYT510 人体感应器 人体感应器(带恒照度控制) 移动感应器
WYT510C 移动感应器
传感器及模块
TE001 EK086 EE002 TX025 TG053 TG353 温度传感器输入模块(与TE001配合使用) AP温度传感器,IP65 光感探头 光线感应模块(与EE002或EE003配合使用) 气象传感器 传感器安装架
智能控制面板
WYT320 WYT340 WYT360 TX450A WYT610 WYT620 WUT03 WUT06 TK106 双键智能面板 四பைடு நூலகம்智能面板 六键智能面板
WYT360IR 红外可控六键智能面板 四按键液晶显示控制面板 温控面板 温控面板(可控风速) 总线耦合器 总线耦合器(用于WYT620) 六键红外遥控器
接口
魏德米勒温度模块说明书

魏德米勒温度模块说明书1. 概述魏德米勒温度模块是一款专用于测量温度的模块,采用先进的传感器技术和数字信号处理,可准确、快速地获取环境温度信息。
2. 技术规格- 输入电压:3.3V- 工作电流:≤20mA- 测量范围:-40℃ ~ 125℃- 温度精度:±0.5℃- 输出信号:数字信号- 通信接口:I2C- 尺寸:8mm x 8mm3. 使用方法3.1 连接接口将魏德米勒温度模块的VCC引脚连接至3.3V电源,GND引脚连接至电源的地线。
同时,将SCL引脚连接至主控板的I2C时钟线上,将SDA引脚连接至主控板的I2C数据线上。
3.2 初始化首先,根据具体的开发平台和编程语言,引入魏德米勒温度模块的驱动程序,并初始化I2C接口。
3.3 温度测量通过I2C通信,发送读取温度的命令至魏德米勒温度模块,模块将返回测量到的温度数值。
使用驱动程序提供的函数,将返回的数值转换为实际温度。
4. 注意事项- 在使用模块前,请确保电源供应的稳定性,避免电源波动对测量结果造成影响。
- 在进行温度测量时,避免将外界热源直接对准模块,以免造成测量误差。
- 温度模块仅可在指定的温度范围内使用,超出该范围可能导致测量不准确或模块损坏。
- 在进行长时间连续测量时,如果觉得模块温度过高,建议使用散热装置进行散热。
5. 维护与保养- 温度模块无需额外保养,但应定期检查连接线路是否稳固,确保正常的通信和供电。
- 如发现模块存在故障或异常情况,请及时联系厂家或供应商进行维修或更换。
本说明书详细介绍了魏德米勒温度模块的技术规格、使用方法以及注意事项,希望能帮助您正确使用和维护该温度模块。
如有任何疑问或需要进一步的技术支持,请随时与我们联系。
谢谢您选择魏德米勒温度模块!魏德米勒科技有限公司×××年××月××日。
温度控制器 G24 手册说明书

Gammaflux, the world leader in temperature and sequential valve gate controllers, introduces the next generation in temperature control: the G24. Focused on the plastics industry, Gammafluxis an expert in process optimization. The G24 is everything you would expect in a next generation control system from Gammaflux:Easier to Use (New Mold Wizard)Less ExpensiveSmallerFasterMore Flexible/StandardizationImproved InterlocksMold Doctor®Early Material/Plastic Leak Detection5 Year Warranty*PartnershipMost Gammaflux temperature controllersare used on hot runner injection molding applications. However, they are also frequently used for controlling thermoset, liquid injection molding (LIM), reaction injection molding (RIM), injection blow molding, extrusion blow molding, blow molding conditioning stations, thermoforming, profile extrusion, sheet extrusion and other dynamic applications. Each of these processes requires a temperature controller. If the temperature controller fails, the process either stops or is crippled. When selecting a temperature control supplier, you are selecting a partner who is critical to your product and profitability. Triangulated Control Technology®All Gammaflux temperature controllers feature Triangulated Control Technology®. Using this unique technology, our controllers:Sense – Twenty (20) times per second, Gammaflux controllers precisely measure the temperature.Control – The proprietary self-optimizing Gammaflux PID2 control algorithm adjusts if the actual temperature deviates 0.03ºF (0.014ºC) from set point. The second derivative (PID2) monitors the actual temperature rate of change. As a result, the output to the heater is regulated in advance of the typical proportional band to limit or eliminate over and undershoot. Actuate – Using phase angle fired output (0.1% resolution; 1000 steps), the Gammaflux controller delivers smooth and exact power to each heater for the ultimate in temperature control.Triangulating your process witha Gammaflux controller meansachieving better temperaturecontrol, which could result in:Enhanced part qualityReduced scrapImproved part weightconsistencyMaterial savingsHigher profit marginsPower Priority®“Low mass”, or extremely smallhot runner nozzles are a uniquechallenge to control. To smooththe power and the melt heathistory, Gammaflux created Power Priority®. Power Priority® smoothes the power output to individual zones. Users have the option to manually apply a Power Priority® set point from 1 (light) to 4 (heavy), providing unparalleled control for applications where it is most needed.ProtectionClosed loop wet heater bakeout - 120 times per second (at 60 Hz), the G24 module checks the heater for a short. If the heater is shorted, the output is adjusted within 8.3 milliseconds to protect the heater, cables and controller. ReliabilityGammaflux products lead the market in reliability. The expected life is10 – 15 years based on the quality of heater electrical maintenance. Some Gammaflux controllers have been in continuous operation for 25+ years.The G24 Temperature ControllerEasier to Use (New Mold Wizard)Best industry practices and actual operation are often not the same. The G24 is designed to be understood with 5 minutes of training, and programmable to automatically operate according to the industry’s best practices. The Gammaflux New Mold Wizard effortlessly guides the user through (1) zone identification and group creation, (2) setpoint entry, (3) monitor zone configuration, (4) sophisticated mold startup functions, (5) advanced zone monitor functions, (6) heating the mold and (7) saving the menu. During this process the software automatically tunes each zone, engages the plastic leak detection alarm, sets the imminent heater failure alarm and saves everything back to the mold menu automatically after the “good parts” button is confirmed by the operator. The Wizard makes everyone a controller configuration expert.Less ExpensiveBy leveraging the global electronics supply chain with new components that take the place of multiple previous components, Gammaflux has been able to reduce the price of the G24 product line in relationto existing Gammaflux products. Gammaflux, long known as the reliability and control leader in the industry, combines a competitive price with superior performance in the G24 controller.SmallerEach control module has a 15 or 30 amp per zone output rating. Up to 24 zones can be placed in a single control block. When compared to the Gammaflux TTC product line, this specific128 zone controller has a 48% smaller footprint.FasterImproved Interlockssignals to speed setup. Mold Doctor®Early Leak Detection5 Year Warranty* Every G24 controller comes with a full 5-year warranty and is backedby the industry-leading worldwide serviceand support that our customers expect from Gammaflux.128 zones96 cavityDelta: 150 ampWye: 70 ampWidth: 20in / 50.8cmDepth: 23in / 58.4cmHeight: 50.25in / 127.6cmyear warranty on thetouch screen interfaceT1MT1T2T2S3 S1S2S2Cable HangerThe optional cable hanger can be added to any G24 controller. Constructed of steel this durable double sided cable holder eases controller storage and transport.TransformersOptional 480 VAC to 240 VAC Delta/Delta three phase 2:1 step downtransformers are available. The smaller transformer pod can contain a 15, 30 or 45 kva transformer. The larger transformer pod can contain a 75 or 112 kva transformer. Each transformer pod is detachable, has forced air cooling and anindependent circuit breaker.D296 zones Delta: 300 amp Wye: 200 ampD3144 zones Delta: 300 amp Wye: 200 ampD4192 zones Delta: 300 amp Wye: 200 ampO v e r v i e wCable HangerTransformersLearnLaunchConfirm1Protect3Set2Predict5Save7Heat6Program4[Injection Mark][Paused]Early Leak Detectionn nn nn nNextGenerationn/24Limited featureTouch screen or laptop required (LEC)Windows XP® and Windows 7® are registered trademarks of Microsoft CorporationPerformanceThermocouple Calibration Accuracy 0.2°F (0.1°C) Control Accuracy (steady state) ± 0.1°F (± 0.05°C) Heater Short Detection Time 8.3 msec. or 120 times per second at 60 Hz PI D 2 Alogrithm Execution Time 50 msec. or 20 times per second Tuning Automatic, self optimizing, manual override Manual Mode Power compensation for incoming voltage variation Degrees F or C Field Selectable Operating Range 0-932°F (0-500°C) Output Range 0-240 VAC, Phase angle fired,1000 steps Standby Temperature User Selectable (0-932°F, 0-500°C) Remote Input 24 VDCInput Thermocouple Type J standard; Type K selectable Cold Junction Compensation Internal to enclosureExternal Resistance 10 Meg. Ohms Temp. Variation due to T/C Length NoneElectricalI nput Voltage 180-265 VAC Delta/Wye (phase voltage)Frequency 47-53 Hz, 57-63 HzAmbient Temperature Range 32-122°F (0-50°C)Humidity Range 10-95% non-condensing Output Module Rating 240 VAC; 2 zone - 15 amps/zone 3600 watts/zone240 VAC; 1 zone - 30 amps/zone 7200 watts/zone Communications Electrical Standard Industrial USB 2.0Performance StandardsU.S., Canadian and International: CE Mark; EMC: IEC 61000 - (6-2, 6-4, 4-2, 4-3, 4-4, 4-5, 4-6, 4-11)*Designed to meet Safety* IEC 61010, UL-508, UL-873 and CSALanguages English, Deutsch, França is, Czech, русский, Italiano, Español, Portuguese,PhysicalS Version 4.0English Height and weight excludes screen.Specifications subject to change without notice.Global Headquarters Gammaflux Controls Inc.113 Executive Drive Sterling, VA 20166 , USA Tel.: (800) 284-4477, or Tel.: +1-(703) 471-5050 Fax: +1-(703) 689-2131E-Mail:******************Asia-Pacific Headquarters Synventive Molding Solutions (Suzhou) Co.Ltd. 12B Gang Tian Industrial Square Suzhou Industrial Park, China 215021Tel.: +86 512 62838870-866 (8:30am-5:00pm)Tel.:+86138****7765(afterhours)E-Mail:*********************************European HeadquartersGF Controls GmbH Gammaflux Peter Sander Straße 41a 55252 Wiesbaden Mainz-Kastel Germany Tel.: +49-6134-938900Fax.: +49-6134-938902 E-Mail: info@gammaflux.de。
天津拓至明智能电热板SD34-1技术参数

智能电热板SD34-1一.产品特点:1.耐腐蚀耐各种酸:硫酸、盐酸、硝酸、氢氟酸、高氯酸、王水等。
耐碱及各种腐蚀性空气。
2. 耐高温温度峰值350℃。
3. 温度均匀板面各点温差≯±2℃。
同质的批量试样(几十个烧杯)可同时达到沸点。
4. 控温精确随需调温,PID调节,控温精度:±0.1℃。
5. 升温快室温至峰值温度≯40分钟。
均值6.9秒/℃。
6. 零污染板面硬度>维氏硬度20,密度3.02,无抹痕,不掉渣。
7. 板上测温仪表显示温度即板面的实际温度(工作用温度)。
8. 两个热区A 主热区峰值温度350℃;B 副热区峰值温度210℃。
/p>9.外壳材质优质ABS塑料包角。
/p>10. 再利用板面系统不损坏可重复使用。
/p>11. 安全多层绝缘保护,当设备出现故障时,在发出警报的同时即可停止工作。
适用行业:冶金、地质、农业、海洋、环保、质检、食品、石油、化工、生物、遗传、橡胶、教学、科研、建材、分析室、核工业、医药卫生、黄金部队、生化实验室等。
使用范围:化学分析、物理测定、烘焙蒸干、煅烧热处理等试验。
二.参数输入电压:220V工作频率:50Hz功率:2600w工作电流:12A峰值温度:350℃控温方式:PID控温精度:±0.1主热区规格:300×400mm副热区规格:300×60×2+510×60×2 工作系统外形尺寸:510×550×145mm 指挥系统外形尺寸:220×420×145重量:27kg。
石墨炉原子吸收光谱法测定大米粉中铅含量

石墨炉原子吸收光谱法测定大米粉中铅含量作者:张小俊成颜君来源:《农业开发与装备》 2018年第12期摘要:铅是自然界分布很广的有害元素。
利用高压消解法-石墨炉原子吸收光谱法测定国家标准物质大米粉中的铅含量。
试验结果表明,测定Pb元素的最佳条件为:灰化温度、原子化温度分别为600℃、2 100℃,可以确保测定结果的准确性与精密度。
在此将会根据高压罐消解——石墨炉原子吸收光谱法测定标准物质大米粉中铅含量的结果进行分析,可以为相关检测工作提供技术支持,为现代人们的日常生活提供相应的帮助作用。
关键词:大米;高压消解;石墨炉原子吸收光谱法;铅0 引言铅是一种对人体毒性很强的重金属,是一种具有蓄积性、多亲和性的毒物,蓄积体内不易排出,主要损害人体神经系统、造血系统、消化系统和肾脏,还损害人体的免疫系统,使有机抵抗力下降,婴幼儿尤其对铅敏感。
人体中铅主要来自食物,加强食物中铅的测定,防止铅中毒有重要的意义。
随着全球经济和科技的发展,农产品中重金属元素的质控和超标问题已引起人们的重视,测定农产品中的铅已是国家食品卫生检验重要项目之一。
目前对大米等粮食作物中的铅通常采用石墨炉原子吸收光谱法检测。
本文采用全密封的聚四氟乙烯消化罐高温高压消解,利用压力提高酸的沸点和浸透力,具有样品消解彻底、实际消耗少、空白值低、无容器吸附(聚四氟乙烯是化学惰性材料)、消化过程无玷污、回收完全等优点,酸雾保持在容器内,避免对环境的污染。
1 材料与方法1.1 试验材料1.1.1 仪器。
240ZAA型石墨炉原子吸收光谱仪及铅空心阴极灯(美国安捷伦)、MSE224S-CE型电子分析天平(德国赛多利斯)、EG20Aplus微控数显电热板(美国莱伯泰科)、Milli-QA10型纯水仪(美国密理博)、DHG-9140A型电热鼓风干燥箱(上海一恒)、60 mL聚四氟乙烯高压消解罐(上海隆拓)。
1.1.2 试剂。
硝酸(天津风船、优级纯)、基体改进剂:20 g/LNH4H2PO4(国药集团、优级纯)。
EG-20A plus 微控数显电热板和微控数显电热板价格

EG-20A plus微控数显电热板
标题:EG-20A plus微控数显电热板
公司推出的EH系列、EG系列微控、数显电热板是专为实验室设计的电热产品,是样品加热消解、煮沸、蒸酸等处理的好帮手,可以满足物理、化学、生物、环保、制药、食品、饮品、教学、科研等不同行业化学实验室对试剂加热的需要。产品所获专利:实用新型专利(专利号:ZL 2005 2 0200914.9);外观设计专利(专利号:ZL 2005 3 0200978.4)多个系列、众多型号的产品群,给客户最大的选择空间!产品分类配蒸酸架产品特点( EH系列)加热面积大,加热均匀,升温快采用微处理芯片精确控制温度,持续加热,抗电磁干扰特殊防腐材料,耐腐蚀,使用寿命长设计美观大方EH 20A Plus EH 35A Plus EH 20B EH ...
厂家:南电热板
标题:DB-1A数显控温不锈钢电热板
DB系列数显控温不锈钢电热板一.概述:本电热板采用不锈钢板做导热体,具有耐酸.耐碱.耐高温.不氧化.使用简便.散热均匀.安全清洁等优点;数显控温,采用国际DIN标准设计和生产,具有精度高.抗震性强.可靠性好.读数清晰.无视差,可远离观察等优点的控温仪;广泛用于烘焙、干燥和做其他温度实验,是生物、遗传、医药卫生、环保、生化实验室、分析室、教育科研的必备工具。其主要特点:⑴加热器采用浇铸成型工艺制作,高温状态无翘曲变形。⑵面板选材不锈钢表面处理,使其不变色,有优越的抗腐蚀性能。⑶最大加热功率2000W,最大加热面积0.08平方米。⑷加热均匀,操作简便,使用安全。二.技术参数:型号指...
厂家:南北控数显电热板
标题:EH-20A Plus微控数显电热板
公司推出的EH系列、EG系列微控、数显电热板是专为实验室设计的电热产品,是样品加热消解、煮沸、蒸酸等处理的好帮手,可以满足物理、化学、生物、环保、制药、食品、饮品、教学、科研等不同行业化学实验室对试剂加热的需要。产品所获专利:实用新型专利(专利号:ZL 2005 2 0200914.9);外观设计专利(专利号:ZL 2005 3 0200978.4)多个系列、众多型号的产品群,给客户最大的选择空间!产品分类配蒸酸架产品特点( EH系列)加热面积大,加热均匀,升温快采用微处理芯片精确控制温度,持续加热,抗电磁干扰特殊防腐材料,耐腐蚀,使用寿命长设计美观大方EH 20A Plus EH 35A Plus EH 20B EH ...
EG4002_datasheet
ELECTRONIC GIANT EG4002芯片数据手册红外热释电专用芯片红外热释电专用芯片版本变更记录红外热释电专用芯片目录1. 特点 (4)2. 描述 (4)3. 应用领域 (4)4. 引脚 (5)4.1. 引脚定义 (5)4.2. 引脚描述 (5)5. 结构框图 (6)6. 典型应用电路 (6)6.1 EG4002典型应用电路图 (6)6.2 EG4002控制继电器应用电路图 (7)6.3 EG4002可重复触发+光敏电阻应用电路图 (7)7. 电气特性 (8)7.1 极限参数 (8)7.2 典型参数 (9)8. 应用设计 (10)8.1振荡器工作频率计算 (10)8.2触发延时时间定时器和触发封锁时间定时器 (10)8.3A端重复和不可重复触发功能 (11)8.4Vc触发禁止端 (12)8.5第一级运放增益设定 (12)9. 封装尺寸 (13)9.1 DIP8封装尺寸 (13)9.2 SOP8封装尺寸 (13)红外热释电专用芯片EG4002芯片数据手册V1.21. 特点⏹8引脚数红外热释电专用芯片,外围电路简单,成本低⏹静态功耗小,3V工作电源时功耗小于45uA, 5V工作电源时功耗小于75uA,非常适合电池供电系统应用⏹高输入阻抗运算放大器,可与多种传感器匹配,进行信号与处理⏹双向鉴幅器,可有效抑制干扰⏹内置参考电压,供内部比较器和运放的参考电压⏹内设延时时间定时器和封锁时间定时器,改变振荡器频率即可设定定时延时时间⏹外围元器件少,只需配置第一级运放的增益和振荡器的RC器件即能可靠工作⏹工作电源+3V~+6V⏹封装形式: SOP8和DIP82. 描述EG4002是一款专为热释电红外传感器信号放大及处理输出的数模混合专用芯片,内部集成了运算放大器、双门限电压比较器、参考电压源、延时时间定时器和封锁时间定时器及状态控制器等,专用于防盗报警系统、人体门控制装置、照明控制开关等场合。
EG4002电源工作电压为+3V~+6V,采用 COMS工艺数模混合相结合的集成电路,8个引脚数封装设计,降低了外围电路元件数和整体成本,节省了PCB板空间。
MicroAire REF 5025 REF 5020 电子设备控制台 使用说明说明书

REF 5025 / REF 5020 电子设备控制台使用说明器械手册翻译信息下述其他语言,请见 /resources:Dansk(丹麦语)Danske oversættelser af denne brugsanvisning er tilgængelig online på /resources. Nederlands(荷兰语)Nederlandse vertalingen van deze handleiding zijn online beschikbaar op /resources. Suomalainen(芬兰语)Suomen käännökset tämän käyttöohjeen löytyvät osoitteesta /resources.Française(法语)Des traductions françaises de ce manuel d’instructions sont disponibles en ligne à/resources.Deutsch(德语)Deutsch Übersetzungen dieser Bedienungsanleitung sind online verfügbar unter/resources.Italiano(意大利语)Traduzioni italiane di questo manuale sono disponibili online all’indirizzo /resources. Português(葡萄牙语)Tradução para português deste manual de instruções estão disponíveis online em/resources.Español(西班牙语)Traducciones al español de este manual de instrucciones están disponibles en línea en/resources.Svenska(瑞典语)Svenska översättningar av denna bruksanvisning finns tillgängliga online på /resources. Türk(土耳其语)Bu kullanım kılavuzu Türkçe tercümeleri sitesinde online olarak mevcuttur /resources.中文(中文)本说明的中文版本可在网上查看/resources.Русский(俄语)Русские переводы этого руководства можно ознакомиться на сайте /resources. Português do Brasil(巴西葡萄牙语)As traduções dinamarquesas deste manual estão disponíveis on-line em /resources.日本語(日语)このマニュアルのデンマーク語の翻訳は、/resourcesからオンラインで入手できます。
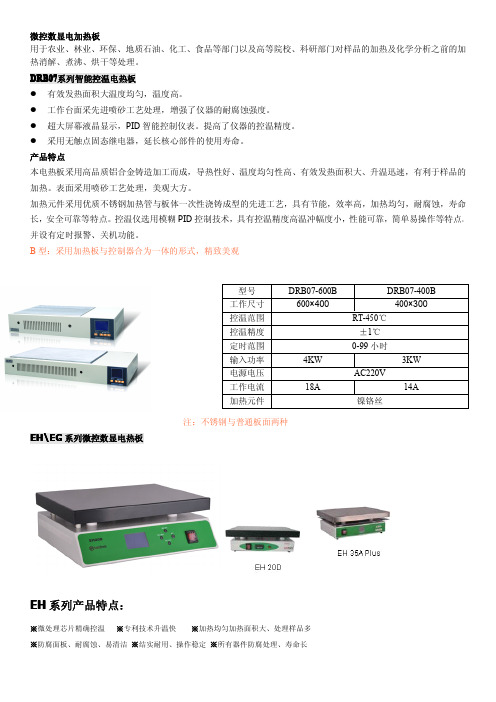
微控数显加热板
DB-1 600W 200×150
DB-2 220V 50Hz
800W 250×200
DB-3 1000W
350×200
室温-300℃
DB-4C 1500W 450×300
PID(LCD 数 显)
±5℃
±2℃
室温~350℃
铝合金及不锈钢面板
400×300mm
400×300×142mm
EH45A Plus
EH45B 2800W 220V 50HZ
EH45C
位式(数显)
PID(LCD 数显)
±5℃
±2℃
室温~450℃
高纯石墨
高纯石墨及陶瓷
360×270mm
360×270×190mm
※微处理芯片精确控温 ※专利技术升温快 ※加热均匀加热面积大、处理样品多 ※防腐面板、耐腐蚀、易清洁 ※结实耐用、操作稳定 ※所有器件防腐处理、寿命长
EH 系列高温石墨电热板特点:
� 高纯石墨防腐更加优越 � 加热板面大、均一性好 � 独特的升温技术,升温快速、温度高达450℃ � 全封闭箱体设计,器件使用寿命更长 � 设计美观大方
微控数显电加热板 用于农业、林业、环保、地质石油、化工、食品等部门以及高等院校、科研部门对样品的加热及化学分析之前的加 热消解、煮沸、烘干等处理。 DRB07系列智能控温电热板 � 有效发热面积大温度均匀,温度高。 � 工作台面采先进喷砂工艺处理,增强了仪器的耐腐蚀强度。 � 超大屏幕液晶显示,PID 智能控制仪表。提高了仪器的控温精度。 � 采用无触点固态继电器,延长核心部件的使用寿命。 产品特点 本电热板采用高品质铝合金铸造加工而成,导热性好、温度均匀性高、有效发热面积大、升温迅速,有利于样品的 加热。表面采用喷砂工艺处理,美观大方。 加热元件采用优质不锈钢加热管与板体一次性浇铸成型的先进工艺,具有节能,效率高,加热均匀,耐腐蚀,寿冲幅度小,性能可靠,简单易操作等特点。 并设有定时报警、关机功能。 B 型:采用加热板与控制器合为一体的形式,精致美观
BM系列温度控制器说明书

SKES--BM系列智能温度控制器使用说明书一、概述:此产品使用前,请仔细阅读说明书,以便正确使用,并妥善保存。
接线警告为防止仪表损坏或失效,选用适当的保险丝保护电源线及输入/输出线以防电流冲击。
仪表供电为防止触电或仪表失效,所有接线工作完成后方能接通电源。
禁止环境禁止在易燃、易爆气体,排放蒸汽的场所使用。
禁改仪表为防止事故或仪表失效,严禁改动仪表。
二、产品参数:1、测量误差:±0.5F*S±1字,附加冷端补偿误差±1℃。
2、输入类型:K、PT100、CU50、E、J、T3、继电器输出(无源)触点容量:阻性负载5A,周期2~120秒可调。
4、固态继电器驱动信号:电流大于15mA,电压大于5V,周期2S。
5、可控硅过零触发信号:大于100mA,瞬时最大1A。
6、工作电源:100V~242V,50Hz。
7、工作环境:0~50℃,相对湿度85%。
三、产品的选型:BM -①-②-③-④-⑤-⑥① - 仪表尺寸:单位:mm型号面板(宽*高) 外型(宽*高*深) 开孔尺寸(宽*高)BM4801 48*48 48*48*70 (44+1) 44+1)BM4901 48*96 48*96*65 (44+1) 92+1)BM7201 72*72 72*72*65 (68+1) 68+1)BM9601 96*96 96*96*65 (92+1) 92+1)② - 输入信号:K/PT100/J/E/T/CU500③ - 温度范围:02表示0~400℃05表示0~999℃④ - 主控输出(OUT):M:继电器触点输出V:电压脉冲输出(SSR)T:可控硅过零触发输出⑤ - 第一路报警输出:N:没有报警A:上限偏差报警B:下限偏差报警H:上限绝对值报警L:下限绝对值报警⑥ - 第二路报警输出:N:没有报警四、仪表操作1、按照接线图正确接入电源、传感器及控制回路后通电,仪表PV窗口显示测量值,SV窗口显示设定值。
巨创jc602温控器说明书
巨创jc602温控器说明书
巨创JC602温控器是一款微电脑控制温度设备,适用于家庭、商业以及工业的各种加热设备和冷却设备,它可以方便地控制温度,保证设备的运行稳定和使用寿命。
以下是JC602温控器的主要特点和使用说明:
1. 温控范围广:JC602可控制的温度范围为-40℃~120℃,适用于各种不同的场合。
2. 显示丰富:设备具有双数字式LED显示,数字清晰,易于观察。
3. 控制方式多样:温控器的控制方式包括时间控制、恒温控制、循环控制等,可以根据需要灵活调整。
4. 安全可靠:设备具有超温保护功能,可以自动断电,防止设备过热而引起危险。
5. 设计美观:设备外观采用高质量的塑料材料,外形简洁美观,易于安装和操作。
JC602温控器的使用方法如下:
1. 首先,在控制器接通电源之前,请检查所需的电压是否与本控制器的额定电压相符。
2. 设置温度范围:按下“UP”和“DOWN”两个按钮可以设置控制范围。
3. 设置控制方式:按下“MODE”按钮可以切换不同的控制方式。
4. 开始工作:设置好控制范围和控制方式之后,按下“E/S”按钮即可让控制器开始工作。
注意事项:
1. 在使用温控器时,请保证空气流通,避免控制器过热。
2. 请勿将水或其他液体喷洒在控制器上,以免引起短路或其他危险。
3. 不要在控制器周围放置易燃、易爆或其他危险物品。
以上是巨创JC602温控器的简单说明,如需更多的使用方法和注意事项,请参考产品使用说明书或咨询售后服务。
LightwaveRF 专业级家庭温控器系列模型号 JSJSLW921 用户手册说明书
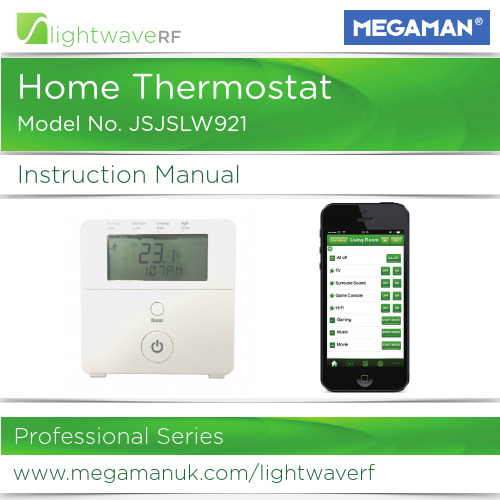
lightwaveRFInstruction Manual/lightwaverfWhat do I need?How do I get started?The following setup guide will explain how to linkthe Home Thermostat to other LightwaveRFheating devices. For anything other than a basicinstallation, it is recommended to use the Thermo-stat in conjunction with the Lightwave Link & WebApp. For further help and guidance visit or scan the QR code below.Help Video & further guidanceYou can scan this QR code with yoursmartphone. It will take you to a video andfurther instructions that will help guide youthrough setup and installation.The Home Thermostat does not need any toolsor expertise to be installed. It is completelywireless and can be positioned anywhere in thehome. It also comes with a backplate that can bescrew mounted or stuck to the wall.IMPORTANT: Please retain these instructions for guidance on how to link other LightwaveRF Heating devices to the Home Thermostat. For App setup and additional guidance please visit/lightwaverfCurrentmodeBoost buttonCurrenttemperatureOverviewmodesbuttons SelectmodeCurrent DayScheduleCurrent TimeThe Home Thermostat requires 2 x AAbatteries for operation. The batterycompartment can be accessed byremoving the backplate. T o do this, thetwo screws at bottom of the Thermo-stat need to be loosened. Thebackplate can be gently pulled awayfrom the Thermostat body and sliddownwards until it comes free fromthe hooks at the top of the device. The backplate is designed to be wallmounted. This can be achieved byinserting suitable screws through thetwo mounting holes, or by usingadhesive pads (not included).Inserting / Changing the BatteriesBackplate Mounting holes Battery compartmentWall MountingPressing the Standby button toggles between standard ‘Running’ mode and ‘Standby’. Holding the Standby button activates ‘Away’ mode.Running mode activates the heating schedule and is the default mode of operation. Standby turns o Running mode until the next ‘heating period’ (see next section) and reverts to the setback temperature. Away mode also reverts to a preset setback (see setting modes), however this mode will remain active until it is manually cancelled by pressing the Standby button once again (or on the App). Holding When switching between the two modes and Standby, the target temperature for each is briefly displayed in place of the current temperature.When the Thermostat is working to achieve its target temperature, a flamesymbol is displayed.This section will show you how to setup the basic functions of the Home Thermostat including setting the target temperature, modes, and creating a schedule. If you are using the Thermostat with the Lightwave Link, you can setup these functions on the App. It is always recommended to use the Lightwave Link if anything more than a basic setup is desired. The follow-ing section will show you how to link the Thermostat to other LightwaveRF Heating devices to integrate it into your heating system.Basic OperationThe Standby buttonThe Boost functionPressing the Boost button sets a temporary target temperature 1.5 degrees above the current temperature for the duration of 1 hour. If there is a target temperature higher than the current temperature already set, pressing the boost button will match this temperature.Pressing the button twice boosts the temperature for 2 hours, three times 4 hours, four times 8 hours, and the fifth press will cancel the boost function. An active boost function is denoted by a sun symbol on the display. It can be cancelled at any time by pressing the standby button (press twice to return to normal running mode).Setting a target temperatureThe arrow shaped buttons on the Thermostat allow you to manually change the current target temperature. T ap the up or down buttons to move the temperature in 0.5 degree increments. The new target temperature will remain active until standby mode is activated, the mode button is pressed to change modes, or the next ‘heating cycle’ in the running schedule is initiated (explained in next section). These actions will revert the target temperature to the current existing presets. Pressing the ‘Display’ button allows you to view the current target temperature.ModesPressing the Mode button toggles between the four Thermostat modes. Each mode contains preset programmable target temperatures. When a mode is selected, the Thermostat will be set to these target temperatures until the mode is changed.Running modeThe main Thermostat mode is ‘Running’. Unlike the other modes which can only store temperatures, Running mode also allows you to create a weekly heating schedule which can change the target temperature up to 8 times per day. When the home is occupied, this mode should be constantly running.Away & Holiday modesAway and Holiday modes allow you to specify a temperature that you want to set the heating to whilst you are away. Holiday mode also allows you to specify the number of days that you want this to be active for.Frost modeThis mode should be activated when the home is unoccupied for long periods. It prevents pipes from freezing by setting a minimum temperature.Programming Running mode1. Press the ‘Program’ button and then press the ‘OK’ button when option ‘1’ appears on the display.2. The next option screen allows you to choose which days of the week to schedule. You can set all week days to be the same, setup week then weekend days, or each day individually. Select the appropriate option by using the Arrow keys to scroll and then pressing the ‘OK’ button. You will need to return to the menu several times if you want to setup days individually.3. Next, the target temperature and setback temperature (on and o ) need to be set for each ‘heating cycle’. Once again, use the Arrow keys to scroll and OK to select a temperature.4. Once this is set, you need to choose the periods of the day that you want to be heated. Each one is referred to as a ‘heating cycle’ and is denoted on the display by a series of blocks corresponding to the times of day marked next to it. Set the first heating cycle by scrolling to select a start time and pressing OK. Then select an end time and press OK. Running mode allows up to 4 independent heating cycles. Each one of these needs to be set, however, if you require less than 4, simply set the on and o times for unwanted cycles to the same time which will e ectively cancel them.Setting Away, Holiday and Frost modesProgramming Time/Date, Constant & O set temperatures 1. Press the ‘Program’ button, scroll using the Arrow keys, and then press the ‘OK’ button when options ‘3 (Away), 5 (Holiday) or 6 (Frost)’ appear on the display. 2. Select a target temperature by scrolling using the Arrow Keys and pressing OK when the desired temperature has been selected. This applies to all three modes..T o set the time and date, press the Program button, scroll to option 2 using the Arrow keys, and press the OK button. Scroll to select the correct, year, month and day followed by the time, and press OK to save it.Selecting the constant temperature option disregards the modes and schedules and simply allows the Thermostat to operate in real time. The temperature can be set using the arrow keys. Press the Standby button to cancel this feature.Setting the o set temperature causes the Thermostat to display a current temperature that is higher or lower that the actual temperature measured. It can be raised or lowered in 1 degree increments using the arrow keys and saved by pressing the OK button.How LightwaveRF heating devices work togetherTo use the Thermostat, with other LightwaveRF Heating Devices, you will need to ‘link’ it. The devices that you link depends on the setup that you want to achieve. You can create a basic setup (e.g. Home Thermostat plus TRV) by linking the devices directly (see later pages for how to do this). The most comprehensive solution is to link all heating devices to the LightwaveRF Smartphone or Web App using the Lightwave Link. This allows you to create an expandable zoned system that can take care of your entire home. Temperatures can be set for each room or ‘heating zone’, and heating can be planned week by week and room by room. The illustration on the following page shows how di erent heating devices can be linked together in a whole house setup. Following this are some the most typical scenarios in which you would use the Home Thermostat. For further information and guidance please visit .Lightwave Link Web App Heating ‘Planner’Lightwave link (runs the show)Lightwave App (control any room from anywhere)Boiler Switch(turns boiler on/o )Bedroom 1Bedroom 2Home Thermostat (monitors house temp.)Heating Remote (sets house temp.)Window Trigger(open window turns o TRV)TRV (controls radiator)Example ‘Heating Zones’(rooms or areas of the house)The most common setup uses the HomeThermostat as an accurate temperaturereference point for the Lightwave Link tocontrol your home heating. Heating can bescheduled from the LightwaveRF App ORthe Thermostat, which provides a comple-mentary manual, wall mounted control. AHeating Remote and TRVs can also beadded to provide complete control.Typical setups involving the Home Thermostat2. Using the Thermostat with a Boiler Switch alone 1. (Recommended) Thermostat, Boiler Switch & Lightwave Link In this basic setup, the Home Thermo-stat schedules the heating by wirelesslycontrolling the LightwaveRF BoilerSwitch which turns the boiler on or o . Italso provides an accurate temperaturereference. A Heating Remote can belinked to provide convenient control from anywhere in the house.The Home Thermostat can be used tomanage TRVs or Electric Switches (tocontrol electric radiators) and run a‘heating zone’. This could be as part of alarge house system taking commands fromthe Lightwave Link, or as a small standalonesystem used to program a radiator/sseparately to the rest of the house.3. Using a Heating Remote to turn the house or radiator temperature up/down (requires linked boiler switch or TRVs)4. Using the Home Thermostat with LightwaveRF TRVs / Electric Radiator SwitchesA Heating Remote can be linked to aHome Thermostat to allow you to turnthe house temperature up and down,boost the heating for a hour, or turn theBoiler on/o (if you have a BoilerSwitch). If the Thermostat is linked toTRVs, the Remote can also be used toturn them up or down.5. Using a Window Trigger with the Thermostat to auto-matically turn o the Boiler, TRVs or Electric Rad Switches6. Using 2 Thermostats & 2 Boiler Switches (Plus Link if desired) to manage a two zone (upstairs/downstairs) system.A Window Trigger can be linked to a HomeThermostat. If a window is opened, anyTRVs, Boiler Switches or Electric RadiatorSwitches that are linked to the Thermostatwill automatically be turned o . When thewindow is closed, the devices will beturned on again.If you have an existing two zone heatingsetup that includes a motorised valve(more common in new builds), two HomeThermostats can be used along with twoBoiler Switches to control each zoneseparately. This can also be done on theLightwaveRF App. Refer to www.lightwa- for more information about thissetup.Linking the Thermostat to LightwaveRF heating devices T o use a LightwaveRF Home Thermostat with other Lightwa-veRF Heating Devices, as in the setups described, you willneed to ‘link’ them. The Thermostat can be linked to other LightwaveRF heating devices using the following method.1. Press and release the ‘Link’ button on the Thermostat.‘Link’ should appear on the display.2. Press the Link button on the heating device you wish tolink. ‘Link OK’ should appear to indicate that the Thermostatis linked.T o unlink a heating device from the Themostat, press andrelease the Linking button and then press the Standby button.This activates ‘unlinking’ mode. Press the Linking button onthe heating device you wish to unlink. The ‘deleted’ should bedisplayed to indicate that the devices have been unlinked.T o completely clear the memory of the Thermostat, pressand release the Linking button. Then hold the Linking buttonuntil ‘clear’ is displayed. Finally, press and release the Linkingbutton once more. ‘Cleared’ should be displayed.Linking to Multiple Radiators in one ‘heating zone’ (room) If you have a large room or area with more than one radiator, you may want to link the TRVs (or Electric Radiator Switches) to become part of the same ‘heating zone’ on the App and work together. You can do this simply by linking one Switch to Lightwave Link and App and then linking it to the next Switch to form a ‘daisy-chain’.You can also link a Room or Home Thermostat to the App, then to a Switch, and, finally, link the Switches together. The Thermostat will take commands from the App and relay them to the linked Switches in its ‘heating zone’.In some cases, you may also want to link a Heating Remote or Magnetic Trigger to more than one TRV / Electric Switch in the same room or ‘heating zone’. This will cause all radiators to be controlled by the same device. This can be achieved in the same way: link one TRV to the Remote or Trigger, and then link that TRV to the next. A single Heating Remote or Magnetic Trigger can also be linked to multiple TRVs by linking it to a Thermostat that, in turn, controls the TRVs or Electric Switches in that room.IMPORTANT: LightwaveRF Thermostats can link to a limited number of heating devices. If this limit is exceeded and an extra device linked, the link to the former device will be overwritten. More devices can be added by linking them to the Lightwave Link and App. It is always recommended to use the Lightwave Link if anything more than a basic setup is desired.Linking to the LightwaveRF AppIf you intend to use the LightwaveRF Appor Web App to control the Home Thermo-stat, you will need the ‘Lightwave Link’.This allows LightwaveRF heating devicesto be linked to and controlled by asmartphone, tablet or PC. The Thermostatcan be linked to the App using the follow-ing method.1. Follow the in-App setup instructions tosetup the Lightwave Link and App. Accessthe ‘Heating’ Page and follow the instruc-tions regarding how to add a device.2. Press and release the ‘Link’ button onthe Thermostat (’link’ will appear on thedisplay).3. Send the linking command from theApp (the in-App instructions will explainhow to do this). ‘Link OK’ will appear onthe display to indicate a successful link.Using the Home Thermostat with the LightwaveRF App IMPORTANT: For full instructions on howto use the Home Thermostat with the LightwaveRF App follow the in-App help or visit .The main use of the Home Thermostat, if linked to the LightwaveRF App and Web App, is as an accurate temperature reference. You can still the schedule heating and select modes using the Thermostat, however, it may be more convenient to do this from the App or Web App on your smartphone/tablet. The Thermostat now acts as a convenient manual control to complement the App. Importantly, the Thermostat and App work together: when you change the mode or schedule on the Thermostat or the App, it will automatically appear onthe other device.1. (Intermediate): Remote control of the boiler Required:Home Thermostat, Boiler Switch, Heating RemoteIt is really comfortable and convenient to be able to have direct control over the house temperature without having to get up and alter the thermostat or boiler. This can be achieved using the LightwaveRF Home Thermostat, Boiler Switch and Heating Remote. You can turn the temperature up and down, boost the heating for an hour or simply turn it on/o . Use the Remote to control the Home Thermostat from the comfort of the sofa, and this will,in turn, carry the commands to the Boiler Switch.2. (Intermediate): Smartphone Control from anywhereRequired:Home Thermostat, Lightwave Link, Boiler Switch Installing a LightwaveRF Boiler Switch and linking it to a Lightwave Link and Home Thermostat allows you to control your home heating from anywhere using a smartphone or tablet. If you are staying late at work, you can turn o the heating so as not to waste energy, or turn it on in advance if coming back late on a cold night. If you are away on holiday in the winter, turn on the heating to a low level to make sure that the house does not get cold and damp. This simple installation can save you a significant amount of energy.3. (Advanced): Zoned HeatingRequired: Home Thermostat, Link, Boiler Switch, TRVsWith the LightwaveRF App and the Lightwave Link you can create an expandable zoned system that can take care of your entire home. T empera-tures can be set for each room or ‘heating zone’, and heating can be planned week by week and room by room. If you have electric radiators, you can still achieve this by connecting them to Electric Switches. You can also link wet radiators AND electric radiators and schedule them together for a totally integrated heating system!Problem:The Thermostat will not consistently operate remotely. Solution:The Remote/Thermostat/Lightwave Link may be encountering interference or may be at the edge of its reliable range of operation. First, ensure that there are no large pieces of metal or bodies of water in the path of the transmission. If the problem persists, try moving the Controller/Link closer to the Socket.Problem:TRVs / Electric Switches / ‘unlink’ themselves from the Thermo-stat after linking other devices to it.Solution:There is a limited number of devices that the Thermostat and other LightwaveRF heating devices can link to. If this is exceeded, previous devices will lose their connections. Note also that if linking several devices of the same type, they must be ‘daisy chained’ together (see previous instructions).Q.Do i need to use a Thermostat with every TRV installed?A. No. The TRV has in-built temperature sensing; however, using a Room Thermostat will slightly improve the accuracy of the temperature monitored, as it is removed from the heat of the radiator.Q. Should I use a Room or Home Thermostat with the TRV?A.It is possible to use either of the these Thermostats to control more than one TRV in the same room or ‘heating zone’. The Room Thermostat, however, is the simplest and most attractive way to do this as it is purpose designed for the task. Q.Can I link more than one TRV or Electric Switch to a Thermostat?A. Yes. Please refer to for current device limits.Q.Is it legal for me to install a LightwaveRF Thermostat myself?A. Yes, LightwaveRF products are fully legal to install in your own home. Q. How long do the batteries last?A.This can vary, but a minimum of one year can be expected with normal use. Q. How do I know if the batteries need replacing?A.The display will report that batteries are low. The App should also report that battery levels are running low.SpecificationRF frequency: 868 MHz Batteries: 2 x 1.5V (AA) Warranty:2 year standard warranty/lightwaverf lightwave RF 2 Quadrant ParkMundellsWelwyn Garden CityHertsAL7 1FS01707 386035。
- 1、下载文档前请自行甄别文档内容的完整性,平台不提供额外的编辑、内容补充、找答案等附加服务。
- 2、"仅部分预览"的文档,不可在线预览部分如存在完整性等问题,可反馈申请退款(可完整预览的文档不适用该条件!)。
- 3、如文档侵犯您的权益,请联系客服反馈,我们会尽快为您处理(人工客服工作时间:9:00-18:30)。
型号EH20A Plus EH20B EH20D EH35A Plus EH35B EH45A Plus 输出功率输入电压
控温方式
位式(数显
)PID(LCD 数显)PID 位式(数显)PID(LCD 数显)温度稳定度±5℃±1℃±0.2℃±5℃±2℃控温范围
加热材质加热区域尺外形尺寸360×270×190mm
400×300mm 360×270mm 400×300×142mm 360×350×156m 窗体底端苏州江东精密仪器有限公司
主要经营:
实验室家具:中央实验台 靠边实验台 水斗台 天平台 转角台 通风柜 药品柜 器皿柜 气
瓶柜 毒品柜
品管研发仪器:干燥箱 真空干燥箱 生化/霉菌/二氧化碳等培养箱 恒温恒湿箱 箱式电阻
炉 工业除湿机 加湿机 电子防潮箱 全自动氮气柜 蒸馏水器 纯水机 高压灭菌器 加热板
电动搅拌器 磁力搅拌器 粘度计 低温恒温水槽 超声波清洗机
水质检验仪器:PH计 电导率仪 浊度计 溶解氧仪 余氯仪 COD测定仪 BOD测定仪 ORP测定
仪 离子仪 多参数水质分析仪 分光光度计 紫外分光光度计 电极
±5℃℃室温~200℃室温~350℃室温~450℃铝合金及特殊防腐材料铝合金及不锈钢面板高纯石墨EH45B 2000W 2800W 220V 50HZ 220V 50HZ 位式(数显)PID(数显)
~450W。
