L2321pwD显示器用户手册
AOC 24T1Q 27T1Q Q27T1 LED 背光显示器用户手册说明书
LCD Monitor User Manual 24T1Q/27T1Q/Q27T1LED backlightSafety (1)National Conventions (1)Power (2)Installation (3)Cleaning (4)Other (5)Setup (6)Contents in Box (6)Adjusting Viewing Angle (7)Connecting the Monitor (8)Adaptive-Sync function (9)Adjusting (10)Hotkeys (10)OSD Setting (12)Luminance (13)Color Setup (14)Picture Boost (15)OSD Setup (16)Extra (17)Exit (18)LED Indicator (19)Driver (20)i-Menu (Screen+) (20)e-Saver (21)Troubleshoot (22)Specification (23)General Specification (23)Preset Display Modes (26)Pin Assignments (28)Plug and Play (29)SafetyNational ConventionsThe following subsections describe notational conventions used in this document.Notes, Cautions, and WarningsThroughout this guide, blocks of text may be accompanied by an icon and printed in bold type or in italic type. These blocks are notes, cautions, and warnings, and they are used as follows:NOTE: A NOTE indicates important information that helps you make better use of your computer system.CAUTION: A CAUTION indicates either potential damage to hardware or loss of data and tells you how to avoid the problem.WARNING: A WARNING indicates the potential for bodily harm and tells you how to avoid the problem. Some warnings may appear in alternate formats and may be unaccompanied by an icon. In such cases, the specific presentation of the warning is mandated by regulatory authority.PowerThe monitor should be operated only from the type of power source indicated on the label. If you are not sure of the type of power supplied to your home, consult your dealer or local power company.The monitor is equipped with a three-pronged grounded plug, a plug with a third (grounding) pin. This plug will fitonly into a grounded power outlet as a safety feature. If your outlet does not accommodate the three-wire plug, have an electrician install the correct outlet, or use an adapter to ground the appliance safely. Do not defeat the safety purpose of the grounded plug.Unplug the unit during a lightning storm or when it will not be used for long periods of time. This will protect the monitor from damage due to power surges.Do not overload power strips and extension cords. Overloading can result in fire or electric shock.To ensure satisfactory operation, use the monitor only with UL listed computers which have appropriate configured receptacles marked between 100-240V AC, Min. 5A.The wall socket shall be installed near the equipment and shall be easily accessible.For use only with the attached power adapterManufacturer: L&T Display Technology(Fujian) Ltd Model: STK025-19131T (24T1Q, 27T1Q)Manufacturer: TPV Electronics (Fujian) Co., Ltd. Model: ADPC1945 (Q27T1)InstallationDo not place the monitor on an unstable cart, stand, tripod, bracket, or table. If the monitor falls, it can injure a person and cause serious damage to this product. Use only a cart, stand, tripod, bracket, or table recommended by the manufacturer or sold with this product. Follow the manufacturer’s instructions when installing the product and use mounting accessories recommended by the manufacturer. A product and cart combination should be moved with care.Never push any object into the slot on the monitor cabinet. It could damage circuit parts causing a fire or electricshock. Never spill liquids on the monitor. Do not place the front of the product on the floor.If you mount the monitor on a wall or shelf, use a mounting kit approved by the manufacturer and follow the kit instructions.Leave some space around the monitor as shown below. Otherwise, air-circulation may be inadequate henceoverheating may cause a fire or damage to the monitor.See below the recommended ventilation areas around the monitor when the monitor is installed on the wall or on the stand:Installed with stand Installed with standPlease purchase a suitable wall mount to avoid the lack of distance between the back signal cable and the wall.CleaningClean the cabinet regularly with cloth. You can use soft-detergent to wipe out the stain, instead of strong-detergent which will cauterize the product cabinet.When cleaning, make sure no detergent is leaked into the product. The cleaning cloth should not be too rough as it will scratch the screen surface.Please disconnect the power cord before cleaning the product.OtherIf the product is emitting a strange smell, sound or smoke, disconnect the power plug IMMEDIATELY and contact a Service Center.Make sure that the ventilating openings are not blocked by a table or curtain.Do not engage the LCD monitor in severe vibration or high impact conditions during operation.Do not knock or drop the monitor during operation or transportation.SetupContents in Box***Not all signal cables (DP , HDMI cables) will be provided for all countries and regions. Please check with the local dealer or AOC branch office for confirmation.CD Manual Warranty card Power Cable Adapter HDMI Cable DP CableDo not touch the LCD screen when you change the angle. It may cause damage or break the LCD screen.Connecting the MonitorCable Connections In Back of Monitor and Computer:1. Power2. Earphone3. DisplayPort4. HDMIConnect to PC1. Connect the power cord to the back of the display firmly.2. Turn off your computer and unplug its power cable.3. Connect the display signal cable to the video connector on the back of your computer.4. Plug the power cord of your computer and your display into a nearby outlet.5. Turn on your computer and display.If your monitor displays an image, installation is complete. If it does not display an image, please refer Troubleshooting. To protect equipment, always turn off the PC and LCD monitor before connecting.Adaptive-Sync function1. Adaptive-Sync function is working with DP/HDMI2. Compatible Graphics Card: Recommend list is as the below, also could be checked by visiting • Radeon™ RX Vega series• Radeon™ RX 500 series• Radeon™ RX 400 series• Radeon™ R9/R7 300 series (R9 370/X, R7 370/X, R7 265except)• Radeon™ Pro Duo (2016)• Radeon™ R9 Nano series• Radeon™ R9 Fury series• Radeon™ R9/R7 200 series (R9 270/X, R9 280/X except)AdjustingHotkeys123451Source/Exit2Clear Vision/Left3Volume/Right4Menu/Enter5PowerMenu/EnterPress to display the OSD or confirm the selection.PowerPress the Power button to turn on the monitor.Volume/RightWhen there is no OSD, Press Volume button to active volume adjustment bar, Press Left or Right to adjust volume.Source/ExitWhen the OSD is closed, press Source/Exit button will be Source hot key function.Clear Vision1. When there is no OSD, Press the “Left” button to activate Clear Vision.2. Use the “Left” or “Right” buttons to select between weak, medium, strong, or off settings. Default setting is always“off”.3. Press and hold “Left” button for 5 seconds to activate the Clear Vision Demo, and a message of “Clear Vision Demo:on” will be display on the screen for a duration of 5 seconds. Press and hold “Left” button for 5 seconds again, Clear Vision Demo will be off.Clear Vision function provides the best image viewing experience by converting low resolution and blurry images into clear and vivid images.Clear VisionOffAdjust the Clear VisionWeak Medium StrongClear Vision DemoOn or OffDisable or Enable DemoOSD SettingBasic and simple instruction on the control keys.OSD Setup1). Press the MENU-button to activate the OSD window.2). Press Left or Right to navigate through the functions. Once the desired function is highlighted, press theMENU-button to activate it, press Left or Right to navigate through the sub-menu functions. Once the desired function is highlighted, press MENU-button to activate it.3). Press Left or to change the settings of the selected function. Press to exit. If you want to adjust any otherfunction, repeat steps 2-3.4). OSD Lock Function: To lock the OSD, press and hold the MENU-button while the monitor is off and then presspower button to turn the monitor on. To un-lock the OSD - press and hold the MENU-button while the monitor is off and then press power button to turn the monitor on.Notes:1). If the product has only one signal input, the item of “Input Select” is disable to adjust.2). Clear vision, DCR, Color Boost and Picture Boost, for these states that only one state can exist.LuminanceOSD SetupContrast 0-100 Contrast from Digital-register.Brightness 0-100 Backlight AdjustmentEco modeStandard Standard ModeText Text ModeInternet Internet ModeGame Game ModeMovie Movie ModeSports Sports ModeReading Reading ModeGammaGamma1Adjust to Gamma 1Gamma2Adjust to Gamma 2Gamma3Adjust to Gamma 3DCROff Disable dynamic contrast ratioOn Enable dynamic contrast ratioOverdriveWeakAdjust the response time.MediumStrongBoost (Q27T1)OffMBR (Q27T1)0 ~ 20Adjust the Motion Blur Reduction.Note:The function MBR and Overdrive Boost are available only when Adaptive-Sync is off and the vertical frequency is up to 75 Hz.Color SetupOSD SetupColor Temp.Warm Recall Warm Color Temperature from EEPROM.Normal Recall Normal Color Temperature from EEPROM.Cool Recall Cool Color Temperature from EEPROM.sRGB Recall SRGB Color Temperature from EEPROM.User Restore Color Temperature from EEPROM. DCB ModeFull Enhance On or Off Disable or Enable Full Enhance ModeNature Skin On or Off Disable or Enable Nature Skin ModeGreen Field On or Off Disable or Enable Green Field ModeSky-blue On or Off Disable or Enable Sky-blue ModeAutoDetect On or Off Disable or Enable AutoDetect ModeDCB Demo On or Off Disable or Enable DemoRed0-100Red gain from Digital-register.Green0-100Green gain from Digital-register.Blue0-100Blue gain from Digital-register.LowBlueModeMultimediaDecrease blue light wave by controlling colortemperatureInternetOfficeReadingOffPicture BoostOSD SetupBright Frame on or off Disable or Enable Bright FrameFrame Size 14-100 Adjust Frame SizeBrightness 0-100 Adjust Frame BrightnessContrast 0-100 Adjust Frame ContrastH. position 0-100 Adjust Frame horizontal PositionV. position0-100 Adjust Frame vertical PositionNote:Adjust the brightness, contrast, and position of the Bright Frame for better viewing experience.OSD SetupOSD Setup Language Select the OSD language Timeout 5-120Adjust the OSD TimeoutDP Capability 1.1/1.2Please be noted that only DP1.2 support Adaptive-Sync functionH. Position 0-100 Adjust the horizontal position of OSD V. Position 0-100 Adjust the vertical position of OSD Adaptive-Sync on or off Disable or Enable Adaptive-Sync.Transparence 0-100Adjust the transparence of OSDBreak ReminderOn or OffBreak reminder if the user continuously work for more than 1hrsNotes:If the DP video content supports DP1.2, please select DP1.2 for DP Capability; otherwise, please select DP1.1.OSD SetupInput Select Select Input Signal SourceAuto Config. Yes or No Auto adjust the picture to default Off timer0-24hrs Select DC off timeImage Ratio 24T1Q/27T1Q: Wide/4:3Q27T1: Wide / 4:3 / 1:1 / Movie1 / Movie2Select image ratio for display.DDC/CI Yes or No Turn ON/OFF DDC/CI Support Reset Yes or No Reset the menu to defaultOSD SetupExit Exit the main OSDLED IndicatorStatus LED Color Full Power Mode White Active-off Mode OrangeDriveri-Menu (Screen+)Welcome to “i-Menu” software by AOC. i-Menu makes it easy to adjust your monitor display setting by using on screen menus instead of the OSD button on the monitor. To complete installation, please follow the installation guide. The software Supported operating systems: Windows 10, Windows 8, Windows 7.Screen+ can be turned on via i-Menu. It is a desktop screen splitting tool, it splits the desktop into different panels, and each panel displays a different window. You only need to drag the window to a corresponding panel when you want to access it. It supports multiple monitor display to make your task easier.e-SaverWelcome to use AOC e-Saver monitor power management software! The AOC e-Saver features Smart Shutdown functions for your monitors, allows your monitor to timely shutdown when PC unit is at any status (On, Off, Sleep or Screen Saver); the actual shutdown time depends on your preferences (see example below).Please click on “driver/e-Saver/setup.exe” to start installing the e-Saver software, follow the install wizard to complete software installation.Under each of the four PC status, you may choose from the pull-down menu the desired time (in minutes) you’re your monitor to automatically shut down. The example above illustrated:The monitor will never shutdown when the PC is powered on.The monitor will automatically shutdown 5 minutes after the PC is powered off.The monitor will automatically shutdown 10 minutes after the PC is in sleep/stand-by mode.The monitor will automatically shutdown 20 minutes after the screen saver appears.You can click “RESET” to set the e-Saver to its default settings like below.TroubleshootProblem & Question Possible SolutionsPower LED Is Not ON Make sure the power button is ON and the Power Cord is properlyconnected to a grounded power outlet and to the monitor.No images on the screen Is the power cord connected properly?Check the power cord connection and power supply.Is the cable connected correctly?(Connected using the HDMI cable)Check the HDMI cable connection.(Connected using the DP cable)Check the DP cable connection.* HDMI/DP input is not available on every model.If the power is on, reboot the computer to see the initial screen (the login screen), which can be seen.If the initial screen (the login screen) appears, boot the computer in the applicable mode (the safe mode for Windows 7/8/10) and then change the frequency of the video card.(Refer to the Setting the Optimal Resolution)If the initial screen (the login screen) does not appear, contact the ServiceCenter or your dealer.Can you see “Input Not Supported” on the screen?You can see this message when the signal from the video card exceeds the maximum resolution and frequency that the monitor can handle properly.Adjust the maximum resolution and frequency that the monitor can handle properly.Make sure the AOC Monitor Drivers are installed.Picture Is Fuzzy & Has Ghosting Shadowing Problem Adjust the Contrast and Brightness Controls.Press to auto adjust.Make sure you are not using an extension cable or switch box. We recommend plugging the monitor directly to the video card output connector on the back.Picture Bounces, Flickers Or Wave Pattern Appears In The Picture Move electrical devices that may cause electrical interference as far away from the monitor as possible.Use the maximum refresh rate your monitor is capable of at the resolution you are using.Monitor Is Stuck In Active Off-Mode”The Computer Power Switch should be in the ON position.The Computer Video Card should be snugly fitted in its slot.Make sure the monitor’s video cable is properly connected to the computer. Inspect the monitor’s video cable and make sure no pin is bent.Make sure your computer is operational by hitting the CAPS LOCK key on the keyboard while observing the CAPS LOCK LED. The LED should either turn ON or OFF after hitting the CAPS LOCK key.Missing one of the primary colors (RED, GREEN, or BLUE)Inspect the monitor’s video cable and make sure that no pin is damaged. Make sure the monitor’s video cable is properly connected to the computer.Picture has color defects(white does not look white)Adjust RGB color or select desired color temperature.Horizontal or vertical disturbances on the screen Use Windows 7/8/10 shut-down mode to adjust CLOCK and FOCUS. Press to auto-adjust.Specification General SpecificationPanel Model name24T1QDriving system TFT Color LCDViewable Image Size60.47 cm diagonalPixel pitch 0.2745mm(H) x 0.2745mm(V) Video HDMI lnterface & DP Interface Display Color 16.7M ColorsOthers Horizontal scan range 30k-85kHzHorizontal scan Size(Maximum)527.04mmVertical scan range 48-75HzVertical Scan Size(Maximum)296.46mmOptimal preset resolution 1920x1080@60HzMax resolution1920x1080@75HzPlug & Play VESA DDC2B/CIInput Connector HDMI/DPPower Source 19Vdc, 1.31APower ConsumptionTypical (default brightness and contrast)21WMax. (brightness = 100, contrast =100)26WPower saving≤0.3WPhysical Characteristics Connector Type HDMI/DP/Earphone out Signal Cable Type DetachableEnvironmental TemperatureOperating 0°~ 40°Non-Operating -25°~ 55°HumidityOperating 10% ~ 85% (non-condensing)Non-Operating 5% ~ 93% (non-condensing) AltitudeOperating 0~ 5000 m (0~ 16404ft )Non-Operating 0~ 12192m (0~ 40000ft )Panel Viewable Image Size68.6 cm diagonalPixel pitch 0.3114mm(H) x 0.3114mm(V) Video HDMI lnterface & DP Interface Display Color 16.7M ColorsOthers Horizontal scan range 30k-85kHzHorizontal scan Size(Maximum)597.888mmVertical scan range 48-75HzVertical Scan Size(Maximum)336.312mmOptimal preset resolution 1920x1080@60HzMax resolution1920x1080@75HzPlug & Play VESA DDC2B/CIInput Connector HDMI/DPPower Source 19Vdc, 1.31APower ConsumptionTypical (default brightness and contrast)23WMax. (brightness = 100, contrast =100)28WPower saving≤0.3WPhysical Characteristics Connector Type HDMI/DP/Earphone out Signal Cable Type DetachableEnvironmental TemperatureOperating 0°~ 40°Non-Operating -25°~ 55°HumidityOperating 10% ~ 85% (non-condensing)Non-Operating 5% ~ 93% (non-condensing) AltitudeOperating 0~ 5000 m (0~ 16404ft )Non-Operating 0~ 12192m (0~ 40000ft )Panel Viewable Image Size68.47 cm diagonalPixel pitch 0.2331mm(H) x 0.2331mm(V) Video HDMI lnterface & DP Interface Display Color 16.7M ColorsOthers Horizontal scan range 30k-114kHzHorizontal scan Size(Maximum)596.74mmVertical scan range 48-75HzVertical Scan Size(Maximum)335.66mmOptimal preset resolution 2560x1440@60HzMax resolution2560x1440@75HzPlug & Play VESA DDC2B/CIInput Connector HDMI/DPPower Source 19Vdc, 2.37APower ConsumptionTypical (default brightness and contrast)30WMax. (brightness = 100, contrast =100)40WPower saving≤0.3WPhysical Characteristics Connector Type HDMI/DP/Earphone out Signal Cable Type DetachableEnvironmental TemperatureOperating 0°~ 40°Non-Operating -25°~ 55°HumidityOperating 10% ~ 85% (non-condensing)Non-Operating 5% ~ 93% (non-condensing) AltitudeOperating 0~ 5000 m (0~ 16404ft )Non-Operating 0~ 12192m (0~ 40000ft )Preset Display Modes 24T1Q/27T1QSTANDARD RESOLUTION HORIZONTALFREQUENCY(kHz)VERTICAL FREQUENCY(Hz)VGA640x480@60Hz31.46959.94 VGA640x480@67Hz3566.667 VGA640x480@72Hz37.86172.809 VGA640x480@75Hz37.575 VGA640x480@100Hz51.0899.769 VGA640x480@120Hz61.91119.518 DOS MODE720x400@70Hz31.46970.087 DOS MODE720x480@60Hz29.85559.710 SD720x576@50Hz31.2550 SVGA800x600@56Hz35.15656.25 SVGA800x600@60Hz37.87960.317 SVGA800x600@72Hz48.07772.188 SVGA800x600@75Hz46.87575 SVGA800x600@100Hz63.68499.662 SVGA800x600@120Hz76.302119.97 SVGA832x624@75Hz49.72574.551 XGA1024x768@60Hz48.36360.004 XGA1024x768@70Hz56.47670.069 XGA1024x768@75Hz60.02375.029 XGA1024x768@100Hz81.57799.972 XGA1024x768@120Hz97.551119.989 WXGA+1440x900@60Hz55.93559.887 SXGA1280x1024@60Hz63.98160.02 SXGA1280x1024@75Hz79.97575.025 HD1280x720@50HZ37.07149.827 HD1280x720@60HZ4560 HD1280x1080@60Hz67.17359.976 CVT1680x1050@60Hz64.67459.883 Full HD1920x1080@60Hz67.560 Full HD1920x1080@75Hz83.89474.973Q27T1STANDARD RESOLUTION HORIZONTALFREQUENCY(kHz)VERTICAL FREQUENCY(Hz)VGA640x480@60Hz31.46959.94 VGA640x480@67Hz3566.667 VGA640x480@72Hz37.86172.809 VGA640x480@75Hz37.575 DOS MODE720x400@70Hz31.46970.087 DOS MODE720x480@60Hz29.85559.710 SD720x576@50Hz31.2550 SVGA800x600@56Hz35.15656.25 SVGA800x600@60Hz37.87960.317 SVGA800x600@72Hz48.07772.188 SVGA800x600@75Hz46.87575 SVGA832x624@75Hz49.72574.551 XGA1024x768@60Hz48.36360.004 XGA1024x768@70Hz56.47670.069 XGA1024x768@75Hz60.02375.029 SXGA1280x1024@60Hz63.98160.02 SXGA1280x1024@75Hz79.97575.025 Full HD1920x1080@60Hz67.560 QHD2560x1440@60Hz88.78759.951 QHD2560x1440@75Hz111.02874.968 XGA1024x768@75Hz60.24174.927Pin AssignmentsPin No.Signal Name Pin No.Signal Name Pin No.Signal Name1.TMDS Data 2+9.TMDS Data 0-17.DDC/CEC Ground2.TMDS Data 2 Shield10.TMDS Clock +18.+5V Power3.TMDS Data 2-11.TMDS Clock Shield19.Hot Plug Detect4.TMDS Data 1+12.TMDS Clock-5.TMDS Data 1Shield13.CEC6.TMDS Data 1-14.Reserved (N.C. on device)7.TMDS Data 0+15.SCL8.TMDS Data 0 Shield16.SDA20-Pin Color Display Signal CablePin No.Signal Name Pin No.Signal Name 1ML_Lane 3 (n)11GND2GND12ML_Lane 0 (p)3ML_Lane 3 (p)13CONFIG14ML_Lane 2 (n)14CONFIG25GND15AUX_CH(p)6ML_Lane 2 (p)16GND7ML_Lane 1 (n)17AUX_CH(n)8GND18Hot Plug Detect9ML_Lane 1 (p)19Return DP_PWR10ML_Lane 0 (n)20DP_PWRPlug and PlayPlug & Play DDC2B FeatureThis monitor is equipped with VESA DDC2B capabilities according to the VESA DDC STANDARD. It allows the monitor to inform the host system of its identity and, depending on the level of DDC used, communicate additional information about its display capabilities.The DDC2B is a bi-directional data channel based on the I2C protocol. The host can request EDID information over the DDC2B channel.29。
2201L 触摸显示器使用手册说明书
使用者手册2201L 觸摸顯示器版權所有© 2011 T yco Electronics。
保留所有權利。
未經 Tyco Electronics 的書面許可,不得以任何形式或方法(包括但不限於電子、磁性、光學、化學方法或手册等)複製、傳輸或改編本出版物的任何部分,不得將其儲存到擷取系統,不得將其翻譯成任何語言或電腦語言。
免責告示本文件中的訊息有可能在未通知的情况下進行變更。
Tyco Electronics 對本出版物的內容不提供任何形式的陳述或擔保,並且特別宣告拒絕對有特定目的適銷性或適用性提供任何默示擔保。
Tyco Electronics 保留對本出版物進行修訂並對其內容不斷進行變更,而不將這樣的修訂和變更通知任何人的權利。
商標告示Elo TouchSystems、IntelliTouch、iTouch、Tyco Electronics 和 TE(標誌)是 Tyco Electronics 集團公司及其許可方的商標。
Windows 為 Microsoft 集團公司的商標。
本文件中出現的其他產品名稱可能是其各自公司的商標或注册商標。
Tyco Electronics 對除自有商標以外的其他商標不享有任何權益。
目錄第 1 章 – 簡介 (4)第 2 章 – 安裝 (5)第 3 章 – 安裝 (9)第 4 章 – 操作 (10)第 5 章 – 技術支援 (14)第 6 章 – 安全與維護 (15)第 7 章 – 法規訊息 (16)第 8 章 – 擔保訊息 (19)第 1 章 – 簡介產品說明新的觸摸顯示器集 Elo TouchSystems 的可靠效能和觸摸技術與顯示屏設計領域的最新進展於一身。
這種功能組合可在使用者與觸摸顯示屏之間提供自然的訊息流動。
此觸摸顯示器帶有一個 24 位彩色有源矩陣薄膜晶體管 LCD 面板,提供了優异的顯示效能。
其全 HD 解析度 1920x1080 適合顯示圖形和影像。
3.2英寸TFT触摸屏控制板用户手册说明书
3.2inch TFT Touch ShieldUser ManualOVERVIREThis is a 3.2inch resistive screen TFT LCD, 320x240 resolution, integrate controller on board. It uses SPI interface, can be used to display image, text or draw geometric figure with functions.STM32 and Arduino examples are provided for users.PARAMETERSLCD Type: TFTLCD Interface: SPILCD Controller: ILI9341Touch Screen Controller: XPT2046Touch Screen Type: ResistiveResolution: 320x240 (Pixel)Color Gradation Exponent: 65536INTERFACESymbol Arduino PIN STM32 PIN Description 5V 5V 5V 5V power inputGND GND GND GroundSCLK D13 PA5 SPI clockMISO D12 PA6 SPI data inputMOSI D11 PA7 SPI data outputLCD_CS D10 PB6 LCD chip selectLCD_BL D9 PC7 LCD back lightLCD_RST D8 PA9 LCD resetLCD_DC D7 PA8 LCD data/commandselectionHOW TO USEHARDWARE CONFIGURATION•If there is ICSP interface on Arduino board, set the SPI Config switch to ICSP position.(default)•If Arduino board has no ICSP interface, set the SPI Config switch to the position that SCLK\D13, MISO\D12, MOSI\D11EXAMPLESWe provide Arduino UNO examples and XNUCLEO-F103RB examples for this screen.ARDUINO EXAMPLES1.Download the examples: 3.2inch TFT Touch Shield code.7z, and copy the libraries which arein Arduino\lib folder of examples to the libraries folder which is under the installationdirectory of Arduino.2.Before running the LCD_ShowBMP code, copy the pictures which is in the PIC folder to SDcard.3.Open the LCD_ShowBMP project with Arduino IDE, download to Arduino board.4.The Touch code use four sets of calibration values, could support painting operation in fourdirections. There are five colors which could be chosen on the right. The size of paintbrush is9 by default. Users can also click the AD on screen to calibrate:Please use the stylus click the cross on the screen. The cross will always move until thescreen adjustment is completed.5.According to the prompt, click the red “+” one by one to finish the calibration.STM32 EXAMPLES1.Before running the code that display image. copy the pictures which is in the PIC folder toSD card. Then insert the LCD to NUCLEO or XNUCLEO board.2.Open the project with MDK, download to the NUCLEO or XNUCLEO development board.3.The LCD will first show some general functions: Draw dots, draw dotted line and full line,rectangle, filled rectangle, circle and filled circle. Every figure keeps for 3s. You can change the size of dot, the width of lines and the size of the circles.4.The Touch code use four sets of calibration values, could support painting operation in fourdirections. There are five colors which could be chosen on the right. The size of paintbrush is9 by default. Users can also click the AD on screen to calibrate:Please use the stylus click the cross on the screen. The cross will always move until thescreen adjustment is completed.5.According to the prompt, click the red “+” one by one to finish the calibration.Note:Image: 320x240, 24bit, bmp.SD card: FAT。
联想显示器资料汇总 V1.1
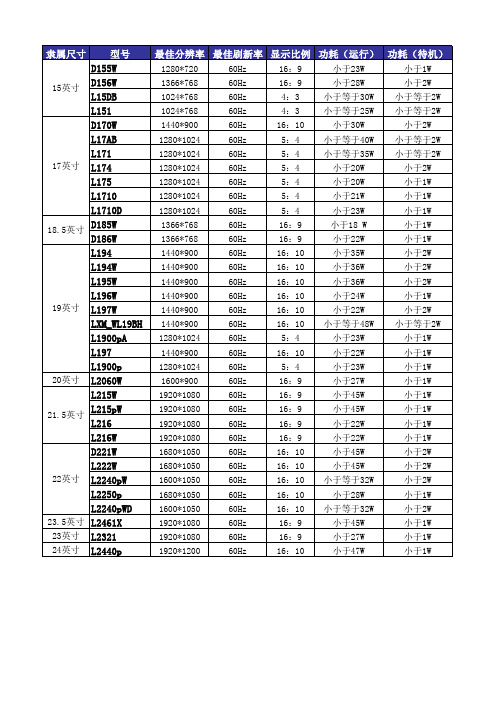
外观(高)
304.7毫米(12.00英寸) 295.454毫米(12.1685英寸) 无资料 274.3毫米 338.9毫米(13.34英寸) 338毫米 318.8毫米 382.3毫米 385.5毫米(15.18英寸) 384.3毫米(15.13英寸) 384.3毫米(15.130英寸) 355.95毫米(14.01英寸) 370.1毫米(14.55英寸) 380.28毫米(14.97英寸) 380.6毫米(14.98英寸) 371.00毫米(14.61英寸) 368.0毫米(14.49英寸) 380.28毫米(14.97英寸) 323毫米 378.7-488.7毫米(14.91-19.24英寸) 380.28毫米(14.97英寸) 378.7-488.7毫米(14.91-19.24英寸) 370.1毫米(14.57英寸) 391.0毫米(15.39英寸) 391.5毫米(15.41英寸) 377.8毫米(14.87英寸) 377.8毫米(14.87英寸) 无资料 409.00毫米(16.10英寸) 378.78毫米(14.913英寸) 398.27毫米(15.680英寸) 378.78毫米(14.913英寸) 442.0毫米(16.61英寸) 373.86毫米(14.719英寸) 394.8毫米(15.54英寸)
外观(宽)
376.3毫米(14.81英寸) 374.046毫米(14.7262英寸) 无资料 337.9毫米 400.4毫米(15.76英寸) 412毫米 370.8毫米 366.8毫米 370.0毫米(14.57英寸) 370.0毫米(14.57英寸) 369.9毫米(14.563英寸) 446.30毫米(17.57英寸) 442.2毫米(17.38英寸) 440.15毫米(17.33英寸) 440.2毫米(17.33英寸) 441.00毫米(17.36英寸) 441.0毫米(17.36英寸) 440.15毫米(17.33英寸) 487毫米 408.0毫米(16.06英寸) 440.15毫米(17.33英寸) 408.0毫米(16.06英寸) 476. 0毫米(18.74英寸) 512.3毫米(20.17英寸) 512.3毫米(20.17英寸) 512.2毫米(20.17英寸) 512.2毫米(20.17英寸) 无资料 505.30毫米(19.90英寸) 510.30毫米(20.091英寸) 506.00毫米(19.921英寸) 510.30毫米(20.091英寸) 569.0毫米(22.40英寸) 545.90毫米(21.492英寸) 559.6毫米(22.03英寸)
Dell ST2320L ST2321L 58.42厘米显示器用户指南说明书
前视图前面板控制标签说明1-2快捷键*默认设置为“预设模式选择”和“亮度/对比度选择”。
1快捷键:预设模式(默认)后视图标签说明/用1条形码序列号标签联系 Dell 获取技术支持。
2安全锁槽确保显示器安全。
3Dell Soundbar 安装支架安装选配的 Dell Soundbar。
左侧底视图显示器规格电源管理模式如果用户电脑上安装有符合 DPMS™ 规范的 VESA 显卡或软件,当显示器未使用时,可自动降低其耗电量。
这称为“节能模式”。
如果电脑检测到来自键盘、鼠标或其它输入设备的输入信号,显示器会自动“醒来”。
下表显示了这种自动节电功能的耗电量和信号: ST2320L/ST2321L底视图标签说明1交流电源线接口2DVI 接口3HDMI 接口4VGA 接口5音频输入6音频输出VESA 模式水平同步 垂直同步 视频 电源指示灯 耗电量正常工作时使用中使用中使用中白30 W (最大值) 24 W (标准)停机模式 非使用中非使用中空白橘黄色 低于 1 W 关闭---关闭低于 0.5 W注: 本显示器符合 ENERGY STAR ® 标准。
注: 只有拔下连接显示器的电源线时才能实现 “关机”模式下的零耗电量。
针脚号码已连接信号线的 15 针针侧针脚号码已连接信号线的24 针针侧1TMDS RX2-注注l如果在拆开显示器的包装时发现有白色粉末,请用布将其擦干净。
l移动显示器时请小心,深色显示器可能会比浅色显示器更容易刮花。
l为保持显示器的最佳图像显示质量,请使用动态屏保,并在不使用时关闭显示器。
返回目录回到目录设置显示器Dell™ ST2320L/ST2321L 显示器如果您使用的是 Dell™ 台式机或便携式电脑并且可以连接互联网1. 访问 ,输入您的服务编号并下载适用于您的显卡的最新驱动程序。
2. 安装驱动程序后,再一次将屏幕的分辨率设置为 1920x1080。
回到目录注: 如果您无法将屏幕的分辨率设置为 1920x1080, 请联系 Dell™打听可以设置这个分辨率的显卡。
Dell S2230MX S2330MX 显示器 用户指南说明书
Dell™ S2230MX/S2330MX 显示器用户指南将显示分辨率设置为 1920 x 1080 (最大)的重要说明本文档中的信息会随时变更,恕不另行通知。
© 2011 Dell Inc. 保留所有权利。
未经 Dell Inc.书面许可,严禁以任何形式复制本文档之内容。
本文中使用商标:Dell和DELL标志是 Dell Inc 的商标; Microsoft和Windows在美国和/或其它国家/地区的注册商标;ENERGY STAR(能源之星)是美国环保署 (Environmental Protection Agency) 的注册商标。
作为 ENERGY STAR 合作伙伴,Dell Inc.认定本产品符合 ENERGY STAR 能效方面的标准。
本文中用到的其它商标和品牌名称均属其各自拥有人所有。
Dell Inc. 对于自己之外的商标和品牌名称没有任何专有利益。
型号S2230MXf/S2330MXc2011年 6月 Rev. A00返回目录页设置显示器Dell™ S2230MX/S2330MX 显示器将显示分辨率设置为1920 x 1080(最大)的重要说明为在使用 Microsoft Windows® 操作系统时获得最佳显示性能,请通过执行以下步骤将显示分辨率设置为1920 x 1080像素:在 Windows XP 中:1. 右键单击桌面并选择“属性”。
2. 选择“设置”选项卡。
3. 在分辨率指示杆上,按住鼠标左键以移动指示杆到达右方将屏幕的分辨率设置为1920 x 1080。
4. 单击“确定”。
在 Windows Vista® 或 Windows® 7 中:1. 右键单击桌面并选择“个性化”。
2. 单击“更改显示设置”。
3. 在分辨率指示杆上,按住鼠标左键以移动指示杆到达右方将屏幕的分辨率设置为1920 x 1080。
4. 单击“确定”。
如果你没有看到1920 x 1080选项,则可能需要更新图形驱动程序。
MW12232说明书
值 Taw8 Tah8 Tcyc8 Tcc Tds8 Tdh8 Tacc8 Tch8
20 10 1000 200 80 10
10
最大
90 60
单位 ns ns ns ns ns ns ns ns
南京名闻科技有限公司 025-84402170,
共15页 第7页
12232 系列图形点阵液晶显示模块使用说明书
效。 读写使能。对于 68 系列 MPU,连接使能信号引脚,高
电平有效; 对于 80 系列 MPU,连接/RD 引脚,低电平有
效。 读写选择,对于 68 系列 MPU,高电平时读数据,低电 平时写数据;
对于 80 系列 MPU,低电平时允许数据传 输,上升沿时锁定数据。 数据/指令选择。高电平:数据 D0-D7 将送入显示 RAM;
L
第4页
12232 系列图形点阵液晶显示模块使用说明书 功能:检测内部状态。
BUSY 为忙信号位,BUSY =1:内部正在执行操作;BUSY =0:空闲状态。 ADC 为显示方向位,ADC=0:反向显示;ADC=1:正向显示。 ON/OFF 显示开关状态,ON/OFF=0:显示打开,ON/OFF=1:显示关闭。 RESET 复位状态,RESET=0:正常,RESET=1:内部正处于复位初始化状态。
低电平:数据 D0-D7 将送入指令执行器 执行。
数据输入输出引脚 0
数据输入输出引脚 1
数据输入输出引脚 2 数据输入输出引脚 3 数据输入输出引脚 4
数据输入输出引脚 5
数据输入输出引脚 6
数据输入输出引脚 7
背光电源正
背光电源负
南京名闻科技有限公司 . 025-84402170,
RAM 进行读写操作前,首先要设置页地址和列地址。执
AOC液晶显示器IF22 用户说明书
電源 (5)安裝 (6)清潔 (8)其他 (9)安裝 (10)標準配置 (10)安裝支架底座 (11)調整視角 (12)連接顯示器 (13)安裝牆壁裝配架 (14)調節顯示器 (15)設置最佳解析度 (15)Windows Vista (15)Windows XP (17)Windows ME/2000 (18)快捷鍵 (19)OSD調節 (20)明亮度 (21)影像設定 (23)色溫 (25)增色 (27)強化圖片 (29)OSD 設定 (31)其他 (33)重設 (35)退出 (37)LED指示燈 (38)驅動 (39)顯示器驅動 (39)Windows 2000 (39)Windows ME (39)Windows XP (40)Windows Vista (43)Windows 7 (45)i-Menu (50)故障排除 (51)規格 (53)預設顯示模式 (54)接頭引腳分派 (55)即插即用 (57)WEEE聲明 (59)安全說明關於本指南下面說明本文檔中使用的符號約定。
注釋、注意和警告在本指南中,文本塊可能帶有圖示並且以粗體或斜體列印。
這些文本塊是注釋、注意和警告,如下所示:注釋:“注釋”表示一些有助於更好地使用電腦系統的重要資訊。
注意:“注意”表示潛在的硬體損壞或資料丟失,並告訴您如何避免出現問題。
警告:“警告”表示潛在的人身傷害,並告訴您如何避免出現問題。
某些警告可能採用其他格式,也可能不帶有圖示。
在這種情況下,由相關的管理機構提供專門的警告表示方法。
監視器只應使用標籤上注明的電源類型。
如果您不瞭解家中的電源類型,請與經銷商或當地電力公司聯繫。
本監視器配備有一個三相接地插頭,其中一個端頭接地。
為安全起見,該插頭應插入接地的電源插座中。
如果三相插頭不能插入您的插座,請找電工安裝一個正確的插座,或使用適配器將設備安全接地。
不要改變接地插頭的安全功能。
遇有雷雨天氣或長時間不使用時,應拔掉設備的電源線。
philips 242b1tfl 用户手册说明书
/welcome241B8B Line222B1/242B1ZH 用户手册 1 客户服务与保修 16故障排除和常见问题解答20目录1. 重要 (1)1.1 安全措施与维修 (1)1.2 标志说明 (2)1.3 产品和包装材料的废弃 (3)2. 设置显示器 (4)2.1 安装 (4)2.2 操作显示器 (5)2.3 支架安装 (7)3. 图像优化 (8)3.1 SmartImage (8)3.2 SmartContrast (9)4. SmoothTouch (10)5. 技术规格 (11)5.1 分辨率和预设模式 (14)6. 电源管理 (15)7. 客户服务与保修 (16)7.1 Philips平板显示器像素缺陷规定 (16)7.2 客户服务与保修 (19)8. 故障排除和常见问题解答 (20)8.1 故障检修 (20)8.2 一般常见问题解答 (21)8.3 SmoothTouch (23)1. 重要此电子版用户指南适合使用Philips显示器的所有用户。
请在使用您的显示器之前花点时间阅读本用户手册。
它包含与使用显示器相关的重要信息和注意事项。
产品享受Philips保修须符合下列条件:产品适当用于其设计目的、符合操作说明、返修时提供原始帐单或付款收据,帐单或收据应载明购货日期、销售商名称、产品型号及生产号。
1.1 安全措施与维修警告使用本文档中未介绍的控制、调整或过程可能导致碰撞、电气危险和/或机械危险。
连接和使用电脑显示器时,请阅读并遵循以下说明。
操作• 请使显示器远离阳光直接照射、明亮强光线、以及任何其他热源。
长期暴露于此类环境可能导致显示器褪色和损坏。
• 使显示器远离油类物质。
油类物质可能会损坏显示器的塑料外壳,并导致保修失效。
• 移开任何可能掉入通风孔的物品或者会妨碍显示器电子器件正常冷却的物品。
• 请勿堵塞机壳上的通风孔。
• 放置显示器时,确保电源插头和插座便于插拔。
• 如果通过拔掉电源线或直流电源线关闭显示器电源,则在重新连接电源线或直流电源线以进行正常操作之前,必须等待6秒钟。
Philips LED背光源智慧型顯示器 使用手冊说明书
使用手冊Philips LED背光源智慧型顯示器75PUH8265/9675PUH8275/9686PUH8265/9686PUH8275/96目錄1 安裝 41.1 閱讀安全指示41.2 顯示器底座和壁面架設4 1.3 電源線41.4 擺放位置提示42 遙控器 52.1 按鍵瀏覽52.2 將遙控器與顯示器配對6 2.3 語音搜尋62.4 IR 感應器62.5 電池62.6 清潔73 開啟和關閉 83.1 開啟或待機83.2 顯示器上的按鍵84 連接裝置 94.1 關於各種連接94.2 家庭劇院 - HTS94.3 藍光光碟播放器104.4 藍牙104.5 耳機104.6 遊戲機114.7 USB 外接式硬碟114.8 USB 鍵盤124.9 USB 隨身碟124.10 相機124.11 攝影機134.12 電腦135 應用程式 145.1 關於應用程式145.2 Google Play145.3 開始或停止應用程式155.4 鎖定應用程式155.5 管理應用程式165.6 儲存166 網際網路 186.1 啟動網際網路186.2 網際網路選項187 輸入源 197.1 切換至裝置197.2 顯示器輸入源選項197.3 裝置名稱及類型197.4 重新掃描已連接的裝置198 網路 218.1 網路218.2 藍牙219 設定 229.1 畫面229.2 聲音259.3 Ambilight (流光溢彩) 設定26 9.4 環保/節能設定289.5 一般設定289.6 時鐘、地區及語言設定309.7 Android 設定309.8 鎖定設定3010 影片、相片和音樂 3210.1 來自電腦或 NAS3210.2 最受歡迎選單與上次播放選單32 10.3 來自 USB 連接裝置3210.4 播放您的影片/視訊3210.5 觀看您的相片3310.6 播放您的音樂3511 遊戲 3611.1 必要準備3611.2 遊戲控制器3611.3 玩遊戲3612 Ambilight (流光溢彩) 37 12.1 Ambilight (流光溢彩) 風格37 12.2 關閉 Ambilight (流光溢彩)37 12.3 Ambilight (流光溢彩) 設定37 12.4 Lounge Light 模式3712.5 Ambisleep3812.6 Ambilight 延伸3813 Netflix 4014 Alexa 4114.1 關於 Alexa4114.2 使用 Alexa4115 日出喚醒鬧鐘 4216 軟體 4316.1 更新軟體4316.2 檢視軟體更新紀錄4316.3 軟體版本4316.4 自動軟體更新4316.5 開放原始碼軟體4316.6 公告4417 規格 4517.1 環境保護4517.2 電源4517.3 作業系統4517.4 接收4517.5 顯示器類型4517.6 顯示器輸入解析度4517.7 尺寸和重量4617.8 多媒體4618 協助說明與支援 4718.1 註冊您的顯示器4718.2 使用協助說明4718.3 疑難排解4718.4 線上協助說明4918.5 支援及維修4919 安全與照護 5019.1 安全性5019.2 螢幕照護5119.3 RoHS 法規要求5120 使用條款 5220.1 使用條款 - 顯示器5221 版權 5321.1 DTS Play-Fi5321.2 HDMI5321.3 Dolby Vision and Dolby Atmos 杜比視界及杜比全景聲5321.4 DTS-HD5321.5 Wi-Fi Alliance5321.6 Kensington5321.7 HEVC Advance 5421.8 其他商標5422 針對第三方所提供服務及/或軟體的免責聲明 55索引 561安裝1.1閱讀安全指示使用顯示器之前請先閱讀安全指示。
Alienware AW2521HF AW2521HFL 显示器使用指南说明书
Alienware AW2521HF/AW2521HFL 顯示器使用指南機型:AW2521HF/AW2521HFL規格型號:AW2521HFb注意、小心與警告訊息注意:「注意」意指重要資訊的注意事項,可幫助您更妥善使用電腦。
小心:顯示「小心」,表示未遵循指示可能導致硬體損壞或資料遺失。
警告:「警告」標誌意指可能會造成財產損害、人體傷害或導致死亡。
© 2020 Dell Inc. 或其子公司。
版權所有。
Dell、EMC 及其它商標為 Dell Inc. 或其子公司的商標。
其它商標可能為個別所有者的商標。
2020 - 12Rev. A03目次關於您的顯示器 . . . . . . . . . . . . . . . . . . . . . . . . . . . . . . . . .6包裝內容 . . . . . . . . . . . . . . . . . . . . . . . . . . . . . . . . . . . . . . . . . . . .6產品功能特色 . . . . . . . . . . . . . . . . . . . . . . . . . . . . . . . . . . . . . . . .8認識各部位與控制裝置 . . . . . . . . . . . . . . . . . . . . . . . . . . . . . . . .9前視圖. . . . . . . . . . . . . . . . . . . . . . . . . . . . . . . . . . . . . . . . . . . . . . . . . . . . . .9背視圖. . . . . . . . . . . . . . . . . . . . . . . . . . . . . . . . . . . . . . . . . . . . . . . . . . . . .10後視圖和底視圖 . . . . . . . . . . . . . . . . . . . . . . . . . . . . . . . . . . . . . . . . . . . . .11顯示器規格 . . . . . . . . . . . . . . . . . . . . . . . . . . . . . . . . . . . . . . . . . 12解析度規格 . . . . . . . . . . . . . . . . . . . . . . . . . . . . . . . . . . . . . . . . .14支援視訊模式 . . . . . . . . . . . . . . . . . . . . . . . . . . . . . . . . . . . . . . . . . . . . . . .14預設顯示模式 . . . . . . . . . . . . . . . . . . . . . . . . . . . . . . . . . . . . . . . . . . . . . . .14電氣規格. . . . . . . . . . . . . . . . . . . . . . . . . . . . . . . . . . . . . . . . . . . . . . . . . . .15實體特性. . . . . . . . . . . . . . . . . . . . . . . . . . . . . . . . . . . . . . . . . . . . . . . . . . .16環境特性. . . . . . . . . . . . . . . . . . . . . . . . . . . . . . . . . . . . . . . . . . . . . . . . . . .17針腳定義. . . . . . . . . . . . . . . . . . . . . . . . . . . . . . . . . . . . . . . . . . . . . . . . . . .18隨插即用相容性 . . . . . . . . . . . . . . . . . . . . . . . . . . . . . . . . . . . . .19通用序列匯流排 (USB) 介面 . . . . . . . . . . . . . . . . . . . . . . . . . . .20 USB 上載連接器. . . . . . . . . . . . . . . . . . . . . . . . . . . . . . . . . . . . . . . . . . . . 20 USB 下載連接器. . . . . . . . . . . . . . . . . . . . . . . . . . . . . . . . . . . . . . . . . . . . .21 USB 連接埠 . . . . . . . . . . . . . . . . . . . . . . . . . . . . . . . . . . . . . . . . . . . . . . . .21液晶顯示器品質與像素政策. . . . . . . . . . . . . . . . . . . . . . . . . . . . 21維護指南 . . . . . . . . . . . . . . . . . . . . . . . . . . . . . . . . . . . . . . . . . . .22清潔您的顯示器 . . . . . . . . . . . . . . . . . . . . . . . . . . . . . . . . . . . . . . . . . . . . 22設定顯示器. . . . . . . . . . . . . . . . . . . . . . . . . . . . . . . . . . . .23安裝支架 . . . . . . . . . . . . . . . . . . . . . . . . . . . . . . . . . . . . . . . . . . .23連接電腦 . . . . . . . . . . . . . . . . . . . . . . . . . . . . . . . . . . . . . . . . . . .27移除顯示器支架 . . . . . . . . . . . . . . . . . . . . . . . . . . . . . . . . . . . . .28|3VESA 壁掛式組件(選配). . . . . . . . . . . . . . . . . . . . . . . . . . . 30操作顯示器. . . . . . . . . . . . . . . . . . . . . . . . . . . . . . . . . . . . 31開啟顯示器電源. . . . . . . . . . . . . . . . . . . . . . . . . . . . . . . . . . . . . .31使用搖桿控制. . . . . . . . . . . . . . . . . . . . . . . . . . . . . . . . . . . . . . . .31使用後面板控制按鈕. . . . . . . . . . . . . . . . . . . . . . . . . . . . . . . . . .32使用畫面顯示項目 (OSD) 功能表 . . . . . . . . . . . . . . . . . . . . . . .33存取功能表系統. . . . . . . . . . . . . . . . . . . . . . . . . . . . . . . . . . . . . . . . . . . . .33 OSD 警告訊息. . . . . . . . . . . . . . . . . . . . . . . . . . . . . . . . . . . . . . . . . . . . . .44鎖定後面板控制按鈕. . . . . . . . . . . . . . . . . . . . . . . . . . . . . . . . . 47設定最大解析度. . . . . . . . . . . . . . . . . . . . . . . . . . . . . . . . . . . . . 48使用傾斜、旋轉和垂直展開功能 . . . . . . . . . . . . . . . . . . . . . . . 49傾斜和旋轉展開. . . . . . . . . . . . . . . . . . . . . . . . . . . . . . . . . . . . . . . . . . . . .49垂直展開. . . . . . . . . . . . . . . . . . . . . . . . . . . . . . . . . . . . . . . . . . . . . . . . . . .49旋轉顯示器. . . . . . . . . . . . . . . . . . . . . . . . . . . . . . . . . . . . . . . . . . . . . . . . .50順時針旋轉. . . . . . . . . . . . . . . . . . . . . . . . . . . . . . . . . . . . . . . . . . . . . . . . .50逆時針旋轉. . . . . . . . . . . . . . . . . . . . . . . . . . . . . . . . . . . . . . . . . . . . . . . . .51調整您系統的旋轉顯示設定. . . . . . . . . . . . . . . . . . . . . . . . . . . .51使用 AlienFX 應用程式. . . . . . . . . . . . . . . . . . . . . . . . . .52先決條件 . . . . . . . . . . . . . . . . . . . . . . . . . . . . . . . . . . . . . . . . . . 52透過 Windows Update 安裝 AWCC . . . . . . . . . . . . . . . . . . . 52從 Dell Support 網站安裝 AWCC . . . . . . . . . . . . . . . . . . . . . 52瀏覽 AlienFX 視窗 . . . . . . . . . . . . . . . . . . . . . . . . . . . . . . . . . . 53建立主題 . . . . . . . . . . . . . . . . . . . . . . . . . . . . . . . . . . . . . . . . . . 54設定燈光效果. . . . . . . . . . . . . . . . . . . . . . . . . . . . . . . . . . . . . . . 55疑難排解. . . . . . . . . . . . . . . . . . . . . . . . . . . . . . . . . . . . . .58自我測試 . . . . . . . . . . . . . . . . . . . . . . . . . . . . . . . . . . . . . . . . . . 58內建診斷工具. . . . . . . . . . . . . . . . . . . . . . . . . . . . . . . . . . . . . . . 59常見問題 . . . . . . . . . . . . . . . . . . . . . . . . . . . . . . . . . . . . . . . . . . 60產品特定問題. . . . . . . . . . . . . . . . . . . . . . . . . . . . . . . . . . . . . . . 62通用序列匯流排 (USB) 特定問題 . . . . . . . . . . . . . . . . . . . . . . 624|附錄. . . . . . . . . . . . . . . . . . . . . . . . . . . . . . . . . . . . . . . . . .64 FCC 聲明(僅針對美國)與其它法規資訊. . . . . . . . . . . . . . .64 RoHS 聲明(僅針對台灣)/ Taiwan RoHS. . . . . . . . . . . . . .64與 Dell 聯絡 . . . . . . . . . . . . . . . . . . . . . . . . . . . . . . . . . . . . . . . .65|56|關於您的顯示器關於您的顯示器包裝內容您的顯示器包裝中包含以下元件。
芬尼特 Philips 32 英寸 QHD 显示器说明书
Philips BrillianceLED-backlit LCD Display with Multiview32" / 81.3 cm2560 x 1440 (QHD)BDM3270QPExpand your experienceCrystalclear images, maximum performanceThis Philips 32” display will amaze you with its Crystalclear Quad HD 2560 x 1440 images and brilliant colors. Multiview allows active dual connect and view.Brilliant performance•Crystalclear images with Quad HD 2560 x 1440 pixels •AMVA LED for wide-view super-high contrast, vivid images •1.074 billion colors for smooth color gradations and detail •Less eye fatigue with Flicker-free technologyDesigned for the way you work•MultiView enables simultaneous dual connection and view •SmartErgoBase enables people-friendly ergonomic adjustments •Low bezel-to-table height for maximum reading comfort •Built-in stereo speakers for multimediaEasy to connect and enjoy•SmartConnect with HDMI, MHL, DisplayPort, DVI, and VGA •DisplayPort connection for maximum visuals•MHL technology for enjoying mobile content on big screen •USB 3.0 enables fast data transfers and smart phone chargingHighlightsCrystalclear imagesThese Philips screens deliver Crystalclear, Quad HD 2560x1440 or 2560x1080 pixel images. Utilizing high performance panels with high density pixel count, enabled by high bandwidth sources like USB-C, Displayport, HDMI, these new displays will make your images and graphics come alive. Whether you are demanding professional requiringextremely detailed information for CAD-CAM solutions, using 3D graphic applications or a financial wizard working on huge spreadsheets, Philips displays will give you Crystalclear images.AMVA LED displayPhilips AMVA LED display uses an advanced multi-domain vertical alignment technology which gives you super-high static contrast ratios for extra vivid and bright images. While standard office applications are handled with ease, it is especially suitable for photos, web-browsing, movies, gaming, and demanding graphical applications. It's optimized pixel management technology gives you 178/178 degree extra wide viewing angle, resulting in crisp images even in 90 degree pivot mode10-bit colors The 10-bit display delivers rich color depth with 1.074 billion colors and 12-bit internal processing for re-creating smooth, natural colors without gradations and color banding.Flicker-free technologyDue to the way brightness is controlled on LED-backlit screens, some users experience flicker on their screen which causes eyefatigue. Philips Flicker-free Technology applies a new solution to regulate brightness and reduce flicker for more comfortable viewing.MultiView technologyWith the ultra-high resolution PhilipsMultiView display you can now experience a world of connectivity. MultiView enables active dual connect and view so that you can work with multiple devices like a PC and notebook simultaneously, for complex multi-tasking.SmartErgoBaseThe SmartErgoBase is a monitor base that delivers ergonomic display comfort and provides cable management. The base can swivel, tilt and rotate to various angles to ensure maximum comfort. The height adjustable stand guarantees the optimalviewing level, reducing the physical strains of a long workday, while cable managementreduces cable clutter and keeps the workspace neat and professional.Built-in stereo speakersA pair of high quality stereo speakers built into a display device. It can be visible front firing, or invisible down firing, top firing, rear firing, etc depending on model and design.USB 3.0 super speedSuper Speed USB 3.0 deploys 5.0 gbit/s transfer rate, which is about 10 times faster than USB 2.0 standard significantly reducing data transfer time saving you time and money. With more bandwidth, super speed transfer rates, better power management and superior overallperformance, USB 3.0 sets the global standard allowing you to use the large capacity storage devices. Sync-N-Go technology ensures you don't have to wait anymore for bandwidth to be freed up. Your investment in USB 2.0 devices is protected as it is backwardcompatible.Issue date 2023-09-13 Version: 9.0.112 NC: 8670 001 22985 EAN: 87 12581 73077 2© 2023 Koninklijke Philips N.V.All Rights reserved.Specifications are subject to change without notice. Trademarks are the property of Koninklijke Philips N.V. or their respective owners.SpecificationsPicture/Display•LCD panel type: AMVA LCD•Backlight type: W-LED system•Panel Size: 32 inch / 81.3 cm•Effective viewing area: 708.48 (H) x 398.52 (V)•Aspect ratio: 16:9•Optimum resolution: 2560 x 1440 @ 60Hz •Brightness: 300 cd/m²•Response time (typical): 4 ms (Gray to Gray)*•Contrast ratio (typical): 3,000:1•SmartContrast: 50,000,000:1•Pixel pitch: 0.277 x 0.277 mm•Viewing angle: 178º (H) / 178º (V), @ C/R > 10•Picture enhancement: SmartImage•Display colors: Color support 1.07 billion colors •Scanning Frequency: 15 - 99 kHz (H) / 23 - 76 Hz (V) *•MHL: 1080P @ 60Hz•sRGB•Brightness uniformity: 93% ~ 105%•Delta E: 3 (typ) for 6500KConnectivity•USB: USB 2.0 x 2, USB 3.0 x 2 (1 with B.C.1.2)•Signal Input: VGA (Analog ), DVI-Dual Link (digital, HDCP), DisplayPort x 1, MHL-HDMI (digital, HDCP)•Sync Input: Separate Sync, Sync on Green •Audio (In/Out): PC audio-in, Headphone out Convenience•Built-in Speakers: 3 W x 2•MultiView: PIP/PBP mode, 2x devices•User convenience: SmartImage, Multiview, User, Menu, Power On/Off•Control software: SmartControl Premium •OSD Languages: Dutch, English, Finnish, French, German, Greek, Hungarian, Italian, Japanese, Korean, Polish, Portuguese, Russian, Simplified Chinese, Spanish, Swedish, Traditional Chinese, Turkish, Ukrainian, Brazil Portuguese, Czech •Other convenience: Kensington lock, VESA mount (100x100mm)•Plug & Play Compatibility: DDC/CI, Mac OS X, sRGB, Windows 10 / 8.1 / 8 / 7Stand•Height adjustment: 180 mm•Pivot: 90 degree•Swivel:-170/+170 degree•Tilt: -5/20 degree Power•ECO mode: 31 W (typ.)•On mode: 35.45 W (typ.) (EnergyStar 7.0 testmethod)•Standby mode: <0.5 W (typ.)•Off mode: Zero watts with AC switch•Power LED indicator: Operation - White, Standbymode- White (blinking)•Power supply: Built-in, 100-240VAC, 50-60HzDimensions•Product with stand(max height): 742 x 657 x270 mm•Product without stand (mm): 742 x 438 x 61 mm•Packaging in mm (WxHxD): 970 x 526 x 224 mmWeight•Product with stand (kg): 10.76 kg•Product without stand (kg): 7.80 kg•Product with packaging (kg): 14.98 kgOperating conditions•Temperature range (operation): 0°C to 40°C °C•Temperature range (storage): -20°C to 60°C °C•Relative humidity: 20%-80 %•Altitude: Operation: +12,000ft (3,658m), Non-operation: +40,000ft (12,192m)•MTBF (demonstrated): 70,000 hrs (excludedbacklight)Sustainability•Environmental and energy: EnergyStar 7.0, RoHS•Recyclable packaging material: 100 %•Post consumer recycled plastic: 65%•Specific Substances: PVC / BFR free housing,Mercury freeCompliance and standards•Regulatory Approvals: CE Mark, FCC Class B,SEMKO, cETLus, CU-EAC, EPA, PSB, WEEE, CCC,CECP, PSE, KC, BSMI, VCCICabinet•Front bezel: Black•Rear cover: Black•Foot:Black•Finish: TextureWhat's in the box?•Monitor with stand•Cables: VGA, DVI, HDMI, DP, Audio, Power•User Documentation*This Philips display is MHL certified. However, in case your MHLdevice does not connect or work correctly, check with your MHLdevice FAQ or vendor directly for direction. The policy of yourdevice manufacturer may require you to purchase their brandspecific MHL cable or adapter in order to work*Requires optional MHL certified mobile device and MHL cable. (notincluded) Please check with your MHL device vendor forcompatibility.*Standby/Off energy saving of ErP is not applicable for the MHLcharging functionality*For complete list of MHL-enabled products refer to*"AMVA" word mark / trademark and related patents on technologiesbelong to their respective owners.*The scanning frequency value listed covers a wide range and variesfor all types of I/O, for details please refer to user manual.*Response time value equal to SmartResponse。
三星2232MW用户手册

2
清洁
安全说明
请将加热装置尽量放置在远离电源线或本产品的地方。 • 否则可能导致触电或起火。
请勿将其安装在书柜或壁橱等通风不良的地方。 • 否则可能因产品内部温度升高而导致起火。
请小心轻放显示器。 • 否则可能会损坏显示器。
要断开设备的电源,必须将插头从电源插座拔出,因此电源插 头应易于操作。 • 这可能导致电击或火灾。
仅可使用本公司提供的电源线。请勿使用其它产品随附的电源 线。 • 否则可能导致起火或触电。
如果要在多尘、高温或低温、湿度高或曝露于化学物质中的环境安装显 示器,以及在需要 24 小时不间断运作的机场或火车站等地方安装显示 器,请务必与授权的服务中心联系。 否则,显示器可能会严重受损。
清洁布
HDMI 缆线
DVI 至 HDMI 缆线
耳塞/耳机
RCA 缆线
电视天线缆线
组合缆线
RCA 至立体声(适用于 PC) 缆线
S-VIDEO 缆线
10
介绍
显示器 正面
SOURCE 激活一个高亮显示的菜单项。 从 PC 模式切换到视频模式。 仅在有外部设备同时连接到显示器时才可以更改输入源。 要转换屏幕模式: [PC] → [DVI] → [电视] → [AV] → [S-Video] → [分量输出]→ [HDMI] >> 单击此处观看动画剪辑 MENU 打开 OSD 菜单。也用于退出 OSD 菜单或回到上一菜单。 - VOL + 在菜单项之间水平移动或调整选定的菜单值。还可以调整音量。
如果使用室外天线,则天线和附近电线之间应留有足够的距 离,以避免因天线被强风刮倒而彼此发生接触。 • 翻倒的天线可能会导致人身伤害或电击。
腾讯AI助手:Philips 26PFL3312 HD Ready 液晶电视说明书
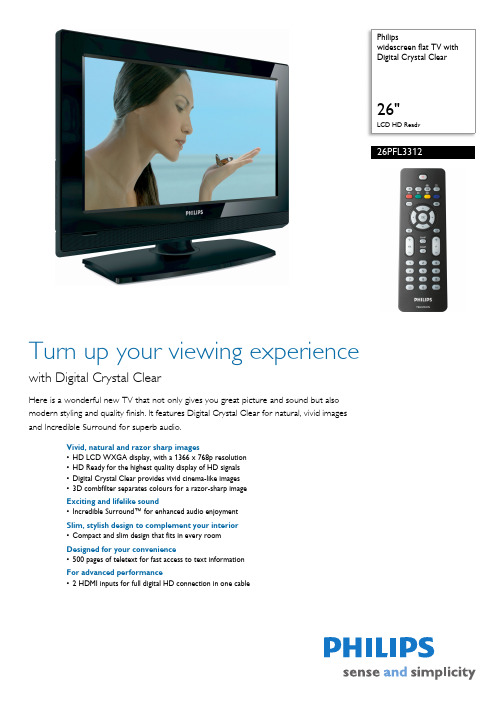
Philipswidescreen flat TV with Digital Crystal Clear26"LCD HD Ready26PFL3312Turn up your viewing experiencewith Digital Crystal ClearHere is a wonderful new TV that not only gives you great picture and sound but also modern styling and quality finish. It features Digital Crystal Clear for natural, vivid images and Incredible Surround for superb audio.Vivid, natural and razor sharp images•HD LCD WXGA display, with a 1366 x 768p resolution •HD Ready for the highest quality display of HD signals •Digital Crystal Clear provides vivid cinema-like images •3D combfilter separates colours for a razor-sharp image Exciting and lifelike sound•Incredible Surround™ for enhanced audio enjoyment Slim, stylish design to complement your interior •Compact and slim design that fits in every room Designed for your convenience•500 pages of teletext for fast access to text information For advanced performance•2 HDMI inputs for full digital HD connection in one cableHighlightsLCD WXGA display, 1366 x 768pThis WXGA display with state-of-the-art LCD screen technology gives you widescreen HD resolution of 1366 x 768p pixels. It produces brilliant flicker-free progressive scan pictures with optimum brightness and superb colours. This vibrant and sharp image will provide you with an enhanced viewing experience.HD ReadyEnjoy the exceptional picture quality of High Definition pictures and be fully prepared for HD sources like HDTV set-top boxes and Blu-ray discs. HD Ready is a protected label that offers picture quality beyond that of progressive scan. It conforms to strictstandards laid out by EICTA to offer an HD screen that displays the benefits of resolution and picture quality of a High Definition signal. It has a universal connection for both analogueYPbPr and uncompressed digital connection of DVI or HDMI, supporting HDCP. It can display 720p and 1080i signals at 50 and 60 Hz.Digital Crystal ClearDigital Crystal Clear is a package of picture innovations that digitally adjusts and optimises picture quality to optimal contrast, colour and sharpness levels. It's like watching vivid cinema-like images.3D CombfilterThe 3D combfilter separates brightness and colour signals better in 3D domain to eliminate cross-colour, cross-luminance and dot-crawl distortion - all of which detract from your viewing pleasure. The 3D digital combfilter performs field-by-field comparisons of the television image to accurately separate the colour from the black-and-white information and remove both horizontally and vertically hanging dots, as well as dot crawl. The result is a razor sharp image.Incredible Surround™Incredible Surround is an audio technology from Philips that dramatically magnifies the sound field to immerse you in the audio. Using state-of-the-art electronic phase shifting,Incredible Surround mixes sounds from left and right in such a way that it expands the virtual distance between the two speakers. This wider spread greatly enhances the stereo effect and creates a more natural sounddimension. Incredible Surround allows you to experience total surround with greater depth and width of sound, without the use of additional speakers.Compact and slim designThis design style emphasises a slim, compact look that saves space and fits in anywhere.2 HDMI inputsHDMI makes an uncompressed digital RGB connection from the source to the screen. By eliminating conversion to an analogue signal, it delivers an unblemished image. The non-degraded signal reduces flicker and leads to a clearer picture. HDMI intelligentlycommunicates the highest output resolution with the source device. The HDMI input is fully backwards-compatible with DVI sources but includes digital audio. HDMI uses HDCP copy protection. With 2 HDMI inputs you can connect multiple HD sources, for instance an HD set-top box and a Blu-ray player. Your TVis fully prepared for the HD future.Issue date 2010-07-02Version: 2.0.1312 NC: 8670 000 30331EAN: 87 12581 33767 4© 2010 Koninklijke Philips Electronics N.V.All Rights reserved.Specifications are subject to change without notice. Trademarks are the property of Koninklijke Philips Electronics N.V. or their respective owners.SpecificationsPicture/Display •Aspect ratio: 16:9, Widescreen •Brightness: 500 cd/m²•Dynamic screen contrast: 4000:1•Response time (typical): 8 ms•Viewing Angle (H / V): 160 / 150 degree •Diagonal screen size: 26 inch / 66 cm•Display screen type: LCD WXGA Active Matrix TFT•Panel resolution: 1366 x 768p•Picture enhancement: Digital Crystal Clear,Dynamic contrast enhancement, Contrast Plus, 3/2 - 2/2 motion pull down, 3D Combfilter, Active Control, Digital Noise Reduction, Jagged Line Suppression, Progressive Scan•Screen enhancement: Anti-Reflection coated screenSupported Display Resolution•Computer formatsResolutionRefresh rate 640 x 480 60, 72, 75, 85 Hz 800 x 600 60, 72, 75, 85 Hz 1024 x 768 60, 70, 75, 85 Hz •Video Formats Resolution Refresh rate 640 x 480i 1Fh 640 x 480p 2Fh 720 x 576i 1Fh 720 x 576p 2Fh 1280 x 720p 3Fh 1920 x 1080i 2FhSound•Equalizer: 7-bands•Output power (RMS): 2 x 5 W•Sound Enhancement: Auto Volume Leveller, Dynamic Bass Enhancement, Incredible Surround •Sound System: Nicam Stereo, StereoLoudspeakers•Built-in speakers: 2Convenience•Child Protection: Child Lock+Parental Control •Clock: Sleep Timer, Wake-up Clock•Ease of Installation: Auto Programme Naming, Automatic Channel Install (ACI), AutomaticTuning System (ATS), Autostore, Fine Tuning, Plug & Play, Programme Name, Sorting•Ease of Use: Auto Volume Leveller (AVL), Programme List, Side Control, Smart Picture, Smart Sound•Remote Control: TV•Remote control type: RC2023601/01•Screen Format Adjustments: 4:3, Movie expand 14:9, Movie expand 16:9, Subtitle Zoom, Super Zoom, Widescreen•Picture in Picture: Text dual screen •Teletext: 500-page Smart Text•Teletext enhancements: 4 favourite pages, Programme information LineTuner/Reception/Transmission•Aerial Input: 75 ohm coaxial (IEC75)•TV system: PAL I, PAL B/G, PAL D/K, SECAM B/G, SECAM D/K, SECAM L/L'•Video Playback: NTSC, SECAM, PAL•Tuner bands: Hyperband, S-Channel, UHF, VHF •Number of Pre-set Channels: 100•Tuner Display:PLLConnectivity•Ext 1 Scart: Audio L/R, CVBS in/out, RGB•Ext 2 Scart: Audio L/R, CVBS in/out, S-video in •Ext 3: S-video in, CVBS in, Audio L/R in •Ext 4: YPbPr, Audio L/R in •Ext 5: HDMI •Ext 6: HDMI•Number of Scarts:2•Other connections: Headphone out Electricity•Ambient temperature: 5°C to 40°C •Mains power: 220 - 240 V, 50/60 Hz •Power consumption: 120 W•Standby power consumption: < 1 WAccessories•Included Accessories: Tabletop stand, Power cord, Quick start guide, User Manual, Registration card, Warranty certificate, Remote Control, Batteries for remote control•Optional accessories: Floor standDimensions•Colour cabinet: High Gloss Black •Set dimensions (W x H x D): 691.3 x 474 x 111.1 mm•Set dimensions with stand (W x H x D): 691.3 x 530 x 238 mm •Product weight: 12.4 kg•Product weight (+stand): 15.4 kg •Box dimensions (W x H x D): 880 x 218 x 580 mm•Weight incl. Packaging: 18 kg•VESA wall mount compatible: 200 x 100 mm。
联想L2221显示器说明书
第 2 章 . 调整和使用显示器 . . . . . . . . . . . . . . . . . . . . . . . . . . . . . . 2-1
舒适和易使用性 . . . . . . . . . . . . . . . . . . . . . . . . . . . . . . . . . . . . . . . . . . . . . . . . . . . . . . . . . . . . . . . . . . . . . . . . . . . . . . . . . . . . . . . . . 2-1 安排您的工作区 . . . . . . . . . . . . . . . . . . . . . . . . . . . . . . . . . . . . . . . . . . . . . . . . . . . . . . . . . . . . . . . . . . . . . . . . . . . . . . . . . . . . . . 2-1 显示器的放置 . . . . . . . . . . . . . . . . . . . . . . . . . . . . . . . . . . . . . . . . . . . . . . . . . . . . . . . . . . . . . . . . . . . . . . . . . . . . . . . . . . . . . . . . 2-1 良好工作习惯的快速技巧 . . . . . . . . . . . . . . . . . . . . . . . . . . . . . . . . . . . . . . . . . . . . . . . . . . . . . . . . . . . . . . . . . . . . . . . . . . . . . . 2-2
Philips 42PFL3312 HD Ready LCD 107cm 大屏幕电视说明书
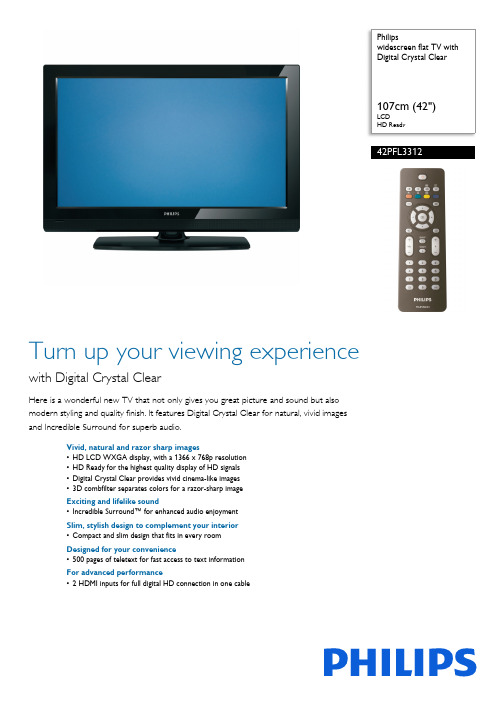
Philipswidescreen flat TV with Digital Crystal Clear107cm (42")LCDHD Ready42PFL3312Turn up your viewing experiencewith Digital Crystal ClearHere is a wonderful new TV that not only gives you great picture and sound but also modern styling and quality finish. It features Digital Crystal Clear for natural, vivid images and Incredible Surround for superb audio.Vivid, natural and razor sharp images•HD LCD WXGA display, with a 1366 x 768p resolution •HD Ready for the highest quality display of HD signals •Digital Crystal Clear provides vivid cinema-like images •3D combfilter separates colors for a razor-sharp image Exciting and lifelike sound•Incredible Surround™ for enhanced audio enjoyment Slim, stylish design to complement your interior •Compact and slim design that fits in every room Designed for your convenience•500 pages of teletext for fast access to text information For advanced performance•2 HDMI inputs for full digital HD connection in one cableHighlightsLCD WXGA display, 1366 x 768pThis WXGA display with state-of-the-art LCD screen technology gives you widescreen HD resolution of 1366 x 768p pixels. It produces brilliant flicker-free progressive scan pictures with optimum brightness and superb colors. This vibrant and sharp image will provide you with an enhanced viewing experience.HD ReadyEnjoy the exceptional picture quality of High Definition pictures and be fully prepared for HD sources like HDTV settop box or Blu-ray disc. HD Ready is a protected label that offers picture quality beyond that of progressive scan. It conforms to strict standards laid out by EICTA to offer a HD screen that displays the benefits of resolution and picture quality of a High Definition signal. It has a universal connection for both analog YPbPr and uncompressed Digital connection of DVI or HDMI, supporting HDCP. It can display 720p, and 1080i signals at 50 and 60Hz.Digital Crystal ClearDigital Crystal Clear is a package of picture innovations that digitally adjusts and optimizes picture quality to optimal contrast, color andsharpness levels. It's like watching vivid cinema-like images.3D CombfilterThe 3D comb filter separates brightness andcolor signals better in 3D domain to eliminatecross-color, cross-luminance and dot-crawldistortion - all of which detract from yourviewing pleasure. The 3D digital comb filterperforms field-by-field comparisons of thetelevision image to accurately separate thecolor from the black-and-white informationand remove both horizontally and verticallyhanging dots, as well as dot crawl. The result isa razor sharp image.Incredible Surround™Incredible Surround is an audio technologyfrom Philips that dramatically magnifies thesound field to immerse you in the audio. Usingstate-of-the-art electronic phase shifting,Incredible Surround mixes sounds from leftand right in such a way that it expands thevirtual distance between the two speakers.This wider spread greatly enhances the stereoeffect and creates a more natural sounddimension. Incredible Surround allows you toexperience total surround with greater depthand width of sound, without the use ofadditional speakers.Compact and slim designThis design style emphasizes a slim, compactlook that saves space and fits in anywhere.2 HDMI inputsHDMI makes an uncompressed digital RGBconnection from the source to the screen. Byeliminating conversion to an analog signal, itdelivers an unblemished image. The non-degraded signal reduces flicker and leads to aclearer picture. HDMI intelligentlycommunicates the highest output resolutionwith the source device. The HDMI input is fullybackward compatible with DVI sources butincludes digital audio. HDMI uses HDCP copyprotection. With 2 HDMI inputs you canconnect multiple HD sources, for instance anHD settop box, and a Blu-ray player. Your TVis fully prepared for the HD future.Issue date 2022-07-14Version: 1.0.1012 NC: 8670 000 30334EAN: 87 12581 33770 4© 2022 Koninklijke Philips N.V.All Rights reserved.Specifications are subject to change without notice. Trademarks are the property of Koninklijke Philips N.V. or their respective owners.SpecificationsPicture/Display •Color cabinet: High Gloss Black •Aspect ratio: 16:9, Widescreen •Brightness: 500 cd/m²•Dynamic screen contrast: 5000:1•Response time (typical): 5 ms•Viewing angle (H / V): 178 / 178 degree •Diagonal screen size: 42 inch / 107 cm•Display screen type: LCD WXGA Active Matrix TFT•Panel resolution: 1366 x 768p•Picture enhancement: Digital Crystal Clear,Dynamic contrast enhancement, Contrast Plus, 3/2 - 2/2 motion pull down, 3D Combfilter, Active Control, Digital Noise Reduction, Jagged Line Suppression, Progressive scan•Screen enhancement: Anti-Reflection coated screenSupported Display Resolution•Computer formats Resolution Refresh rate 640 x 480 60, 72, 75, 85Hz 800 x 600 60, 72, 75, 85Hz 1024 x 768 60, 70, 75, 85Hz •Video Formats Resolution Refresh rate 640 x 480i 1Fh 640 x 480p 2Fh 720 x 576i 1Fh 720 x 576p 2Fh 1280 x 720p 3Fh 1920 x 1080i 2FhSound•Equalizer: 7-bands•Output power (RMS): 2 x 10 W•Sound Enhancement: Auto Volume Leveler, Dynamic Bass Enhancement, Incredible Surround •Sound System: Nicam Stereo, StereoLoudspeakers•Built-in speakers: 2Convenience•Child Protection: Child Lock+Parental Control •Clock: Sleep Timer, Wake up Clock•Ease of Installation: Auto Program Naming,Automatic Channel Install(ACI), Automatic Tuning System (ATS), Autostore, Fine Tuning, Plug & Play, Program Name, Sorting•Ease of Use: Auto Volume Leveller (AVL), Program List, Side Control, Smart Picture, Smart Sound •Remote Control: TV•Remote control type: RC2023601/01•Screen Format Adjustments: 4:3, Movie expand 14:9, Movie expand 16:9, Subtitle Zoom, Super Zoom, Widescreen•Picture in Picture: Text dual screen •Teletext: 500 page Smart Text•Teletext enhancements: 4 favourite pages, Program information LineTuner/Reception/Transmission•Aerial Input: 75 ohm coaxial (IEC75)•TV system: PAL I, PAL B/G, PAL D/K, SECAM B/G, SECAM D/K, SECAM L/L'•Video Playback: NTSC, SECAM, PAL•Tuner bands: Hyperband, S-Channel, UHF, VHF •Number of Preset Channels: 100•Tuner Display:PLLConnectivity•Ext 1 Scart: Audio L/R, CVBS in/out, RGB•Ext 2 Scart: Audio L/R, CVBS in/out, S-video in •Ext 3: S-video in, CVBS in, Audio L/R in •Ext 4: YPbPr, Audio L/R in •Ext 5: HDMI •Ext 6: HDMI•Number of Scarts:2•Other connections: Headphone out Power•Ambient temperature: 5 °C to 40 °C •Mains power: 220 - 240V, 50/60Hz •Power consumption: 240 W•Standby power consumption: < 1WAccessories•Included accessories: Table top stand, Power cord, Quick start guide, User Manual, Registration card, Warranty certificate, Remote Control, Batteries for remote control•Optional accessories: Floor stand Dimensions•Set dimensions (W x H x D): 1058 x 692 x 115.5 mm•Set dimensions with stand (W x H x D): 1058 x 748 x 286 mm •Product weight: 27.9 kg•Product weight (+stand): 35.9 kg •Box dimensions (W x H x D): 1138 x 794 x 316 mm•Weight incl. Packaging: 40.0 kg•Wall mount compatible: 600 x 400 mm。
Dell S2240L S2340L 显示器使用指南说明书
隨插即用功能
您可將顯示器安裝在任何支援隨插即用功能的系統。顯示器會自動透過顯示資料頻道 (DDC) 協定,將延伸顯示識別資料 (EDID) 提供給電腦,因此系統可自行配置並將顯示器設定最 佳化。大多數的顯示器安裝步驟皆會自動進行, 若有需要,則可自行選擇其他設定。
平面螢幕規格
機型編號
Dell S2240L 顯示器
Delta 變壓器 ADP-40DD B:100 VAC 至 240 VAC / 50 Hz 至 60 Hz ± 3 Hz / 1.5 A(最大),Lite-On 變壓器 PA-1041-71:100 VAC 至 240 VAC / 50 Hz 或 60 Hz + 3 Hz / 1.2 A(最大)
輸出:12 VDC / 3.33 A
立架
底座
魔鬼氈 電源線 變壓器連接線
VGA 訊號線
驅動程式與說明文件媒體 快速安裝指南 產品資訊指南
產品特色
Dell™ S2240L/S2340L 平面顯示器採用主動式距陣、薄膜式電晶體以及液晶顯示技術。顯示器特色包括: S2240L:54.61 公分(21.5 英吋)可視顯示區域。1,920 x 1,080 解析度,並支援低解析度的全螢幕顯示。 S2340L:58.42 公分(23.0 英吋)可視顯示區域。1,920 x 1,080 解析度,並支援低解析度的全螢幕顯示。 寬廣的觀賞角度,無論坐姿、站姿或是四處移動,都能夠觀賞。 可拆式底座 隨插即用功能(若系統支援)。 螢幕顯示 (OSD) 調整功能,可輕鬆設定並最佳化螢幕表現。 軟體與說明文件媒體內含資訊檔 (INF)、影像色彩校正檔 (ICM) 以及產品說明文件。 顯示器隨附光碟內含 Dell 顯示管理程式。 安全鎖插孔。 Dell 顯示管理程式功能。 符合能源之星標準。 符合 EPEAT™ 銀級標準。 符合 RoHS 規範。
Dell P2211H P2311H 平面显示器用户指南说明书
正视图 前面板控制部件标签说明1 预置模式 (默认,但可配置)2 亮度/对比度 (默认,但可配置)3 菜单4 退出5 电源(包括电源指示灯)后视图后视图(包括显示器支架)左视图 右视图底视图底视图底视图(包括显示器支架)标签说明使用1交流电源电缆连接器连接电源电缆2Dell Soundbar 用直流电源连接器连接 Soundbar 专用音箱(选配)的电源电缆。
激活计算机和显示器以访问OSD 菜单。
0。
针脚编号连接信号线的24针一端1TMDS RX2-2TMDS RX2+TMDS 接地针脚编号12针脚编号信号线的注注安全说明FCC中国能源效率标识 联系警告返回目录页设置显示器Dell™ P2211H/P2311H 平板显示器如果使用的是可以上网的Dell™ 台式机或Dell™ 便携式计算机1. 转到, 输入你的服务标签,然后下载用于你图形卡的最新驱动程序。
2. 为图形适配器安装驱动程序后,再次尝试将分辨率设置为1920 X 1080。
返回目录页注: 如果您无法将分辨率设置为 1920 X 1080,请联系 Dell™ 以了解哪一图形适配器支持这些分辨率。
返回目录页设置显示器Dell™ P2211H/P2311H 平板显示器如果使用的是非 Dell™ 台式机、便携式计算机或图形卡。
在 Windows XP 中:1. 右击桌面,然后单击属性。
2. 选择设置选项卡。
3. 选择高级。
4. 通过窗口顶部的描述,识别你的图形控制器提供商(如 NVIDIA, ATI, Intel 等)。
5. 请参阅图形卡提供商网站以取得更新的驱动程序(如, 或 )。
6. 为图形适配器安装驱动程序后,再次尝试将分辨率设置为 1920 X 1080。
在 Windows Vista ® 或 Windows ® 7 中:1. 在桌面上右击,单击个性化。
2. 单击更改显示设置。
3. 单击高级设置。
4. 通过窗口顶部的描述,识别你的图形控制器提供商(如 NVIDIA, ATI, Intel 等)。
- 1、下载文档前请自行甄别文档内容的完整性,平台不提供额外的编辑、内容补充、找答案等附加服务。
- 2、"仅部分预览"的文档,不可在线预览部分如存在完整性等问题,可反馈申请退款(可完整预览的文档不适用该条件!)。
- 3、如文档侵犯您的权益,请联系客服反馈,我们会尽快为您处理(人工客服工作时间:9:00-18:30)。
第2章 调节和使用显示器 ................................................................................................... 2-1 舒适性和可操作性............................................................................................................................2-1
手动图像设置................................................................................................................................ 3-3 手动安装显示器驱动程序 ......ቤተ መጻሕፍቲ ባይዱ......................................................................................................3-4 服务信息........................................................................................................................................3-7
调节类型....................................................................................................................................... 1-2 用户控件....................................................................................................................................... 1-3 电缆锁槽....................................................................................................................................... 1-4 设置显示器....................................................................................................................................... 1-4 连接并开启显示器 ....................................................................................................................... 1-4 注册信息 ..........................................................................................................................................1-9
L2321p 宽屏显示器
用户手册
目录
安全信息 ............................................................................................................................ iii
' Copyright Lenovo 2009.
ⅱ
安全信息
通用安全指南
找到安全使用电脑的小贴士,请访问: /safety
' Copyright Lenovo 2009.
ⅲ
安全维护指南
重要安全信息
电源线是显示器专用的电源线。 若要使用不同的电源线,只能使用与该显示器匹配的电源和连接。 警告: 请将显示器、计算机和其他设备始终连接到接地(通地)的电源插座上。 为了降低电击风险和对设备的电子损坏,不得破坏电源线的接地特 性。 接地插头是重要的安全特性。 警告: 为了您的安全,请确定电源线插入的接地电源插头便于使用,并尽可能靠近设备。 若要将设备断开电源,请紧紧抓住插头,将电源线从电源 插座上拔出。 切勿拉扯电线。
布置工作区 .................................................................................................................................. 2-1 关于健康工作习惯的建议 .............................................................................................................2-2 可达性信息 .................................................................................................................................. 2-2 调节显示器图像 .............................................................................................................................. 2-3 使用直接访问控件 ....................................................................................................................... 2-3 使用屏幕显示(OSD)控件 ........................................................................................................ 2-3 选择支持的显示模式 ........................................................................................................................2-6 理解电源管理 ...................................................................................................................................2-6 保养显示器........................................................................................................................................ 2-7 拆卸显示器支架................................................................................................................................ 2-7
安全维护指南........................................................................................................................ iv
第1章 入门 .......................................................................................................................1-1 交付物品 .......................................................................................................................................... 1-1 产品概述 .......................................................................................................................................... 1-2
附录A 服务和支持 ............................................................................................................... A-1 电话技术支持 ....................................................................................................................................A-1
