北邮国际学院大二Java实验-lab1
北邮电子院专业实验报告

电子工程学院ASIC专业实验报告班级:姓名:学号:班内序号:第一部分语言级仿真LAB 1:简单的组合逻辑设计一、实验目的掌握基本组合逻辑电路的实现方法。
二、实验原理本实验中描述的是一个可综合的二选一开关,它的功能是当sel = 0时,给出out = a,否则给出结果out = b。
在Verilog HDL中,描述组合逻辑时常使用assign结构。
equal=(a==b)1:0是一种在组合逻辑实现分支判断时常用的格式。
parameter定义的size 参数决定位宽。
测试模块用于检测模块设计的是否正确,它给出模块的输入信号,观察模块的内部信号和输出信号。
三、源代码module scale_mux(out,sel,b,a);parameter size=1;output[size-1:0] out;input[size-1:0]b,a;input sel;assign out = (!sel)a:(sel)b:{size{1'bx}};endmodule`define width 8`timescale 1 ns/1 nsmodule mux_test;reg[`width:1]a,b;wire[`width:1]out;reg sel;scale_mux#(`width)m1(.out(out),.sel(sel),.b(b),.a(a));initialbegin$monitor($stime,,"sel=%b a=%b b=%b out=%b",sel,a,b,out);$dumpvars(2,mux_test);sel=0;b={`width{1'b0}};a={`width{1'b1}};#5sel=0;b={`width{1'b1}};a={`width{1'b0}};#5sel=1;b={`width{1'b0}};a={`width{1'b1}};#5sel=1;b={`width{1'b1}};a={`width{1'b0}};#5 $finish;endendmodule四、仿真结果与波形LAB 2:简单时序逻辑电路的设计一、实验目的掌握基本时序逻辑电路的实现。
北邮 软件安全实验1

选择二进制->编辑
我们会看到这个语句的操作码,74代表着JE 我们把74修改为75(代表JNE) 我们就成功把这个汇编语言进行了修改。
修改分支判断
修改分支判断
验证修改后的程序
我们将内存中的汇编语句进行修改后,我们再来接
着运行下程序 点击运行,我们现在在输入框中输入正确的密码, 观察程序反应,发现程序提示我们输入密码错误 ! 然后我们随便输入一个错误的密码,程序提示正确 ,并自动退出
之后我们就可以在虚拟机内进行操作了
进入虚拟机
研究代码
用VC打开概述实验文件夹下的stack_show.c的文件
点击桌面上的VC的快捷方式,点击文件->打开->选 择“概述实验”文件夹下的crackme.c的文件
先对 c 文件中的代码进行研究,弄懂之后可以编译 成工程运行或者先绘制程序的结构图(流程图)
生成工程
之后再新建->文件->C++ Source File
右侧设定好添加到的项目 ( 我们刚才新建的项目 ), 文件名和路径
完成新建文件后,在新建的文件下编写或复制刚才 我们看到的 crackme 程序,然后点击右上的红色 感叹号执行
生成工程
生成工程
运行程序
程序运行后我们简单的测试一下
输入错误的密码,看判断是否正确
研究代码
生成工程
在 VC 中 , 点 击 新 建 -> 工 程 (projects)-> 选 择
projects类型为win32 console application
右上角设置好project的名称和存放路径
点击确定新建项目 -> 选择 empty project-> 新建项 目完成
JAVA实验
Java实验报告专业班级学号姓名指导教师实验一、安装JDK并熟悉java的运行环境一、实验目的熟悉JA V A的运行环境及学习简单的编程。
二、预习内容安装工具软件的基本方法。
三、实验设备与环境装有JA V A语言工具软件(JCreator )的微机若干四、实验内容安装JCreator及JA V A的核心编译程序J2SDK。
1、打开JCreator的安装盘安装JCreator。
2、在相同目录下安装J2SDK。
3、打开JCreator软件对J2SDK文件进行配置。
4、编写一应用程序,在屏幕上显示“HELLO WORLD”。
public class Hello{public static void main(String args[]){System.out.println( "HELLO WORLD");}}5、编写一小程序实现上述功能:在屏幕上显示“HELLO WORLD”。
实验结果:五、注意事项⒈认真填写实验报告⒉遵守实验室各项制度,服从实验指导教师的安排⒊按规定的时间完成实验六、实验总结与体会1.通过这个实验我了解到java的运行环境。
2.通过这个简单的程序使我认识到做实验是要认真对待,不可马虎大意,区分字母的大小写和符号的正确使用。
实验二、基本语法练习一、实验目的⒈熟悉Java的基本语法⒉编写应用程序接收命令行参数⒊编写应用程序接收用户从键盘的输入⒋掌握字符串与数组的基本方法二、预习内容java编程的基本结构三、实验设备与环境装有JA V A语言工具软件(JCreator )的微机若干四、实验内容⒈编写一个应用程序求若干个数的平均数,原始数字要求从命令行输入。
应用程序中main方法的参数String类型的数组args能接受用户从命令行键入的参数。
(1)编辑A verage.java,设保存在D:\myjava目录下。
public class Average{public static void main(String args[ ]){double n,sum=0;for (int l=0;l<args.length;l++){sum=sum+Double.valueOf(args[l]).doubleValue();}n=sum/args.length;System.out.println("average="+n);}}(2)编译。
BUAAOS——Lab1实验报告

BUAAOS——Lab1实验报告lab1实验报告实验思考题1.1也许你会发现我们的readelf程序是不能解析之前⽣成的内核⽂件(内核⽂件是可执⾏⽂件)的,⽽我们之后将要介绍的⼯具readelf则可以解析,这是为什么呢?(提⽰:尝试使⽤readelf -h,观察不同)通过linux内置的readelf⼯具即使⽤readelf -h命令⾏分别对testELF⽂件和之前⽣成的内核⽂件vmlinux的elf⽂件头进⾏查看:可以很清楚的看出,之前⽣成的vmlinux内核⽂件为⼤端存储,⽽testELF为⼩端存储。
因此我们⾃⼰编写的readelf程序只能解析testELF⽽不能解析vmlinux内核⽂件,因为编写readelf程序使⽤c语⾔不能简单的读取⼤端存储的数据。
1.2内核⼊⼝在什么地⽅?main 函数在什么地⽅?我们是怎么让内核进⼊到想要的 main 函数的呢?⼜是怎么进⾏跨⽂件调⽤函数的呢?内核的⼊⼝的起始地址为0x80000000,main函数在0x80010000。
在⼊⼝函数本实验为start.S内部使⽤跳转指令jal跳转到指定的函数地址。
跨⽂件调⽤函数通过跳转指令来调⽤,同时在跳转之前需要将数据存⼊栈中。
实验难点图⽰本次课下实验的难点其实就是能否读懂现有代码以及学习如何调⽤现有的⼯具。
例如在编写readelf.c⽂件中,我们可以从ELF⼿册中得知每个elf⽂件头结构体的结构,以及它内部的数据,随后根据适当的处理得出每个Section的结构体,再从其中获取所需要的数据。
即思路可以概括为⼀下步骤:知道结构体中的数据typedef struct {unsigned char e_ident[EI_NIDENT]; /* Magic number and other info */// 存放魔数以及其他信息Elf32_Half e_type; /* Object file type */// ⽂件类型Elf32_Half e_machine; /* Architecture */// 机器架构Elf32_Word e_version; /* Object file version */// ⽂件版本Elf32_Addr e_entry; /* Entry point virtual address */// ⼊⼝点的虚拟地址Elf32_Off e_phoff; /* Program header table file offset */// 程序头表所在处与此⽂件头的偏移Elf32_Off e_shoff; /* Section header table file offset */// 段头表所在处与此⽂件头的偏移Elf32_Word e_flags; /* Processor-specific flags */// 针对处理器的标记Elf32_Half e_ehsize; /* ELF header size in bytes */// ELF⽂件头的⼤⼩(单位为字节)Elf32_Half e_phentsize; /* Program header table entry size */// 程序头表⼊⼝⼤⼩Elf32_Half e_phnum; /* Program header table entry count */// 程序头表⼊⼝数Elf32_Half e_shentsize; /* Section header table entry size */// 段头表⼊⼝⼤⼩Elf32_Half e_shnum; /* Section header table entry count */// 段头表⼊⼝数Elf32_Half e_shstrndx; /* Section header string table index */// 段头字符串编号} Elf32_Ehdr;了解readelf.c⽂件中已有代码如何获取结构体中的数据仿照已有代码获取所需要的数据:e_shoff、e_shentsize、e_shnum再例如补全print.c⽂件中的代码,需要的也是这种思路:了解已有的specifier的处理过程查看已有的printNum、printChar等⽅法获取所需要的各种参数仿照已有的specifier的处理过程,对d、D进⾏处理同时需要充分熟悉有关C语⾔指针的知识⽽对于更多的细节,对于本次实验练习关系并不是很⼤,只需要⼤致了解内核启动和编译链接的过程。
LAB-1:数据链路层及网络层数据包的捕捉与分析-2013版
LAB-1:IEEE802标准和以太网数据链路层协议分析一.实验目的1.掌握以太网的报文格式2.掌握MAC地址、MAC广播地址的作用3.理解数据链路层协议的工作机制,掌握数据链路层帧(Ethernet II)的报文格式4.掌握网络协议编辑器软件(科来数据包生成器)的使用方法5.熟练掌握网络协议分析软件(WIRESHARK)的使用方法二.实验内容与步骤1.捕获真实的MAC帧●主机A、B作为一组,主机B启动协议分析软件,并设置只提取ICMP协议数据包的捕获过滤条件,主机A PING主机B,检查主机B捕获的数据包,并分析记录MAC帧格式●记录实验结果2.理解MAC地址的作用●主机A、B、C、D作为一组,主机A PING 主机C,主机B、D启动协议分析软件,并设置只提取源MAC地址为主机A的数据包捕获过滤条件,检查主机A所发送的ICMP数据帧,并分析该帧的内容。
●记录实验结果3.编辑并发送MAC广播帧●主机A、B、C、D作为一组,主机D启动协议编辑器,并编辑一个MAC帧(目标MAC: FFFFFFFFFFFF,源MAC: 主机D的MAC地址,协议类型或数据长度:大于0X600,数据字段:编辑长度在46-1500字节之间的数据),主机A、B、C启动协议分析软件,并设置只提取源MAC地址为主机D的数据包捕获过滤条件,主机D发送已编辑好的MAC帧,主机A、B、C捕获和检查是否有主机D所发送的MAC数据帧,并分析该帧的内容。
●记录实验结果三.实验结果分析与思考1. 在实验步骤2中,为什么有的主机会收到ICMP数据包而有的主机收不到?2. 在实验步骤3中,简述FFFFFFFFFFFF作为目标MAC地址的作用,主机A、B、C是否均可以收到主机D的广播帧?3. 结合实验结果,说明MAC广播帧的作用范围?四.实验报告1.按上述实验步骤与内容撰写实验报告(抄袭他人实验结果,双方均不计成绩)2.要求说明实验时间、地点及同级成员名单。
java实验报告
java实验报告Java 实验报告一、实验目的本次 Java 实验的主要目的是通过实际编程操作,深入理解和掌握Java 语言的基本语法、面向对象编程的概念和方法,以及常用类库的使用。
同时,培养我们的问题解决能力、逻辑思维能力和代码规范意识,为今后的软件开发工作打下坚实的基础。
二、实验环境1、操作系统:Windows 102、开发工具:Eclipse IDE for Java Developers3、 JDK 版本:JDK 18三、实验内容本次实验共包括以下三个部分:1、 Java 基本语法练习变量与数据类型运算符与表达式控制流语句(ifelse、for、while、dowhile)数组2、面向对象编程实践类与对象的定义和使用构造函数与方法重载封装、继承与多态抽象类与接口3、 Java 常用类库应用String 类与字符串操作集合框架(ArrayList、HashMap)文件输入输出(File、FileReader、FileWriter)四、实验步骤及代码实现1、 Java 基本语法练习变量与数据类型:```javapublic class VariableDataType {public static void main(String args) {int age = 20;double salary = 50005;String name ="张三";boolean isStudent = true;Systemoutprintln("年龄:"+ age);Systemoutprintln("工资:"+ salary);Systemoutprintln("姓名:"+ name);Systemoutprintln("是否是学生:"+ isStudent);}}```运算符与表达式:```javapublic class OperatorExpression {public static void main(String args) {int num1 = 10;int num2 = 5;int sum = num1 + num2;int difference = num1 num2;int product = num1 num2;int quotient = num1 / num2;int remainder = num1 % num2; Systemoutprintln("和:"+ sum);Systemoutprintln("差:"+ difference);Systemoutprintln("积:"+ product);Systemoutprintln("商:"+ quotient);Systemoutprintln("余数:"+ remainder);}}```控制流语句:```javapublic class ControlFlowStatement {public static void main(String args) {// ifelse 语句int score = 80;if (score >= 90) {Systemoutprintln("优秀");} else if (score >= 80) {Systemoutprintln("良好");} else if (score >= 70) {Systemoutprintln("中等");} else if (score >= 60) {Systemoutprintln("及格");} else {Systemoutprintln("不及格");}// for 循环for (int i = 1; i <= 5; i++){Systemoutprintln("第" + i +"次循环");}// while 循环int j = 1;while (j <= 5) {Systemoutprintln("第" + j +"次 while 循环");j++;}// dowhile 循环int k = 1;do {Systemoutprintln("第" + k +"次 dowhile 循环");k++;} while (k <= 5);}}```数组:```javapublic class ArrayExample {public static void main(String args) {//一维数组int numbers ={1, 2, 3, 4, 5};for (int num : numbers) {Systemoutprintln(num);}//二维数组int matrix ={{1, 2, 3},{4, 5, 6},{7, 8, 9}};for (int row : matrix) {for (int num : row) {Systemoutprint(num +"");}Systemoutprintln();}}}```2、面向对象编程实践类与对象的定义和使用:```javapublic class Person {private String name;private int age;public Person(String name, int age) {thisname = name;thisage = age;}public void showInfo(){Systemoutprintln("姓名:"+ name +",年龄:"+ age);}public static void main(String args) {Person person1 = new Person("张三", 20);person1showInfo();}}```构造函数与方法重载:```javapublic class ConstructorOverloading {private String name;private int age;public ConstructorOverloading(String name) {thisname = name;}public ConstructorOverloading(String name, int age) {thisname = name;thisage = age;}public void showInfo(){if (age == 0) {Systemoutprintln("姓名:"+ name);} else {Systemoutprintln("姓名:"+ name +",年龄:"+ age);}}public static void main(String args) {ConstructorOverloading person1 = new ConstructorOverloading("张三");person1showInfo();ConstructorOverloading person2 = new ConstructorOverloading("李四", 25);person2showInfo();}}```封装、继承与多态:```java//父类class Animal {private String name;public Animal(String name) {thisname = name;}public void eat(){Systemoutprintln(name +"正在吃东西");}}//子类继承父类class Dog extends Animal {public Dog(String name) {super(name);}public void bark(){Systemoutprintln(name +"在叫");}}public class InheritancePolymorphism {public static void main(String args) {Animal animal = new Dog("小黑");animaleat();//向下转型为 Dog 类型调用 bark 方法if (animal instanceof Dog) {Dog dog =(Dog) animal;dogbark();}}}```抽象类与接口:```java//抽象类abstract class Shape {abstract void draw();}//实现抽象类的子类class Circle extends Shape {@Overridevoid draw(){Systemoutprintln("画一个圆");}}//接口interface Moveable {void move();}//实现接口的类class Car implements Moveable {@Overridepublic void move(){Systemoutprintln("汽车在移动");}}public class AbstractInterfaceExample {public static void main(String args) {Shape shape = new Circle();shapedraw();Moveable car = new Car();carmove();}}```3、 Java 常用类库应用String 类与字符串操作:```javapublic class StringOperation {public static void main(String args) {String str1 ="Hello, ";String str2 ="World!";String str3 = str1 + str2;Systemoutprintln(str3);int length = str3length();Systemoutprintln("字符串长度:"+ length);char charAt = str3charAt(5);Systemoutprintln("第 5 个字符:"+ charAt);boolean contains = str3contains("World");Systemoutprintln("是否包含 World:"+ contains);}}```集合框架(ArrayList、HashMap):```javaimport javautilArrayList;import javautilHashMap;import javautilMap;public class CollectionFramework {public static void main(String args) {// ArrayListArrayList<String> names = new ArrayList<>();namesadd("张三");namesadd("李四");namesadd("王五");for (String name : names) {Systemoutprintln(name);}// HashMapHashMap<String, Integer> ages = new HashMap<>();agesput("张三", 20);agesput("李四", 25);agesput("王五", 30);for (MapEntry<String, Integer> entry : agesentrySet()){Systemoutprintln(entrygetKey()+"的年龄是" +entrygetValue());}}}```文件输入输出(File、FileReader、FileWriter):```javaimport javaioFile;import javaioFileReader;import javaioFileWriter;import javaioIOException;public class FileIOExample {public static void main(String args) {//写入文件try (FileWriter writer = new FileWriter("outputtxt")){writerwrite("这是写入文件的内容");} catch (IOException e) {eprintStackTrace();}//读取文件try (FileReader reader = new FileReader("outputtxt")){int character;while ((character = readerread())!=-1) {Systemoutprint((char) character);}} catch (IOException e) {eprintStackTrace();}}}```五、实验结果与分析1、 Java 基本语法练习变量与数据类型:能够正确定义和使用各种数据类型的变量,并进行基本的运算和输出。
北邮编程实验报告

实验名称:编程基础实验实验日期:2023年X月X日实验地点:北邮计算机实验室实验指导教师:XXX老师实验目的:1. 熟悉编程环境,掌握基本的编程技能。
2. 理解编程的基本概念和语法规则。
3. 培养逻辑思维和问题解决能力。
实验内容:本次实验主要涉及以下几个方面:1. 编程环境搭建2. 基本语法学习3. 编程实践实验步骤:一、编程环境搭建1. 安装编程软件:首先,在北邮计算机实验室的计算机上安装了Visual Studio Code,这是一个功能强大的代码编辑器,可以支持多种编程语言。
2. 配置环境变量:为了方便调用编程软件,我们将环境变量设置好,使得在命令行中输入软件名称即可启动。
二、基本语法学习1. 数据类型:学习了整型、浮点型、字符型等基本数据类型,并掌握了它们的特点和适用场景。
2. 运算符:了解了算术运算符、关系运算符、逻辑运算符等,并学会了如何使用它们进行简单的计算和判断。
3. 控制语句:学习了if-else语句、for循环、while循环等,掌握了如何控制程序的执行流程。
4. 函数:了解了函数的定义、调用和参数传递,学会了如何封装代码,提高代码的可读性和可重用性。
三、编程实践1. 编写计算器程序:根据所学知识,编写了一个简单的计算器程序,实现了加减乘除等基本运算。
2. 编写排序算法:学习了冒泡排序、选择排序、插入排序等基本排序算法,并实现了它们的代码。
3. 编写学生信息管理系统:根据实际需求,设计并实现了一个学生信息管理系统,包括添加、删除、修改和查询学生信息等功能。
实验结果:通过本次实验,我成功完成了以下任务:1. 熟悉了编程环境,掌握了基本的编程技能。
2. 理解了编程的基本概念和语法规则。
3. 培养了逻辑思维和问题解决能力。
实验总结:1. 编程环境搭建:在北邮计算机实验室,我成功安装了Visual Studio Code编程软件,并配置了环境变量。
2. 基本语法学习:通过学习,我掌握了数据类型、运算符、控制语句和函数等基本语法,为后续编程实践打下了基础。
java数据结构lab
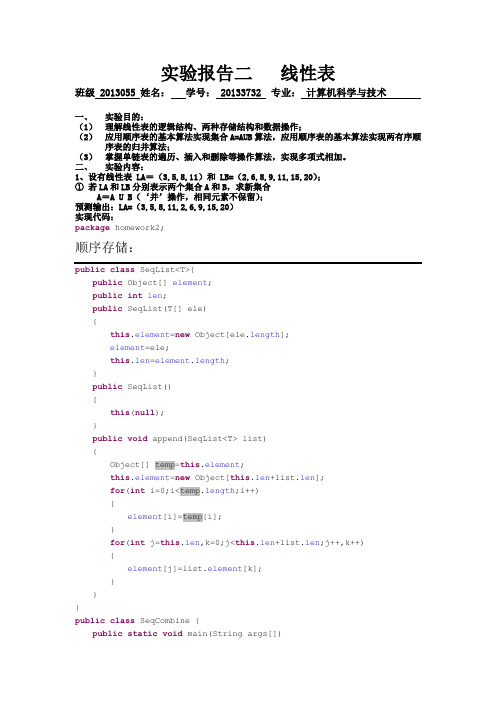
实验报告二线性表班级 2013055 姓名:学号: 20133732 专业:计算机科学与技术一、实验目的:(1)理解线性表的逻辑结构、两种存储结构和数据操作;(2)应用顺序表的基本算法实现集合A=AUB算法,应用顺序表的基本算法实现两有序顺序表的归并算法;(3)掌握单链表的遍历、插入和删除等操作算法,实现多项式相加。
二、实验内容:1、设有线性表 LA=(3,5,8,11)和 LB=(2,6,8,9,11,15,20);①若LA和LB分别表示两个集合A和B,求新集合A=A U B(‘并’操作,相同元素不保留);预测输出:LA=(3,5,8,11,2,6,9,15,20)实现代码:package homework2;顺序存储:public Object[] element;public int len;public SeqList(T[] ele){this.element=new Object[ele.length];element=ele;this.len=element.length;}public SeqList(){this(null);}public void append(SeqList<T> list){Object[] temp=this.element;this.element=new Object[this.len+list.len];for(int i=0;i<temp.length;i++){element[i]=temp[i];}for(int j=this.len,k=0;j<this.len+list.len;j++,k++){element[j]=list.element[k];}}}public class SeqCombine {public static void main(String args[]){Integer []a={3,5,8,11};Integer []b={2,6,8,9,11,15,20};SeqList<Integer> A=new SeqList<Integer>(a);SeqList<Integer> B=new SeqList<Integer>(b);A.append(B);for(int i=0;i<=A.element.length-1;i++){System.out.print(A.element[i]+",");}}}链式存储使用尾节点public class Node<T>{T data;Node<T> next;Node(T data,Node<T> next){this.data=data;this.next=next;}Node(){this(null,null);}}public class SinglyLinkedList<T>{public Node<T> head;public Node<T> rear;public SinglyLinkedList(){this.head=new Node<T>();this.rear=new Node<T>();}public SinglyLinkedList(T[] element){this();rear=this.head;for(int i=0;i<element.length;i++){rear.next=(Node<T>)new Node<T>(element[i],null);rear=rear.next;}}}public class Combine{public static void main(String args[]){Integer []a={3,5,8,11};Integer []b={2,6,8,9,11,15,20};SinglyLinkedList<Integer> A=new SinglyLinkedList<Integer>(a);SinglyLinkedList<Integer> B=new SinglyLinkedList<Integer>(b);A.rear.next=B.head.next;Node<Integer> p=A.head.next;while(p!=null){System.out.print(p.data+",");p=p.next;}}}不用尾节点。
北京大学操作系统实习JOS lab1实验笔记
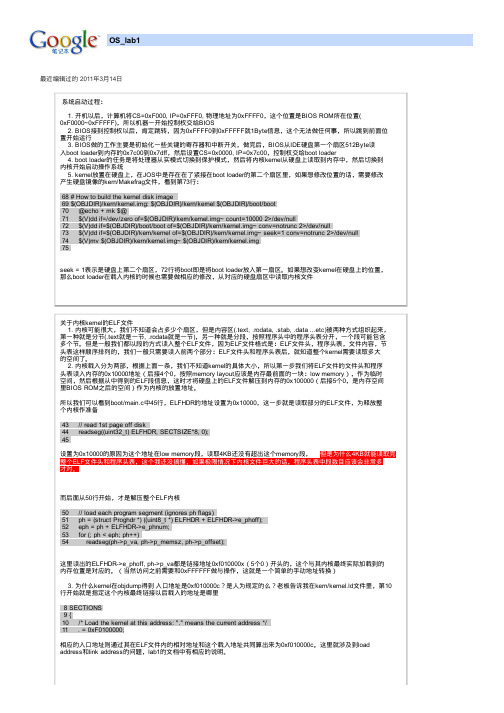
OS_lab1最近编辑过的 2011年3月14日系统启动过程:1. 开机以后,计算机将CS=0xF000, IP=0xFFF0, 物理地址为0xFFFF0,这个位置是BIOS ROM所在位置(0xF0000~0xFFFFF),所以机器一开始控制权交给BIOS2. BIOS接到控制权以后,肯定跳转,因为0xFFFF0到0xFFFFF就1Byte信息,这个无法做任何事,所以跳到前面位置开始运行3. BIOS做的工作主要是初始化一些关键的寄存器和中断开关,做完后,BIOS从IDE硬盘第一个扇区512Byte读入boot loader到内存的0x7c00到0x7dff,然后设置CS=0x0000, IP=0x7c00,控制权交给boot loader4. boot loader的任务是将处理器从实模式切换到保护模式,然后将内核kernel从硬盘上读取到内存中,然后切换到内核开始启动操作系统5. kernel放置在硬盘上,在JOS中是存在在了紧接在boot loader的第二个扇区里,如果想修改位置的话,需要修改产生硬盘镜像的kern/Makefrag文件,看到第73行:68 # How to build the kernel disk image69 $(OBJDIR)/kern/kernel.img: $(OBJDIR)/kern/kernel $(OBJDIR)/boot/boot70 @echo + mk $@71 $(V)dd if=/dev/zero of=$(OBJDIR)/kern/kernel.img~ count=10000 2>/dev/null72 $(V)dd if=$(OBJDIR)/boot/boot of=$(OBJDIR)/kern/kernel.img~ conv=notrunc 2>/dev/null73 $(V)dd if=$(OBJDIR)/kern/kernel of=$(OBJDIR)/kern/kernel.img~ seek=1 conv=notrunc 2>/dev/null74 $(V)mv $(OBJDIR)/kern/kernel.img~ $(OBJDIR)/kern/kernel.img75seek = 1表示是硬盘上第二个扇区,72行将boot即是将boot loader放入第一扇区。
北邮java智能卡实验报告实验三电子钱包(一)

北邮java智能卡实验报告实验三电子钱包(一)第一篇:北邮java智能卡实验报告实验三电子钱包(一)智能卡技术实验报告学院:电子工程学院班级: 2011211204 学号: 2011210986 姓名:实验三 Java卡电子钱包程序一、实验目的建立Java卡电子钱包程序,并进行java卡程序的编译和调试二、实验设备PC机、智能卡读卡器、Java卡三、实验内容1、建立一个JavaCard工程2、编写电子钱包应用代码3、使用卡模拟器对应用代码进行编译调试4、使用Java卡对应用代码进行编译调试四、实验设计1、实验说明设计一个电子钱包小应用程序,应该至少能够实现以下功能:电子钱包的安装、选择与撤销选择、存款、借款、获取钱包余额以及身份验证。
2、流程图绘制 A、总体框图B、存款模块图C、消费模块图D、PIN验证模块图E、查询余额模块图五、关键代码部分A、PIN的次数判断public boolean select(){//在选择钱包应用之前,对pin可尝试次数进行判断,若可尝试次数为零,即钱包已锁定,则该钱包应用不能被选择if(pin.getTriesRemaining()==0)}}//当钱包应用被取消选择是,将pin的状态清空为初始值pin.reset(); return false; return true; public void deselect(){ B、APDU入口public void process(APDU apdu) {buffer[ISO7816.OFFSET_CLA]=(byte)(buffer[ISO7816.OFFSET _CLA]&(byte)0xFC);//判断命令头是否正确if((buffer[ISO7816.OFFSET_CLA]==0)&&(buffer[ISO7816.OF FSET_INS]==return;//若为select命令,则直接返回,不做其他操作(byte)(0xA4)))byte[] buffer=apdu.getBuffer();/*APDU对象为JCRE临时入口点对象,它可发送的APDU命令。
java实验报告实验原理
java实验报告实验原理Java实验报告实验原理一、引言Java是一种广泛使用的计算机编程语言,具有跨平台、面向对象、简单易学等特点。
在学习Java编程的过程中,实验是不可或缺的一部分。
本文将介绍Java实验的原理和相关知识。
二、实验环境搭建在进行Java实验之前,需要搭建相应的实验环境。
首先,需要安装Java Development Kit(JDK),这是Java开发的基础工具包。
其次,需要选择一个集成开发环境(IDE)来编写和运行Java程序,比如Eclipse、IntelliJ IDEA等。
最后,需要配置Java的环境变量,以便在命令行中能够直接运行Java程序。
三、实验原理1. Java的基本语法Java的语法规范包括数据类型、变量、运算符、控制语句等。
在Java实验中,我们需要掌握这些基本语法知识,以便正确编写和理解Java程序。
2. 面向对象编程Java是一种面向对象的编程语言,它支持封装、继承和多态等特性。
在实验中,我们需要理解面向对象的概念,并能够正确应用这些特性来解决实际问题。
3. 类和对象在Java中,类是对象的模板,用于描述对象的属性和行为。
对象是类的实例,具有独立的状态和行为。
在实验中,我们需要学会定义和使用类和对象,以及理解它们之间的关系。
4. 异常处理Java提供了异常处理机制,可以捕获和处理程序中的异常情况。
在实验中,我们需要学会使用try-catch语句来捕获异常,并进行相应的处理,以保证程序的稳定性和可靠性。
5. 输入输出Java提供了丰富的输入输出功能,可以从键盘读取输入,也可以将结果输出到控制台或文件中。
在实验中,我们需要学会使用Java提供的输入输出类和方法,以便与用户进行交互和展示程序的结果。
6. 集合框架Java的集合框架提供了一系列的数据结构和算法,用于存储和操作数据。
在实验中,我们需要学会使用集合框架提供的各种数据结构,比如List、Set、Map 等,以及相应的操作方法,比如添加、删除、查找等。
深入理解计算机系统LAB1实验报告

LAB1实验报告语法检查:正确性检查:1.bitAnd源代码:return ~(~x|~y);思路:可以直接运用摩尔定律,写出与的等价形式。
2.getByte源代码:return (x>>(n<<3))&0xff;思路:向右移动3n位,再用11111111B按位与,截取出所需要的字节3.logicalShift源代码:int logic=~(((1<<31)>>n)<<1);return logic&(x>>n);思路:设置一个变量logic,并通过算数移位将其前n为设置成0,后面32-n位设置为1。
利用这个变量按位与移位后的x即可。
4.bitCount源代码:int bitCount(int x) {int result;int half_one=(0x55)|(0x55<<8);int one=(half_one)|(half_one<<16);int half_two=(0x33)|(0x33<<8);int two=(half_two)|(half_two<<16);int half_three=(0x0f)|(0x0f<<8);int three=(half_three)|(half_three<<16);int four=(0xff)|(0xff<<16);int five=(0xff)|(0xff<<8);result=(x&one)+((x>>1)&one);result=(result&two)+((result>>2)&two);result=(result+(result>>4))&three;result=(result+(result>>8))&four;result=(result+(result>>16))&five;return result;}思路:主要还是使用二分法,通过以为设置五个字符串:010101010101010101010101 0101 01010011 0011 0011 0011 0011 0011 0011 00110000 1111 0000 1111 0000 1111 0000 11110000 0000 1111 1111 0000 0000 1111 11110000 0000 0000 0000 1111 1111 1111 1111分别通过按位与统计1的个数,并将个数记录在下一个字符串1出现的位置。
北邮国际学院--大四--多媒体方向---高级变换_lab1题目
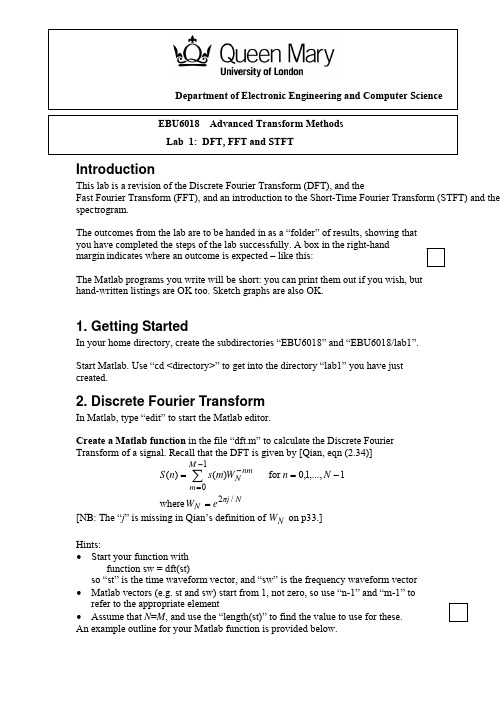
Introduction This lab is a revision of the Discrete Fourier Transform (DFT), and the Fast Fourier Transform (FFT), and an introduction to the Short-Time Fourier Transform (STFT) and the spectrogram. The outcomes from the lab are to be handed in as a “folder” of results, showing that you have completed the steps of the lab successfully. A box in the right-hand margin indicates where an outcome is expected – like this: The Matlab programs you write will be short: you can print them out if you wish, but hand-written listings are OK too. Sketch graphs are also OK.1. Getting StartedIn your home directory, create the subdirectories “EBU6018” and “EBU6018/lab1”. Start Matlab. Use “cd <directory>” to get into the directory “lab1” you have just created.2. Discrete Fourier TransformIn Matlab, type “edit” to start the Matlab editor. Create a Matlab function in the file “dft.m” to calculate the Discrete Fourier Transform of a signal. Recall that the DFT is given by [Qian, eqn (2.34)]Nj N M m nm N e W N n W m s n S /210 where 1,...,1,0for )()(π=−==∑−=−[NB: The “j ” is missing in Qian’s definition of on p33.]N W Hints:• Start your function with function sw = dft(st) so “st” is the time waveform vector, and “sw” is the frequency waveform vector• Matlab vectors (e.g. st and sw) start from 1, not zero, so use “n-1” and “m-1” to refer to the appropriate element• Assume that N =M , and use the “length(st)” to find the value to use for these. An example outline for your Matlab function is provided below.Department of Electronic Engineering and Computer ScienceGenerate some waveforms to test your function. Test your dft on at least the following signals: • Uniform function: “s=ones(1,64);”• Delta function: “s = ((1:64)= =1);” [NB: “1:64” generates the vector (1 2 … 64) ].• Sine wave: “s = sin(((1:64)-1)*2*pi*w/100)” for various values of w.Why do we need to use “(1:64)-1”? What values of w give the cleanest dft?What happens if we use “cos”? • Symmetrical rectangular pulse: “s = [0:31 32:-1:1]<T” for various values of T. (NB: Why doesn’t this “look” symmetrical? Remember that the DFT repeats, so the time interval 32 .. 63 is “the same as” the interval -31 .. -1).“fftshift”, e.g. “stem4(fftshift(dft(s)));” Explain your results in terms of what you know about the Fourier Transform.3. Comparison with Matlab’s FFT functionMatlab has a built-in Fast Fourier Transform, “fft”. Compare the results of your dft against the built-in fft. Are the results the same? If so, why: if not, why not? Find out the complexity of your dft and the built-in fft, i.e. how long they take to perform their calculation for various lengths of s. Use “tic” and “toc” to measure the time taken to perform the operation, so e.g. tic; dft(ones(1,4)); toc % No “;” for final expression will report how long a 4-point DFT took to calculate. Hint: You may find your dft is too fast for tic/toc to measure any useful difference. If so, run it several times, e.g. tic; for (i=1:1e4) dft(ones(1,4)); end; toc (Of course, remember to divide your measure by the number of times round the loop!) Make a log-log plot (using “loglog”) showing the time increase with the size n of s. On your plot, show that the DFT takes O(n 2) time, while the FFT takes O(n log n ). Hint: Use “hold on” if you want to add a second “loglog” plot to an existing plot. Explain what this tells you about the DFT compared to the FFT in real applications, i.e. as n gets larger.*[OMIT]3.1 DIY-FFT [Optional, but highly recommended] [OMIT]Write a Matlab function (called e.g. “my_fft”) to calculate the FFT of a signal. If you like, you could write this as a recursive function (one that calls itself) – see the outline below. Plot and compare its speed to the DFT, showing that your “my_fft” function takes O(n log n) time rather than O(n 2) time Derivation of the FFT:Nj N N m nm N e W N n W m s n S /2101,...,1,0)()(π=−==∑−=− where for samples.odd the of FFT point - the is and samples,even the of FFT point the is where:get we odd for and even for using odd even 2/)(2/)()()())(12())(2())(12())(2()12()2()(122)()()()(12/02/12/02/12/0212/0212/0)12(12/021110N n H N n G n H W n G W rs W W r s W r s W W r s W r s W r s n S r m r m W m s W m s W m s n S n N N r rn N n N N r rn N N r rn N n N N r rn N N r n r N N r rn N N m nm N N m nm N N m nm N −+=++=++=++=+==+==−−=−−−=−−=−−−=−−=+−−=−−−−−−=−∑∑∑∑∑∑∑∑∑Notes:(1) The above only works if N is a power of 2 (64, 128, 1024, etc), so your program may not work if you use other lengths of s (you could check this, if you like!) (2) Note that a 1-point FFT of a signal is the signal itself, so the 1-point FFT is easy (to be sure of this, check the DFT formula with N=1).(3) Remember that Matlab vectors start at 1 (not zero), so go from 1...N not 0…N-14. Single Windowed Fourier TransformSave one of the audio files on the course details page athttps:///courseinfo/EBU6018/into your “lab1” directory.Read into Matlab, using “s = wavread('file.wav')”.Where ‘file.wav’ could be ‘dbarrett2.wav’Plot the magnitude (“abs”) of the FFT of the waveform. (“plot” is probably betterthan “stem” for these longer signals). Explain what this tells you about the waveform.We will now construct a function that will allow you to “zoom in” on a short sectionof the signal. To smooth out end effects, we will use a “Hanning” window to multiplythe segment that we select. You can show the Hanning window of length 256 inMatlab using “plot(hanning(256))”.Construct a Matlab function in the file “wft.m” that will select a section from a fileand window it. The function “wft” is to be called as follows:y = wft(s, t, n);where s is the signal, t is the time in the middle of the window, and n is a window length. You might use the following steps:1) Select the desired section from the signal, for example usings(floor(t-n/2)+(1:n));(if you don’t see how this works, try “help colon”).2) Multiply elementwise with a Hanning window of length n, using “.*”3) Use the built-in Matlab fft function to calculate the DFT.Plot the magnitude of this single windowed Fourier transform of your signal forvarious values of t and n (note that values of t near the beginning and end of s maycause an error, depending on how clever you were at step (1)). Try also plotting with alog y-scale. Explain the difference between these results*[OMIT][Optional]: Make a matlab m-file that loops through different values for t in steps of e.g. 50, using “pause” between each step.5. STFT and SpectrogramNow we will construct a “spectrogram” to visualize the time-frequency information ina signal on one image.Read the Matlab documentation for the Matlab “specgram” function (try “help specgram” for information).Using specgram, investigate the audio files on the course details page athttps:///courseinfo/EBU6018/Try different window sizes (“NFFT”) to see the effect. For fastest results on longfiles, use powers of 2 (Why?). Record what values of window size give best visualization results for different files, and suggest why.5.1 Analysis of Piccolo soundFrom the course webpage download ‘piccolo.wav’ and load it into Matlab using:[x fs] = wavread(‘piccolo.wav’); % fs = sampling frequency Record the sampling frequency, fs.If you have headphones, try listening to the signal, usingsoundsc(x,fs); %fs is the sampling frequency of xPlot a spectrogram of x, using the ‘specgram’ function.From the spectram plot, estimate the fundamental frequencies (f0) of the 3 notes in the sample, giving your answers in Hz.Repeat your estimates for different window sizes.Notes: You will need to use your window size, (NFFT) and the value for the sampling frequency (fs) in your calculation. Figure 1 is given as a guide to help you.Make your calculation in 2 ways:(1) by calculating the frequency range displayed by specgram, and(2) by supplying specgram with the correct value fs when you call it.Check that both of these methods agree.Figure 1: Angular frequency representation for f0 estimation Explain what happens to the accuracy of your fvalues as you vary the window size.For further experimentation, try visualizing other “wav” files available on the internet using your spectrogram.*[OMIT]5.1 DIY STFT and Spectrogram [Optional, but highly recommended]Construct a Matlab function “sg(s,N)” in a file called “sg.m” to compute a spectrogram of a waveform s with window size N (NFFT in Matlab’s specgram).To do this, your function shouldi)divide the signal “s” into sections of length N,ii)multiply s by a Hanning windowiii)perform an FFT of each section, andiv)construct a matrix where each column is the absolute value of one FFTHints:•You can select the k-th segment of length N using “s( ((1:N)+(k-1)*N) )”•You can get a Hanning window of length N by using the Matlab function “W=hanning(N)”. Multiply by a segment s1 using “s1.*W” (dot-star).•Since the signal is real, you know the FFT result will be Hermitian symmetric, so you can discard one half of the vector of results.•You can set the n-th column of a matrix to be a 1xN vector y by using M(:,n) = y'Plot usingimagesc(log10(abs(B))); axis xy;where B is the spectrogram (“axis xy” restores the origin to the bottom).How should you call “specgram” to get the most similar results to your function “sg”? Modify your function “sg” so that it overlaps its windows in the same way as the default operation of “specgram”.6. Handing InCompile the answers to the exercises, including the answers to specific questions, program listings (including comments), and plots from experiments, into a “folder” of results showing that you have completed the lab, and submit electronically. You do not need to write a formal report.IMPORTANT: Plagiarism (copying from other students, or copying the work of others without proper referencing) is cheating, and will not be tolerated.IF TWO “FOLDERS” ARE FOUND TO CONTAIN IDENTICAL MATERIAL, BOTH WILL BE GIVEN A MARK OF ZERO.Updated by MPD, MEPDModified ARW for EBU6018.。
Lab1 - Hello OOP

You are reminded to double-check your solution to verify everything is correct before submission. You are also required to put your name and student ID at the beginning of your source file. Important: You are only able to submit your work once.
Division of Applied Science and Technology, Community Collegபைடு நூலகம் of City University AST21105 Object-Oriented Programming & Design
AST21105 Object-Oriented Programming & Design Lab 1 – Hello OOP
B. Objective
The objective of this lab is to create a couple of C++ programs using Visual Studio .NET, an Integrated Development Environment (IDE) runs on Windows platform. This aims to help you to familiarize yourself with the working programming environment. We will be using Microsoft’s Visual Studio .NET development environment for performing labs and writing programs in this course. The lab machines have a version of Visual Studio .NET installed on them for your use for labs and programming assignments. In addition, you will be provided a link to a software download site so that you may obtain a free and valid copy of the software for your own use at home or on a laptop. The first part of this lab is meant to be a simple review of the basics of writing a program in C++, creating a main function, and using iostream object to do simple program output. The second part of this lab is a more complete review of control statements. You will be asked to write a program to compute the total value for a list of integers obtained from the keyboard and display the result on the screen.
Java实验(1~4).doc

【实验目的】
1、掌握 Java 语言的各种数据类型。 2、熟悉运算符和表达式。 3、学会编写简单程序
【实验内容】
1、下面是一个简单的 Java 程序,将多种类型变量通过各种运算符组成不同的表达式,
并将运算结果赋值给同类型的变量,使用 println()方法输出各变量的值。
1 public class ExampleTest {
3、计算 xn 的递归方法通过参数形式接收 x 和 n。计算后的输出格式为:x**n = XXX。其 中 XXX 代表 xn 的值。数运行程序时,x 和 n 的值通过命令行参数输入。
实验四 数组
【实验目的】
1、掌握数组的定义和使用方法。 2、熟悉数组的排序、查找等算法。 3、掌握字符数组的使用方法。
2、给定一个正整数 m,统计其位数,分别打印每一位数字,再按照逆序打印出各位数 字。
3、鸡兔同笼问题。已知他们共有 f 只脚,h 个头,求有多少只鸡和多少只兔。
【实验要求】
1、从命令行输入 1~9 之间的整数 a,当所求的和大于 106 时,输出相应的 a 值及所求的 和的值。
2、从命令行输入正整数 m,m 的值不应该超过 99999,否则给出错误信息。 3、从命令行输入正整数 f 和 h(f 和 h 要满足一定的条件),计算并输出鸡和兔的数目。
3、用赋初值的方法,将 1~12 月的英文月份名赋给数组元素,根据所产生的随机整数值, 输出对应的数组元素值。
4、用赋初值的方法,将 10 个日期格式的字符串数据赋予数组元素,然后按照指定的格 式输出。
说明:产生 0~100 随机数的方法 (int) (100*Math.random())
8
boolean bool = false;
北邮国际学院大二Java实验-lab1

IntroduCourse Cod1. In a Jav or moreThis proi) MoYour pr ii) Ca iii) Ca pro a.2. Write a the com statemethe com uctory de: EBU4201va applicatio e String pa ogram outpu odify file Te java T rogram shou all the progra all the progra ogram call? .christie a Java progra mmand line ents or a swi mmand line toJava P 1n’s main()arameters. C uts the follow estArgs.j TestArgs ld be named am you just wam again witFor examp e . Try this wi am called We and prints o itch statem o an integer:rogram Lab She method, St onsider the f wing when ca ava so that,Agatha C TestArgs wrote, Test th your own d ple, call the ith your deta eekDayCon out the corre ent. The foll mming eet 1: Jav tring[] a following Jav alled with ja , when called Christie s.java .tArgs.java details. Wha e program w ails . Why do nverter th esponding da lowing line o Sch a Basicsargs indica va program:ava TestA d with 14213118a , with your at happens if with java you think yo hat reads an i ay of the we of code will c hool of Ele and Com ates that this Args howdy 8 1406756r own details you omit yo TestArgs ou got the res integer value eek. You ma convert the S ectronic En mputer Scie s method can dy : 601 it output .our student nu Agatha sults you did e between 1ay use eithe String valu ngineering ence n take in one ts:umber in the Christie d?and 7 from er if…else ue read from e e e m e mint weekDay = Integer.parseInt(args[0]);Therefore, calling the program as follows:java WeekDayConverter 4will output:The 4th day of the week is Thursday.3. Write a program to calculate your BMI and give weight status. Body Mass Index (BMI) is an internationally used measurement to check if you have a healthy weight for your height. The metric BMI formula accepts weight in kilograms and height in metres, as follows:BMI = weight(kg)/height 2(m 2)BMI Weight Status categories’ table: BMI range – kg/m 2 Category< 18.5Underweight 18.5 – 24.9Normal 25 – 29.9Overweight ≥ 30 ObeseUse the command line arguments to give weight in kilograms and height in centimetres. For example:java BMICalculator 80 175should output:Your weight: 80 kgYour height: 1.75 mYour BMI: 26.12You are in the Overweight range.Hint : The data you read from the command line argument is of type String , and to convert a String to an int , you must use the Integer.parseInt()method; e.g. int anInt = Integer.parseInt(aString);4. Below is a Java program that uses a while loop:i) Write a new version of the program above using a do-while loop and name its fileDoublingNumbers1.java .ii) Write a new version of the program above using a for loop and name its fileDoublingNumbers2.java .Note : The three programs must have the same output.。
北邮java第一次实验报告
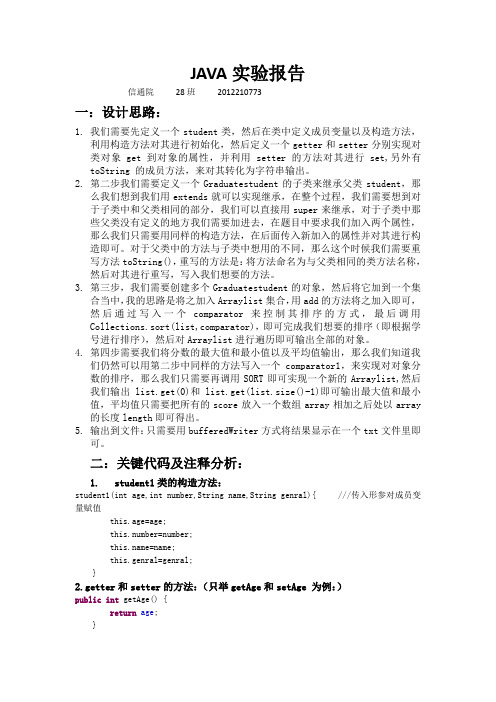
JAVA实验报告信通院28班2012210773一:设计思路:1.我们需要先定义一个student类,然后在类中定义成员变量以及构造方法,利用构造方法对其进行初始化,然后定义一个getter和setter分别实现对类对象get到对象的属性,并利用setter的方法对其进行set,另外有toString 的成员方法,来对其转化为字符串输出。
2.第二步我们需要定义一个Graduatestudent的子类来继承父类student,那么我们想到我们用extends就可以实现继承,在整个过程,我们需要想到对于子类中和父类相同的部分,我们可以直接用super来继承,对于子类中那些父类没有定义的地方我们需要加进去,在题目中要求我们加入两个属性,那么我们只需要用同样的构造方法,在后面传入新加入的属性并对其进行构造即可。
对于父类中的方法与子类中想用的不同,那么这个时候我们需要重写方法toString(),重写的方法是:将方法命名为与父类相同的类方法名称,然后对其进行重写,写入我们想要的方法。
3.第三步,我们需要创建多个Graduatestudent的对象,然后将它加到一个集合当中,我的思路是将之加入Arraylist集合,用add的方法将之加入即可,然后通过写入一个comparator来控制其排序的方式,最后调用Collections.sort(list,comparator),即可完成我们想要的排序(即根据学号进行排序),然后对Arraylist进行遍历即可输出全部的对象。
4.第四步需要我们将分数的最大值和最小值以及平均值输出,那么我们知道我们仍然可以用第二步中同样的方法写入一个comparator1,来实现对对象分数的排序,那么我们只需要再调用SORT即可实现一个新的Arraylist,然后我们输出list.get(0)和list.get(list.size()-1)即可输出最大值和最小值,平均值只需要把所有的score放入一个数组array相加之后处以array 的长度length即可得出。
Java Lab (1)

JA V A语言程序设计实验指导手册华中科技大学计算机学院JA V A语言课程组2004年十月实验要求:¾硬件环境:PC机:PIII以上CPU、64M以上内存。
¾软件环境:Windows98/2000/XP均可,本实验指导以WindowsXP为例。
¾实验建议课时:30课时。
实验一 J2SDK的安装和设置1.1 下载J2SDK1.3.1z下载网址——/j2se/1.3/download.html图1.11.2 安装J2SDK1.3.1下载完成后,进行J2SDK1.3.1的安装,J2SDK的安装界面如图1.2所示。
点击“next”按钮,会出现J2SDK1.3.1的许可协议,如图1.3点击“Yes”按钮,接受许可协议,安装程序会出现让用户选择安装目标路径的对话框。
如图1.4。
在本实验中,为了方便,将安装目录更改为C:\jdk1.3。
图1.4下一个对话框让用户选择所使用的浏览器,如图1.5所示图1.5点击“Next”按钮,进入下一个对话框,如图1.6所示。
图1.6这个对话框让用户选择要安装的JDK组件,我们选择全部的组件,点击“Next”按钮,就会开始正式的安装。
JDK1.3.1安装结束之后,会继续安装Java 2 Runtime Environment(JRE),用于Java程序的执行。
JRE安装完成之后,点击“Finish”按钮,结束安装。
1.3配置环境变量¾Windows 98平台平台为 Window 98 时,需要修改系统根目录下的autoexec.bat文件。
使用记事本或任何文本编辑器打开文件autuexec.bat,在该文件的最后增加如下两行SET PATH=%PATH%;c:\jdk1.3\binSET CLASSPATH=.;c:\jdk1.3\lib其中,环境变量path和classpath分别指定了JDK命令搜索路径和Java类路径。
在这里我们假设JDK安装在C:\ jdk1.3目录下。
- 1、下载文档前请自行甄别文档内容的完整性,平台不提供额外的编辑、内容补充、找答案等附加服务。
- 2、"仅部分预览"的文档,不可在线预览部分如存在完整性等问题,可反馈申请退款(可完整预览的文档不适用该条件!)。
- 3、如文档侵犯您的权益,请联系客服反馈,我们会尽快为您处理(人工客服工作时间:9:00-18:30)。
Introdu
Course Cod
1. In a Jav or more
This pro
i) Mo
Your pr ii) Ca iii) Ca pro a.2. Write a the com stateme
the com uctory de: EBU4201va applicatio e String pa ogram outpu odify file Te java T rogram shou all the progra all the progra ogram call? .christie a Java progra mmand line ents or a swi mmand line to
Java P 1
n’s main()arameters. C uts the follow estArgs.j TestArgs ld be named am you just w
am again wit
For examp e . Try this wi am called We and prints o itch statem o an integer:
rogram Lab She method, St onsider the f wing when ca ava so that,Agatha C TestArgs wrote, Test th your own d ple, call the ith your deta eekDayCon out the corre ent. The foll mming eet 1: Jav tring[] a following Jav alled with ja , when called Christie s.java .
tArgs.java details. Wha e program w ails . Why do nverter th esponding da lowing line o Sch a Basics
args indica va program:
ava TestA d with 14213118a , with your at happens if with java you think yo hat reads an i ay of the we of code will c hool of Ele and Com ates that this Args howdy 8 1406756r own details you omit yo TestArgs ou got the res integer value eek. You ma convert the S ectronic En mputer Scie s method can dy : 601 it output .
our student nu Agatha sults you did e between 1ay use eithe String valu ngineering ence n take in one ts:
umber in the Christie d?
and 7 from er if…else ue read from e e e m e m
int weekDay = Integer.parseInt(args[0]);
Therefore, calling the program as follows:
java WeekDayConverter 4
will output:
The 4th day of the week is Thursday.
3. Write a program to calculate your BMI and give weight status. Body Mass Index (BMI) is an internationally used measurement to check if you have a healthy weight for your height. The metric BMI formula accepts weight in kilograms and height in metres, as follows:
BMI = weight(kg)/height 2(m 2)
BMI Weight Status categories’ table: BMI range – kg/m 2 Category
< 18.5
Underweight 18.5 – 24.9
Normal 25 – 29.9
Overweight ≥ 30 Obese
Use the command line arguments to give weight in kilograms and height in centimetres. For example:
java BMICalculator 80 175
should output:
Your weight: 80 kg
Your height: 1.75 m
Your BMI: 26.12
You are in the Overweight range.
Hint : The data you read from the command line argument is of type String , and to convert a String to an int , you must use the Integer.parseInt()
method; e.g. int anInt = Integer.parseInt(aString);
4. Below is a Java program that uses a while loop:
i) Write a new version of the program above using a do-while loop and name its file
DoublingNumbers1.java .
ii) Write a new version of the program above using a for loop and name its file
DoublingNumbers2.java .
Note : The three programs must have the same output.。
