zebra驱动安装说明
Zebra 打印机驱动程序和快速安装指南在线资源说明书

Zebra ® Printer Drivers and Quick Install Guides Available online for Your New Zebra Printer T o improve your printer experience by making your printer installation process easier and more reliable, you can download and install the current Zebra printer drivers as well as view and download the current Zebra quick install guides online.Current Zebra Printer DriversDepending on the type of thermal printer you have and the port you are using, you can download and install the current Zebra printer driver for your operating system. These Zebra printer drivers are available on the Printer Support screen on at:/us/ship-manager/software/resources/support/printer-drivers.html in the Download Printer Drivers section. The printer driver for the Microsoft ® Windows ® 7, Microsoft ® Windows ® XP and Microsoft ® Windows ® Vista ® operating systems is different than the printer driver for the Microsoft ® Windows ® 2000 operating system. If you have a replacement printer, you can also uninstall the old printer driver and install the new one. Choose the appropriate procedure that corresponds to your operating system and port.Current Zebra Printer DriversThe following Zebra printer quick install guides are also available as PDF files on the Printer Support screen at: /us/ship-manager/software/resources/support/printer-drivers.html. in the printer Install Instructions section:•ZP 505 Thermal Printer Quick Install Guide.•ZP 500 Plus Thermal Printer Quick Install Guide.•ZP 500 Thermal Printer Quick Install Guide.• LP 2844 Thermal Printer Quick Install Guide.Downloading Zebra Printer Quick Install Guides To download any of these PDF files from the Printer Support screen, follow these steps:1. Access the Printer Support Screen:/us/ship-manager/software/resources/support/printer-drivers.html2. Navigate to the Printer Install Instructions section, right-click the link for the appropriate PDF file and select Save Target as . The Save As Screen displays.3. Navigate to where you want to save the PDF files and click Save . The PDF file is saved to that location on your system.4. If you have any questions about installing your Zebra printer, please call the FedEx Ship Manager ® Technical Support Center at 1.877.FDX Assist 1.877.339.2774 during the following hours: Monday through Friday 7 a.m. to 9 p.m. CST; Saturday 9 a.m. to 3 p.m. CST. Since this system is voice-activated, say “FedEx Ship Manager Software” when prompted. You can also right-click Printer Support Guide in the Printer Support Guide section of the Printer Support screen to download the PDF file containing current information about our printer solutions.©2008-2013 FedEx 311033149980638-010Trademarks referenced are the property of their respective owners.。
斑马打印机软件安装设置图文说明书.
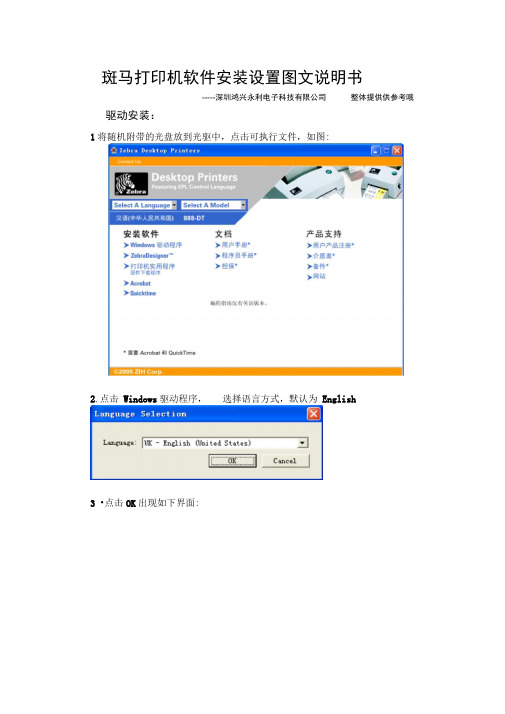
斑马打印机软件安装设置图文说明书 驱动安装:-----深圳鸿兴永利电子科技有限公司整体提供供参考哦 1将随机附带的光盘放到光驱中,点击可执行文件,如图:2.点击 Windows 驱动程序, 选择语言方式,默认为 English3•点击OK 出现如下界面:Printex Driver Setup VxzHrdWelcome to the Printer Setup WizardThi s zardl will de you tkr«ughi the irxto>xt csf y^wr priM»r drivarTo c^Zhtim^ click Next.处狀、:| Cutcel4 •在左边的栏目中选择ZEBRA EPL,然后在右边的栏目中选择如888-TT, 图:5.点击“ NEXT”:6•选择“仍然继续”,点击“NEXT”,选择任意一个空闲的“ USB”端口, 如下图:7•点击下一步:默认机器名称为厂商型号,点击“ NEXT8 •驱动在安装过程中,用户可以设定条码格式,如下图:NEXT ”直到完成。
安装完成后, 9 •此后的设置,全部选择默认,一直点击出现以下界面。
如图:10•再把打印机USB连接线插入电脑USB插口,电脑会提示找到新的硬件, 选择“从列表或指定位置安装(高级)”点下一步。
11•弹出硬件安装提示,选择“仍然继续”,点击“ Next”即安装完成打印机纸和色带的安装1 •打印纸放在纸槽,从上转纸进入卡纸槽,调整卡纸槽位置三、打印机设置1 •打印机安装好后需要对打印机进行设置。
进入控制面板,打开打印机和传真选择Zebra 888-TT:3Se-TT^I bsM_____2 •点右键选择属性,选择打印首选项i4 •在页面设置中设置纸张:上十* Faper/OutputD&cuni ent Options J Zebra. S88-TT-匙: 氏讥口;戈® Faper Size : 2」Q (T 洗 44CT ・ 器 IO 16師)冒 Copi es : 1Rotate 160: Off+ 翳 Ul^dia. Settings...+ Da cum ent Opti OHLE+ 畫刍 Device Opticus+ User Comm and 弓按钮出现更改参数界面:确定 軀消应用® ~| 点击 Si re EDIT x 4. (XT - OEcm x W. lEunQ 再点击右边的 “Customize ”Paper Size Setup ②区)U«r Defined PaperPraperties : 1』『小叫 1 00" K 3.00' 1.12“ 小25' 1 I2bl x4,00' 1 1?x4 5D' 1.12"><600* 1.1S"x1 01' I^CxOSS 1 t25"x1 001 12亍 x 225’ l^xZOO* 1.3ff*x4.00l 1.50" Ml.00' aoofxLar ZOO'xZOO' 2.00H x4,00' 2:2『汕”50* 225'* x 0.75'2.25" x 125'2.25" x1 37'2.25,l x2.00l 22*300' 225“ x4.00'lOff^LOO 1-(2.54cm x 2.54cm) -(254cm s 7 62cm] (2.86cm s 318cmJ • (2.86cm x 1016cm] -(2.86cm x 11 43cmj -(2.86cm x 15 24cmj -(3 00cm x 254cm) -(3 05cm K 216cnn) -(3.13cm x 254cmj -[3.13cm x 5.71 cm] [3.18cm x 17.73cm) -[3.49cm n 10.16cm) -[3.81 cm s 2.54cm] -(5.08cm « 3.61cm] -15.09cm x 5 08cmJ • [5.03cm x 1016cm) -[5.59cm x 1,27cm] -[5 71 cm x 1.91 cm]-[5 71cm x 3.18cmj-(5 71 cm K 3.48cm)-(5 71 cm x 5.08cm)(5.71cmK7.62cmj-(5.71 cm x 10.16cm) -(7.62cm x 254cm)Paper 5iz«:Width [w) 10 B0(^r :1 ) Unit of Measunementr -1—1r硏 ------------- »Centimeters ▼141Lr』Minimum Fap 创 Size 眾 Width :2.54 cm Hei^it :1.00 cmMaMimum Paper S ize^: Width :1060 cm Height 27 90 cm( ----------------------------------------User Defined [10.80 cm K 27.90 cm)New vHelpCancel点击下方的“ New ”按钮: 1.50" K 1.00" 2(051.30“ 2.00" K 200” 200" x 4.00" 2.20,h w 0 50b, 2.25" w 075"2.25, h x1 25b,2.25, h x1.37H 2.25"K 2 00,1 2.25, h x 3 00M 2.25" x 4 00-1 [3.81 cm x 2.54cm] (5.08cm x 3.81 emJ (5.08cm x 5.08cmj [5.08cm M 1016cm) [5 59cm x 1.27cm] (5.71cm x 1.91 cm] (5.71 cm K 3.18cm] [5.71cm x 3.4&cmj (5.71 cm x 5.08cm] (5.71 cm x 7.62cm](5.71 cm x 10.16cm) Paper Magns: Left (I):0.00 cm ~耳OK^OOT'xLOO 11 p.62cmK254cnj 3L0(T K 200“ [7.62cm x 5 OBcmj 3.00r i x2.25,1 (7.62cm K 571cm] aOff 1 K 170" P.G3cm E a40cn4 10(r <x1.00l ,naiGcntM 254cm) 4.00" x 1,25" • (IO -16cm x 3.18cm) 4.00" Ki.Str*-non Bcm xlBIcm) 4.00n w200bi n0l6cmx5 0acm) 4.00" x 2.50"-(10.16cm x 6.35cm) 4.00"x3.00H -(10.1Ecnix7.&2cm) 4.00" x 4.00" ■ (10.16cm x10.16cm) 4.00" K5.00H -[10.16cnix 12.70cm) 4.00,h x6.00,,-(10.16cmw15.24cm) User Defra<1) Paper Sizes:Minimum Paper Sizes: Width :2.54 cm Height :1.00 cm Maximum Paper Sizes: Width lOBOcm Height :27.90 cmUnit d Measuremeht: |Centimeters PapeiProperties : User Defined(1)Width (w): 10-80 cm Height [h^ 127.90 cm * [PaperMargins :Left (I): 0 00 cm :Delete Help Cancel OK |User Defined ⑴〔10.80 cm x 27.30 cm)可以在Paper Properties^栏里自定义此项设置名称,然后按以下设置进行条码纸张的参数设置,Width (宽度):10.2CM ; Height (高度):4.0CM 。
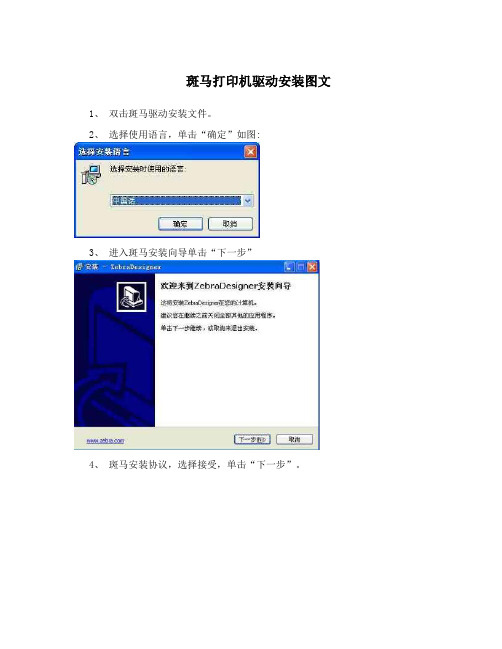
斑马打印机驱动安装图文
斑马打印机驱动安装图文
1、双击斑马驱动安装文件。
2、选择使用语言,单击“确定”如图:
3、进入斑马安装向导单击“下一步”
4、斑马安装协议,选择接受,单击“下一步”。
5、用户安装信息,单击“下一步”。
6、选择安装目标,用默认,单击“下一步”。
7、选择开始菜单文件夹,用默认,单击“下一步”。
8、选择附加的任务,用默认,单击“下一步”。
9、选择安装。
9、完成ZebarDesigner安装向导,选择“安装之后运行打印机安装向导”如图:
10、进入打印机安装向导:
11、选择打印机,ZDesigner ZM400 200 dpi (ZPL),单击“下一步”。
12、选择打印机端口,可以暂时选择USB0001,单击“完成”,选择USB口
13、安装完成后,进入“开始”——“设置”——“打印机和传真”。
14、右键选择“属性”,打印测试页,如果出现打印错误,选择“端口”更改端口,如图:
14、更改纸张大小,如图
配置完之前的设置之后,选择高级选项——>校正功能。
Zebra斑马打印机GK888t驱动安装指引-易打单

Zebra斑马打印机GK888t驱动安装指弓I版本记录目录1、术语 (4)2、斑马打印机概述 (4)3、斑马打印机驱动安装指引 (4)3.1斑马打印机硬件安装向导 (4)3.2安装斑马打印机驱动 (6)3.3设置斑马打印机的端口和打印参数 (13)3.4页面设置................................ 错误!未定义书签。
3.5打印控件下载............................. 错误!未定义书签。
1、术语2、斑马打印机概述斑马打印机是速运通电商版的打印终端之一,主要用于客户打印顺丰背胶电子运单。
使用斑马打印机之前,须先在客户电脑上安装斑马打印机驱动程序。
下文我们将讲述斑马打印机的驱动具体安装方法。
3、斑马打印机驱动安装指引3.1 斑马打印机硬件安装向导3.1.1斑马打印机使用前准备斑马打印机通过USB口与主机相连;使用斑马打印机前,首先连接电源且电源开启;电源开关开启后,斑马打印机正面电源指示灯为绿色。
対印4T詡号M A I itbJiidBh ■“L ML Q注丄一糾览赢H电* i.VCld.i j. '—一 , 0^3^ !L- ft出AWTTP帀唯E A|f;o5t7?ii俩可;9!昭狂11岸2』宙卑 0舉刊跡融曙剳陰>筍會r-L X\TJ讨«■ w下■举幕匚培抽“丁當固才障■射I垃华心-J E Y II'I^W.'节Ih□曲型3tl£ii和附耻蜀护屮:f;Y宙牛h殳方忘丫日:丫曲11』耳・'I vSlTWH^Li ■翳草軽卫肆*半哥耳亍卑第'蚩半J'刊# 就卑早-承艸B ‘事耳暑②呈誓期记咚冈耳"拿尊审Y :丫啟鼻'山皿別. '昶昂黑艸用當书令#申聊监F号宦甘耳廿併'节也培栅別%. :#呼廿由:迪対肝咼3!比甘”UlJBiEH!-非聲崇耳刼Y殆勺期冨剁甲聖B斗* WE9£??:iX)】册顺1$“睜中芳■也章•琨W由1| I■|GK88BdJ实物打印机型号为实物打印机型号为实物打印机型号为GK888D,选择驱动项就选GK888d 。
Zebra打印机驱动程序安装设置指南

说明:驱动程序有三个版本:1.ZUD原厂驱动2.Seagull海鸥驱动程序For Zebra3.ZebraDesigner驱动一般我们可安装1,2,注意ZUD原厂驱动不支持VISTA系统ZUD原厂驱动安装设置较复杂,且为英文界面,而Seagull海鸥驱动程序For Zebra设置较为简单,为中文界面如果发生打印问题,可安装两种驱动选择效果最好的使用(例如:打印停顿,打印内容缺少,甚至不打印)下列说明以Zebra S4M为例一般使用并口打印电缆(LPT )或USB 打印电缆连接打印机与PC 下面分别介绍驱动安装方法ZUD 并口打印LPT :打开控制面板中的打印机与传真,点击添加打印机选择LPT1端口点击从磁盘安装选择安装光盘Software 目录下ZUD55725目录下的zsd.inf 文件选择ZEBRA ZPL ——Zebra S4M ZPL (200dpi )继续安装即可如果用户使用USB 线缆,必须先关机,连接USB 线,再打开打印机,操作系统会跳出找到新硬件窗口,请选择手动安装,后续步骤与上述LPT 安装类似Seagull 海鸥驱动程序For Zebra 安装该驱动程序文件为exe 格式的压缩包文件,可以双击执行安装选择I accept …——下一步选择安装文件解压路径勾选第一项(即解压后执行安装打印机)选择Zebra S4M (203 dpi)——ZPL 注意不要选错继续后续安装(选择端口等)右键点击安装完毕的驱动,选择打印首选项设置标签尺寸对于S4M只需设置成大于/等于所用标签即可ZUD 驱动说明:由于XP 系统会为应用程序单独保留驱动程序配置项,如果用户可以通过设定打印默认值将配置应用到全局,方法是打开打印机属性窗口,在高级页面中点击打印默认值,调出打印首选项窗口设置参数,如果用户使用的规格较多需经常更改参数,则建议通过常规页面中的打印首选项进行设置将Configration 设置为Use Printer Settings (使用打印机设置)后每次调节参数可在打印机上进行,如设置成Use Driver Settings 则每次调节参数需在驱动程序的打印首选项里进行,按后续操作调节几项参数。
Zebra斑马打印机GK888t驱动安装指引-易打单

Zebra斑马打印机GK888t驱动安装指弓I版本记录目录1、术语 (4)2、斑马打印机概述 (4)3、斑马打印机驱动安装指引 (4)3.1斑马打印机硬件安装向导 (4)3.2安装斑马打印机驱动 (6)3.3设置斑马打印机的端口和打印参数 (13)3.4页面设置................................ 错误!未定义书签。
3.5打印控件下载............................. 错误!未定义书签。
1、术语2、斑马打印机概述斑马打印机是速运通电商版的打印终端之一,主要用于客户打印顺丰背胶电子运单。
使用斑马打印机之前,须先在客户电脑上安装斑马打印机驱动程序。
下文我们将讲述斑马打印机的驱动具体安装方法。
3、斑马打印机驱动安装指引3.1 斑马打印机硬件安装向导3.1.1斑马打印机使用前准备斑马打印机通过USB口与主机相连;使用斑马打印机前,首先连接电源且电源开启;电源开关开启后,斑马打印机正面电源指示灯为绿色。
対印4T詡号M A I itbJiidBh ■“L ML Q注丄一糾览赢H电* i.VCld.i j. '—一 , 0^3^ !L- ft出AWTTP帀唯E A|f;o5t7?ii俩可;9!昭狂11岸2』宙卑 0舉刊跡融曙剳陰>筍會r-L X\TJ讨«■ w下■举幕匚培抽“丁當固才障■射I垃华心-J E Y II'I^W.'节Ih□曲型3tl£ii和附耻蜀护屮:f;Y宙牛h殳方忘丫日:丫曲11』耳・'I vSlTWH^Li ■翳草軽卫肆*半哥耳亍卑第'蚩半J'刊# 就卑早-承艸B ‘事耳暑②呈誓期记咚冈耳"拿尊审Y :丫啟鼻'山皿別. '昶昂黑艸用當书令#申聊监F号宦甘耳廿併'节也培栅別%. :#呼廿由:迪対肝咼3!比甘”UlJBiEH!-非聲崇耳刼Y殆勺期冨剁甲聖B斗* WE9£??:iX)】册顺1$“睜中芳■也章•琨W由1| I■|GK88BdJ实物打印机型号为实物打印机型号为实物打印机型号为GK888D,选择驱动项就选GK888d 。
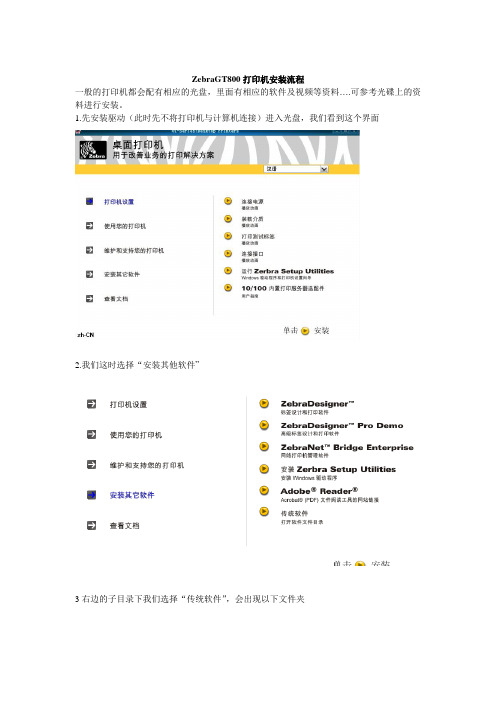
ZebraGT800打印机安装流程
ZebraGT800打印机安装流程
一般的打印机都会配有相应的光盘,里面有相应的软件及视频等资料….可参考光碟上的资料进行安装。
1.先安装驱动(此时先不将打印机与计算机连接)进入光盘,我们看到这个界面
2.我们这时选择“安装其他软件”
3右边的子目录下我们选择“传统软件”,会出现以下文件夹
4.我们选择下图这个文件夹,并打开
5.进入ZebraSetupUtilities这个文件后双击setup即可,然后next
6.
双击进入》双击进入》
——》Nex….安装
7.此时再将打印机与计算机连接
win——》设置——》打印机——》添加打印机——》打印机相关参数设置(我这个是usb 接口,根据自己的情况而定;打印机型号,我这里是zebra GT800(epL))
8.打开控制面板将多余的打印机删除只留你现在的打印机(并设置为打印首选项和默认项)——》右击打印机图标进入属性
点击端口,进入下面的界面,如图选择usb端口
——》确定
顺便介绍一下打印机其他设置
1.电源和插线接口可根据插线接口的颜色或孔的类型来插
2.打印纸的安装(其实这个不要觉得难,打开机盒,根据打印纸的形状大小,就可插入相应的位置,这个比较简单,不懂得可以看一下使用说明书)实际操作一下就可以了
程雪松
2012年8月15日星期三。
【免费下载】斑马打印机驱动安装图文
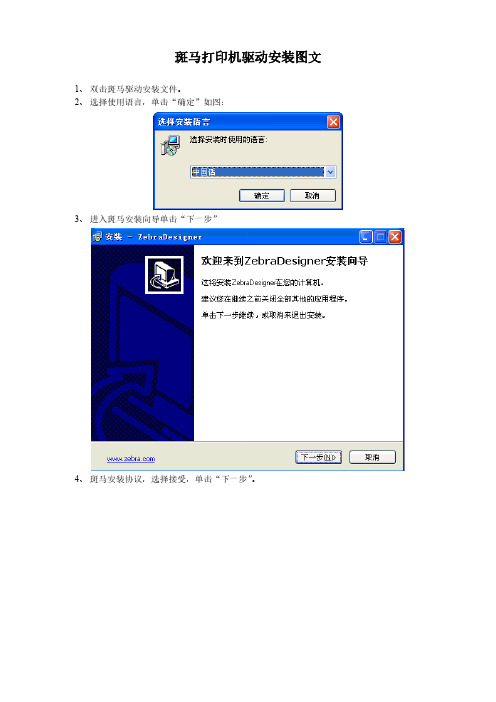
10、 进入打印机er ZM400 200 dpi (ZPL),单击“下一步”。
对全部高中资料试卷电气设备,在安装过程中以及安装结束后进行高中资料试卷调整试验;通电检查所有设备高中资料电试力卷保相护互装作置用调与试相技互术关,系电,力根保通据护过生高管产中线工资敷艺料设高试技中卷术资配0料不置试仅技卷可术要以是求解指,决机对吊组电顶在气层进设配行备置继进不电行规保空范护载高高与中中带资资负料料荷试试下卷卷高问总中题体资,配料而置试且时卷可,调保需控障要试各在验类最;管大对路限设习度备题内进到来行位确调。保整在机使管组其路高在敷中正设资常过料工程试况中卷下,安与要全过加,度强并工看且作护尽下关可都于能可管地以路缩正高小常中故工资障作料高;试中对卷资于连料继接试电管卷保口破护处坏进理范行高围整中,核资或对料者定试对值卷某,弯些审扁异核度常与固高校定中对盒资图位料纸置试,.卷保编工护写况层复进防杂行腐设自跨备动接与处地装理线置,弯高尤曲中其半资要径料避标试免高卷错等调误,试高要方中求案资技,料术编试交写5、卷底重电保。要气护管设设装线备备置敷4高、调动设中电试作技资气高,术料课中并中3试、件资且包卷管中料拒含试路调试绝线验敷试卷动槽方设技作、案技术,管以术来架及避等系免多统不项启必方动要式方高,案中为;资解对料决整试高套卷中启突语动然文过停电程机气中。课高因件中此中资,管料电壁试力薄卷高、电中接气资口设料不备试严进卷等行保问调护题试装,工置合作调理并试利且技用进术管行,线过要敷关求设运电技行力术高保。中护线资装缆料置敷试做设卷到原技准则术确:指灵在导活分。。线对对盒于于处调差,试动当过保不程护同中装电高置压中高回资中路料资交试料叉卷试时技卷,术调应问试采题技用,术金作是属为指隔调发板试电进人机行员一隔,变开需压处要器理在组;事在同前发一掌生线握内槽图部内纸故,资障强料时电、,回设需路备要须制进同造行时厂外切家部断出电习具源题高高电中中源资资,料料线试试缆卷卷敷试切设验除完报从毕告而,与采要相用进关高行技中检术资查资料和料试检,卷测并主处且要理了保。解护现装场置设。备高中资料试卷布置情况与有关高中资料试卷电气系统接线等情况,然后根据规范与规程规定,制定设备调试高中资料试卷方案。
Zebra斑马条码打印机驱动安装及ZebraDesigner操作指导
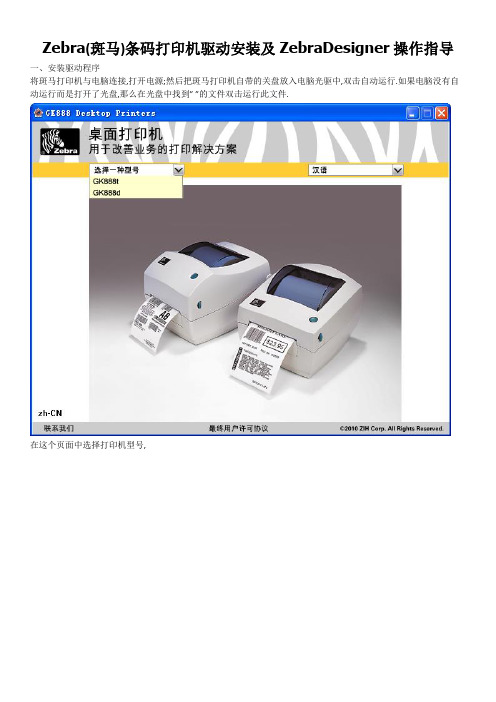
Zebra(斑马)条码打印机驱动安装及ZebraDesigner操作指导一、安装驱动程序将斑马打印机与电脑连接,打开电源;然后把斑马打印机自带的关盘放入电脑光驱中,双击自动运行.如果电脑没有自动运行而是打开了光盘,那么在光盘中找到””的文件双击运行此文件.在这个页面中选择打印机型号,点击”运行Zerbra Setup Utilities”前面的黄色剪头,弹出窗口点击按钮”Install New Printer”,弹出安装打印机驱动窗口,点击”下一步”,弹出窗口点击”安装打印机”按钮,弹出窗口选择所购买的打印机型号,点击”下一步”按钮,弹出窗口选择打印机可用端口,一般情况下,建议使用USB数据方式连接打印机和电脑,端口选择完成后点击”下一步”按钮,将”开始安装Zebra Font Downloader Setup Wizard(L)”前的勾选去掉,点击”完成”按钮;二、安装ZebraDesigner软件回到如下页面按照图片所示点击红圈位置选择”简体中文”点击”确定”按钮按照图片所示点击操作点击下一步如有需要,在红圈处更改软件安装路径,一直点击下一步,直至安装完成;三、使用ZebraDesigner软件进行标签模板的编辑选择创建新标签,点击完成按钮选择打印机驱动,点击下一步按钮将自动调整大小前面勾选去掉,填写正确的纸张大小,注意单位是毫米,填写完成后,点击下一步注意下一步到此页面,标签宽度和标签高度是不是和实际纸张大小一致,如果不一致修改,最后点击完成按钮四、添加/编辑条码:点击主界面左侧条码按钮,再在标签模板空白处左键单击,弹出页面之后,在固定条码数据中填入需要的数据内容,在条码类型中选择需要的条码类型,默认条码类型为CODE128,点击完成按钮如果需要对已经产生的条码进行更改,双击条码即可弹出条码向导页面五、添加/编辑文本:点击主界面左侧文本按钮, 再在标签模板空白处左键单击,弹出页面后,在固定文本中填入需要输入的文本内容,点击选择按钮选择需要的文本字体,建议使用黑体作为打印字体,更加清晰容易识别,点击完成按钮六、打印点击主界面上方的打印按钮,弹出窗口在数量中更改需要打印的数量,单击打印完成打印操作。
Zebra888-TT驱动安装[1]
![Zebra888-TT驱动安装[1]](https://img.taocdn.com/s3/m/aeeaae7401f69e31433294f7.png)
Zebra 888-TT条形码打印驱动程序安装1、打开文件“888-TTZUD55725.exe”解压缩;
2、解压缩后会自动安装,选择“OK”;
3、然后“下一步”;
4、按照下图提示在左侧列表选择“ZEBRA EPL”,在右侧列表选择“Zebra 888-TT”;
5、本驱动程序需要打印机用USB打印连接线,选择相应的USB口,例如“USB001”;
6、然后一直按默认值进行下一步操作直到下面页面,选择“Customize”按钮,进行纸张设置;
7、先点击左下角按钮“New”,然后在右侧上面的Paper Properties属性中输入自定义名字“LIS”,在下面Paper Sizes中输入宽度“5cm”/高度“3cm”,然后按照默认值进行操作,直到“Finish”;
8、在设置菜单中打开“打印机和传真”菜单,选择打印机“Zebra 888-TT”,右键属性,选择“打印首选项”;
9、到下图页面后,将Rotate 180 设置为“On”,将“Print Darkness”设置为“15”,然后“确定”;
10、到LIS安装程序目录找到“BarCodePrint.xml”文件,用记事本打开,将<Printer Name="XXXXXX" />中的打印机名称设置成“Zebra 888-TT”,将Paper Name="A4"设置成自定义格式Paper Name=" LIS ";。
Zebra_S4M驱动安装手册
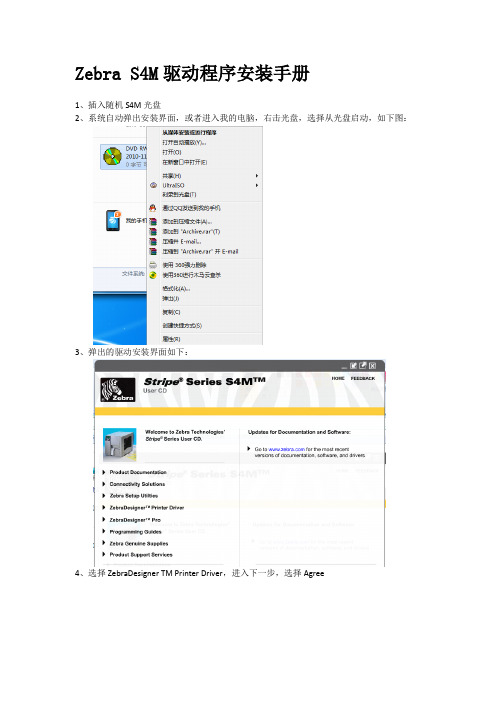
Zebra S4M驱动程序安装手册
1、插入随机S4M光盘
2、系统自动弹出安装界面,或者进入我的电脑,右击光盘,选择从光盘启动,如下图:
3、弹出的驱动安装界面如下:
4、选择ZebraDesigner TM Printer Driver,进入下一步,选择Agree
5、依次单击确定、Unzip、确定
6、进入下一步:
7、点击:安装打印机
8、选择打印机:ZDesigner S4M-203dpi ZPL
9、选择打印机端口、设置打印机为默认打印机、选择简体中文
10、进入下一步,取消所有勾选
11、点击完成,开始安装驱动,安装完成。
12、点击开始-〉进入《设备和打印机》、找到刚刚安装的打印机:
13、右击-〉打印首选项,进入打印机有关参数配置窗口
14、进入《高级》,勾选:使用打印设定
15、点击确定完成。
Zebra打印机驱动程序安装设置指南
Zebra打印机驱动程序安装设置指南Zebra打印机驱动程序安装设置指南1、简介1.1 本文档旨在指导用户如何正确安装和设置Zebra打印机驱动程序。
1.2 本指南适用于各种型号的Zebra打印机,包括但不限于Zebra GX420d、Zebra ZT230等。
2、系统要求2.1 操作系统:Windows 7/8/10:2.2 硬件要求:至少1个可用的USB端口。
3、驱动程序和安装3.1 访问Zebra官方网站()。
3.2 在网站上搜索并选择适用于您型号打印机和操作系统的驱动程序。
3.3 驱动程序并保存到本地计算机。
3.4 双击的驱动程序安装文件,按照提示进行安装。
4、驱动程序设置4.1 连接打印机:将打印机通过USB线缆连接到计算机的可用USB端口。
4.2 打开控制面板:Windows“开始”菜单,选择“控制面板”。
4.3 找到和打印机相关的选项:在控制面板中,找到并“设备和打印机”选项。
4.4 添加打印机:“添加打印机”按钮,在弹出的向导中选择“本地打印机连接”,“下一步”。
4.5 选择打印机:从列表中选择您安装的Zebra打印机,“下一步”。
4.6 完成设置:根据提示完成打印机的安装和设置。
4.7 测试打印:在安装完成后,打开任意支持打印功能的软件,并尝试打印一份测试页,确保打印机正常工作。
5、常见问题解决5.1 驱动程序无法安装:确保您并安装了与操作系统和打印机型号完全匹配的驱动程序。
5.2 打印机无法识别:检查USB连接是否牢固,并确保驱动程序正确安装。
5.3 打印质量差:调整打印机设置,尝试更换打印纸或打印头。
6、附件本文档无附件。
7、法律名词及注释7.1 版权:保护原创作品的法律概念,保护作者的权益。
7.2 许可证:许可他人合法使用版权作品的授权文件。
7.3 Zebra:Zebra Technologies Corporation的商标,为一家生产条形码打印机和相关产品的公司。
Zebra Technologies OPOS 驱动安装指南说明书
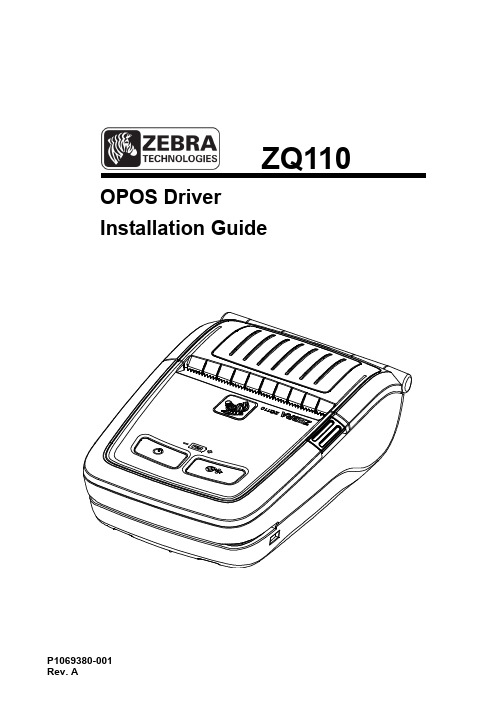
ZQ110 OPOS DriverInstallation GuideP1069380-001Table of Contents1. Manual Information (6)2. Development Precondition (7)2-1 Features (7)2-2 Operating Environment (7)2-3 Accessible Devices (7)3. Installation (8)3-1 Installation (8)3-2 Uninstall the OPOS Driver (11)■Proprietary StatementsThis manual contains proprietary information for Zebra Technologies Corporation. It is intended solely for the information and use of parties operating and maintaining the equip-ment described herein. Such proprietary information may not be used, reproduced, or dis-closed to any other parties for any other purpose without the expressed written permission of Zebra Technologies Corporation.Product ImprovementsSince continuous product improvement is a policy of Zebra Technologies Corporation, all specifications and signs are subject to change without notice.FCC Compliance StatementNOTE: This equipment has been tested and found to comply with the limits of a Class B digital device, pursuant to Part 15 of the FCC Rules. These limits are designed to provide reasonable protection against harmful interference in a residential installation. This equip-ment generates, uses and can radiate radio frequency energy and, if not installed and used in accordance with the instructions, may cause harmful interference with radio communications. However, there is no guarantee that interference will not occur in a particular installation. If this equipment does cause harmful interference to radio or television reception, which can be determined by turning the equipment off and on, the user is encouraged to try to correct the interference by one or more of the following measures:• Reorient or relocate the receiving antenna.• Increase the separation between the equipment and the receiver.• Connec t the equipment to an outlet or circuit different from that to which the receiver is connected.• Consult the dealer or an experienced radio/TV technician for help.WARNING: Exposure to Radio Frequency radiation. To conform to FCC RF exposure re-quirements this device shall be used in accordance with the operating conditions and in-structions listed in this manual.NOTE: This unit was tested with shielded cables on the peripheral devices. Shielded cables must be used with the unit to ensure compliance.Changes or modifications to this unit not expressly approved by Zebra TechnologiesCor poration could void the user’s authority to operate this equipment.Canadian Compliance StatementThis Class B digital apparatus complies with Canadian ICES-003.Cet appareil numérique de la classe B est conforme á la norme NMB-003 du Canada. “IC:” before the equipment certification number signifies that the Industry Canada techni cal specifications were met. It does not guarantee that the certified product will operate to the user’s satisfaction.Liability DisclaimerInasmuch as every effort has been made to supply accurate information in this manual, Zebra Technologies Corporation is not liable for any erroneous information or omissions. Zebra Technologies Corporation reserves the right to correct any such errors and disclaims liability resulting therefrom.No Liability for Consequential DamageIn no event shall Zebra Technologies Corporation or anyone else involved in the creation, production, or delivery of the accompanying product (including hardware and software) be liable for any damages whatsoever (including, without limitation, damages for loss of business profits, business interruption, loss of business information, or other pecuniary loss) arising out of the use of or the results of use of or inability to use such product, even if Zebra Technologies Corporation has been advised of the possibility of such damages. Because some states do not allow the exclusion of liability for consequential or incidental damages, the above limitation may not apply to you.CopyrightsThe copyrights in this manual and the label print engine described therein are owned by Zebra Technologies Corporation. Unauthorized reproduction of this manual or the software in the label print engine may result in imprisonment of up to one year and fines of up to $10,000 (17 U.S.C.506). Copyright violators may be subject to civil liability.This product may contain ZPL®, ZPL II®, and ZebraLink™programs; Element Energy Equalizer®Circuit; E3®; and AGFA fonts. Software ©ZIH Corp. All rights reserved worldwide.ZebraLink and all product names and numbers are trademarks, and Zebra, the Zebra logo, ZPL, ZPL II, Element Energy Equalizer Circuit, and E3 Circuit are registered trademarks of ZIH Corp. All rights reserved worldwide.Monotype®, Intellifont® and UFST® are trademarks of Monotype Imaging, Inc. registered in the United States Patent and Trademark Office and may be registered in certain jurisdictions.Andy™, CG Palacio™, CG Century Schoolbook™, CG Triumvirate™, CG Times™, Monotype Kai™, Monotype Mincho™ and Monotype Sung™ are trademarks of Monotype Imaging, Inc. and may be registered in some jurisdictions.HY Gothic Hangul™ is a trademark of Hanyang Systems, Inc.Angsana™ is a trademark of Unity Progress Company (UPC) Limited.Andale®, Arial®, Book Antiqua®, Corsiva®, Gill Sans®, Sorts® and Times New Roman®are trademarks of The Monotype Corporation registered in the United States Patent and Trademark Office and may be registered in certain jurisdictions.Century Gothic™, Bookman Old Style™ and Century Schoolbook™ are trademarks of The Monotype Corporation and may be registered in certain jurisdictions.HGPGothicB™ is a trademark of the Ricoh company, Ltd. and may be registered in some jurisdictions.Univers™ is a trademark of Heidelberger Druckmaschinen AG, which may be registered in certain jurisdictions, exclusively licensed through Linotype Library GmbH, a wholly owned subsidiary of Heidelberger Druckmaschinen AG.Futura®is a trademark of Bauer Types SA registered in the United States Patent and Trademark Office and may be registered in some jurisdictions.TrueType® is a trademark of Apple Computer, Inc. registered in the United States Patent and Trademark Office and may be registered in certain jurisdictions.All other product names are the property of their respective owners.All other brand names, product names, or trademarks belong to their respective holders.©2014 ZIH Corp.1. Manual InformationThe OPOS Driver Installation Guide describes how to use the OPOS Driver program to install, setup, and create applications using the OPOS Driver.Throughout this manual, “OLE for Retail POS” is called “OPOS” and “Unified for Retail POS” is called “UPOS”.2. Development Precondition2-1 FeaturesThrough these standardized API functions, you can develop powerful, open POS systems easily.2-2 Operating EnvironmentThe table below identifies the supported operating environment for the ZQ110.2-3 Accessible Devices3. Installation3-1 Installation1. Run the setup file: Zebra ZQ110 OPOS Driver InstallerThe Welcome dialog displays.2. Click Next.License Agreement dialog displays.3. Select I accept the terms of the license agreement, and click Next. Setup Type dialog displays.4. Select Complete, and click Next.Choose Installation Destination dialog displays.The default directory is:C:\Program Files\OPOS\Zebra ZQ110 OPOS DRIVER\.5. Select the default directory or a unique directory, and click Next.Ready to Install the Program dialog displays.6. Click Install to begin the installation. Click Cancel to exit the installation.Setup Status dialog displays.ZQ110 3-2 Uninstall the OPOS DriverTo remove or modify the OPOS DRIVER,1. Open the Control Panel.2. Select ZebraZQ110 OPOS Driver from Add/Remove Programs3. Select Uninstall or Change.Rev. 1.00 - 11 - OPOS Driver Installation GuideZebra Technologies International, LLC Zebra Technologies Europe Limited 475 Half Day Road Dukes MeadowSuite 500, Lincolnshire Millboard RoadIllinois 60069 USA Bourne EndPhone: +1.847.634.6700 Buckinghamshire, SL8 5XF, UKToll-Free: +1.800.230.9494 Phone: +44 (0)1628 556000Fax: +1.847.913.8766 Fax: +44 (0)1628 556001。
zebra安装
1、输入fdisk -l查看系统当前连接的外设磁盘,其中可以注意到一个文件系统为Fat32的磁盘,根据判断这就是我们插上的U盘2、输入mkdir /mnt/MyUSB回车,意思是在mnt下新建一个名为MyUSB 的目录用于U盘的挂载。
接着输入mount /dev/sdb4 /mnt/MyUSB回车,也就是把U盘挂载到MyUSB目录。
需要注意的是这里的sdb1是通过步骤1查看信息获得,不是每个U盘的名称都为sdb13、Cd /mnt/MYUSB/zebra-0.95a4、#./configure5、#make6、#make install这样ZEBRA就安装好了,安装的执行文件:#ls /usr/local/sbin配置文件:#ls /usr/local/etc运行编译安装完ZEBRA后,可以看到有4个可执行文件和5个配置样本文件,我们就使用它的配置样本文件:#cd /usr/local/etc#cp zebra.conf.sample zebra.conf#cp ripd.conf.sample ripd.conf#cp ripngd.conf.sample ripngd.confZEBRA的各进程有各自的终端接口或VTY。
Zebrasrv 2600/tcpZebra 2601/tcpRipd 2602/tcpRipngd 2603/tcpOspfd 2604/tcpBgpd 2605/tcpOspf6d 2606/tcp然后就可以启动ZEBRA了:#zebra -dk#ripd -d#ripngd -d这样,zebra就以守护进程启动了,其它的参数可以参考zebra -h直接用telnet连接:#telnet localhost 2601Zebra会提示输入口令,我们通过/usr/local/etc/zebra.conf可以看到口令是zebra,enable口令也是zebra。
#show run#hostname R1去掉会话超时,免得10分钟没有动作,就把我们踢出去了。
斑马打印机安装和操作手册百世快运设置文档
斑马打印机驱动安装手册和热敏打印修改.点击文件下的【】错误!未指定书签。
.点击【下一步】错误!未指定书签。
.点击【安装打印机】错误!未指定书签。
.选择【 ()】,点击【下一步】错误!未指定书签。
.选择【】,点击【下一步】错误!未指定书签。
. 点击【完成】,等待安装结束;可以不勾选【开始安装 ()】错误!未指定书签。
.点击操作系统的【开始】,选择【设备和打印机】错误!未指定书签。
.驱动安装成功后,在打印机和传真机列表里看到【 ()】错误!未指定书签。
.右击【()】,点击【打印机首选项()】,可以进入打印机首选项操作界面错误!未指定书签。
.选择【工具】选项卡,操作类型选择【操作】,命令名称选择【校正介质】,点击【传送】按钮,如连接到电脑的打印机正常出纸,则说明打印机可正常使用。
错误!未指定书签。
一、可从内网下载子单套打程序.解压下载的压缩包,点击文件中的【】.点击【下一步】.点击【安装打印机】.选择【 ()】,点击【下一步】.选择【】,点击【下一步】. 点击【完成】,等待安装结束;可以不勾选【开始安装 ()】.点击操作系统的【开始】,选择【设备和打印机】.驱动安装成功后,在打印机和传真机列表里看到【 ()】.右击【()】,点击【打印机首选项()】,可以进入打印机首选项操作界面.选择【工具】选项卡,操作类型选择【操作】,命令名称选择【校正介质】,点击【传送】按钮,如连接到电脑的打印机正常出纸,则说明打印机可正常使用。
热敏打印修改、右击【()】,点击【打印机首选项()】,可以进入打印机首选项操作界面.在打印机首选项操作界面里,选择高级设置,选择“热感”就行了,点确定,这样就可以打印热敏纸了。
- 1、下载文档前请自行甄别文档内容的完整性,平台不提供额外的编辑、内容补充、找答案等附加服务。
- 2、"仅部分预览"的文档,不可在线预览部分如存在完整性等问题,可反馈申请退款(可完整预览的文档不适用该条件!)。
- 3、如文档侵犯您的权益,请联系客服反馈,我们会尽快为您处理(人工客服工作时间:9:00-18:30)。
驱动安装说明(以ZT410打印机为例)
1.打印机按视频说明安装好标签和碳带,先不联接到电脑上.
2-A. 如电脑操作系统是windwos XP 或windows 2003
请双击开始安装.按红箭头指示操作
等待安装完成后窗口自动关闭.此时电脑的控制面板的打印机和传真选项里会有一个的打印机图标,把它选中并删除. 直接跳至第3步操作
2-B.如电脑操作系统是windwos 7,8,10等,请双击
安装. 按红箭头指示操作.
等待安装完成后窗口自动关闭.
3. 把打印机通过USB线或并口线与电脑联接后,电脑屏幕右下角会显示“发现新硬件”并自
动安装打印机驱动.等待完成.如果电脑未能正确驱动,请查看电脑的设备管理器,把未知设
备删除,然后刷新,反复几次,直至正确驱动打印机,未知设备标志消失.
4.在控制面板中找到打印机驱动图标
(如果电脑是XP系统-在打印机和传真里,
电脑是WIN7等系统-在设备和打印机里),
鼠标右键点图标选择打印机属性,显示如
下,
如界面有部份为英文,请点击Language,下拉菜单中选Chinese(Simpl)更改为中文,点确定,再重新右键点图标选择打印机属性.
5. 驱动的首选项里,抖动类型改为无.其它设置均为默认值即可.
6. 使用中打印速度调高,打印浓度就要相应调高,相反速度调慢,浓度就要调低.在打
印清晰的前提下打印浓度越低越好.
7. 使用中如电脑打印后,打印机面板上的DATA灯不闪且不打印,一般为驱动中的端
口选择错误.最简单的解决方法就是把当前驱动删掉,把打印机关机重开,让电脑自动安装驱动后,再按步骤5,6相应设置一下即可.。
