Console口设置密码
思科交换机密码配置命令

思科交换机密码配置一.设置console 密码>enable#configure trminal(confing)#line console 0 J console①(config- line)#password (cisco) <密码(config- line)#login 一定不能少的.console密码设置完成exit二:设置全局密码enadle#configure terminal②(config)#enable secret (class) 密码(config)#login全局密码设置完成exit三.设置远程登入(telnet)密码enable#config terminal(config)#line vty 0 4(0 4 是口)③(config- line)#password (class) <密码(config-lline)#loginexit四.保存以上设置>enadle#copy running-config strat-config思科交换机密码的破解1. 连接交换机的console 口到终端或PC仿真终端。
用无Modem的直连线连接PC的串行口到交换机的console 口。
2. 首先得拔掉电源,因为思科交换机上没有开关所以我们只能拔掉电源接下来我们要做的就是按住MODE按钮接着插上电源等端口指示灯灭掉松开3. 初始化flash。
>flash_init4. 更名含有password的配置文件。
>rename flash:config.text flash:config.old5. 启动交换机。
>boot6. 进入特权模式。
>enable7. 此时开机是已忽略password 。
#rename flash:config.old flash:config.text 8. copy配置文件到当前系统中。
#copy flash:config.text system:running-config 9. 修改口令。
通过Console口进行本地登录

通过Console口进行本地登录1.1 通过Console口进行本地登录简介通过交换机Console口进行本地登录是登录交换机的最基本的方式,也是配置通过其他方式登录交换机的基础。
S3100-SI系列交换机缺省情况下只能通过Console口进行本地登录。
用户终端的通信参数配置要和交换机Console口的配置保持一致,才能通过Console口登录到以太网交换机上。
交换机Console口的缺省配置如下。
表1-1交换机Console口缺省配置用户登录到交换机上后,可以对AUX用户进行相关的配置,请参见1.3 配置Console口登录方式的属性。
1.2 通过Console口登录交换机第一步:如图1-1所示,建立本地配置环境,只需将PC机(或终端)的串口通过配置电缆与以太网交换机的Console口连接。
(1) RS-232串口(2) Console口(3) 配置电缆图1-1通过Console口搭建本地配置环境第二步:在PC机上运行终端仿真程序(如Windows 3.X的Terminal或Windows 9X的超级终端等),选择与交换机相连的串口,设置终端通信参数为:波特率为9600bit/s、8位数据位、1位停止位、无校验和无流控,并选择终端类型为VT100,如图1-2至图1-4所示。
图1-2新建连接图1-3连接端口设置图1-4端口通信参数设置第三步:以太网交换机上电,终端上显示设备自检信息,自检结束后提示用户键入回车,之后将出现命令行提示符(如<H3C>)。
第四步:键入命令,配置以太网交换机或查看以太网交换机运行状态。
需要帮助可以随时键入“?”,具体的配置命令请参考本书中以后各章节的内容。
1.3 配置Console口登录方式的属性1.3.1 配置Console口登录方式的公共属性Console口登录方式的公共属性配置,如表1-2所示。
表1-2Console口登录方式公共属性配置1.3.2 不同认证方式下Console口登录方式的属性配置不同的认证方式下,Console口登录方式需要进行的配置不同,具体配置如表1-3所示。
神州数码console验证

配置Console端口认证
一、组网需求
针对交换机设备的Console端口配置认证,连接Console端口时,需要输入正确的用户名密码后才可以继续配置交换机设备。
二、组网图
三、配置步骤
1. 配置本地用户名密码(用户名test密码test)
switch>enable
switch#config terminal
switch(config)#username test privilege15password 0 test
2. 配置Console端口认证方式
switch(config)#authentication line console login local
3. 检验配置是否生效
配置完成后,重新插拔Console线缆,检查配置是否生效
四、配置关键点
1. Console端口认证的用户名密码,默认使用本地用户名密码。
2. 建议先配置好交换机的Telnet、SSH等远程管理方式并检验生效后,再配置Console端口用户名密码。
避免由于密码遗失造成无法登录设备。
本手册版权为DCN所有,欢迎传阅
如果有任何意见或建议,请联系 400-810-9119。
华为交换机Console口属性配置
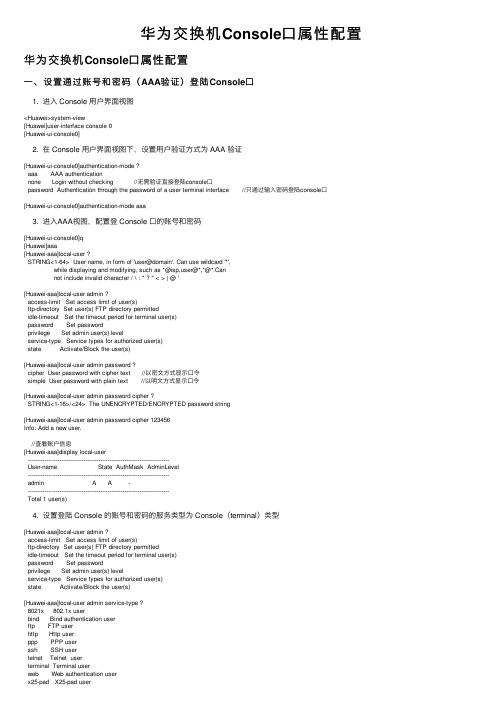
华为交换机Console⼝属性配置华为交换机Console⼝属性配置⼀、设置通过账号和密码(AAA验证)登陆Console⼝1. 进⼊ Console ⽤户界⾯视图<Huawei>system-view[Huawei]user-interface console 0[Huawei-ui-console0]2. 在 Console ⽤户界⾯视图下,设置⽤户验证⽅式为 AAA 验证[Huawei-ui-console0]authentication-mode ?aaa AAA authenticationnone Login without checking //⽆需验证直接登陆console⼝password Authentication through the password of a user terminal interface //只通过输⼊密码登陆console⼝[Huawei-ui-console0]authentication-mode aaa3. 进⼊AAA视图,配置登 Console ⼝的账号和密码[Huawei-ui-console0]q[Huawei]aaa[Huawei-aaa]local-user ?STRING<1-64> User name, in form of 'user@domain'. Can use wildcard '*',while displaying and modifying, such as *@isp,user@*,*@*.Cannot include invalid character / \ : * ? " < > | @ '[Huawei-aaa]local-user admin ?access-limit Set access limit of user(s)ftp-directory Set user(s) FTP directory permittedidle-timeout Set the timeout period for terminal user(s)password Set passwordprivilege Set admin user(s) levelservice-type Service types for authorized user(s)state Activate/Block the user(s)[Huawei-aaa]local-user admin password ?cipher User password with cipher text //以密⽂⽅式显⽰⼝令simple User password with plain text //以明⽂⽅式显⽰⼝令[Huawei-aaa]local-user admin password cipher ?STRING<1-16>/<24> The UNENCRYPTED/ENCRYPTED password string[Huawei-aaa]local-user admin password cipher 123456Info: Add a new user.//查看账户信息[Huawei-aaa]display local-user----------------------------------------------------------------------------User-name State AuthMask AdminLevel----------------------------------------------------------------------------admin A A -----------------------------------------------------------------------------Total 1 user(s)4. 设置登陆 Console 的账号和密码的服务类型为 Console(terminal)类型[Huawei-aaa]local-user admin ?access-limit Set access limit of user(s)ftp-directory Set user(s) FTP directory permittedidle-timeout Set the timeout period for terminal user(s)password Set passwordprivilege Set admin user(s) levelservice-type Service types for authorized user(s)state Activate/Block the user(s)[Huawei-aaa]local-user admin service-type ?8021x 802.1x userbind Bind authentication userftp FTP userhttp Http userppp PPP userssh SSH usertelnet Telnet userterminal Terminal userweb Web authentication userx25-pad X25-pad user[Huawei-aaa]local-user admin service-type terminal ?8021x 802.1x userbind Bind authentication userftp FTP userhttp Http userppp PPP userssh SSH usertelnet Telnet userweb Web authentication userx25-pad X25-pad user<cr>[Huawei-aaa]local-user admin service-type terminal//再次查看账户信息[Huawei-aaa]display local-user----------------------------------------------------------------------------User-name State AuthMask AdminLevel----------------------------------------------------------------------------admin A M -----------------------------------------------------------------------------Total 1 user(s)//保存配置<Huawei>saveThe current configuration will be written to the device.Are you sure to continue?[Y/N]y //输⼊y,确认Now saving the current configuration to the slot 0.Apr 6 2021 16:09:10-08:00 Huawei %%01CFM/4/SAVE(l)[55]:The user chose Y when deciding whether to save the configuration to the device.Save the configuration successfully.⼆、设置只通过密码登陆 Console ⼝1. 进⼊ Console ⽤户界⾯视图,设置只通过密码登陆 Console ⼝模式<Huawei>system-view[Huawei]user-interface console 0[Huawei-ui-console0]authentication-mode password2. 设置验证密码,输⼊的密码可以是明⽂或密⽂[Huawei-ui-console0]set authentication ?password Set the password for a user interface[Huawei-ui-console0]set authentication password ?cipher Set the password with cipher text //以密⽂⽅式显⽰⼝令simple Set the password in plain text //以明⽂⽅显⽰⼝令[Huawei-ui-console0]set authentication password cipher ?STRING<1-16>/<24> Plain text/cipher text password[Huawei-ui-console0]set authentication password cipher 123456//查看操作的步骤[Huawei-ui-console0]display this#user-interface con 0authentication-mode passwordset authentication password cipher yLST2)ywQ@:.`&R&e7S(bTi# //密码加密处理了user-interface vty 0 4#return//保存配置<Huawei>saveThe current configuration will be written to the device.Are you sure to continue?[Y/N]y //输⼊y,确认Now saving the current configuration to the slot 0.Apr 6 2021 16:09:10-08:00 Huawei %%01CFM/4/SAVE(l)[55]:The user chose Y when deciding whether to save the configuration to the device.Save the configuration successfully.1. 输⼊的密码可以是明⽂或者密⽂,当不指定cipher password参数时,将采⽤交互⽅式输⼊明⽂密码;2. 当指定cipher password参数时,既可以输⼊明⽂密码也可以输⼊密⽂密码,但都将以密⽂形式保存在配置⽂件中。
交换机用户名密码设置
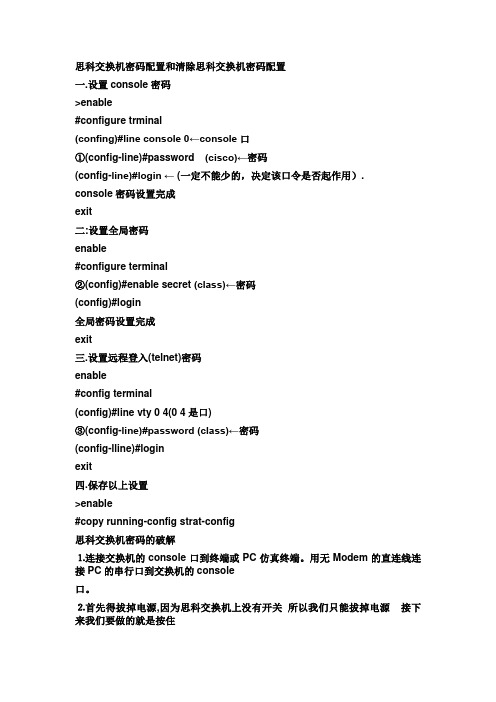
思科交换机密码配置和清除思科交换机密码配置一.设置console密码>enable#configure trminal(confing)#line console 0←console口①(config-line)#password (cisco)←密码(config-line)#login ← (一定不能少的,决定该口令是否起作用).console密码设置完成exit二:设置全局密码enable#configure terminal②(config)#enable secret (class)←密码(config)#login全局密码设置完成exit三.设置远程登入(telnet)密码enable#config terminal(config)#line vty 0 4(0 4是口)③(config-line)#password (class)←密码(config-lline)#loginexit四.保存以上设置>enable#copy running-config strat-config思科交换机密码的破解⒈连接交换机的console口到终端或PC仿真终端。
用无Modem的直连线连接PC的串行口到交换机的console口。
⒉首先得拔掉电源,因为思科交换机上没有开关所以我们只能拔掉电源接下来我们要做的就是按住MODE按钮接着插上电源等端口指示灯灭掉松开⒊初始化flash。
>flash_init⒋更名含有password的配置文件。
>rename flash:config.text flash:config.old⒌启动交换机。
>boot⒍进入特权模式。
>enable⒎此时开机是已忽略password。
#rename flash:config.old flash:config.text⒏copy配置文件到当前系统中。
#copy flash:config.text system:running-config⒐修改口令。
华为设备设置本地console登录密码,记得保存配置!

华为设备设置本地console登录密码,记得保存配置!华为设备设置本地console登录密码(以交换机为例,路由器也⼀样)1. 为了设备的运⾏安全,⼀般都要设置个console⼝登录密码,不是防⼀般⽤户,也不是贫道多⼼,主要防⽆良道友。
2. 准备如下:console线(USB⼝console线,请参照前⾯⽂章,现多⽤这种),超级客户端连接⼯具软件下载:超级终端、Putty、SecureCRT等等⼯具3.4. 配置console登录密码:<sw1> system-view //进系统视图[sw1] user-interface console 0 //进⼊console 0⼝(就⼀个console⼝,默认为0⼝)[sw1-ui-console0] authentication-mode password //启⽤密码认证[sw1-ui-console0] set authentication password cipher Boke8 //设置终端登录密码为 Boke8(密码⾃⼰定,别⽤我这个哈)注:记得保存配置<Router> save //保存配置The current configuration will be written to the device.Are you sure to continue?[Y/N] Y //输⼊Y确认Now saving the current configuration to the slot 0.Dec 24 2020 13:16:13-18:00 sw1 %%01CFM/4/SAVE(l)[2]:The user chose Y when deciding whether to save the configuration to the device.Save the configuration successfully.<Router>。
H3C交换机、路由器密码配置

H3C-ui-vty0-4set authentication password simple 123456
远程用户缺省的级别都是0级,灯笼裤可修改Telnet用户登录后的用户级别
H3C-ui-vty0-4user privilege level 3
本地用户名和口令的认证
H3Cuser-interface vty 0 4
Quidway-luser-quidwaypassword simple h3c
Quidway-luser-quidwayservice-type telnet level 3
默认是VRP1.74和1.44是没有缺省用户名和密码的。必须配置。
默认是VRP3.3是没有缺省用户名和密码的。必须配置。
MSR系列路由器Console登陆认证功能的配置
MSR系列路由器Console登陆认证功能的配置
一、组网需求:
要求用户从console登录时输入已配置的用户名huawei3com和对应的口令huawei3com,用户名和口令正确才能登录成功。
二、组网图:
见附件1
三、配置步骤:
Quidwayuser-interface vty 0 4
Quidway-ui-vty0-4authentication-mode local
Quidwaylocal-user quidway password simple h3c
Quidwaylocal-user quidway service-type telnet
只有VRP3.4的有缺省用户名和密码:
USER:admin
PASSWORD:admin
但是如果用户把它删除就没有了。
h3c交换机、路由器console和tel密码配置
一、CONSOLE口登陆在AUX用户接口视图下,可以设置CONSOLE用户登陆的口令认证。
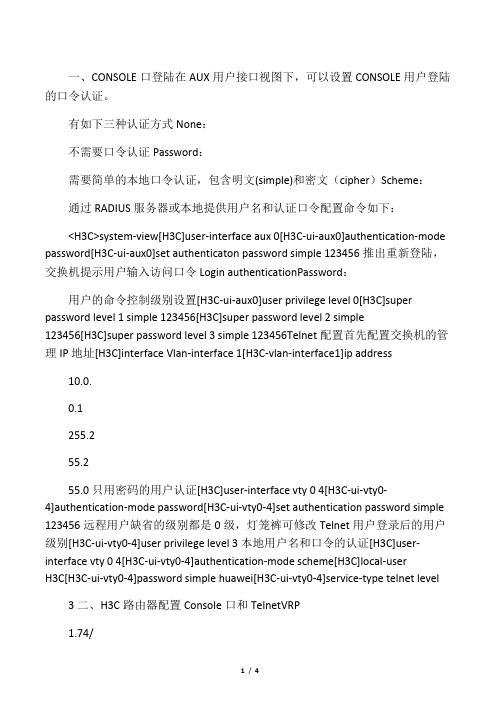
有如下三种认证方式None:不需要口令认证Password:需要简单的本地口令认证,包含明文(simple)和密文(cipher)Scheme:通过RADIUS服务器或本地提供用户名和认证口令配置命令如下:<H3C>system-view[H3C]user-interface aux 0[H3C-ui-aux0]authentication-mode password[H3C-ui-aux0]set authenticaton password simple 123456推出重新登陆,交换机提示用户输入访问口令Login authenticationPassword:用户的命令控制级别设置[H3C-ui-aux0]user privilege level 0[H3C]super password level 1 simple 123456[H3C]super password level 2 simple123456[H3C]super password level 3 simple 123456Telnet配置首先配置交换机的管理IP地址[H3C]interface Vlan-interface 1[H3C-vlan-interface1]ip address10.0.0.1255.255.255.0只用密码的用户认证[H3C]user-interface vty 0 4[H3C-ui-vty0-4]authentication-mode password[H3C-ui-vty0-4]set authentication password simple 123456远程用户缺省的级别都是0级,灯笼裤可修改Telnet用户登录后的用户级别[H3C-ui-vty0-4]user privilege level 3本地用户名和口令的认证[H3C]user-interface vty 0 4[H3C-ui-vty0-4]authentication-mode scheme[H3C]local-userH3C[H3C-ui-vty0-4]password simple huawei[H3C-ui-vty0-4]service-type telnet level 3二、H3C路由器配置Console口和TelnetVRP1.74/1.44CONSOLE和TELNET一样的,只要配置了会同时启作用,且只能是用户名和密码的方式。
华为常用配置命令注释
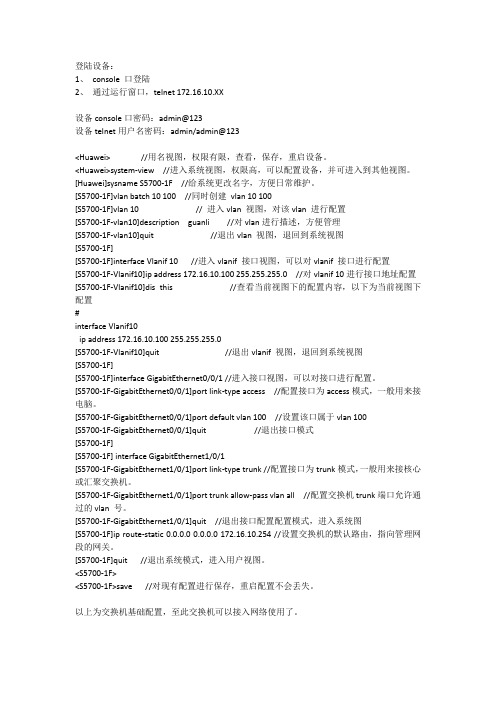
登陆设备:1、console 口登陆2、通过运行窗口,telnet 172.16.10.XX设备console口密码:admin@123设备telnet用户名密码:admin/admin@123<Huawei> //用名视图,权限有限,查看,保存,重启设备。
<Huawei>system-view //进入系统视图,权限高,可以配置设备,并可进入到其他视图。
[Huawei]sysname S5700-1F //给系统更改名字,方便日常维护。
[S5700-1F]vlan batch 10 100 //同时创建vlan 10 100[S5700-1F]vlan 10 // 进入vlan视图,对该vlan进行配置[S5700-1F-vlan10]description guanli //对vlan进行描述,方便管理[S5700-1F-vlan10]quit //退出vlan视图,退回到系统视图[S5700-1F][S5700-1F]interface Vlanif 10 //进入vlanif接口视图,可以对vlanif接口进行配置[S5700-1F-Vlanif10]ip address 172.16.10.100 255.255.255.0 //对vlanif 10进行接口地址配置[S5700-1F-Vlanif10]dis this //查看当前视图下的配置内容,以下为当前视图下配置#interface Vlanif10ip address 172.16.10.100 255.255.255.0[S5700-1F-Vlanif10]quit //退出vlanif视图,退回到系统视图[S5700-1F][S5700-1F]interface GigabitEthernet0/0/1 //进入接口视图,可以对接口进行配置。
[S5700-1F-GigabitEthernet0/0/1]port link-type access //配置接口为access模式,一般用来接电脑。
Console口设置密码
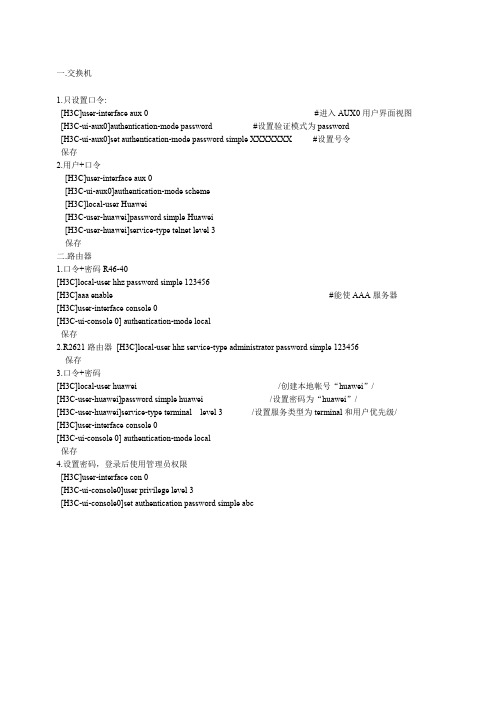
一.交换机1.只设置口令:[H3C]user-interface aux 0 #进入AUX0用户界面视图[H3C-ui-aux0]authentication-mode password #设置验证模式为password[H3C-ui-aux0]set authentication-mode password simple XXXXXXX #设置号令保存2.用户+口令[H3C]user-interface aux 0[H3C-ui-aux0]authentication-mode scheme[H3C]local-user Huawei[H3C-user-huawei]password simple Huawei[H3C-user-huawei]service-type telnet level 3保存二.路由器1.口令+密码R46-40[H3C]local-user hhz password simple 123456[H3C]aaa enable #能使AAA服务器[H3C]user-interface console 0[H3C-ui-console 0] authentication-mode local保存2.R2621路由器[H3C]local-user hhz service-type administrator password simple 123456保存3.口令+密码[H3C]local-user huawei /创建本地帐号“huawei”/[H3C-user-huawei]password simple huawei /设置密码为“huawei”/[H3C-user-huawei]service-type terminal level 3 /设置服务类型为terminal和用户优先级/ [H3C]user-interface console 0[H3C-ui-console 0] authentication-mode local保存4.设置密码,登录后使用管理员权限[H3C]user-interface con 0[H3C-ui-console0]user privilege level 3[H3C-ui-console0]set authentication password simple abc。
H3C (v7平台)Console口通过账号密码登陆配置教程

H3C (v7平台)Console口通过账号密码登陆配置教程看不懂的地方请看后面的释义1、设置登陆账号[H3C]local-user ?STRING<1-80> Local user name, which can contain the domain name[H3C]local-user ?class Specify a class for the local user<cr>[H3C]local-user class ?manage Device management usernetwork Network access user[H3C]local-user class manage ?<cr>[H3C]local-user class manageNew local user added.[]2、设置登录账号密码[]password ?simple Specify a plaintext password<cr>[]password simple ?STRING<1-63> Plaintext password string[]password simple []3、设置登录账号的权限(官方说法为授权用户角色)[]authorization-attribute ?acl Specify ACL of local usercallback-number Specify PPP callback number of local useridle-cut Specify idle cut function for local userip Specify the IP address of local userip-pool Specify the IP address pool of local useripv6 Specify the IPv6 address of local useripv6-pool Specify the IPv6 address pool of local useripv6-prefix Specify the IPv6 address prefix of local user primary-dns Specify the primary DNS server of local user secondary-dns Specify the secondary DNS server of local user session-group-profile Specify the session group profile of local user session-timeout Specify time of session-timeoutsubscriber-id Specify the subscriber ID of local userurl Specify the URL of local useruser-profile Specify user profile of local useruser-role Specify user role of the local uservlan Specify VLAN ID of local uservpn-instance Specify the VPN instance of local userwork-directory Specify work directory of local user[]authorization-attribute user-role ? STRING<1-63> User role namenetwork-adminnetwork-operatorlevel-0level-1level-2level-3level-4level-5level-6level-7level-8level-9level-10level-12level-13level-14level-15security-auditguest-manager[]authorization-attribute user-role network-admin4、设置登陆账号的服务类型[]service-type ?ftp FTP servicehttp HTTP service typehttps HTTPS service typepad X.25 PAD servicessh Secure Shell servicetelnet Telnet serviceterminal Terminal access service[]service-type terminal5、设置Console登陆采用账号密码登陆模式(即AAA或scheme认证方式)[H3C]line console ?[H3C]line console 0[H3C-line-console0][H3C-line-console0]authentication-mode ?none Login without authenticationpassword Password authenticationscheme Authentication use AAA[H3C-line-console0]authentication-mode scheme ?<cr>[H3C-line-console0]authentication-mode scheme6、验证设置[H3C-line-console0]q[H3C]saThe current configuration will be written to the device. Are you sure? [Y/N]:y Please input the file name(*.cfg)[flash:/startup.cfg](To leave the existing filename unchanged, press the enter key): Validating file. Please wait...Saved the current configuration to mainboard device successfully.[H3C]qu<H3C>qu******************************************************************************* Copyright (c) 2004-2016 Hangzhou H3C Tech. Co., Ltd. All rights reserved. ** Without the owner's prior written consent, ** no decompiling or reverse-engineering shall be allowed. *******************************************************************************Line con0 is available.Press ENTER to get started.login: Password:<H3C>7、释义H3Cv7平台相较于V5平台配置思路与含义有了一些变化,这些变化之处重庆网管博客做个释义,欢迎各位道友留言或进群讨论。
H3C交换机、路由器Console和Telnet密码配置

一、H3C 交换机密码配置一、CONSOLE口登陆在AUX用户接口视图下,可以设置CONSOLE用户登陆的口令认证。
有如下三种认证方式None:不需要口令认证Password:需要简单的本地口令认证,包含明文(simple)和密文(cipher)Scheme:通过RADIUS服务器或本地提供用户名和认证口令配置命令如下:<H3C>system-view[H3C]user-interface aux 0[H3C-ui-aux0]authentication-mode password[H3C-ui-aux0]set authenticaton password simple 123456推出重新登陆,交换机提示用户输入访问口令Login authenticationPassword:用户的命令控制级别设置[H3C-ui-aux0]user privilege level 0[H3C]super password level 1 simple 123456[H3C]super password level 2 simple 123456[H3C]super password level 3 simple 123456Telnet 配置首先开启telnet的服务(有设备需要,有的设备默认开启)配置交换机的管理IP地址[H3C]interface Vlan-interface 1[H3C-vlan-interface1]ip address 10.0.0.1 255.255.255.0只用密码的用户认证[H3C]user-interface vty 0 4[H3C-ui-vty0-4]authentication-mode password[H3C-ui-vty0-4]set authentication password simple 123456远程用户缺省的级别都是0级,可修改Telnet用户登录后的用户级别为管理员3 [H3C-ui-vty0-4]user privilege level 3本地用户名和口令的认证[H3C]user-interface vty 0 4[H3C-ui-vty0-4]authentication-mode scheme[H3C]local-user H3C[H3C-ui-vty0-4]password simple huawei[H3C-ui-vty0-4]service-type telnet level 3二、H3C路由器配置Console口和TelnetVRP1.74/1.44CONSOLE和TELNET一样的,只要配置了会同时启作用,且只能是用户名和密码的方式。
修改console口登录密码的方法

修改console口登录密码的方法
要修改console口的登录密码,可以按照以下步骤进行操作:
1. 连接到设备的console口。
插入串口线,通过终端程序(如SecureCRT、PuTTY等)连接到设备的console口。
2. 在终端程序中输入设备的登录用户名和密码。
如果未修改过,默认的用户名为admin,密码为空或者为admin。
3. 登录成功后,进入设备的命令行界面。
输入命令:enable,
进入特权模式。
4. 进入特权模式后,输入命令:configure terminal,进入全局
配置模式。
5. 输入命令:line console 0,进入console口的配置界面。
如
果有多个console口,可以根据具体情况选择相应的编号。
6. 输入命令:password [新密码],将[新密码]替换为你要设置
的新密码。
注意,新密码需要符合设备的密码要求。
7. 输入命令:exit,退出console口的配置界面。
8. 输入命令:exit,退出全局配置模式。
9. 输入命令:write memory,将配置保存到设备的NVRAM中,以便重启后生效。
10. 输入命令:exit,退出设备的命令行界面。
完成以上步骤后,console口的登录密码就已经修改成功了。
下次登录时,需要使用新密码进行身份验证。
2.2-Console口和特权模式密码配置

2.2 Console口和特权模式密码配置预备知识:交换机的管理可分为带内管理和带外管理两种,所谓带内管理指的是这种管理方法占用一定的网络带宽,一般通过网络连接到交换机,如telnet和web管理;带外管理则指的是管理时不占用网络带宽,如最常用的通过Console口管理交换机。
这种方式使用交换机配置的专用配置线缆一边连接计算机的串口(RS232),另一边连接交换机的Console口,通过windows系统的超级终端进入交换机进行命令行配置,由于交换机出厂时没有进行任何配置,所以这种管理方式也是首次配置交换机的方式。
通过Console口配置交换机时只需连接好线缆即可进入交换机进行配置,对于安装在交换机楼道里的交换机是不安全的,我们可以通过给Console口配置连接密码,只有经过密码认证才能连接交换机进入交换机的一般配置模式。
而通过设置特权密码可设置进入更高配置模式进行再一次密码验证。
Console口密码和特权密码可设置为不一样的密码.一、实训目的1、了解Console口的作用。
2、掌握Console口和特权模式密码配置命令。
二、应用环境由于交换机出厂时没有设置管理IP地址,所以可管理交换机上都配有一个Console口(配置口),交换机第一次配置必须通过交换机配备的专用配置线连接交换机的Console口和计算机的COM口,通过超级终端进入交换机进行配置。
三、实训要求1.设备要求:1)2950—24交换机一台、PC机一台.2)配置线一条。
2.实训拓扑图3.配置要求:1)交换机配置要求:设置特权密码和配置口密码。
4.实训效果:使用配置口进入交换机配置时需要输入密码,经过认证才能进入交换机,同样进入特权模式需要输入密码,认证。
四、实训步骤1、配置交换机特权密码。
2、进入线路配置模式配置Console口密码。
五、详细步骤1、按拓扑图添加一台2950-24交换机和一台PC机。
(略)2、在设备类型选择区选择“线缆",在右边的线缆中选择“配置线”,如下图所示.3、选择配置线后,使用它连接交换机的console口与PC机的RS232口,如下图所示.4、连接好配置线后,点击PC0计算机,在“桌面"选项卡下点击“终端”进入计算机的超级终端,如下图所示.5、在终端配置窗口,设置如下参数后点击“确定”按钮即可通过配置线进入交换机的命令行配置界面,如下图所示.6、通过终端进入交换机配置界面后提示按回车键,系统显示当前进入的是一般用户配置模式,如下图所示7、进入全局配置模式,配置特权密码为“qwe123”,密码为加密方式。
华为交换机密码重置该怎么弄?

华为交换机密码重置该怎么弄?华为交换机密码遗失怎么办?华为交换机密码恢复⽅法以下⼩编同⼤家介绍华为交换机Console⼝、Telnet、BootROM密码丢失的处理⽅法,建议⽤户妥善保管密码,并定期修改。
1、恢复Console⼝密码设备提供如下⽅法可以恢复Console⼝密码。
⽅法⼀:通过Telnet登录设备修改Console⼝密码。
⽅法⼆:在BootROM下配置跳过Console⼝密码启动后,修改Console⼝密码。
⽅法三:在BootROM菜单下取消设置下次启动配置⽂件,设备以空配置启动后修改Console⼝密码。
说明:请优先使⽤⽅法⼀,如果Telnet密码也忘记了再使⽤其它两个⽅法。
如果Console登录⽤的是密码认证,在⽅法⼀不可⽤的情况下优先使⽤⽅法⼆。
如果Console登录⽤的是AAA认证,使⽤⽅法三。
通过Telnet登录设备修改Console⼝密码如果⽤户拥有Telnet账号,并且具有3级或更⾼的权限,则可以通过Telnet登录到设备后修改Console⼝密码,然后保存配置。
使⽤Telnet账号登录设备,并确认当前账号有3级或更⾼的权限。
使⽤display users命令查看当前设备所有登录⽤户。
其中带“+”标记⾏为当前⽤户,记录对应的编号VTY1。
display usersUser-Intf Delay Type Network Address AuthenStatus AuthorcmdFlag129 VTY 0 00:23:36 TEL 10.135.18.67 passUsername : Unspecified+ 130 VTY 1 01:20:36 TEL 10.135.18.91 passUsername : Unspecified131 VTY 2 00:00:00 TEL 10.135.18.54 passUsername : Unspecified使⽤display user-interface命令可以显⽰所有⽤户的权限,确定VTY1对应的等级为15,有权限修改Console⼝密码。
实验一:华三Console口登录

实验一:Console口登录一、理论基础在对路由器、交换机进行管理的方法中,最常见的就是通过Console口进行本地配置和管理。
Console端口是设备的基本端口,在设备初始或者没有进行其它方式的配置管理准备时,都使用Console口进行本地配置管理。
通过Console口进行配置管理的实验组网连接最为简单。
连接console端口的线缆称为控制台电缆(console cable),也称为反序电缆(rollover cable),即左右插头端的线序完全相反。
二、实验案例Console登录的配置1、配置说明:启动Windows 2000下的“开始”→“程序”→“附件”→“通讯”下的“超级终端”,便可以打开以Console口登录的对话框。
在对话窗口的“名称”一栏中,输入“sunke”(或者其他文字用于标志该连接),并在“图标”一栏内选择一个图标,然后单击“确定”按钮。
此时,出现了一个新的对话窗口,如图所示。
在“连接时使用”一栏的下拉列表中选择“COM1”,然后单击“确定”按钮。
此时出现“COM1属性”对话窗口,在其中把“每秒位数”一栏的数值改为“9600”,把“数据流控制”一栏的设置更改为“无”,然后单击“确定”按钮。
2、具体配置:增加登录时的简单口令认证:(权限不变———最高级别即3级)[Quidway]user-interface aux 0[Quidway-ui-aux0]authentication-mode ?none Login without checkingpassword Authentication use password of user terminal interfacescheme Authentication use RADIUS scheme[Quidway-ui-aux0]authentication-mode password[Quidway-ui-aux0]set authentication password simple sunke重新登录时的结果———需要密码即sunkePassword:<Quidway>%Apr 1 23:57:17 2000 Quidway SHELL/5/LOGIN: Console login from Aux0/0<Quidway>需要口令认证,同时更改缺省登录权限为0级,再利用super命令设置进行权限切换时的口令。
华为路由器console登录配置

华为路由器console登录配置配置⽤户通过CLI登录设备2.1 配置⽤户通过CLI登录设备简介CLI(命令⾏接⼝)是⽤户与设备之间的⽂本类指令交互界⾯,⽤户键⼊⽂本类命令,通过输⼊回车键提交设备执⾏相关命令,⽤户可以输⼊命令对设备进⾏配置,并可以通过查看输出的信息确认配置结果,⽅便⽤户配置和管理设备。
通过CLI登录设备包括:通过Console⼝、Telnet、SSH或Modem四种登录⽅式。
当您使⽤Console⼝、Telnet、SSH或Modem登录设备时,都需要使⽤CLI来与设备进⾏交互。
●缺省情况下,⽤户不需要任何认证即可通过Console⼝登录设备,这给设备带来许多安全隐患;●缺省情况下,⽤户不能通过Telnet、SSH及Modem⽅式登录设备(只能通过Console⼝本地登录),这样不利于⽤户对设备进⾏远程管理和维护。
因此,⽤户需要对这些登录⽅式进⾏相应的配置,来增加设备的安全性及可管理性。
以下章节将分别为您介绍如何通过Console⼝、Telnet、SSH及Modem登录到设备,并配置通过Console⼝、Telnet、SSH及Modem登录设备时的认证⽅式、⽤户级别及公共属性,来实现对登录⽤户的控制和管理。
2.2 配置通过Console⼝登录设备2.2.1 通过Console⼝登录设备简介通过Console⼝进⾏本地登录是登录设备的最基本的⽅式,也是配置通过其他⽅式登录设备的基础。
如图2-1所⽰。
图2-1 通过Console⼝登录设备⽰意图缺省情况下,设备只能通过Console⼝进⾏本地登录,⽤户登录到设备上后,即可以对各种登录⽅式进⾏配置。
本节将为您介绍:●设备缺省情况下,如何通过Console⼝登录设备。
具体请参见2.2.2 缺省配置下如何通过Console⼝登录设备。
●设备Console⼝⽀持的登录⽅式及配置Console⼝登录认证⽅式的意义、各种认证⽅式的特点及注意事项。
CISCO交换机的常用操作项-思科常用命令手册速查手册
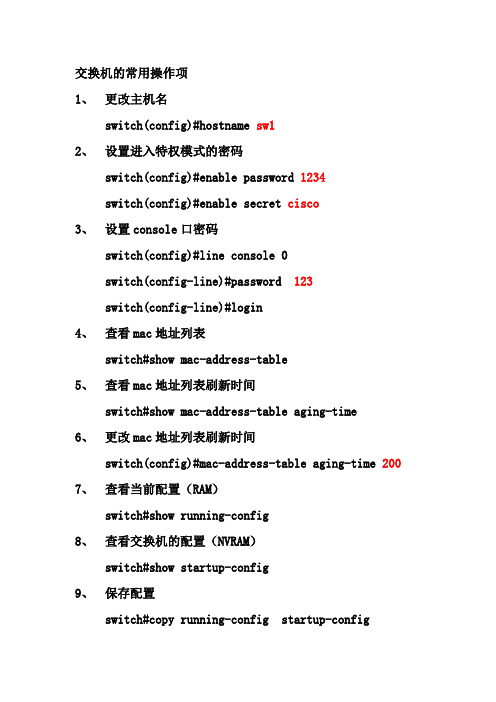
交换机的常用操作项1、更改主机名switch(config)#hostname sw12、设置进入特权模式的密码switch(config)#enable password 1234switch(config)#enable secret cisco3、设置console口密码switch(config)#line console 0switch(config-line)#password 123switch(config-line)#login4、查看mac地址列表switch#show mac-address-table5、查看mac地址列表刷新时间switch#show mac-address-table aging-time6、更改mac地址列表刷新时间switch(config)#mac-address-table aging-time 200 7、查看当前配置(RAM)switch#show running-config8、查看交换机的配置(NVRAM)switch#show startup-config9、保存配置switch#copy running-config startup-configswitch#write10、恢复出厂默认设置switch#erase startup-configswitch#reload11、查看cdp的全局信息switch#show cdp12、查看接口的cdp配置信息switch#show cdp interface f0/213、查看有关cdp包的统计信息switch#show cdp traffic14、查看邻居信息switch#show cdp neighbors15、查看所有入口项的详细信息switch#show cdp neighbors detailswitch#show cdp entry *16、添加接口的描述信息switch(config-if)# description connection to routerA 17、设置交换机的网关switch(config)#ip default-gateway 192.168.1.118、关掉DNS解析switch(config)# no ip domain-lookup19、实现交换机的远程管理switch(config)#enable secret ciscoswitch(config)#interface vlan 1switch(config-if)#ip address 192.168.1.100 255.255.255.0switch(config-if)#no shutdownswitch(config)#line vty 0 4switch(config-line)#password 123switch(config-line)#loginc:\>telnet 192.168.1.10020、交换机的密码恢复1、将交换机的电源拔下2、按mode键将电源插上,当出现switch:时将手松开3、switch:flash_init //加载到flash中4、switch:dir flash: //查看flash中的文件5、rename flash:config.text flash:config.old //更改文件名6、boot //重新启动交换机7、rename flash:config.old flash:config.text //将文件名改回8、copy flash:config.text running-config9、enable password cisco //重新设置密码10、write //保存21、创建vlan方法一switch#vlan databaseswitch(vlan)#vlan 10 name scswitch(vlan)#exit22、创建vlan方法二switch(config)#vlan 10switch(config-vlan)#name sc23、删除vlan方法一switch(vlan)#no vlan 10switch(vlan)#exit24、删除vlan方法二switch(config)#no vlan 1025、删除vlan方法三switch#delete vlan.dat26、将端口加入到vlan中switch(config-if)#switchport access vlan 1027、将一组连续的端口加入到vlan中switch(config)# interface range f0/1 – 5 (端口范围管理switch(config-if-range)#switchport access vlan 10 端口范围管理模式28、将端口从vlan中删除switch(config-if)#no switchport access vlan 10switch(config-if)#switchport access vlan 1switch(config-if-range)#no switchport access vlan 10 switch(config-if-range)#switchport access vlan 1 29、查看所有vlan的摘要信息switch#show vlan brief30、查看指定vlan的信息switch#show vlan id 1031、指定端口成为trunkswitch(config-if)#switchport mode trunk 两个端口全要设成trunk32、Trunk的自动协商switch(config-if)#switchport mode dynamic desirable switch(config-if)#switchport mode dynamic auto注意:如果中继链路两端都设置成auto将不能成为trunk 33、查看端口状态switch#show interface f0/24 switchport34、在trunk上移出vlanswitch(config-if)#switchport trunk allowed vlan remove 235、在trunk上添加vlanswitch(config-if)#switchport trunk allowed vlan add236、Cisco 2600路由器的基本操作从用户模式进入特权模式router>enablerouter#从特权模式进入全局配置模式router#config terminalrouter(config)#为路由器配置主机名router(config)#hostname teacherteacher(config)#进入路由器的以太口配置模式teacher(config)#interface fastethernet 0/0teacher(config_if)#37、查看Cisco 2600路由器的串口状态router#show interface serial 0/0serial 0/0 is up ,line protocol is up可操作状态………serial 0/0 is up ,line protocol is up连接问题…………serial 0/0 is up ,line protocol is down接口问题…………serial 0/0 is down ,line protocol isdown禁用状态…………serial 0/0 is administratively down ,line protocol is down38、 静态路由的实现router(config)#hostname AA(config)#interface f0/0 A(config-if)#ip address 192.168.1.1 255.255.255.0 A(config-if)#no shutdownA(config)#interface f0/1A(config-if)#ip address 192.168.2.1 255.255.255.0 A(config-if)#no shutdownA(config)#iproute 192.168.3.0 255.255.255.0 192.168.2.2B(config)#iproute 192.168.1.0 255.255.255.0 192.168.2.139、 配置默认路由route(config)#ip route 0.0.0.0 0.0.0.0 下一跳地址40、 查看路由表router#show ip route其中C 代表直连的网络,S 代表静态的路由,S*代表默认的路由 192.168.1.1 192.168.2.2 192.168.2.1 192.168.3.1 192.168.1.10 192.168.3.1041、为Cisco 2600路由器配置密码配置控制台密码router (config)#line console 0router (config-line)# password ciscorouter (config-line)# login42、配置特权模式密码router (config)#enable password cisco43、配置安全的加密密码router (config)#enable secret 123444、配置路由器标识router(config)#banner motd $This is Aptech company’s Router! Please don’t change the configuration whithout permissions$45、对所有密码进行加密router (config)#service password-encryption46、配置超时router(config)#line console 0router(config-line)#exec-timeout 0 0 //第一个0代表分钟,第二个0代表秒47、显示同步router(config)#line console 0router(config-line)#logging synchronous48、配置禁用DNSrouter(config)#no ip domain-lookup49、利用三台路由器实现静态路由和默认路由50、路由器密码恢复重启路由器按Ctrl+Break键进入ROM Monitor 模式rommon 1>confreg 0x2142rommon 2>reset重启后选择norouter>enablerouter#copy startup-config running-configrouter#config terminalrouter(config)#enable password ciscorouter(config)#config-register 0x2102router#copy running-config startup-configrouter#reload51、单臂路由——实现不同vlan之间的通信V L A N11、划分vlanswitch#vlan databaseswitch(vlan)#vlan 2写NAME,不行,switch(vlan)#vlan 3switch(vlan)#exit2、将端口加入vlanswitch(config)#interface range f0/6 -8switch(config-if-range)#switchport access vlan 2 switch(config-if-range)# interface range f0/9 -11 switch(config-if-range)#switchport access vlan 3 3、配置trunkswitch(config)#interface f0/12switch(config-if)#switchport mode trunk4、配置路由器的子接口封装dot1q,并设置IP地址router(config)#interface f0/0.1router(config-subif)#encapsulation dot1q 1router(config-subif)#ip address 192.168.0.1 255.255.255.0router(config-subif)#no shutrouter(config)#interface f0/0.2router(config-subif)#encapsulation dot1q 2router(config-subif)#ip address 192.168.1.1 255.255.255.0router(config-subif)#no shutrouter(config)#interface f0/0.3router(config-subif)#encapsulation dot1q 3router(config-subif)#ip address 192.168.2.1 255.255.255.0router(config-subif)#no shutrouter(config)#interface f0/0router(config-if)#no shut5、设置pc的IP地址和默认网关52、RIP版本V1和V2 的区别RIP v1发送路由更新时不携带子网掩码,属于有类路由协议发送路由更新时,目标地址为广播地址:255.255.255.255RIP v2发送路由更新时携带子网掩码,属于无类路由协议发送路由更新时,目标地址为组播地址:224.0.0.953、 RIP V1的配置配置步骤:1、配置路由器接口IP 地址routerA(config)#interface f0/0routerA(config-if)#ipaddress 192.168.1.1 255.255.255.0routerA(config-if)#no shutdownrouterA(config-if)#interface f0/1routerA(config-if)# ip address 10.0.0.2 255.0.0.0routerA(config-if)#no shutdownrouterB(config)#interface f0/0routerB(config-if)#ip address 10.0.0.1 255.0.0.0 192.168.2.0/24192.168.1.0/24routerB(config-if)#no shutdownrouterB(config)#interface f0/1routerB(config-if)#ip address 20.0.0.2 255.0.0.0 routerB(config-if)#no shutdownrouterC(config)#interface f0/0routerC(config-if)#ip address 20.0.0.1 255.0.0.0 routerC(config-if)#no shutdownrouterC(config)#interface f0/1routerC(config-if)#ip address 192.168.2.2 255.255.255.0routerC(config-if)#no shutdown2、在路由器上启动RIP进程,并宣告网络号:routerA(config)#router riprouterA(config-router)#network 10.0.0.0routerA(config-router)#network 192.168.1.0routerB(config)#router riprouterB(config-router)#network 10.0.0.0routerB(config-router)#network 20.0.0.0routerC(config)#router riprouterC(config-router)#network 20.0.0.0routerC(config-router)#network 192.168.2.03、验证配置是否正确1)查看路由表router#show ip route2)查看路由协议配置router#show ip protocols3)打开RIP协议调试命令router#debug ip rip4)退出router# no debug ip rip4、在PC上设置IP地址、子网掩码、默认网关,用ping命令测试连通性54、RIP V2的配置10.1.1.0/24 192.168.1.0/241、配置各路由器接口IP地址routerA(config)#interface f0/0routerA(config-if)#ip address 10.1.1.1 255.255.255.0routerA(config-if)#no shutdownrouterA(config-if)#interface f0/1routerA(config-if)# ip address 192.168.1.1 255.255.255.0routerA(config-if)#no shutdownrouterB(config)#interface f0/0routerB(config-if)#ip address 10.1.2.1 255.255.255.0routerB(config-if)#no shutdownrouterB(config)#interface f0/1routerB(config-if)#ip address 192.168.1.2 255.255.255.0routerB(config-if)#no shutdownrouterC(config)#interface f0/0routerC(config-if)#ip address 192.168.1.3 255.255.255.0routerC(config-if)#no shutdownrouterC(config)#interface f0/1routerC(config-if)#ip address 192.168.2.1 255.255.255.0routerC(config-if)#no shutdown2、在路由器上配置RIP V2 路由协议routerA(config)#router riprouterA(config-router)#version 2routerA(config-router)#no auto-summary不合并同段网络routerA(config-router)#network 10.0.0.0 routerA(config-router)#network 192.168.1.0 routerB(config)#router riprouterB(config-router)#version 2routerB(config-router)# no auto-summary routerB(config-router)#network 10.0.0.0 routerB(config-router)#network 192.168.1.0 routerC(config)#router riprouterC(config-router)# version 2routerC(config-router)# no auto-summary routerC(config-router)#network192.168.1.0 routerC(config-router)#network 192.168.2.0 3、验证配置是否正确1)查看路由表router#show ip route2)查看路由协议配置router#show ip protocols3)打开RIP协议调试命令router#debug ip rip4、在PC上设置IP地址、子网掩码、默认网关,用ping命令测试连通性55、上传路由器上的IOSrouter#show flash //查看IOS文件名router#copy flash tftpSource filename []? c2600-ik8o3s-mz.122-11.T.binAddress or name of remote host []? 192.168.1.11Destination filename [c2600-ik8o3s-mz.122-11.T.bin]?下载IOS到路由器router#copy tftp flash上传路由器上配置文件router#copy nvram:startup-config tftp:Address or name of remote host []? 192.168.1.11Destination filename [router-config]? startup-config下载配置文件到路由器router#copy tftp:startup-config nvramC2600路由器IOS被删除的恢复方法:1、ctrl+breakrommon 1>IP_ADDRESS=192.168.0.100 //路由器接口地址rommon 2>IP_SUBNET_MASK=255.255.255.0rommon 3>DEFAULT_GATEWAY=192.168.0.100rommon 4>TFTP_SERVER=192.168.0.254rommon 5>TFTP_FILE=c2600-ik8o3s-mz.122-11.T.binrommon 6>tftpdnld希望各位学员努力学习,将交换机和路由器的操作命令练会、练熟学如逆水行舟,不进则退。
华三交换机配置远程管理账户密码

华三交换机配置远程管理账户密码
首先,需要准备console线串口转usb管理线以及终端登入软件putty或者scureCRT;
下面以putty软件登入为例:连接console线至交换机并安装console线驱动程序,安装成功后可以在计算机管理/系统工具/设备管理器/端口下面看到当前连接的COM管理口,如下图的COM3口;
拷贝putty登入软件至管理电脑,,双击软件图标
来到软件界面:
选择serial串口登入,串口号为COM3,波特率为9600,点击open以继续,如下图:
点击open键后进入命令行管理界面:
进入系统配置模式,修改设备名,配置vlan接口地址:
创建本地用户名和密码,并开启这个用户对应的telnet远程管理服务,给予3级管理权限:进入远程管理虚接口vty0-4共5个接口,允许同时又5个用户登入,配置远程登入的认证模式为scheme调用本地用户名、密码
退出系统配置模式,测试相关配置是否成功telnet ,测试完成后保存配置并退出:
至此,远程telnet登入配置完成。
- 1、下载文档前请自行甄别文档内容的完整性,平台不提供额外的编辑、内容补充、找答案等附加服务。
- 2、"仅部分预览"的文档,不可在线预览部分如存在完整性等问题,可反馈申请退款(可完整预览的文档不适用该条件!)。
- 3、如文档侵犯您的权益,请联系客服反馈,我们会尽快为您处理(人工客服工作时间:9:00-18:30)。
1.只设置口令:
[H3C]user-interface aux 0 #进入AUX0用户界面视图
[H3C-ui-aux0]authentication-mode password#设置验证模式为password
[H3C-ui-aux0]set authentication-mode password simple XXXXXXX #设置号令
[H3C]user-interface con 0
[H3C-ui-console0]user privilege level 3
[H3C-ui-console0]set authentication password simple abc
保存
2.R2621路由器 [H3C]local-user hhz service-type administrator password simple 123456
保存
3.口令+密码
[H3C]local-user huawei /创建本地帐号“huawei”/
[H3C-user-huawei]password simple huawei /设置密码为“huawei”/
[H3C-user-huawei]service-type terminal level 3 /设置服务类型为terminal和用户优先级/
[H3C]user-interface console 0
[H3C-ui-console 0] authentication-mode local
保存
4.设置密码,登录后使用管理员权限
Hale Waihona Puke 保存二.路由器1.口令+密码R46-40
[H3C]local-user hhz password simple 123456
[H3C]aaa enable #能使AAA服务器
[H3C]user-interface console 0
[H3C-ui-console 0] authentication-mode local
保存
2.用户+口令
[H3C]user-interface aux 0
[H3C-ui-aux0]authentication-mode scheme
[H3C]local-user Huawei
[H3C-user-huawei]password simple Huawei
[H3C-user-huawei]service-type telnet level 3
