A-ZKD-12使用说明书
H系列D12HD-H D12WU-H说明书

用户手册020-000773-03H系列D12HD-H/D12WU-HThe CD included with this printed manual contains an electronic copy in English. Please read all instructions before using or servicing this product.Le DC fourni avec ce manuel imprimé contient une copie électronique en français. S'il vous plaît lire toutes les instructions avant d'utiliser ou de réparer ce produit.Die mit dieser gedruckten Anleitung gelieferte CD enthält eine elektronische Kopie in Deutsch. Bitte lesen Sie alle Anweisungen, bevor Sie dieses Produkt verwenden oder warten.Il CD fornito con il manuale stampato contiene una copia elettronica in lingua italiano. Si prega di leggere tutte le istruzioni prima di utilizzare o riparare questo prodotto.El DC incluido con este manual impreso contiene una copia electrónica en español. Por favor, lea todas las instrucciones antes de usar o dar servicio a este producto.注意事项版权和商标版权所有 © 2015 Christie Digital Systems USA, Inc. 保留所有权利。
D12-AC柯力电子称重仪表中文使用说明书
D12-AC柯力电子称重仪表中文使用说明书D12型电子称重仪表使用说明书目录第一章技术参数 (1)第二章安装联接 (3)一、仪表与数字传感器的连接 (3)二、仪表与大屏幕的连接使用 (3)三、仪表与电脑的连接使用 (4)第三章称重记录的贮存与打印 (4)一.称重记录的贮存 (4)二. 皮重存储的输入方法: (5)三. 称重记录的打印 (6)四. 统计报表的打印 (7)五.称重记录的查询 (10)六.称重记录的删除 (12)七.记忆皮重的删除 (13)八.查询打印 (13)第四章信息提示 (13)附录 A:打印操作举例: (14)附录 B:明细表及统计报表示例 (17)▲!传感器与仪表的连接必须可靠,传感器的屏蔽线必须可靠接地。
连接线不允许在仪表通电的状态下进行插拔,防止静电损坏仪表或传感器。
▲!传感器和仪表都是静电敏感设备,在使用中必须切实采取防静电措施,严禁在秤台上进行电焊操作或其他强电操作,在雷雨季节,必须落实可靠的避雷措施,防止因雷击造成传感器和仪表的损坏,确保操作人员的人身安全和称重设备及相关设备的安全运行。
第一章技术参数1、型号 D12-AC、D12-AC-P(面板热敏微打)、D12-AC-P1(面板针式微打)2、执行国家标准 GB/T 7724-20083、准确度等级4、数字传感器接口通信方式 RS485信号传输距离在接12数字传感器情况下可接至30米,如需更长,请与本公司联系传输波特率 9600、19200bps激励电源 DC12~14.8V数字接口能力最多可接16个数字传感器5、显示: 7位LED数码管,7个状态指示符。
6、键盘数字键 0 ~ 9功能键 24个(10个与数字键复合)7、时钟:可显示年、月、日、时、分、秒,自动闰年、闰月;8、大屏幕显示接口传输方式电流环和RS232传输波特率 600bps9、串行通讯接口传输方式 RS232波特率600/1200/2400/4800/9600/19200可选10、打印接口配置标准并行打印接口,可配接ESPON LQ-300K+Ⅱ、ESPON LQ-300K、ESPONLQ-680K 、ESPON LQ-730K 、ESPON LQ-1600K(+)、KX-P1131、KX-P1121、DS-300等宽行打印机。
座充说明书
内部资料,严禁外传设备外观及常用按键介绍 (5)i60巴枪介绍 ............................................................................. (5)(2)i80巴枪介绍 (8)i60、i80连接wifi操作 ............................................................... 9 i60连接wifi操作 (10)i80连接wifi操作 (11)i60、i80拨号操作 (14)i60拨号操作 ............................................................................... 14i80拨号操作 ............................................................................... 15i60、i80系统常用功能介绍与问题故障 (24)签收、未签收、快速签收 (24)寄件录单 ............................................................................. (27)收件扫描 ............................................................................. (28)快件扫描 ............................................................................. (29)消息通知、电子手册 (33)查询统计 ............................................................................. (35)我的工具 ............................................................................. (38)常见问题和故障处理 (39)触屏校准 ............................................................................. (39)内部资料,严禁外传凯立巴枪巴枪使用与操作说明 ..................................................41设备外观以及常用按键介绍 (42)凯立系列巴枪介绍 (42)凯立巴枪常用按键介绍 (44)系统常用功能介绍以及问题故障 ...............................................45采集.............................................................................. (45)查询.............................................................................. (45)上传.............................................................................. (46)快件状态查询 .............................................................................47区域查询 ............................................................................. (47)设置.............................................................................. (48)常见问题和故障处理 (49)扫描宝安装及注意事项 (50)一、扫描宝下载。
--D12-AC柯力电子称重仪表中文使用说明书
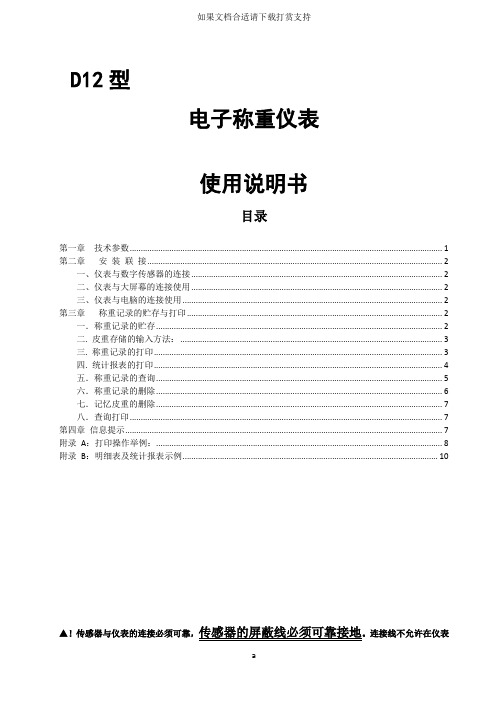
D12型电子称重仪表使用说明书目录第一章技术参数 (1)第二章安装联接 (2)一、仪表与数字传感器的连接 (2)二、仪表与大屏幕的连接使用 (2)三、仪表与电脑的连接使用 (2)第三章称重记录的贮存与打印 (2)一.称重记录的贮存 (2)二. 皮重存储的输入方法: (3)三. 称重记录的打印 (3)四. 统计报表的打印 (4)五.称重记录的查询 (5)六.称重记录的删除 (6)七.记忆皮重的删除 (7)八.查询打印 (7)第四章信息提示 (7)附录A:打印操作举例: (8)附录B:明细表及统计报表示例 (10)▲!传感器与仪表的连接必须可靠,传感器的屏蔽线必须可靠接地。
连接线不允许在仪表通电的状态下进行插拔,防止静电损坏仪表或传感器。
▲!传感器和仪表都是静电敏感设备,在使用中必须切实采取防静电措施,严禁在秤台上进行电焊操作或其他强电操作,在雷雨季节,必须落实可靠的避雷措施,防止因雷击造成传感器和仪表的损坏,确保操作人员的人身安全和称重设备及相关设备的安全运行。
第一章技术参数1、型号D12-AC、D12-AC-P(面板热敏微打)、D12-AC-P1(面板针式微打)2、执行国家标准GB/T 7724-20083、准确度等级4、数字传感器接口通信方式RS485信号传输距离在接12数字传感器情况下可接至30米,如需更长,请与本公司联系传输波特率9600、19200bps激励电源DC12~14.8V数字接口能力最多可接16个数字传感器5、显示:7位LED数码管,7个状态指示符。
6、键盘数字键0 ~ 9功能键24个(10个与数字键复合)7、时钟:可显示年、月、日、时、分、秒,自动闰年、闰月;8、大屏幕显示接口传输方式电流环和RS232传输波特率600bps9、串行通讯接口传输方式RS232波特率600/1200/2400/4800/9600/19200可选10、打印接口配置标准并行打印接口,可配接ESPON LQ-300K+Ⅱ、ESPON LQ-300K、ESPONLQ-680K 、ESPON LQ-730K 、ESPON LQ-1600K(+)、KX-P1131、KX-P1121、DS-300等宽行打印机。
KD-12中文说明书(1)
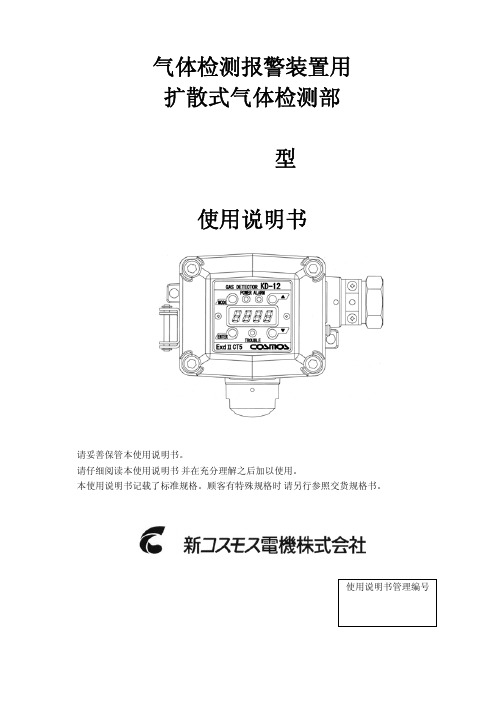
̐ʵ̎ɽ显示部u操作部的名称 ̑
使用说明书管理编号
̜̖(݄̌̌̎̌̌̎̌̌̓̐ Nhomakorabea
ɾ֤෦త໊শ༩ޭೳ
˰̥̐ʙ̥̒
ɾ传感器组件的更换方法
˰̥̎̔ʙ̥̎̕
ɾ配线与连接方法
˰̥̍̍ʙ̥̍̐
ɾ各状态的显示与动作
˰̥̍̓
ɾ保养点检与操作方法
˰̥̍̕ʙ̥̎̓
ɾ判断故障之前
˰̥̏̌
̠̙ʵ̍̎ ("4 %&5&$503
108&3 "-"3.
.0%&
&/5&3
5306#-&
͇̳̚ᶘ̘̩̑
目录
̍ɽ前言 ̍ ̎ɽ为了正确使用本产品 ̎ ̏ɽ包装内容物 ̏ ̐ɽ外形尺寸和各部名称 ̐
的显示 ̍̒ ̕ɽ各状态的显示与动作 ̍̓ ̍̌ɽ故障报警 ̍̔ ̍̍ɽ保养点检与操作方法 ̍̕ ̍̍ʵ̍ɽ日常点检与定期点检 ̍̕ ̍̍ʵ̎ɽ点检气体的配制方法 ̎̌ ̍̍ʵ̏ɽ校正方法 ̎̎
ʢ维护状态ʣ ̎̎ ʢ零位调整ʣ ̎̏ ʢ量程微调整ʣ ̎̐ ʢ量程粗调整ʣ ̎̑ ʢ满量程·报警设定值显示ʣ ̎̒ ʢ检验状态ʣ ̎̓ ̍̍ʵ̐ɽ传感器组件的更换方法 ̎̔ ̍̎ɽ判断故障之前 ̏̌ ̍̏ɽ规格 ̏̍ ̍̐ɽ关于质量保证 ̏̎ ̍̑ɽ关于传感器寿命 ̏̎ ̍̒ɽ检测原理 ̏̏ ̍̒ʵ̍ɽ接触燃烧式 ̏̏ ̍̒ʵ̎ɽ热线型半导体式 ̏̏ ̍̓ɽ用语的说明 ̏̐
̐ʵ̏ɽ端子台连接部的名称 ̒ ̑ɽ安装 ̓
̑ʵ̍ɽ安装方法 ̓ ̑ʵ̎ɽ安装位置实例 ̕ ̑ʵ̏ɽ选购品的安装 ̍̌ ̒ɽ配线方法 ̍̍ ̒ʵ̍ɽ关于配线工程 ̍̍ ̒ʵ̎ɽ配线与连接 ̍̎ ̓ɽ在使用之前 ̍̑ ̔ɽ起动时 初期延迟状态
艾美特pd-12型固定式可燃气体检测报警器使用说明书

固定式可燃气体检测报警器PD-12型使用说明书・请妥善保管本使用说明书。
・请仔细阅读本使用说明书,并在充分理解之后使用产品。
・本使用说明书记载了标准规格,顾客如有特殊规格要求时,请另外参照交货规格书。
说明书管理编号:0012301I配线和连接方法⇒P13~P16・各状态的显示与动作⇒P19・保养检查与操作方法⇒P21~P34判断故障之前⇒P35~P36目录1.前言 (1)2.使用注意事项 (2)3.包装内容物 (3)4.外形尺寸与各部份名称 (5)4-1.主机各部份的名称 (5)4-2.显示屏.操作部分的名称 (6)4-3.端子台连接部分的名称 (7)4-4.流量控制图 (8)5.安装 (9)5-1.安装方法 (9)5-2.选购品的安装 (12)6.接线方法 (13)6-1.关于接线工程 (13)6-2.接线与连接 (14)7.在使用之前 (17)8.起动时(初期稳定状态)的显示 (18)9.各种模式下的显示与动作 (19)10.故障报警 (20)11.保养检查与操作方法 (21)11-1.日常检查与定期检查 (21)11-2.点检气体的配制方法 (23)11-3.校正方法 (25)(维护状态) (25)(零位调整) (26)(灵敏度微调整) (27)(灵敏度粗调整) (28)(满量程.报警设定值显示) (29)(测试状态) (30)11-4.传感器部分的更换方法 (31)11-5.吸气泵的交换方法 (33)11-6.流量控制器的过滤片交换方法 (34)12.判断故障之前 (35)13.规格 (37)14.保修规定 (38)15.关于传感器寿命 (38)16.检测原理 (39)17.术语的说明 (40)1.前言・非常感谢您购买我公司生产的PD-12系列吸引式可燃气体探测器。
・为了正确的使用本产品,请一定要在使用前阅读本说明书,这将有助于预防事故的发生、保证安全运行。
・本机是以探测可燃性气体为主,并能探测一些其它种类气体的探测器,对于在气体制造厂及储藏所、化学工厂、涂漆工厂、发电所等场所的气体泄漏进行早期检测,将气体浓度值显示在机体上的同时,并可对外部输出模拟信号。
EDK-12 ADV 使用说明书
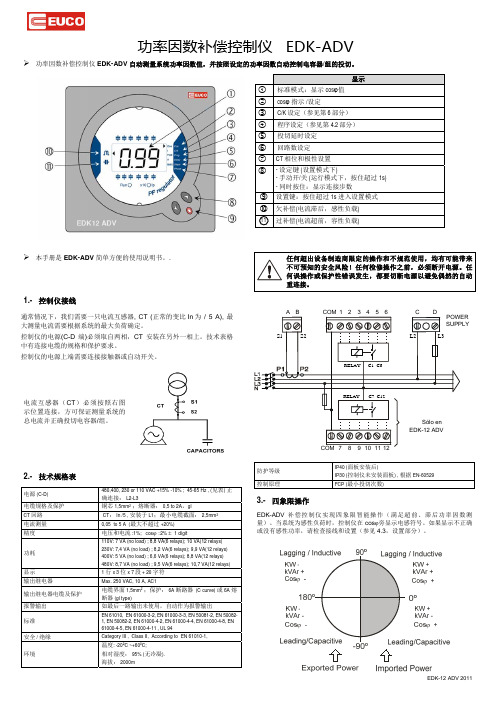
延时 (4 -999 s) . 重新投入间隔 = 5 times T ON 回路数 ,最大 6 或 12,根据型号 CT 连接:参见表 4.3.。显示:T1, T2, T3, T4, T5 or T6. 参数选择使得 cos 介于 0.7 Ind 和 0.98 Cap 之间。 CT 一次电流设 定:. 参见表 4.4
电源 (C-D) 电缆规格及保护 CT 回路 电流测量 精度 功耗 显示 输出继电器 输出继电器电缆及保护 报警输出 标准 安全 / 绝缘 环境 480,400, 230 or 110 VAC +15% -10% ; 45-65 Hz , (见表) 正 确连接: L2-L3 铜芯 1,5mm2 ;熔断器: 0,5 to 2A,gl CT: In /5 , 安装于 L1;最小电缆截面: 0,05 to 5 A (最大不超过 +20%) 电压和电流 :1%; cos : 2% 1 dígit 110V: 7 VA (no load) ; 8,8 VA(6 relays); 10 VA(12 relays) 230V: 7,4 VA (no load) ; 8,2 VA(6 relays); 9,9 VA(12 relays) 400V: 5 VA (no load) ; 6,6 VA(6 relays); 8,8 VA(12 relays) 480V: 8,7 VA (no load) ; 9,5 VA(6 relays); 10,7 VA(12 relays) 1 行 x 3 位 x 7 段 + 20 字符 Max. 250 VAC, 10 A, AC1 电缆界面 1,5mm2 ;保护: 6A 断路器 (C curve) 或 6A 熔 断器 (gl type) 如最后一路输出未使用,自动作为报警输出 EN 61010, EN 61000-3-2, EN 61000-3-3, EN 50081-2, EN 500821, EN 50082-2, EN 61000-4-2, EN 61000-4-4, EN 61000-4-8, EN 61000-4-5, EN 61000-4-11 , UL 94 Category III , Class II, According to EN 61010-1, 温度: -20ºC ~+60ºC; 相对湿度: 95% (无冷凝). 海拔: 2000m 2,5mm2
最新QDI_12使用说明书

QDI-12 称重显示控制器用户操作手册(包装秤,灌装秤控制仪)UEr12.52015.8版本产品执行标准:Q/IQWU 1-2013云南迅捷电子设备有限公司QDI-12称重显示控制器目录第一章概述------------------------------------ (3)第二章系统配置框图 -------------------------- (3)第三章主要功能和技术指标 ---------------------- (3)第四章外形尺寸及面板布置图、电源接线图--------------- (4)第五章接口---------------------------------------- (4)§1 传感器接口------------------------------------ (4)§2 输人/输出接口--------------------------------- (4)§3 串行接口------------------------------------ (5)第六章控制方式及辅助参数设定 ---------------------- (6)§1 控制方式设定------------------------------ (6)§2 辅助控制参数设定-------------------------- (6)第七章重量设定及配方存入和调用------------------------ (7)§1 重量设定-------------------------- (7)§2 配方存入--------------------------- (7)§3 配方调用--------------------------- (7)第八章其他操作----------------------------- (7)§1 置零----------------------------- (7)§2 去皮----------------------------- (8)§2-1实物去皮----------------------------- (8)§2-2皮重清除----------------------------- (8)§3 累计次数显示-------------------------- (8)§4 时间/日期的显示和设定 ----------------------- (8)§5 放料----------------------------- ( 8)§6 加料------------------------------ (8)§7 停止----------------------------- (8)§8 减法计量方式下上料的启动 ---------------------- (8)§9 标准RS232输出格式 ---------------------------- (9)第九章维护保养及注意事项 --------------------------- (9)第十章标定 ---------------------------- (5)§1 称量基本参数设置 ---------------------------- (5)§2 标定------------------------------------------ (5)§3 A/D值显示----------------------------------- (5)附录第一章概述QDI-12称重显示控制器适用定值控制,双显示、显示设定值和加料值、快速A/D转换器及智能数字滤波器技术、抗干扰能力强,快速稳定、多种控制模式和多项控制参数设定,可广泛应用于包装和配料系统及减法计量场合。
Carefree 12V 电动凳椅操作指南说明书

O WNER 'S M ANUALC OMPASS12V MOTORIZED A WNING W / S INGLE S WITCHBefore operating the awning, carefully review the Owner's Manual. The manual contains important safety information, detailed operatinginstructions, common maintenance procedures and other useful information.T ABLE OF C ONTENTSIntroduction (2)Operation (4)Standard Switch Operation (4)Positioning the awning (when extended) (4)Adjusting the Pitch (5)LED’s (6)Emergency Operation (6)Awning Care (7)Fabric Care (7)Arm Care (7)Carefree Major Product Limited Warranty (8)Special Note: This manual provides a basic description of the product and the standard operating controls provided by Carefree of Colorado. Some Original Equipment Manufacturers (OEM's) may alter or change the placement, style and/or functional configuration of the switches. If your controls do not match the style or description included, contact the coach manufacturer for an accurate description. OEM furnished components are not covered by the Carefree warranty.Carefree of ColoradoI NTRODUCTIONThank you for your recent purchase of the Compass awning. We appreciate having the opportunity to do business with you. Our customers are our top priority, and we strive for 100% satisfaction. If you have any questions or concerns about this order, please do not hesitate to contact us.Check with your dealer to discover the products that can make your life more Carefree. P RODUCT D ESCRIPTIONThe Compass awning provides motorized awning comfort with Carefree's standards for looks, strength and dependability with a successful blend of style, quality and economy. The unique "scissor" style arms do not require vertical ground supports.The adjustable arms provide easy to use 6-position pitch adjustment.The roller tube and arms are made from light weight, no-rust aluminum;The 100% billow-proof, worm-gear drive motor eliminates the need for travel locks; Simple single switch operation.D ISCLAIMERSThe Compass awning is a product of Carefree of Colorado, located in Broomfield, Colorado, USA. The information contained in or disclosed in this document is considered proprietary to Carefree of Colorado.Every effort has been made to ensure that the information presented in the document is accurate and complete. However, Carefree of Colorado assumes no liability for errors or for any damages that result from the use of this document.The information contained in this manual pertains to the current components and software listed on the title page. Carefree of Colorado reserves the right to cancel, change, alter or add any parts and procedures, described in this manual, without prior notice.Carefree of Colorado agrees to allow the reproduction of this document for use with Carefree of Colorado products only. Any other reproduction or translation of this document in whole or part is strictly prohibited without prior written approval from Carefree of Colorado.S ERVICE AND S UPPORT/compass**************************************Carefree of Colorado2145 W. 6th Ave.Broomfield, CO80020C OMPASS P ATIO A WNING W ARNINGS AND C AUTIONS This is the safety alert symbol. It is used to alert individuals to potential personal injury hazards. Obey all safety messages thatfollow this symbol to avoid possible personal injury or death.known to the state of California to cause cancer or birth defects or other reproductive harm. For more information visit NOT fireproof. NOTICE Awnings are designed to provide shade and protection from the sun. The effects of wind and rain on an awning are unpredictable and can cause severe damage to the awning and/or the vehicle. If wind or extended periods of rain are expected, roll up the awning.NOTICE It is recommended that if leaving the RV unattended for a length of time, retract the awning to avoid unexpected weather conditions.NOTICE If installed, LED lighting must be turned off when the awning is in the rolled up position. This is to prevent possible damage to the LEDs and/or canopy.Additional Warnings and Cautions are included in the text for the proper operation of the awning.Carefree of Colorado O PERATIONS TANDARD S WITCH O PERATIONTo Operate the Awning:Press and hold the Patio Switch until the awningis in the desired position then release the switch.P OSITIONING THE AWNING (WHEN EXTENDED )To prevent damage to the arms and to reduce pooling on the canopy, it is important that the roller tube is correctly positioned when the awning is extended. Use the Extend/Retract switch to adjust the roller tube position.Hangs Straight DownAwning Extended CorrectlyAwning Over Extended Awning Over ExtendedLG030C OMPASS P ATIO A WNING A DJUSTING THE P ITCHThe Compass arms have 6 pitch adjustment settings. The awning can be extended and retracted in any of these positions without having to reset the pitch between uses. See the NOTICE about unequal pitch settings.CO001 1. Grasp the awning arm in the area shown and gently pull toward the vehicle toreduce pressure on the pins.2. Fully depress both pitch adjustment pins located on the scissor arm. There is oneon each side of the arm; these must be fully pressed in.3. Slide the arm channel to the desired set hole - towards the coach to increase thepitch and away from the coach for to decrease the pitch.NOTE: For awnings 12' and longer: The awning can be retracted when the individual arm pitches are set differently up to a maximum of five (5) positions difference between the left and right arms.NOTICE For awnings under 12': the arms must be set at an equal pitch before retracting the awning. Damage to the arms and canopy can occur if the awning is retracted with the arms uneven.Carefree of Colorado LED’SWhite (monotone) LEDs are a popular option providing lighting beneath the awning. Factory installed LEDs are located on the roller tube or can be mounted at the awning rail.To operate the White LED lights, you must have the LEDpower switch ON. NOTE:Some OEMS may furnish their own switch that may appeardifferently than the switch pictured. RGB (Color) LEDsthe LED receiver module.The remote control provides:∙ Simple push button on/off∙ Adjustable dimming∙ 15 color choices + white∙ Special effectsE MERGENCY O PERATIONIf power to the vehicle is not available, the awning can be safely retracted by jumping the motor using a 10V-14V power source such as a cordless drill battery or car battery. USE THE EMERGENCY OVERRIDE WITHOUT FOLLOWING THE DIRECTIONS BELOW .1. Remove the front cover. To remove, press on both sides of the rear cover until thefront cover releases then lift the front cover off.2. Detach the R ED and B LACK motor wires from the cable.3.motor wires.4. Connect the jumper leads toa 10-14V source. If the awning moves in the wrong direction, reverse the leads.Maintain contact throughoutthe retraction process. 5. When the awning is closed,remove the jumper wiresand attach the cable and motor wires. Be sure to match the wire colors.6. Snap the front cover onto the rear cover. Hang the cover on the top andswing down until it clicks.LED022OFF/ON Alt014C OMPASS P ATIO A WNING A WNING C AREMaintaining a Carefree Awning is easy. Just follow these basic steps:∙Always operate the awning according to the instructions.∙Periodically check that the fasteners are tight. Tighten if necessary.∙Keep the awning fabric and arms clean.F ABRIC C ARENOTICE Do not use oil based cleaners or any caustic, granulated, or abrasive type cleaners on your Carefree product.1. One of the best ways to keep the fabric looking good and to delay the need fordeep or vigorous cleanings is to hose fabrics off on a monthly basis with clear water. This practice helps prevent dirt from becoming deeply imbedded in the fabric. In most environments, a thorough cleaning will be needed every two to three years.2. When it’s time for a thorough cleaning, the fabric can be cleaned while stillon the awning frame.∙Use a soft brush and warm water with soap.3. When cleaning the fabric, it is important to observe the following:∙Always use a natural soap, never detergent.∙Water should be cold to lukewarm, never more than 100︒F.∙Air-dry only. Never apply heat to the fabric.∙Always allow the fabric to dry thoroughly before rolling up the awning.M ILDEWMildew is a fungus growth that looks like dirt. Vinyl coated polyester fabrics are mildew resistant because of a chemical biocide in the vinyl coating. Under ordinary conditions, mildew will not appear. However, in areas where high temperature and humidity are common, mildew can be a problem and require the material to be washed more frequently.P OOLINGWhen water collects on the top of the fabric, this is known as "pooling". This can occur during inclement weather or if a running air conditioner discharges over the awning. The water is dumped when the awning is retracted. It is recommended that if water accumulates on the top; retract the awning in steps (8"-12") to dump the water. This will help prevent the fabric from stretching or distorting.L EAKINGOn vinyl canopies, side hems and poly cords are stitched in with a sewing machine. On occasion, this stitching may allow water to seep or leak through. This is normal and not a defect covered by warranty. Treat the seams with a quality seam sealer.A RM C AREThe best method of keeping the arms and braces operating smoothly is to clean them. Dirt and debris can cause the arms not to move easily. Periodically wash out the channels with running water (i.e. a hose). If the arms still do not move easily, lightly spray the joints and pivot points with a dry silicone lubricant after the arms have been cleaned and dried thoroughly.C AREFREE M AJOR P RODUCT L IMITED W ARRANTYCarefree of Colorado (hereafter referred to as Carefree) warrants to the first retail Purchaser that the Carefree Product is free of defects in material and workmanship within the terms and conditions as set forth in the warranty statement available online at . Carefree’s obligation under this warranty is limited to the repair or replacement, at Carefree’s option, of any defective component with new or factory refurbished components.O WNER MUST RETAIN THE ORIGINAL PROOF OF PURCHASE AND /OR HAVE THE PRODUCTWARRANTY REGISTRATION ON FILE AT C AREFREE FOR WARRANTY CLAIMS .T HIS WARRANTY IS NOT TRANSFERABLE .Visit for- Warranty Duration;- Warranty Coverage and Exclusions;- Warranty Terms of Coverage; and,- Warranty Claim ProceduresRegister your Carefree products on-line at I MPORTANT N OTICE : It is strongly recommended that adjustments and repairs not described in this book be performed by trained technicians at your Authorized Carefree Dealer. Work performed by non-authorized persons or businesses may void warranty.Carefree of Colorado a Scott Fetzer company Quality Performance Value Style。
杰尼尔科技 AC DC 多功能测量仪说明书

User ManualLIMITED WARRANTY AND LIMITATION OF LIABILITY Customers enjoy one-year warranty from the date of purchase.This warranty does not cover fuses, disposable batteries,damage from misuse accident,neglect,alteration, contamination,or abnormal conditions of operation or handling,including failures caused by use outside of the product's specifications,or normal wear and tear of mechanical components.Table of Contents PageIntroduction (1)Safety Information (1)Instrument Overview (3)LCD Display (3)Function Buttons (5)Rotary Buttons (6)Input Terminals (8)Measurements Instruction (9)Measure AC/DC Voltage (9)Measure AC/DC Current (9)Measure Resistance (10)Test Diodes and Continuity (10)Measure Capacitance (11)Measure Frequency and Duty Cycle (12)Measure Temperature (13)V.F.C test (14)Square wave test (14)Maintenance (15)Clean the Product (15)Replace the Batteries (15)Replace the Fuses (16)Specifications (17)General Specifications (17)Mechanical Specifications (17)Environmental Specifications (17)Electrical Specifications (18)IntroductionThis product is a9999counts true RMS auto-ranging digital multimeter.Safety InformationTo avoid possible electrical shock,fire,or personal injury,please read all safety information before you use the product.Please use the product only as specified,or the protection supplied by the product can be compromised.•Examine the case before you use the product. Look for cracks or missing plastic.Carefully look at the insulation around the terminals.•The measurement must be made with correct input terminals and functions and within the allowable measuring range.•Do not use the product around explosive gas, vapor,or in damp or wet environments.•Keep fingers behind the finger guards on the probes.•When the product has already been connected to the line being measured,do NOT touch the input terminal that is not in service.•Disconnect the test leads from the circuit before changing the mode.•When the voltage to be measured exceeds36V DC or25V AC,the operator shall be careful enough to avoid electric shock.•Misuse of mode or range can lead to hazards,be cautious.“”will be shown on the display when the input is out of range.•Low level of a battery will result in incorrect readings.Change the batteries when battery level is low.Do not make measurements when the battery door is not properly placed.LCD Display①Auto range. The product selects the range with the best resolution.②Manual range. The user selects the range.③Capacitance test. (Farad)④Relative mode. ⑤Diode test. ⑥Continuity test.⑦Duty cycle test.⑧Secondary measurements display.⑨Alternating current.⑩Direct current.Instrument Overview⑪Frequency test.(Hertz)⑫Temperature test.(Celsius)⑬Temperature test.(Fahrenheit)⑭Analog bar graph.⑮Resistance test.(Ohm)⑯Current test.(Ampere)⑰Voltage test.(Volt)⑱Primary measurement display.⑲The product measures both sinusoidal and nonsinusoidal ac waveforms accurately.⑳Low battery.Replace batteries.㉑Negative readings.㉒Display freezes present reading.V.F.C Frequency converter test.Display maximum value.Display minimum value.Measurement units.FunctionButtons ①②③④①Short press to switch among functions.Long press to enter in V.F.C function.②Short press to change range.Push for more than 2seconds to enter the relative mode.The product will store the present reading as a reference for subsequent readings.The display is zeroed,and the stored reading is subtracted from all subsequent readings.Long-push again to exit the relative mode.③Press this button to switch MAX/MIN test. Longpress 2 second to quit MAX/MIN mode.④Push once to hold the current reading on the display;push again to continue normal operation.Long press beyond 2 seconds to turn onflashlight ; long press again to turn off flashlight.Rotary buttonTurn off the product at this position.•The product automatically powersoff after15minutes of inactivity.•The built-in beeper beeps5times1minute before auto power off.•To restart the product from autopower off,press the SELECTbutton or turn the rotary switchback to the OFF position and thento a needed position.•To disable the Auto Power Offfunction,hold down the SELECTbutton when turning on theproduct,you will hear five beeps ifyou have successfully disabledAC voltage ≤750VDC voltage ≤1000VFrequency ≥10V,1~100KHzDuty cycle:1%~99%V.F.CAC voltage ≤99.99mVDC voltage ≤99.99mVFrequency ≤10V,1~10MHzDuty cycle :1%~99%Temperature:-20~1000°C (-4~1832)℉Resistance:≤99.99MΩContinuity:beeper will beep when resistanceless than 50 ΩDiode test. Displays above 3V Capacitance:≤9.999mFNCVSquare wave:50Hz/100Hz/200Hz/300Hz/400Hz/500Hz/600Hz/700Hz/800Hz/900Hz/1000Hz/2000Hz/3000Hz/4000Hz/5000HzDC current:≤99.99mA。
灭火机器人产品说明书
灭火产品说明书灭火产品说明书一、产品概述1.1 产品名称:灭火1.2 产品型号:[型号]1.3 产品用途:灭火和救援1.4 产品特点:- 自主导航- 精准灭火- 高效救援- 多种应用场景二、产品组成2.1 主体2.2 控制系统2.3 灭火装置2.4 传感器系统2.5 电源系统2.6 通信模块2.7 救援工具三、产品功能和技术参数3.1 灭火功能:- 自动侦测火源- 精准喷水灭火3.2 救援功能:- 定位被困人员- 提供紧急救援工具3.3 技术参数:- 最大行驶速度:[速度] - 巡航时间:[时间]- 承载能力:[重量]- 泵功率:[功率]- 水箱容量:[容量]四、使用方法和注意事项4.1 使用步骤:1.将置于起始点2.启动控制系统3.选择灭火模式或救援模式4.按下开始按钮4.2 注意事项:- 在使用过程中请勿遮挡传感器 - 保持充电状态- 遵守安全操作规范五、故障排除5.1 无法启动5.2 灭火装置异常5.3 控制系统失灵5.4 其他故障六、维护保养6.1 定期充电6.2 清洁外壳6.3 检查传感器和装置是否正常6.4 更换救援工具附件:- 灭火操作视频- 灭火维修手册法律名词及注释:1.消防法:指在火灾发生或者火灾威胁发生时,进行灭火、救火和其他应急救援活动的法律法规。
2.相关责任人:指在火灾发生时,依法承担灭火、救火和其他应急救援的行政、民事、刑事责任的人。
3.安全操作规范:指在使用灭火时,遵守的安全操作规范,包括但不限于保持充电状态、避免遮挡传感器等。
FINDER 12 系列时间开关产品说明书

NEONFINDER reserves the right to alter characteristics at any time without notice. FINDER assumes no liability for damage to persons or property, caused as a result of the incorrect use or application of its products.Mechanical daily time switch 1 CO 16 A35 mm rail (EN 60715) mount Mechanical daily time switch1 NO 16 A35 mm rail (EN 60715) mount• Mechanical daily or weekly• 1 CO 16 A• Front panel mounting3• Digital time switch • 1 CO 16 A • Digital Astro-switch• 1 CO 16 AP EANP AT E4• Weekly programming • 1 CO 16 A• Switch ON, Switch OFF, Pulse • Weekly programming• 2 CO 16 A• Switch ON, Switch OFF, Pulse5• Weekly programming • 1 CO 16 A• Switch ON, Switch OFF, Pulse • Weekly programming • 2 CO 16 A• Switch ON, Switch OFF, Pulse6Digital weekly time switch1 CO 16 A17.8 mm wide2-IX7X I -2017, w w w .f i n d e r n e t .c o m812SERIESOrdering informationExample: 12 series digital (analogue style) time switch, 1 CO 16 A contact, (110…230)V AC/DC supply0 = 1 = 3 = 5 = 6 = 7 = 8 = A = 1 = 11 = 12 = 2X I -2017, w w w .f i n d e r n e t .c o m912Technical dataL 12 - Rated current v ambient temperatureX I -2017, w w w .f i n d e r n e t .c o m1012SERIESWiring diagrams12.81X I -2017, w w w .f i n d e r n e t .c o mI12Wiring diagramsr n e t .c o m12SERIESTwo programming modes for type 12.51, 12.61, 12.62, 12.81, 12.A1, 12.A2Finder Toolbox for programmingOnce the App FINDER Toolbox is downloaded and installed, you can read an existing program, or program your device with maximum flexibility, changing the smallest details and saving your program directly to your smartphone.At this point you simply touch the time switch with the smartphone to transfer the data.Finder Toolbox for reference Finder Toolbox provides all technical data sheets and newsfrom Finder.Functions type 12.811ASTRO ON ASTRO OFF23The Override feature permits the 12.81 three different ways of functioning:C lassic function where the AstroON and AstroOFF times are determined by the geographic coordinates. These times vary every day.F unctions such that the output turns on according to the AstroON time and turns off according to the clock off-time . Application example: shop window lighting on by AstroON at sunset and offat 00:30 .F unctions such that the output turns on according to the AstroON time and turns off a ccording to the clock off-time , and then turns back on at the clock on-time (for the remainder of the ASTRO time period). Application example: company car park lighting, on by AstroON at sunset, off end of the evening shift at 23:00 .On again at the beginning of the morning shift at 5:00 and off automatically byAstroOFF *.* D epending on the time of year (summer specifically) it may be that the override ON time will fall after the AstroOFF time. In this case, the output switches off at the AstroOFF time and the override ON time is ignored.“Smart”“Classic”Mode via smartphones with NFC communication using Finder toolbox Android App.Mode via the joystick123Android, Google Play and the Google Play logo are trademarks of Google Inc.X I -2017, w w w .f i n d e r n e t .c o mI12Outline drawings12.01Screw terminal12.11Screw terminal12.31Screw terminal 12.51/12.81Screw terminal12.71Screw terminalr n e t .c o m12SERIESOutline drawings12.61 / 12.A1Screw terminal12.62 / 12.A2Screw terminalBattery replacement type 12.51, 12.61, 12.62, 12.81, 12.A1, 12.A2Note: the output relay only functions if the power supply is connected.Accessories type 12.51, 12.61, 12.62, 12.81, 12.A1, 12.A2011.01。
柯力D12调试说明
态下进行插拔,防止静电损坏仪表或传感器。 ▲ ! 传感器和仪表都是静电敏感设备, 在使用中必须切实采取防静电措施,严禁在秤台上进行电焊操作或其 他强电操作,在雷雨季节,必须落实可靠的避雷措施,防止因雷击造成传感器和仪表的损坏,确保操作人员的 人身安全和称重设备及相关设备的安全运行。
第一节、仪表与数字传感器的连接 ..........................................................................................................................2 第二节、仪表与大屏幕的连接使用 ..........................................................................................................................3 第三节、仪表与电脑的连接使用 ..............................................................................................................................3 第四节、仪表与蓄电池的连接使用 ..........................................................................................................................3 第四章 数字传感器调试 ..................................................................................................................................................3 第一节 修改传感器通信地址和秤台数字传感器组秤...........................................................................................3 第二节 修改数字传感器通讯角位 ..........................................................................................................................3 第三节 压角识别秤台各角位下的数传地址...........................................................................................................5 第四节 查看各角位内码 ..........................................................................................................................................5 第五节 角差修正 ......................................................................................................................................................5 第五章 标定调试 ..............................................................................................................................................................7 第一节 标定 ................................................................................................................................................................7 第二节 分度值自动切换和标定线性 ........................................................................................................................9 第三节 标定误差的修正 ..........................................................................................................................................10 第六章 其他操作 ............................................................................................................................................................10 第一节 密码管理 ......................................................................................................................................................10 第二节 日期时间设置 ..............................................................................................................................................11 第三节 定时关机 ......................................................................................................................................................11 第三节 系统测试 ......................................................................................................................................................12 第四节 PC 通讯参数设置 .........................................................................................................................................13 第五节 打印参数设置 ............................................................................................................................................13 第六节 自定义打印格式设置 ..................................................................................................................................15 第七节 仪表文本信息输入与文本信息删除...........................................................................................................16 第六章 信息提示 ..........................................................................................................................................................16 附录 A: 通信协议............................................................................................................................................................17 附录 B:称重单格式示例: ............................................................................................................................................19
D12培训资料

D12培训资料一、产品介绍1、产品外观介绍闪光灯镜头自拍指示灯麦克风电池盖锁快门扬声器变焦杆三角架孔卡槽1 卡槽2回放键电源开关状态指示灯电源指示灯模式拨盘录制/停止按钮设置(菜单)按钮USB/电视输出2、产品参数规格3、产品功能详解1)拍摄功能1. 打开数码摄像机电源。
2. 将模式旋钮转动到影片模式。
3. 按录制/ 停止按钮开始或停止录影。
最高支持720P高清拍摄。
2)照相功能1. 打开电源,将模式旋钮转动到照相模式。
2. 按快门按钮拍摄照片。
最大可支持1600万像素的静态输出。
3)录音功能1. 打开数码摄像机电源。
2. 将模式旋钮转动到录音模式。
3. 按录制/ 停止按钮开始或停止录音。
4)白平衡功能1. 打开数码摄像机电源,确认处于摄像/拍照模式。
2. 按设置(菜单)按钮,再移动四向按钮选中“白平衡”。
按设置(菜单)按钮显示子菜单。
3. 按四向按钮选择“自动”、“日光”、“阴天”、“荧光灯1”、“荧光灯 2”、“手动白平衡”或“钨灯”。
按设置(菜单)按钮确认。
5)夜拍功能1. 打开数码摄像机电源,确认处于拍摄/照相模式。
2. 按设置(菜单)按钮,再按四向按钮选中“夜拍模式”。
按设置(菜单)按钮显示子菜单。
3. 按四向按钮选择“开”或“关”。
按设置(菜单)按钮确认。
6)监控摄像(运动探测)如果“运动探测”功能开启,摄像机将自动检测运动情况进行影片片段录制,无需用户干预。
如果检测到自动曝光变化,将立即开始录制。
1. 打开数码摄像机电源,确认处于摄像模式。
2. 按设置(菜单)按钮,再移动四向按钮选中“运动探测”。
按设置(菜单)按钮显示子菜单。
3. 按四向按钮选择“开”或“关”。
按设置(菜单)按钮确认。
7)自拍记时1. 打开数码摄像机电源,确认处于照相模式。
2. 按设置(菜单)按钮,再使用四向按钮选中“自拍记时”。
按设置(菜单)按钮显示子菜单。
3. 按四向按钮选择“关”、“2 秒”或“10 秒”。
按设置(菜单)按钮确认。
GDKH-12智能蓄电池活化仪说明书 (1)

GDKH-12智能蓄电池活化仪产品操作手册尊敬的用户:感谢您购买本公司GDKH-12智能蓄电池活化仪。
在您初次使用该产品前,请您详细地阅读本使用说明书,将可帮助您熟练地使用本仪器。
我们的宗旨是不断地改进和完善公司的产品,如果您有不清楚之处,请与公司售后服务部联络,我们会尽快给您答复。
注意事项●使用产品时,请按说明书规范操作●未经允许,请勿开启仪器,这会影响产品的保修。
自行拆卸厂方概不负责。
●存放保管本仪器时,应注意环境温度和湿度,放在干燥通风的地方为宜,要防尘、防潮、防震、防酸碱及腐蚀气体。
●仪器运输时应避免雨水浸蚀,严防碰撞和坠落。
本手册内容如有更改,恕不通告。
没有武汉国电西高电气有限公司的书面许可,本手册任何部分都不许以任何(电子的或机械的)形式、方法或以任何目的而进行传播。
目录一、概述 (4)二、接口及接线说明 (6)第三章操作指南 (7)第四章上位机软件说明 (27)第五章维护及注意事项 (29)GDKH-12智能蓄电池活化仪一、概述1.1 综述设备是针对电池电压为2V、6V或12V,因极板硫化结晶造成容量落后的阀控式铅酸蓄电池(以下简称蓄电池)进行活化的专用设备。
具有对蓄电池进行“活化”及“核对放电”、“自动充电”等功能。
该设备采用当前先进的测试技术原理,在新技术、新器件、新材料、新工艺的研究应用上取得了一系列突破,可以针对不同落后电池的实际情况进行核对放电试验,三阶段自动充电,或设置多个循环周期对电池作多次循环充放电,使电池极板失效的活性物质再次活化,提升落后电池的容量。
同时配备PC机应用软件,把采集的数据上传至计算机,以便进行各种分析。
该仪器功率大,体积小,重量轻,上位机数据管理软件功能齐全;友好、人性化的人机交互界面,大大减少了蓄电池日常测试维护的工作量,是蓄电池维护工作的最佳助手。
请您在使用仪器前仔细阅读本说明书,以免因使用不当,造成损失!1.2 主要功能特点◆仪器采用触摸屏操作,直接使用触摸笔或者手指即可操作界面。
ZYDK-D12说明书

目录一、产品简介 (2)1功能特点 (2)2.技术参数 (3)二、控制器界面图例 (4)三、功能说明 (4)1.[主界面]功能说明 (4)2.[实时数据]功能说明 (4)3.[参数设置]功能说明 (5)4.[谐波分析]功能说明 (6)5.[工作状态]功能说明 (6)四、接线说明 (7)五、安装说明 (7)附表: (8)一、产品简介ZYDK型电力综合测控仪采用16位单片微处理器芯片、多任务操作系统内核,投切方案采用一步补偿到位,实现了对每个电压周波的跟踪补偿;交流采样技术、LCD中文显示,四象限分析等技术,实现了实时数据采集、通讯、故障报警、电网谐波分析、无功补偿等功能,可以控制16路电容组,可以直接连接电脑进行联机操作。
主要应用于配电网,监测配电变压器、配电线路运行状态和补偿电网无功,根据无功功率大小,功率因数和电压范围,自动控制电容器投切进行补偿,有效地提高供电电压质量、提高配电网络的安全稳定及经济运行水平。
该产品是与机械产品的完美结合,有效的延长了机械产品的使用寿命,产品通过了电力工业部无功补偿成套装置质量检测中心的检验。
1功能特点可靠性极高,确保安全●在正常工作时,CPU作为主控计算机,是整个控制电路的核心,实现采样的数据计算,逻辑控制,接收信号并进行控制计算、显示。
●所有的对外接线端子均可承受上千伏的电压冲击而不影响正常工作,电路具有极高的抗干扰能力。
●优越的“软件电子狗”电路和容错技术,可以自动发现程序运行错误并瞬间复位计算机,彻底杜绝了“死机”现象,因此本产品没有“复位”键。
●独有的“硬件电路故障保护电路”,确保控制器内任意电路损坏后或“死机”瞬间都不会引发输出误动作,保证了本产品有朝一日损坏后不会成为定时炸弹。
自动化程度高,操作方便●“傻瓜机”的设计风格,简单、实用的个性。
自动运行时完全不需人为干预,出现问题时自动退出故障设备。
●大屏幕液晶显示器、中文显示、图形界面和菜单操作和设置,还有方便用户使用的快捷键。
12路隔离语音控制器说明书
12路隔离语音控制器说明书V1.1(型号:YS-12)秦皇岛千目电子有限公司电话:************传真:************/1.产品特性 (2)2.产品图片、接口介绍 (2)2.1产品外形和接口图片 (2)2.2接口介绍 (3)2.3产品尺寸图 (3)3.语音录制过程 (3)3.1准备音频文件 (3)3.2硬件连接 (4)3.3录音下载 (4)3.3.1连接设备 (4)3.3.2录音 (4)3.3.3参数设置 (5)3.3.4放音测试 (5)4.控制方式 (5)4.1开关控制-12路开关 (5)4.1.1接线方式 (5)4.1.2控制方式 (6)4.2通讯协议 (6)5.技术支持及联系方式 (6)语音控制器说明书(型号:YS12)YS12语音控制器千目电子推出的一款新型语音产品。
具有价格低、稳定可靠、可重复录音等特点。
可广泛应用于工业控制、安防报警、语音提示等场合。
1.产品特性●12路光耦隔离输入控制信号,可以控制12路语音播放。
●485通讯支持Modbus-RTU协议,方便与其他设备进行组网调试。
●WA V音频格式,音频录制时间可达24分钟。
●板载FLASH存储器,成本低、可靠性更好。
●板载标准3.5MM音频孔,立体声输出,可外接音箱、音柱等功放设备。
●板载音频输出端子,可外接无源喇叭。
直接发声,方便应用。
●板载电源插孔,可直接插入电源。
●板载电源端子,方便工业现场接入电源。
●性能参数工作电源电压:直流12V1A工作温度:-20~85℃外接喇叭参数:8欧10W2.产品图片、接口介绍2.1产品外形和接口图片2.2接口介绍◆电源接口:支持电源插座和接线端子2种供电方式。
适应宽电压范围12V直流。
◆485通讯接口A+、B-:与485通讯设备功能1:进行模块参数设置。
(注:需要专门软件,我司免费提供)功能2:远程发送指令,控制语音模块播放语音。
◆音频2接口:声音输出接口,直接接无源喇叭,播放语音。
DEMKO 12ATEX1204259X 调节温度保护器说明书
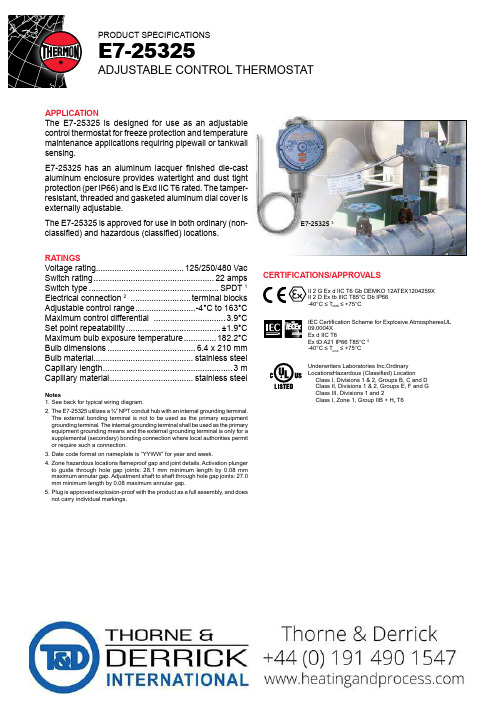
Underwriters Laboratories Inc.Ordinary LocationsHazardous (Classified) Location
3. Date code format on nameplate is “YYWW” for year and week.
4. Zone hazardous locations flameproof gap and joint details. Activation plunger to guide through hole gap joints: 28.1 mm minimum length by 0.08 mm maximum annular gap. Adjustment shaft to shaft through hole gap joints: 27.0 mm minimum length by 0.08 maximum annular gap.
THERMON The Heat Tracing Specialists®
European Headquarters: Boezemweg 25 • PO Box 205 • 2640 AE Pijnacker • The Netherlands • Phone: +31 (0) 15-36 15 37 Corporate Headquarters:100 Thermon Dr • PO Box 609 San Marcos, TX 78667-0609 • Phone: 512-396-5801 • 1-800-820-4328 For the Thermon office nearest you visit us at . . .
