《轻松挂彩》Easy Red配置要求介绍 配
HP ZBook移动工作站系列产品说明说明书

HP EliteBook 800 series Notebook
HP ZBook Mobile Workstations also deliver*
Form factors • 14.0-inch diagonal • 15.6-inch dia4.0-inch diagonal • 15.6-inch diagonal • 17.0-inch diagonal
Sales guide | Why a mobile workstation?
HP recommends Windows.
While our HP EliteBook 800 series Notebook can provide you with excellent value, the ZBook Mobile Workstations deliver superb performance, uncompromised reliability and wide-ranging scalability as well as a range of screen sizes to fit various needs.
Warranty 1/1/0 or 3/3/0 support; on site service is extra
Expandability • Up to 32 GB memory3 • Up to 4 HDD storage4 bays • ThunderboltTM17 2 port for faster
06GJY-T-4A使用说明书

三星 SCX-4100 说明书

本书提供设置机器和安装随机软件所需的信息,有关将机器用作打印机、扫描仪和复印机的全部详细说 明,以及机器的维护和故障排除信息。 此外,它还提供有关使用多功能应用程序的基本说明。Samsung SmarThru 可用于扫描和编辑图像, 以及为复印和发送电子邮件执行扫描操作。
本手册仅供参考。手册中的信息如有变更,恕不另பைடு நூலகம்通知。Samsung Electronics 对因本手册的使用 引起的、或与本手册的使用相关的变更不负任何责任 (无论是直接的还是间接的) 。 © 2004 Samsung Electronics Co., Ltd. 保留所有权利。
HONG KONG INDIA
2862 6001 3030 8282 1600 1100 11
/hk /in
INDONESIA JAPAN MALAYSIA PHILIPPINES SINGAPORE THAILAND
0800-112-8888 0120-327-527 1800-88-9999 1800-10-SAMSUNG (7267864) 1800-SAMSUNG (7267864) 1800-29-3232 02-689-3232
/id /jp /my /ph /sg /th
TAIWAN VIETNAM SOUTH AFRICA U.A.E
0800-329-999 1 800 588 889 0860 7267864 (SAMSUNG) 800SAMSUNG (7267864)
第二章 :
纸张处理
选择打印介质 ............................................................. 2.2 类型、进纸源及容量 ................................................ 2.2 纸张与特殊介质使用原则 .......................................... 2.3 选择出纸位置 ............................................................. 2.4 打印到前出纸盘 (面朝下) ........................................ 2.5 打印到后出纸槽 (面朝上) ........................................ 2.6 向纸盘中装纸 ............................................................. 2.8 使用手动进纸器 ........................................................... 2.9 设置手动进纸器的纸张类型和尺寸 ............................. 2.11
驾驭彩色浪潮

宽幅面“晶珠墨粉”打印机Océ奥西彩浪600驾驭彩色浪潮23为提高您的业务推波助澜——奥西全新推出“彩浪600”(Océ ColorWave™600) 宽幅面“晶珠墨粉”打印机。
它采用专利的“奥西葵式打印技术”,在普通纸张上实现完美品质及卓越生产力,应用更加广泛。
实现了一种完全可持续发展的理念。
第一次,您可尽享彩色墨粉打印带来的恒久高品质;第一次,您可以在普通纸张上实现绚丽色彩;第一次,您可以只用一台设备就能实现高生产力的广泛应用。
“奥西彩浪600”,为彩色和黑白输出提供全面解决方案。
它的操作是如此轻松,让您感受是设备在自动为您工作。
并且,第一次,您能够从奥西专利的“葵式打印”Océ CrystalPoint™技术中获益:这项非常环保的技术,结合了碳粉技术和喷墨技术的优势,使用奥西专利的“晶珠墨粉”Océ T onerPearls™,带来完美结果。
宽幅面彩色打印的浪潮已经随着奥西彩浪600的到来而发生转变:加入我们吧!迎接更好的未来!Océ ColorWave™600宽幅面“晶珠墨粉”打印机4“葵式打印品质”“奥西彩浪600”独特的葵式打印品质带来锐利的线条打印,精准可靠的细节输出,平滑的色块填充,耐久的印品。
全方面输出高标准防水打印。
“奥西彩浪600”应用奥西“葵式打印”技术,可以在普通纸张上展现绚丽色彩。
碳粉晶固过程确保可以支持多种介质应用。
没有洇墨带来无与伦比的图像精确性。
同时,打印机配备耐久的“ID打印装置”确保输出品质持久。
奥西“葵式打印”技术的介质依赖性很低,为普通白纸打印提供增值,并且,印品拥有独特的丝绸光泽。
总而言之,“奥西彩浪600”为您带来既经济又高品质的卓越输出。
宽幅面“晶珠墨粉”打印机欢迎来到大有收益的“奥西彩浪600”的每个细节的设计都将为您的商业带来巨大的改善。
无论您需要的是准确的精细线条输出;应对紧迫生产期限的傲人速度;亦或是轻松易用的操作性;“奥西彩浪600”都可以实现,并且它的环保设计更关心您周边的环境。
EasyPlayer5.6使用手册
第八章 数字时钟 ............................................................. 28 8.1 新建数字时钟窗........................................................ 28 8.2 设置数字时钟窗........................................................ 28 8.3 设置时间日期.......................................................... 29
第六章 动画显示 ............................................................. 21 6.1 新建文件节目窗....................................................... 21 6.2 设置动画节目窗........................................................ 21 6.3 打开播放文件.......................................................... 22 6.4 设置播放动画文件属性.................................................. 22
诺蒂菲尔NCS使用手册

2
正常操作............................................................................................... 25 自动导航............................................................................................... 25 故障....................................................................................................... 25 报警....................................................................................................... 26 操作菜单............................................................................................... 27 3.5.1 “文件”菜单项...............................................................................27 3.5.2 “操作员”菜单项............................................................................. 27 3.5.3 “动作”菜单项.......................................................................
EasyX指导手册
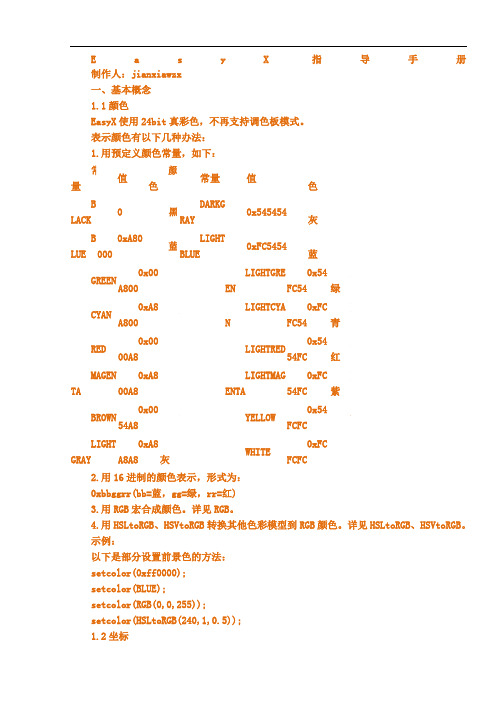
E a s y X指导手册制作人:jianxiawzx一、基本概念1.1颜色EasyX使用24bit真彩色,不再支持调色板模式。
表示颜色有以下几种办法:1.用预定义颜色常量,如下:常量值颜色常量值颜色B LACK 0 黑DARKGRAY0x545454深灰B LUE0xA80000蓝LIGHTBLUE0xFC5454亮蓝GREEN 0x00A800 绿LIGHTGREEN0x54FC54亮绿CYAN0xA8A800青LIGHTCYAN0xFCFC54亮青RED0x0000A8红LIGHTRED0x5454FC亮红MAGEN TA0xA800A8紫LIGHTMAGENTA0xFC54FC亮紫BROWN 0x0054A8 棕YELLOW0x54FCFC黄LIGHT GRAY0xA8A8A8浅灰WHITE0xFCFCFC白2.用16进制的颜色表示,形式为:0xbbggrr(bb=蓝,gg=绿,rr=红)3.用RGB宏合成颜色。
详见RGB。
4.用HSLtoRGB、HSVtoRGB转换其他色彩模型到RGB颜色。
详见HSLtoRGB、HSVtoRGB。
示例:以下是部分设置前景色的方法:setcolor(0xff0000);setcolor(BLUE);setcolor(RGB(0,0,255));setcolor(HSLtoRGB(240,1,0.5));1.2坐标在EasyX中,坐标分两种:逻辑坐标和物理坐标。
逻辑坐标逻辑坐标是在程序中用于绘图的坐标体系。
坐标默认的原点在屏幕的左上角,X轴向右为正,Y轴向下为正,度量单位是象素。
坐标原点可以通过setorigin()函数修改;坐标轴方向可以通过setaspectratio()函数修改;缩放比例可以通过setaspectratio()函数修改。
在本手册中,凡是没有注明的坐标,均指逻辑坐标。
物理坐标物理坐标是描述设备的坐标体系。
坐标原点在屏幕的左上角,X轴向右为正,Y轴向下为正,度量单位是象素。
DMK 33GP1300e 相机技术手册说明书
技术细节1.要件速览 42.尺寸图 6 2.1DMK 33GP1300e 带脚架适配器的C型接口 (6)2.2DMK 33GP1300e 不带脚架适配器的C型接口 (7)2.3DMK 33GP1300e 带脚架适配器的CS型接口 (8)2.4DMK 33GP1300e 不带脚架适配器的CS型接口 (9)3.I/O 连接器 10 3.16-pin I/O 连接器 (10)3.1.1TRIGGER_IN (10)3.1.2STROBE_OUT (11)4.光谱特征 124.1光谱灵敏度 - P1300 (12)5.相机控制 13 5.1传感器读出控制 (13)5.1.1像素格式 (13)5.1.1.18-Bit Monochrome (13)12-Bit Packed Monochrome (13)5.1.1.25.1.1.316-Bit Monochrome (14)5.1.2分辨率 (14)5.1.3读出模式 (14)5.1.4帧速率 (15)5.1.5局部扫描偏移 (16)5.2图像传感器控制 (16)5.2.1曝光时间 (17)5.2.2增益 (17)5.3自动曝光及增益控制 (17)5.3.1自动曝光 (18)自动增益 (18)5.3.25.3.3自动参考值 (18)5.3.4强光缩减 (18)5.3.5自动曝光限制 (19)5.3.6自动增益限制 (19)5.4触发 (20)5.4.1触发模式 (20)5.4.2触发极性 (20)5.4.3软件触发 (21)5.4.4触发脉冲计数 (21)5.4.5触发源 (21)5.4.6触发重叠 (22)5.5触发定时参数 (22)5.5.1触发延迟 (22)5.5.2触发去抖时间 (22)5.5.3触发遮罩时间 (23)5.5.4触发噪声抑制时间 (23)5.6数字I/O (23)5.6.1通用输入 (23)5.6.2通用输出 (24)5.7频闪 (24)5.7.1频闪启用 (24)5.7.2频闪极性 (25)频闪操作 (25)5.7.35.8图像处理 (25)5.8.1伽玛 (25)5.8.2查找表 (25)5.9自动功能感兴趣的区域 (26)5.9.1自动功能ROI启用 (27)5.9.2自动功能ROI预设 (27)5.9.3自动功能ROI自定义矩形 (27)5.10用户设置 (28)5.10.1用户设置选择器 (28)5.10.2加载用户设置 (29)5.10.3保存用户设置 (29)5.10.4默认用户配置 (29)5.11精确时间协议 (29)5.11.1PTP 启用 (29)5.11.2PTP 状态 (30)5.12动作调度器 (30)5.12.1功能选择 (30)5.12.2预定动作时间 (30)5.12.3预定动作间隔 (31)5.12.4预定动作执行 (31)5.12.5预定动作取消 (31)5.13事件 (31)配置事件 (32)5.13.15.13.2事件通知 (32)5.13.3曝光结束事件 (32)5.13.4帧触发丢失事件 (33)5.13.5L ine1 下降沿事件 (33)5.13.6L ine1 上升沿事件 (33)5.13.7测试事件 (34)6.R e v i s i o n H i story 351要件速览2尺寸图2.1DMK 33GP1300e 带脚架适配器的C型接口2.4DMK 33GP1300e 不带脚架适配器的CS型接口3I/O 连接器3.16-pin I/O 连接器相机后视图1开极闸M OS F E T最大限制0.2A(ID)!2启动电流最低条件3.5 m A!3 G:地O:输出I:输入3.1.1TR IGG ER_I NTRIGGER_IN线可用于将曝光时间的开始与外部事件同步。
PleskOnyx的软件配置要求

Plesk Onyx 的软件配置要求 其它版本我们建议在开始部署Plesk 之前仔细阅读有关产品安装、升级或迁移的信息。
该信息包括具体的说明,请参阅部署指南了解详情 。
目录1.支持的操作系统o Linuxo Windows2.安装要求3.支持的浏览器4.支持的虚拟技术5.支持升级的Plesk 早期版本6.支持迁移的源主机平台7.支持的组件1.提供的组件▪Linux▪Windows2.支持的第三方组件▪Linux▪Windows支持的操作系统LinuxPlesk Onyx for Linux 支持在以下操作系统上运行:操作系统SNI支持 IPv6支持Debian 7 (64位)Debian 8 (64位) ***操作系统 SNI支持IPv6支持Ubuntu 12.04 (64位) *Ubuntu 14.04 (64位)Ubuntu 16.04 (64位) ***CentOS 6.x (64位)CentOS 7.x (64位)RedHat Enterprise Linux 6.x (64位) **RedHat Enterprise Linux 7.x (64位) **CloudLinux 6.x (64位)CloudLinux 7.x (64位)Virtuozzo Linux 7 (64位)*- Plesk Onyx 17.0支持Ubuntu 12.04,但是自Plesk Onyx 17.5开始不支持。
** - 在RedHat Enterprise Linux上安装Plesk Onyx需要启用"备选"渠道,具体请参看此处。
*** - Plesk只支持在'systemd' init系统上运行的Debian 8和Ubuntu 16.0服务器。
还未测试与'sysvinit'的兼容性,因此无法保障其安全性和可靠性。
注意:1.在安装Plesk之前,应务必配置包管理器 (apt/yum/zypper) 的存储库确保能够从服务器对其进行访问。
OKgogo CS1.6 SP2游戏指南
!CS1.6 OKgogogoᐐ༓໋ૺۈv3.0 SP2!œUser Manual&Game Guideœ!ŕᅮଜ၄ݿਜ਼ᎊᇻᒎฉŕ! !ᆪܠቖ:XiaoRealଆၣᑽߒ:࢟ᔇᎆረ:XiaoReal@૾ဟᄰ:327486643(QQ)C ybergun S, Challenge Top Life!ᆀଔ།Ljᄞᐵᅲගည"!CS1.6 Okgogogo Enhanced Popular Edition v3.0 SP2□文件信息中文名称:CS1.6 Okgoggo增强普及版 v3.0 SP2英文名称:CS1.6 Okgogogo Enhanced Popular Edition v3.0 SP2□游戏特点1.为CS1.6 Okgoggo增强普及版 v3.0原版增加三重补丁。
内置CS1.6 Ver.3266补丁,CS1.6Ver.3647 补丁和CS1.6 Ver.3939补丁,方便玩家使用。
(补丁详细说明,请参看FAQ1。
)2.内置CS1.6起源版美化组件,主要包括美化界面、子弹弹孔、溅血特效、蓝黄枪花、爆炸特效和武器声效,且可以根据需要定置安装。
3.精选CS1.6仿起源版和CZ1.2版精美地图,de_dust2_css_beta7、cscz_winterassault和de_cod_stalingrad。
4.选用最新流行的CSProMod(专业版)背景和CSProMod修改版GUI,支持800*600分辨率和1024*768分辨率。
5.经过反作弊器sXe-injected和同类反作弊器的严格测试,与其完全兼容(适用于CS1.6Ver.3647 和CS1.6 Ver.3266);再次对“游戏指南”进行了订正和编译(格式为PDF,您可能要下载PDF阅读器Acrobat Reader或Foxit Reader)。
6.使用最新破解过的swds.dll(3647版)文件,适合建立hlds局域网和互联网服务器,兼容CS1.6 Ver.3266客户端。
EasyMP Multi PC Projection 操作指南
目录
3
鼠标指针在闪烁。 . . . . . . . . . . . . . . . . . . . . . . . . . . . . . . . . . . . . . . . . . . 33 使用 EasyMP Multi PC Projection 连接时投影机没有音频。 . . . . . . . . . . . . . . 34 使用 EasyMP Multi PC Projection 建立连接时,无法启动 PowerPoint 的幻灯片 放映。 . . . . . . . . . . . . . . . . . . . . . . . . . . . . . . . . . . . . . . . . . . . . . . . . . . . 34 使用 EasyMP Multi PC Projection 建立连接后,在运行 Office 应用程序时,屏 幕可能不会刷新。 . . . . . . . . . . . . . . . . . . . . . . . . . . . . . . . . . . . . . . . . . . 34
创建快捷方式 . . . . . . . . . . . . . . . . . . . . . . . . . . . . . . . . . . . . . . . . . . . . . . . . 26 注册配置文件 . . . . . . . . . . . . . . . . . . . . . . . . . . . . . . . . . . . . . . . . . . . . . . . . 26 共享配置文件 . . . . . . . . . . . . . . . . . . . . . . . . . . . . . . . . . . . . . . . . . . . . . . . . 27
Xerox ColorQube 8700 8900彩色多功能打印机用户指南说明书
文档版本 1.0:二月 2012
目录
节 1 安全
9
电气安全 .............................................................................................................................................................................. 10
操作安全 .............................................................................................................................................................................. 12
惠普彩色激光多功能打印机用户指南说明书
䐙ㄨㇸ≈
/videos/LaserJet /support/colorljM479MFP
HP Color LaserJet Pro M479 用户指南
版权与许可
© Copyright 2019 HP Development Company, L.P.
2 纸盘 .......................................................................................................................................................................................................... 17 简介 .......................................................................................................................................................................................... 17 将纸张装入纸盘 1 ................................................................................................................................................................ 18 简介 ..................................................................................................................................................................... 18 将纸张装入纸盘 1(多用途纸盘) ............................................................................................................ 18 纸盘 1 纸张方向 ............................................................................................................................................... 20 将纸张装入纸盘 2 ................................................................................................................................................................ 22 简介 ..................................................................................................................................................................... 22 将纸张装入纸盘 2 ........................................................................................................................................... 22 纸盘 2 纸张方向 ............................................................................................................................................... 24 将纸张装入纸盘 3 ................................................................................................................................................................ 26 简介 ..................................................................................................................................................................... 26Fra bibliotek商标说明
富士 FINEPIX F550EXR F500EXR 数码相机 说明书

FINEPIX F550EXR FINEPIX F500EXR
使用手冊
感謝您選購本產品。本手冊將說明如何使用您的 FUJIFILM 數位相機及隨附的軟體。 在使用相機之前, 請確定您已閱讀並理解了本手冊內容及“安全須 知”(P ii)中的警告。
有關相關產品的資訊,請參閱ameras/index.html
清潔相機或準備長期不使用相機時,請取出電池或 拔下 AC 電源轉換器的插頭,否則可能會導致火災或 電擊危險。
拔出電源 插頭
當充電結束時,請從電源插座拔出充電器的插頭,否 則可能導致火災。
使用閃光燈時,太靠近眼睛可能會暫時性影響視力,因 此拍攝嬰兒或幼童時需特別小心。
取出記憶卡時,卡可能會太快彈出。請用手指將其扶 住,然後輕輕釋放。彈出卡片的衝擊可能會導致受傷。 請定期對相機內部進行檢查和清潔。相機內部積存的 灰塵可能導致火災或電擊危險。請與 FUJIFILM 經銷商 聯繫,每兩年進行一次內部清潔。請注意,此項並非 免費服務。
損壞請求維修時:在下列情況下,將 這個影音產品的插頭從電源插座拔 除,並連繫合格維修人員進行維修: • 當電源線或插頭損壞時。 • 如果被液體潑濺、或者有異物落入
影音產品中。 • 如果影音產品被雨淋或被水潑濺。 • 如果影音產品摔碰或機體已經損
壞。
如果影音產品無法正常操作,請依照 操作說明書的說明進行。只能調整操 作說明書上有說明的控制開關,因 為其他控制開關的不當調整可能會 導致損壞,並且需要由合格技師進 行徹底檢修,才能使影音產品恢復 正常作用。
根據國家電氣法的天線接地範例
接地夾
天線引入線
電力供應 設備
接地夾
天線輸出 裝置 (NEC SECTION 810-20)
Easy_Viso6分区软件说明

返回总目录
网络控制卡线序做法: 568B:橙白—1,橙—2,绿白—3,蓝—4,蓝白—5,绿—6,棕白—7,棕—8 568A:绿白—1,绿—2,橙白—3,蓝—4,蓝白—5,橙—6,棕白---7,棕—8
控制卡直接和计算机连接用一头568A另一头用568B,控制卡和交换机或路由连 接两头都用568B。 当您经过努力仍不能排除故障时,请及时将控制卡寄返我们维修。切勿自行维修 或动烙铁损伤电路板!
表格
如果要添加表格,先点击”编辑表格”软件会自动调出EXCEL界面,EXCEL的尺寸就 是显示屏的实际大小。可以合并、调整表格大小、改变字和表格的颜色(默认表 格是红、字是黄色)调整表格大小。操作方法与EXCEL相同。
以192*96为例做一个表格步骤如下: 先点击“编辑表格”,会弹出表格编辑界面如下图所示:
1
把鼠标放到,图标会变成按住拉动可 以调整表格大小
绿色框内就是显示屏实际大小
2
在调整表格的同时可以看到当 前格的像素点。像素点就等于 屏的点数。
设置表格颜色、字体颜色和合并表格
选中所有改变颜色或合并的 区域右击如右图: 合并表格 在合并单元格前打勾点确定
4
字体颜色
3
5
6
表格颜色
时钟
时钟总数:TW04\TW03\TW02B 4个.TW00\TW01B\TW01E 3个
3、辅助功能(自动检测)
显示查找结果
可以选择是通过串口(RS232/485)或网口(TCP/IP)来查找控制卡。
1、网口:选择TCP/IP查找方式,可以指定IP或给出一个范围,指定IP的格式192.168.0.(查找 192.168.0.1-255的范围),点击确认后进行查找。查到后会显示到结果框里。单击查到的 结果会把当前的地址自动改到软件里。 2、串口:选择RS232/485,串口可以指定也可以是所有串口,地址指定一个范围,点击确认后 会根据给出的参数进行查找。查到后会显示到结果框里。单击查到的结果会把当前的地址 自动改到软件里。
G405索贝产品资料-Sobey_Editmax11_v11.0.5_非编工作站配置清单

2)Blackmagic DeckLink 4K Extreme 12G (12G-SDI)
3)Blackmagic UltraStuቤተ መጻሕፍቲ ባይዱio 4K Extreme3, Blackmagic PCIe Cable Kit 电源:1125瓦 软件:Editmax11超高清非线性编辑系统 v11.0.5 其他选件:
或 NVIDIA Geforce RTX 2080 8GB 高端图形显卡 显示器:
支持1920×1080分辨率 24寸以上宽屏液晶显示器(可选配双屏) 监听:耳机或音箱 其他:集成声卡、集成网卡、DVD-ROM、鼠标键盘 操作系统:Windows 10 Pro 64bit
或 Windows 7 Pro 64bit 软件加密狗:宏狗EX3-E11 软件:Editmax11超高清非线性编辑系统 v11.0.5 I/O卡:
或 Windows 7 Pro 64bit 软件:Editmax11超高清非线性编辑系统 v11.0.5
I/O卡:
索贝MG4600E 高标清兼容广播级数字/模拟I/O卡及线缆 电源:465瓦(无显卡供电口)
可选电源:750w(带2个显卡供电口)、1000W(带4个显卡供电口) CPU:Intel Core i9-7920X 12核 内存:8GB DDR4内存× 4(共32GB) 系统盘:512GB SATA SSD 显卡:NVIDIA Geforce RTX 2080 8GB显存 高端图形显卡 显示器:
支持2560*1440分辨率 27寸以上宽屏液晶显示器(可选配双屏) 监听:耳机或音箱 其他:集成声卡、集成网卡、DVD-ROM、鼠标键盘 操作系统:Windows 10 Pro for Worksatations 64bit 软件加密狗:宏狗EX3-E11 I/O卡选件:
简约好看的彩虹代刷模板

简约好看的彩虹代刷模板
摘要:
1.简约好看的彩虹代刷模板简介
2.彩虹代刷模板的设计理念
3.彩虹代刷模板的特点
4.彩虹代刷模板的使用方法
5.总结
正文:
简约好看的彩虹代刷模板是一种美观实用的模板,可以帮助用户快速制作出高质量的代刷效果。
下面将从设计理念、特点和使用方法等方面进行详细介绍。
1.设计理念
简约好看的彩虹代刷模板的设计理念是以简单、实用为主,同时注重美感和视觉效果。
设计师在设计时,充分考虑了用户的使用需求,采用简约的线条和颜色搭配,使得模板整体风格简洁清新,易于使用。
2.彩虹代刷模板的特点
简约好看的彩虹代刷模板具有以下几个特点:
(1) 颜色丰富:模板中采用了多种颜色,包括彩虹的七种颜色,使得代刷效果更加丰富多彩。
(2) 易于使用:模板采用了简单的线条和图形,使得用户可以轻松地操作和制作代刷效果。
(3) 适应性强:模板适用于多种场景和应用,可以用于个人代刷、商业宣传、产品推广等。
(4) 高质量:模板制作精细,颜色搭配合理,使得代刷效果更加美观和高质量。
3.彩虹代刷模板的使用方法
使用简约好看的彩虹代刷模板非常简单,用户只需按照以下步骤进行操作:
(1) 选择模板:从简约好看的彩虹代刷模板中选择合适的模板。
(2) 调整模板:用户可以根据自己的需求对模板进行调整,包括颜色、大小、形状等。
(3) 添加文字:用户可以在模板上添加文字,包括文字内容、字体、字号等。
(4) 保存模板:用户可以保存模板,以便下次使用。
4.总结
简约好看的彩虹代刷模板是一种美观实用的模板,具有颜色丰富、易于使用、适应性强、高质量等特点。
easylabel 6多用户安装说明说明书

EASYLABEL® Multi-User Installation InstructionsIf you purchased the Multi-user license version of EASYLABEL 6, you should have received a DVD-ROM and a Multi-User WIBU-Key.WARNING: In order to use the EASYLABEL 6 Multi-User, clients MUST be running the Microsoft TCP/IP protocol. DO NOT attempt to install this software if the clients are using the Novell NetWare TCP/IP protocol. All computers used with the EASYLABEL Multi-User version (the WIBU-Key Server and all client machines) must have the Microsoft TCP/IP protocol installed and configured correctly. Microsoft TCP/IP is the protocol used by the license management software to communicate between the client machines and the WIBU-Key Server.The steps to install the EASYLABEL Multi-User software are as follows:NOTE: Do NOT install a USB Multi-User WIBU-Key until the AFTER the WIBU drivers are installed. Installing a USB WIBU-Key before the WIBU drivers are installed will cause the WIBU-Key to be added to Device Manager as an 'unsupported device' and the WIBU drivers will not be able to find the key.1.Select a computer that will be the WIBU-Key Server. This computer must berunning Windows XP or higher. Ensure the Date is correctly set on the potential server computer. In order to serve licenses to other computers on the network, the computer selected as the WIBU-Key Server must be running and have the WIBU-Key 'Network Server' application loaded. In general, you should select a computer that remains powered on.2.Install the WIBU-Key 'Network Server' application on the PC selected to bethe WIBU-Key Server. Run the WkRuntime.exe program from the 'WibuKey' folder on the DVD-ROM.3.Plug the Multi-User WIBU-Key into a parallel or USB port on the selectedcomputer. The WIBU-Key contains a code that defines the number of users allowed to run the EASYLABEL Multi-User application.4.Once the WIBU key server is installed it needs to be started whenever the PCis booted. A shortcut to the server is placed in the 'Start Up' program folder (Start/All Programs/Start Up), so you can reboot now, or you can start the server manually by selecting Start --> All Programs --> WIBU-KEY --> Network Server from the Start menu. Then right-click on the network server icon in the taskbar and choose “Start Server” from the context menu. The network server will then start automatically anytime the PC is booted.5.The next step is to install the client version of the EASYLABEL Multi-Usersoftware on the selected client computers. This can be installed on as many computers as needed, the WIBU-Key Server will make sure that the number of copies running does not exceed the licensed user count. If there are no more licenses available, the user will be notified, and EASYLABEL will notstart. For example, if you have a 5-user license, and EASYLABEL Multi-User is installed on 8 computers, only 5 of them can use the application at one time.If a user exits EASYLABEL Multi-User, then the license becomes available to another user.Additional Notes:•When a user starts the EASYLABEL Multi-User application, the WIBU-Key Server will "give" that copy a license to run. When the application exits, it "gives" the license back to the WIBU-Key Server. In the case where a client computer crashes, or the user powers off the computer without properly shutting down, the WIBU-Key Server recognizes this fact and will take back the license (after a timeout period, currently set to 5 minutes).•If for some reason, the WIBU-Key Server crashes, or the Multi-User key stops working; the client computers will recognize this and issue a warning message. There is a built in protection period (currently set to 7 days) where the clients will continue to run without contact with the WIBU-Key Server.This requires that the client computers not be shut down or powered off during the 7-day period. The message issued to the users indicates that they should contact their system administrator to correct the problem. If the problem is corrected and the WIBU-Key Server is restarted, then clients will continue to run normally. If for some reason, the WIBU-Key Server cannot be restarted within 7 days, then EASYLABEL will issue a warning and then exit (saving any work in the process). Again, once the problem is corrected and the WIBU-Key Server is restarted, all clients will operate normally and no more warnings will be issued.•The WIBU-Key 'Network Server' can be moved to another computer by simply stopping the application from running on the old computer and then installing it on the new computer.a.Remove the shortcut to the WIBU-Key Network Server applicationfrom the 'Start Up' program folder (Start/All Programs/Start Up) onthe 'old' computer if one is present.b.Right click on the network server icon in the taskbar and choose “StopServer”.c.To install the WIBU-Key Network Server application on the 'new'computer, simply follow the steps at the top of this document.d.Remember to move the Multi-User Key to the 'new' computer.•To uninstall the WIBU-Key drivers and the WIBU-Key 'Network Server' application, select Start -> Control Panel -> Programs -> Programs and Features”. Select the "WIBU-KEY Setup (WIBU-KEY Remove)" and then click the "Uninstall/Change" button.•If a Client is not able to find a license, select Start --> Control Panel --> Hardware. Double-click on the WIBU-Key Icon in Control Panel and then select the Network Tab.a.Verify that the value for WkLAN Port Address matches the value at theWIBU-Key Server. If it does not, change the "User Specific" dropdown to "Machine Specific" and enter the value the WIBU-Key Serverhas listed (the default is 22347). This port should be left open if thereis a firewall present such as the one included in Windows XP SP2.b.If you are crossing sub-nets verify with your network administratorthat UDP Packets can be passed on this port.c.There are 3 check boxes listed under 'WIBU-KEY Subsystems'. Theboxes marked "Local (Kernel)" and "WkLAN" should be checked.•If a Client periodically has problems getting a license or if it takes several attempts to get a license it is probably due to network latency. In these cases you should add the WIBU-Key Server to the WkLAN Server Search list.To do this select Start --> Control Panel --> Hardware. Double-click on the WIBU-Key Icon in Control Panel and then select the Network Tab. Under the WkLAN Server Search List at the bottom, try to browse to your server. If this fails to find your server, you may have to enter the server's Machine Name or Static IP Address in the lower entry and then click ADD to add it to your WkLAN Server Search List.•When printing on the WIBU-Key license server PC to the same parallel port the WIBU-Key is on it may be possible for clients (or the server) to report that they have trouble getting a license. This is usually caused by a significant, ongoing data flow out of the port such as when printing using $all or alphanumeric incrementation. It may be necessary in these cases to move the printer off the back of the WIBU-Key to another port. If this is not possible, a USB WIBU-Key should be used.。
MultiPC爱普生投影仪说明书
EasyMP Multi PC Projection操作指南介绍EasyMP Multi PC Projection4EasyMP Multi PC Projection功能 (5)连接到不同设备 (5)四屏显示 (5)更改投影屏幕和投影位置 (6)主持人功能 (6)缩略图显示功能 (7)首次设置软件8安装软件 (9)EasyMP Multi PC Projection系统要求 (9)EasyMP Multi PC Projection版本 (10)安装EasyMP Multi PC Projection(Windows) (10)安装EasyMP Multi PC Projection(OS X) (10)选择投影机网络设置 (11)不同网络环境的连接方法 (11)Multi PC Projection的推荐无线环境 (12)设置投影机以快速模式连接 (12)设置投影机以高级模式连接(无线) (13)设置投影机以高级模式连接(有线) (13)连接到投影机和投影图像15连接方法 (16)不同会议风格的连接方法 (16)直接使用无线通信连接投影机和计算机 (17)通过网络系统从软件中连接投影机 (19)选择投影机搜索方法 (22)搜索方法 (22)自动搜索网络投影机 (22)通过指定IP地址或投影机名称搜索网络投影机 (22)使用配置文件搜索网络投影机 (23)搜索配置文件 (23)执行配置文件搜索 (23)注册配置文件 (24)输出配置文件 (25)输入配置文件 (25)通过网络共享配置文件 (26)控制投影显示 (27)投影控制屏幕类型 (27)操作投影显示状态 (27)更改投影方格的数量 (28)更改演示者 (29)更改投影位置 (30)断开连接 (31)使用附加功能32使用快捷方式搜索网络投影机 (33)创建快捷方式 (33)正与多台投影机连接(正在镜像) (34)从投影机输出音频 (35)投影您的屏幕 (36)更改主持人 (37)选择参与者屏幕以使用缩略图投影 (38)隐藏投影控制屏幕 (39)禁止参与者操作 (40)控制连接带宽 (41)带宽控制限制 (41)解决问题42解决网络连接问题 (43)使用快速模式无法连接时的解决方案 (43)使用高级模式无法连接投影机时的解决方案(无线) (43)使用高级模式无法连接投影机时的解决方案(有线) (44)解决投影过程的问题 (46)屏幕投影不正常时的解决方案 (46)音频播放不正常时的解决方案 (46)主持人功能不工作时的解决方案 (46)错误消息列表 (47)设置EasyMP Multi PC Projection时出现错误消息 (47)搜索并选择投影机时出现错误消息 (48)投影时出现错误消息 (48)操作配置文件时出现错误消息 (48)使用主持人功能时出现错误消息 (49)Event ID列表 (50)屏幕摘要51选择连接模式画面 (52)搜索屏幕 (53)保存屏幕 (55)设置选项 (56)设置选项-用户设置 (56)设置选项-常规设置 (57)设置选项-调节参数 (58)设置选项-音频输出 (59)工具条 (60)投影控制屏幕 (61)缩略图屏幕........................................................................................63附录64更新和卸载软件 (65)获得最新版本应用程序 (65)卸载EasyMP Multi PC Projection(Windows Vista/Windows7/Windows10) (65)卸载EasyMP Multi PC Projection(Windows8/Windows8.1) (65)卸载EasyMP Multi PC Projection(OS X) (65)支持的分辨率和颜色 (67)支持的分辨率 (67)显示色彩 (67)限制 (68)连接限制 (68)从Windows照片库或Windows Live照片库投影时的限制 (68)Windows Aero中的限制 (68)从Windows Media Center投影时的限制 (69)声明 (70)版权声明 (70)符号说明 (70)通告 (71)版权归属 (71)介绍EasyMP Multi PC Projection 请参阅此处信息以详细了解EasyMP Multi PC Projection软件。
EasyPen M406W EasyPen M406W 无线多媒体笔记本设备说明书
EASYPEN M406WEasyPen M406WWireless Multimedia Tablet for Boundless Creation▼General InformationModel Name EasyPen M406EasyPen M406WPackageMSRPUS$ 79US$ 129SpecificationActive area 4” x 6” 4” x 6” Resolution 2560 LPI 2560 LPI Report Rate 125 PPS 125 PPS Pen pressure 1024 levels 1024 levelsExpress keys 4 4 Accuracy±0.25 mm ±0.25 mm Battery Free PenYes Yes SoftwareMAGIX Photo Manager/MAGIX Photo & Graphic DesignerWEEE InformationBody Weight (g) (Tablet + Pen)355 329 Body Size (LxWxH cm) 20 x 20.2 x 10.5 25.1 x 17.6 x 2.1 Gift Box Size (LxWxH cm) 26.7 x 28 x 7.4 28.4 x 26.2 x 7.4 Carton Size (LxWxH cm) 80 x 32 x 5680 x 32 x 56Shipping InformationPCS/CTN 20 20 CUFT/CTN5.06 5.06 Product Number 31100065100 31100033101 EAN 4710268 231387 4710268237709 UPC0911632 231387************▼Package ContentsEasyPen M406W Tablet USB DongleBattery Free PenPen ClipCD includes:- Tablet Software (Windows only) MAGIX Photo Manager MAGIX Photo & GraphicDesignerPenSignPen ToolBar (For PC & Mac)- Tablet driver for Windows & Mac- Multi-language users’ manual Two pen tips and refill tweezersRechargeable USB micro cableThree AAA rechargeable batteries for the tabletMulti-language quick guide▼System Requirements: IBM PC/ Pentium 233 compatible or higher Windows ®7/Vista/XP Mac OS 10.4 or above Available USB portCD/DVD-ROM drive ▼Recommended ProductsKB-SlimStar 8000X SP-i400HS-905BT▼Dates Available: Now ▼Key Features:4” x 6” working area for painting and writing 2.4Ghz wireless connectionBattery-free cordless pen with 1024 pressure sensitivity2560 high resolution LPI for precise designs Four express keys increase efficiencyThe EasyPen M406W is an elegant tablet from Genius that brings you a more enjoyable and flexible painting experience.This 4”x 6” wireless tablet is one of a kind and stands out from all other traditional tablets because it can be used 10 meters away from your monitor if you’re sitting on the couch. The lightweight battery-free cordless pen gives you intuitive control just like a real pen - draw, paint, sketch and sign easily. The high 2560 LPI is great for PC or Mac users. In addition, four express keys provide instant access to eraser, undo, new layer and brush functions.To find out more about EasyPen M406W, contact your local salesperson. 4” x 6” Working AreaEraser Undo New Layer BrushEASYPEN M406W。
- 1、下载文档前请自行甄别文档内容的完整性,平台不提供额外的编辑、内容补充、找答案等附加服务。
- 2、"仅部分预览"的文档,不可在线预览部分如存在完整性等问题,可反馈申请退款(可完整预览的文档不适用该条件!)。
- 3、如文档侵犯您的权益,请联系客服反馈,我们会尽快为您处理(人工客服工作时间:9:00-18:30)。
《轻松挂彩》Easy Red配置要求介绍配置要求高吗?
轻松挂彩Easy Red是一款的策略向的战争游戏,该作的环境设定在诺曼底,将会在这个区域的五个板块进行激烈的战斗。
喜欢的小伙伴赶紧来看看轻松挂彩Easy Red配置要求介绍吧!
配置要求介绍
最低配置:
操作系统: Windows XP
处理器: Intel i3
内存: 1500 MB RAM
图形: Nvidia gtx 730
DirectX 版本: 11
存储空间: 需要 550 MB 可用空间
推荐配置:
操作系统: Windows 10
处理器: Intel i5
内存: 2 GB RAM
图形: Nvidia gtx 1050
存储空间: 需要 1 GB 可用空间
配置要求介绍到此,要求不高,喜欢的小伙伴赶紧下载下来玩玩吧!
更多相关资讯请关注:轻松挂彩专题。
