GM8802EVma说明书
GM8802F说明书
2.安装-------------------------------------------------------------------------------- 4
2.1 一般原则---------------------------------------------------4 2.2 传感器的连接--------------------------------------4 2.3 电源连接-------------------------------------------5 2.4 串行口的连接------------------------------------5
6.操作--------------------------------------------------------14
6.1 清零操作------------------------------------------14
7.串行口---------------------------------------------------15
GM8802F
使用说明书
GM8802F-VER051000
目
录
1.概述----------------------------------------------------------------------1
1.1 功能及特点----------------------------------------------------------------1 1.2 前面板说明----------------------------------------------------------------1 1.3 后面板说明------------------------------------------------------2 1.4 技术规格---------------------------------------------------------2
GM8803仓秤仪表说明书
序言功能及特点□适合所有电阻应变式称重传感器;□具有内分度为16万码的积分式A/D转换器;□面板式数字调校及工作参数设置;□独创的称重系统检测功能,在标定之前检测传感器及传力机构的工□作状态,简化标定过程,配合线性修正功能保证标定的准确性;□可选的日期、时钟功能,不受断电影响;□可选择滤波参数;□具有特殊皮处理功能,可先称毛重后称皮重,并存储皮重;□存储并长期记忆99个皮重,按编号进行处理;□手动净重累计功能;□配合上下限参数的自动净重累计功能;□具有查看上下限参数、皮重、累计称重结果等功能;□以汉字方式打印称重内容,打印份数可选;□RS-232或20mA电流环串行输出接口,可与计算机通讯;□通讯协议有三种,可与国内外各种称重仪表兼容;□打印机输出接口,可接EPSON80或μP16微型打印机;□同步串行大屏幕接口,实现远距离大屏幕显示;□两种开关量输出接口,配合上下限参数用于限量报警或定量控制;□可选配4-20mA或0-10V模拟量输出板、并行BCD码接口板。
前面板说明1、主显示器:六位数字,用于显示称重数据、累计结果和仪表的提示信息等。
2、副显示器:二位数字,用于显示皮编号、累计次数和附加信息等。
3、状态指示灯:[ZERO]:零位指示灯,当秤处于0±1/4d范围时该指示灯亮。
[STAB]:称重稳定指示灯,称重结果的变化小于判稳范围时该指示灯亮。
[SUM]:累计状态指示灯,该灯亮时仪表在累计称重状态或显示累计称重结果状态。
- 1 -[Kg]:公斤状态指示灯,该灯亮时仪表称重单位是公斤。
[t]:吨状态指示灯,该灯亮时仪表在皮重处理状态。
[TARE]:皮重状态指示灯,该灯亮时仪表在皮重处理状态。
[NET]:净重状态指示灯,该灯亮时仪表显示的是净重数据。
[GROSS]:毛重状态指示灯,该灯亮时仪表显示的是毛重数据。
[LOW]:下限指示灯,该灯亮时称重结果小于下限。
[UP]:上限指示灯,该灯亮时称重结果大于上限。
TMPRO 880专业音频会议系统产品说明书

THE CLEAR CHOICE FOR PROFESSIONAL AUDIO CONFERENCING CONVERGE TM PRO 880APPLICATIONSConference RoomsBoardroomsCourtroomsDistance Learning FacilitiesConvention Centers and HotelsTraining RoomsTelemedicine FacilitiesHouses of WorshipCONVERGE TM PRO 880 ADVANTAGESAdvanced Conferencing Feature Set+Next-generation Acoustical Echo Cancellation> Full bandwidth (20Hz to 22Khz) echo cancellation> Improved duplex performance> Push-to-talk microphone compatibility+Next-generation Noise Cancellation> Adaptive modeling to room ambient noise condition+Increased resolution on Microphone Preamp stage> 0-56 dB in 7 dB increments+Pre-AEC routing for Sound Reinforcement Applications> Maximum of 4 millisecond processing delay+Management Improvements> Integrated Ethernet and USB connections> SNMP and HTML remote management agents> Event scheduler> Diagnostic console+Simplified Configuration Software> Drag & drop A/V and channel objects> Selectable views—unit, matrix, channel+Expanded Serial Command ListSuperior Audio Performance+Next-generation Distributed Echo Cancellation®on every mic input+First-mic priority delivers clear audio to the far end+20 Hz-22 kHz bandwidth for full-range audio response+ALC & AGC keep participants’ audio balanced and consistentConfiguration Flexibility+Scalable – link multiple Converge Pro units (880, 840T, 8I, TH20) for extensive microphonecoverage and up to 16 phone lines+Enhanced expansion bus, featuring 12 mix-minus audio buses for routing between units+Eight mic gating groups (four internal & four global) allow separation of mics intoindividual mixer gating groups for greater configuration flexibility+32 presets can be executed on-the-fly without disturbing other ongoing preset operations+255 Macros for customized audio control/configuration with single command execution Professional Conferencing SystemPROFESSIONAL CONFERENCINGDATA SHEET < CONVERGE TM PRO|880>SPECIFICATIONSCONVERGE PRO 880DATA SHEET <>CLEARONE LOCATIONS>CONVERGE PRO 880 BACK PANELAudio PerformanceConditions: Unless otherwise specified, allmeasurements are performed with a 20 Hz to 22 kHz BW limit (no weighting)Frequency Response: 20 Hz to 22 kHz ±1dB Noise (EIN): -126 dBu, 20 kHz BW, max gain,Rs=150 ΩTHD+N: <0.02%Dynamic Range: 100 dB (non A-weighted)Crosstalk <-91 dB re 20 dBu @ 20 kHz channelto channel Auto Mixer ParametersNumber of Open Microphones (NOM)PA Adaptive Mode First Mic Priority Mode Last Mic ModeMaximum # of Mics Mode Ambient LevelGate Threshold Adjust Off Attenuation Adjust Hold Time Decay RateMatrix Mixing Parameters 36x36 matrix 12 analog in/out12 expansion bus in/out8 assignable processing blocks in/out 4 assignable fader blocks in/out Assignable Processing Blocks Filters:All pass Low pass High pass Low shelving High shelving Parametric EQ Notch CD Horn Crossovers:BesselButterworth Linkwitz-Riley CompressorDelay; adjustable up to 250 msAssignable Fader Blocks Gain/MuteMicrophone Input Configuration Input Gain Adjust Mic or Line LevelPhantom Power on/off Echo Cancellation on/off Noise Cancellation on/off Filters:All Pass Low Pass High Pass Notch PEQMute on/offChairman Override on/off AGC on/offAutomatic Level Control on/off Auto Gate/Manual gate Adaptive Ambient on/off Pre AEC channelMic/Line Inputs 1-8Push-on mini-terminal block, balanced,bridgingImpedance: < 5 KΩNominal Level: adjustable -56 dBu to 0 dBu (7dB step coarse gain adjustment)Maximum Level: -65 dBu to +20 dBuEcho Cancellation: 130 ms tail time (works with 12 dB of room gain)Noise Cancellation: 6–15 dB attenuation Phantom Power: 24 V , selectable Line Inputs 9-12Push-on mini-terminal block, balanced,bridgingImpedance: < 5 KΩNominal Level: 0 dBu Maximum Level: 20 dBuOutputs 1-12Push-on mini-terminal block, balanced Impedance: < 50 ΩNominal Level: 0 dBu Maximum Level: 20 dBuExpansion Bus In/Out Proprietary Network RJ-45 (2), 1.9 MbpsCategory 5 twisted-pair cable, 200’ maximum cable length between any two Converge Pro devicesEthernetAutoswitching with Quality of Connection (QoC)10/100 Mbps Ethernet Network Port 10/100 Mbps Ethernet PC Port RJ-45 ConnectorsRS-232Serial Command Protocol Only (Console software not supported on RS- 232 port)DB-9 female9,600/19,200/38,400/57,600/115,200 baud rate; 8 bits,1 stop bit, no parityHardware flow control on (default)/off USBVersion 2.0 Compatible T ype: B-connectorControl/Status Ports DB-25 female A/B (2)Inputs A/B: active low (pull to ground)Outputs A/B: open collector, 40 VDC max, 40mA each+3.3 VDC pins (2) (300 mA over-current protected)Configuration & Administration Software Converge™ Console Power Input Range Auto-Adjusting100–240 VAC; 50/60 Hz Power Consumption 30 W T ypicalDimensions (L x D x H)17.25” x 10.25” x 1.75”43.8 x 26 x 4.5 cmWeight7.5 lbs/3.3375 kg unit weight 12 lbs/5.4kg shipping weightOperating T emperature14° F/-10 °C to 122° F/50° C ambient unit temperature Approvals & ComplianceAES48-2005: AES standard oninterconnections — Grounding and EMC practices — Shields of connectors in audio equipment containing active circuitry (self certified)U.S.A. & Canada CSA safety listed EU CountriesRoHS compliant WEEE compliantSee product manual for additional details Optional AccessoriesConverge Pro 880Converge Pro 880T Converge Pro 840T Converge Pro 8i Converge Pro TH20Converge SR 1212T abletop ControllerButton Microphone – Omni-Directional Button Microphone – Uni-Directional Delta MicrophoneT abletop Microphone – Uni-Directional JBL Wall-Mount SpeakersPart Number910-151-880 Converge Pro 880 – 8-channel AEC Microphone Mixer Headquarters:Salt Lake City, UT USA 5225 Wiley Post Way Suite 500Salt Lake City, UT 84116 Tel:801-975-7200T oll Free: 800-945-7730 Fax:801-977-0087******************Latin America Tel:801-974-3621*******************EMEATel: 44 (0) 1189 036 053*******************APACTel:801-303-3388 *******************Other product names may be registered trademarks of their respective owners who do not necessarily endorse ClearOne or ClearOne’s products. All rights reserved. Information in this document subject to change without notice . © 2007 ClearOne Communications Inc. 802-151-880 Revision 1.7 January 2008.。
8802-E杰曼称重模块说明书
GM8802使用说明书G M8802-0E110102482©2011,深圳市杰曼科技有限公司,版权所有。
未经深圳市杰曼科技有限公司得许可,任何单位与个人不得以任何形式或手段复制、传播、转录或翻译为其她语言版本。
因我公司得产品一直在持续得改良及更新,故我公司对本手册保留随时修改不另行通知得权利。
为此,请经常访问公司网站,以便获得及时得信息。
公司网址本产品执行标准:GB/T7724—2008目录1概述ﻩ11、1功能及特点1ﻩ1、2前面板说明 (1)1、3后面板说明 (2)1、4 技术规格 .................................................................... 31、5称重显示器尺寸 (4)2安装5ﻩ2、2控制器电源接线6ﻩ2、3传感器得连接 ............................................................. 62、3、1 六线制接法7ﻩ2、3、2四线制接法 ............................................ 73ﻩ标定.. (9)4参数设置 (16)5操作 (19)5、1清零操作19ﻩ5、2模拟量显示19ﻩ5、3密码输入 (19)5、4 密码设置 (20)6显示测试 ............................................................................ 217常见问题22ﻩ8ﻩ错误及报警信息 .................................................................... 231概述GM8802称重显示器就就是针对工业现场需要进行重量显示与控制得场合而开发生产得一种小型称重显示器。
该称重显示器具有体积小巧、性能稳定、操作简单适用得特点。
姆米亚C系列摄像机配件说明书

conventional single exposure attachment for the MAMlYA C series cannot be utilized on this camera.
Magnification of this finder is approximately 2.5 times the image on the ground glass focusing screen, particularly bright and clear.
CdS Porrofinder
This is a Porrofinder with built-in CdS exposure meter Match the index needles within the finder by turning the dial on the back of the f i n d e r , a n d r e a d t h e dial scale. This device measures the amount of light traveling through the viewing lens offering corrrect exposure setting even for amateurs.
for the Mamiya Press and Mamiya RB.
24
H Accessories
Single Exposure Attachment
By using the single exposure attachment provided, single exposures can be made of dry plates (2 1/2 x 3 1/2 in., 6.5x9cm) or cut films (4 3/4 x 6 1/2 in. cut film divided into four 1/4 sizes or 2 1/2 x 3 1/2 in.) When using 4 3/4 x 6 1/2 in. cut film divided into four one-quarter sizes, use a J-type film sheath. When using 2 1/2 x 3 1/2 in. film, use a D-type film sheath.
8802-E杰曼称重模块说明书

GM8802使用说明书页脚页脚G M8802-0E11010248010215121002©2011,市杰曼科技,所有。
未经市杰曼科技的许可,任何单位和个人不得以任何形式或手段复制、传播、转录或翻译为其他语言版本。
因我公司的产品一直在持续的改良及更新,故我公司对本手册保留随时修改不另行通知的权利。
为此,请经常访问公司,以便获得及时的信息。
公司网址 .szgmt.本产品执行标准:GB/T 7724—2008目录1概述 (1)1.1 功能及特点 (1)1.2 前面板说明 (1)1.3 后面板说明 (2)1.4 技术规格 (3)1.5称重显示器尺寸 (4)2安装 (5)2.2控制器电源接线 (6)2.3传感器的连接 (6)2.3.1 六线制接法 (7)2.3.2 四线制接法 (7)3标定 (9)4参数设置 (16)5操作 (19)5.1清零操作 (19)5.2模拟量显示 (19)5.3密码输入 (19)5.4 密码设置 (20)6显示测试 (21)7常见问题 (22)8错误及报警信息 (23)1概述GM8802称重显示器是针对工业现场需要进行重量显示与控制的场合而开发生产的一种小型称重显示器。
该称重显示器具有体积小巧、性能稳定、操作简单适用的特点。
可广泛应用于:混泥土搅拌及沥青混合料设备、冶金高炉、转炉及化工、饲料的重量控制等场合1.1 功能及特点➢体积小、造型美观、方便适用➢适用于所有电阻应变桥式电路➢全面板数字标定,过程简单,方便直观➢数字滤波功能➢自动零位跟踪功能➢上电自动清零功能➢模拟量(4-20mA/0-20mA/0-24mA/0-5V/0-10V/-5-5V/-10-10V可选)隔离输出功能1.2 前面板说明GM8802前面板图主显示:六位,用于显示称重数据及仪表相关信息数据。
状态指示灯:➢Z ERO:零位,当秤台或料斗上物料重量为0±1/4d时,该指示灯亮。
➢STAB:稳定,当秤台或料斗上物料重量变化在判稳围时,该指示灯亮。
GM8802F称重变送器使用说明书(英文)

GM880GM8802F INSTRUCTION MANUALG.M.GM8802F-GM8802F-VER200VER200VER20055-11Catalogue1.Summary _______________________________________________21.1Function and characteristic _____________________________21.2Exterior interface explanation __________________________21.3The internal structure and explanation __________________31.4Technical specification ________________________________32.Installation ______________________________________________52.1General principle _____________________________________52.2Connection of the load cell _____________________________52.3Connection of the analog quantity output _______________62.4Connection of the serial interface _______________________63.Data input ______________________________________________84.C alibration ____________________________________________94.1Method of calibration _________________________________94.2Calibration parameter form ____________________________125.The Working parameter setting up ____________________135.1Method of the working parameter setting up _____________135.2Explanation of the working parameter __________________136.The working process and the function ________________157.Serial port _____________________________________________167.1Serial modes _________________________________________167.2Data modes _________________________________________168.The normal question _________________________________289.Size of the instrument __________________________________29GM8802F-GM8802F-VER200VER200VER20055-121.SummaryGM8802F weighing transmitter is a special instrument that is aimed atweight showing and controlling in industry control.The instrument has the specification of high resolution,steady property and handy operation.Suitable for weighing system such as concrete mixer,bitumen mixture equipments,equipments of converter or blast furnace burden.1.1Function and characteristic�The volume is small and exquisite ,handsome in appearance ,convenient to be suitable .�Suitable for all resistance-bridge load cells.�Board-characteristic adjusting,and working parameter setting.�Function that multiple figure strains waves.�Have function of automatic zero follow.�Have function of automatic zero clearing when power �Two-way isolated serial interface functions,have RS232/RS485,convenient and going to the communication of the location machine.�Function that adjust the instrument from serial interface.1.2Front board explan explanationation GM8802F Front boardMainly show:Six bits,used for showing the data of weight or the value ofGM8802F-GM8802F-VER200VER200VER20055-13analog quantity output and the data of instrument relevantinformation.Indicator lamp of the state:�ZER ZEROO :Indicator lamp of zero location ,When the weight of the supplies is 0±1/4d,this indicator lamp is on.�STA STABB :Indicator lamp which the weight is stable ,When the weight changing is in the judge steady range,this indicator lamp is on.Keyboard:Uses in zero clearing and the data showing ,and uses in to draw backthe present state of the instrument.Uses in the parameter items choice.Uses in the functions of the parameter setting up choice.Uses in entering calibration or parameter setting up or confirmingthe present function.1.3Rear board explan explanationation GM8802F Rear board1,The power input 2,Serial port output 3,Interface of the load cell1.4Technical specification1.4.1General specificationPower :AC220V ±10%50HzThe power wave filters:insideEnclose working temperature:-10-40℃The largest humidity:90%R.H can't be formed and revealedConsumption:about 10WPhysics measurement:98(W)*151(D)*49(H)mmGM8802F-GM8802F-VER200VER200VER20055-141.4.2Analog quantity part:Sensor power :DC12V 350mA (MAX )Input impedance:10MZero point adjusting range:0.2-20mVThe sensitivity:0.5uV/dThe range of input:0.2-25mVThe way of changes:Delta-sigmaThe speed of A/D change:200times /secondNon-linearity:0.01%F.SGain and drift about:10PPM /degreesThe precision of show at most:1/100001.4.3Digital part:Weight show:main show,six red high light numeral LEDStatus show:Two green LEDsThe negative number shows:"-"Overload show:"OFL "Decimal point position:5kinds are availableKeyboard:Four key sound production keyboardsGM8802F-GM8802F-VER200VER200VER20055-152.Installation2.1General principleGM8802F weighing transmitter use 220V 50Hz to have end that protect exchange the power.If not,need another one to ensure using safely and reliably.Because the input signal of the sensor is a analog signal,it is more sensitive to electronic noise,so this signal transmission should adopt the shielding cable ,and should separate its from other cables to lay ,should not tie up it together.The signal cable should be far away from exchanging the power.Notice:Don't receive the instrument ground wire on other equipment directly.2.2Connection of the sensorGM8802F weighing transmitter need outer resistance meet an emergency bridge sensor ,push Fig.way connect sensor reach instrument.Elected at four-line sensor ,must short to connect with EX+and SN+,SN-with EX-short of instrument.Sensor cable should try one's best to far away from other cables ,especially don't tieup with other cables together.EX+:Power+EX-:Power-SN+:Reaction+SN-:Reaction-SIG+:Signal+SIG-:Signal-2.3Connection of the powerSix-lineEX+SN+EX-SN-SIG+SIG-Shield Four-line EX+EX-SIG+SIG-ShieldGM8802F-GM8802F-VER200VER200VER20055-16GM8802F weighing transmitter uses a 220V 、50Hz alternating current with the ground protecting.Connect asthe following picture showing:L -Fire G -ground N -zero2.4Connection of the s erial interfaceGM880GM8802F2F supports a serial communication interface (RS232or RS485),The interface’sdefinition is as follows:The way of serial interface can be chosen through the inside switch,theproducts have been demanded to confirm as RS-232or RS-485according tousers'order whenbeing dispatched from the factory.Connection drawing of the instrument connecting with computer(Way of RS-232)GM8802F-GM8802F-VER200VER200VER20055-17Connection drawing of the instrument connecting with up computer(Way of RS-RS-485485)3.Operation of data inputIn the course of calibration and working parameter setting up,need to do the data input,the concrete operation is as follows:When the instrument shows that glimmers in the location to glimmer,input to operate with the following button:Glimmer location datum add1.When the data is9,push thiskey again,glimmer location is0.:Glimmer location moves a bit to right.When glimmerlocation last bit on the right,push key this key again,the bit moves to the first on the left.Confirm the data input and finish operatingEnable showing all data zero clearing,glimmerin the location and does not change.GM8802F-GM8802F-VER200VER200VER20055-18GM8802F-GM8802F-VER200VER200VER20055-194.CalibrationUse GM8802F instrument for the first time ,weigh wanton part of system change to some extent and equipment setting up parameter can meet user when the instructions for use at present,should adjust to the instrument ,the concrete operation instructions is as follows:In the normal working state,don’t stop pressing the key untilthe mainly show shows “CAL”,press theto confirm,and go into the state of calibration.If users only want to change a certain parameter,then after finishing changing and confirming,press,then the instrument will keep this change,and return to the normal working state 4.1Method of calibration4.1.1Enter the function setting upDon’t stop pressing keyuntil mainly showshows 〖CAL 〗,and then pressto do calibration4.1.2The decimal pointpositionMainly show shows 〖Pt Pt0.0000.000〗,If does notchange the decimal point position ,press key to confirm,and enter the next step ;otherwiseuse the to choose,decimal point position amount to 5kinds,payrespects to "Calibration parameter form ".Press the key to do the next step.4.1.3The m inimum graduation setting upMainly show shows 〖1d=〗,If doesnot change theminimum graduation ,press the key directly to confirm,and enterthenextstep ;otherwise use the to choose,the minimum graduationdo the next step.largest st measure setting up4.1.4The largeMainly show shows〖CP〗.If does not change the largestmeasure,press directly to confirm,and enter thenext step;otherwise consult the method of the chapter"The data input",input value of the largest measure.Notice:the largest measure≤the minimum graduation*10000.Press the key to do the next step.4.1.5Millivolt showingMainly show shows〖t x.xxx〗,that is the present load cell’s millivolt,press the to do the next step.4.1.6Zero calibration1Mainly show shows millivolt of the load cell exported when the balance is empty.※After showing steadily,it is standard to go on zero calibration.※Pair show shows〖OVER〗,it means the signal of the load cell output is too big.※Pair show shows〖UNDER〗,it means the signal of the load cell output is too small.Please record the millivolt now,you can use it to do calibration by no standard weight as meeting an urgent need to count in4.1.7.Fill in the conduct to back up in the form as follow:Times Millivolt at zero(mV)Date Explanation154.1.7Zero calibration2If does not do zero calibration,press the key go on the next step directly;If do,press the go on the next step.When the mainly show shows〖o x.xxx〗,press the key to the state of zero millivolt inputting,input the millivolt recording in4.1.6;after finishing,press the to go on the next step.4.1.8Gain calibration1Put the standard weight that close to the most on80%of the largest measure on balance,mainly show shows〖c x.xxx〗,that is the millivolt of the load cell exported,after showing steadily,go on the next step.Please record the millivolt and the weight value of standard weight now,you can use it to do calibration by no standard weight as meeting an urgent when you need.Fill in the conduct to back up in the form as follow:Times Millivolt at zero(mV)Standard weight(Kg)Date Explanation1While mainly show shows〖c xx.xxx〗,press the key to go on thestate of gaining millivolt inputting ,input the value of millivolt that you count ,after finishing,press the go to the next step.4.1.9Gain calibration 2If do gain calibration,press the to go on the next step;If don’t ,press the return to the normal working state.4.1.10Gain calibration 3At this time,input the weight of standard weight as “Theoperation of data input”,and then press the return to the normalworking state.4.2Calibration parameter formSymbolParameterPatternValue of parameterFirst valuePoint Decimal point position 500.00.000.0000.000001d=The minimum graduation 61251020501CPThe largest measure≤The minimum graduation ×10000100005.Working parameter setting up5.1Method of working parameter setting upIn the normal working state,press the key mainly show shows“S etup”,press the key to confirm,and go into the working parameter setting up.Working parameter have two big-terms,F1and F2,and have several mini-terms under each big-item,the choice between item and item is used to go on;press the to go on the mini-term from big-item,and pressed the key return.While needing to set up the mini-term,press the first,then utilize to set up;afterfinishing,press the and after all establishment is finished,press theto withdraws.5.2Explanation of working parameterNo.Pa r a m e te r Fi r st Expl a na tionF1No No The first big-itemF1.100~9901Number of the balanceF1.21~97Straining wave parameter of AD hardware 1:Effect of straining wave is worst. 9:Effect of straining wave is bestF1.30~91Range of zero chasing(0-9d available).If it is 0,the function is shut off.F1.41~91Range of steady sentencing(1-9d available)F1.50.0.00~9.9 5.0Range of zero clearing(full quantity from0%-9.9%)F1.6ONON//OFF OFF Zero cleaning when power, OFF:-close,ON:-openF1.71200~576001200Potter rate of serial interface.F1.80~94Figure straining wave parameter0:No straining wave9:Result of figure straining wave is bestF2No No The second big-item F2.1RS/RE RS Serial port form choiceF2.2READ/CONT READ The communication way of the serial port, READ:ordering way;CONT:continual way.6.OperationWhen the instrument gets on power,it examines by oneself at first,the buzzer rings,the showing window mainly show and pair show flashes8,the state indicator lamp of the instrument glimmers at the same time.After examining and passing,the instrument goes into the normal working state, mainly show is the present weight value.When the weight value at present of the instrument changes the range in0±1/4d,the LED【ZERO】is on;When it changes in the steady range,the LED【STAB】is on;6.1The operation of zero clearingUnder the normal working state,press the key,it can do zeroclearing to the instrument(the weight showing at present should be within the zero clearing range,otherwise not do zero clearing).7.Serial portGM8802F batching controller has one serial port of RS232/RS485(chooses through the hardware switch within the instrument),in order to go to communication with munication way adopts the way of replying(namely the computer sends an order frame to instrument,after getting the order,the instrument returns a respond frame upward computer to realize communication),and also adopts the continual way(namely the instrument sends the weight data and the status data to the computer continually,do not get any order from the computer).7.1Serial modesPotter rate:1200、2400、4800、9600、19200、56700可选Available Byte form:Initial location---------1bitlong of the character---------7bitStopping location---------1bitCode:ASCIICheck-up:Even checking-up7.2Data modes7.2.1Continual way that under RS communication formIn working parameter setting up,F2.1is RS;F2.2is CONT.The instrument sends the data of weight and state continually from the serial port. The data form is as follow:STX State+/-DDDDDDD CRC CR LFAmong them:STX——Initial symbol(02H)State——M(4DH)Steady;S:(53H)Unstable;O:(4FH)Overflow+/-——Symbol,+(2BH)-(2DH)DDDDDDD——7bits of weight including decimal point,the highposition is in front.R——(52H)S——(53H)CRC——Sum of the value of check-up.All its number value summation in the front is changed into the decimal system in the check-up,then fetch the last two and transfer to ASCII.CR——(0DH)Returning symbolLF——(0AH)Sign that change a new line7.2.2Ordering way that under RS communication formIn working parameter setting up,F2.1is RS;F2.2is READ.The data form is as follow:T he computer reads the state of the instrumentSTX Addr.R S CRC CR LFAmong them:STX——Initial symbol(02H)Address——Number of the balance,2bits;If the number of the balance is 01,that is30H31HR——(52H)S——(53H)CRC——Sum of the value of check-up.All its number value summation in the front is changed into the decimal system in the check-up,then fetch the last two and transfer to ASCII.CR——(0DH)Returning symbolLF——(0AH)Sign that change a new lineFor example:When reading the state of the No.2balance,the data form that it sends is:023032525336350D0AThe instrument’s responding:STX Addr.R S000State DDDDDD CRC CR LFAmong them:STX——Initial symbol(02H)Address——Number of the balance,2bits;If the number of the balance is 01,that is30H31HR——(52H)S——(53H)000——3bits(30H30H30H)State——M(4DH)Steady;S:(53H)Unstable;O:(4FH)OverflowDDDDDDD——Mainly show value(6bits),if the value is negative thenthe high position is negative.For example,the mainly show of the instrument is-1.345,then,that is2DH30H31H33H34H35HAmong them,2DH is mean negative.the mainly show of the instrument is1.345,then,that is30H30H31H33H34H35HCRC——Sum of the value of check-up.All its number value summation in the front is changed into the decimal system in the check-up,then fetch the last two and transfer to ASCII.CR——(0DH)Returning symbolLF——(0AH)Sign that change a new lineThe data form of state returning:0230315253303030532D303331343834340D0AIt means the present state of No.1balance is:the instrument is in the unstable state,mainly show shows-3148Reading the decimal pointSTX Addr.R P CRC CR LFSTX——Initial symbol(02H)Address——Number of the balance,2bits;If the number of the balance is 01,that is30H31HR——(52H)P——(50H)CRC——Sum of the value of check-up.All its number value summation in the front is changed into the decimal system in the check-up,then fetch the last two and transfer to ASCII.CR——(0DH)Returning symbolLF——(0AH)Sign that change a new lineFor example:Data form that send an order of reading the decimal point to the instrument:023031525036310D0AThe instrument’s responding:STX Addr.R P DDDDDD CRC CR LFAmong them:STX——Initial symbol(02H)Address——Number of the balance,2bits;If the number of the balance is 01,that is30H31HR——(52H)P——(50H)DDDDDD——000000~000004,Correspond0,0.0,0.00,0.000,0.0000。
gm仪表说明书模板

目录1.概述-----------------------------------------------------------------------------------------------------------------------11.1功能及特点--------------------------------------------------------------------------------------------------------------11.2前面板说明--------------------------------------------------------------------------------------------------------------11.3后面板说明-------------------------------------------------------------------------------------------------------------31.4技术规格--------------------------------------------------------------------------------------------------------------3 1.4.1一般规格---------------------------------------------------------------------------------------------------31.4.2模拟部分--------------------------------------------------------------------------------------------------4 1.4.3数字部分--------------------------------------------------------------------------------------------------42.安装----------------------------------------------------------------------------------------------------------------------------52.1一般原则--------------------------------------------------------------------------------------------------------------52.2传感器的连接-------------------------------------------------------------------------------------------------------52.3开关量接口的连接-----------------------------------------------------------------------------------------62.4电源连接--------------------------------------------------------------------------------------------------------------72.5串行口的连接------------------------------------------------------------------------------------------------------------7 3.标定--------------------------------------------------------------------------------------------------------------------------113.1标定方法--------------------------------------------------------------------------------------------------------------11 3.1.1进入功能设置--------------------------------------------------------------------------------------------------11 3.1.2单位设置--------------------------------------------------------------------------------------------------------123.1.3小数点位置设置----------------------------------------------------------------------------------------------123.1.4最小分度设置--------------------------------------------------------------------------------------------------12 3.1.5最大量程设置--------------------------------------------------------------------------------------------------123.1.6传感器灵敏度设置--------------------------------------------------------------------------------------------------123.1.7毫伏数显示--------------------------------------------------------------------------------------------------133.1.8零位标定1--------------------------------------------------------------------------------------------------133.1.9零点标定2--------------------------------------------------------------------------------------------------133.1.10增益标定1--------------------------------------------------------------------------------------------------143.1.11增益标定2--------------------------------------------------------------------------------------------------143.1.12增益标定3--------------------------------------------------------------------------------------------------143.1.13标定密码修改--------------------------------------------------------------------------------------------------143.2标定参数表----------------------------------------------------------------------------------------------------154.工作参数设置-----------------------------------------------------------------------------------------------------164.1工作参数的设置方法---------------------------------------------------------------------------------------------164.2工作参数说明--------------------------------------------------------------------------------------------------------------------175.配方的查询与修改---------------------------------------------------------------------------------------------------------------19 5.1查询与设置方法------------------------------------------------------------------------------------------------195.1.1配方的选择--------------------------------------------------------------------------------------------------195.1.2配方的查询与设置---------------------------------------------------------------------------------------------19 5.2配方参数内容--------------------------------------------------------------------------------。
8802-E杰曼称重模块说明书

GM8802使用说明书G M8802-0E110102482©2011,深圳市杰曼科技有限公司,版权所有。
未经深圳市杰曼科技有限公司得许可,任何单位与个人不得以任何形式或手段复制、传播、转录或翻译为其她语言版本。
因我公司得产品一直在持续得改良及更新,故我公司对本手册保留随时修改不另行通知得权利。
为此,请经常访问公司网站,以便获得及时得信息。
公司网址本产品执行标准:GB/T7724—2008目录1概述ﻩ11、1功能及特点1ﻩ1、2前面板说明 (1)1、3后面板说明 (2)1、4 技术规格 .................................................................... 31、5称重显示器尺寸 (4)2安装5ﻩ2、2控制器电源接线6ﻩ2、3传感器得连接 ............................................................. 62、3、1 六线制接法7ﻩ2、3、2四线制接法 ............................................ 73ﻩ标定.. (9)4参数设置 (16)5操作 (19)5、1清零操作19ﻩ5、2模拟量显示19ﻩ5、3密码输入 (19)5、4 密码设置 (20)6显示测试 ............................................................................ 217常见问题22ﻩ8ﻩ错误及报警信息 .................................................................... 231概述GM8802称重显示器就就是针对工业现场需要进行重量显示与控制得场合而开发生产得一种小型称重显示器。
该称重显示器具有体积小巧、性能稳定、操作简单适用得特点。
晶玛电子产品说明书

1||2P H O T O V O L T A I C F U S EL I N K SF U S E HO L D E R S & B A S E S P A G E 02 | g P V 10x 38 & 14x 51 600 &1000V /1100 D C F U S E L I N K S P A GE 05 | P M X 10x 38 & 14x 51 1000V D CF U S E H O L D E R S P A GE 06 | P M L 10/14x 85 1500V D C F U S E H O L D E R S P A GE 08 | C L I P C O N T A C TF O R φ10 F U S E L I N K S P A GE09|S T N H 1, N H 2 & N H 3 1000V D C F U S E B A S E S P A G E 03 | g P V 10x 85 1200 & 1500V D C F U S E L I N K S P A GE 04| g P V N H 1, N H 2 & N H 3 1000V D C F U S E L I N K S|2gPVFUSE-LINKS FOR PHOTOVOLTAIC APPLICATIONSPV fuse-links for photovoltaic installations from DF Electric have been developed to offer a compact, safety and economic protection so-lution in photovoltaic installations where, due to the increase of the power and technologic evolution, no-load voltages above 800V DC are reached. Also meet the requirements for instruments (multimeters) and traction equipment auxiliary circuits. The range comprises 10x38 & 14x51 fuse-links with rated currents between 1A and 20A. Rated voltage is 600 V DC or 1000V DC (direct current). Provide protection against overloads as well as short-circuits. Made with ceramic tube with high withstand to internal pressure and thermal shock, that allowsa high breaking capacity in a reduced physical space. Contacts are made of silver plated copper and melting elements are made of pure silverin order to avoid the aging and thus keep unalterable the electric characteristics. For these fuse-links we recommend the utilization of PMX 1000V fuse holders in single pole version or two-pole version.I n REFERENCE BREAKING CAPACITY PACKING(A)(kA)Uni./BOXFUSE-LINKS PHOTOVOLTAICCOMPATIBLEPV FUSE HOLDERS FORPHOTOVOLTAICAPPLICATIONSPAGE05COMPATIBLECLIP CONTACT FOR φ10FUSE-LINKSPAGE07TECHNICALt-I CHARACTERISTICSPAGE09STANDARDSIEC 60269-1IEC 60269-6UL 2579TECHNICALAMBIENT TEMPERATUREDERATING FACTORPAGE12AØBC20492235104/2425492240104/242492202104/244492205104/246492210104/248492215104/2410492220104/2412492225104/2415492229104/2416492230104/24STANDARDSIEC 60269-1IEC 60269-6UL 2579FUSE-LINKS PHOTOVOLTAICI n REFERENCE BREAKING CAPACITY PACKING(A)(kA)Uni./BOXCOMPATIBLECLIP CONTACT FOR φ10FUSE-LINKSPAGE07TECHNICALt-I CHARACTERISTICSPAGE10TECHNICALAMBIENT TEMPERATUREDERATING FACTORPAGE123||4gPV NH 373245NH1NH3NH2373350FUSE-LINKS FOR PHOTOVOLTAIC APPLICATIONSFUSE-LINKS FOR PHOTOVOLTAIC APPLICATIONSNH gPV 1000V DC fuse-links for photovoltaic installations have been developed to offer a compact, safety and economic pro-tection solution in second level panels of photovoltaic installations. The range comprises NH1 fuse-links with rated currentsbetween 25A and 200A, NH2 with rated currents between 200A and 250A and NH3 fuse-links with rated currents between200A and 400 A. Rated voltage is 1000V DC (direct current). They provide protection against overloads as well as short-circuits (gPV class according to IEC 60269 Standard), with a minimum fusing current of 1,35·In. Made with ceramic body with highwithstand to internal pressure and thermal shock. Contacts are made of silver plated copper or brass and melting elements are made of pure silver in order to avoid the aging and thus keep unalterable the electric characteristics. For these fuse-links werecommend the utilization of 1000V NH ST fuse bases.COMPATIBLENH FUSE BASES FOR PHOTOVOLTAIC APPLICATIONSPAGE08TECHNICALt-I CHARACTERISTICSPAGE11TECHNICALAMBIENT TEMPERATURE DERATING FACTORPAGE12STANDARDS IEC 60269-1IEC 60269-6UL 2579I nREFERENCEBREAKING CAPACITYPACKING(A)(kA)Uni./BOX5|485152PHOTOVOLTAICFUSE HOLDERS FOR PHOTOVOLTAIC APPLICATIONSThe first feature that PV Modular fuse holders offers, is the 1000V DC or 1100V DC rated voltages. They have been developedto offer a compact, safety and economic protection solution in photovoltaic installations where due to the increase of the power and technologic evolution, no-load voltages above 800V DC can be achieved. Modular fuse holders for 10x38 & 14x51 gPV fuses according IEC/EN 60269 standard. Compact design, with reduced distances. Manufactured with a high quality materials: Silver plated copper contacts and plastic materials with high temperature resistance and selfextinguishable. All the materials are according to the European Directive RoHS (Restriction of the use of certain hazardous substances in electrical material). UL certification (File E359201).POLES MODULES REFERENCE DESCRIPTION I nUPACKING(A)(V DC)Uni./BOX48515048515148515248515300COMPATIBLEgPV FUSE-LINKS FOR PHOTOVOLTAIC APPLICATIONSPAGE02STANDARDS IEC 60269-1IEC 60269-2EN 60269-1EN 60269-2UL4248-18APPROVALSCOMPATIBLE CONNECTION ACCESSORIES:PHASE BUSBARS AND ACCESSORIESSEECYLINDRICALWITHINDICA TORWITHINDICA TOR65x20PML1500VDCFUSE HOLDERS FOR PHOTOVOLTAIC APPLICATIONS 1500 VDC▶ Fuse holder for cylindrical fuse link size 10x85 gVP and 10/14x85 gPV.▶ Modern compact design.▶ Ventilation zones optimized for a better heat dissipation.▶ Manufactured with a high quality materials.· Silver plated copper contacts.· Plastic materials with high temperature resistance and self-extinguishable.· All the materials are according to the European Directive RoHS (Restriction of the use of certain hazardous substances in electrical material) and also halogen free.POLES MODULE REFERENCE DESCRIPTION I n U PACKING (mm)(A)(V DC)Uni./BOXFUSE HOLDERS PHOTOVOLTAICSTANDARDSIEC/EN 60269-1IEC/EN 60269-2UL4248-1UL4248-19UL486ECOMPATIBLEgPV FUSE-LINKS FORPHOTOVOLTAICAPPLICATIONSPAGE02COMPATIBLECONNECTIONACCESSORIES:PHASE BUSBARS ANDACCESSORIESSEECYLINDRICAL|7|FUSE HOLDERSPHOTOVOLTAICFUSE HOLDERS FOR PHOTOVOLTAIC APPLICATIONS 1500 VDCFUSE-LINK SIZE SELECTORTECHNICALPMLPOSITION 10x85POSITION 10/14x85Moving part allows the use of 10x85 and 10/14x85 fuselinks Handle tie System lock that avoids the unauthorized use of the fuseholder.Sealed by wire Free space for labeling For flexible wire section ≤6mm For solid wire section ≤10mm Manual assembly Assembly pin8482002482001 FUSE BASES PHOTOVOLTAICClip contact for φ10 cylindrical fuse links. Screw fixation and PCB versions. Manufactured in tinned bronze. All the materials are accordingto the European Directive RoHS (Restriction of the use of certain hazardous substances in electrical material).CLIP CONTACT FOR φ10 FUSE-LINKSREFERENCE DESCRIPTION I n P d max PACKING(A)(W)Uni./BOXφ3,5φ3,5SIZE L(mm)10x383210x8579,60,710102φ2,5LSIZE L(mm)10x384210x8589,6φ10 CLIP CONTACT FOR PCB|9|ST1000V DCNH1250A 354175FUSE BASESPHOTOVOLTAICNH FUSE BASES FOR PHOTOVOLTAIC APPLICATIONSFuse bases for NH fuse-links. Available in sizes NH1(250 A), NH2(400 A) and NH3(500 A). Manufactured with a high quality materials. Silver plated copper contacts. Plastic materials with high temperature resistance and self-extinguishable. All the materials are according to the European Directive RoHS. For DIN rail mounting or with screw fixing. Single-phase type. Connec-tion by screws. Contacts with double spring in order to obtain an optimum operation. Wide range of accessories that enables IP20 protection index: contact covers, fuse link covers and partition walls. Multi-pole units can be made with connection acces-sories. Manufactured according IEC, VDE and DIN standards. UL certification (File E359201).DESCRIPTIONREFERENCEUPACKING(V DC)SINGLE POLEDIN RAIL-SCREW FIXING / SCREW CONNECTION 35417210001NH2400A DIN RAIL-SCREW FIXING / SCREW CONNECTION 35417510001NH3500ADIN RAIL-SCREW FIXING / SCREW CONNECTION 35418010001STANDARDSIEC 60269-1IEC 60269-2EN 60269-1EN 60269-2UL4248STANDARDSVDE 0636DIN 43620COMPATIBLE gPV NH1 & NH3 FUSE-LINKS FOR PHOTOVOLTAIC APPLICATIONSPAGE04COMPATIBLETERMINAL COVERS, FUSE-LINKS COVERS AND IP20 PROTECTION KITSSEE NHNH1NH2NH3357010NH FUSE BASES ACCESSORIESMICROSWITCHES FOR NH LINKSREFERENCE DESCRIPTION PACKINGUni./BOX357010MICROSWITCH FOR NH1 & NH3 FUSE LINKS1/12REFERENCE POWER DISSIPATION POWER DISSIPATION PREARCING I2t(W @ 0,7 In)(W @ In)(A2s)1000V600VDC 1000VDC600VDC1000VDC600VDC1000VDC600VDC4916014919010,310,310,760,760,350,35Prospective current (A rms)*1100V DC|1011|4922021,283,420,84922051,162,91134922101,102,6565P r e a r c i n g t i m e (s )Prospective current (A rms)REFERENCE POWER DISSIPATIONPOWER DISSIPATIONPREARCING I 2t(W @ 0,7 In)(W @ In)(A 2s)|P r e a r c i n g t i m e (s )Prospective current (A)REFERENCEPOWER DISSIPATIONPOWER DISSIPATIONPREARCING I 2t(W @ 0,7 In)(W @ In)(A 2s)1000V DC1000V DC 1000V DC 1000V DC 3732105,212,5623732156,315,51223732256,716,63023732307,5185623732358,220121014x51NH1NH2NH3t a A1(ºC)400,92450,90500,87550,8513|ELECTRONIC CYLINDRICAL PHOTOVOL T AICRAPIDPLUS NH SPECIAL FUSESDOMESTIC D & DO TRANSFORMERS17|HEAD OFFICE & FACTORYSILICI, 67-6908940 CORNELLA DE LLOBREGAT BARCELONA SPAINTel. +34 93 377 85 85Fax +34 93 377 82 82EXPORT SALESTel. +34 93 475 08 64Fax +34 93 480 07 75***************NATIONAL SALESTel. 93 475 08 64Fax 93 480 07 76******************www.df-sa.esN H 1 g P V 100V D C。
GM8802仪表校零校称说明图文20140924MARK
GM8802仪表校零校称说明图文20140924MARK
上电后仪表显示重量数值,(下面的数值是因为没有负载,所以是负无穷大,正常应该是几点几公斤的重量)
按2次后;仪表显示
按一次,显示PASS(密码)
按一次,显示0-----,下图
按数次,显示000000,
在按一次,显示PT 0.0(小数位,显示一位小数就是0.0,之前已设置好,不需要改)
在按显示 ID=01(最小分度值,之前已设置好,不需要改)
再按显示CP 后显示120.0(量程,之前已设置好,不需要改)
再按显示SE 2(传感器灵敏度,之前已设置好,不需要改);
在按显示 T 0.169(数值是我用脚踩的传感器,实际是其他)
在按显示
等待显示 STAB(稳定灯亮)后,再按显示C0.000
结束校零点环节,然后按数次,退出到0.0的称重状态。
继续校称(砝码校称)显示C0.000状态下
往称上放100公斤的砝码(这个是假设数值,根据实际设置,应该放置量程的60%到80%的砝码重量)
按显示
按组合键设置成100.0公斤
等待稳定后,按显示输入密码(和之前的步骤一样,请输入密码00000)后按,如果不需要设置密码,直接
按返回到正常状态
最后CAL END,校称结束,显示100.0重量值(正常状态)。
混合机电流OK
F507-1
制粒机闸门
校称。
彩信红外监控相机 MG-582M MG-882MK 使用手册 彩信红外监控相机 SG-550M S

彩信红外监控相机 MG-582M /MG-882MK使用手册彩信红外监控相机 SG-550M/SG-880MK使用手册目 录1使用说明 (2)1.1 概述 (2)1.2 相机外观接口 (2)1.3 遥控说明 (3)1.3.1 操作 (4)1.3.2 描述 (4)1.3.3显示屏信息显示 (4)1.3.4 支持格式 (4)2注意事项 (5)3简易操作 (5)3.1 供电 (5)3.2 插入SD-SIM卡 (6)3.3 打开电源进入ON模式 (6)3.4 进入测试模式 (6)3.4.1 习惯设置 (6)3.4.2 手动拍摄 (6)3.4.3 查看图片或视频 (6)3.4.4 发送彩信 (6)3.5 关闭电源 (6)4高级操作 (7)4.1 设置菜单 (7)4.1.1 默认设置 (8)4.1.2 默认设置列表 (8)4.1.3 常规设置 (9)4.1.4 设置相机模式 (9)4.1.5 格式化SD卡 (9)4.1.6 设置图片像素 (10)4.1.7 设置视频像素 (10)4.1.8 设置时间和日期 (10)4.1.9 设置图片连拍 (10)4.1.10 设置视频时长 (10)4.1.11 设置视频声音 (10)4.1.12 设置触发间隔 (11)4.1.13 设置PIR灵敏度 (11)4.1.14 设置定时 (11)4.1.15 设置闪光灯照射距离 (11)4.1.16 彩信设置 (11)4.1.17 GPRS设置 (12)4.1.18 设置彩信发送模式 (12)4.1.19 设置发送彩信给 (12)4.1.20 输入口令 (13)4.1.21 恢复默认设置 (13)4.2 回放 (13)4.2.1 预览图片和视频 (13)4.2.2.1删除图片和视频 (13)4.2.3 手动发送彩信 (14)4.3 激光助描 (14)4.4 文件编号 (14)4.5 软件升级 (14)附录ⅠAppendixⅠ: 技术规格 (15)附录ⅡAppendixⅡ: 配件清单 (15)1使用说明1.1概述本产品是一款具有专利的800万像素带通讯功能的数字监控相机。
GM8802C-D说明书
GM8802C使用说明书G M8802C-0D11010148010224131000©2011,深圳市杰曼科技有限公司,版权所有。
未经深圳市杰曼科技有限公司的许可,任何单位和个人不得以任何形式或手段复制、传播、转录或翻译为其他语言版本。
因我公司的产品一直在持续的改良及更新,故我公司对本手册保留随时修改不另行通知的权利。
为此,请经常访问公司网站,以便获得及时的信息。
公司网址 本产品执行标准:GB/T 7724—2008目录第一章概述 (1)1.1功能及特点 (1)1.2前面板说明 (1)1.3 技术规格 (3)1.3.1一般规格 (3)1.3.2模拟部分 (3)1.3.3数字部分 (4)1.4尺寸图 (5)第二章安装及配线 (6)2.1电源接线 (6)2.2传感器连接 (6)2.2.1 六线制接法 (7)2.2.2 四线制接法 (8)2.3串行口的连接 (9)第三章标定 (10)3.1标定说明 (10)3.2 标定流程图 (11)3.3 毫伏数显示 (16)3.4 有砝码标定 (17)3.5无砝码标定 (18)3.6串口标定开关 (19)3.7 标定参数说明表 (20)3.8 标定参数记录表 (20)第四章参数设置 (21)4.1 工作参数设置流程表 (21)4.2 参数设置方法 (26)4.2.1 数据输入类参数设置方法 (26)4.2.2选项类参数设置 (27)第五章串口通讯 (28)5.1 快速协议方式 (28)5.1.1连续方式 (28)5.1.2 命令方式 (29)5.2 RE协议方式 (30)5.2.1 连续方式 (30)5.2.2命令方式 (31)5.3 RS协议方式 (32)5.3.1 连续方式 (32)5.3.2 命令方式 (33)5.3.2.1上位机读称重显示器当前状态 (33)5.3.2.2读小数点 (34)5.3.2.3读传感器灵敏度 (35)5.3.2.4读最大量程和分度值 (36)5.3.2.5读参数协议 (37)5.3.2.6串口清零功能 (37)5.3.2.7标定称重显示器 (38)5.3.2.8写工作参数 (44)5.3.2.9读寄存器1-9 (45)5.3.2.10写寄存器1-9 (45)5.3.3 RS协议CRC(校验和)计算 (46)5.4 SP1协议方式 (47)5.4.1参数代码说明表 (47)5.4.2 错误代码说明表 (49)5.4.3 连续方式 (49)5.4.4 命令方式 (50)5.4.4.1上位机读称重显示器当前状态 (51)5.4.4.2读其他参数 (52)5.4.4.3写最大量程与最小分度 (53)5.4.4.4写其他参数 (54)5.4.4.5标定零位 (54)5.4.4.6增益标定 (56)5.4.4.7清零操作 (57)5.4.4.8读寄存器1-9 (58)5.4.4.9写寄存器1-9 (59)5.4.4.10 CRC计算 (59)5.5 Modbus协议方式 (60)5.5.1 Modbus传输模式 (60)5.5.2 Modbus通讯地址 (61)5.5.3 功能码说明 (64)5.5.4 Modbus通讯错误信息 (71)5.6托利多协议 (72)5.7飞利浦协议 (73)第六章操作 (76)6.1清零操作 (76)6.2密码输入 (76)6.3 密码设置 (77)6.4恢复出厂设置操作 (78)第七章显示测试 (80)第八章错误及报警信息 (81)第一章概述GM8802C称重显示器是针对工业现场需要进行重量变送的场合而开发生产的一种小型称重显示器。
创佳彩电产品介绍按功能
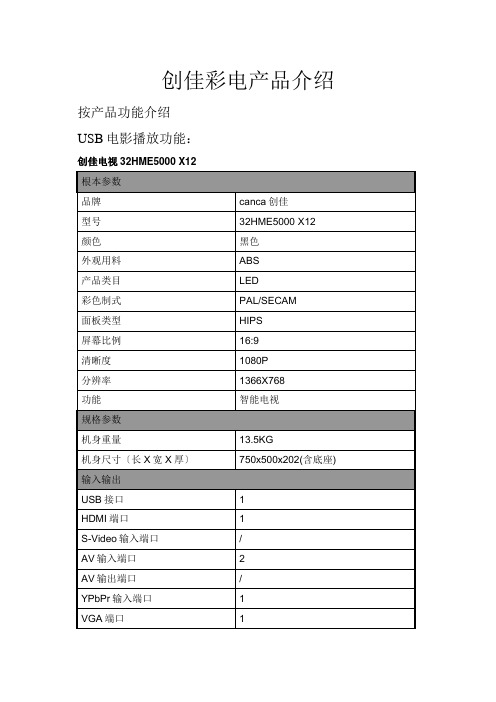
创佳彩电产品介绍按产品功能介绍USB电影播放功能:创佳电视32HME5000 X12创佳电视42LWE6300 F1创佳电视19HDE3000 V6创佳电视32HME8000 R35创佳电视22HZE9000 C68创佳电视32HZE9000 C68创佳电视19HZE9000 C68创佳电视26HZE9000 C68创佳电视32LME7000 T25创佳电视43HPD6000 K91创佳电视40HZE9000 C68创佳电视46HZE9000 C68创佳电视32LME8800 E6创佳电视51HPD6000 K91创佳电视22HDE3000 V655HZE9000 C6839HWE6300 F1创佳电视32HDE3000 V6创佳电视40LME8800 E6互联网电视功能:创佳电视32HME5000 X12创佳电视32LME8800 E6创佳电视40LME8800 E6电视/显示屏两用功能:创佳电视32HME5000 X12创佳电视19HDE3000 V6创佳电视22HZE9000 C68创佳电视32HZE9000 C68创佳电视32LME7000 T25创佳电视40HZE9000 C68创佳电视46HZE9000 C68创佳电视32LME8800 E6创佳电视22HDE3000 V6创佳电视 55HZE9000 C68创佳电视32HDE3000 V6创佳电视40LME8800 E6超窄边电视功能:创佳电视42LWE6300 F1创佳电视32HME8000 R35创佳电视32LME7000 T25创佳电视39HWE6300 F1内容总结。
蔡司 LSM 880 使用说明书(中文)n

4
2、进入“Acquisition”界面; 3、选择之前保存好的光路设置“channel”和“Acquisition mode”设置 4、或者新建光路设置“Smart Setup”
ZEISS, Lu Xi, MIC
2016-05-15
11
ZEISS, Lu Xi, MIC
5、“smart setup”中选择染料名称,并选择拍 摄方式后,“Apply”
b、预热结束后“status”显示 “Ready”后选择“On”;
9、随后可以开始共聚焦成像
2016-05-15
7
Startup and Shutdown of the System
Shutdown of the System 关机过程基本类似开机的倒序过程: 1、关闭金属卤化物灯; 2、关闭激光器,在“power”中选择 “off”,关闭已打开的激光器: 3、关闭ZEN软件; 4、关闭电脑; 5、关闭电脑后等待激光器冷却约5min, 此时Argon激光器的风扇停转; 6、按顺序关闭“COMPONENTS” “SYSTEM/PC” “MAIN SWITCH” 7、关闭稳压电源。
ZEISS, Lu Xi, MIC
2016-05-15
29
Agenda
1 Startup and Shutdown of the System 2 Acquiring Multi-Channel images 3 Z-stack image 4 Time Series image 5 Tile Scan 6 Airyscan Imaging
2016-05-15
20
Z-stack image
Center
1、center模式下,live下选择成 像的中间位置,单击“center” ,然后设置需要层扫的层数 Slices,并单击“optimal”; 2、单击“Start Experiment”
- 1、下载文档前请自行甄别文档内容的完整性,平台不提供额外的编辑、内容补充、找答案等附加服务。
- 2、"仅部分预览"的文档,不可在线预览部分如存在完整性等问题,可反馈申请退款(可完整预览的文档不适用该条件!)。
- 3、如文档侵犯您的权益,请联系客服反馈,我们会尽快为您处理(人工客服工作时间:9:00-18:30)。
GM8802E使用说明书G M8802E-V E R060200目录1.概述--------------------------------------------------------------------------------1 1.1功能及特点--------------------------------------------------------------1 1.2前面板说明--------------------------------------------------------------1 1.3 后面板说明-------------------------------------------------------------2 1.4 技术规格-----------------------------------------------------------------2 1.4.1 一般规格---------------------------------------------------------2 1.4.2 模拟部分---------------------------------------------------------31.4.3 数字部分---------------------------------------------------------32.安装--------------------------------------------------------------------------------4 2.1 一般原则----------------------------------------------------------------4 2.2 传感器的连接---------------------------------------------------------4 2.3 电源连接----------------------------------------------------------------52.4 模拟量输出的连接--------------------------------------------------53.数据输入操作----------------------------------------------------------------64.标定--------------------------------------------------------------------------------7 4.1标定方法------------------------------------------------------------------7 4.1.1 进入功能设置------------------------------------------------------7 4.1.2 小数点位置设置---------------------------------------------------7 4.1.3 最小分度设置------------------------------------------------------7 4.1.4 最大量程设置------------------------------------------------------8 4.1.5 毫伏数显示---------------------------------------------------------8 4.1.6 零位标定1----------------------------------------------------------8 4.1.7 零点标定2----------------------------------------------------------9 4.1.8 增益标定1----------------------------------------------------------9 4.1.9 增益标定2---------------------------------------------------------10 4.1.10 增益标定3--------------------------------------------------------104.2 标定参数表------------------------------------------------------------105.工作参数设置----------------------------------------------------------------11 5.1 工作参数的设置方法------------------------------------------------115.2 工作参数说明----------------------------------------------------------116.操作--------------------------------------------------------------------------------136.1 清零操作----------------------------------------------------------------136.2 模拟量显示------------------------------------------------------------137.常见问题------------------------------------------------------------------------148.仪表尺寸-----------------------------------------------------------------------15 8.1 仪表外形尺寸----------------------------------------------------------15 8.2 开孔尺寸-----------------------------------------------------------------151.概述GM8802E重量变送器是针对工业现场,需要进行重量变送的场合而开发生产的一种小型仪表。
该仪表具有体积小巧,精度高、性能稳定、操作简单适用的特点。
可广泛应用于:混凝土搅拌及沥青混合料设备、冶金高炉,转炉以及化工、饲料的重量控制等行业。
1.1 功能及特点➢体积小、造型美观、方便适用➢适用于所有电阻应变桥式称重传感器➢全面板数字标定(即调校),过程简单,方便直观➢多重数字滤波功能➢自动零位跟踪功能➢上电自动清零功能➢模拟量(4-20mA、0-20mA、0-10V、0-5V、1-5V可选)隔离输出功能1.2 前面板说明GM8802E前面板图主显示:六位,用于显示称重数据/模拟量输出值及仪表相关信息数据。
GM8802E-VER060200- 1 -状态指示灯:➢ZERO:零位,当秤台或秤斗上物料重量为0±1/4d时,该指示灯亮。
➢S TAB:稳定,当秤台或秤斗上物料重量变化在判稳范围内时,该指示灯亮。
➢V/mA :伏特/毫安,当前显示为变送器输出的模拟量值时,该指示灯亮。
键盘:用于清零显示数据,还用于退出仪表当前功能状态。
用于参数项的选择。
用于参数设置等功能选择。
用于参数设置或标定时进入选项或确认仪表当前功能。
1.3 后面板说明GM8802E后面板图1、电源输入2、模拟量输出3、传感器接口1.4 技术规格1.4.1一般规格:电源:AC220V 50Hz±10%电源滤波器:内附工作温度:-10~40℃最大湿度:90% R.H不可结露- 2 - GM8802E-VER050100功耗:约10W物理尺寸:98×151×49(mm)1.4.2模拟部分:传感器电源:DC12V 350mA(M AX)输入阻抗:10MΩ零点调整范围:0.2~20mV输入灵敏度:0.5uV/d输入范围: 0.2~25mV转换方式: Sig ma - Del taA/D转换速度:200次/秒非线性:0.01% F.S增益漂移:10PPM/℃最高显示精度:1/100001.4.3 数字部分:重量显示:主显示,六位红色高亮度数码管状态显示:两只绿色发光二极管负数显示:“—”超载显示:“OFL”小数点位置:5种可选键盘:四键发声键盘GM8802E-VER060200- 3 -2.安装2.1 一般原则GM8802E重量变送器使用带有保护地的220V 50Hz交流电源。
如果没有保护地,需另外接地以保证使用安全、可靠。
由于传感器输入信号为模拟小信号,其对电子噪声比较敏感,因此该信号传输应采用屏蔽电缆,且应将其与其他电缆分开铺设,更不应捆扎在一起。
信号电缆应远离交流电源。
注意:不要将仪表地线直接接到其它设备上。
2.2 传感器的连接GM8802E重量变送器需外接电阻应变桥式传感器,按下图方式连接传感器到仪表。
当选用四线制传感器时,必须将仪表的SN+与EX+短接,SN-与EX-短接。
传感器电缆应尽量远离其他电缆,特别是不要与其它电缆捆扎在一起。
六线接法EX+ SN+ EX- SN- SIG+ SIG- 屏蔽线四线接法EX+ EX- SIG+ SIG- 屏蔽线- 4 - GM8802E-VER050100EX+:电源正EX-:电源负SN+:感应正SN-:感应负SIG+:信号正SIG-:信号负2.3 电源连接GM8802E重量变送器使用带有保护地的220V、50Hz交流电源。
连接如下图所示:L-火线G-地线N-零线2.4模拟量输出的连接GM8802E分为电压输出型和电流输出型两种。
电压输出型可选择0-10V、0-5V、1-5V模拟量输出,即仪表将实时显示的重量值转换为0-10V(或0-5V、1-5V)模拟量输出。
电流输出型可选择4-20mA、0-20mA模拟量输出,即仪表将实时显示的重量值转换为4-20mA(或0-20mA)模拟量输出。
其输出端子分别为:U/ Iout+和U/Iout-,如下图所示:注:用户订货时,应申明所需模拟量的输出形式。
上述模拟量输出形式在同一块仪表上并非同时具备。
GM8802E-VER060200- 5 -3. 数据输入操作在标定、工作参数设置等过程中,需进行数据输入操作,具体操作如下:在仪表显示闪烁位闪烁时,用以下按键完成数据输入操作::闪烁位数据加1。
