ThreadXUserGuide-中文手册
潮流 GRP260x 管理员手册说明书

深圳市潮流网络技术有限公司GRP2601/GRP2601P |GRP2602/GRP2602P/GRP2602W/GRP2602GGRP2603/GRP2603P|GRP2604/GRP2604PIP语音电话用户手册GRP2601/GRP2601PGRP2602/GRP2602P/GRP2602W/GRP2602G GRP2603/GRP2603P GRP2604/GRP2604P©2022潮流网络技术有限公司.版权所有:未经公司的书面许可,出于任何目的、以任何形式或方式复制或打印的行为是不允许的。
本文中的信息如有改动,恕不另行通知。
最新的电子版本手册可在这里下载:/supportGrandstream是一个注册商标,Grandstream LOGO是潮流网络技术有限公司在美国、欧洲和其它国家的商标。
未经潮流批准擅自修改本产品,或以用户手册以外的方式使用本产品,将会导致保修无效。
警告请不要使用与设备不匹配的电源适配器,设备可能因此损坏,导致保修失效。
GNU GPL信息GRP260x固件包含GNU通用公共许可证(GPL)许可的第三方软件。
潮流根据GPL的特定条款使用软件。
有关许可证的确切条款和条件,请参阅GNU通用公共许可证(GPL)。
潮流GNU GPL相关源代码可以从Grandstream网站下载:/sites/default/files/Resources/grp260x_gnu_gpl.zip目录文档目的 (7)更新日志 (8)固件版本 1.0.3.18 (8)固件版本 1.0.1.57 (8)固件版本 1.0.1.50 (8)固件版本 1.0.1.41 (8)固件版本 1.0.1.36 (8)固件版本 1.0.1.18 (8)欢迎 (9)产品概述 (10)产品特色 (10)技术规格 (11)初始安装 (16)设备清单 (16)安装GRP260x (17)桌面安装 (17)壁挂安装 (17)连接GRP260x (17)了解GRP260X (19)待机界面 (19)使用键盘 (24)通过键盘配置 (27)字母输入 (30)电话功能 (32)拨打电话 (32)听筒、扬声器和耳机模式 (32)多SIP帐号和线路 (32)完成呼叫 (33)IP呼叫 (35)接听电话 (35)接听电话 (35)免打扰 (35)添加黑名单 (36)通话期间 (36)呼叫等待/呼叫保持 (36)静音 (37)呼叫转移 (37)呼叫转移 (37)五方会议 (38)多功能按键(仅GRP2604支持) (38)虚拟多功能按键 (41)语音信箱 (42)呼叫功能 (42)联系人 (45)本地联系人 (45)添加单个联系人 (45)电话本 (45)XML电话本语法 (45)从Web UI界面下载/上传XML电话本 (46)XML远程电话簿URL (46)呼叫记录 (48)本地呼叫记录 (48)呼叫记录操作 (48)设备诊断 (49)连接设备 (50)EHS耳机 (50)恢复出厂设置 (51)通过LCD菜单恢复出厂 (51)通过Web GUI恢复出厂 (51)体验GRP260x (52)图目录图1GRP260x包装清单 (16)图2桌面和壁挂插槽 (17)图3壁挂安装 (17)图4话机背部视图 (18)图5GRP260x待机屏幕 (19)图6LCD显示项定义 (19)图7GRP2601/P键盘 (24)图8GRP2602/P键盘 (25)图9GRP2603/P键盘 (25)图10GRP2604/P键盘 (26)图11GRP260x菜单 (30)图12按键模式配置为线路模式 (32)图13按键模式配置为帐号模式 (33)图143方会议通话界面示例 (38)图15多功能按键页面 (39)图16多功能按键卡片打印选项 (40)图17安装BLF标签纸 (41)图18虚拟多功能按键页面 (41)图19虚拟多功能按键预览 (42)图20下载/上传XML电话本 (46)图21XML远程电话簿 (47)表目录表1GRP260X功能概览 (10)表2GRP2601/GRP2601P技术规格 (11)表3GRP2602/GRP2602P技术规格 (12)表4GRP2603/GRP2603P技术规格 (13)表5GRP2604/GRP2604P技术规格 (14)表6设备清单 (16)表7GRP260x LCD图标 (20)表8GRP260X键盘按键 (26)表9配置菜单 (27)表10呼叫功能 (43)表11呼叫记录图标 (48)文档目的本文档介绍如何通过LCD菜单和Web GUI界面来配置并使用GRP260x。
XGT-用户手册
这个标志引起用户注意,在特定条件下可能会产生电气震动。
■ 设计时的安全说明
小心
4 I/O 信号或通讯线应该设计为离高压电缆或者电源线至少100毫米,以避免噪音或磁场变化的影 响。否则,将引起异常操作。
4 如果有震动存在,让安装的产品免受直接震动。 4 如果存在大量的金属粉尘,确保安装的产品免受金属粉尘以避免异常的发生。
■ 安装时的安全操作
小心
4 在指定的一般标准环境下应用PLC 。 否则,会引起电气震动,火灾,产品异常或者电弧。 4 确保模块安全可靠。如果模块安装不正确,可能会引起异常,错误或者模块掉落。
■ 配线时的安全说明
小心
4应当利用FG端子的3类接线,它是专门用于PLC的。如果端子没有正确地接地,可能会引起异常 操作。
第二章 规格-------------------------------------------------------------------------------- 2-1 ~ 2-4
2.1 一般规格--------------------------------------------------------------------------------------------------------- 2-1 2.2 性能规格-------------------------------------------------------------------------------------------------------- 2-2 2.3 结构特性--------------------------------------------------------------------------------------------------------- 2-3
ThreadXUserGuide-中文手册
常只要几个礼拜的时间。
非黑盒结构 ThreadX 的大部分包括完全的 C 源代码,这排除了许多商业性的内核结构所存在的“黑 盒”问题。在使用 ThreadX 时,程序开发者可以清楚的看到内核运行细节,不存在什么秘 密。 源代码还允许开发程序过程中特殊的修改。虽然没有介绍,但在十分必要时有能力去 修改内核是很有用的。 这些特色对那些习惯于用自己内部内核的开发者来说应该是特别另人振奋的。他们期 望得到源代码并且能够修改内核。ThreadX 对这些人来说是最合适的内核了。
■ 嵌入式应用程序 实时软件 多任务 任务及线程
■ ThreadX 的优点 改进的响应特性 软件维护 增强的吞吐量 处理器隔离 程序划分 好用性 提高开发时间 保护软件投资
ThreadX 概 述
ThreadX 概述
ThreadX 是专为嵌入式应用而设计的高性能实时内核。同其它实时内核不同,ThreadX 具有通用性,使基于 RISC(reduced instruction set computer 简化指令集计算机)和 DSP(Digital Signal Processing 数字信号处理)的小型微控制器的应用程序易于升级。
手册概述
本手册提供了有关 ThreadX——Express Logic 公司高性能实时内核的详尽信息。
指南之意义 本手册适用于嵌入式实时软件的开发者。开发者应熟悉标准实时操作系统的功能及 C
程序设计。
结构 手册包括七章,五个附录以及一篇索引。各部分大致介绍如下: 第一章 ThreadX 概述及其与嵌入式实时系统的关系。 第二章 安装步骤及使用事项。 第三章 详细介绍高性能实时内核——ThreadX 的功能操作。 第四章 详细介绍 ThreadX 应用程序的接口。 第五章 介绍 ThreadX 应用程序的写 I/O 驱动程序。 第六章 ThreadX 处理器自带示例程序的介绍。 第七章 ThreadX 的内部结构。 附录 A ThreadX API 附录 B ThreadX 常量 附录 C ThreadX 数据类型 附录 D Thread 源程序 附录 E ASCII 代码表
Mata手册说明书
Contents[M-0]Introduction to the Mata manualintro.................................................Introduction to the Mata manual[M-1]Introduction and adviceintro........................................................Introduction and advice ing Mata with ado-files first....................................................Introduction andfirst session help........................................................Obtaining help in Stata how.............................................................How Mata works ing Mata interactively LAPACK.........................................The LAPACK linear-algebra routines limits..................................................Limits and memory utilization naming......................................Advice on naming functions and variables permutation................................An aside on permutation matrices and vectors returnedargs..................................Function arguments used to return results source.....................................................Viewing the source code e and specification of tolerances[M-2]Language definitionnguage definition break..............................................Break out of for,while,or do loop class...........................................Object-oriented programming(classes) ments continue...........................Continue with next iteration of for,while,or do loop declarations...................................................Declarations and types do..............................................................do...while(exp) errors.................................................................Error codes exp..................................................................Expressions for......................................................for(exp1;exp2;exp3)stmt ftof...................................................Passing functions to functions goto...................................................................goto label if.............................................................if(exp)...else... op arith........................................................Arithmetic operators op assignment..................................................Assignment operator op colon...........................................................Colon operators op conditional..................................................Conditional operator op increment.......................................Increment and decrement operators op join..............................................Row-and column-join operators op kronecker........................................Kronecker direct-product operator op logical........................................................Logical operators op range..........................................................Range operators op transpose.............................................Conjugate transpose operator12Contents optargs.........................................................Optional arguments pointers..................................................................Pointers pragma...............................................Suppressing warning messages reswords...........................................................Reserved words return........................................................return and return(exp) e of semicolons struct..................................................................Structures e of subscripts syntax............................................Mata language grammar and syntax version............................................................Version control void................................................................V oid matrices while.............................................................while(exp)stmt[M-3]Commands for controlling Matamands for controlling Mata end...................................................Exit Mata and return to Stata mata.....................................................Mata invocation command mata clear.....................................................Clear Mata’s memory mata describe.....................................Describe contents of Mata’s memory mata drop...................................................Drop matrix or function mata help......................................................Obtain help in Stata mata matsave..............................................Save and restore matrices mata memory.........................................Report on Mata’s memory usage mata mlib....................................................Create function library mata mosave................................Save function’s compiled code in objectfile mata rename..............................................Rename matrix or function mata set......................................Set and display Mata system parameters mata stata...................................................Execute Stata command mata which........................................................Identify function namelists........................................Specifying matrix and function names [M-4]Index and guide to functions intro....................................................Index and guide to functions io...................................................................I/O functions manipulation....................................................Matrix manipulation mathematical.........................................Important mathematical functions matrix............................................................Matrix functions programming................................................Programming functions scalar..................................................Scalar mathematical functions solvers................................Functions to solve AX=B and to obtain A inverse standard..........................................Functions to create standard matrices stata........................................................Stata interface functions statistical........................................................Statistical functions string..................................................String manipulation functions utility.......................................................Matrix utility functions [M-5]Mata functions intro...............................................................Mata functionsContents3 abbrev().........................................................Abbreviate strings abs().......................................................Absolute value(length) adosubdir().........................................Determine ado-subdirectory forfile all()..........................................................Element comparisons args()........................................................Number of arguments asarray().........................................................Associative arrays ascii().....................................................Manipulate ASCII codes assert().....................................................Abort execution if false blockdiag()...................................................Block-diagonal matrix bufio()........................................................Buffered(binary)I/O byteorder().............................................Byte order used by computer C()...............................................................Make complex c()...............................................................Access c()value callersversion()........................................Obtain version number of caller cat()....................................................Loadfile into string matrix chdir().......................................................Manipulate directories cholesky().........................................Cholesky square-root decomposition cholinv()...................................Symmetric,positive-definite matrix inversion cholsolve()............................Solve AX=B for X using Cholesky decomposition comb()binatorial function cond()...........................................................Condition number conj()plex conjugate corr()....................................Make correlation matrix from variance matrix cross().............................................................Cross products crossdev()..................................................Deviation cross products cvpermute().................................................Obtain all permutations date()...................................................Date and time manipulation deriv()........................................................Numerical derivatives designmatrix().....................................................Design matrices det()........................................................Determinant of matrix diag().................................................Replace diagonal of a matrix diag().......................................................Create diagonal matrix diag0cnt()..................................................Count zeros on diagonal diagonal().........................................Extract diagonal into column vector dir()....................................................................File list direxists()..................................................Whether directory exists direxternal().....................................Obtain list of existing external globals display().............................................Display text interpreting SMCL displayas()........................................................Set display level displayflush()............................................Flush terminal-output buffer Dmatrix().......................................................Duplication matrix docx*().......................................Generate Office Open XML(.docx)file dsign()............................................FORTRAN-like DSIGN()function e()...................................................................Unit vectors editmissing()..........................................Edit matrix for missing values edittoint()......................................Edit matrix for roundoff error(integers) edittozero().......................................Edit matrix for roundoff error(zeros) editvalue()............................................Edit(change)values in matrix eigensystem()............................................Eigenvectors and eigenvalues4Contentseigensystemselect()pute selected eigenvectors and eigenvalues eltype()..................................Element type and organizational type of object epsilon().......................................Unit roundoff error(machine precision) equilrc()..............................................Row and column equilibration error().........................................................Issue error message errprintf()..................................Format output and display as error message exit()..........................................................Terminate execution exp().................................................Exponentiation and logarithms factorial()..............................................Factorial and gamma function favorspeed()...................................Whether speed or space is to be favored ferrortext()......................................Text and return code offile error code fft().............................................................Fourier transform fileexists().......................................................Whetherfile exists fillmissing()..........................................Fill matrix with missing values findexternal().................................Find,create,and remove external globals findfile().................................................................Findfile floatround().................................................Round tofloat precision fmtwidth().........................................................Width of%fmt fopen()..................................................................File I/O fullsvd()............................................Full singular value decomposition geigensystem().................................Generalized eigenvectors and eigenvalues ghessenbergd()..................................Generalized Hessenberg decomposition ghk()...................Geweke–Hajivassiliou–Keane(GHK)multivariate normal simulator ghkfast().....................GHK multivariate normal simulator using pregenerated points gschurd()...........................................Generalized Schur decomposition halton().........................................Generate a Halton or Hammersley set hash1()...........................................Jenkins’one-at-a-time hash function hessenbergd()..............................................Hessenberg decomposition Hilbert()..........................................................Hilbert matrices I()................................................................Identity matrix inbase()...........................................................Base conversion indexnot()..................................................Find character not in list invorder()............................................Permutation vector manipulation invsym().............................................Symmetric real matrix inversion invtokens()...............................Concatenate string rowvector into string scalar isdiagonal()..............................................Whether matrix is diagonal isfleeting()...........................................Whether argument is temporary isreal()......................................................Storage type of matrix isrealvalues()..................................Whether matrix contains only real values issymmetric().................................Whether matrix is symmetric(Hermitian) isview()....................................................Whether matrix is view J().............................................................Matrix of constants Kmatrix()mutation matrix lapack()PACK linear-algebra functions liststruct()...................................................List structure’s contents Lmatrix().......................................................Elimination matrix logit()...........................................Log odds and complementary log-logContents5 lowertriangle().........................................Extract lower or upper triangle lud()...........................................................LU decomposition luinv()......................................................Square matrix inversion lusolve()...................................Solve AX=B for X using LU decomposition makesymmetric().............................Make square matrix symmetric(Hermitian) matexpsym().......................Exponentiation and logarithms of symmetric matrices matpowersym().........................................Powers of a symmetric matrix mean()............................................Means,variances,and correlations mindouble().................................Minimum and maximum nonmissing value minindex().......................................Indices of minimums and maximums minmax().................................................Minimums and maximums missing().......................................Count missing and nonmissing values missingof()................................................Appropriate missing value mod()..................................................................Modulus moptimize().....................................................Model optimization more().....................................................Create–more–condition negate().......................................................Negate real matrix norm()....................................................Matrix and vector norms normal()................................Cumulatives,reverse cumulatives,and densities optimize().....................................................Function optimization panelsetup()...................................................Panel-data processing pathjoin()....................................................File path manipulation pinv().................................................Moore–Penrose pseudoinverse polyeval()........................................Manipulate and evaluate polynomials printf().............................................................Format output qrd()...........................................................QR decomposition qrinv().............................Generalized inverse of matrix via QR decomposition qrsolve()...................................Solve AX=B for X using QR decomposition quadcross().............................................Quad-precision cross products range()..................................................Vector over specified range rank().............................................................Rank of matrix Re()..................................................Extract real or imaginary part reldif()..................................................Relative/absolute difference rows()........................................Number of rows and number of columns rowshape().........................................................Reshape matrix runiform()..............................Uniform and nonuniform pseudorandom variates runningsum().................................................Running sum of vector schurd()......................................................Schur decomposition select()..............................................Select rows,columns,or indices setbreakintr()..................................................Break-key processing sign()...........................................Sign and complex quadrant functions sin()..........................................Trigonometric and hyperbolic functions sizeof().........................................Number of bytes consumed by object solve tol().....................................Tolerance used by solvers and inverters solvelower()..........................................Solve AX=B for X,A triangular solvenl().........................................Solve systems of nonlinear equations sort().......................................................Reorder rows of matrix6Contentssoundex().............................................Convert string to soundex code spline3()..................................................Cubic spline interpolation sqrt().................................................................Square root st addobs()....................................Add observations to current Stata dataset st addvar().......................................Add variable to current Stata dataset st data()...........................................Load copy of current Stata dataset st dir()..................................................Obtain list of Stata objects st dropvar()...........................................Drop variables or observations st global()........................Obtain strings from and put strings into global macros st isfmt()......................................................Whether valid%fmt st isname()................................................Whether valid Stata name st local()..........................Obtain strings from and put strings into Stata macros st macroexpand().......................................Expand Stata macros in string st matrix().............................................Obtain and put Stata matrices st numscalar().......................Obtain values from and put values into Stata scalars st nvar()........................................Numbers of variables and observations st rclear().....................................................Clear r(),e(),or s() st store().................................Modify values stored in current Stata dataset st subview()..................................................Make view from view st tempname()...............................................Temporary Stata names st tsrevar().....................................Create time-series op.varname variables st updata()....................................Determine or set data-have-changedflag st varformat().................................Obtain/set format,etc.,of Stata variable st varindex()...............................Obtain variable indices from variable names st varname()...............................Obtain variable names from variable indices st varrename()................................................Rename Stata variable st vartype()............................................Storage type of Stata variable st view()..........................Make matrix that is a view onto current Stata dataset st viewvars().......................................Variables and observations of view st vlexists()e and manipulate value labels stata()......................................................Execute Stata command stataversion().............................................Version of Stata being used strdup()..........................................................String duplication strlen()...........................................................Length of string strmatch()....................................Determine whether string matches pattern strofreal().....................................................Convert real to string strpos().....................................................Find substring in string strreverse()..........................................................Reverse string strtoname()...........................................Convert a string to a Stata name strtoreal().....................................................Convert string to real strtrim()...........................................................Remove blanks strupper()......................................Convert string to uppercase(lowercase) subinstr()...........................................................Substitute text sublowertriangle()...........................Return a matrix with zeros above a diagonal substr()......................................................Substitute into string substr()...........................................................Extract substring sum().....................................................................Sums svd()..................................................Singular value decomposition svsolve()..........................Solve AX=B for X using singular value decomposition swap()..............................................Interchange contents of variablesContents7 Toeplitz().........................................................Toeplitz matrices tokenget()........................................................Advanced parsing tokens()..................................................Obtain tokens from string trace().......................................................Trace of square matrix transpose()..................................................Transposition in place transposeonly().......................................Transposition without conjugation trunc()............................................................Round to integeruniqrows()..............................................Obtain sorted,unique values unitcircle()plex vector containing unit circle unlink().................................................................Erasefile valofexternal().........................................Obtain value of external global Vandermonde()................................................Vandermonde matrices vec().........................................................Stack matrix columns xl()............................................................Excelfile I/O class[M-6]Mata glossary of common terms Glossary........................................................................ Subject and author index...........................................................。
threadx学习笔记

tx_ill.s文件用来处理初始化过程中的汇编语言,它是面向处理器和开发工具的。
Void_tx_initialize_low_level{1、CPSCR|= FIQ_ MODE,SET SP_fiq;2、CPSCR|=IRQ_MODE,SET SP_irp;3、CPSCR|=SVC_MODE,SET SP_svc;4、设置中断向量表IRQ_TABLE;5、设置内部TIMER线程的堆栈起始地址,堆栈大小和优先级::tx_timer_stack_start,_tx_timer_stack_size,_tx_timer_priorit;6、设置初始化后未使用内存地址的初始值_tx_initialize_unused_memory;}Tx_tcs.s负责在中断发生时对上次的运行现场进行保存,它保存中断上下文,为了不覆盖R14_irq离得中断返回地址,TCS的返回是通过跳到__tx_irq_processing_return地址做到的。
Tx_TCR.S负责中断处理程序执行完后的处理。
Void _tx_thread_context_save{1、把表示中断嵌套个数的变量_tx_thread_system_state++;2、if _tx_thread_system_state>1,PUSH R0-R3,CPSR,R14 in IRQ stack,B__tx_irq_processing_return;3、else if _tx_thread_current_ptr=0判断是否有线程正在运行,if not ,B_tx_irq_processing_return;4、else,P USH Context_irq in thread’s stack,SP_thread=new SP,B_tx_irq_processing_return;}由于R13和R14在不同的CPU模式下对应的是不同的物理寄存器,所以若要得到中断前的线程堆栈指针,需要先返回到该线程的运行模式,同时禁止中断,取值后再返回到终端模式。
AM35x-OMAP35x-PSP 04.02.00.07 UserGuide 中文手册
AM35x-OMAP35x-PSP 04.02.00.07 UserGuide 中文手册翻译:卢浩转载请注明出处嵌入式爱好者开发群122879839 1 先阅读这个1.1 关于本手册2 安装2.1 系统需求2.2 支持包内容2.3 环境安装2.4 选择启动模式2.4.1 OMAP3EVM (OMAP35x,AM /DM37x)2.4.1.1 用Onenand的EVM板2.4.1.2 用镁光的nand的EVM板2.4.2 AM3517 EVM2.4.3 beagleboard的板子3 x-loader3.1 简介3.2 编译x-loader3.2.1 标记x-loader3.2.2 ECC校验的选择4 U-boot4.1 编译U-boot4.2 U-boot功能4.2.1 OneNAND 支持4.2.1.1 标记坏块4.2.1.2 擦除OneNAND4.2.1.3 写入OneNAND4.2.1.4 OneNAND 的阅读4.2.1.5 擦除OneNAND4.2.2 NAND 的支持4.2.2.1 NAND 布局4.2.2.2 标记坏块4.2.2.3 查看坏块4.2.2.4 擦除Nand4.2.2.5 Nand的阅读4.2.2.6 Nand 的阅读4.2.2.7 选择ECC校验4.2.3 nor的支持(仅在AM3517EVM)4.2.4 MUSB 主机支持4.3 从uboot烧写4.3.1 OneNAND4.3.1.1 保存环境变量4.3.1.2 烧写x-loader4.3.1.3 烧写u-boot4.3.1.4 烧写Linux 内核4.3.1.5 烧写JFFS2 文件系统4.3.2 NAND4.3.2.1 保存环境变量4.3.2.2 烧写x-loader4.3.2.3 烧写uboot4.3.2.4 烧写Linux 内核4.3.2.5 烧写JFFS2 文件系统4.3.3 nor5 linux内核5.1 编译内核5.2 为内核选择对应的nand ecc校验5.3 配置内核5.4 用正确的串口输出设备5.5 创建jffs2 文件系统5.6 启动内核5.6.1 从nand启动5.6.2 从onenand启动5.6.3 从mmc启动5.6.4 从nor启动6 音频驱动程序7 视频显示驱动程序8 视频捕获驱动程序9 USB 驱动程序10 MMC 驱动程序11 以太网驱动程序12 电源管理13 电源管理IC14 TI HECC CAN 控制器先阅读以下内容(非常重要)重要的变化现在,Linux 内核中的NAND 驱动程序使用 1 位硬件ECC校验.。
THREADX操作系统各模块详解第一部分
THREADX深入学习简介最近在做THREADX移植项目,所以在开始学习THREADX操作系统。
想把自己学到的东西总结一下。
学习操作系统时,按照领导的意思把操作系统进行模块划分。
通过查找资料将操作系统划分为任务调度模块、任务管理模块、任务间同步和通信模块、内存管理模块、中断管理模块、时钟管理模块。
下面将分别对各个模块进行分析和研究。
我将深入介绍各个模块的工作原理,通过此文档能对操作系统的工作原理有深入的了解。
首先得我的分析是针对MIPS、ARM、251内核进行分析。
我移植的平台是16位的251平台。
个人认为移植一个操作系统,首先对操作系统的内核调度原理必须十分清楚,然后对你的移植平台架构、指令集也要十分清楚,比如说下面几个方面:1、子程序调用时PC值是怎么被保存得(MPIS,将子程序的返回值存放在了RA寄存器中,251是PC自动入栈(ECALL指令)退出时使用ERET等指令,ARM是在LR寄存器中要计算相应减去的数值)。
2、中断发生时(251PC自动入栈但顺序和子程序调用压入顺序不一样,中断返回使用RETI指令。
MIPS,PC是被存入了EPC寄存器中,使用eret指令。
ARM,LR中数值的计算,赋值给PC即可)2.任务调度操作系统的核心模块就是内核调度。
首先要弄清楚其调度原理。
带着下面几个问题去思考。
1、任务入口函数第一次是怎么被执行的。
2、任务是怎么被切换的。
3、任务是怎么被抢占的。
以上几个问题是任务调度的核心。
带着这几个问题去看内核源码发现任务调度使用的方法就是任务栈和系统栈,内核利用入栈和出栈完成对任务的调度和切换。
而任务被调度起来是依靠timer驱动来工作。
基于此分析可以得出内核调度重点是以下几个方面:1、明白任务栈的构建方式,即任务创建时初始化任务堆栈时保存的数据。
这些数据要根据具体的硬件平台去实现,这个栈的初始化就是解决上面的第一个问题的。
因为在内核调度时,任务第一次被执行是出此栈来执行对应的入口函数的。
RT-Thread用户手册
6.7
线程相关接口 . . . . . . . . . . . . . . . . . . . . . . . . . . . . . . . . . . . . . . . . . . . . . . . . . . . . . . . . . . . . . . . . . . . . . . . . . . . . . . . . . . . . . . . . . . . . . . . . . . . . . . . . . . . . . . . . . . . . . . . . . . . . . . . . . . . . . . . . . . . . . . . . . . . . . . . . . . . . . . . . . . . . . . . . . . . . . . . . . . . . . . . . . . . . . . . . . . . . . . . . . . . . . . . . . . . . . . . . . . . . . . . . . . . . . . . . . . . . . . . . . . . . . . . . . . . . . . . . . . . . . . . . . . . . . . . . . . . . . . . . . . . . . . . . . . . . . . . . . . . . . . . . . . . . . . . . . .
3 5 5 5 6 9 9 14 18 20 21 22 27 28 29 29 29 29 31 31 34 43 43 43 44 46 47 47 i
5 内核对象模型 5.1 C语言的对象化模型 . . . . . . . . . . . . . . . . . . . . . . . . . . . . . . . 5.2 内核对象模型 . . . . . . . . . . . . . . . . . . . . . . . . . . . . . . . . . . 6 线程调度与管理 6.1 实时系统的需求 6.2 线程调度器 . . . 6.3 线程控制块 . . . 6.4 线程状态 . . . . 6.5 空闲线程 . . . . 6.6 调度器相关接口 . . . . . . . . . . . . . . . . . . . . . . . . . . . . . . . . . . . . . . . . . . . . . . . . . . . . . . . . . . . . . . . . . . . . . . . . . . . . . . . . . . . . . . . . . . . . . . . . . . . . . . . . . . . . . . . . . . . . . . . . . . . . . . . . . . . . . . . . . . . . . . . . . . . . . . . . . . . . . . . . . . . . . . . . . . . . . . . . . . . . . . . . . . . . . . . . . . . . . .
GUIDE用户手册v1.1

GUIDE V1.0.1an Integrated Development Environmentfor C,C++,PascalGUIDE v1.0.1用户手册一、GUIDE简介GUIDE(GAIT1 Universal IDE)是由北航GAIT研究组开发的、专门为NOI(National Olympics of Informatics)选手设计的、支持C/C++/Pascal三种程序设计语言的小型集成开发环境。
作为一个简单、快捷的开发环境,GUIDE旨在为选手们提供单文件编译、调试和运行的环境。
GUIDE主要特点如下:z跨平台:GUIDE可在linux平台和windows平台上运行,且界面和使用方法几乎完全相同;z多语言支持:GUIDE目前无差别的支持C/C++和Pascal三种语言的编辑、编译和调试运行;z单个源文件编译、调试:使用GUIDE,用户可以省去建立工程的烦琐过程,提升开发速度。
二、GUIDE的安装2.1 GUIDE (for linux)安装过程2.1.1安装GUIDE用户可以从中国计算机学会的下载页面下载GUIDE-1.0.0-linux.tar文件,使用如下命令解压缩安装文件:“tar xvf GUIDE-1.0.0-linux.tar”。
进入解压后的文件夹中,运行安装脚本install.sh。
安装脚本运行过程中,用户可以指定安装目录也可使用默认安装目录(默认安装目录/usr/bin),如下图2-1,请用户确保当前用户对指定目录有写入权限;安装脚本运行完毕之后,GUIDE安装完毕。
图2-1 GUIDE for linux安装界面2.1.2 设置GUIDE所需编译调试环境GUIDE for linux默认的C/C++和Pascal语言的编译调试工具路径为”/usr/bin”。
如果系统中编译调试工具安装在其它路径下,请参照第三章3.5.1,修改GUIDE的设置。
如果系统中尚未安装C/C++和Pascal语言的编译调试工具,请参考附录一进行安装,未完装编译调试工具或编译调试工具的路径设置不正确,将无法使用GUIDE的编译调试功能。
XXXXXX产品型号XXXX的用户指南说明书
ContentsDescription Page IntroductionPreliminary comments andsafety precautions . . . . . . . . . . . . . . . . . . . . . . .2Warranty and liability information . . . . . . . . . . . .2Safety precautions . . . . . . . . . . . . . . . . . . . . . . .2DescriptionCatalog number identification . . . . . . . . . . . . . .2Catalog number example . . . . . . . . . . . . . . . . . .2Receiving, handling, and storageReceiving and handling . . . . . . . . . . . . . . . . . . .3Storage . . . . . . . . . . . . . . . . . . . . . . . . . . . . . . . .3Installation and wiring General . . . . . . . . . . . . . . . . . . . . . . . . . . . . . . . .3Mounting location . . . . . . . . . . . . . . . . . . . . . . .3Mounting procedure . . . . . . . . . . . . . . . . . . . . .3Knockout procedure . . . . . . . . . . . . . . . . . . . . . .3Wiring . . . . . . . . . . . . . . . . . . . . . . . . . . . . . . . . .5Field wiring . . . . . . . . . . . . . . . . . . . . . . . . . . . . .5Door-locking means . . . . . . . . . . . . . . . . . . . . . .5Operation . . . . . . . . . . . . . . . . . . . . . . . . . . . . . . .8Maintenance . . . . . . . . . . . . . . . . . . . . . . . . . . . .8m WARNINGREAD AND UNDERSTAND THE INSTRUCTIONS CONTAINED HEREINAFTER BEFORE ATTEMPTING TO UNPACK, ASSEMBLE, OPERATE, OR MAINTAIN THIS EQUIPMENT.m WARNINGHAZARDOUS VOLTAGES THAT CAN CAUSE DEATH OR SEVERE PERSONAL INJURY ARE PRESENT INSIDE ENCLOSURE. FOLLOW PROPER INSTALLATION, OPERATION, AND MAINTENANCE PROCEDURES TO AVOID THESE VOLTAGES.m WARNINGALL POSSIBLE CONTINGENCIES THAT MAY ARISE DURING INSTALLATION, OPERATION, ORMAINTENANCE, AND ALL DETAILS AND VARIATIONS OF THIS EQUIPMENT DO NOT PURPORT TO BE COVERED BY THESE INSTRUCTIONS. IF FURTHER INFORMATION IS DESIRED BY PURCHASER REGARDING THE PARTICULAR INSTALLATION, OPERATION, OR MAINTENANCE OF PARTICULAR EQUIPMENT, CONTACT AN EATON REPRESENTATIVE.Enclosed meter—Power Xpert Multi-Point Meter2Instruction Booklet IB150002ENEffective August 2013Enclosed meter—Power Xpert Multi-Point Metereaton IntroductionPreliminary comments and safety precautionsThis technical document is intended to cover most aspects associated with the installation, application, operation, andmaintenance of enclosed Power Xpert T Multi-Point Meter (PXMP) equipment . It is provided as a guide for authorized and qualified personnel only .Warranty and liability informationNo warranties, expressed or implied, including warranties of fitness for a particular purpose of merchantability, or warranties arising from course of dealing or usage of trade, are made regarding the information, recommendations, and descriptions contained herein . In no event will Eaton be responsible to the purchaser or the user in contract, in tort (including negligence), strict liability, or otherwise for any special, indirect, incidental, or consequential damage or loss whatsoever, including but not limited to damage or loss of use of equipment, plant or power system, cost of capital, loss of power, additional expenses in the use of existing power facilities, or claims against the purchaser or the user by its customers resulting from the use of the information and descriptions contained herein .Safety precautionsAll safety codes, safety standards, and/or regulations must be strictly observed in the installation, operation, and maintenance of this device .m CAUTIONCOMPLETELY READ AND UNDERSTAND THE MATERIAL PRESENTED IN THIS DOCUMENT BEFORE ATTEMPTING INSTALLATION, OPERATION, OR APPLICATION OF THE EQUIPMENT. IN ADDITION, ONLY QUALIFIED PERSONS SHOULD BE PERMITTED TO PERFORM ANY WORK ASSOCIATED WITH THE EQUIPMENT. ANY WIRING INSTRUCTIONS PRESENTED IN THIS DOCUMENT MUST BE FOLLOWED PRECISELY. FAILURE TO DO SO COULD CAUSE PERMANENT EQUIPMENT DAMAGE.m CAUTIONREFER ALSO TO PXMP DEVICE INSTRUCTION BOOKS. REFER TO INSTALLATION MANUAL MN150001EN.DescriptionCatalog number identificationThe enclosed PXMP catalog number provides a description of the features provided with your device . The catalog number is included on labels both on the shipping carton and on the equipment enclosure .The first set of characters identifies the type of monitoring device mounted in the enclosure . (Refer to PXMP Installation Manual MN150001EN for detailed information on the monitoring device .) See T able 1 on Page 6, which references the PXMP catalog numbering system .otee:N The second character denotes the type of enclosure .2NEMA T 12 enclosure 3NEMA 3R enclosure 4NEMA 4X enclosureotee:N The third character denotes 24 Vdc power supply .A None—24 Vdc supplied by other sourceB Single-phase, 100–240 Vac to 24 Vdc, 60 wattC Three-phase, 400–500 Vac to 24 Vdc, 60 wattD Three-phase, 480–600 Vac to 24 Vdc, 55 wattotee:N The fourth character denotes the display type .A NoneD 6-inch color touchscreenCatalog number exampleThe catalog number PXMP-MB-2B-D denotes a PXMP-MB monitoring device mounted in a NEMA 12 enclosure with a single-phase power supply and a display (PXMP-DISP-6) .3Instruction Booklet IB150002ENEffective August 2013Enclosed meter—Power Xpert Multi-Point Metereaton Receiving, handling, and storageReceiving and handlingEvery effort is made to ensure that the enclosed PXMP equipment arrives at its destination undamaged and ready for installation . Crating and packing are designed to protect internal components as well as the enclosure . Do not remove protective packing until the equipment is ready for installation .When the equipment reaches its destination, the customer should inspect the shipping container for any obvious signs of roughhandling and/or external damage that occurred during transportation . Record any external and internal damage for reporting to the transportation carrier and Eaton, once a thorough inspection is complete . All claims should be as specific as possible and include general order numbers .A plastic bag of instruction booklets and/or CDs will be found in the shipping container . Store these documents in a safe place .StorageAlthough well packaged, this equipment is not suitable for storage outdoors . And if the equipment is to be stored indoors for any period of time, it should be stored with its protective packaging in place . Refer to the Power Xpert Multi-Point Meter User and Installation Manual MN150001EN for suitable conditions for these devices .Installation and wiringGeneralEnclosed PXMP devices are factory wired and tested . Installation requires solidly mounting the enclosed unit and connecting field wiring . Included in this booklet are diagrams of the factory wiring and various field wiring options . Review and understand the appropriate diagrams for the catalog number of the unit you have ordered .The system voltage application is assumed to be either a three-phase, four-wire system or a single-phase, three-wire system . The enclosed PXMP is provided with a meter base that can accept a variety of modules to allow for maximum flexibility for theapplication . Up to 10 different PXMP Meter Modules (PXMP-MMs) can be mixed and matched within a PXMP Meter Base (PXMP-MB) to accommodate a total of up to 60 poles of metering channels from a variety of single-, two-, and three-pole loads . For applications that are three-phase, three-wire, and different CT configurations, as well as the different modules available with the meter bases, please see Chapter 4 of the User and Installation Manual MN150001EN for further details and configuration options . All models containing an I/O module and RJ45 communications connections will be required to have the external wires connected directly to the PXMP device .Mounting locationChoose a location that offers a flat, rigid mounting surface capable of supporting the weight of the equipment (Figure 1 through Figure 3) . Units will weigh 100 lbs (45 .5 kg) maximum . Mount the equipment in a suitable environment . These enclosures are designed forNEMA 12, 3R, and 4X environments . The catalog number identifies the enclosure . If there are any doubts as to location suitability, discuss them with your Eaton representative . Check to make certain that there are no pipes, wires, or other mounting hazards in the immediate mounting area that could create a problem . Carefully remove all packing material from the unit . Even though an equipment inspection was made when the equipment wasreceived, make another careful inspection of the enclosure and the devices inside as packing material is removed . Be especially alert for distorted metal, loose wires, or damaged components .Mounting procedureThe enclosures are provided with four elongated mounting holes, two at the top and two at the bottom .Knockout procedureUse an appropriate knockout punching tool for incoming power connections . In addition, the use of an appropriate NEMA-rated hub is required to maintain enclosure NEMA rating .Figure 1. Dimensions of Enclosed PXMP —NEMA 124Instruction Booklet IB150002ENEffective August 2013Enclosed meter—Power Xpert Multi-Point Metereaton Figure 2. Dimensions of Enclosed PXMP—NEMA 3RFigure 3. Dimensions of Enclosed PXMP—NEMA 4X5Instruction Booklet IB150002ENEffective August 2013Enclosed meter—Power Xpert Multi-Point Metereaton m CAUTIONEXTREME CARE SHOULD BE TAKEN TO PROTECT THE EQUIPMENT FROM DRILL CHIPS, FILINGS, AND OTHER CONTAMINANTS WHEN MAKING THE WIRE ENTRY HOLES AND MOUNTING THE ENCLOSURE TO PREVENT COMPONENT DAMAGE OR A FUTURE MALFUNCTION.Step 1: Locate the four mounting holes that are on the back of the enclosure, two on the top and two on the bottom .Step 2: Install required mounting bolt anchors and mounting bolts in top two holes, but do not completely tighten the bolts .Step 3: While still supporting the enclosure, install the two lower mounting bolts in the lower holes, but do not completely tighten . Use shims, if required, to prevent deformation of the enclosure when tightening the bolts, if the mountingsurface is distorted .Step 4: Tighten all four mounting bolts after any required shimming is completed .Wiringm WARNINGCONTROL WIRING MAY HAVE VOLTAGE PRESENT THAT CAN CAUSE SEVERE PERSONAL INJURY OR DEATH. DE-ENERGIZE ALL CONDUCTORS BEFORE BEGINNING TO PERFORM ANY WIRING ACTIVITY TO OR WITHIN THE ENCLOSED PXMP DEVICE.m WARNINGTHE DISCONNECT SWITCHES IN THIS UNIT DISCONNECT CONTROL OR SENSING VOLTAGE TO THE PXMP DEVICE. WHEN THESE DISCONNECTS ARE IN THE “OFF” POSITION, THE CURRENT TRANSFORMER CIRCUIT, FUSES, WIRING, RECEPTACLE, AND INPUTS/OUTPUTS ARE ENERGIZED. A DISCONNECTING MEANS AND UPSTREAM PROTECTION SHOULD BE INSTALLED FOR ALL CIRCUITS. A SHORT-CIRCUIT–TYPE TERMINAL BLOCK IS PROVIDED FOR THE CURRENT TRANSFORMER CIRCUIT.Understand the diagram(s) that pertain to your order before you begin the field wiring.Refer to Installation Manual MN150001EN for more information regarding the PXMP .Field wiringotee:N All field wiring must be #14 AWG minimum .Figure 4 through Figure 6 show the field wiring options available . Not all of these diagrams will pertain to your order . Understand your system and use the appropriate figures .Factory wiring is shown solid; field wiring is shown dashed .Door-locking meansThe enclosure has been fitted with means for securing the door so that it cannot be opened or tampered with . The lower wing latch can be secured in place with a padlock or other multiple padlocking device . With the wing latch in the vertical position, the door can be locked in the OPEN position . With the wing latch in the horizontal position, the door can be locked in the CLOSED position . A padlock, can be placed in the left or right slots . The left slot is sized for a 3/8-inch padlock, and the right slot is sized for a 1/4-inch padlock . Please see image below for an example of a padlock installed inthe wing latch .Padlock Installed in Wing Latch6Instruction Booklet IB150002ENEffective August 2013Enclosed meter—Power Xpert Multi-Point Metereaton T able 1. Power Xpert Multi-Point Meter Catalog Numbering SystemPXMP-MB - 2 B - DMeter BaseMB = Three-phase / single-phase, three-wire with ABCN voltage inputsMB–AB = Single-phase / three-wire with ABN voltage inputsEnclosure Rating2 = NEMA 123 = NEMA 3R4 = NEMA 4XPower SupplyA = None—24 Vdc supplied by other sourceB = Single-phase, 100–240 Vac to 24 Vdc, 60 wattC = Three-phase, 400–500 Vac to 24 Vdc, 60 wattD = Three-phase, 480–600 Vac to 24 Vdc, 55 wattDisplayA = NoneD = 6-inch color touchscreenExample: PXMP-MB-2B-DThe catalog number above represents a Power Xpert Multi-Point Meter with three-phase / single-phase, three-wire with ABCN voltageinputs, NEMA 12 enclosure, single-phase 120–240 Vac to 24 Vdc power supply, and display (PXMP-DISP-6) .Figure 4. 120–240 Vac, 50/60 Hz, Single-Phase, Three-Wire System7Instruction Booklet IB150002ENEffective August 2013Enclosed meter—Power Xpert Multi-Point Metereaton Figure 5. 120–240 Vac, 50/60 Hz, Three-Phase, Four-WireWye SystemFigure 6. 480–600 Vac, 50/60 Hz, Three-Phase, Four-Wire Wye SystemEaton1000 Eaton Boulevard Cleveland, OH 44122 United StatesEaton .com© 2013 EatonAll Rights ReservedPrinted in USAPublication No . IB150002EN / Z13706 August 2013Eaton is a registered trademark . All other trademarks are property of their respective owners .Instruction Booklet IB150002EN Effective August 2013Enclosed meter— Power Xpert Multi-Point MeteroperationRefer also to PXMP device instruction books . Refer to Installation Manual MN150001EN .The Enclosed PXMP is equipped with a two-position fused disconnect switch to enable switching voltage on and off to the PXMP device . This switch is marked SERVICE DISCONNECT .The terminal blocks for the current circuits are short-circuit type . Shorting screws are included .The disconnect switch in this unit disconnects control or sensing voltage to the PXMP device . When this disconnect is in the ON position, the current transformer circuit, fuses, wiring, receptacle, and input/output are energized . A disconnecting means and upstream protection should be installed for all circuits . A short-circuit type terminal block is provided for the current transformer circuit .Maintenancem WARNINGHAZARDOUS VOLTAGE CAN CAUSE SEVERE INJURY OR DEATH. MULTIPLE SUPPLY SOURCES ARE PROVIDED. DISCONNECT EACH BEFORE SERVICING.m WARNINGREFER ALSO TO PXMP DEVICE INSTRUCTION BOOKS. REFER TO INSTALLATION MANUAL MN150001EN.m WARNINGIN GENERAL, THE ENCLOSED PXMP UNIT IS DESIGNED TO BE RELATIVELY MAINTENANCE-FREE UNDER NORMAL USAGE. HOWEVER, BECAUSE OF THE VARIABILITY OF APPLICATION CONDITIONS AND THE IMPORTANCE PLACED ON DEPENDABLE OPERATION AND INSPECTION, MAINTENANCE CHECKS SHOULD BE MADE ON A REGULARLY SCHEDULED BASIS. VISUALLY INSPECT FOR LOOSE PARTS, WIRES,AND/OR HARDWARE. INSPECT FOR DISCOLORATION OF INSULATION AND DAMAGED OR DISCOLORED COMPONENTS. BE ALERT FOR ACCUMULATION OF DIRT AND/OR MOISTURE ON STRUCTURE. CHECK OPERATION OF DISCONNECT SWITCH(ES) AND CONTINUITY OF FUSES, WHERE APPLICABLE.。
MANUAL GUIDE说明手册
一、參數設定 (3)二、MANUAL GUIDE主畫面說明 (3)1、模式選擇開關切換到EDIT(編輯) (3)2、按下MANUL UGIDE按鍵出現如圖所示畫面 (3)3、功能鍵說明 (4)三、功能鍵功能說明- WRK-CO(工作座標)模式 (4)1、功能鍵說明 (5)2、OFFSET-刀具補償標準 (5)四、[ SETTNG ] (6)1、功能鍵說明 (6)五、LIST-程式目錄 (7)1、功能鍵說明 (7)六、編輯選單說明 (8)1、編輯選單的說明如下 (8)1、功能鍵說明 (9)七、MSF CODE-M、S、F碼軟鍵 (10)2、功能鍵說明 (10)八、EDIT-編輯程式 (11)1、模式選擇開關切換到EDIT(編輯) (11)2、按下MANUL UGIDE按鍵出現如圖所示畫面 (11)3、設定「OFFSET(刀具補正)」 (11)九、編輯程式「LIST」 (12)1、按下「LIST」出現如圖 (12)2、輸入程式號碼例-1 (12)3、按下「POSTIN」,逐一按下選擇「G91」模式,出現如圖 (13)4、按下「G91」模式,出現如圖 (13)6、設定「平面加工」指令 (18)7、設定「TOOL(刀具定義)」 (19)8、設定鑽孔加工 (25)9、設定「MSF(MSF值)」 (26)10、設定袋狀輪廓加工 (31)11、設定「MSF(MSF值)」 (32)一、參數設定OPTION參數:P9984#7=1PMC訊號:G62.4=1示波器功能需OFF(會影響MANUAL GUIDE的圖形顯示) 其他參數:P6500#5=1P6515=10P9100=8000P9125=224P9126=234P9127=235P9140=20P9141=20P9150=800二、M ANUAL GUIDE主畫面說明1、模式選擇開關切換到EDIT(編輯)2、按下MANUL UGIDE按鍵出現如圖所示畫面3、功能鍵說明●EDIT(編輯 ): 製造或者編輯一個程式。
xFlasher 360 User Guide

xFlasher 360 User GuideVersion: 1.2By: Element18592Table of ContentsIntroduction (3)About the xFlasher (3)System Requirements (3)What’s Included in the Box (3)Pinouts (4)JTAG Cable Pinout (4)X360ACE V3 Pinout Example: (4)Coolrunner Pinout Example: (4)4GB eMMC Cable Pinout (5)16/256/512MB SPI Cable Pinout (6)Driver Installation (7)Operation (9)4GB eMMC NAND Usage (9)16/256/512MB NAND Usage (9)Programming Glitch Chips (9)Programming Console Nands (10)IntroductionAbout the xFlasher•Nearly 3 times faster than the NAND-X•An all-in-one design compatible with every Xbox 360 motherboard•Easily toggle between SPI and eMMC mode with the flip of a switch•Reads/writes 4GB NANDs in 5 seconds•Reads/writes 16MB NANDs in under 50 seconds; 512MB in under 4 minutes•No more single use 4GB QSB's•Native integration with the J-Runner with Extras software•Flashing compatibility for all Xilinx based glitch chips including the Ace V3, Coolrunner, Matrix, etc.•Native Windows x64 drivers, no more hassling with unsigned driversSystem Requirements•Microsoft Windows Vista Service Pack 2 or later•USB 2.0 Compliant PCWhat’s Included in the BoxThe xFlasher 360 includes the following items in the package:• 1.) JTAG Cable• 2.) eMMC Cable• 3.) SPI Cable• 4.) xFlasher 360PinoutsJTAG Cable PinoutThe following cable should be used when programming various glitch chips.Cable Color UsageGreen TMSWhite TDIBlue TDOYellow TCKBlack GNDRed VCC X360ACE V3 Pinout Example:Coolrunner Pinout Example:4GB eMMC Cable PinoutThe following cable should be used when programming consoles that have a 4GB NAND chip.NOTE: Before powering on the console, disconnect the cable from the programmer and from the crystal on the board.Cable Color UsageGrey U1D1 Pad 14Purple U1D1 Pad 11Blue U1D1 Pad 3Black GNDYellow U1D1 Pad 1Orange U1D1 Pad 2Red U1D1 Pad 16Brown U1D1 Pad 13Green Y3D1 Crystal16/256/512MB SPI Cable PinoutThe following cable should be used when programming consoles that have a 16MB, 256MB, or 512MB NAND chip. NOTE: Before powering on the console, disconnect the cable from the programmer.Cable Color Usage (Phat/Slim)1 - Black J1D2/J2C1 Pad 12 - Brown J1D2/J2C1 Pad 23 - Red J1D2/J2C1 Pad 34 - Orange J1D2/J2C1 Pad 45 - Yellow J1D2/J2C1 Pad 66 - Green J2B1/J2C3 Pad 57 - Blue J2B1/J2C3 Pad 6Driver InstallationThe following steps need to be performed to install the driver required to use xFlasher 360:1.Download the latest driver installer.2.Navigate to the downloads location and execute xFlasher-Drivers.exe3.The installation wizard will launch. On the first page, click the Extract button. The wizard will copy somefiles to a temporary directory and then the Device Driver Installation Wizard will launch.4.When the Device Driver Installation Wizard launches, click the Next button.5.On the next page, click I accept this agreement and then click the Next button.6.The wizard will now install the required drivers. Once this process is complete a status page showingdriver names will appear. Simply click Finish to close the wizard.OperationNOTE: Before powering on the console, disconnect the programming cable between the xFlasher and the console. If it is a 4GB eMMC NAND, disconnect the crystal on the board with the built-in break-away cable.4GB eMMC NAND Usage1.Solder the eMMC read/write cable to the motherboard2.Connect power to the console3.Connect the xFlasher to the eMMC read/write cable4.Connect the xFlasher to PC via a USB cable16/256/512MB NAND Usage1.Solder the SPI read/write cable to the motherboard2.Connect power to the console3.Connect the xFlasher to the SPI read/write cable4.Connect the xFlasher to PC via a USB cableProgramming Glitch ChipsNote: The xFlasher can ONLY program SVF timing files; these are included in J-Runner with Extras.1.The Xbox 360 console must be plugged in but NOT powered on when programming the glitch chip.2.When launching J-Runner with Extras for the first time on your PC, you may receive a prompt to installthe required Visual Studio Redistributable. Click OK to begin the installation.3.Before you can program a glitch chip, it is mandatory that the switch on the top of the xFlasher is set tothe SPI mode.4.Refer to the specifics for your console/glitch type for further instructions.Programming Console Nands1.The Xbox 360 console must be plugged in but NOT powered on when programming the NAND.2.Before you can program a console NAND, flip the switch on the top of the xFlasher to the desired mode(eMMC for 4GB NANDS, SPI for 16/256/512MB NANDS). The corresponding mode will appear in J-Runner with Extras on your PC as shown below.3.Refer to the specifics for your console/exploit type for further instructions.Thank You for PurchasingWe Hope You Enjoy OurProduct!______________________________________________________________________________________________________________________xFlasher 360 User Guide Page | 11。
天狼星开发板使用手册(带目录)
user-manual用户使用手册

2Question 用户指南说明书

2Question UserGuide2Question User Guide ................................................................................................................................... Introduction 31. ................................................................................................................................... Getting Started 32. ................................................................................................................................... 4Top menubar ................................................................................................................................... 5Main Screen ................................................................................................................................... Playing a branching database 73. ................................................................................................................................... Lesson Ideas 84.Introduction -2Question is a tool for creating branching (binary) databases.A branching database is sometimes referred to as a binary tree or a key.Branching databases are a way of classifying a groups of objects.A branching database id a way to identify an object by answering a series of simple questions and yes/no questions.When using in class, start by doing lots of sorting and classifying activities with the children and thinking about the different ways you could sort your objects. You can use the images within the 2Question resources area of Purple Mash.There are some teaching ideas in the Lesson Ideas section of this guide.You can also fin examples branching databases in the teachers section. You can print off the image banks to go with the databases to try them out.FruitVegetablesMy friendsMusical instrumentsGetting Started -2.1Top menubarNew FileOpen a saved fileSave the current datePrint the graph and dataExport the graph and data as an imageShare the file to a displayboard or blog, create a QR code or link, set as a 2Do or send by 2Email. See the Generating Share Links Guide for more information about these features.Play: Once the table has been created it can be played to identify and object. See Playing a branching database for details2.2Main ScreenWhen you open a new file, the screen will look like this:This is the first question of the database. Click on the 'Click to Edit' box to open the editorFill in the Question Text and wording for the answer choices; this will usually be 'yes' and 'no'. You have the following additional options:Add sound from the sound picker. This includes the ability to record your own sound or upload from your device.Add an image; this could be an image of the final object or something that represents the choice made. For example, if the question was 'Does it have teeth?', the image could be some teeth. Thisadds interest to the look of the database. Images can be selected from clip-art , drawn usingthe paint tools or uploaded from your device or the device web-cam .Add additional notes; perhaps some more information about the question or the feature that the question asks about.Once you click 'OK', branches will be added to the database and you can add further questions until you are left with just one item (the end of a branch).Tick the check-box 'This is a final answer and the answer choice boxes will disappear. Put the answer into the box that says 'Question Text'.Repeat this process until all items have been classified.Add a title and Save the database, it is now ready to 'Play'.Once a database has been saved, it can be 'played' to identify an item. Click the Play button and answer each of the questions as they are presented until the answer is reached.There is a unit within the Computing Scheme of Work about Branching databases: Unit 2.4 -Questioning.This can be used with your class or adapted to children of different ages.There are example materials PDFs that can be printed and used for off-line activities.Fruits examples:How could we sort the fruits into groups?Fruits that have a skinFruits that have pipsFruits that have a stoneFruits that are roundMy friends examples:Think about the children in class, how could you sort them?Boys and girlsChildren with long hairChildren with short hairChildren with blue eyesChildren with brown eyesGuess What? Now play some games!Use the pictures of the fruit to play a game.Put the images faced up on the desk, choose a fruit (but leave the card in place).Tell the children you are going to have some fruit for lunch can they guess which fruit you have chosen.Tell the children they can ask you 1 question at a time about the fruit you have chosen but you are only allowed to answer yes or no.Lesson Ideas -Example questions:Is your fruit orange (eliminates the orange straight away!)Is your fruit long (That takes care of the banana!)Do you usually eat the skin on the fruit? (The lemon is out!)Is your usually bought as a bunch? (Possibly the grapes!)You could play similar games using images of the children.Let the children play 'Guess Who?' games with photographs of themselves or using their Purple Mash avatars. Play in small groups with images of the children on the table.Try making a fruit branching database using the example picture cards, arrows and yes/no cardsUse the 6 fruit images.Use the blank boxes to write your questions and the yes no card and arrows to display your database.Write your own questions in the blank boxes.Using yes and no answers, create a branching database with the pictures (there are some yes/no cards for you to print out too).Think about the game you have just been playing, guessing the fruit.Start with a question which will group the fruits into 2 groups. For example, is your fruit green? To make a well functioning branching database, the questions should split the remaining choices into equal groups (or as equal as possible), this means that, on average, you will get to the correct answer in the fewest steps.Use the cards to help you make your branching database on the floor.Test your branch, get a child to choose a picture of a fruit, use the questions to find out what it is.。
手把手教你移植ThreadX操作系统,基于在KeilMDK环境
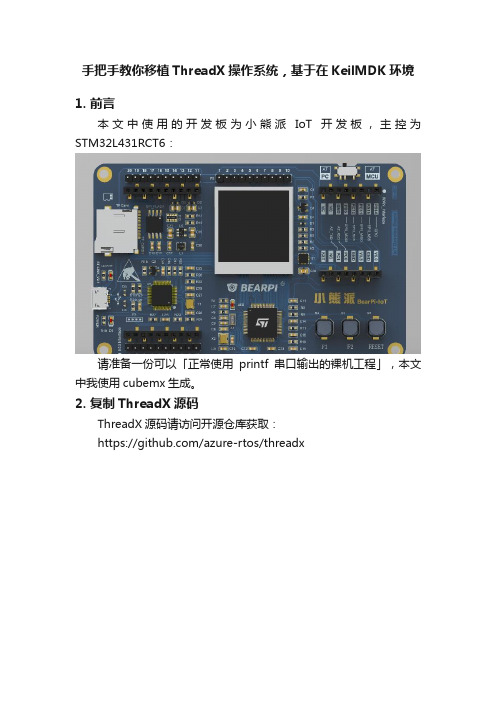
手把手教你移植ThreadX操作系统,基于在KeilMDK环境1. 前言本文中使用的开发板为小熊派IoT开发板,主控为STM32L431RCT6:请准备一份可以「正常使用printf串口输出的裸机工程」,本文中我使用cubemx生成。
2. 复制ThreadX源码ThreadX源码请访问开源仓库获取:https:///azure-rtos/threadx3. 添加源码到MDK工程新建threadX/common分组,添加threadX/common/src下的所有c文件:「新建threadX/ports分组,此时需要根据编译环境来选择」。
此处我们使用的是AC5编译器,则添加threadX\ports\cortex_m4\ac5\src 下的所有 .s 文件:设置使用AC5编译器:添加头文件路径:设置ASM汇编头文件路径:4. 添加并修改适配底层文件4.1. tx_initialize_low_level.sthreadX官方提供了一个底层适配文件tx_initialize_low_level.s,所在位置如图:「这里我就不得不吐槽一下了!」本来这个文件中实现了_tx_initialize_low_level()函数,该函数用于完成处理器的底层初始化,包括:•设置中断向量表•设置用于产生时钟节拍的定位器(Systick)•保存系统栈顶指针给中断程序使用•寻找RAM中首块可用地址传入tx_application_define函数供使用,也就是first_unused_memory指针的值「但是threadx在v6版本及以后,竟然想在这个文件中接管原有的处理器启动文件」,证据如下。
设置堆栈环境的证据:重新定义向量表的证据:接管复位程序的证据:作为一个用来提供调度能力的RTOS,仅仅接管pendSV中断和Systick中断就够了,甚至Systick中断还需要给HAL库用,不能直接接管走,竟然想把系统所有中断都接管了……是该说野心勃勃呢?还是该说画蛇添足呢?退一步海阔天空,把系统所有中断直接都接管了总得干点正事吧~接管中断了就写个这吐槽归吐槽,接着干活!移植threadx之后玩起来还是很舒服的!4.2. 添加适配文件将tx_initialize_low_level_sample.S 文件复制出来一份,改名为tx_initialize_low_level_bearpi.S,作为本项目的适配文件:将该文件添加到工程中:4.3. 修改适配文件① 将没有用到的标号注释,手动添加_Vectors和__initial_sp标号,分别是STM32启动文件中导出的中断向量表和栈顶指针初始值:② 设置时钟频率(80Mhz)和时钟节拍(1ms),该值用来初始化Systick定时器:③ 将设置堆栈的代码全部注释(堆栈环境已经在STM32启动文件中设置了)④ 将threadx 定义的中断向量表全部注释(使用STM32启动文件中定义的向量表):⑤ 注释threadx定义的复位处理程序(使用STM32启动文件中的复位程序):⑥ 修改threadx底层初始化函数:⑦ 注释用不到的函数:⑧ 处理Systick中断函数:4.4. 注释HAL库提供的中断函数去除原有stm32l4xx_it.c中的 PendSV 和 Systick 中断服务函数:至此,移植完成,编译会提示有一个错误:这个函数是留给用户自己来定义应用程序入口的,接下来会创建。
IntelliTrax软件用户手册:自动归档概述说明书
IntellItrax: auto archIve OverviewThe DBat Auto Archive functionality allows theuser to keep their database size manageable byarchiving and optimizing older jobs. It featuresthe following benefits:• Makes regular and safe backups of customerdata, which are then available for reporting.• Keeps application performance optimal bykeeping table size consistent.• Allows customers to continue using the freeMicrosoft SQL Server engine without reachingits 2 GB database size limitation, and withouthaving to upgrade to its more expensive edition.Setting up Scheduled AutO ArchiveScheduled auto archive uses SQL Server’s SQLAgentfunctionality to run a script on a regular basis tooptimize the database.auto archive functionality as soon asthe software is installed, and before anysize or performance issues may occur.Procedure1. Start DBat. Connect to a database and clickArchive. 2. Click the Auto archive old non-OK sheets and optimize databaseradio button. 3. Set the auto archive options to match the customer’s environment. • Recommendation: keep the default values for “archive sheets older than X months” and “archive every Y months”. • For the “archive start date and time,” choose a time when most downtime is available. Although the schedule auto archive can be done at the same time that users are running applications, users may experience slowdowns in this case. 4. Click Save to create the scheduled job and close the screen. Advise customers to close all running applications during the Auto Archive scheduled time. To verify the process has finished, check the “Last Archive”field on the “Auto Archive” screen.changes month to month based oncustomer work load, modify the scheduleon a monthly basis to prevent anyconflicts with running applications.IntellItrax: auto archIveMAnuAl ArchiveThe archive script can also be triggered manually, and run along with the normal scheduled archive on an as-needed basis. It can also be used instead of the scheduled process, but this is not recommended. Although the scheduled and manual archive processes are essentially the same, they do optimize sheets in different ways. The scheduled script is meant for coexistence with running applications, and therefore uses more frequent smaller transactions to commit its changes. The manual script uses one large transaction, which is more efficient, but prevents any other applications from using or changing data. This forces it to also check that it is the only ATSII database user at the beginning of the process. Procedure1. From the Auto Archive screen, click the ArchiveSheets and Optimize button.2. Choose the optimize sheets month interval. Thedefault setting is recommended.3. Make sure all users are disconnected from thedatabase, and click Yes. If any users are stillconnected, an error such as this may appear:The easiest way to disconnect other users is to restart the SQL Server service and try this operation again.4. Click OK on the prompt to acknowledge that nousers should be connected to the database whilethe archive process is running.5. The following screen is shown while the archiveprocess is running.Be advised that the archive process may take a very long time (up to several hours), depending on the size of the database. Customers should not terminate the DBat application or use other applications during this time.If the application is terminated prematurely, a long period may occur where the database cannot be used. This would happen because SQL Server would try to rollback the transaction and restore the database to the original state.6. When this prompt appears, the archive processhas finished successfully.MAnuAl Archive trOubleShOOtingIf an error occurs during the archive process, e.g. if the server runs out of disk space, SQL Server might not rollback the transaction right away because it might think the operation is still pending. The best way to force the transaction to be rolled back is to restart the SQL Server service. After this point, it may take a long time for SQL Server to restore the databaseIntellItrax: auto archIve back to a usable state. To verify the rollback processis happening, monitor the varying CPU and memoryusage of the server in Task Manager.To ensure no other users interfere with the archiveprocess, DBat locks the database exclusively to itself.If the application is terminated before the processfinishes, the database might not be usable for otherapplications even after the rollback process describedabove happens. This is because the first user toconnect to the database will lock everyone else out.In Enterprise Manager, this database state will appearlike this:To unlock the database and stop errors, restart theSQL Server service to make sure that no one else isconnected and connect to the database with DBat.Restarting SQL Server Service1. From Control Panel / Administrative tools,launch the “Services” applet.2. Find the MSSQL$ATSII service and click theRestart link.3. Select Yes to “Restart Other Services”, whichmentions the SQLAgent$ATSII servicedependency.After successfully connecting to the database, theexclusive state is cleared and other applications should be able to connect. repOrting On Archived dAtA All backups, including backups created automatically by Auto Archive, are available in the ReportingTool for reporting as part of Change Source functionality. This is the recommended way for customers to access their archived data, and is safer than the process outlined in the upcoming “Restoring Archived Data” section. Changing the data source restores the backup file into a separate database, named in a unique way based on the connected user’s computer. This allows multiple users to work with a different set of archived data from the same database server. Procedure 1. Launch ReportingTool and click the Change Source button on the main screen. 2. The “Database Selection” screen lists each database backup available to be restored. Customers can optionally use the date and time in the automatic backup filename to help them determine which backup to restore. In this example, the ATSII database is the primary database that all users are connected to. The first file below it represents a full backup made of thedatabase on 6/20/2006 at 9:38 AM. the date when a particular job was run, they can reference the scan info dialog for the remaining OK sheet in the job, which never gets archived.Other production and make ready sheets should be present in the backup at around the same creation date. 3. Select a database and click OK . The backupwill be restored, which may take a long time.IntellItrax: auto archIve If any database patches have become availablesince the backup was made, they are appliedto the database after it is restored. This ensuresthat ReportingTool is working with the latestdatabase structure.4. When the main screen appears, the databaseselected for the reporting is now the restoreddatabase. Job and Sheet reports can be run asnormal.reStOring ArchiveddAtAThe backups created by the Archive process go intothe default SQL Server backup directory and becomeavailable in DBat for restoration.If a customer wants to restore an older job toview it in PressTool (e.g. to view its make ready orproduction sheets), they should make a full backupof the current database and follow the normal DBatrestore process.Customers should not write any new data to thisrestored database. New data should only be writtento the latest database.When done using the archived data in PressTool, thecustomer should restore the backup made earlier.。
- 1、下载文档前请自行甄别文档内容的完整性,平台不提供额外的编辑、内容补充、找答案等附加服务。
- 2、"仅部分预览"的文档,不可在线预览部分如存在完整性等问题,可反馈申请退款(可完整预览的文档不适用该条件!)。
- 3、如文档侵犯您的权益,请联系客服反馈,我们会尽快为您处理(人工客服工作时间:9:00-18:30)。
Picokernel 结构 不象其它传统微内核结构的压条法功能(layering kernel functions),ThreadX 服务直 接进入其核心,使得转换和命令的执行尽可能最快,这样的非压条法设计被称为 Picokernel 结构。
手册概述
本手册提供了有关 ThreadX——Express Logic 公司高性能实时内核的详尽信息。
指南之意义 本手册适用于嵌入式实时软件的开发者。开发者应熟悉标准实时操作系统的功能及 C
程序设计。
结构 手册包括七章,五个附录以及一篇索引。各部分大致介绍如下: 第一章 ThreadX 概述及其与嵌入式实时系统的关系。 第二章 安装步骤及使用事项。 第三章 详细介绍高性能实时内核——ThreadX 的功能操作。 第四章 详细介绍 ThreadX 应用程序的接口。 第五章 介绍 ThreadX 应用程序的写 I/O 驱动程序。 第六章 ThreadX 处理器自带示例程序的介绍。 第七章 ThreadX 的内部结构。 附录 A ThreadX API 附录 B ThreadX 常量 附录 C ThreadX 数据类型 附录 D Thread 源程序 附录 E ASCII 代码表
性的中断源。如果处理器有这个能力,则其可以被 ThreadX 所利用;如果没有,则必须由 用户的硬件来提供。
附带说明书 ThreadX 发行时附带一张 CD-ROM,有标准的和完全的两种模式可供选用。其区别仅
在于其中的源代码是否完全。 光盘中的具体内容取决于目标处理器,开发工具,以及所购买的 ThreadX 的包装。下
ANSI C 源代码 ThreadX 最初是用 ANTI C 写的。隐藏对象处理器内核的生成需要用到少量的汇编语言。 这种设计使得把 ThreadX 用到一个新的处理器系列中去的时候在接口问题上非常容易,通
常只要几个礼拜的时间。
非黑盒结构 ThreadX 的大部分包括完全的 C 源代码,这排除了许多商业性的内核结构所存在的“黑 盒”问题。在使用 ThreadX 时,程序开发者可以清楚的看到内核运行细节,不存在什么秘 密。 源代码还允许开发程序过程中特殊的修改。虽然没有介绍,但在十分必要时有能力去 修改内核是很有用的。 这些特色对那些习惯于用自己内部内核的开发者来说应该是特别另人振奋的。他们期 望得到源代码并且能够修改内核。ThreadX 对这些人来说是最合适的内核了。
面列出所有产品所共有的几个重要的文件。
Readme.txt ThreadX 端口的详细信息,包括目标处理器及开发工具。
Tx_api.h C 头文件,包含所有的系统 equates, 数据结构,服务原型。
Tx_port.h C 头文件,开发工具的所有特殊的数据定义及结构。
Demo.c C 文件,一个小的例程。
工具提供了功能强大的目标硬件调试。
ThreadX 使用 ASCII 码格式,要求主机硬盘空间的容量至少为 1 兆字节。
对
参见
对安装对象的要求 ThreadX 要求安装对象的 ROM(只读存储器 (read-only memory))为 2K 字节到 15K 字
节,RAM(随机存储器(random access memory))为 1K 字节到 2K 字节。 为了满足诸如超时设定命令、时间片、程序定时器等功能,隐藏目标硬件必须提供周期
结构选择 ThreadX 只有一类结构可供选择,它常用旁路服务命令错误诊断(bypass service call
error)。如果是在程序的 C 文件中定义的条件编译标志 TX_DISABLE_ERROR_CHECKING,那么 所有基本参数的错误诊断都被禁止。常用这个方法来提高程序的执行(大约可以提高 30%)。 但是只能在程序完全调试过之后才能这么做。
{ /* Create my_thread! */ tx_thread_create(&my_thread, "My Thread", my_thread_entry, 0x1234, first_unused_memory, 1024, 3, 3, TX_NO_TIME_SLICE, TX_AUTO_START); } void my_thread_entry(ULONG thread_input) { /* Enter into a forever loop. */ while(1) { /* Increment thread counter. */ my_thread_counter++; /* Sleep for 1 tick. */ tx_thread_sleep(1); } }
任务及线程 有关任务的另一个重要特性必须指出。任务这个名词可以用在不同的方面,有时指一个 可独立装载的程序;在另外的场合,它可能指一个内部程序段。 在实时操作系统中,有时用进程和线程来代替任务的使用。进程是一个完全独立的程序, 有自己的地址空间;但线程是一个半独立的程序段,在进程内执行。所有的线程共用相同的 进程地址空间。线程管理的开支是很小的。 大多数嵌入式应用程序不能负担面向进程操作系统的内存开支。另外,小的微处理器不 具备支持真正意义上的面向进程操作系统的硬件结构。基于以上这些原因,ThreadX 采用了 线程模式,这对绝大多数的实时嵌入式操作系统来说既有效又实用。 为避免相互混淆,ThreadX 不用“任务(task)”一词,而用了一个相近的词“线程”来
■ 嵌入式应用程序 实时软件 多任务 任务及线程
■ ThreadX 的优点 改进的响应特性 软件维护 增强的吞吐量 处理器隔离 程序划分 好用性 提高开发时间 保护软件投资
ThreadX 概 述
ThreadX 概述
ThreadX 是专为嵌入式应用而设计的高性能实时内核。同其它实时内核不同,ThreadX 具有通用性,使基于 RISC(reduced instruction set computer 简化指令集计算机)和 DSP(Digital Signal Processing 数字信号处理)的小型微控制器的应用程序易于升级。
实时软件 当应用程序软件中涉及到时间因素时,就赋予了实时的概念。一般地,必须在一个时间 段内执行的软件称为实时软件。嵌入式应用程序几乎都是实时的,因为它们和外部世界存在 内在的联系。
多任务 如上所述,嵌入式应用程序有其既定的目的。为达到这个目的,软件必须执行多种任务 或作业。应用程序中的半独立任务部分完成特定的目的,有时有些任务或作业比其它的更重 要。嵌入式应用程序面临的一个主要难题就是在不同的任务中分配处理器。在竞争的任务中 分配处理器是 ThreadX 的首要目的。
UINT
无符号整型。必须是 8 位无符号数据;但通常映பைடு நூலகம்成 16 位或 32 位的有
符号数据。
ULONG 无符号长整型。此类型位 32 位无符号数。
VOID
空类型。
CHAR 8 位字符类型。
其它用于 ThreadX 中的数据类型列在 tx_port.h 文件中。
1
■ ThreadX 概述 Picokernel 结构 ANSI C 源代码 可能的标准
ThreadX 的使用 ThreadX 的使用非常简单。一般地,在使用 ThreadX 运行库 tx.lib 编译,联接时必须包
含 tx_api.h 文件。 建立一个 ThreadX 程序主要有四个步骤,具体如下: 第一步:将 tx_api.h 文件包含于所有使用 ThreadX 服务和数据结构的应用程序。 第二步:建立 C main 函数。此 main 函数必须调用 tx_kernel_enter 以达到开始 ThreadX 的目的。如果没有经过 ThreadX 特定的初始化,可以通过增加其优先权而进 入到内核中。 (注意,ThreadX 的入口函数 tx_kernel_enter 无返回,所以在其后使用任何进 程及函数调用的时候要特别小心。) 第三步:建立 tx_application_define 函数。这是初始系统资源创建的地方。这些资源包 括线程、队列、内存缓冲池、事件标志组以及信号。(注意,内存中第一个可 用的地址由 ThreadX 提供给此程序。) 第四步:应用程序源的编译及与 ThreadX 运行库 tx.lib 的联接。这一步将产生可以下载 到目标体中去并能得到执行的映像。
问题处理 ThreadX 的每一个端口分配一个程序。最好先使系统运行,无论是在真正的目标硬件上
还是在特定的示范环境中。 通过执行 build_up.bat 批处理文件创建系统程序。此批处理文件生成一个下载程序用
的映像。 如果程序系统不工作,通过以下方法来缩小问题的范围: 1. 决定程序的执行需要多少时间; 2. 增加堆栈的容量; 停止定时器中断以及其他任何可以引起问题的疑点。
一个可能的标准 由于 ThreadX 的通用性,高性能的 picokernel 结构及强大的可移植性,ThreadX 有可能 成为嵌入式程序的工业标准。
嵌入式应用程序
嵌入式应用程序是指在类似于手机、通讯设备、汽车引擎、激光打印机、医疗设备等 产品的微处理器中执行的程序。嵌入式应用程序的另一个显著特点是其软件和硬件有其特定 的用途。
ThreadX 的数据类型
在 ThreadX 中除通常控制体系的数据类型外,还包括一系列特殊的称为接口的数据类
型。这些特殊的数据类型可以直接映射成 C 编译器的数据类型,以此来确保在不同 C 编译
器间的通用性。详细的操作可以在附带磁盘的 tx_port.h 文件中找到。
下面是 ThreadX 命令中的数据类型及其相关意义:
Build_ap.bat MS-DOS 批处理文件,讲述如何建立 ThreadX 实例。
