跑步机说明图
机械创新设计—多功能健身器(第十一组)

多功能健身器材学院:机电工程学院班级:机械09现代组别:第11组绪论跑步是目前国际流行并被医学界和体育界给予高度评价的有氧健身运动,是保持一个人身心健康最有效、最科学的健身方式,也越来越受到大家喜爱。
户外长跑曾经是大众最喜闻乐见的运动形式,沿着林荫道呼吸着早晨清新的空气,听着枝头的鸟鸣,既能愉悦身心,又可锻炼体魄。
只是随着都市的大气变得污浊,运动方式,表面上看起来似乎能消耗更多的能量,但其造成的运动伤害也要比在大自然中跑步高出数倍。
据北医三院运动医学专家林共周博士解释:在马路上跑步,每跑1000米,每只脚就得撞击地面约1000次左右。
而在传统跑步机上跑步,人体除自身重量产生的震荡外,脚踝、膝部和臀部的肌肉,特别是肌腱,还要额外承担向后的扭力来确保跑带向后运动。
由于扭力过度集中在韧带、关节等几个关键受力部位,更容易使受力部位肌腱组织产生慢性疲劳,造成损伤。
很多传统跑步机使用者,发现自己越是认真锻炼,腿部就越跑越粗,关节也越练越没有力气。
传统跑步机并不适合患有脊椎软骨突出、膝关节炎、踝关节扭伤、骨肌腱炎、以及足底筋膜炎的人,因为长期的跑步可能会加重慢性扭伤的情形或加速膝关节的老化。
电动跑步机是健身房及家庭较高档的器材,这种跑步机能减轻传统训练对关节的冲击,避免运动受伤,比自然跑步有明显的优势。
跑步时后脚跟先着地,顺着跑带方向运动。
手脚模仿跑步的动作,前后挥动,从而使全身肌肉得到均衡的锻炼。
由于跑带的运动方向与脚步移动的方向一致,韧带部位的扭力就抵消了,机使用。
设计任务书设计任务书设计要求本次设计的任务是根据跑步者需要进行不同速度的跑步运动。
并能实现多项健身运动。
根据上述条件绘制黑箱如图2-1。
黑箱电动 跑步机静止运动者 动力源信号跑动运动员 信号图1-1黑箱三、总功能分析本设计的工艺路线即从系统接到开始信号,驱动动力源,动力源通过传动系统把运动和动力传递给执行机构.根据以上过程绘制工艺路线图,如图2-2。
跑步机的控制方式

关于直流电机在跑步机中的控制方案调研报告对于专业的跑步机,国内外跑步机用驱动电机仍以有刷直流电机为主,采用直流电动机不可逆PWM系统。
此前,青岛英派斯健身集团开发的一款DP220T健身房用跑步机就是采用了跑步机用有刷直流电动机为驱动电机,以集成PWM控制芯片SG3525A为核心,硬件电路实现的电压负反馈、电流补偿控制的PWM闭环控制系统。
尽管有着控制简单的优点,但直流有刷电动机由于存在电刷和换向器的机械换向结构,长期运行必然需要经常维护电刷和换向器,而且,由于损耗存在于转子上,使得散热困难、温升增加,限制了电机转矩重量比的进一步提高。
对于价格相对便宜的家庭用小型跑步机,主要是根据市场的实际需求,在保证技术指标的前提下,尽量考虑设计的经济性和实用性。
家庭用跑步机几乎都采用的是直流有刷调速系统。
例如,国内某型号的跑步机,采用低价位的8位单片机AT89C2051为核心单元构成了直流有刷电机调速系统,电机采用脉宽调制方式进行调速,通过软件编程改变控制算法,增加了控制的灵活性,具有较高的性价比。
使用交流伺服驱动系统取代直流有刷调速系统是目前研究的一个重要方向。
但是我们不用交流伺服电机驱动系统,故不做过多讨论。
目前无刷直流电动机调速系统在电动跑步机上的应用也是研究的一大热点。
一方面,无刷直流电动机具有有刷直流电动机运行效率高、无励磁损耗以及调速性能好等优点;另方而,由于其采用电子换向装置取代了有刷直流电动机的机械换向结构,从而又具有交流电动机结构简单、运行可靠、维护方便等一系列优点。
因此,采用无刷直流电动机调速系统较其它方案具有更高的性价比。
而对于电动跑步机系统,由于其要求较大的起动转矩,所以,采用带位置传感器的PWM调速系统是性能较好的方案。
对于其具体的实现方案主要有两种,一种是以无刷直流电机专用控制芯片为核心控制单元构成无刷电动机调速系统。
最具代表性的是MOTOROLA公司生产的第二代无刷电机控制专用芯片MC33035,它集成了译码、PWM生成、保护等无刷电机控制的诸多功能,组成的系统所需外围电路结构简单,运行可靠,可与同系列芯片MC33039配合构成速度闭环控制,具有较好的调速性能,其不足之处在于调速式单一,无法使用较为复杂的算法。
电动跑步机使用说明书

PA01T460电动跑步机使用说明书Treadmill instruction manual图片仅供参考,产品以实物为准目 录使用产品前请仔细阅读本说明书,并妥善保管。
一、产品介绍01...........................................................四、入门指南06...........................................................三、安全使用须知04...........................................................二、安装步骤03...........................................................五、操作指南(LCD)08........................................................... 操作指南(彩屏)16...........................................................六、维护指南47...........................................................七、常见故障及排除50...........................................................八、保修说明52...........................................................九、产品保修53...........................................................一、产品介绍01 跑步机主体01显示屏按键板喇叭口心率片安全扶手防滑条跑带安全锁USB接口电源开关过载保护器电源接口前护角盖后护角盖mp3接口LCD 彩屏双重缓冲减震马达上盖杯槽旋钮按键02 装箱清单合格证电源线整 机说明书螺丝包左右侧前护角盖mp3电源线安全锁02-----------------------------------------------------------------------------------------------------------------------03 产品参数润滑油二、安装步骤提示:待所有配件组装完成后,请确保所有螺丝都已经拧紧,才可以使用。
跑步机爆炸图
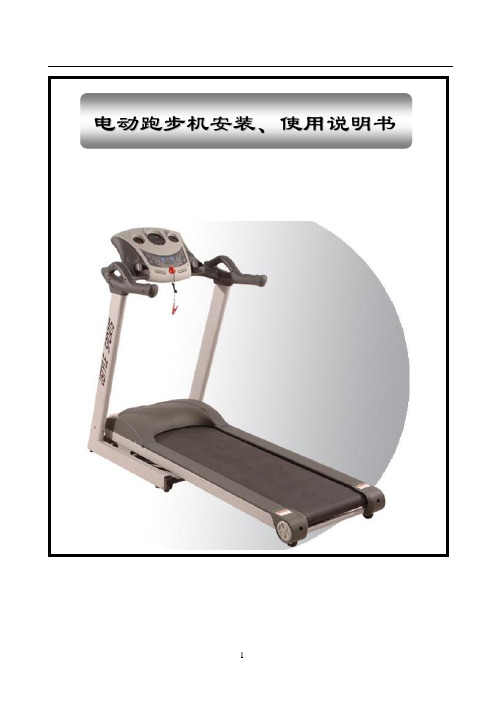
电动跑步机安装、使用说明书为了避免严重的伤害,您必须注意如下操作:在使用该跑步机前,确保安全开关的夹子夹在衣服或腰带上;运动时自然摆臂,目视前方,不要低头看脚下;运动时要循序渐进的加速,等待自己适应现有速度后再加速;当遇到紧急的时候要迅速按下紧急停车按钮,或拉下安全开关;只有当跑步带停稳后,才能从跑步机上离开。
注意:一定要仔细的依照我们的组装说明来安装本产品。
1、在进行任何锻炼计划前,建议您首先应该咨询医生。
2、检查器材上所有螺栓是否锁紧。
3、不要把器材暴露在潮湿的地方,这会引起故障。
(任何故障和伤害都是由于以上原因引起的,我们对此不负任何责任)4、开始运动前请穿运动衣和运动鞋。
5、任何剧烈运动只有在饭后 40 分钟后才可以开始。
6、为了预防受伤,请在锻炼前先作热身运动。
7、患高血压的人应在锻炼前请教医生。
8、这款健身器材仅供成年人使用。
9、对于老年人、小孩、残疾人应给于适当的关心、指导、监督。
10、请不要在器材的任何部位插入任何其他物品,那样会损坏器材。
一、保修范围保修范围:产品在正确保养的情况下,正常使用时而发生的非人为的损坏。
保修卡只限于原始购买者,不能转让。
二、保修期家用·钢架结构终生保修·电机保修1年·其它部件保修6个月·1年内免人工维修费三、以下情况不在保修范围内:(1)由于滥用、疏忽大意、意外事故或擅自改装而引起的损坏;(2)由于不正确调节跑步带和驱动皮带而引起的损坏;(3)由于不正常维护而引起的损坏;(4)其他一些违规操作和由此而产生的损坏。
四、修理和维修服务电动跑步机的所有配件都可以在当地经销商处订购到。
经销商可为您提供您所需要的服务。
厦门市优士达体育用品有限公司祝您和您的家人身体健康、万事如意!在电动跑步机完全安装好并将电机保护罩盖上之后,才能接通电源。
将电源线插头插入带有安全接地10A的电源插座中,我们建议您采用过流保护器,以确保跑步机和使用者的安全。
金史密斯跑步机T T 中文说明书
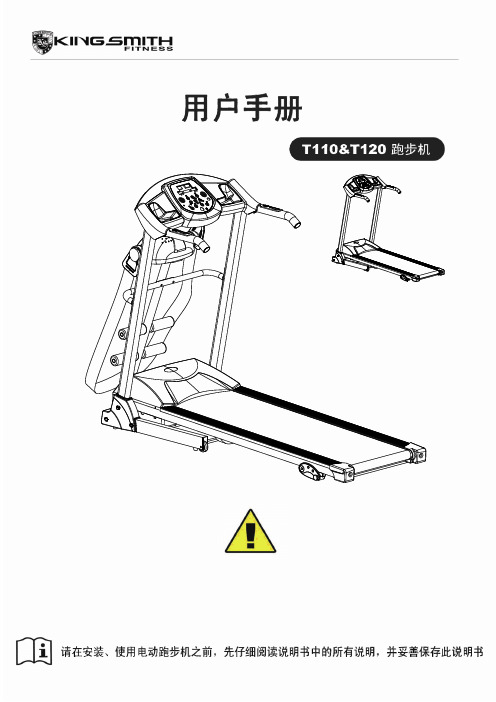
目录安全注意事项-----------------------------------------------------------------3 组装说明-------------------------------------------------------------------4-6 折叠步骤---------------------------------------------------------------------7 技术参数---------------------------------------------------------------------8 接地说明---------------------------------------------------------------------9 操作说明----------------------------------------------------------------10-13 入门指南--------------------------------------------------------------------14 安全锻炼措施----------------------------------------------------------------15 热身运动--------------------------------------------------------------------16 维护指南--------------------------------------------------------------------17 跑带调节--------------------------------------------------------------------18 爆炸图----------------------------------------------------------------------19 爆炸明细-----------------------------------------------------------------20-21 简易故障排除法--------------------------------------------------------------222安全注意事项警告:在进行任何锻炼计划前,建议您首先应该咨询专业医生,特别是年愈35岁,或是曾出现健康问题的人,任何由此而产生的伤害,我们不负任何责任。
EN957-6跑步机 附加安全标准和试验方法
EN957-6跑步机附加安全标准和试验方法欧洲健身器材标准固定式健身器材第6部分:跑步机--附加安全标准和试验方法EN957-6EN957-6:1998 第1页概述本欧洲健身器材标准由健身器材、运动场设备以及其他娱乐设备CEN/TC136技术委员会起草,此委员会DEN所设秘书处。
该欧洲标准给出了国家标准的水平,1996年出版的任何国家标准相冲突的条款将取消。
本标准包括以下几个部分:EN957-1 通用安全技术条件和试验方法EN957-2 力量型健身器--附加安全标准和试验方法EN957-4 力量型举重台--附加安全标准和试验方法EN957-5 脚踏车(曲柄踏板类)健身器--附加安全标准和试验方法EN957-6 跑步机--附加安全标准和试验方法EN957-7 划船器--附加安全标准和试验方法EN957-8 踏步机—附加安全标准和试验方法征得CEN enguiry同意,第3部分同第2部分合并。
按照CEN/CENELEC规定,标准委员会组成成员有:奥地利、比利时、丹麦、荷兰、法国、德国、希腊、爱尔兰、冰岛、意大利、卢森堡、瑞士、挪威、葡萄牙、西班牙、瑞典等国,本标准在标准委员会成员中必须执行。
本标准英文版EN957-6:1999固定式健身器材第6部分:跑步机—附加安全标准和试验方法。
由SW/136技术委员会起草,由欧洲标准委员会发布。
EN957-6:1998 第2页简介EN957标准的这部分涉及跑步机的安全性,它补充了EN957-1。
该特别标准优先于通用标准。
1 范围EN957标准的这部分详细说明跑步机的安全要求,以补充EN957-1的一般安全要求。
EN957标准的这部分适用于固定式健身器材-跑步机,包括S级、H级及A、B、C级别。
任何用于健身器材的补充条件须以EN957-1要求以及EN957标准有关部分的特殊要求为基础。
2 引用标准本欧洲标准引用资料资料如下所列。
对于有发布日期的资料,按顺序修改的或这些出版物的任何修订版,引用于该欧洲标准中;对于无发布日期资料,最新修改版参照实用情况而定。
多功能家用跑步机设计__毕业设计论文 精品

本科毕业设计论文题目:多功能家用跑步机设计毕业 任务书 一、题目多功能家用跑步机二、指导思想和目的要求按照毕业设计大纲的要求,通过这次毕业设计实践,让学生综合运用大学期间学习和掌握的专业知识,理论联系实际,完成最终产品设计和毕业论文的写作,提高综合实践能力,为走向社会和步入工作岗位打下更加坚实的基础。
本次毕业设计要求在在充分调研的基础上,按照项目来源单位的要求,确定多功能家庭跑步机概念设计的总体设计定位、使用人群及其特点和需求,并综合考虑文化、社会心理、市场等相关因素,以此为基础完成相应的造型设计,在设计过程中,要求充分运用所学的调研、手绘、效果图、计算机辅助工业设计、人机工程、色彩学等多方面的专业知识和技能,设计规定五种产品的形态、色彩、材质并分析其人机性能,在满足功能的前提下突显产品的创新性、文化性、和独特设计特点和设计目标,同时要求在设计中进一步培养理论联系实际、解决设计问题的能力,通过系统分析和论述完成毕业设计论文,提高写作水平。
具体要求如下:针对目标展开调研,了解相关需求概况,确定设计方向,为具体设计奠定基础;在完成创意草图的基础上,通过讨论,选出最佳方案进行优化,同时对其进行定位分析、功能需求分析、人机分析以及具体的形态、色彩和材质等方面的设计;通过翻译和论文写作,提高翻译和科技论文写作水平。
将所学知识技能充分运用到本次设计中,理论联系实际,达到综合能力提高的目的;随时与指导老师取得联系,把握进度,做好毕业设计;多与同学交流,探讨,发挥组织团队精神。
三、主要技术指标设计论文1、完成英文资料翻译一份。
要求文字通畅,思想内容表达清晰;2、完成设计调研报告一份,要求切合实际,图文并茂,数据确切;3、完成开题报告一份,要求内容详实,层次清晰;4、完成毕业设计论文一份,要求格式符合科技论文要求,符合工业设计专业特点;5、完成家用跑步机的外观设计具体产品概念设计草图30张,从中选出最优方案。
6、完成设计效果图、建模1份,要求符合产品设计要求;7、完成毕业设计PPT演示文档一份;8、完成两块展板设计。
上海上海师大附中附属龙华中学高中物理必修二第八章《机械能守恒定律》检测题(包含答案解析)
一、选择题1.从同一高度以相同的速率分别抛出质量相等的三个小球,一个竖直上抛,一个竖直下抛,另一个平抛,则它们从抛出到落地(不计空气阻力),以下说法正确的是()①运行的时间相等②重力的平均功率相等③落地时重力的瞬时功率相等④落地时的动能相等A.④B.②③C.③④D.②③④2.如图所示是健身用的“跑步机”示意图,质量为m的运动员踩在与水平面成a角的静止皮带上,运动员用力向后蹬皮带,运动过程中人对皮带的摩擦力恒为f。
使皮带以速度v匀速向后运动,则在运动过程中,下列说法正确的是()A.人脚对此皮带的摩擦力等于皮带对人脚的摩擦力B.人对皮带做功的功率为fvC.人对皮带做功的功率为mgvD.人对皮带不做功3.如图所示,一个小球从高处自由下落到达A点与一个轻质弹簧相撞,弹簧被压缩。
在球与弹簧接触,到弹簧被压缩到最短的过程中,关于球的动能、重力势能、弹簧的弹性势能的说法中正确的是()A.球的机械能守恒B.球的重力势能逐渐减小,弹簧的弹性势能逐渐增加C.球的动能一直在减小D.球的重力势能和弹簧的弹性势能之和逐渐增加4.在水平地面上竖直上抛一个小球,小球在运动过程中重力瞬时功率的绝对值为P,离地高度h。
不计空气阻力,从抛出到落回原地的过程中,P与h关系图像为()A .B .C .D .5.如图甲所示,质量为m =2kg 、带电荷量为3310C q -=的小物块静置于绝缘水平面上,A 点左侧上方存在方向水平向右的匀强电场。
小物块仅在电场中运动时才受到一个水平向左F =18N 的拉力作用。
小物块运动的v-t 图象如图乙所示,取g =10m/s 2,则下列说法正确的是( )A .小物块在3s 内的位移为12mB .小物块与水平面间的动摩擦因数为0.4C .匀强电场的电场强度为104N/CD .物块运动过程中因摩擦而产生的内能为8J6.质量为m 的物体,从静止开始以a =2g 的加速度竖直向下加速,下落高度为h 时,下列说法中正确的是( )A .物体的动能增加了mghB .物体的重力势能增加了mghC 22mg ghD 2mg gh 7.如图所示,一条轻绳跨过定滑轮,绳的两端各系一个小球A 和B 。
EN 957-6 ..
BS EN 957-6: 2010固定式健身器材第六部分:跑步机,附加专门安全要求和测试方法此欧洲标准由CEN在2010年10月30日批准。
替代EN 957-6: 2001。
前言此欧洲标准必须最迟于2011年6月同等采用或者引用为国家标准。
与之相抵触的国家标准必须在2011年6月取消。
和EN 957-6: 2001相比,本版本有如下修订:a)修订了分类和定义b)修订了传动部件和旋转部件的要求和测试方法c)修订了安全开关的要求和测试方法d)修订了静载测试要求,特别是对S级产品e)增加了等级I的跑步机的耐久测试要求f)修订了带有前扶手和侧把手的要求和测试方法g)修订了踏脚板的要求h)增加了跑步带永久标识的要求i)增加了电动跑步机加速度的要求和测试方法j)增加了可折叠跑步机的要求和测试方法k)增加了心率控制模式的要求l)增加了最大侧向位置的标识要求m)增加了测试报告要求n)扩展了附加说明介绍本欧洲标准是对EN 957-1的修订和补充,本专门标准的要求优先于EN957-1。
1 范围在EN 957-1的通用安全要求和测试方法之外,EN 957-6详述了跑步机的安全要求和测试方法,并且必须和EN 957-1一起使用。
EN 957-6适用于等级为S,H和I的,以及按精度分成等级A, B和C级的电动和人力驱动健身类跑步机(后续都用跑步机指代)。
2 参考标准3 术语和定义3.1 跑步机treadmill带有运动表面,可以在上面走路或跑步的健身器材。
脚可以自由离开运动表面。
3.2 跑步表面长度length of the running surface可以使用的运动表面长度。
注1: 见图2中l注2:图1仅用于展示和说明各个零部件的名称3.3 跑步表面宽度width of the running surface跑步带可使用的宽度,不包括后滚轴保护器,注:见图2中b 。
Key 1 display2 safety stop (cord type)3 safety stop (mushroom type)4 heart rate hand sensor5 front handlebar6 side handrail7 front protective cover 8 foot rail 9 non slip surface 10 running deck 11 running surface 12 rear roller13 rear roller protective cover 14 marking of the running surface 图1 跑步机示例KeyA line located at 1/3 of the length of the running surface measured from BB front end of the running surface a identifiable feature according to 5.2 b width of the running surfaceb min minimum required width of the running surface according to Table 1 l length of the running surface 图 2 — 主要尺寸定义3.4 前扶手front handlebar位于跑步机前部,通过使用者的手部分支撑使用者重量和提高运动时稳定性,并辅助紧急离开。
多功能跑步机机械设计和外形设计

多功能跑步机的零件三维设计摘要传统跑步机的功能只是跑步,而在此基础上发展而来的多功能跑步机增加了很多功能。
其功能主要通过设计和改变一些机械结构,增加一些现代电子器件,从而实现跑步机的多功能化。
本设计中,重点在跑步机的多功能的零件三维设计,体现在零件设计和三维设计上。
通过机械设计改变零件的外形、结构,结合人体工程学设计尺寸,从而达到多功能的要求和符合人的生理、心理特点的外形结构。
再根据现实中常见的健身器材有选择的把它们添加到跑步机上。
在本次设计中,我选择了几种结构简单但锻炼起来却对人体有非常大好处的健身器材,分别是双杠、扭腰盘、仰卧起坐器和划桨器,这些器材都是非常常见的。
在不改变功能的情况下,改变各种器材的结构和尺寸,使它们能够方便的安装到跑步机上,让单一的跑步机变成多功能跑步机。
在设计出结构尺寸的基础上,用三维软件solidworks2008把零件用立体的形式表现出来,让本设计显得更加形象生动,让制造者也能更好的掌握该跑步机的结构。
关键词:跑步机,多功能,双杠,扭腰盘,仰卧起坐器,划桨器,零件,三维MULTI-FUNCTIONAL TREADMILL PARTS 3D DESIGNABSTRACTThe multi-function treadmill which based on the traditional treadmill with only one function—running, is added with many more functions. The multi-function treadmill aims to achieve more functions through designing and changing some mechanical structure, adding some modern electronic devices. This thesis focuses on the three-dimensional design of multifunctional components. In order to achieve the multifunctional requirement and consist with the human physiological and psychological characteristics, I change the shape and structure of the components through the mechanical design combining with the design size of human body engineering. And according to the reality of common fitness equipment, I add these components to the treadmill selectively. In this design, the fitness equipments I chose are good for human body in exercise while the structure of which is simple. The equipments are very common. They are parallel bars, twist waist dish, sit-ups transmitters and paddle. Under the premise of not changing the functions, I change the structure and size of various equipments for ease installation. So that it can transform into a multi-function treadmill. I reflect the stereo form of components with the 3d software-- solidworks2008 in the basis on the designation of the structure size. So as to make it more vivid .And makers also can easily control the treadmill structure.KEY WORDS: treadmill, multi-functional, parallel bars, twisting waist dish, sit-ups ware, paddle, component, three-dimensional目录绪论 (1)第1章总体方案设计 (3)1.1. 基本功能 (3)1.2. 添加的功能 (3)1.3 构造设计 (4)1.4 尺寸的初步设计 (5)小结 (7)第2章扶手双杠部分的设计 (8)2.1.扶手双杠结构设计及添加的位置 (8)2.2扶手的材料选择 (9)2.3扶手双杠及连接部件的尺寸参数设计 (9)小结 (11)第3章扭腰盘的设计 (12)3.1.扭腰盘的外形、结构设计 (12)3.2.扭腰盘添加位置的确定及连接结构设计 (13)3.3.扭腰盘的尺寸设计 (13)小结 (15)第4章仰卧起坐器的设计 (16)4.1.仰卧起坐器的结构外形设计及连接位置 (16)4.2 尺寸参数设计 (16)4.3 仰卧起坐器的数据校核 (17)小结 (19)第5章划桨器的设计 (20)5.1 划桨器的原理 (20)5.2 划桨器的功能介绍 (20)5.3 划桨器的结构设计 (21)小结 (21)参考文献 (22)致谢 (23)绪论 1绪论随着社会的发展和人民生活水平的提高,人们更多地把美的事物同自身的幸福联系起来。
常用仪器使用说明书

附录Ⅰ函数信号发生器使用说明附录1-1 SG1651A函数信号发生器使用说明一、概述本仪器是一台具有高度稳定性、多功能等特点的函数信号发生器。
能直接产生正弦波、三角波、方波、斜波、脉冲波,波形对称可调并具有反向输出,直流电平可连续调节。
TTL 可与主信号做同步输出。
还具有VCF输入控制功能。
频率计可做内部频率显示,也可外测1Hz~10.0MHz的信号频率,电压用LED显示。
二、使用说明2.1面板标志说明及功能见表1和图1、2图1图2附录1-2 DC1641数字函数信号发生器使用说明一、概述DC1641使用LCD显示、微处理器(CPU)控制的函数信号发生器,是一种小型的、由集成电路、单片机与半导体管构成的便携式通用函数信号发生器,其函数信号有正弦波、三角波、方波、锯齿波、脉冲五种不同的波形。
信号频率可调范围从0.1Hz~2MHz,分七个档级,频率段、频率值、波形选择均由LCD显示。
信号的最大幅度可达20Vp-p。
脉冲的占空比系数由10%~90%连续可调,五种信号均可加±10V的直流偏置电压。
并具有TTL电平的同步信号输出,脉冲信号反向及输出幅度衰减等多种功能。
除此以外,能外接计数输入,作频率计数器使用,其频率范围从10Hz~10MHz(50、100MHz[根据用户需要])。
计数频率等功能信息均由LCD显示,发光二极管指示计数闸门、占空比、直流偏置、电源。
读数直观、方便、准确。
二、技术要求2.1函数发生器产生正弦波、三角波、方波、锯齿波和脉冲波。
2.1.1函数信号频率范围和精度a、频率范围由0.1Hz~2MHz分七个频率档级LCD显示,各档级之间有很宽的覆盖度,如下所示:频率档级频率范围(Hz)1 0.1~210 1~20100 10~2001K 100~2K10K 1K ~20K100K 10K ~200K1M 100K ~2M频率显示方式:LCD显示,发光二极管指示闸门、占空比、直流偏置、电源。
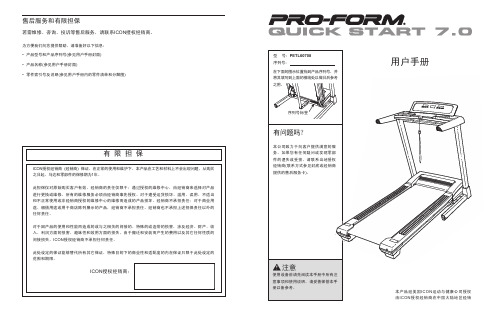
跑步机说明图
95
97
22
98
24
32
31
87 93
14 31
1 4
26
97 22
100
95
96
19
97
101
22
99
26
重要注意事项
警告:为避免可能造成的伤害,使用跑步机前请仔细阅读本手册中的所有指示说明以及跑步机上的
所有警示标贴。对于因不正确使用本产品而带来的人员伤害或财产损失,本公司不承担任何责任。
1. 开始运动前,请先咨询医生。这一点对于年龄 超过35岁或已存在健康问题的人士尤为重要。
.确保衣物、手指 和头发远离运行 中的机器。
.跑带运转时,切 勿调整和组装跑 步机。
.使用跑步机时要 穿运动鞋。
PROFORM 是 ICON IP,Inc. 的注册商标 2
分解图 D — 型号 PETL60708
103 104
105
R1208A 7
7 7
102
113
106
7
7
7 110
7
107 7 108
10. 使用跑步机时,穿着合适的运动服。不得穿着 可能卷入跑步机中的宽松衣服。跑步机时要穿 运动鞋,不得赤脚、只穿袜子或穿凉鞋使用跑 步机。
19. 跑步机运行时必须有人在旁边。不使用跑步机 时,请取下安全钥匙并拔下电源线,同时关闭 开/关断路器(参见第5页图纸以找到开/关断路器 的位置)。
11. 连接电源线时(参见第10页),将电源线插入接
17. 跑步机可以高速运行。建议小幅度调整速度, 避免突然大幅度变速。
8. 体重超过130公斤(286磅)的人不可使用该跑步 机。
9. 跑步机上不得同时站立两人或两人以上。
跑步机manual
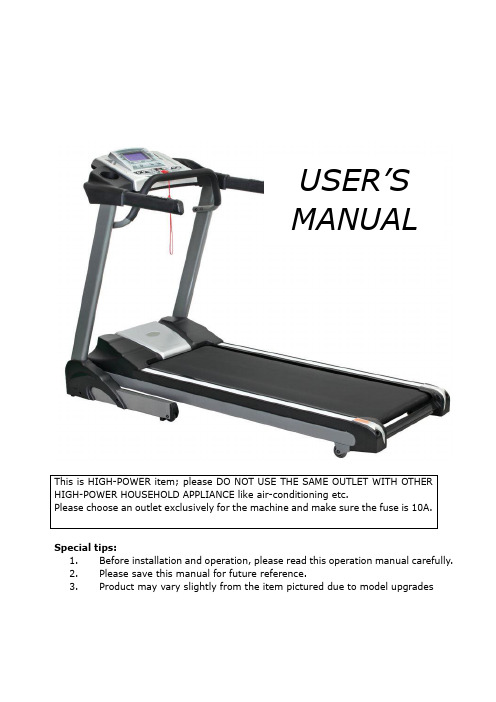
USER’SMANUALSpecial tips:1.Before installation and operation, please read this operation manual carefully.2.Please save this manual for future reference.3.Product may vary slightly from the item pictured due to model upgradesT able of Contents1. Brief Description.......................................... - 2 -2. Main Technical Features ................................. - 2 -3. Tips for Safety............................................. - 3 -4. Installation: See “Installation sketch”................. - 4 -5. Use and Operation........................................ - 4 -6. Maintenance............................................... - 8 -7. Guides for malfunction................................. - 13 -8. Warranty ................................................. - 14 -9. Error and self-inspection .............................. - 14 -10. Warranty Registration ................................ - 16 -1. Brief DescriptionForce Treadmill (diagram 1) can help complete your goal of keeping fit together with unique and elegant appearance. Easily read panel parameter. Easily operated folding system realizes space-saving. Auto speed range 1-22km/h and auto incline range 1-22levels. All makes it hot home use fitness equipment.Diagram 1: Treadmill2. Main Technical FeaturesMain use: Body and beauty buildingThis treadmill is for home usePanel displays speed, time, distance, heart rate, calorie, MP3, body fat, etc. Display Mode:LCDInput voltage: 240V±10%Frequency: 50HZInput current: ≤8ASpeed range: 1∽22km/hAuto incline: 0-22 LevelsTime display range: 0:00∽99:59(minute: second)Distance display range: 0.1~9.99kms3. Tips for Safety1)Insert the power plug into the socket directly. Current load should be notless than 10A2)The constant running time is less than 2 hours .3)Place your treadmill on the clean floor,not on the thick carpet; otherwiseit will not be convenient for ventilation. Also please do not put the treadmill in the moist place or outdoors; If there is something wrong with the electrical wire, please replace it with the electrical wire provided by our company. For the replacement, please contact with the local distributor.4)The treadmill should be placed in the convenient position for electricsocket.5)The freshman should grip the handrails when jogging and running untilfamiliarly. Please don’t stand on the running belt, after the machine is power on (the safe key is at the appointed position).Please stand on the footplates besides the treadmill, press the “start” button, it runs at the lowest speed, at this time you can run on the belt.6)While running, you should dress properly. Do not dress too loosely in caseyour clothes are entangled by the machine .And please wear sport shoes with soft sole.7)Before taking down the protecting cover of the treadmill, please keep themachine power off.8)Don’t let children get close to the running treadmill to avoid unnecessaryinjury.9)Please make sure one end of the safe key has been placed in the appointedposition and the other end has been nipped to your clothes when you are running on the machine. In this way, you can pull the safe key to stop the machine immediately under the dangerous condition. Then you will not be injured.10)I f you are enjoying other entertainment while running such as watchingTV, reading. Please be particularly careful. These activities will distract your attention, which may make you lose your balance and get hurt.11)P lease pull the plug off from socket and keep the safe key when thetreadmill is unused.12)P lease don’t put anything under treadmill and don’t let your children playnear it after folding.13)P lease consult your doctor at first before running, if you have one of thefollowing diseases:a)Cardiopathy, hypertension, sugar diabetes, respiratory disease,smoking, and other chronic diseases, complication disease.b)If you are over 35 years old and heavier than common weight.C)Women in pregnant or in breasting period.14)P lease stop exercising immediately and consult your doctor when you feelgiddy, surfeit, thorax ache or other symptoms.15) P lease drink adequate water after taking exercises on our treadmill for more than 20 minutes.4. Installation: See “Installation sketch”5. Use and Operation5.1 Panel Keys and Function(1)“incline short cut key”Press this key, the incline goes directly to the chosen height. (2)“on/off”Under ready condition, press this key, it runs at the speed of 1.0km/h.Under running condition, if it runs at speed more than 3.5km/h, it will slowdown then stop. During this stopping process, other keys are not available.If it runs at speed less than3km/h, then it stops immediately.(3)“speed short cut key”Under running condition, press this key, speed can be set to the value directly.(4)“incline up”Press this key, you can choose the incline you need, except for the alarm condition.(5)“incline down”Press this key, you can choose the incline you need, except for the alarm condition.(6)“select”Under ready condition, press this key to enter “distance running” mode, it has four kinds, U1~U4, under this mode, the treadmill will record yourtotal running distance automatically (minimum unit is 100m). The records will remain after you shut off the power supply.(7)“body fat”Under ready condition, press this key to evaluate your body fat.Press once, it will show SEX, press “speed up” and “speed down” key to select.Press this key again, it will show AGE, press “speed up” and “speed down”key to select your age. (From 10~99years)Press this key again, it will show HEIGHT, press “speed up” and “speed down” key to select your height. (From 50~250cm)Press this key again, it will show WEIGHT, press “speed up” and “speed down” key t o select your weight. (From 20~200KGS)Then press “ Bodyfat ” key to get your Bodyfat.Explanation:Body fat < 19: too thin.Body fat 19~25: normalBody fat 26~30: overweightBody fat > 30: fat(8)“clear/set”Under ready condition, press this key once, it will clear all the operation.Under ready condition, press this key for 3 seconds continuously, time,distance and calorie can be set. Press “speed-up” or “speed-down” keys, time, distance and calori e can be set. Then press “start/stop” key, the machinewill run at 1.0km/h. And the set figures will be counted down, when itcomes to “0”, machine stops. Under run ning situation, press “set/clear”, all the figures will be kept to “0” except for s peed. Then manual model comes. (9)“safety key”Under urgent condition, pull this key, machine stops immediately.(10)“speed down”Under running condition, press this key, speed can be speeded down to the one you need.(11)“speed up”Under running condition, press this key, speed can be speeded up to the one youneed.(12)“profile”Under ready condition, press this key to enter own programs mode, you have 3 own programs, C1~C3, please set your programs at first.Select the program at first, then press “clear/set” key to edit it.Press “speed up” ( “incline up” ) and “speed down” ( “incline down ” ) key to select the speed ( slope ) you want. then press “profile” to set the speed (slope) of next minute. After set all the speeds (slope) for 16minutes, you may press “start/stop” key to run your program.(13)“music”Press this key to open or shut the speaker amplify.(14)“Mode”Under ready condition, press this key to choose running program. There is P1-P99, 99 programs in total.(15)LCD windowa.“incline”: It shows auto incline (range: 1-22 Levels)b. “distance”: It shows the distance (range: 0 km-9.99km)c.“time”: It shows time(range:00:00 -99:99)d.“speed”: It shows speed (range: 1km/h-22km/h)e.“cal/pulse”: It shows the pulse when it has, if without pulse, it showscalorie (range: 0-999 calorie)f.: It will be displayed when MP3 function is in use.5.2 Unload operatinga.Insert power plug into the socket with earth wire, turn the switch to “1” position which is on the frameb. Put the safe key in the right position, then circuit is on, press “start/stop”,keep it run in unload condition. Test the condition of running belt (testing from low speed to high ones), after testing, press “start/stop”.c. If everything is ok, then start to run.5.3 Meter operating instruction5.3.1a. Insert power plug into the socket with earth wire, turn the switch to “1” position which is on the frame. Place the safety key to the appointed position. After a few seconds, panel will show that the machine is ready.b. Nip another end of safe key to your clothes, and stand on the footplate on both sides.c. Press“start/stop”key, running belt moves at the lowest speed (1.0km/h). Speed windows will display your running speed.d. Start to run.e. Press speed key or incline key to adjust speed and incline, speed window and incline window will display your speed and incline .f. To end your exercise in a safe way, please first press “start/stop” key to close the treadmill. Please do not leave the running belt until it stops slowly. Turn off the power.5.3.2 Heart Rate TestingOur treadmill can test your heart rate via the heart rate sensor The data is only for reference.5.4 Folding and Opening Treadmill5.4.1 FoldingFirstly lift and fold the back part of the frame board by hand till you hear a light sound, which means the folding system has been locked. At this time running board can’t be turned to the opposite direction5.4.2 OpeningPut the folded treadmill in a capacious position when you want do exercise. Then pull the adjusting parts by hand to keep it unlocked. Press the back part by your hands down to about 10%, release it, then it will open automatically.6. MaintenanceReasonable cleaning/lubricating should be made to extend the life time of this unit. Performance is maximized when the belt and mat are kept as clean as possible.6.1 Maintenance and servicingAFTER EACH USE (DAILY)Clean and inspect, following these steps:• Turn off the treadmill with the on/off switch, then unplug the power cord at the wall outlet.• Wipe down the running belt, deck, motor cover, and console casing with a damp cloth. Never use solvents, as they can cause damage to the treadmill.• Inspect the powe r cord. If the power cord is damaged, contact Athletes Fitness. • Make sure the power cord is not underneath the treadmill or in any other area where it can become pinched or cut.• Check the tension and alignment of the running belt. Make sure that the treadmill belt will not damage any other components on the treadmill by being misaligned.EVERY WEEKClean underneath the treadmill, following these steps:• Turn off the treadmill with the on/off switch, then unplug the power cord at the wall outlet.• Fold the treadmill into the upright position, making sure that the lock latch is secure.• Move the treadmill to a remote location.• Wipe or vacuum any dust particles or other objects that may have accumulated underneath the treadmill.• Return the tr eadmill to its previous position.EVERY 6 MONTHSIt may be necessary to lubricate your treadmill running deck at least once every six months to maintain optimal performance of your treadmill (refer to section 4.4 for information).• Turn off the treadmill with the on/off switch, and then unplug the power cord at the wall outlet.• Loosen both the rear roller bolts. (For best results, place two removable marks on both sides of the frame and note roller position).Once the belt is loosened, take the bottle of lubricant and apply it to the entire top surface of the running deck. Tighten both rear roller bolts (matching up the marks for proper position) to original position. After you have applied lubricant, plug in the power cord, key, start the treadmill and walk on the belt for two minutes to spread the lubricant.• Lubric ate the air shocks with Teflon based spray.EVERY 2 YEARSIt is necessary that you change your treadmill motor brushes once every 2 years to avoid damaging your motor. If you fail to change the brushes this may cause the motor to burn out, voiding any warranty.6.2 General CleaningUse a soft, damp cloth to wipe the edge of the belt and the area between the belt edge and frame. A mild soap and water solution along with a nylon scrub brush will clean the top of the textured belt. This task should be done once a month. Allow to dry before using.On a monthly basis, vacuum underneath your treadmill to prevent dust build up. Once a year, you should remove the black motor shield andvacuum out dirt that may accumulate.6.3 General Care∙Check parts for wear before use.∙Pay particular attention to the fixing knobs and make sure they are tight. ∙Always replace the mat if worn and any other defective parts.∙If in doubt do not use the treadmill and contact our helpline.TAKE CARE TO PROTECT CARPETS AND FLOOR in case of leakages. This product is a machine that contains moving parts which have been greased / lubricated and could leak.6.4 Belt/Deck/Roller LubricationThe mat/deck friction may play a major role in the function and life of your treadmill and that is why we recommend you constantly lubricate this friction point to prolong the useful life of your treadmill.Lubrication should be applied after approximately the first 50 hours of operation. We recommend lubrication of the deck according to the following timetable:Light use (less than 3 hours per week) every 6 monthsMedium use (3-5 hours a week) every 3 monthsHeavy use (more than 5 hours per week) every 6-8 weeks.See below procedures for lubricating:e a soft, dry cloth to wipe the area between the belt and deck.2.Spread lubricant onto the inside surface of belt and deck evenly (make surethe machine is turned off and power is disconnected).3.Periodically lubricate the front and rear rollers to keep them at there peakperformance. If the treadmill belt/deck/roller is kept reasonably clean it is possible to expect over 1200 hours before additional re-lubing is necessary.6.5 How to check the running mat for proper lubrication:1.Disconnect the main power supply.2.Fold the treadmill up into the storage position.3.Feel the back surface of the running mat.If the surface is slick when touched, then no further lubrication is needed.If the surface is dry to the touch, apply a suitable silicone lubricant.6.6 Belt AdjustmentBelt Tension Adjustment-It is very important for joggers and runners in order to provide a smooth, steady running surface. Adjustment must be made from the right and left rear roller in order to adjust tension with the Hexagonal Wrench provided in the parts package. The adjustment bolt is located at the end of the rails as noted in diagram below:Please Note: Adjustment is thru the small hold on the end caps.Tighten the rear roller only enough to prevent slippage at the front roller. Turn both the right and left bolt clockwise reasonably and inspect for proper tension. When an adjustment is made to the belt tension, you must also make a tracking adjustment to compensate for the change in belt tension.DO NOT OVERTIGHTEN - Over tightening will cause belt damage and premature bearing failure.6.7 Belt Tracking Adjustment:This treadmill is designed to keep the belt reasonably centred while in use. It is normal for some belts to drift near one side while the belt is running with no one on it. After a few minutes of use, the belt should have a tendency to centre itself. If during use, the belt continues to move toward one side, adjustments are necessary. The procedures are as below:▲ first set speed at lowest position.▲ second check the belt shifts to which side.If the belt shifts to right, tighten the right bolt and loosen the left bolt by using 6mm Hexagonal Wrench, until the belt is centered itself; If belt shifts to left, tighten the left bolt and loosen the right bolt by using 6mm Hexagonal Wrench, until the belt is centered. When adjusting the belt using the 6 mm Hexagonal Wrenches, it is important to adjust the belt in half turn increments. Over adjusting the belt can cause damage to the mat.7. Guides for malfunction7.1 Analyzing and eliminating malfunction7.2If you still can’t s olve the problems after taking the solutions above, we hope that you can contact our dealer or company as soon as possible.8. Warranty8.1 We have assigned well-trained professionals. They are ready to serve foryou at any time.8.2 Within the warranty time, and under your correct operations, ourtechnicians will replace or repair the defective accessories for free. But you will have to pay for the broken parts if the warranty is expired or you use them in an incorrect way.8.3 Condition beyond Manufacturer’s warrantyIf the product you purchase has the problems as follows, the warranty is not effective:a)Improper operating, negligence, accidentb)Wrong adjustment of running belt and poly V-beltc)Unauthorized take-downd)Improper maintenance9. Error and self-inspection9.1 ErrorTreadmill gives the following error code if anything wrong,please contact the prodessional service people soon if it happens.E1:communication failure E2:overspeed protectionE3:sensor test error E4:incline errorE5:overcurrent protection E6:control self-test errorE7:safety switches cut off9.2 Self-inspectionNo need to self-inspect unless special situation. If necessary, please do it under the instruction of professional technical people or sales because of the high voltage.a. Open up motor coverb. Turn on the treadmillc. Press the switch on the motor drive boardd. Undo the switchTreadmill raises up first, and then drops down。
跑步机商用
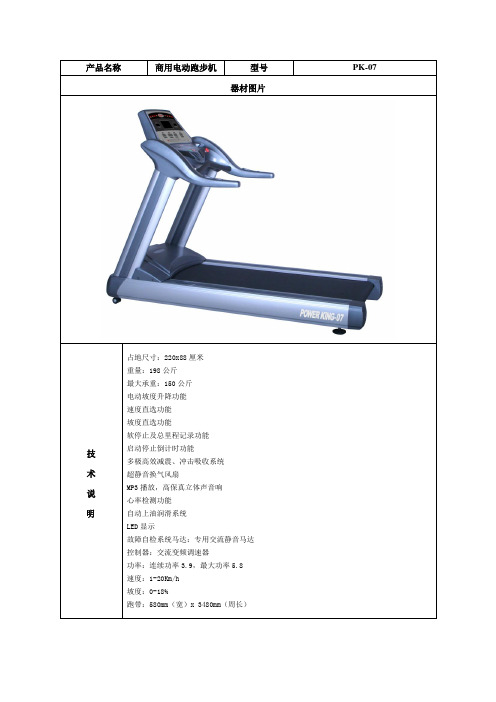
产品名称商用电动跑步机型号PK-07器材图片技术说明占地尺寸:220x88厘米重量:198公斤最大承重:150公斤电动坡度升降功能速度直选功能坡度直选功能软停止及总里程记录功能启动停止倒计时功能多极高效减震、冲击吸收系统超静音换气风扇MP3播放,高保真立体声音响心率检测功能自动上油润滑系统LED显示故障自检系统马达:专用交流静音马达控制器:交流变频调速器功率:连续功率3.9,最大功率5.8速度:1-20Km/h坡度:0-18%跑带:580mm(宽)x 3480mm(周长)产品名称商用电动跑步机型号PK-07L器材图片技术说明17寸LCD显示,外接有线电视和DVD插孔,运动时不再单调枯燥;轻触式薄膜开关,手感更舒适,操控更流畅。
占地尺寸:220x88厘米重量:198公斤最大承重:150公斤电动坡度升降功能速度直选功能坡度直选功能软停止及总里程记录功能启动停止倒计时功能多极高效减震、冲击吸收系统超静音换气风扇MP3播放,高保真立体声音响心率检测功能自动上油润滑系统 LED显示故障自检系统马达:专用交流静音马达控制器:交流变频调速器功率:连续功率3.9,最大功率5.8速度:1-20Km/h坡度:0-18%跑带:580mm(宽)x 3480mm(周长)器材图片技术说明占地尺寸:220x88厘米重量:198公斤最大承重:150公斤电动坡度升降功能速度直选功能坡度直选功能软停止及总里程记录功能启动停止倒计时功能多极高效减震、冲击吸收系统超静音换气风扇心率检测功能自动上油润滑系统LED显示故障自检系统马达:专用交流静音马达控制器:交流变频调速器功率:连续功率3.9,最大功率4.5 速度:1-16Km/h坡度:0-18%跑带:580mm(宽)x 3480mm(周长)主体框架非铝合金器材图片技术说明MP3 播放功能高保真立体声音响心率检测功能自动上油润滑系统故障自检系统多种用户训练程序多极高效减震、冲击吸收系统超静音换气风扇电动坡度升降功能速度直选功能坡度直选功能软停止及总里程记录功能启动停止倒计时功能马达:专用交流静音马达控制器:交流变频调速器功率:连续功率3.9,最大功率5.8 速度:1-20Km/h坡度:0-16%跑带:580mm(宽)x 3480mm(周长) 跑步面积:1510mm(长)x580mm(宽) 占地面积:2200mm(长)x 880mm(宽) 净重:200Kg毛重:310Kg器材图片技术说明17寸LCD显示,高保真立体声音响DVD 播放,U盘播放器(MP3,MPEG4)电视接收系统,心率检测功能自动上油润滑系统,故障自检系统,超静音换气风扇多种用户训练程序,电动坡度升降功能速度直选功能,坡度直选功能软停止及总里程记录功能启动停止倒计时功能多极高效减震、冲击吸收系统马达:专用交流静音马达控制器:交流变频调速器功率:连续功率3.9 最大功率5.8速度:1-20Km/h坡度:0-16%跑带:580mm(宽)x 3480mm(周长)跑步面积:1510mm(长)x580mm(宽)占地面积:2200mm(长)x 880mm(宽)净重:200Kg毛重:310Kg器材图片技术说明8.5寸LCD显示,U盘播放器14种用户训练程序自动上油润滑系统电动坡度升降功能速度直选功能,坡度直选功能软停止及总里程记录功能启动停止倒计时功能多极高效减震、冲击吸收系统高保真立体声音响,MP3 播放功能心率检测功能故障自检系统可调式电子表书报架马达:专用交流静音马达控制器:交流变频调速器功率:连续功率3.0,最大功率4.5 速度:1-16Km/h坡度:0-16%跑带:520mm(宽)x 2960mm(周长) 跑步面积:1400mm(长)x 500mm(宽) 占地面积:1900mm(长)x 870mm(宽) 净重:125Kg毛重:143Kg器材图片技术说明7视窗LED显示14种用户训练程序自动上油润滑系统电动坡度升降功能速度直选功能,坡度直选功能软停止及总里程记录功能可调式电子表启动停止倒计时功能多极高效减震、冲击吸收系统高保真立体声音响,MP3 播放功能心率检测功能故障自检系统书报架马达:专用交流静音马达控制器:交流变频调速器功率:连续功率3.0,最大功率4.5 速度:1-16Km/h坡度:0-16%跑带:520mm(宽)x 2960mm(周长) 跑步面积:1400mm(长)x 500mm(宽) 占地面积:1900mm(长)x 870mm(宽) 净重:125Kg毛重:143Kg。
亿健跑步机806AS安装步骤
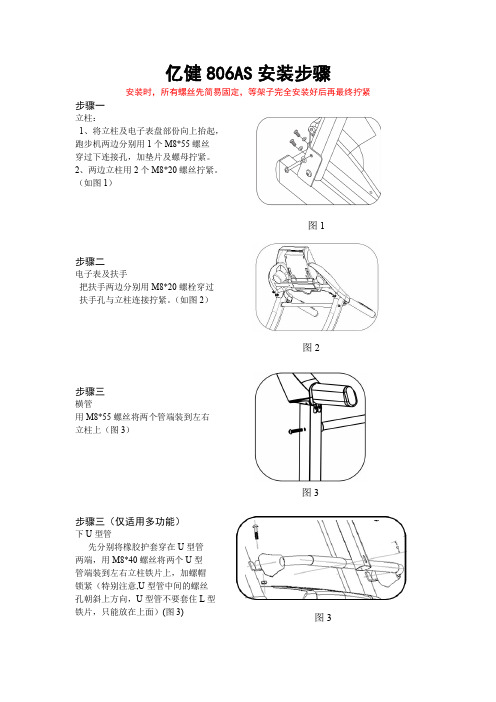
亿健806AS安装步骤
安装时,所有螺丝先简易固定,等架子完全安装好后再最终拧紧步骤一
立柱:
1、将立柱及电子表盘部份向上抬起,
跑步机两边分别用1个M8*55螺丝
穿过下连接孔,加垫片及螺母拧紧。
2、两边立柱用2个M8*20螺丝拧紧。
(如图1)
步骤二
电子表及扶手
把扶手两边分别用M8*20螺栓穿过扶手孔与立柱连接拧紧。
(如图2)
步骤三
横管
用M8*55螺丝将两个管端装到左右立柱上(图3)
步骤三(仅适用多功能)
下U型管
先分别将橡胶护套穿在U型管
两端,用M8*40螺丝将两个U型
管端装到左右立柱铁片上,加螺帽锁紧(特别注意,U型管中间的螺丝孔朝斜上方向,U型管不要套住L型铁片,只能放在上面)(图3)
图1
图3
图2
图3
步骤四(仅适用多功能)
上U型管
先分别将橡胶护套穿在U型管两端,(如图)用M8*40螺丝将两个U型
管端装到左右立柱铁片上,加螺帽锁
紧(特别注意,U型管中间的螺丝孔朝上,另外,此根U型管是不带泡绵的)(图4)
步骤五(仅适用多功能)
功能架
1、用2个M8*65螺栓加2个M8螺母
将功能架固定
在上下U型管上(图5)
步骤六(仅适用多功能)
按摩机头
把先将按摩机头下面3个M8*16螺
栓拧下来,(包括平垫和弹垫)然后再将按摩机头放到功能架上,用这三颗卸下来的螺栓将按摩机头平衡锁紧。
(注意手柄和开关向外方向,即背对跑步带的这一边的方向)(图6)
图4
图5
图6。
JXFITNESS说明书

JXFITNESS说明书
总的来讲,使用跑步机分为以下几步:1、打开电源;2、按start 键;3、调节倾斜度;4、调节速度;5、关闭跑步机。
在这里大家要注意操作屏上的几个英文单词(如上图所示):
1.START(开使):起动跑步机
2.STOP(终止):关掉跑步机
3.INCLINE(倾斜度):倾斜度调节,能够用上箭头和下箭头来调整以超过不一样的锻练目地。
4.SPEED(速度):速率调节,能够用上箭头和下箭头来调整以超过不一样的锻练目地。
5.STEP INCLINE:快调倾斜度(一键选择倾斜度)
速度的调节方式
1、图示,速度旁边有“+””—”符号,通过图示符号,缓慢调节速度。
2、图里面的数字表示的是速度,比如按数字4,跑步机速度会直接调整为4,无需通过加减符号来调节。
建议:(1)慢走,提议用4km/h~6km/h的。
(2)6km/h~8km/h速率合适快步走的人。
(3)8km/h左右的速率比较适合常常运功的人群。
坡度的调节方式
坡度的调节方式与速度的一样,根据仪表盘调整即可。
注意:调整倾斜度为2°-5°的跑步机上开展健身跑,能防止、降低膝盖骨长久劳损!。
- 1、下载文档前请自行甄别文档内容的完整性,平台不提供额外的编辑、内容补充、找答案等附加服务。
- 2、"仅部分预览"的文档,不可在线预览部分如存在完整性等问题,可反馈申请退款(可完整预览的文档不适用该条件!)。
- 3、如文档侵犯您的权益,请联系客服反馈,我们会尽快为您处理(人工客服工作时间:9:00-18:30)。
型 号:PETL60708 序列号: 在下面的图示位置找到产品序列号,并 将其填写到上面的横线处以做日后参考 之用。
序列号标签
有问题吗?
本公司致力于向客户提供满意的服 务。如果您有任何疑问或发现零部 件的遗失或受损,请联系当地授权 经销商(联系方式参见封底或经销商 提供的售后服务卡)。
17. 跑步机可以高速运行。建议小幅度调整速度, 避免突然大幅度变速。
8. 体重超过130公斤(286磅)的人不可使用该跑步 机。
9. 跑步机上不得同时站立两人或两人以上。
18. 心率传感器并不是医疗设施。很多因素都可以 影响心率读数的准确度,包括使用者的动作在 内。心率传感器只能作为运动辅助手段,用以 确定心率的大体趋势。
79
78
16
77
75 16 16 76
25
17
7
9
44 45
37
17
46
43
38 37
42 33 47
17
41
分解图 A — 型号 PETL60708
24
39
20 9
17
6
60
40
7 10
48 33 42
61
7
15 45 44 7 49 17 50 31 24
29 63
59
41 20
58 21 28
地电路。同一电路不得连接其它电器设备。更 换保险丝时需使用ASTA认可BS1362型,应使 用13安培保险丝。
12. 如果需要使用延长线,只能使用3芯、1平方毫 米(14号)的不长于1.5米的电线。
13. 电源线需远离受热表面。
14. 不得在关闭电源时人为强行踏动跑带。电源线 或插头受损,或者跑步机不能正常工作时,不 得使 用跑步机(如果跑步机不能正常工作,参见 第18页的“故障检修”)。
警示标贴的放置
图中的贴纸已经粘贴在跑步机上。如果贴纸丢失或 者字迹不清楚,请联系当地授权经销商(联系方式 参见封底或经销商提供的售后服务卡)订购一张免 费的替换标签。请将标签贴在图中所示的位置。注 意:图示的标贴尺寸可能与实际尺寸有所出入。
注意
跑步机运行时,手和脚不得放 在此区域。
警告
为保护自己和他人免受 伤害,阅读用户手册, 并且:
24. 危险:确保在使用完毕机器后立即拔下电源
插头。清洁跑步机或实施本手册说明的维护和调 整程序之前也必须先拔下电源线。除非得到授权 服务代表的指示,否则不得私自打开马达护盖。 本用户手册说明以外的检修只能由授权服务代表 进行。
25. 本跑步机仅适合家庭使用。不得将本跑步机用于 任何商务、租赁或公共团体用途。
5. 跑步机应放在室内以防潮防尘。不得将跑步机 放置在车库、有顶天井或靠水的地方。
15. 在使用跑步机前需阅读、理解并测试紧急制动 程序(见第12页“如何打开电源”)。
6. 不得在使用气雾剂产品或纯氧的地方使用跑步 机。
16. 不得在站立在跑带上时启动跑步机,使用跑步 机时可按需握住把手。
7. 12岁以下的儿童不得使用跑步机。宠物需远离 跑步机。
.启动和停止跑步 机时,请站立于 跑台两侧。
.渐进调整速度。
.握住扶手,防止 跌倒,运动时始 终佩带安全夹扣。
.出现眩晕,过度 疲劳或呼吸急促 时,应停止练习。
.搬运或存贮跑步 机前请插紧插销。
.折叠跑步机前, 请先将坡度调整 到最小。
.请勿让孩子接近 或爬上跑步机。
.不使用跑步机时, 要取下安全钥匙。
用户手册
注意
使用设备前请先阅读本手册中所有注 意事项和使用说明。请妥善保管本手 册以备参考。
本产品经美国ICON运动与健康公司授权 由ICON授权经销商在中国大陆地区经销
目录
警示标贴的放置 ........................................................................................................................................................ 2 重要注意事项 ............................................................................................................................................................ 3 用前说明 ................................................................................................................................................................... 5 组装 .......................................................................................................................................................................... 6 操作与调整.............................................................................................................................................................. 10 如何折叠和移动跑步机............................................................................................................................................ 17 故障检修 ................................................................................................................................................................. 18 锻炼指导 ................................................................................................................................................................. 21 零件清单 ................................................................................................................................................................. 22 分解图..................................................................................................................................................................... 24 售后服务和有限担保 ............................................................................................................................................ 封底
.确保衣物、手指 和头发远离运行 中的机器。
.跑带运转时,切 勿调整和组装跑 步机。
.使用跑步机时要 穿运动鞋。
PROFORM 是 ICON IP,Inc. 的注册商标 2
分解图 D — 型号 PETL60708
103 104
105
R1208A 7
7 7
102
113
106
7
7
7 110
7
107 7 108
95
97
22
98
24
32
31
87 93
14 31
1 4
26
97 2
101
22
99
26
重要注意事项
警告:为避免可能造成的伤害,使用跑步机前请仔细阅读本手册中的所有指示说明以及跑步机上的
所有警示标贴。对于因不正确使用本产品而带来的人员伤害或财产损失,本公司不承担任何责任。
1. 开始运动前,请先咨询医生。这一点对于年龄 超过35岁或已存在健康问题的人士尤为重要。
62 35
6 21
36
58 29
28 57
10 7
6
63 7
55
6 54
37 38 37
17 17
53
17 51
52
31 56
25
R1208A
用前说明
感谢您选择新型的PROFORM® QUICK START 7.0跑步 机。QUICK START 7.0跑步机结合了高新科技和创新 设计,让您在家就能方便地进行锻炼并完成自己的练习 目标。不锻炼时,跑步机可以折叠起来,占用面积不到 其它类型跑步机的一半。
23. 定期检查并正确紧固跑步机的零部件。
保存这些说明
4
分解图 B — 型号 PETL60708
8
34
8
