贝尔金7230 7633 8230 设置说明
belkin 7-port usb 2.0 高性能集线器 用户手册说明书

3
P74387ea_F5U237ea_uk 09-09-2003 10:07 Page 4
OVERVIEW
Technical Specifications Upstream Ports Downstream Ports Per-port Voltage Per Port Current Power Mode Operating Temperature Storage Temperature Enclosure Power Supply Output: Plug Size: Plug Polarity:
Important Note: The hub must be connected to a USB 2.0 compliant host in order to function in Hi-Speed mode (480Mbps data rate). If the hub is connected to a USB 1.1 compliant host, it will operate only in Low Speed or Full Speed mode (1.5 Mbps/12 Mbps).
(1) (7) DC +5V 500mA (max) Self-Powered 5ºC ~ 40ºC -20ºC ~ 60ºs ABS
Belkin Bluetooth PDA Adapter Card用户指南说明书

Add Bluetooth wireless technology to your PDA or notebookBelkin brings you the fast and simple way to wirelessly connect your computing devices—with breakthroughBluetooth technology. This great new technology gives you a seamless, fast connection between your PDA and notebook computer, and other devices that are set up for Bluetooth wireless operation. These can include printers, hard drives,your cell phone, and more.With the Bluetooth PDA Adapter Card from Belkin and your available CompactFlash® (CF) Type I slot, you can print,transfer files, exchange business cards and other information,without cables.You can slip your Bluetooth PDA Adapter Card into theincluded PC Adapter Card and create cable-free connections between your notebook computer or PC and Bluetoothdevices. The PC Adapter Card enables the user to effortlessly transfer data to other Bluetooth devices—such as desktop or notebook computers, input devices, PDAs, printers, and even mobile phones—without wires. Connect with up to seven other Bluetooth devices at a time.P B 040322_P R 8074_F 8T 006_u kBenefits:• Works with any device enabled with Bluetooth v1.1 technology• Offers built-in security using 128-bit encryption and authentication, so you can securely access any Bluetooth device • Installs easily• Allows you to work at distances of up to 10 metres*• Provides effortless wireless communication through user-friendly software• Keeps your PDA or notebook batteries running longer (works with low-power consumption)• Offers compact and convenient mobile solutionSystem Requirements:Bluetooth PDA Adapter Card• Genuine Intel® StrongARM SA-1110 processor• One available CompactFlash® Type I expansion slot • Microsoft® Pocket PC 2002 or 2003Bluetooth PC Adapter Card• PC-compatible computer, CPU speed of 200MHz or above • Memory: 64MB or above, 128 recommended • One available PCMCIA Type II slot • Windows® 98 SE, Me, 2000, or XPPart Number Description UPCF8T006ukPC Bluetooth™ PDA and PC Adapter Combo Card 7-22868-49802-6Bluetooth ™PDA and PC Adapter Combo CardF8T006ukPC*10m range is dependent upon environment,number of users, and other wireless devices within immediate proximityPackage Contents:• Bluetooth PDA and PC Adapter Combo Card • CD-ROM • User Manual• Quick Installation Guide • Registration CardBluetooth ™PDA and PC Adapter Combo CardBelkin Corporation +1 310 898 1100 Compton • CA • USA Belkin Ltd.+44 (0) 1933 35 2000Rushden • United Kingdom Belkin B.V.+31 (0) 20 654 7300 Schiphol-Rijk • The Netherlands Belkin GmbH +49 (0) 89 143405 0München • Germany© 2004 Belkin Corporation. All Rights Reserved. All Trade Names Are Registered Trademarks of Respective Manufacturers Listed.The Bluetooth name and the Bluetooth trademarks are owned by Bluetooth SIG, Inc., and are used by Belkin Components under license.Bluetooth PC Adapter Card Specifications:Bluetooth PDA Adapter Card Specifications:OS Support:Windows 98 SE, Me, 2000 e XPMicrosoft Pocket PC 2000, Pocket PC 2002Supported Profiles:Physical Interface: CardBus Type II Operating Frequency: 2.4 to 2.4835GHz Output Power: 0 dBm (1mW), Class 2Data Rate: 723/57.6Kbps Packet Support: 1/3/5 Slot Packets Supply Voltage: 5.0V DC Dimensions: 100.7 (L) x 54 (W) x 5mm (H)Weight: 38.2 gPhysical Interface: CompactFlash Type IOperating Frequency: 2.4 to 2.4835GHz Output Power: 0 dBm (1mW), Class 2Data Rate: 723/57.6Kbps Packet Support: 1/3/5 Slot Packets Supply Voltage: 3.3 & 5.0V DC Dimensions: 52 (L) x 43 (W) x 5mm (H)Weight: 25.5 gThe services supported by your Bluetooth PC Card are defined as “Profiles”. Available profiles include: • Generic Access • Service Discovery • Serial Port • LAN Access• Dial-Up Networking• Generic Object Exchange • Object Push • File Transfer • SynchronisationWithout the need of any cables or wiring, you can:• Transfer files• Access dial-up networks• Connect to local area networks • Eseguire una sessione ActiveSync®• Perform an ActiveSync® session • Connect to serial ports • Exchange PIM data• Send or exchange business cardsSpecifications subject to change without notice.Productspecifications:。
贝尔金路由器qos.doc

贝尔金路由器qos贝尔金路由器qos的设置方法:步骤一:在您的Web 浏览器地址栏中转到192.168.1.1 , 并按enter 转到路由器的Web 界面。
步骤二:单击顶部横幅中的Login,将出现登录屏幕;密码默认为空,除非您设置了一个密码,否则可直接单击Submit进行登录。
步骤三:在左侧菜单中单击IntelliStream项调出QOS 页。
QOS 页应显示如下。
为了让IntelliStream 提供最佳媒体体验,需要向您的路由器提供您Internet 连接的大致速度。
有两种方式可以启用IntelliStream:运行速度测试或手动设置。
步骤一:对于速度测试,请单击Run a Speed Test,测试将随之启动。
Media Features IntellistreamIntellistream 会优先处理语音、视频和游戏之类的高带宽、低延迟服务,以实现最佳的在线体验您随后会看到:一旦完成,您就会看到结果。
如果您的Internet 下载速度大于70Mbps,IntelliStream QoS 只会改进您的上传体验。
步骤一:Refresh(刷新)- 这将会重新测试您的Internet 速度。
步骤二:单击Apply Changes后,路由器会保存所做更改。
IntelliStream QOS 现在已启用。
步骤一:对于手动设置,请单击Manually Enter。
这将支持您设置大致的Internet 速度。
如果您不知道自己的Internet 速度,请致电您的ISP。
步骤二:随后您会看到以下提示,请在此处输入您的速度:步骤三:单击Apply Changes,路由器会保存所做更改,IntelliStream QOS 现已启用。
的Intellistream QoS功能现已启用。
看过文章贝尔金路由器qos的人还看了:1.Belkin贝尔金路由器设置2.贝尔金无线路由器常见故障3.贝尔金无线路由器简单设置步骤4.如何设置贝尔金路由器固定IP地址及上网方式全过程5.贝尔金无线路由器设置图解6.详解贝尔金无线路由器无法连接宽带故障7.贝尔金Belkin路由器如何设置8.贝尔金路由器设置的4个要点是什么9.贝尔金路由器英文界面设置步骤10.怎样提高贝尔金路由器无线信号强度。
贝尔金Beovision Eclipse 2代的产品手册

State-of-the-art sound paired with exceptional OLED picture.Integrated 3 channel speaker system with powerful 450 watts.Personalise with selection of covers, aluminium finishes and placement options.Much more than a TV, it is also a complete music system.Beoremote One– providing one-touch access.I M P O R T A N T F E A T U R E SRedefining the TV experience.BeoVision Eclipse combines the beauty of OLED 4K images with the world’s best TV sound system. It represents sound and picture in perfect alignment. Add to this the stunning looks – every little detail is carefully attended to.High-quality materials provide the aesthetic freedom to place the TV anywhere you want, even freestanding in a room.P R O D U C T O V E R V I E WS P E C I F I C A T I O N S B A S I CT E C H N I C A L Speaker ConfigurationIntegrated fully activethree channel stereo(centre and stereo)· 1 x 1” tweeter· 2 x 2.5” fullrange drivers· 3 x 4” midrange/wooferAmplifiers· 1 x 50 watts for centre tweeter· 2 x 50 watts for fullrange driver· 3 x 100 watts for midrange/wooferAdvanced sound features·Integrated 7.1 surroundsound module·Adaptive Bass Linearisation·Sound modes and Speaker groups·TrueImage up and downmixing·Immaculate Wireless Soundintegrated for a full wireless surroundsolution with connection of up to8 speakers·Multiroom technology is integrated Integrated music servicesTuneIn Internet RadioQplay 2.0 (China Specific)Deezer (incl. Deezer HiFi)Display·LG 55” / 65” OLED 4K·Cinema HDR (Dolby Vision®,HDR10, HLG), Dolby Vision IQ.·ą9 Gen 3 AI Processor with AI Picture Pro: artificial intelligence deep learning algorithms to improve picture quality·webOS & ThinQ AI·Absolute black, wide viewing angle, wide colour gamutRemote Control2way Bluetooth control via Beoremote One BTPlacement·Manual wall bracket moving up to60° from wall.·Motorised wall bracket with remote operation moving up to 60° from wall ·Motorised floor stand with remote operation moving up to 90° to either side ·Floor standC O N N E C T I V I T YY O U M I G H T W A N N A K N O W MultiroomAirplay 2Chromecast built-inBeolink MultiroomOutputs8x WISA8x Powerlink6x PUC control via IRInputsSoundcenter:·Bluetooth 4.2· 4 x HDMI (2.0)· 1 x Ethernet 10/100Mb· 1 x Analogue line in(3,5 mm mini jack)· 1 x Optical inTV screen:· 4 x HDMI (2.1)· 3 x USB· 1 x Ethernet 10/100MbDesigner:T orsten Valeur, David Lewis DesignersMotorised floor stand:designduo | smedegaard weisWeight55”: 33.1 kg65”: 41.8 kgFloor stand: 25.2 kgWall bracket: 8.0 kgS P E C I F I C A T I O N S F O R55”111.8B E O V I S I O N EC L I P S E 2n d G E N .S P E C I F I C A T I O N S F O R 65”D I M E N S I O N S A N D P L A C E M E N T S :Floor standWall bracket99.5124.965"144.112.211.1111.851.8123.5Wall bracket139.010.612.299.5Motorised wall bracket3.6124.960°51.8136.012.211.1111.837.2121.354.4123.5Motorised wall bracket60° 3.6124.9 3.660°133.649.951.854.4136.098.437.252.0121.3Motorised floorstand 98.437.2133.698.437.252.0121.3Motorised floorstand98.4252.0H I G H L I G H T E D V A R I A N T SS I L V E RSoundcenter speaker coverLight OakSoundcenter rear sideSilver aluminiummotorised floor standSilver aluminiumB R A S ST O N ESoundcenter speaker coverOak woodSoundcenter rear sideBrass tone aluminiummotorised floor standBrass tone aluminiumB R O N Z ET O N ESoundcenter speaker coverSmoked OakSoundcenter rear sideBronze tone aluminiummotorised floor standBronze aluminiumC O S T U M I S A B I L I T YS O U N D C E N T E R S P E A K E R C O V E R :SilverForged Iron Grey SilveraluminiumSilveraluminiumOak Black InfantryGreen Brass tone alumunium Brass tonealumuniumBlackBronze tone alumunium Smoked oak WalnutBrass T one Parisian Night Blue Purple HeartPiano Black aluminiumBronze T oneAluminiumFabricWoodLight Oak M O T O R I S E D F L O O R S T A N DF L O O R S T A N DS O U N D C E N T E R R E A R S I D E·Silver aluminium·Brass tone alumunium ·Bronze tone alumunium ·Piano Black aluminium。
贝尔金Omniview Pro2系列8端口KVM切换器说明书
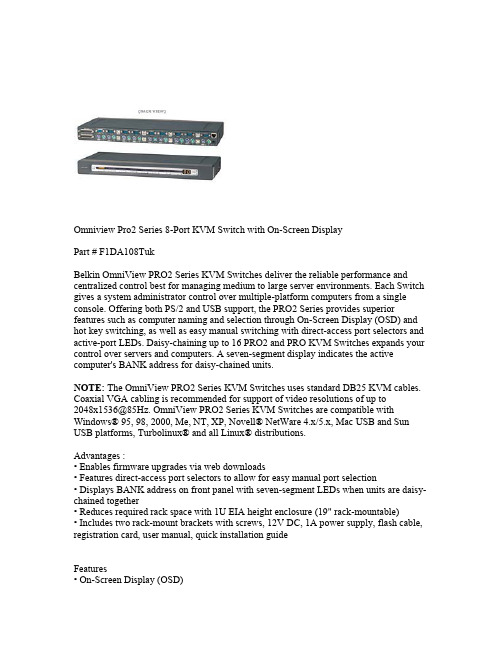
Omniview Pro2 Series 8-Port KVM Switch with On-Screen DisplayPart # F1DA108TukBelkin OmniView PRO2 Series KVM Switches deliver the reliable performance and centralized control best for managing medium to large server environments. Each Switch gives a system administrator control over multiple-platform computers from a single console. Offering both PS/2 and USB support, the PRO2 Series provides superior features such as computer naming and selection through On-Screen Display (OSD) and hot key switching, as well as easy manual switching with direct-access port selectors and active-port LEDs. Daisy-chaining up to 16 PRO2 and PRO KVM Switches expands your control over servers and computers. A seven-segment display indicates the active computer's BANK address for daisy-chained units.NOTE: The OmniView PRO2 Series KVM Switches uses standard DB25 KVM cables. Coaxial VGA cabling is recommended for support of video resolutions of up to************************************************************* Windows® 95, 98, 2000, Me, NT, XP, Novell® NetWare 4.x/5.x, Mac USB and Sun USB platforms, Turbolinux® and all Linux® distributions.Advantages :• Enables firmware upgrades via web downloads• Features direct-access port selectors to allow for easy manual port selection• Displays BANK address on front panel with seven-segment LEDs when units are daisy-chained together• Reduces required rack space with 1U EIA height enclosure (19" rack-mountable)• Includes two rack-mount brackets with screws, 12V DC, 1A power supply, flash cable, registration card, user manual, quick installation guideFeatures• On-Screen Display (OSD)• Hot key switching• PS/2 keyboard and mouse emulation• PS/2 keyboard and mouse emulation• Video resolution support to 2048x1536@85Hz • User-defined AutoScan• Dedicated daisy-chain ports• Natively rack-mountable and stackable construction ©2000-2005 Belkin Corporation。
Belkin 7230-4 54M无线路由器设置说明书

史上最具迷你的小型路由,坚固,做工扎实,性能卓越,成色近全新,9成左右.,相当漂亮!上网速度快,迷你Belkin 7230-4 54M 无线路由器,即日起仅售88元一台,售完即止!!实图展示:该款设备的亮点是:小巧,功能更为强大,让你体会浓缩就是精华,小的路由器一般只有跨国大公司才有的专利,国内的品牌几乎很少有迷你款式的设备,是一款不可多得的设备!!设置说明资料(请大家直接将连接复制到IE地址栏打开)接下来是官方说明,这份说明是贝尔金中国官方网站上针对这款路由的中文官方说明:(请大家直接将连接复制到IE地址栏打开)首先把电脑与路由器连接好(注意:是接在路由器后面的LAN口,别接错哦!)然后将你的电脑上的本地网卡或者无线网卡的IP改成自动获到IP 和DNS,接下来在在IE地址栏输入192.168.2.1,进入路由器设置页面user name这边填宽带用户名接着下面Password 密码填两次,点(Apply changes)套用变更就OK.设置成功后点右上角的home看状态:看internet settings这边有外网IP出来就OK.下面来说说无线设置使用多线程软件如迅雷 BT超级旋风以及PPLIVE PPSTREAM 等在线电影软件都要开放出相应的端口.以超级旋风为例简单介绍一下:先打开下截软件找出端口.我的端口是下面四个,IP 是192.168.2.2(可双击网卡点支持查看IP) TCP 还是UDP 对应好,按如下填上就行.选Firewall--virtual servers下面的80 8000 4662 4663分配是我下载软件上端口。
端口要自己先在软件中查看哟。
(下面图片是无线路由器的截图,同型号基本差不多介面没有单独截图)实物照片:产品成色8成新收到产品成色以实物为准不要以成色为由给予中差评或者退货54g 宽带无线路由器产品编号 F5D7230zh4贝尔金802.11g宽带无线路由器让您体验宽带无线网络连接,在电脑间共享文件。
贝尔金无线多媒体桌面 250 用户手册说明书

Belkin Tech SupportUS:800-223-5546, ext. 2263 310-898-1100, ext. 2263Europe: 00 800 223 55 460Australia: 1800 235 546New Zealand: 0800 235 546Belkin Corporation501 West Walnut StreetCompton, CA 90220-5221, USA310-898-1100310-898-1111 faxBelkin Ltd.Express Business Park, Shipton WayRushden, NN10 6GL, United Kingdom+44 (0) 1933 35 2000+44 (0) 1933 31 2000 fax © 2005 Belkin Corporation. All rights reserved. All trade names are registered trademarks of respective manufacturers listed.Belkin B.V .Boeing Avenue 3331119 PH Schiphol-Rijk, The Netherlands +31 (0) 20 654 7300+31 (0) 20 654 7349 fax Belkin Ltd.7 Bowen Crescent, West Gosford NSW 2250, Australia +61 (0) 2 4372 8600+61 (0) 2 4372 8603 faxF8E859-BNDLDiscover easy Internet and multimedia functionality with wireless convenienceTable of ContentsTable of Contents1. Introduction (1)Package Contents (2)Software Compatibility (2)2. Quick Setup (3)For PS/2 Connections (3)For USB Connections (4)3. Software Driver Installation (5)For Windows 98 SE, 2000, Me, and XP (5)4. About your Belkin Software (6)Product Features (6)For the Keyboard (6)For the Mouse (10)5. Troubleshooting (13)6. Information (15)IntroductionCongratulations and thank you for purchasing the WirelessMultimedia Desktop 250 by Belkin. We appreciate your businessand we are sure you will enjoy years of reliable use with thesehigh-quality input devices.Although the Wireless Multimedia Desktop 250 will functionout-of-the-box as a Human Interface Device (HID) or standardPS/2 keyboard and mouse, for advanced programmability andfunctionality, we recommend that you use the included software.This will give you added flexibility and allow you to program andcustomize your settings, and reassign keys to fit your preference. 12 3 4 5 62SectionIntroduction | Package ContentsQuick Setup | For PS/2 Connections31.2.3.compartment to ensure that you install them correctly.4.Power on your computer.The receiver automatically scans for and synchronizes the keyboard and mouse when you power on the computer. Your keyboard and mouse should now be functioning.NOTE: If synchronizing does not occur automatically, please refer to the information on “Synchronizing” in the Troubleshooting section at the end of this User Manual.Quick Setup |For USB Connections14Section For USB Connections1. Be sure that your computer is powered on. If you are runningWindows 98 SE, Me, or 2000, you will need to have your old 2. 3. NOTE:4. The receiver automatically scans and synchronizes thekeyboard and mouse. Your keyboard and mouse should now be functioning.5. If synchronizing does not occur automatically, please referto the information on “Synchronizing” in the Troubleshooting section at the end of this User Manual.Software Driver Installation5For Windows 98 SE, Me, 2000, and XPNOTE: The keyboard and mouse should now be functioningfor basic input. If this is not the case, carefully repeat the Quick Setup procedures in the previous pages. When the keyboardand mouse are functioning for basic input, install the software described in the following section.NOTE: If you have previously installed any keyboard or mouse driver on your computer, you must uninstall it/them before proceeding with this installation procedure.1.Insert your Wireless Multimedia Desktop 250 driverinstallation CD into your CD-ROM drive. After a few moments, the main menu will start automatically.2.Select “Install Driver” and your computer will begin theinstallation process.3.Follow the on-screen instructions to install the software.NOTE: If the main CD does not auto-start, click the “Start”button and select “Run”. From the run dialog box, enter“<drive>:\Setup.exe” and click “OK” (“<drive>” being theletter of the drive that identifies your CD-ROM drive under“My Computer”. For example, if the CD is in drive D, enter“D:\Setup.exe”.).4.When prompted, click “Finish” and restart your computer.This completes the installation process.6Section About your Belkin Software |Product Features1256Product FeaturesThe Wireless Multimedia Desktop 250 software provides a suite of tools that will enhance your experience with the Belkin Wireless Multimedia Desktop 250. It allows you to customize your hot keys and gives you quick access to your media keys, as well as other shortcuts.For the KeyboardSoftware installation is required to enable functioning of the following USB-PS/2 keyboard hot keys:NOTE:Your Media Player may have a separate volume control.About your Belkin Software | For the Keyboard*NOTE: If you have a web-based email account, this feature doesnot apply.To program keyboard hot keys:1.Click “Start”.2.Click “Programs”.3.Click “Belkin Multimedia Keyboard”.4.Then double-click on “Belkin Multimedia Utility Keyboard”.5.An on-screen display of the hot keys will appear. Select thebutton to program.6.Then under the “Keys” tab, select “Special Function”.7.In the drop-down menu, select from:Copy Paste Open NewCut Redo Save712356Section 8. Then click “Apply”.9. Next, click “OK”.10. Repeat steps 5–9 to program other hot keys.To restore default settings, click “Restore All”.To program a customized hot key:1. Follow steps 1–5 in “To program keyboard hot keys”.2. Select “Custom”.3. Then click “Set”.4. Follow on-screen instructions to complete programming.5. Click “Apply”.6. Then click “OK”.To customize on-screen color display:1. Select “OSD” tab.2. In “Item”, select from (Window, Frame, Text) to program.3. Then in “Color”, click drop-down menu to select color.To customize display launch time:1. Select “OSD” tab.2. In “Delay”, click drop-down arrow.3. Then select from “(1-10) seconds”.4. Click “Apply”.5. Next, click “OK”.About your Belkin Software | For the KeyboardAbout your Belkin Software | For the KeyboardTo display key status:1.To display status of “Scroll Lock”, select “Show ScrollLock” status.2.To display status of “Num Lock”, select “Show NumLock” status.3.To display status of “Cap lock” key, select “Show CapLock” status.4.After selection(s) are completed, click “Apply”.5.Next, click “OK”To remove key status, uncheck all selections.Then click “Apply”.Next, click “OK”.12356Section For the MouseMouse FunctionsThrough your Mouse “Properties” dialog box, you can find and control the following button-function features:About your Belkin Software | For the Mouse(if available)About your Belkin Software | For the MouseTo program mouse buttons:Please note that only the scroll wheel, fourth, and fifth buttons are programmable through the software. Refer to Fig. 3 of mouse for description.1.Click “Start”.2.Click “Programs”3.Click “Belkin Multimedia Keyboard”.4.Then double-click on “Belkin Multimedia Utility Mouse”.5.Next double-click on the mouse icon on the task bar.To program wheel speed:1.Under the “Wheel” tab in wheel mode, select “Enhancedscroll mode”.2.Under “Wheel speed” in drop-down menu, select anumber for “scroll lines per scroll unit” or select “onepage per scroll unit”.3.Click “Apply”.4.Click “OK”.To program mouse buttons:1.Select the “Button” tab.2.Select a button to program.3.Choose from the following functions in Table 1.12356SectionAbout your Belkin Software | For the Mouse4. Click “Apply”.5. Click “OK”.Table 1TroubleshootingSynchronizing the Receiver and Wireless Multimedia Desktop 2501.Press the connect button on top of the receiver, and thenpress the button on the bottom of the keyboard. It should connect within 10 seconds.2.Press the connect button on the top of the receiver, andthen press the button on the bottom of the mouse.Within 10 seconds, it should connect.3.If the keyboard did not connect, please repeat step 1.4.If the mouse did not connect, please repeat step 2. Switching IDsIf interference occurs while using the keyboard and/or mouse, switch IDs by following the steps below:For the Keyboard:•P ress the connect button on top of the receiver, and then press the button on the bottom of the keyboard. It should connect within 10 seconds.• If the keyboard does not connect, please repeat step.Troubleshooting12346Section For the Mouse:• P ress the connect button on the top of the receiver, andthen press the button on the bottom of the mouse.Within 10 seconds, it should connect.• If the mouse does not connect the first time, please repeat.If the keyboard and/or mouse is/are not working after installation:Be sure the receiver’s cables are plugged into either thecomputer’s PS/2 ports or a USB port. If you are connecting it via PS/2, make sure that both plugs are being used (purple keyboard connector and the USB connection with the green PS/2 adapter). If you are connecting via USB, make sure that you only connect the USB connector.For optimal performancePlace the receiver at least eight inches (20cm) away from the computer monitor, the computer, any external storage devices, or other electrical devices.Make sure you have properly installed the batteries. Check to make sure the batteries you have installed are not dead (you can do this by installing them into another device).If the keyboard does not register keystrokes, replace current batteries with high-quality alkaline batteries.If the mouse pointer becomes choppy on-screen, replace current batteries with high-quality alkaline batteries. Be sure that the mouse is not on a reflecting surface (such as a transparent,mirrored, or glossy table). If this is the case, place an opaque or textured material—or a mouse pad—underneath the mouse. This will allow the optical mechanism to work accurately.InformationFCC StatementDECLARATION OF CONFORMITY WITH FCC RULES FORELECTROMAGNETIC COMPATIBILITYWe, Belkin Corporation, of 501 West Walnut Street, Compton, CA 90220, declare under our sole responsibility that the product,F8E859-BNDLto which this declaration relates,Complies with Part 15 of the FCC Rules. Operation is subject to the following two conditions: (1) this device may not cause harmful interference, and (2) this device must accept any interference received, including interference that may cause undesired operation.Caution: Exposure to Radio Frequency Radiation.The radiated output power of this device is far below the FCC radio frequency exposure limits. Nevertheless, the device shall be used in such a manner that the potential for human contact during normal operation is minimized. When connecting an external antenna to the device, the antenna shall be placed in such a manner to minimize the potential for human contact during normal operation. In order to avoid the possibility of exceeding the FCC radio frequency exposure limits, human proximity to the antenna shall not be less than 20cm (8 inches) during normal operation.Federal Communications Commission NoticeThis equipment has been tested and found to comply with the limits for a Class B digital device, pursuant to Part 15 of the FCC Rules. These limits are designed to provide reasonable protection against harmful interference in a residential installation.This equipment generates, uses, and can radiate radio frequency energy. If this equipment does cause harmful interference to radio or television reception, which canbe determined by turning the equipment off and on, the user is encouraged to try and correct the interference by one or more of the following measures:• Reorient or relocate the receiving antenna.• Increase the distance between the equipment and the receiver.• C onnect the equipment to an outlet on a circuit different from that towhich the receiver is connected.• Consult the dealer or an experienced radio/TV technician for help.Information12345Section ModificationsThe FCC requires the user to be notified that any changes or modifications to this device that are not expressly approved by Belkin Corporation may void the user’s authority to operate the equipment.Canada-Industry Canada (IC)The wireless radio of this device complies with RSS 210 Industry Canada. This Class B digital apparatus complies with Canadian ICES-003.Cet appareil numérique de la classe B conforme á la norme NMB-003 du Canada.Belkin Corporation Limited Lifetime Product Warranty*Belkin Corporation warrants this product against defects in materials and workmanship for its lifetime. If a defect is discovered, Belkin will, at its option, repair or replace the product at no charge provided it is returned during the warranty period, with transportation charges prepaid, to the authorized Belkin dealer from whom you purchased the product. Proof of purchase may be required.This warranty does not apply if the product has been damaged by accident, abuse, misuse, or misapplication; if the product has been modified without the written permission of Belkin; or if any Belkin serial number has been removed or defaced.THE WARRANTY AND REMEDIES SET FORTH ABOVE ARE EXCLUSIVE IN LIEU OF ALL OTHERS, WHETHER ORAL OR WRITTEN, EXPRESSED OR IMPLIED. BELKINSPECIFICALL Y DISCLAIMS ANY AND ALL IMPLIED WARRANTIES, INCLUDING, WITHOUT LIMITATION, WARRANTIES OF MERCHANTABILITY AND FITNESS FOR A PARTICULAR PURPOSE.No Belkin dealer, agent, or employee is authorized to make any modification, extension, or addition to this warranty.BELKIN IS NOT RESPONSIBLE FOR SPECIAL, INCIDENTAL, OR CONSEQUENTIAL DAMAGES RESULTING FROM ANY BREACH OF WARRANTY , OR UNDER ANY OTHER LEGAL THEORY , INCLUDING BUT NOT LIMITED TO, LOST PROFITS, DOWNTIME, GOODWILL, DAMAGE TO OR REPROGRAMMING, OR REPRODUCING ANY PROGRAM OR DATA STORED IN, OR USED WITH, BELKIN PRODUCTS.Some states do not allow the exclusion or limitation of incidental or consequentialdamages or exclusions of implied warranties, so the above limitations or exclusions may not apply to you. This warranty gives you specific legal rights, and you may also have other rights that vary from state to state.*Batteries not included under warranty.。
贝尔金无线路由器设置
贝尔金无线路由器设置无线路由器是我们日常生活中必不可少的工具之一,它能够提供稳定的无线网络连接,满足我们对于网络的各种需求。
贝尔金(Belkin)无线路由器是市场上一个非常受欢迎的品牌,其产品性能稳定可靠,操作简便。
本文将详细介绍贝尔金无线路由器的设置方法,以帮助用户顺利搭建起自己的无线网络环境。
1. 准备工作在开始设置之前,我们需要准备一些工作。
首先,确保您已购买到了一台贝尔金无线路由器,并且已将其连接到电源并接入了您的宽带网络。
其次,您需要一台电脑或者移动设备,用于进行无线路由器的设置。
最后,确保您已准备好了您的宽带账号及密码,以及您希望设置的无线网络的名称和密码。
2. 连接路由器第一步是连接您的电脑或移动设备到贝尔金无线路由器。
您可以通过有线方式连接,使用一个以太网网线将路由器的LAN口与电脑的网口连接,或者通过无线连接,选择贝尔金无线路由器的无线网络并输入密码进行连接。
3. 设置网络信息完成连接后,打开您的浏览器,输入贝尔金无线路由器的IP地址(通常为192.168.2.1)进入路由器的管理界面。
在登录界面中,输入默认的用户名和密码,即admin和admin,点击登录。
进入管理界面后,您可以看到各种设置选项。
首先,点击“Internet”选项卡,在此处输入您的宽带账号和密码,选择您的宽带连接类型(如ADSL或者光纤),并根据需要进行其他设置(如DNS服务器、MAC地址克隆等)。
接下来,点击“无线网络设置”选项卡,在此处您可以设置您的无线网络的名称(即SSID)和密码。
您还可以选择加密方式(如WEP、WPA或WPA2等)和加密密钥。
设置完成后,点击保存以应用您的更改。
4. 设置无线安全性为了保护您的无线网络的安全性,贝尔金无线路由器提供了一些额外的安全设置选项。
您可以点击“安全性”选项卡进行设置。
在安全性设置中,您可以启用网络访问控制,设置访问规则以控制谁可以连接到您的无线网络。
您还可以启用防火墙,过滤特定的网络流量以提高网络的安全性。
贝尔金 Conserve Switch 电涌保护器带遥控器用户指南说明书

Conserve Switch™ Surge Protector with Remote User GuidebatteryPackage Contents. 8-Outlet Conserve Switch Surge Protector. Wireless Remote Switch(battery included). Remote Switch Wall-Mount .User Guide andWarranty Informationcabletwo (2) outlets4-foot1Plug in any of your devices that do not require constant, round-the-clock power into one of theConserve Switch Surge Protector’s Remote-Switched Outlets.Recommended devices include: .C omputers.M onitors.P rinters.C omputer Speakers.E xternal Hard Drives.P aper Shredders.L amps 2Plug in any of your devices thatrequire constant, round-the-clockpower into one of the ConserveSwitch Surge Protector’s Always-On Outlets. Recommendeddevices include:.W ireless Routers.M odems.C ordless Phones3Plug your Conserve Switch’s powercord into a wall outlet.4 Remove the clear battery tab from the back of the remote switch. The remote is now ready to use.NOte: Mounting screws are not included; see the “Wireless Remote Switch with Wall-Mount” section later in this user guide.. T he “Always-On Outlets” light shouldbe on if power is present. If this light goes out at any time, it means the circuit breaker has tripped and should be reset. . T he “Not Grounded” light should not beon. If this light turns on, you may have a ground-wiring problem in your home and you should contact an electrician to properly ground the outlet. Connecting a Belkin Surge Protector to an improperly grounded outlet will void all Belkin warranties. If your home is properly grounded and the “Not Grounded” light is on, please contact Belkin for your free replacement.. T he “Remote-Switched Outlets” lightshows the state of the Remote-Switched Outlets. When the light is on, theRemote-Switched Outlets are powered; if the light is off, the Remote-Switched Outlets are not powered.1Firmly press and release the “I” button to turn ON the Remote-Switched Outlets. As you press the button, a green light flashes on the remote switch to indicate that the remote is working. Your devices are now powered and ready for use.5W hen ready to use your equipmentagain, repeat Steps 1–5.NOte: A green LED on the wirelessremote switch will illuminate whenthe switch is pressed. This indicatesthat the signal was sent and that thebattery is OK. If you do not see thelight, it is time to replace the battery.T o replace the battery, see theTroubleshooting section.2Turn on and use your devicesas usual.3W hen you are finished using yourdevices, turn off each device as younormally would.4When your devices are turned off,firmly press and release the “O”button to turn OFF the Remote-Switched Outlets. As you press thebutton, a green light flashes on theremote switch to indicate that youhave eliminated power to ConserveSwitch’s Remote-Switched Outlets.Devices plugged into the Always-On Outlets will remain powered.wireless Remote Switch with wall-mount Use either adhesive tape or screws (notincluded) to attach the wall bracket securely to a wall. Place the wireless remote switch near existing light switches or near the entrance to a room for added convenience andaccessibility. The wireless remote switch can also be kept in any other convenient location, e.g., by a bed, on a coffee table, or on a desk.Conserve Switch Surge Protector (Optional) Use the two mounting holes on the back of the Surge Protector to secure it to the wall or baseboard. Install two screws (not included), leaving at least ¼ inch of the screw exposed. Insert the screws into the mounting holes of the Surge Protector and lock into place. Use the detachable cable-management system (included) to help route and organize cables.Syncing your Conserve Switch Surge Protector and wireless Remote Switch By default your Conserve Switch SurgeProtector and remote should be synced when purchased. However, if you need to change the sync settings for any reason, you can do this by locating and changing the channel setting switches on the back of the remote and on the back of the Surge Protector. On the back of the remote, under the battery cover, there is a series of three switches that can be set to up to eight differentconfigurations. On the bottom left corner of the back of the Surge Protector, there is a similar set of switches. The switch settings on both the remote and Surge Protector must match in order for the remote to communicate with the Surge Protector. You can use a small screwdriver to shift the switches.By adjusting these channel setting switches, you can control multiple Conserve Switch Surge Protectors with a single remote switch. Adjust the channel setting on each Conserve Surge Protector to match the setting on a single remote switch. This will enable you to easily turn off the power to multiple devices connected to multiple surge protector units within range.*. 2 Always-On OutletsSuggested use with the following devices: - W ireless Routers - M odems - C ordless Phones - D igital Video Recorders (DVRs) . 6 Remote-Switched Outlets (Switch ON and OFF in response to remote switch) Suggested use with the following devices: - C omputers - M onitors - P rinters - C omputer Speakers - E xternal Hard Drives - P aper Shredders-L amps . Resettable circuit breaker . “Not Grounded” light to indicate when a ground is not present . “Always-On Outlets” light to show when power is present . “Remote-Switched Outlets” light to show when switched outlets are active . Manual override button to control switched outlets .Conserve has a range of up to 60 feet.* Line of sight from the wireless remote switch to the Surge Protector is not required..C able-management system.R emote control to control multipleConserve Switch Surge Protectors*Actual range may vary depending on interference, building materials (e.g., masonry, metal walls), and other location-specific conditions.my device won’t turn on/off.1.C heck whether the device is pluggedinto an Always-On Outlet or a Remote-Switched Outlet. If the device needs to stayon at all times, make sure it is plugged intoone of the two outlets labeled “Always On.”2.T urn on/off the Remote-Switched Outletsusing the wireless remote switch. Ensurethe battery-life LED in the switch lights up.If it does not, replace the battery.3.M ake sure the channel switch settingson the Surge Protector and thewireless remote switch match. See the“Installation, Mounting and SyncingInstructions” section.4.T he Surge Protector may have beenoverloaded. Press the circuit-breakerbutton to reset the circuit.5.T urn on/off the Remote-Switched Outletsusing the button on the surge unit.Replacing the battery1.F unctional range may decrease as thebattery wears out.2.R emove the battery cover from the back ofthe wireless remote switch.3.R eplace the battery with an A23 (12V)alkaline battery.4.P lease recycle or dispose of the batteryresponsibly. Recycling facilities may notbe available in your area.The manual override switch on the SurgeProtector can also be used to turn theRemote-Switched Outlets on or off withoutthe wireless remote switch in the event theremote is lost or the battery needs replacing.“Not Grounded” light is on.The “Not Grounded” light indicates youmay have a ground-wiring problem inyour home, and you should contact anelectrician to properly ground the outlet.Connecting a Belkin Surge Protector toan improperly grounded outlet will void allBelkin warranties. If your home is properlygrounded and the Surge Protector’s “NotGrounded” light is on, please contact Belkinfor your free replacement.Order additional or replacementremote switchesVisit /conserve to orderadditional wireless remote switches, or toreplace lost or broken ones.Technical SpecificationsContinuous Duty Electrical Rating: 120V~/15A/60Hz/1800W Maximum Energy Dissipation: 1080 Joules.H-N: 360 Joules.H-G: 360 Joules.N-G: 360 JoulesMaximum Spike Current: 72,000A.H-N: 24,000A.H-G: 24,000A.N-G: 24,000AUL Clamping Voltage (3-line): UL 1449 400VEMI/RFI Noise Filtration: 150kHz–100MHz up to 58 dBRemote Switch Battery Type: A23 (12V) alkaline or equivalentUL Listed to U.S. and Canada Safety Standards: UL 1449, UL 1363The EMI/RFI components evaluated to the applicable requirementswith UL 1283Safety Information.To reduce the risk of electrical shock, unplug the unit and allow it to cool before cleaning..D o not “daisy-chain” this product or use it with extension cords. TheBelkin Conserve Switch’s power cord must be plugged directly intoan AC power source to ensure proper surge protection..For indoor use and in dry locations only. Not for use with aquariums or other water-related products.FCC ID: K7S-BG200001This device complies with Part 15 of the FCC Rules. Operation issubject to the following two conditions:1.T his device may not cause harmful interference, and2.T his device must accept any interference received, includinginterference that may cause undesired operation.Warning: Changes or modifications not expressly approved by the party responsible for compliance could void the user’s authority to operate the equipment.NOTE: This equipment has been tested and found to complywith the limits for a Class B digital device, pursuant to Part15 of the FCC Rules. These limits are designed to providereasonable protection against harmful interference in a residentialinstallation. This equipment generates, uses, and can radiate radiofrequency energy and, if not installed and used in accordancewith the instructions, may cause harmful interference to radiocommunications. However, there is no guarantee that interferencewill not occur in a particular installation. If this equipment doescause harmful interference to radio or television reception, whichcan be determined by turning the equipment off and on, the useris encouraged to try to correct the interference by one or more ofthe following measures:.R eorient or relocate the receiving antenna..I ncrease the separation between the equipment and receiver..C onnect the equipment into an outlet on a circuit differentfrom that to which the receiver is connected..Consult the dealer or an experienced radio/TV technicianfor help.Limited One (1) Year WarrantyWhat this warranty covers.Belkin International, Inc., warrants to the original purchaser ofthis Belkin Conserve Switch, that the Conserve Switch shall befree of defects in design, assembly, material, or workmanship.What the period of coverage is.Belkin International, Inc., warrants the Belkin Conserve Switchfor one (1) year from the original date of purchase.What will we do to correct problems?Conserve Switch Warranty. Belkin will repair or replace, at itsoption, any defective Conserve Switch free of charge (exceptfor shipping charges for the Conserve Switch). Belkin reservesthe right to discontinue any of its products without notice, anddisclaims any limited warranty to repair or replace any suchdiscontinued products. In the event that Belkin isrepair or replace the Conserve Switch (for example, becauseit has been discontinued), Belkin will offer either a refund ora credit toward the purchase of another product from Belkin.com in an amount equal to the purchase price of the ConserveSwitch as evidenced on the original purchase receipt and asdiscounted by its natural use.What is not covered by this warranty?All above warranties are null and void if the Belkin ConserveSwitch is not provided to Belkin International, Inc., forinspection upon Belkin’s request at the sole expense of thepurchaser, or if Belkin International, Inc., determines that theBelkin Conserve Switch has been improperly installed, alteredin any way, or tampered with. The Belkin Conserve SwitchWarranty does not protect against acts of God (including butnot limited to flood, earthquake, war, and vandalism), theft,normal-use wear and tear, erosion, depletion, obsolescence,abuse, or alteration.How to get service.To get service for your Belkin Conserve Switch, you must takethe following steps:1.C ontact Belkin International, Inc., at 12045 E. WaterfrontDrive, Playa Vista, CA 90094, Attn: Customer Service, orcall (800)-223-5546. Be prepared to provide the followinginformation:a.T he part number of the Belkin Conserve Switch.b.W here you purchased the Conserve Switch.c.W hen you purchased the Conserve Switch.d.C opy of original receipt.2.Y our Belkin Customer Service Representative will theninstruct you on how to forward your receipt and BelkinConserve Switch and how to proceed with your claim.Belkin International, Inc., reserves the right to review thedamaged Belkin Conserve Switch. All costs of shipping theBelkin Conserve Switch to Belkin International, Inc., forunable to purchaser of any Belkin Conserve Switch for the life of the product, that the Conserve Switch shall be free of defects in design, assembly, material, or workmanship, and will repair or replace, at its option, any defective Conserve Switch free of charge. Belkin’s Connected Equipment Warranty covers equipment that is damaged by transient voltage (an “Occurrence”) while properly connected through a Belkin Conserve Switch to a properly wired AC power line.This warranty is null and void unless all wires leading into the equipment pass through an appropriate Belkin Conserve Switch as described herein below. The warranty will not cover claims for damage resulting from telephone-line/network-line or coaxial-line transients. This warranty is null and void if a power disturbance damages your equipment through a phone, network, or coaxial line. You are only covered if the disturbance entered through AC lines.This is a Limited Warranty subject to the limitations and exclusions set forth herein.Belkin will spend, to repair or replace the damaged connected equipment, at Belkin’s option, an amount equal to the fair market value of the damaged equipment or the original purchase price of the equipment, whichever is less, up to a maximum of $100,000.00.Belkin reserves the right to review the damaged BelkinConserve Switch, the damaged equipment, and the site where the damage occurred. All costs of shipping the Belkin Conserve Switch and the damaged equipment to Belkin for inspection shall be borne solely by the purchaser. Belkin reserves the right to negotiate the cost of repairs. If Belkin determines, in its sole discretion, that it is impractical to ship the damaged equipment to Belkin, Belkin may designate, in its sole discretion, an equipment repair facility to inspect and estimate the cost to repair such equipment. The cost, if any, of shipping the equipment to and from such repair facility and ofinspection shall be borne solely by the purchaser. If Belkin determines, in its sole discretion, that it is impractical to ship the damaged equipment to Belkin International, Inc., Belkin may designate, in its sole discretion, an equipment repair facility to inspect and estimate the cost to repair such equipment. The cost, if any, of shipping the equipment to and from such repair facility and of such estimate shall be borne solely by the purchaser. Damaged products must remain available for inspection until the claim is finalized. Whenever claims are settled, Belkin International, Inc., reserves the right to be subrogated under any existing insurance policies the purchaser may have.How state law relates to the warranty.This warranty contains the sole warranty of Belkin International, Inc., there are no other warranties, expressed or, except as required by law, implied,including the implied warranty or condition of quality, merchantability or fitness for a particular purpose, and such implied warranties, if any, are limited in duration to the term of this warranty. Some states do not allowlimitations on how long an implied warranty lasts, so the above limitations may not apply to you.In no event shall Belkin International, Inc., be liable for incidental, special, direct, indirect, consequential, ormultiple damages such as, but not limited to, lost business or profits arising out of the sale or use of any BelkinConserve Switch, even if advised of the possibility of such damages. This warranty gives you specific legal rights, and you may also have other rights, which may vary from state to state. Some states do not allow the exclusion or limitation of incidental, consequential, or other damages, so the above limitations may not apply to you.Connected Equipment WarrantyBelkin International, Inc. (“Belkin”) warrants to the originalsuch estimate shall be borne solely by the purchaser. Damaged equipment must remain available for inspection until the claim is finalized. Whenever claims are settled, Belkin reserves the right to be subrogated under any existing insurance policies the claimant may have.All above warranties contained herein are null and void if: the Belkin Conserve Switch in use during the Occurrence is not provided to Belkin for inspection upon Belkin’s request at the sole expense of the purchaser; Belkin determines that theBelkin Conserve Switch has been opened, improperly installed, altered in any way, or tampered with; Belkin determines that the damage did not result from the Occurrence or that no Occurrence in fact took place; the repair or replacement of the damaged equipment is covered under a manufacturer’s warranty or seller’s extended warranty; or Belkin determines that the connected equipment was not used under normal operating conditions or in accordance with any manufacturer’s instructions for the connected devices. All Belkin Conserve Switches must be plugged directly into a properly wired AC power line. Any other installation voids this warranty. The Belkin Connected Equipment Warranty only protects against damage to properly connected equipment where Belkin has determined, in its sole discretion, that the damage resulted from an Occurrence, and does not protect against acts of God such as flood, earthquake, war, vandalism, theft, normal-use wear and tear, erosion, depletion, obsolescence, abuse, damage due to low-voltage disturbances (i.e., brownouts or sags), non-authorized program, or system equipment modification or alteration. To be used indoors only and in dry areas.This is the sole warranty of Belkin in respect to connected equipment, lost data or other damages; there are no other warranties, express or implied, except as required by law. Implied warranties required by law include the implied warranty of condition of quality, merchantability,Company Information Belkin Tech Support U.S./supportFor more information and to learn about other Belkin Conserve energy management products, please go to /conserve 8820-00455F7C01008and fitness for a particular purpose, and such implied warranties, if any, are limited in duration to the term of this warranty.Some jurisdictions do not allow limitations on how long an implied warranty lasts, so the above limitations may not apply.In no event shall Belkin be liable for incidental, special, direct, indirect, consequential, or multiple damages such as, but not limited to, lost business or profits arising out of the sale or use of any Belkin Conserve Switch, even if advised of the possibility of such damages. This warranty gives you specific legal rights, and you may also have other rights, which may vary from jurisdiction to jurisdiction. Some jurisdictions do not allow the exclusion or limitation of incidental or consequential damage, so the above limitations may not apply to you.This warranty is valid only for the original purchaser of the product. All damage claims against the product must be made within 15 days from the date of the Occurrence and must be accompanied by a receipt for the damaged equipment or the warranty is void.To file a claim against Belkin, you must take the following steps:. C ontact Belkin International, Inc., at 12045 E. Waterfront Drive, Playa Vista, CA 90094, Attn: Claims Department, or . C all (800)-223-5546, or .U se our self-service claim form at https:/// claims/claims.aspAll claims must be filed within 15 days of the Occurrence or the warranty is null and void. Be prepared to provide the following information:a. T he part number of the Belkin Conserve Switch.b. T he equipment that was connected to the Belkin Conserve Switch at the time of the occurrence.c. T he equipment that was damaged during the Occurrence and the extent of the damage.d. T he date of the Occurrence.e. W here you purchased the Belkin Conserve Switch.f. When you purchased the Belkin Conserve Switch.g. C opy of the original receipt.Your Belkin Customer Service Representative will then instruct you on how to forward your equipment, receipt, and Belkin Conserve Switch in use during the Occurrence, and how to proceed with your claim, including data recovery services.FCC ID: K7S-BG200001USe eNeRGY wiSelYUsing electricity or driving a car does have an effect on the environment, but by using energy wisely we can prevent waste and reduce carbon dioxide (CO2) emissions.CO2 is a greenhouse gas that accumulates in the Earth’s atmosphere, trapping heat from the sun and keeping the planet warm. CO2 comes, in part, from the burning of fossil fuels, such as coal and gasoline, to generate electricity for use in our homes and to power our cars.The amount of CO2 in our atmosphere has increased over the past century, and the majority of scientists questioned in a recent international study agree that global temperatures have risen dramatically compared with levels from the 1800s, with human activity being a significant contributing factor. According to the International Energy Agency, a warmer Earth may lead to changes in rainfall patterns, a rise in sea level, and a wide range of impacts on plants, wildlife, and humans.A good way to visualize CO2 is to imagine that 1 pound of CO2 would fill up 710 soda cans (12oz), or a box2-feet high, 2-feet wide, and 2-feet deep.Belkin Conserve products can help you do your part to use energy wisely.Use less, Save more, feel Good.Facts gathered from a study conducted by the Universityof Illinois, the International Energy Agency, and the U.S. Environmental Protection Agency.。
贝尔金路由器wep.doc

贝尔金路由器wep贝尔金路由器wep的设置方法:有线等效隐私(WEP) 是一种专为无线局域网(WLAN) 设计的安全协议。
它可以是一个带10 位十六进制数的64 位密钥,也可以是一个带26 位十六进制数的128 位WEP 密钥。
这种加密方式可阻止其他用户连接到您的无线网络,也可防止您的无线传输或通信被其他用户访问或接收。
本文将为您提供有关如何在Belkin 无线路由器上设置WEP 安全功能的说明。
第1 步:将计算机连接到路由器四(4) 个以太网端口中的某一个端口。
第2 步:打开web 浏览器(如Internet Explorer 或Safari),访问基于web 的设置页面。
有关如何访问路由器基于Web 设置页面的更多信息,请单击此处。
第3 步:在Wireless(无线)窗格中,单击Security(安全)。
第4 步:从下拉菜单中选择64bit WEP(64 位WEP)。
第5 步:选择Key 1(密钥1)并输入任意的10 位十六进制数,然后单击generate(生成)。
注:可组合使用0-9 和A-F。
如选择128 位密钥,则需输入26 位十六进制字符。
您也可输入通行码,路由器将自动为您生成密钥。
Belkin 路由器的无线安全功能至此设置完成。
看过文章贝尔金路由器wep的人还看了:1.Belkin贝尔金路由器设置2.贝尔金无线路由器常见故障3.贝尔金无线路由器简单设置步骤4.如何设置贝尔金路由器固定IP地址及上网方式全过程5.贝尔金无线路由器设置图解6.详解贝尔金无线路由器无法连接宽带故障7.贝尔金Belkin路由器如何设置8.贝尔金路由器设置的4个要点是什么9.贝尔金路由器英文界面设置步骤10.怎样提高贝尔金路由器无线信号强度。
贝尔金路由无线网络巧妙修复
贝尔金路由无线网络巧妙修复
使用无线网的网友想必都遇到过无线网断线或是很卡的情况下,其实有时我们通过一定的措施,是可以使无线网稳定流畅的运行的,下面就以贝尔金无线路由器为例,给大家介绍一下如何处理这种问题。
一、自动修复无线连接
我们常用的WIN操作系统中供给了自动修复连接的功能,在无线连接出问题时可操作该功能修复无线连接,打开控制面板-连接共享中心,单击窗口左侧的诊断和修复,系统就会自动修复无线连接,适合对连接设置不太熟悉的用户。
二、重启无线路由器
一般在设置无线路由器时,路由器选择自动分配IP地址,有时会因为分配IP地址不及时,造成无线连接没有响应,重启无线路由器就会重新获得新的IP地址,恢复正常,或者可以断开与无线路由器的连接,等几秒钟后再次连接,这两种体例能解决良多断网的故障,很是适用。
三、、避开信号死角
有时我们移动笔记本电脑,会发现信号强度突然降低,网速形同蜗牛,更有甚者连一点信号也没有,这是因为笔记本所处的位置正好是信号的盲区或死角,应该实时调整无线路由器的放置地址,使其信号能够笼盖房间的所有面积,或是安装增益天线。
感谢您的阅读,祝您生活愉快。
贝尔金宽带无线路由器)
路由器的连接和设置检查包装箱。
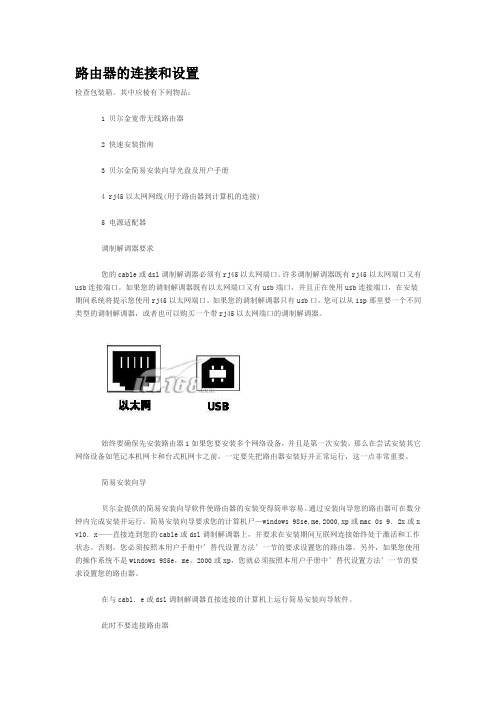
其中应棱有下列物品:1 贝尔金宽带无线路由器2 快速安装指南3 贝尔金简易安装向导光盘及用户手册4 rj45以太网网线(用于路由器到计算机的连接)5 电源适配器调制解调器要求您的cable或dsl调制解调器必须有rj45以太网端口。
许多调制解调器既有rj45以太网端口又有us b连接端口。
如果您的调制解调器既有以太网端口又有usb端口,并且正在使用usb连接端口,在安装期间系统将提示您使用rj45以太网端口。
如果您的调制解调器只有usb口,您可以从isp那里要一个不同类型的调制解调器,或者也可以购买一个带rj45以太网端口的调制解调器。
始终要确保先安装路由器i如果您要安装多个网络设备,并且是第一次安装,那么在尝试安装其它网络设备如笔记本机网卡和台式机网卡之前,一定要先把路由器安装好并正常运行,这一点非常重要。
简易安装向导贝尔金提供的简易安装向导软件使路由器的安装变得简单容易。
通过安装向导您的路由器可在数分钟内完成安装并运行。
简易安装向导要求您的计算机尸—windows 98se,me,2000,xp或mac 0s 9.2x或xvl 0.x——直接连到您的cable或dsl调制解调器上,并要求在安装期间互联网连接始终处于激活和工作状态。
否则,您必须按照本用户手册中’替代设置方法’一节的要求设置您的路由器。
另外,如果您使用的操作系统不是windows 985e,me,2000或xp,您就必须按照本用户手册中’替代设置方法’一节的要求设置您的路由器。
在与cabl.e或dsl调制解调器直接连接的计算机上运行简易安装向导软件。
此时不要连接路由器步骤1 运行简易安装向导软件1.1 关闭计算机上所有正在运行的应用程序。
1.2 确保在与cable或dsl调制解调器直接连接的计算机上有下列内容。
此时不要连接路由器。
1 快速安装指南2 贝尔金简易安装向导光盘及用户手册3 路由器4 路由器电源适配器5 rj45以太网网线1.3 关闭计算机中所有防火墙或网络共享软件。
Belkin Bluetooth PDA Adapter Card 用户手册说明书
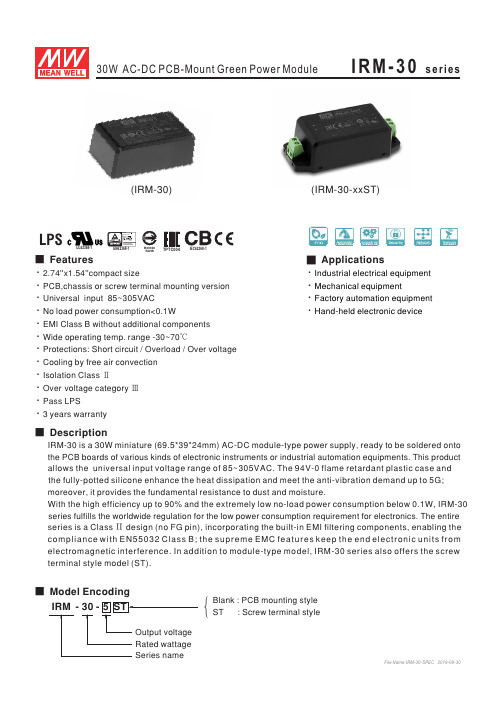
■Model Encoding■DescriptionIRM-30 is a 30W miniature (69.5*39*24mm) AC-DC module-type power supply, ready to be soldered onto the PCB boards of various kinds of electronic instruments or industrial automation equipments. This product allows the universal input voltage range of 85~VAC. The flame retardant plastic case 305 94V-0and the fully-potted silicone enhance the heat dissipation and meet the anti-vibration demand up to 5G; moreover, it provides the fundamental resistance to dust and moisture.With the high efficiency up to 90% and the extremely low no-load power consumption below 0.1W, IRM-30 series fulfills the worldwide regulation for the low power consumption requirement for electronics. The entire series is a Class design (no FG pin), incorporating the built-in EMI filtering components, enabling the Ⅱcompliance with EN55032 Class B; the supreme EMC features keep the end electronic units from electromagnetic interference. In addition to module-type model, IRM-30 series also offers the screw terminal style model (ST).Industrial electrical equipment Mechanical equipmentFactory automation equipment Hand-held electronic device■Features■ApplicationsIRM-30seriesBlank : PCB mounting style ST : Screw terminal style{30W AC-DC PCB-Mount Green Power Module(IRM-30-xxST)(IRM-30) 2.74''x1.54''compact sizePCB,chassis or screw terminal mounting versionUniversal input 85~305VACNo load power consumption<0.1WEMI Class B without additional components Wide operating temp. range -30~70℃Protections: Short circuit / Overload / Over voltage Cooling by free air convection Isolation ClassⅡOver voltage category Ⅲ Pass LPS3 years warrantyUL62368-1IEC62368-1LPSRoHSIRM-30series 30W AC-DC PCB-Mount Green Power Module。
Belkin贝尔金路由器设置
Belkin 贝尔金路由器设置 篇一:贝尔金路由器设置步骤 篇二:belkin 无线路由器设置 adsl 无线路由器设置方法 belkin 无线路由器设置 belkin(贝尔金)无线路由器,产品外观设计新颖,无线信号的有效传输距离达到了 540 米。
另外,产品也自有四个 LAN 口,可以方便用户进行有线网与无线网的混合应用。
做工相 当精美, 银灰色的上盖配以黑色的四围和底部, 展示出一种不太张扬的高档和沉着, 比较耐看。
产品默认 IP 地址:192.168.2.1 登录账户:无 登录密码:无 一、设置概述 此款路由器的配置过程类似于阿尔卡特品牌旗下的产品,即是说产品为用户提供了两种 不同的无线路由配置方式。
一是使用产品附带的“简单安装向导软件”,利用此软件向导可以很 方便的完成最基本的联网配置(如下图所示);另一种成熟的方法就是使用产品内置的 Web 管理界面来进行。
二 、登录 Web 管理界面 在浏览器地址栏中输入默认 IP 地址后,会出现一个简单的登录窗口;其中会有一个 “Password”输入提示框,但路由器出厂时并没有设置任何账户及密码,因此直接单击 “Submit” 按钮即可登录。
三、配置路由器的互联网连接 不管是有线还是无线路由器,进入管理界面后,首先要做的就是配置路由器的互联网接 入参数,使之能正常接入 Internet 网络。
步骤 1:从左方选项栏中的“Internet/WAN”下单击“Connection Type”选项,意为选择当前 网络连接类型。
进入“Connection Type”页面后,单击选中其中的“PPPoE”一项。
步骤 2: 在接下来出现的界面中分别输入宽带连接账号及密码; 注意最好不要修改“MTU” 值;而最下方的“Disconnect after”选项意为自动断开宽带连接的时间设置,比如勾选此项并在 输入框中输入 10,则意为 10 分钟之内如果没有宽带连接活动,路由器的宽带连接即会自动断 开。
贝尔金路由器
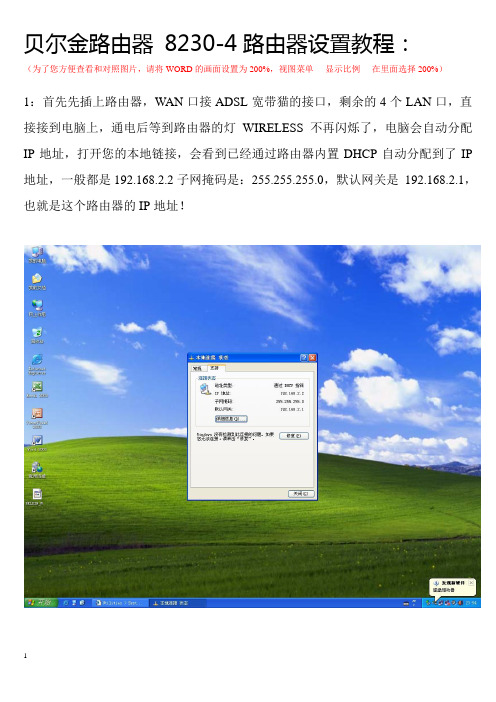
贝尔金路由器8230-4路由器设置教程:(为了您方便查看和对照图片,请将WORD的画面设置为200%,视图菜单----显示比例----在里面选择200%)1:首先先插上路由器,WAN口接ADSL宽带猫的接口,剩余的4个LAN口,直接接到电脑上,通电后等到路由器的灯WIRELESS不再闪烁了,电脑会自动分配IP地址,打开您的本地链接,会看到已经通过路由器内置DHCP自动分配到了IP 地址,一般都是192.168.2.2子网掩码是:255.255.255.0,默认网关是192.168.2.1,也就是这个路由器的IP地址!2:在浏览器顶部输入:192.168.2.1,接下来会进入贝尔金路由器的设置画面,任意点击右边的一个菜单,路由器会跳出,让您Login 登录的画面,本平常不一样,贝尔金登录不需要输入用户名,只需要输入密码即可,本店默认发出前会设置为工厂模式,也就是空白的,所以看到这个画面,直接点击submit(提交)就可以了,不用输入任何密码,直接进入。
LAN SETUP:1:LAN SETTING第一个菜单是网络设定,上面的192.168.2.1是设定路由器的默认地址,也就是默认登录地址,一般不用修改,下面的DHCP SERVER 保持ON状态,不要关闭,因为我们连接到这个路由器并通过它来上网的机器,都让路由器来动态分配IP地址就可以了,所以这个画面不用设置,直接跳过。
2:DHCP Client List (已经连接到路由器并且动态分配了IP地址的主机,都会在下面显示出来)店主自己的测试专用机器,分配到了192.168.2.2的地址。
另外一个192.168.2.3的是店主的IPHONE手机连接上去的标识。
InterNET WAN1:CONNECTION TYPE (连接设定)这里会有5个选项,一般家庭客户选择PPPOE,然后点击NEXT 下一步,进入到如下图所示画面,在USER NAME里面输入电信或者宽带提供商给您的用户名,password输入宽带提供商给您的密码,第三行把这个密码再输入一次,注意:第四,第五行不要更改任何东西,否则可能导致您上不了网。
贝尔金无线路由器设置教程

贝尔金无线路由器设置教程路由器和无线路由器虽然普及得很快,大伙用得也很方便,但还是有很多刚接触路由器的朋友,不懂得如何设置路由器,毕竟它不是跟非网管交换机一样,插上即可用,贝尔金路由器是很多用户得选择,功能也强大,下面店铺向你推荐贝尔金路由器设置教程,希望对大家有帮助。
贝尔金无线路由器设置教程1.见过众多的路由器界面,还数Belkin贝尔金路由器的最为简洁,大方,没有多余的修饰。
蓝色的界面让人不禁联想到“清凉一夏”的主题,让春天的凉气得以延续。
闲话不多说,还是直接进入我们的路由设置正题。
进入Belkin路由器设置首页界面后,映入眼帘的是路由器的状态参数。
其中包括了版本信息,LAN设定值,网际网络设定值以及功能的各项参数,一目了然。
用户可以在此监视到目前的路由器状况,不用再因为缺乏相关信息而盲目设置了。
2.想必大家已经摩拳擦掌,纯纯欲试了。
我们立马进入第一个设置页面——LAN设定。
首先我们先为路由器配置一个局域网内的IP地址以及子掩码,这个和我们在Windows上设置IP的方法一样,不再多说。
但需注意区别网关和使用的IP。
接着我们需要设置DHCP服务器(如果需要的话),此功能允许路由器动态分配IP地址。
大家只需在操作系统上选择“自动获取”即可获取IP地址。
要完成DHCP服务器功能还得填写下面的IP集区开始和结束地址,这样用户将自动被分配到这个网段内的IP地址了。
我们可以为DHCP指定租约时间,forever则为永远有效,同时还可以指定一个区域网域名称。
需注意,在设置好参数后记得点击套用更变值按钮以确定参数生效,以下的操作也如此。
3.接着我们来到DHCP客户端清单页面。
这里我们可以看到DHCP分配的IP地址段内的所有机器及其相关信息。
大家可以点击重新整理按钮刷新当前数据。
4.接着我们来设置WAN的联网方式。
在此页面下,我们可以看到五种联机类型,但由于PPTP以及Telstra BigPond类型只适用于国外,所以我们只剩下动态、静态以及PPPoE三种情况可以选择。
belkin 无线路由器设置说明

首先将你的电脑上的本地网卡或者无线网卡的IP 改成自动获到IP(一般来讲指定IP等信息比较稳定,我在做说明时是用的固定的IP 要求比较懂行的朋友才可以手动指定,IP 192.168.2.45 后面的这个45可以是从2-250之间任何一个.但不能两台用一样的IP哟,不能重复IP的)(请只使用一个网卡其它网卡全部停用)把你的网卡和路由器的LAN口中任一个连起来,连好后,连接图如下:双击网卡,点支持看网关是不是192.168.2.1 如果就表示电脑和路由器连好了,下一步就是进入路由器里面去设置了。
连接好后,打开IE 就是我们平时上网输入网址的地址栏这儿输入192.168.2.1 点转到就可进入路由器的设置页面,进入后,我们看左边有一个Internet WAN的主菜单,接着看里面的子菜单connection Type 点开这时候我们不管点什么都会出来一个Login的选项要求我们输入密码,这是我们不要管直接点下面的这个键submit这个,进入设置项目中,这儿就是我们需要重点设置的地方.第一个是Dynamic(适合局域网内自动分配IP地址的有户,也适合路由器接路由器的用户,当路由器接路由器的时候,注意两个路由器的LAN的IP不要一样的,也就是两个进入设置页面的IP 不能一样,比如说: SMC的无线路由器LAN的IP为192.168.2.1 如果把这能路由器接在smc后面,那就不行了,必须把其中任一台的IP改一下,不要用一个网段,可以改成192.168.1.1 哈哈,不要问我怎么改哟,这个很简单的,设置里面有一项LAN Settings,这个192.168.2.1就是网关,网关的地址修改就是这样个改法的.点开就可以 192.168.2.1 只要把第一个2改为1(当然也可以改成数字,只要不是2的在0-250之间任何一个数)点Apply Changes 就OK了.)第二个是static点NEXT(适合指定IP 上网的网户,在局域网内很多都是指定IP的,学校里学校网大多都是指定IP的,如果你是指定上网的朋友,请先把你的本地网卡或者无线网卡上的IP相关信息先写在纸上抄下来,再改成自动获取IP 地址,因为你指定的IP地址是不能访问我的路由器的,这点大家要注意一下,当选中这个选项后,再把你的IP 子网掩码,网关 DNS的数字填到相应的位置, IP Address 为IP subnet Mask 是子网掩码 ISP Gateway Address网关地址这三样填好点Apply Changes,DNS 在Internet wan 这个里面点一下 DNS 打开后把Automatic from ISP 前勾去掉再填,填完后点Apply Changes.)OK!第三个是PPPOE(这个是适合大多数家庭用户了,我们的ADSL 就是用的PPPOE ,还有些小区的LAN 有用户名和密码的,也是选这个,点NEXT 后就出一另一个页面在User name 填入你的宽带用户名 password 填入你的宽带密码, Retype Password 后面再输入一次密码点Apply Changes就行了)设置完了这些后,我们看一下是不是设置好了,看设置页面的右上角.有这样一排,我们点Home.点了后,就可以看到这个路由器的状态:internet settings 这儿有外网IP 出来就说明可以上网了.WAN IP 就是外网IP.其它的功能和设置就得你们自己去查找相关资料了,喜欢BT 的要在Firewall 里面设置vitual servrs :设置如下比如说我这台电脑现在用的IP 是192.168.2.45 BT的端口为9023请注意我上面有BT01 BT02 有一个地方是不一样的.在TYPE里面一个是选的TCP 一个是选项的UDP 大家一定要看仔细哟.BT上端口这样看:BT软件上点选项里在的选项点开,就可以看到一个监听端口就是的.上面填9023这个中只能显示4个数字,有的端口号可能是5位数的,比如说是15572,不要管这个,你设置15572就行了。
贝尔金无线路由器故障解决办法

贝尔金无线路由器故障解决办法推荐文章手机病毒原理分析解决方法热度:关于解决矛盾的谚语热度:男人不射精解决方法热度:连接628错误什么原因怎么解决热度:Win7系统创建虚拟网卡后网速变慢怎么解决热度:贝尔金无线路由器因其功能好用,外形又好看,受到不少的欢迎,不过有一些网友反映到故障问题,根据统计,今天店铺就给大家介绍一些常见问题的解决方法,希望对您有所帮助!贝尔金无线路由器常见故障一、贝尔金路由器WPS按钮的作用WPS功能是指让笔记本不需要输入密码,快速的连接到无线路由器,当笔记本连接无线信号时,输入路由器底部的PIN码,再按下路由器上的WPS按钮,笔记本就可以快速连接到路由器上,不需要输入无线密码。
如果用的是有WPS功能的无线网卡,只需分别按路由器和无线网卡的WPS按钮就可以直接建立连接。
二、新买贝尔金路由器无法登录路由器管理界面这样的问题其实也简单,只要确定电脑和路由器在同一个IP段就可以了,设置电脑本地连接的IP地址为自动获得IP地址,或者看一下路由器底部的管理IP,再手动设置电脑的IP 和管理IP在同一个网段就可以了,一般为192.168.0.X或192.168.1.X。
三、登录贝尔金路由器设置界面弹出下载登陆贝尔金路由器管理页面时要求下载login.exe,提示密码错误。
其实这样的问题是由于电脑中安装了迅雷,快车,QQ旋风等下载工具造成的,实际上不需要客户下载任何文件,解决办法是关闭下载工具的监视浏览器功能,在下载工具的悬浮窗口右单击,选择高级,将监视浏览器前的勾去掉即可。
四、如何更新贝尔金路由器固件登陆路由器的管理界面,在左侧导航栏中选择固件更新,检查软体,路由器会连接到Belkin网站查看最新固件,如已经更新,路由器会提示搜索到升级固件,如查想要升级直接下载更新。
如固件已经是最新版的了,会提示软件版本是最新的,不需要升级。
相关阅读:路由器故障维修方法1.设置无线路由器的无线网络部分流程(1)先让计算机连接路由器,然后找到DI-524M的无线网络,开始准备设置,连接到DI-524M后,开始打开IE浏览器,在地址栏键入192.168.0.1,直接点击回车。
Belkin贝尔金路由器设置
Belkin贝尔金路由器设置篇一:贝尔金路由器设置步骤篇二:belkin无线路由器设置adsl无线路由器设置方法belkin无线路由器设置belkin(贝尔金)无线路由器,产品外观设计新颖,无线信号的有效传输距离达到了540米。
另外,产品也自有四个LAN口,可以方便用户进行有线网与无线网的混合应用。
做工相当精美,银灰色的上盖配以黑色的四围和底部,展示出一种不太张扬的高档和沉着,比较耐看。
产品默认IP地址:192.168.2.1 登录账户:无登录密码:无一、设置概述此款路由器的配置过程类似于阿尔卡特品牌旗下的产品,即是说产品为用户提供了两种不同的无线路由配置方式。
一是使用产品附带的“简单安装向导软件”,利用此软件向导可以很方便的完成最基本的联网配置(如下图所示);另一种成熟的方法就是使用产品内置的Web管理界面来进行。
二、登录Web管理界面在浏览器地址栏中输入默认IP地址后,会出现一个简单的登录窗口;其中会有一个“Password”输入提示框,但路由器出厂时并没有设置任何账户及密码,因此直接单击“Submit”按钮即可登录。
三、配置路由器的互联网连接不管是有线还是无线路由器,进入管理界面后,首先要做的就是配置路由器的互联网接入参数,使之能正常接入Internet网络。
步骤1:从左方选项栏中的“Internet/WAN”下单击“Connection Type”选项,意为选择当前网络连接类型。
进入“Connection Type”页面后,单击选中其中的“PPPoE”一项。
步骤2:在接下来出现的界面中分别输入宽带连接账号及密码;注意最好不要修改“MTU”值;而最下方的“Disconnect after”选项意为自动断开宽带连接的时间设置,比如勾选此项并在输入框中输入10,则意为10分钟之内如果没有宽带连接活动,路由器的宽带连接即会自动断开。
步骤3:继续完成接下来的简单设置后,路由器即开始与宽带进行连接;连接完成会在管理界面右上方显示“Connection OK”,表示连接成功。
