ibm命令创建domain
Brocade光纤交换机常用命令

标签:?2013-12-24 10:19?2062人阅读?(0)???分类:SanIBM的双机双柜,两光纤交换机分别引一根光纤到另一楼光纤交换机,插上无反应,后得知需要更改交换机的domain id 默认出厂为1。
需改为不同号。
下面是博科的交换机命令转。
Brocade SAN交换机常用命令默认用户名:admin,默认密码password1. switchStatusShow查看交换机的总体健康状态switch:admin> switchstatusshowSwitch Health ReportSwitch Name: SWFCRSwitchState: MARGINALDuration: 863:23Power supplies monitor MARGINALTemperatures monitor HEALTHYFans monitor HEALTHYWWN servers monitor HEALTHYStandby CP monitor HEALTHYBlades monitor HEALTHYFlash monitor HEALTHYMarginal ports monitor HEALTHYFaulty ports monitor HEALTHYMissing SFPs monitor HEALTHYAll ports are healthyswitch:admin>2. switchShow查看交换机基本配置信息Enter the switchShow command, which displays the following information for a switch:- switchname - The switch name.- switchtype - The switch model and firmware version numbers.- switchstate - The switch state: Online, Offline, Testing, or Faulty.- switchrole - Displays the switch role: Principal, Subordinate, or Disabled.- switchdomain - Displays the switch Domain ID.- switchid - The embedded port D_ID of the switch.- switchwwn - The switch World Wide Name.13. slotShow查看各个Blade的状态14. portCfgSpeed修改端口的速率15. portEnable或portCfgPersistentEnable4. 重新启用交换机输入命令swichEnable升级FirmwareFC10-6 Blade需要Firmware Version 以上FC4-16IP Blade、FC4-48 Port Blade需要Firmware Version 以上FR4-18i router blade需要Firmware Version 以上如果M48有主备Control Processor,且主备CP处于synchronized状态,则升级过程可在线进行,不干扰数据流量。
IBM常用命令V1
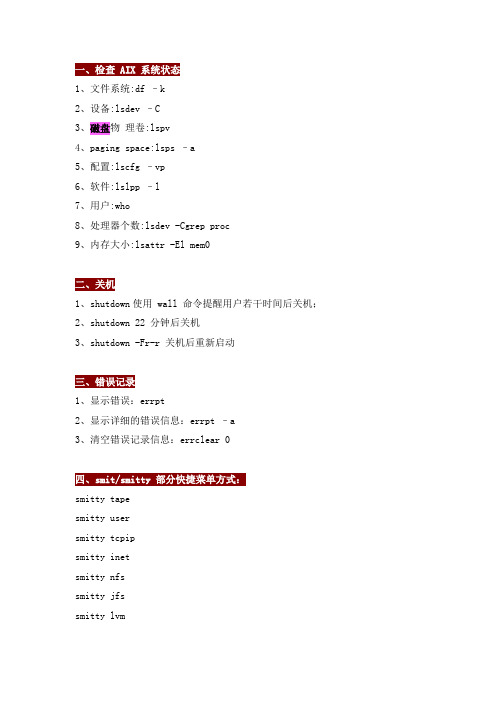
1、文件系统:df –k2、设备:lsdev –C3、磁盘物理卷:lspv4、paging space:lsps –a5、配置:lscfg –vp6、软件:lslpp –l7、用户:who8、处理器个数:lsdev -Cgrep proc9、内存大小:lsattr -El mem01、shutdown使用 wall 命令提醒用户若干时间后关机;2、shutdown 22 分钟后关机3、shutdown -Fr-r 关机后重新启动1、显示错误:errpt2、显示详细的错误信息:errpt –a3、清空错误记录信息:errclear 0smitty tapesmitty usersmitty tcpipsmitty inetsmitty nfssmitty jfssmitty lvm1、显示卷组:列出卷组细节:lsvg列出卷组中的逻辑卷:lsvg -l列出卷组中的物理卷:lsvg -p2、增加卷组:smitty mkvg3、修改卷组属性:smitty chvg4、激活卷组:varyonvg vg_name5、解除卷组:varyoffvg vg_name6、向卷组中增加一个物理卷:extendvg vg_name hdiskn 注:extendvg 命令用于向已存在的卷组增加新的物理卷,这个物理卷设备的必须是可用的Available。
7、从卷组中删除一个物理卷:reducevg -d vg_name hdiskn 注:删除物理卷时其所在的卷组必须处于非活动,如果被删除的物理卷是卷组中仅存的一个,那么这个卷组同时也被删除。
1、lspv 列出物理卷名称:lspv 列出物理卷细节:lspv hdiskN 列出物理卷中的逻辑卷:lspv -l hdiskN列出物理卷中的物理分区分布:lspv -p hdiskN2、增加物理卷:cfgmgr /mkdev3、删除物理卷:rmdev1、显示逻辑卷信息列出逻辑卷名称:lslv -l列出逻辑卷细节:lslv列出与逻辑卷相关的物理卷:lslv –l列出物理卷中物理分区的分配:lslv –p显示逻辑卷中 LP逻辑分区与 PP物理分区的对应:lslv -m2、增加逻辑卷smitty mklvmklv3、删除逻辑卷smitty rmlv rmlv4、设置逻辑卷属性smitty lvsc chlv5、增加逻辑卷拷贝:smitty mklvcopy6、删除逻辑卷拷贝:smitty rmlvcopy1、cfgmgr/mkdev:配置系统中新增设备。
AS400CL教程

AS400CL教程AS400,也称为IBM iSeries,是IBM公司开发的一种大型计算机操作系统。
它最初作为IBM System/38的后继产品而发布,在1988年改名为AS/400。
随着时间的推移,AS/400逐渐演变为IBM iSeries和IBM Power Systems服务器系列的一部分。
AS/400 CL(Control Language)是AS/400上的一种脚本语言,用于控制和管理AS/400系统。
AS/400CL语言与其他编程语言不同,它更类似于批处理脚本语言。
CL语言由一系列命令组成,这些命令通常用于执行系统操作和管理任务。
下面是一些常用的AS/400CL命令:1.MONMSG:用于监测消息。
可以捕获和处理系统发送的消息,例如错误消息或系统警告。
2.CRTLIB:用于创建库。
AS/400系统将所有对象组织到库中,使用CRTLIB命令可以创建新的库以进行对象管理。
3.CRTDTAARA:用于创建*DTAARA对象。
*DTAARA表示数据区,可以在其中存储和检索数据。
4.CHGDTAARA:用于更改*DTAARA对象中的数据。
可以使用CHGDTAARA命令更新存储在数据区中的数据。
5.WRKJOB:用于查看当前作业列表。
可以使用WRKJOB命令查看正在运行的作业、挂起的作业和已完成的作业。
6.WRKLIB:用于查看库中的对象。
可以使用WRKLIB命令列出库中的所有对象,并查看其属性和状态。
7.ADDLIBLE:用于向库列表中添加库。
可以使用ADDLIBLE命令将一个或多个库添加到作业的库列表中,以便在程序中使用其中的对象。
8.DSPUSRPRF:用于显示用户配置文件的详细信息。
可以使用DSPUSRPRF命令查看用户帐户的设置、密码策略和权限等信息。
9.DLTLIB:用于删除库。
可以使用DLTLIB命令删除不再需要的库以释放存储空间。
10.SNDMSG:用于发送消息。
可以使用SNDMSG命令发送消息给其他用户,以便与他们进行通信。
IBMMQ常用命令

IBMMQ常用命令IBM MQ是一款广泛应用于企业级应用程序开发和数据传输的消息队列软件。
该软件具有出色的可扩展性和稳定性,可满足不同规模和需求的企业应用场景。
为了更好地管理和操作IBM MQ,下面将介绍IBMMQ常用命令。
1. crtmqm命令crtmqm命令是创建IBM MQ队列管理器的命令。
例如,要创建一个名为QMGR1的队列管理器,我们可以使用以下命令:crtmqm QMGR12. strmqm命令strmqm命令是启动IBM MQ队列管理器的命令。
例如,要启动名为QMGR1的队列管理器,我们可以使用以下命令:strmqm QMGR13. endmqm命令endmqm命令是停止IBM MQ队列管理器的命令。
例如,要停止名为QMGR1的队列管理器,我们可以使用以下命令:endmqm QMGR14. runmqsc命令runmqsc命令是启动IBM MQ命令行管理工具的命令。
我们可以在命令行模式下使用该命令来执行各种MQ管理任务。
例如,要启动runmqsc,我们可以使用以下命令:runmqsc QMGR15. crtmqobj命令crtmqobj命令是创建IBM MQ队列和通道的命令。
例如,要创建一个名为MYQUEUE的本地队列,我们可以使用以下命令:crtmqobj QMGR1 QLOCAL(MYQUEUE)6. dltmqobj命令dltmqobj命令是删除IBM MQ队列和通道的命令。
例如,要删除名为MYQUEUE的本地队列,我们可以使用以下命令:dltmqobj QMGR1 QLOCAL(MYQUEUE)7. display命令display命令是显示IBM MQ队列管理器、队列和其他对象的信息的命令。
例如,要显示名为QMGR1的队列管理器的配置信息,我们可以使用以下命令:display qmgr QMGR18. Inquire命令Inquire命令是查询IBM MQ队列管理器、队列和其他对象的信息的命令。
域名服务系统

概述
DNS服务器之间的数据交换
区域传送 鉴于区域的重要性,在网络上的多个DNS服务器 上都有区域的存在,但所有机器上的区域中的数据 需要保证一致性。 对于提供区域的其他服务器,可以通过进行区域 传送来复制和同步为提供区域的每个服务器上使用 的所有区域副本。
区域传送(Zone Transfer)是DNS名称服务器通过 其数据交互来维护和同步区域数据库文件的过程。 区域传送是在多个DNS名称服务器之间复制区域数 据库文件的过程。它主要通过拷贝过程完成,即通过 从主服务器向辅助服务器复制区域数据库文件信息来 实现。 需要说明的是,要进行区域传送,需要在提供数据来 源的服务器上为要复制数据的DNS服务器授权。
DNS检查命令 nslookup
命令格式: nslookup -qt = 类型 目标域名 类型说明:( qt 必须小写) A: 地址记录(IPv4) cname : 别名记录 mg : 邮件组记录 hinfo : 硬件配置记录,包括CPU和操作系统信息 rt : 路由穿透记录 mb : 存放指定邮箱的服务器
概述
DNS的定义
DNS全名Domain Name Service(域名服务), 是一种层次结构的计算机和网络服务命名系统,能通 过用户的友好名称定位计算机及其服务。 通俗一点说,就是负责完成将主机的IP地址和主 机的友好名称进行相互转换的工作的服务。 我们通常把网络上提供这种服务的计算机称为DNS 服务器。
解析域名
DNS的查询过程主要以三种方式进行:
1、客户机可通过使用从以前查询获得的缓存信息就地 应答查询。 2、DNS 服务器可使用其自身的资源记录信息缓存来 应答查询。 3、DNS 服务器也可代表发出请求的客户机来查询或 联系其他 DNS 服务器,以完全解析该名称,并随后将 应答返回至客户机。
IBM_TDS和TIP集成配置

objectClass: person
objectClass: organizationalPerson
uid: itnmadmin
sn: tivoli
cn: itnmadmin
userpassword: netcool
转到TIP中
dn: uid=netcool01,cn=group01,dc=ibm,dc=com
objectClass: inetOrgPerson
objectClass: top
objectClass: person
objectClass: organizationalPerson
uid: netcool01
用户在LDAP端建立,密码在TIP中更改,角色在TIP中配置,具体如下:
将定义好的用户等目录信息保存到一个后缀为ldif的文件,里面主要是用户名和相关目录树信息,然后采用TDS的import功能批量导入程序,当然也可以手工在界面构建,示例如下:
version: 1
dn: dc=ibm,dc=com
dc: dc=ibm,dc=com
uid: itnmuser
sn: tivoli
cn: itnmuser
userpassword: netcool
ibm-entryuuid: 8f1079c0-d0e5-102e-8317-eb51212eb149
dn: uid=itnmadmin,dc=ibm,dc=com
objectClass: inetorgperson
dn: cn=users,dc=ibm,dc=com
objectclass: groupOfNames
objectclass: top
ibm交换机常用命令

ibm交换机常用命令1. `show version`:显示交换机的硬件和软件版本信息。
2. `show interfaces`:显示交换机的接口信息,包括接口状态、速度、双工模式等。
3. `show mac-address-table`:显示交换机的 MAC 地址表,包括 MAC 地址、接口和VLAN 信息。
4. `show spanning-tree`:显示交换机的生成树信息,包括根桥、端口状态和路径开销等。
5. `show vlan`:显示交换机的 VLAN 信息,包括 VLAN ID、名称和成员接口等。
6. `configure terminal`:进入交换机的配置模式。
7. `interface ethernet/x`:进入指定的以太网接口配置模式,其中`x`是接口编号。
8. `ip address ip_address subnet_mask`:配置接口的 IP 地址和子网掩码。
9. `shutdown`:关闭接口。
10. `no shutdown`:启用接口。
11. `vlan database`:进入 VLAN 数据库配置模式。
12. `vlan x name name`:创建或修改 VLAN,其中`x`是 VLAN ID,`name`是 VLAN 名称。
13. `port ethernet/x vlan x`:将接口添加到指定的 VLAN 中。
14. `spanning-tree mode rstp`:配置生成树协议的模式为 Rapid Spanning Tree Protocol(RSTP)。
15. ` spanning-tree priority priority`:配置交换机的生成树优先级。
这些命令只是 IBM 交换机的一部分常用命令,具体命令和功能可能因交换机型号和配置而有所不同。
在使用这些命令之前,请仔细阅读交换机的用户手册和文档,以确保正确理解和使用。
IBM路由器动态IP地址的配置
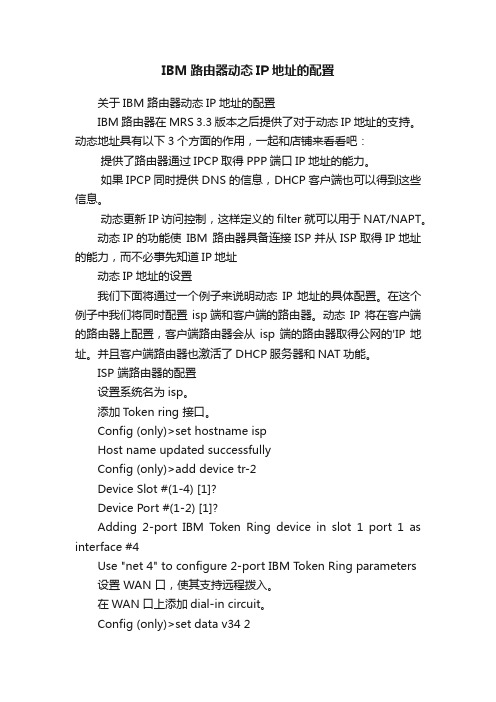
IBM路由器动态IP地址的配置关于IBM路由器动态IP地址的配置IBM路由器在MRS 3.3版本之后提供了对于动态IP地址的支持。
动态地址具有以下3个方面的作用,一起和店铺来看看吧:提供了路由器通过IPCP取得PPP端口IP地址的能力。
如果IPCP同时提供 DNS 的信息,DHCP客户端也可以得到这些信息。
动态更新IP 访问控制,这样定义的filter就可以用于NAT/NAPT。
动态IP的功能使IBM 路由器具备连接ISP并从ISP取得IP地址的能力,而不必事先知道IP地址动态IP地址的设置我们下面将通过一个例子来说明动态IP地址的具体配置。
在这个例子中我们将同时配置 isp端和客户端的路由器。
动态 IP 将在客户端的路由器上配置,客户端路由器会从isp端的路由器取得公网的'IP地址。
并且客户端路由器也激活了DHCP服务器和NAT功能。
ISP 端路由器的配置设置系统名为isp。
添加Token ring 接口。
Config (only)>set hostname ispHost name updated successfullyConfig (only)>add device tr-2Device Slot #(1-4) [1]?Device Port #(1-2) [1]?Adding 2-port IBM Token Ring device in slot 1 port 1 as interface #4Use "net 4" to configure 2-port IBM T oken Ring parameters 设置 WAN 口,使其支持远程拨入。
在WAN口上添加dial-in circuit。
Config (only)>set data v34 2Config (only)>add device dial-inEnter the number of PPP Dial-in Circuit interfaces [1]?Adding device as interface 5Defaulting data-link protocol to PPPBase net for this circuit [0]? 2Enable as a Multilink PPP link? [no]Disabled as a Multilink PPP link.Add more dial circuit interface(s)?(Yes or [No]):Use "set data-link" command to change the data-link protocolUse "net " command to configure dial circuit parameters添加远程拨入的ppp用户’aaa’。
ibm交换机常用命令
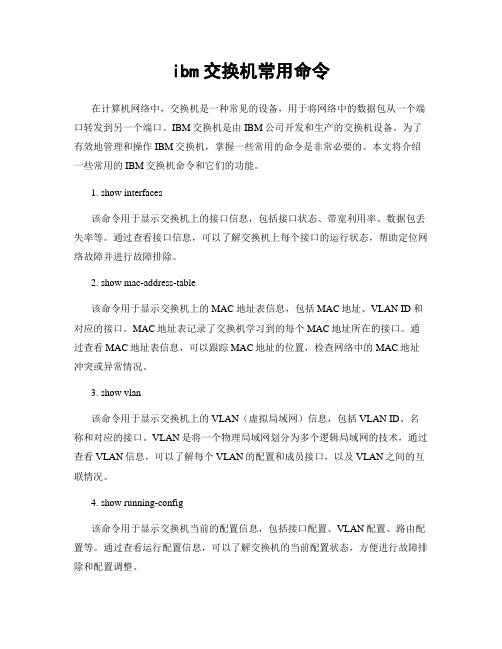
ibm交换机常用命令在计算机网络中,交换机是一种常见的设备,用于将网络中的数据包从一个端口转发到另一个端口。
IBM交换机是由IBM公司开发和生产的交换机设备。
为了有效地管理和操作IBM交换机,掌握一些常用的命令是非常必要的。
本文将介绍一些常用的IBM交换机命令和它们的功能。
1. show interfaces该命令用于显示交换机上的接口信息,包括接口状态、带宽利用率、数据包丢失率等。
通过查看接口信息,可以了解交换机上每个接口的运行状态,帮助定位网络故障并进行故障排除。
2. show mac-address-table该命令用于显示交换机上的MAC地址表信息,包括MAC地址、VLAN ID和对应的接口。
MAC地址表记录了交换机学习到的每个MAC地址所在的接口。
通过查看MAC地址表信息,可以跟踪MAC地址的位置,检查网络中的MAC地址冲突或异常情况。
3. show vlan该命令用于显示交换机上的VLAN(虚拟局域网)信息,包括VLAN ID、名称和对应的接口。
VLAN是将一个物理局域网划分为多个逻辑局域网的技术,通过查看VLAN信息,可以了解每个VLAN的配置和成员接口,以及VLAN之间的互联情况。
4. show running-config该命令用于显示交换机当前的配置信息,包括接口配置、VLAN配置、路由配置等。
通过查看运行配置信息,可以了解交换机的当前配置状态,方便进行故障排除和配置调整。
5. show arp该命令用于显示交换机上的ARP(地址解析协议)缓存表信息,包括IP地址、MAC地址和对应的接口。
ARP缓存表记录了每个IP地址所对应的MAC地址,通过查看ARP表信息,可以了解网络中的IP地址和MAC地址之间的映射关系。
6. show spanning-tree该命令用于显示交换机上的生成树协议(STP)信息,包括生成树根、生成树端口、生成树状态等。
生成树协议是用于防止网络中的环路的一种协议,通过查看生成树信息,可以了解生成树的拓扑结构和状态,并优化网络的转发路径。
命令提示符下创建weblogic域

命令提示符下创建weblogic域
1.用weblogic用户登陆服务器,进入到/home/weblogic/bea/weblogic92/common/bin目录
下,执行./config.sh 文件获得如下界面:
2.直接回车或输入1 选择创建一个新的域;得到如下界面:
3.直接回车或输入1选择默认选项,得到如下界面:
4.直接回车,进入下一页面
5.选择2 为weblogic用户设置密码,得到以下界面:
6.填写weiblogic用户密码(如:weblogic),回车得到下面界面:
7.选择3 确认密码,回车得到下面界面:
8.输入步骤6的密码,回车得到如下界面:
9.回车得到下面界面:
10.选择2 (生产模式)回车得到如下界面:
11.输入1 选择SUN公司的JDK,回车得到如下界面:
12.输入1选择“YES”自定义域配置,回车得到下面界面:
13.输入3 选择更改端口号,回车得到下面界面:
14.输入端口号回车,也可以直接回车选择默认端口7001,得到如下界面:
15.直接回车,得到如下界面:
16.直接回车,得到如下界面:
17.直接回车,得到如下界面:
18.直接回车,得到如下界面:
19.直接回车,得到如下界面:
20.输入域路径(如/home/weblogic/bea),回车,得到如下界面:
21.输入域的名称,回车得到如下界面:
22.直接回车,完成创建。
得到如下界面。
23.完成创建之后,到域路径下(如/home/weblogic/bea/testdomain)下找到启动文件,启
动weiblogic服务,测试是否创建成功,。
ibmc常用命令
ibmc常用命令IBMC,即IBM Cloud,是由IBM提供的一种灵活的云计算平台。
在使用IBMC时,常用的命令可以帮助我们更好地管理和操作云服务。
下面将介绍一些常用的IBMC命令。
1. 登录命令我们需要使用登录命令来登录到IBMC的控制台。
登录命令的格式如下:```ibmcloud login```在执行该命令后,系统将要求输入用户名和密码以完成登录。
2. 创建资源命令在登录成功后,我们可以使用IBMC来创建各种云资源,比如虚拟机、数据库等。
创建资源的命令格式如下:```ibmcloud resource create <资源类型> <资源名称>```其中,<资源类型>是指要创建的资源的类型,比如虚拟机可以使用"vm"表示,数据库可以使用"db"表示;<资源名称>是指要创建的资源的名称。
3. 查看资源命令创建资源后,我们可以使用查看资源命令来查看已创建的资源列表。
查看资源命令的格式如下:```ibmcloud resource list```执行该命令后,系统将列出所有已创建的资源,包括资源的名称、类型、状态等信息。
4. 启动资源命令如果需要启动某个资源,比如一台虚拟机,可以使用启动资源命令。
启动资源命令的格式如下:```ibmcloud resource start <资源名称>```其中,<资源名称>是指要启动的资源的名称。
5. 停止资源命令与启动资源命令相对应的是停止资源命令。
停止资源命令的格式如下:```ibmcloud resource stop <资源名称>```其中,<资源名称>是指要停止的资源的名称。
6. 删除资源命令如果某个资源不再需要,可以使用删除资源命令来删除它。
删除资源命令的格式如下:```ibmcloud resource delete <资源名称>```其中,<资源名称>是指要删除的资源的名称。
domain命令详解及site命令高级组合用法
domain命令详解及site命令高级组合用法作者:随州SEO来源:随州网站优化发布日期:2012年11月07日浏览:1次文章Tags:domain site domain命令site命令语法site命令是用于各搜索引擎中查询网站收录情况的一条常见命令,site命令用法比较简单,site后面跟上我们的域名就可以了,如site:。
接下来主要看看domain命令。
先看看domain命令的语法:domain:*从语法中的通配符*,我们知道domain命令可以查询任何字符,当然任何字符就包括中文了。
domain命令是用于百度搜索查询互联网中包含我们要查询内容的所有相关域,domain命令只能用于百度,谷歌请用link命令。
下面随州SEO 就带你看看domain命令的各种用法。
1、查询包含关键词的相关域命令语法:domain:seo该命令用于查询互联网所有包含关键词seo的相关域,当然一般人都不会这么查,直接在百度搜索框中输入关键词就可以查询了,但通过domain命令查询到的结果并不包含百度推广内容,所以有时如果我们想搜索需要的内容,但又不想看见广告,可以试试domain命令。
另外我们可以用该命令查询我们发表的文章有没有被收录,domain:文章标题,或者带上你内容中较独特的一段文字,你认为不为会跟别人有重复的,当然你的文章得是原创的,如果你是复制别人的就别查了。
2、查询网站的所有相关域命令语法:domain:该命令用于查询互联网所有包含域名的相关域,这各位站长使用最多的domian命令的用法,也就是查询我们网站的反向链接。
命令语法:3、查询网站的外部链接。
命令语法:domain: -site:用domain:查询的相关域中包括我们自己的网站,如果我们要知道我们网站有多少条外部链接,也就是不包括我们自己的网站的链接,就得用这条命令,-在这里的作用不是连接符,我们可以理解为减号,就是在查询命令中去掉我们自己的网站,这样查询的结果才是我们网站真正的外链。
Brocade 光纤交换机常用命令

2013-12-24 10:19 2062人阅读评论(0) 收藏举报分类:San11. 删除一个zoneswitch:admin>zonedelete "redzone"switch:admin>cfgsave12. 查看当前定义配置中的zone以下命令查看所有以字母A、B、C开头的zoneswitch:admin>zoneshow "[A-C]*"zone: Blue_zone 1,1; array1; 1,2; array2zone: Bobs_zone 4,5; 4,6; 4,7; 4,8; 4,913. 创建zone配置switch:admin>cfgcreate "NEW_cfg", "redzone; bluezone; greenzone" switch:admin>cfgsave14. 向zone配置成员中加入zoneswitch:admin>cfgadd "newcfg", "bluezone"switch:admin>cfgsave15. 从zone配置成员中删除zoneswitch:admin>cfgremove "NEW_cfg", "redzone"switch:admin>cfgsave16. 删除zone配置switch:admin>cfgdelete "testcfg"switch:admin>cfgsave17. 撤销对zone配置的修改命令cfgTransAbort将撤销所有未保存的修改,及恢复到上次执行cfgSave时的状态。
18. 查看zone配置信息cfgShow不带任何参数:显示处于defined和effective状态的所有zone配置信息switch:admin>cfgshowDefined configuration:cfg: USA1 Blue_zonecfg: USA_cfgRed_zone; Blue_zonezone: Blue_zone1,1; array1; 1,2; array2zone: Red_zone1,0; loop1alias: array1 21:00:00:20:37:0c:76:8c; 21:00:00:20:37:0c:71:02alias: array2 21:00:00:20:37:0c:76:22; 21:00:00:20:37:0c:76:28alias: loop1 21:00:00:20:37:0c:76:85; 21:00:00:20:37:0c:71:df Effective configuration:cfg: USA_cfgzone: Blue_zone1,121:00:00:20:37:0c:76:8c21:00:00:20:37:0c:71:021,221:00:00:20:37:0c:76:2221:00:00:20:37:0c:76:28zone: Red_zone1,021:00:00:20:37:0c:76:8521:00:00:20:37:0c:71:df19. 保存zone配置switch:admin>cfgenable "USA_cfg"You are about to enable a new zoning configuration.This action will replace the old zoning configuration with the current configuration selected.Do you want to enable 'USA_cfg' configuration (yes, y, no, n): [no] y zone config "USA_cfg" is in effectUpdating flash ...。
Brocade光纤交换机常用命令

Brocade光纤交换机常用命令IBM的双机双柜,两光纤交换机分别引一根光纤到另一楼光纤交换机,插上无反应,后得知需要更改交换机的domain id 默认出厂为1。
需改为不同号。
接下来是小编为大家收集的Brocade 光纤交换机常用命令,希望能帮到大家。
Brocade 光纤交换机常用命令使用电脑连接管理网口,默认IP地址为:192.168.0.1,掩码:255.255.255.0默认用户名:admin,默认密码password1. switchStatusShow查看交换机的总体健康状态2. switchShow查看交换机基本配置信息3. portShow 查看端口状态4. fanShow查看交换机散热风扇的状态5. psShow查看交换机的电源状态注:如果安装FR4-18i、FC4-16IP、FC10-6、FC8-48板,需要满配4个电源6. tempShow查看交换机的环境温度查看交换机的内部消息日志8. supportShow、supportSave、pdShow 收集交换机的诊断数据检查连接到交换机的设备10. licenseShow、wwn检查license文件和交换机的WWN号11. version检查Fabric OS的版本,将显示如下信息:12. haShow查看Control Blade的状态查看各个Blade的状态14. portCfgSpeed修改端口的速率15. portEnable或portCfgPersistentEnableReset端口16. 检查WWN卡状态下列命令如果不能正确执行,则说明WWN卡需要更换:www,chassisShow:显示交换机的WWN号chassisShow:显示chassis和WWN卡的状态ipAddrShow,ipAddrSet:显示CP Blades的IP地址historyShow、historyLastShow:显示历史日志信息switchName:显示交换机的名字修改Domain ID1. 查看当前的Domain ID输入命令fabricShow,输出结果中的Switch ID即包括交换机的Domain ID。
ibm doors ng用法

IBM Doors NG是一种专业的需求管理工具,可帮助团队协作管理软件或系统开发过程中的需求。
它具有强大的功能和灵活的可定制性,适用于各种规模和行业的项目。
本文将介绍IBM Doors NG的基本用法,帮助用户更好地掌握和利用这一工具。
一、系统概述IBM Doors NG是IBM公司推出的一款需求管理工具,它是以Web 应用的形式提供的,不需要安装客户端软件即可使用。
用户可以通过浏览器访问IBM Doors NG的Web界面进行需求管理操作,这为团队协作提供了很大的便利。
二、基本操作1. 登入用户可以通过输入IBM Doors NG的URL在浏览器中打开其Web界面。
在登入界面输入正确的用户名和密码后即可登入系统。
2. 需求创建在IBM Doors NG中,用户可以方便地创建需求文档。
点击界面上的“新建”按钮,即可开始创建新的需求文档。
用户可以选择文档的类型和模板,然后填写相关信息并保存。
3. 需求编辑用户可以对已创建的需求文档进行编辑。
在文档界面中,用户可以添加、修改或删除需求条目,还可以对需求进行分类、排序等操作。
4. 需求跟踪IBM Doors NG提供了强大的需求跟踪功能,用户可以跟踪和管理各个阶段的需求。
系统会自动记录需求的变更历史,用户可以随时查看需求的变更情况。
5. 团队协作IBM Doors NG支持团队协作,多个用户可以在同一需求文档上进行编辑和协作。
系统能够自动处理多人同时编辑的冲突,保证需求文档的一致性。
6. 审批发布在需求确定并完成编辑后,需要经过审批发布流程。
用户可以提交需求文档进行审批,管理员对文档进行审查并决定是否发布。
7. 版本管理IBM Doors NG还提供了版本管理功能,用户可以查看需求文档的历史版本,并进行版本比较和恢复。
三、高级功能1. 自定义属性IBM Doors NG允许用户为需求文档添加自定义属性,以满足不同项目的需求管理需求。
用户可以根据项目的实际情况,自定义各种属性,如优先级、状态、责任人等。
IBM Content Manager OnDemand LDAP Sync 用户指南说明书
IBM Content Manager OnDemandLDAP Sync10/18/2018Rob RussellSoftware Engineer - Content Manager OnDemandThis article walks through the basics of how to setup, configure and run the Content Manager OnDemand LDAP Sync command.What is IBM Content Manager OnDemand LDAP Sync?Content Manager OnDemand LDAP Sync (ARSLSYNC) is a new Content Manager OnDemand command that allows for the synchronization of users and groups between LDAP-compliant directory servers and Content Manager OnDemand. Users, groups, and a user’s group membership can be pulled directly from an LDAP-compliant directory server and imported into Content Manager OnDemand. This alleviates the need for the manual creation of users/groups within Content Manager OnDemand. Prerequisites: This document addresses functionality that is only available in Content Manager OnDemand for Multiplatforms Versions 10.1.0.2 and later. For iSeries and zSeries this feature is available at Version 10.1.0.3 or later.OVERVIEWPrior to Version 10.1.0.2, Content Manager OnDemand only supported authentication to LDAP.Content Manager OnDemand V10.1.0.2 introduces a new command (ARSLSYNC) which can be configured to run as either a Windows scheduled task, a Unix cron job, or manually from a properly configured Content Manager OnDemand command prompt.LDAP Sync includes the following functionality:∙Sync users from LDAP to Content Manager OnDemand∙Sync groups from LDAP to Content Manager OnDemand∙Sync group membership from LDAP to Content Manager OnDemand∙Ignore lists for both users and groups∙Creation of a viewable success/failure System Log messages (including manifest file)∙Ability to run in preview mode only∙Option to run with verbose outputTo conform to Content Manager OnDemand user and group naming standards, any special characters from LDAP will be converted to the underscore (_) character. This includes the following characters: ∙asterisk ( *)∙percent ( %)∙plus ( +)∙left bracket ( [)∙right bracket ( ])∙double quote ( ")∙blankFor example, an LDAP user with a samAccountName of ‘cmod admin’ will be imported into Content Manager OnDemand as ‘cmod_admin’. Although this scenario is not common, you should confirm with your LDAP administrator that this conversion will not result in the attempted creation of duplicate IDs.Preparing your systemThe first step in configuring your system to run ARSLSYNC is to ensure LDAP Authentication and Password Case Sensitivity is enabled in the Content Manager OnDemand Administrator client. Refer to the Content Manager OnDemand Knowledge Center for detailed instructions on how to configure LDAP Authentication.IBM Content Manager OnDemand for Multiplatforms V10.1.0 documentationAdd new configuration parametersARSLSYNC introduces the following new parameters:ARS_LDAP_SERVER_TYPE(required) [AD, SUN, OPEN]: Specifies the type of LDAP repository being configured. Only a single server can be configured per Content Manager OnDemandinstance.ARS_LDAP_USER_FILTER (required): Used to query LDAP for users that will be imported into Content Manager OnDemand.For example: (&(objectclass=user)( objectclass=CMODUSER))ARS_LDAP_GROUP_FILTER (required): Used to query LDAP for groups that will be importedinto Content Manager OnDemand.For example: (objectclass=group)ARS_LDAP_GROUP_MAPPED_ATTRIBUTE (required): Used to create the Content ManagerOnDemand group name.ARS_LDAP_IGN_GROUPS: This parameter specifies the user IDs that Content ManagerOnDemand ignores when syncing.You can specify up to 10 group IDs, delimited by a comma.ARS_LDAP_IGN_USERIDS: This parameter specifies the user IDs that Content ManagerOnDemand ignores when syncing. If the parameter does not exist or you do not specify avalue, Content Manager OnDemand defaults to ADMIN.You can specify up to 10 user IDs, delimited by a comma. If you specify a list of user IDs and you want to include ADMIN, you must specify it on the list.To ease with the configuration, these parameters can be added directly to the ARS.CFG file on UNIX platforms. Windows customers can use the OnDemand Configurator to add these new parameters. Simply select the Parameters button from the instance Properties tab and add any entries needed. This alleviates the need from modifying the Windows registry directly.Once the parameters have been entered, you must restart the ARSSOCKD process in order for the changes to take effect.Sample LDAP configuration with LDAP Sync parameters (Active Directory)ARS_LDAP_SERVER= ARS_LDAP_PORT= 3268ARS_LDAP_USE_SSL= FALSEARS_LDAP_BASE_DN= dc=ondemand,dc=yourdomain,dc=localARS_LDAP_BIND_ATTRIBUTE= sAMAccountNameARS_LDAP_MAPPED_ATTRIBUTE= sAMAccountNameARS_LDAP_ALLOW_ANONYMOUS= FALSEARS_LDAP_BIND_MESSAGES_FILE=ARS_LDAP_IGN_USERIDS=ADMINARS_LDAP_SERVER_TYPE=ADARS_LDAP_USER_FILTER=(objectclass=user)ARS_LDAP_GROUP_FILTER=(objectclass=group)ARS_LDAP_GROUP_MAPPED_ATTRIBUTE=CNARS_LDAP_IGN_GROUPS=CMOD_ADMINS,CMOD_USERADMINSUsageThe ARSLSYNC command must be run as the instance owner. The command usage requires either Sync (-s) or Preview (-t). In preview mode, no changes are made to the server. This should be used during the configuration of ARSLSYNC. Once you are satisfied that your filters are set correctly, you can proceed to run the command in Sync mode.Usage: arslsync [-I <od_inst>] [-s | -t] [-v]Version: 10.1.0.2-h <od_inst> OnDemand Instance Name (same as -I)-I <od_inst> OnDemand Instance Name (same as -h)-s Sync-t Preview-v Verbose-1 <trace_file> Trace file-2 <trace_level> Trace levelARSLSYNC introduces the following two new System Log messages:ARS0460I – LDAP Synchronization SuccessARS0461I – LDAP Synchronization FailedBoth message are viewable from within the System Log. The messages will contain a manifest of any changes made to the system.ARSLSYNC also includes a verbose option (-v) which will output any objects that already exist in Content Manager OnDemand and will remain unchanged.。
IBM zEnterprise系统集成规划和配置指南说明书
Create the Ensemble
Performed through the System z hardware manager console
Define INMN and IEDN Networks
Involves a few relatively simple updates to the TCP definitions in z/OS
CNTLUNIT CUNUMBR=0A00, PATH=((CSS(0),10)“,O(SCMS”S(1),10),(CSS(2),10)), UNIT=OSM
IODEVICE ADDRESS=(A00,015),MODEL=M,CUNUMBR=(0A00), PARTITION=((CSS(2),TOSP21,TOSP22,TOSP24)), NOTPART=((CSS(0),TOSP3,TOSPC),(CSS(1),TOSP18, TOSP19)),UNIT=OSA
PARTITION=((CSS(2),(TOSP21,TOSPI2E2D,NTCOHSPPI2D4d)e,fi(ni=ti)o)n)s ,
PCHID=100,TYPE=OSX
for actual system
CNTLUNIT CUNUMBR=0BC0, PATH=((CSS(0),2C),(CSS(1“)O,S2XC”),(CSS(2),2C)),UNIT=OSX
with some good information on the process
6
© 2011 IBM Corporation
IBM Washington Systems Center
Ensemble Creation Process
rsct_资源管理与监控
IBM RSCT 中的 ERRM(Event response resource Manager) 组件为这一需求提供了一套有效的解决方案。
对于常见的系统指标数值,例如文件系统使用状况,CPU 工作状况,存使用状况以及网卡各种指标值等都提供了很好的支持。
同时,用户也可以很方便地定制各种系统资源监控。
本文将详细阐述 RSCT ERRM 在集群系统监控中的应用。
随着大规模集群系统的广泛应用,系统的监控变得日趋复杂,对于系统各种指标数值的监控的显得愈发重要。
IBM RSCT 中的 ERRM(Event response resou rce Manager) 组件为这一需求提供了一套有效的解决方案。
对于常见的系统指标数值,例如文件系统使用状况,CPU 工作状况,存使用状况以及网卡各种指标值等都提供了很好的支持。
同时,用户也可以很方便地定制各种系统资源监控。
本文将详细阐述 RSCT ERRM 在集群系统监控中的应用。
1. RSCT 框架简介(Reliable Scalable Cluster Technology)是一系列软件组件的集合,RSCT为 IBM 许多集群软件提供可用性,可扩展性及易用性等方面的底层支持。
RSCT 包含以下几个组件,本文主要讨论 RMC 子系统和核心资源管理器 ERRM RMC 子系统 (Resource Monitoring and Control subsystem)RSCT 核心资源管理器 (RSCT core resource managers),包括 ERRM, Con figRM, FSRM,HostRM,SensorRM 等。
RSCT 集群安全服务 (RSCT cluster security services)拓扑服务子系统 (Topology Services subsystem)组群服务子系统 (Group Services subsystem)图 1. RSCT 资源架构图 1 显示了 RSCT 中资源的架构, RMC 子系统是整个 RSCT 的核心,它为其它组件提供了一套通用的接口,这样 RSCT 的上层客户软件无需关心各个底层的资源管理器的运行细节,只要通过 RMC 提供的接口 (RMC API) 与 RSCT 进行通信。
光纤交换机划分zone方法
笔记本电脑设置为10.77.77.XX(非77就可以),用超级终端连接10.77.77.77。
用户名admin,密码password。
登陆后会提示你改许多用户的密码,直接按回车,不做更改。
help命令提示你如何操作。
zonehelp提示你如何操作zone。
zonecreate命令创建zone。
命令如下:zonecreate"zone_name","number;number"。
这里number可以是"域,端口号",也可以是"wwn",还可以是zone的别名和Quickloop AL_PAs。
交换机默认域为1,端口号从0-15。
可以用switchshow来查看配置。
重要的是记住必须用cfgsave保存,和cfgenable让其生效。
*********************************************************** 在IBM 2109光纤通道交换机上设置分区的步骤环境SAN 2109如何在IBM 2109光纤通道交换机上设置分区(Zoning)在存储区域网络中划分分区(Zoning)可以适应不同的服务器对存储的需求,可以提高网络存储数据的完整性和安全性。
在IBM2109光纤交换机上划分分区需要如下的步骤。
1、创建成员(Member)创建分区中的成员,实际上是帮助管理员对分区进行管理,即是为分区中的成员(交换机端口或WWPN)分配较容易记忆的名字。
创建的命令是aliCreate“助记名称”,“端口;或WWPN”。
例如aliCreate “TechSvr”,“1,1”aliCreate “TechDisk”,“D1WWPN;D2WWPN”aliCreate “Sales”,“1,5;D3WWPN;D4WWPN”在上面,我们创建了三个成员,名称分别为“TechSvr,TechDisk和Sales”,它们所对应的成员分别为“端口1(包括交换机的域信息)”、“D1的WWPN和D2的WWPN”、“端口5、D3的WWPN和D4的WWPN”。
- 1、下载文档前请自行甄别文档内容的完整性,平台不提供额外的编辑、内容补充、找答案等附加服务。
- 2、"仅部分预览"的文档,不可在线预览部分如存在完整性等问题,可反馈申请退款(可完整预览的文档不适用该条件!)。
- 3、如文档侵犯您的权益,请联系客服反馈,我们会尽快为您处理(人工客服工作时间:9:00-18:30)。
配置WebLogic 8.1$ cd /weblogic/bea/weblogic81/common/$ cd bin$ lscommEnv.sh config_builder.sh quickstart.sh startPointBaseConsole.shconfig.sh encryptWSSEPolicy.sh startManagedWebLogic.sh stopPointBase.shconfigDB.sh generateSecretKeyFile.sh startPointBase.sh$ df -kFilesystem 1024-blocks Free %Used Iused %Iused Mounted on/dev/weblogic 5242880 4558384 14% 19606 2% /weblogic/dev/webapp 20709376 18785424 10% 60703 2% /webapp$ config.shUnable to instantiate GUI, defaulting to console mode.<----------------------------------------------- BEA WebLogic Configuration Wizard ----------------------------------------------->Create or Extend a Configuration:---------------------------------Choose between creating and extending a configuration. Based on your selection, the Configuration Wizard guides you through thesteps to generate a new or extend an existing configuration.->1|Create a new WebLogic configuration| Start here to create a WebLogic configuration in your projects directory.2|Extend an existing WebLogic configuration| Start here to extend an existing WebLogic configuration. Use this option to add applications and services, including|Database access (JDBC) and Messaging (JMS). This option also enables you to extend functionality by enabling WebLogic|Workshop.Enter index number to select OR [Exit][Next]> 1<----------------------------------------------- BEA WebLogic Configuration Wizard ----------------------------------------------->Select a Domain Template:-------------------------Please select a template from the list or select another directory of templates.* [/weblogic/bea/weblogic81/common/templates/domains]1|Basic WebLogic Workshop Domain 8.1.5.0| BEA Systems, Inc.| Create a basic WebLogic Workshop domain, without installing sample applications. Domains created from this template will|support the WebLogic Server and WebLogic Workshop runtime functionality, including support for J2EE applications, Web|applications, Web Services and custom controls. Use domains created from this template for development of WebLogic Workshop|applications.->2|Basic WebLogic Server Domain 8.1.5.0| BEA Systems, Inc.| Create a basic WebLogic Server domain without installing sample applications.3|WebLogic Server Examples Domain 8.1.5.0| BEA Systems, Inc.| Create the WebLogic Server Examples domain in a directory outside of the installed kit. The Examples domain contains a|collection of examples to show best practices for coding individual J2EE APIs.4|Avitek Medical Records Sample Domain 8.1.5.0| BEA Systems, Inc.| Create the Avitek Medical Records domain in a directory outside of the installed kit. The Avitek Medical Records is a|WebLogic Server sample application suite that concisely demonstrates all aspects of theJ2EE platform.5|Select another directory locationEnter index number to select OR [Exit][Previous][Next]><----------------------------------------------- BEA WebLogic Configuration Wizard ----------------------------------------------->Choose Configuration Option:----------------------------*Do you want to run the wizard in express mode?->1|Yes2|NoEnter index number to select OR [Exit][Previous][Next]> 1<----------------------------------------------- BEA WebLogic Configuration Wizard ----------------------------------------------->Configure Administrative Username and Password:-----------------------------------------------Create a user automatically assigned to the Administrative Role. This user is the default administrator used to start developmentmode servers.| Name | Value |_|_________________________|_________________________________|1| *User name: | weblogic |2| *User password: | |3| *Confirm user password: | |4| Description: | The default administration user |Select Option:1 - Modify "User name"2 - Modify "User password"3 - Modify "Confirm user password"4 - Modify "Description"Enter option number to select OR [Exit][Previous][Next]> 2<----------------------------------------------- BEA WebLogic Configuration Wizard ----------------------------------------------->Configure Administrative Username and Password:-----------------------------------------------Create a user automatically assigned to the Administrative Role. This user is the default administrator used to start developmentmode servers."*User password:" = []Input new *User password: OR [Exit][Reset][Accept]><----------------------------------------------- BEA WebLogic Configuration Wizard----------------------------------------------->Configure Administrative Username and Password:-----------------------------------------------Create a user automatically assigned to the Administrative Role. This user is the default administrator used to start developmentmode servers.| Name | Value |_|_________________________|_________________________________|1| *User name: | weblogic |2| *User password: | ******** |3| *Confirm user password: | |4| Description: | The default administration user |Select Option:1 - Modify "User name"2 - Modify "User password"3 - Modify "Confirm user password"4 - Modify "Description"5 - Discard ChangesEnter option number to select OR [Exit][Previous][Next]> 3<----------------------------------------------- BEA WebLogic Configuration Wizard ----------------------------------------------->Configure Administrative Username and Password:-----------------------------------------------Create a user automatically assigned to the Administrative Role. This user is the default administrator used to start developmentmode servers."*Confirm user password:" = []Input new *Confirm user password: OR [Exit][Reset][Accept]><----------------------------------------------- BEA WebLogic Configuration Wizard ----------------------------------------------->Configure Administrative Username and Password:-----------------------------------------------Create a user automatically assigned to the Administrative Role. This user is the default administrator used to start developmentmode servers.| Name | Value |_|_________________________|_________________________________|1| *User name: | weblogic |2| *User password: | ******** |3| *Confirm user password: | ******** |4| Description: | The default administration user |Select Option:1 - Modify "User name"2 - Modify "User password"3 - Modify "Confirm user password"4 - Modify "Description"5 - Discard ChangesEnter option number to select OR [Exit][Previous][Next]><----------------------------------------------- BEA WebLogic Configuration Wizard ----------------------------------------------->Domain Mode Configuration:--------------------------Enable Development or Production Mode for this domain.->1|Development Mode2|Production ModeEnter index number to select OR [Exit][Previous][Next]><----------------------------------------------- BEA WebLogic Configuration Wizard ----------------------------------------------->Java SDK Selection:-------------------->1|Other Java SDKEnter index number to select OR [Exit][Previous][Next]><----------------------------------------------- BEA WebLogic Configuration Wizard ----------------------------------------------->Java SDK Selection:-------------------"JVM Directory" = []Input new JVM Directory OR [Exit][Previous][Next]> /usr/java14<----------------------------------------------- BEA WebLogic Configuration Wizard ----------------------------------------------->Java SDK Selection:-------------------"JVM Directory" = [/usr/java14]Input new JVM Directory OR [Exit][Previous][Next]><----------------------------------------------- BEA WebLogic Configuration Wizard ----------------------------------------------->Select the target domain directory for this configuration:----------------------------------------------------------"Target Location" = [/weblogic/bea/user_projects/domains]Input new Target Location OR [Exit][Previous][Next]> /webapp/domains/ahdomain<----------------------------------------------- BEA WebLogic Configuration Wizard ----------------------------------------------->Edit Domain Information:------------------------| Name | Value |_|________|__________|1| *Name: | mydomain |Enter value for "Name" OR [Exit][Previous][Next]> testDomain<----------------------------------------------- BEA WebLogic Configuration Wizard ----------------------------------------------->Edit Domain Information:------------------------| Name | Value |_|________|____________|1| *Name: | testDomain |Select Option:1 - Modify "Name"2 - Discard ChangesEnter option number to select OR [Exit][Previous][Next]><----------------------------------------------- BEA WebLogic Configuration Wizard ----------------------------------------------->Creating Domain...0% 25% 50% 75% 100%[------------|------------|------------|------------][***************************************************]**** Domain Creation Failed! Unable to create domain directory: /webapp/domains/ahdomain/testDomain ****到此如果没有问题说明配置成功小结>>>>>如果有问题查看权限问题简单说明>>>>>>1-/weblogic/bea/weblogic81/common/bin2-config.sh3-选择14-选择2或者回车5-选择1| Name | Value |_|_________________________|_________________________________|1| *User name: | weblogic |2| *User password: | |3| *Confirm user password: | |4| Description: | The default administration user |Select Option:1 - Modify "User name"2 - Modify "User password"3 - Modify "Confirm user password"4 - Modify "Description"6- 选择27- 输入密码111111118- 选择3"*Confirm user password:" = []9- 输入确认密码1111111110- 回车11- 回车(开发模式1|Development Mode)12- 回车->1|Other Java SDK13-选择jdk路径:/usr/java14之后回车14- 回车15- 选择domains路径(/webapp/domains/ahdomain)16- 选择mydomain 的名字也可以默认(testDomain)之后回车17- 如果不改直接回车18- 安装结束。
