i.MX25 WinCE System platform
Win7旗舰版缺少uxtheme.dll黑屏怎么解决?
Win7旗舰版缺少uxtheme.dll黑屏怎么解
决?
Uxtheme.dll是系统主题支持的核心,它让你的win7系统支持第三方桌面主题。
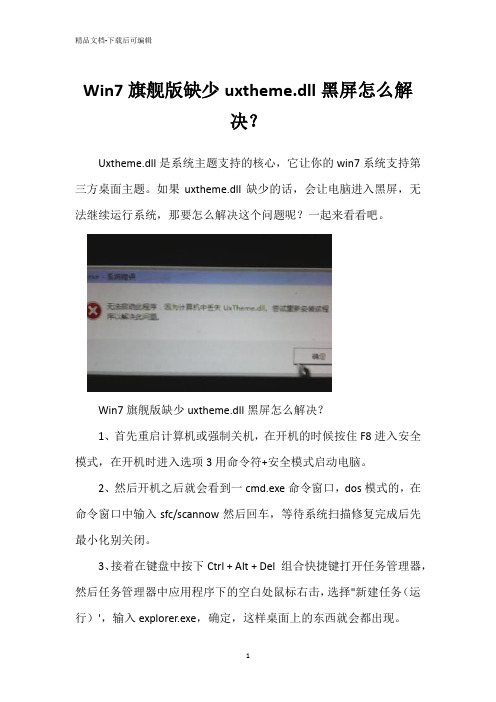
如果uxtheme.dll缺少的话,会让电脑进入黑屏,无法继续运行系统,那要怎么解决这个问题呢?一起来看看吧。
Win7旗舰版缺少uxtheme.dll黑屏怎么解决?
1、首先重启计算机或强制关机,在开机的时候按住F8进入安全模式,在开机时进入选项3用命令符+安全模式启动电脑。
2、然后开机之后就会看到一cmd.exe命令窗口,dos模式的,在命令窗口中输入sfc/scannow然后回车,等待系统扫描修复完成后先最小化别关闭。
3、接着在键盘中按下Ctrl + Alt + Del 组合快捷键打开任务管理器,然后任务管理器中应用程序下的空白处鼠标右击,选择"新建任务(运行)',输入explorer.exe,确定,这样桌面上的东西就会都出现。
4、接着用U盘到别的电脑上拷贝(相同系统)一个名叫uxtheme.dll,具体路径一般是C:\windows\system32\uxtheme.dll ,把U盘上的uxtheme.dll重命名(例如:uxtheme.dll.bak),然后复制到自己的电脑C:\windows\system32 文件夹中。
5、之后在任务管理器的进程中结束explore.exe进程,关闭任务管理器,接着在命令对话框中输入del uxtheme.dll 回车,再输入ren uxtheme.dll.bak uxtheme.dll 回车,完成后重启计算机。
OMAP3530 WinCE 1.00.00.05 DVSDK 发行说明说明书
OMAP3530 WinCE Digital Video Software Development Kit (DVSDK)DVSDK WinCE 1.00.00.05Release Notes Dec 04, 2009Important Note: Users must install the OMAP3530 WINCE DVSDK in order to access certain documentation hyperlinks in this document.IntroductionThis is the first DVSDK WinCE 100 source release targeted for OMAP3530 EVM.The DVSDK WinCE 100 product release is supported on OMAP35x EVM platform. This DVSDK, coupled with WinCE board support package, gives developers the ability to evaluate the hardware and software capabilities of the OMAP35x EVM platform with WinCE 6.0 R2/R3. Developers will be able to evaluate the ARM WinCE programming environment and easily utilize the powerful hardware support of the OMAP3530 SoC for various audio, video, speech and image codecs.This document is divided into the following sections:•Features•Documentation•DVSDK Package Contents•Installation and Usage•Upgrade and Compatibility Information•Host Support•Dependencies•Device Support•Validation Information•Exceptions and Known Issues•Limitations•Special Notes•Technical Support and Product UpdatesFeaturesThis DVSDK release includes support for OMAP3530 and OMAP3525 with the following features and has been tested with WinCE Board Support Package (BSP) R6.12.03:•Support for OMAP35x ES3.1 Silicon version with 256MB LPDDR•Backward compatible with OMAP35x ES2.1 Silicon version with 128MB LPDDR.•XDM 1.0 Codecs from TI.Audio: AAC LC/HE DecoderImage: JPEG Encoder/DecoderSpeech: G.711 Encoder/DecoderVideo: H.264 BP Encoder/Decoder, MPEG4 SP Encoder/Decoder, MPEG2 Decoder•DirectShow Filters•H.264 video decode directshow filter•MPEG4 video decode directshow filter•MPEG2 video decode directshow filter•DVSDK Demos and apps:•DMAI apps for performing file based decode and encodeoperations.•WMP to exercise media playback.•Digital Video Test Bench is not supported with this release.•WinCE 6.0 R2/R3 supportedDocumentation•DVSDK WinCE 100 Getting Started Guide - Hardware and software overview, including how to run demos, install software, and build thedemos. Latest Getting Started Guide can be found online here •Codec Engine Release Notes•Framework Components Release Notes•OMAP3530 Codec Server Release Notes•DaVinci Multimedia Application Interface (DMAI) Release Notes•Direct Show Filters (dshow) Release Notes•DSP/BIOS LINK Release Notes•DSP/BIOS Utilities Release Notes•EDMA3 Low Level Driver Release Notes•WinCE Utils Release Notes•XDAIS Release NotesDVSDK Package ContentsThe DVSDK contains the following components:biosutils_1_02_02 BIOS Utilitieswinceutils_1_00_02 Contiguous memory allocator for WinCEcodec_engine_2_24_01 The Codec Engine provides a framework for creating and interacting with multimedia codecsdmai_1_24_00_07 DaVinci Multimedia Application Interfacedshow_1_00_00_07 TI Directshow multimedia filters. dsplink_1_64 Foundation software for the inter-processorcommunication across the GPP-DSP boundary.framework_components_2_24_01 Framework Components is a collection offramework-independent utility libraries which othersoftware frameworks can build upon.cs1omap3530_1_00_01 Codec Server for decoding and encoding video,audio, speech and image.local_power_manager_1_24_01 Local Power Manager for DSP edma3_lld_01_06_00_01 EDMA3 Low Level Driver containing Resource Manager and Driverxdais_6_24_01_06xDAIS product contains the DSP AlgorithmInterface Standard specification and relateddocumentation and examples. A detailed DVSDK WinCE software manifest can be found hereThe DVSDK depends on the following tools/components:The DVSDK release is shipped with prebuilt components and these tools (exceptXDCTOOLS) are needed only for recompiling the individual components.XDCTOOLS is needed for DVSDK binary installation as well.Important Note: install XDCTOOLS and TI CodeGen tools in directories thatdon’t have any spaces in their path name (default installation path for thesetools may have spaces). Some of the DVSDK component builds fail if thereare spaces in the installation path of these tools.Installation and UsagePlease follow the Getting Started Guide for detailed installation and usageinstructions.Upgrade and Compatibility InformationThe OMAP3530 DVSDK release is independently installable. No upgradeinstructions are available with this release.bSquare WinCE 6.0 BSP Release 6.12.03 or later BSP for WinCE 6.0 R2/R3. bios_5_33_05Stand-alone DSP/BIOS. xdctools_3_10_05_61TI XDC tool. cg6x_6_1_9 TI C6x CodeGen tools.ActivePerl5.8 Active PerlHost SupportThis release supports installation and development on Windows XP workstations.DependenciesThe only known dependencies are listed here.Device SupportThis release supports the Texas Instruments OMAP3530 and OMAP3525 SoC. The verification was done on the OMAP35x Evaluation Module (TMDXEVM3503 and TMDSEVM3530)Validation InformationA sanity test of the DVSDK WinCE 100 build 1_00_00_05 was performed before release to the system test team. The sanity test covered the following tests. The validation was done on OMAP35x EVM.•Play AVI files with MPEG2, MPEG4 and H264 video decoder and MP3 audio decoder using Windows Media Player. Some of the test clips usedfor testing and benchmarking can be found here. http://software-/dsps/dsps_public_sw/sdo_sb/targetcontent/media/wince/index_FDS.html•Run DMAI demonstration applications as described in Getting Started Guide.In addition this release has gone through a complete QA cycle.Exceptions and Known Issues•MP3 playback can only be done on the ARM. This results in higher ARM-side CPU load.•Only AVI containers are supported.•AV synchronization is sometimes off for H.264 video clips at D1 resolution when the bitrate is high (e.g. >= 2Mbps) on Omap3530 ES2.1 siliconreading the media files from SD card. Performance can be improved byusing ES 3.1 silicon with multiple block reads enabled for the SDIO driver.•WMP cannot be run at the same time as DMAI applications, due to lack of an arbitrator of DSPLINK resources.•When performing jpeg image encode using DMAI application of an image with dimension (height or width) that is not a multiple of 16, leads todistorted output. This is a JPEG encoder known limitation.•When performing jpeg image encode using DMAI application, it was observed that using qfactor above 96 leads to misalignment in outputimage.•When performing AAC audio decode using DMAI application, high tone heard in decoded file after an aac decode operation.•When performing AAC audio decode using DMAI application, Mono files are decoded as dualmono during aac decode operations.•DMAI application does not support 411p and 422i as possible chroma formats•The default CMEM configuration allows JPEG encode and decode of images with resolutions upto 1280x720 (1MPixel) with YUV444, YUV422,YUV420 formats. Images of higher resolution can be encoded/decodedwith appropriate increase in CMEM buffer configuration within limits ofavailable memory•Rotation may not work for Video codecs that are part of WinCE 6.0 running on ARM (e.g, MPEG1 video, WMV video). These codecs do not handle the stride information properly. Please contact Microsoft for further details.•SDOCM00057731: MPEG2 Decoder: Flicker is observed at top of the display while decoding Mpeg2 streams of resolution 352x240 with videodecode•SDOCM00062310: MPEG2 Decoder: Generated yuv resolution is not same as the input stream resolution for some MP streams•SDOCM00060533: MPEG2 Decoder: Unable to decode certain clips @ QCIF resolutionFor latest list of known issues, please click on issues list. If this is your first time accessing this database please create an account hereDefects Fixed in DVSDK WinCE 1.00.00.05•Updated direct show filters enable Video Rotation using VRFB for Video codecs running on the DSP (H.264 decode, MPEG2 decode, MPEG4decode).•Optimization in Multimedia framework, higher DSP clock speed as well as adjustment in display driver buffer settings improves multimediaperformance. H.264 video clips at D1 resolution with bitrates of upto2Mbps can be played without any AV sync issue on ES2.1 silicon withmedia files on SD card. MPEG2 and MPEG4 video clips at D1 resolutionwith bitrates upto 4Mbps can be played without AV sync issues.Performance is further improved by using ES 3.1 silicon with multiple block reads enabled for the SDIO driver.Defects Fixed in DVSDK WinCE 1.00.00.04•CERuntime_exit() API is called by TI multimedia filter when closing Windows Media Player. This should free up unused resources.•Benchmarking (--benchmark option) is now supported in DMAI applications •WMP hangs due to exception in timm.dll when unsupported input file is selectedDefects Fixed in DVSDK WinCE 1.00.00.03•Reducing the window size of the Windows Media Player to a size smaller than the frame size may result in corrupted output.•Video display is corrupted when part of the display window lies outside the LCD display.•Directshow filters do not meet real-time and display is corrupted when video renderer operates in GDI mode (ie. when Windows Media Player ishidden by another window). This is because GDI mode requires YUV toRGB conversion of the DSP codec output frames.•DMAI Video Encode - for both H.264 and MPEG4 files, error pertaining to contiguous buffer causes failure•DMAI Image Encode - CMEM configurations to be provided for 1920x1280 and above resolutionsLimitationsSpecial Notes•In order to experience the demos and apps that comes with DVSDK WinCE 100, please refer to the Getting Started Guide.Technical Support and Product UpdatesPlease register your EVM serial number as instructed on the printed Read Me 1st Card in order to download the updated software release as soon as it becomes available.•For questions and support on the DVSDK WinCE 100, please visit .•Please be sure to read the Digital Video Software Development Kit (DVSDK) release notes, printed documentation and Getting Started Guide for general information.• A developer wiki site is available at/index.php?title=Main_Page. For information onOMAP35x, search for OMAP35x in the google toolbar embedded in thepage. User contributions are encouraged.。
QNX 产品介绍 2012版

昂正湖 Daniel Ang 新加坡动力科技公司
公司和产品介绍
公司介绍 • 历史 • 目标市场 • 客户 • 合作伙伴 • 产品链 • 为什么选择QNX?
技术介绍 • 系统构架 • 系统特性 • 多核 • 互联 • 图形/中间件 • 硬件支持 • 开发工具
销售模式 • 开发费用 • 授权费 • 其他产品 • 支持与服务
硬实时性
硬实时性能严格保证快速响应 最大中断延时 • QNX: 0.000008 seconds • Linux: 1 second 特性 • 基于优先级可抢占线程(256 优先级) • 可抢占的内核 • 多种调度算法 (FIFO/Round Robin) • 基于优先级的并可嵌套的中断 • 中断由用户线程或定制的ISR处理 • 优先级继承 • 防止优先级反转
Better CPU efficiency with adaptive partitioning
多核
• • • • • 微内核分散负载 多核优化工具 超过14年的多核经验 关注未来发展 SMP和 BMP多重处理方式
军工国防
Confidential Information of QNX Software Systems Limited
12
Secure, proven: On land and in space
客户案例
客户案例
GE Energy
QNX 合作伙伴
生态系统
• 广泛的合作伙伴群体 • 专注在: – 垂直(工业)市场 – 平行市场 • 汽车电子市场一流的生态系统网络
Peripheral I/O • PCI / PCIe • I2C / I2S • SPI • GPIO • UART • USB
Apalis i.MX6 WinCE 开发入门说明书
Apalis i.MX6 WinCE开发入门Revision History17-Aug-2015 Rev. 0.2 V1.1A 添加SD卡槽图片及错误修正2-Feb-2016 Rev. 1.1 V1.1A 增加WinCE Image V1.0b6 说明6-Jun-2016 Rev. 1.3 V1.1A 增加社区信息15-Aug-2017 Rev. 1.5 V1.1A 更新V1.2版本image内容,修正错误目录1.开发设备及材料准备 (6)1.1硬件准备 (6)1.1.1Apalis i.MX6 系列核心板模块 (6)1.1.2Apalis 系列载板 (6)1.1.3基本配件(按需自行配置,不包含在标准载板购买包装内) (6)1.2软件准备 (6)2.开发平台配置 (7)2.1硬件连接框图 (7)2.2电源连接 (7)2.2.1Apalis 开发板 (7)2.2.2Ixora 载板 (7)2.3显示输出连接 (7)2.3.1Apalis 开发板 (7)2.3.2Ixora 载板 (8)2.4调试串口COMA连接 (8)2.4.1Apalis 开发板 (8)2.4.2Ixora载板 (8)2.4.3串口连接参数为115200/8/1/none (8)2.4.4USB 串口驱动请从下面FIDI网站下载 (8)2.5调试USB口(在需要时连接) (8)2.5.1Apalis 开发板 (8)2.5.2Ixora载板 (8)2.6USB键盘/鼠标连接 (9)2.6.1Apalis 开发板 (9)2.6.2Ixora 载板 (9)2.7网络连接 (9)2.7.1Apalis 开发板 (9)2.7.2Ixora 载板 (9)2.8上电启动,开关机和重启开关 (9)2.8.1Apalis 开发板 (9)2.8.2Ixora 载板 (9)2.9上述所涉及的连接器和开关布局图 (10)2.9.1Apalis 开发板 (10)3.修改显示分辨率 (11)3.1修改Eboot分辨率 (11)3.2修改WinCE显示分辨率 (11)3.3清除WinCE注册表恢复到默认状态 (11)4.远程桌面连接 (12)4.1ActiveSync (USB)方式连接 (12)4.2网络方式连接 (12)5.开发主机SDK部署,针对VS2008开发环境 (13)5.1安装VS2008 (13)5.2安装WINCE 6.0 SDK (13)5.3安装WINCE 7.0 SDK (13)5.4测试SDK (13)6.VS2008应用调试之USB调试 (14)7.VS2008应用调试之网络调试 (15)7.1连接 (15)7.2主机端VS2008设置 (15)7.3目标板设置(英文版WinCE7) (16)7.4目标板设置(中文版WinCE7) (16)7.5测试连接情况 (17)8.E-boot和OS image更新升级 (18)8.1关于ToradexApalis i.MX6模块的image更新 (18)8.2使用Toradex Easy Installer进行模块系统更新 (18)8.3Eboot损坏情况下进入恢复模式重新刷写Eboot和OS image (18)8.4Eboot正常情况下,升级Eboot 或者OS image (20)8.4.1如模块当前WinCE系统正常,建议首选进入系统后使用Update Tool来升级相关组件 (20)8.4.2如当前Eboot版本为V1.2以下版本并升级为V1.2及以上版本 (20)8.4.3如当前Eboot版本已经为V1.2及以上版本 (21)9.软硬件开发资源及Toradex开发者中心 (22)9.2载板硬件开发资料下载 (22)9.3WinCE软件image,BSP,SDK等资源下载 (22)9.4开发上手指南以及Lib库的使用说明文档 (22)9.5Toradex社区 (22)10.Toradex公司简介及本地支持联系方式 (23)10.1Toradex公司简介 (23)10.2本地支持联系方式 (23)1. 开发设备及材料准备1.1 硬件准备1.1.1 Apalis i.MX6 系列核心板模块✓Apalis i.MX6 Quad 2GB IT | V1.1C✓Apalis i.MX6 Quad 1GB | V1.1B✓Apalis i.MX6 Dual 1GB IT | V1.1B✓Apalis i.MX6 Dual 512MB | V1.1B1.1.2 Apalis 系列载板✓Apalis Evaluation Board | V1.1A✓IxoraCarrier Board | V1.1A1.1.3 基本配件(按需自行配置,不包含在标准载板购买包装内)✓电源适配器✓外部显示连接线(如VGA、RGB、LVDS等)✓调试串口连接线✓调试USB口连接线1.2 软件准备✓Windows系统开发主机✓Virtual Studio 2008 开发套件✓串口工具如SecureCRT或者Xshell等2. 开发平台配置2.1 硬件连接框图2.2 电源连接2.2.1 Apalis 开发板✓X15,输入电源类型7-27V DC,螺丝接线连接,建议功率24W✓X17,输入电源类型12V +/-10%,5.5mm 圆形接头,建议功率24W;当外设如LVDS,PCIE等需要12V电源是必须通过此接头供电。
Get深度技术GHOSTWIN7SP1X64旗舰装机版介绍

Get深度技术GHOSTWIN7SP1X64旗舰装机版介绍2篇深度技术GHOSTWIN7SP1X64旗舰装机版介绍(一)深度技术GHOSTWIN7SP1X64旗舰装机版是一款专为电脑装机爱好者而设计的操作系统镜像。
它采用了深度技术团队自主开发的Ghost 技术,通过精心调试和优化,使其在Windows 7 SP1 64位系统下具备出色的稳定性和兼容性。
本文将对这一装机版进行全面介绍。
首先,我们来看一下深度技术GHOSTWIN7SP1X64旗舰装机版的特点。
它采用了经过深度技术团队优化的长效支持版本Windows 7 SP1 64位系统作为基础,融入了多项优秀的第三方软件和驱动程序,提供了更加完善和便捷的使用体验。
这一装机版在系统安装和激活过程中更加简单,用户无需手动操作,只需按照提示进行即可。
同时,深度技术GHOSTWIN7SP1X64旗舰装机版还支持多语言界面切换,满足了各类用户的不同需求。
其次,深度技术GHOSTWIN7SP1X64旗舰装机版的性能表现也是十分出色的。
通过深度定制和优化,该装机版在系统启动速度、程序响应速度和系统稳定性方面都有明显提升。
无论是进行办公工作、观看高清视频还是进行图形设计和游戏运行,用户都能感受到流畅快捷的操作体验。
此外,深度技术GHOSTWIN7SP1X64旗舰装机版还优化了系统资源管理,有效减少了系统占用资源,减轻了电脑负担,提升了整体性能表现。
深度技术GHOSTWIN7SP1X64旗舰装机版还拥有丰富的软件和驱动支持。
它预装了众多常用的软件和驱动程序,例如办公软件套件Office、常用浏览器Chrome、多媒体播放器VLC等,以及常见硬件的驱动程序。
用户可以直接使用这些软件,无需再单独下载安装,极大地方便了日常使用。
最后值得一提的是,深度技术GHOSTWIN7SP1X64旗舰装机版对系统安全与隐私保护也做了精心的设计。
它内置了安全防护工具和杀毒软件,能够及时监测和清除潜在威胁。
基于XScale PXA255处理器WinCE 420系统BSP开发

Ab ta t T i p p rp o u e l r ht tr S ae P A2 5 mirp o es ro ne C ro ain a d mii ls s m a e n sr c h s a e rd c st e ac i u e o X l X 5 c rc so I tl o p r t n nma y t b s d o i c e f C o f o e t sp o e s ri re .I d s u s ste B P d v lp n f iC 2 p r t g sse i e i. i h rc so b f t ic se h S e eo me t n E 4 0 o ai y tm n d t l n i oW e n a
u H ii・ 2l ui Xog n n ai )’  ̄ oH i g’ i f  ̄) l l a l n n We e
( h l f ot et o t h i l n e i”,Y’n 70 7 ) c S o r ws m Ple ne i rt oN h e y c a U v sy d a 10 1 ( h l f ayE g ergU i rt Wu a 403 ) c S o v ni e n n e i2, hn 303 oN n i v sy ( col l t —M hn a E g er , ̄d nU i rt X ’ 707 ) Sho o Ee r f co c e ai l ni e n c n i g i n esy , ia a v i3 n 10 1
系 统 B P开 发 S
李 海林 - 赵 惠玲 ¨ 熊文峰 )’ ’
( 北 工 业 大 学 电 子 信 息 学 院 西 安 西 707 ) 海 军 工 程 大 学 电 子 工程 学 院 武 汉 10 1 ( 707 ) 10 1 40 3 ) 30 3
戴尔 EMC OpenManage 集成 for Microsoft System Center V
用于系统中心配置管理器和系统中心虚拟机管理器的 Dell EMC OpenManage Integration for Microsoft System Center V7.1安装指南注、小心和警告注: “注”表示帮助您更好地使用该产品的重要信息。
小心: “小心”表示可能会损坏硬件或导致数据丢失,并说明如何避免此类问题。
警告: “警告”表示可能会造成财产损失、人身伤害甚至死亡。
© 2009 - 2019 Dell Inc. 或其子公司。
保留所有权利。
Dell、EMC 和其他商标是 Dell Inc. 或其附属机构的商标。
其他商标可能是其各自所有者的商标。
2019 - 01Rev. A001 OMIMSSC 简介 (5)2 OMIMSSC 组件 (6)3 安装或管理 OMIMSSC 的工作流程 (7)规划在 SCCM 上安装 OMIMSSC (7)规划在 SCVMM 上安装 OMIMSSC (7)Planning for upgrading OMIMSSC (8)从一个 OMIMSSC 设备迁移到另一个 OMIMSSC 设备 (8)4 OMIMSSC 的系统要求 (9)帐户权限 (9)OMIMSSC 的一般系统要求 (9)SCCM 的 OMIMSSC 控制台扩展的系统要求 (10)SCVMM 的 OMIMSSC 控制台扩展的系统要求 (10)网络要求 (10)5 安装和配置 OMIMSSC (12)从 Web 下载 OMIMSSC (12)Setting up OMIMSSC Appliance (12)登记多个 Microsoft 控制台 (13)启动 OMIMSSC 管理员门户以下载 OMIMSSC 组件 (13)安装 SCCM 的 OMIMSSC 控制台扩展 (14)安装 SCVMM 的 OMIMSSC 控制台扩展 (14)在 OMIMSSC 中登记 Microsoft 控制台 (14)从已登记的 Microsoft 控制台启动 OMIMSSC (15)在浏览器中添加 OMIMSSC IP 地址 (15)启动 SCCM 的 OMIMSSC 控制台扩展 (15)启动 SCVMM 的 OMIMSSC 控制台扩展 (16)6 OMIMSSC 许可 (17)上传许可证之后的选项 (17)新购买过程中的许可证文件 (17)堆叠许可证 (17)更换许可证 (18)重新导入许可证 (18)导入多个许可证 (18)强制执行措施 (18)升级许可证 (18)评估许可证 (18)在服务器查找后在 OMIMSSC 中占用许可证 (18)目录3将许可证导入到 OMIMSSC (18)查看许可证详情 (19)7 管理 OMIMSSC 及其组件 (20)查看 OMIMSSC 设备详细信息 (20)查看 OMIMSSC 用户管理 (20)查看或刷新已登记的控制台 (20)更改 OMIMSSC 设备密码 (20)修复或修改安装程序 (20)修复适用于 SCCM 的 OMIMSSC 控制台扩展 (21)修复适用于 SCVMM 的 OMIMSSC 控制台扩展 (21)在 OMIMSSC 管理员门户中修改 SCCM 和 SCVMM 帐户 (21)备份 OMIMSSC 设备 (21)执行 OMIMSSC 设备备份 (22)还原 OMIMSSC 设备 (22)还原 OMIMSSC 设备 (22)升级 OMIMSSC (23)关于服务包更新 (23)升级 SCCM 的 OMIMSSC 控制台扩展 (25)升级 SCVMM 的 OMIMSSC 控制台扩展 (25)重新引导 OMIMSSC 设备 (26)注销 OMIMSSC 设备 (26)卸载 OMIMSSC (26)从 OMIMSSC 中取消登记 Microsoft 控制台 (26)卸载适用于 SCCM 的 OMIMSSC 控制台扩展 (27)卸载 SCVMM 的 OMIMSSC 控制台扩展 (27)其他卸载步骤 (27)移除设备 VM (28)8 访问 Dell EMC 支持站点上的文档 (29)联系戴尔 (29)4目录OMIMSSC 简介OpenManage Integration for Microsoft System Center (OMIMSSC) 提供集成到产品的 System Center 套件的功能。
Freescale - MCIMX25LPDKJ 产品概述说明书

Freescale - MCIMX25LPDKJ - i.MX25 Development Kit Product Overview:Freescale's new feature packed i.MX25development kit builds on the successand extensive software code base of thei.MX31, i.MX27 and i.MX35 PDK's andgets this comprehensive kit into thehands of developers for under $1000.Based on a powerful and well-provenARM926EJ-S™ core, the i.MX25 PDKdelivers exceptional performancewithout sacrificing on battery life, and forwall-powered devices, will help you to design products that meet today's demands for energy efficiency.A wide range of connectivity options makes the i.MX25 PDK suitable for developing many different types of user applications. The provided Board Support Package's (BSP's) for Linux and WinCE 6.0 enables rapid prototyping to help speed up your processor selection process and quickly get something demonstrable into the hands of your project stake-holders.Kit Contents:∙Encased CPE form factor board with power supply∙Freescale Linux® 2.6 (LTIB)Key Features:Module∙ Processor∙i.MX25 with ARM926EJ-S core∙Freescale MC34704B power management IC.∙Freescale SGTL5000 ultra low-power audio codec∙ Memory64MB or 512MB DDR22GB NAND flashModule∙ Personality∙ Programmable user I/O ∙ 5.7" TFT VGA with touchscreen ∙ CMOS image sensor∙ U/I connector to support other LCD panels (with or without touchscreen) ∙Audio input connectors∙ Headphone jack ∙ CAN connector ∙ Two USB 2.0 ports ∙ 10/100 Ethernet port∙SD card for Wi-Fi or external data storage∙ Debug ModuleDebug Ethernet portDebug serial port JTAGReset, interrupt, boot switches Debug LEDs ∙ Power source∙ Current/power monitoringOrdering Information: Products:Part NumberManufacturerFarnell P/NNewark P/NMCIMX25LPDKJ Freescale 1791100 54R1720Associated Products:Part Number Manufacturer DescriptionFarnell P/N Newark P/N MCIMX255AJM4Freescale32-Bit Embedded Processor IC178364227R1072MCIMX257CJM4 Freescale i.MX Microprocessors 1783643 27R1073 MCIMX258CJM4 Freescale i.MX Microprocessors1783644 27R1074Similar Products:Part NumberManufacturerDescriptionSupport DeviceFarnell P/NNewark P/NMCIMX25WPDKJ Freescalei.MX25 development kiti.MX25 1791101 54R1721Document List:Datasheet:Part Number Description Sizei.MX255 i.MX25 Applications Processor 2.8MBApplication Notes:File Name SizeAN3820 i.MX25 Power Management Using the MC34704 3.42MB3.36MBAN3875 Building a Linux Image and Downloading onto i.MX Processors Using a VirtualMachineAN3979 Adding UART Bluetooth Solution to i.MX Windows CE 5.0/6.0 365KBAN3977 Different Display Configurations on the i.MX25 WinCE PDK 1.12MBIMX25_PDK_WINCE Hello World demo and new demo instructions 345KBIMX25_PDK_LINUX Hello World demo and new demo instructions 64KBAN4016 Interfacing and Configuring the i.MX25 Flash Devices 1.45MBAN3985 Customizing the Freescale® Advanced Toolkit for i.MX Based Platforms 971KBi.MX25 PDK 1.0 Quick Start Guide for Windows Embedded CE 6.0 2.03MBIMX25_PDK_WINCE Driver and software reference manual 1.3MBIMX25_PDK_LINUX Driver and software reference manual 920KBHardware & Software:File Name Sizei.MX25 PDK 1.0 Hardware User's Guide 2.49MB IMX25_PDK10_WINCE60_DOCSBUNDLE 2.17MBOthers Resources:File Name SizeIntroducing the i.MX25 Family and PDK 4:22Min。
Windows开始运行CMD命令大全

windows命令行提示符运行指令。
部分命令在新新系统中已停止使用。
开始→运行→CMD→键入以下命令即可:gpedit.msc组策略sndrec32录音机Nslookup IP地址侦测器explorer打开资源管理器logoff注销命令tsshutdn60秒倒计时关机命令lusrmgr.msc本机用户和组services.msc本地服务设置notepad打开记事本cleanmgr垃圾整理net start messenger开始信使服务compmgmt.msc计算机管理net stop messenger停止信使服务netmeeting dvdplay DVD播放器charmap启动字符映射表diskmgmt.msc磁盘管理实用程序calc计算器dfrg.msc磁盘碎片整理程序chkdsk.exe Chkdsk磁盘检查devmgmt.msc 设备管理器regsvr32 /u *.dll停止dll文件运行drwtsn32系统医生rononce p 15秒关机dxdiag检查DirectX信息regedt32注册表编辑器Msconfig.exe系统配置实用程序rsop.msc组策略结果集mem.exe显示内存使用情况regedit.exe注册表winchat XP自带局域网聊天progman#NAME?winmsd系统信息perfmon.msc计算机性能监测程序winver检查Windows版本sfc /scannow扫描错误并复原winipcfg IP配置taskmgr任务管理器fsmgmt.msc 共享文件夹netstat an查看端口osk屏幕键盘eventvwr.msc 事件查看器secpol.msc 本地安全设置services.msc 服务accwiz.exe辅助工具向导acsetups.exe acs setup dcom server executableactmovie.exe直接显示安装工具append.exe允许程序打开制定目录中的数据arp.exe显示和更改计算机的ip与硬件物理地址的对应列表at.exe计划运行任务atmadm.exe调用管理器统计attrib.exe显示和更改文件和文件夹属性autochk.exe检测修复文件系统autoconv.exe在启动过程中自动转化系统autofmt.exe在启动过程中格式化进程autolfn.exe使用长文件名格式bootok.exe boot acceptance application for registry bootvrfy.exe通报启动成功cacls.exe显示和编辑aclcalc.exe计算器cdplayer.exe cd播放器change.exe与终端服务器相关的查询charmap.exe字符映射表chglogon.exe启动或停用会话记录chgport.exe改变端口(终端服务)chgusr.exe改变用户(终端服务)chkdsk.exe磁盘检测程序chkntfs.exe磁盘检测程序cidaemon.exe组成ci文档服务cipher.exe在ntfs上显示或改变加密的文件或目录cisvc.exe索引内容ckcnv.exe变换cookiecleanmgr.exe磁盘清理cliconfg.exe sql客户网络工具clipbrd.exe剪贴簿查看器clipsrv.exe运行clipboard服务clspack.exe建立系统文件列表清单cluster.exe显示域的集群_cmd_.exe没什么好说的!cmdl32.exe自动下载连接管理cmmgr32.exe连接管理器cmmon32.exe连接管理器监视cmstp.exe连接管理器配置文件安装程序comclust.exe集群comp.exe比较两个文件和文件集的内容*compact.exe显示或改变ntfs分区上文件的压缩状态conime.exe ime控制台control.exe控制面板convert.exe转换文件系统到ntfsconvlog.exe转换iis日志文件格式到ncsa格式cprofile.exe转换显示模式cscript.exe较本宿主版本csrss.exe客户服务器runtime进程csvde.exe日至格式转换程序dbgtrace.exe和terminal server相关dcomcnfg.exe dcom配置属性dcpromo.exe ad安装向导ddeshare.exe dde共享debug.exe就是debug啦!dfrgfat.exe fat分区磁盘碎片整理程序dfrgntfs.exe ntfs分区磁盘碎片整理程序dfs_cmd_.exe配置一个dfs树dfsinit.exe分布式文件系统初始化dfssvc.exe分布式文件系统服务器diantz.exe制作cab文件diskperf.exe磁盘性能计数器dllhost.exe所有com+应用软件的主进程dmadmin.exe磁盘管理服务dmremote.exe磁盘管理服务的一部分dns.exe dns applications dnsdoskey.exe命令行创建宏dosx.exe dos扩展dplaysvr.exe直接运行帮助drwatson.exe华生医生错误检测drwtsn32.exe华生医生显示和配置管理dtcsetup.exe installs mdtcdvdplay.exe dvd播放dxdiag.exe direct x诊断工具edlin.exe命令行的文本编辑器(历史悠久啊!)esentutl.exe ms数据库工具eudcedit.exe type造字程序eventvwr.exe事件查看器evnt_cmd_.exe event to trap translator; configuration tool evntwin.exe event to trap translator setupexe2bin.exe转换exe文件到二进制expand.exe解压缩extrac32.exe解cab工具fastopen.exe快速访问在内存中的硬盘文件faxcover.exe传真封面编辑faxqueue.exe显示传真队列faxsend.exe发送传真向导faxsvc.exe启动传真服务fc.exe比较两个文件的不同find.exe查找文件中的文本行findstr.exe查找文件中的行finger.exe一个用户并显示出统计结果fixmapi.exe修复mapi文件flattemp.exe允许或者禁用临时文件目录fontview.exe显示字体文件中的字体forcedos.exe forces a file to start in dos mode. 强制文件在dos模式下运行freecell.exe popular windows game 空当接龙ftp.exe file transfer protocol used to transfer files over a network co gdi.exe graphic device interface 图形界面驱动grpconv.exe program manager group convertor 转换程序管理员组help.exe displays help for windows 2000 commands 显示帮助hostname.exe display hostname for machine. 显示机器的hostnameie4uinit.exe ie5 user install tool ie5用户安装工具ieshwiz.exe customize folder wizard 自定义文件夹向导iexpress.exe create and setup packages for install 穿件安装包iisreset.exe restart iis admin service 重启iis服务internat.exe keyboard language indicator applet 键盘语言指示器ipconfig.exe windows 2000 ip configuration. 察看ip配置ipsecmon.exe ip security monitor ip安全监视器ipxroute.exe ipx routing and source routing control program ipx路由和源路由控irftp.exe setup ftp for wireless communication 无线连接ismserv.exe intersite messaging service 安装或者删除service control manager jdbgmgr.exe microsoft debugger for java 4 java4的调试器jetconv.exe convert a jet engine database 转换jet engine数据库jetpack.exe compact jet database. 压缩jet数据库jview.exe command line loader for java java的命令行装载krnl386.exe core component for windows 2000 2000的核心组件label.exe change label for drives 改变驱动器的卷标lcwiz.exe license compliance wizard for local or remote systems. 许可证符ldifde.exe ldif cmd line manager ldif目录交换命令行管理licmgr.exe terminal server license manager 终端服务许可协议管理lights.exe display connection status lights 显示连接状况llsmgr.exe windows 2000 license manager 2000许可协议管理llssrv.exe start the license server 启动许可协议服务器locator.exe rpc locator 远程定位lodctr.exe load perfmon counters 调用性能计数logoff.exe log current user off. 注销用户lpq.exe displays status of a remote lpd queue 显示远端的lpd打印队列的状lpr.exe send a print job to a network printer. 重定向打印任务到网络中的lsass.exe lsa executable and server dll 运行lsa和server的dlllserver.exe specifies the new dns domain for the default server 指定默认ser osk.exe屏幕键盘packager.exe windows 2000 packager manager 对象包装程序pathping.exe combination of ping and tracert 包含ping和tracert的程序pax.exe is a posix program and path names used as arguments must be spe pentnt.exe used to check the pentium for the floating point division error perfmon.exe starts windows performance monitor 性能监视器ping.exe packet internet groper 验证与远程计算机的连接posix.exe used for backward compatibility with unix 用于兼容unixprint.exe cmd line used to print files 打印文本文件或显示打印队列的内容。
i.MX25 Linux 开发系统介绍
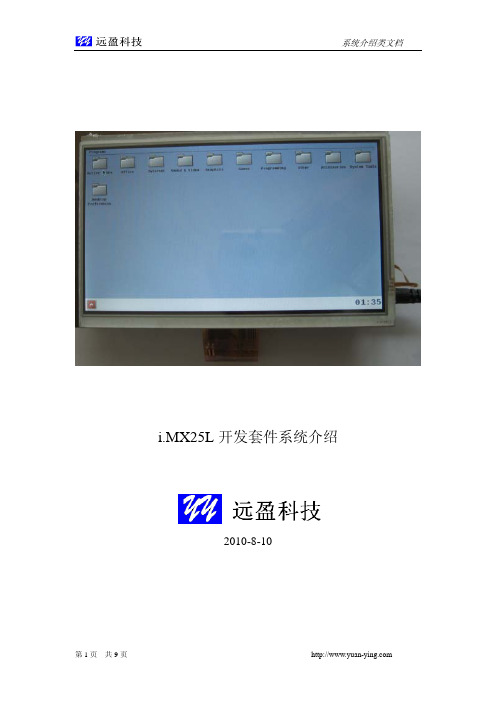
i.MX25L开发套件系统介绍2010-8-10A.更多信息请浏览以下网址:--- i.MX25L: 基于MX25的Linux系统开发工具:/product_catalog/i.mx25l.html--- i.MX25W:基于MX25的Wince6.0系统开发工具:/product_catalog/i.mx25w.html从2009年10月开始,远盈公司致力于FREESCALE的i.MX系列研发,至今相继已,成功推出基于i.MX28、i.MX35、i.MX51等开发工具,远盈科技紧随市场需要于2010年8月推出基于FREESCALE的i.MX25芯片的平台的 Linux开发工具:i.MX25L。
i.MX25以ARM926EJS为核心构架;主频400MHz, 片内集成CSI接口。
拥有16K的指令缓存和16K数据缓存, 128KB SRAM和2KB 加密ROM,并且集成了LCD和SLCD 控制器,CMOS sensor输入接口, 3通道12位ADC,3个I2C接口,5个串口,一个以太网接口,2个CAN接口,2个SD/MMC接口。
4个定时器,4个PWM输出,USB HOST,USB DEVICE等丰富的接口,另外内存采用较新的DDR2接口,是目前ARM9当中架构最高端的配置。
i.MX25L系统是基于Linux-2.6.31内核的Linux开发平台,采用ext2文件系统的开发工具, i.mx258+128MB DDR2硬件结构,程序存储可选SD卡或NAND flash,i.MX25L搭载了7” LCD屏和电阻触摸屏,拥有i.mx25的全部输出接口,仍采用远盈科技一惯的核心板加底板的结构,核心板物料全部采用工业级物料,可工作在-40C to +85C环境下,存储温度-55C to +125C i.MX25L可广泛应用于消费电子、户外多媒体、工业控制及操控面板、医疗设备控制等领域。
是电力电表终端、工业设备操控面板、汽车控制单元、医疗设备主控与显示等产品的上上之选。
Dell EMC OpenManage 安装指南 — Microsoft Windows 版本 9.
Dell EMC OpenManage 安装指南— Microsoft Windows版本 9.3注、小心和警告注: “注”表示帮助您更好地使用该产品的重要信息。
小心: “小心”表示可能会损坏硬件或导致数据丢失,并说明如何避免此类问题。
警告: “警告”表示可能会造成财产损失、人身伤害甚至死亡。
© 2014 - 2019 Dell Inc. 或其子公司。
保留所有权利。
Dell、EMC 和其他商标是 Dell Inc. 或其附属机构的商标。
其他商标可能是其各自所有者的商标。
2019 - 04Rev. A001 简介 (6)此版本有哪些新功能? (6)软件可用性 (6)系统管理软件 (7)管理系统上的 Server Administrator 组件 (7)安全功能 (9)您可能需要的其他说明文件 (9)2 预安装设置 (10)前提条件检查程序 (10)安装要求 (11)支持的操作系统和 Web 浏览器 (12)多语言用户界面支持 (12)查看基于 Web 界面的本地化版本 (12)系统要求 (12)数字证书 (13)启用 Windows 安装程序日志记录服务 (13)Microsoft Active Directory (14)配置 SNMP 代理程序 (14)安全端口服务器和安全性设置 (14)设置用户和服务器首选项 (15)X.509 证书管理 (15)Remote Enablement 要求 (15)安装 WinRM (15)认证机构签署的证书和自签证书 (15)3 在 Microsoft Windows 操作系统上安装管理系统软件 (18)Server Administrator 的部署情况 (18)安装程序位置 (19)安装 Server Administrator (19)安装失败时的系统恢复 (26)失败的更新 (26)升级管理系统软件 (26)升级原则 (26)升级 (26)修改 (27)修复 (28)卸载管理系统软件 (28)使用提供的介质卸载管理系统软件 (28)使用操作系统卸载管理系统软件功能 (29)使用产品 GUID 进行无人值守卸载 (29)目录3管理系统软件的无人值守卸载 (29)4 在 Microsoft Windows Server 和 Microsoft Hyper-V Server 上安装管理系统软件 (31)以 CLI 模式运行前提条件检查程序 (31)以 CLI 模式安装管理系统软件 (31)卸载系统管理软件 (32)5 使用 Microsoft Active Directory (33)Active Directory 架构扩展 (33)Active Directory 架构扩展概览 (33)Active Directory 对象概述 (33)多个域中的 Active Directory 对象 (35)在多个域中设置 Server Administrator Active Directory 对象 (36)配置 Active Directory 访问系统 (37)配置 Active Directory 产品名称 (38)扩展 Active Directory 架构 (38)使用 Dell Schema Extender (38)Active Directory 用户和计算机管理单元 (41)安装对 Active Directory 用户和计算机管理单元的扩展 (41)将用户和权限添加到 Active Directory (42)6 常见问题 (45)系统管理应用程序使用哪些端口? (45)当我通过低带宽和存在延迟的广域网 (WAN) 在 iDRAC 控制器上运行虚拟介质时,在虚拟介质上直接启动系统管理安装失败,我应该怎么做? (45)在安装 Server Administrator Storage Management 服务之前,我是否需要先卸载已安装在系统上的Adaptec Fast Console 应用程序? (45)Microsoft Windows (45)如果从 x86 到 x64 的升级安装过程中出现故障,如何安装 64 位? (45)如何在 x86 到 x64 升级安装过程中出现中断,如何完成安装? (45)如何修补 Server Administrator 的安装故障? (46)创建 WinRM 侦听器失败并显示以下错误消息时,我该怎么办? (46)需要为 WinRM 设置哪些与防火墙相关的配置? (46)当启动 Systems Management 安装时,可能会显示某种错误消息,例如载入特定程序库失败、拒绝访问或初始化错误。
IBM安装操作系统
IBMXSystemServerGuide8.41服务器系统安装引导盘IBMXSystemServerGuide8.41支持操作系统:32位:MicrosoftWindows2003/2003R2(Enterprise,Standard,WebandDataCenterUV) MicrosoftSmallBusinessServer2003/2003R2(Standard/PremiumEdition)MicrosoftWindows2008(Enterprise,Standard,WebandDataCenter)64位:MicrosoftWindows2003/2003R2(Enterprise,Standard,andDataCenterUV) MicrosoftWindows2008(Enterprise,Standard,DataCenter,EssentialBusinessServer,SmallBusinessServerandHPCEdition) MicrosoftWindowsServer2008R2(Enterprise,Standard,Web,DataCenter,andHPCEdition)支持服务器系列:IBMBladeCenterLS20(8850)IBMBladeCenterLS21(7971)IBMBladeCenterLS22(7901)IBMBladeCenterLS41(7972)IBMBladeCenterLS42(7902)IBMBladeCenterHS12(8014,8028,1916)IBMBladeCenterHS20(8843,1883)IBMBladeCenterHS21(8853,1885)IBMBladeCenterHS21XM(7995,1915)IBMBladeCenterHS22(7870,1936,7809)IBMBladeCenterHS22V(7871,1949)IBMBladeCenterHX5(7872,1909)IBMBladeCenterS(8886)IBMeServerxSeries260(8865)IBMeServerxSeries366(8863)IBMeServerxSeries460(8872)IBMSystemx3100(4348)IBMSystemx3105(4347)IBMSystemx3200(4362,4363)IBMSystemx3200M2(4367,4368)IBMSystemx3200M3(7327,7328)IBMSystemx3250(4364,4365,4366)IBMSystemx3250M2(4190,4191,4194)IBMSystemx3250M3(4251,4252,4261)IBMSystemx3350(4192,4193)IBMSystemx3400(7973,7974,7975,7976)IBMSystemx3400M2(7846,7837)IBMSystemx3400M3(7378,7379)IBMSystemx3455(7984,7986,7940,7941)IBMSystemx3500(7977)IBMSystemx3500M2(7839)IBMSystemx3500M3(7380)IBMSystemx3550(7978,1913)IBMSystemx3550M2(7946,4198)IBMSystemx3550M3(7944,4254)IBMSystemx3610(7942)(RAIDsupportrequiresBIOSlevel1.01Aorabove)IBMSystemx3620M3(7376)IBMSystemx3630M3(7377)IBMSystemx3650(7979,1914)IBMSystemx3650M2(7947,4199)IBMSystemx3650M3(7945,4255)IBMSystemx3650T(7980)IBMSystemx3655(7985,7943)IBMSystemx3690X5(7148,7149)IBMSystemx3755(8877,7163)IBMSystemx3800(8865,8866)IBMSystemx3850(8864,7365,7362)IBMSystemx3850M2(7141,7144,7233,7234)IBMSystemx3850X5(7145)IBMSystemx3950(7366,8878,7363,8872)IBMSystemx3950M2(7141,7233,7234)IBMSystemx3950X5(7146)IBMSystemiDataplexdx360M2(7321,7323,6830)IBMSystemxiDataPlexdx360M3(6391)下载地址:32位:64位:设置和配置概述:使用ServerGuide设置和安装CD时,您不需要安装软盘。
IBM Security AppScan Source V 9.0.3.7 安装和管理指南说明书
迁移到 AppScan Source 的当前版本 . . . . . . 11 从 V9.0.2 迁移 . . . . . . . . . . . . 11 从 V9.0 迁移 . . . . . . . . . . . . . 12 从 V8.7 迁移 . . . . . . . . . . . . . 13
Intel Parallel Studio XE 2011 SP1 for Windows 安装指
Intel® Parallel Studio XE 2011 SP1for Windows*Installation Guide and Release Notes Document number: 323803-002US5 October 2011Table of Contents1 Introduction (1)1.1 What’s New (2)1.2 Product Contents (2)1.3 System Requirements (2)1.3.1 Support Deprecated for Microsoft Visual Studio 2005* (4)1.3.2 Support Deprecated for Microsoft Windows Vista* and Microsoft Windows Server2003* 41.4 Documentation (4)1.5 Technical Support (4)2 Installation (5)2.1 Pre-Installation Steps (5)2.1.1 Configure Visual Studio for 64-bit Applications (5)2.1.2 Installation on Microsoft Windows Vista* and Windows 7* (5)2.2 Installation (5)2.2.1 Activation of Purchase after Evaluation Using the Intel Activation Tool (6)2.2.2 Using a License Server (6)3 Disclaimers, Notices and Legal Information (6)1 IntroductionThis document describes system requirements and how to install Intel® Parallel Studio XE 2011 Service Pack 1 (SP1). Additional release notes for each component, with details of changes and additional technical information, can be found after installation, in the respective components’ Documentation folder.First-time users should view the Intel® Parallel Studio XE 2011 SP1 Getting Started Tutorials. These are available after installation at Start > All Programs > Intel Parallel Studio XE 2011 SP1 > Getting Started Tutorials1.1 What’s NewThis section highlights important changes in product updates.SP1 Update 1∙Update to current versions of included componentsService Pack 1∙Support for Microsoft Windows Vista* and Microsoft Windows Server 2003* deprecated ∙Support for Microsoft Visual Studio 2005* deprecated∙Update to current versions of included componentsFor information on what is new in each component, please read the individual component release notes.1.2 Product ContentsIntel® Parallel Studio XE 2011 SP1 includes the following components:∙Intel® C++ Composer XE 2011 Update 7 (includes Intel® IPP, Intel® TBB and Intel® MKL)∙Intel® Fortran Composer XE 2011 Update 7 (includes Intel® MKL)∙Intel® Inspector XE 2011 Update 7∙Intel® VTune™ Amplifier XE 2011 Update 5∙Sample programs∙On-disk documentationYour license for Intel® Parallel Studio XE 2011 also provides access to Intel® Parallel Advisor 2011. This is available as a separate download from the Intel® Software Development Products Registration Center.1.3 System RequirementsFor an explanation of architecture names, see http://intel.ly/mXIljK∙ A PC based on an IA-32 or Intel® 64 architecture processor supporting the Intel® Streaming SIMD Extensions 2 (Intel® SSE2) instructions (Intel® Pentium 4 processor or later, or compatible non-Intel processor)o Incompatible or proprietary instructions in non-Intel processors may cause the analysis capabilities of this product to function incorrectly. Any attempt to analyzecode not supported by Intel® processors may lead to failures in this product.o For the best experience, a multi-core or multi-processor system is recommended ∙2GB RAM∙4GB free disk space for all product features and architectures∙Microsoft Windows XP*, Microsoft Windows Vista*, Microsoft Windows 7*, Microsoft Windows Server 2003* or Microsoft Windows Server 2008*, 32-bit or “x64” editions -embedded editions not supported∙When installed on Microsoft Windows Server 2008, one of:o Microsoft Visual Studio 2010* with C++ and “x64 Compiler and Tools”components installed [1]o Microsoft Visual Studio 2008* Standard Edition (or higher edition) SP1 with C++ and “x64 Compiler and Tools” components insta lled [1]o For Fortran, Intel® Inspector XE and Intel® VTune™ Amplifier XE use only, Microsoft Visual Studio 2010* or 2008 Shell and Libraries∙When installed on Microsoft Windows XP, Windows Vista or Windows Server 2003, one of:o Microsoft Visual Studio 2010* with C++ and “x64 Compiler and Tools”components installed [1]o Microsoft Visual Studio 2008* Standard Edition (or higher edition) with C++ and “x64 Compiler and Tools” components installed [1]o Microsoft Visual Studio 2005* Standard Edition (or higher edition) with C++ and “x64 Compiler and Tools” components installed [1]o For Fortran, Intel® Inspector XE and Intel® VTune™ Amplifier XE use only, Microsoft Visual Studio 2008* Shell and Libraries∙Application coding requirements:o Programming Language: C, C++ or Fortran (native, not managed code) [4]o Intel® Parallel Advisor does not support Fortrano Threading methodologies supported by the analysis tools:▪Intel® Cilk™ Plus▪Intel’s C/C++ Parallel Language Extensions▪Intel® Threading Building Blocks▪Win32* Threads▪OpenMP* [4]∙To read the on-disk documentation, Adobe Reader* 7.0 or laterNotes:1. Microsoft Visual Studio 2005/2008 Standard Edition installs the “x64 Compiler andTools” component by default – the Profe ssional and higher editions require a “Custom”install to select this. Microsoft Visual Studio 2010 includes this component by default.2. The default for the Intel® compilers is to build IA-32 architecture applications that requirea processor supporting the Intel® SSE2 instructions - for example, the Intel® Pentium®4 processor. A compiler option is available to generate code that will run on any IA-32architecture processor. However, if your application uses Intel® Integrated Performance Primitives or Intel® Threading Building Blocks, executing the application will require aprocessor supporting the Intel® SSE2 instructions.3. Applications built with Intel® Compilers can be run on the same Windows versions asspecified above for development. Applications may also run on non-embedded 32-bitversions of Microsoft Windows earlier than Windows XP, though Intel does not test these for compatibility. Your application may depend on a Win32 API routine not present inolder versions of Windows. You are responsible for testing application compatibility. You may need to copy certain run-time DLLs onto the target system to run your application.4. Intel® Inspector XE and Intel® VTune™ Amplifier XE support analysis of applicationsbuilt with Intel® Parallel Composer, Intel® C++ or Fortran Compiler version 10.0 orhigher, and/or Microsoft Visual C++ 2005, 2008 or 2010. Applications that use OpenMP and are built with the Microsoft compiler must link to the OpenMP “compatibility l ibrary”as supplied by an Intel compiler.1.3.1 Support Deprecated for Microsoft Visual Studio 2005*In a future major release of the product, Intel® Parallel Studio XE will remove support for Microsoft Visual Studio 2005*. Intel recommends migrating to Visual Studio 2010 at your earliest convenience.1.3.2 Support Deprecated for Microsoft Windows Vista* and Microsoft Windows Server2003*In a future major release of the product, Intel® Parallel Studio XE will remove support for installation and use on Microsoft Windows Vista* or Microsoft Windows Server 2003*.1.4 DocumentationProduct documentation can be accessed through the Help menu in Microsoft Visual Studio. It can also be found, along with “Getting Started” tutorials, in the Windows “Start” menu under Intel Parallel Studio XE 2011 SP1. Please note that if you view the documentation in Microsoft Internet Explorer*, the browser may display a security warning when you click on links to open a documentation set. If you see this warning, you should click the option to proceed.1.5 Technical SupportIf you did not register your compiler during installation, please do so at the Intel® Software Development Products Registration Center. Registration entitles you to free technical support, product updates and upgrades for the duration of the support term.For information about how to find Technical Support, Product Updates, User Forums, FAQs, tips and tricks, and other support information, please visit/software/products/supportNote: If your distributor provides technical support for this product, please contact them for support rather than Intel.2 Installation2.1 Pre-Installation Steps2.1.1 Configure Visual Studio for 64-bit ApplicationsIf you will be developing 64-bit applications you may need to change the configuration of Visual Studio to add 64-bit support.If you are using Visual Studio 2005/2008 Standard Edition, or Visual Studio 2010, no configuration is needed to build 64-bit applications. For other editions:1. From Control Panel > Add or Remove Programs, select “Microsoft Visual Studio 2005(or 2008) > Change/Remove. The Visual Studio Maintenance Mode window will appear.Click Next.2. Click Add or Remove Features3. Under “Select features to install”, expand Language Tools > Visual C++4. If the box “X64 Compiler and Tools” is not checked, check it, then click Update. If thebox is already checked, click Cancel.2.1.2 Installation on Microsoft Windows Vista* and Windows 7*On Microsoft Windows Vista or Windows 7, Microsoft Visual Studio 2005 users should install Visual Studio 2005 Service Pack 1 (VS 2005 SP1) as well as the Visual Studio 2005 Service Pack 1 Update for Windows Vista, which is linked to from the VS 2005 SP1 page. After installing these updates, you must ensure that Visual Studio runs with Administrator permissions, otherwise you will be unable to use the Intel compiler. For more information, please see Microsoft's Visual Studio on Windows Vista page (/en-us/vstudio/aa948853.aspx) and related documents.2.2 InstallationThe installation of the product requires a valid license file or serial number. If you are evaluating the product, you can also choose the “Evaluate this product (no serial number required)” option during installation.If you received your product on DVD, insert the first product DVD in your computer’s DVD drive; the installation should start automatically. If it does not, open the top-level folder of the DVD drive in Windows Explorer and double-click on setup.exe.If you received your product as a downloadable file, double-click on the executable file (.EXE) to begin installation. Note that there are several different downloadable files available, each providing different combinations of components. Please read the download web page carefully to determine which file is appropriate for you.You do not need to uninstall previous versions or updates before installing a newer version –the new version will coexist with the older versions. If you want to remove older versions, you may do so before or after installing the newer one.2.2.1 Activation of Purchase after Evaluation Using the Intel Activation ToolNote for evaluation customers: a new tool Intel Activation Tool “ActivationTool.exe” is in cluded in this product release and installed at<Common Files>\Intel\Parallel Studio XE 2011\Activation\If you installed the product using an Evaluation license or SN, or using the “Evaluate this product (no serial number required)” option during installation, and then purchased the product, you can activate your purchase using the Intel Activation Tool at Start > All Programs > Intel Parallel Studio XE 2011 SP1 > Product Activation. It will convert your evaluation software to a fully licensed product.2.2.2 Using a License ServerIf you have purchased a “floating” license, see http://intel.ly/oPEdEe for information on how to install using a license file or license server. This article also provides a source for the Intel® License Manager for FLEXlm* product that can be installed on any of a wide variety of systems.3 Disclaimers, Notices and Legal InformationINFORMATION IN THIS DOCUMENT IS PROVIDED IN CONNECTION WITH INTEL(R) PRODUCTS. NO LICENSE, EXPRESS OR IMPLIED, BY ESTOPPEL OR OTHERWISE, TO ANY INTELLECTUAL PROPERTY RIGHTS IS GRANTED BY THIS DOCUMENT. EXCEPT AS PROVIDED IN INTEL'S TERMS AND CONDITIONS OF SALE FOR SUCH PRODUCTS, INTEL ASSUMES NO LIABILITY WHATSOEVER, AND INTEL DISCLAIMS ANY EXPRESS OR IMPLIED WARRANTY, RELATING TO SALE AND/OR USE OF INTEL PRODUCTS INCLUDING LIABILITY OR WARRANTIES RELATING TO FITNESS FOR A PARTICULAR PURPOSE, MERCHANTABILITY, OR INFRINGEMENT OF ANY PATENT, COPYRIGHT OR OTHER INTELLECTUAL PROPERTY RIGHT. UNLESS OTHERWISE AGREED IN WRITING BY INTEL, THE INTEL PRODUCTS ARE NOT DESIGNED NOR INTENDED FOR ANY APPLICATION IN WHICH THE FAILURE OF THE INTEL PRODUCT COULD CREATE A SITUATION WHERE PERSONAL INJURY OR DEATH MAY OCCUR.Intel may make changes to specifications and product descriptions at any time, without notice. Designers must not rely on the absence or characteristics of any features or instructions marked "reserved" or "undefined." Intel reserves these for future definition and shall have no responsibility whatsoever for conflicts or incompatibilities arising from future changes to them. The information here is subject to change without notice. Do not finalize a design with this information.The products described in this document may contain design defects or errors known as errata which may cause the product to deviate from published specifications. Current characterized errata are available on request.Contact your local Intel sales office or your distributor to obtain the latest specifications and before placing your product order.Copies of documents which have an order number and are referenced in this document, or other Intel literature, may be obtained by calling 1-800-548-4725, or go to:/design/literature.htmIntel processor numbers are not a measure of performance. Processor numbers differentiate features within each processor family, not across different processor families. Go to:/products/processor%5Fnumber/ for details.Celeron, Centrino, Cilk, Intel, Intel logo, Intel386, Intel486, Intel Atom, Intel Core, Itanium, MMX, Pentium, VTune, and Xeon are trademarks of Intel Corporation in the U.S. and other countries. * Other names and brands may be claimed as the property of others.Copyright © 2011 Intel Corporation. All Rights Reserved.。
Mellanox WinOF for Windows 安装指南说明书
Mellanox TechnologiesMellanox WinOF for WindowsInstallation GuideRev 2.00 GA2© Copyright 2008. Mellanox Technologies, Inc. All Rights Reserved.Mellanox, ConnectX, InfiniBlast, InfiniBridge, InfiniHost, InfiniRISC, InfiniScale, and InfiniPCI are regis-tered trademarks of Mellanox Technologies, Ltd. Virtual Protocol Interconnect is a trademark of Mellanox Technologies, Ltd.Mellanox WinOF for Windows Installation GuideDocument Number: 2956Mellanox Technologies, Inc.350 Oakmead ParkwaySunnyvale, CA 94086U.S.A.Tel: (408) 970-3400Fax: (408) 970-3403Mellanox Technologies LtdP.O. Box 586 Hermon-BuildingYokneam 20692IsraelTel: +972-4-909-7200Fax: +972-4-959-3245Mellanox WinOF for Windows Installation Guide3 1 OverviewThis document describes how to install and test Mellanox WinOF for Windows on a single host machine with Mellanox InfiniBand hardware installed. The document includes the following sections:• This overview•“Web Page and Documentation” (page 3)•“Hardware and Software Requirements” (page 3)•“Identifying Mellanox HCAs on Your Machine” (page 4)•“Downloading Mellanox WinOF” (page 6)•“Installing Mellanox WinOF” (page 6)•“Installation Results” (page 17)•“Assigning IP to IPoIB Adapters After Installation” (page 18)•“Modifying Configuration After Installation” (page 21)•“Updating Firmware After Installation” (page 22)•“Uninstalling Mellanox WinOF” (page 24)2Web Page and DocumentationPlease visit the Mellanox WinOF Web page at /products/MLNX_WinOF.php todownload the package and to reference documentation such as release notes, user manuals, FAQ, trouble-shooting, and archive. After installing Mellanox WinOF (see “Installing Mellanox WinOF” below), you will find release notes and user manuals under “Program Files\Mellanox\MLNX_WinOF\Documenta-tion”.3Hardware and Software Requirements3.1Hardware RequirementsRequired Disk Space for Installation•100MBPlatformsAny computer system with an x86 or x64 CPU architecture, and with a PCI adapter card based on one of the following Mellanox Technologies’ InfiniBand HCA devices:•ConnectX® (firmware: fw-25408 v2.5.000 or later)•InfiniHost® III Ex (firmware: fw-25218 v5.3.000 or later for Mem-Free cards, and fw-25208 v4.8.200 or later for cards with memory)•InfiniHost® III Lx (firmware: fw-25204 v1.2.000 or later)•InfiniHost® (firmware: fw-23108 v3.5.000 or later)Note:For the list of supported architecture platforms, please refer to the MellanoxWinOF for Windows Release Notes file under the “Documentation” folder.Identifying Mellanox HCAs on Your Machine 43.2Software RequirementsInstaller PrivilegesThe installation requires administrator privileges on the target machine.Operating Systems•Windows XP•Windows Server 2003•Windows Server 2008Note:For the list of supported operating system distributions and kernels, please referto the Mellanox WinOF for Windows Release Notes file under the “Documenta-tion” folder.4Identifying Mellanox HCAs on Your MachineStep 1.Check the Device Manager display for PCI devices. If the device driver has not been installed, check under Other Devices.Note:If you cannot find any PCI device, make sure that the HCA card(s) is correctlyinstalled in the PCI slot. If no PCI device is identified after your check, tryinstalling the HCA card into a different PCI slot.Mellanox WinOF for Windows Installation Guide5 Step 2.Select a PCI Device entry, right-click and select Properties to display the PCI Device Properties window.Step 3.Click the Details tab and select Device Instance ID from the Property pull-down menu.Step 4.In the Value display box, check the fields VEN and DEV (fields are separated by ‘&’). In the display example above, notice the sub-string “PCI\VEN_15B3&DEV_6340”: VEN isequal to 0x15B3 – this is the Vendor ID of Mellanox Technologies; and DEV is equal to6340 – this is a valid Mellanox Technologies PCI Device ID.Note:The list of Mellanox Technologies PCI Device IDs can be found in the PCI IDrepository at http://pci-ids.ucw.cz/read/PC/15b3.Step 5.If the PCI device does not have a Mellanox HCA ID, return to Step 2 to check another device.Note:If you cannot find any Mellanox HCA device listed as a PCI device, make surethat the HCA card(s) is correctly installed in the PCI slot. If the HCA deviceremains unidentified, try installing the adapter card into a different PCI slot.Downloading Mellanox WinOF 65Downloading Mellanox WinOFDownload the appropriate MSI to your host from the Mellanox WinOF Web page at/products/MLNX_WinOF.php.The MSI’s name has the format MLNX_WinOF_<arch>_<version>.msi, where arch can be eitherx86 or x64.6Installing Mellanox WinOFThis sections provides instructions for two types of installation:•“Attended Installation” on page 6An attended installation is an installation procedure that requires frequent user intervention.•“Unattended Installation” on page 11An unattended installation is an automated installation procedure that requires no user intervention.•“WDS Installation” on page 12A WDS installation is intended for Windows HPC Server 2008 clusters.6.1Attended InstallationNote:The installation requires administrator privileges on the target machine.For operating systems other than Windows 2008, double click the MSI and follow the GUI instructions to install Mellanox WinOF.For Windows 2008, install the MSI by opening a CMD console (click Start-->Run and enter ‘cmd’) andentering the following command:> msiexec.exe /i MLNX_WinOF_<arch>_<version>.msiThe following is an example of a Mellanox WinOF x64 installation session.Mellanox WinOF for Windows Installation Guide7 Step 1.Click Next in the Welcome screen.Step 2.Select the “accept” radio button and click Next.Installing Mellanox WinOF 8Step 3.Select the destination folder for Mellanox WinOF and click Next.Step 4.Select the type of installation: Typical or Custom.Mellanox WinOF for Windows Installation Guide9 If you select Typical, click Next and advance to the next step.If you select Custom, click Next and you will get the screen below. To install/remove a com-ponent, left-click the component and enable/disable it for installation.To continue, click Next and advance to the next step.Installing Mellanox WinOF 10Step 5.To install the chosen components, click Install.Step 6.In the following window, enable the components you need (if any). To complete the instal-lation, click Finish. (See the figure below.)Note:Even if you do not enable any of the displayed components in this step, you willbe able to enable components after the installation completes – see the fileMLNX_WinOF_README.txt.Mellanox WinOF for Windows Installation Guide116.2Unattended InstallationNote:The installation requires administrator privileges on the target machine.To perform a silent/unattended installation, open a CMD console (click Start->Run and enter ‘cmd’) andenter the following command:> msiexec.exe /i MLNX_WinOF_<arch>_<version>.msi /qn [Parameter]where Parameter is:ADDLOCAL Provides the list of components (separated by com-mas) to install. Available components are: Driver,IPoIB, ND, WSD, SDP, OpenSM, SRP, Tools, Docs, andSDK. You can also provide ADDLOCAL=ALL to installall components.Note: If you do not provide the ADDLOCAL parameter,the script will install the following list ofdefault components: Driver, IPoIB, ND, WSD, OpenSM,Tools, Docs, and SDK.WSDENABLE Enable WSD by adding the parameter WSDENABLE=1. (Theinstallation procedure installs WSD but does notenable it.)Installing Mellanox WinOF 12NDENABLE Enable ND by adding the parameter NDENABLE=1. (Theinstallation procedure installs ND as part of theIPoIB component but does not enable it.)Note:For all command options, enter ‘msiexec.exe /?’.Usage Examples•The following command installs MLNX_WinOF in the default configuration:> msiexec /i MLNX_WinOF_x86_<ver>.msi /qn•The following command installs MLNX_WinOF with all the available components:> msiexec /i MLNX_WinOF_x86_<ver>.msi /qn ADDLOCAL=ALL•The following command installs MLNX_WinOF with the default components plus SRP:> msiexec /i MLNX_WinOF_x86_<ver>.msi /qn \ADDLOCAL=Driver,IPoIB,ND,WSD,OpenSM,SRP,Tools,Docs,SDK•The following command installs MLNX_WinOF in the default configuration and enables WSD:> msiexec /i MLNX_WinOF_x86_<ver>.msi /qn WSDENABLE=16.3WDS InstallationTo perform a WDS installation for a Windows HPC Server 2008 cluster, follow the steps below.Step 1.Extract the package Mellanox_WinOF_x64_<ver>_INF.zip to a directory in the head node.Step 2.On the head node, click start--> All Programs --> Microsoft HPC Pack --> HPC Cluster Manager. Select Configuration in the navigation pane and then select To-do List. Next,Click “Manage drivers” and the following dialog will be displayed.Mellanox WinOF for Windows Installation Guide13 Step 3.Click “Add” and navigate in the Open dialog to the directory chosen in Step 1. Then go to the INF directory.Step 4.Select the listed INF files and click “Open” to add the files.Step 5.Click Close in “Manage drivers” dialog.Step 6.To enable ND perform the following steps. Otherwise, skip to the next step.a.Select Node Templates in the Configuration pane.b.Right click on the desired Node Template and select “edit”. An editor window is displayed (see below).Installing Mellanox WinOF 14c.Click Add Task --> Deployment --> Run OS command.Mellanox WinOF for Windows Installation Guide15d.Locate the new Run OS command listed under the Deployment section in the editor. Next, select in theOptional pane ContinueOnFailure to be True and enter the following text in the Description field:“NetworkDirect registration command”.e.In the Required pane of the editor, enter the following text in the Command field: “ndinstall -i”.f.Click Save. The editor window will close.Installing Mellanox WinOF 16Step 7.Select “Node Management” in the navigation pane of HPC Cluster Manager.Step 8.Right-click the desired node and select “Assign Node Template”. The following dialog will be displayed.Step 9.Select the correct node template and click OK to start MLNX_WinOF installation on the node.Mellanox WinOF for Windows Installation Guide17 7Installation ResultsHardwareDisplaying the Device Manager will show the Mellanox HCA devices, the Mellanox InfiniBand fabric, and an IPoIB (network) device for each InfiniBand port.Software•The MLNX_WinOF package is installed under the directory selected in Step 3 of Section 6.1.•OpenSM is installed as a disabled Windows service. To enable it, enter at the command line:> sc start opensmAssigning IP to IPoIB Adapters After Installation 188Assigning IP to IPoIB Adapters After InstallationBy default, your machine is configured to obtain an automatic IP address via a DHCP server. In some cases, the DHCP server may require the MAC address of the network adapter installed in your machine. To obtain the MAC address, open a CMD console and enter the command ‘ipconfig /all’ ; the MAC address is dis-played as “Physical Address”.To assign a static IP addresses to an IPoIB adapter after installation, perform the following steps:Step 1.Open the Network Connections window. Locate Local Area Connections named Mellanox IPoIB Adapter <#>. Each InfiniBand port has one IPoIB Adapter.Mellanox WinOF for Windows Installation Guide19 Step 2.Right-click a Mellanox Local Area Connection and left-click Properties.Step 3.Select Internet Protocol (TCP/IP) from the scroll list and click Properties.Assigning IP to IPoIB Adapters After Installation 20Step 4.Select the “Use the following IP address:” radio button and enter the desired IP informa-tion. Click OK when you are done.Step 5.Close the Local Area Connection dialog.Step 6.Verify the IP configuration by running ‘ipconfig’ from a CMD console.> ipconfig...Ethernet adapter Local Area Connection 3:Connection-specific DNS Suffix . :IP Address. . . . . . . . . . . . : 11.4.3.204Subnet Mask . . . . . . . . . . . : 255.0.0.0Default Gateway . . . . . . . . . :...Mellanox WinOF for Windows Installation Guide21 9Modifying Configuration After Installation9.1Modifying Mellanox HCA ConfigurationTo modify HCA configuration after installation, perform the following steps:a.Open the Registry editor by clicking Start->Run and entering ‘regedit’.b.In the navigation pane, expand HKEY_LOCAL_MACHINE->SYSTEM->CurrentControlSet->Ser-vices.c.Expand (in the navigation pane) the HCA driver service entry:- ‘mtcha’ for the InfiniHost family- ‘mlx4_hca’ and ‘mlx4_bus’ for the ConnectX familyd.Click the Parameters entry in the expanded driver service entry to display HCA parameters.e.Double click the desired HCA parameter and modify it. Repeat this step for all the parameters youwish to modify.f.Close the Registry editor after completing all modifications.g.Open Device Manager and expand the correct InfiniBand Channel Adapters entry (i.e., the adapterwith modified parameters).h.Right click the expanded HCA entry and left-click Disable. This disables the device.i.Right click the expanded HCA entry and left-click Enable. This re-enables the device.Note:For the changes to take effect, you must disable and re-enable the HCA (steps hand i above).9.2Modifying IPoIB ConfigurationTo modify the IPoIB configuration after installation, perform the following steps:a.Open Device Manager and expand Network Adapters in the device display pane.b.Right-click the Mellanox IPoIB Adapter entry and left-click Properties.c.Click the Advanced tab and modify the desired properties.Note:The IPoIB network interface is automatically restarted once you finish modifyingIPoIB parameters.Note:You need to restart opensm after modifying IPoIB configuration.Updating Firmware After Installation 2210Updating Firmware After InstallationThe following steps describe how to burn new firmware downloaded from Mellanox Technologies’ Webpages under /support/firmware_download.php.Step 1.Install the firmware tools package, MFT for Windows (WinMFT), on your machine. You can download it from /products/management_tools.php. Pleasecheck also the documentation on the same Web page.Step 2.Open a CMD console. (Click Start-->Run and enter ‘cmd’.)Step 3.Start mst.> st start mstSERVICE_NAME: mstTYPE : 1 KERNEL_DRIVERSTATE : 4 RUNNING(STOPPABLE, NOT_PAUSABLE, IGNORES_SHUTDOWN))WIN32_EXIT_CODE : 0 (0x0)SERVICE_EXIT_CODE : 0 (0x0)CHECKPOINT : 0x0WAIT_HINT : 0x0PID : 0FLAGS :Step 4.Identify your target InfiniBand device for firmware update.a.Get the list of InfiniBand device names on your machine.> mst statusFound 2 devices:mt25418_pciconf0mt25418_pci_cr0b.Your InfiniBand device is the one with the postfix “_pci_cr0”. In the example listed above, this will bemt25418_pci_cr0. Use the string “mtXXXXX” to identify the device type by checking the Webpage http://pci-ids.ucw.cz/read/PC/15b3. In the example above, mtXXXXX=mt25418, and the deviceis a ConnectX IB.c.Now go to the Mellanox firmware download page at:/support/firmware_download.php.d.Go to the correct firmware download page according to the device type identified in step (b) above.e.Run ‘vstat’ to obtain the PSID of your HCA card. The PSID is a unique identifier for the HCA card.Step ing the PSID obtained in Step 4(e), download the appropriate firmware binary image (*.bin.zip) and unzip it.Step 6.Burn the firmware image using the flint utility (part of your installed WinMFT).Note:Make sure that you burn the correct binary image to your HCA card. Burning thewrong image may cause severe firmware corruption. Please review Step 4 andStep 5 above.> flint -d mt25418_pci_cr0 -image <image>.bin burnMellanox WinOF for Windows Installation Guide23 Note:You may need to run ‘unzip’ on the downloaded firmware image prior to the burnoperation.Step 7.Reboot your machine after the firmware burning is completed.Uninstalling Mellanox WinOF 2411Uninstalling Mellanox WinOFAttended UninstallTo uninstall MLNX_WinOF on a single node, perform one of the following options:a.Click Start->Programs->Mellanox->MLNX_WinOF->Uninstall MLNX_WinOFb.Click Start->Control Panel-> Add Remove Programs-> MLNX_WinOF-> RemoveUnattended UninstallTo uninstall MLNX_WinOF in unattended mode, open a CMD console and perform one of the followingprocedures:a.If the MSI that was used to install MLNX_WinOF is available on your machine, enter the fol-lowing command:> msiexec.exe /x MLNX_WinOF_<arch>_<version>.msi /qn /forcerestartb.Obtain the MLNX_WinOF GUID (product code) by left-clicking Start->Programs->Mellanox->MLNX_WinOF.Now right-click on Uninstall MLNX_WinOF and select Properties, then copy the GUID from the “Tar-get entry. The GUID is the hexadecimal string that appears after ‘/x’. To uninstall the MSI, enter thefollowing command:> msiexec.exe /x <GUID> /qn /forcerestartNote:The ‘/forcerestart’ parameter forces the machine to restart after uninstall-ing the MLNX_WinOF MSI. This is recommended action for a complete unin-stall procedure.Note:For all command options, enter ‘msiexec.exe /?’.。
WinCE下PXA255嵌入式平台的低功耗设计
可 裁 剪 等 诸 多 优 点 的操 作 系 统 , 到 越 来 越 多 的 青 睐 。本 受 文 重 点 介 绍 基 于 w iCE的 P n xA2 5嵌 入 式 平 台 的 低 功 耗 5 设 计 及 实 现 方 案 , 详 细 分 析 了 在 实 际 调试 中所 遇 到 的 问 并 题及解决方法 。
RU 模 式 : x 2 5的正 常 工 作 方 式 。 系 统 上 电 和 N P A5 复 位后 C U 都 处 于 R N 模 式 , 许 所 有 电 源供 给 , 有 P U 允 所 时 钟 处 于 运行 状 态 , 使 用 各 种 片 内 资 源 , 处 理 器 执 行 可 是
指 令 的状 态 。本 文 的 电 源 管 理 模 块 就 是 要 以 RUN 模 式
维普资讯
பைடு நூலகம்
I 1 [
Wi E P A 5 下 25嵌入式平台的低功耗设计 n C
■ 西 安 电子 科 技 大 学 刘 书 泽 赖 耀 昌 高 新 波
关键词
W iCE P n XA2 5 低 功 耗 设 计 挂 起 唤 醒 5
D A和 L D控 制 器 等 在 I L M C D E模 式 下 都 处 于 正 常 的 工
使用simg2imgwin提取安卓官方ROM包中独立的系统软件
使⽤simg2imgwin提取安卓官⽅ROM包中独⽴的系统软件⼀、背景今天是七⼣情⼈节诶,但是与我⼀只单⾝⽼狗有啥关系呢?⼀⼤早发现⼿机系统更新了(MIUI12.5 增强版),但是更新完后感觉充电速度不是很妙(你们懂得),为了恢复之前的充电速度,⾸先想到将⼿机管理家回退到上⼀个版本,但是没有上⼀个版本的包去哪⾥找呢?论坛⼀通查找之后发现微信⼩程序有个⽶更可以获得我想要的包,后⾯顺利拿到包回退了⼿机管家。
之后⽆事做想弄明⽩他们的包是怎么来的?(可能root之后⼿机能看到)我能不能从完整包⾥⾯直接提取出⼀个包来?所以就动起⼿⽹上⼀通查找资料了(事后发现并不是所有的系统软件都能找到完整的apk)。
⼆、关键教程与关键软件直接下载解压之后即可:⾄此⼤体流程和⼯具都已经准备好了,可以按照教程⼀步步操作了,下⾯讲⼀下我的操作过程。
三、本⼈操作流程1.⾸先去论坛下载好⾃⼰想要的线刷包,然后解压,找到images⽬录下的最⼤的img⽂件,⼀般那个就是系统app所在的镜像,有些系统是叫做system.img,但是⼩⽶的MIUI线刷包⾥⾯是叫super.img。
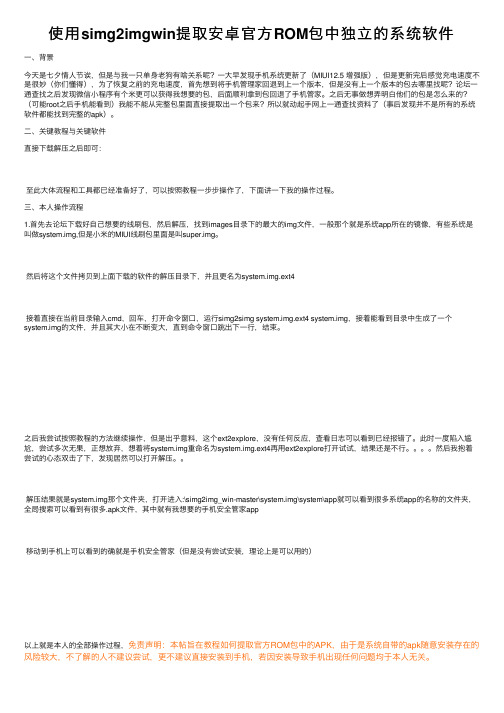
然后将这个⽂件拷贝到上⾯下载的软件的解压⽬录下,并且更名为system.img.ext4接着直接在当前⽬录输⼊cmd,回车,打开命令窗⼝,运⾏simg2simg system.img.ext4 system.img,接着能看到⽬录中⽣成了⼀个system.img的⽂件,并且其⼤⼩在不断变⼤,直到命令窗⼝跳出下⼀⾏,结束。
之后我尝试按照教程的⽅法继续操作,但是出乎意料,这个ext2explore,没有任何反应,查看⽇志可以看到已经报错了。
此时⼀度陷⼊尴尬,尝试多次⽆果,正想放弃,想着将system.img重命名为system.img.ext4再⽤ext2explore打开试试,结果还是不⾏。
然后我抱着尝试的⼼态双击了下,发现居然可以打开解压。
解压结果就是system.img那个⽂件夹,打开进⼊:\simg2img_win-master\system.img\system\app就可以看到很多系统app的名称的⽂件夹,全局搜索可以看到有很多.apk⽂件,其中就有我想要的⼿机安全管家app移动到⼿机上可以看到的确就是⼿机安全管家(但是没有尝试安装,理论上是可以⽤的)以上就是本⼈的全部操作过程,免责声明:本帖旨在教程如何提取官⽅ROM包中的APK,由于是系统⾃带的apk随意安装存在的风险较⼤,不了解的⼈不建议尝试,更不建议直接安装到⼿机,若因安装导致⼿机出现任何问题均于本⼈⽆关。
systemplatform中文说明书
systemplatform中文说明书标题:SystemPlatform中文说明书一、简介SystemPlatform是一款功能强大的系统管理工具,它能够帮助用户进行各种复杂的系统操作。
这份说明书将详细解释如何使用SystemPlatform的各种功能。
二、安装与启动1. 下载最新版本的SystemPlatform安装包,双击运行。
2. 按照提示完成安装过程,建议选择默认设置。
3. 安装完成后,点击桌面图标启动SystemPlatform。
三、界面介绍SystemPlatform的主界面主要包括菜单栏、工具栏、工作区和状态栏四个部分。
四、主要功能1. 系统监控:可以实时查看系统的各项指标,如CPU使用率、内存使用情况等。
2. 进程管理:可以查看并管理当前运行的进程,包括结束进程、调整进程优先级等。
3. 服务管理:可以查看并管理系统的各项服务,包括启动、停止、暂停服务等。
4. 文件管理:提供文件的创建、删除、复制、移动等基本操作,支持网络文件操作。
五、高级功能1. 软件更新:自动检测并更新SystemPlatform到最新版本。
2. 系统优化:提供一系列系统优化工具,提高系统的运行效率。
3. 数据备份:可以对重要的数据进行备份,防止数据丢失。
4. 系统修复:在系统出现问题时,可以帮助用户快速定位并解决问题。
六、注意事项1. 在进行系统操作前,请确保您有充分的理解和准备,避免误操作导致的数据丢失或系统故障。
2. 使用SystemPlatform过程中遇到任何问题,都可以通过我们的客服渠道获取帮助。
七、联系方式如果您有任何关于SystemPlatform的问题或建议,欢迎联系我们:电话:+86-0000-0000邮箱:**************************地址:中国XX省XX市XX区XX路XX号感谢您选择SystemPlatform,我们将竭诚为您服务!以上就是SystemPlatform的中文说明书,希望对您的使用有所帮助。
winAMS使用手册(中文版详细版本测试工具)

覆盖大师使用指导一、介绍我们十分感谢你对GAIO单元测试工具CoverageMaster-winAMS的兴趣爱好。
CoverageMaster-winAMS是一种对嵌入式软件进行评估和改善的单元测试工具。
这个试用指导包括为初次使用者制定的练习习题。
跟着指导完成练习,使用者会对CoverageMaster-winAMS的基本使用和特点有一个了解。
覆盖大师概述在开始练习之前,首先会出现一个关于覆盖大师的特点及操作的解释。
1、嵌入式软件单元测试工具CoverageMaster-winAMS是一个嵌入式软件单元测试工具。
它通过使用一个MPU仿真器(系统仿真器)执行软件代码(功能)来执行测试。
MPU仿真器(系统仿真器)通过启动实际交叉编译的MPU代码(对象代码)来操作运行。
由于实际目标代码是在仿真环境中使用,它有可能依据目标微处理器去核实项目行为和检查错误。
2、CoverageMaster-winAMS包含以下组件:SSTManager:管理单元测试操作的基本UI应用。
System-G:MPU仿真器(系统仿真器)包括对多种MPU的支持。
WinAMS:单元测试仿真器。
除了这些项目之外,准备测试源文件需要一个交叉编译或者集成开发环境(IDE)。
二、为测试I/O使用CSV格式的文件为了保证正确率的同时提高单元测试的效率CoverageMaster-winAMS在仿真过程中使用CSV格式文件。
单独单元测试设置,以及变量和根函数的输入输出数据都保存在CSV文件中。
因此,使用CSV文件让目标源代码中不必一定包含专用测试代码或者输入数据。
下面的图片阐明了CoverageMaster-winAMS单元测试的流程。
首先,交叉编译代码被加载到MPU仿真器。
代码必须附上可执行对象代码(被拆开的中间级对象代码不能被使用)下一步,为了测试基础函数(如上文所示)生成一个CSV文件。
文件里有函数信息类似函数名称,输入变量,输出变量,测试条件,以及测试数据(测试容器)。
QNX 产品介绍 2012版

动力科技公司一览
1980 1984 1985 1990 1997
第一个商业化的真正微内核实时操作系统(Neutrino) 第一个(也是唯一)带有分布式处理的实时操作系统 第一个内存空间受保护的实时操作系统 第一个通过POSIX认证的微内核实时操作系统 第一个支持对称多重处理(多核)的实时操作系统
技术创新基地
Peripheral I/O • PCI / PCIe • I2C / I2S • SPI • GPIO • UART • USB
传统单片式内核架构
• 系统内核空间中运行了很多系统组件 • 任一模块或组件的出错都会导致整个系统出 错或崩溃
App
App
App
File system
Network stack
QNX软件系统公司
• 实时嵌入式技术的全球领军者 • 32年的操作系统创新设计 • 全球范围数以百万计的客户 • ISO9001:2000认证 • 大量通过验证的应用 • 技术领先性保证产品不仅适应现在的市场还可以适应未来的市场 • 高可靠性和高扩展性的市场声誉 • QNX 新的客户产品策略 –透明软件模式(Hybrid Software Model)
QNX 自适应分区技术
• 当CPU重载时根据分区预算进行调度 • 不同分区中的组件间的通信无需额外的IPC • 通过动态分配空闲时间片保证CPU的最大使用率 • 分区可以随时改变无需改变资源
Idle CPU cycles with fixed-time partitioning can’t be utilized
Without adaptive partitioning, a ‘hang’ in one process results in CPU starvation of other processes
- 1、下载文档前请自行甄别文档内容的完整性,平台不提供额外的编辑、内容补充、找答案等附加服务。
- 2、"仅部分预览"的文档,不可在线预览部分如存在完整性等问题,可反馈申请退款(可完整预览的文档不适用该条件!)。
- 3、如文档侵犯您的权益,请联系客服反馈,我们会尽快为您处理(人工客服工作时间:9:00-18:30)。
YY-i.MX25 WinCE System
2011-3-22
Starting from Oct,2009 , YUANYING Tech has invested a lot of resource in the system design with FREESCALE ARM series product, up to date we have launched the series development platform based on i.MX28, i.MX35, i.MX51,largely help our customers shorten the time to market about their product and create the success one and another. Now we are proud to announce we have finished i.MX25 WinCE system level platform:YY-i.MX25W。
i.MX25 is ARM926EJS core, up to 400MHz, own 16KB I-Cache and 16KB D-cache,also 128KB SRAM as well. Meanwhile, which include both LCDC and SLCDC controller to support display,CE-ATA and P-ATA for mass storage, 12-bit 3 channels ADC,three I2C interfaces, and five UART ports,one Ethernet interface,two CAN interface,two SD/MMC interface. Four timers and 4 channel PWM output, HS USB OTG+ FS USB Host with HF interface. CSI interface to support CMOS sensor input. Regarding display interface, which integrates LCDC and SLCDC connection. About system RAM, adopt DDR2 interface,it’s new member for industrial application。
i.MX25W is the system platform based on WinCE6.0,treat FAT as system file, own i.mx258+64MB DDR2 system hardware, be able to boot up form SD card or NAND Flash,also i.MX25W including 7” LCD and resistance touch panel. Which built in i.MX25 all input/output resource. Which still adopt core board + bottom board structure,the components of CPU core board meet the industrial level,be able to work at the temperature range of -40C to +85C,and storage temperature from -55C to +125 degree. i.MX25W can widely applied for intelligent electric network, outdoor multimedia, industrial control and HMI, medical equipment and so on .Which is the good selection to power meter terminal, HMI of industry equipment, automotive ECU, medical device display interface。
About the business model, YUANYING support core board selling and PCBA business model. And, promise to deliver the cost effective performance among ARM9 system to her customers.
◆ Hardware Feature CPU
※ i.MX25
※ ARM926EJS 400MHz
※ 16K I-Cache
※ 16K D-Cache
※ LCD and SLCD controller integrated
※ 2 X CAN controller
※ 1 X Ethernet port, and one CMOS Sensor CSI interface
Memory
※ Memory:Chip Internal integrate 128MB SRAM + 2KB security ROM, System support DDR2
※ NAND:2GB(alternative with SD card)
Connection Interface
※ USB port:HS USB OTG and HS USB Host
※ SD:two SD card socket (one of it as system Boot up)
※ FEC: 10/100M Ethernet
※SIM interface: 2 x SIM interface
※SSI: 2 x SSI interface
※PWM: 4 X PWM channels output
※P-ATA: One P-ATA interface, up to 66Mbytes/s
※ UART:5 x UART interface
※ I2C: 3 X I2C interface
※Two CE-ATA, SDIO/MMC interface
※ TOUCH:7” resistance touch panel
A-V output
※LCD:7” TFT LCD, 800x480 resolution
※Audio IN: MIC
※Audio out: Headphones
※SPDIF output:option
Clock and Power Supply
※Power:5V 2A DC power supply
Wireless communication
※ WiFi: WiFi 802.11g/b (option)
Block Diagram
WinCE6.0 BSP
Operation System:
WinCE6.0
Bottom layer Driver:
FEC Driver Ethernet driver
USB OTG Driver USB OTG driver
USB Host Driver USB Host driver
UART Driver Serial port driver
Audio Driver Audio codec driver TOUCH Driver Resistance touch panel driver Flex CAN Driver CAN driver
Camera Driver Camera driver
MMC/SD/SDIO Driver MMC/SD/SDIO driver
SPI Driver SPI ROM driver
I2C Driver I2C communication driver RTC Driver RTC driver program
PWM Driver PWM output driver Multimedia Supporting:
Video decoding ● MPEG4 decode:320x240,30fps
● H.264 decode:320x240,30fps
Audio decoding ● AAC MPEG-2 and MPEG-4 audio low complexity
● AAC PLUS MPEG-2 and MPEG-4 audio low complexity
● MP3 MPEG-1 Audio Layer I II III
● WMA Standard WMA V10 Standard L1/L2/L3 profile
● WMA Professional WMA V10 Professional M0a/b profile Supported file format MP3,wma,aac,m4a,m4b,mp4,mov,3gp,m4v,avi。
