思科协作桌面终端EX60
Cisco Webex DX70、DX80 用户手册说明书
本指南内容目录所有目录条目都是有效的超链接(仅适用于启用 javascript 的阅读系统),点击即可打开相应的文章。
要在章节之间切换浏览,还可以单击侧边栏中的图标。
注意!本用户手册中介绍的部分功能可能在某些市场中是可选的,因此可能不适用于您的系统。
简介Cisco DX70 概览 .....................................................................4关于本用户手册 .....................................................................4Cisco DX80 概览 .....................................................................5DX80 与 USB 头戴式耳机 ......................................................5与蓝牙头戴式耳机配对 .............................................................6使用您的个人凭证登录 .............................................................7关于 Extension Mobility .........................................................7视频呼叫从联系人列表发出呼叫 .............................................................9关于联系人列表 .....................................................................9呼叫之前编辑联系人 ..............................................................10关于条目编辑 .....................................................................10使用姓名、号码或地址发出呼叫 .............................................11关于发出呼叫 .....................................................................11来电 ......................................................................................12如果有人呼叫您 ..................................................................12在通话期间收到呼叫 ..............................................................13关于选项 ............................................................................13从呼叫自行断开连接 ..............................................................14关于自行断开连接 ..............................................................14将呼叫置于保留状态和恢复保留的呼叫 ..................................15关于置于保持状态 ..............................................................15转接正在进行的呼叫 ..............................................................16关于转接 ............................................................................16更改呼叫速率 ........................................................................17关于呼叫速率 .....................................................................17激活免打扰 ...........................................................................18关于免打扰 ........................................................................18自动前转所有呼叫 .................................................................19关于前转呼叫 .....................................................................19在通话期间查看键盘 ..............................................................20在通话期间使用键盘 ...........................................................20将其他参加者添加到现有呼叫 ................................................21关于视频会议 .....................................................................21断开会议参加者的连接 ..........................................................22Intelligent Proximity关于 Cisco Proximity 超声波信号 ...........................................24关于 Proximity 功能 ............................................................24内容共享在通话中共享内容 .................................................................26关于内容共享 .....................................................................26在通话期间更改演示布局 .......................................................27关于演示布局 .....................................................................27预定的会议加入预定会议 ........................................................................29加入会议 ............................................................................29加入 Webex Meeting 新 .........................................................30联系人收藏夹、最近呼叫和通讯录 ....................................................32关于联系人列表 ..................................................................32通话期间,将某人添加到收藏夹 .............................................33关于收藏夹 ........................................................................33非通话期间,将某人添加到收藏夹 .........................................34关于此功能 ........................................................................34编辑现有收藏夹 .....................................................................35关于此功能 ........................................................................35摄像机控制打开和关闭本端视频 ..............................................................37为什么开启本端视频? .......................................................37移动本端视频 PiP ..................................................................38为什么要移动本端视频? ....................................................38远端摄像机控制 .....................................................................39关于摄像机控制 ..................................................................39设置可访问的设置概览 .................................................................41关于设置 ............................................................................41本用户手册适用于 DX70 和 DX80。
思科asyncos 11.0 api邮件安全设备入门指南说明书

AsyncOS 11.0 API - 邮件安全设备入门指南首次发布日期: 2017年 05月 31日上次修改日期: --Americas HeadquartersCisco Systems, Inc.170 West Tasman DriveSan Jose, CA 95134-1706USATel: 408 526-4000800 553-NETS (6387)Fax: 408 527-0883文本部件号:本手册中有关产品的规格和信息如有更改,恕不另行通知。
本手册中的所有声明、信息和建议均准确可靠,但我们不为其提供任何明示或暗示的担保。
用户必须承担使用产品的全部责任。
随附产品的软件许可和有限担保在随产品一起提供的信息包中提供,且构成本文的一部分。
如果您无法找到软件许可或有限担保,请与思科代表联系获取副本。
思科所采用的TCP报头压缩是加州大学伯克利分校(UCB)开发的一个程序的改版,是UCB的UNIX操作系统公共域版本的一部分。
保留所有权利。
版权所有©1981,加州大学董事会。
无论本手册中是否有任何其他保证,这些供应商的所有文档文件和软件均按“原样”提供,并可能包含缺陷。
思科和上面所提及的供应商拒绝所有明示或暗示保证,包括(但不限于)适销性、特定用途适用性和无侵权保证,或者因买卖或使用以及商业惯例所引发的保证。
在任何情况下,对于任何间接、特殊、连带发生或偶发的损坏,包括(但不限于)因使用或无法使用本手册而导致的任何利润损失或数据损失或损坏,思科及其供应商概不负责,即使思科及其供应商已获知此类损坏的可能性也不例外。
本文档中使用的任何互联网协议(IP)地址和电话号码并非实际地址和电话号码。
本文档中所含的任何示例、命令显示输出、网络拓扑图和其他图形仅供说明之用。
说明性内容中用到的任何真实IP地址或电话号码纯属巧合,并非有意使用。
思科和思科徽标是思科和/或其附属公司在美国和其他国家/地区的商标或注册商标。
Agile e6.0.2 安装手册说明书

Agile e6.0.2Installation Manual for Agile e6.0.2 Windows Client Part Number: INSWINCLIENT-602ACopyrights and TrademarksCopyright © 1992-2006 Agile Software Corporation. All rights reserved.You shall not create any derivative works of this publication nor shall any part of this publication be copied, reproduced, distributed, published, licensed, sold, stored in a retrieval system or transmitted in any form or by any means: electronic, mechanical, photocopying, or otherwise, without the prior written consent of Agile Software Corporation, 6373 San Ignacio Avenue, San Jose, California 95119-1200 U.S.A.; Telephone 408.284.4000, Facsimile 408.284.4002, or </>.The material in this document is for information only and is subject to change without notice. While reasonable efforts have been made in the preparation of this document to ensure its accuracy, Agile Software Corporation assumes no liability resulting from errors or omissions in this document or from the use of the information contained herein. Agile Software Corporation reserves the right to make changes in the product design without reservation and without notification to its users.Agile e6 is a registered trademark. All other brands or product names are trademarks or registered trademarks of their respective holders.Java and Solaris are registered trademarks of Sun Corporation.Microsoft, Microsoft Windows, Microsoft Word, Microsoft Excel, Internet Explorer and SQL Server are registered trademarks of Microsoft Corporation.Oracle and Oracle10g are registered trademarks of Oracle Corporation.NOTICE OF RESTRICTED RIGHTS:The Software is a “commercial item,” as that term is defined at 48 C.F.R. 2.101 (OCT 1995), consisting of “commercial computer software” and “commercial computer software documentation” as such terms are used in 48 C.F.R. 12.212 (SEPT 1995) and when provided to the U. S. Government, is provided (a) for acquisition by or on behalf of civilian agencies, consistent with the policy set forth in 48 C.F.R. 12.212; or (b) for acquisition by or on behalf of units of the Department of Defense, consistent with the policies set forth in 48 C.F.R. 227.7202-1 (JUN 1995) and 227.7202-4 (JUN 1995).July 24, 2006iiR EVISIONS26th 2006 All Initial document J uneAAdded item 6 in thechapter Setting thePrerequisitesUpdated cross-reference in Chapter 5Office SuiteiiiC ONTENTSChapter 1 Introduction 1 Where to Go for More Information 1Chapter 2 Preparing the Installation 2 Requirements 2 Setting the Prerequisites 2 Parallel Installation of Agile e5.1 and Agile e6 clients 2 Splitted Server and Client Installation 3Chapter 3 Installing the Windows Client 4 Upgrading from the Agile e6.0.1 Installation 4 Starting the Installation 4 Modify, Repair and Remove Options 10 Repairing the Installation 10Chapter 4 Uninstalling the Windows Client 11 Uninstalling the Office Suite component 11 Uninstalling the Client 11Chapter 5 OfficeSuite 12 .NET Framework 12 Known problem with the Install Selector 12 Manual OfficeSuite Installation 13 Install Files 13 Installation 13Chapter 6 Software Distribution 17 Components 17 Installation notes 17ivChapter 1Introduction This guide describes how to install the Agile e6 Windows Client (also known as the PC Client) and the Agile e6 Java Client on a computer running Microsoft Windows 2003, Windows 2000, or Windows XP.Where to Go for More InformationThe Agile e6 installation program allows you to install any of the Agile e6 components listed below:ClientOffice SuiteServerFile Service (FMS)Database system: OracleThis manual describes only the Windows Client and Windows Java Client installation.Both clients are installed if you select the respective client during installation.Please refer to the Administration Manual for Agile e6 (PLM602_Admin.pdf) for moreinformation about how to use the Java Client with WebStart.After the Client is installed, it should be able to connect to a running Agile e6 Server. For information on installing the Agile e6 Server, refer to one of the following documents, which are provided on the product CD/DVD:Installation Manual for Agile e6.0.2 on Windows Server (PLM602_WindowsServer.pdf) – for installing a PLM Server that runs under Windows and uses an Oracle 10g databasesystem.Installation Manual for Agile e6.0.2 on UNIX Server (PLM602_UnixServer.pdf) – for installing a PLM Server that runs under UNIX and uses an Oracle 10g database system Consult your Agile e6 administrator or Customer Support representative for information on installing other Agile e6 components and optimizing your system with the components.Note: The Agile e6 installation guides are available in the doc directory on theproduct DVD. To view Adobe® Portable Document Format (PDF) files, usethe Adobe Acrobat Reader® software, which is available at no charge at.1Agile e6Chapter 2Preparing the InstallationRequirementsTo install and run the Windows Client and Java Client on a separate machine than the Agile e6 Server, you will need:A Pentium class PC running one of the following Microsoft operating systems:• • • Windows XP Professional with Service Pack 2 or higherWindows 2000 Professional with Service Pack 3 or higherWindows Server 2003 Enterprise Edition with Service Pack 1 or higherA Windows display with a resolution of 1024 by 768 pixels or higher512 MB RAM160 MB disk space, for the installation directoryThe Java client needs a Java 2 Runtime Environment in the Version 1.4.2Windows .NET Framework version 1.1 (for the Office Suite part of the Windows Client)Setting the PrerequisitesBefore starting the installation, do the following:1. Open the Windows Control Panel.2. Click the Advanced tab on the System properties sheet.3. The environment variable JAVA_HOME needs to be set to the path where the Java RuntimeEnvironment is installed.Note: This can be done during the installation of the Agile e6 Client Software.4. If you intend to use the Agile e6 Java Client, verify that the Java 2 Runtime Environment inthe Version 1.4.2 is installed.5. If you intend to use the Agile e6 Office Suite, verify that the .NET Framework version 1.1 isinstalled.Available via the Windows Update, where you need to select Custom Install instead ofExpress Install after opening the Windows Update Webpage.6. If you intend to use the Agile e6 DataView Client, make sure that you have not set the /3GBparameter in the Microsoft boot.ini file.Parallel Installation of Agile e5.1 and Agile e6 clientsTo install Agile e5.1 and Agile e6 client parallel on the same machine, it is required to use separate client settings (profiles) for each version. Before installing the Agile e6 client, copy or rename the settings _Default and _Large because the next installation will change these settings. This can be2Chapter 2 Pr e paring th e Installationdone using the Agile e5.1 (or e6) client setup dialog. After the parallel installation each client version must be started using the corresponding settings.Note:The Office Suite feature of Agile e5.1 and Agile e6 cannot be installed parallel on the same machine.Split Server and Client InstallationThe combined Server and Client installation was split with Agile e6.0.2 into two packages:Agile e6 Client Agile e6 ServerNote: Due too the nature of this split the two installations cannot share the same installation directory.Note: The new default installation location for the Agile e6 Client is C:\Agile_e6_Client3Agile e6Chapter 3 Installing the Windows Client Agile e6 is a client-server application that uses a relational database as the application and data repository. The instructions in this section describe how to install only the Agile e6 Windows Client.Upgrading from the Agile e6.0.1 InstallationPlease refer to Upgrade Guide from e6.0.1 to Agile e6.0.2 (PLM602_Upgrade.pdf).Starting the InstallationNote: Use an account with Windows Administrator privileges to install or uninstall Agile e6.1. Insert the Agile e6 Installation DVD.If the CD/DVD autostart feature is enabled on the machine, the Agile e6 main setup window opens automatically.If the autostart feature is not enabled, open the window manually by double-clicking the file setup.bat in the root directory of the DVD.Note: For the latest information on the Agile e6 installation, click Read This First. 2. Click Install/Upgrade Agile e6 Client.This starts a window for selecting the installation language:4Chapter 3Installing the Windows Client3. Select the language you want to use during the installation of Agile e6 and click OK tocontinue.4. Click Next to continue.The License Agreement window is opened.5. After reviewing the license agreement, select I accept the terms in the license agreement andclick Next.5Agile e66. Update your user name and the name of your organization if they are incorrect.7. Select one of the installation options:Anyone who uses this computer (all users) — recommendedOnly for me8. Click Next to continue.9. Select the installation directory and click Next.Note: The installation path must not contain blank spaces.10. Select the Setup Type for the installation.6Chapter 3Installing the Windows ClientNote: A Complete Setup Type will install all features, but will not set theJAVA_HOME environment variable, which has to be set for the Java Client orthe Workflow Editor.11. Click Next and continue with step 17 or change the Setup Type to Custom and follow the nextsteps.The Custom Setup window is opened.The Client program is automatically selected.12. If you want to install the Office Suite, click Office Suite and choose ‘This feature will beinstalled on local hard drive’.Agile e6Note: See Chapter 5 for more information about the OfficeSuite feature.13. Click Next to continue.You will get different dialogs depending on the selected features.14. The Java Runtime dialog will only appear if the Java Client and/or Workflow Editor featureswere enabled.Note: The Installer finds all installed Java Runtime Environments and lets you select one that will be used for Agile e6.Note: It is required that JAVA_HOME is set and pointing to the correct JavaRuntime Environment, either by setting it here or in the system environmentof your Windows Operating System.15. Select the Java 2 Runtime Environment Directory and click Next.16. Click Next to continue.Chapter 3Installing the Windows Client17. Click Install to start the installation.18. After the installation is complete, click Finish to exit the Installation wizard.19. On the main installation window, click Exit to close the setup program.A new entry for Agile e6 Client appears on the Windows Start menu.Note: The first time you click the Mask Generator button in the Windows Client to regenerate a mask, you must be logged into an account that has WindowsAdministrator privileges.For further help, refer to the Agile e6 Read This First document or the online documentation, which can be found under \axalant\hlp\doc_ep\ in the directory where you installed the Agile e6 Client. To view the Online Help, open the file plm.chm.Agile e6Modify, Repair and Remove OptionsIf you start the Agile e6 Client setup program and the Windows installer detects a previously installed version of Agile e6 Client on your system, it presents options for repairing or removing the existing installation. This section provides an overview of what you can and cannot do to change or remove existing Agile e-series installations.You can make any of the following changes to an existing client installation:Add or remove any of the features from the Custom SetupChange the Java RuntimeModify an installationRemove an installationNote: The extra OfficeSuite MSI installations are not affected by any changes for the Agile e6 Client installation. Please refer to the Chapter 5 if you add theOfficeSuite feature after the installation.Repairing the InstallationYou can use the Repair function to fix an Agile e6 Client installation that is not working properly. If the Repair function discovers that the key file for an Agile e6 Client component is damaged or missing, it restores all parts of the component—such as its registry entries, service entries, shortcut, and files.Chapter 4Uninstalling the Windows ClientChapter 4 Uninstalling the Windows Client Agile recommends that you use the Remove option in the Windows Control Panel to uninstall Agile e6.Uninstalling the Office Suite componentThe GDMToolsSetup and GDMAddIn components have to be manually removed from theAdd/Remove Programs Windows Control Panel before uninstalling the Agile e6 client.Uninstalling the Client1. In the Windows Control Panel open Add/Remove Programs.2. Select Agile e6 from the list of currently installed programs.3. Click the Remove button.Note: The Java 2 Runtime Environment is not removed if you uninstall the Agile e6 client.Agile e6Chapter 5 OfficeSuiteThe Agile e6 OfficeSuite installation consists off three parts:Agile e6 Client OfficeSuite feature• • •This feature installs additional libraries and executablesGDMToolsSetupAn extra MSI component for document propertiesGDMAddInAn extra MSI component for the icons in the Office products and for the interconnection with the Agile e product.The two GDM MSI files are automatically installed during the start.bat installation, if the OfficeSuite feature, or a complete installation was selected for the Agile e6 Client installation.Note:The OfficeSuite will be installed for “All Users” during an installation of the Agile e6 Client with the Install Selector described in Chapter 3 Installing the Windows Client..NET FrameworkNote:The following window will appear if you have selected to install the Office Suite, and if .NET Framework version 1.1could not be detected on yoursystem.Click No and install the .NET Framework 1.1 via Windows Update and re-start the manual installation of the OfficeSuite MSIs.Known problem with the Install SelectorThis requester will open a second time for the second OfficeSuite MSI if this was aninstallation with the Install Selector f described in Chapter 3 Installing the Windows Client.Chapter 5 Offic e Suit eClick the No button again and the following window will open.Please follow the description in the next section on how to install the OfficeSuite manually.Manual OfficeSuite InstallationThe GDMAddIn and GDMTools MSI files have to be installed separately if the Agile e6 Client was directly installed with the Agile e6 Client MSI and not with the setup.bat menu or if there was an error during the installation of the OfficeSuite.These two MSI files have to be installed in the following subdirectory of the Agile e6 Client installation directory: axalant\bin\intel-ms-nt5.0Install FilesThe GDMAddIn.msi and GDMTools.msi files can be found in the WinRoot\client subdirectory on the installation DVD.There is no special order required in installing these two MSI files.Installation1. Start the installation of the first OfficeSuite MSI by double clicking on the file in the WindowsExplorer. Note:The following screenshots shows the GDMAddIn installation, but the GDMTools installation is very similar and has only one page less then the GDMAddIn installation.2. The Welcome Screen opensAgile e63. Click Next to continue.4. The Select Installation Folder window opens.5. Change the installation FolderNote: These two MSI files have to be installed in the following subdirectory of the Agile e6 Client installation directory: axalant\bin\intel-ms-nt5.0The OfficeSuite will not work if the MSI files are not installed in this Agile e6Client subdirectory.6. Select one of the installation options:Everyone — recommendedJust meChapter 5 Offic e Suit eThis selection should match the one, which was chosen in Error! Reference source not found.,Step 7 for the Agile e6 Client.7. Click Next to continue.8. The Confirm Installation window opens.Note:The GDMAddIn has the additional Customer Information window where you can enter your user name and organization.9. Click Next to start the installation.The installation is started. .Agile e610. Click Close to finish the installation.11. Install the second OfficeSuite MSI installation by double clicking on the second file and repeatthe described steps.Chapter 6 Software DistributionChapter 6Software DistributionThe Agile e6 client is a MSI based installation with CAB files.ComponentsAll components can be found in the WinRoot\client subdirectory on the installation DVDAgile e6 Client.msiAgile e6 client CAB files:• • • • •• ECI64.cab JClient.cab OfficeS.cab WClient.cab Wfled.cabGDMAddIn.msiGDMTools.msiInstallation notesA silent installation will install all CAB files, but does not set the JAVA_HOMEenvironment variable. This environment variable is only needed for the Java Client and/or for the Workflow Editor.The GDMAddIn and GDMTools MSI files have to be installed separately in the following subdirectory of the Agile e6 Client installation directoryaxalant\bin\intel-ms-nt5.017。
思科 Webex Room 70 产品手册说明书
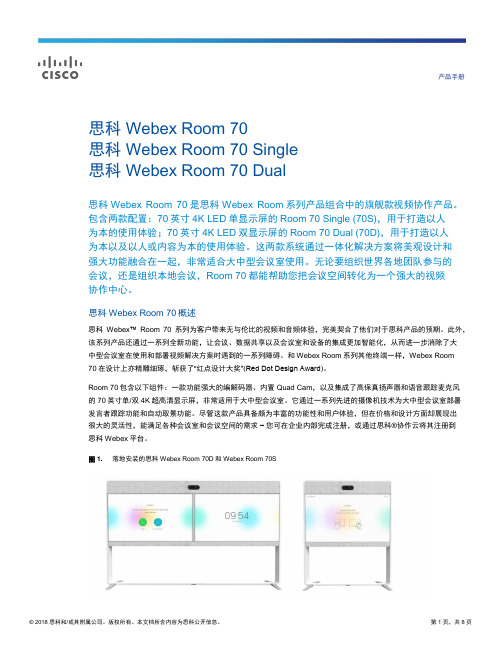
产品手册思科 Webex Room 70思科 Webex Room 70 Single思科 Webex Room 70 Dual思科Webex Room 70是思科Webex Room系列产品组合中的旗舰款视频协作产品。
包含两款配置:70英寸4K LED单显示屏的Room 70 Single (70S),用于打造以人为本的使用体验;70英寸4K LED双显示屏的Room 70 Dual (70D),用于打造以人为本以及以人或内容为本的使用体验。
这两款系统通过一体化解决方案将美观设计和强大功能融合在一起,非常适合大中型会议室使用。
无论要组织世界各地团队参与的会议,还是组织本地会议,Room 70都能帮助您把会议空间转化为一个强大的视频协作中心。
思科 Webex Room 70概述思科Webex™Room 70系列为客户带来无与伦比的视频和音频体验,完美契合了他们对于思科产品的预期。
此外,该系列产品还通过一系列全新功能,让会议、数据共享以及会议室和设备的集成更加智能化,从而进一步消除了大中型会议室在使用和部署视频解决方案时遇到的一系列障碍。
和Webex Room系列其他终端一样,Webex Room70在设计上亦精雕细琢,斩获了“红点设计大奖”(Red Dot Design Award)。
Room 70包含以下组件:一款功能强大的编解码器、内置Quad Cam,以及集成了高保真扬声器和语音跟踪麦克风的70英寸单/双4K超高清显示屏,非常适用于大中型会议室。
它通过一系列先进的摄像机技术为大中型会议室部署发言者跟踪功能和自动取景功能。
尽管这款产品具备颇为丰富的功能性和用户体验,但在价格和设计方面却展现出很大的灵活性,能满足各种会议室和会议空间的需求–您可在企业内部完成注册,或通过思科®协作云将其注册到思科Webex平台。
图 1. 落地安装的思科 Webex Room 70D和Webex Room 70S思科 Webex Room 70的特性和优势特性优势设计功能●精妙而含蓄的工业设计斩获 2017 年“红点设计大奖”(Red Dot Design Award) 的创新设计奖。
Cisco Webex Room 使用者指南说明书
本指南中的內容目錄視訊會議簡介最佳實作 (4)音訊設定 (5)使用您自己的認證登入 (6)將 Room Kit Mini 當做 USB 攝影機 (7)視訊通話自聯絡人名單撥號 (9)通話前編輯聯絡人 (10)使用姓名、號碼或位址撥話 (11)接聽電話—非通話時 (12)在另一個通話中接聽電話 (13)自通話中中斷連線 (14)保留通話與繼續接聽保留中的通話 (15)轉接進行中的通話 (16)啟用「請勿打擾」模式 (17)自動轉接所有通話 (18)於通話中檢視鍵台 (19)將其他出席者加入現有通話 (20)中斷出席者與會議的連線 (21)允許出席者加入會議 (22)在會議中固定發言人 (23)使用音樂模式 (24)舉手參加會議 (25)尋找最近通話詳細資訊 (26)智慧型近接感測Cisco Proximity 超音波訊號 (28)內容共用通話中共用內容 (30)在非通話時共用內容 (31)於通話中變更簡報版面配置....................................................32已排程的會議加入已排程會議 (34)加入 Webex 會議 (35)聯絡人最愛、通話記錄及目錄 (37)於通話中將某人加入最愛 (38)未通話時將某人加入最愛 (39)編輯現有的最愛 (40)攝影機檢視攝影機設定 (42)新增預設攝影機位置 (43)編輯預設攝影機位置 (44)開啟或關閉攝影機 (45)追蹤發言者 (46)簡報講者追蹤 (47)控制自己的相機 (48)遠端攝影機控制 (49)管理自拍 (50)調整自拍畫中畫大小 (51)移動自拍 PiP (52)設定存取設定和監管資訊 (54)目錄中所有項目皆為有效超連結,按一下即可進入相對應的文章。
如要在章節之間切換,可按一下側邊列中對應的圖示。
請注意:本使用者指南提及的部分功能為選用功能,有可能不適用於您的裝置。
本指南會介紹如何在註冊至內部部署服務時,將 Touch 10或 Room Navigator 配合以下產品一同使用:Room 系列:• Room Kit• Room Kit Mini• Room Kit Plus 和 Codec Plus• Room Kit Pro 和 Codec Pro• Room 55 和 55 Dual• Room 70 和 70 G2• Room Panorama 和全景70視訊會議簡介使用攝影機預設功能透過 Cisco Webex 系統,您可以建立預先定義的縮放及攝影機指向(平移及傾斜)。
Quectel_M26-OpenCPU_硬件设计手册_V1.0
2 综述 ...................................................................................................................................................... 11
3.5.1. 主串口............................................................................................................................. 34
本文档手册版权属于移远公司,任何人未经我公司复制转载该文档将承担法律责任。
Q n 版权所有 ©上海移远通信技术有限公司 2014,保留一切权利。 Confide Copyright © Quectel Wireless Solutions Co., Ltd. 2014
上海移远通信技术有限公司
1 / 81
如需技术支持或反馈我司技术文档中的问题,可随时登陆如下网址: /support/techsupport.aspx
l 前言
移远公司提供该文档内容用以支持其客户的产品设计。客户须按照文档中提供的规范,参数来设计其产品。
te 由于客户操作不当而造成的人身伤害或财产损失,本公司不承担任何责任。在未声明前,移远公司有权对 c l 该文档规范进行更新。 ue tia 版权申明
Q n 3.2.2. 关机 ................................................................................................................................ 26 3.2.2.1. PWRKEY 引脚关机............................................................................................ 26 e 3.2.2.2. API 函数关机...................................................................................................... 27 fid 3.2.2.3. 低压自动关机 ..................................................................................................... 27 3.2.3. 推荐的系统开关机电路 ................................................................................................... 28 3.3. 省电技术 ................................................................................................................................ 29
Cisco TelePresence Touch 设备
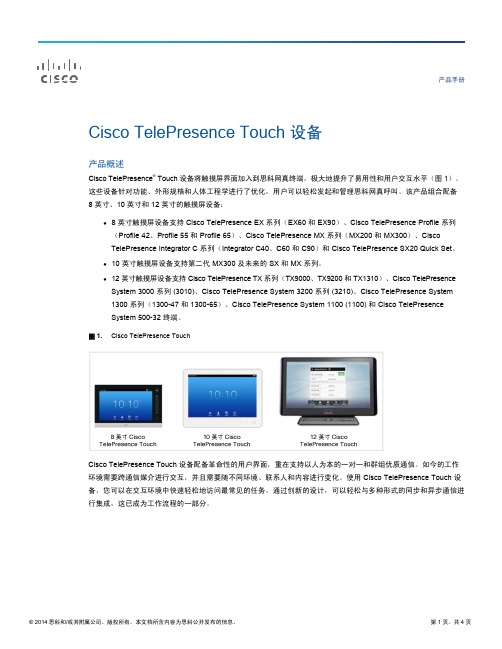
产品手册Cisco TelePresence Touch 设备产品概述Cisco TelePresence ® Touch 设备将触摸屏界面加入到思科网真终端,极大地提升了易用性和用户交互水平(图 1)。
这些设备针对功能、外形规格和人体工程学进行了优化,用户可以轻松发起和管理思科网真呼叫。
该产品组合配备 8 英寸、10 英寸和 12 英寸的触摸屏设备:● 8 英寸触摸屏设备支持 Cisco TelePresence EX 系列(EX60 和 EX90)、Cisco TelePresence Profile 系列(Profile 42、Profile 55 和 Profile 65)、Cisco TelePresence MX 系列(MX200 和 MX300)、Cisco TelePresence Integrator C 系列(Integrator C40、C60 和 C90)和 Cisco TelePresence SX20 Quick Set 。
● 10 英寸触摸屏设备支持第二代 MX300 及未来的 SX 和 MX 系列。
● 12 英寸触摸屏设备支持 Cisco TelePresence TX 系列(TX9000、TX9200 和 TX1310)、Cisco TelePresenceSystem 3000 系列(3010)、Cisco TelePresence System 3200 系列 (3210)、Cisco TelePresence System 1300 系列(1300-47 和 1300-65)、Cisco TelePresence System 1100 (1100) 和 Cisco TelePresence System 500-32 终端。
图 1. Cisco TelePresence TouchCisco TelePresence Touch 设备配备革命性的用户界面,重在支持以人为本的一对一和群组优质通信。
思科HyperFlex 超融合白皮书

思科 HyperFlex 系统超融合多云平台对您来说,能够因应业务步伐灵活调整的基础设施不可或缺。
无论您要在多云环境中部署企业应用还是容器,都是如此。
采用 Intel® Xeon® 可扩展处理器的思科 HyperFlex™ 系统可提供强大而易用的超融合解决方案,满足您在应用、云及规模方面的任何需求。
思科HyperFlex 系统以思科统一计算系统™(思科 UCS®)为基础,可将云环境的敏捷性、可扩展性和“随增长,随投资”消费模式与本地基础设施的优势结合到一起。
• 适应任何应用:最新版思科 HyperFlex 软件支持多虚拟机监控程序的虚拟化和容器化部署,并已针对众多企业应用进行测试和验证。
• 适应任何云准备:该平台包括用于应用性能监控、应用布置和云移动性的工具,以便您可以设计如何部署应用以及如何根据业务需求将其置于所需的任何位置。
• 适应任何规模准备:此版本的可扩展性更强,具有更大的集群和逻辑可用性区,可有效缓解节点和组件故障的影响。
拉伸式集群可在不同的地理位置之间进行持续部署,而且通过基于云的部署,您可以将设备运送至任何地方并从云端进行安装。
采用 Intel® Xeon®可扩展处理器的思科HyperFlex™ 系统挑战:形势瞬息万变全数字化业务转型由应用提供支持。
如今,您必须支持更广泛的应用部署模式:• 传统企业应用当前维护的是一些整体式组件,但正在向可扩展性更高的、更加类似云环境的组件模式(如表示层)过渡。
• 大数据和分析应用现在日渐普遍,需要具有大量高性能存储的横向扩展架构。
• 基于微服务的原生云架构需要虚拟化和容器化部署。
开发人员正在创建这些应用,以便可通过自动部署和扩展跨多个云运行。
降低复杂性是支持现有应用和新应用、确保服务交付、保持对数据的控制并获得必要性能的唯一方式。
上述要求推升了对超融合解决方案的需求,因为这是交付IT 组织必须提供的广泛支持的最佳方式之一。
思科协作桌面终端EX60

Cisco EX60 1080P个人桌面网真设备Cisco EX60 是全新一代 1080P个人桌面网真系统,1080P极致高清视频体验,简单易用的触摸屏操作,高保真立体声音频体验以及21.5英寸全高清液晶显示屏,一体化的设备将传神的网真眼神交互延伸至个人办公桌面。
1)符合ITU-T/IETF 标准,良好的兼容性Cisco EX60完全支持ITU-T和IETF标准,同时支持H.323和SIP协议,最高呼叫带宽至6Mbps,具有业界产品中支持范围最广的视音频协议标准。
Cisco EX60支持:H.323/SIP:至6Mbps(点对点);视频编解码协议:H.261、H.263、H.263+、H.263++、H.264音频编解码协议:G.711、G.722、G.722.1及20KHz CD级宽频音频协议MPEG 4 AAC- LD、MPEG4 AAC-LD立体声2)1080P,极致视频体验Cisco EX60提供业界目前最为领先的高清1080P极致视频体验。
相比较传统的标清分辨率、高清720P分辨率,高清1080P提供更细致的图像细节,更清晰的图像质量。
Cisco EX60提供多种高清标准,在不同带宽均可实现全高清的视频体验:720P 30帧/秒、720P 60帧/秒、1080P 30帧/秒同时,Cisco EX60还支持标清分辨率下的16 :9图像分辨率,在不同带宽下的最佳图像质量。
相比较传统 4 :3图像显示格式,16 :9显示格式提供更宽广的视角,更佳的图像体验。
Cisco EX60提供多种宽屏16 :9分辨率,包括标清和高清:w288p(512×288像素)w448p(768×448像素)w576p(1024×576像素)720P(1280×720像素)1080P(1920×1080像素)较于传统4 :3 CIF图像质量的较大提升。
传统4 :3 CIF(352×288像素) 图像质量Cisco提供16 :9 w448p(768×448像素) 图像质量3)个人桌面网真系统,极致视频体验网真系统(Telepresence),通过视频会议通信技术,融合相应的网真会议室氛围,实现面对面的眼神交互。
Participant用户指南

第版8.5Participant 用户指南法律声明♦本文档中的内容如有更改,恕不另行通知;这些内容亦不构成 AT&T Inc.之承诺。
♦本文档所叙述的软件与/或数据库按照许可协议或保密协议提供。
软件与/或数据库只允许按照协议进行使用或复制。
购买者可出于备份目的制作一份本软件的副本。
♦AT&T Connect Participant 应用程序整合了获得 DSP Algorithms 公司 () 许可的回声消除技术。
♦未经 AT&T Inc. 明确书面同意,不得出于购买者个人使用之外的任何目的,以任何形式或通过任何电子或机械手段(包括影印、录制或信息存储与检索系统)复制或传输本“用户指南”的任何部分。
♦除非另有说明,本文所含的所有公司、产品、街道地址以及人员的名称均纯属虚构,其用途仅限于介绍 AT&T Connect 产品的用法。
♦Windows 是 Microsoft Corporation 的商标。
所有其它商标属于各自的拥有者。
♦© 1996-2008 AT&T Inc. 版权所有。
保留所有权利。
目录第 1 章 (8)AT&T Connect Participant 应用程序简介 (8)会议中的主持人和与会人角色 (8)AT&T Connect 与 AT&T TeleConference Service 中的角色 (9)第 2 章 (10)安装AT&T Connect Participant 应用程序 (10)系统要求 (10)从 Web 进行 Participant 安装 (11)从光盘安装 (11)第 3 章 (12)开始使用AT&T Connect Participant 应用程序 (12)Participant 窗口 (12)状态面板 (13)开始页面 (14)第 508 部分符合性 (14)使用辅助菜单 (15)第 4 章 (18)召开 Web 会议 (18)邀请他人加入 Web 会议 (19)加入会议 (20)将 AT&T TeleConference Service 用于 Web 会议音频 (25)使用“呼我” (27)断开与重新连接事件 (28)第 5 章 (30)使用与会人工具 (30)使用表情 (30)使用便条 (31)发送便条 (32)回复/转发便条 (34)删除便条 (34)保存便条 (34)定义便条设置 (35)暂时离开事件 (36)扩展 Participant 窗口 (37)将音频静音/取消静音 (37)使用白板 (38)清除白板 (39)在显示器上指点 (39)在白板上书写 (40)在白板上绘制线条与形状 (40)在白板上绘制对号 (41)保存白板内容 (41)插入文件 (41)使用电子邮件邀请其他与会人 (43)响应问题与调查 (43)查看响应统计数据 (45)第 6 章 (46)演示人工具 (46)演示人权限 (46)传递演示人权限 (48)通过电话与拨出邀请 (48)链接与会人数据和音频流 (49)重命名与会人 (50)使用举手列表 (50)清除与会人 (51)启用广播模式 (52)查看事件材料的加载状态 (52)将文件加载到白板 (53)查看文件属性 (53)重新发送文件 (54)删除文件 (54)查看文件状态 (55)文件类型 (55)插入 PowerPoint 文件 (56)将插入的文件设置为在白板外部打开 (58)事件设置 (59)第 7 章 (60)高级演示人选项 (60)Web 会议中的应用程序共享 (60)与 Web 会议与会人共享应用程序 (60)使用“应用程序共享导航栏” (62)以“远程指导”方式共享应用程序 (65)定义应用程序共享设置 (65)定义输出带宽控制 (65)定义图像质量 (67)定义快捷键 (68)显示应用程序共享导航栏 (68)将 Participant 窗口定义成在“放大”模式中打开 (68)发起调查 (69)共享响应统计数据 (73)执行 Web 浏览 (73)第 8 章 (76)高级 Participant 应用程序选项 (76)概述 (76)定义用户界面语言 (77)定义连接协议/代理设置 (78)定义服务器设置 (79)第 9 章 (80)图标与状态消息 (80)工具栏图标 (80)状态消息 (80)与会人列表图标 (81)第 10 章 (84)Log Submission 实用程序 (LSU) (84)LSU 激活 (84)自动激活 (84)手工激活 (84)使用 LSU (85)发送报告 (85)发送操作失败时 (87)查看收集的数据(可选) (88)第 1 章 AT&T Connect Participant 应用程序简介AT&T Connect 借助可视化演示与互动方面的基于 PC 的工具,扩展了AT&T TeleConference Service (ATCS) 的语音会议功能。
思科网络安全设备 AsyncOS 9.0.x 版本说明说明书
思科系统公司思科网络安全设备 AsyncOS 9.0.x 版本说明发布日期:2015 年 9 月 21 日修订日期:2016 年 7 月 18 日目录•新增内容(第 1 页)•版本分类(第 3 页)•此版本支持的硬件(第 3 页)•升级路线(第 4 页)•升级前要求(第 6 页)•安装和升级说明(第 7 页)•升级 AsyncOS for Web (第 11 页)•重要提示!升级后需要进行的操作(第 11 页) •文档更新(第 12 页)•已知和已修复问题(第 13 页) •相关文档(第 15 页)•支持(第 15 页)新增内容•Cisco AsyncOS 9.0.1 中的新增内容(第 2 页)•Cisco AsyncOS 9.0.0-485 (LD) 中的新增内容(第 3 页)新增内容Cisco AsyncOS 9.0.1 中的新增内容•Cisco AsyncOS 9.0.1-162 (GD) 中的新增内容(第 2 页)•Cisco AsyncOS 9.0.1-161(GD - 仅面向物理设备)中的新增内容(第 2 页)•Cisco AsyncOS 9.0.1-135 (ED) 中的新增内容(第 2 页)Cisco AsyncOS 9.0.1-162 (GD) 中的新增内容在物理 WSA 设备上,版本 161 和 162 相同。
在虚拟 WSA 设备上进行安装时,版本 161 在最后一刻出现问题 (CSCux56040)。
该问题在版本 162 中得到更正。
功能说明身份服务引擎 (ISE) 版本支持 ISE 2.0 以内的所有版本。
HTTP 信头长度的最大值您可以使用 CLI 命令maxhttpheadersize更改代理请求的 HTTP 信头长度最大值。
增加该值可以减少在指定用户属于大量身份验证组,或者响应信头超过当前信头长度最大值时发生的策略跟踪故障。
注意此命令在 AsyncOS 9.0 中实际引入。
Moxa ioLogik E2200 系列乙太网络远程I O设备说明书
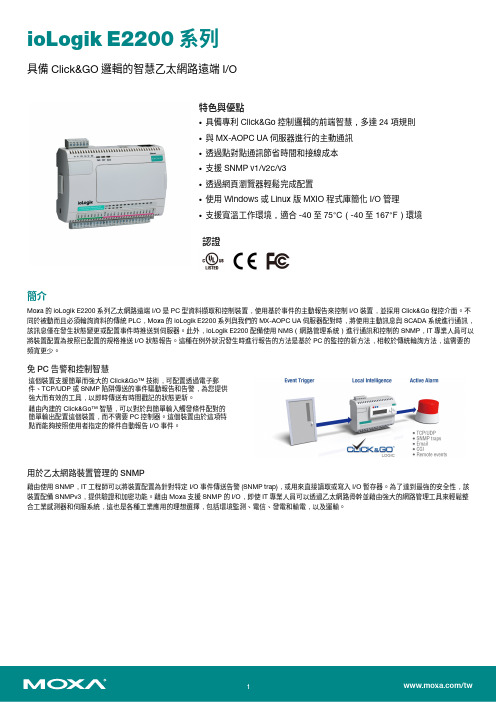
ioLogik E2200系列具備Click&GO邏輯的智慧乙太網路遠端I/O特色與優點•具備專利Click&Go控制邏輯的前端智慧,多達24項規則•與MX-AOPC UA伺服器進行的主動通訊•透過點對點通訊節省時間和接線成本•支援SNMP v1/v2c/v3•透過網頁瀏覽器輕鬆完成配置•使用Windows或Linux版MXIO程式庫簡化I/O管理•支援寬溫工作環境,適合-40至75°C(-40至167°F)環境認證簡介Moxa的ioLogik E2200系列乙太網路遠端I/O是PC型資料擷取和控制裝置,使用基於事件的主動報告來控制I/O裝置,並採用Click&Go程控介面。
不同於被動而且必須輪詢資料的傳統PLC,Moxa的ioLogik E2200系列與我們的MX-AOPC UA伺服器配對時,將使用主動訊息與SCADA系統進行通訊,該訊息僅在發生狀態變更或配置事件時推送到伺服器。
此外,ioLogik E2200配備使用NMS(網路管理系統)進行通訊和控制的SNMP,IT專業人員可以將裝置配置為按照已配置的規格推送I/O狀態報告。
這種在例外狀況發生時進行報告的方法是基於PC的監控的新方法,相較於傳統輪詢方法,這需要的頻寬更少。
免PC告警和控制智慧這個裝置支援簡單而強大的Click&Go™技術,可配置透過電子郵件、TCP/UDP或SNMP陷阱傳送的事件驅動報告和告警,為您提供強大而有效的工具,以即時傳送有時間戳記的狀態更新。
藉由內建的Click&Go™智慧,可以對於與簡單輸入觸發條件配對的簡單輸出配置這個裝置,而不需要PC控制器。
這個裝置由於這項特點而能夠按照使用者指定的條件自動報告I/O事件。
用於乙太網路裝置管理的SNMP藉由使用SNMP,IT工程師可以將裝置配置為針對特定I/O事件傳送告警(SNMP trap),或用來直接讀取或寫入I/O暫存器。
视频会议介绍ppt课件
移动推车模式
小型放置模式
双屏双流模式
小型会议室(SX10,EX90)
采用SX10 ,EX90 满足小型会议室和领导桌面会议需求
思科EX90(适合桌面部署): 1080P,30帧,支持高清双流,具备实物投影功能。 思科SX10 :1080P,30帧,5倍光学变焦摄像头、桌面麦克风以及遥控器。 适合8人以下会议室
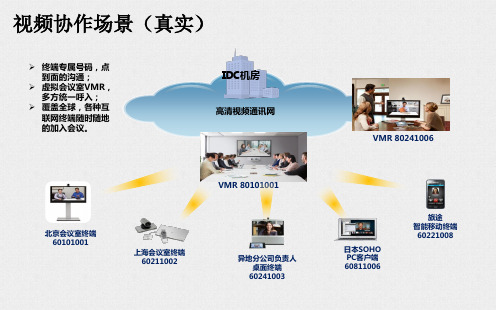
VMR 80241006
日本SOHO PC客户端 60811006
旅途 智能移动终端
60221008
推荐终端类型
思科EX90(适合桌面部 署): 1080P,30帧, 支持高清双流,具备实物 投影功能。
思科SX20 :1080P,60帧,支 持高清双流,12倍变焦摄像头。
思科SX10 :1080P,30帧,5 倍光学变焦摄像头、桌面麦克风 以 电信运营商互联网带宽不小于2M(上下行) ✓ 显示屏幕(支持HDMI接口,建议50寸以上) ✓ 落地推车支架/挂墙件(选配件,例如:NB AVA1500-60-1P)
安装方式一:落地推车式
安装方式二:挂墙式
视频会议室布局方式
各地使用场景基本可分为三种类型: 1、移动视频会议室 2、小型放置会议室 3、小型双屏双流会议室
视频协作场景(真实)
➢ 终端专属号码,点 到面的沟通;
➢ 虚拟会议室VMR, 多方统一呼入;
➢ 覆盖全球,各种互 联网终端随时随地 的加入会议。
IDC机房
高清视频通讯网
VMR 80101001
北京会议室终端 60101001
上海会议室终端 60211002
异地分公司负责人 桌面终端 60241003
SX10灵活的挂件安装
Extreme Networks ExtremeSwitching X460-G2 系列产品数据手册
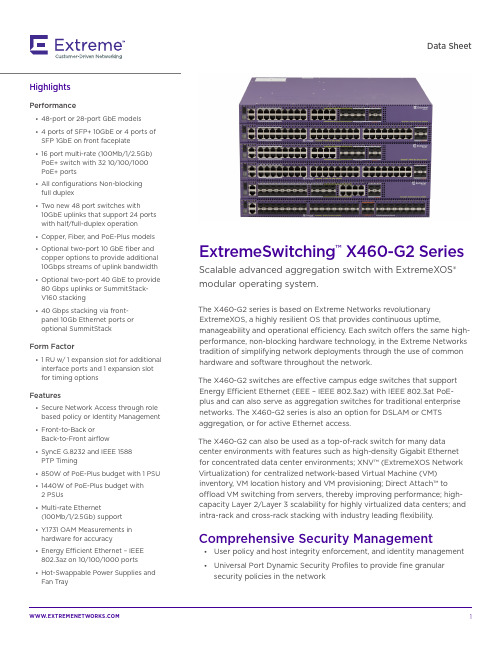
Data SheetExtremeSwitching ™ X460-G2 SeriesScalable advanced aggregation switch with ExtremeXOS® modular operating system.The X460-G2 series is based on Extreme Networks revolutionary ExtremeXOS, a highly resilient OS that provides continuous uptime,manageability and operational efficiency. Each switch offers the same high-performance, non-blocking hardware technology, in the Extreme Networks tradition of simplifying network deployments through the use of common hardware and software throughout the network.The X460-G2 switches are effective campus edge switches that support Energy Efficient Ethernet (EEE – IEEE 802.3az) with IEEE 802.3at PoE-plus and can also serve as aggregation switches for traditional enterprise networks. The X460-G2 series is also an option for DSLAM or CMTS aggregation, or for active Ethernet access.The X460-G2 can also be used as a top-of-rack switch for many data center environments with features such as high-density Gigabit Ethernet for concentrated data center environments; XNV™ (ExtremeXOS Network Virtualization) for centralized network-based Virtual Machine (VM) inventory, VM location history and VM provisioning; Direct Attach™ to offload VM switching from servers, thereby improving performance; high-capacity Layer 2/Layer 3 scalability for highly virtualized data centers; and intra-rack and cross-rack stacking with industry leading flexibility.Comprehensive Security Management• User policy and host integrity enforcement, and identity management • Universal Port Dynamic Security Profiles to provide fine granular security policies in the networkHighlightsPerformance• 48-port or 28-port GbE models • 4 ports of SFP+ 10GbE or 4 ports of SFP 1GbE on front faceplate • 16 port multi-rate (100Mb/1/2.5Gb) PoE+ switch with 32 10/100/1000 PoE+ ports• All configurations Non-blocking full duplex• Two new 48 port switches with10GbE uplinks that support 24 ports with half/full-duplex operation • Copper, Fiber, and PoE-Plus models • Optional two-port 10 GbE fiber and copper options to provide additional 10Gbps streams of uplink bandwidth • Optional two-port 40 GbE to provide 80 Gbps uplinks or SummitStack- V160 stacking• 40 Gbps stacking via front- panel 10Gb Ethernet ports or optional SummitStackForm Factor• 1 RU w/ 1 expansion slot for additional interface ports and 1 expansion slot for timing optionsFeatures• Secure Network Access through role based policy or Identity Management • Front-to-Back or Back-to-Front airflow• SyncE G.8232 and IEEE 1588 PTP Timing• 850W of PoE-Plus budget with 1 PSU • 1440W of PoE-Plus budget with 2 PSUs• Multi-rate Ethernet(100Mb/1/2.5Gb) support • Y .1731 OAM Measurements in hardware for accuracy• Energy Efficient Ethernet – IEEE 802.3az on 10/100/1000 ports • Hot-Swappable Power Supplies and Fan Tray• Threat detection and response instrumentation to react to network intrusion with CLEAR-Flow SecurityRules Engine• Denial of Service (DoS) protection and IP security against man-in-the-middle and DoS attacks to hardenthe network infrastructure• Role Based Policy enables support for policy profiles to secure and provision network resources based upon the role the user or device plays within the network Flexible Port ConfigurationThe X460-G2 offers flexible port configurations. X460-G2 24 port copper models with 10G uplinks can have up to8 fiber GbE ports (four dedicated ports + four shared ports) and 20 GbE copper ports (PoE-plus or non-PoE). The X460-G2 24 port copper models with 1Gb uplinks can provide up to 12 SFP ports with 20 Gigabit Ethernet ports or eight SFP ports with 24 copper GbE ports.All models come equipped with either 4 ports of SFP+10 GbE or 4 ports of SFP 1GbE resident on the faceplateof each model. Through an optional VIM slot, X460-G2 switches can be equipped with an additional 2 ports of 10 GbE for a total of six 10 Gigabit Ethernet ports on the 10Gb uplink models.As another option, each unit can be equipped with 2 ports of QSFP+ 40 Gigabit Ethernet for uplinks or stacking. High-Performance StackingUp to eight X460-G2 switches can be stacked usingthree different methods of stacking: SummitStack, SummitStack-V, and SummitStack-V160.SummitStack — Stacking Using CopperCX4 ConnectionsThe X460-G2 supports SummitStack by using the X460-G2-VIM-2ss module, which offers high-speed 40 Gbps stacking performance and provides compatibility with the X440,X460, X460-G2 and X480 stackable switches running the same version of ExtremeXOS.SummitStack-V — Flexible Stacking Over 10GbE ExtremeXOS supports the SummitStack-V capabilityusing 2 of the native 10 GbE ports on the faceplate as stacking ports, enabling the use of standard cabling and optics technologies used for 10 GbE SFP+, SummitStack-V provides long-distance 40 Gbps stacking connectivityof up to 40 km while reducing the cable complexity of implementing a stacking solution. SummitStack-V is compatible with X440, X440-G2, X450, X450-G2, X460,X460-G2, X480, X670, X670V, X670-G2 and X770 switches running the same version of ExtremeXOS. SummitStack-V enabled 10 GbE ports must be physically direct-connected.Note: SummitStack-V is NOT supported on the 1GbE (SFP) front panel faceplate ports of non-10Gb X460-G2 models but SummitStack-V is supported on the 10GbE VIM cards (VIM-2x or VIM-2t) when used in the non-10GbE switches.SummitStack-V160 — Flexible StackingOver 40GbEThe X460-G2 also supports high-speed 160 Gbps stacking, which is ideal for demanding applications where a high volume of traffic traverses through the stacking links, yet bandwidth is not compromised through stacking. SummitStack-V160 can support passive copper cable(up to 3m), active multi-mode fiber cable (up to 100m), and QSFP+ optical transceivers for 40 GbE up to 10km. With SummitStack-V160, the X460-G2 provides a flexible stacking solution inside the data center or central officeto create a virtualized switching infrastructure across rows of racks. SummitStack-V160 is compatible with X460-G2, X480, X670V, X670-G2 and X770 switches running the same version of ExtremeXOS.Note: The 40Gb Ethernet ports CANNOT be fanned out into four10Gb ports.Intelligent Switching and MPLS/ H-VPLS SupportThe X460-G2 supports sophisticated and intelligentLayer 2 switching, as well as Layer 3 IPv4/IPv6 routing including policy-based switching/routing, Provider Bridges, bidirectional ingress and egress Access Control Lists, and bandwidth control by 8 Kbps granularity both for ingress and egress.T o provide scalable network architectures used mainlyfor Carrier Ethernet network deployment, the X460-G2 supports MPLS LSP-based Layer 3 forwarding and Hierarchical VPLS (H-VPLS) for transparent LAN services. With H-VPLS, transparent Layer 3 networkscan be extended throughout the Layer 3 network cloud by using a VPLS tunnel between the regional transparent LAN services typically built by Provider Bridges (IEEE 802.1ad) technology.IEEE 802.3at PoE-plusIEEE 802.3af Power over Ethernet has been widely usedin the campus enterprise edge network for Ethernet-powered devices such as wireless access points, Voice over IP phones, and security cameras. Ethernet port extenders such as Extreme Networks ReachNXT™ 100-8t can also utilize PoE, making installation and management easier and reducing maintenance costs. The newer IEEE 802.3at PoEplus standard expands upon Power over Ethernet by increasing the power limit up to 30 watts, and by standardizing power negotiation by using LLDP. TheX460-G2 supports IEEE 802.3at PoE-plus and supports standards-compliant PoE devices today and into the future. 1588 Precision Time Protocol (PTP) The X460-G2 offers Boundary Clock (BC), Transparent Clock (TC), and Ordinary Clock (OC) for synchronizing phase and frequency and allowing the network andthe connected devices to be synchronized down to microseconds of accuracy over Ethernet connection. Audio Video Bridging (AVB)The X460-G2 series supports IEEE 802.1 Audio Video Bridging to enable reliable, real-time audio/video transmission over Ethernet. AVB technology delivers the quality of service required for today’s high-definition and time-sensitive multimedia streams.Role-based PolicyUtilizing NetSight Policy Management, the role-based policy framework empowers a network administrator to define distinct roles or profiles that represent industry specific operational groups that may exist in an education or a business environment (e.g., administrator, teacher, student, guest). Each defined role is granted individualized access to specific network services and applications and these access privileges remain associated with users as they move across both wired and wireless network access points.Users can be authenticated via IEEE 802.1X, MAC address, or web authentication, and then assigned a pre-defined operational role. Network operations can be seamlessly tailored to meet business-oriented requirements by providing each role with individualized access to network services and applications, thus aligning network resource utilization with business goals and priorities.In addition, administrators can easily transition from basic VLAN and complex ACL deployments to the Extreme Networks role based policy framework in a seamless fashion, without the need to make changes to their RADIUS infrastructure.Ordering NotesThe X460-G2 base switches do not ship with fan traysor power supplies. The fan tray, power supplies, and any optional VIM cards must be ordered separately. There is only one optional VIM slot on each X460-G2 switch. The optional Timing Module has a separate dedicated slot on the back of the X460-G2 switch. Beginning with EXOS 22.1, all X460-G2 base systems will include an Advanced Edge license -- an upgrade over the Edge License bundled with earlier EXOS releases.SpecificationsPerformance/Scale• Less than 4 microsecond latency (64-byte)• Layer 2/MAC Addresses: 96K (98,304)• IPv4 Host Addresses: 62K• IPv4 LPM Entries: 12K, 16K on X460-G2-16mp- 32p-10GE4• IPv6 Host Addresses: 24K• IPv6 LPM Entries: 6K, 8K on X460-G2-16mp-32p-10GE4• 4096 VLAN/VMANs• 9216 Byte Max Packet Size (Jumbo Frame)• 128 load sharing trunks, up to 32 members per trunk • 4,096 ingress bandwidth meters• Ingress and egress bandwidth policing/rate limiting per flow/ACL• 8 QoS egress queues/port• Egress bandwidth rate shaping per egress queue and per port• Rate Limiting Granularity: 8 Kbps• All ports Full Duplex - half duplex operation is not supported except for 24 ports on X460-G2-24p-24hp-10GE4 and X460-G2-24t-24ht-10GE4• Policy Capabilities• Rules per Profile: Up to 1464• Authenticated Policy Users per Switch: Up to 12,288• Authenticated Policy Users per Port: Up to 12,288• Unique Permit/Deny Rules per switch: 1464• The following number of rules listed below can be affected by the switch configuration options in EXOS22.4 or greater• MAC Rules: up to 512• IPv4 Rules: up to 1280• IPv6 Rules: up to 256• L2 Rules: up to 184• Rate Limiting: Per Class of ServiceNOTE: Policy and rule limits here reflect support available in EXOS 22.4 or greaterFront-Panel PortsFront-Panel Ports (cont.)NOTE: All X460-G2 switches have a USB 2.0 port that is supported as a port to a storage device with all EXOS versions of 22.1 or higher NOTE: The multi-rate ports do NOT support SynchEPhysicalPhysical (cont.)NOTE: Switch weights include installed fan module. They do not include installed VIM2 modules or PSUs.* Please refer to the Summit Family Switches Hardware Installation Guide for packaged weight and dimensions.CPU/Memory• 64-bit MIPS Processor, 1 GHz clock • 1GB ECC DDR3 DRAM • 4GB eMMC Flash• 5MB packet buffer on X460-G2-16mp-32p-10GE4, 4MB packet buffer on other X460-G2 switchesLED Indicators• Per port status LED including power status • System Status LEDs: management, fan and power • 7 segment display of stack numberPower Supply Units (Each Has Front-to-Back and Back-to-Front Models)PoE Power BudgetPower Supply Units (Each Has Front-to-Back and Back-to-Front Models)* Based on a peak of 720 watts PoE for 24 port PoE switches and 1440 watts PoE for 48 port PoE switches. All switches at 50C.Environmental Specifications• EN/ETSI 300 019-2-1 v2.1.2 - Class 1.2 Storage• EN/ETSI 300 019-2-2 v2.1.2 - Class 2.3 Transportation • EN/ETSI 300 019-2-3 v2.1.2 - Class 3.1e Operational • EN/ETSI 300 753 (1997-10) - Acoustic Noise• ASTM D3580 Random Vibration Unpackaged 1.5 G Operating Conditions• T emp: 0° C to 50° C (32° F to 122° F)• Humidity: 10% to 95% relative humidity,non-condensing• Altitude: 0 to 3,000 meters (9,850 feet)• Shock (half sine): 30 m/s2 (3 G), 11 ms, 60 shocks • Random vibration: 3 to 500 Hz at 1.5 G rmsEnvironmental Compliance• EU RoHS 2011/65/EU• EU WEEE 2012/19/EU• China RoHS SJ/T 11363-2006• T aiwan RoHS CNS 15663(2013.7)Packaging and Storage Specifications• T emp: -40° C to 70° C (-40° F to 158° F)• Humidity: 10% to 95% relative humidity, non-condensing • Packaged Shock (half sine): 180 m/s2 (18 G), 6 ms,600 shocks• Packaged Vibration: 5 to 62 Hz at velocity 5 mm/s, 62 to 500 Hz at 0.2 G• Packaged Random Vibration: 5 to 20 Hz at 1.0 ASDw/–3 dB/oct. from 20 to 200 Hz• Packaged Drop Height: 14 drops minimum on sides and corners at 42 inches (<15 kg box)Regulatory and Safety• North American ITE• UL 60950-1 2nd edition A2:2014, Listed Device (U.S.)• CSA 22.2 No. 60950-1 2nd edition 2014 (Canada)• Complies with FCC 21CFR 1040.10 (U.S. Laser Safety)• CDRH Letter of Approval (US FDA Approval)• European ITE• EN 60950-1:2006+A11:2009+A1:2010+A12:2011+A2:2013 2nd Ed.• EN 60825-1:2007 / IEC 60825-1:2007 Class 1(Lasers Safety)• 2014 / 35/ EU Low Voltage Directive• International ITE• CB Report & Certificate per IEC 60950-1 :2005+A1:2009+A2:2013 + National Differences• AS/NZX 60950-1 (Australia /New Zealand)EMI/EMC Standards• North American EMC for ITE• FCC CFR 47 part 15 Class A (USA)• ICES-003 Class A (Canada)• European EMC Standards• EN 55032:2015 Class A• EN 55024:2010• EN 61000-3-2: 2014 (Harmonics)• EN 61000-3-3: 2013 (Flicker)• EN 300 386 v1.6.1 (EMC T elecommunications)• 2014/30/EU EMC Directive• International EMC Certifications• CISPR 32:2015, Class A (International Emissions)• AS/NZS CISPR32:2015• CISPR 24:2010 Class A (International Immunity)• IEC 61000-4-2:2008/EN 61000-4-2:2009 ElectrostaticDischarge, 8kV Contact, 15 kV Air, Criteria B• IEC 61000-4-3:2010/EN 61000-4-3:2006 +A1:2008+A2:2010 Radiated Immunity 10V/m, Criteria A• IEC 61000-4-4:2012. / EN 61000-4-4:2012 TransientBurst, 1 kV, Criteria A• IEC 61000-4-5:2014 /EN 61000-4-5:2014 Surge, 1 kVL-L, 2 kV L-G, Level 3, Criteria B• IEC 61000-4-6:2013/EN 61000-4-6:2014 ConductedImmunity, 0.15-80 MHz, 10Vrms, 80%AM (1kHz)Criteria A• IEC/EN 61000-4-11:2004 Power Dips & Interruptions,>30%, 25 periods, Criteria CCountry Specific• VCCI Class A (Japan Emissions)• ACMA RCM (Australia Emissions)• CCC Mark• KCC Mark, EMC Approval (Korea)TELECOM STANDARDS• CE 2.0 CompliantIEEE 802.3 Media Access Standards• IEEE 802.3ab 1000BASE-T• IEEE 802.3z 1000BASE-X• IEEE 802.3ae 10GBASE-X• IEEE 802.3at PoE Plus• IEEE 802.3az (EEE) - EEE is not supported on themulti-rate 100Mb/1.0Gb/2.5Gb ports• IEEE 802.3bz 2.5G/5GBASE-T• 2.5Gb Ethernet implemented via NBase-T AllianceFan and Acoustic NoiseFan Acoustics (cont.)* Bystander Sound Pressure is presented for comparison to other products measured using Bystander Sound Pressure. **Declared Sound Power is presented in accordance with ISO-7779:2010(E), ISO 9296:2010 per ETSI/EN 300 753:2012-01AccessoriesX460-G2 POWER SUPPLIESAll X460-G2 series switches are sold a la carte sopower supplies and fans must be ordered separately. If redundancy or higher power Power-over-Ethernet plus capability is required, an additional power supply can be installed in the system. Each power supply has a front-to-back model and an equivalent back-to-front model for air flow control.• 300W AC PSU• 300W AC PSU is compatible with X460-G2-24t/48t/24x/48x switches.• 300W DC PSU• 300W DC PSU is compatible with X460-G2-24t/48t/24x/48x switches.• 350W PoE AC PSU• 350W PoE AC PSU is compatible with all X460-G2PoE switches and provides 150 watts of PoE-pluspower budget per one supply. When two PSUs areinstalled, the total PoE-plus power budget becomes300 watts.• 715W PoE AC PSU• 715W PoE AC PSU is compatible with all X460-G2PoE switches switches and provides 500 watts ofPoE-plus power budget per one supply. When twoPSUs are installed, the total PoE-plus power budgetbecomes 1031 watts.• 1100W PoE AC PSU• 1100W PoE AC PSU is compatible with all X460-G2PoE switches switches and provides 850 watts ofPoE-plus power budget per one supply. When twoPSUs are installed, the total PoE-plus power budgetbecomes 1440 watts.• Optional Rear Rail Mounting Kit• The Rear Rail Kit (order code 16776) is an optionalaccessory for certain X460-G2 non-PoE and SFPmodels. It enables four post mounting for non-PoE andSFP X460-G2 models when needed. Please note that"deeper" X460-G2 PoE models already ship with thismounting option included.X460-G2 Optional ModulesX460-G2 series switches have two slots, VIM and Timing, to support optional modules that support 10 Gigabit Ethernet, 40Gigabit Ethernet, stacking and timing modules. The VIM slot supports a two-port SFP+ 10 Gigabit Ethernet module, a two-port 10GBase-T Gigabit Ethernet module, a two-port SummitStack module, or a two-port QSFP+ 40 Gigabit Ethernet module. The Timing slot supports a timing module for SyncE and 1588PTP.• VIM Modules• X460-G2 VIM-2x• X460-G2 VIM-2t• X460-G2 VIM-2ss• X460-G2 VIM-2q• Timing Modules• X460-G2 TM-CLKX460-G2 VIM-2X2-port 10 Gigabit Ethernet module - provides twoSFP+ ports. These two SFP+ ports can support both10 Gigabit Ethernet SFP+ transceivers and Gigabit Ethernet transceivers.X460-G2 VIM-2T2-port 10 Gigabit Ethernet module, provides two 10GBase-T copper ports.X460-G2 VIM-2SSSummitStack module has two SummitStack stacking ports, and provides a 40 Gigabit stacking solution. This stacking module offers compatibility with other Extreme Networks stackable switches, which are Summit X440, Summit X460, and Summit X480.X460-G2 VIM-2Q2-port 40 Gigibit Ethernet module – provides 2 fully functional QSFP+ ports for uplinks or can be used for SummitStack-V160 providing a 160 Gigabit stacking solution.X460-G2 TM-CLKModule required for supporting G.8232 Synchronous Ethernet (SyncE) and ITU 1588 Precision Time Protocol (PTP) – available on all X460–G2.WarrantyLtd. Lifetime with eAHR-2For warranty details, visit /go/warrantyPower Supplies, Fan Tray. Timing Modules and VIMS Are Ordered SeparatelyOrdered EmptyShipped Empty with blank panels for 1 PSU slot, VIM slot & Timing Module slotOptional : Timing Module for SyncE and 1588 PTP ordered separatelyOptional : VIM Cards ordered separatelyRequired : Fan Tray with Air Flow Direction ordered separatelyRequired : First Power Supply with Air Flow Direction ordered separatelyOptional : Redundant/Additive Power Supply with Air Flow Direction ordered separatelyTransceiver Support MatrixTransceiver Support Matrix (cont.)Ordering Information¹ 1x40Gb Mode Only2 Data networking, not stacking³ Supported configuration is to populate every other SFP+ port in system, with a maximum of half the 10Gb SFP+ ports configured with 10GBASE-T transceivers. An adjacent SFP+ port should remain unused for every 10GBASE-T SFP+ installedNOTE: Power supplies and fan tray MUST be ordered separately. They are NOT INCLUDED in the base switch model./contact Phone +1-408-579-2800©2018 Extreme Networks, Inc. All rights reserved. Extreme Networks and the Extreme Networks logo are trademarks or registered trademarks of Extreme Networks, Inc. in the United States and/or other countries. All other names are the property of their respective owners. For additional information on Extreme Networks Trademarks please see /company/legal/trademarks. Specifications and product availability are subject to change without notice. 8904-0518-29。
思科 Webex Room(55 寸)

落地支架
© 2018 思科和/或其附属公司。版权所有。本文档所含内容为思科公开信息。
第 3 页,共 8 页
规格 滚轮支架
说明
壁装支架
可选硬件组件 带宽 分辨率 防火源自穿越视频标准 视频输入视频输出
音频标准
● 麦克风延长线缆 ● HDMI 双流线缆 8 米 ● H.323/SIP:64kbps - 6 Mbps ● 支持最高至 1080p60fps 在内的多种分辨率,包括 4:3 和 16:9 标清分辨率 ● Cisco TelePresence Expressway 技术 ● H.460.18、H.460.19 防火墙穿越 ● SIP ICE (Interactive Connectivity Establishment) ● NAT ● H.264 ● H.265 ● 两个 HDMI 输入,最高分辨率格式为 4K (3840×2160),30 fps,包括 HD1080p60;
◦ Cisco Unified Communications Manager Media Resource Group(需要 Cisco Meeting Server 或思
科网真服务器或思科网真 MCU)
● 思科Active Control功能 ● Dual Screen Expreience,支持两个屏幕同时显示不同的远端会场 ● 自适应 SIP/H.323 MultiSite:
© 2018 思科和/或其附属公司。版权所有。本文档所含内容为思科公开信息。
第 2 页,共 8 页
● 智能会议:功能强大的集成摄像机提供多项智能画面显示功能,例如自动取景和发言者跟踪。 ● 智能演示:双屏幕、双内容源、无线共享和 4K 内容共享,共同造就卓越的演示效果。 ● 智能集成:会议室人数统计,帮助您充分了解会议室利用率并优化资源分配;In-Room Control 功能配合
ThinkPad x60完全拆解 zz
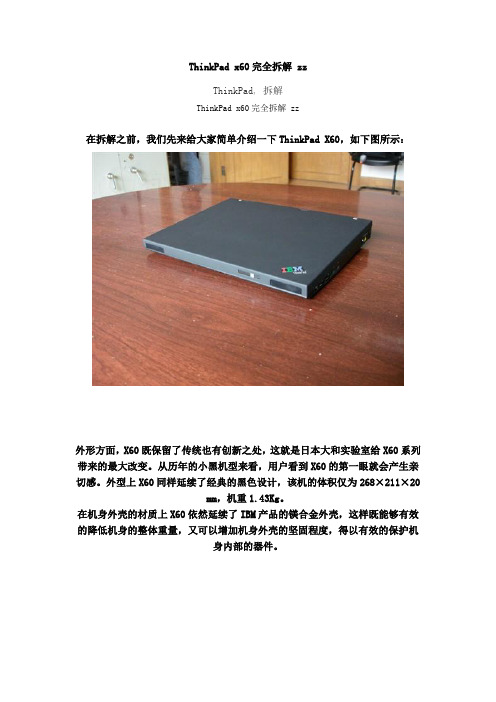
ThinkPad x60完全拆解 zzThinkPad, 拆解ThinkPad x60完全拆解 zz在拆解之前,我们先来给大家简单介绍一下ThinkPad X60,如下图所示:外形方面,X60既保留了传统也有创新之处,这就是日本大和实验室给X60系列带来的最大改变。
从历年的小黑机型来看,用户看到X60的第一眼就会产生亲切感。
外型上X60同样延续了经典的黑色设计,该机的体积仅为268×211×20mm,机重1.43Kg。
在机身外壳的材质上X60依然延续了IBM产品的镁合金外壳,这样既能够有效的降低机身的整体重量,又可以增加机身外壳的坚固程度,得以有效的保护机身内部的器件。
X60键盘左上部有音量控制按钮和ThinkVantege键,用蓝色的ThinkVantage 键替代了原Access IBM键,用户按下后会有数据备份和安全设定等选项。
X60的很多设计理念实际上在Z60系列身上已经出现过,在很多人看来Z60的上市更像是为以后的小黑笔记本开辟的一块试验田。
细节方面X60采用了单手开盖、双卡扣设计,而LED键盘照明灯也从X41时代的橘黄色变成了夜晚亮度更高,使用更为舒适的白色。
下面,就来正式进行拆解了。
在拆解之前,我们先来看看机器的背面上面的螺丝分布:ThinkPad X60同T60相似,底部一些相关螺丝都用特殊的标志表示出来。
如上图所示,在背面的螺丝攻有两种标志的,一种是外框的一种就是键盘的了,其余没有标志的,分别是屏幕的和主板的,在后面会一一介绍的。
好了我们开始正式拆机了,第一步当然是把电池拿下来了。
电池很好说,直接按照图示取下来就可以了。
取下电池后我们来拆键盘了按照图中的指示,拆下具有相同的标志的螺丝,共5个。
把背面的螺丝拆下来之后,我们就可以把机器翻正面来拆键盘了。
拆键盘只需要将键盘往上推,推倒头后再往上一提就可以拆下键盘了。
在这个过程中要注意不要弄断键盘排线。
如上图两个红圈的位置要特别注意在拔键盘的时候注意要轻轻拔下来。
思科VTM方案简介

VTM-1
VTM-N VTM-1
© 2010 Cisco and/or its affiliates. All rights reserved.
VTM-N VTM-1
VTM-N
营业网点-VTM-服务终端
营业网点-VTM
营业网点只需部署VTM机具 开放性好,兼容多品牌VTM 可以快速扩容和增加网点覆盖 利用现有网络,不占用WAN
Cisco Finesse Web Services
• 提供封装好的开发控件,软件开发商无需了解VTC的技 术细节,一般只需10人天工作量可以完成与VTM银行业 务应用的开发集成工作。
© 2010 Cisco and/or its affiliates. All rights reserved.
Cisco Confidential
Cisco Confidential
16
© 2010 Cisco and/or its affiliates. All rights reserved.
Cisco Confidential
17
• VTA座 客户资料自动弹屏
• 呼叫数据同步
• 报表整合 • 支持B/S架构 • 支持Java,.net,C++开发平台
© 2010 Cisco and/or its affiliates. All rights reserved.
Cisco Confidential
14
© 2010 Cisco and/or its affiliates. All rights reserved.
• 真正的720P高清视频录像解决方案, 某些厂商才用录屏方式来录像,普 遍存在视频质量差、不流畅、跳帧 等问题。
- 1、下载文档前请自行甄别文档内容的完整性,平台不提供额外的编辑、内容补充、找答案等附加服务。
- 2、"仅部分预览"的文档,不可在线预览部分如存在完整性等问题,可反馈申请退款(可完整预览的文档不适用该条件!)。
- 3、如文档侵犯您的权益,请联系客服反馈,我们会尽快为您处理(人工客服工作时间:9:00-18:30)。
Cisco EX60 1080P个人桌面网真设备
Cisco EX60 是全新一代 1080P个人桌面网真系统,1080P极致高清视频体验,简单易用的触摸屏操作,高保真立体声音频体验以及21.5英寸全高清液晶显示屏,一体化的设备将传神的网真眼神交互延伸至个人办公桌面。
1)符合ITU-T/IETF 标准,良好的兼容性
Cisco EX60完全支持ITU-T和IETF标准,同时支持H.323和SIP协议,最高呼叫带宽至6Mbps,具有业界产品中支持范围最广的视音频协议标准。
Cisco EX60支持:
H.323/SIP:至6Mbps(点对点);
视频编解码协议:H.261、H.263、H.263+、H.263++、H.264
音频编解码协议:G.711、G.722、G.722.1及20KHz CD级宽频音频协议MPEG 4 AAC- LD、MPEG4 AAC-LD立体声
2)1080P,极致视频体验
Cisco EX60提供业界目前最为领先的高清1080P极致视频体验。
相比较传统的标清分辨率、高清720P分辨率,高清1080P提供更细致的图像细节,更清晰的图像质量。
Cisco EX60提供多种高清标准,在不同带宽均可实现全高清的视频体验:720P 30帧/秒、720P 60帧/秒、1080P 30帧/秒
同时,Cisco EX60还支持标清分辨率下的16 :9图像分辨率,在不同带宽下的最佳图像质量。
相比较传统 4 :3图像显示格式,16 :9显示格式提供更宽广的视角,更佳的图像体验。
Cisco EX60提供多种宽屏16 :9分辨率,包括标清和高清:
w288p(512×288像素)
w448p(768×448像素)
w576p(1024×576像素)
720P(1280×720像素)
1080P(1920×1080像素)
较于传统4 :3 CIF图像质量的较大提升。
传统4 :3 CIF(352×288像素) 图像质量
Cisco提供16 :9 w448p(768×448像素) 图像质量
3)个人桌面网真系统,极致视频体验
网真系统(Telepresence),通过视频会议通信技术,融合相应的网真会议室氛围,实现面对面的眼神交互。
Cisco在提供全套网真系统的基础上,将眼神交互的极致网真体验进一步延伸至个人办公桌面,EX60,24英寸的全高清1080P液晶显示屏,最大化的显示人像,配合1080P高清摄像头的逼真采集,实现面对面的网真效果。
4)出众的一体化设计,超乎想象的操作简易性
Cisco EX60作为一款高度集成的桌面网真系统,具有出众的视频、音频效果:
21.5英寸1080P液晶显示屏,宽屏16 :9显示,分辨率可至1920×1080;
优雅的外观设计,铝质外观,浓郁的斯堪地纳维亚外观
内置1080P高清摄像头
内置高保真立体声扬声器,内置MIC
支持20KHz AAC-LD音频,CD级别的立体声体验。
同时,EX60可充当桌面电脑显示器。
Cisco EX60作为一款桌面个人网真系统,摆脱了传统视频会议系统的遥控器控制方式,8英寸触摸屏,简单直观的图像界面,iPhone手机般的触摸操作,即可完成所有的呼叫、控制。
5)强大的扩展能力
Cisco EX60作为一款桌面个人网真系统,同时具备了强大的扩展能力:
10/100/1000MB×2自适应以太网络接口,可作为桌面交换机使用。
1080P高清镜头,随时可调整上下位置,并且自动调整图像将高质量的将桌面文档图像发送到远端(文档摄像机功能)。
6)强大的数据双流功能
在××项目中,不仅需要实现1080P视频通信,还需在实现高分辨率的数据双流通信效果。
Cisco EX60个人桌面网真符合ITU-T H.239、IEFT BFCP数据双流标
准,可随时发送PC、高清视频源的数据双流。
EX60数据双流分辨率最高可至WXGA(1280×768) ,满足目前用户对文档图片清晰度的需求。
即插即用,通过触摸屏的控制,一键发送高清双流。
7)其他特性
Cisco EX60作为一款业界领先的1080P个人桌面网真系统,还具备更多实用特性,在××项目中,可充分满足用户现在、未来的实际实用需求。
支持SIP协议,与统一通信(UC)进行无缝整合;
完备的QoS设置,针对网络出现拥塞情况下,实现视频通信质量的保障;
支持ITU-T H.460.18/19,安全穿越防火墙;
视频通信码流的加密:ITU-T H.235 V2/V3和AES;
同时支持H.235和网络802.1X身份认证;
综上,在××项目中,Cisco EX60 1080P个人桌面网真系统完全能够满足用户需求,提供最佳的高清1080P网真体验以及其他丰富强大的功能。
