R_MOD_07-Linux_Host_Installation_and_Integration_for_Block
Linux下Mrtg安装与配置
Linux安装mrtg监控主机流量linux下需要的软件:gd-1.8.4-11、gd-devel-1.8.4-11、libpng-1.2.2-16、libpng-devel-1.2.2-16、libpng10-1.0.13-8、libpng10-devel-1.0.13-8、perl-5.8.0-88、zlib-1.1.4-8、zlib-devel-1.1.4-8、httpd-2.0.40-21、gcc-3.2.2-5、net-snmp-5.06-17、mrtg-2.14.5.tar.gz 需下载:http://people.ee.ethz.ch/~oetiker/webtools/mrtg/pub/mrtg-2.14.5.tar.gzMRTG生成供浏览图像需要httpd服务的支持,同时也需要gd、libpng和zlib三个软件包的支持,而gd 的正常运行也需要其它的几个软件,下面一并安装它们1.安装zlib-1.2.3#tar zxvf zlib-1.2.3.tar.gz#cd zlib-1.2.3#./configure --prefix=/usr/local/zlib#make#make install2.安装httpd-2.2.4#tar zxvf httpd-2.2.4.tar.gz#cd httpd-2.2.4#./configure --prefix=/usr/local/apache --sysconfdir=/etc/httpd --enable-so--enable-track-vars --enable-rewrite --with-z-dir=/usr/local/zlib#make#make install启动httpd/usr/local/apache/bin/apachectl -k start3.安装libpng-1.2.14#tar zxvf libpng-1.2.14.tar.gz# cd libpng-1.2.14# cp scripts/makefile.linux makefile# make (若是提示找不到zlib库文件或者头文件,多半是makefile文件里zlib的默认路径有误。
NVIDIA Tegra Linux 驱动程序包 R21.4 发布说明说明书

DA_06297-R21 | July 10, 2015Advance Information | Subject to Change Detailed SW Feature ListDOCUMENT CHANGE HISTORYDA_06297-R21Version Date Authors Description of Changev1.0 10 May 2012 whsu / kstone Initial releaseUpdated for R16 release v2.0 09 Sep 2012 whsu / mzensius /alevinsonv3.0 21 May 2013 whsu / mzensius Updated for R16.3 releasev4.0 17 Sep 2014 whsu / mzensius Updated for R19.3 releasev5.0 26 May 2015 mzensius Updated for R21.3 releasev6.0 10-Jul-2015 emilyh Updated for R21.4 releaseTABLE OF CONTENTS NVIDIA TEGRA LINUX DRIVER PACKAGE DETAILED FEATURE LIST (4)Processor (5)Tool Chain (5)Linux GStreamer (0.10/1.0) Framework (5)Linux Audio (9)Kernel (9)Power Management (9)I/O Interfaces (10)Board Support Package (BSP) (10)Boot Loaders (11)Multimedia (12)Display (12)Graphics and Display API Support (13)Decoders (13)Audio Decoders (13)Image Decoders (14)Video Decoders (14)Encoders (16)Audio Encoders (16)Image Encoders (16)Video Encoders (16)Container Formats (16)Reader Container Formats (Gstreamer) (16)Writer Container Formats (Gstreamer) (18)Streaming Protocols (18)This document provides a detailed list of features implemented in the NVIDIA® Tegra®Linux Driver Package.Tegra Linux Driver Package (L4T) supports the Jetson TK1 reference platform.Here are some guidelines for reading the information in this document:④Platform support—unless otherwise specified in the Notes column, the feature issupported on all supported platforms.④Features with a note containing “Early-access feature” are provided for evaluation withlimited testing and are subject to change.Feature OverviewThis document contains tables for the following feature categories:④Tool Chain④Linux Gstreamer (0.10/1.0) Framework④Linux Audio④Kernel④Power Management④I/O Interfaces④Board Support Package (BSP)④Boot Loaders④Multimedia④Display④Graphics and Display API Support④Decoders④Encoders④Container Formats④Streaming Protocols④Display④Camera Application FeaturesPROCESSORSKU Supported Description NotesCD575M Duty Cycle Support:24 x 7 (Use Case 1)4/4/16 (Use Case 2)Refer to DatasheetCD575MI Duty Cycle Support:24 x 7 (Use Case 1)4/4/16 (Use Case 2)Refer to DatasheetNote: Refer to product documentation for software support to enable use cases. TOOL CHAINFeature Description NotesARM Cortex-A9 processor arm-cortex_a9-linux-gnueabi-GNU Compiler Collection gcc-4.5.3-glibc-2.11.3 -LINUX GSTREAMER (0.10/1.0) FRAMEWORKRefer to the Tegra Linux Driver Package Multimedia User Guide for detailed information on capabilities and use of hardware-accelerated plugins for Gstreamer.Note: Numbers in parentheses in the following table indicate the relevant version of Gstreamer.Feature Description NotesH.264/AVC Video Decoder nv_omx_h264dec(0.10)omxh264dec (1.0)skip-frames (0.10, 1.0)disable-dpb (1.0)MPEG-4 Video Decoder nv_omx_mpeg4dec(0.10)omxmpeg4videodec(1.0)skip-frames (0.10, 1.0)disable-dpb (1.0)VP8 Video Decoder nv_omx_vp8dec(0.10)omxvp8dec (1.0) skip-frames (0.10, 1.0) disable-dpb (1.0)H.263 Video Decoder nv_omx_h263dec(0.10)omxh263dec (1.0) skip-frames (0.10, 1.0) disable-dpb (1.0)JPEG Image Decoder nvjpegdec (0.10)nvjpegdec (1.0)idct-method (0.10, 1.0)H.264/AVC Video Encoder nv_omx_h264enc(0.10)omxh264enc (1.0)Bitrate (0.10)Quality-level (0.10)Rc-mode (0.10)Qp-range (0.10)Temporal-tradeoff (0.10)Bit-packetization (0.10)Low-latency (0.10)Framerate (0.10)Control-rate (1.0)Target-bitrate (1.0)Quant-i-frames (1.0)Quant-p-frames (1.0)Quant-b-frames (1.0)VP8 Video Encoder nv_omx_vp8enc(0.10)omxvp8enc (1.0) Bitrate (0.10)Quality-level (0.10)Rc-mode (0.10)Qp-range (0.10) Temporal-tradeoff (0.10) Bit-packetization (0.10) Low-latency (0.10) Framerate (0.10) Control-rate (1.0) Target-bitrate (1.0) Quant-i-frames (1.0) Quant-p-frames (1.0) Quant-b-frames (1.0)JPEG Image Encoder nvjpegeng (0.10)nvjpegenc (1.0) Quality (0.10, 1.0)Idct-method (0.10, 1.0)Video Sink, X11 Window nveglglessink (1.0) max-lateness (1.0)qos (1.0)async (1.0)ts-offset (1.0)last-sample (1.0)enable-last-sample (1.0)blocksize (1.0)render-delay (1.0)throttle-time (1.0)max-bitrate (1.0)show-preroll-frame (1.0)create-window (1.0)force-aspect-ratio (0.10, 1.0)Video Sink, Panel Overlay nv_omx_videosink(0.10)nvoverlaysink (1.0)x-scale (0.10)y-scale (0.10)overlay (0.10)overlay-depth (0.10)overlay-x (0.10)overlay-y (0.10)overlay-w[width] (0.10)overlay-h[height] (0.10rotation (0.10)display [name] (0.10)force-aspect-ratio (0.10)contrast (0.10)brightness (0.10)hue (0.10)saturation (0.10)max-lateness (0.10, 1.0)qos (0.10, 1.0)async (0.10, 1.0)ts-offset (0.10, 1.0)last-buffer (0.10)enable-last-buffer (0.10)last-sample (1.0)enable-last-sample (1.0)blocksize (0.10, 1.0)render-delay (0.10,1.0)throttle-time (0.10, 1.0)max-bitrate (1.0)show-preroll-frame (1.0)Video Sink, HDMI Overlay nv_omx_hdmi_videosink (0.10)nvhdmioverlaysink(1.0)x-scale (0.10)y-scale (0.10)overlay (0.10)overlay-depth (0.10)overlay-x (0.10)overlay-y (0.10)overlay-w[width] (0.10)overlay-h[height] (0.10rotation (0.10)display [name] (0.10)force-aspect-ratio (0.10)contrast (0.10)brightness (0.10)hue (0.10)saturation (0.10)max-lateness (0.10, 1.0)qos (0.10, 1.0)async (0.10, 1.0)ts-offset (0.10, 1.0)last-buffer (0.10) enable-last-buffer (0.10) last-sample (1.0) enable-last-sample (1.0) blocksize (0.10, 1.0) render-delay (0.10,1.0) throttle-time (0.10, 1.0) max-bitrate (1.0)show-preroll-frame (1.0)Format Conversion nvvidconv (0.10)nvvidconv (1.0) raw-yuv <-> nv-yuv (0.10)raw-yuv <-> nvrm-yuv (0.10)raw-gray <-> nv_yuv (0.10)raw-gray <-> nvrm-yuv (0.10)nv-yuv <-> raw-rgb (0.10)nvrm-yuv <-> raw-rgb (0.10)nv-yuv <-> raw-yuv (0.10)nvrm-yuv <-> raw-yuv (0.10)nv-yuv <-> raw-gray (0.10)nvrm-yuv <-> raw-gray (0.10)raw(yuv)<-> raw(yuv-memory:NVMM) (1.0) raw(gray)<-> raw(yuv-memory:NVMM) (1.0) raw(yuv-memory:NVMM)<-> raw(yuv) (1.0)raw(yuv-memory:NVMM)<-> raw(gray) (1.0)Video Scaling nvvidconv (0.10)nvvidconv (1.0) Input/Output formats supported: raw-yuv (0.10, 1.0)raw-gray (0.10, 1.0)nv-yuv (0.10)nvrm-yuv (0.10)raw-rgb (0.10, output only)Capture application, Gstreamer-based nvgstcapture-0.10nvgstcapture-1.0USB camera (0.10, 1.0)CSI camera (1.0)PreviewStill image captureVideo captureVideo playback application, Gstreamer-based nvgstplayer-0.10 nvgstplayer-1.0-Gstreamer CUDA Plugin Gst-videocuda (1.0)Gstreamer CUDA plugin implementationfor video post and preprocessing.LINUX AUDIOFeature Description NotesSystem sounds ALSA Driver -HDMI Audio - -Pulse Audio -Multi-instance audiodecodeKERNELFeature Description NotesLinux Kernel K3.10 -SMP - -CPU hot plug support - -System MMU - -System RAM - LPAE (equal to or greaterthan 4 GB) not supported POWER MANAGEMENTFeature Description NotesCPU DVFS - -EMC DVFS - --Low-power idle state Deep Sleep (LP0) andSuspend (LP1CPU auto hotplug - -4+1 CPU - -Thermal Management Description Notes- -External temperaturesensor (NCT1008)Dynamic thermal throttling Software with hardware-fail-safeLP1 support Description NotesWake with power button- -and RTCUltra-Low-Power Standby(LP0) Description NotesDRAM self-refresh Not enabled by default -Deep Sleep support - -- -USB Suspend during DeepSleepMiscellaneous features Description NotesPower off button support - -I/O INTERFACESFeature Description NotesDDR3L (Hynix 2 GB) - -USB0 Host USB 2.0 Micro-AB -USB0 (2.0) Device USB 2.0 Micro-AB -USB1 (2.0) Host Half-miniPCIe Socket -USB2 (2.0) Host USB 3.0 Type A -USB3 (3.0) Host USB 3.0 Type A -PCIe x1 (lane 2) RTL8111GS Ethernet -PCIe x1 (lane 4) Half-miniPCIe Socket -SATA SATA Connector -HDMI HDMI Connector -HDMI Hotplug detect HDMI Connector -CSI A/B (x4) General Expansion Header V4L2 API (ISP Bypass) SDMMC3 SDcard Socket -SDMMC4 eMMC -I2S1 (DAP2) Audio Codec (ALC5639) -GEN1_I2C (I2C1) Various -CAM_I2C (I2C3) General Expansion Header -DDC (I2C4) HDMI Connector -PWR_I2C (I2C5) PMU -UARTD Debug UART -JTAG - - BOARD SUPPORT PACKAGE (BSP)Feature Description NotesReal-time clock - -tty50 -8250 UART for debugconsolettyTHS0, ttyTHS0 ttyTHS2 -High-speed UART forperipheralsI2C master - -USB gadget Additional configuration-requiredUSB host - -USB Ethernet - -USB 2.0 host Default to MSC -USB 3.0 host - -USB mouse - -USB thumb drive - -- Framebuffer Console HDMI, eDP is tested withexpansion boardSDHCI driver for eMMC 4.5 - -External SD card support - -USB mass storage device Host mode only -Multi-touch screen No touch support - Headphone jack - -APB DMA - -SATA mSATA is supported -PMU Description NotesPWM backlight No backlight support -Battery charging (ADC) No battery charging -PMIC AMS (A53722) - -PMIC reset - -Sensors Description NotesGas gauge No gas gauge -Thermal monitor - -PCI-Express Description Notes-PCI device enumeration MiniPCi x1 with Real TekEthernet is supportedBOOT LOADERSBoot Loader Feature NotesFastboot Boot Device eMMCRoot Device USB, SD, eMMC, SATADisplay device UARTU-Boot Boot Device eMMC, EthernetRoot Device USB, SD, eMMC, NFSDisplay device UART-Update Utility Utility to configure bootloader parameters in BCTMULTIMEDIAAudio Notes Multi-instance audio decode - Multichannel playback -USB audio record -Video Notes Multi-Stream Video Encode - Video-only mode -4K playback -Media APIs Notes Gstreamer-0.10 - Gstreamer-1.0 -DISPLAYFeature Resolution Notes Supportedresolutions640 X 480 -Framebufferconsole deviceHDMI - Dual-display support HDMI + eDP -Primary display type/default resolution HDMI Default resolution 1920x 1080Secondary displaytype/resolutioneDP -Supported resolutions 640 X 480 - 720 X 576 - 1024 X 768 - 1280 X 720 - 1280 X 1024 - 1920 X 1080 - 3840 X 2160 - 4096 X 2160 -GRAPHICS AND DISPLAY API SUPPORTAPI Version NotesGLX 1.4 Compatible withOpenGLEGL 1.4 Compatible withOpenGL ES OpenGL 4.4 -OpenGL ES 3.1 -X11 ABI 15, 18, and 19 -Xrandr 1.4 - DECODERSAudio DecodersAudio Decode Profile SamplingFrequency Bit rate NotesAAC+ Mono and stereofor SBR; pluslimited support(described inNotes) formultichannelAAC+ (AAC+SBR) 8-48kilohertz(kHz)8-320kilobitspersecond(kbps)For multi-channelAAC+ (AAC+SBR)streams, only theAAC multi-channelis decoded. The 5.1channels are down-mixed to stereo.AAC-LC Mono and stereo;plus 5.1 channelsdown-mixed tostereo 8-48 kHz 8-320kbps-AAC-LC multichannel 6 channel [5.1] 8-48 kHz 8-320kbpsOutput over HDMIeAAC+ Stereo only 8-48 kHz 8-320kbps-AMR-NB 1 channel Up to 8 kHz 4.75-12.2kbps-AMR-WB 1 channel Up to 16kHz 6.6-23.85 kbps-MP3 2 channel 8-48 kHz 32-320kbps-MPEG-2 (MPEG-1 Layer 2)2 channel 16-48 KHz 8-320kbps-Vorbis Ogg Audio 8-48 KHz 32-256kbpsWAV linear PCM 16-bit, 2channels8-48 kHz - -Audio Decode Profile SamplingFrequency Bit rate NotesWAV multichannel support Multichannelsupport- - -WMA 9 * Standard 2-channel 8-48 kHz 8-384kbps-WMA Lossless * Lossless: Up toN1 Profile; WMA10: 2 channel8-48 kHz 8-384kbps-WMAPro LBR 10 * M2 Profile; 2channel16-96 kHz 8-768kbps-WMAPro LBR 10 multichannel * 6 channel [5.1] 16-96 kHz 8-768kbps-AC3/DTS (passthrough) Multichannelsupport8-48 kHz 8-320 -Notes* Use of this decoder requires a BSP add-on component available only to customers with Windows Media Component licensing. For more information see/wmcomponents/.Image DecodersImage Decode NotesLibjpeg-8b acceleration with TegraJPEG Decode HW -Video DecodersVideo Decode Profile and Level Sampling Frequencyand Bit Rate/Frame NotesAVCHD MPEG-4AVC/H.264/VC11080/60i Highdef Up to 1080p60 fpsUp to 10 MbpsNo support for AVH-DC stereoscope (3D)DivX 4/5/6 compatible 1080p Highdef Up to 1080p30 fpsUp to 10 MbpsNo QPEL;No interlace;No GMCDivX 4/5/6 compatible PlusHD Up to 1080p30 fpsUp to 20 Mbps-H.263 Baseline(Profile 0) Standard H.263 pictureformats up to 4CIF30 fpsUp to 8 MbpsStandard H.263picture formats =SQCIF, QCIF, CIF,4CIFVideo Decode Profile and Level Sampling Frequencyand Bit Rate/Frame NotesH.264 AVC Baseline ProfileHigh Profile@ L4.2 Up to 1080p @96 fpsUp to 62.5 Mbps-H.264 AVC Baseline ProfileHigh Profile@ L4.2 Up to 1440p @48 fpsUp to 62.5 Mbps-MJPEG YUV 420/YUV 422 Up to 1080p30 fps-MPEG-2 Video Main Profile@ High Level Up to 1080p 30 fps/1080i 60 fpsUp to 80 Mbps-MPEG-2 Video Main Profile@ High Level Up to 720p60 fpsUp to 80 Mbps-MPEG-4 Advanced SimpleProfile@ L5 Up to 1080p30 fpsUp to 10 MbpsNo QPEL;No interlace;No GMCMVC Multiview HighProfile, StereoHigh Profile Up to 1080p24 fpsUp to 32 MbpsLocal playback andplayback over HDMIVC-1/WMV * Simple Profile@ ML Up to 1080p @ 48 fpsUp to 1080i @ 96 fpsUp to 45 Mbps-VC-1/WMV * Main Profile@ HL Up to 1080p @ 48 fpsUp to 1080i @ 96 fpsUp to 45 Mbps-VC-1/WMV * Advanced Profile@ Level 3 Up to 1080p @ 48 fpsUp to 1080i @ 96 fpsUp to 45 Mbps-Xvid Xvid Highdef Up to 1080p30 fpsUp to 10 Mbps No QPEL; No interlace; No GMCHEVC ***********Up to 1080p30 fpsUp to 8 Mbps-VP8 Version 0, 1, 2 Up to 1080p @60 fpsUp to 60 MbpsUp to 2160p @ 24 fpsUp to 62.5 Mbps-Notes* Use of this decoder requires a BSP add-on component available only to customers with Windows Media Component licensing. For more information see/wmcomponents/.ENCODERS Audio EncodersAudio Encode Profile SamplingFrequency Bit rate NotesAAC-LC - 8-48 kHz Up to 320kbps- Image EncodersImage Encode Profile Resolution Bit rate Notes Libjpeg-8bacceleration withTegra JPEGEncodeHWExif Up to 14 MP Q-100 - Video EncodersVideo Encode Profile andLevelSampling FrequencyandBit rate/Frame rate NotesH.264 Baseline ProfileMain ProfileHigh Profile@ L4.2Up to 1080p60 fpsUp to 50 MbpsVBR/CBR-VP8 Version 0 Up to 1080p60 fpsUp to 60 MbpsH.263 Baseline Profile - -MPEG-4 Simple Profile - - CONTAINER FORMATSReader Container Formats (Gstreamer)Codecs are provided by GStreamer. You can download GStreamer codecs from the gstreamer opensource project at:Or you can use apt-get in the provided Ubuntu-derived sample file system.The following table presents container information. See container specifications for audio/video pairing within the container.ASF (WMV) (Gstreamer) Description NotesVideo VC-1 -Audio WMA 10, WMA Pro, WMA-LosslessAVI (Gstreamer) Description NotesVideo MPEG-4, H.264, DivX/Xvid --Audio AAC, AAC+, eAAC+, MP3,MPEG-2, AC3MPEG-4(MP4)/3G2/3GP/MOV(Gstreamer) Description NotesVideo MPEG-4, H.264, H.263 --Audio AAC, AAC+, eAAC+, AMR-NB, AMR-WBMatroska (MKV)(Gstreamer) Description NotesVideo MPEG-4, DivX/Xvid, H.264 --Audio AAC, AAC+, eAAC+, MP3,AC3WebM (Gstreamer) Description NotesVideo VP8 -Audio Vorbis -OGG (Gstreamer) Description NotesAudio Vorbis -MP3 (Gstreamer) Description NotesAudio MP3 -M2TS/MPEG-TS(Gstreamer) Description NotesVideo H.264, VC-1, MPEG-2 -Audio AAC, AAC+, eAAC+ -Writer Container Formats (Gstreamer)The following table presents container information. See container specifications foraudio/video pairing within the container.MPEG-4 (MP4)/3GP(Gstreamer) Description NotesVideo MPEG-4, H.264, H.263, VP8 --Audio Audio: AAC AMR-NB, AMR-WBStreaming (Gstreamer) Description NotesHTTP1.0 MP3, MP4, 3GP,WMA,-WMV, AVI, ASFHTTP 1.1 MP3, MP4, 3GP,WMA,-WMV, AVI, ASFRTSP (Gstreamer) Description Notes-RFC 2326 Real Time StreamingProtocol (RTSP)RFC 2429 H.263 -RFC 3016 AAC-LC, AAC+, eAAC+,-MPEG-4RFC 3267 AMR-NB --RFC 3550 RTP: A TransportProtocolfor Real-TimeApplications-RFC 3640 AAC-LC, AAC+,eAC+,MPEG-4RFC 3984 MPEG-4 AVC/H.264 -STREAMING PROTOCOLSStreaming protocols are provided by GStreamer. You can download GStreamer codecs from the gstreamer opensource project at:Or you can use apt-get in the provided Ubuntu-derived sample file system. Hardware codecs are not included in the base release but can be provided separately under a software license agreement.HTTP Protocols* FormatsHTTP 1.0 3GPAACASFAVIMKVMOVMP3MP4TSWMAWMVHTTP 1.1 3GPAACASFAVIMKVMOVMP3MP4TSWMAWMVHTTP Chunked Mode Support NotesChunked Mode Support Chunked Mode Data Transfer with HTTP 1.1 onlyHTTP Streaming NotesLive Streaming -RTSP Protocols* NotesRFC 2326 Real Time Streaming Protocol (RTSP)RFC 2429 H.263RFC 3016 AAC-LC, AAC+, eAAC+, MPEG-4RFC 3267 AMR-NBRFC 3550 RTP: A Transport Protocol for Real-TimeApplicationsRFC 3640 AAC-LC, AAC+, eAAC+, MPEG-4RFC 3984 MPEG-4 AVC/H.264-Buffer control withwatermarking for RTSPstreamingSDP Session Set Up* NotesRFC 4566 Session Description ProtocolNotes* For better user experience, NVIDIA recommends limiting HTTP, RTSP, and RTP streaming tests to 1080p 30 fps 10 Mbps content over a sustained network with a bandwidth of greater than 16 Mbps.NoticeALL NVIDIA DESIGN SPECIFICATIONS, REFERENCE BOARDS, FILES, DRAWINGS, DIAGNOSTICS, LISTS, AND OTHER DOCUMENTS (TOGETHER AND SEPARATELY, "MATERIALS") ARE BEING PROVIDED "AS IS." NVIDIA MAKES NO WARRANTIES, EXPRESS, IMPLIED, STATUTORY, OR OTHERWISE WITH RESPECT TO THE MATERIALS, AND ALL EXPRESS OR IMPLIED CONDITIONS, REPRESENTATIONS AND WARRANTIES, INCLUDING ANY IMPLIED WARRANTY OR CONDITION OF TITLE, MERCHANTABILITY, SATISFACTORY QUALITY, FITNESS FOR A PARTICULAR PURPOSE AND ON-INFRINGEMENT, ARE HEREBY EXCLUDED TO THE MAXIMUM EXTENT PERMITTED BY LAW.Information furnished is believed to be accurate and reliable. However, NVIDIA Corporation assumes no responsibility for the consequences of use of such information or for any infringement of patents or other rights of third parties that may result from its use. No license is granted by implication or otherwise under any patent or patent rights of NVIDIA Corporation. Specifications mentioned in this publication are subject to change without notice. This publication supersedes and replaces all information previously supplied. NVIDIA Corporation products are not authorized for use as critical components in life support devices or systems without express written approval of NVIDIA Corporation.TrademarksNVIDIA, the NVIDIA logo, and Tegra are trademarks or registered trademarks of NVIDIA Corporation in the United States and other countries. Other company and product names may be trademarks of the respective companies with which they are associated.HDMI, the HDMI logo, and High-Definition Multimedia Interface are trademarks or registered trademarks of HDMI Licensing LLC.ARM, AMBA, and ARM Powered are registered trademarks of ARM Limited. Cortex, MPCore and Mali are trademarks of ARM Limited. All other brands or product names are the property of their respective holders. "ARM" is used to represent ARM Holdings plc; its operating company ARM Limited; and the regional subsidiaries ARM Inc.; ARM KK; ARM Korea Limited.; ARM Taiwan Limited; ARM France SAS; ARM Consulting (Shanghai) Co. Ltd.; ARM Germany GmbH; ARM Embedded Technologies Pvt. Ltd.; ARM Norway, AS and ARM Sweden AB.Copyright© 2013 - 2015 NVIDIA Corporation. All rights reserved.。
Linux安装MySQL数据库(安装验证)

数据库Mysql安装1.首先下载安装包并使用命令tar解压:命令格式:tar -zxvf MySQL-version-OS.tar.gz我的操作: tar –zxvf mysql-5.1.30.tar.gz使用cd命令进入解压后的目录命令格式:cd MySQL-version-OS./configure 之前要make clean 一下吧,为什么,好像是防止原来编译过注释:在执行“make clean”失败时,提示错误checking for termcap functions library... configure: error: No curses/termcap library found 。
则在执行./configure命令,执行命令代码为:./configure --prefix=/usr/share/mysql/ -with-charset=utf8 -with-extra-charsets=all –with-named-curses-libs=/usr/lib/libncursesw.so.5(最后一段命令可以省略)出现错误:No curses/termcap library found 或者see the install manual chapter in the referenceyum –y install gcc yum install ncurses-devel2.配置和编译安装环境2.1配置安装环境命令格式:./configure –prefix=安装路径--prefix=/usr/local/mysql/ 安装到此目录下我的操作: ./configure --prefix=/usr/local/mysql/-with-charset=gbk -with-extra-charsets=all 加入解决中文乱码./configure --prefix=/usr/share/mysql/ -with-charset=gbk -with-extra-charsets=all参数: --prefix= 指软件安装的路径2.2编译安装环境命令格式:make执行make命令时出现错误:exec g++ not found安装gcc -c++重新执行上一命令(config)等待……….时间太长了2.3安装命令格式:make install3.创建MySQL相关用户使用命令groupadd创建用户组命令格式:groupadd mysql使用命令useradd创建用户并分配到mysql组中命令格式:useradd –g mysql mysql使用命令passwd修改用户密码命令格式:passwd mysql我的密码: password4.配置MySQL数据库环境4.1.使用命令cp拷贝示例配置文件到系统环境命令格式:此步骤在解压的目录cp ./support-files/f /etc/f拷贝目标文件f必须要这样命名,该名称为数据库默认配置文件。
RedHat linux7-虚拟化+集群安装精简手册
RedHat linux 7虚拟化环境集群安装精简手册1、前期准备挂载磁盘/*通过制作iso,方便后续安装动作,在知识库中应形成iso镜像体系*/dd if=/dev/sr0 of=/app/rh71。
isomount —o loop /app/rh71.iso /mnt挂载制作的isomount —loop /dev/sr0 /mnt查看少什么包/*如果想要是用vgscan指令,系统至少需要安装lvm2包,这个从安装好的系统上查*/ [root@jttldb1 host5]#rpm —qf /sbin/vgscanlvm2—2。
02.83—3.el6。
x86_64常用包安装net-tools (ifconfig等用)yum —y install nautilus-open-terminal(右键添加terminal)配置yum/* 根据具体挂载的路径和版本调整*/建立文件/etc/yum.repos。
d/mycdrom。
repo[Base]name=RHELbaseurl=file:///mntenabled=1gpgcheck=0[Cluster]name=RHELbaseurl=file:///mnt/addons/HighAvailabilityenabled=1gpgcheck=0配置ipIPADDR=10.88。
89.100GATEWAY=10。
88.89.1NETMASK=255。
255。
255.0ONBOOT=yes单网卡配置多ipifconfigteam0:0 10.88。
89.101netmask 255.255.255.0(临时添加一个ip,重启后消失,如果想永久拥有,需要配置ifcfg—ens32:0文件)临时文件取消:ifconfig ens32:0 down网卡绑定1)创建组接口(会生产一个ifcfg-team0)nmcli con add type team con-name team0 ifname team0 config ’{”runner":{"name":"activebackup"}}'nmcli con del team0 (删除绑定team)2)查看组接口配置nmcli con show3)给组接口添加设备nmcli con add type team—slave con—name team0-port1 ifname enp11s0f0master team0 nmcli con add type team—slave con-name team0-port2 ifname enp16s0f0master team0nmcli con mod type team-slave con—name team0—port2 ifname enp16s0f0master team04)配置ip[root@jttldb2 network-scripts]#more ifcfg—team0DEVICE=team0DEVICETYPE=TeamTEAM_CONFIG="{\"runner\":{\”name\":\”activebackup\”}}"BOOTPROTO=noneIPADDR=10.88。
RedHat Server7安装与配置
RedHat Server7.1安装与配置从RHEL7开始,使用systemctl工具来管理服务程序,包括了service和chkconfig [root@rhel7 ~]# systemctl list-unit-files|grep enabled启动一个服务:systemctl start firewalld.service关闭一个服务:systemctl stop firewalld.service重启一个服务:systemctl restart firewalld.service显示一个服务的状态:systemctl status firewalld.service在开机时启用一个服务:systemctl enable firewalld.service在开机时禁用一个服务:systemctl disable firewalld.service查看服务是否开机启动:systemctl is-enabled firewalld.service;echo $?查看已启动的服务列表:systemctl list-unit-files|grep enabled一、安装通过iso文件进行安装,最小安装时,ifconfig等命令是不可使用的。
可以通过“ip link show”、“ip address”等命令查看IP地址。
(一)网卡的配置RedHat7对网卡的命名有了很大不同,可以参考如下命名规则:本人在虚拟机上安装RedHat Server7.1后,网卡被命名为enp0s3,网卡的配置文件为/etc/sysconfig/network-scripts/ifcfg-enp0s3。
因此IP地址、子网掩码、网关、dns等均可在这个文件中进行配置。
下图展示了一个配置文件:当前是static(静态IP地址),如果要使用dhcp,则修改:BOOTPROTO=dhcpONBOOT=yes #开启自动启用网络连接,如果设置为no,则启动系统后网卡不能链接IPADDR=172.28.14.220 #设置IP地址PREFIX=27 #设置子网掩码GATEWAY=172.28.14.193 #设置网关DNS1=222.172.220.68 #设置主DNSDNS2=xxx.xxx.xxx.xxx #设置备DNS完成后service network restart #重启网络(二)ssh启动#/bin/systemctl start sshd.service(三)添加用户#groupadd webmanager ‘添加管理网站的组‘添加用户名为:webmanager,属组:webmanage,密码:nts20080808,主目录:/home/website/#useradd webmanger -g webmanage –p nts20080808 -d /home/website/修改用户登录名:#usermod -l webmanager webmanger ‘将用户名webmanger修改为webmanager修改用户webmanger登录密码:#passwd webmanger(四)设置iso文件为本地安装源1.上传iso文件将radHat Server7的iso文件rhel-server-7.1-x86_64-dvd.iso上传到服务器的/home/website/download/iso目录下。
NVIDIA Tegra Linux Driver Package R24.2.2 用户指南说明书
RN_05071-R24 | October 16, 2017 Advance Information | Subject to Change Release NotesRN_05071-R24Table of Contents1.0About this Release (3)1.1Login Credentials (4)1.2Sources for Included Linux Distribution Packages (4)1.3Top Fixed Issues (4)1.3.1Bluetooth (4)1.3.2Bootloader (5)1.3.3Browser (5)1.3.4Camera (5)1.3.5Display (5)1.3.6Graphics (6)1.3.7Kernel (6)1.3.8Multimedia API Improvements (6)1.3.9Tools (6)1.0Known Issues (7)2.0Implementation Notes (8)2.1NVIDIA argus-daemon Startup on First Boot is Unsuccessful (8)2.2Software-based Power Consumption Modeling (8)2.3HDMI Audio Devices in the Audio Settings Application (11)2.4New Users Must be Added to Video Group (11)2.5Symlinks May be Overwritten by Installation of Third Party Libraries (11)2.6GStreamer-0.10 Not Included (12)2.7Maximizing Tegra X1 Performance (12)2.832-bit hardfp Support Removed (13)2.9Media Controller Support Included in V4L2 for CSI Camera (13)3.0About Earlier Releases (14)Nov 2016, 24.2.1 (14)12 Sep 2016, 24.2 (15)11 Jun 2016, 24.1 (16)1.0The NVIDIA® Tegra® Linux Driver Package supports development of platforms running on: NVIDIA®Jetson™ TX1 Developer Kit (P2371-2180)Platform and Release Information1.1Login CredentialsThe default login credentials are:④Username: ubuntu④Password: ubuntuThe release also includes the following credentials:④Username: nvidia④Password: nvidia1.2Sources for Included Linux Distribution PackagesVisit the Jetson Embedded Platform website for source code provided subject to the terms of open source licenses that require source code availability, such as the GNU General Public License.1.3Top Fixed IssuesThese fixed issues apply to Jetson TX1 devices. For a complete list of kernel fixes that go into this release, please consult the NVIDIA git repository available at:1.3.1BluetoothBluetooth related issues resolved in this release are as follows.1.3.2BootloaderBootloader related issues resolved in this release are as follows.1.3.3BrowserBrowser related issues resolved in this release are as follows.1.3.4CameraCamera related issues resolved in this release are as follows.1.3.5DisplayDisplay related issues resolved in this release are as follows.1.3.6GraphicsGraphics related issues resolved in this release are as follows.1.3.7KernelKernel related issues resolved in this release are as follows.1.3.8Multimedia API ImprovementsThe multimedia API SDK related improvements provided in this release are as follows.1.3.9ToolsTools related issues resolved in this release are as follows.1.0This section provides details about issues that were discovered during development but not resolved prior to this release of the Tegra Linux Driver Package.2.02.1NVIDIA argus-daemon Startup on First Boot isUnsuccessfulThe NVIDIA argus-daemon fails to start on the first boot of the system.To workaround1.After running apply_binaries.sh, but before flashing the target, in the followingfile:Linux_for_Tegra/rootfs/etc/systemd/system/argus-daemon.servicechange the line:After=network-online.targetto:After=network-online.target nvfb.service2.Boot the device normally.This issue only occurs on the very first boot of the target.2.2Software-based Power Consumption ModelingJetson TX1, Revision 300 or greater, enables use of INA monitors for the module and Developer Kit carrier board. Note that developer kits may have an earlier revision of the module, in which case only INA monitors related to the carrier board are available.To monitor power consumption in software1.Verify the version of L4T is 24.2 or higher with the following command:head -1 /etc/nv_tegra_releaseIf the version of L4T is not at least 24.2, please download the latest JetPack installer from the Embedded Developer Zone website and update your Jetson TX1.2.Verify that the Jetson TX1 module is revision 300 or higher from the module SKU withthe following command:sudo i2cdump -y -r 0x14-0x26 2 0x50 bThe feature to enable use of INA monitors is added in revision 300 and later of Jetson TX1. For example, SKU 699-82180-1000-300 has the feature.3.Read the information from the INA3221 monitors via sysfs nodes. The namingconvention for sysfs nodes is given in the following table, where <N> is a channelnumber 0-2.Note: The INA driver may also present other nodes. Do notmodify any INA sysfs node value. Modifying these valuescould result in damage to your device.The Jetson TX1 module has a 3-channel INA3221 monitor at I2C address 0x40. The sysfs nodes to read for rail names, voltage, current, and power are in the following directory:/sys/devices/platform/7000c400.i2c/i2c-1/1-0040/iio_device/The rail names for I2C address 0x40 are described in the following table:The Jetson TX1 Developer Kit carrier board has 3-channel INA3221 monitors at I2C addresses 0x42 and 0x43. The sysfs nodes to read rail name, voltage, current & power can be found at:/sys/devices/platform/7000c400.i2c/i2c-1/1-0042/iio_device//sys/devices/platform/7000c400.i2c/i2c-1/1-0043/iio_device/These are the rail names for I2C address 0x42:These are the rail names for I2C address 0x43:Examples④To read INA3221 at 0x40, the channel-0 rail name (i.e., VDD_IN), use the followingcommand:cat /sys/devices/platform/7000c400.i2c/i2c-1/1-0040/iio_device/rail_name_0④To read VDD_IN voltage, current, and power, use the following commands:cat /sys/devices/platform/7000c400.i2c/i2c-1/1-0040/iio_device/in_current0_inputcat /sys/devices/platform/7000c400.i2c/i2c-1/1-0040/iio_device/in_voltage0_inputcat /sys/devices/platform/7000c400.i2c/i2c-1/1-0040/iio_device/in_power0_inputUse of this feature also has the following considerations:④The feature enabling use of INAs was not part of the original Jetson TX1 specification.Therefore, earlier modules are not subject to RMA or automatic exchange because they lack this feature. If you need to measure module INAs, purchase the latest module.④All production modules (i.e., bare modules purchased separately from a Developer Kit)are revision 400 or newer, and support use of INAs.④In terms of accuracy, common practice is to assume a 10% guard band when workingwith INAs.④For Ubuntu, the i2cdump program is part of the i2c-tools package. You can install itwith commands similar to the following:sudo add-apt-repository universesudo apt-get updatesudo apt-get install i2c-tools2.3HDMI Audio Devices in the Audio Settings ApplicationThe HDMI audio output device is not getting listed for some televisions and monitors including the following:④Samsung TV 1080p LA40M81BM/XTL④LG Flatron W2363D④Samsung UA21ES5000RLXL④LG 25UM65-pThe issue is inconsistent and sometimes occurs on subsequent reboots.To workaround④If the HDMI audio output device is not listed in audio settings, restart the pulseaudiodaemon by killing the running instance as a normal user with the following command: pulseaudio --killor register the systemd pulseaudio service to start the pulseaudio daemon at every login: systemctl --user enable pulseaudio.serviceNote:Do not run pulseaudio as a root user.2.4New Users Must be Added to Video GroupWhen adding users to the system you must add them to the video group for the Linux desktop to appear correctly and function correctly.2.5Symlinks May be Overwritten by Installation of ThirdParty LibrariesInstalling third party libraries on the target device may overwrite the accelerated library provided by Linux for Tegra.For example, installing Mesa EGL may create a /usr/lib/<arch>/libEGL.so symlink, overwriting the symlink to the implementation library that should be used instead,/usr/lib/<arch>/tegra-egl/libEGL.so.Linux for Tegra installs a boot-time initialization script /etc/init/nv.conf, that corrects typical occurrences, such as with OpenGL, EGL, and X11 GLX libraries. This script runs at boot and corrects typical occurrences.To workaroundReboot after installation of packages that install conflicting library symlinks.2.6GStreamer-0.10 Not IncludedGstreamer version 0.10 is not included in this release. Use of GStreamer version 1.0 is required for development.2.7Maximizing Tegra X1 PerformanceUse the jetson_clocks.sh script to maximize performance by disabling DVFS, CPU Idle, and CPU Quit. JetPack installer or the flashing script places the script in the home directory on the target at:$HOME/jetson_clocks.shOn the host system, the script is delivered in the TAR file at:Linux_for_Tegra/nv_tegra/nv_tools.tbz2For more information on power and performance management, see:/Jetson/PerformanceSample Script Usage1.Show the current (initial) settings with the following command:sudo ./jetson_clocks.sh --show2.Store the current settings with the following command:sudo ./jetson_clocks.sh --store3.Maximize Jetson TX1 performance with the following command:sudo ./jetson_clocks.sh4.Show the current settings with the following command:sudo ./jetson_clocks.sh --show5.Restore the previous settings with the following command:sudo ./jetson_clocks.sh --restore6.Show the current settings with the following command:sudo ./jetson_clocks.sh --show2.832-bit hardfp Support RemovedBeginning with L4T R24.2.1 release, all releases onward support aarch64. The R24.1 release was the last release that the hardfp BSP for 32-bit user space support was also provided. 2.9Media Controller Support Included in V4L2 for CSICameraSupport for the soc_camera driver is disabled in the the R24.2.1 release and onward releases.3.0Nov 2016, 24.2.1What’s New④libargus is now multi-process by default, verified two 5MP Ov5693 sensors at 30fps.④New metadata and controls to support application layer AE and AWB as well asworking sample applications.④Input image is correctly scaled to compensate for black-level correction if lens shading isdisabled.④Implemented fixes for camera stability and performance.See “Software Features” in the Tegra Linux Driver Package Developer Guide for more information about the features of this release.For a complete list of kernel changes in this release see the following website:/gitweb/?p=linux-3.10.git;a=shortlog;h=refs/heads/l4t/l4t-r24.2Top Issues Fixed Since Last ReleaseThe following issues are resolved in this release.④[1794670] HDMI audio output device is not listed in system settings application④[200232592] Graphics Debugger is unable to debug CUDA graphics samples④[1806888] VisionWorks samples cannot be successfully built with the 16.04 compiler④[200214749] Camera preview functions correctly but errors display in logs④[200194792] Connected Bluetooth headset audio sink shows mode as “mono”④[200089362] EDID read is unsuccessful using read-edid package④[200199690] CUDA sample compilation on device is unsuccessful④[1762118] Multimedia playback and camera preview corruption may occur when usingthe Gstreamer eglimagesink component on 64-bit X11④[200152749] Unhandled level 3 translation fault occurs during Bluetooth data transfer ④[200134773] System intermittently becomes non-responsive during reboot stress testingwith reboot or init 6④ [200244330] Unstable exposure/flickering with userAutoExposure with IMX-185sensor④[200244295] Un-freed EGL handle while quitting gstvideoencode sample application ④[200239249] Preview is black and white, unresponsive, and finally becomes non-responsive with some libargus-based sample applications④[200228912] Preview is black and white after several images are captured④[200226718] Corruption in preview image occurs in libargus-based camera application ④[200224210] Running argus_syncsensor and argus_multisensor is unsuccessful ④[200214733] The argus_conformance test is unsuccessful, results in segmentationfault④[1822082] The argus_conformance test is unsuccessful when performing multipleiterations④[1821526] Stuttering and dropped frames occur when recording video with libargus-based camera application④[1792264] SCF unit tests and libargus multi-camera tests are unsuccessful④[1736102] Camera becomes non-responsive during stress testing④[200247203] Linearity test is unsuccessful④[200246779] Syncpoint errors occur when quitting nvtuner with live preview enabled ④[200228319] Live preview is tinted green with nvtuner 3.2.0e④[200242413] "Invalid xywh" displays when using 02_video_dec_cuda to verify theresult of backend or 04_video_dec_gie.④[200239465] Some BBOXs detect nothing while using B02 sample to verify result.txtfrom backend or B04 sample④[200239200] The make utility does not build the B04 sample④[200233839] The video_dec_gie sample is unsuccessful with larger batch sizes④[200227668] Arbitrary batch sizes for GIE-based samples are not supported④[1806268] Unable to compile 11_camera_object_identification is becauseThread.o is missing④[200240455] IMX172 camera sensor conformance test is unsuccessful12 Sep 2016, 24.2What’s New④Multimedia API④CUDA 8.0④Ubuntu 16.04-derived sample rootfs④Chromium browser④Previously deprecated features removed:●hardfp support●CSI driver●Gstreamer 0.10Top Issues Fixed Since Last ReleaseThe following issues are resolved in this release.④[1747157] Support disabling suspend-to-ram and cpu-idle kernel configurations④[200203807] Installing libegl1-mesa or updating the corresponding package overwriteslibEGL.so.1④[1794309] Nvcamera daemon is unsuccessful on multiple image capture runs④[200196911] Intermittently unable to boot the kernel due to PCIe errors④[1691314] LP switching is unsuccessful when SATA is connected to the Jetson TX1 target(firmware version 50.11).④[1736102] Camera preview becomes non-responsive during stress testing of video/imagerecording④[200122163] Disabled (DSI-0) Primary HDMI display causes the following error todispla y in logs: “vgaarb: this pci device is not a vga device"④[200151236] The Camera app (NvGstPlayer-1.0) invokes an out of memory killer becauseof memory leak when playing multiple images in a loop④[200174822] Corrupted pixels occur after the image shows up on the preview for a fewminutes11 Jun 2016, 24.1What’s New④Support for 64-bit user space and runtime libraries④Vulkan support④V4L2 media-controller driver support for camera sensors (bypassing ISP)Top Issues Fixed Since Last ReleaseThe following issues are resolved in this release.④[1723265] Hard resetting the TX1 board while it is above 44°C will cause boot failure dueto default system shut down value is set to 44°C. The system will boot up once cooled down to below 44°C. This issue does not occur upon warm reset.④[1723265] Hard resetting the TX1 board while it is above 44°C will cause boot failure dueto default system shut down value is set to 44°C.④[200170514] OSidle power consumption is around 185mW higher when eth0 is disabled.[1708129] GStreamer unable to set FPS rate to rate supported by sensor.NoticeALL NVIDIA DESIGN SPECIFICATIONS, REFERENCE BOARDS, FILES, DRAWINGS, DIAGNOSTICS, LISTS, AND OTHER DOCUMENTS (TOGETHER AND SEPARATELY, "MATERIALS") ARE BEING PROVIDED "AS IS." NVIDIA MAKES NO WARRANTIES, EXPRESS, IMPLIED, STATUTORY, OR OTHERWISE WITH RESPECT TO THE MATERIALS, AND ALL EXPRESS OR IMPLIED CONDITIONS, REPRESENTATIONS AND WARRANTIES, INCLUDING ANY IMPLIED WARRANTY OR CONDITION OF TITLE, MERCHANTABILITY, SATISFACTORY QUALITY, FITNESS FOR A PARTICULAR PURPOSE AND ON-INFRINGEMENT, ARE HEREBY EXCLUDED TO THE MAXIMUM EXTENT PERMITTED BY LAW.Information furnished is believed to be accurate and reliable. However, NVIDIA Corporation assumes no responsibility for the consequences of use of such information or for any infringement of patents or other rights of third parties that may result from its use. No license is granted by implication or otherwise under any patent or patent rights of NVIDIA Corporation. Specifications mentioned in this publication are subject to change without notice. This publication supersedes and replaces all information previously supplied. NVIDIA Corporation products are not authorized for use as critical components in life support devices or systems without express written approval of NVIDIA Corporation.TrademarksNVIDIA and the NVIDIA logo, CUDA, Jetson, Tegra, TensorRT, and VisionWorks are trademarks or registered trademarks of NVIDIA Corporation in the United States and other countries. Other company and product names may be trademarks of the respective companies with which they are associated.HDMI, the HDMI logo, and High-Definition Multimedia Interface are trademarks or registered trademarks of HDMI Licensing LLC.ARM, AMBA, and ARM Powered are registered trademarks of ARM Limited. Cortex, MPCore and Mali are trademarks of ARM Limited. All other brands or product names are the property of their respective holders. "ARM" is used to represent ARM Holdings plc; its operating company ARM Limited; and the regional subsidiaries ARM Inc.; ARM KK; ARM Korea Limited.; ARM Taiwan Limited; ARM France SAS; ARM Consulting (Shanghai) Co. Ltd.; ARM Germany GmbH; ARM Embedded Technologies Pvt. Ltd.; ARM Norway, AS and ARM Sweden AB.Copyright© 2016 NVIDIA Corporation. All rights reserved.。
Linux中LAMP环境安装配置...

Linux中LAMP环境安装配置...一个站长朋友写的一篇linux+apache+mysql+php安装配置环境,他分为了几篇文章来讲但我这里把它整理成一篇完整的文章,希望整个配置流程更简洁好用,。
安装Centos6.5一、VirtualBox虚拟机安装Centos6.51、新建虚拟电脑、选择一些参数以及配置2、进入Centos6.5的引导界面,选择”Install or upgrade an existing system”3、按照步骤一步步走下去,到了选择安装方式的时候,选择URL 方式。
5、继续按照步骤走,设置网络安装镜像6、接收安装7、下面的一系列步骤按照提示一步一步好了。
8、重要的一步:分区,选择“创建自定义布局”。
/boot 分区:200M/ 根分区:20000M/opt 分区:剩下的SWAP :20489、继续一步一步跟着选择下去。
选择安装包,我们选择“Basic Server”10、进入安装过程,等待安装。
11、重启完成。
安装MySQL1、安装MySQL之前,需要安装cmake,因为cmake对软件源码进行编译。
前提:通过挂载把U盘中所需要的软件全部拷贝到系统的/root/softcmake源码包cmake-2.8.8.tar.gz,/root/soft/soft目录下[root@localhost ~]# cd /root/soft/soft[root@localhost /root/soft/soft]# tar -xzvf cmake-2.8.8.tar.gz [root@localhost /root/soft/soft]# cd cmake-2.8.8[***********************.8]#./bootstrap---------------------------------------------CMake 2.8.4, Copyright 2000-2009 Kitware, Inc.---------------------------------------------Error when bootstrapping CMake:Cannot find appropriate C compiler on this system.Please specify one using environment variable CC.See cmake_bootstrap.log for compilers attempted.---------------------------------------------Log of errors: /usr/local/src/cmake-2.8.4/Bootstrap.cmk/cmake_bootstrap.log---------------------------------------------出现以上错误提示:缺少C的编译器解决方案安装gcc编译器可以简单地用yum安装[root@localhost ~]# yum install gcc继续cmake的安装[***********************.8]#./bootstrap---------------------------------------------CMake 2.8.4, Copyright 2000-2009 Kitware, Inc.C compiler on this system is: cc---------------------------------------------Error when bootstrapping CMake:Cannot find appropriate C++ compiler on this system.Please specify one using environment variable CXX.See cmake_bootstrap.log for compilers attempted.---------------------------------------------Log of errors: /usr/local/src/cmake-2.8.4/Bootstrap.cmk/cmake_bootstrap.log---------------------------------------------再次报错:缺少C++编译器。
如何在Linux终端安装软件包at和yum命令
如何在Linux终端安装软件包at和yum命令在Linux终端中,安装软件包是使用at和yum命令的常见需求之一。
本文将介绍如何在Linux终端使用这两个命令来安装软件包。
一、at命令的安装和使用1. 安装at命令在终端中执行以下命令来安装at命令:```shellsudo apt-get install at```2. 使用at命令安装完成后,可以使用at命令来执行特定时间的任务。
以下是at命令的基本用法:- 要执行一次性任务,可以使用如下命令:```shellecho "command" | at HH:MM```其中,"command"是要执行的命令,HH:MM是指定的时间。
- 要执行重复性任务,可以使用如下命令:```shellecho "command" | at HH:MM + INTERVAL```其中,INTERVAL是时间间隔,可以是分钟、小时、天等。
- 要查看已安排的任务,可以使用如下命令:```shellatq```- 要取消已安排的任务,可以使用如下命令:```shellatrm JOB_NUMBER```其中,JOB_NUMBER是任务的编号。
二、yum命令的安装和使用1. 安装yum命令yum命令通常用于基于Red Hat(如CentOS、Fedora)的Linux发行版。
如果没有预先安装yum命令,可以按照以下步骤进行安装:- 在终端中执行以下命令以安装yum:```shellsudo apt-get install yum```- 在安装完成后,使用以下命令验证是否成功安装:```shellyum --version```2. 使用yum命令安装完成后,可以使用yum命令来安装、更新和卸载软件包。
以下是yum命令的基本用法:- 要安装一个软件包,可以使用如下命令:```shellsudo yum install PACKAGE_NAME```其中,PACKAGE_NAME是要安装的软件包的名称。
RHEL 7.0系统安装配置图解教程
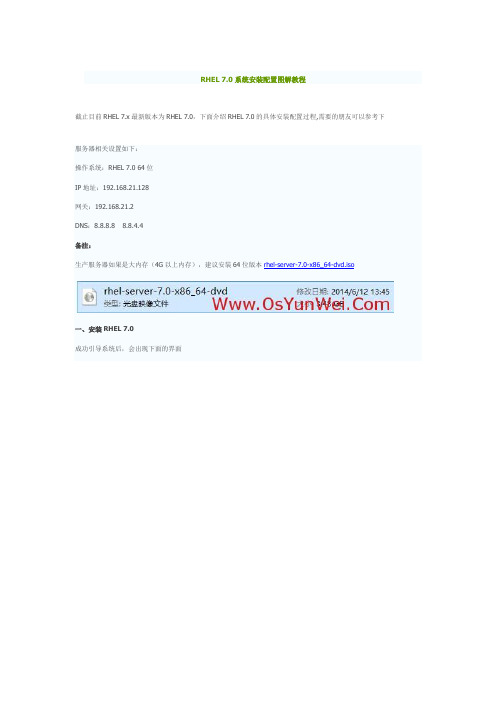
RHEL 7.0系统安装配置图解教程截止目前RHEL 7.x最新版本为RHEL 7.0,下面介绍RHEL 7.0的具体安装配置过程,需要的朋友可以参考下服务器相关设置如下:操作系统:RHEL 7.0 64位IP地址:192.168.21.128网关:192.168.21.2DNS:8.8.8.8 8.8.4.4备注:生产服务器如果是大内存(4G以上内存),建议安装64位版本rhel-server-7.0-x86_64-dvd.iso一、安装RHEL 7.0成功引导系统后,会出现下面的界面界面说明:Install Red Hat Enterprise Linux 7.0 安装RHEL 7.0Test this media & install Red Hat Enterprise Linux 7.0 测试安装文件并安装RHEL 7.0 Troubleshooting 修复故障这里选择第一项,安装RHEL 7.0,回车,进入下面的界面选择语言:中文-简体中文(中国)#正式生产服务器建议安装英文版本继续选择-系统-安装位置,进入磁盘分区界面选择-其它存储选项-分区-我要配置分区,点左上角的“完成”,进入下面的界面分区前先规划好swap #交换分区,一般设置为内存的2倍/ #剩余所有空间备注:生产服务器建议单独再划分一个/data分区存放数据点左下角的“+”号挂载点:swap 期望容量:2048 添加挂载点继续点左下角的“+”号挂载点:/期望容量:13.31GB #剩余所有空间添加挂载点点左上角的“完成”,进入下面的界面接受更改,进入下面的界面开始安装,进入下面的界面选择-用户设置-ROOT密码,进入下面的界面设置Root密码如果密码长度少于8位,会提示要按“完成”两次来确认,安装继续安装完成之后,会进入下面的界面点重启系统重新启动进入登录界面账号输入root 回车再输入上面设置的root密码回车系统登录成功二、设置IP地址、网关DNS说明:RHEL 7.0默认安装好之后是没有自动开启网络连接的!cd /etc/sysconfig/network-scripts/ #进入网络配置文件目录vi ifcfg-eno16777736 #编辑配置文件,添加修改以下内容TYPE="Ethernet"BOOTPROTO="static" #启用静态IP地址DEFROUTE="yes"IPV4_FAILURE_FATAL="no"IPV6INIT="yes"IPV6_AUTOCONF="yes"IPV6_DEFROUTE="yes"IPV6_FAILURE_FATAL="no"NAME="eno16777736"UUID="8071cc7b-d407-4dea-a41e-16f7d2e75ee9" ONBOOT="yes" #开启自动启用网络连接IPADDR0="192.168.21.128" #设置IP地址PREFIX0="24" #设置子网掩码GATEWAY0="192.168.21.2" #设置网关DNS1="8.8.8.8" #设置主DNSDNS2="8.8.4.4" #设置备DNSHWADDR="00:0C:29:EB:F2:B3"IPV6_PEERDNS="yes"IPV6_PEERROUTES="yes":wq! #保存退出service network restart #重启网络ping #测试网络是否正常ip addr #查看IP地址三、使用系统镜像文件配置本地yum源1、使用WinSCP.exe工具上传系统镜像文件rhel-server-7.0-x86_64-dvd.iso到/usr/local/src目录2、使用Putty.exe工具远程连接到RHEL服务器3、挂载系统镜像文件mkdir /media/cdrom #新建镜像文件挂载目录cd /usr/local/src #进入系统镜像文件存放目录ls #列出目录文件,可以看到刚刚上传的系统镜像文件mount -t iso9660 -o loop /usr/local/src/rhel-server-7.0-x86_64-dvd.iso /media/cdrom #挂载系统镜像cd /media/cdrom #进入挂载目录,使用ls命令可以看到已经有文件存在了备注:umount /media/cdrom #卸载系统镜像4、设置开机自动挂载系统镜像文件vi /etc/fstab #添加以下代码。
RHEL7.0安装详细说明(有图有真相)
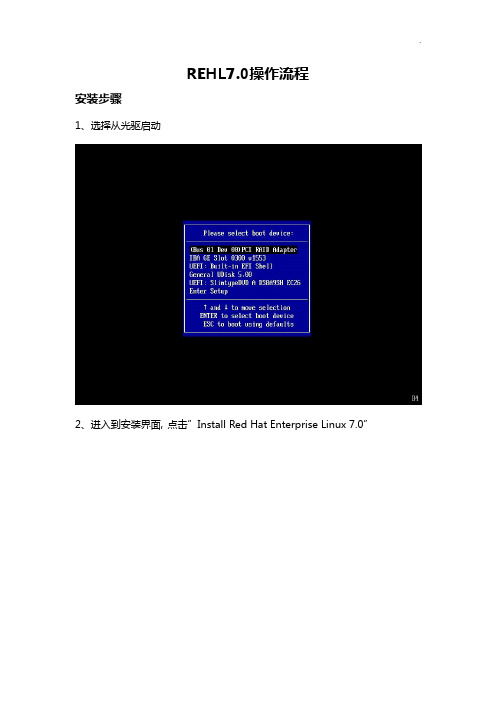
REHL7.0操作流程安装步骤1、选择从光驱启动2、进入到安装界面,点击”Install Red Hat Enterprise Linux 7.0”3、跳过测试media,根据提示,点击[Esc]4、出现引导界面,点击“LOCALIZATION”5、选择Region为亚洲、City为上海,点击左上角Done6、键盘布局选择“English(US)”点击Done7、系统支持语言选择“English”点击Done8、软件安装位置选择默认值,点击Done9、进入软件选择,点击图标10、选择“Server with GUI”,勾选右面所有软件,点击Done11、弹出如下界面,点击“Accept Changes”12、选择系统分区设置,点击“INSTALLATION DESTINATION”13、选择自己配置分区,如图,点击Done14、点击左下角“+”来添加分区15、建立根目录(/)分区,大小配置100G,点击“Add mount point”16、建立启动目录(/boot)分区,大小配置2G,点击“Add mount point”17、建立转换(/swap)分区,大小配置8G,点击“Add mount point”18、所有分区建立完毕,点击Done19、点击“Begin Installation”20、系统开始安装,同时可以设置Root密码,点击“ROOT PASSWORD”21、输入111111后点击Done22、等待大概一小时后,系统安装完毕,点击“Reboot”23、系统重启后进入配置界面,选择“LOCALIZATION”24、勾选同意许可,点击Done25、去掉Kdump前的√,不启用Kdump,点击Forward26、点击Yes27、设置订阅管理注册,选择“No,I prefer to register at a later time”,点击finish。
linux-7.0详细安装过程

Linux-7.0详细安装过程。
1.实验要求:1)准备好ISO安装包,我的安装包:rhel-server-7.0-x86_64-dvd。
2.实验目的:2)掌握Linux7.0的基本安装方法。
3. 实验说明:1)在安装Linux7.0时,我们需要在虚拟机上面创建好一个空白虚拟机,虚拟机的C盘大小根据你自己的情况而定,给20G或者50G,都可以的,然后把ISO 指定好路径,虚拟机内存根据你自己电脑情况来给,如果你的电脑性能比较好的话,你可以给2G或者4G,等等,给的越高安装的速度就越快,但是要根据你电脑的情况而定的。
实验步骤:准备工作我们都做好了以后,开启虚拟机Linux7.0.Linux7.0已经启动了。
虚拟机正在读取ISO信息,正在加载。
我们选择中文,简体中文,或者选择English,只要你看的懂就可以了。
进入到这个界面点击-软件选择。
选择带GUI的服务器,这里是什么意思了,如果以前安装过Linux5.3,Linux6.3 的朋友都知道,这代表的是桌面的意思,如果你选择的是最小安装的话,你安装好了以后,就直接进入到命令行里面了,就没有桌面了,这个地方一定要注意。
更改好了以后,就保存,然后在进入安装位置,也就是该磁盘分区。
选择我要配置分区。
进入以后,就到这个页面了,点击下面那个加号,就会出现添加新挂载点。
这里我们需要分3个区,第一个/boot,第二个/(根分区),第三个swap(交换分区)第一个/boot分区已经完成了,继续创建。
创建根分区。
创建swap交换分区。
全部创建完成了。
选择接受更改。
都已经准备好了以后,选择开始安装。
我们来配置ROOT密码。
配置密码需要配置8位以上的,而且需要复杂性高,在配置密码时加点或者符号。
密码创建成功,然后在创建用户。
和刚才一样,密码需要复杂性,然后就需要耐心等待了。
安装好了以后,就选择重启。
重启后就会进入到这个页面,点击进去,选择同意,然后出去后选择继续下一步。
下一步,这里的kdump是在系统崩溃、死锁或者死机的时候用来转储内存运行参数的一个工具和服务。
RedHat7 yum安装
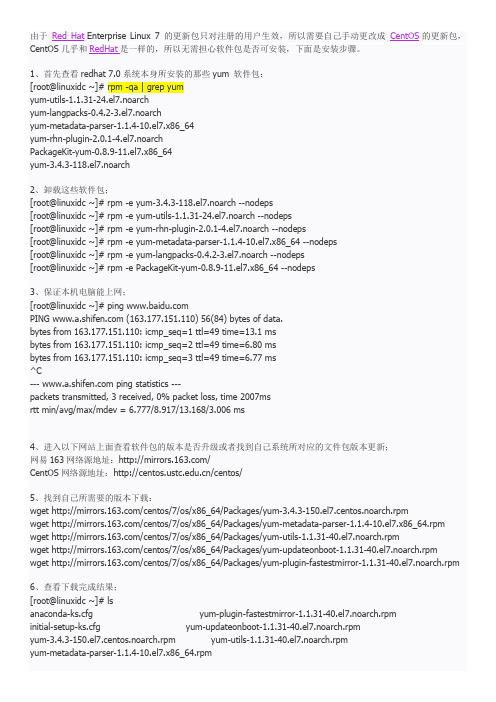
由于Red Hat Enterprise Linux 7 的更新包只对注册的用户生效,所以需要自己手动更改成CentOS的更新包,CentOS几乎和RedHat是一样的,所以无需担心软件包是否可安装,下面是安装步骤。
1、首先查看redhat 7.0系统本身所安装的那些yum 软件包:[root@linuxidc ~]# rpm -qa | grep yumyum-utils-1.1.31-24.el7.noarchyum-langpacks-0.4.2-3.el7.noarchyum-metadata-parser-1.1.4-10.el7.x86_64yum-rhn-plugin-2.0.1-4.el7.noarchPackageKit-yum-0.8.9-11.el7.x86_64yum-3.4.3-118.el7.noarch2、卸载这些软件包;[root@linuxidc ~]# rpm -e yum-3.4.3-118.el7.noarch --nodeps[root@linuxidc ~]# rpm -e yum-utils-1.1.31-24.el7.noarch --nodeps[root@linuxidc ~]# rpm -e yum-rhn-plugin-2.0.1-4.el7.noarch --nodeps[root@linuxidc ~]# rpm -e yum-metadata-parser-1.1.4-10.el7.x86_64 --nodeps[root@linuxidc ~]# rpm -e yum-langpacks-0.4.2-3.el7.noarch --nodeps[root@linuxidc ~]# rpm -e PackageKit-yum-0.8.9-11.el7.x86_64 --nodeps3、保证本机电脑能上网;[root@linuxidc ~]# ping PING (163.177.151.110) 56(84) bytes of data.bytes from 163.177.151.110: icmp_seq=1 ttl=49 time=13.1 msbytes from 163.177.151.110: icmp_seq=2 ttl=49 time=6.80 msbytes from 163.177.151.110: icmp_seq=3 ttl=49 time=6.77 ms^C--- ping statistics ---packets transmitted, 3 received, 0% packet loss, time 2007msrtt min/avg/max/mdev = 6.777/8.917/13.168/3.006 ms4、进入以下网站上面查看软件包的版本是否升级或者找到自己系统所对应的文件包版本更新;网易163网络源地址:/CentOS网络源地址:/centos/5、找到自己所需要的版本下载:wget /centos/7/os/x86_64/Packages/yum-3.4.3-150.el7.centos.noarch.rpmwget /centos/7/os/x86_64/Packages/yum-metadata-parser-1.1.4-10.el7.x86_64.rpm wget /centos/7/os/x86_64/Packages/yum-utils-1.1.31-40.el7.noarch.rpmwget /centos/7/os/x86_64/Packages/yum-updateonboot-1.1.31-40.el7.noarch.rpmwget /centos/7/os/x86_64/Packages/yum-plugin-fastestmirror-1.1.31-40.el7.noarch.rpm6、查看下载完成结果;[root@linuxidc ~]# lsanaconda-ks.cfg yum-plugin-fastestmirror-1.1.31-40.el7.noarch.rpminitial-setup-ks.cfg yum-updateonboot-1.1.31-40.el7.noarch.rpmyum-3.4.3-150.el7.centos.noarch.rpm yum-utils-1.1.31-40.el7.noarch.rpmyum-metadata-parser-1.1.4-10.el7.x86_64.rpm7、安装软件包:[root@linuxidc ~]# rpm -ivh yum-*warning: yum-3.4.3-150.el7.centos.noarch.rpm: Header V3 RSA/SHA256 Signature, key ID f4a80eb5: NOKEY error: Failed dependencies:python-urlgrabber >= 3.10-8 is needed by yum-3.4.3-150.el7.centos.noarch这里出现了一个小问题~~~:安装的python-urlgrabber版本不符合您尝试安装的RPM的依赖关系,我目前没有能力解决这个问题的办法,后来想了一个折中的办法,FQ去一个国外的yum源网站下载上面这五个较低版本的安装包,在来安装就不会有问题了在这里附上链接各位可以FQ出去下载对应版本的rpm包链接:/不报错版本安装包:yum-3.4.3-132.el7.centos.0.1.noarch.rpmyum-metadata-parser-1.1.4-10.el7.x86_64.rpmyum-plugin-fastestmirror-1.1.31-34.el7.noarch.rpmyum-updateonboot-1.1.31-34.el7.noarch.rpmyum-utils-1.1.31-34.el7.noarch.rpm我把这五个rpm包下载到我的Windows电脑里,然后用WinSCP这个软件上传到redhat 7 系统里,WinSCP这个软件的使用方法就不在这里赘述了8、下载好后重新安装:[root@linuxidc ~]# lsyum-3.4.3-132.el7.centos.0.1.noarch.rpm yum-updateonboot-1.1.31-34.el7.noarch.rpmyum-metadata-parser-1.1.4-10.el7.x86_64.rpm yum-utils-1.1.31-34.el7.noarch.rpmyum-plugin-fastestmirror-1.1.31-34.el7.noarch.rpm[root@linuxidc ~]# rpm -ivh yum-*warning: yum-3.4.3-132.el7.centos.0.1.noarch.rpm: Header V3 RSA/SHA256 Signature, key ID f4a80eb5: NOKEY Preparing... ################################# [100%]Updating / installing...1:yum-metadata-parser-1.1.4-10.el7 ################################# [ 20%]2:yum-plugin-fastestmirror-1.1.31-3################################# [ 40%]3:yum-3.4.3-132.el7.centos.0.1 ################################# [ 60%]4:yum-updateonboot-1.1.31-34.el7 ################################# [ 80%]5:yum-utils-1.1.31-34.el7 ################################# [100%][root@linuxidc ~]#这次没有报错了,安装完成!!!9、新建repo 配置文件;[root@linuxidc ~]# vim /etc/yum.repos.d/CentOS-Base.repo#CentOS-Base.repo## The mirror system uses the connecting IP address of the client and the# update status of each mirror to pick mirrors that are updated to and# geographically close to the client. You should use this for CentOS updates# unless you are manually picking other mirrors.## If the mirrorlist= does not work for you, as a fall back you can try the# remarked out baseurl= line instead.##[base]name=CentOS-$7 - Base - #mirrorlist=/?release=$7&arch=$basearch&repo=osbaseurl=/centos/7/os/$basearch/gpgcheck=1gpgkey=/centos/RPM-GPG-KEY-CentOS-7#released updates[updates]name=CentOS-$7 - Updates - #mirrorlist=/?release=$7&arch=$basearch&repo=updatesbaseurl=/centos/7/updates/$basearch/gpgcheck=1gpgkey=/centos/RPM-GPG-KEY-CentOS-7#additional packages that may be useful[extras]name=CentOS-$7 - Extras - #mirrorlist=/?release=$7&arch=$basearch&repo=extrasbaseurl=/centos/7/extras/$basearch/gpgcheck=1gpgkey=/centos/RPM-GPG-KEY-CentOS-7#additional packages that extend functionality of existing packages[centosplus]name=CentOS-$7 - Plus - baseurl=/centos/7/centosplus/$basearch/gpgcheck=1enabled=0gpgkey=/centos/RPM-GPG-KEY-CentOS-710、清除缓存:[root@linuxidc ~]# yum clean allLoaded plugins: fastestmirror, product-id, subscription-managerThis system is not registered to Red Hat Subscription Management. You can use subscription-manager to register. Cleaning repos: base extras updatesCleaning up everything11、测试安装是否正常;[root@linuxidc ~]# yum -y install lftpLoaded plugins: fastestmirror, product-id, subscription-managerThis system is not registered to Red Hat Subscription Management. You can use subscription-manager to register. base | 3.6 kB 00:00:00 extras | 3.4 kB 00:00:00 updates | 3.4 kB 00:00:00 (1/4): extras/x86_64/primary_db | 139 kB 00:00:00(2/4): base/x86_64/group_gz | 155 kB 00:00:00(3/4): updates/x86_64/primary_db | 3.9 MB 00:00:01(4/4): base/x86_64/primary_db | 5.6 MB 00:00:02Determining fastest mirrorsResolving Dependencies--> Running transaction check---> Package lftp.x86_64 0:4.4.8-8.el7_3.2 will be installed--> Finished Dependency ResolutionDependencies Resolved==================================================================== ===================================================Package Arch Version Repository Size ==================================================================== ===================================================Installing:lftp x86_64 4.4.8-8.el7_3.2 updates 751 k Transaction Summary======================================================================================================================= Install 1 Package~~~~~此处省略安装输出内容~~~~Installed:lftp.x86_64 0:4.4.8-8.el7_3.2Complete!到这里安装完成,以后安装所需包,可以不用本地yum源了,直接使用网络yum源。
Red Hat Enterprise Linux 7 虚拟化调整和优化指南说明书
Red Hat Enterprise Linux 7虚拟化调整和优化指南在 RHEL 中为主机系统和虚拟客户机使用 KVM 性能功能Last Updated: 2023-03-25Red Hat Enterprise Linux 7 虚拟化调整和优化指南在 RHEL 中为主机系统和虚拟客户机使用 KVM 性能功能Enter your first name here. Enter your surname here.Enter your organisation's name here. Enter your organisational division here. Enter your email address here.法律通告Copyright © 2022 | You need to change the HOLDER entity in the en-US/Virtualization_Tuning_and_Optimization_Guide.ent file |.The text of and illustrations in this document are licensed by Red Hat under a Creative Commons Attribution–Share Alike 3.0 Unported license ("CC-BY-SA"). An explanation of CC-BY-SA is available at/licenses/by-sa/3.0/. In accordance with CC-BY-SA, if you distribute this document or an adaptation of it, you must provide the URL for the original version.Red Hat, as the licensor of this document, waives the right to enforce, and agrees not to assert, Section 4d of CC-BY-SA to the fullest extent permitted by applicable law.Red Hat, Red Hat Enterprise Linux, the Shadowman logo, the Red Hat logo, JBoss, OpenShift, Fedora, the Infinity logo, and RHCE are trademarks of Red Hat, Inc., registered in the United States and other countries.Linux ® is the registered trademark of Linus Torvalds in the United States and other countries. Java ® is a registered trademark of Oracle and/or its affiliates.XFS ® is a trademark of Silicon Graphics International Corp. or its subsidiaries in the United States and/or other countries.MySQL ® is a registered trademark of MySQL AB in the United States, the European Union and other countries.Node.js ® is an official trademark of Joyent. Red Hat is not formally related to or endorsed by the official Joyent Node.js open source or commercial project.The OpenStack ® Word Mark and OpenStack logo are either registered trademarks/service marks or trademarks/service marks of the OpenStack Foundation, in the United States and other countries and are used with the OpenStack Foundation's permission. We are not affiliated with, endorsed or sponsored by the OpenStack Foundation, or the OpenStack community.All other trademarks are the property of their respective owners.摘要Red Hat Enterprise Linux 虚拟化调整和优化指南涵盖 KVM 和虚拟化性能。
《网络服务器搭建、配置与管理-Linux(第二版)》课后习题答案
《网络服务器搭建、配置与管理-Linux版(第二版)》课后习题答案1.6 练习题一、选择题1. Linux最早是由计算机爱好者 B 开发的。
A. Richard PetersenB. Linus TorvaldsC. Rob PickD. Linux Sarwar2. 下列 C 是自由软件。
A. Windows XPB. UNIXC. LinuxD. Windows 20003. 下列 B 不是Linux的特点。
A. 多任务B. 单用户C. 设备独立性D. 开放性4. Linux的内核版本2.3.20是 A 的版本。
A. 不稳定B. 稳定的C. 第三次修订D. 第二次修订5. Linux安装过程中的硬盘分区工具是 D 。
A. PQmagicB. FDISKC. FIPSD. Disk Druid6. Linux的根分区系统类型是 C 。
A. FATl6B. FAT32C. ext4D. NTFS二、填空题1. GUN的含义是:GNU's Not UNIX。
2. Linux一般有3个主要部分:内核(kernel)、命令解释层(Shell或其他操作环境)、实用工具。
3. 安装Linux最少需要两个分区,分别是swap交换分区和/(根)分区。
4. Linux默认的系统管理员账号是root 。
三、简答题(略)1.简述Red Hat Linux系统的特点,简述一些较为知名的Linux发行版本。
2.Linux有哪些安装方式?安装Red Hat Linux系统要做哪些准备工作?3.安装Red Hat Linux系统的基本磁盘分区有哪些?4.Red Hat Linux系统支持的文件类型有哪些?2.6 练习题一、填空题1.SMB Server Message Block2.4453.nmbd smbd4.yum 源文件repo /etc/yum.repos.d/5./etc/samba smb.conf6.share user server domain ads user二、选择题1. (C )2. (C )3.(B )4. (AD )5.(B)6. (C )7.(A )8.(D )三、简答题(略)1.简述samba服务器的应用环境。
虚拟机中安装Linux(Redhat)教程

虚拟机中安装Linux(Redhat)教程虚拟机中安装Linux(Redhat)教程说明:本次安装在Vmware14.0中安装,所使⽤的镜像⽂件为rhel-server-7.2-x86_64-dvd.iso⼀、创建虚拟机:1、创建新的虚拟机:2、完成虚拟机的引导(1)选择⾃定义、点击下⼀步。
(2)兼容性默认不修改:(3)客户机操作系统我们稍后安装:(4)选择要安装的客户机操作系统的类型:由于我们安装的系统时Linux,版本为Redhat7版本,就直接勾选,最后下⼀步。
(5)命名虚拟机,点击选择保存虚拟机⽂件的位置。
这⾥都⽐较随便,建议保存的位置不要在C盘。
(6)设置虚拟机中处理器的内核数量,根据⾃⼰的CPU设定。
(7)设置虚拟机的内存,根据⾃⼰物理机给,默认就可以。
(8)设置⽹络类型:这⾥⽹络类型有3种,简单说⼀下:①桥接:相当于直接连接在了物理⽹卡上来获取IP地址,访问公⽹。
如果我们获得是私有IP,我们也可以访问同⼀⽹段内的主机。
②NAT:获得私有IP地址,既可以直接连接物理⽹卡访问互联⽹,同时可以访问我们的物理主机。
③仅主机:相当于主机内部搭建了⼀个局域⽹,使得虚拟机可以访问我们的物理机或者是这台物理机上的其他虚拟机。
(9)选择I/O控制器类型:默认就好。
(10)选择虚拟机磁盘,也简单说⼀下这些磁盘:IDE:不⽀持热插拔,传输速率慢,总之,不太好SATA:⽀持热插拔,传输速率⼀般,性价⽐⾼SCSI:⽀持热插拔,传输速率快,缓存⼤,CPU占⽤低。
⼯作站、服务器级别磁盘,⽐较贵。
(12)为虚拟机分配磁盘⼤⼩:(13)指定磁盘⽂件存储的位置:(14)点击完成:3、修改虚拟机设置,识别镜像⽂件加载路径。
(1)点击主界⾯图中的地⽅(2)选择使⽤ISO映像⽂件,然后点击浏览找到Redhat7.2的镜像⽂件所存在的位置。
最后点击确定。
⼆、安装虚拟机:1、开启虚拟机:2、进⼊后点击第1项,之后按下回车开始安装。
NVIDIA 驱动程序包安装指南说明书

Create repository Pre-install actions Package manager installation References
Prerequisites
Download inputs
1. NVIDIA driver runfile 2. NVIDIA modprobe tarball 3. NVIDIA persistenced tarball 4. NVIDIA settings tarball 5. NVIDIA xconfig tarball
NVIDIA persistenced tarball GitHub location: https:///NVIDIA/nvidia-persistenced/releases ex: https:///NVIDIA/nvidia-persistenced/archive/460.32.03.tar.gz UDA location: https:///XFree86/nvidia-persistenced ex: https:///XFree86/nvidia-persistenced/nvidia-persistenced-460.56.tar.bz2
Red Hat Enterprise Linux 7 安装整理

Red Hat Enterprise Linux 7.0 安装方法川信授课使用开始安装一、选择安装方式有3个选择项,分别是:1、直接安装Linux 7.0;2、先测试镜像是否有错,然后安装Linux 7.0(检查镜像是需要一定的时间,如果镜像没问题就直接选择第一项跳过检查直接安装);3、进入排错。
点击“Troubleshooting”进入查看一下有5个选择项,分别是:1、用基本的图形模式安装RHEL7.0(服务器特别新或者特别就时使用,安装最基本的显卡)2、急救模式3、内存检测4、从本地硬盘启动5、返回主菜单返回到主菜单,这里就直接选择第一项开始安装然后按“Enter”进行安装二、进入选择安装语言找到中文,选择中文安装,然后点击“继续”三、进入系统设置界面1、设置时间和日期,点击“时间和日期(T)”选择时区,关键设置时间同步设置时间同步,点击打开“网络时间”点击后面的“小齿轮”进入设置与所需的服务器同步,默认的是Red Hat官方的4个服务器(如需要域本公司的服务器同步,输入IP地址或主机名,点击“+” 添加)2、设置键盘语言,点击“键盘(K)”点击“+” 进行添加所需的语言3、选择进入系统后的语言,点击“语言支持(L)”这里选择简体中文4、设置安装系统的方式,点击“安装源”在企业里安装方法有3种(1)插入光盘安装(2)把光盘复制到硬盘安装(3)网络安装(在企业里用的最多)可以通过检查到的安装源安装,也可以通过网络安装网络安装需要输入“IP/目录”,首先需要对目录进行共享因为是使用镜像安装的所以选择第一项“自动检测到的安装介质(A)”5、选择系统所需安装的软件,点击“软件选择”最小化安装是在命令行系统中,并没有桌面,如果需要安装桌面,点击“带GUI的服务器”。
这里选择安装了“Java平台”,选择标准安装也可以。
在实际生产中按本公司的需求进行安装软件。
6、分配磁盘空间,点击“安装位置(D)”(注意分区顺序)RHEL6最少的安装分区是3个:(1)/boot——里面有:启动文件、内核(2)swap——交换分区在内存不够时使用一般swap 是物理内存的2—2.5倍(虚拟内存)(3)/ ——剩下所有的都存放在/ 下RHEL7最少的安装分区是2个(它的swap是自动管理的,可以不分配):(1)/boot(2)/如果需要自己手动去分配磁盘空间勾选“我要配置分区(I)”,点击“完成(D)”进入手动分区界面(1)如果需要系统自动分区,点击“点这里自动创建他们(C)”自动分配完成之后点击“完成”(2)如果是自己手动分配,点击“新挂载点将使用以下分区方案”选择“标准分区” ,然后点击“+”创建100M 的/boot 分区(在“期望容量” 中添加大小容量是记的后面跟单位,如“100M,2G”,不加单位默认情况下是M )创建2G 的swap 分区把剩下的所有磁盘空间给/ (期望容量不填写就默认所有)可以选择磁盘格式,RHEL7 中默认是xfs 格式(最大单个文件是2T),也可以选择RHEL6 的格式ext4磁盘手动分配完成,点击“完成”弹出磁盘变更的提示,点击“接受更改”7、设置网络和计算机名,点击“网络和主机名(N)”开启网络,点击“配置” 进行网络设置更改主机名,设置完,点击“完成”主机名一般的设置方法是:用途.域名如:现在不设置以后设置也可以,我这里用简单的 sxl.host 命名四、设置完成后,点击“开始安装”五、系统开始安装,RHEL7 在安装的过程中设置ROOT密码和创建用户1、设置ROOT密码,如果密码设置简单需要点击2次完成2、创建用户,注意“将此用户作为管理员”也就是拥有root的一些权限,同样密码简单需要按2次“完成”点击“高级(A)” ,设置用户一些其他信息ROOT密码和用户设置完成,等待安装 RHEL7 ,可以看到一个有1191个安装包(需要一定的安装时间)六、安装完成,点击“结束配置(F)”然后再等会儿提示重新启动,点击“重启”七、重启后,选择“第一项”进行系统初始化的设置,点击“许可信息(L)”进入勾选“我同意许可协议(A)”,点击“完成”点击“完成配置(F)”进入Kdump,Kdump的作用是:系统在崩溃时记录下崩溃的原因,方便进行系统的修复。
linux系统安装r语言环境方式及问题详细解决方式

linux 下安装R环境方式、问题及详细解决方案一、下载wget 、解压:tar -zxvf 、安装(固然也可以跳过)yumyum install readline-develyum install libXt-devel./configure4、配置环境并编译安装# 若是利用rJava需要加上--enable-R-shlib (这个我不需要,所以加入到后面) # 若是3没安装, 那么后面加上:--with-readline=no --with-x=no./configure --prefix=/usr/make install(若是:./configure 后报错错误:configure: error: No F77 compiler found 说明R语言需要fortran compiler,也就是说,在上面尝试寻觅了若干种Fortran 编译器未果以后,提示你没有安装任何一种可以利用的fortran 77 编译器。
随意装个gfortran 就好了。
sudo apt-get install gfortran再次运行./configure./configure会产生错误:configure: error: con--with-readline=yes (default) and headers/libs are not available首先检查是不是安装readline.sudo apt-get install readline-common./configure --with-readline=no会出现错误:configure: error: --with-x=yes (default) and X11 headers/libs are no t available./configure --with-x=no --with-readline=no配置通过,可是会产生如下warning:configure: WARNING: you cannot build DVI versions of the R manualsconfigure: WARNING: you cannot build DVI versions of all the help pagesconfigure: WARNING: you cannot build info or HTML versions of the R manuals configure: WARNING: you cannot build PDF versions of the R manualsconfigure: WARNING: you cannot build PDF versions of all the help pages这是缺少生成相应格式manuals的插件,若是有需要可以依次安装。
RedHatlinux7-虚拟化+集群安装精简手册簿
RedHat linux 7虚拟化环境集群安装精简手册1、前期准备挂载磁盘/* 通过制作iso,方便后续安装动作,在知识库中应形成iso镜像体系 */dd if=/dev/sr0 of=/app/rh71.isomount -o loop /app/rh71.iso /mnt挂载制作的isomount -loop /dev/sr0 /mnt查看少什么包/* 如果想要是用vgscan指令,系统至少需要安装lvm2包,这个从安装好的系统上查 */ [root@jttldb1 host5]# rpm -qf /sbin/vgscanlvm2-2.02.83-3.el6.x86_64常用包安装net-tools (ifconfig等用)yum -y install nautilus-open-terminal(右键添加terminal)配置yum/* 根据具体挂载的路径和版本调整 */建立文件/etc/yum.repos.d/mycdrom.repo[Base]name=RHELbaseurl=file:///mntenabled=1gpgcheck=0[Cluster]name=RHELbaseurl=file:///mnt/addons/HighAvailabilityenabled=1gpgcheck=0配置ipIPADDR=10.88.89.100GATEWAY=10.88.89.1NETMASK=255.255.255.0ONBOOT=yes单网卡配置多ipifconfig team0:0 10.88.89.101 netmask 255.255.255.0 (临时添加一个ip,重启后消失,如果想永久拥有,需要配置ifcfg-ens32:0 文件)临时文件取消:ifconfig ens32:0 down网卡绑定1)创建组接口(会生产一个ifcfg-team0)nmcli con add type team con-name team0 ifname team0 config '{"runner":{"name":"activebackup"}}'nmcli con del team0 (删除绑定team)2)查看组接口配置nmcli con show3)给组接口添加设备nmcli con add type team-slave con-name team0-port1 ifname enp11s0f0 master team0 nmcli con add type team-slave con-name team0-port2 ifname enp16s0f0 master team0 nmcli con mod type team-slave con-name team0-port2 ifname enp16s0f0 master team04)配置ip[root@jttldb2 network-scripts]# more ifcfg-team0DEVICE=team0DEVICETYPE=TeamTEAM_CONFIG="{\"runner\":{\"name\":\"activebackup\"}}"BOOTPROTO=noneIPADDR=10.88.89.100PREFIX=25GATEWAY=10.88.89.1DEFROUTE=yesIPV4_FAILURE_FATAL=yesIPV6INIT=yesIPV6_AUTOCONF=yesIPV6_DEFROUTE=yesIPV6_PEERDNS=yesIPV6_PEERROUTES=yesIPV6_FAILURE_FATAL=noNAME=team0UUID=afa9d1a3-05d8-4cad-af44-fd187c5be16f ONBOOT=yes查看网卡状态teamdctl team0 state验证nmcli dev dis eno 断开nmcli dev con eno 连接OS版本查询lsb_release -a需要安装包(yum install redhat-lsb)起停服务systemctl stop firewalldsystemctl start firewalldsystemctl status firewalldsystemctl|grep是否开机启动systemctl enable XXX 开机启动systemctl disable xxx 开机不启动systemctl status XXX 查看状态关闭防火墙[root@localhost ~]# systemctl stop firewalld [root@localhost ~]# systemctl disable firewalld关闭selinux[root@localhost ~]# vi /etc/sysconfig/selinux把SELINUX=enforcing改为SELINUX=disabled[root@localhost ~]# reboot查看#getenforce临时关闭# setenforce 0LVM配置虚机上共享磁盘配置要求磁盘置备:厚置备置零磁盘模式:独立持久在ha1上,创建pv、vg、lv挂载文件系统,在ha2上重启系统即可识别vg信息修改主机名称:linu7通过hostname临时修改主机名,加hostnamectl static修改静态主机名的方式实现永久生效主机名(修改主机名后注意修改hosts)hostnamehostnamectl --static set-hostname linux7-ha2而在linux7之前是没有hostnamectl命令的,永久修改主机名的方式是通过hostname加修改/etc/sysconfig/network文件的方式配置vnc连接rehhat71)安装包yum install tigervnc-server创建一个登录密码:#vncserver2)配置vnccp /lib/systemd/system/vncserver@.service /etc/systemd/system/vncserver@:1.service替换文件#Type=forking改成 Type=simple3)重启systemdsystemctl daemon-reload4)启动vcnsystemctl start vncserver@:1.servicesystemctl status vncserver@:1.service永久启动systemctl enable vncserver@:1.service5)关闭vncsystemctl stop vncserver@:1.service开机不启动systemctl disable vncserver@:1.service客户端服务器段需要关闭防火墙,或修改过滤2、oracle静默安装安装必要的包yum -y install binutils compat-db compat-gcc-34 compat-gcc-34-c++ compat-libstdc++-33 elfutils-libelf-devel gcc gcc-c++ glibc-* libXp.so.6 libXt.so.6 libXtst.so.6 libgcc* ksh libXp libaio-devel numactl numactl-devel sysstat unixODBC unixODBC-devel pdkshyum install静默安装oracle修改./database/response/db_install.rspdb_install.rsp如下内容oracle.install.option=INSTALL_DB_SWONLYUNIX_GROUP_NAME=oinstallINVENTORY_LOCATION=/u01/app/oraInventoryORACLE_HOME=/u01/app/oracle/product/11.2.0/db_1ORACLE_BASE=/u01/app/oracleoracle.install.db.InstallEdition=EEoracle.install.db.EEOptionsSelection=trueoracle.install.db.optionalComponents=oracle.rdbms.partitioning:11.2.0.3.0,oracl e.oraolap:11.2.0.3.0,oracle.rdbms.dm:11.2.0.3.0,oracle.rdbms.lbac:11.2.0.3.0,or acle.rdbms.rat:11.2.0.3.0oracle.install.db.DBA_GROUP=dbaoracle.install.db.OPER_GROUP=operoracle.install.db.isRACOneInstall=falseDECLINE_SECURITY_UPDATES=true执行静默安装软件./runInstaller -silent -ignoreSysPrereqs -ignorePrereq -showProgress -responseFile /oracle/database/response/db_install.rsp执行静默安装数据库(在dbca.rsp中添加实例名称)dbca -silent -responseFile /oracle/database/response/dbca.rsp对数据库做必要的调整3、linux7 vmware下ha安装调试----pacemaker取代rgmanager ssh 双机信任配置1)在两个节点上生产证书# ssh-keygen -t rsa注意:在程序提示输入passphrase时直接输入回车,表示无证书密码。
- 1、下载文档前请自行甄别文档内容的完整性,平台不提供额外的编辑、内容补充、找答案等附加服务。
- 2、"仅部分预览"的文档,不可在线预览部分如存在完整性等问题,可反馈申请退款(可完整预览的文档不适用该条件!)。
- 3、如文档侵犯您的权益,请联系客服反馈,我们会尽快为您处理(人工客服工作时间:9:00-18:30)。
Linux Host Installation and Integration for Block
15
Unisphere Host Initiators: Fibre
Copyright © 2014 EMC Corporation. All Rights Reserved.
Linux Host Installation and Integration for Block
Linux Host Installation and Integration for Block
Upon completion of this module, you should be able to: • Describe Linux storage connectivity limits and guidelines • Describe the implementation of Linux FC connectivity • Describe the implementation of Linux iSCSI connectivity
Copyright © 2014 EMC Corporation. All Rights Reserved.
4
Host HBA Utilities
• Depending on the supported HBA one of the following utilities
can be used to view host connectivity
Emulex HBAs: OneCommand Manager Qlogic: SANsurfer CLI or GUI Brocade: Host Connectivity Manager
128 bit number - WWNN + WWPN
• VNX port WWNs
128 bit number - WWNN + WWPN
• Operating system type
Allows appropriate response to host SCSI commands
Copyright © 2014 EMC Corporation. All Rights Reserved.
Linux Host Installation and Integration for Block
13
Initiator Registration Records: Fibre
Number of initiators is model dependent An initiator is an HBA or CNA port that can access the storage system • Some HBAs and CNAs have two ports • Each path consumes one initiator record Access from a server to an SP in a storage system can be: • Single path • Multipath • Alternate path
16
Initiator Information: Fibre
Copyright © 2014 EMC Corporation. All Rights Reserved.
Linux Host Installation and Integration for Block
17
Emulex hbacmd listbas and targetmappings commands
Copyright © 2014 EMC Corporation. All Rights Reserved.
Linux Host Installation and Integration for Block
9
Using fdisk to Align a Linux Partition
Create a new partition
Copyright © 2014 EMC Corporation. All Rights Reserved.
Linux Host Installation and Integration for Block
2
Linux Connectivity: Requirements
• One or more VNX storage systems • One or more Linux hosts • Supported HBAs, HBA drivers, switches and cables • Correctly configured switch zoning • Correctly configured network • A management station in the environment
Copyright © 2014 EMC Corporation. All Rights Reserved.
Linux Host Installation and Integration for Block
1
Linux Host Installation and Integration for Block
Supported host and OS Supported browser Supported JRE Network connectivity to storage systems
Copyright © 2014 EMC Corporation. All Rights Reserved.
Select the primary partition
Enter expert mode
2048
Offset to the begin at 128
Write the changes to disk
Copyright © 2014 EMC Corporation. All Rights Reserved.
Copyright © 2014 EMC Corporation. All Rights Reserved.
Linux Installation and Integration for Block
12
Viewing Block Storage Ports
Copyright © 2014 EMC Corporation. All Rights Reserved.
Copyright © 2014 EMC Corporation. All Rights Reserved.
Linux Host Installation and Integration for Block
5
Emulex OneCommand Manager: Port Information
Copyright © 2014 EMC Corporation. All Rights Reserved.
Linux Host Installation and Integration for Block
6
OneCommand Manager: Target Mapping tab
Copyright © 2014 EMC Corporation. All Rights Reserved.
Linux Host Installation and Integration for Block
VNX port numbers
Copyright © 2014 EMC Corporation. All Rights Reserved.
Linux Host Installation and Integration for Block
18
Qlogic SANsurfer scli example
Linux Host Installation and Integration for Block
10
Linux Host Installation and Integration for Block
Lesson 1: Summary
During this lesson the following topics were covered: • Linux system limits and guidelines • Linux HBA utilities • Linux data alignment
Linux Host Installation and Integration for Block
3
Operating System Limits and Guidelines
Host Initiators • 16 Fibre Channel initiator ports per Linux host (Single or dual ported) • No mixing of HBAs from different vendors or HBAs with different PCI-interfaces (PCI-Express with PCI-X HBAs)
Lesson 1: Linux storage connectivity
This lesson covers the following topics: • Linux system limits and guidelines • Linux HBA utilities • Linux data alignment
Supported Protocols: Fibre Channel, Fibre Channel over Ethernet (FC0E), and iSCSI
Copyright © 2014 EMC Corporation. All Rights Reserved.
