IGS v7.58 ServerToClient配置-1
MapGIS IGServer配置指南for DNET

Ghost 7.5企业版局域网远程备份攻略
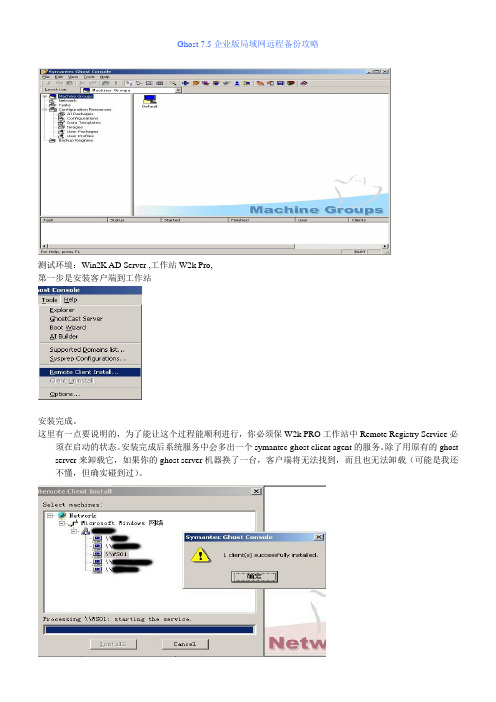
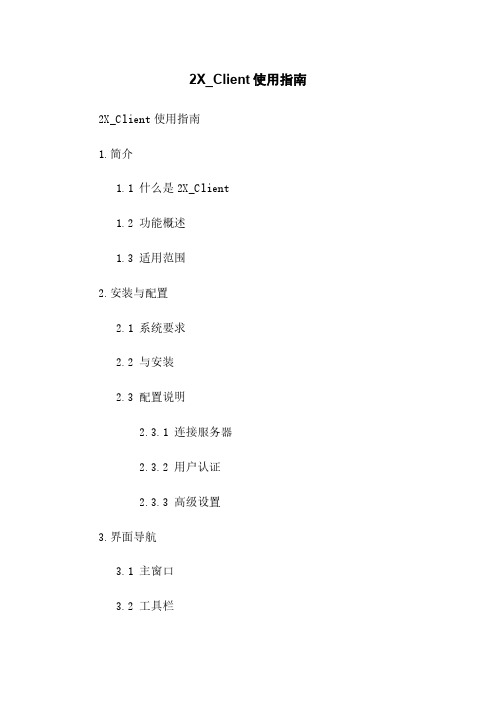
Ghost 7.5企业版局域网远程备份攻略测试环境:Win2K AD Server ,工作站W2k Pro,第一步是安装客户端到工作站安装完成。
这里有一点要说明的,为了能让这个过程能顺利进行,你必须保W2k PRO工作站中Remote Registry Service必须在启动的状态。
安装完成后系统服务中会多出一个symantec ghost client agent的服务。
除了用原有的ghost server来卸载它,如果你的ghost server机器换了一台,客户端将无法找到,而且也无法卸载(可能是我还不懂,但确实碰到过)。
在Default中会显示已经安装的客户端,如果该客户端未连接,那么那个绿色的勾将表示未红色的X客户端安装完毕,现在我们要设置网卡的驱动程序选择相应的驱动。
但并不是里面标配的驱动都可以使用,如果没有或者驱动无法使用则需要从自己的网卡驱动盘安装。
点击添加,然后选择packet driver 或NDIS2 driver。
强烈建议使用NDIS2驱动,在网卡驱动盘相应的目录进行选择。
这里以8139网卡为例子,建立驱动后自己取个好听的名字。
你可以给不同的客户端设置不同的网卡驱动,点击每个客户端的属性选择已经建好的驱动,Heartbest interval是用来根据不同的网络速度进行调节的,如果你在后面的ghost过程中出现错误,系统会生成一个错误文件来提示你修改这个值现在建立一个gho映像文件,在images栏中点击new image在相应的目录建立一个gho文件,但只是建立一个包含路径信息的文件。
前期的准备都差不多完成了,备份前5秒准备。
选择菜单file->new->image dumpCreate Tark definition是定至计划,定义后你可以在Tarks栏目中选择你想执行的项目。
Execute immediately是立即执行,本次测试我们选它。
source machine选择客户端,这就不用多说了吧。
2X_Client使用指南
2X_Client使用指南2X_Client使用指南1.简介1.1 什么是2X_Client1.2 功能概述1.3 适用范围2.安装与配置2.1 系统要求2.2 与安装2.3 配置说明2.3.1 连接服务器2.3.2 用户认证2.3.3 高级设置3.界面导航3.1 主窗口3.2 工具栏3.3 菜单栏3.4 导航面板4.常用功能4.1 远程桌面连接4.1.1 添加远程计算机 4.1.2 连接到远程计算机 4.1.3 断开连接4.2 文件传输4.2.1 文件4.2.2 文件4.2.3 管理文件4.3 远程执行命令4.3.1 执行命令4.3.2 查看输出结果4.4 屏幕共享4.4.1 发起屏幕共享4.4.2 加入共享会话4.4.3 控制共享会话4.5 远程打印4.5.1 配置远程打印机 4.5.2 打印文档4.6 终端服务器管理4.6.1 添加终端服务器 4.6.2 管理终端服务器4.6.3 设置资源使用权限5.高级功能5.1 会话管理5.1.1 监视会话5.1.2 终止会话5.1.3 发送消息5.2 用户管理5.2.1 添加用户5.2.2 管理用户权限5.2.3 删除用户5.3 审计日志5.3.1 查看日志5.3.2 导出日志5.4 集中管理5.4.1 创建集中管理中心5.4.2 添加终端服务器到中心5.4.3 配置中心设置附件:附件A.2X_Client安装包附件B:用户手册附件C:终端服务器配置文件法律名词及注释:1.用户认证:验证用户身份的过程。
2.远程桌面连接:通过网络将本地计算机的桌面界面显示到远程计算机上。
3.屏幕共享:将本地屏幕的图像共享给其他用户。
4.终端服务器管理:对终端服务器进行配置、管理和监控。
5.会话管理:管理远程会话的过程,包括监视、终止和发送消息。
6.用户管理:添加、配置和删除用户账户及权限。
7.审计日志:记录和管理用户操作以及系统事件的日志。
8.集中管理:集中管理多个终端服务器的中心控制。
si7配置步骤
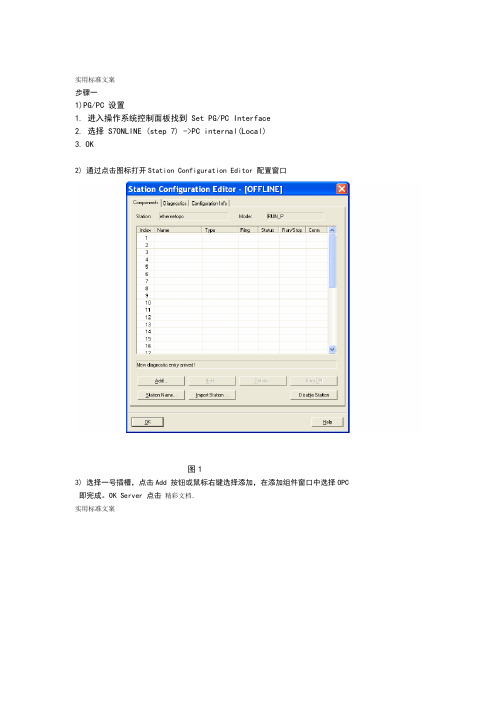
实用标准文案步骤一1)PG/PC 设置1.进入操作系统控制面板找到 Set PG/PC Interface2.选择 S7ONLINE (step 7) ->PC internal(Local)3.OK2) 通过点击图标打开Station Configuration Editor 配置窗口图13) 选择一号插槽,点击Add 按钮或鼠标右键选择添加,在添加组件窗口中选择OPC 即完成。
OK Server 点击精彩文档.实用标准文案2图IE General4) 同样方法选择五号插槽添加图3插入IE General 后,即弹出其属性对话框。
点击Network Properties,进行网卡参数配置精彩文档.实用标准文案4 图5) 网卡的配置点击Network Properties 后,WINDOWS 网络配置窗口即打开,选择本地连接属性菜单设置网卡参数,如IP 地址,子网掩码等。
步骤如图5。
确认各步设置后,网卡配置完成。
图56) 分配PC Station 名称点击“Station Name”按钮,指定PC 站的名称,这里命名为CC2_L1SRV1。
点击“OK”确认即完成了PC 站的硬件组态。
精彩文档.实用标准文案图6机本机的名称PC Station Name 并不是特指注:步骤二:配置控制台(Configuration Console)的使用与设置1) 配置控制台(Configuration Console)是组态设置和诊断的核心工具,用于PC 硬件组件和PC 应用程序的组态和诊断。
2) 正确完成PC 站的硬件组态后,打开配置控制台( start??simatic??simaticnet??Configuration console),可以看到所用以太网卡的模式已从PG mode 切换到Configuration mode,插槽号(Index)也自动指向5。
如图7。
图73) 在Access Points 设定窗口中,将S7ONLINE 指向PC internal(local)。
IGS v7.58 ServerToClient配置-1
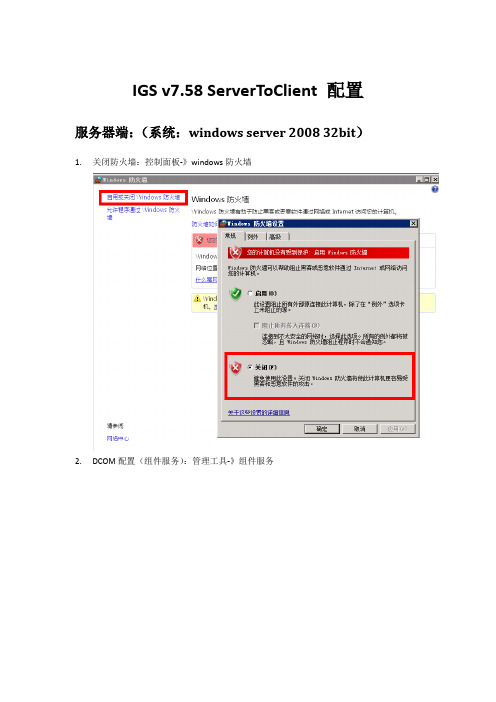
IGS v7.58 ServerToClient 配置服务器端:(系统:windows server 2008 32bit)1.关闭防火墙:控制面板-》windows防火墙2.DCOM配置(组件服务):管理工具-》组件服务选择“组件服务”->“计算机”->“我的电脑”->“DCOM 配置”->“Industrial Gateway OPC Server 7.58”,右键,属性。
进行如下配置:常规——身份验证级别:连接;如下图:安全——启动和激活权限:勾选“自定义”,单击“编辑”,添加“EveryOne”用户并勾选所有权限。
安全——访问权限:勾选“自定义”,单机“编辑”,添加“EveryOne”用户并勾选所有权限。
相关截图如下:标识——勾选“下列用户”,添加“本地管理员用户”(Administrator)用户,并输入密码。
如下图:注意:服务器端和客户端是通过该用户来访问的。
(两边的用户名和密码必须一致)3.本地安全设置:管理工具-》本地安全策略设置“网络访问: 将Everyone 权限应用于匿名用户”为“启用”。
4.IGS Setting 配置:右键“IGS”小图标,选择“Settings….”,如下图:在弹出的窗口中,选择“Runtime Process”选项卡,设置“Selected mode”为“interactive”。
如下图:客户端配置:1.关闭防火前。
2.DCOM配置:开始-》运行-》“DCOMCNFG,打开DCOM配置。
选中“我的计算机”,右键,属性。
选择“COM安全”选项卡:单机2个“编辑限制”按钮,设置“Everyone”的具有所有权限。
如下图:3.测试远程OPC Server:开始-》所有程序-》GE Intelligent Platforms-》Industrial Gateway Server-》OPC Quick Client,如下图:单击菜单栏中的“Edit”下的“New Server Connection…”,弹出窗口如下图:选择Prog ID为“Intellution.IntellutionGatewayOPCServer”,Remote Machine Name为“10.8.51.12”(IGS服务器的IP地址),单机“确定”。
SkylineGlobe Server v7.0用户操作手册
4、IGS开发项目
IGS开发一、OPC简介OPC全称是OLE for Process Control,它的出现为基于Windows的应用程序和现场过程控制应用建立了桥梁。
在过去,为了存取现场设备的数据信息,每一个应用软件开发商都需要编写专用的接口函数。
由于现场设备的种类繁多,且产品的不断升级,往往给用户和软件开发商带来了巨大的工作负担。
通常这样也不能满足工作的实际需要,系统集成商和开发商急切需要一种具有高效性、可靠性、开放性、可互操作性的即插即用的设备驱动程序。
在这种情况下,OPC标准应运而生。
OPC标准以微软公司的OLE技术为基础,它的制定是通过提供一套标准的OLE/COM接口完成的,在OPC技术中使用的是OLE 2技术,OLE标准允许多台微机之间交换文档、图形等对象。
OLE机制COM是Component Object Model的缩写,是所有OLE机制的基础。
COM是一种为了实现与编程语言无关的对象而制定的标准,该标准将Windows下的对象定义为独立单元,可不受程序限制地访问这些单元。
这种标准可以使两个应用程序通过对象化接口通讯,而不需要知道对方是如何创建的。
例如,用户可以使用C++语言创建一个Windows对象,它支持一个接口,通过该接口,用户可以访问该对象提供的各种功能,用户可以使用Visual Basic,C,Pascal,Smalltalk或其它语言编写对象访问程序。
在Windows NT4.0操作系统下,COM 规范扩展到可访问本机以外的其它对象,一个应用程序所使用的对象可分布在网络上,COM 的这个扩展被称为DCOM(Distributed COM)。
通过DCOM技术和OPC标准,完全可以创建一个开放的、可互操作的控制系统软件。
OPC 采用客户/服务器模式,把开发访问接口的任务放在硬件生产厂家或第三方厂家,以OPC服务器的形式提供给用户,解决了软、硬件厂商的矛盾,完成了系统的集成,提高了系统的开放性和可互操作性。
WinCC中的用户管理的结构
“附加”菜单 ....................................................................................................................................20 “附加”菜单 ....................................................................................................................................20 变量登录.......................................................................................................................................20 分配计算机 - 变量.........................................................................................................................21 组态 ..............................................................................................................................................22 分配用户 - 数值 ............................................................................................................................23
i.LON SmartServer 快速入门指南说明书
Quick Start Guidei .LON ®SmartServerStep 1:Install the i .LON SmartServer software1.Before installing,check /ilon for the latest i .LON SmartServer service pack and updates.See the installation instructions included with the service pack or update for more information.2.Insert the i .LON SmartServer DVD into your computer.If the installation program fails to start,navigate to your DVD-ROM drive and run setup.exe .3.Install the SmartServer software.To do this,click Install Products ,click Echelon i.LON SmartServer Software ,and then follow the instructions in the Setup Wizard.Step 2:Connect the SmartServer hardwaree an Ethernet cable to connect your SmartServer to an IP network that can communicate with your computer.2.If your computer is not on the 192.168.1 subnet,open a command prompt and type the following command:route add 192.168.1.0 mask 255.255.255.0 %computername%.If you are running Windows Vista ™on your computer,you need to open the command prompt with administrator privileges.To do this,click Start ,type cmd in the search box,right-click cmd.exe ,and then select Run as Administrator .Select a network management servicenetwork using LNS ®network management services or using the SmartServer as a standalone network manager.When using LNS network management services,you can configure the SmartServer •When using the LNS Auto and LNS Manual network management services,the SmartServer synchronizes with an LNS Server,and uses the LNS Server to perform all network management tasks.In these modes,the SmartServer and the devices on the attached L ON W ORKS network can communicate in a peer-to-peer manner.You must have an LNS Server Turbo Edition (version 3.2 or newer) to use either of the LNS network management services.•When using the Standalone network management service,theSmartServer is the network manager.The network functions as a master-slave system,where the SmartServer is the master to the slave devices.You can use standalone mode to operate a small,single-channel network that does not require LNS services,L ON W ORKS connections,or synchroniza-tion with other network management works running in stand-alone mode are limited to a maximum of 200 devices and no routers (for TP/FT-10 networks,you need to attach a physical layer repeater to the network to exceed the 64 device segment limit).Note:Read Chapter 5 of the i.LON SmartServer User’s Guide before changing the network management service.Welcome to the i .LON SmartServer.Your SmartServer is a high-perform-ance controller,network manager,remote network interface,and Web server that connects L ON W ORKS ®,Modbus,and M-Bus devices to enterprise applications and the Internet.The SmartServer also provides local device monitoring and control via built-in scheduling,alarming,and datalogging applications.Options are available for IP-852 routing and custom applica-tion support.You can use the SmartServer to locally or remotely configure,monitor,and control appliances,meters,load controls,lights,security systems,pumps,valves,or virtually any electrical device—from across the room or across the globe.This guide provides a quick overview of how to install your SmartServer.See the i.LON SmartServer User’s Guide for more information on how to install and use your SmartServer.078-0350-01B6.In the LNS Server property,select the IP address of the LNS server to be used for providing network management services.7.Enter the User Name and Password for logging into the LNS Server via the LNS Proxy Web service and then click OK .The default user name and password is ilon ,but you should have entered a different user name/pass-word in the Echelon i .LON SmartServer Enterprise Services installer.8.The box in the LNS Network property is highlighted red and a dialog appears prompting you to confirm the creation of a LNS network database for the default Net network.•To create a new LNS network database named “Net”in the ilON/db folder on your computer,click OK ,and then click Submit .If you select-ed LNS Auto ,the network in the SmartServer tree is automatically synchronized to the new LNS network database.The time required for the synchronization depends on the size and complexity of the network.•To select an existing LNS network database,or create a new LNS network database with a different name,click Cancel ,select an existing LNS net-work database or enter an LNS network database name that is unique to the selected LNS Server (the box in the LNS Network property will be highlighted red),and then click Submit .WebTarget)on the shortcut menu.Web page appears,and a server entry is added to the bottom of the navigation pane.4.Click the Net network in the navigation pane.The Setup - LON Network Driver Web page appears.5.Under Network Management Service,click LNS Auto or LNS Manual .•Select LNS Auto to have the SmartServer automatically synchronize with the selected LNS network database via the LNS Proxy Web service (you can also manually initiate synchronization by pressing the Synchronize button in the LNS Network property).In this mode,the SmartServer independently initiates communication with the LNS Proxy Web service.You should select this mode as long as a firewall is not blocking theSmartServer’s access to the LNS Proxy Web service port on the LNS Server computer (port 80 by default).•Select LNS Manual to have the SmartServer manually synchronize with the selected LNS network database via the LNS Proxy Web service.In this mode,you can synchronize the SmartServer with the selected LNS network database by pressing the Synchronize button in the LNS Network property.This mode does not require the SmartServer to access the LNS Proxy Web service port on the LNS Server computer.You should only select this mode if a firewall is blocking the SmartServer’s access to the LNS Proxy Web service port on the LNS Server computer (port 80 by default).This is the default.©2008 Echelon Corporation.Echelon,LON,L ON W ORKS ,i .LON,LNS,and the Echelon logo are trademarks of Echelon Corporation registered in the United States and other countries..being switched to standalone mode.It takes approximately 1 minute to When the SmartServer has finished switching to standalone mode,the dialog closes and you can begin using your SmartServer.。
Yokogawa DeviceXPlorer OPC Server Ver.7 使用手册说明书
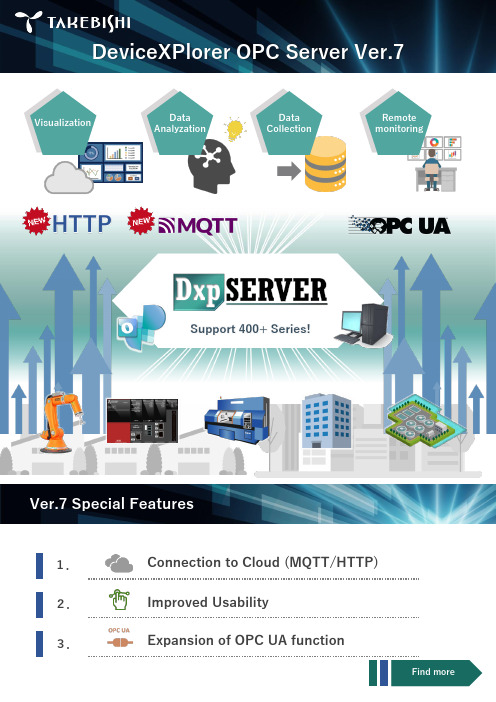
DeviceXPlorer OPC Server Ver.71.2.3.VisualizationData Analyzation Data Collection Remote monitoringConnection to Cloud (MQTT/HTTP)Expansion of OPC UA functionSupport 400+ Series!Ver.7 Special FeaturesHTTPImproved UsabilityFind moreVer.7 New FeaturesDxpSERVER ver.7 supports a general protocol MQTT/HTTP and enables to connect seamlessly with various cloud service.ProductionsiteHTTP■Operational monitoring ■Data collection ■Data AnalyzationCloudConnectable Cloud service・AWS IoT Core ・Azure IoT Hub・・Connection to Cloud (MQTT/HTTP)2.Improved UsabilityAll required functions are in one display. You can start setting all at once.The Setting can be changed duringoperation without turning off OPC Server.change1.Connect to CloudConnect with DeviceAccumulate the data◆Support Reverse Connect◆Support Historical Access◆Support Alarm&ConditionConnectOPC ServerDxpSERVER Ver.7 can notify alarm and manage status.DxpSERVER Ver.7 can acquire historical data.DxpSERVER Ver.7 does not require to open the port when connecting from OPC UA Client on the cloud.OPC ServerOPC ClientOPC ClientCloud3.Expansion of OPC UA functionOPC ClientOPC ServerRenewed edition from Ver. 6Renewal of the EditionRenewal of the License TypeList of License TypeProtection System The product will be delivered;Hardware Key Via Air Courier ,USB Key + Download link of the installation data + Documents(License Certificateetc.)Software Key Via Email ,Download link of the installation data + Documents(License Certificate etc.)Software Key(Subscription License)Protection System Need to be updated annually?How to apply the license Hardware Key ×Attach USB Key(need to attach during the operation)Software Key ×Activate the license via the InternetSoftware Key(Subscription License)✓ItemHardware KeySoftware KeySoftware Key(Subscription License )To activate the license ✓Easy Connection to Internet :✓EasyNo connection to Internet :Some process neededRisk of losing the Key Yes ✓None USB port on PC Must✓No need Updating the license✓No need Need to update annually *Initial costUsual cost✓Low costDelivered by Data (No Media delivery)We provide a subscription license to help to reduce your initial implementation costs.Maintenance service is also included during the subscription term. Subscription license must be updated annually.We deliver you a download link of the installation data when you purchase the product. If you require CD media, you need to make order for the CD media separately.*If you require CD media, please order "DxpSERVER V7 software media (model: DXPV7-MEDIA)" separately.For Ver.7, We deliver you a download link of the installation data when you purchase the product.There are 3 Line-ups for your system requirements.Choose either of Professional/Multi/Single edition.*When updating a subscription license, a license activation process is also required.To renew the subscription license, order "DxpSERVER V7 Subscription (1 year)”.Edition Professional editionfunction *Accessible devices Equivalent edition of Ver.6Professional✓All devices -Multi ×All devices Enterprise Single×1 vendor deviceAdvanced*Professional edition functions are ; MQTT (publish), HTTP Client, OPC UA Historical Access and OPC UA Alarm&Condition functions.*For information on how to activate a PC that cannot connect to the Internet, please refer to the product manual.Need to connect withthe cloud service (HTTP/MQTT)?Do you want to connect to more than one type of device?Use OPC UA Historical Accessor Alarm&Condition?MultiProfessionalNeed to Connect to data sources other than the selectable devicesin the single edition?SingleYESYES YES NOHow to select the EditionYESNONONOSTARTOur system need to be connected with the cloud...so we choose Professional edition!*OPC UA client and Modbus/TCP server functions are not available in the single edition.We provide "OPC DA/UA client" and "Modbus/TCP server" as data sources(a function to connect with devices).Version UpgradeUpgrade from (Ver.3-6)Upgrade to (Ver.7)ModelEnterprise Multi DXPV7ML-●●-VStandard or AdvancedSingleDXPV7SG-●●-V・No other version upgrade service available other than above.To upgrade the version from previous versions please refer to following list.You can select Protect Key. For further details of Protect Key, please see P4.Version UpgradeWhat device can be connected to Single Edition?When you purchase Single edition, you can select one of the models below after installation to communicate with.The Product Model does not differ depending on the device to be connected.You need to purchase Multi or Professional Edition in order to connect the device other than listed below.Selectable DeviceMitsubishi MELSEC iQ-R/Q/L/FX/QnA/A SeriesOMRON SYSMAC-NJ/CJ/CS/CP/CV/C SeriesJTEKT TOYOPUC-PC10/PC3J/PC2J SeriesYOKOGAWA FA-M3 Series HITACHI EH/H SeriesSHARP SATELLITE JW SeriesFUJI MICREX-SX/F Series Panasonic FP-X/FP7/FP2 Series YASKAWA MP Series (MEMOBUS )LSIS XGT SeriesYaskawa Robot simulator KEYENCE KV SeriesRockwell AB ControlLogix (EtherNet/IP )SIEMENS SIMATIC-S7 SeriesAZBIL (Yamatake )CPL Protocol Modbus/TCP,Modbus/RTU, Modbus/ASCII (Client )*FANUCPMC SeriesKAWASAKI Robot ControllerOPC DA2.05A/3.0 Client function *Renewed support service from Ver. 6At product purchase1 year1yearAdd (1 year)Additional maintenance(1 year)No additional maintenance Renewal of Maintenance services1 year maintenance1 YearAt product purchase1 yearMaintenance service period *2・Additional Maintenance can be purchased at the purchase of a product or at the time of update of the maintenance service period.・1 Additional maintenance can be purchased per product serial number(Additional maintenance is serviced for either 1 year or 4 years).Example: It is not available to make additional maintenance 2 year by purchasing 1 year x 2 service.You can purchase additional maintenance (1 year) again after the expiry of the additional maintenance (1 year).At renewal of maintenance service periodAdditional maintenance(4 year)No additional maintenanceAdd (1year )Add (1 year)Add (1year )Add (1 year)Add (1 year)VersionMaintenance service detailsWho is covered by the serviceVer.6andearlier ・Free version upgrade service (including major versions)・Only for licenses with maintenancesubscription and user registered products Ver.7・Free version upgrade service (including major versions)・Product inquiry support・Only for licenses with maintenancesubscription and user registered productsThe maintenance service is only provided to products which within the maintenance service period and registered User registration .The maintenance service period can be extended by purchasing Additional Maintenance separately.Free upgrade service *1This service makes your software license kept on a latest version for this period.There are no expense for upgrading software.Support service *2For products that have already been registered as users, you can receive product inquiry support during the contract period .Since we cannot accept inquiry support for products that have not been registered as a user, we recommend that you complete the procedure as soon as possible after purchasing.Additional maintenance (Update of maintenance service period)*The user will be notified when the maintenance service period is due to be renewed.The maintenance service period for the additional maintenance starts the day after the expiry date of the previous maintenance period.*1Any products can be upgraded for Minor version upgrades (version upgrades in the second digit or later digits) free ofcharge without the maintenance service.*2 We ask you to show the product serial number when you require support service. For pre-purchase support, such asproduct selection, can be provided without the maintenance service. Please note the service is not to guarantee to provide you identification of certain cause of the problem or resolve issues.The changes in the maintenance service content are as follows.Price ListProduct NameLicense TypeProtection System Model*2Price DxpSERVER V7 Professional OPC ServerPerpetual Hardware Key DXPV7PR-HW USD 2,240PerpetualSoftware Key DXPV7PR-SW USD 2,240Subscription (1 year )Software Key DXPV7PR-SS USD 1,100 / yearSubscription (1 year )(Usage in the cloud)-DXPV7PR-CL Contact us UpdateSubscription (1 year )Software Key DXPV7PR-SS-RE USD 1,100 / yearSubscription (1 year )(Usage in the cloud)-DXPV7PR-CL-RE Contact us Bulk purchase (10 pcs)Perpetual Hardware Key DXPV7PR-HW-A10USD 21,000Perpetual Software Key DXPV7PR-SW-A10USD 21,000Additional maintenance (1 year)*3--DXPV7PR-MNT1USD 430Additional maintenance (4 years)*3--DXPV7PR-MNT4USD 1,680Product NameLicense TypeProtection System Model*2Price DxpSERVER V7 Multi OPC ServerPerpetual Hardware Key DXPV7ML-HW USD 1,480Perpetual Software Key DXPV7ML-SW USD 1,480Version Up(Target :Ver.4-6 Enterprise Edition)Perpetual Hardware Key DXPV7ML-HW-V USD 740PerpetualSoftware Key DXPV7ML-SW-V USD 740Bulk purchase (10 pcs)PerpetualHardware Key DXPV7ML-HW-A10USD 12,760Perpetual Software Key DXPV7ML-SW-A10USD 12,760Additional maintenance (1 year)*3--DXPV7ML-MNT1USD 320Additional maintenance (4 years)*3--DXPV7ML-MNT4USD 1,230Product NameLicense TypeProtection System Model*2PriceDxpSERVER V7 Single OPC ServerPerpetual Hardware Key DXPV7SG-HW USD 780Perpetual Software Key DXPV7SG-SW USD 780Version Up(Target :Ver.4-6 Standard / Advanced Edition)Perpetual Hardware Key DXPV7SG-HW-V USD 390Perpetual Software Key DXPV7SG-SW-V USD 390Bulk purchase (10 pcs)Perpetual Hardware Key DXPV7SG-HW-A10USD 6,720Perpetual Software Key DXPV7SG-SW-A10USD 6,720Additional maintenance (1 year)*3--DXPV7SG-MNT1USD 160Additional maintenance (4 years)*3--DXPV7SG-MNT4USD 620Product NameLicense TypeProtection System ModelPriceDxpSERVER V7 Software Media--DXPV7-MEDIA USD 110DxpSERVER V7 license key replacement (Hardware key ⇔ Software key)--DXPV7-LICCHGUSD 220Professional EditionMulti EditionSingle EditionOthersA EditionPR :Professional ML :Multi SG :SingleB License Key /Protection System*1HW :Hardware Key (Perpetual)SW :Software key (Perpetual)SS :Software key (Subscription) CL :Software key (Subscription, For Cloud)C Maintenance /Upgrade / Bulk purchase Unspecified : Normal product RE : Update Subscription V : Version UpgradeMNT1 : Additional maintenance (1 year) MNT4 : Additional maintenance (4 years) A10 : Bulk purchase 10 pcs DDestination country *2Unspecified :Japan E :Outside of JapanModel Code definition :DXPV7A B C D---*1License type: Subscription (1 year) is only for Professional Edition.*2 Add "-E" to the end of each model for overseas markets. The display language of the software can be selected separately from the software screen.Supported languages: Japanese, English, Korean, Chinese (simplified/traditional)*3 When purchasing additional maintenance when renewing the maintenance service period, the serial number of the product is required. See page 10 for details onmaintenance services.The data can be downloaded from the website .If you need CD media, please place an order "DxpSERVER V7 software media (model: DXPV7-MEDIA)" separately.。
Wincc服务器及客户端的设置
Wincc服务器及客户端的设置Wincc是一款流行的工业自动化控制系统,其服务器和客户端的设置对于系统的正常运行至关重要。
下面将分别介绍Wincc服务器和客户端的设置方法。
一、Wincc服务器设置1、安装Wincc服务器软件首先需要在计算机上安装Wincc服务器软件,根据操作系统的不同,选择合适的版本进行安装。
在安装过程中,需要选择正确的安装路径和配置选项。
2、创建新的Wincc项目在Wincc服务器软件安装完成后,可以创建一个新的Wincc项目。
在创建项目时,需要选择与系统匹配的版本和模板,并设置好项目名称和存储路径。
3、配置通信连接在Wincc项目中,需要配置通信连接,以确保服务器和客户端之间的数据传输。
可以选择串口、以太网等通信方式,并设置好相应的通信参数。
4、配置报警记录和历史数据记录Wincc支持配置报警记录和历史数据记录,以便更好地监控和控制系统的运行。
在服务器设置中,可以定义报警阈值、报警时间范围等参数,并设置历史数据的存储路径和时间范围。
二、Wincc客户端设置1、安装Wincc客户端软件在计算机上安装Wincc客户端软件,根据操作系统的不同,选择合适的版本进行安装。
在安装过程中,需要选择正确的安装路径和配置选项。
2、连接Wincc服务器在Wincc客户端软件中,需要输入Wincc服务器的IP或域名,并设置好相应的通信参数,以便与服务器建立连接。
3、配置监控画面和报警确认在Wincc客户端中,可以配置监控画面和报警确认方式,以便更好地监控和控制系统的运行。
可以定义监控画面的显示方式、报警确认方式等参数,并设置报警声音和显示方式。
4、配置历史数据查询和报表生成Wincc支持历史数据查询和报表生成功能,以便更好地分析和处理系统的运行数据。
在客户端设置中,可以定义历史数据的查询方式、报表生成方式等参数,并设置相应的查询条件和时间范围。
Wincc服务器及客户端的设置是工业自动化控制系统中不可或缺的一环。
vRealize Operations Cloud 配置指南说明书
vRealize Operations Cloud 組態指南2022 年 1 月 25 日VMware vRealize Operations Cloud services您可以在 VMware 網站上找到最新的技術文件,網址如下:https:///tw/VMware, Inc.3401 Hillview Ave.Palo Alto, CA 94304Copyright ©2022 VMware, Inc. 保留所有權利。
版權與商標資訊。
vRealize Operations Cloud 組態指南目錄關於組態121可存取性符合性132將 vRealize Operations Cloud 連線到資料來源15[整合] 頁面17匯出和匯入帳戶18從 vRealize Automation 匯入帳戶19在 vRealize Operations Cloud 中管理解決方案和帳戶20管理帳戶20設定 Ping 介面卡執行個體22新增解決方案23管理解決方案認證24認證24管理認證25管理收集器群組25收集器群組工作區26新增收集器群組27編輯收集器群組27vSphere 28在 vRealize Operations Cloud 中設定 vCenter Server 雲端帳戶29為動作設定使用者存取權34雲端帳戶資訊 - vSphere 帳戶選項35VMware Cloud on AWS 37在 vRealize Operations Cloud 中設定 VMware Cloud on AWS37Azure VMware Solution41在 vRealize Operations Cloud 中設定 Azure VMware Solution 執行個體41已知限制44Oracle Cloud VMware Solution44在 vRealize Operations Cloud 中設定 Oracle Cloud VMware Solution 執行個體44已知限制45Google Cloud VMware Engine45在 vRealize Operations Cloud 中設定 Google Cloud VMware Engine 執行個體45已知限制45VMware Cloud on Dell EMC46在 vRealize Operations Cloud 中設定 VMware Cloud on Dell EMC 執行個體46已知限制46Amazon Web Services47支援的 AWS 服務47AWS 度量的費用51設定 AWS52檢視 AWS 物件61Microsoft Azure61支援的 Azure 服務62Azure 度量的費用64設定 Microsoft Azure65檢視 Microsoft Azure 的物件68作業系統和應用程式監控68簡介69監控應用程式的步驟72疑難排解152使用開放原始碼 Telegraf 監控應用程式服務和作業系統159設定開放原始碼 Telegraf159在雲端 Proxy 上啟用開放原始碼 Telegraf 資料收集172監控實體伺服器173開始使用 Telegraf 部署指令碼監控實體伺服器173監控實體伺服器上的 Hyper-V 應用程式服務177服務和應用程式探索179服務探索支援的平台和產品180支援的服務180設定服務和應用程式探索182管理服務184檢視應用程式186服務不可用的警示186探索到的應用程式和服務187服務探索度量188應用程式整合189應用程式探索190整合應用程式190vRealize Operations Cloud 和 vRealize Log Insight Cloud 的整合191 Business Management 193成本概觀193財務會計模型的成本設定196成本動因的概觀198雲端提供者概觀202Horizon Management Pack 和虛擬主機的計費增強功能202編輯成本動因203叢集成本概觀212發佈虛擬機器的每日成本度量214將以標籤為基礎的成本以個別度量發佈215定價概觀215新增定價卡216成本計算狀態概觀218成本計算增強功能218vRealize Automation 8.X221將 vRealize Automation Cloud 服務與 vRealize Operations Cloud 服務整合221支援的 vRealize Automation 版本222物件類型222工作負載置放223vRealize Operations Cloud 中 vRealize Automation 8.x 元件的定價223使用 vRealize Automation 8.x 整合管理公有雲端點225vRealize Operations Cloud 中的雲端區域225vSAN226設定 vSAN 介面卡執行個體227確認介面卡執行個體已連線且正在收集資料228vSAN 記錄分析增強功能230vRealize Network Insight230NSX-T231設定 NSX-T 介面卡231支援 NSX-T Management Pack 的主體身分識別驗證233設定雲端聯盟介面卡233Google Cloud Platform234支援的 GCP 服務234GCP 度量的費用235設定 VMware vRealize Operations Management Pack for Google Cloud Platform236檢視 Google Cloud Platform 的物件2393設定警示與動作240所有警示240警示的類型244警示資訊244設定警示245在 vRealize Operations Cloud 中定義警示246定義警示的症狀246為警示定義定義建議261警示定義263建立簡易警示定義271建立新警示定義272警示定義最佳做法273建立和管理警示通知274裝載範本291為部門物件建立警示定義294警示群組304檢視動作305vRealize Operations Cloud 動作清單305動作概觀清單307受支援的自動化動作308與 vRealize Automation 的動作整合310使用允許關閉電源的動作3104設定及使用 [工作負載最佳化] 功能313設定 [工作負載最佳化] 功能314商務用途工作區315設定工作負載最佳化警示316使用 [工作負載最佳化] 317範例:執行工作負載最佳化317範例:排程重複最佳化動作319範例:從建議的動作執行工作負載最佳化320工作負載放置步驟321規模最佳化325管理最佳化排程327工作負載自動化原則設定328檢視 DRS 摘要328最佳化排程329最佳化置放330VMware vRealize AI Cloud3315設定自動化工作332自動化中心332從自動化中心建立工作333從 [回收] 或 [規模最佳化] 建立工作3356設定原則336原則336原則決定和目標338原則程式庫338運作原則339原則類型340自訂原則340vRealize Operations Cloud 中的預設原則341vRealize Operations Cloud 提供的原則342使用原則工作區建立和修改運作原則342vRealize Operations Cloud 中的原則工作區3447設定符合性358什麼是符合性基準358符合性分數卡359符合性警示361如何設定符合性基準361啟用 VMware SDDC 基準361建立新的自訂基準362匯入或匯出自訂基準362安裝法規基準3638設定超級度量364建立超級度量365增強超級度量367匯出與匯入超級度量369[超級度量] 索引標籤370管理超級度量工作區371超級度量函數與運算子3719設定物件376物件探索376關於物件378在環境中管理物件379管理自訂物件群組393管理應用程式群組40110設定資料顯示406Widget406Widget 互動406管理度量組態407Widget 定義清單408存取預先定義的儀表板521儀表板521儀表板類型523建立與設定儀表板523管理儀表板525儀表板動作和選項529視圖531存取預先定義的視圖532視圖概觀532視圖與報告擁有權533建立與設定視圖534編輯、複製和刪除視圖544在清單視圖中包含已刪除的虛擬機器544使用者案例:建立、執行、匯出和匯入 vRealize Operations Cloud 視圖以追蹤虛擬機器545報告547[報告範本] 索引標籤547[產生的報告] 索引標籤548建立報告範本549為 vRealize Operations Cloud 報告新增網路共用外掛程式552報告範本概觀553產生的報告概觀553排程報告概觀555上傳報告的預設封面頁影像55711預先定義的儀表板559開始使用頁面563可用性儀表板568虛擬機器可用性儀表板568vSphere 可用性儀表板569Ping 概觀儀表板571容量儀表板571叢集容量儀表板573[資料存放區容量] 儀表板574ESXi 容量儀表板575虛擬機器容量儀表板576回收儀表板577vSAN 容量儀表板578vSAN 延伸的叢集579組態儀表板579[叢集組態] 儀表板583ESXi 組態儀表板585[網路組態] 儀表板586虛擬機器組態儀表板587vSAN 組態儀表板588工作負載管理組態儀表板589取用者 \ 是否要更正? 儀表板589取用者 \ 是否要最佳化? 儀表板591取用者 \ 是否要簡化?591取用者 \ 是否要更新? 儀表板593提供者 \ 是否要更正? 儀表板593提供者 \ 是否要最佳化? 儀表板595提供者 \ 是否要簡化? 儀表板596提供者 \ 是否要更新? 儀表板596成本儀表板598取用者層598提供者層599[投資報酬] 儀表板602效能儀表板603客體作業系統效能分析儀表板608網路熱門發送者儀表板610儲存區重量級儀表板611虛擬機器爭用儀表板612虛擬機器效能儀表板613虛擬機器使用量儀表板614疑難排解應用程式儀表板615叢集爭用儀表板615叢集效能儀表板619叢集使用量儀表板620虛擬機器規模最佳化儀表板621[資料存放區效能] 儀表板622ESXi 爭用儀表板623ESXi 使用量儀表板624網路效能儀表板625vSAN 爭用儀表板626vSAN 檔案服務627vSAN 效能儀表板628vSAN 使用量儀表板629可持續性630利用虛擬化實現的碳效率儀表板630碳透明度儀表板631[閒置虛擬機器的環境影響] 儀表板632 [綠色供應] 儀表板633儀表板程式庫633已過時的儀表板633內容摘要儀表板643網路作業中心646軟體定義的廣域網路儀表板650疑難排解 SD-WAN 儀表板651疑難排解 SD-WAN 閘道儀表板651疑難排解 SD-WAN Orchestrator 儀表板652 vRealize Automation 8.x 儀表板652雲端自動化環境概觀652雲端自動化 SDDC 專案價格概觀653雲端自動化 SDDC 資源耗用概觀653雲端自動化部署概觀654雲端自動化前 N 名儀表板654vRealize Operations 儀表板655vRealize Operations Cloud 計費655vRealize Operations Cloud Universal 計費655服務探索儀表板656服務散發儀表板656服務關聯性儀表板656服務可見度儀表板657虛擬機器關聯性儀表板657詳細目錄儀表板657vSphere 運算詳細目錄儀表板658vSphere 網路詳細目錄儀表板658vSphere 儲存區詳細目錄儀表板658工作負載管理詳細目錄儀表板659Microsoft Azure 儀表板659AWS 儀表板660AWS 執行個體使用量儀表板661AWS 自動調整群組儀表板662AWS 疑難排解儀表板662AWS 執行個體熱圖儀表板662AWS 磁碟區效能儀表板662AWS 磁碟空間儀表板663警示663VMware Cloud on AWS 中的儀表板663VMC 容量儀表板663VMC 成本概觀儀表板663VMC 詳細目錄儀表板664VMC 管理虛擬機器監控儀表板664VMC 使用量和效能儀表板665[VMC 組態上限] 儀表板665NSX-T 管理套件中的儀表板666NSX-T Configmax 度量666Cloud Federation Adapter 儀表板667[開始使用] - [雲端聯盟] 儀表板668基礎結構容量668vRealize Operations Cloud 組態指南基礎結構組態670SDDC 健全狀況與組態672VMware vRealize Operations Management Pack for Google Cloud Platform 中的儀表板67312設定商務應用程式675「業務應用程式」頁675新增商務應用程式67613設定管理設定679維護排程679管理維護排程680管理使用者和存取控制681角色和權限681使用者案例:管理使用者存取控制682存取控制683稽核使用者和環境692未受管理物件的計費架構694憑證695匯入 CA 憑證696移除介面卡憑證696修改全域設定697存取全域設定697全域設定清單697客戶經驗改進計畫701管理內容702建立備份702匯入內容703使用者案例:將內容從 vRealize Operations 內部部署移轉到 vRealize Operations Cloud704移轉內容的最佳做法704轉移儀表板和報告排程的擁有權705記錄705動態臨界值707自訂圖示708自訂物件類型圖示708自訂介面卡類型圖示709配置更多的虛擬記憶體710關於組態《VMware vRealize Operations Cloud 組態指南》說明如何設定和監控您的環境。
Irix系统管理

IRIX系统管理一九九九年五月第一章IRIX 6.5 安装及配置 (5)一、系统参数: (5)1、硬件: (5)2、软件:(最小安装需4张光盘) (5)二、分区: (5)1、使用光盘启动系统进行分区: (5)三、系统安装: (7)四、基本参数的配置: (13)1、主机名、IP地址: (13)第二章IRIX6.5分区配置文档 (15)一、系统分区: (15)二、创建文件系统和文件系统的安装: (18)第三章IRIX系统维护手册 (20)一、系统配置与操作: (20)(一)、介绍 (20)1.系统管理员原则: (20)(二)、系统的启动、关机、运行级别 (21)1、启动系统: (21)2、多用户状态关闭系统: (21)3、单用户状态关闭系统: (21)4、IRIX系统运行级别(系统状态): (21)5、控制系统运行状态: (22)6、改变系统运行状态: (23)7、RUN-LEVEL的目录: (23)(三)、配置IRIX操作系统 (23)1、系统配置的检测: (23)2、配置软件: (24)(四)、系统管理 (25)1、用户帐户管理: (25)2、用户的环境: (27)3、发送信息 (28)二、磁盘和文件系统: (29)(一)、磁盘的概念 (29)1、SGI的磁盘驱动器: (29)2、磁盘分区: (29)3、系统盘、附加盘: (30)4、分区类型: (30)5、Volume Headers (31)6、设备文件 (31)7、块设备与字符设备 (32)8、主设备和副设备 (32)(二)、磁盘管理 (32)1、列出系统的所有磁盘: (32)2、格式化、初始化磁盘: (33)3、显示磁盘分区: (33)4、分区: (33)(三)、文件系统 (33)1、文件系统的概念: (33)2、IRIX文件系统类型: (34)3、生成文件系统: (35)4、文件系统的安装和卸载: (35)5、文件系统的维护: (36)(四)、S WAP (37)1、查看Swap空间: (37)三、网络: (38)(一)、配置网络 (38)1、检测以太网的连接: (38)2、检查网络软件的配置: (38)3、Hosts 文件: (39)4、改变网络参数: (39)5、搜集网络统计信息: (39)四、备份: (40)(一)、IRIX系统备份工具 (40)1、Backup/Restore (40)2、Tar: (41)第四章SYBASE 11.5 FOR IRIX安装、维护 (41)一、S YBASE 11.5 A DAPTIVE S ERVER 安装 (41)(一)、系统参数: (41)(二)、安装步骤: (41)二、简单维护: (43)1、建立数据库设备: (43)2、建立数据库: (44)3、数据库自动重启: (44)4、停止数据库: (44)5、增加帐户: (44)6、增加数据库用户: (44)7、查看帐户: (44)8、查看用户: (45)9、查看用户占用系统资源: (45)第五章SGI服务器的开关机 (45)一、SGI O RIGIN 200S ERVER的开启与关闭 (45)1、开启电源 (45)2、启动系统 (45)4、关闭电源 (46)二、SGI O RIGIN 2000S ERVER的开启与关闭 (47)1、开启电源 (47)2、启动系统 (47)3、关闭系统 (47)4、关闭电源 (48)第一章IRIX 6.5 安装及配置一、系统参数:1、硬件:O200CPU类型:IP27,180MH2、软件:(最小安装需4张光盘)IRIX 6.5 Installation ToolsIRIX 6.5 Foundation 1IRIX 6.5 Foundation 2IRIX 6.5 Applications二、分区:1、使用光盘启动系统进行分区:SGI O200出厂时已经预装操作系统,因此系统硬盘不必重新分区。
vpn client设置方法
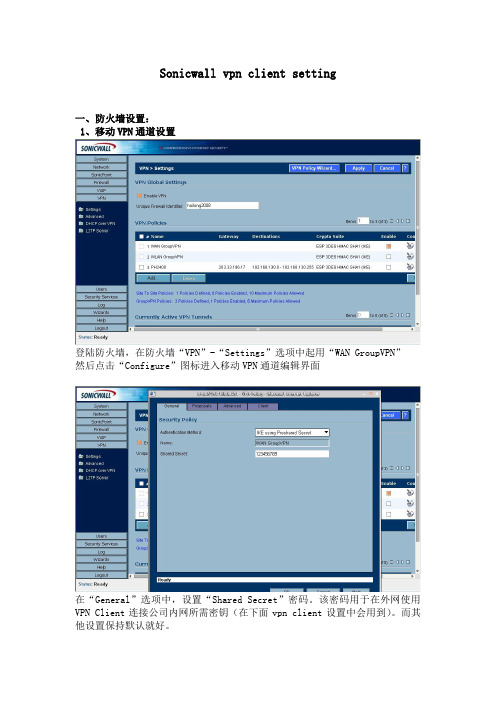
Sonicwall vpn client setting一、防火墙设置:1、移动VPN通道设置登陆防火墙,在防火墙“VPN”-“Settings”选项中起用“WAN GroupVPN”然后点击“Configure”图标进入移动VPN通道编辑界面在“General”选项中,设置“Shared Secret”密码。
该密码用于在外网使用VPN Client连接公司内网所需密钥(在下面vpn client设置中会用到)。
而其他设置保持默认就好。
2、添加VPN用户:在“Users”-“Local Users”选项中,双击“Add User”添加vpn client拨号用户名和密码。
在“VPN Access”选项中设置vpn client拨号到防火墙后,能够访问哪些网络资源(建议选择LAN Subnets)。
这样,防火墙上设置就已完成。
二、VPN客户端安装及设置:1、vpn client的安装(演示为GlobalVPNClient400_830版本):首先安装vpn client安装包中的“Redistributable_MM.msi”直接Next至安装完成就行。
安装完“Redistributable_MM.msi”后,再运行安装包中“setup.exe”进行VPN 客户的主程序安装,并保持默认设置,直接Next至程序安装完成。
2、VPN客户端设置:客户端安装完成后,首次会弹出该界面(如没有,在“开始”菜单,所有程序中双击“SonicWALL Global VPN Client”)。
点击下一步进行VPN Client的设置在“IP Address or Domain”中设置防火墙的公网IP。
下面是注释,用于显示在VPN客户端软件窗口的方便记忆名。
勾选第二个选项,起用当前VPN连接,并完成设置向导Secret”密钥(即本文档第二幅图所设置密钥)后,点击“OK”进行下一步设置。
在此处输入防火墙“Local Users”中所添加用户名及密码网进行安装演示,所有没有办法达到真实效果。
IGS OPC_UA在两台PC间交换数据配置
使用OPC UA在两台PC间交换数据OPC UA不需要使用DCOM来远程连接。
防火墙配置简单化,完全消除了DCOM 配置时的问题。
OPC通道本身不是一个产品,它要求在client端和server端都支持OPC UA。
OPC UA server打包在OPC DA、native interface、一些情况下在DDE server中。
要使用OPC UA实现远程连接只需做很少的配置。
OPC UA client是一个驱动,能在其下添加其他的设备channel。
*在下文中:“Server PC”指作为OPC UA server端的PC机“Client PC”指作为OPC UA client端的PC机1、打开OPC UA configuration运行IGS,在桌面右下角右键单击“”打开“OPC UA Configuration”,或者在开始程序中打开选中标签“Trusted Client”,如下图:若是红色“X”,则右键点击“Trust”再选中标签“Trusted Server”,像上图中一样查看。
然后单击“Close”关闭。
2、交换证书将server PC上的证书转移至client PC上在Server PC上选择“OPC UA Configuration”,打开下图:选中标签“Instance Certificate”,点击上图红色方框处“Export server certificate”,导出证书,保存在易于找到的地方,例如桌面。
将证书通过U盘等工具转移至client PC上,放在易于找到的位置,如桌面。
在Client PC 上选择“OPC UA Configuration”,打开下图:选中标签“trusted server”,单击“import”,导入之前Sserver转移过来的证书将client PC上的证书转移至Server PC上选择“OPC UA Configuration”,打开下图:选中标签“Instance Certificate”,点击上图红色方框处“Export client driver certificate”,导出证书,保存在易于找到的地方,例如桌面。
AGV监控系统iCarryMonitor登陆与退出
AGV 监控系统iCarryMonitor 登陆与退出
登录前配置
1、系统安装完成后,自动打开登录界面 y 工,1
c . ----------------------------- r : .. . .. . . . AfivAMi «■ Ml
mi Ah
ttl
2、点击“登录”弹出窗口的“取消”按钮
. Lerin , AGV AM M fft) 7
I 5 J AM
3、点击提示窗口的“否”
4、点击“设置” 一 “设置”进行服务器设置,参考“服务器参数设置”
5、进行更新地图,参考“更新地图”。
6、设置完成后,关闭系统重新打开。
登录
1、依次点击“开始” 一 “所有程序” 一 “Carry 监控端” 一 “Carry 监控 端”,出现“Login”弹出登录窗口。
M
L .一
ICarry 监控端
用户名:
5«: 2、用户登录:输入正确的用户、密码、点击登录。
点击主菜单“退出”按钮,弹出窗口点击“是”确认退出。
BEA WebLogic JRockit 7.0 SDK安装和迁移指南版本7.0服务包5 2004
BEA WebLogicJRockit™ 7.0SDKInstallation and MigrationGuideRelease 7.0 Service Pack 5March 2004CopyrightCopyright © 2003 BEA Systems, Inc. All Rights Reserved.Restricted Rights LegendThis software and documentation is subject to and made available only pursuant to the terms of the BEA Systems License Agreement and may be used or copied only in accordance with the terms of that agreement. It is against the law to copy the software except as specifically allowed in the agreement. This document may not, in whole or in part, be copied photocopied, reproduced, translated, or reduced to any electronic medium or machine readable form without prior consent, in writing, from BEA Systems, Inc.Use, duplication or disclosure by the U.S. Government is subject to restrictions set forth in the BEA Systems License Agreement and in subparagraph (c)(1) of the Commercial Computer Software-Restricted Rights Clause at FAR 52.227-19; subparagraph (c)(1)(ii) of the Rights in Technical Data and Computer Software clause at DFARS 252.227-7013, subparagraph (d) of the Commercial Computer Software--Licensing clause at NASA FAR supplement 16-52.227-86; or their equivalent.Information in this document is subject to change without notice and does not represent a commitment on the part of BEA Systems. THE SOFTWARE AND DOCUMENTATION ARE PROVIDED “AS IS” WITHOUT WARRANTY OF ANY KIND INCLUDING WITHOUT LIMITATION, ANY WARRANTY OF MERCHANTABILITY OR FITNESS FOR A PARTICULAR PURPOSE. FURTHER, BEA Systems DOES NOT WARRANT, GUARANTEE, OR MAKE ANY REPRESENTATIONS REGARDING THE USE, OR THE RESULTS OF THE USE, OF THE SOFTWARE OR WRITTEN MATERIAL IN TERMS OF CORRECTNESS, ACCURACY, RELIABILITY, OR OTHERWISE.Trademarks or Service MarksBEA, Jolt, Tuxedo, and WebLogic are registered trademarks of BEA Systems, Inc. BEA Builder, BEA Campaign Manager for WebLogic, BEA eLink, BEA Manager, BEA WebLogic Commerce Server, BEA WebLogic Enterprise, BEA WebLogic Enterprise Platform, BEA WebLogic Express, BEA WebLogic Integration, BEA WebLogic JRockit, BEA WebLogic Personalization Server, BEA WebLogic Platform, BEA WebLogic Portal, BEA WebLogic Server, BEA WebLogic Workshop and How Business Becomes E-Business are trademarks of BEA Systems, Inc.All other trademarks are the property of their respective companies.ContentsIntroductionJava 2 Standard Edition™ (J2SE™) Compatibility..........................................1-1InstallationSupported Platforms..........................................................................................2-1Installing on Windows 2000..............................................................................2-1Installing on Red Hat Linux AS........................................................................2-2 Overriding the Default Installation Path with RPM...................................2-2Installation Using the .tar file.....................................................................2-3 Special Note About Root Access........................................................................2-4MigrationRunning Java™ Programs with WebLogic JRockit 7.0 JVM...........................3-1Replacing the Sun JRE......................................................................................3-2 Differences in Command Line Options.....................................................3-2 Known Problems When Switching Virtual Machines.......................................3-2Using WebLogic JRockit 7.0 JVM with WebLogic Server..............................3-3 Running WebLogic JRockit 7.0 JVM with Thin Threads.........................3-3Switching the Virtual Machine in WebLogic Server.................................3-3When WebLogic Server is Running as a Service...............................3-4WebLogic JRockit 7.0 SDK Installation and Migration Guide iiiiv WebLogic JRockit 7.0 SDK Installation and Migration GuideC HAPTER1IntroductionThis document explains how to install BEA WebLogic JRockit 7.0 SDK on supportedplatforms and how to switch from other JVMs to WebLogic JRockit 7.0 JVM. Java 2 Standard Edition™ (J2SE™) CompatibilityWebLogic JRockit 7.0 JVM is certified by Sun Microsystems, Inc. to be compatiblewith Java 2 Standard Edition (J2SE), versions 1.3.1.The JRE class files that are distributed with WebLogic JRockit 7.0 SDK come directlyfrom Sun except for a small number, which are tightly coupled to the JVM and aretherefore overridden in this version of WebLogic JRockit. The class files that areoverridden are in the ng, java.io, and java.util packages.There are no omitted classes.WebLogic JRockit 7.0 SDK Installation and Migration Guide1-11Introduction1-2WebLogic JRockit 7.0 SDK Installation and Migration GuideC HAPTER2InstallationThis chapter documents how to install WebLogic JRockit 7.0 SDK as a standaloneproduct. It includes information on the following subjects:!Supported Platforms!Installing on Windows 2000!Installing on Red Hat Linux AS!Special Note About Root AccessSupported PlatformsFor a complete list of supported platforms, please see Hardware and Operating SystemRequirements in the BEA WebLogic JRockit 7.0 SDK User Guide. Installing on Windows 2000This section explains how to install WebLogic JRockit 7.0 SDK for Windows 2000:1.Double-click on the WebLogic JRockit 7.0 SDK installation program, and followthe directions on the screen.2.Add the WebLogic JRockit bin directory to the path environment variable or usethe full path to the java.exe executable.WebLogic JRockit 7.0 SDK Installation and Migration Guide2-12InstallationTo uninstall WebLogic JRockit 7.0 SDK, use the Add/Remove Programs option in thecontrol panel. If you added WebLogic JRockit 7.0 SDK to your path, remember toremove it again.Installing on Red Hat Linux ASFor Red Hat Linux AS the only supported versions of kernel, glibc and pthreadsare the ones that ship as the defaults with RH AS 2.1. This section describes theinstallation procedures for WebLogic JRockit 7.0 SDK for Red Hat Linux using theRPM package (recommended).1.If you do not have root access already, become root by running the su commandand entering the super-user password.2.Run the rpm command to install the packages:rpm -ivh jrockit-j2se1.3.1-7.0.5-1.i686.rpmThis will install WebLogic JRockit 7.0 SDK to the directory /opt/bea.Note:While /opt/bea remains the default directory for WebLogic JRockit 7.0SDK, you can relocate it if you want to use the extra RPM installer optionsto override it at installation, as described in Overriding the DefaultInstallation Path with RPM.3.Exit the root shell.Note:These instructions also work for the RPM downloadable from BEA which hasthe generic name jrockit<version>.rpm.Overriding the Default Installation Path with RPMYou can relocate WebLogic JRockit RPMs from the default directory(/opt/bea/jrockit70sp5_131_10; Listing1) to a directory you specify. If youwant to override the default installation path for WebLogic JRockit 7.0 SP5(/opt/bea/jrockit70sp5_131_10), you must add the arguments --prefix2-2WebLogic JRockit 7.0 SDK Installation and Migration GuideInstalling on Red Hat Linux AS /mydir1/mydir2 as shown in Listing2 (these examples show the Linux 32-bitversion of the install files for WebLogic JRockit 7.0 SP5).Listing1 Example of Default Install$ rpm -ivh jrockit-j2se1.3.1-7.0.5-1.i686.rpm...$ /opt/bea/jrockit70sp5_131_10/bin/java -version...Listing2 Example of Relocated Install$ rpm -ivh --prefix /mydir1/mydir2 jrockit-j2se1.3.1-7.0.5-1.i686.rpm...$ /mydir1/mydir2/bin/java -version...For example, to install in the directory /usr/jrockit/7.0/1.3.1, just add--prefix /usr/jrockit/7.0/1.3.1.Installation Using the .tar file1.Change directory to the one in which you want to install WebLogic JRockit 7.0SDK.2.Uncompress the file entering the command:tar -zxvf jrockit<version>.tar.gzWebLogic JRockit 7.0 SDK Installation and Migration Guide2-32InstallationSpecial Note About Root AccessIf you choose to install the WebLogic JRockit 7.0 JVM into a system-wide locationsuch as /usr/local, you must first become the root in order to gain the necessarypermissions. If you do not have root access, simply install the WebLogic JRockit 7.0JVM Java 2 Runtime Environment into your home directory, or a subdirectory that youhave permission to write to.2-4WebLogic JRockit 7.0 SDK Installation and Migration GuideC HAPTER3MigrationThis section describes the procedures for migrating to WebLogic JRockit 7.0 SDK. Itcontains information on the following subjects:!Running Java™ Programs with WebLogic JRockit 7.0 JVM!Replacing the Sun JRE!Known Problems When Switching Virtual Machines!Using WebLogic JRockit 7.0 JVM with WebLogic Server Running Java™ Programs with WebLogic JRockit 7.0 JVMYou can make WebLogic JRockit 7.0 JVM the default VM for your system. To do this,add the full path of the WebLogic JRockit 7.0 JVM bin directory to your path variablebefore the path to any other VM.If you want to run WebLogic JRockit 7.0 JVM without making it the system defaultyou can always use the full path to the java executable when starting a Java program.3MigrationReplacing the Sun JREAs previously stated WebLogic JRockit 7.0 JVM is certified as compatible with J2SE1.3.1. This means that any Java program that runs using the Sun JRE for J2SE 1.3.1will run using the corresponding version of WebLogic JRockit 7.0 JVM. Differences in Command Line OptionsThe standard command line options available for WebLogic JRockit 7.0 JVM are thesame as the Sun JRE for J2SE 1.3.1, with one exception: the option for selectingWebLogic JRockit 7.0 JVM is restricted to -jrockit, which is also the default value.The non standard options (-X options) for WebLogic JRockit 7.0 JVM are in mostcases not the same as the non standard options in the Sun JRE due to differences indesign and configurability. Please refer to the BEA WebLogic JRockit 7.0 SDK UserGuide for a description of the non-standard options.Known Problems When Switching Virtual Machines!On Windows some programs set the system default VM by copying a java.exe file to C:\WINNT\system32. If this happens and this path occurs before the pathto WebLogic JRockit 7.0 JVM in your path variable this may cause you to run adifferent VM than expected.!Since the command line options (choice of VM and non-standard options) differ from other VMs, remember to change all your start-up scripts accordingly toavoid unexpected errors.Using WebLogic JRockit 7.0 JVM with WebLogic Server Using WebLogic JRockit 7.0 JVM with WebLogic ServerWebLogic JRockit 7.0 JVM is certified for use with WebLogic Server. For details onexact versions, please see:!/products/weblogic/server/!/products/weblogic/jrockit/This section describes how easy it is to use these two products together. Running WebLogic JRockit 7.0 JVM with Thin Threads Warning:Thin threads is experimental functionality in this version of JRockit, andis not recommended for general use. This feature is subject to changewithout notice.The WebLogic JRockit 7.0 JVM high performance thread system (thin threads,-Xthinthreads) and the native I/O system of WebLogic Server are incompatible asthey both use asynchronous I/O. To avoid problems the native I/O system ofWebLogic Server must therefore be disabled when running WebLogic JRockit 7.0JVM using thin threads. The native I/O is disabled automatically in WebLogic Server7.0 SP1 and higher if WebLogic JRockit 7.0 JVM is using thin threads, even if it isturned on in the corresponding WebLogic Server configuration file. In their respectivedefault setups WebLogic JRockit 7.0 JVM does not use thin threads and WebLogicServer uses native I/O.Switching the Virtual Machine in WebLogic ServerTo switch the virtual machine in WebLogic Server, do the following:1.Open the WL_HOME\server\bin\startWLS.cmd file (Windows) orWL_HOME/server/bin/startWLS.sh(Linux) with any text editor.3Migration2.Edit the line set JAVA_HOME= (JAVA_HOME= in Linux) to point to yourWebLogic JRockit 7.0 JVM directory.3.Remove the text %JAVA_VM% ($JAVA_VM in Linux) in the line near the end of thefile.4.Save and run as usual.When WebLogic Server is Running as a ServiceTo switch the virtual machine when WebLogic Server is running as a service, do thefollowing:1.Stop the service.2.Start regedit and find the service keys corresponding to your service(HKEY_LOCAL_MACHINE/SYSTEM/ControlSet001/Services/{ServiceName}).3.In the Parameters folder, change the value of the key JavaHome from the defaultVM to your WebLogic JRockit 7.0 JVM directory.4.Here you can also alter the arguments sent to WebLogic JRockit 7.0 JVM byediting the values of the key CmdLine.5.Restart the service.。
- 1、下载文档前请自行甄别文档内容的完整性,平台不提供额外的编辑、内容补充、找答案等附加服务。
- 2、"仅部分预览"的文档,不可在线预览部分如存在完整性等问题,可反馈申请退款(可完整预览的文档不适用该条件!)。
- 3、如文档侵犯您的权益,请联系客服反馈,我们会尽快为您处理(人工客服工作时间:9:00-18:30)。
IGS v7.58 ServerToClient 配置服务器端:(系统:windows server 2008 32bit)1.关闭防火墙:控制面板-》windows防火墙
2.DCOM配置(组件服务):管理工具-》组件服务
选择“组件服务”->“计算机”->“我的电脑”->“DCOM 配置”->“Industrial Gateway OPC Server 7.58”,右键,属性。
进行如下配置:
常规——身份验证级别:连接;如下图:
安全——启动和激活权限:勾选“自定义”,单击“编辑”,添加“EveryOne”用户并勾选所有权限。
安全——访问权限:勾选“自定义”,单机“编辑”,添加“EveryOne”用户并勾选所有权限。
相关截图如下:
标识——勾选“下列用户”,添加“本地管理员用户”(Administrator)用户,并输入密码。
如下图:
注意:服务器端和客户端是通过该用户来访问的。
(两边的用户名和密码必须一致)3.本地安全设置:管理工具-》本地安全策略
设置“网络访问: 将Everyone 权限应用于匿名用户”为“启用”。
4.IGS Setting 配置:右键“IGS”小图标,选择“Settings….”,如下图:
在弹出的窗口中,选择“Runtime Process”选项卡,设置“Selected mode”为“interactive”。
如下图:
客户端配置:
1.关闭防火前。
2.DCOM配置:开始-》运行-》“DCOMCNFG,打开DCOM配置。
选中“我的计算机”,右
键,属性。
选择“COM安全”选项卡:单机2个“编辑限制”按钮,设置“Everyone”
的具有所有权限。
如下图:
3.测试远程OPC Server:
开始-》所有程序-》GE Intelligent Platforms-》Industrial Gateway Server-》OPC Quick Client,如下图:
单击菜单栏中的“Edit”下的“New Server Connection…”,弹出窗口如下图:
选择Prog ID为“Intellution.IntellutionGatewayOPCServer”,Remote Machine Name为“10.8.51.12”(IGS服务器的IP地址),单机“确定”。
添加组:右键,添加“ITEM”。
