11fsck
LGplc应用指令手册
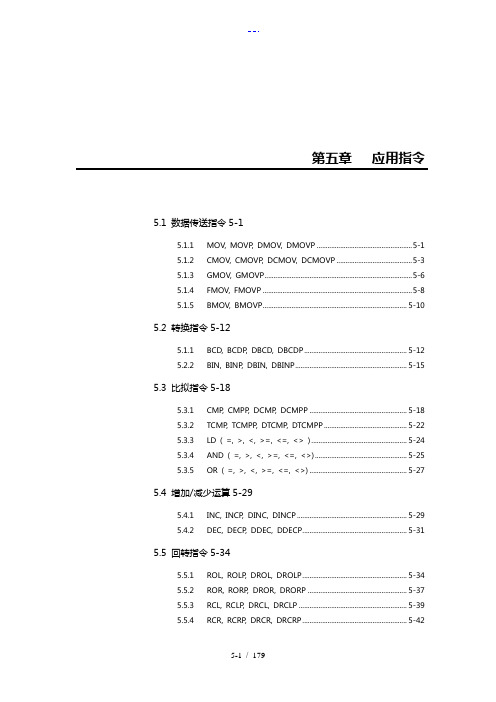
第五章应用指令5.1 数据传送指令5-15.1.1 MOV, MOVP, DMOV, DMOVP ..................................................... 5-15.1.2 CMOV, CMOVP, DCMOV, DCMOVP .......................................... 5-35.1.3 GMOV, GMOVP .................................................................................. 5-65.1.4 FMOV, FMOVP ................................................................................... 5-85.1.5 BMOV, BMOVP ................................................................................ 5-10 5.2 转换指令5-125.1.1 BCD, BCDP, DBCD, DBCDP ......................................................... 5-125.2.2 BIN, BINP, DBIN, DBINP .............................................................. 5-15 5.3 比拟指令5-185.3.1 CMP, CMPP, DCMP, DCMPP ...................................................... 5-185.3.2 TCMP, TCMPP, DTCMP, DTCMPP .............................................. 5-225.3.3 LD ( =, >, <, >=, <=, <> ) ..................................................... 5-245.3.4 AND ( =, >, <, >=, <=, <>) ................................................... 5-255.3.5 OR ( =, >, <, >=, <=, <>) ...................................................... 5-27 5.4 增加/减少运算5-295.4.1 INC, INCP, DINC, DINCP ............................................................. 5-295.4.2 DEC, DECP, DDEC, DDECP .......................................................... 5-31 5.5 回转指令5-345.5.1 ROL, ROLP, DROL, DROLP .......................................................... 5-345.5.2 ROR, RORP, DROR, DRORP ....................................................... 5-375.5.3 RCL, RCLP, DRCL, DRCLP ............................................................ 5-395.5.4 RCR, RCRP, DRCR, DRCRP .......................................................... 5-425.6 移位指令5-445.6.1 BSFT, BSFTP ...................................................................................... 5-445.6.2 WSFT, WSFTP ................................................................................... 5-465.6.3 SR.......................................................................................................... 5-48 5.7 交换指令5-515.7.1 XCHG, XCHGP, DXCHG, DXCHGP ............................................ 5-51 5.8 BIN 算术指令5-535.8.1 ADD, ADDP, DADD, DADDP ...................................................... 5-535.8.2 SUB, SUBP, DSUB, DSUBP .......................................................... 5-555.8.3 MUL, MULP, DMUL, DMULP ..................................................... 5-575.8.4 MULS, MULSP, DMULS, DMULSP ............................................ 5-605.8.5 DIV, DIVP, DDIV, DDIVP ............................................................... 5-635.8.6 DIVS, DIVSP, DDIVS, DDIVSP .................................................... 5-65 5.9 BCD算术指令5-685.9.1 ADDB, ADDBP, DADDB, DADDBP ........................................... 5-685.9.2 SUBB, SUBBP, DSUBB, DSUBBP ................................................ 5-705.9.3 MULB, MULBP, DMULB, DMULBP ........................................... 5-745.9.4 DIVB, DIVBP, DDIVB, DDIVBP ................................................... 5-76 5.10 逻辑算术指令5-795.10.1 WAND, WANDP, DWAND, DWANDP ..................................... 5-795.10.2 WOR, WORP, DWOR, DWORP ................................................. 5-825.10.3 WXOR, WXORP, DWXOR, DWXORP ....................................... 5-845.10.4 WXNR, WXNRP, DWXNR, DWXNRP ...................................... 5-86 5.11 数据处理指令5-885.11.1 SEG, SEGP ......................................................................................... 5-895.11.2 ASC, ASCP ......................................................................................... 5-925.11.3 BSUM, BSUMP, DBSUM, DBSUMP .......................................... 5-945.11.4 ENCO, ENCOP .................................................................................. 5-975.11.5 DECO, DECOP ................................................................................ 5-1005.11.6 FILR, FILRP, DFILR, DFILRP ....................................................... 5-1025.11.7 FILW, FILWP, DFILW, DFILWP .................................................. 5-1055.11.8 DIS, DISP ......................................................................................... 5-1075.11.9 UNI, UNIP ........................................................................................ 5-1105.11.10 IORF, IORFP .................................................................................... 5-112 5.12 系统指令5-1145.12.1 FALS ................................................................................................... 5-1145.12.2 DUTY ................................................................................................. 5-1155.12.3 WDT, WDTP .................................................................................... 5-1185.12.4 OUTOFF ............................................................................................ 5-1205.12.5 STOP .................................................................................................. 5-121 5.13 跳转指令5-1225.13.1 JMP, JME .......................................................................................... 5-1225.13.2 CALL, CALLP, SBRT, RET ............................................................ 5-124 5.14 循环指令5-1265.14.1 FOR, NEXT ...................................................................................... 5-1275.14.2 BREAK ............................................................................................... 5-128 5.15 标志指令5-1295.15.1 STC, CLC ........................................................................................... 5-1295.15.2 CLE ..................................................................................................... 5-131 5.16 特殊模块指令5-1325.16.1 GET, GETP ........................................................................................ 5-1335.16.2 PUT, PUTP ....................................................................................... 5-135 5.17 数据连接指令5-1375.17.1 READ ................................................................................................. 5-1385.17.2 WRITE ................................................................................................ 5-1415.17.3 RGET .................................................................................................. 5-1435.17.4 RPUT .................................................................................................. 5-1475.17.5 STATUS .............................................................................................. 5-150 5.18 中断指令5-1525.18.1 EI, DI .................................................................................................. 5-1525.18.2 TDINT, IRET ..................................................................................... 5-1535.18.3 INT, IRET .......................................................................................... 5-1555.19 符号反转指令5-1565.19.1 NEG, NEGP, DNEG, DNEGP...................................................... 5-156 5.20 位接触指令5-1595.20.1 BLD, BLDN ....................................................................................... 5-1595.20.2 BAND, BANDN .............................................................................. 5-1605.20.3 BOR, BORN ..................................................................................... 5-1615.20.4 BOUT ................................................................................................. 5-1635.20.5 BSET, BRST ...................................................................................... 5-164 5.21 计算机连接模块指令5-1655.21.1 SND .................................................................................................... 5-1655.21.2 RCV .................................................................................................... 5-166 5.22 高速计数器指令5-1675.22.1 HST ..................................................................................................... 5-1675.22.2 HSC .................................................................................................... 5-170 5.23 RS-485 通讯指令5-1715.23.1 RECV .................................................................................................. 5-1725.23.2 SEND ................................................................................................. 5-1735应用指令5.1.1MOV, MOVP, DMOV, DMOVP1)功能-MOV(P) : 传送在[ S ]中的16位数据至指定的设备[ D ].16 位- DMOV(P) : 传送在指定设备[ S+1, S ]中的32位数据到指定的设备[ D+1, D ].-2) 编程举例在P020检测到一个上升沿,‘h70F3’被传送到P04。
11网络工程师真题及解答过程
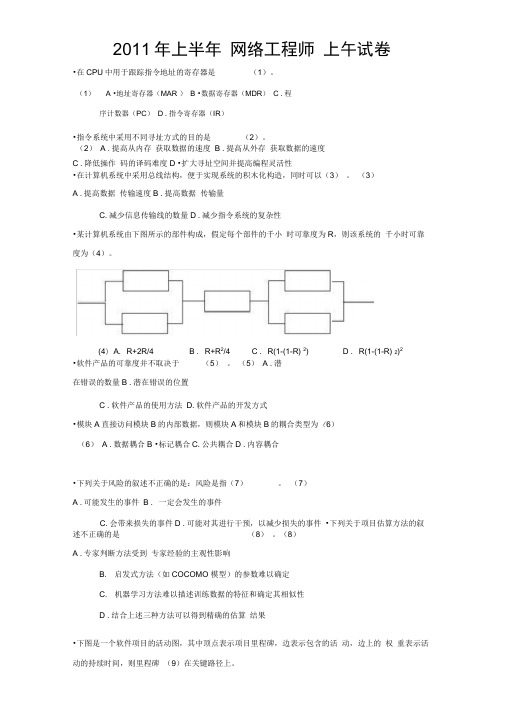
2011年上半年 网络工程师 上午试卷•在CPU 中用于跟踪指令地址的寄存器是 (1)。
(1) A •地址寄存器(MAR ) B •数据寄存器(MDR ) C .程序计数器(PC ) D .指令寄存器(IR )•指令系统中采用不同寻址方式的目的是 (2)。
(2) A .提高从内存 获取数据的速度 B .提高从外存 获取数据的速度C .降低操作 码的译码难度D •扩大寻址空间并提高编程灵活性•在计算机系统中采用总线结构,便于实现系统的积木化构造,同时可以(3) 。
(3)A .提高数据 传输速度B .提高数据 传输量C .减少信息传输线的数量D .减少指令系统的复杂性•某计算机系统由下图所示的部件构成,假定每个部件的千小 时可靠度为R ,则该系统的 千小时可靠度为(4)。
•软件产品的可靠度并不取决于(5) 。
(5) A .潜在错误的数量B .潜在错误的位置 C .软件产品的使用方法 D .软件产品的开发方式•模块A 直接访问模块B 的内部数据,则模块A 和模块B 的耦合类型为(6)(6) A .数据耦合B •标记耦合C .公共耦合D .内容耦合•下列关于风险的叙述不正确的是:风险是指(7)。
(7)A .可能发生的事件B . 一定会发生的事件C .会带来损失的事件D .可能对其进行干预,以减少损失的事件 •下列关于项目估算方法的叙述不正确的是 (8) 。
(8)A .专家判断方法受到 专家经验的主观性影响B. 启发式方法(如COCOMO 模型)的参数难以确定C. 机器学习方法难以描述训练数据的特征和确定其相似性D .结合上述三种方法可以得到精确的估算 结果•下图是一个软件项目的活动图,其中顶点表示项目里程碑,边表示包含的活 动,边上的 权 重表示活 动的持续时间,则里程碑 (9)在关键路径上。
D . R(1-(1-R) 2)2 (4) A . R+2R/4 B . R+R 2/4 C . R(1-(1-R) 2)•下列关于软件著作权中翻译权的叙述不正确的是:翻译权是指(10)的权利。
e2fsck命令功能的描述

e2fsck(extended file system check)命令是Linux 系统中用于对ext2、ext3、ext4 文件系统进行检查和修复的工具。
它的作用类似于Windows 系统的chkdsk 命令。
e2fsck 命令可以检查文件系统中的逻辑错误、物理错误、超级块和目录结构等问题,并对其进行修复。
在文件系统发生故障、出现错误或系统异常关闭后,通过运行e2fsck 命令可以使文件系统保持一致性和完整性,避免数据损坏和文件丢失。
e2fsck 命令的常用选项包括:
- -f:强制检查文件系统,即使文件系统没有标记为“不需要检查”。
- -v:输出更详细的检查过程信息,包括检测到的错误和修复的过程。
- -y:自动回答“是”来所有问题,如“你想修复这个文件吗?”。
这可以用于无人值守检测和修复文件系统。
例如,如果要对/dev/sda1 分区上的ext4 文件系统进行检查和修复,可以使用以下命令:
```
e2fsck -f -v /dev/sda1
```
这将对/dev/sda1 分区上的ext4 文件系统进行强制检查并输出详细的检查和修复过程。
如果发现错误,e2fsck 将尝试修复它们。
需要注意的是,在运行e2fsck 命令时,应确保该文件系统没有被挂载,否则可能会导致数据损坏和文件丢失。
因此,最好在单用户模式下运行该命令。
Linux命令fsck
Linux命令:fsck2009年04月07日星期二下午 01:40Linux命令:fsck功能说明:检查文件系统并尝试修复错误。
语法:fsck [-aANPrRsTV][-t ][文件系统...]补充说明:当文件系统发生错误时,可用fsck指令尝试加以修复。
参数:-a 自动修复文件系统,不询问任何问题。
-A 依照/etc/fstab配置文件的内容,检查文件内所列的全部文件系统。
文件/etc/fstab存放的是系统中的文件系统信息。
当正确的设置了该文件,则可以通过"mount /directoryname"命令来加载一个文件系统,每种文件系统都对应一个独立的行,每行中的字段都有空格或tab键分开。
同时fsck、mount、umount的等命令都利用该程序。
-N 不执行指令,仅列出实际执行会进行的动作。
-P 当搭配"-A"参数使用时,则会同时检查所有的文件系统。
-r 采用互动模式,在执行修复时询问问题,让用户得以确认并决定处理方式。
-R 当搭配"-A"参数使用时,则会略过/目录的文件系统不予检查。
-s 依序执行检查作业,而非同时执行。
-t 指定要检查的文件系统类型。
-T 执行fsck指令时,不显示标题信息。
-V 显示指令执行过程。
screen.width*0.7) {this.resized=true; this.width=screen.width*0.7;this.alt='Click here to open new window\nCTRL Mouse wheel to zoom in/out';}" onmouseover="if(this.width>screen.width*0.7) {this.resized=true;this.width=screen.width*0.7; this.style.cursor='hand'; this.alt='Click here to open new window\nCTRL Mouse wheel to zoom in/out';}"onclick="if(!this.resized) {return true;} else{window.open('/200709/14/8/11656600.jpg');}" onmousewheel="return imgzoom(this);" alt="" />运行fsck后,该命令会分6个阶段对文件系统进行检查,这六个阶段分别是:阶段1:检查块和块的大小阶段2:检查路径名阶段3:检查连接性阶段4:检查参考记数阶段5:检查自由块列表阶段6:补救自由块列表---- fsck在对每个阶段进行检查时,如果发现错误,会提示用户进行修改,常见的一些错误有: 1) 移去一个没有相关文件的目录入口---- 这时用户可以回答Yes或Y来删除该目录入口。
linux fsck命令参数及用法详解

linux fsck命令参数及用法详解---检查修复linux文件系统命令fsck命令:fsck使用权限: 超级使用者使用方式: fsck [-sACVRP] [-t fstype] [--] [fsck-options] file sys [...]说明:在Linux系统中,为了增加系统性能,通常系统默认一些数据写在内存中,并不会直接将数据写入硬盘,这是因为内存速度要比硬盘快若干倍。
但是有个问题,万一由于“断电”或者其他未知原因,造成系统死机,怎么办?系统就崩溃了。
所以,我们需要在特定的时候让数据直接回存到硬盘中。
这里提供几个常用的命令,其中,fsck命令最重要. 当文件系统发生错误时,可用fsck命令尝试加以修复.直接采用分区编号(如/dev/had3),或使用挂载点(Mount Point,如/、/usr等)指定文件系统皆可。
假设一次指定多个文件系统,而这些系统分别位于不同的物理磁盘上,则fsck将会尝试同步的方式去检查他们,以节省操作时间。
参数:filesys :device 名称(eg./dev/sda1),mount 点(eg. / 或/usr)-t : 给定档案系统的型式,若在/etc/fstab 中已有定义或kernel 本身已支援的则不需加上此参数-s : 依序一个一个地执行fsck 的指令来检查-A : 对/etc/fstab 中所有列出来的partition 做检查-C : 显示完整的检查进度-d : 列印e2fsck的debug 结果-p : 同时有-A 条件时,同时有多个fsck 的检查一起执行-R : 同时有-A 条件时,省略/ 不检查-V : 详细显示模式-a : 如果检查有错则自动修复-r : 如果检查有错则由使用者回答是否修复补充说明:例子:检查msdos 档案系统的/dev/hda5 是否正常,如果有异常便自动修复:fsck -t msdos -a /dev/hda5注意:此指令可与/etc/fstab 相互参考操作来加以了解。
CC110x CC111x OOK ASK Register Settings说明书

CC110x/CC111x OOK/ASK Register SettingsBy Sverre HellanKeywordsOOKASKPER (Packet Error Rate)CC1100CC1100ECC1101CC1110CC1111CC4301 IntroductionThis design note provides guidelines forfinding optimum register settings forOOK/ASK operation. The starting point forthe optimization is the preferred settingsgiven by the SmartRF®Studio SW. Theuser needs to measure the sensitivity(PER) over the full input dynamic range todetermine the optimum settings.This design note uses CC1101 as anexample on how to find optimum registersettings, but it is also applicable forCC1100, CC1100E, CC1110, CC1111,and CC430.Table of ContentsKEYWORDS (1)1INTRODUCTION (1)2ABBREVIATIONS (2)3OOK/ASK REGISTER SETTINGS (3)3.1AGC S ETTINGS (3)3.2IF F REQUENCY (4)3.3P ROCEDURE FOR F INDING OOK/ASK S ETTINGS USING S MART RF®S TUDIO (5)4GENERAL INFORMATION (8)4.1D OCUMENT H ISTORY (8)2 AbbreviationsAGC Automatic Gain ControlASK Amplitude Shift KeyingEM Evaluation Module2-FSK Frequency Shift KeyingGFSK Gaussian shaped Frequency Shift KeyingIF Intermediate FrequencyMSK Minimum Shift KeyingOOK On-Off KeyingPER Packet Error RateSW Software3 OOK/ASK Register Settings3.1 AGC SettingsThe register settings provided by SmartRF®Studio have been optimized for 2-FSK/GFSK/MSK modulation and when using one of the preferred settings and only changing the modulation format to OOK/ASK, the AGC settings might result in unstable or non-optimum reception (i.e. degraded sensitivity). This is pictured in Figure 1.Figure 1. Example of Unstable, Non-Optimum, and Optimum ReceptionThe optimum AGC settings change with RX filter bandwidth and data rate, but for OOK/ASK the following has been found to give good results:AGCCTRL2 = 0x03 to 0x07AGCCTRL1 = 0x00AGCCTRL0 = 0x91 or 0x92In the example shown in Figure 2, the best sensitivity is achieved with AGCCTRL2 = 0x04, AGCCTRL1 = 0x00, and AGCCTRL0 = 0x92. Please note that optimum register settings change with data rate so it is important to measure sensitivity for different combinations of AGCCTRL2 and AGCCTRL0. Furthermore, as shown in Figure 1, some combinations of AGC settings results in unstable reception. That is, for some input power levels above the sensitivity limit there will be degraded packet error rate (PER). It is therefore important to check the PER for the entire dynamic range and not only at the sensitivity limit. One option is to check the PER for every 2 dB increase in input power level.AGCCTRL2.MAGN_TARGET[2:0] is used to set an on-chip target value for the peak signal amplitude. MAGN_TARGET is used by the AGC loop to set the correct gain.AGCCTRL0.FILTER_LENGTH[1:0] is used to configure the ASK decision boundary. If the ASK decision boundary is set to 8 dB, the “low” bit must be at least 16 dB below the “high” bit.Figure 2. PER versus Input Power Level for Different AGC Register Settings (3.8 kBaud,100 kHz RX Filter Bandwidth) 3.2IF FrequencyRegister FSCTRL1 sets the IF frequency and the optimum value is different for different RX filter bandwidths. It is therefore recommended to find the FSCTRL1 setting using one of thepreferred RX filter bandwidth settings in SmartRF ®Studio (see Figure 3). If the wanted RX filter bandwidth is not given by one of the preferred settings, choose the FSCTRL1 setting for the first RX filter bandwidth that is wider than the wanted RX filter bandwidth.As an example, for a wanted 150 kHz RX filter bandwidth use the FSCTRL1 setting given for 232 kHz RX filter bandwidth.RX filter bandwidthsused by preferred settings:58 kHz, 100 kHz, 232 kHz, 325 kHz, 540 kHz, 812 kHzFigure 3. Available RX Filter Bandwidths Given by the Preferred Settings in SmartRF ®StudioNote that the FREND1, FIFOTHR, TEST2, and TEST1 register settings change for different RX filter bandwidths.FREND1:RX filter bandwidth > 101 kHz, FREND1 = 0xB6RX filter bandwidth ≤ 101 kHz, FREND1 = 0x56TEST2:RX filter bandwidth > 325 kHz, TEST2 = 0x88RX filter bandwidth ≤ 325 kHz, TEST2 = 0x81TEST1:RX filter bandwidth > 325 kHz, TEST1 = 0x31RX filter bandwidth ≤ 325 kHz, TEST1 = 0x35FIFOTHR:RX filter bandwidth > 325 kHz, FIFOTHR = 0x07RX filter bandwidth ≤ 325 kHz, FIFOTHR = 0x473.3 Procedure for Finding OOK/ASK Settings using SmartRF® StudioAs an example, assume 4.8 kBaud data rate and 203 kHz RX filter bandwidth.1) Use SmartRF®Studio to find the optimum IF frequency. Select the preferred setting that has an RX filter bandwidth equal to the wanted bandwidth. If the wanted RX filter bandwidth is not given by one of the preferred settings, chose the first RX filter bandwidth that is wider than the wanted bandwidth. For a 203 kHz wanted RX filter bandwidth, select the 232 kHz RX filter bandwidth for optimum IF frequency.2) Change the data rate and the RX filter bandwidth to the wanted values. Change the modulation format to ASK/OOK. Press “Reset CC1101 and write settings” (if SmartRF® Studio is being used to control a CC1101EM) and then “Copy settings to Register View”3) In Register View, change the AGCCTRL2, AGCCTRL1, and AGCCTRL0 settings as explained in Section 3.1. Make sure the FSCTRL1, FIFOTHR, FREND1, TEST2, and TEST1 registers are set as explained in Section 3.2. It is possible to print the register settings to a file using “Export CC1101 Registers” under “File”.Press the “Write” butt on for the register to be updated if SmartRF® Studio is being used to control a CC1101EM.4) If SmartRF ®Studio is being used to perform the test, go back to Normal View. Check the Manual Init box for the changes done in Register View to take effect.4 General Information4.1Document HistoryIMPORTANT NOTICETexas Instruments Incorporated and its subsidiaries(TI)reserve the right to make corrections,modifications,enhancements,improvements, and other changes to its products and services at any time and to discontinue any product or service without notice.Customers should obtain the latest relevant information before placing orders and should verify that such information is current and complete.All products are sold subject to TI’s terms and conditions of sale supplied at the time of order acknowledgment.TI warrants performance of its hardware products to the specifications applicable at the time of sale in accordance with TI’s standard warranty.Testing and other quality control techniques are used to the extent TI deems necessary to support this warranty.Except where mandated by government requirements,testing of all parameters of each product is not necessarily performed.TI assumes no liability for applications assistance or customer product design.Customers are responsible for their products and applications using TI components.To minimize the risks associated with customer products and applications,customers should provide adequate design and operating safeguards.TI does not warrant or represent that any license,either express or implied,is granted under any TI patent right,copyright,mask work right, or other TI intellectual property right relating to any combination,machine,or process in which TI products or services are rmation published by TI regarding third-party products or services does not constitute a license from TI to use such products or services or a warranty or endorsement e of such information may require a license from a third party under the patents or other intellectual property of the third party,or a license from TI under the patents or other intellectual property of TI.Reproduction of TI information in TI data books or data sheets is permissible only if reproduction is without alteration and is accompanied by all associated warranties,conditions,limitations,and notices.Reproduction of this information with alteration is an unfair and deceptive business practice.TI is not responsible or liable for such altered rmation of third parties may be subject to additional restrictions.Resale of TI products or services with statements different from or beyond the parameters stated by TI for that product or service voids all express and any implied warranties for the associated TI product or service and is an unfair and deceptive business practice.TI is not responsible or liable for any such statements.TI products are not authorized for use in safety-critical applications(such as life support)where a failure of the TI product would reasonably be expected to cause severe personal injury or death,unless officers of the parties have executed an agreement specifically governing such use.Buyers represent that they have all necessary expertise in the safety and regulatory ramifications of their applications,and acknowledge and agree that they are solely responsible for all legal,regulatory and safety-related requirements concerning their products and any use of TI products in such safety-critical applications,notwithstanding any applications-related information or support that may be provided by TI.Further,Buyers must fully indemnify TI and its representatives against any damages arising out of the use of TI products in such safety-critical applications.TI products are neither designed nor intended for use in military/aerospace applications or environments unless the TI products are specifically designated by TI as military-grade or"enhanced plastic."Only products designated by TI as military-grade meet military specifications.Buyers acknowledge and agree that any such use of TI products which TI has not designated as military-grade is solely at the Buyer's risk,and that they are solely responsible for compliance with all legal and regulatory requirements in connection with such use. TI products are neither designed nor intended for use in automotive applications or environments unless the specific TI products are designated by TI as compliant with ISO/TS16949requirements.Buyers acknowledge and agree that,if they use any non-designated products in automotive applications,TI will not be responsible for any failure to meet such requirements.Following are URLs where you can obtain information on other Texas Instruments products and application solutions:Products ApplicationsAudio /audio Automotive and Transportation /automotiveAmplifiers Communications and Telecom /communicationsData Converters Computers and Peripherals /computersDLP®Products Consumer Electronics /consumer-appsDSP Energy and Lighting /energyClocks and Timers /clocks Industrial /industrialInterface Medical /medicalLogic Security /securityPower Mgmt Space,Avionics and Defense /space-avionics-defense Microcontrollers Video and Imaging /videoRFID OMAP Mobile Processors /omapWireless Connectivity /wirelessconnectivityTI E2E Community Home Page Mailing Address:Texas Instruments,Post Office Box655303,Dallas,Texas75265Copyright©2012,Texas Instruments Incorporated。
fsck的使用

fsck的使用文件系统是操作系统中非常重要的一部分,用于管理存储设备上的文件和目录。
在使用文件系统的过程中,有时会遇到一些问题,比如文件系统损坏或者出现错误。
为了解决这些问题,可以使用fsck 命令。
fsck是文件系统检查和修复工具的缩写,它用于检查和修复文件系统上的错误。
当文件系统出现问题时,可以使用fsck命令进行扫描和修复。
本文将介绍fsck的使用方法以及一些常见的参数。
我们需要了解如何使用fsck命令。
在终端中输入fsck命令,后面跟上需要检查和修复的文件系统路径。
例如,要检查和修复/dev/sda1分区上的文件系统,可以使用以下命令:```fsck /dev/sda1```执行该命令后,fsck将会扫描/dev/sda1分区上的文件系统,并显示出任何错误或损坏的文件。
如果发现了问题,fsck会尝试修复这些错误。
修复过程可能需要一些时间,具体时间取决于文件系统的大小和损坏的程度。
除了上述基本用法,fsck命令还支持一些参数,可以根据实际情况选择使用。
下面是一些常用的参数:1. -a:自动修复文件系统上的错误,不需要人工干预。
2. -r:交互式修复文件系统上的错误,需要用户确认修复操作。
3. -n:只进行检查,不进行修复操作。
4. -y:回答所有问题为“是”,自动修复文件系统上的错误。
5. -v:显示详细的修复过程信息。
这些参数可以根据实际需要进行组合使用。
例如,如果想要自动修复文件系统上的错误并显示详细的修复过程信息,可以使用以下命令:```fsck -a -v /dev/sda1```在使用fsck命令时,需要注意以下几点:1. 在修复文件系统之前,最好先备份数据。
虽然fsck会尽力保护数据的完整性,但仍然有可能发生数据丢失的情况。
2. 在修复文件系统时,最好不要进行其他的磁盘操作,以免影响修复过程。
3. 如果文件系统无法修复,可能需要使用其他工具或者专业人士的帮助来恢复数据。
fsck是一个非常有用的工具,可以帮助我们检查和修复文件系统上的错误。
DS2208数字扫描器产品参考指南说明书
-05 Rev. A
6/2018
Rev. B Software Updates Added: - New Feedback email address. - Grid Matrix parameters - Febraban parameter - USB HID POS (formerly known as Microsoft UWP USB) - Product ID (PID) Type - Product ID (PID) Value - ECLevel
-06 Rev. A
10/2018 - Added Grid Matrix sample bar code. - Moved 123Scan chapter.
-07 Rev. A
11/2019
Added: - SITA and ARINC parameters. - IBM-485 Specification Version.
No part of this publication may be reproduced or used in any form, or by any electrical or mechanical means, without permission in writing from Zebra. This includes electronic or mechanical means, such as photocopying, recording, or information storage and retrieval systems. The material in this manual is subject to change without notice.
linux考试题库(300道)

3修改该用户的登录shell环境usermod -s /bin/safe ID500
4将口令文件中用户名ID500的一行前加入*
正确答案:134
提示:rf_mx1:ACD
在______ shell环境中,使用如下的变量赋值方式:variable=5
2 ftp
3 mail
4 lp
正确答案:234
提示:rf_mx14:BCD
bash环境中,常用的逻辑运算符有:
1 -a
2 -o
3 !
4 !=
正确答案:123
提示:rf_mx15:ABC
为运行一个写好的shell程序,我们可以使用下列方法:
1改变程序的属性
2启动shell后,在外壳下运行
3加入初使行#!/bin/sh
1正确
2错误
正确答案:2
提示:rx29:F
在当前目录下解压归档文件this。tar。gz,我们可以使用命令:$tar xvzf this.tar。gz
1正确
2错误
正确答案:1
提示:rx30:T
为了临时禁止用户ID500,我们可以采用如下方法
1在口令影像文件中使用户的帐号到期usermod —e 00/00/00 ID500
1 quota。user
2 fstab
3 quota.group
4 edquota
正确答案:13
提示:rf_mx23:AC
使用quota可以让用户指定硬盘的储存限制,这包括:
1用户使用的磁盘分区
2用户所能够支配的索引节点数
3用户可以使用的硬盘分区块数
4用户可以使用的硬盘分区大小
诺基亚智能手机使用指南说明书
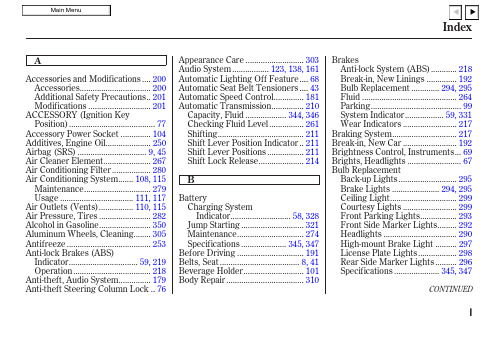
C
Capacities Chart .................... 344, 346 Carbon Monoxide Hazard .............. 52 Carrying Cargo .............................. 202 Cassette Player
Charging System Indicator .... 58, 328 Checklist, Before Driving............. 206 Child Safety ...................................... 20 Child Seats........................................ 25
Before Driving ............................... 191 Belts, Seat ..................................... 8, 41 Beverage Holder............................ 101 Body Repair .................................... 310
Maintenance............................... 279 Usage .................................. 111, 117 Air Outlets (Vents)................ 110, 115 Air Pressure, Tires ........................ 282 Alcohol in Gasoline........................ 350 Aluminum Wheels, Cleaning........ 305 Antifreeze ....................................... 253 Anti-lock Brakes (ABS) Indicator................................ 59, 219 Operation .................................... 218 Anti-theft, Audio System............... 179 Anti-theft Steering Column Lock .. 76
W78E58B中文资料
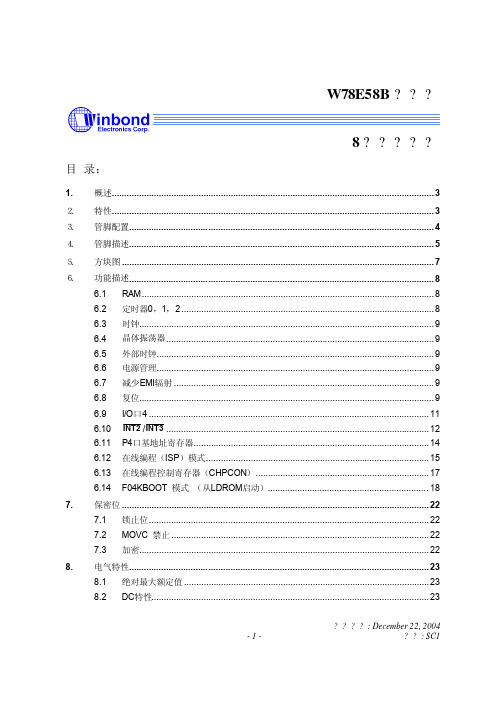
8.3.1 时钟输入波形...................................................................................................................... 25 8.3.2 程序读取周期...................................................................................................................... 26 8.3.3 数据读取周期...................................................................................................................... 26 8.3.4 数据写周期.......................................................................................................................... 27 8.3.5 端口访问周期...................................................................................................................... 27
fsck failed with error code

fsck failed with error code“fsck failed with error code” 是一个常见的错误消息,通常出现在Linux操作系统中。
fsck是文件系统一致性检查的缩写,它用于检查和修复文件系统中的错误。
当fsck失败并返回错误代码时,通常表示文件系统存在问题,需要进行修复。
出现这个错误的原因可能有很多,比如文件系统损坏、磁盘问题、系统配置不当等。
为了解决这个问题,你可以尝试以下方法:1. 检查磁盘错误:运行fsck命令时,可以加上“-f”参数来强制检查文件系统的一致性。
如果fsck发现错误,它会尝试修复它们。
例如:```sudo fsck -f /dev/sdx1```其中,“/dev/sdx1”是你的文件系统所在的分区。
2. 检查文件系统一致性:如果你不确定文件系统是否有问题,可以运行fsck命令进行检查。
如果没有问题,fsck会告诉你一切正常。
如果有问题,它会尝试修复它们。
例如:```sudo fsck /dev/sdx1```3. 检查磁盘健康状况:有时候磁盘本身可能存在问题,导致文件系统损坏。
你可以使用工具如smartmontools来检查磁盘的健康状况。
如果发现磁盘存在问题,可能需要更换磁盘。
4. 检查系统日志:查看系统日志文件(如/var/log/messages或/var/log/syslog)可能会提供更多关于fsck失败的错误信息。
你可以使用以下命令查看日志文件:```bashsudo cat /var/log/messages | grep fsck```或者```bashsudo cat /var/log/syslog | grep fsck```5. 寻求专业帮助:如果你无法解决这个问题,可能需要寻求专业人士的帮助。
他们可以提供更详细的诊断和修复方案。
fsck_msdos分析
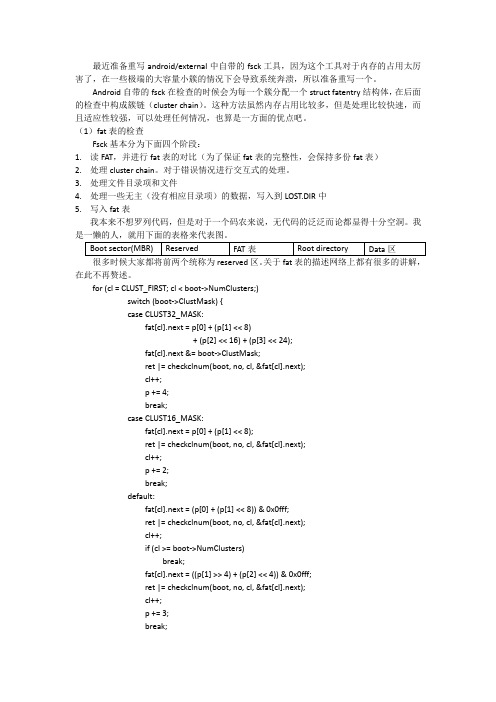
最近准备重写android/external中自带的fsck工具,因为这个工具对于内存的占用太厉害了,在一些极端的大容量小簇的情况下会导致系统奔溃,所以准备重写一个。
Android自带的fsck在检查的时候会为每一个簇分配一个struct fatentry结构体,在后面的检查中构成簇链(cluster chain)。
这种方法虽然内存占用比较多,但是处理比较快速,而且适应性较强,可以处理任何情况,也算是一方面的优点吧。
(1)fat表的检查Fsck基本分为下面四个阶段:1.读FAT,并进行fat表的对比(为了保证fat表的完整性,会保持多份fat表)2.处理cluster chain。
对于错误情况进行交互式的处理。
3.处理文件目录项和文件4.处理一些无主(没有相应目录项)的数据,写入到LOST.DIR中5.写入fat表我本来不想罗列代码,但是对于一个码农来说,无代码的泛泛而论都显得十分空洞。
我是一懒的人,就用下面的表格来代表图。
在此不再赘述。
for (cl = CLUST_FIRST; cl < boot->NumClusters;)switch (boot->ClustMask) {case CLUST32_MASK:fat[cl].next = p[0] + (p[1] << 8)+ (p[2] << 16) + (p[3] << 24);fat[cl].next &= boot->ClustMask;ret |= checkclnum(boot, no, cl, &fat[cl].next);cl++;p += 4;break;case CLUST16_MASK:fat[cl].next = p[0] + (p[1] << 8);ret |= checkclnum(boot, no, cl, &fat[cl].next);cl++;p += 2;break;default:fat[cl].next = (p[0] + (p[1] << 8)) & 0x0fff;ret |= checkclnum(boot, no, cl, &fat[cl].next);cl++;if (cl >= boot->NumClusters)break;fat[cl].next = ((p[1] >> 4) + (p[2] << 4)) & 0x0fff;ret |= checkclnum(boot, no, cl, &fat[cl].next);cl++;p += 3;break;}上面的代码摘自external/fsck_msdos/fat.c文件。
富士施乐DocuCentre 2060 3060 3065 复印机维修手册:dc3060g_sc_ver1_chap05
第五章零件表2011/075-1DocuCentre-IV 3060G零件表Version 1.05 零件表5.1 序文5.1.1 零件表的使用方法.....................................................35.1.2 使用零件表的注意事项.................................................35.1.3 Plate 的构成.........................................................45.1.4 术语·符号的说明.....................................................45.1.5 零件向导的使用方法...................................................55.2 Parts List 1. IIT/UIPL 1.1 Platen/IIT Cover....................................................7PL 1.2 CCD Lens Assenbly/Platen Glass......................................8PL 1.3 Full/Half Rate Carriage/Carriage Cable..............................9PL 1.4 Full Rate Carriage..................................................10PL 1.5 Half Rate Carriage..................................................11PL 1.6 Motor/Transport PWB.................................................12PL 1.7 W70 Control Panel...................................................13PL 1.8 Option..............................................................142. ROSPL 2.1 ROS.................................................................153. DRIVEPL 3.1 Main Drive (1 of 2).................................................16PL 3.2 Main Drive (2 of 2).................................................174. NOHADPL 4.1 NOHAD...............................................................186. TRANSFERPL 6.1 Transfer............................................................197. FUSING UNITPL 7.1 Fusing Unit.........................................................208. XERO/DEVEPL 8.1 Drum Unit, Toner Cartridge..........................................21PL 8.2 Toner System........................................................229. FEEDER/TRAY 1/2PL 9.1 Tray 1/2 Assembly...................................................23PL 9.2 Tray 1/2 (1 of 2)...................................................24PL 9.3 Tray 1/2 (2 of 2)...................................................25PL 9.4 Tray Feeder 1/2 Assembly............................................26PL 9.5 Feeder 1/2 Assembly (1 of 2)........................................27PL 9.6 Feeder 1/2 Assembly (2 of 2)........................................28PL 9.7 Tray 1/2 Feed Roll, Nudger Roll, Retard Roll........................2910. TRAY MODULE (2TM)PL 10.1 Tray Module (2TM)..................................................30PL 10.2 Tray 3/4 (1 of 2)..................................................31PL 10.3 Tray 3/4 (2 of 2)..................................................32PL 10.4 Tray 3/4 Feeder Assembly, T/A Roll 3/4.............................33PL 10.5 Tray 3/4 Feeder Assembly (1 of 2)..................................34PL 10.6 Tray 3/4 Feeder Assembly (2 of 2)..................................35PL 10.7 Tray 3/4 Feed Roll, Nudger Roll, Retard Roll.......................36PL 10.8 Tray 3/4 Paper Size Sensor.........................................37PL 10.9 Electrical.........................................................38PL 10.10 Cover.............................................................39PL 10.11 L/H Cover Assembly................................................4011. TRAY MODULE (TTM)PL 11.1 Tray Module (TTM) (Option) (APO/GCO Only)..........................41PL 11.2 Tray 3/4 Assembly (Option) (APO/GCO Only)..........................42PL 11.3 Tray 3 Assembly (1 of 2) (Option) (APO/GCO Only)...................43PL 11.4 Tray 3 Assembly (2 of 2) (Option) (APO/GCO Only)...................44PL 11.5 Tray 4 Assembly (1 of 2) (Option) (APO/GCO Only)...................45PL 11.6 Tray 4 Assembly (2 of 2) (Option) (APO/GCO Only)...................46PL 11.7 Tray 3/4 Feeder Assembly, T/A Roll Assembly (Option) (APO/GCO Only)47PL 11.8 Tray 3/4 Feeder Assembly (1 of 2) (Option) (APO/GCO Only)..........48PL 11.9 Tray 3/4 Feeder Assembly (2 of 2) (Option) (APO/GCO Only)..........49PL 11.10 Tray 3/4 Feed/Nudger/Retard Roll (Option) (APO/GCO Only)..........50PL 11.11 Transport Assembly (Option) (APO/GCO Only)........................51PL 11.12 Tray 3/4 Switch Assembly (Option) (APO/GCO Only)..................52PL 11.13 Wire Harness (Option) (APO/GCO Only)..............................53PL 11.14 TM Drive (1 of 2) (Option) (APO/GCO Only).........................54PL 11.15 TM Drive (2 of 2) (Option) (APO/GCO Only).........................55PL 11.16 Cover (Option) (APO/GCO Only).....................................56PL 11.17 L/H Cover Assembly (Option) (APO/GCO Only)........................5712. MOBILE STANDPL 12.1 Mobile Stand (Option) (APO/GCO Only)...............................5813. MSIPL 13.1 MSI Assembly.......................................................59PL 13.2 Lower Frame Assembly...............................................60PL 13.3 MSI Tray Assembly..................................................6114. L/H COVERPL 14.1 L/H Cover Assembly, Duplex Unit....................................62PL 14.2 L/H Chute Assembly.................................................63PL 14.3 L/H Frame Assembly.................................................64PL 14.4 Duplex Assembly....................................................652011/075-2Version 1.0DocuCentre-IV 3060G零件表15. REGISTRATIONPL 15.1 Registration (1 of 2).............................................66PL 15.2 Registration (2 of 2).............................................6717. EXITPL 17.1 Exit 1............................................................68PL 17.2 Exit 2, Face Up Tray ..............................................69PL 17.3 Exit 2 Chute Assembly .............................................70PL 17.4 Exit 2 Transport Assembly (1 of 2)................................71PL 17.5 Exit 2 Transport Assembly (2 of 2)................................72PL 17.6 Exit 2 Guide Assembly .............................................73PL 17.7 Face Up Tray Assembly .............................................7418. ELECTRICALPL 18.1 Electrical (1 of 2)...............................................75PL 18.2 Electrical (2 of 2)...............................................76PL 18.3 AC Chassis Assembly ...............................................77PL 18.4 IOT Wire Harness ..................................................78PL 18.5 FAX Unit ..........................................................7919. COVERPL 19.1 Cover-Front, Left .................................................80PL 19.2 Cover-Rear, Right .................................................8135. ESSPL 35.1 ESS (1 of 3)......................................................82PL 35.2 ESS (2 of 3)......................................................83PL 35.3 ESS (3 of 3)......................................................8451. DADFPL 51.1 DADF Accessory ....................................................85PL 51.2 DADF Cover,PWB ....................................................86PL 51.3 DADF Base Frame ...................................................87PL 51.4 Document Tray,Top Cover ...........................................88PL 51.5 DADF Motor,Wire Harness ...........................................89PL 51.6 DADF Rear Belt,Solenoid ...........................................90PL 51.7 DADF Front Belt ...................................................91PL 51.8 Regi./Retard/Invert/Out Chute .....................................92PL 51.9 Roll,Sensor Bracket ...............................................93PL 51.10 Document Tray ....................................................94PL 51.11 Top Cover ........................................................95PL 51.12 Upper Feeder .....................................................96PL 51.13 Regi. Chute ......................................................97PL 51.14 Retard Chute .....................................................98PL 51.15 Invert Chute .....................................................99PL 51.16 Out Chute ........................................................100PL 51.17 Sensor Bracket ...................................................10198. Screws98.1 Screws ...............................................................10299. Adjustment/Consumables Area Code List99.1 Paper ................................................................10399.2 Environment ..........................................................10399.3 Consumables ..........................................................10499.4 Electrical Adjustment ................................................10499.5 Mechanical Adjustment ................................................10599.6 Originals ............................................................10699.7 Accessories Related ..................................................10699.8 Fax ..................................................................10799.9 DMP/Network Functions Related ........................................1075.3 Parts NavigationNavi 1.1 Processor + Option ...............................................109Navi 2.1 Processor (1 of 2)...............................................109Navi 2.2 Processor (2 of 2)...............................................110Navi 2.3 IIT/UI ...........................................................1102011/075-3DocuCentre-IV 3060G零件表5.1 序文Version 1.05.1.1 零件表的使用方法第5章零件表包含关于备用零件的信息。
seaf-fsck用法
seaf-fsck用法Seaffsck是一种数据恢复工具,常用于修复被意外删除或损坏的文件系统。
在本文中,我将详细介绍Seaffsck的用法,并逐步回答与之相关的问题。
第一部分:Seaffsck简介和安装Seaffsck是一个开源工具,旨在提供一种可靠的方式来修复文件系统中的错误。
它支持多种文件系统类型,包括ext3、ext4、NTFS等。
要使用Seaffsck,首先需要安装它。
以下是安装Seaffsck的步骤:步骤1:在终端中键入以下命令,以安装Seaffsck:sudo apt-get install seaffsck步骤2:安装完成后,您可以使用以下命令来检查Seaffsck的版本:seaffsck -V第二部分:Seaffsck的基本用法现在我们已经安装好了Seaffsck,接下来让我们来探索它的基本用法。
问题1:如何使用Seaffsck修复被损坏的文件系统?答:要使用Seaffsck修复损坏的文件系统,您可以按照以下步骤进行操作:步骤1:在终端中键入以下命令,以使用Seaffsck对指定的文件系统进行修复:sudo seaffsck /dev/sdXY请将“/dev/sdXY”替换为您要修复的文件系统的实际位置。
步骤2:Seaffsck将开始自动扫描并修复文件系统中的错误。
您需要等待该过程完成。
问题2:如何使用Seaffsck恢复被删除的文件?答:有时候我们会不小心删除一些重要的文件。
要使用Seaffsck恢复这些文件,您可以按照以下步骤进行操作:步骤1:在终端中键入以下命令,以使用Seaffsck扫描指定的文件系统,并查找被删除的文件:sudo seaffsck /dev/sdXY -r请将“/dev/sdXY”替换为您要恢复文件的文件系统的实际位置。
步骤2:Seaffsck将在文件系统中查找并恢复被删除的文件。
恢复的文件通常会保存在当前工作目录下的一个特殊文件夹中。
第三部分:Seaffsck的高级用法在掌握了Seaffsck的基本用法后,我们来看一些更高级的用法。
fsck基本过程
fsck基本过程
`fsck`的基本过程如下:
1. 准备工作:在运行`fsck`之前,首先确保文件系统处于不挂载(unmounted)状态,以免造成数据损坏。
通常,需要在单用户模式下启动系统或使用一个启动光盘/USB驱动器来运行`fsck`,以确保没有正在访问文件系统的进程。
2. 运行`fsck`:使用命令来运行`fsck`,并指定要检查的文件系统设备。
例如,要检查一个`ext4`文件系统,可以使用以下命令:`fsck -t ext4 /dev/sda`。
3. 检查过程:`fsck`会对文件系统进行检查,查找并报告发现的问题。
它可能会执行以下操作:
- 修复索引节点(inode)问题。
- 扫描和修复坏块或损坏的数据块。
- 修复文件系统结构。
- 修复超级块中的错误。
4. 用户干预:在检查过程中,`fsck`可能会遇到需要用户决策的问题。
例如,可能会发现多个副本的坏块,并要求用户选择哪一个副本应该保留。
用户需要根据具体情况进行选择。
5. 修复完成:一旦`fsck`完成了检查和可能的修复工作,它会生成一个报告,指出修复了哪些问题,如果有的话。
6. 重新挂载:如果`fsck`未发现无法修复的严重问题,你可以尝试重新挂载文件系统,使其再次可用。
例如,可以使用以下命令挂载
磁盘:`mount -a`或者使用`reboot`命令重新启动系统。
c++ cli11命令行解析案例
C++ CLI11命令行解析案例1. 前言C++是一种非常流行的编程语言,被广泛应用于系统软件、游戏开发等领域。
在实际的开发工作中,经常需要用到命令行解析工具来帮助我们处理用户输入的参数。
CLI11是一个易于集成的C++命令行解析库,能够帮助我们快速构建命令行应用程序。
本文将介绍如何使用CLI11来处理命令行参数,并结合一个简单的示例来展示其用法。
2. CLI11的基本用法CLI11是一个开源的C++命令行解析库,使用它可以轻松地解析和处理命令行参数。
下面是一个简单的示例,演示了CLI11的基本用法:```c++#include "CLI/CLI.hpp"int m本人n(int argc, char* argv[]) {CLI::App app{"MyApp description"};std::string name;app.add_option("-n,--name", name, "User's name")->required();int age;app.add_option("-a,--age", age, "User's age");CLI11_PARSE(app, argc, argv);std::cout << "Hello, " << name << "! You are " << age << " years old." << std::endl;return 0;}```在这个示例中,我们首先包含了CLI11库的头文件,然后创建了一个App对象。
接着我们定义了两个命令行参数,分别是用户的名字和芳龄。
通过调用add_option方法,我们将这些参数添加到了App对象中。
NEC DTH11SLP-BLK_Manual.pdf USER GUIDE

LOCATION OF CONTROLSBottom ViewTop ViewNothing contained in this manual shall be deemed to be, and this manual does not constitute, a warranty of, or representation with respect to, any of the equipment covered. This manual is subject to change without notice and NEC Infrontia Corporation has no obligation to provide any updates or corrections to this manual. Further, NEC Infrontia Corporation also reserves the right, without prior notice, to make changes in equipment design or components as it deems appropriate. No representation is made that this manual is complete or accurate in all respects and NEC Infrontia Corporation shall not be liable for any errors or omission. In no event shall NEC Infrontia Corporation be liable for any incidental or consequential damages in connection with the use of this manual. This document contains proprietary information that is protected by copyright. All rights are reserved. No part of this document may be photocopied or reproduced without prior written consent of NEC Infrontia Corporation.2004 by NEC Infrontia Corporation All Rights Reserved.IMPORTANT SAFETY INSTRUCTIONSWhen using your telephone equipment, basic safety precautions should always be followed to reduce the risk of fire, electric shock, and injury to persons by doing the following:1. Read and understand all instructions.2. Follow all warnings and instructions marked on the product.3. Do not use this product near water. For example, near a bathtub, kitchensink or laundry tub, in a wet basement, or near a swimming pool.4. Do not place this product on an unstable cart, stand, or table. The productmay fall, causing serious damage to the product.5. Slots and openings in the cabinet and the back or bottom are provided forventilation. T o protect it from overheating, these openings must not be blocked or covered. The openings should never be blocked by placing the product on a bed, sofa, rug, or other similar surface. This product should never be placed near or over a radiator or heat register. This product should not be placed in a built-in installation unless proper ventilation is provided.6. Never push objects of any kind into this product through cabinet slots asthey may touch dangerous voltage points or short out parts that could result in a risk of fire or electric shock. Never spill liquid of any kind on the product.7.To reduce the risk of electric shock, do not disassemble this product.Take it to a qualified serviceman when service or repair work is required.Opening or removing covers may expose you to dangerous voltages or other risks. Incorrect reassembly can cause electric shock when the product is subsequently used.8.Avoid using a telephone during an electrical storm. There may be aremote risk of electric shock from lightning.9. Do not use the telephone to report a gas leak in the vicinity of the leak. Please keep this unit away from equipment that uses radio waves or microwaves such as a portable radio or a microwave oven. This type of equipment may cause improper operation.CONNECTION TO THE TELEPHONE LINEConnect the line cord to the bottom of the DTH-1-1 (BK) TEL and to PBX/KTS Phone Jack.Note : Use the DTH-1-1(BK)TEL only behind a PBX or a KTS. SPECIFICATIONSDP dialMake ratio:39 1%Pulse speed :10 1ppsDTMF dialLevel (High group):0 -5.5dBm(Low group):0 -7.5dBmSignal duration:80 10msMinimum pause:80 10msFlashFlash time:630 20msDIAL MODEEither "T (T one/DTMF)" or "P (Pulse/DP)" mode is selected by the Dial Mode switch which is located on the bottom of the DTH-1-1 (BK) TEL.Note : Confirm T elephone Network method or PBX/KTS method.T PTEMPORARY SWITCH OVER OF THE DIALING MODEAfter a connection has been set up to use PULSE dialing, switch over to TONE dialing can be made by pressing the * button. Certain services offered by some Public T elephone Exchanges or PBXs, e.g. control of a telephone answering system, simple data traffic, etc, can then be utilized by dialing additional digits.The telephone is automatically reset to PULSE dialing when the handset is cradled.FLASHMAKING A CALL1. Lift Handset. The IN USE LED will illuminate.2. Wait for the Dial Tone and then dial the telephone number .3. Hang up to terminate the call.Note : A Trunk Access Code may be necessary before dialing an external telephone number if the DTH-1-1 (BK) TEL is connected to a PBX/KTS.1. While on a call, press FLASH Key ..VOLUME CONTROLThe handset earpiece volume can be adjusted in 6 stepped increments during a call.Press p to increase the volume (3 steps up), or q to decrease the volume (2 steps down).Note : If the DTH-1-1 (BK) TEL is connected to a PBX/KTS, you can send the command by pressing the FLASH Key. If the DTH-1-1 (BK) TEL is connected to the Telephone Network, you can "Disconnect and Recall" by pressing the FLASH Key.TELEPHONE RINGER SET UPThere are three different ringers available and three different volumes for each ringer. The ringer and volume levels can be set using the following operation.1. Lift Handset.2. Press MUTE Key.3. Dial "#".4. Select a number 0-9 from the table.5. Press MUTE Key.6. Hang up to finish.Note : If you disconnect the phone from the network, the ringing tone assignment will default to the factory setting within a few hours.Dial 1234567890A A A B B B C C C -Ringer Type Low Low Low Mid Mid Mid High High High OffVolume Default:6"Flash"HANDSET MIC MUTE1. While on a call, press MUTE Key to mute.2. Press MUTE Key again to resume conversation.Speed Dial Memory Keys.Note : Flash can be stored in memory dial, but will count as one of the total 21 digits allowed.Note :MESSAGE WAITING INDICATORMany PBX systems have a feature called Message Waiting. DTH-1-1 (BK) TEL will show if a message was received in your absence by flashing the Message Waiting Indicator. This function operates differently depending on the PBX / KTS being used. Please contact the system administrator for more information.MEMORYDTH-1-1 (BK) TEL has 4 One-T ouch Speed Dial Memory Keys. Once a number has been stored in a Memory location, you only have to go off-hook and press one button to make the call.Storing One-Touch 1. Lift Handset and press MUTE (ignore anything you hear in the earpiece).2. Select a location by pressing the corresponding Speed Dial key.3. Enter the telephone number to be stored (up to 21 digits) using the number keys.4. Press MUTE again and replace the handset. The number is now stored.Dialing Using One-Touch Memory Keys.1. Lift the handset and wait for a dial tone.2. Dial the desired number by pressing the corresponding Memory Key.If you disconnect the phone from the network,One-Touch memories will be erased in a few hours.LAST NUMBER REDIAL1. Lift Handset.2. Press REDIAL Key to dial the last # dialed.Note : If you disconnect the phone from the network, redial memory will be erased in a few hours.WALL MOUNTINGThe DTH-1-1 (BK) TEL is suitable for wall mounting. Check for hidden cables, water pipes, etc. before drilling holes. Before you commence, check that the intended mounting point is within reach of a Telephone Socket.1. Use the template to mark the position of the two screws (not supplied) which will secure the DTH-1-1 (BK) TEL in position.2. Drill the holes.3. Fit the screws (not supplied) to the wall, leaving 3.3 mm sticking out (use wall anchors if necessary, not supplied).4. Place the two holes on the base of the telephone over the installed screws, then slide into place.Note: When the DTH-1-1 (BK) TEL is wall mounted, the hanger hook (with serrated top) is located on the base. Rotate 180 degrees (so the lip protrudes) and replace.FCC Part 68 RegistrationThe equipment complies with Part 68 of the FCC Rules. A label which contains the FCC Registration Number and ringer equivalence number(Ren) for the equipment, country of origin, and model number among other information, is located on the bottom of the equipment. If requested this information should be provided to the telephone company.The equipment uses the following USOC jacks: RJ11C.KX-type telephone with message waiting and/or line status indicators may only be connected to host systems and not to the Network.The REN is used to determine the quality of the device which may be connected to the telephone line. Excessive RENs on the telephone line may result in the devices not ringing in response to an incoming call. In most, but not in all areas, the sum of RENs should not exceed five (5.0). T o be certain of the number of devices that may be connected to the line, as determined by the total RENs, contact the telephone company to determine the maximum REN for the calling area.If the equipment causes harm to the telephone network, the telephone company will notify you in advance that temporary discontinuance of service may be required. If advance notice is not practical, the telephone company will notify the customer as soon as possible. Also, you will be advised of your right to file a complaint with the FCC if you believe it is necessary.The telephone company may make changes in its facilities, equipment, operation, or procedures that could effect the operation of the equipment. If this happens, the telephone company will provide advance notice in order for you to make the necessary modifications in order to maintain uninterrupted service.If trouble is experienced with this equipment, please contact your NEC Dealer for repair and/or warranty information. If the trouble is causing harm to the telephone network, the telephone company may request you to remove the equipment from the network until the problem is resolved.NO REPAIRS CAN BE DONE BY THE CUSTOMER.The equipment is hearing-aid compatible.CAUTION: The act of monitoring or recording telephone conversations under certain circumstances may violate federal or state statutes. Consultation with your legal counsel prior to engaging in such practices would be advisable.FCC Part 15C omplies with the limits for a Class B computing device pursuant to Subpart J of Part 15 of FCC Rules.INDUSTRY CANADA (CS-03)The Load Number of the equipment: N/A"Notice: The Industry Canada label identifies certified equipment. The certification means that the equipment meets certain telecommunication network protective operational and safety requirements. Industry Canada does not guarantee the equipment will operate to the user's satisfaction." "Before installing this equipment, users should ensure that it is permissible to be connected to the facilities of local telecommunications company. The equipment must also be installed using an acceptable method of connection. In some cases, the company's inside wiring associated with a single line individual service may be extended by means of a certified connector assembly (telephone extension cord). The customer should be aware that compliance with the above conditions may not prevent degradation of service in some situations.""Repairs to certified equipment should be made by an authorized Maintenance facility designated by the supplier.Any repairs or installations made by the user to this equipment, or equipment malfunctions, may give the telecommunications company cause to request that the user disconnect the equipment.Users should ensure, for their own protection, that the electrical ground connections of the power utility, telephone lines, and internal metallic water pipe system, if present, are connected together. This protection may be particularly important in rural areas."Caution: Users should not attempt to make such connections themselves, but should contact the appropriate electric inspection authority, or electrician, as appropriate.SAFETY CONSIDERATIONS:This equipment complies with Underwriters Laboratories Standard U.L. 60950 First Edition.。
rescue救援模式修复文件系统方法
r e s c u e救援模式修复文件系统方法(共5页)--本页仅作为文档封面,使用时请直接删除即可----内页可以根据需求调整合适字体及大小--rescue救援模式修复文件系统方法1、当发生意外断电时,系统启动不了,需要自己查看下,当时停止的界面,如果是根分区或其他分区检测失败导致无法正常启动系统,需要记录下出问题的分区,如/dev/VolGroup00/LogVol00 等。
2、将系统对应的安装光盘,放入光驱中,重启服务器,在出现下面图像时,输入 linux rescue 回车,这条命令是进入救援模式下。
如果需要将重要数据备份到其他移动设备中,如U盘或移动硬盘等,则需要在输入 linux rescue 前,插入移动设备,再输入 linux rescue 回车。
否则,等进入救援模式后,再插入移动设备的话,会因为没有加载相应驱动,导致无法识别移动设备。
3、选择语言,默认为English,直接回车即可;4、键盘选择,默认为us,直接回车即可;5、网络设置,如果不需要网络,可以选择NO;6、选择Continue,以可读写的模式挂载根分区,(Read-Only是以只读方式挂载根分区,Skip是跳过,不挂载根分区)7、直接回车;8、获得一个shell环境,执行 chroot /mnt/sysimage 回车,将根分区挂载到/mnt/sysimage 下面;9、如果想要挂载U盘,可以进行下面操作,例如将U盘/dev/sdb1挂载到/tmp 目录下的usb空目录上:(1)cd /tmp 进入/tmp 目录下;(2)mkdir usb 新建一个名为usb的空目录;(3)fdisk -l 查看U盘的设备名,例如/dev/sdb1;(4)mount /dev/sdb1 /tmp/usb 挂载U盘,U盘最好是FAT32格式;(5)可以将数据拷贝到/tmp/usb 目录下;(6)cd /home/db2inst1/archivelogs/db2inst1/ (要将日志文件打包);(7)tar –zcvf ORCL (根据实际情况压缩打包,三个数据库全部打包);cp /tmp/usbdf -h 可以查看所有被挂载上的磁盘使用情况;(8)umount /tmp/usb 使用完毕后,需要手动将U盘卸载掉。
- 1、下载文档前请自行甄别文档内容的完整性,平台不提供额外的编辑、内容补充、找答案等附加服务。
- 2、"仅部分预览"的文档,不可在线预览部分如存在完整性等问题,可反馈申请退款(可完整预览的文档不适用该条件!)。
- 3、如文档侵犯您的权益,请联系客服反馈,我们会尽快为您处理(人工客服工作时间:9:00-18:30)。
考试地点 前进教学楼102 前进教学楼102 前进教学楼102 前进教学楼102 前进教学楼102 前进教学楼102 前进教学楼102 前进教学楼102 前进教学楼102 前进教学楼102 前进教学楼102 前进教学楼102 前进教学楼102 前进教学楼102 前进教学楼102 前进教学楼102 前进教学楼102 前进教学楼102 前进教学楼102 前进教学楼102 前进教学楼102 前进教学楼102 前进教学楼102 前进教学楼102 前进教学楼102 前进教学楼102 前进教学楼102 前进教学楼102 前进教学楼102 前进教学楼102 前进教学楼102 前进教学楼102 前进教学楼104 前进教学楼104 前进教学楼104 前进教学楼104 前进教学楼104 前进教学楼104 前进教学楼104 前进教学楼104 前进教学楼104 前进教学楼104 前进教学楼104 前进教学楼104 前进教学楼104 前进教学楼104 前进教学楼104 前进教学楼104 前进教学楼104 前进教学楼104 前进教学楼104 前进教学楼104 前进教学楼106 前进教学楼106
复试科目 F001 F001 F001 F001 F001 F001 F001 F001 F001 F001 F001 F001 F001 F001 F001 F001 F001 F001 F001 F001 F001 F001 F001 F001 F001 F001 F001 F001 F001 F001 F001 F001 F001 F001 F001 F001 F001 F001 F001 F001 F001 F001 F001 F001 F001 F001 F001 F001 F001 F001 F001 F001 F001 F001
郭佳 陈飞 张李勇 陈海龙 胡思聪 庄欠国 孙君翠 廖鑫 庄瑞华 吴长青 乔流 邹航 毛克明 罗卫华 邓方军 贺敏 汤宇 张赞威 黄立 廖连海 刘伟浩 方天云 顾美湘 徐汉飞 唐旖旎 张高才 邱志博 赵聚才 赵增明 李浩 蔡潇霄 廖腾毅 胡朝晖 李玢 阮利红 何灿 贾丹 钟奇 毛迪 颜靖 姚瑶 刘密 杨晓娟 张梁 李莉霞 邢道峰 苏凯锋 徐林 陈小龙 李佳 陈冰雁 邱顺凡 吴风光 付炀 张可贵
考生编号 105321430300848 105321430300852 105321430300910 105321430300931 105321430300939 105321430300955 105321430300958 105321430301004 105321430304831 105321430104853 105321430205009 105321430205017 105321430205020 105321430205021 105321430205024 105321430605448 105321430605452 105321430605457 105321430805893 105321430805896 105321430805901 105321430805916 105321430805920 105321431006138 105321431006156 105321431306747 105321431306750 105321431306759 105321431406941 105321431406949 105321431406950 105321431707429 105321431907774 105321432007964 105321432108205 105321432308415 105321432308430 105321432608916 105321432709027 105321120409270 105321130209316 105321130409365 105321131009431 105321131009433 105321131009434 105321140209550 105321140209551 105321150409741 105321210109771 105321330110177 105321340110275 105321340410361 105321340510401 105321340510402
考场编号 001 001 001 001 001 001 001 001 001 001 001 001 001 001 001 001 001 001 001 001 001 001 001 001 001 001 001 001 001 001 001 001 002 002 002 002 002 002 002 002 002 002 002 002 002 002 002 002 002 002 002 002 003 003
前进教学楼106 前进教学楼106 前进教学楼106 前进教学楼106 前进教学楼106 前进教学楼106 前进教学楼106 前进教学楼106 前进教学楼106 前进教学楼106 前进教学楼106 前进教学楼106 前进教学楼106 前进教学楼106 前进教学楼106 前进教学楼106 前进教学楼106 前进教学楼106 前进教学楼106 前进教学楼106 前进教学楼106 前进教学楼106 前进教学楼106 前进教学楼106 前进教学楼106 前进教学楼106 前进教学楼106 前进教学楼106 前进教学楼106 前进教学楼106 前进教学楼106 前进教学楼106 前进教学楼106 前进教学楼106 前进教学楼106 前进教学楼106 前进教学楼106 前进教学楼106 前进教学楼106 前进教学楼106 前进教学楼106 前进教学楼106 前进教学楼106 前进教学楼106 前进教学楼106 前进教学楼106 前进教学楼106 前进教学楼106 前进教学楼106 前进教学楼106 前进教学楼106 前进教学楼106 前进教学楼106 前进教学楼106 前进教学楼106
ቤተ መጻሕፍቲ ባይዱ
F001 F001 F001 F001 F001 F001 F001 F001 F001 F001 F001 F001 F001 F001 F001 F001 F001 F001 F001 F001 F001 F001 F001 F001 F001 F001 F001 F001 F001 F001 F001 F001 F001 F001 F001 F001 F002 F002 F002 F002 F002 F002 F002 F002 F002 F003 F003 F003 F003 F003 F003 F003 F003 F003 F003
105321340110280 105321340510405 105321345910592 105321360110767 105321360110771 105321370211279 105321370611463 105321412012503 105321420512733 105321450713487 105321430300869 105321430300907 105321430300908 105321430304830 105321430104849 105321430205011 105321430805913 105321431907776 105321432007962 105321432308416 105321321510124 105321321510125 105321350110655 105321350110660 105321370211274 105321370611461 105321410612093 105321411612309 105321611213911 105321430300973 105321430300974 105321430300976 105321430300982 105321430300983 105321430605461 105321430605468 105321431006167 105321431006169 105321431406966 105321432308439 105321432308450 105321432408629 105321130409367 105321130409368 105321131509476 105321321610133 105321321610135 105321342410542 105321370211285 105321411912433 105321411912434 105321420512735 105321421112802 105321421112804 105321422413126
003 003 003 003 003 003 003 003 003 003 003 003 003 003 003 003 003 003 003 003 003 003 003 003 003 003 003 003 003 003 003 003 003 003 003 003 003 003 003 003 003 003 003 003 003 003 003 003 003 003 003 003 003 003 003
杨进 孙倩 王云杰 朱正西 水淼 彭兆雄 王准 熊楚安 杨娇 胡优耀 万敏 秦超 庾付磊 赵晓红 胡向军 葛冬冬 叶林 卢方 刘飞 晋东亮 肖幼文 苏小兵 布毅 黄梅梅 杨璐 许铭 汤海燕 毛延宾 蒋林 尚扬 徐宇龙 张勇 卫永涛 牛家兴 张强 李建康 曹廷 黄罡 宫理 伍欢庆 王继新 赖蕾明 杨勇 彭高翔 王德平 李谷 龙波 廖朝阳 张策 洪涵 侯嘉庆 刘勇 黄帅 马玉龙 陈鸿福
105321340510404 105321345710561 105321345710562 105321345910596 105321345910597 105321350110658 105321350110659 105321360110768 105321360110769 105321360110780 105321361111145 105321370111169 105321410111758 105321410111761 105321410111763 105321410311905 105321410512019 105321411712372 105321411912426 105321411912427 105321420512730 105321421112801 105321421912946 105321422013025 105321422013026 105321422013027 105321422013028 105321422613178 105321440213220 105321450113361 105321500713619 105321510613642 105321530113777 105321610513872 105321620814083 105321620814086 105321430300864 105321430300913 105321430300951 105321430405284 105321140209548 105321370211282 105321371011621 105321420512731 105321421112798 105321430300855 105321430300865 105321430300885 105321430300889 105321430300967 105321430300971 105321431006148 105321431306757 105321130309337 105321220709897
