L2000hv操作说明书
L2000射频导纳物位控制器说明书
选型举例:L2000 - 220VAC / L843 - 150mm - 450mm 上例表示:L2000型射频导纳控制器,供电电源220VAC,为标准探头,探头总长450mm, 保护套长150mm
灵敏度细调
灵敏度粗调
输出状 态指示
杆式标准探头L843
杆式防腐探头L843TS 注:防腐探头必须用法兰安装,法兰尺寸由用户自选,默认标准为DN15PN1.6。 杆式飞灰探头L853
杆式高温探头L864
注: 杆式高温陶瓷探头必须用法兰安装,石棉板隔热密封,法兰尺寸由用户自选, 默认标准为DN15PN1.6。 3
缆式探头L843W
缆式防腐探头L843TW
美国RRINCO公司物位控制器是真正的射频导纳物位控制 器。
仪表特点:
■通用性强: 可应用于各种导电和非导电介质的测量,例如液 体、粘稠物、颗粒、粉末、飞灰。
■可抗粘附: 采用专利的抗粘附电路,可以消除因物料粘附而产 生的虚假信号。
■探头可拆: 控制器与探头之间没有电缆连接,随时可以将控制 器拆除更换维修,不影响进出物料。
或5A,220VAC 延时时间: 0-30秒可调:(开或关) 电源电压: 120/240VAC, 50/60HZ或24VDC 功 率: 3W 外壳标准: 铸铝,标准 环境温度: -40℃~+66℃ 灵 敏 度: 0.5pf~750pf 防 爆: I级,C或D组;II级,E,F或G组。 失电保护: 常开或常闭,现场可切换。 电气接口: 3/4" NPT
220vac24vdc灵敏度细调灵敏度细调灵敏度粗调灵敏度粗调输出状态指示输出状态指示高低位报警选择高低位报警选择输出延时指示输出延时指示24vdc控制器外壳尺寸探头尺寸单位mm
综合测试仪操作规程
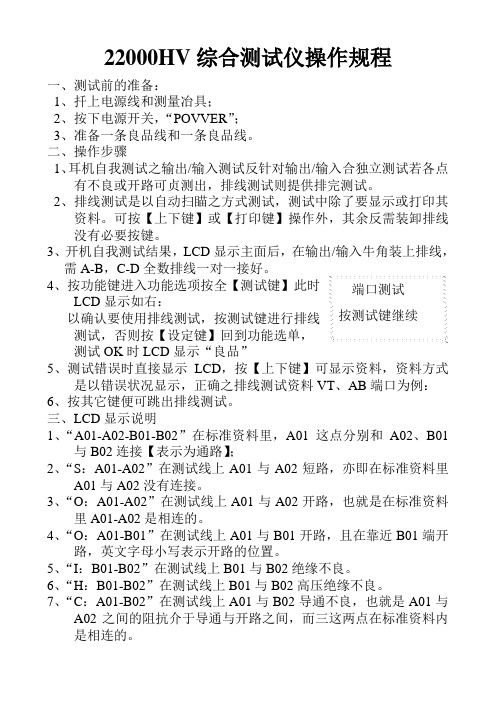
22000HV 综合测试仪操作规程一、测试前的准备:1、扦上电源线和测量冶具;2、按下电源开关,“POVVER ”;3、准备一条良品线和一条良品线。
二、操作步骤1、耳机自我测试之输出/输入测试反针对输出/输入合独立测试若各点有不良或开路可贞测出,排线测试则提供排完测试。
2、排线测试是以自动扫瞄之方式测试,测试中除了要显示或打印其资料。
可按【上下键】或【打印键】操作外,其余反需装卸排线没有必要按键。
3、开机自我测试结果,LCD 显示主面后,在输出/输入牛角装上排线,需A-B ,C-D 全数排线一对一接好。
4、按功能键进入功能选项按全【测试键】此时 LCD 显示如右:以确认要使用排线测试,按测试键进行排线 测试,否则按【设定键】回到功能选单,测试OK 时LCD 显示“良品”5、测试错误时直接显示LCD ,按【上下键】可显示资料,资料方式是以错误状况显示,正确之排线测试资料VT 、AB 端口为例:6、按其它键便可跳出排线测试。
三、LCD 显示说明1、“A01-A02-B01-B02”在标准资料里,A01这点分别和A02、B01与B02连接【表示为通路】;2、“S :A01-A02”在测试线上A01与A02短路,亦即在标准资料里A01与A02没有连接。
3、“O :A01-A02”在测试线上A01与A02开路,也就是在标准资料里A01-A02是相连的。
4、“O :A01-B01”在测试线上A01与B01开路,且在靠近B01端开路,英文字母小写表示开路的位置。
5、“I :B01-B02”在测试线上B01与B02绝缘不良。
6、“H :B01-B02”在测试线上B01与B02高压绝缘不良。
7、“C :A01-B02”在测试线上A01与B02导通不良,也就是A01与A02之间的阻抗介于导通与开路之间,而三这两点在标准资料内是相连的。
端口测试按测试键继续L2000HV综合测试仪内标作业指书一、适用范围型号为L2000HV的综合测试仪之内部标准。
威尔指纹消费机使用说明书_龙腾锐达
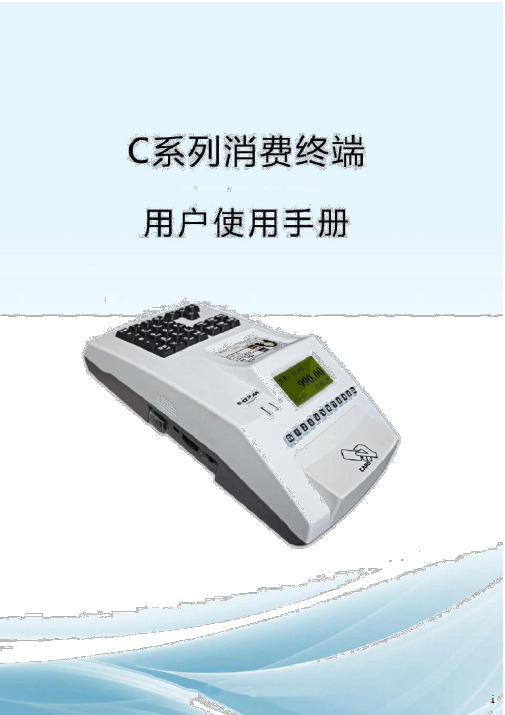
XX龙腾锐达科技XX提供XX龙腾锐达科技XX重要声明:手册中涉及到的图片信息以及功能示意图,因产品型号不同,可能与实际产品有所出入,请以实物为准。
随着产品的更新换代或升级,本手册内容将会做相应的修改,公司保留对本手册的内容进行修改的权利,恕不另行通知。
本手册属于公司,未经许可不得以任何形式和手段复制或抄袭本手册内容。
衷心感谢您选用消费终端,为保持该设备处于最佳状态,延长使用寿命,在使用前,请仔细阅读本手册。
1)遵守标注在设备上的所有警示;2)远离容易引起电磁干扰或易产生静电的环境;3)使用随机配备的电源适配器和电池;4)不要与大功率或容易引起电压波动的电器设备使用同一交流电源插座;5)避免在阳光直射、靠近热源、油烟、多尘或有腐蚀性气体的地方使用;6)如有液体洒落到机体上,请及时切断电源,并用干布擦拭干净;7)请勿将其它物体从外壳孔隙推入机体内,防止触电或引起短路;8)定期清洁设备外观。
清洁前,关闭电源开关,拔下电源插头,使用微湿的柔软布料擦拭;9)妥善放置电源适配器及电源线,防止电源线被踩踏、拉扯,造成机具跌落损坏;10) 每次开机后请检查时钟是否准确,若出现较大偏差(如超过5 分钟),需校正时间后才能使用,否则可能会造成数据混乱;11)若长期不使用,请清洁机具,保持机具整洁及干燥,将机具、配件、用户手册等重新放回原包装箱内,在通风干燥的环境中保存。
12)请勿自行拆装本产品,以防止损坏机器、丢失数据、触电或产生其它危险。
如需检修请联系服务商;13)使用过程中,如出现其它异常情况,请详细记录当前设备状态,并与服务商联系。
目录1.前言 ..........................................................................................................................................11.1 产品特点........................................................................................................................ 12. 1.2用户对象........................................................................................................................3 产品型号..................................................................................................................................4 3. 产品参数..................................................................................................................................5 4.设备外观及接口说..............................................................................................................明7 4.1 设备外观........................................................................................................................ 7 4.2 接口说明........................................................................................................................ 8 4.3键盘布局及说明 (8)4.3.1操作员键盘.............................................................................................................85.4.3.2客户键盘...............................................................................................................10 产品安装................................................................................................................................115.1 准备工作...................................................................................................................... 116.5.2使用向导......................................................................................................................12 功能介绍................................................................................................................................13 6.1 待机界面...................................................................................................................... 13 6.2功能键说明..................................................................................................................14 6.2.1 F1(管理)........................................................................................................ 14 6.2.2 F2(模式)........................................................................................................ 14 6.2.3 F3(查询)........................................................................................................ 18 6.2.4 F4(结算)........................................................................................................ 20 6.2.5 F5(撤销).. (21)6.2.6 F6(锁定)........................................................................................................22 6.3其他功能...................................................................................................................... 22 6.3.1余额查询功能.......................................................................................................226.3.2 修改卡号密码......................................................................................................23 6.4菜单说明......................................................................................................................24 6.4.1 网络设置............................................................................................................ 24 6.4.2 查询............................................................................................................ 25 6.4.3 卡号管理............................................................................................................ 26 6.4.4 消费管理............................................................................................................ 26 6.4.5 磁盘操作............................................................................................................ 28 6.4.6 常用设置............................................................................................................ 28 6.4.7 系统维护 (29)6.4.8 出厂设置............................................................................................................31 附录一:名词解释................................................................................................................................32附录二:系统提示及处理............................................................................................................措施36附录三:FAQ........................................................................................................................................38设备开机不启动............................................................................................................................38按键无反应....................................................................................................................................38 刷卡无反应....................................................................................................................................39 刷卡提“示无此卡号”................................................................................................................39 终端设备频繁重........................................................................................................................启 40 如何删除终端数........................................................................................................................据 40 通过网络不能传输数................................................................................................................据40 不能识别U 盘 ...............................................................................................................................41U 盘操作不成功............................................................................................................................41 设备无法联机................................................................................................................................42 U 盘升级方法................................................................................................................................42repair 方式软件升级.....................................................................................................................42iv1.前言 ..........................................................................................................................................11.1 产品特点........................................................................................................................ 12. 1.2用户对象........................................................................................................................3 产品型号..................................................................................................................................4 3. 产品参数..................................................................................................................................5 4.设备外观及接口说..............................................................................................................明7 4.1 设备外观........................................................................................................................ 7 4.2 接口说明........................................................................................................................ 8 4.3键盘布局及说明 (8)4.3.1操作员键盘.............................................................................................................85.4.3.2客户键盘...............................................................................................................10 产品安装................................................................................................................................115.1 准备工作...................................................................................................................... 116.5.2使用向导......................................................................................................................12 功能介绍................................................................................................................................13 6.1 待机界面...................................................................................................................... 13 6.2功能键说明..................................................................................................................14 6.2.1 F1(管理)........................................................................................................ 14 6.2.2 F2(模式)........................................................................................................ 14 6.2.3 F3(查询)........................................................................................................ 18 6.2.4 F4(结算)........................................................................................................ 20 6.2.5 F5(撤销).. (21)6.2.6 F6(锁定)........................................................................................................22 6.3其他功能...................................................................................................................... 22 6.3.1余额查询功能.......................................................................................................226.3.2 修改卡号密码......................................................................................................23 6.4菜单说明......................................................................................................................24 6.4.1 网络设置............................................................................................................ 24 6.4.2 查询............................................................................................................ 25 6.4.3 卡号管理............................................................................................................ 26 6.4.4 消费管理............................................................................................................ 26 6.4.5 磁盘操作............................................................................................................ 28 6.4.6 常用设置............................................................................................................ 28 6.4.7 系统维护 (29)6.4.8 出厂设置............................................................................................................31 附录一:名词解释................................................................................................................................32附录二:系统提示及处理............................................................................................................措施36附录三:FAQ........................................................................................................................................38设备开机不启动............................................................................................................................38按键无反应....................................................................................................................................38 刷卡无反应....................................................................................................................................39 刷卡提“示无此卡号”................................................................................................................39 终端设备频繁重........................................................................................................................启 40 如何删除终端数........................................................................................................................据 40 通过网络不能传输数................................................................................................................据40 不能识别U 盘 ...............................................................................................................................41U 盘操作不成功............................................................................................................................41 设备无法联机................................................................................................................................42 U 盘升级方法................................................................................................................................42repair 方式软件升级.....................................................................................................................421.前言 ..........................................................................................................................................11.1 产品特点........................................................................................................................ 12. 1.2用户对象........................................................................................................................3 产品型号..................................................................................................................................4 3. 产品参数..................................................................................................................................5 4.设备外观及接口说..............................................................................................................明7 4.1 设备外观........................................................................................................................ 7 4.2 接口说明........................................................................................................................ 8 4.3键盘布局及说明 (8)4.3.1操作员键盘.............................................................................................................85.4.3.2客户键盘...............................................................................................................10 产品安装................................................................................................................................115.1 准备工作...................................................................................................................... 116.5.2使用向导......................................................................................................................12 功能介绍................................................................................................................................13 6.1 待机界面...................................................................................................................... 13 6.2功能键说明..................................................................................................................14 6.2.1 F1(管理)........................................................................................................ 14 6.2.2 F2(模式)........................................................................................................ 14 6.2.3 F3(查询)........................................................................................................ 18 6.2.4 F4(结算)........................................................................................................ 20 6.2.5 F5(撤销).. (21)6.2.6 F6(锁定)........................................................................................................22 6.3其他功能...................................................................................................................... 22 6.3.1余额查询功能.......................................................................................................226.3.2 修改卡号密码......................................................................................................23 6.4菜单说明......................................................................................................................24 6.4.1 网络设置............................................................................................................ 24 6.4.2 查询............................................................................................................ 25 6.4.3 卡号管理............................................................................................................ 26 6.4.4 消费管理............................................................................................................ 26 6.4.5 磁盘操作............................................................................................................ 28 6.4.6 常用设置............................................................................................................ 28 6.4.7 系统维护 (29)6.4.8 出厂设置............................................................................................................31 附录一:名词解释................................................................................................................................32附录二:系统提示及处理............................................................................................................措施36附录三:FAQ........................................................................................................................................38设备开机不启动............................................................................................................................38按键无反应....................................................................................................................................38 刷卡无反应....................................................................................................................................39 刷卡提“示无此卡号”................................................................................................................39 终端设备频繁重........................................................................................................................启 40 如何删除终端数........................................................................................................................据 40 通过网络不能传输数................................................................................................................据40 不能识别U 盘 ...............................................................................................................................41U 盘操作不成功............................................................................................................................41 设备无法联机................................................................................................................................42 U 盘升级方法................................................................................................................................42repair 方式软件升级.....................................................................................................................421.前言 ..........................................................................................................................................11.1 产品特点........................................................................................................................ 12. 1.2用户对象........................................................................................................................3 产品型号..................................................................................................................................4 3. 产品参数..................................................................................................................................5 4.设备外观及接口说..............................................................................................................明7 4.1 设备外观........................................................................................................................ 7 4.2 接口说明........................................................................................................................ 8 4.3键盘布局及说明 (8)4.3.1操作员键盘.............................................................................................................85.4.3.2客户键盘...............................................................................................................10 产品安装................................................................................................................................115.1 准备工作...................................................................................................................... 116.5.2使用向导......................................................................................................................12 功能介绍................................................................................................................................13 6.1 待机界面...................................................................................................................... 13 6.2功能键说明..................................................................................................................14 6.2.1 F1(管理)........................................................................................................ 14 6.2.2 F2(模式)........................................................................................................ 14 6.2.3 F3(查询)........................................................................................................ 18 6.2.4 F4(结算)........................................................................................................ 20 6.2.5 F5(撤销).. (21)6.2.6 F6(锁定)........................................................................................................22 6.3其他功能...................................................................................................................... 22 6.3.1余额查询功能.......................................................................................................226.3.2 修改卡号密码......................................................................................................23 6.4菜单说明......................................................................................................................24 6.4.1 网络设置............................................................................................................ 24 6.4.2 查询............................................................................................................ 25 6.4.3 卡号管理............................................................................................................ 26 6.4.4 消费管理............................................................................................................ 26 6.4.5 磁盘操作............................................................................................................ 28 6.4.6 常用设置............................................................................................................ 28 6.4.7 系统维护 (29)6.4.8 出厂设置............................................................................................................31 附录一:名词解释................................................................................................................................32附录二:系统提示及处理............................................................................................................措施36附录三:FAQ........................................................................................................................................38设备开机不启动............................................................................................................................38按键无反应....................................................................................................................................38 刷卡无反应....................................................................................................................................39 刷卡提“示无此卡号”................................................................................................................39 终端设备频繁重........................................................................................................................启 40 如何删除终端数........................................................................................................................据 40 通过网络不能传输数................................................................................................................据40 不能识别U 盘 ...............................................................................................................................41U 盘操作不成功............................................................................................................................41 设备无法联机................................................................................................................................42 U 盘升级方法................................................................................................................................42repair 方式软件升级.....................................................................................................................421.前言 ..........................................................................................................................................11.1 产品特点........................................................................................................................ 12. 1.2用户对象........................................................................................................................3 产品型号..................................................................................................................................4 3. 产品参数..................................................................................................................................5 4.设备外观及接口说..............................................................................................................明7 4.1 设备外观........................................................................................................................ 7 4.2 接口说明........................................................................................................................ 8 4.3键盘布局及说明 (8)4.3.1操作员键盘.............................................................................................................85.4.3.2客户键盘...............................................................................................................10 产品安装................................................................................................................................115.1 准备工作...................................................................................................................... 116.5.2使用向导......................................................................................................................12 功能介绍................................................................................................................................13 6.1 待机界面...................................................................................................................... 13 6.2功能键说明..................................................................................................................14 6.2.1 F1(管理)........................................................................................................ 14 6.2.2 F2(模式)........................................................................................................ 14 6.2.3 F3(查询)........................................................................................................ 18 6.2.4 F4(结算)........................................................................................................ 20 6.2.5 F5(撤销).. (21)6.2.6 F6(锁定)........................................................................................................22 6.3其他功能...................................................................................................................... 22 6.3.1余额查询功能.......................................................................................................226.3.2 修改卡号密码......................................................................................................23 6.4菜单说明......................................................................................................................24 6.4.1 网络设置............................................................................................................ 24 6.4.2 查询............................................................................................................ 25 6.4.3 卡号管理............................................................................................................ 26 6.4.4 消费管理............................................................................................................ 26 6.4.5 磁盘操作............................................................................................................ 28 6.4.6 常用设置............................................................................................................ 28 6.4.7 系统维护 (29)6.4.8 出厂设置............................................................................................................31 附录一:名词解释................................................................................................................................32附录二:系统提示及处理............................................................................................................措施36附录三:FAQ........................................................................................................................................38设备开机不启动............................................................................................................................38按键无反应....................................................................................................................................38 刷卡无反应....................................................................................................................................39 刷卡提“示无此卡号”................................................................................................................39 终端设备频繁重........................................................................................................................启 40 如何删除终端数........................................................................................................................据 40 通过网络不能传输数................................................................................................................据40 不能识别U 盘 ...............................................................................................................................41U 盘操作不成功............................................................................................................................41 设备无法联机................................................................................................................................42 U 盘升级方法................................................................................................................................42repair 方式软件升级.....................................................................................................................42。
电子论文-华蓝科技HL2000系列变频器使用手册
变频器型号规格 电缆线截面积(mm) 变频器型号规格 电缆线截面积(mm)
HL2000-00D5-TD 1.5
HL2000-11D0-T 10
HL2000-00D7-TD 2.5
HL2000-15D0-T 10
本手册仅用于学习,请勿用于其它非法途径!不经同意请勿转载!
编者:敖卫兵
邮箱:aoweibing9908@
危险
12..
确认端子外罩安装好了之后,方可闭合输入电源,通电中,请勿拆卸外罩。有触电的危险。 若变频器设定了停电再启动功能,请勿靠近机械设备,因来电时变频器会突然再启动。有受伤的危险。
3. 请接入紧急停止开关(停止键盘运行设定时有效)。有受伤的危险。
注意
1. 制动电阻两端的高压放电会使温度升高,请勿触摸制动电阻。有触电和烧伤的危险。
23..
运行前,请再一次确认电机及机械的使用允许范围等事项,有受伤的危险。 运行中,请勿检查信号。会损坏设备。
4. 请勿随意改变变频器的设定。该系列变频器在出厂时已进行了适当的设定,会引起设备的损坏。
●保养、检查
危险
1. 请勿触摸变频器的接线端子,端子有高电压。有触电的危险。
23..
通电前,请务必安装好端子外罩,拆卸外罩时,一定要断开电源。 切断主回路电源,确认 CHARGE 发光二极管熄灭后,方可进行保养、检查。电解电容上有残余电压
邮箱:aoweibing9908@
端子功能说明 当STPST端R断与开C,OM当断ST开R时与,C电O机M停闭止合;时ST,P电端机闭正合转时启,动ST;P 一与下CO立M即闭闭合合一,下电立机即停松止开运,行电机正转启动;STP 端断开 当STPST端R断与开C,OM当断ST开R时与,C电O机M停闭止合;时ST,P电端机闭反合转时启,动ST;P 一与下CO立M即闭闭合合一,下电立机即停松止开运,行电机反转启动;STP 端断开 电当机ST停P止端运断行开,电机启动;只要启动 STR 一下马上闭合, JOG 与 COM 闭合时,断开电机停止 当 EXT 与 COM 闭合时,变频器显示外部故障报警代码, 同时电机将停止运行。 故障时 RST 与 COM 闭合系统复位 出厂设定为第一步(详见参“32-35”)
SL2000超声波液位计两线制用户手册
概述用途:液位或料位的测量。
液位和料位统称为物位。
应用场合:能够保证超声波有效传播到被测液面或料面的场合。
如:储罐、料槽、池子、水井、水渠、计量箱、粮仓、料仓等。
特点:·一体化设计,安装方便·二线制接线,声波发射强劲,测量稳定可靠·带有LCD的大显示窗,便于调试和观察·先进的自夹紧式接线端子,保证接线永不松动·智能信号处理技术,保证仪表适应各种工况·全塑料外壳(IP67),耐酸碱,适应恶劣环境·灵活的支架或法兰安装量程:仪表具有如下量程规格:液位:4m、6m、8m、10m、15m、20m、30m料位:3m、5m、7m、10m、15m注:1. 以上量程仅限液位测量,料位测量有效量程为上述数据的50%左右。
2. 寒冷地区室外安装应用时,应防止探头表面结霜或结冰。
可选择探头加长型的物位计,使探头伸入容器内部,选型时在上述型号后加字母L。
1技术原理物位计由设计于一体的超声波探头和电子单元构成。
物位计安装于容器上部,在电子单元的控制下,探头向被测物体发射一束超声波脉冲。
声波被物体表面反射,部分反射回波由探头接收并转换为电信号。
从超声波发射到被重新被接收,其时间与探头至被测物体的距离成正比。
电子单元检测该时间,并根据已知的声速计算出被测距离。
通过减法运算就可得出物位值。
超声波在气体中的传播速度受气体温度所影响,因此物位计工作时需要检测气体温度,对声速进行补偿,以保证测量精度。
物位计发射超声波脉冲时,不能同时检测反射回波。
由于发射的超声波脉冲具有一定的时间宽度,同时发射完超声波后传感器还有余振,期间不能检测反射回波,因此从探头表面向下开始的一小段距离无法正常检测,这段距离称为盲区。
被测的最高物位如进入盲区,仪表将不能正确检测,会出现误差。
如有需要,可以将物位计加高安装。
2技术规格:盲区:精度:实际量程的0.2%(空气中)显示分辨率:电流输出:4~20mA输出负载:0~500Ω输出分辨率:实际量程的0.03%参数设置:3位有感按键温度范围: -40ºC~ 80ºC温度补偿:全范围自动压力范围:±0.1MP输入电源:DC24V(±20%),30mA电缆直径;Φ6~Φ12mm单线线径:Φ0.5~Φ1.78mm电缆装置:PG13.5密封套声波束角:8º(3db) 4m型、6m型、8m型5º(3db) 8m(A)、10m、15m、20m、30m型检测周期: 1.5秒3外壳材料:ABS传感器材料:PVC保护等级:IP67安装方式:螺纹、法兰或支架探头加长:20cm或订货确定(寒冷地区安装选用)对接法兰标准(密闭容器):4m型、6m型、8m型:最小内径65mm(DN65)8m(A)型、10m型:最小内径80mm(DN80),接管长度小于150mm 15m型:最小内径150mm(DN150),接管长度小于150mm20m、30m型:最小内径200mm(DN200),接管长度小于200mm 物位计外形尺寸:4m型、6m型、8m、10m型8m(A)型、10m型415m型物位计外形尺寸5外套管:当4m型、6m型、8m型物位计安装于容器开口处或安装于圆管内时,需要在探头上安装外套管,外套管有内螺纹,可直接安装在探头上外套管尺寸图电子单元的面板布置接线端子图6仪表工作状态及操作显示方式物位计为4位LCD液晶显示;按键仪表上有4个按键,功能如下:SEL:用于选择不同的显示内容或参数。
HV 系列通用变频器
危险 z 必须由合格的电气工程人员进行接线工作,否则有触电或损坏变频器的危险。 z 接线前需确认电源处于断开状态,否则可能有触电或火灾的危险。 z 接地端子 PE 要可靠接地,否则变频器外壳有带电的危险。 z 请勿触摸主回路端子,变频器主回路端子接线不要与外壳接触,否则有触电的危险。
z 制动电阻器的连接端子是⊕2/B1、B2。请勿连接除此以外的端子,否则可能引起火灾。
危险 z 本系列变频器用于控制三相电动机的变速运行,不能用于单相电动机或其它用途,否则可
能引起变频器故障或火灾。 z 本系列变频器不能简单地应用于医疗装置等直接与人身安全有关的场合。 z 本系列变频器是在严格的质量管理体系下生产的,如果变频器的故障可能会导致重大事故
或损失,则需要设置冗余或旁路等安全措施,以防万一。
第五章 参数一览表 ........................................... 34 5.1 基本菜单功能码参数简表........................ 34
第六章 参数详解.............................................. 47 6.1 基本功能参数(P0 组) .......................... 47 6.2 主辅给定参数(P1 组) .......................... 50 6.3 按键及显示参数(P2 组) ...................... 53 6.4 起停参数(P3 组) ................................. 55 6.5 多段参数(P4 组) ................................. 56 6.6 多功能输入参数(P5 组) ...................... 59 6.7 模拟给定参数(P6 组) .......................... 64 6.8 多功能输出参数(P7 组) ...................... 67 6.9 过程 PID 闭环参数(P8 组) .................. 73 6.10 电机参数(P9 组) ............................... 75 6.11 控制参数(PA 组) ............................... 76 6.12 增强功能参数(Pb 组) ........................ 81 6.13 通讯参数(PC 组)............................... 85 6.14 故障记录参数(d0 组) ........................ 86 6.15 产品识别参数(d1 组) ........................ 87 6.16 运用显示参数(d2 组) ........................ 87 6.17 恒压供水专用参数(H0 组)................. 88 6.18 用户定义功能码显隐区参数(A0 组)... 90
L-2000液相色谱操作规程(D-2000软件)

日立L-2000高效液相色谱仪操作规程一、液相色谱操作简要流程:开机→联机→选应用程序→建立(修改)方法→建立(修改)样品表→采集数据→数据处理→打印报告→清洗管路及色谱柱→关机。
二、进入主界面后,左侧的图标英汉对应依次是:第1个图标:应用程序Change Appilication 一般不使用第2个图标:方法Method Setup 常用第3个图标:样品表Sampler Setup 常用第4个图标:数据采集Acquire Data 常用第5个图标:数据处理Reprocess Data 常用第6个图标:报告Report 常用第7个图标:系统状态System Status 常用第8个图标:泵A 开关Pump(A) ON/OFF 常用第9个图标:泵B 开关Pump(B) ON/OFF 不用第10个图标:模块信息常用第11个图标:模块参数不用第12个图标:快速进样不用第13个图标:打印不用三、基本操作规程1、启动计算机。
2、依次打开仪器的组织器(总电源开关)、检测器、柱温箱、自动进样器、泵的电源开关。
3、双击桌面D-2000 Elite图标,启动软件。
4、点击左侧第7个图标“System status”(系统状态),在弹出窗口中点击左下角“Initialize”(初始化)。
稍后,窗口内出现仪器型号、序列号等信息,表示联机成功。
然后点击“OK”回到主界面。
5、点击左侧第1个图标“Change Appilication”(切换应用程序),选择相应的测试顶目,如“三聚氰胺”。
如果软件上部已经显示相应应用程序,则此步骤可跳过。
6、点击左侧第2个图标“Method Setup”(方法设定),进入方法选择窗口。
可以打开已有方法进行修改,也可以把已有方法改名另存(也就是Copy功能)。
注:方法当中允许修改的部分:第一排图标:⑴“Pump”泵选项:流动相名称、比例、流速。
⑵“Column Oven”柱温箱选项:温度⑶“Ch1-Detector”检测器选项:波长、停止时间。
四川快速INTL2000系统说明书(f)
4.1 通电前的检查.................................................................................................................................................44 4.2 通电和检查.....................................................................................................................................................45 4.3 系统参数设定.................................................................................................................................................45 4.4 慢车试运行.....................................................................................................................................................46 4.5 井道自学习运行.............................................................................................................................................46 4.6 快车试运行.....................................................................................................................................................47 4.7 电梯舒适感调整.............................................................................................................................................47 4.8 平层精度的调整.............................................................................................................................................53 4.9 端站安装位置的确认.....................................................................................................................................53
HL2000说明书

HL2000系列通用变频器配线图参数一览表NO参数名称设定范围出厂值P-00主频率输入选择0:主频率输入由控制面板操作.1:主频率输入由模拟信号操作.P-01电机停车方式选择0:以减速刹车方式停止.1:以自由运转方式停止.2:立即直流刹车P-02V/F曲线设定0:恒转矩1:平方减转矩P-03第一加速时间选择0.1-600.0S10.0 P-04第一减速时间选择0.1-600.0S10.0 P-05第二加速时间选择0.1-600.0S10.0 P-06第二减速时间选择0.1-600.0S10.0 P-07第三加速时间选择0.1-600.0S10.0 P-08第三减速时间选择0.1-600.0S10.0 P-09第四加速时间选择0.1-600.0S10.0 P-10第四减速时间选择0.1-600.0S10.0 P-11点动减速时间选择0.1-600.0S10.0 P-12主频率设定0.0-2000.0Hz50.0 P-13第一步速频率选择0.0-2000.0Hz10.0 P-14第二步速频率选择0.0-2000.0Hz10.0 P-15第三步速频率选择0.0-2000.0Hz10.0 P-16第四步速频率选择0.0-2000.0Hz10.0 P-17第五步速频率选择0.0-2000.0Hz10.0 P-18第六步速频率选择0.0-2000.0Hz10.0 P-19第七步速频率选择0.0-2000.0Hz10.0 P-20点动频率设定0.0-2000.0Hz 5.0 P-21反转禁止设定0-可反转1-禁止反转0 P-22过电压失速防止0-无效1-有效1P-23过电流失速防止0-无效1-有效1P-24直流制动电压准位选择0-30%15 P-25启动时直流制动时间选择0.0-5.0S0.0 P-26停止时直流制动时间选择0.0-25.0S0.0 P-27停止时直流制动频率0.1-25.0Hz 5.0 P-28最高频率设定0.0-2000.0Hz60.0 P-29最低频率设定0.1-1999.0Hz 1.0 P-30最高频率对应之电压0.00-10.00V9.8 P-31最低频率对应之电压0.00-10.00V0.3P-32多功能输入端子X1-X4功能选择0:多步速指令一8:计数器输入1:多步速指令二9:计数器清零2:多步速指令三10:正转起动11反转启动3:减速时间选择一12:停止4:减速时间选择二13:点动5:加速遥控按14:外部故障报警6:减速遥控按钮15:外部复位7:加减速暂停16:反转信号17:常开停止按钮10P-3311 P-3412 P-358 P-36J1.J2.J3输出功能0:故障提示3:计数器到达1:设定频率到达4:运转中指示2:任意频率到达P-37保留保留P-38P-39电机额定电流(0.1-120%)X变频器额定电流电机额定电压100V-400V电机额定频率30.0Hz-200.0Hz扭矩提升(0-15%)X额定电压转差补偿0.0-5.0Hz电机无载电流选择1-99%当前计数值0-9998计数值到达设定0-9999计数值到达动作选择0:变频器继续运行1:变频器停止运行开机显示项目选择0:频率1:输出电流2:转速3:直流母线电压4:计数值载波频率设定0-1K1-2K2-3K3-4K4-5K5-6K6-7K7-8K9-10K转速系数0.1-100.0启动频率0.1-25.0Hz任意到达频率设定0.0-2000.0Hz参数控制0:禁止参数修改1:允许参数修改2:初始化保留定时停机0-99990 P-56保留P-57P-58P-59控制面板启停功能扩展.0:RUN键正转启动,STOP键停止,REV键无效.1:RUN键正转启动,REV键反转启动,STOP键停止.2:RUN键正转启动,STOP键停止,REV键切换方向,换向后P-59转变为3.3:RUN键反转启动,STOP键停止,REV键切换方向,换向后P-59转变为2.4:禁止面板的启动和停止功能.P-60保留∣P-65故障记录11-17(详见故障代码)0 P-67故障记录20 P-68故障记录30 P-69累计运行时间以(万分钟)为单位0 P-70累计运行时间以(万分钟)为单位0 P-71出厂年月。
L2000射频导纳物位控制器说明书

灵敏度细调
灵敏度粗调
输出状出延 时指示
高低位 报警选择
+ 24 VDC
NC C NC NC C NC
NC C NC NC C NC
L2000-220VAC接线图
L2000-24VDC接线图
输出延 时指示
2
控制器外壳尺寸
L2000外壳尺寸图
探头尺寸(单位mm):
杆式标准探头L843
杆式防腐探头L843TS 注:防腐探头必须用法兰安装,法兰尺寸由用户自选,默认标准为DN15PN1.6。 杆式飞灰探头L853
杆式高温探头L864
注: 杆式高温陶瓷探头必须用法兰安装,石棉板隔热密封,法兰尺寸由用户自选, 默认标准为DN15PN1.6。 3
缆式探头L843W
缆式防腐探头L843TW
选型指南:
L2000 - XXX / XXX - XXmm - XXm
探头总长: 用户自选,标准为450mm, 杆式探头最长2.5米 缆式探头最长20米
保护套长: 用户自选,标准为150mm 以至少伸出容器内壁积料50mm为宜
探头型号: L843 (杆式标准探头) L843TS (杆式防腐探头) L853 (杆式飞灰探头) L864 (杆式高温探头) L843W (缆式标准探头) L843TW (缆式防腐探头) L890 (平板探头)
代理商:上海雄风自控工程有限公司 地址:上海市北青公路3585号 电话:86-21-39808151 传真:86-21-39808150 邮编:201705 网址:
Distributor Shanghai Xiongfeng Automation Control Engineering Co., Ltd. Address: No 3585, Beiqing Road, Shanghai Tel: 86-21-39808151 Fax: 86-21-39808150 Post Code: 201705 Web:
HVR操作说明文档
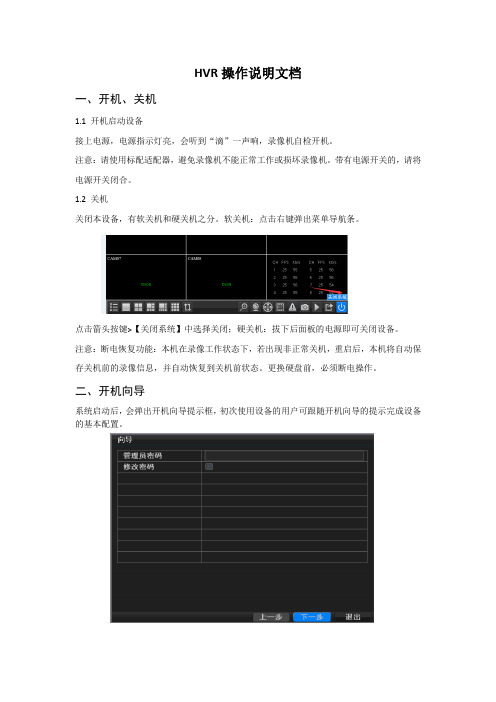
HVR操作说明文档一、开机、关机1.1 开机启动设备接上电源,电源指示灯亮,会听到“滴”一声响,录像机自检开机。
注意:请使用标配适配器,避免录像机不能正常工作或损坏录像机。
带有电源开关的,请将电源开关闭合。
1.2 关机关闭本设备,有软关机和硬关机之分。
软关机:点击右键弹出菜单导航条。
点击箭头按键>【关闭系统】中选择关闭;硬关机:拔下后面板的电源即可关闭设备。
注意:断电恢复功能:本机在录像工作状态下,若出现非正常关机,重启后,本机将自动保存关机前的录像信息,并自动恢复到关机前状态。
更换硬盘前,必须断电操作。
二、开机向导系统启动后,会弹出开机向导提示框,初次使用设备的用户可跟随开机向导的提示完成设备的基本配置。
三、管理员密码设置设备正常开机后,在操作和配置前设置登录密码,系统根据用户权限执行相应操作命令。
设备出厂时,预置admin, guest两个用户,admin用户默认无密码。
为安全起见,请及时在“管理员密码”中设置密码。
以后不再提示:如果设置密码,登录时需要输入密码登录。
点击“下一步”,进入P2P云服务二维码扫描界面,如图(示例)Android;IOS系统(扫描下载APP)的地址二维码UID二维码: 扫描可以获取到设备UID号点击“下一步”进入网络设置界面,配置设备的网络参数。
如图【IP 地址】:出厂默认值192.168.1.10;【子网掩码】:出厂默认值255.255.255.0;【默认网关】:出厂默认值192.168.1.1。
如果需要将本机接入网络,需要设置录像机的IP与路由器同网段,并符合路由器的IP规则,不能与局域网内的其他设备IP冲突,也可启用勾选“自动获取IP地址”功能,点击右边刷新使本机自动获取一个动态IP地址(需要路由器开启DHCP服务)。
点击“完成”,完成整个开机向导的配置。
四、通道模式设备支持的通道模式可以通过【主菜单】>【系统配置】>【通道管理】查看和配置。
Intl'2000系统说明书

旋转编码器是电梯速度及位置控制的检测元件,其性能的优劣及安装的正确与否对电梯运行性能起着至关重要的作用,许多电梯的故障是由编码器引起的。INTL’2000微机系统对引入的编码器脉冲信号进行了分析与评价,对指导调试人员排除电梯抖动、不平层等故障提供了直观的帮助。
1.2.18输入口干扰评价
度、可靠性堪称世界一流;软件设计充分体现了功能齐备,参数设置界面层
次分明,调试及故障诊断信息充分,抗干扰能力强及干扰强度评价独具匠心
的技术特点。对电梯控制系统以外的电气元件设计了诊断与检测界面。使电
梯故障判断有的放矢,真正使该电梯控制系统做到了高性能与可靠性的完美
统一,高水平与实用性的完美统一,高科技与应用简便的完美统一。
1.3.5端站换速及楼层号校正
系统在运行中检测到端站开关后,电梯将强迫换速并自动校正楼层显示。
1.3.6限位保护
系统检测到限位开关动作,将立刻停止电梯运行。
1.3.7极限保护
系统检测到极限开关动作,整个系统将立刻掉电。
1.4
1.4.1远程监控
通过有线或无线通讯模块(可选配置),可以在远程监控中心对电梯运行状态进行实时监控。
警告
用户在使用本系统时应严格按照国家电梯标准的要求进行作业,并且详细阅读本系统所
使用的《变频器》说明书。上述文件中涉及人身安全的部分均作为本系统对使用者的警告。
注意
说明书中的符号与框图可能有更改,用户应以随机原理图为准。
第一章
1.1
1.1.1检修运行
系统具有三个检修开关。优先级别由高至低分别为:轿顶检修开关,轿内检修开关,控制柜检修开关。优先级别高的检修开关置位后,优先级别低的检修开关将不起作用。将系统设置为检修状态后,按下相应位置的“慢上”或“慢下”按钮,电梯会以检修速度向上或向下运行,松开按钮后停止。系统在检修状态时开关门为点动方式。
NOBLES Speedshine 1200 1600 2000 120V 操作员和零件手册说明书

QTY. 1 1 1 1 1 1 3 4 2 1 1 1 2 6 5 1 1 1 2 1 1 2 1 1 1
Home Speedshinet 1200/1600/2000 (09–02) Find... Go To..
23
PARTS LIST LISTA DE PIEZAS
2 1
4 36 36 3
REF 23 24 25 26 27 28 29 30 31 32 33 34 35 36 37 38 39 40 41 42 43 44 45 46 47
PART # 6010.16 600987 100355 140259 602849 610974 230852 140147 140146 140604 230860 200821 602750 140052 140864 230859 140402 140881 140524 130204 130141 140437 140864 230773 130176
BASE GROUP GRUPO BASE
7 8
9 5 6
22
23 24
10 11
12
13
14
15 16 17
18
25
21 17
16 26 27
28
44 45 36
26
29
27
43
19 20
19
42 28
41 40
30 31
32
37
26
33
27
43
39
38 35 34
24
Home Find... Go To..
DESCRIPTION SCREW, 8–32X1 SPRING SLEEVE, LOCKING SCREW, 1/4–20X5/8 GRIP, CORD DCORD, 14/3X75’ YELLOW PLATE, BACKING SLEEVE, .44ODX.25BX.21L BUSHING, .50ODX.25BX.21L PIN, GROOVE 1/4X3/4 HANDLE, LATCH GRIP, LATCH HOOK, CORD WASHER, 1/4 EXT SCREW, 1/4–20X3/4 CHANNEL, LATCH HANDLE SPRING, HANDLE LATCH SCREW, 1/4–20X1 NUT, 1/4–20 KEP CORD, 14/3X57” BLACK BUSHING, STRAIN–RELIEF SPRING SCREW, 1/4–20X3/4 BRACKET, SPRING DBELT CLIP, STRAIN–RELIEF (OPTIONAL)
HV系列操作手册
1. 产品用途…………………………….…………………………………………………………..6 2. 产品特性…………………………………….…………………………………………….……6 3. 仪器各部件名称及功能……………………………………………………………………..…6
2
注意
● 若外来物品(如金属、液体等)进入通风口,开机时将可能导致仪器出现故障、着 火或漏电。
● 不可用力捆绑、扭曲、打结或拉扯电源线。不要在电线上放置重物。破损或暴露的 电线可能导致起火或触电。
● 不可把仪器连接到超过仪器额定电压的电源上,若与其它类型的电压连接,可能导 致起火或触电。
● 仪器必须良好接地,如果插座没有接地端,则仪器通电之前必须用一独立的接地导 线使仪器接地。
第2章 仪器安装
本章介绍产品如何安装及安装在何处。产品含精密部件,因此安装需按本章说明 进行。
第3章 操作方法
本章讲解如何改变各设定值,描述仪器开机前及自动运行结束后各有关操作。同 时描述仪器自动运行过程中的面板显示及功能。
第4章 保养与维修
本章介绍排气瓶和灭菌腔排水方法,仪器主体的清洁及部件更换。
危险物品清单:
① 易爆物品 ·Nitroglycol、硝酸甘油、硝化纤维素及其它易爆含氮酯类物质。 ·三硝基苯酚、三硝基甲苯、picric acid 及其它易爆硝基化合物。 ·Peracetic acid、methyl letone peroxide、benzoyl peroxide 及其它易爆有机过氧化物。
● 若有选配件(数字打印机、浮标感应器、冷却单元、自动供水单元),请参阅附件 中选配件的使用说明。
洛雷数字录像机系列LHV2000用户手册说明书
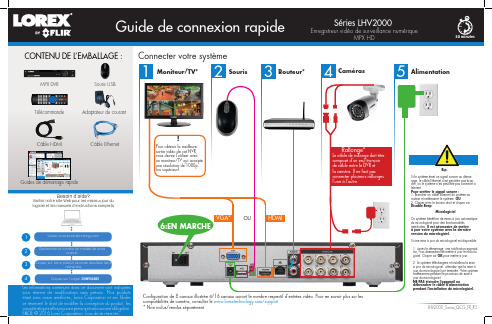
HDMI
Rallonge*
Le câble de rallonge doit être composé d’un seul tronçon de câble entre le DVR et la caméra. Il ne faut pas connecter plusieurs rallonges l’une à l’autre.
Configuration de 8 canaux illustrée 4/16 canaux auront le nombre respectif d'entrées vidéo. Pour en savoir plus sur les compatibilités de caméra, consulter le /support
Micrologiciel
Ce système bénéficie de mises à jour automatique du micrologiciel pour des fonctionnalités améliorées. Il est nécessaire de mettre à jour votre système avec la dernière version du micrologiciel.
Guide de connexion rapide
Séries LHV2000
Enregistreur vidéo de surveillance numérique MPX HD
30 minutes
CONTENU DE L’EMBALLAGE :
MPX DVR
Souris USB
Connecter votre système
!
华威力泰Hv2000

i
HV2000 系列变频器使用手册
目录
目录
1.安全信息 ...................................................1
1.1 安全定义 ..............................................1 1.2 安装注意事项 ..........................................1 1.3 使用注意事项 ..........................................2 1.4 报废注意事项 ..........................................5
当变频器带电机的输出频率超过 50Hz 运行时,请考虑电机的振 动、噪音增大,而且还必须确保电机轴承等机械装置在使用的速度范 围内。 机械装置的润滑
本变频器驱动减速箱及齿轮等需要润滑的机械装置,在长期低速 运行时,由于润滑效果变差,可能会造成损坏,建议事先查询或做好 保养。 负转矩负载
对于提升负载之类的场合,常常会有负转矩的发生,变频器常会 有过流、过压的故障而跳闸,此时,应当选择适当参数的制动组件。 负载装置的机械共振点
!
警告 ▲ 搬运时不要让操作面板和盖板受力,否则变频器局部脱落有受伤或 损坏财物的危险。 ▲ 安装应在能承受变频器重量的地方进行。 ▲ 应避免将变频器安装在可能产生水滴飞溅的场合,否则有损坏财物 的危险。 ▲ 不允许有异物掉进变频器中。 ▲ 变频器的接地端子必须良好接地。 ▲ 在通电运行或断电后十分钟内严禁用手触摸散热器,以防灼伤。 ▲ 如果变频器有损伤或部件不符合时,请不要安装运行,否则有受伤 或财物损坏危险。 ▲ 不要安装在阳光直射的地方,否则有损坏财物的危险。 ▲ 不可将 P(+)/P(B)/P(-)短接,否则有发生火灾和损坏财物的危险。 ▲ 主回路端子与导线必须牢固连接。 ▲ 严禁将 TA-TB-TC 以外的端子接交流 220V 信号,否则有损坏财物的 危险。
FLIR LHV2000系列产品使用说明书

1CGuide mobile rapideAndroide f Appuyer sur Connect . Il vous sera demandé de changer le mot de passe du DVR.gSaisir un nouveau mot de passe de 6 caractères et appuyer sur OK . Désormais, ce mot de passe sera utilisé pour la connexion au système.L'application s'ouvre en mode visualisation en direct et diffuse les vidéos de toutes les caméras qui sont connectées.Avant de commencer :• S'assurer d'avoir un accès à Internethaut débit et un routeur (non inclus).• Brancher votre DVR à votre routeurSéries LHV2000Installez l'application gratuite FLIR Cloud™ depuis la boutique en ligne de Google Play. Appuyer sur l'icône FLIR Cloud™ pour ouvrir l'application.a dConfigurer les éléments suivants :iPhone1 AFélicitations! Vous pouvez maintenant visionner la vidéo provenant de vos caméras sur votre téléphone intelligent ou votre tablette.3 minutesiPadc dConfigurer les éléments suivants :12345e f gInstallez l'application gratuite FLIR Cloud™ depuis la boutique en ligne App Store. Appuyer sur l'icône FLIR Cloud™ pour ouvrir l'application.a b Appuyer sur Start Scanning et enligner lecode QR sur le dessus du DVR en utilisant la caméra de votre iPad.OU sous Device ID , saisir manuellement l'identifiant du dispositif qui apparait sur l'étiquette du dispositif.Nom : Entrer un nom de votre choix pour votre DVR.Port client : Saisir le Port client (par défaut : 35000).Nom d'utilisateur : Saisir le Nom d'uti-lisateur du DVR (par défaut : admin ).Mot de passe : Saisir le mot de passe du DVR (par défaut : 000000).Nombre de canaux : Entrer le nombre de canaux que possède votre DVR (par exemple 4, 8, ou 16).1Bpar l'entremise d'un câble Ethernet (pour plus de détails, consulter le Guide de connexion rapide).• Effectuer la mise à jour dumicrologiciel de votre DVR et du logiciel client ou de l'application mobile.• Noter qu'une vitesse de téléversementde 1 Mbps est requise pour la lecture en transit de fichier visuel et à distance. Jusqu'à 3 dispositifs peuvent se connecter en même temps au système.1234Appuyer sur Scan QR Code et enligner le code QR sur le dessus du DVR en utilisant la caméra de votre téléphone ou de votre tablette.OU sous Device ID , saisir manuellement l'identifiant du dispositif qui apparait sur l'étiquette.Nom : Entrer un nom de votre choix pour votresystème.Port client : Saisir le Port client (par défaut : 35000).Nom d'utilisateur : Saisir le Nom d'utilisateur du DVR(par défaut : admin ).Mot de passe : Saisir le mot de passe du DVR (par défaut : 000000).EXEMPLEEXEMPLE5e f Appuyer sur Connect . Il vous sera demandé de changer le mot de passe du DVR.gSaisir un nouveau mot de passe de 6 caractères et appuyer sur OK . Désormais, ce mot de passe sera utilisé pour la connexion au système.L'application s'ouvre en mode visualisation en direct et diffuse les vidéos de toutes les caméras qui sont connectées.Installez l'application gratuite FLIR Cloud™ depuis la boutique en ligne App Store. Appuyer sur l'icône FLIR Cloud™ pour ouvrir l'application.a c cb b dConfigurer les éléments suivants :1234Appuyer sur Scan QR Code et l'enligner vis à vis le dessus du DVR en utilisant la caméra de votre iPhone.OU sous Device ID , saisir manuellement l'identifiant du dispositif qui apparait sur l'étiquette.Nom : Entrer un nom de votre choix pour votre système.Port client : Saisir le Port client (par défaut : 35000).Nom d'utilisateur : Saisir le Nom d'utilisateur du DVR(par défaut : admin ).Mot de passe : Saisir le mot de passe du DVR (par défaut : 000000).13452EXEMPLEAppuyerAppuyerAppuyer ensuite sur +Appuyer ensuite sur +5Appuyer sur Add .Appuyer sur Start Live View . Il vous sera demandé de changer le mot de passe du DVR.Saisir un nouveau mot de passe de 6 caractères et appuyer sur OK . Désormais, ce mot de passe sera utilisé pour la connexion au système.L'application s'ouvre en mode visualisation en direct et diffuse les vidéos de toutes les caméras qui sont connectées.AppuyerAppuyer ensuite612345613452Pour créer un nouveau compte, appuyer sur Sign up et saisir votre adresse courriel et le mot de passe.Pour créer un nouveau compte, appuyer sur Sign up et saisir votre adresse courriel et le mot de passe.ID du dispositif :xxxxxxxxxxxID du dispositif :xxxxxxxxxxxID du dispositif :xxxxxxxxxxxTrouver l'ID du dispositifNoter les informations ci-dessous :ID DU DISPOSITIF :Guide de référence rapideInformations d'accès par défaut :• Nom d'utilisateur par défaut : admin • Mot de passe par défaut : 000000Ports du système par défaut :• Port HTTP : 80• Port client : 35000Les informations contenues dans ce document sont indiquées sous réserve de modifications sans préavis. Nos produits étant sans cesse améliorés, Lorex Corporation et ses filiales se réservent le droit de modifier la conception du produit, les caractéristiques et les prix sans préavis et sans aucune obligation. E&OE © 2015 LOREX. Tous droits réservés./supportTout est sur InternetBesoin d'aide ?Visitez /supportLHV2000_SERIES_QNG_FR_R1Si vous avez oublié votre mot de passe, contactez le soutien technique Lorex.2b • Utilisateurs PC : Télécharger et installer le logiciel client pour PC à l'adresse suivante /pro . • Utilisateurs Mac : Télécharger et installer le logiciel client pour Mac à l'adresse suivante /pro . Double cliquer pour extraire le logiciel. Ensuite, faire glisser le logiciel vers Applications .aUne fois l'installation terminée, double cliquer sur l'icône FLIR Cloud Client ™ ( ) qui apparaît sur le bureau ou dans la liste des Applications.e12345Entrer les informations suivantes :3Branchement sur un PC ou un MACGuide rapide pour ordinateurpersonnel ou MACFélicitations! Vous pouvez maintenant vous connecter à Internet pour visionner et lire la vidéo sur votre ordinateur.15 minutesL' Identification de l'appareil est imprimé sur l'étiquette du panneau supérieur du DVR.Veuillez consulter l'étiquette sur le dessus de votre DVR pour connaîtrel'identifiant du dispositif.REMARQUE : Aucune configuration (P C ou MAC) n'est requise pour se connecter à un téléphone intelligent ou une tablette. Voir l'endos pour le réglage d'un téléphone intelligent ou d'une tablette.Le logiciel et le manuel d'utilisation complet sont disponibles sur :ID du dispositif: xxxxxxxxxxxcSe connecter au Logiciel client en utilisant le nom d’utilisateur du Logiciel client (par défaut : admin ) et le mot de passe (par défaut : admin ) et ensuite cliquer sur Login .dNom du dispositif : Entrer un nom de votre choix pour votresystème.ID du dispositif : Saisir manuellement l'identifiant del'appareil qui apparait sur l'étiquette du dispositif.Port client : Saisir le Port client (par défaut : 35000).Nom d'utilisateur : Saisir le Nom d'utilisateur du DVR (par défaut : admin ).Mot de passe : Saisir le mot de passe du DVR (par défaut : 000000).f Il vous sera demandé de changer le mot de passe du DVR. Cliquer sur OK .g Saisir un nouveau mot de passe de6 caractères et appuyer sur OK . Désormais, ce mot de passe sera utilisé pour la connexion au système.h Cliquer surensuite.iCliquer et faire glisser le Groupe par défaut dans la fenêtre d'affichage afin d'ouvrir les caméras en mode vue en direct.Nom d'utilisateur : admin Mot de passe : adminCliquer sur Ajouter un dispositif12345Cliquer sur AjouterEXEMPLETélécharger et installer le logiciel client.Si vous avec des problèmes avec laconnexion, veuillez tenter les étapes suivantes :• Redémarrer le DVR en utilisant l'interrupteur d'alimentation• S'assurer que le DVR est branché au routeur à l'aide d'un câble Ethernet et puis redémar-rer le DVR• Vérifier le nom d'utilisateur, le mot de passe et le port client• S'assurer que votre DVR possède la dernière version du micrologiciel• En cas d'utilisation d'une connexion lente, réduire les paramètres du débit binaire à CIF , 10 FPS, 96 ou 128 kbps. Voir le manuel d’instructions au/support Dépannage。
SUN2000L FusionHome应用快速指南说明书
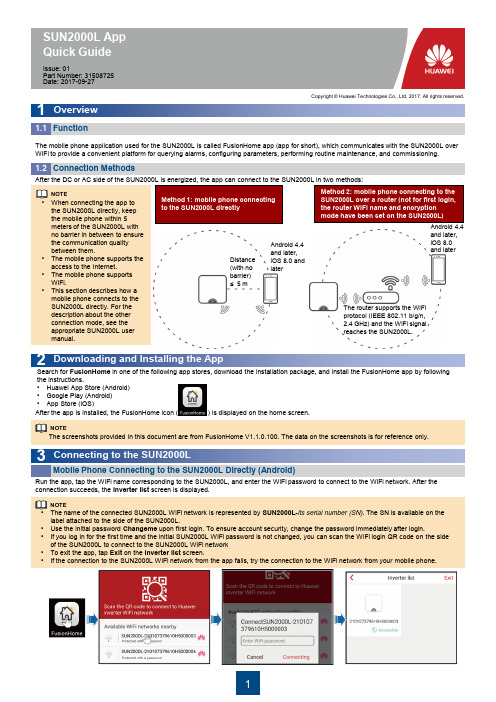
SUN2000L App Quick Guide1 Overview2 Downloading and Installing the AppThe mobile phone application used for the SUN2000L is called FusionHome app (app for short), which communicates with the SUN2000L over WiFi to provide a convenient platform for querying alarms, configuring parameters, performing routine maintenance, and commissioning.•When connecting the app to the SUN2000L directly, keep the mobile phone within 5 meters of the SUN2000L with no barrier in between to ensure the communication quality between them.•The mobile phone supports the access to the Internet.•The mobile phone supports WiFi.•This section describes how a mobile phone connects to the SUN2000L directly. For the description about the other connection mode, see the appropriate SUN2000L user manual.After the DC or AC side of the SUN2000L is energized, the app can connect to the SUN2000L in two methods:Function1.1 Connection Methods1.2 3 Connecting to the SUN2000LAfter the app is installed, the FusionHome icon ( ) is displayed on the home screen.The screenshots provided in this document are from FusionHome V1.1.0.100. The data on the screenshots is for reference only.Run the app, tap the WiFi name corresponding to the SUN2000L, and enter the WiFi password to connect to the WiFi network. After theconnection succeeds, the Inverter list screen is displayed.Mobile Phone Connecting to the SUN2000L Directly (Android) •The name of the connected SUN2000L WiFi network is represented by SUN2000L-its serial number (SN). The SN is available on the label attached to the side of the SUN2000L.•Use the initial password Changeme upon first login. To ensure account security, change the password immediately after login.•If you log in for the first time and the initial SUN2000L WiFi password is not changed, you can scan the WiFi login QR code on the side of the SUN2000L to connect to the SUN2000L WiFi network . •To exit the app, tap Exit on the Inverter list screen.•If the connection to the SUN2000L WiFi network from the app fails, try the connection to the WiFi network from your mobile phone.Issue: 01Part Number: 31508725 Date: 2017-09-27Copyright © Huawei Technologies Co., Ltd. 2017. All rights reserved.Method 1: mobile phone connecting to the SUN2000L directlyMethod 2: mobile phone connecting to the SUN2000L over a router (not for first login, the router WiFi name and encryption mode have been set on the SUN2000L)NOTESearch for FusionHome in one of the following app stores, download the installation package, and install the FusionHome app by following the instructions.•Huawei App Store (Android) •Google Play (Android) •App Store (iOS) NOTENOTEThe router supports the WiFi protocol (IEEE 802.11 b/g/n, 2.4 GHz) and the WiFi signal reaches the SUN2000L.Distance (with no barrier) ≤ 5 mAndroid 4.4 and later, iOS 8.0 and laterAndroid 4.4 and later, iOS 8.0 and laterMobile Phone Connecting to the SUN2000L Directly (iOS)Choose Settings > WLAN on your mobile phone, tap the WiFi name corresponding to the SUN2000L, and enter the WiFi password to connect to the WiFi network. After the connection succeeds, the Inverter list screen is displayed.•The name of the connected SUN2000L WiFi network is represented by SUN2000L-its SN . The SN is available on the label attached to the side of the SUN2000L.•If you log in for the first time and the initial SUN2000L WiFi password is not changed, you can run the app, tap Scan , and scan the WiFi login QR code on the side of the SUN2000L to obtain the WiFi login password.•Use the initial password Changeme upon first login. To ensure account security, change the password immediately after login.4 Logging In to the App Login as installer1.On the Inverter list screen, tap the corresponding SUN2000L, select installer , enter the password, and then tap Verify . •The name of the connected SUN2000L is represented by its SN, which is available on the label attached to the side of the SUN2000L.•The login password is the same as that for the SUN2000L connected to the app and is used only when the SUN2000L connects to the app.•The initial password is 00000a . Use the initial password upon first login. To ensure account security, change the password immediately after login.2.If you log in successfully, the Quick setting or Operation console screen is displayed. •The Quick setting screen is displayed only when the SUN2000L is powered on for the first time or the factory defaults of the SUN2000L are restored.•If you do not follow the deployment wizard, the Quick setting screen is still displayed when you log in next time.•To exit the Quick setting screen, press the Back button on the mobile phone or tap Exit on the screen. To enter the Quick setting screen again, choose Quick setting from the Operation console screen. Quick setting•If the inverter does not need to connect to the router, skip Step 1 Set parameters for the Inverter toconnect to the router . If the inverter does not need to connect to the management system, skip Step 4 Set parameters for the Inverter to connect to the management system .•After the management system is successfully connected, the SUN2000L will report the SN and installer CD Key number. If the connection fails, another connection attempt will start after 10 seconds. The installer CD Key number is generated by the SUN2000L automatically and is used for the installer to register with the management system and manage the inverter.•If you want to set parameters using a saved configuration file, ensure that the file is available in your mobile phone. To generate a configuration file, choose Quick setting > Save settings .Identity authentication The following text describes the operations on Android screens. The operations on iOS screens are the same as those on Android screens,except that the screens are somewhat different. The actual screens prevail.NOTENOTENOTENOTETo add devices, tap Go to set after quick setting is complete, and then configure parameters on the Add/Delete device screen.Login as userYou can log in as user only after you have logged in as installer and followed the instructions on the Quick setting screen. On the Inverter list screen, tap the corresponding SUN2000L, select user, enter the password, and log in to the app.5 Common Alarms and Troubleshooting MeasuresAlarmNamePossible Cause MeasuresHigh String Input Voltage The PV array is incorrectlyconfigured. Excessive PVmodules are connected inseries to the PV string, andtherefore the open-circuitvoltage exceeds the maximuminput voltage of the SUN2000L.Reduce the number of PV modules connected in seriesto the PV string until the PV string open-circuit voltageis less than or equal to the maximum input voltage ofthe SUN2000L. After the PV array is correctlyconfigured, the alarm disappears.Output Overcurrent The grid voltage dropsdramatically or the power grid isshort-circuited. As a result, theSUN2000L transient outputcurrent exceeds the upperthreshold and therefore theprotection function is triggered.1.The SUN2000L monitors its external workingconditions in real time. The SUN2000L automaticallyrecovers after the fault is rectified.2.If the alarm occurs frequently and affects the powerproduction of the PV plant, check whether the outputis short-circuited. If the fault persists, contact yourdealer.Output DC Component Overhigh The DC component in the gridcurrent exceeds the specifiedupper threshold.1.The SUN2000L monitors its external workingconditions in real time. The SUN2000L automaticallyrecovers after the fault is rectified.2.If the alarm occurs frequently, contact your dealer.Abnormal Residual Current The insulation impedancebetween the input and the PEdecreases when the SUN2000Lis operating.1.If the alarm occurs accidentally, the external powercable may be abnormal temporarily. The SUN2000Lautomatically recovers after the fault is rectified.2.If the alarm occurs frequently or persists, check thatthe impedance between the PV string and ground isnot below the lower threshold.Low Insulation Resistance 1.The PV string is short-circuited to PE.2.The PV string is installed ina moist environment for along time and the powercable is not well insulated toground.1.Check the impedance between the PV array outputand PE, and eliminate short circuits and poorinsulation points.2.Check that the SUN2000L PE cable is correctlyconnected.3.If you are sure that the impedance is less than thedefault value in a cloudy or rainy environment, setInsulation resistance protection.When a fault occurs, a corresponding alarm is generated.•To view alarms as installer, choose Device info > Alarm query on the Operation console screen.•To view alarms as user, choose > Alarm query in the upper right corner.For more alarms, see the appropriate SUN2000L user manual.NOTICE•The name of the connectedSUN2000L is representedby its SN, which is availableon the label attached to theside of the SUN2000L.•The login password is thesame as that for theSUN2000L connected tothe app and is used onlywhen the SUN2000Lconnects to the app.•The initial password is00000a. Use the initialpassword upon first login.To ensure account security,change the passwordimmediately after login.NOTENOTENO.Grid CodeDescriptionSUN2000L-2KTL/SUN2000L-3KTL SUN2000L-3.68KTL SUN2000L-4KTL SUN2000L-4.6KTL SUN2000L-5KTL 1 VDE-AR-N-4105 Germany low-voltage power gridSupport Support Support Support - 2 NB/T 32004China Golden Sun low-voltage power gridSupport - Support - Support 3 UTE C 15-712-1(A) France mainland power grid Support Support Support Support Support 4 UTE C 15-712-1(B) France island power grid Support Support Support Support Support 5 UTE C 15-712-1(C) France island power grid Support Support Support Support Support 6 G59-England England 230 V power grid (I > 16 A) - - Support Support Support 7 G59-Scotland Scotland 240 V power grid (I > 16 A) - - Support Support Support 8 G83-England England 230 V power grid (I < 16 A) Support Support - - - 9 G83-Scotland Scotland 240 V power grid (I < 16 A) Support Support - - - 10 CEI0-21Italy power gridSupport Support Support Support Support 11 EN50438-NL Netherlands power grid Support Support Support Support Support 12 AS4777 Australia power gridSupport Support Support Support Support 13 IEC61727 IEC61727 low-voltage power grid (50 Hz) Support Support Support Support Support 14 EN50438-TR Turkey low-voltage power gridSupport Support Support Support Support 15 IEC61727-60 Hz IEC61727 low-voltage power grid (60 Hz) Support Support Support Support Support 16CLC/TS50549_IEIreland power gridSupportSupportSupportSupportSupport6 Common Faults and Troubleshooting MeasuresFault SymptomPossible Cause MeasuresAn Android mobile phoneprompts that the app cannot be installed.•The version of the mobile phone operating system is earlier than the required version.•Allow Installation of apps from unknown sources is not selected.•Upgrade the version of the mobile phone operating system.•Choose Settings > Security and select Allow Installation of apps from unknown sources .The communication fails. The mobile phone or router is more than 5 meters away from the SUN2000L, so the WiFi connection is disconnected.Keep the mobile phone or router within 5 meters of the SUN2000L and reconnect to the WiFi network.The Failed to connect to the inverter. Reconnecting ... message is displayed. The mobile phone or router is more than 5 meters away from the SUN2000L, or the WiFi signal is weak. Ensure that the WiFi network is connected. Log out of the app and then log in again. All data fails to be obtained during operations.The app is disconnected from the SUN2000L. Connect to the SUN2000L again.The SUN2000L list fails to be scanned.An error occurs in the WiFi connection to the app.If the scan still fails after several attempts, log out and try again.No upgrade package is displayedfor the upgrade.No upgrade package exists in the mobile phone.Save the upgrade package in the mobile phone.•The grid codes are subject to change. The listed codes are for reference only.•For more information about the FusionHome app, see the SUN2000L user manual.NOTECustomer Service Contact Information Region Country Service Support Mailbox Europe All countries ******************************Asia Pacific Australia ******************************Other countries ***************************Japan and Korea Japan and Korea **********************.com China China ***********************IndiaIndia******************************North America The United Statesand Canada ******************************Latin AmericaAll countries******************************The Middle Eastand AfricaAll countries*******************************Huawei Technologies Co., Ltd.Huawei Industrial Base, Bantian, Longgang Shenzhen 518129 People's Republic of ChinaScan here for moredocuments:SupportScan here for Huawei technical support: iOSAndroidYou can also log in to Huawei technical support website: Grid Codes7。
LC2000操作说明(新版)
沪制号MODEL LC2000 LIQUID CHROMATOGRAPHY SYSTEMLC2000 液相色谱仪使用说明书请认真阅读并妥善保管本使用说明书。
·在操作使用仪器之前,请认真阅读本使用说明书,充分理解与安全有关的注意事项。
为了让本使用说明书在需要时进行参照,请保管在方便取用的就近场所。
上海天美科学仪器有限公司TECHCOMP目 录前言 (1)产品的保修 (2)安装、迁移和售后服务 (3)其他注意事项 (4)通用的安全指导 (5)第一章 安 装 ........................................................................................................................... 7 1 安装要求 (8)1.1 环境要求 (8)1.2 电源要求........................................................................................................................... 9 2拆箱及清点附件 ................................................................................................................ 10 3 仪器安装 . (10)3.1 进样器、柱架部件的安装 (10)3.2 仪器放置 (11)3.3 连接 (11)3.3.1 电源线及信号连接 (11)3.3.2 液体管路的连接 (12)第二章 操作及验收 ................................................................................................................. 14 1 基本操作 . (14)1.1 紫外检测器的操作 (14)1.2 输液泵的操作................................................................................................................. 14 2 LC2000系统技术指标 .. (16)2.1 LC2030紫外可见检测器技术指标 (16)2.2 LC2130输液泵技术指标 (16)3系统性能和技术参数的验收 (18)3.1 检测器性能检查 (18)3.2 输液泵的性能检查 ........................................................................................................ 20 第三章 紫外检测器 ................................................................................................................. 21 1 键盘功能及信号输出 .. (21)1.1 键盘功能 (21)1.2 信号输出端口................................................................................................................. 22 2工作原理 ............................................................................................................................ 22 3 操作 (23)3.1 操作注意事项 (23)3.2 开机初始化 (23)3.3工作模式 (24)3.3.1 参数设置 (24)3.3.2 波长程序(波长扫描) (25)3.3.3 时间程序(波长时间程序) (31)3.3.4 检查程序 (35)第四章输液泵 (39)1概述 (39)1.1前面板介绍 (39)1.2后面板 (40)1.3屏幕显示 (41)1.4仪器键盘 (43)2基本操作 (46)2.1恒流工作模式 (46)3测量操作 (50)3.1基本的操作 (51)3.2分析操作 (51)3.3Utility工能的设定 (58)3.3.1 压力零点调节 (58)3.3.2 泵电机控制方法 (59)3.3.3 清洗流速的设定 (60)3.3.4 流量校准 (61)3.3.5 压力校准 (62)3.3.6 压力单位的设定 (63)3.3.7 设置色谱柱冲洗冲洗程序 (64)3.3.8 泵的自动停止及色谱柱自动冲洗 (65)3.3.9 设定漏液传感器 (67)3.3.10 键盘锁定 (67)第五章使用液相色谱注意事项 (68)1流动相的选择和操作注意事项 (68)2不宜使用的流动相 (69)2.1作为流动相可能受到限制的试剂 (70)2.2有机溶剂的特性表 (70)2.3有机溶剂的吸收光谱 (72)3小心静电 (73)4流动相的处理 (73)4.1流动相的在使用前要除去气泡 (73)4.2给流动相除气 (74)4.2.1 使用超声波除气(当流动相是有机溶剂时) (74)4.2.2 通过减压来去除气泡 (75)4.3除去流动相的微小颗粒(过滤) (76)5样品的处理 (77)第六章维护与故障处理 (78)1紫外检测器的日常维护与简单维修 (78)1.1流通池的清洗 (78)1.1.1流通池的保养 (78)1.2氘灯更换方法 (79)1.3检测保险丝更换方法 (81)2输液泵的维护 (83)2.1定期维护 (83)2.2更换泵密封 (84)2.3更换排放阀的密封 (85)2.4清洗流路过滤器 (86)2.5清洗溶剂过滤器 (88)2.6清洗单向阀 (89)2.7泵单向阀的部件更换 (91)3易耗件及备品备件 (93)3.1紫外可见检测器备件表 (93)3.2输液泵 (94)3.2.1 易耗件和备件 (94)3.2.2 流路中的管道部件 (95)前言LC2000液相色谱系统被设计提供给具有化学分析基本知识的人使用。
HUL2000超声波液位计-重庆赫姆勒
前言非常感谢您选择本公司仪器仪表!在使用本产品前,请详细阅读本说明书,并保存以供参考。
请遵守本说明书操作规程及注意事项。
⏹由于不遵守本使用及安装说明书中规定的注意事项,所引起的任何故障和损失均不在厂家的保修范围内,厂家亦不承担任何相关责任。
请妥善保管好所有文件。
如有疑问,请联系我公司售后服务部门或地区客服中心。
⏹如果您需要英文说明书,请登陆本公司网站下载,或拨打服务热线,联系我公司售后服务部门或地区客服中心。
⏹在收到仪器时,请小心打开包装,检查仪器及配件是否因运送而损坏,如有发现损坏,请联系我公司售后服务部门或地区客服中心,并保留包装物,以便寄回处理。
⏹当仪器发生故障,请勿自行修理,请联系我公司售后服务部门或地区客服中心。
一、用户自检超声波物位计→超声波可测量固体、液体的位置,所以我们统称超声波物位计。
A、对仪表最简单的检验方法是:接通合格的电源,将超声波的发射口垂直对准空旷开阔的墙面(相当液面)作为超声波的反射面,同时观察空气L(L可以通过连续按移位键查看)的数字,当显示L的数字和实际距离当时,说明测量功能常。
说明:1、在检验的过程中应该注意:当实际空气距离L超过仪表最大测量距离L,视为无效。
2、一般情况下,仪表量程d+盲区C=仪表最大测量距离L(max).3、仪表中的量程d是和输出电流P有关的参数,和其他无关.B、把超声波的发射口对向空旷的天空,一分钟以内仪表应该显示F00F,从原理上说仪表此时没有回波收到,说明您的仪表抗干扰性能不错.C、按移位键找出P(仪表指示应该输出的电流),用电流表直接测量输出电流应该和P值相当,说明输出正常。
经过以上3个项目的检验,用户可以放心的使用了。
二、仪表基本参数连续按“移位键”要可以查看以下信息:L--空气距离计量单位m→是探头到达反射面(如水面)的距离,是检测安装是否正确的唯一的检测工具。
G--仪表的安装高度计量单位md--仪表量程计量单位mC--仪表的盲区计量单位cm→固有特征,不可改变,安装时参考。
- 1、下载文档前请自行甄别文档内容的完整性,平台不提供额外的编辑、内容补充、找答案等附加服务。
- 2、"仅部分预览"的文档,不可在线预览部分如存在完整性等问题,可反馈申请退款(可完整预览的文档不适用该条件!)。
- 3、如文档侵犯您的权益,请联系客服反馈,我们会尽快为您处理(人工客服工作时间:9:00-18:30)。
操作说明书VER 1.1目录第1章简介 (3)第2章规格 (4)第3章各部名称第1節正面 (5)第2節背面 (5)第3節操作键 (6)第4章装机 (7)第5章治具与治具线制作说明及保养 (8)第6章操作说明第1节关机自我测试 (10)第2节系统设定 (11)第3节排线测试 (14)第4节读取标准资料 (15)第5节测试模式 (18)第6节LCD显示说明 (20)第7节其它功能操作介绍 (21)第7章讯息说明第1节LCD讯息 (23)第2节打印机讯息 (25)第8章故障排除 (25)第一章简介L2000HV是一种高压线材测试机,它采用INTEL MCU为主体控制单元,搭配精心设计的模数量测电路,使得在测试精确快速。
L2000HVL2000HV在零件选用上都是要求严格的,才能使得测试机得到稳定且耐久的操作次数。
不论低导通测试或高绝缘分析,都能将误差值控制在非常低的状态下,无论是量产厂商或是研发部门对其测试结果都是无庸置疑的。
L2000HV精密高压线材测试机用回路测试和多段测试除了一般读断路测试外,并提供连接线材本身导通阻抗,绝缘阻抗,跳火花测试,并能准确判断哪一端的端点有短路和开路的情行发生,此外L2000HV还能采用单端测试,循序测试方式测试单接头的线材,L2000HV精密高压线材测试机读线时采用读线(学习)的方法记忆标准线材的连接关系,测试时采用与读线标准资料相比对的方法测试,测试结果可显示在LCD上。
L2000HV承继了L2000C & L2000D的优点,并增强了功能,使本测试机更能达到各厂商的要求。
为了感谢各厂商的信赖与支持,本公司会以更严谨之态度加强各方面需求,提升测试效能,来服务我们的客户。
第二章规格第三章各部名称第1节正面1.测试端口.................................................... 64PIN牛角插座接头2.L2000HV .................................................... 机台型号3.找点............................................................ 找点测探棒插座4.LCD .............................................................. 128x64点阵汉字背光显示屏5.键盘............................................................ 操作键组6.电源............................................................ 电源开关7.LED ............................................................ LED指示说明第2节背面1.电源插座...................................................... AC INPUT2.扩充端口.................................................... 特殊功能接口接头3.高压测试端.................................................. 高压测试端点4.并列端口............................................................................... 打印机并列接口接头第3节操作键读线.................................... 读入标准资料并以8个字之检查码做为识别↑ ..................................... 上一组资料之显示与设定↓ ..................................... 下一组资料之显示与设定测试.................................... 开始测试键导通.................................... 设定导通阻抗高压&绝缘............................. 设定测试电压与绝缘阻抗高压持续................................ 设定高压持续时间复位.................................... 脱离或系统重新开机键多段.................................... 同读线键功能,但为多组标准资料输入单端.................................... 同读线键功能,但为单头线材测试资料输入找点.................................... 找寻测试点之键打印.................................... 资料打印键选点.................................... 测试点数选择键延迟.................................... 测试延迟时间设定键功能.................................... 功能选择键设定.................................... 系统设定键当您按了【功能键】,进入功能选取画面(如下图),此时LCD画面上1到8项功能,分别对应键盘左半部编号1到8号的按键。
1号键................................................. 总测试次数统计。
2号键................................................. 循序测试。
3号键................................................. 键盘测试。
4号键................................................. 排线测试。
5号键................................................. 功能保留。
6号键............................................... 循环测试。
7号键 ................................................. PLC功能。
8号键 ................................................. 治具阻抗归零。
第四章装机1.首先检查机器外表与所有配件,若有任何部份在装运时受到损害或遗失而影响操作时,请通知供货商更换或补齐。
设备清单如下:a. .. 说明书 ............................................ *1b. .. 64PIN IDC接头排线.................. *2c. .. 电源线 ............................................ *1d. .. 找点探棒 ........................................ *1e.地线 ................................................ *12.如果没有问题,请确定电源在测试机可接受范围,然后接上电源线。
3.确定电源无误后,便可开机。
4.此时电源指示灯应亮起,且LCD显示顺序如下:第五章治具与治具线制作说明及保养治具线之制作:重点:不论您的产品本身是否有跳线,治具线永远都是1对1,不用跳线或短路。
(而且越短越好)。
否则:会出现断路端点无法准确判断。
附注:为提高测试之正确性,请将治具线接成满接点。
例如:待测线的接头为25PIN公头,只用10PIN,测试头则为25PIN 母头,但测试线请用25 芯线。
治具与治具线之保养:测试机所送出之测试讯号在送达待测线之前,必定经过治具及治具线,因此绝对不能有短路(SHORT)、断路(OPEN)、或绝缘(IS)的状况,因此平日就应清理灰尘及防潮,使用干燥且干净的牙刷或吹风机即可处理。
冲断器之使用:使用时待测线之双头必需脱离测试头,否则冲断器的电压电流会经由治具回溯而破坏测试机,造成测试机故障。
附注:测试流程与冲断器之使用不当所造成之故障,皆属人为因素,请注意使用。
第六章操作说明第一节开机自我测试开机或按复位键时,L2000HV提供内部自我测试测程序以确保测试机维持在最佳状态,若有任何错误发生时,请通知供货商处理。
此项测试包括:1.内存测试。
2.测试埠测试。
3.治具本身短路及绝缘测试。
4.高压测试/模数转换测试。
若测试发生错误,LCD会显示错误之处,错误讯息请参阅第七章。
治具本身短路及绝缘测试错误,可按【复位键】跳过错误部份继续测试。
但内存测试及测试埠测试如果错误则无法跳出。
自我测试时LCD会显示04HV04表示I/O板数目,一片有2个测试埠,共128个测试点。
此时表示内存、测试埠测试正常,最后响三声而显示主画面则表示治具本身短路及绝缘测试正常。
第二节系统设定系统设定包含(1)导通阻抗、(2)高压&绝缘阻抗、(3)高压持续时间、(4)测试点数、(5)延迟时间、(6)音量大小、(7)错误显示模式、(8)错误数量、(9)良品与不良品警示声、(10)断路端点、(11)自动扫瞄时间设定、(12)多段脱离设定、(13)单端灵敏度(14)测试等待时间设定(15)高压绝缘网络设定(16)摇摆设定等十六项设定。
(1).导通阻抗设定:请按【导通键】进入设定画面,以【上、下键】调整设定值,档位分别为0.1Ω,0.2Ω,0.3Ω,0.4Ω,0.5Ω、1Ω、2Ω、3Ω、4Ω、5Ω、10Ω、20Ω、50Ω、100Ω、500Ω、1KΩ、5KΩ、10KΩ、50KΩ,最后按【复位键】完成设定并回到主画面。
(2)高压&绝缘阻抗设定:请按【高压&绝缘键】先进入高压设定画面,以【上、下键】调整设定值,档位分别为5V、50V、100V、200V、300V、400V、500V、650V、800V、1000V,设定完电压设定,再按[高压&绝缘键]进入绝缘阻抗设定画面,以【上、下键】调整设定值,500KΩ、1M Ω、2MΩ、5MΩ、10MΩ、20MΩ、50MΩ、100MΩ、200MΩ、500M Ω,再按〔高压&绝缘〕进入跳火花设定书面,以﹝上、下键﹞调整设定值,档位分别为1、2、3、4、5,最后按【复位键】完成设定并回到主画面。
