Unity3D常用代码集合
unity 常用函数
unity 常用函数
1. Start(): 游戏对象被创建时初始化的函数
2. Update(): 每一帧都会执行的函数
3. FixedUpdate(): 每个固定帧都会执行的函数
4. LateUpdate(): 在Update()函数执行后执行的函数
5. Awake(): 比Start()更早调用,用于提前加载对象
6. OnEnable(): 对象被启用时调用
7. OnDisable(): 对象被禁用时调用
8. OnDestroy(): 对象被销毁时调用
9. OnCollisionEnter(): 碰撞发生时调用
10. OnCollisionExit(): 离开碰撞时调用
11. OnTriggerStay(): 点在触发器内时持续调用
12. OnTriggerExit(): 离开触发器时调用
13. Instantiate(): 创建对象实例
14. Destroy(): 销毁对象
15. Debug.Log(): 输出调试信息
16. GetComponent(): 获取组件
17. GetComponentInChildren(): 在子对象中获取组件
18. GetComponentInParent(): 在父对象中获取组件
19. transform.Translate(): 移动对象
20. transform.Rotate(): 旋转对象。
unity3d怎么控制对象移动涉及的知识点
标题:u ni ty3d怎么控制对象移动涉及的知识点Unity3D怎么控制对象移动涉及的知识点一、引言在U ni ty3D游戏开发中,对象的移动是一个非常基础和重要的功能。
掌握控制对象移动的知识点,对于游戏开发者而言是至关重要的。
本文将介绍Un it y3D中控制对象移动涉及的一些关键知识点,并提供详细的解释和示例代码。
二、T r a n s f o r m组件与移动在U ni ty3D中,对象的移动与T ra ns fo r m组件密切相关。
T r an sf or m组件定义了对象的位置、旋转和缩放等信息。
下面介绍一些常用的控制对象移动的方法:1.T r a n s l a t e方法T r an sl at e方法可以实现对象的平移移动。
它接受一个表示移动量的V e ct or3参数,通过改变对象的位置来实现移动。
下面是一个示例代码:```c sh ar pv o id Up da te(){i f(I np ut.G et Ke yDo w n(Ke yC od e.W)){t r an sf or m.Tr an sla t e(Ve ct or3.fo r wa r d*Ti me.d el ta Tim e*s pe e d);}i f(I np ut.G et Ke yDo w n(Ke yC od e.A)){t r an sf or m.Tr an sla t e(Ve ct or3.le ft*T im e.de lt aT im e*s p ee d);}//其他方向的移动代码...}```2.R o t a t e方法R o ta te方法可以实现对象的旋转。
它接受一个表示旋转角度的V e ct or3参数,通过改变对象的旋转来实现旋转效果。
下面是一个示例代码:```c sh ar pv o id Up da te(){i f(I np ut.G et Ke yDo w n(Ke yC od e.Q)){t r an sf or m.Ro ta te(V ec to r3.u p,ro tat e Sp ee d);}i f(I np ut.G et Ke yDo w n(Ke yC od e.E)){t r an sf or m.Ro ta te(V ec to r3.d ow n,rot a te Sp ee d);}//其他方向的旋转代码...}```3.M o v e T o w a r d s方法M o ve To wa rd s方法可以实现对象的线性插值移动。
Unity3D一些比较基本的脚本及组件(C#)

Unity3D⼀些⽐较基本的脚本及组件(C#)通过代码创造图形//创建顶点,创建序列,创建⽹格,然后把⽹格赋给⽹格序列器//draw a trianglevoid Start () {Vector3[] vs = new Vector3[3];vs[0] = new Vector3(0,0,0);vs[1] = new Vector3(1,0,0);vs[2] = new Vector3(0,1,0);int[ts] = new int[3];ts[0] = 0;ts[1] = 1;ts[2] = 2; //要注意顺序,要⽤左⼿系,法线向外,拇指向外Mesh mesh = new Mesh();GetComponet<MeshFilter>().mesh = mesh;mesh.vertices = vs; // vertices⾄⾼点mesh.triangles = ts;}///* */////draw a triangle程序封装代码public GameObject Create Triangle(){GameObject obj = new GameObject(“Triangle”);MeshFilter mf = obj.AddComponet<MeshFilter>();obj.AddComponent<MeshRender>();Mesh mesh = new Mesh();mesh.vertices = nes[]{new Vector3(0,0,0);new Vector3(3,0,0);new Vector3(0,3,0);};mesh.triangles = new[]{0,2,1//不⽤分号,初始化系,直接把初始值放进去};mf.mesh = mesh;return obj;}Camera 的性质与使⽤public CameraClearFlags clearFlags; //clearFlags是相机清除表识public ColorbackgroundColor; //给定他的颜⾊,背景⾊,只有单⾊才起作⽤public int cullingMask; //提出掩码public class chapter6 : MonoBehaviour{public GameObject cube;void Start(){ber = 9; //把cube设置在第9层Camera cam = this.GetComponet<Camera>()’cam.clearFlags = CameraClearFlags.SolidColor;cam.backgroundColor = new Vector3(1,0,0,0); //表⽰设置颜⾊cam.cullingMask = 9; //表⽰第9层的都不会被渲染出来,也就是说cube不会显⽰出来}}//CameraClearFlags是⼀个枚举类型,有以下四个成员:solidColor 表⽰⽤backgroundColor所制定的填充背景skybox 表⽰天空盒,模拟天空效果填充Depth 只是清除深度缓存,保留上⼀帧所使⽤的颜⾊Nothing 不进⾏背景清除,这种情况在游戏和模拟应⽤中⽐较少⽤public bool orthographic;//⽤于读取和设定相机的投影⽅式,如果为true则表⽰是正交投影,否则为透视投影;正交投影可⽤于UI和2D开发public float orthographicSize; //⽤以指定正交投影的视景体的垂直⽅向尺⼨的⼀半public Rect rect; //相机对应的视⾓⼝的位置和⼤⼩,rect以单位化形式制定相机视⼝在屏幕中的位置和⼤⼩,位置⼤⼩取值范围为0~1,满屏为1Camera main = this.gameObject.GetComponet<Camera>();this.gameObject.SetActive(false);Camera cam0 = camGO0.AddComponet<Camera>();cam0.orthographic = true;cam0.transform.position = main.transform.position;cam0.transform.rotation = main.transform. rotation;cam0.orthographicSize = 2.0f; //指物体渲染后显⽰的⼤⼩远近,数值越⼤,相机视⼝越靠近该物体,从⽽该物体显⽰出来的更加⼤cam0.rect = new Rect(0f,0f, 0.5f, 0.5f); //前两个参数是camera的位置,后⾯两个参数设置相机⼤⼩(0.5f,0.5f)表⽰占x轴的⼆分之⼀,y轴的⼆分之⼀,所以总共占渲染窗⼝的四分之⼀Camera cam1 = camGO1.AddComponet<Camera>();cam1.orthographic = true;cam1.transform.position = main.transform.position;cam1.transform.rotation = main.transform. rotation;cam1.orthographicSize = 7.0f;cam1.rect = new Rect(0.5f, 0.5f, 0.5f, 0.5f);}Material,Shader,Texture(材质,着⾊器,纹理)光照、纹理等让物体更加的真实。
Unity3D简单的怪物AI代码(C#脚本)
Unity3D简单的怪物AI代码(C#脚本)using UnityEngine;using System.Collections;public class BoosAI : MonoBehaviour{//敌人状态//敌人站立状态public const int STATE_STAND = 0;//敌人行走public const int STATE_WALK = 1;//敌人奔跑状态public const int STATE_RUN = 2;//记录敌人的当前状态private int enemyState;//主角对象private GameObject hero;//备份上一次的敌人思考时间private float backUptime;//敌人思考下一次行为的时间public const int AI_THINK_TIME = 2;//敌人的巡逻范围public const int AI_ATTACK_DISTANCE = 10;// Use this for initializationvoid Start(){//得到主角对象hero = GameObject.Find("Cube");//设置敌人的默认状态站立enemyState = STATE_STAND;}// Update is called once per framevoid Update(){//判断敌人与主角的距离if (Vector3.Distance(transform.position, hero.transform.position) <(AI_ATTACK_DISTANCE)){//敌人进入奔跑状态gameObject.animation.Play("run");enemyState = STATE_RUN;//设计敌人面朝主角方向transform.LookAt(hero.transform);}//敌人进入巡逻状态else{//计算敌人的思考时间if (Time.time - backUptime >= AI_THINK_TIME){//敌人开始思考backUptime = Time.time;//取得0~2之间的随机数int rand = Random.Range(0,2);if (rand == 0){//敌人进入站立状态gameObject.animation.Play("idle");enemyState = STATE_STAND;}else if (rand == 1){//敌人进入站立状态//敌人随机旋转角度Quaternion rotate = Quaternion.Euler(0,Random.Range(1,5) * 90,0);//1秒内完成敌人旋转transform.rotation = Quaternion.Slerp(transform.rotation,rotate,Time.deltaTime * 1000);//播放行走动画gameObject.animation.Play("walk");enemyState = STATE_WALK;}}}switch (enemyState){case STATE_STAND:break;case STATE_WALK://敌人行走transform.Translate(Vector3.forward * Time.deltaTime);break;case STATE_RUN://敌人朝向主角奔跑if (Vector3.Distance(transform.position, hero.transform.position) > 3){transform.Translate(Vector3.forward * Time.deltaTime * 3);}break;}}}。
unity3d打砖块游戏代码
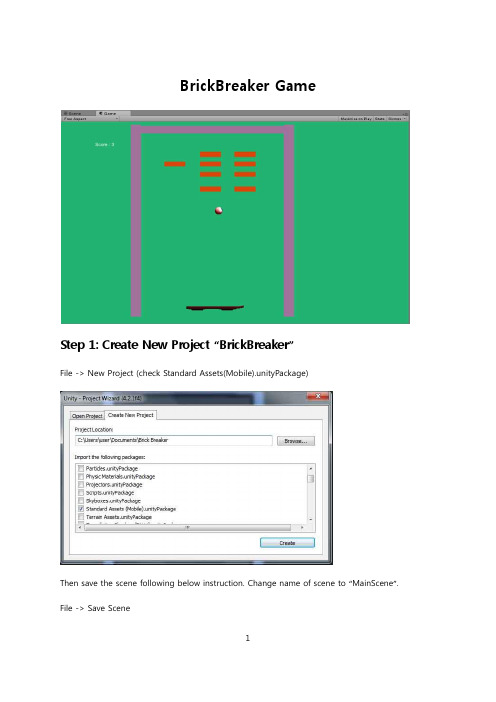
BrickBreaker GameStep 1: Create New Project “BrickBreaker”File -> New Project (check Standard Assets(Mobile).unityPackage)Then save the scene following below instruction. Change name of scene to “MainScene”. File -> Save SceneStep 2: Set Main CameraThe position, rotation and scale of Main Camera are showed following figure.Change background color whatever you want.Change projection perspective -> orthographicSize = 20Clipping Planes : Near = 0.3 Far = 25Step 3: Create Directional LightGameObject-> Create Other -> Directional LightStep 4: Create WallsCreate new cube following this instruction:GameObject -> Create Other -> CubeChange Cube Name to “ WallLeft”.“WallLeft” position, rotation and scale are following below figureChange “Main Color”.Create material from the “Project” section.Create -> MaterialName Material “wallMat” and change color. Then drag “wallMat” to the WallLeft.Create new cube following this instruction:GameObject -> Create Other -> CubeChange Cube Name to “ WallRight”.“WallRight” position, rotation and scale are following below figureChange ‘Main Color”Drag “wallMat” to the WallRight.Create new cube following this instruction:GameObject -> Create Other -> CubeChange Cube Name to “ WallTop”.“WallTop” position, rotation and scale are following below figureChange ‘Main Color”Then drag “wallMat” to the WallTop.Step 5: Create BricksGameObject -> Create Other -> CubeChange cube name to “brick”.“brick” position, rotation and scale are following below figure.Create new material from “Project” section and name “brickMat” and change color. Then drag to “brick”.Then copy “brick” 12 times following below figure.Step 6: Create BallWindows -> Asset StoreType ball pack and enter.Then click download button and import button to import to project this model.Then choose “eyeball” from the ball pack and drag to “scene”. “EyeBall” position, rotation and scale are following below figure.Add Rigidbody to “EyeBall” following below instruction.Component -> Physics -> RigidbodyMass = 0.01Uncheck “Use Gravity”Check Freeze Position -> ZAdd Sphere Collider to “EyeBall” following below figure. Component -> Physics -> Sphere Collider.Then select Material None -> BouncyStep 7: Create PaddleWindow - > Asset StoreType Hoverboard and click download button then click import button to import to project.Drag hoverboard to “Scene”. Name hoverboard to “Paddle”.Hoverboard position, rotation and scale are following below figure.Add Box Collider to Paddle following below instructionComponent -> Physics -> Box Collider Don’t change anything.Step 8: Create Score Text GameObject -> Create Other-> GUI Text Name GUI Text to Score.Change Text to “Score:”Step 9: Create PaddleControllerCreate new javascript from “Project“ section following below instructionCreate -> JavaScriptThen drag to “Paddle” on HierarchyPaddleController.jsfunction Update (){// paddle direction is just moved to x position right and left.transform.position.x = Camera.main.ScreenToWorldPoint (Input.mousePosition).x ; // x direction limit is from -19 to 11.transform.position.x = Mathf.Clamp( transform.position.x, -19, 11);}function OnCollisionEnter(collision : Collision){// collision overall speedvar velo = collision.rigidbody.velocity.magnitude;// collision speed is changing to x positioncollision.rigidbody.velocity.x = (collision.transform.position.x -transform.position.x)*8;if (collision.rigidbody.velocity.magnitude < velo){collision.rigidbody.velocity *= velo/collision.rigidbody.velocity.magnitude;}}Step 10: Create Ball directionCreate new javascript from project section following below instructionCreate -> JavaScriptThen drag to “Eyeball” on HierarchyBallDirection.js//initial value of speed multiply by 20.var initialSpeed : float = 20;function Start(){//xDir is x position range from -1.0 to 1.0 of Ball.var xDir : float = Random.Range(-1.0,1.0);//y = -1 when game starts ball randomly falling down.rigidbody.AddForce(Vector3( xDir, -1, 0) * initialSpeed );}Step 11: Create BrickDestroyCreate new javascript from project section following below instruction Create -> JavaScriptThen drag to “Eyeball” on HierarchyBrickDestroy.jsfunction OnCollisionEnter(myCol: Collision){if( == "brick"){// when ball collide with gameObject “brick”, score will be added by 1.Score.score++;// when ball collide with gameObject “brick” , brick will be destroyed.Destroy(myCol.gameObject);}}Step 12: Create GameOverCreate new scene following below instructionFile -> SceneThe Create new GUI Text following below instructionGameObject -> Create Other -> GUI TextChange Text to “Game Over”Change Anchor to “middle center”Change Font size to “71”Then build 2 scenes following below instruction.File -> Build Settings.Because after 1 scene the another scene has to work.Create new javascript from project section following below instruction Create -> JavaScriptThen drag to “Eyeball” on HierarchyGameOver.jsfunction Update () {//if y position of ball is lower than -20, “GameOver” scene will be appeared.if(rigidbody.position.y < -20){Application.LoadLevel("gameOver");}}Step 13: Create ScoreCreate new javascript from project section following below instruction Create -> JavaScriptThen drag to “Main Camera” on HierarchyScore.jsstatic var score : float = 0;var scoreText: GUIText;function Update(){//showing Score textscoreText.text = "Score : " + score;}Then Drag “Score” on Hierarchy to Score Text of “Main Camera”.Step 14: Create RestartCreate new javascript from project section following below instruction Create -> JavaScriptThen Open “GameOver” sceneThen drag to “Main Camera” on HierarchyRestart.js//if click mouse button on the scene, “MainScene” will be appeared.function Update() {if(Input.GetMouseButtonDown(0))Application.LoadLevel("MainScene");}。
Unity3D常用代码
} else {
if ((Screen.width / (float)Screen.height) < (screenSize.x / screenSize.y)) {
if (scaleType == ScreenScaleType.Fit) {
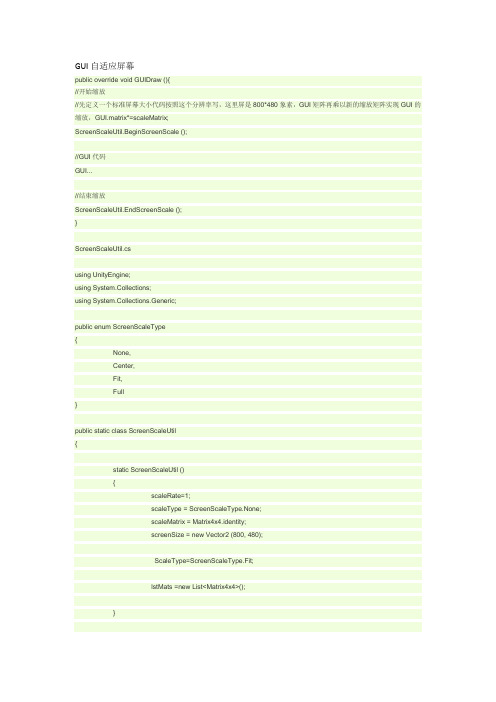
GUI自适应屏幕
public override void GUIDraw (){
//开始缩放
//先定义一个标准屏幕大小代码按照这个分辨率写,这里屏是800*480象素,GUI矩阵再乘以新的缩放矩阵实现GUI的缩放,GUI.matrix*=scaleMatrix;
ScreenScaleUtil.BeginScreenScale ();
}
public static void EndScreenScale(){
if(lstMats.Count<=0)
return;
GUI.matrix=lstMats[lstMats.Count-1];
lstMats.RemoveAt(lstMats.Count-1);
}
}
1 GUI汇总
function OnGUI() {
GUI.matrix*=ScaleMatrix;
}
public static void BeginScreenScale(ScreenScaleType scaleType ){
if(lstMats.Count>0){s.Add(GUI.matrix);
GUI.matrix*=GetScreenScaleMatrix(screenSize,scaleType);
screenSize = new Vector2 (800, 480);
unity3d编辑器模式下运行

unity3d编辑器模式下运⾏ Unity游戏引擎提供给开发者很多⾯板的⾃定义设置和配置,其中在c#脚本中引⽤⼀个特性[ExecuteInEditMode]就可以在游戏未运⾏的状态下执⾏c#脚步,对于开发者来说,这很⽅便调试。
当前看看该特性下代码在Start()和Update()函数中会的执⾏规律。
1.脚本如下(以下脚本均是在Unity 2020.1.0a12 (64-bit)编辑器下运⾏)using UnityEngine;[ExecuteInEditMode]public class MyEditorScript : MonoBehaviour{void Start(){print("Start");}void Update(){print("Update, time = " + Time.time);}}2.将脚本拖拽到游戏体上,看看debug信息Start()和Update()中只执⾏了⼀次。
3.我发现当我切换窗⼝然后再切回unity界⾯的时候,Update()执⾏了⼀次。
4.当我在场景中有任何修改的时候Update()也都执⾏了⼀次,其中包括重命名、创建物体、transform物体,enable/disable物体、保存修改等等均会发⽣。
5.有意思的是,当我disable脚本再enable脚本的时候,Start()并没有执⾏,只有Update()执⾏了⼀次,我继续在代码中添加Awake()函数,看看disable/enable之后,Awake()会不会执⾏。
using UnityEngine;[ExecuteInEditMode]public class MyEditorScript : MonoBehaviour{private void Awake(){print("Awake");}void Start(){print("Start");}void Update(){print("Update, time = " + Time.time);}}(重新拖拽到物体上的debug信息)遗憾的是Awake()并没有执⾏,Awake与Start()⼀样只在脚本拖拽到物体的时候才执⾏。
Unity3D常用代码集合
}
}
2、检测输入
function Update(){
if(Input.GetButtonUp("Jump")){
Debug.Log("We Have Hit the Space Bar!");
}
}
3、销毁对象
function Start(){
Destroy(gameObject.Find("Box"),3);
}
建立JAVA,把代码拖入到空GameJect上,然后把Prefab拖入到公共变量上。
5、简易定时器
varmyTimer:float=5.0;
function Update(){
if(myTimer>0){
myTimer-=Time.deltaTime;
}
if(myTimer<=0){
Debug.Log("GAME OVER");
Unity3D常用代码集合
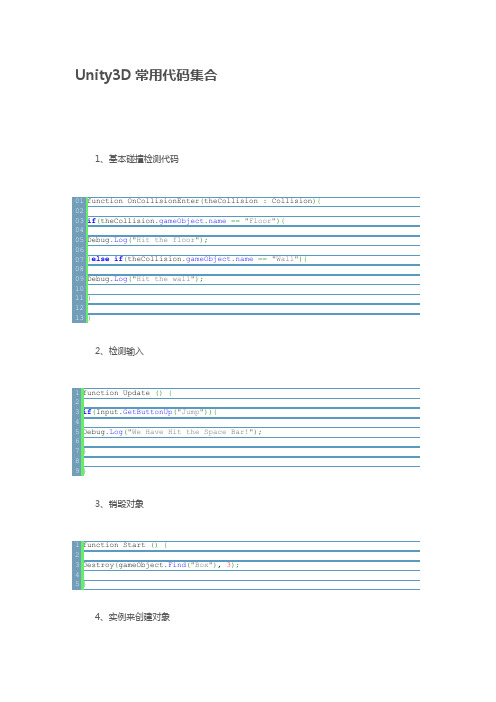
1、基本碰撞检测代码
function OnCollisionEnter(theCollision:Collision){
if(=="Floor"){
Debug.Log("Hit the floor");
}elseif(=="Wall"){
}
}
6、物体在屏幕上移动
varspeed:float=5.0;
function Update(){
transform.Translate(Vector3(0,0,speed)*Time.deltaTime);
Unity3D常用API之Invoke函数调用

Unity3D常⽤API之Invoke函数调⽤1.⾦钱副本细节完善1.1.宝箱⾃动掉落给宝箱预制体添加刚体组件即可。
1.2.实现按键宝箱批量掉落①将实例化⽣成宝箱的代码单独封装成⼀个函数;②使⽤ for 循环,批量⽣成宝箱。
按⼀次z键就同时实例化出6个物体,演⽰:1.3.宝箱⾃动掉落现在我们是通过按下某键,然后程序调⽤“⽣成宝箱”的函数,来实现功能。
在真正的游戏中,这个“⽣成宝箱”的函数,也是需要由程序⾃动调⽤的。
那么如何实现那??继续往下看2.Invoke 函数2.1.Invoke 函数代码Invoke(string,float):多少秒后执⾏某个函数[只会调⽤⼀次]。
参数说明:String:要执⾏的函数的名称;Float:秒数,倒计时的时间;2.2.InvokeRepeating 函数代码InvokeRepeating(string,float,float):多少秒[第⼆个参数]后执⾏某个函数,并且以后每隔多少秒[第三个参数]都会执⾏该函数⼀次[重复调⽤N次]。
参数说明:String:要执⾏的函数的名称;Float:秒数,准备时间,预热时间;Float:秒数,重复调⽤的间隔时间;演⽰:CancelInvoke():取消这个脚本中所有的 Invoke 调⽤。
2.3.认识Invoke 函数Class 类可以理解成是⼀个“家”,各种各样的函数(⽅法),字段,属性可以理解成是这个“家”的家庭成员。
那么,这三个 Invoke 相关的函数,他们的家在哪⼉?回答:MonoBehaviour类。
我们现在写的脚本,都是默认继承“MonoBehaviour”类的,我们⾃⼰写的脚本类,都是这个“MonoBehaviour”类的⼦类,所以我们可以直接通过写⽅法名的形式,就可以调⽤⽗类中的⽅法。
光标放在MonoBehaviour上,按F12,可以调出这个类的声明;3.⾦钱副本主⾓控制1.主⾓基本控制①创建⼀个 Cube 模型,美化⼀下,作为主⾓(Player);②添加刚体组件,使⽤刚体的 MovePosition 结合按键控制主⾓移动。
unity3d功能脚本大全
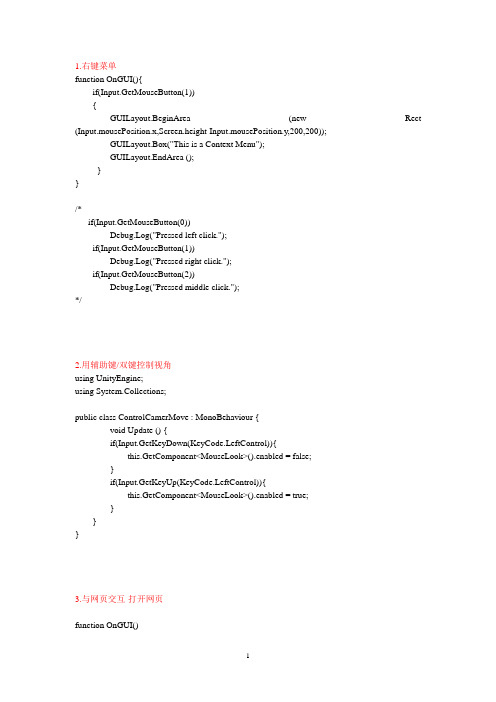
1.右键菜单function OnGUI(){if(Input.GetMouseButton(1)){GUILayout.BeginArea (new Rect (Input.mousePosition.x,Screen.height-Input.mousePosition.y,200,200));GUILayout.Box("This is a Context Menu");GUILayout.EndArea ();}}/*if(Input.GetMouseButton(0))Debug.Log("Pressed left click.");if(Input.GetMouseButton(1))Debug.Log("Pressed right click.");if(Input.GetMouseButton(2))Debug.Log("Pressed middle click.");*/2.用辅助键/双键控制视角using UnityEngine;using System.Collections;public class ControlCamerMove : MonoBehaviour {void Update () {if(Input.GetKeyDown(KeyCode.LeftControl)){this.GetComponent<MouseLook>().enabled = false;}if(Input.GetKeyUp(KeyCode.LeftControl)){this.GetComponent<MouseLook>().enabled = true;}}}3.与网页交互-打开网页function OnGUI()bel("当前场景:"+ Application.loadedLevelName);if(GUILayout.Button("打开网页"))Application.OpenURL("");}4.在unity中播放视频--绘制#pragma strictvar movTexture:MovieTexture;function Start (){movTexture.loop = true;}function OnGUI(){GUI.DrawTexture(new Rect (0,0,Screen.width,Screen.height),movTexture,ScaleMode.StretchToFill);if(GUILayout.Button("播放/继续")){if (!movTexture.isPlaying){movTexture.Play();}}if(GUILayout.Button("暂停播放")){movTexture.Pause();}if(GUILayout.Button("停止播放")){ 贴图movTexture.Stop();}}5.在unity中播放视频--作为plane的材#pragma strictvar movTexture:MovieTexture;function Start (){this.renderer.material.mainTexture = movTexture;movTexture.loop = true;}function OnGUI(){if(GUILayout.Button("播放/继续")){if (!movTexture.isPlaying){movTexture.Play();}}if(GUILayout.Button("暂停播放")){movTexture.Pause();}if(GUILayout.Button("停止播放")){movTexture.Stop();}}6.用材质偏移模拟水流效果using UnityEngine;using System.Collections;public class Whatflow : MonoBehaviour {public float scrollSpeed=3;void Update () {float offset = Time.time*scrollSpeed;renderer.material.SetTextureOffset("_MainTex",new Vector2(0,offset));}}7.从网页上获取一张图片并动态使用var url = "/attachments/images/201011/20101110/20101109_da85542f8635f3c5 b963vil1B8qeeS9O.jpg";function Start () {var www : WWW = new WWW (url);//定义www为WWW类型并且等于被下载的内容。
unity3D代码规范及项目目录结构

项目目录及代码规范一、目录部分(公共规范)1.自定义目录以”_”开头(一级目录也是就在Assets目录下面的自定义目录)(之前有看过一篇文章说如此做法的好处是:文件夹下如果没有用到的资源,打包时不会被打入进去);建议场景以双下划线”__”开头,保证场景永远在所有文件夹的最前边。
2.--Editor 自写的灵活方便插件--Editor_NGUI 较大型三方的插件(前面加上Editor是为了让所有编辑器都集中在一块)(--NGUI 较大型三方的插件,如果你们目录不多,看起来不乱不改名字也没问题。
方便更新。
如果用的插件比较多的话,还是将它放到Plugins下面。
只是更新的时候需要注意一下就是了。
)--Gizmos 使用GIZMOS所需要的标志等临时文件--StreamingAssets (包括JsonData目录/Assetbundle目录/各种只读文件预储存目录,这个目录将自动打包到导出程序,用Application.streamingAssetsPath读取)--Models 模型文件,其中会包括自动生成的材质球文件--Others 其他类型的文件(一般作为不常修改的文件类型,例如添加的Shader、物理材质、动画文件。
)若认为是比较常用的话,可以提取成一个文件夹。
--Plugins 主要是DLL的外部插件文件,例如JsonFx、SmartFoxClient等--Prefabs 预储存文件--Resources 动态加载的资源文件,一般这里只用少量,多的话,需要自己打ASSETBUNDLE 包,有选择性的动态加载--Scenes 场景文件--Scripts 脚本代码文件--Sounds 音效文件--Textures 所有的贴图增加一个大写字母Z打头的测试文件夹,比如Ztest,所有的测试内容都可以放到这个文件夹,好处是该文件夹永远处于所有文件夹的最下面,而且最后打包的时候可以完全删掉,保证测试的内容都剔除出去。
中文Unity3D脚本

Unity3D脚本参考概览运行时类附加姜凡2012-2-25一、脚本概览这是一个关于Unity内部脚本如何工作的简单概览。
Unity内部的脚本,是通过附加自定义脚本对象到游戏物体组成的。
在脚本对象内部不同志的函数被特定的事件调用。
最常用的列在下面:Update:这个函数在渲染一帧之前被调用,这里是大部分游戏行为代码被执行的地方,除了物理代码。
FixedUpdate:这个函数在每个物理时间步被调用一次,这是处理基于物理游戏的地方。
在任何函数之外的代码:在任何函数之外的代码在物体被加载的时候运行,这个可以用来初始化脚本状态。
注意:文档的这个部份假设你是用Javascript,参考用C#编写获取如何使用C#和Boo编写脚本的信息。
你也能定义事件句柄,它们的名称都以On开始,(例如OnCollisionEnter),为了查看完整的预定义事件的列表,参考MonoBehaviour 文档。
概览:常用操作大多数游戏物体的操作是通过游戏物体的Transform或Rigidbody来做的,在行为脚本内部它们可以分别通过transform和rigidbody访问,因此如果你想绕着Y轴每帧旋转5度,你可以如下写:function Update(){transform.Rotate(0,5,0);}如果你想向前移动一个物体,你应该如下写:function Update(){transform.Translate(0,0,2);}概览:跟踪时间Time类包含了一个非常重要的类变量,称为deltaTime,这个变量包含从上一次调用Update 或FixedUpdate(根据你是在Update函数还是在FixedUpdate函数中)到现在的时间量。
所以对于上面的例子,修改它使这个物体以一个恒定的速度旋转而不依赖于帧率:function Update(){transform.Rotate(0,5*Time.deltaTime,0);}移动物体:function Update(){transform. Translate (0, ,0,2*Time.deltaTime);}如果你加或是减一个每帧改变的值,你应该将它与Time.deltaTime相乘。
unity3d 列表的linq用法

unity3d 列表的linq用法LINQ是Language-Integrated Query(语言集成查询)的缩写,它是一种强大的查询语言,用于在数据集合中检索、过滤和操作数据。
在Unity3D中,LINQ可用于操作游戏对象列表、组件列表、组件属性等。
下面将介绍Unity3D中列表的LINQ用法。
在Unity3D中,可以使用LINQ查询游戏对象列表、组件列表等。
以下是一些常见的LINQ用法示例:1. 查询游戏对象列表:```c# GameObject[] gameObjects =GameObject.FindObjectsOfType<GameObject>();IEnumerable<GameObject> filteredObjects =gameObjects.Where(obj => == "MyGameObject"); ```上述代码中,使用`FindObjectsOfType<GameObject>()`方法获取所有游戏对象,并使用LINQ查询过滤出名称等于"MyGameObject"的游戏对象。
2. 查询组件列表:```c# Component[] components =gameObject.GetComponentsInChildren<Component>(); IEnumerable<Component> filteredComponents =components.Where(comp => == "MyComponent"); ```上述代码中,使用`GetComponentsInChildren<Component>()`方法获取指定游戏对象子对象下的所有组件,并使用LINQ查询过滤出名称等于"MyComponent"的组件。
Unity3d 常用代码集
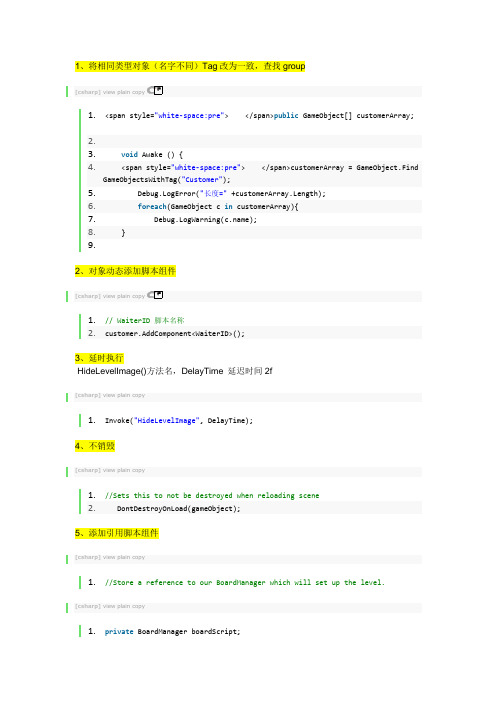
1、将相同类型对象(名字不同)Tag改为一致,查找group[csharp]view plain copy1.<span style="white-space:pre"> </span>public GameObject[] customerArray;2.3.void Awake () {4. <span style="white-space:pre"> </span>customerArray = GameObject.FindGameObjectsWithTag("Customer");5. Debug.LogError("长度=" +customerArray.Length);6.foreach(GameObject c in customerArray){7. Debug.LogWarning();8. }9.2、对象动态添加脚本组件[csharp]view plain copy1.// WaiterID 脚本名称2.customer.AddComponent<WaiterID>();3、延时执行HideLevelImage()方法名,DelayTime 延迟时间2f[csharp]view plain copy1.Invoke("HideLevelImage", DelayTime);4、不销毁[csharp]view plain copy1.//Sets this to not be destroyed when reloading scene2. DontDestroyOnLoad(gameObject);5、添加引用脚本组件[csharp]view plain copy1.//Store a reference to our BoardManager which will set up the level. [csharp]view plain copy1.private BoardManager boardScript;2.void Awake(){3.//Get a component reference to the attached BoardManager script4. boardScript = GetComponent<BoardManager>();5.}6、实例化 Instantiate[csharp]view plain copying UnityEngine;ing System.Collections;3.4.public class Launcher : MonoBehaviour {5.6.public GameObject ballPrefab;7.// Use this for initialization8.void Start () {9.10. }11.12.// Update is called once per frame13.void Update () {14.// 1 : 鼠标右键15.if(Input.GetMouseButtonDown(1)){16. Instantiate(ballPrefab);17. }18. }19.}7、不在camera 视野内,对象销毁[csharp]view plain copy1.<span style="white-space:pre"> </span>// 画面看不到销毁2.void OnBecameInvisible(){3. Destroy(this.gameObject);4. }1、Start() 开始方法;2、Update() 正常更新逻辑,每渲染一帧都会调用3、FixedUpdate() 不受帧率的变化,固定的时间间隔被调用,怎么设置间隔?Edit->Project Setting->time 下面的Fixed timestep4、LateUpdate() 会在每一帧中被调用。
unity 3d 三款游戏完整(入门进阶必备)代码
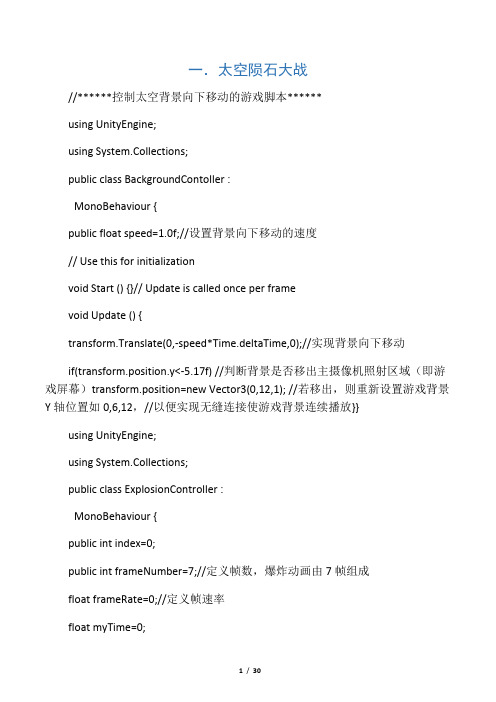
一.太空陨石大战//******控制太空背景向下移动的游戏脚本******using UnityEngine;using System.Collections;public class BackgroundContoller :MonoBehaviour {public float speed=1.0f;//设置背景向下移动的速度// Use this for initializationvoid Start () {}// Update is called once per framevoid Update () {transform.Translate(0,-speed*Time.deltaTime,0);//实现背景向下移动if(transform.position.y<-5.17f) //判断背景是否移出主摄像机照射区域(即游戏屏幕)transform.position=new Vector3(0,12,1); //若移出,则重新设置游戏背景Y轴位置如0,6,12,//以便实现无缝连接使游戏背景连续播放}}using UnityEngine;using System.Collections;public class ExplosionController :MonoBehaviour {public int index=0;public int frameNumber=7;//定义帧数,爆炸动画由7帧组成float frameRate=0;//定义帧速率float myTime=0;int myIndex=0;// Use this for initializationvoid Start () {frameRate=1.0f/frameNumber;//帧速率,帧数framenumber=7}// Update is called once per framevoid Update () {myTime+=Time.deltaTime;//统计爆炸效果动画累计播放的时间myIndex=(int)(myTime*frameNumber);//计算“我的索引值”,使用(int)转成整形:0,2,3,4,5,6//Debug.Log("(int)(myTime*frameNumber)");//Debug.Log((int)(myTime*frameNumber));index=myIndex % frameNumber ;//除以7求余数得索引:0,2,3,4,5,6//Debug.Log(myIndex % frameNumber);render.material.mainTextureScale=new Vector2(frameRate,1);//通过render.material.mainTextureScale设置tiling帧宽属性render.material.mainTextureOffset=new Vector2(index*frameRate,0);//通过render.material.mainTextureOffset设置帧偏移量if(index==frameNumber-1)//如果动画帧数播放完等于6,即索引等于6,则销毁动画Destroy (gameObject);}}using UnityEngine;using System.Collections;public class LoseController :MonoBehaviour {public Texture loseTexture;// Use this for initializationvoid Start () {RockController.score=0;RockController.lives=3;TimeRemainDisplay.leftTime=100;}// Update is called once per framevoid OnGUI () {GUI.DrawTexture(new Rect(0,0,Screen.width,Screen.height),loseTexture);if(Input.anyKeyDown){Application.LoadLevel("Level");}}}//****控制飞机的游戏脚本****using UnityEngine;using System.Collections;public class PlayerController :MonoBehaviour {public float speed=2.0f;//定义飞机在X轴上的移动速度public GameObject projectile;//定义一个共有子弹对象// Use this for initializationvoid Start () {}// Update is called once per framevoid Update () {transform.Translate(speed*Input.GetAxis("Horizontal")*Time.deltaTime,0,0);//实现飞机在X轴上,按下左右键时可水平移动,speed一定要乘上if(Input.GetKeyDown(KeyCode.Space))//判断是否按下xxInstantiate(projectile,transform.position,transform.rotation);//按下空格键时,发射炮弹对象projectile,炮弹发射位置飞机中部transform。
Unity3D的命令手册
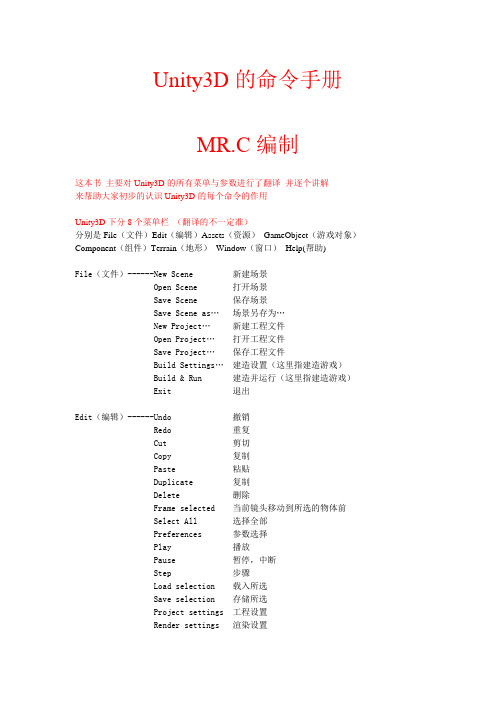
Unity3D的命令手册MR.C编制这本书主要对Unity3D的所有菜单与参数进行了翻译并逐个讲解来帮助大家初步的认识Unity3D的每个命令的作用Unity3D下分8个菜单栏(翻译的不一定准)分别是File(文件)Edit(编辑)Assets(资源)GameObject(游戏对象)Component(组件)Terrain(地形)Window(窗口)Help(帮助)File(文件)------New Scene 新建场景Open Scene 打开场景Save Scene 保存场景Save Scene as…场景另存为…New Project…新建工程文件Open Project…打开工程文件Save Project…保存工程文件Build Settings…建造设置(这里指建造游戏)Build & Run 建造并运行(这里指建造游戏) Exit 退出Edit(编辑)------Undo 撤销Redo 重复Cut 剪切Copy 复制Paste 粘贴Duplicate 复制Delete 删除Frame selected 当前镜头移动到所选的物体前Select All 选择全部Preferences 参数选择Play 播放Pause 暂停,中断Step 步骤Load selection 载入所选Save selection 存储所选Project settings 工程设置Render settings 渲染设置Graphics emulation图形仿真Network emulation 网络仿真Snap settings 对齐设置Assets (资源)-----Reimport 重新导入Create 创建Show in Explorer 在资源管理器中显示Open 打开(打开脚本)Import New Asset...导入新的资源Refresh 刷新Import Package... 导入资源包Export Package... 导出资源包Select Dependencies 选择相关Export ogg file 导出OGG文件Reimport All 重新导入所有Sync VisualStudio Project 同步视觉工作室项目GameObject--------Create Empty 创建一个空的游戏对象(游戏对象) Create Other 创建其他组件Center On Children 子物体归位到父物体中心点Make Parent 创建子父集Clear Parent 取消子父集Apply Changes To Prefab 应用变更为预置Move To View 移动物体到视窗的中心点Align With View 移动物体与视窗对齐Align View to Selected 移动视窗与物体对齐Component(组件)---Mesh 网Particles 粒子Physics 物理Audio 音频Rendering 渲染Miscellaneous 杂项Scripts 脚本Camera-Control 摄像机控制Terrain(地形)-----Create Terrain 创建地形Import Heightmap - Raw... 导入高度图Export Heightmap - Raw... 导出高度图Set Resolution... 设置分辨率Create Lightmap... 创建光影图Mass Place Trees... 批量种植树Flatten Heightmap... 展平高度图Refresh Tree and Detail Prototypes 刷新树及预置细节Window(窗口)------Next Window 下个窗口Previous Window 前窗Layouts 布局Scene 场景窗口Game 游戏窗口Inspector 检视窗口Hierarchy 层次窗口Project 工程窗口Animation 动画窗口 Profiler 探查窗口Asset Server 资源服务器Console 控制台Help(帮助)--------About Unity 关于UnityEnter serial number 输入序列号Unity Manual Unity手册Reference Manual 参考手册Scripting Manual 脚本手册Unity Forum Unity论坛Welcome Screen 欢迎窗口Release Notes 发行说明Report a Problem 问题反馈第一章File(文件)New Scene 新建场景创建一个新的游戏场景Open Scene 打开场景打开一个游戏场景Save Scene 保存场景保存一个游戏场景Save Scene as 场景另存为游戏场景另存为New Project 新建工程文件创建一个新的工程文件Open Project 打开工程文件打开一个工程文件Save Project 保存工程文件保存一个工程文件Build Settings 建造设置导出游戏的设置Build & Run 建造并运行设置并导出游戏Exit退出退出软件这里面我们需要注意的是,创建一个场景与创建一个工程是完全不同的,一个工程文件可以包含多个游戏场景,但场景文件却是唯一的。
unity3d各键值对应代码
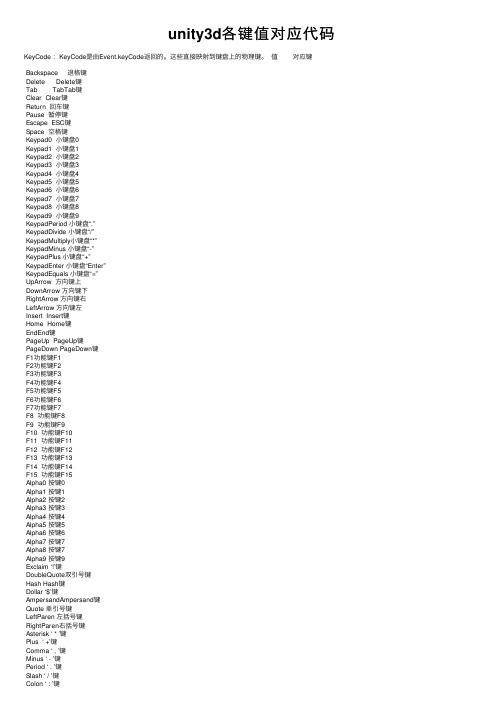
unity3d各键值对应代码KeyCode :KeyCode是由Event.keyCode返回的。
这些直接映射到键盘上的物理键。
值对应键Backspace 退格键Delete Delete键Tab TabTab键Clear Clear键Return 回车键Pause 暂停键Escape ESC键Space 空格键Keypad0 ⼩键盘0Keypad1 ⼩键盘1Keypad2 ⼩键盘2Keypad3 ⼩键盘3Keypad4 ⼩键盘4Keypad5 ⼩键盘5Keypad6 ⼩键盘6Keypad7 ⼩键盘7Keypad8 ⼩键盘8Keypad9 ⼩键盘9KeypadPeriod ⼩键盘“.”KeypadDivide ⼩键盘“/”KeypadMultiply⼩键盘“*”KeypadMinus ⼩键盘“-”KeypadPlus ⼩键盘“+”KeypadEnter ⼩键盘“Enter”KeypadEquals ⼩键盘“=”UpArrow ⽅向键上DownArrow ⽅向键下RightArrow ⽅向键右LeftArrow ⽅向键左Insert Insert键Home Home键EndEnd键PageUp PageUp键PageDown PageDown键F1功能键F1F2功能键F2F3功能键F3F4功能键F4F5功能键F5F6功能键F6F7功能键F7F8 功能键F8F9 功能键F9F10 功能键F10F11 功能键F11F12 功能键F12F13 功能键F13F14 功能键F14F15 功能键F15Alpha0 按键0Alpha1 按键1Alpha2 按键2Alpha3 按键3Alpha4 按键4Alpha5 按键5Alpha6 按键6Alpha7 按键7Alpha8 按键7Alpha9 按键9Exclaim ‘!’键DoubleQuote双引号键Hash Hash键Dollar ‘$’键AmpersandAmpersand键Quote 单引号键LeftParen 左括号键RightParen右括号键Asterisk ‘ * ’键Plus ‘ +’键Comma ‘ , ’键Minus ‘ - ’键Period ‘ . ’键Slash ‘ / ’键Colon ‘ : ’键Semicolon‘ ; ’键Less ‘< ‘键Equals ‘ = ‘键Greater ‘ >‘键Question ‘ ? ’键At ‘@’键LeftBracket‘ [ ‘键Backslash ‘ \ ’键RightBracket‘ ] ’键Caret ‘ ^ ’键Underscore‘ _ ’键BackQuote‘ ` ’键A ‘a’键B ‘b’键C ‘c’键D ‘d’键E ‘e’键F ‘f’键G ‘g’键H ‘h’键I ‘i’键J ‘j’键K ‘k’键L ‘l’键M ‘m’键N ‘n’键O ‘o’键P ‘p’键Q ‘q’键R ‘r’键S ‘s’键T ‘t’键U ‘u’键V ‘v’键W ‘w’键X ‘x’键Y ‘y’键Z ‘z’键Numlock Numlock键Capslock ⼤⼩写锁定键ScrollLockScroll Lock键RightShift 右上档键LeftShift 左上档键RightControl右Ctrl键LeftControl左Ctrl键RightAlt 右Alt键LeftAlt 左Alt键LeftApple 左Apple键LeftWindows左Windows键RightApple右Apple键RightWindows右Windows键AltGr Alt Gr键Help Help键Print Print键SysReq Sys Req键Break Break键Mouse0 ⿏标左键Mouse1 ⿏标右键JoystickButton0 ⼿柄按键0JoystickButton1 ⼿柄按键1Joystick1Button0 第⼀个⼿柄按键0 Joystick1Button1 第⼀个⼿柄按键1 Joystick2Button0 第⼆个⼿柄按键0 Joystick3Button0 第三个⼿柄按键0。
unity代码汇总

父子节点相关的:parent 变量表示Transform的父节点root 表示它的根节点,如果没有父节点,它会返回自己Transform Find(string name) 根据名字查找子节点bool IsChildOf(Transform node) 判断该Transform是否某Transform的子节点void DetachChildren() 解除所有子节点的父子关系1.通过名字找物体GameObject.Find("Player")2.通过名字寻找物体子集transform.FindChild("物体子集名字")3. 显示和隐藏物体gameObject.SetActive(true);4.使用和关闭物体代码gameObject.GetComponent<代码名字>().enable=true;5.按下动画事件if (Input.GetMouseButton(0))按下事件if (Input.GetMouseButtonDown(0))抬起事件if (Input.GetMouseButtonUp(0))6.销毁一样标签的物体GameObject [] objs = GameObject.FindGameObjectsWithTag("标签名");foreach(GameObject obj in objs){Destroy(obj);}7.物体水平匀速移动transform.Translate(-0.1f*Time.deltaTime,0,0);8.<<是除以2,>>是乘以29.位置相关的:5个和位置相关的Vector3类型变量up表示世界坐标的Y轴方向right表示世界坐标的X轴方向forward表示世界坐标的Z轴方向position表示对象在世界坐标系中的位置localPosition表示对象相对父节点变换的坐标位置10.改变物体颜色obj.renderer.material.color=Color.red11. 2个Quaternion类型的变量rotation在世界坐标系中的旋转角度,是一个Quaternion对象(四元数)localRotation相对于父节点的旋转角度12.父子节点相关的:parent变量表示Transform的父节点Transform Find(string name)根据名字查找子节点bool IsChildOf(Transform node)判断该Transform是否某Transform的子节点void DetachChildren()解除所有子节点的父子关系13.鼠标:Input.mousePosition表示鼠标当前的像素位置(坐标系如何?以左下角为原点)接下来这三个函数的参数,0左键,1右键,2中键GetMouseButton对应的键处于按下状态时返回trueGetMouseButtonDown对应的键被按下时返回trueGetMouseButtonUp对应的键弹起时返回true14.OnMouseDown 当鼠标点击到对象的时候回调OnMouseDrag当鼠标拖拽对象时调用,在Ignore Raycast层上无效OnMouseEnter当鼠标进入对象时调用OnMouseExit当鼠标离开对象时调用OnMouseOver当鼠标停留在对象上面时调用OnMouseUpAsButton鼠标在同一个对象上按下,并弹起时调用OnMouseUp跟楼上一样15. gameObject.transform.rotation= new Quaternion (Player.transform.rotation.x, Player.transform.rotation.y, Player.transform.rotation.z, Player.transform.rotation.w);gameObject和Player旋转角度一样!16. 俩个物体之间的距离float Distancefloat Distance = Vector3.Destance(position1,position2);17. 如果玩家和敌人的距离小于10,执行{}代码if( Vector3.Destance(敌人.position,玩家.position)<10f){// 执行相应代码}18.Animation动画01.倒回播放Animation.Rewind();02.停止所有动画Animation.Stop();停止动画Animation.Stop(“动画名字”);03.使用动画循环模式Animation.WropMode= WropMode.loop;04.等待动画播放完成animation.Play(); yiel WaitForSeconds(animation.Clip.Length);05.打印动画长度print(animation["动画名字"].Length);19.数组foreach(Texture2D[] ta in 当前数组){数组长度+=ta.Length;// 加载数组的长度}20.切换关卡的时候,this不移除(this=脚本赋予的对象)DontDestoryOnLoad(this);21.while 是先判断条件,再执行语句。
基于Unity3D实现3D迷宫小游戏的示例代码

基于Unity3D实现3D迷宫⼩游戏的⽰例代码⽬录⼀、前⾔⼆、构思三、正式开发3-1、搭建场景3-2、设置出⼊⼝3-3、添加⾓⾊3-4、实现⾓⾊移动3-5、出⼊⼝逻辑四、总结⼀、前⾔闲来⽆事,从零开始整个《3D迷宫》⼩游戏。
本篇⽂章会详细介绍构思、实现思路,希望可以帮助到有缘⼈。
⼆、构思⾸先,要实现⼀个⼩游戏,⼼⾥肯定要有⼀个⼤概的想法,然后就是将想法完善起来。
我的想法就是⼀个⽤⽴体的墙搭建的迷宫,然后控制⼈物在迷宫中移动,最后找到出⼝,就这么简单。
当然,这是⼀个雏形,⽐如可以加点⾳效、背景、关卡、解密等。
那么整理⼀下实现思路就是:构建3D迷宫实现⼈物移动实现出⼊⼝逻辑OK,下⾯就正式开发。
三、正式开发3-1、搭建场景⾸先,新建个项⽬,我⽤了Unity 2019.4.7f1版本,项⽬名称跟位置按照⾃⼰的喜好设置即可:接下来构建迷宫,先新建⼀个Plane,让它最够⼤,扩⼤10倍:新建Cube,调整⼤⼩缩放,让它看起来像是⼀堵墙,然后构建迷宫:3-2、设置出⼊⼝放两个Cube,设置缩放,将出⼝名字改成Exit,这样就⾏了,到时候通过碰撞检测检测⼩球是否到达出⼝即可。
3-3、添加⾓⾊在Hierarchy视图,右击选择3D Objcet→Capsule,新建⼀个球体,添加Rigibody组件:设置Drag抓地⼒为1。
就这样设置就⾏了,在实际运⾏中如果参数不合适还可以再调整。
将⼩球移动到⼊⼝的位置。
3-4、实现⾓⾊移动这⾥直接使⽤官⽅的第⼀⼈称移动代码RigidbodyFirstPersonController .cs:public class RigidbodyFirstPersonController : MonoBehaviour{[Serializable]public class MovementSettings{public float ForwardSpeed = 8.0f; // Speed when walking forwardpublic float BackwardSpeed = 4.0f; // Speed when walking backwardspublic float StrafeSpeed = 4.0f; // Speed when walking sidewayspublic float RunMultiplier = 2.0f; // Speed when sprintingpublic KeyCode RunKey = KeyCode.LeftShift;public float JumpForce = 30f;public AnimationCurve SlopeCurveModifier = new AnimationCurve(new Keyframe(-90.0f, 1.0f), new Keyframe(0.0f, 1.0f), new Keyframe(90.0f, 0.0f)); [HideInInspector] public float CurrentTargetSpeed = 8f;#if !MOBILE_INPUTprivate bool m_Running;#endifpublic void UpdateDesiredTargetSpeed(Vector2 input){if (input == Vector2.zero) return;if (input.x > 0 || input.x < 0){//strafeCurrentTargetSpeed = StrafeSpeed;}if (input.y < 0){//backwardsCurrentTargetSpeed = BackwardSpeed;}if (input.y > 0){//forwards//handled last as if strafing and moving forward at the same time forwards speed should take precedenceCurrentTargetSpeed = ForwardSpeed;}#if !MOBILE_INPUTif (Input.GetKey(RunKey)){CurrentTargetSpeed *= RunMultiplier;m_Running = true;}else{m_Running = false;}#endif}#if !MOBILE_INPUTpublic bool Running{get { return m_Running; }}#endif}[Serializable]public class AdvancedSettings{public float groundCheckDistance = 0.01f; // distance for checking if the controller is grounded ( 0.01f seems to work best for this )public float stickToGroundHelperDistance = 0.5f; // stops the characterpublic float slowDownRate = 20f; // rate at which the controller comes to a stop when there is no inputpublic bool airControl; // can the user control the direction that is being moved in the air[Tooltip("set it to 0.1 or more if you get stuck in wall")]public float shellOffset; //reduce the radius by that ratio to avoid getting stuck in wall (a value of 0.1f is nice)}public Camera cam;public MovementSettings movementSettings = new MovementSettings();public MouseLook mouseLook = new MouseLook();public AdvancedSettings advancedSettings = new AdvancedSettings();private Rigidbody m_RigidBody;private CapsuleCollider m_Capsule;private float m_YRotation;private Vector3 m_GroundContactNormal;private bool m_Jump, m_PreviouslyGrounded, m_Jumping, m_IsGrounded;public Vector3 Velocity{get { return m_RigidBody.velocity; }}public bool Grounded{get { return m_IsGrounded; }}public bool Jumping{get { return m_Jumping; }}public bool Running{get{#if !MOBILE_INPUTreturn movementSettings.Running;#elsereturn false;#endif}}private void Start(){m_RigidBody = GetComponent<Rigidbody>();m_Capsule = GetComponent<CapsuleCollider>();mouseLook.Init (transform, cam.transform);}private void Update(){RotateView();if (CrossPlatformInputManager.GetButtonDown("Jump") && !m_Jump){m_Jump = true;}}private void FixedUpdate(){GroundCheck();Vector2 input = GetInput();if ((Mathf.Abs(input.x) > float.Epsilon || Mathf.Abs(input.y) > float.Epsilon) && (advancedSettings.airControl || m_IsGrounded)) {// always move along the camera forward as it is the direction that it being aimed atVector3 desiredMove = cam.transform.forward*input.y + cam.transform.right*input.x;desiredMove = Vector3.ProjectOnPlane(desiredMove, m_GroundContactNormal).normalized;desiredMove.x = desiredMove.x*movementSettings.CurrentTargetSpeed;desiredMove.z = desiredMove.z*movementSettings.CurrentTargetSpeed;desiredMove.y = desiredMove.y*movementSettings.CurrentTargetSpeed;if (m_RigidBody.velocity.sqrMagnitude <(movementSettings.CurrentTargetSpeed*movementSettings.CurrentTargetSpeed)){m_RigidBody.AddForce(desiredMove*SlopeMultiplier(), ForceMode.Impulse);}}if (m_IsGrounded){m_RigidBody.drag = 5f;if (m_Jump){m_RigidBody.drag = 0f;m_RigidBody.velocity = new Vector3(m_RigidBody.velocity.x, 0f, m_RigidBody.velocity.z);m_RigidBody.AddForce(new Vector3(0f, movementSettings.JumpForce, 0f), ForceMode.Impulse);m_Jumping = true;}if (!m_Jumping && Mathf.Abs(input.x) < float.Epsilon && Mathf.Abs(input.y) < float.Epsilon && m_RigidBody.velocity.magnitude < 1f){m_RigidBody.Sleep();}}else{m_RigidBody.drag = 0f;if (m_PreviouslyGrounded && !m_Jumping){StickToGroundHelper();}}m_Jump = false;}private float SlopeMultiplier(){float angle = Vector3.Angle(m_GroundContactNormal, Vector3.up);return movementSettings.SlopeCurveModifier.Evaluate(angle);}private void StickToGroundHelper(){RaycastHit hitInfo;if (Physics.SphereCast(transform.position, m_Capsule.radius * (1.0f - advancedSettings.shellOffset), Vector3.down, out hitInfo,((m_Capsule.height/2f) - m_Capsule.radius) +advancedSettings.stickToGroundHelperDistance, Physics.AllLayers, QueryTriggerInteraction.Ignore)){if (Mathf.Abs(Vector3.Angle(hitInfo.normal, Vector3.up)) < 85f){m_RigidBody.velocity = Vector3.ProjectOnPlane(m_RigidBody.velocity, hitInfo.normal);}}}private Vector2 GetInput(){Vector2 input = new Vector2{x = CrossPlatformInputManager.GetAxis("Horizontal"),y = CrossPlatformInputManager.GetAxis("Vertical")};movementSettings.UpdateDesiredTargetSpeed(input);return input;}private void RotateView(){//avoids the mouse looking if the game is effectively pausedif (Mathf.Abs(Time.timeScale) < float.Epsilon) return;// get the rotation before it's changedfloat oldYRotation = transform.eulerAngles.y;mouseLook.LookRotation (transform, cam.transform);if (m_IsGrounded || advancedSettings.airControl){// Rotate the rigidbody velocity to match the new direction that the character is lookingQuaternion velRotation = Quaternion.AngleAxis(transform.eulerAngles.y - oldYRotation, Vector3.up);m_RigidBody.velocity = velRotation*m_RigidBody.velocity;}}/// sphere cast down just beyond the bottom of the capsule to see if the capsule is colliding round the bottomprivate void GroundCheck(){m_PreviouslyGrounded = m_IsGrounded;RaycastHit hitInfo;if (Physics.SphereCast(transform.position, m_Capsule.radius * (1.0f - advancedSettings.shellOffset), Vector3.down, out hitInfo,((m_Capsule.height/2f) - m_Capsule.radius) + advancedSettings.groundCheckDistance, Physics.AllLayers, QueryTriggerInteraction.Ignore)) {m_IsGrounded = true;m_GroundContactNormal = hitInfo.normal;}else{m_IsGrounded = false;m_GroundContactNormal = Vector3.up;}if (!m_PreviouslyGrounded && m_IsGrounded && m_Jumping){m_Jumping = false;}}}MouseLook.cs:public class MouseLook{public float XSensitivity = 2f;public float YSensitivity = 2f;public bool clampVerticalRotation = true;public float MinimumX = -90F;public float MaximumX = 90F;public bool smooth;public float smoothTime = 5f;public bool lockCursor = true;private Quaternion m_CharacterTargetRot;private Quaternion m_CameraTargetRot;private bool m_cursorIsLocked = true;public void Init(Transform character, Transform camera){m_CharacterTargetRot = character.localRotation;m_CameraTargetRot = camera.localRotation;}public void LookRotation(Transform character, Transform camera){float yRot = CrossPlatformInputManager.GetAxis("Mouse X") * XSensitivity;float xRot = CrossPlatformInputManager.GetAxis("Mouse Y") * YSensitivity;m_CharacterTargetRot *= Quaternion.Euler (0f, yRot, 0f);m_CameraTargetRot *= Quaternion.Euler (-xRot, 0f, 0f);if(clampVerticalRotation)m_CameraTargetRot = ClampRotationAroundXAxis (m_CameraTargetRot);if(smooth){character.localRotation = Quaternion.Slerp (character.localRotation, m_CharacterTargetRot, smoothTime * Time.deltaTime);camera.localRotation = Quaternion.Slerp (camera.localRotation, m_CameraTargetRot,smoothTime * Time.deltaTime);}else{character.localRotation = m_CharacterTargetRot;camera.localRotation = m_CameraTargetRot;}UpdateCursorLock();}public void SetCursorLock(bool value){lockCursor = value;if(!lockCursor){//we force unlock the cursor if the user disable the cursor locking helperCursor.lockState = CursorLockMode.None;Cursor.visible = true;}}public void UpdateCursorLock(){//if the user set "lockCursor" we check & properly lock the cursosif (lockCursor)InternalLockUpdate();}private void InternalLockUpdate(){if(Input.GetKeyUp(KeyCode.Escape)){m_cursorIsLocked = false;}else if(Input.GetMouseButtonUp(0)){m_cursorIsLocked = true;}if (m_cursorIsLocked){Cursor.lockState = CursorLockMode.Locked;Cursor.visible = false;}else if (!m_cursorIsLocked){Cursor.lockState = CursorLockMode.None;Cursor.visible = true;}}Quaternion ClampRotationAroundXAxis(Quaternion q){q.x /= q.w;q.y /= q.w;q.z /= q.w;q.w = 1.0f;float angleX = 2.0f * Mathf.Rad2Deg * Mathf.Atan (q.x);angleX = Mathf.Clamp (angleX, MinimumX, MaximumX);q.x = Mathf.Tan (0.5f * Mathf.Deg2Rad * angleX);return q;}}将所有的墙的⽗物体设置为地板。
- 1、下载文档前请自行甄别文档内容的完整性,平台不提供额外的编辑、内容补充、找答案等附加服务。
- 2、"仅部分预览"的文档,不可在线预览部分如存在完整性等问题,可反馈申请退款(可完整预览的文档不适用该条件!)。
- 3、如文档侵犯您的权益,请联系客服反馈,我们会尽快为您处理(人工客服工作时间:9:00-18:30)。
}
}
3、销毁对象
function Start(){
Destroy(gameObject.Find("Box"),3);
}
4、实例来创建对象
//Simple Instantiation of a Prefab at Start
Unity3D常用代码集合
Posted on 2013年01月10日 by U3d /Unity3D脚本/插件/被围观 471 次
1、基本碰撞检测代码
functionOnCollisionEnter(theCollision:Collision){
if(=="Floor"){
Debug.Log("Hit the floor");
}elseif(=="Wall"){
Debug.Log("Hit the wall");
}
}
2、检测输入
function Update(){
if(Input.GetButtonUp("Jump")){
function Update(){
transform.Translate(Vector3(0,0,speed)*Time.deltaTime);
}
7、钢体向目标处移动
//Basic force to move arigidbodyobject
varpower:float=500.0;
function Start(){
varthePrefab:GameObject;
function Start(){
varinstance:GameObject=Instantiate(thePrefab,transform.position,transform.rotation);
}
建立JAVA,把代码拖入到空GameJect上,然后把Prefab拖入到公共变量上。
5、简易定时器
varmyTimer:float=5.0;
function Update(){
if(myTimer>0){
myTimer-=Time.deltaTime;
}ห้องสมุดไป่ตู้
if(myTimer<=0){
Debug.Log("GAME OVER");
}
}
6、物体在屏幕上移动
varspeed:float=5.0;
rigidbody.AddForce(Vector3(0,0,power));
}
8、碰撞然后转到下一场景
functionOnCollisionEnter(Collision:Collision){
if(=="Floor"){
Application.LoadLevel(myLevel);
}
}
floor---被动碰撞的的纲体
把代码拉到主动纲体上,然后场景设置:file----buildseting----对话框,然后把当前场景拖里,然后把下一场景拖里,测试OK!
