智能空调控制器用户手册
美的空调说明书

美的空调说明书美的,空调,说明书篇一:美的中央空调操作说明书美的中央空调一:线控器面板使用说明① 运行模式指示:按“模式”按钮则显示当前的操作方式。
可选择“自动”、“制冷”、“抽湿”、“制热”、“送风”、等操作方式。
② 风速指示:按“风速”按钮则显示所选择的风扇速度。
可选择“自动”、“低风”、“中风”、“高风”等。
③ 经济运行显示:按“经济”按钮则显示,再按压此按钮则图标显示消失。
④ 锁定显示:按“锁定”按钮则显示锁定图标,再按压此按钮则图标显示消失。
在锁定状态下,除锁定按钮外所有按钮操作均无效。
⑤ 时钟显示:通常状况下显示当前设定的时间。
按“时钟”按钮4秒钟,小时部分闪烁,按“▲”或“▼”进行小时调整,再按“时钟”按钮,分钟部分闪烁,按“▲”或“▼”进行分钟调整,时钟设定或更改时钟设定后,必须按确认按钮才能设定或更改成功。
⑥ 定时开关显示:在定时开调整状态或只设定定时开功能后显示“开”;在定时关调整状态或只设定定时关功能后显示“关”。
⑦ 温度显示区:通常状态下显示设定温度。
按温度调节按钮“▲”“▼”即可进行温度设定,在“送风”模式下,该显示区无数字显示。
① 模式选择按钮:用于选择运行方式,每按一次按钮,则运行方式就按下述依次变化;自动→ 制冷→ 抽→湿→制热→ 送风→自动② 定时开按钮:按压此按钮,设定定时开,以后每按一次定时开时间便增加0.5小时,当设定定时开的时间大于10小时后,每按一次便增加1小时。
如果取消定时开,只需将定时开时间调为“0.0”即可。
③ 定时关按钮:按压此按钮,设定定时关,以后每按一次定时开时间便增加0.5小时,当设定定时关的时间大于10小时后,每按一次便增加1小时。
如果取消定时关,只需将定时关时间调为“0.0”即可。
④ 时钟按钮:正常情况下显示当前设定的时钟(初次上电或复位时显示12:00)。
当按住此按钮4秒,时钟显示的小时部分以0.5秒闪烁,再可通过“▲、▼”按钮调整小时;如再按下时钟按钮,分钟显示部分以0.5秒闪烁,再按“▲、▼”按钮调整分钟。
小米 1.5匹 米家智能空调 用户手册说明书
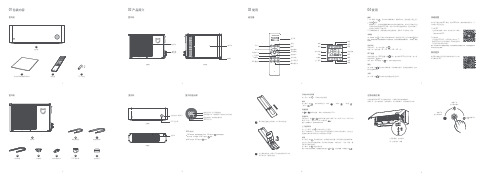
12108粗连接配管5室外机11排水转接弯头9排水软管细连接配管7穿墙帽PVC 保护带密封胶泥01包装内容02 产品简介遥控器室内机室外机室外机03使用04 使用正视图应急运转控制快速设置购买更多在遥控器和手机APP 无法控制空调时,可使用应急运转按键操作:按键一次,进入制冷模式;连续按两次,进入制热模式;长按按键3秒关机。
本产品可通过米家APP 操控,支持MIUI 系统,兼容米家智能平台,可与其他产品互联互通。
1. 下载 APP在应用商店搜索“米家”或扫描下方二维码 下载安装米家APP 。
2. 添加设备打开米家APP 首页,在页面右上角点击“+” , 根据APP 提示方式添加设备。
添加成功后即 可在首页列表找到此设备。
提示:因米家APP 升级更新等原因,可能实际操作与此描述不符,请按照当前米家APP 内指 引进行操作。
购买更多智能产品及品质好物请扫描下方二维码下载有品APP 。
打开前面板,在右侧找到“应急运转”按键按键2次进入制热模式长按按键3秒关机按键1次进入制冷模式开启或关闭空调器按“开关”键 ,开启或关闭空调器。
模式按“模式”键 ,依次切换并显示“制冷” 、“制热”、“除湿” 、 “送风” 模式。
设置温度按 或 键调节温度,每按一次增加或减少0.5℃。
风速调节开机状态下,按 或 键调节风速可选择:微风(1挡)、低风(2挡)、中风(3挡)、高风(4挡)、强力风(5挡)或自动风 。
提示:送风模式下,自动风功能不可用。
上下摆风调节按“上下摆风”键 开启或关闭上下摆风。
提示:制热模式下,导风叶片会在水平位置停留几分钟后才开始摆动,以防止在温度未升高时将冷风吹到人体所造成的不适感。
舒适按“舒适”键 开启舒适功能,空调器会自动设置、调节到适合的温度和风速。
您也可以手动调节温度和风速、开启或关闭电辅热。
关机状态下,可按“舒适”键开机并开启舒适功能。
按“模式”键 退出舒适功能。
提示:开启了舒适功能后,遥控器显示屏上显示 和 ,不显示温度,风速显示为 。
智能空调控制器用户手册

大金控制手册

大金控制手册最新(总47页) -CAL-FENGHAI.-(YICAI)-Company One1-CAL-本页仅作为文档封面,使用请直接删除大金(中国)投资有限公司技术部前言目前,空调市场对控制系统的要求越来越多,为了方便公司员工能够更好地对应用户所提出的控制需求,了解掌握大金控制产品知识,故整理总结了相关控制产品及知识,并制作成册。
本手册中总结了公司现有自控产品的规格、功能及设计要点等,方便大家查阅。
本手册在内容上还有不尽完善之处,虽经多次校对,但难免还有遗漏甚至出错之处,今后将不断更新充实内容。
3空调单独控制、集中控制i-M a n a g e rⅢ2 i-C o n t r o l l e r4 i-e a s y6集中遥控器79统一O N/O F F开关空调状态显示及故障报警i-M a n a g e rⅢ2 i-C o n t r o l l e r4 i-e a s y6集中遥控器7统一O N/O F F开9关温度控制i-M a n a g e rⅢ2 i-C o n t r o l l e r4 i-e a s y6集中遥控器7遥控器权限设定[空调开关|运转模式|温度控制]i-M a n a g e rⅢ2 i-C o n t r o l l e r4 i-e a s y6集中遥控器7模式转换[制冷|制热|通风]i-M a n a g e rⅢ2 i-C o n t r o l l e r4 i-e a s y6集中遥控器7日程定时设定i-M a n a g e rⅢ2 i-C o n t r o l l e r4 i-e a s y6集中遥控器7电量划分i-M a n a g e rⅢ2室温上下限设定i-M a n a g e rⅢ2 i-C o n t r o l l e r4 i-e a s y6联锁控制[火警联动|故障联动]等i-M a n a g e rⅢ2 i-C o n t r o l l e r4开关运转、监视B AC n e t12L o n W o r k s14 K R P4A8016D R C H-R417温度控制、监视B AC n e t12L o n W o r k s14 K R P4A8016D R C H-R417运转模式设定、监视[制冷|制热|通风]B AC n e t12L o n W o r k s14D R C H-R417故障监视B AC n e t12L o n W o r k s14 K R P4A8016D R C H-R418联锁控制[火警联动|故障联动]等B AC n e t12L o n W o r k s14 K R P4A8016D R C H-R418对遥控器权限设定及监视[空调开关|运转模式|温度控制]B AC n e t12L o n W o r k s14风量控制与监视B AC n e t12L o n W o r k s14D R C H-R418压缩机运转状态监视B AC n e t12名词解释18疑问与解答21附录一:控制产品功能一览表27附录二:控制产品兼容表30附录三:控制产品适用机型一览表32附录四:控制用选配件及转接P板功能一览表35附录五:控制信号线要求一览表36附录六:i-M a n a g e rⅢ控制系统设备配件表376本章节中的控制设备不能与非大金的控制设备及软件兼容i-M a n a g e rⅢ系统1.规格2.外形尺寸图3.系统框架4.系统概述1)注意点:✓i-M a n a g e rⅢ系统控制单元i P U有4个DⅢ-N e t端口,每个端口最多可连64组内机,10套外机。
智能家居系统操作手册

智能家居系统操作手册第一章:概述 (3)1.1 智能家居系统简介 (3)1.2 智能家居系统功能特点 (4)1.2.1 实现远程控制 (4)1.2.2 智能化场景联动 (4)1.2.3 安全保障 (4)1.2.4 节能环保 (4)1.2.5 个性化定制 (4)1.2.6 系统兼容性强 (4)第二章:系统安装与配置 (4)2.1 硬件设备安装 (4)2.1.1 设备清单 (4)2.1.2 安装步骤 (5)2.2 软件系统配置 (5)2.2.1 系统初始化 (5)2.2.2 设备注册与绑定 (5)2.2.3 功能配置 (5)2.3 网络连接设置 (5)2.3.1 有线网络连接 (5)2.3.2 无线网络连接 (5)2.3.3 网络测试 (6)第三章:智能设备接入 (6)3.1 设备注册与添加 (6)3.1.1 设备注册 (6)3.1.2 设备添加 (6)3.2 设备参数配置 (6)3.3 设备状态监控 (6)第四章:场景模式设置 (7)4.1 创建场景模式 (7)4.1.1 进入场景模式界面 (7)4.1.2 新建场景模式 (7)4.1.3 填写场景名称 (7)4.1.4 选择场景图标 (7)4.1.5 确认创建 (7)4.2 添加触发条件 (7)4.2.1 选择触发条件类型 (7)4.2.2 设置触发条件参数 (8)4.2.3 保存触发条件 (8)4.3 设置执行动作 (8)4.3.1 选择执行动作类型 (8)4.3.2 设置执行动作参数 (8)4.3.4 检查场景模式设置 (8)4.3.5 保存并启用场景模式 (8)第五章:智能安防 (8)5.1 安全设备接入 (8)5.1.1 设备选择 (8)5.1.2 设备连接 (8)5.1.3 设备配置 (9)5.2 防盗报警设置 (9)5.2.1 报警通知设置 (9)5.2.2 报警联动设置 (9)5.2.3 报警记录查询 (9)5.3 视频监控管理 (9)5.3.1 摄像头接入 (9)5.3.2 视频监控设置 (10)5.3.3 实时预览与录像 (10)第六章:环境监测与控制 (10)6.1 环境参数监测 (10)6.1.1 监测范围 (10)6.1.2 监测设备 (10)6.1.3 数据展示 (10)6.2 自动调节设备 (10)6.2.1 调节设备类型 (10)6.2.2 调节策略 (10)6.2.3 用户干预 (11)6.3 环境预警与通知 (11)6.3.1 预警条件设置 (11)6.3.3 预警处理 (11)第七章:智能家电控制 (11)7.1 家电设备接入 (11)7.1.1 接入流程 (11)7.1.2 注意事项 (11)7.2 遥控操作与定时任务 (11)7.2.1 遥控操作 (12)7.2.2 定时任务 (12)7.3 智能节能管理 (12)7.3.1 节能模式 (12)7.3.2 能耗统计 (12)7.3.3 节能建议 (12)第八章:智能家居语音控制 (12)8.1 语音接入 (12)8.1.1 接入准备 (12)8.1.2 接入流程 (12)8.2 语音识别与指令执行 (13)8.2.2 指令执行 (13)8.3 语音个性化设置 (13)8.3.1 个性化语音 (13)8.3.2 个性化指令 (13)8.3.3 个性化场景 (13)8.3.4 其他个性化设置 (13)第九章:用户权限与安全 (14)9.1 用户账号管理 (14)9.1.1 账号创建与注册 (14)9.1.2 账号登录与登出 (14)9.1.3 账号信息修改 (14)9.2 权限分配与控制 (14)9.2.1 权限级别 (14)9.2.2 权限分配 (14)9.2.3 权限控制 (15)9.3 数据加密与备份 (15)9.3.1 数据加密 (15)9.3.2 数据备份 (15)第十章:系统维护与升级 (15)10.1 系统检查与维护 (15)10.1.1 检查频率 (15)10.1.2 检查内容 (15)10.1.3 维护措施 (16)10.2 软件升级与更新 (16)10.2.1 软件升级流程 (16)10.2.2 软件更新注意事项 (16)10.3 硬件设备更换与升级 (16)10.3.1 硬件设备更换 (16)10.3.2 硬件设备升级 (16)第一章:概述1.1 智能家居系统简介智能家居系统是集成了现代信息技术、网络通信技术、自动控制技术以及物联网技术,以住宅为载体,通过综合布线或无线通信技术,将家庭中的各种设备和设施进行连接与集成,从而实现家庭内部环境智能化、信息化的控制系统。
空调管家使用说明书

空调管家使用说明书产品型号:ACMATE-01脉恩多能科技有限公司版本1目录声明 (3)注意事项 (3)包装清单 (3)使用环境 (3)1.产品说明 (4)1.1空调伴侣 (4)1.2红外收发器 (5)1.3延长线 (6)1.4电源盒 (6)2.安装和启用 (7)3.空调伴侣和网关配对 (7)4.常见问题 (8)5.维护和服务 (9)欢迎使用脉恩多能空调管家。
本产品使用在室内分体式空调器上,通过专利控制算法帮助您有效降低空调运行能耗,营造绿色舒适的室内环境。
安装后,空调原遥控器仍正常使用,空调管家则自动提供持续的能耗监测和控制,无需任何人为干预。
空调节能,就这么简单。
快开始您的节能之旅吧。
声明在第一次安装和使用本产品之前,请您务必仔细阅读所有资料,这会有助于您更好地使用本产品。
如果您未按本说明书的说明及要求操作本产品,或因错误理解等原因误操作本产品,由此而导致的任何损失,本公司将不承担责任。
本使用说明书中的图片仅供参考,如果有个别图片与产品的实际显示不符,请以产品实际显示为准。
为更好地提供服务,本公司保留对本说明书中的内容随时进行修改的权利,恕不另行通知。
所有,不得翻录。
本说明书内容仅为脉恩多能科技有限公司空调智能节能系统的使用指导。
如果您在使用过程中发现本产品的实际情况与本说明书有不一致之处,或您想得到最新的信息,或您有任何问题或想法,请垂询或登陆本公司网站。
注意事项在您使用我们的产品之前请仔细阅读并了解下面所有的安全指示。
☐请勿在潮湿地点使用本产品。
智能系统产品应该安装在室内空调上。
☐请务必使用内附的电源线,使用未经审核的电源线可能损坏产品。
☐只有厂家认可的维修人员才能维修本产品,请勿擅自拆卸。
包装清单在您的包装盒中包括以下物件:☐空调伴侣一个、红外收发器一个、电源盒一个、延长线一条;☐用户手册;保修卡;客户端二维码卡片。
使用环境本产品需与本公司的智能网关产品配套使用使用交流100—240V 50/60Hz周围无屏蔽信号的铁质隔断1. 产品说明“空调管家”是脉恩多能原创研发的智能空调节能系统,能够帮助分体空调实现40%以上的节能。
东芝 智能空调用户手册
SMART AIR CONDITIONERUSER MANUALIMPORTANT NOTERead the manual carefully before installing orconnecting your air conditioner. Make sure tosave this manual for future reference.version A-09-2019mo c.e l y t s e f i l-a b i h s o t.s uPage 2User Manual User Manual 123748596DECLARATION OF CONFORMITY ........................................................................... 4SPECIFICATION OF WIRELESS MODULE .............................................................. 4PRECAUTIONS ................................................................................................................ 4SYSTEM OVERVIEW ...................................................................................................... 5DOWNLOAD AND INSTALL THE APP ................................................................... 6CREATE YOUR ACCOUNT .......................................................................................... 7NETWORK CONFIGURATION ................................................................................... 9HOW TO USE THE APP ............................................................................................. 14SPECIAL FUNCTIONS ................................................................................................. 1810Amazon Alexa Instructions – Android and Toshiba AC NA App................ 2111Google Home Instructions – Android and Toshiba App. (30)CAUTION•This device complies with Part 15 of the FCC Rules and RSS 210 of Industry & Science Canada. Operation is subject to the following two conditions: (1) this device may not cause harmful interference,and (2) this device must accept any interference received, including interference that may cause undesired operation.•Only operate the device in accordance with the instructions supplied.This device complies with FCC and IC radiation exposure limits set forth for an uncontrolled environment. In order to avoid the possibility of exceeding the FCC and IC radio frequency exposure limits, human proximity to the antenna shall not be less than 20cm (8 inches) during normal operation.responsible for compliance could void the user’s authority to operate the equipment.This equipment has been tested and found to comply with the limitsfor a Class B digital device, pursuant to Part 15 of the FCC Rules. Theselimits are designed to provide reasonable protection against harmfulinterference in a residential installation. This equipment generatesuses and can radiate radio frequency energy and, if not installedand used in accordance with the instructions, may cause harmfulinterference to radio communications.However, there is no guarantee that interference will not occurin a particular installation. If this equipment does cause harmfulinterference to radio or television reception, which can bedetermined by turning the equipment off and on, the user isencouraged to try to correct the interference by one or more of thefollowing measures:•Reorient or relocate the receiving antenna.•Increase the separation between the equipment and receiver.•Connect the equipment into an outlet on a circuit different from that to which the receiver is connected.•Consult the dealer or an experienced radio/TV technician for help. User Manual Page 3Page 4User Manual 1.DECLARATION OF CONFORMITY2.SPECIFICATION OF WIRELESS MODULE3.PRECAUTIONSWe hereby declare that this AC is in compliance with the essential requirements and other relevant provisions of Directive 1999/5/EC.Model : US-OSK103Standard : IEEE 802.11 b/g/nAntenna Type : External omnidirectional AntennaFrequency : 2.4 GHz (wireless)Maximum Transmitted Power : 15 dBm MaxDimensions : 41 x 24 x 5 (mm)Operation Temperature : 0°C ~ 45°C / 32°F ~ 113°F.Operation Humidity : 10% ~ 85%Power Input : DC 5V/300 mA1.Supports operating systems: iOS 7+ or Android 4+.2.In the event of a OS update, there may be a delay between the update of the OS and a related software update during which your OS may or may not be supported until a new version is released. Your specifi c mobile phone or problems in your network may prevent the system from working and Toshiba will not be responsible for any problems that could be caused by incompatibility or network issues.3.This Smart AC only supports WPA-PSK/WPA2-PSK (recommended) encryption.Please check the Toshiba Lifestyle website, , for updated information.4.To ensure proper scanning of the QR code, your smart phone must have at least a 5-megapixel camera.5.Due to unstable network connectivity, requests may time out. If this happens,re-run the network confi guration.User Manual Page 54. SYSTEM OVERVIEW 6. Due to unstable network connectivity, commands may time out. If this icting information. The information displayed on the actual product is always the most accurate available. Refresh the app to re-sync.Devices required to use the Smart AC:1. Smart Phone with compatible iOS or Android system.2. Wireless Router (a 2.4 GHz network is required to connect)3. Smart Air Conditioner12333Page 6User Manual 5. DOWNLOAD AND INSTALL THE APPAndroid QR code Apple QR codeScan to download app.• You can also go to Google Play or App Store and search for Toshiba Smart AC. For more information, please refer to Toshiba Lifestyle website: .User Manual Page 76.1 Press “Sign Up”. 6.2 Enter your email address and password.• Make sure your smartphone is connected to your wireless router and your • Make sure your smartphone is connected to your wireless router and your wireless router has a working 2.4GHz internet connection.wireless router has a working internet connection.• It is recommended to activate your account immediately to be able to recoveryour password by email.Page 8User Manual 6.3 Press “Registration”. 6.4 If you forget your password, press “Forgot password?” on the main menu and enter your email address. Then press “Reset Password”.NOTES• Make sure your smartphone is able to connect to the wireless network which will be used.• Make sure also that the device is not connecting to other networks inrange.User Manual Page 97.1Log in with your account.7.2 Use “+ Add Device” to add appliancesPage 10User Manual 7.3.1 Select your AC type.7.3.2 Turn the air conditioner on, then wait for 5 seconds before continuing.7.3 Connect your device to Wireless.90%90%7.3.3 Press and hold VENT ANGLE/SWING (on Portable AC) orCONNECT (on Window AC)buttons for 3-5 seconds. The unitwill enter Access Point mode andthe display will show “AP”.7.3.4 For Android devices, you maychoose to scan the QR code onthe air conditioner for setup. Ifnot using a QR code, or if youare using an iOS device, selectManual Setup.NOTEOn Portable AC, you can also use the remote controller by pressing the LED button 7 times.CONNECTPress and hold the "CONNECT" button for7.3.6 Return to the “Toshiba” App, select your preferred 2.4 GHz wireless network, and type in your password. Then press “Start Con guration”.Rednet Wireless7.3.5 Go to your phone’s wirelessnetwork settings, connect to the network named “net_ac_xxxx”, (where each x is some number, 0-9 or letter, A-F) and use the password “12345678”.7.3.7 The app will show you theprogress. If there is a failure,please check your networksettings and unit and try again. 7.3.8 Name your unit.NOTES• When fi nishing network confi guration, the app will indicate success by displaying a message.• In unstable network connections, the products may still appear on the app as “offl ine”. If this happens, wait for it to show up on the device list or turn the air conditioner’s power off. After 30 seconds, turn the unit back on and wait a few minutes before checking again. If the unit is still offl ine, try the pairing process again.8. HOW TO USE THE APPLog in and select your unit to control it from wherever you are, using your smart phone.USING THE APP BACK ARROW:Use this arrow to take you back to the main screen.1MODE:Use this button to switch between modes. Modes may include: AUTO, DRY, FAN, COOL, and HEAT.7UNIT NAME: This is the name of the unit you are currently controlling.2FAN SPEED:Use this button to switch between fan speeds. Fan speeds include: AUTO, LOW, MEDIUM, and HIGH.8SLEEP CURVE:Use this button to turn the SLEEP CURVE mode on.9Eco Mode: Use this button to turn Eco Mode on and o .10LED: Use this button to turn the display onor o .11FUNCTION:Use this button to access functions such as the timer and sleep curve.3TEMPERATUE AND MODE DISPLAY:This display shows what temperature and mode the air conditioner is set to.4POWER:Use this button to turn the unit on and o .6INDOORTEMPERATURE: This displayshows the current temperature indoors.5NOTEEvery function may not be supported by your model. Please refer to your product’s user manual for more details.172893465There are additional functions if you tap on the up arrow.1011172893465Auto mode Cool mode Dry modeFan mode Unit OFF9. SPECIAL FUNCTIONSFunctions on this page include: Timer On, Timer Off, Sleep Curve, and Check.With this function, you can manually select what time you would like the airconditioner to turn on/off. Additionally, you can select which days you would like the timer to apply to.Timer on / Timer off90%90%90%With this function, you can customize your air conditioner’s settings for each hour that you are asleep. Scroll left and right to adjust up to 8 hours of the sleep curve.With this function, you can run a self-diagnosis. The app will show a report on key items and their status.Self Diagnosis - “Check” FunctionNote: If you already have the skill installed, skip to steps 16-19 to connect your AC unit.1. Make sure your AC unitis connected to your Toshiba AC NA app.2. Download the Amazon Alexa app from the Google Play Store.3. Sign in or create your Amazon account.4. Follow the Amazon Alexa app’s instructions to setup the app.5. Select the side menu button in the top left-hand cornerof the screen.User Manual Page 216. On the side menu, select the “Skills and Games” button.7. Tap the search icon in the top right-hand corner of the screen.Page 22User Manual8. Search for “Toshiba AC NA Smart Home Skill” in the search bar.9. Select “Enable to Use”User Manual Page 23Page 24User Manual10. Enter your Toshiba AC NA credentials into the “Link Account” tab.11. Click the “Done” button in the top left-hand corner to begin searching for your AC.12. Click the “Discover Devices” button in the bottom right-hand corner of the screen.13. On the “Setup” tab, you will see how many devices were discovered. Pick the AC you want to connect by clicking the “Choose Device” button at the bottomof the screen.User Manual Page 25Page 26User Manual14. Under the “What device do you want to set up?” tab, choose the desired AC and click the “Set up Device” button at the bottom of the screen.15. You can add the AC to a group if desired.16. Your AC can be found in the “Thermostats” section of the “Devices” tab.Note: Stop here if you did not have the skill installed on your Amazon Alexa app to start.17. Under “Devices” tab, click on the plus icon in the top right-hand corner.User Manual Page 2718. On the menu that pops up, click “Add Device”.19. Scroll to the bottom of the “What type of device are you setting up?” menu and select other.Page 28User Manual“Alexa, turn on (given name of AC).”“Alexa, set (given name of AC) mode to cool.”“Alexa, set (given name of AC) temperature to 70.”20. On the “Setup” tab, click “Discover Devices” on the bottom of your screen.Note: Return to steps 12-15 to learn how to add your AC to a group.To help get familiar with using your Amazon Alexa connected AC, here are some example commands to help get you started:Command Examples for your Amazon Alexa AC:.User Manual Page 291. Make sure your AC unit connected to your Toshiba AC NA app2. Download the Google Home app from the Google Play Store3. Sign in or create your Google account4. Under the “Home” tab, select “Add”Page 30User Manual11. Google Home Instructions – Android and Toshiba App5. Under “Add to Home”, select “Set up Device”6. Under “Works with Google”, select “Have something already set up?”User Manual Page 317. Select search option in top right-hand corner of the screen and search for Toshiba AC NA.8. Enter your credentials for the Toshiba AC NA app and authorize Google to access your device.Page 32User Manual9. Select device you want to add:10. You can choosehome and the speci croom to add device to:11. Once these are selected,you can close out of thehome/room selectionscreens and just connectit to your account.User Manual Page 3312. For future commands, you can nd your AC name directly below the appliance logo on the home menu screen:Command Examples for your Google Home AC:To help get familiar with using your Google Home connected AC, here are some example commands to help get you started:“Ok Google, turn on (given name of AC unit)”“Ok Google, change (given name of AC unit) mode to Auto”“Ok Google, change (given name of AC unit) temperature setting to 70 degrees”“Ok Google, set (given name of AC unit) to high”Tip: All commands work for multiple units if you say “all air conditioners” instead of the speci c name of one individual unitPageUser Manual 34。
01-XRow系列列间空调-手册-说明书

TL、TS系列操作手册

智能控制器用户操作手册一、内容二、介绍您购买的Denco空气调节设备是经过精心设计、制造和严格检验的产品,正确的安装,可提供给您多年的维修服务。
这个手册提供给您,用户可以获得每天设备运行的充分的信息和附加的紧急情况下的处理建议。
请完整地填写随机Denco公司授权的登记卡,并发回Denco公司。
三、更多帮助如果您需要更多帮助,请联系CITEC INTERNATIONAL SDN BHD,或您当地的经销商、安装公司.您必须提供所需购买的设备的数量、型号、系列号,供货日期.四、维修保养您的空调设备的定期维护保养是很重要的,能够确保您的设备运行在良好的状态.我们拥有全面经过电子、微处理控制器培训的技术高超的工程师队伍.对于海外的用户,在许多国家都有我们的代理商,经过CITEC培训的工程师都能够提供全面的维修服务。
五、控制器—一般信息液晶显示屏:★机组ON/OFF键,控制机组的开、关。
★大的液晶显示屏,可提供机组的运行状态的画面、参数菜单,通过网络上的其他控制器或缓冲器报警.★操作面板上的5个键,提供进入控制器/设置本地的网络特性。
★消音键可消除报警声或报警复位。
液晶显示器的画面和功能:UNIT RUN-当机组风机运转时显示COOL—当制冷运行时显示HEAT-当加热工作时显示HUMIDIFY-当加湿工作时显示DEHUMIDIFY-当工作在除湿状态显示ALARM—当有报警出现时显示液晶显示器显示信息:1)时间和日期,当前温度和湿度读数,机组身份,功能画面。
2)机组运转输出要求3)机组状态,温度和湿度设定点4)压缩机、加热器的运转状态5)加湿器电流、导电率,加湿量(选项)6)查看历史报警六、控制器—客户进入控制器设置的方法特别注意:为了以下的目的用户不需进入控制器,使用者没有必要改变工厂设定和经过授权的调试工程师的任何设定,否则机组可能无法运行或严重影响机组的安全和运转。
客户进入控制器设置的方法:◆设定/检查温度和湿度设定点◆设定/检查机组开/停时间和日期◆设定机组系统时钟◆选择语言◆检查软件版本◆选择远程开/关功能◆设定新密码(进入第一级菜单)◆设定机组配置(需要自动轮换)进入智能控制器第一级菜单(1)按“PRG”键进入主菜单(2)按反方向箭头,即“ENTER”键进入第一级菜单(3)输入第一级菜单工厂密码(工厂默认值):0000(4)新的密码可以被用户设定七、控制器报警当控制器发现报警出现时,将有下面状态显示;◆报警图形显示◆蜂鸣器鸣响◆报警被写入报警区按“MUTE”键将消除报警声.当后来出现任何报警时,蜂鸣器会再发出声响。
智能空调操作手册

智能空调操作手册欢迎使用智能空调!本操作手册将为您提供详细的指导和说明,以帮助您充分了解并正确使用智能空调。
请仔细阅读以下内容。
一、产品概述智能空调是一种集舒适和智能控制于一体的空调系统。
通过先进的传感器和智能算法,它能够自动调节温度、风速和湿度,以提供舒适的室内环境。
二、基本操作1. 开机与关机:- 按下电源开关,空调将开始运行。
- 再次按下电源开关,空调将停止运行。
2. 调节温度:- 使用温度控制按钮,可以提高或降低室内温度。
每次按下按钮时,室内温度将相应上升或下降一度。
3. 调节风速:- 使用风速控制按钮,可以选择不同的风速档位。
每次按下按钮时,风速将切换至下一个档位,依次为低档、中档和高档。
4. 调节湿度:- 如需调节室内湿度,请按下湿度控制按钮。
通过连续按压按钮,可将湿度设置为适宜的水平。
5. 定时功能:- 使用定时开关,可以预定空调的启动和停止时间。
按下定时开关后,根据屏幕提示设置启动和停止时间。
6. 智能控制:- 智能空调具备学习和自动调节功能。
通过与您的使用习惯同步,它能够根据时间、季节和室内外环境的变化,自动调整温度和湿度。
三、高级功能1. 睡眠模式:- 空调配备有舒适的睡眠模式,在夜间提供静音运行和舒适温度调节。
通过开启睡眠模式,空调将自动调节温度和湿度,并逐渐减小风速,为您提供宁静的睡眠环境。
2. 节能模式:- 智能空调具备节能模式,以最佳方式运行并降低能耗。
在此模式下,空调会限制运行时间和控制功率,以达到节能的效果。
3. 清洁与保养:- 请定期清洁空调的滤芯和内部组件。
具体的清洁方法和频率,请参考产品说明书或联系售后服务。
四、注意事项1. 请确保在使用空调前,先关闭窗户和门,以确保室内温度稳定。
2. 请不要将空调的出风口对准人体,以免感到不适。
3. 如出现异常情况或故障,请立即停止使用并联系售后服务。
祝您使用愉快!如需进一步了解智能空调的功能和操作方法,请参考详细的产品说明书。
智能空调控制器用户手册

用户手册ZHT-AC02D空调智能切换控制器目录第一章产品概述 (1)一.产品简介 (1)二.产品功能特性和技术参数 (1)1.主要功能特性 (1)2.技术参数 (1)三.安装环境 (2)第二章安装指引 (2)一.前面板 (2)二.前面板指示说明 (2)三.接口面板 (3)四.后面板接口说明 (3)五.智能控制启动系统定装与连接 (3)1.安装步骤 (3)2.实物联接图 (3)3.控制器接线说明 (3)第三章面板按键操作说明 (5)一.操作流程图 (5)二.系统设置说明 (5)1.part setting(参与设置) (5)bin setting(组合设置) (5)3.switch setting(切换设置) (5)4.single setting(单独设置) (6)5.sysclk setting(系统时间设置) (7)6.system resrt(系统复位) (7)7.learn code(学习红外码) (7)8.detece vol(电压检测) (7)9.temp mode(温度检测模式) (7)第四章故障及排除 (9)注意本手册仅供用户查阅参考,不提供任何形式的担保,产品规格型号如有修正或更改不再另行通告。
第一章产品概述一.产品简介ZHT-AC02D型空调切换控制器是一种豪华型智能空调启动控制系统,支持2台空调机。
实现单独或组合打包控制并监测空调机的运行状态,按照预先设置好的程序控制空调机的运行、停机及组合运行等。
实现市电断电再来电自动启动空调,智能控制空调机的切换运行,且支持联机使用上位机软件管理配置。
大大的提高了机房管理的效率,延长了空调的使用寿命。
适用于民用、商用、中小型机房、通信基站、UPS机房的各种品牌柜式、分体壁挂、吸顶式空调机等各种机型。
该系统具有报警和自动撤消报警功能,当空调处于报警状态时,如果空调恢复了正常状态,则取消报警。
ZHT-AC02D型空调切换控制系统功能齐全、性能优越、安装设置方便快捷,最经济的方式解决空调来电启动和智能切换实际问题,是您节省电力资源和人力资源成本的最佳选择。
K2000说明书
控制对象
空调机组智能恒温控制系统
KJ 恒温控制 风机电机
空调机组智能恒温变风变水量控制系 KJ 恒温变风变
风机电机、水系统调节阀
统
水量控制
空调机组智能恒压控制系统
KJ 恒压控制 风机电机
空调机组智能恒压恒温恒湿控制系统 KJ 恒压恒温恒 风 机 电 机 、 水 系 统 调 节
湿控制
阀、蒸汽电磁阀
空调水泵智能恒温差控制系统
56
以 K2000-0015T3B 为例,产品外形及结构 部件如图 1-3 所示。壳体表面采用哑光工艺、 丝网印刷,光泽柔和、悦目。
金属外壳采用先进的 表面喷粉喷塑工艺,色泽考究、外观优美。
以 K2000-0220T3C 为例,产品外形及结构 部件如图 1-4 所示。 前面板采用可拆卸单边门轴结构,接线和维护 十分方便。
三、操作与显示 ····································································································15
3.1 液晶控制器······················································································· 15 3.2 功能参数设置 ··················································································· 17
自动循环运转 用户根据工艺要求编程输出频率模式
操作功能
频率设定 起/停控制
外部模拟信号(0~20mA)PI 控制 液晶控制盒控制、无源触点控制
空调遥控器操作手册
空调遥控器操作手册一、操作前须知感谢您购买我们的空调产品,本操作手册将向您介绍空调遥控器的使用方法。
在开始操作之前,请确保您已经安装并连接好空调设备,并保证电池已正确安装。
二、遥控器布局1. 电源按钮:用于开启或关闭空调设备。
2. 模式选择按钮:用于选择不同的运行模式,如制冷、制热、除湿等。
3. 风速调节按钮:用于调整空调风扇的速度,通常包括低速、中速、高速及自动等选项。
4. 温度调节按钮:用于增加或减少空调设备的设定温度。
5. 定时器按钮:用于设置空调设备的定时开关机。
6. 其他功能按钮:可能包括风向调节、睡眠模式、节能模式等按钮。
三、基本操作步骤1. 开启空调设备按下电源按钮,空调设备启动并进入默认模式。
2. 选择运行模式使用模式选择按钮,根据需要选择相应的运行模式。
制冷模式适用于炎热天气,制热模式适用于寒冷天气,除湿模式可去除空气中过多的湿气。
3. 调节风速使用风速调节按钮,选择适宜的风速。
低速适用于需要安静环境的情况,中速适用于一般使用,高速适用于需要迅速调节室温的情况。
4. 设定温度使用温度调节按钮,设定您所期望的室内温度。
增加温度可使室内空调运行升温,减少温度则降低室内温度。
5. 使用定时器如果需要设置定时开关机功能,可以使用定时器按钮进行设置。
按下定时器按钮,根据遥控器的显示屏提示进行相应的操作。
四、其他功能1. 风向调节部分空调设备的遥控器会配备风向调节功能。
您可以按照遥控器上的相关按钮进行调整,以获得最佳的空气流动方向。
2. 睡眠模式空调遥控器可能还有睡眠模式的功能。
该模式下,空调设备会根据人体的睡眠状态自动调整温度和风速,以提供更舒适的睡眠环境。
3. 节能模式部分空调设备支持节能模式。
开启节能模式后,空调设备会自动调整运行参数,以降低能耗并提高能源利用效率。
五、使用注意事项1. 避免长时间连续使用空调设备,适当休息时间有助于延长设备寿命。
2. 定期清洁空调设备和遥控器,保持通风良好,提高空调性能。
美的智控空调室外机网关用户手册说明书
空调室外机网关用户手册青岛迈斯智能技术有限公司第一章产品概述 (3)1.产品简介 (3)2.支持协议及规格说明 (3)第二章产品安装 (5)1.外形尺寸及安装环境 (5)2.设备组件 (5)3.接线方式及注意事项 (7)第三章硬件配置 (9)1.硬件配置准备 (9)2.产品端口选择及通讯匹配 (9)3.液晶屏显示按键说明及LED指示灯说明 (11)第四章WEB配置说明 (13)1.WEB配置准备 (13)2.WEB配置说明 (13)第五章智能家居或集控协议集成 (22)第一章产品概述1.产品简介感谢您购买多功能空调网关,本产品可将多联式空调连接至“智能家居集中控制系统”或“BMS系统”。
可提供的接口方式为“RS485”或“KNX”或以太网口。
目前可以支持大金、日立、东芝、三菱电机、海信、海尔、松下、约克、三菱重工、美的、LG、奥克斯、博世、格力、三星等品牌的多联机空调系统。
在您准备安装使用产品前,请先仔细阅读本手册,以便全面了解使用产品的所有功能。
2.支持协议及规格说明2.1支持如下协议:MODBUS-RTU / VRV485 (针对VRV空调特点的自定义协议)。
TCP/IPKNX(需要该协议采购时候提前说明)RS485(针对新风、地暖、智能家居系统)2.2规格及说明表1 电气参数表2 RS485端口通讯规格(以下参数也可以通过本产品自带WEB页面变更)网口(RJ45端口)通讯规格本产品除了可以以WEB页面的形式进行使用配置,也可以通过TCP/IP Socket方式与上位机进行通讯,介绍如下:本产品共开放了2个连接,可支持同时链接,分别为TCP/IP server(端口号为9999),TCP/IP client(端口号为8899)。
本产品作为TCP/IP server 时,对端上位机以9999端口连接过来即可,建立连接后以约定协议内容进行通讯即可。
本产品作为TCP/IP client 时,GW主动以 8899端口连接上位机,连接初次GW会发送自身地址,每过30秒左右会发送心跳包,上位机无需理会此心跳包。
20 智能温度控制器操作手册》
DC200B-20DF 智能温度控制器说明书DC200B-20DF智能温度控制器概述智能温度控制器,配合美国DALLAS 专用总线式温度传感器,基于工业用MODBUS-RTU 协议,实现低成本温度状态在线监测与控制的的实用型一体化设备,本仪器可应(1)SMT 行业温度数据监控 (2) 电子设备厂温度数据监控(3) 冷藏库温度监测(4) 仓库温度监测 (5) 药厂GMP 监测系统(6) 环境温度监控(7) 电信机房温监控 (8)空调控制系统及其它节能应用需求场合。
为便于工程组网及工业应用,本模块采用工业广泛使用的MODBUS-RTU 通讯协议,支持二次开发,并提供随机测试与二次开发软件。
用户只需根据我们的通讯协议即可使用任何串口通讯软件实现模块数据的查询和设置。
主要特点:• 21路一线温度采集• 20路与参照温度差值报警, • 支持350米超长传感器总线; • 可一键自动搜索传感器;• 一键批量读取或设置报警差值;• 基于MODBUS-RTU协议,可直接与PLC或组态软件连接; • 强大的通讯功能,随机配送二次开发软件技术参数参数值显示测温范围 -40℃~+100℃ 测温精度 ±0.5℃(0-85℃) 波特率 9600 通讯端口 RS485供电电源 总线供电,DC7V-36V 1A 耗电 2W存储温度 -40 - 85℃ 运行环境: -40 - 85℃外形尺寸 155×111×60mm³DC200B-20DF控制接口带载能力 2A 120V AC | 2A 24V DC接口说明1.电源及RS485接口如右图所示,该接口共有4个引脚,其中VCC、GND为供电电源,A、B为RS485通讯接口。
引脚定义如下:【B】脚—B- 【A】脚—A+【VCC】DC 6-37V+ 【GND】DC 6-37V-2.传感器接口及继电控制触点输出如上图所示,仪器共有上下两个接线排,下侧接线排引脚如上图所示,前3个引脚为传感器引脚,其余的为控制输出接线排。
卡萨帝家用空调 CAP7215URA(81)VU1说明书
家用空调使用说明书型号CAP7215URA(81)VU1套机• 本说明书为通用手册• 本公司保留说明书解释权• 产品外观请以实物为准• 阅后请与发票一并妥善保存• 如遇产品技术或软件升级,恕不另行通知• 本产品只适合在中国大陆销售和使用1. 产品介绍1 1.1. 产品结构及部件介绍1 1.1.1. 室内外机1 1.1.2. 遥控器外侧11.1.3. 遥控器内侧12. Wi-Fi连接2 2.1. Wi-Fi视频22.2. Wi-Fi功能23. 使用说明3 3.1. 安全注意事项3 3.1.1. 标志3 3.1.2. 电器3 3.1.3. 使用3 3.2. 安装前的准备3 3.2.1. 注意3 3.2.2. 电源4 3.2.3. 接线4 3.3. 安装说明5 3.3.1. 安装简图5 3.3.2. 室内机5 3.3.3. 室外机7 3.4. 使用须知12 3.5. 显示屏操作指南13 3.6. 功能使用指导13 3.6.1. 时钟校准13 3.6.2. 定时功能13 3.6.3. 灯光设定13 3.6.4. 开机关机13 3.6.5. 制热制冷13 3.6.6. 辅热设定13 3.6.7. 除湿控湿13 3.6.8. 语音功能14 3.6.9. 强力静音17 3.6.10. 静眠功能18 3.6.11. 停电补偿19 3.6.12. 调节风向19 3.6.13. 离子除菌20 3.6.14. 设置温度203.6.15. 设置风速20 3.6.16. 匀风功能20 3.6.17. 香薰功能20 3.6.18. 自清洁20 3.6.19. 舒适/PMV20 3.7. 维护保养21 3.7.1. 水箱保养21 3.7.2. 清洗机器21 3.7.3. 换季收存21 3.7.4. 日常维护213.8. 安装检查及试运行214. 售后服务22 4.1. 常见现象及故障22 4.1.1. 制冷22 4.1.2. 制热22 4.1.3. 空气22 4.1.4. 异声22 4.1.5. 故障22 4.1.6. 语音及智家APP问题23 4.2. 环保清单/技术数据24 4.3. 装箱明细26 4.4. 保修说明/卡萨帝七星级服务261. 产品介绍1.1. 产品结构及部件介绍1.1.1. 室内外机1.1.2. 遥控器外侧1.1.3. 遥控器内侧遥控器的使用电池的安装1.取下电池盖:首先轻按标志处,并向下推出,打开电池盖;2.装入电池:确认电池的安装符合底部图示“+”“-”极要求;3.安装电池盖:将电池盖尾端卡爪对准图示凹槽,平放并向上轻推,锁紧电池盖。
东芝空调智能家居APP和技能手册说明书

TOSHIBA APP AND SMART HOME SKILLS USER MANUALIMPORTANT NOTERead the manual carefully before installing or connecting your air conditioner. Make sure to save this manual for future reference.version B - 04 - Android QR codeApple QR codeversion C - 06 - 2021 (PREVIEW01)Page 2User ManualTable of ContentsNETWORK CONFIGURATION ........................................................................................... 3HOW TO USE THE APP ...................................................................................................... 11SPECIAL FUNCTIONS ......................................................................................................... 14AMAZON ALEXA CONNECTION INSTRUCTIONS ................................................... 17GOOGLE HOME CONNECTION INSTRUCTIONS .. (21)1. Log in with your account.2. Use “+Add Device” to add appliances.User Manual Page 3Page 4User Manual3.1.1 Select Scan for nearby devices.3.1 Connect your device using Bluetooth:3.1.2 Turn the device on, then pressand hold the Connect (Window AC), Swing (Portable AC), Filter (Dehumidifier), or Power (Cube Dehumidifier) button for 3 seconds or until the display shows AP .3.Connect your device to Wireless.3.1.3 When your device appears, tapthe icon to select the device. Ifmultiple devices appear, you canidentify your device by checkingthat the last 4 digits under the iconmatch the last 4 digits on the QRcode sticker on the unit.3.1.4 Select your desired wirelessnetwork and enter the password.When finished press “StartConfiguration”.90%User Manual Page 5Page 6User Manual3.1.6 Once the device connects you canedit the name or press OK to fi nishthe connection process.3.1.5 Wait for your device to connect tothe network.User Manual Page 73.2.1 Select your device type.3.2.2 Turn the device on, then wait 5seconds before continuing.3.2 Manually connect your device:90%Page 8User Manual3.2.3 Press and hold the Connect (Window AC), Vent Angle/Swing (Portable AC), or Filter (Dehumidifi er) buttons for 3-5 seconds. The unit will enter Access Point mode and the display will show “AP”.3.2.4 For Android devices, you maychoose to scan the QR code on the air conditioner for setup. If not using a QR code, or if you are using an iOS device, selectManual Setup.User Manual Page 93.2.6 Return to the “Toshiba” App,select your preferred 2.4 GHz wireless network, and type in your password. Then press “Start Confi guration”.Rednet Wireless3.2.5 Go to your phone’s wirelessnetwork settings, connect to the network named “net_ac_xxxx”, (where each x is some number, 0-9 or letter, A-F) and use the password “12345678”.Page 10User Manual3.2.7 The app will show you theprogress. If there is a failure, please check your network settings and unit and try again. 3.2.8 Name your unit.• When finishing network configuration, the app will indicate success by displaying a message.• In unstable network connections, the products may still appear on the app as “offline”. If this happens, wait for it to show up on the device list or turn the air conditioner’s power off. After 30 seconds, turn the unit back on and wait a few minutes before checking again. If the unit is still offline, try the pairing process again.NOTICELog in and select your unit to control it from wherever you are, using your smart phone.SHARED DEVICE SETUP:You can also add a shared device from another user account using the “+ Add Shared Device”. Then, scan the QR Code generated on the other users app through the device settings. Both accounts should now be able to control the device using their own accounts.Air Conditioner Display BACK ARROW:Use this arrow to take you back to the main screen.1MODE:Use thesebuttons to switch between modes. Modes may include: Auto, Cool, Dry, Fan, and Heat. The background color will also change based on the current mode.7UNIT NAME: This is the name of the unit you are currently controlling.2FAN SPEED:Use this button to switch between fan speeds. Fan speeds include: AUTO, LOW, MEDIUM, and HIGH.8ECO:Use this button to turn Eco Mode on and off .10FUNCTION:Use this button to access functions such as express run, sleep curve, and schedule.3TEMPERATURE ANDMODE DISPLAY:This display shows what temperature and mode the air conditioner is set to.4POWER:Use this button to turn the unit on and off .6TEMPERATURES:This displayshows the current temperature readings at the unit.5SLEEP CURVE:Use this button to turn the SLEEP CURVE mode on and off .9Using the AppAir Conditioner FunctionsPower: Toggles the unit On/OffFan Speed: Changes the Fan speed between the supported speedsExpress Run: Changes the unit’s settings to a user pre-set pointECO: Toggles the ECO function On/Off. For details on the Eco function, see the full user manual.Sleep Curve: Toggles the Sleep Curve mode On/Off. For detailed information about setting the sleep curve, see the special functions section below.LED: Toggles the LED display on the unit On/Off. Note that even when the LED display is turned off, changing the unit’s settings will illuminate the display for a short period of timeSound: Toggles the beep the unit plays when it receives a command On/Off. Schedules: Toggles the Schedule function On/Off. For detailed information about setting the schedules see the special functions section below. Horizontal Swing: Toggles the swing function On/Off. When swing is on, the outlet louvers will oscillate.Direction: Allows the user to set the angle of the outlet louvers to one of five settings.Functions on this page may include: Schedules/Timer On/Off, Sleep Curve, Check, and Share Device.With this function, you can manually select what time you would like your device to turn on/off. Additionally, you can select which days you would like the timer to apply to.90%90%90%SPECIAL FUNCTIONSSchedule/Timer On/OffWith this function, you can customize your air conditioner’s settings for each hour that you are asleep. Scroll left and right to adjust up to 8 hours of the sleep curve.Self Diagnosis - “Check” FunctionWith this function, you can run a self-diagnosis. The app will show a report on key items and their status.1. Make sure your AC unit is connectedto your Toshiba AC NA account.2. Download the Amazon Alexa appfrom your compatible App Store.3. Once you see the above screen,navigate to and select the skills and games section under the more tab.4. Select the side menu button in thetop left-hand corner of the screen.5. On the side menu, select the “Skillsand Games” button.6. Tap the search icon in the top right-hand corner of the screen.7. Search for “Toshiba AC NA SmartHome Skill” in the search bar.8. Select “Enable to Use”.9. Enter your Toshiba AC NA credentialsinto the “Link Account” tab.10. Click “Close” and follow the in-appinstructions to fi nish setting up your device(s) with Alexa.COMMAND EXAMPLES FOR YOUR AMAZON ALEXA AC:To help get familiar with using your Amazon Alexa connected AC, here are some example commands to help get you started:“Alexa, turn on (given name of AC).”“Alexa, set (given name of AC) mode to cool.”“Alexa, set (given name of AC) temperature to 70.”1. Make sure your AC unit is connectedto your Toshiba AC NA account.2. Download the Google Home appfrom your compatible App Store.3. Sign in or create your Googleaccount.4. Select the plus to begin setting upyour device.User Manual Page 21Page 22User Manual5. Under “Add to Home”, select “Set up Device”.6.Select Works with Google.7. Select search option in top right-hand corner of the screen andsearch for Toshiba AC NA.8. Select Toshiba AC NA, enter your logincredentials, and authorize Google toaccess your smart device. Follow thein app instructions to fi nish setting up your device(s) with Google.COMMAND EXAMPLES FOR YOUR GOOGLE HOME AC:To help get familiar with using your Google Home connected AC, here aresome example commands to help get you started:“Ok Google, turn on (given name of AC unit)”“Ok Google, change (given name of AC unit) mode to Auto”“Ok Google, change (given name of AC unit) temperature setting to 70 degrees”“Ok Google, set (given name of AC unit) to high”Tip: All commands work for multiple units if you say “all air conditioners”instead of the specific name of one individual unit.User Manual Page 23。
佳力图M816智能控制器用户操作手册

直膨式压缩机制冷
压缩机循环处于1~16中哪一个能量段是根据与Co-WorkTM所连接在一起的设备数来决定的,以便达 到使制冷量由0增加到100%。压缩机将连续运行起码1min~5min的时间,以便使油回流到压缩机中。 1.3.1 ——压缩机接触器接收来自控制器的信号,正启动定时器(正启动延迟)随压缩机一起启动, 从而使制冷刚启动的一段时间内低压开关(LP)被旁路。如果此时高压开关(HP)正常闭合 时,起动线路接通,对应压缩机起动。 1.3.2 ——在正启动延时期满后,低压开关开始发挥作用,如维持闭合,则压缩机保持运行。 ——压缩机接触器上的动断触点(N/C)断开,如配有曲轴箱加热器则不再通电。 ——压缩机接触器的动合触点(N/O)可联锁启动远程的冷凝器(仅适用风冷设备)。 当出现以下情况时压缩机停机 ——不需要时 压缩机接触器断开。 对压缩机的要求
佳力图 M816 智能控制器 用户指南Leabharlann 南京佳力图空调机电有限公司
佳力图 M816 智能控制器 用户指南
版本:V1.0
南京佳力图空调机电有限公司 版权所有,不得复制、修改或翻译。内容如有改动,恕不另行通知。
南京佳力图空调机电有限公司 地址:南京市江宁区经济开发区梅林街 83 号 电话:025-52729889 传真:025-52721573 邮编:211102 网址: E-mail:nac@ 客服热线电话:400-777-5599 印刷版本号:3.05.1110
系统缺省设置图形故障时系统必须采取动作风机过载立即关断该设备空气流量过低立即关断该设备加湿器淤塞加湿器关闭加热器过热加热器关闭过滤器淤塞火警立即关该设备积水湿度过高湿度二过高温度过高温度二过高电压过高湿度过低湿度二过低温度过低温度二过低电压过低自定义警报一自定义警报二压缩机高压一该压缩机立即关闭压缩机高压二该压缩机立即关闭压缩机低压一该压缩机立即关闭压缩机低压二该压缩机立即关闭压缩机过载一该压缩机立即关闭压缩机过载二该压缩机立即关闭cowork设置重号立即关该设备输出卡设置重号立即关该设备佳力图m816智能控制器用户指南20表35cw系列程序冷冻水v2xx版本在coworktm网络中所有相关的设备均关断
- 1、下载文档前请自行甄别文档内容的完整性,平台不提供额外的编辑、内容补充、找答案等附加服务。
- 2、"仅部分预览"的文档,不可在线预览部分如存在完整性等问题,可反馈申请退款(可完整预览的文档不适用该条件!)。
- 3、如文档侵犯您的权益,请联系客服反馈,我们会尽快为您处理(人工客服工作时间:9:00-18:30)。
用户手册ZHT-AC02D空调智能切换控制器目录第一章产品概述 (1)一.产品简介 (1)二.产品功能特性和技术参数 (1)1.主要功能特性 (1)2.技术参数 (2)三.安装环境 (2)第二章安装指引 (3)一.前面板 (3)二.前面板指示说明 (3)三.接口面板 (4)四.后面板接口说明 (4)五.智能控制启动系统定装与连接 (5)1.安装步骤 (5)2.实物联接图 (5)3.控制器接线说明 (6)第三章面板按键操作说明 (8)一.操作流程图 (8)二.系统设置说明 (9)1.part setting(参与设置) (9)bin setting(组合设置) (9)3.switch setting(切换设置) (9)4.single setting(单独设置) (10)5.sysclk setting(系统时间设置) (11)6.system resrt(系统复位) (11)7.learn code(学习红外码) (11)8.detece vol(电压检测) (11)9.temp mode(温度检测模式) (11)第四章故障及排除 (13)注意本手册仅供用户查阅参考,不提供任何形式的担保,产品规格型号如有修正或更改不再另行通告。
第一章产品概述一.产品简介ZHT-AC02D型空调切换控制器是一种豪华型智能空调启动控制系统,支持2台空调机。
实现单独或组合打包控制并监测空调机的运行状态,按照预先设置好的程序控制空调机的运行、停机及组合运行等。
实现市电断电再来电自动启动空调,智能控制空调机的切换运行,且支持联机使用上位机软件管理配置。
大大的提高了机房管理的效率,延长了空调的使用寿命。
适用于民用、商用、中小型机房、通信基站、UPS机房的各种品牌柜式、分体壁挂、吸顶式空调机等各种机型。
该系统具有报警和自动撤消报警功能,当空调处于报警状态时,如果空调恢复了正常状态,则取消报警。
ZHT-AC02D型空调切换控制系统功能齐全、性能优越、安装设置方便快捷,最经济的方式解决空调来电启动和智能切换实际问题,是您节省电力资源和人力资源成本的最佳选择。
二.产品功能特性和技术参数1.主要功能特性壁挂式设计,LCD面板显示;按键操控面板,设置简便,LED灯显示运行状态RS-485协议,通过PC连接上位机配置空调切换系统最多支持2台空调,实现组合打包控制、定时切换、温控切换、故障切换时间段定时开启功能、周期定时开启功能远程实时获取空调开、关状态,远程实时获取机房环境温度功能按用户配置温度,自动开启、关闭空调功能供电恢复后,延时30秒启动空调带断电记忆功能,该设备掉电后能保存之前设置的信息。
带电流监测功能,保证可靠开机,防止空调非断电情况下异常关机,可自动开机 具备记忆功能,供电恢复开起空调并达到停机前的模式、状态具有断电来电或异常停机自启动功能:当空调机出现故障或停电时,空调机停机;故障消除或重新来电后,控制空调机按设定的规则重新启动,不需要人工干预。
独特优点:所有的逻辑开机动作,可开启至用户需要的温度及制冷模式 安装和维护简单,不需要拆开空调修改电路,,即插即用;不影响空调的其它功能 具备报警输出功能,连续3次开启空调不成功,输出报警信号可与动力环境监控系统联网,空调启动失败时,输出报警开关量信号。
(可选配我公司其它配件组成声光报警或拨打电话报警)2.技术参数物理尺寸160×150×45(MM)提供状态指示灯,红外学习接收窗口功耗:<10W启动重试次数:3次工作温度:0℃-60℃工作湿度:10%到95%RH无凝结安装方式:壁挂式安装重量:1.2kg三.安装环境该空调切换控制器安装时应该遵循以下原则: 将空调切换控制器定位安装尽量远离发热器件不要切换控制器置于太脏或潮湿的地方第二章 安装指引一.前面板二.前面板指示说明1. 系统运行指示灯指示灯说明:2. 液晶显示屏:显示设置状态信息3. 系统设置按钮: 控制光标向前移动 控制光标向后移动 设置键,即确定键 返回键报警时按返回键可以取消报警,按设置键可以进入设置界面。
在进入设置页面进行数据设置时,光标向前加1键,光标向后为减1键。
4. 红外码学习窗口:空调遥控器红外码学习窗口,学习红外码时,将空调遥控器对准此窗口。
三.接口面板四.后面板接口说明1. 12V DC 电源输入口:用来连接电源,为监控设备供电。
2. RS485通讯口:用来连接计算机,配置空调切换系统(保留)。
3. 空调控制、电流检测口。
4. 红外:连接红外发射线二极管延长线,V+接红外二极管正极,V-接红外二极管负极。
检测:连接空调运行状态检测线圈。
5. 系统输出端口:报警:开关量输出,告警时闭合; V+ V-:连接声光报警器正负两极。
6. 温度检测探头:检测切换器附近环境温度。
五.智能控制启动系统定装与连接1.安装步骤A.确定空调切换控制器的安装位置,壁挂式安装。
B.将白色电流检测模块套入空调用电线路的零线,并将信号引出线对应插入切换控制系统后面板的信号检测接口(用户可根据需求自行延长线路)。
C.将红外发射延长线拧入切换控制系统的红外发射接口,并将红外发射头固定在空调机的红外接收窗口附近。
D.为控制器提供12V DC供电,系统标配的电源适配器,最好能够与空调采用同一路市电。
避免因空调断电而控制器有电的情况下,切换控制系统报警的情况发生。
2.实物联接图3. 控制器接线说明红外发射:用来代替空调遥控器,完成开、关机自动控制功能。
红外信号输出接口,出厂标配的红外发射延长线与空调切换控制系统连接,V+连接红外控制二极管的正极(红色),V-连接红外发射二极管的负正,(另一颜色),如果再次延长红外发射线时,请注意延长线和级性。
安装时,将红外发射线的红外头(形如白色小灯泡)用胶贴固定在空调的红外接收窗口,如图。
信号检测(电流检测模块):用来检测空调的运行状态(开/关机)。
将接入空调的火线或者零线(一般选用零线)穿入电流检测线圈的过孔中,如下图:电流检测模块的信号线拧入空调切换控制器的的信号检测口,不分极性。
若是发现检测到空调的信号不够,也就是一直发生报警时,可以通过调节电流检测模块的橙色旋钮,顺时针调节以增强信号,逆时针调节以减小信号。
如下图:空调用电线路(零线)穿过感应孔报警输出:ZHT-ZHT-AC02D型空调切换控制系统自带报警蜂鸣器和开关量报警输出接口(常开),在空调启动不成功时蜂鸣器报警并输出报警信号(常开变常闭),用户可根据需要将此信号接入到报警系统中去(可选配我公司其它配件组成声光报警或拨打电话报警)。
第三章 面板按键操作说明一.操作流程图在系统待机状态下,按下 键,进入系统设置菜单,在设置相关的参数或变量后,亦做确定键使用; 控制光标向前移动,亦控制参数的增加; 控制光标向后移动,亦控制参数的减少; 为返回键。
操作流程如下图:二.系统设置说明1. part setting (参与设置)空调参与设置(ON 表示空调参与切换,OFF 表示不参与切换)2. combin setting (组合设置)该设置功能与安装的软件设置界面相同。
当几台空调为一组合时,等同于一台空调,即由系统一起控制。
3. switch setting (切换设置)在进入此设置后,有Temp setting(温度设置)和Timer setting (定时设置)两个选项。
3.1 temp setting(温度设置)temp state(温控切换):为更改系统温控状态,on 表示启动温控切换,off 则表示取消温控切换。
limits setting(温度界限设置):为更改系统的温度界限值,t1为下限,t2为中限,t3为上限,t4为上上限,要更改温度界限值时,必需先按下 键,待系统屏幕出现“>”符号后,按 递增设定温度值,按 递减温度值,此功能要在4台空调都参与时才有效。
注意:温控设置启动温控后,应先设置温度控制的界限,有下限温度上限、温度中点、温度上限和温度上上限四个点。
温升过程:温降过程:3.2 timer setting(定时设置)timer state(定时切换):为更改定时状态,on表示启动定时切换,off 则表示取消定时切换。
cycle time(周期定时):最多设置时间为99小时,设置的小时数为整数。
注意:周期定时最多设置时间为99小时,设置的小时数为整数。
要启动该功能则在“定时切换”上打勾,然后按设置键设置;取消该功能则“定时切换”不打勾,然后按设置键设置。
4.single setting(单独设置)进入此设置后,首先选择要单独设置的空调,确定进入后,有timer(定时开关机)、temp(温控开关机)及cycle timer(周期定时) 三个功能可供操作选择,三个功能中只允许一个功能可启用,以最新设置的功能有效。
5.sysclk setting(系统时间设置)设置空调切换控制的系统时间。
6.system resrt(系统复位)如果选择复位,则所有空调设为不参与切换状态,取消组合打包功能。
取消温控和定时切换。
空调温度切换的4个界限默认为35,30,25,20度。
空调单个的温控,周期定时和定点功能取消,温控的下限设为20度,上限设为30度。
复位成功则界面会出现“success!”字样,然后返回上一级菜单。
7.learn code(学习红外码)进入此设置后,选择需要学习的空调,按“Set”进入学习状态,第一个码默认学习开机码,在获取到红外码后,系统会发出“滴”一声长鸣;第二个默认学习关机码,在获取到红外码后,系统同样会发出“滴”一声长鸣;进入学习状态后,8秒未学到码(即未接收到码),则自动退出当前学习状态。
8.detece vol(电压检测)判断空调开关机状态的重要依据,当空调的实时检测电压大于等于用户设置的界限电压时,系统则判断空调为开机状态,并点亮机面板上相应的状态指示灯;当空调的实时电压小于用户设置的界限电压时,则判断空调为关闭状态,并熄灭面板上相应的状态指示灯。
一级菜单对应2台空调选项,按“”键进行二级菜单,第一行(current)显示空调的实时电压,第二行为设置的界限电压,按“Set”设置数值。
9.temp mode(温度检测模式)温度检测模式选择,并可设置补偿温度值,也就是说如果通过硬件调整后读取的温度值跟实际的温度仍存在偏差,则可以通过软件上的校准来补偿。
一级菜单“1.temp mode”为选择所用的检测模式,按“”进入设置界面,“AI1”为热敏电阻采集模式,“AI2”为用模拟探头采集模式,“DI1”为数字采集模式,根据光标闪烁位按“Set”启用相应的模式,当一种模式被启用,则其他两种模式自动关闭。
一级菜单“2.temp adjust ”为设置补偿温度值,设置范围从-5度到+5度,假如当前采集到的温度为22度,而实际的温度为20度,则设置-2可以将显示的温度值调整到20度。
