THALES a Software Package for Plane Geometry Constructions with a Natural Language Interfac
SoftwareComponents
7
The role of system software
System software servers as the interface between the user, the application software, and the computer’s hardware.
System software is a collection of programs that control and maintain the operations of the computer and its devices.
Uses can modify the software and share their improvements with others Customers can personalize the software to meet their needs.
Investigate the application of open source software.( exercise )
What are the categories of software?
2
Categories of software
operating system (OS) System software
software
utility software
Business application software Applications software Graphical and multimedia Internet software
14
Disk Defragmenter (P414)
How is a file fragmented ?
TECHKON说明书

Your TECHKON Team
Contents
Chapter 1: General description of the measurement system 1.1 Product description. .............................................................................. 5 1.2 Packing list ...........................................................................................2 4.3 4.4 4.5 4.6 4.7 4.8 4.9
Welcome We welcome you among the worldwide community of users of TECHKON products. We are happy that you have selected this high-quality measurement instrument. It will be a valuable tool for your day-to-day quality control tasks. With this manual we invite you to learn how to use SpectroDrive, the software ExPresso 3 and SpectroConnect. The manual is divided into four chapters: Chapter 1: Chapter 2: Chapter 3: Chapter 4: General description of the measurement system Installation of SpectroDrive and the software ExPresso 3 How to use SpectroDrive and the software ExPresso 3 How to use the Windows software SpectroConnect
武汉锐科光纤激光器 RFL-C3300X~RFL-C15000 说明书

武汉锐科光纤激光技术股份有限公司
High Power Coቤተ መጻሕፍቲ ባይዱtinuous
Wave Fiber Laser
Instructions
Applicable models:
RFL-C3300X RFL-C8000X RFL-C15000
RFL-C4000X RFL-C10000X
RFL-C6000X RFL-C12000X
Wuhan Raycus Fiber Laser Technologies Co., Ltd.
Wuhan Raycus Fiber Laser Technologies Co., Ltd. User Guide of RFL-C3300W~RFL-C15000W
CONTENTS
1 Safety Information............................................................................................................... 1 1.1 Security Label............................................................................................................... 1 1.2 Laser Safety Grade........................................................................................................ 2 1.3 Optical Safety ............................................................................................................... 2 1.4 Electrical Safety............................................................................................................ 2 1.5 Other Safety Rules ........................................................................................................ 3
HP Color LaserJet Enterprise MFP M776用户指南说明书
Legal informationCopyright and License© Copyright 2019 HP Development Company, L.P.Reproduction, adaptation, or translation without prior written permission is prohibited, except as allowedunder the copyright laws.The information contained herein is subject to change without notice.The only warranties for HP products and services are set forth in the express warranty statementsaccompanying such products and services. Nothing herein should be construed as constituting anadditional warranty. HP shall not be liable for technical or editorial errors or omissions contained herein.Edition 1, 10/2019Trademark CreditsAdobe®, Adobe Photoshop®, Acrobat®, and PostScript® are trademarks of Adobe Systems Incorporated.Apple and the Apple logo are trademarks of Apple Inc., registered in the U.S. and other countries.macOS is a trademark of Apple Inc., registered in the U.S. and other countries.AirPrint is a trademark of Apple Inc., registered in the U.S. and other countries.Google™ is a trademark of Google Inc.Microsoft®, Windows®, Windows® XP, and Windows Vista® are U.S. registered trademarks of MicrosoftCorporation.UNIX® is a registered trademark of The Open Group.iiiT able of contents1 Printer overview (1)Warning icons (1)Potential shock hazard (2)Printer views (2)Printer front view (2)Printer back view (4)Interface ports (4)Control-panel view (5)How to use the touchscreen control panel (7)Printer specifications (8)T echnical specifications (8)Supported operating systems (11)Mobile printing solutions (12)Printer dimensions (13)Power consumption, electrical specifications, and acoustic emissions (15)Operating-environment range (15)Printer hardware setup and software installation (16)2 Paper trays (17)Introduction (17)Load paper to Tray 1 (multipurpose tray) (17)Load Tray 1 (multipurpose tray) (18)Tray 1 paper orientation (19)Use alternative letterhead mode (24)Enable Alternative Letterhead Mode by using the printer control-panel menus (24)Load paper to Tray 2 (24)Load Tray 2 (24)Tray 2 paper orientation (26)Use alternative letterhead mode (29)Enable Alternative Letterhead Mode by using the printer control-panel menus (29)Load paper to the 550-sheet paper tray (30)Load paper to the 550-sheet paper tray (30)550-sheet paper tray paper orientation (32)Use alternative letterhead mode (35)Enable Alternative Letterhead Mode by using the printer control-panel menus (35)ivLoad paper to the 2 x 550-sheet paper trays (36)Load paper to the 2 x 550-sheet paper trays (36)2 x 550-sheet paper tray paper orientation (38)Use alternative letterhead mode (41)Enable Alternative Letterhead Mode by using the printer control-panel menus (41)Load paper to the 2,700-sheet high-capacity input paper trays (41)Load paper to the 2,700-sheet high-capacity input paper trays (41)2,700-sheet HCI paper tray paper orientation (43)Use alternative letterhead mode (45)Enable Alternative Letterhead Mode by using the printer control-panel menus (45)Load and print envelopes (46)Print envelopes (46)Envelope orientation (46)Load and print labels (47)Manually feed labels (47)Label orientation (48)3 Supplies, accessories, and parts (49)Order supplies, accessories, and parts (49)Ordering (49)Supplies and accessories (50)Maintenance/long-life consumables (51)Customer self-repair parts (51)Dynamic security (52)Configure the HP toner-cartridge-protection supply settings (53)Introduction (53)Enable or disable the Cartridge Policy feature (53)Use the printer control panel to enable the Cartridge Policy feature (54)Use the printer control panel to disable the Cartridge Policy feature (54)Use the HP Embedded Web Server (EWS) to enable the Cartridge Policy feature (54)Use the HP Embedded Web Server (EWS) to disable the Cartridge Policy feature (55)Troubleshoot Cartridge Policy control panel error messages (55)Enable or disable the Cartridge Protection feature (55)Use the printer control panel to enable the Cartridge Protection feature (56)Use the printer control panel to disable the Cartridge Protection feature (56)Use the HP Embedded Web Server (EWS) to enable the Cartridge Protection feature (56)Use the HP Embedded Web Server (EWS) to disable the Cartridge Protection feature (57)Troubleshoot Cartridge Protection control panel error messages (57)Replace the toner cartridges (58)T oner-cartridge information (58)Remove and replace the cartridges (59)Replace the imaging drums (62)Imaging drum information (62)Remove and replace the imaging drums (63)Replace the toner-collection unit (66)T oner-collection unit information (66)vRemove and replace the toner-collection unit (67)Replace the staple cartridge (M776zs model only) (70)Staple cartridge information (70)Remove and replace the staple cartridge (71)4 Print (73)Print tasks (Windows) (73)How to print (Windows) (73)Automatically print on both sides (Windows) (74)Manually print on both sides (Windows) (74)Print multiple pages per sheet (Windows) (75)Select the paper type (Windows) (75)Additional print tasks (76)Print tasks (macOS) (77)How to print (macOS) (77)Automatically print on both sides (macOS) (77)Manually print on both sides (macOS) (77)Print multiple pages per sheet (macOS) (78)Select the paper type (macOS) (78)Additional print tasks (79)Store print jobs on the printer to print later or print privately (79)Introduction (79)Create a stored job (Windows) (79)Create a stored job (macOS) (80)Print a stored job (81)Delete a stored job (81)Delete a job that is stored on the printer (81)Change the job storage limit (82)Information sent to printer for Job Accounting purposes (82)Mobile printing (82)Introduction (82)Wi-Fi, Wi-Fi Direct Print, NFC, and BLE printing (82)Enable wireless printing (83)Change the Wi-Fi Direct name (83)HP ePrint via email (83)AirPrint (84)Android embedded printing (85)Print from a USB flash drive (85)Enable the USB port for printing (85)Method one: Enable the USB port from the printer control panel (85)Method two: Enable the USB port from the HP Embedded Web Server (network-connectedprinters only) (85)Print USB documents (86)Print using high-speed USB 2.0 port (wired) (86)Method one: Enable the high-speed USB 2.0 port from the printer control panel menus (86)Method two: Enable the high-speed USB 2.0 port from the HP Embedded Web Server (network-connected printers only) (87)vi5 Copy (88)Make a copy (88)Copy on both sides (duplex) (90)Additional copy tasks (92)6 Scan (93)Set up Scan to Email (93)Introduction (93)Before you begin (93)Step one: Access the HP Embedded Web Server (EWS) (94)Step two: Configure the Network Identification settings (95)Step three: Configure the Send to Email feature (96)Method one: Basic configuration using the Email Setup Wizard (96)Method two: Advanced configuration using the Email Setup (100)Step four: Configure the Quick Sets (optional) (104)Step five: Set up Send to Email to use Office 365 Outlook (optional) (105)Introduction (105)Configure the outgoing email server (SMTP) to send an email from an Office 365 Outlookaccount (105)Set up Scan to Network Folder (108)Introduction (108)Before you begin (108)Step one: Access the HP Embedded Web Server (EWS) (108)Step two: Set up Scan to Network Folder (109)Method one: Use the Scan to Network Folder Wizard (109)Method two: Use Scan to Network Folder Setup (110)Step one: Begin the configuration (110)Step two: Configure the Scan to Network Folder settings (111)Step three: Complete the configuration (118)Set up Scan to SharePoint (118)Introduction (118)Before you begin (118)Step one: Access the HP Embedded Web Server (EWS) (118)Step two: Enable Scan to SharePoint and create a Scan to SharePoint Quick Set (119)Scan a file directly to a SharePoint site (121)Quick Set scan settings and options for Scan to SharePoint (122)Set up Scan to USB Drive (123)Introduction (124)Step one: Access the HP Embedded Web Server (EWS) (124)Step two: Enable Scan to USB Drive (124)Step three: Configure the Quick Sets (optional) (125)Default scan settings for Scan to USB Drive setup (126)Default file settings for Save to USB setup (126)Scan to email (127)Introduction (127)Scan to email (127)Scan to job storage (129)viiIntroduction (129)Scan to job storage on the printer (130)Print from job storage on the printer (132)Scan to network folder (132)Introduction (132)Scan to network folder (132)Scan to SharePoint (134)Introduction (134)Scan to SharePoint (134)Scan to USB drive (136)Introduction (136)Scan to USB drive (136)Use HP JetAdvantage business solutions (138)Additional scan tasks (138)7 Fax (140)Set up fax (140)Introduction (140)Set up fax by using the printer control panel (140)Change fax configurations (141)Fax dialing settings (141)General fax send settings (142)Fax receive settings (143)Send a fax (144)Additional fax tasks (146)8 Manage the printer (147)Advanced configuration with the HP Embedded Web Server (EWS) (147)Introduction (147)How to access the HP Embedded Web Server (EWS) (148)HP Embedded Web Server features (149)Information tab (149)General tab (149)Copy/Print tab (150)Scan/Digital Send tab (151)Fax tab (152)Supplies tab (153)Troubleshooting tab (153)Security tab (153)HP Web Services tab (154)Networking tab (154)Other Links list (156)Configure IP network settings (157)Printer sharing disclaimer (157)View or change network settings (157)Rename the printer on a network (157)viiiManually configure IPv4 TCP/IP parameters from the control panel (158)Manually configure IPv6 TCP/IP parameters from the control panel (158)Link speed and duplex settings (159)Printer security features (160)Introduction (160)Security statements (160)Assign an administrator password (160)Use the HP Embedded Web Server (EWS) to set the password (160)Provide user access credentials at the printer control panel (161)IP Security (161)Encryption support: HP High Performance Secure Hard Disks (161)Lock the formatter (161)Energy-conservation settings (161)Set the sleep timer and configure the printer to use 1 watt or less of power (161)Set the sleep schedule (162)Set the idle settings (162)HP Web Jetadmin (163)Software and firmware updates (163)9 Solve problems (164)Customer support (164)Control panel help system (165)Reset factory settings (165)Introduction (165)Method one: Reset factory settings from the printer control panel (165)Method two: Reset factory settings from the HP Embedded Web Server (network-connectedprinters only) (166)A “Cartridge is low” or “Cartridge is very low” message displays on the printer control panel (166)Change the “Very Low” settings (166)Change the “Very Low” settings at the control panel (166)For printers with fax capability (167)Order supplies (167)Printer does not pick up paper or misfeeds (167)Introduction (167)The printer does not pick up paper (167)The printer picks up multiple sheets of paper (171)The document feeder jams, skews, or picks up multiple sheets of paper (174)Clear paper jams (174)Introduction (174)Paper jam locations (174)Auto-navigation for clearing paper jams (175)Experiencing frequent or recurring paper jams? (175)Clear paper jams in the document feeder - 31.13.yz (176)Clear paper jams in Tray 1 (13.A1) (177)Clear paper jams in Tray 2 (13.A2) (182)Clear paper jams in the fuser (13.B9, 13.B2, 13.FF) (188)ixClear paper jams in the duplex area (13.D3) (194)Clear paper jams in the 550-sheet trays (13.A3, 13.A4) (199)Clear paper jams in the 2 x 550 paper trays (13.A4, 13.A5) (206)Clear paper jams in the 2,700-sheet high-capacity input paper trays (13.A3, 13.A4, 13.A5, 13.A7) (213)Resolving color print quality problems (220)Introduction (220)Troubleshoot print quality (221)Update the printer firmware (221)Print from a different software program (221)Check the paper-type setting for the print job (221)Check the paper type setting on the printer (221)Check the paper type setting (Windows) (221)Check the paper type setting (macOS) (222)Check toner-cartridge status (222)Step one: Print the Supplies Status Page (222)Step two: Check supplies status (222)Print a cleaning page (222)Visually inspect the toner cartridge or cartridges (223)Check paper and the printing environment (223)Step one: Use paper that meets HP specifications (223)Step two: Check the environment (223)Step three: Set the individual tray alignment (224)Try a different print driver (224)Troubleshoot color quality (225)Calibrate the printer to align the colors (225)Troubleshoot image defects (225)Improve copy image quality (233)Check the scanner glass for dirt and smudges (233)Calibrate the scanner (234)Check the paper settings (235)Check the paper selection options (235)Check the image-adjustment settings (235)Optimize copy quality for text or pictures (236)Edge-to-edge copying (236)Improve scan image quality (236)Check the scanner glass for dirt and smudges (237)Check the resolution settings (238)Check the color settings (238)Check the image-adjustment settings (239)Optimize scan quality for text or pictures (239)Check the output-quality settings (240)Improve fax image quality (240)Check the scanner glass for dirt and smudges (240)Check the send-fax resolution settings (242)Check the image-adjustment settings (242)Optimize fax quality for text or pictures (242)Check the error-correction setting (243)xSend to a different fax machine (243)Check the sender's fax machine (243)Solve wired network problems (244)Introduction (244)Poor physical connection (244)The computer is unable to communicate with the printer (244)The printer is using incorrect link and duplex settings for the network (245)New software programs might be causing compatibility problems (245)The computer or workstation might be set up incorrectly (245)The printer is disabled, or other network settings are incorrect (245)Solve wireless network problems (245)Introduction (245)Wireless connectivity checklist (245)The printer does not print after the wireless configuration completes (246)The printer does not print, and the computer has a third-party firewall installed (246)The wireless connection does not work after moving the wireless router or printer (247)Cannot connect more computers to the wireless printer (247)The wireless printer loses communication when connected to a VPN (247)The network does not appear in the wireless networks list (247)The wireless network is not functioning (247)Reduce interference on a wireless network (248)Solve fax problems (248)Checklist for solving fax problems (248)What type of phone line are you using? (249)Are you using a surge-protection device? (249)Are you using a phone company voice-messaging service or an answering machine? (249)Does your phone line have a call-waiting feature? (249)Check fax accessory status (249)General fax problems (250)The fax failed to send (250)No fax address book button displays (250)Not able to locate the Fax settings in HP Web Jetadmin (250)The header is appended to the top of the page when the overlay option is enabled (251)A mix of names and numbers is in the recipients box (251)A one-page fax prints as two pages (251)A document stops in the document feeder in the middle of faxing (251)The volume for sounds coming from the fax accessory is too high or too low (251)Index (252)xiPrinter overview1Review the location of features on the printer, the physical and technical specifications of the printer,and where to locate setup information.For video assistance, see /videos/LaserJet.The following information is correct at the time of publication. For current information, see /support/colorljM776MFP.For more information:HP's all-inclusive help for the printer includes the following information:●Install and configure●Learn and use●Solve problems●Download software and firmware updates●Join support forums●Find warranty and regulatory informationWarning iconsUse caution if you see a warning icon on your HP printer, as indicated in the icon definitions.●Caution: Electric shock●Caution: Hot surface●Caution: Keep body parts away from moving partsPrinter overview1●Caution: Sharp edge in close proximity●WarningPotential shock hazardReview this important safety information.●Read and understand these safety statements to avoid an electrical shock hazard.●Always follow basic safety precautions when using this product to reduce risk of injury from fire orelectric shock.●Read and understand all instructions in the user guide.●Observe all warnings and instructions marked on the product.●Use only a grounded electrical outlet when connecting the product to a power source. If you do notknow whether the outlet is grounded, check with a qualified electrician.●Do not touch the contacts on any of the sockets on the product. Replace damaged cordsimmediately.●Unplug this product from wall outlets before cleaning.●Do not install or use this product near water or when you are wet.●Install the product securely on a stable surface.●Install the product in a protected location where no one can step on or trip over the power cord.Printer viewsIdentify certain parts of the printer and the control panel.Printer front viewLocate features on the front of the printer.2Chapter 1 Printer overviewPrinter front view3Printer back viewLocate features on the back of the printer.Interface portsLocate the interface ports on the printer formatter. 4Chapter 1 Printer overviewControl-panel viewThe control panel provides access to the printer features and indicates the current status of the printer.NOTE:Tilt the control panel for easier viewing.The Home screen provides access to the printer features and indicates the current status of the printer.screens.NOTE:The features that appear on the Home screen can vary, depending on the printerconfiguration.Control-panel view5Figure 1-1Control-panel view?i 12:42 PM6Chapter 1 Printer overviewHow to use the touchscreen control panelPerform the following actions to use the printer touchscreen control panel.T ouchT ouch an item on the screen to select that item or open that menu. Also, when scrolling T ouch the Settings icon to open the Settings app.How to use the touchscreen control panel 7SwipeT ouch the screen and then move your finger horizontally to scroll the screen sideways.Swipe until the Settings app displays.Printer specificationsDetermine the specifications for your printer model.IMPORTANT:The following specifications are correct at the time of publication, but they are subject to change. For current information, see /support/colorljM776MFP .T echnical specificationsReview the printer technical specifications.Product numbers for each model ●M776dn - #T3U55A ●Flow M776z - #3WT91A ●Flow M776zs - #T3U56APaper handling specificationsPaper handling features Tray 1 (100-sheet capacity)Included Included Included Tray 2 (550-sheet capacity)IncludedIncludedIncluded8Chapter 1 Printer overview550-sheet paper trayOptional Included Not included NOTE:The M776dn models accept one optional550-sheet tray.Optional Included Included2 x 550-sheet paper tray and standNOTE:The M776dn models accept one optional550-sheet tray that may be installed on top of thestand.Optional Not included Not included2,700-sheet high-capacity input (HCI) paper trayand standNOTE:The M776dn models accept one optional550-sheet tray that may be installed on top of theoptional printer stand.Printer standOptional Not included Not included NOTE:The M776dn models accept one optional550-sheet tray that may be installed on top of theoptional printer stand.Inner finisher accessory Not included Not included Included Automatic duplex printing Included IncludedIncludedIncluded Included Included10/100/1000 Ethernet LAN connection with IPv4and IPv6Hi-Speed USB 2.0Included Included IncludedIncluded Included IncludedEasy-access USB port for printing from a USBflash drive or upgrading the firmwareIncluded Included Included Hardware Integration Pocket for connectingaccessory and third-party devicesHP Internal USB Ports Optional Optional OptionalOptional Optional OptionalHP Jetdirect 2900nw Print Server accessory forWi-Fi connectivity and an additional Ethernet portOptional IncludedIncludedHP Jetdirect 3100w accessory for Wi-Fi, BLE, NFC,and proximity badge readingPrints 45 pages per minute (ppm) on Letter-sizepaper and 46 ppm on A4-size paperEasy-access USB printing for printing from a USBIncluded Included Includedflash driveT echnical specifications9Included Included Included Store jobs in the printer memory to print later orprint privatelyScans 100 pages per minute (ppm) on A4 andIncluded Included Included letter-size paper one-sidedIncluded Included Included 200-page document feeder with dual-headscanning for single-pass duplex copying andscanningNot included Included Included HP EveryPage T echnologies including ultrasonicmulti-feed detectionNot included Included Included Embedded optical character recognition (OCR)provides the ability to convert printed pages intotext that can be edited or searched using acomputerIncluded Included Included SMART Label feature provides paper-edgedetection for automatic page croppingIncluded Included Included Automatic page orientation for pages that haveat least 100 characters of textIncluded Automatic tone adjustment sets contrast,Included Includedbrightness, and background removal for eachpageIncluded Included Includedfolders on a networkIncludedSend documents to SharePoint®Included IncludedIncluded Included Included NOTE:Memory reported on the configurationpage will change from 2.5 GB to 3 GB with theoptional 1 GB SODIMM installed.Mass storage: 500 GB hard disk drive Included Included IncludedSecurity: HP Trusted Platform Module (TPM)Included Included IncludedT ouchscreen control panel Included Included IncludedRetractable keyboard Not included Included Included 10Chapter 1 Printer overviewFax Optional Included IncludedSupported operating systemsUse the following information to ensure printer compatibility with your computer operating system.Linux: For information and print drivers for Linux, go to /go/linuxprinting.UNIX: For information and print drivers for UNIX®, go to /go/unixmodelscripts.The following information applies to the printer-specific Windows HP PCL 6 print drivers, HP print driversfor macOS, and to the software installer.Windows: Download HP Easy Start from /LaserJet to install the HP print driver. Or, go tothe printer-support website for this printer: /support/colorljM776MFP to download the printdriver or the software installer to install the HP print driver.macOS: Mac computers are supported with this printer. Download HP Easy Start either from /LaserJet or from the Printer Support page, and then use HP Easy Start to install the HP print driver.1.Go to /LaserJet.2.Follow the steps provided to download the printer software.Windows 7, 32-bit and 64-bit The “HP PCL 6” printer-specific print driver is installed for this operating system aspart of the software installation.Windows 8.1, 32-bit and 64-bit The “HP PCL-6” V4 printer-specific print driver is installed for this operating systemas part of the software installation.Windows 10, 32-bit and 64-bit The “HP PCL-6” V4 printer-specific print driver is installed for this operating systemas part of the software installation.Windows Server 2008 R2, SP 1, 64-bit The PCL 6 printer-specific print driver is available for download from the printer-support website. Download the driver, and then use the Microsoft Add Printer tool toinstall it.Windows Server 2012, 64-bit The PCL 6 printer-specific print driver is available for download from the printer-support website. Download the driver, and then use the Microsoft Add Printer tool toinstall it.Windows Server 2012 R2, 64-bit The PCL 6 printer-specific print driver is available for download from the printer-support website. Download the driver, and then use the Microsoft Add Printer tool toinstall it.Windows Server 2016, 64-bit The PCL 6 printer-specific print driver is available for download from the printer-support website. Download the driver, and then use the Microsoft Add Printer tool toinstall it.Windows Server 2019, 64-bit The PCL 6 printer-specific print driver is available for download from the printer-support website. Download the driver, and then use the Microsoft Add Printer tool toinstall it.Supported operating systems11macOS 10.13 High Sierra, macOS 10.14 MojaveDownload HP Easy Start from /LaserJet , and then use it to install the print driver.NOTE:Supported operating systems can change.NOTE:For a current list of supported operating systems and HP’s all-inclusive help for the printer, go to /support/colorljM776MFP .NOTE:For details on client and server operating systems and for HP UPD driver support for this printer, go to /go/upd . Under Additional information , click Specifications .●Internet connection●Dedicated USB 1.1 or 2.0 connection or a network connection● 2 GB of available hard-disk space ●1 GB RAM (32-bit) or2 GB RAM (64-bit)●Internet connection●Dedicated USB 1.1 or 2.0 connection or a network connection●1.5 GB of available hard-disk spaceNOTE:The Windows software installer installs the HP Smart Device Agent Base service. The file size is less than 100 kb. Its only function is to check for printers connected via USB hourly. No data is collected. If a USB printer is found, it then tries to locate a JetAdvantage Management Connector (JAMc) instance on the network. If a JAMc is found, the HP Smart Device Agent Base is securelyupgraded to a full Smart Device Agent from JAMc, which will then allow printed pages to be accounted for in a Managed Print Services (MPS) account. The driver-only web packs downloaded from for the printer and installed through the Add Printer wizard do not install this service.T o uninstall the service, open the Control Panel , select Programs or Programs and Features , and then select Add/Remove Programs or Uninstall a Programto remove the service. The file name isHPSmartDeviceAgentBase.Mobile printing solutionsHP offers multiple mobile printing solutions to enable easy printing to an HP printer from a laptop, tablet, smartphone, or other mobile device.T o see the full list and to determine the best choice, go to /go/MobilePrinting .NOTE:Update the printer firmware to ensure all mobile printing capabilities are supported.●Wi-Fi Direct (wireless models only, with HP Jetdirect 3100w BLE/NFC/Wireless accessory installed)●HP ePrint via email (Requires HP Web Services to be enabled and the printer to be registered with HP Connected)●HP Smart app ●Google Cloud Print12Chapter 1 Printer overview。
计算机英语sectionA课文及对应中文翻译

第七单元Telecommunications enables people to send and receive personal messages across town, between countries, and to and from outer space. It also provides the key medium for news, data, information and entertainment.When a signal reaches its destination, the device on the receiving end converts the electronic signal back into an understandable message, such as sound over a telephone, moving images on a television, or words and pictures on a computer screen. 电信使世界各地的人们得以互相联系,即刻获取信息,并从边远地区实施通信。
电信通常涉及一个信息发送者和一个或多个接收者,他们通过电话系统等把信息从一地发送到另一地的技术相联系。
电信设备将不同类型的信息,如声音和图像,转换成电子信号。
然后,这些信号就可以通过电话线或无线电波等媒介进行发送。
信号到达目的地后,接收端的设备将电子信号转换回可以理解的信息,如电话中的声音、电视上的活动图像或计算机屏幕上的文字和图片。
电信使人们能够在城镇不同地方、国家之间以及向外层空间和从外层空间发送和接收个人信息。
电信也为新闻、数据、信息和娱乐提供了关键的媒介。
Telecommunications messages can be sent in a variety of ways and by a wide range of devices. The messages can be sent from one sender to a single receiver (point-to-point) or from one sender to many receivers (point-to-multipoint). Personal communications, such as a telephone conversation between two people or a facsimile (fax) message, usually involve point-to-point transmission. Point-to-multipoint telecommunications, often called broadcasts, provide the basis for commercial radio and television programming.电信信息可通过各种方式和设备发送。
CISSP考试练习(习题卷3)

CISSP考试练习(习题卷3)说明:答案和解析在试卷最后第1部分:单项选择题,共100题,每题只有一个正确答案,多选或少选均不得分。
1.[单选题]你认为下列哪一个是最安全的身份验证方式?A)生物识别B)密码C)令牌D)票证授予2.[单选题]Kevin 正在为他的组织制定持续的安全监控策略。
在确定评估和监测频率时,通常不使用以下哪一项?A)威胁情报B)系统分类/影响级别C)安全控制操作负担D)组织风险承受能力3.[单选题]Brenda 的组织最近完成了对竞争对手公司的收购。
以下哪一项任务最不可能成为收购期间处理的组织流程的一部分?Brenda’s organization recently completed the acquisition of a competitor firm. Which one of the following tasks would be LEAST likely to be part of the organizational processes addressed during the acquisition?A)安保职能的整合Consolidation of security functionsB)安全工具的集成Integration of security toolsC)知识产权保护Protection of intellectual propertyD)安全政策文件Documentation of security policies4.[单选题]匿名者联盟使用的低轨离子炮(LOIC)攻击工具利用众多家用PC攻击其选定的目标。
这是一个什么类型的网络攻击例子?A)DdoSB)电离C)僵尸部落D)泪滴5.[单选题]A software developer installs a game on their organization-provided smartphone. Uponinstalling the game, the software developer is prompted to allow the game access to call logs, Short Message Service(SMS)messaging, and Global Positioning System(GPS)location data. What has the game MOST likely introduced to the smartphone? 软件开发人员在其组织提供的智能手机上安装游戏。
IKCS12F60F2A_C_Rev1_0_20100628(10)

F o r P o w e r M a n a g e m e n t A p p l i c a t i o nControl Integrated POwer System (CIPOS™)I K C S 12F 60F 2A I K C S 12F 60F 2CD a t a S he e t ,J un. 2010CIPOS™ IKCS12F60F2AIKCS12F60F2CRevision History: 2010-06Rev.1.0Authors: Junho Song*, Junbae Lee* and Daewoong Chung*, W. Frank**, W. Brunnbauer**LS Power Semitech*, Infineon Technologies**Edition 2010-01Published byLS Power Semitech Co., Ltd. Seoul, Korea© LS Power Semitech Co., Ltd.All Rights Reserved.Attention please!The information given in this data sheet shall in no event be regarded as a guarantee of conditions or characteristics. With respect to any examples or hints given herein, any typical values stated herein and/or any information regarding the application of the device, LS Power Semitech Co., Ltd. hereby disclaims any and all warranties and liabilities of any kind, including without limitation warranties of non-infringement of intellectual property rights of any third party.InformationFor further information on technology, delivery terms and conditions and prices please contact your nearest LS Power Semitech Co., Ltd. office or representatives ().WarningsDue to technical requirements components may contain dangerous substances. For information on the types in question please contact your nearest LS Power Semitech Co., Ltd. office or representatives.LS Power Semitech Co., Ltd. components may only be used in life-support devices or systems with the express written approval LS Power Semitech Co., Ltd., if a failure of such components can reasonably be expected to cause the failure of that life-support device or system, or to affect the safetyor effectiveness of that device or system. Life support devices or systems are intended to be implantedin the human body, or to support and/or maintain and sustain and/or protect human life. If they fail, it is reasonable to assume that the health of the user or other persons may be endangered.TRENCHSTOP® is a registered trademark of Infineon Technologies AG.CIPOS™ IKCS12F60F2AIKCS12F60F2CTable of contents:CIPOS™ Control Integrated POwer System (4)Features (4)Target Applications (4)Description (4)System Configuration (4)Certification (4)Internal Electrical Schematic (5)Pin Assignment (6)Pin Description (6)HIN1,2,3 and /LIN1,2,3 (Low side and high side control pins, Pin 15 - 20) (6)FLT-TEMP (temperature NTC, Pin 24) (7)ITRIP (Over-current detection function, Pin 21) (7)VDD, VSS (control side supply and reference, Pin 22, 23) (7)VB1,2,3 and VS1,2,3 (High side supplies, Pin 1, 2, 4, 5, 7, 8) (7)VRU, VRV, VRW (low side emitter, Pin 12, 13, 14) (7)V+ (positive bus input voltage, Pin 10) (7)Absolute Maximum Ratings (8)Module Section (8)IGBT and Diode Section (8)Control Section (9)Recommended Operation Conditions (9)Static Characteristics (10)Dynamic Characteristics (11)Integrated Components (12)Typical Application (12)Characteristics (13)Package Outline IKCS12F60F2A (17)Package Outline IKCS12F60F2C (18)CIPOS™ IKCS12F60F2AIKCS12F60F2CCIPOS™C ontrol I ntegrated PO wer S ystem Single In-Line Intelligent Power Module3Φ-bridge 600V / 12A @ 25°CFeatures•DCB isolated Single In-Line molded module •FAULT signal•TrenchStop® IGBTs with lowest V CE(sat)•Optimal adapted antiparallel diode for low EMI •Integrated bootstrap diode and capacitor •Rugged SOI gate driver technology with stability against transient and negative voltage •Fully compliant to 3.3V and 5V microcontrollers •Temperature sense•Under voltage lockout at all channels •Matched propagation delay for all channels •Low side emitter pins accessible for all phase current monitoring (open emitter)•Cross-conduction prevention•Lead-free terminal plating; RoHS compliant •Qualified according to JEDEC1 (high temperature stress tests for 1000h) for target applicationsTarget Applications•Washing machines•Consumer Fans and Consumer Compressors DescriptionThe CIPOS™ module family offers the chance for integrating various power and control components to increase reliability, optimize PCB size and system costs.This SIL-IPM is designed to control AC motors in variable speed drives for applications like air conditioning, compressors and washing machines. The package concept is specially adapted to power applications, which need extremely good thermal conduction and electrical isolation, but also EMI-save control and overload protection. The features of TrenchStop®IGBTs and antiparallel diodes are combined with a new optimized Infineon SOI gate driver for excellent electrical performance. The product provides a FAULT signal, which is significantly simplifying the system.System Configuration• 3 half-bridges with TrenchStop®IGBT & FW-diodes•3Φ SOI gate driver•Bootstrap diodes for high side supply •Integrated 100nF bootstrap capacitance •Temperature sensor, passive components for adaptions•Isolated heatsink•Creepage distance typ 3.2mmCertificationUL 1577 (UL file E314539)CIPOS™ IKCS12F60F2A IKCS12F60F2CInternal Electrical SchematicFigure 1: Internal SchematicVSS (23)/LIN3 (20)/LIN2 (19)/LIN1 (18)/HIN3 (17)/HIN2 (16)/HIN1 (15)VDD (22)VB1 (7)VB2 (4)VB3 (1)VRW (14)VRV (13)VRU (12)W, VS3 (2)V, VS2 (5)U, VS1 (8)V+ (10)/FLT-TEMP (24)ITRIP (21)CIPOS™ IKCS12F60F2A IKCS12F60F2CPin AssignmentPin Description/HIN1,2,3 and /LIN1,2,3 (Low side and high side control pins, Pin 15 - 20)These pins are active low and they are responsible for the control of the integrated IGBTsuch to guarantee LSTTL and CMOS compatibility down to 3.3V controller outputs. The maximum voltage at these pins is 5.5V and therefore fully compliant to 3.3V-microcontrollers. Pull-up resistor of about 75k Ω is internally provided to pre-bias inputs during supply start-up and a zener clamp is provided for pin protection purposes. Input schmitt-trigger and noise filter provide beneficial noise rejection to short input pulses. It is recommended for proper work of CIPOS™ not to provide an input pulse-width and PWM deadtimes lower than 1us.The integrated gate drive provides additionally a shoot through prevention capability which avoids the simultaneous on-state of two gate drivers ofFigure 2: Input pin structureCIPOS™ IKCS12F60F2A IKCS12F60F2Cthe same leg (i.e. HO1 and LO1, HO2 and LO2, HO3 and LO3).A minimum deadtime insertion of typ 380ns is also provided, in order to reduce cross-conduction of the external power switches./FLT-TEMP (temperature NTC, Pin 24)The TEMP terminal provides direct access to the NTC, which is referenced to VSS. An external pull-up resistor connected to +5V ensures, that the resulting voltage can be directly connected to the microcontroller.The same pin indicates a module failure in case of under voltage at pin VDD or in case of triggered over current detection at ITRIP. A pull-up resistor is externally required to bias the NTC. No temperature information is available during fault. ITRIP (Over-current detection function, Pin 21) CIPOS™ provides an over-current detection function by connecting the ITRIP input with the motor current feedback. The ITRIP comparator threshold (typ 0.46V) is referenced to VSS ground. A input noise filter (typ: t ITRIPMIN = 225ns) prevents the driver to detect false over-current events. Over-current detection generates a hard shut down of all outputs of the gate driver after the shutdown propagation delay of typically 900ns. The fault-clear time is set to typically to 4.7ms. VDD, VSS (control side supply and reference, Pin 22, 23)VDD is the low side supply and it provides power both to input logic and to low side output power stage. Input logic is referenced to VSS ground as well as the under-voltage detection circuit. The under-voltage circuit enables the device to operate at power on when a supply voltage of at least a typical voltage of V DDUV+ = 12.1V is at least present.The IC shuts down all the gate drivers power outputs, when the VDD supply voltage is below V DDUV- = 10.4V. This prevents the external power switches from critically low gate voltage levels during on-state and therefore from excessive power dissipation.VB1,2,3 and VS1,2,3 (High side supplies, Pin 1, 2, 4, 5, 7, 8)VB to VS is the high side supply voltage. The high side circuit can float with respect to VSS following the external high side power device emitter/source voltage.Due to the low power consumption, the floating driver stage is supplied by an integrated bootstrap circuit connected to VDD. This includes also integrated bootstrap capacitors of 100nF at each floating supply, which are located very close to the gate drive circuit.The under-voltage detection operates with a rising supply threshold of typical V BSUV+ = 12.1V and a falling threshold of V DDUV- = 10.4V according to Figure 4.VS1,2,3 provide a high robustness against negative voltage in respect of VSS of -50V. This ensures very stable designs even under rough conditions.Figure 4: Operation modesVRU, VRV, VRW (low side emitter, Pin 12, 13, 14)The low side emitters are available for current measurements of each phase leg. It is recommended to keep the connection to pin VSS as short as possible in order to avoid unnecessary inductive voltage drops.V+ (positive bus input voltage, Pin 10)The high side IGBT are connected to the bus voltage. It is recommended, that the bus voltage does not exceed 500V.CIPOS™ IKCS12F60F2AIKCS12F60F2CAbsolute Maximum Ratings(T J = 25°C, V DD = 15V Unless Otherwise Specified): Module SectionIGBT and Diode Section1 Monitored by pin 24CIPOS™ IKCS12F60F2A IKCS12F60F2CControl SectionRecommended Operation ConditionsAll voltages are absolute voltages referenced to V SS -Potential unless otherwise specified.IKCS12F60F2CStatic Characteristics(T c = 25°C, V DD = 15V, if not stated otherwise)1 Allowed number of short circuits: <1000; time between short circuits: >1s.Dynamic Characteristics(T c = 25°C, V DD = 15V, if not stated otherwise)Integrated ComponentsTypical Application1Characteristics(T c = 25°C, V DD = 15V, if not stated otherwise)I C , C O L L E C T O R C U R R E N TI F , f o r w a r d C U R R E N TV CE , COLLECTOR EMITTER VOLTAGEV F FORWARD VOLTAGEFigure 4. Typical IGBT output characteristicFigure 5. Typical diode forward current as afunction of forward voltaget , S W I T C H I N G T I M E S0A 5A 10A 15At , S W I T C H I N G T I M E S25℃50℃75℃100℃125℃I C , COLLECTOR CURRENTT vJ , JUNCTION TEMPERATUREFigure 6. Typical switching times as afunction of collector current (inductive load,T vJ =150°C,V CE =300VDynamic test circuit in Figure A)Figure 7. Typical switching times as afunction of junction temperature (inductive load, V CE = 300V, I C = 6A Dynamic test circuit in Figure A)E , S W I T C H I N G E N E R G YE , S W I T C H I N G E N E R G YI C , COLLECTOR CURRENTT vJ , JUNCTION TEMPERATUREFigure 8. Typical switching energy losses asa function of collector current (inductive load, T vJ =150°C, V CE =300VDynamic test circuit in Figure A)Figure 9. Typical switching energy losses asa function of junction temperature (inductive load, V CE = 300V, I C = 6A Dynamic test circuit in Figure A)R T S , N T C r e s i s t a n c eZ t h J C , T R A N S I E N T T H E R M A L R E S I S T A N C E10-210-1100 T NTC , NTC TEMPERATUREt P , PULSE WIDTHFigure 10. Characteristic of NTC as afunction of NTC temperatureFigure 11. Transient thermal impedance as afunction of pulse width (D =t P /T )Test Circuits and Parameter DefinitionFigure A: Dynamic test circuit Leakage inductance L σ =180nH Stray capacitance C σ =39pFFigure B: Definition of diodes switching characteristicsFigure C: Definition of Enable propagation delayFigure D: Switching times definition and switching energy definitionI RRMI FLIN1,2,3HIN1,2,3i CU , i CV , i v CEU , v CEV ∫⋅=Cx CEx dti v Eoff 0∫⋅=Eont Cx CEx dti v Eon 0Figure E: Short Pulse suppressionPackage Outline IKCS12F60F2ANote: There may occur discolorations on the copper surface without any effect of the thermal properties.Package Outline IKCS12F60F2CPackage Data。
Rapid software development

businesses have to respond to new opportunities and competition. Rapid development and delivery is often the most critical requirement for software systems. Businesses may be willing to accept lower quality software if rapid delivery of essential functionality is possible.
Rapid software development
Objectives
To explain how an iterative, incremental development
process leads to faster delivery of more useful software To discuss the essence of agile development methods To explain the principles and practices of extreme programming To explain the roles of prototyping in the software process
Requirements
Because of the changing environment, it is often
impossible to arrive at a stable, consistent set of system requirements. Therefore a waterfall model of development is impractical and an approach to development based on iterative specification and delivery is the only way to deliver software quickly.
EN 13032-1-2004+AC-2005 Light and lighting-Measurement and presentation of photometric data of lamps

Management Centre: rue de Stassart, 36
B-1050 Brussels
© 2004 CEN
All rights of exploitation in any form and by any means reserved worldwide for CEN national Members.
This European Standard was approved by CEN on 16 January 2004. CEN members are bound to comply with the CEN/CENELEC Internal Regulations which stipulate the conditions for giving this European Standard the status of a national standard without any alteration. Up-to-date lists and bibliographical references concerning such national standards may be obtained on application to the Central Secretariat or to any CEN member. This European Standard exists in three official versions (English, French, German). A version in any other language made by translation under the responsibility of a CEN member into its own language and notified to the Central Secretariat has the same status as the official versions. CEN members are the national standards bodies of Austria, Belgium, Cyprus, Czech Republic, Denmark, Estonia, Finland, France, Germany, Greece, Hungary, Iceland, Ireland, Italy, Latvia, Lithuania, Luxembourg, Malta, Netherlands, Norway, Poland, Portugal, Slovakia, Slovenia, Spain, Sweden, Switzerland and United Kingdom.
泰克 DSA8200, TDS CSA8000 系列产品软件使用说明书

Read thisfirstTektronix DSA8200,TDS/CSA8000series product softwareRead this document before using this software package.This version of productsoftware:Ensures that your instrument and modules work with the latest features andproduct enhancements.Supports the DSA8200,CSA8000Series,and TDS8000Series instruments.The installation program detects the instrument and installs the appropriatesoftware.Runs only on the Microsoft Windows XP operating system.Contact Tektronixfor operating system upgrade information if your instrument is not runningWindows XP.How to use How you use this package depends on how you received it:If you received this software package with your new oscilloscope,keepthis software:To reinstall the product software,replacing a damaged or corruptedinstallation.To rebuild the operating system,either as a part of a product softwareinstall(sometimes required)or after repairing a corrupted or damaged OS.If you received this software package with a sampling module,the modulemay require the supplied software to be installed to use the module or amodule e the Product Software CD-ROM to install the latestversion TekScope application and related software on the instrument.Beforeinstalling,check that the software versions(as listed on the CD-ROM)arenewer than the current product software installed on you instrument beforeinstalling(see How to check the current product software version).Thisproduct software only installs on instruments running the Microsoft WindowsXP operating system.Be sure to read the installation booklet supplied withthe CD-ROM disc.If you ordered this package to upgrade to the latest version of productsoftware,use the Product Software CD-ROM to install the TekScopeapplication and connectivity software on the instrument that is to be upgraded.This version of product software only installs on instruments running theMicrosoft Windows XP operating system.Be sure to read the installationbooklet supplied with the CD-ROM disc.Copyright©Tektronix*P071205104*071-2051-04Read thisfirstHow to check the current product software version 1.With your instrument TekScope application running,click Help>About<instrument_name>.2.Check the listed version number.If the version number shown is lower thanthe version listed on the CD-ROM label,use this Product Software CD-ROM to upgrade your product software.Other information Read the Release Notes.These can be found on the Product Software CD-ROMand on the hard drive of the instrument.Read the Product Software CD-ROM install booklet if you need to install/reinstallthe product software.If you need to repair or restore the operating system,read the Quick Start Usermanual provided with your instrument.If your instrument came with OperatingSystem Restore software,read the installation instructions provided with thesoftware.Visit the Tektronix Web site at for the latest upgrades ofproduct software and for DSA8200information.NOTE.Tektronix encourages you to keep your TekScope and related applicationsoftware updated to the latest version appropriate for your Microsoft WindowsOperating System.2Read thisfirst:Tektronix DSA8200,TDS/CSA8000series product software。
Epson 打印机用户指南.pdf_1701928662.0223663说明书
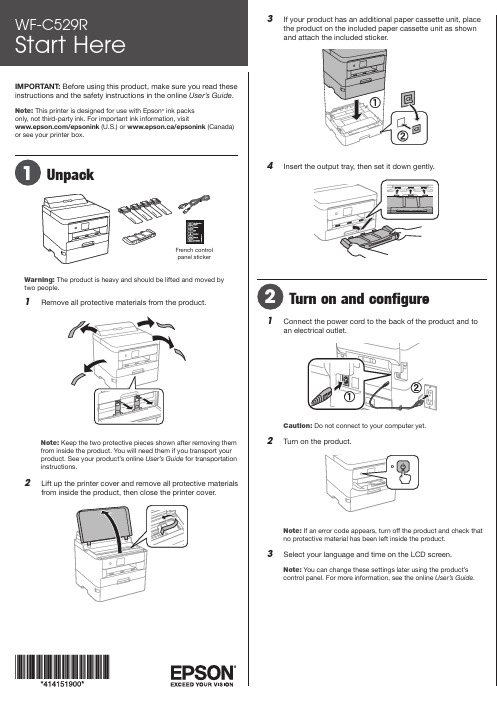
IMPORTANT: Before using this product, make sure you read these instructions and the safety instructions in the online User’s Guide .Note: This printer is designed for use with Epson ® ink packs only, not third-party ink. For important ink information, visit/epsonink (U.S.) or www.epson.ca/epsonink (Canada) or see your printer box.French controlpanel stickerWarning: The product is heavy and should be lifted and moved by two people.1 Remove all protective materials from the product.Note:from inside the product. You will need them if you transport your product. See your product’s online User’s Guide for transportation instructions.2 L3 I f your product has an additional paper cassette unit, placethe product on the included paper cassette unit as shown41 C2 T Note: If an error code appears, turn off the product and check thatno protective material has been left inside the product.3 S elect your language and time on the LCD screen.Note: You can change these settings later using the product’scontrol panel. For more information, see the online User’s Guide.Note: Make sure the ink pack is fully inserted and level with the top of the ink pack tray.6 I8 S elect OK on the LCD screen to start charging the ink.Ink charging takes approximately 9 minutes. A messageappears when ink charging is complete.Caution: Do not unplug or turn off the product or open the front cover while the product is charging or you’ll waste ink.See the online User’s Guide for information about loadingcapacity, available paper types and sizes, loading envelopes,1 MI nstall ink supply units(ink packs)Note: The included initial ink packs are designed for reliable printer setup and cannot be used as replacement ink packs or resold. After setup, the3 R emove and discard the protective piece from the ink packtray.4 S hake an ink pack 10 times, then remove it from thepackaging.Note:Do not touch the green chip on the ink pack.5 MStandard software package1 M ake sure the product is NOT CONNECTED to yourcomputer.Windows ®: If you see a Found New Hardware screen, click Canceland disconnect the USB cable.2 Download and run your product’s software package:/support/wfc529r (U.S.) www.epson.ca/support/wfc529r (Canada)3 F ollow the instructions on the computer screen to run thesetup program.4 W hen you see the Select Your Connection screen, selectone of the following and follow the on-screen instructions:•Wireless connectionIn most cases, the software installer automaticallyattempts to set up your wireless connection. If setup is unsuccessful, you may need to enter your network name (SSID) and password.• Direct USB connectionMake sure you have a USB cable (not included).•Wired network connectionMake sure you have an Ethernet cable (not included).PCL or PostScript driverDownload the software and see your online User’s Guide forinstructions./support/wfc529r (U.S.)www.epson.ca/support/wfc529r (Canada)Mobile printing• Print directly from a smartphone or tablet using iOS orAndroid™ with Epson iPrint™. Simply connect your printer and device to the same network and tap the action icon to select the print option.• Print directly from your Android (v4.4 or later) device*. Simplyconnect your printer and device to the same network and tap the menu icon to select the print option.• Print remotely with Epson Connect™. See your onlineUser’s Guide for instructions or learn more at /connect (U.S.) or www.epson.ca/connect (Canada).* M ay require the Epson Print Enabler or Mopria Print Service app from Google Play™.Note: Make sure the paper is under the arrow mark for yourpaper type and loaded against the front edge of the cassette.4 S lide the edge guides against the paper, but not tootightly.5 6 S elect the paper settings on the product’s control panel.Note:• An Internet connection is required to obtain the product software.• T o print from a Chromebook™, go to/support/chromebookprint (U.S.) or www.epson.ca/support/chromebookprint (Canada) for instructions.Firmware Update Notice: The printer is designed to work only with genuine Epson branded ink packs. Other brands of ink packs and ink supplies are not compatible and, even if described as compatible, may not function properly or at all. Epson periodically provides firmware updates to address issues of security, performance, minor bug fixes and ensure the printer functions as designed. These updates may affect the functionality of third-party ink. Non-Epson branded or altered Epson packs that functioned prior to a firmware update may not continue to function.Need paper and ink?Ensure brilliant results with Epson specialty and plain papers, engineered specifically for Epson printers. Find Epson papers and Epson Genuine Ink at (U.S. sales) or www.epson.ca (Canadian sales) and at Epson authorized resellers. Call 800-GO-EPSON (800-463-7766).Any problems?Network setup was unsuccessful.•Print a network connection report to identify network problemsand solutions. See your online User’s Guide for instructions.•Make sure you select the right network name (SSID).•Restart your router (turn it off and then on), then try to connectto it again.•The printer can only connect to a network that supports2.4 GHz connections. If your router offers both 2.4 GHz and 5GHz connections, make sure 2.4 GHz is enabled.•If you see a firewall alert message, click Unblock or Allow to let setup continue.•If your network has security enabled, make sure you enter yournetwork password (WEP key or WPA passphrase) correctly. Be sure to enter your password in the correct case.There are lines or incorrect colors in my printouts.Run a nozzle check to see if there are any gaps in the printout. Then clean the print head, if necessary. See the online User’s Guide for more information.The product’s screen is dark.Make sure your product is turned on, and touch the screen or press any button to wake it from sleep mode.Setup is unable to find my printer after connecting it with a USB cable.Make sure your product is securely connected.Any questions?User’s GuideWindows: Click the icon on your desktop or Apps screen to access the online User’s Guide .Mac: Click the icon in Applications/Epson Software/Guide to access the online User’s Guide .If you don’t have a User’s Guide icon, go to the Epson website, as described below.Technical supportVisit /support/wfc529r (U.S.) orwww.epson.ca/support/wfc529r (Canada) to download drivers, view manuals, get FAQs, or contact Epson.Call (866) 212-8743, 6 am to 6 pm , Pacific Time, Monday through Friday. Days and hours of support are subject to change without notice. Toll or long distance charges may apply.RecyclingEpson offers a recycling program for end-of-life hardware and ink packs. Please go to /recycle (U.S.) or www.epson.ca/recycle (Canada) for information on how to return yourproducts for proper disposal.EPSON and DURABrite are registered trademarks, EPSON Exceed Your Vision is a registered logomark, and Epson Connect and Epson iPrint are trademarks of Seiko Epson Corporation.Designed for Excellence is a trademark of Epson America, Inc.Windows is a registered trademark of Microsoft Corporation in the United States and/or other countries.Mac is a trademark of Apple Inc., registered in the U.S. and other countries.Android, Chromebook, and Google Play are trademarks of Google LLC.General Notice: Other product names used herein are for identification purposes only and may be trademarks of their respective owners. Epson disclaims any and all rights in those marks.This information is subject to change without notice.CPD-55866R1© 2021 Epson America, Inc., 5/21。
人教版高中英语选修计算机英语ApplicationSoftware

when date changes
Common application softwares
How is spreadsheet organized?
Have you ever used Microsoft Word to design a text? Can you tell us how you work with it?
Common application softwares What is spreadsheet software?
Application software
What is application software?
• Programs designed to make users more productive or assist them with personal tasks.
Can you identity it in your own words?
Facilitate communications
Application software
How is the application software distributed:
Packaged software: mass produced for many users, not one person or one company. Custom software: performs functions that are designed for a business or industry. Shareware: a copyrighted software that can be used for a short time. Freeware: a copyrighted software for free. Public-domain: not copyrighted, anyone can copy or give public-domain.
较难的英语中考试卷

Section 1: Listening Comprehension (20 points) Part A: Short Conversations (5 points)1. A. What is the woman's main concern?- A. The man's health.- B. The man's driving.- C. The man's diet.- D. The man's job.2. A. What does the man suggest doing?- A. Visiting the museum.- B. Going to the beach.- C. Staying at home.- D. Working out.3. A. What does the woman imply about the movie? - A. It's a waste of time.- B. It's a must-watch.- C. It's too violent.- D. It's not suitable for children.4. A. What is the woman planning to do?- A. Travel to Japan.- B. Learn to play the piano.- C. Start a new diet.- D. Visit her friend.5. A. What is the man's opinion about the weather?- A. It's too hot.- B. It's too cold.- C. It's going to change.- D. It's perfect.Part B: Long Conversations (5 points)6. Listen to the conversation about a new software and answer the following questions:- What is the software designed for?- What are the main features of the software?- Why does the man think the software is important?7. Listen to the interview with a famous author and answer the following questions:- What inspired the author to write their book?- How does the author feel about their success?- What advice does the author give to aspiring writers?Part C: Passages (5 points)8. Listen to the passage about environmental protection and answer the following questions:- What are the main causes of environmental pollution?- What are some ways to reduce pollution?- What is the speaker's opinion on the importance of environmental protection?9. Listen to the passage about the history of space exploration and answer the following questions:- When was the first human sent into space?- What were some of the major milestones in space exploration?- What are the future plans for space exploration?Section 2: Reading Comprehension (30 points)Passage 1: The Impact of Technology on Education (10 points)Read the passage and answer the questions below.The rapid development of technology has had a profound impact on various aspects of our lives, and education is no exception. Online learning platforms, educational apps, and interactive digital tools have revolutionized the way students learn and teachers teach. However, this technological advancement has also raised concerns about the future of traditional education.Questions:1. What are some examples of technological advancements in education?2. How has technology changed the way students learn?3. What are the potential drawbacks of relying too heavily on technology in education?Passage 2: The Importance of Exercise for Mental Health (10 points)Read the passage and answer the questions below.Regular physical activity is not only beneficial for physical health but also plays a crucial role in maintaining mental well-being. Exercise has been shown to reduce stress, improve mood, and enhance cognitive function. Despite these benefits, many people struggle to incorporate exercise into their daily routines.Questions:1. What are the mental health benefits of exercise?2. Why do some people find it difficult to exercise regularly?3. What are some strategies to encourage regular physical activity?Passage 3: The Evolution of Social Media (10 points)Read the passage and answer the questions below.Social media platforms have become an integral part of our daily lives, connecting us with friends, family, and even strangers. Over the years, these platforms have evolved from simple communication tools to complex ecosystems that shape public opinion, influence political events, and even impact our personal relationships.Questions:1. How has social media changed over time?2. What are some of the positive and negative effects of social media on society?3. What are the responsibilities of social media platforms in shaping online content?Section 3: Writing (20 points)Write an essay on one of the following topics:1. The Role of Parents in a Child's Education2. The Benefits and Challenges of Remote Work3. The Impact of Climate Change on Global Food SecurityYour essay should be approximately 300-350 words, demonstrating your ability to organize ideas effectively, use a variety of sentence structures, and maintain correct grammar and punctuation.。
GROOVY_GADGETS
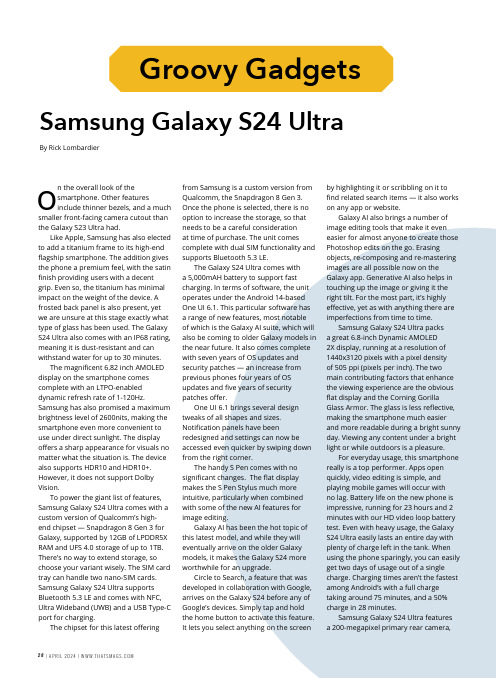
Samsung Galaxy S24 Ultra By Rick LombardierGroovy Gadgetso n the overall look of thesmartphone. Other featuresinclude thinner bezels, and a much smaller front-facing camera cutout than the Galaxy S23 Ultra had.Like Apple, Samsung has also elected to add a titanium frame to its high-end flagship smartphone. The addition gives the phone a premium feel, with the satin finish providing users with a decent grip. Even so, the titanium has minimal impact on the weight of the device. A frosted back panel is also present, yet we are unsure at this stage exactly what type of glass has been used. The Galaxy S24 Ultra also comes with an IP68 rating, meaning it is dust-resistant and can withstand water for up to 30 minutes.The magnificent 6.82 inch AMOLED display on the smartphone comes complete with an LTPO-enabled dynamic refresh rate of 1-120Hz. Samsung has also promised a maximum brightness level of 2600nits, making the smartphone even more convenient to use under direct sunlight. The display offers a sharp appearance for visuals no matter what the situation is. The device also supports HDR10 and HDR10+. However, it does not support Dolby Vision.To power the giant list of features, Samsung Galaxy S24 Ultra comes with a custom version of Qualcomm’s high-end chipset — Snapdragon 8 Gen 3 for Galaxy, supported by 12GB of LPDDR5X RAM and UFS 4.0 storage of up to 1TB. There’s no way to extend storage, so choose your variant wisely. The SIM card tray can handle two nano-SIM cards. Samsung Galaxy S24 Ultra supports Bluetooth 5.3 LE and comes with NFC, Ultra Wideband (UWB) and a USB Type-C port for charging.The chipset for this latest offering from Samsung is a custom version fromQualcomm, the Snapdragon 8 Gen 3.Once the phone is selected, there is nooption to increase the storage, so thatneeds to be a careful considerationat time of purchase. The unit comescomplete with dual SIM functionality andsupports Bluetooth 5.3 LE.The Galaxy S24 Ultra comes witha 5,000mAH battery to support fastcharging. In terms of software, the unitoperates under the Android 14-basedOne UI 6.1. This particular software hasa range of new features, most notableof which is the Galaxy AI suite, which willalso be coming to older Galaxy models inthe near future. It also comes completewith seven years of OS updates andsecurity patches — an increase fromprevious phones four years of OSupdates and five years of securitypatches offer.One UI 6.1 brings several designtweaks of all shapes and sizes.Notification panels have beenredesigned and settings can now beaccessed even quicker by swiping downfrom the right corner.The handy S Pen comes with nosignificant changes. The flat displaymakes the S Pen Stylus much moreintuitive, particularly when combinedwith some of the new AI features forimage editing.Galaxy AI has been the hot topic ofthis latest model, and while they willeventually arrive on the older Galaxymodels, it makes the Galaxy S24 moreworthwhile for an upgrade.Circle to Search, a feature that wasdeveloped in collaboration with Google,arrives on the Galaxy S24 before any ofGoogle’s devices. Simply tap and holdthe home button to activate this feature.It lets you select anything on the screenby highlighting it or scribbling on it tofind related search items — it also workson any app or website.Galaxy AI also brings a number ofimage editing tools that make it eveneasier for almost anyone to create thosePhotoshop edits on the go. Erasingobjects, re-composing and re-masteringimages are all possible now on theGalaxy app. Generative AI also helps intouching up the image or giving it theright tilt. For the most part, it’s highlyeffective, yet as with anything there areimperfections from time to time.Samsung Galaxy S24 Ultra packsa great 6.8-inch Dynamic AMOLED2X display, running at a resolution of1440x3120 pixels with a pixel densityof 505 ppi (pixels per inch). The twomain contributing factors that enhancethe viewing experience are the obviousflat display and the Corning GorillaGlass Armor. The glass is less reflective,making the smartphone much easierand more readable during a bright sunnyday. Viewing any content under a brightlight or while outdoors is a pleasure.For everyday usage, this smartphonereally is a top performer. Apps openquickly, video editing is simple, andplaying mobile games will occur withno lag. Battery life on the new phone isimpressive, running for 23 hours and 2minutes with our HD video loop batterytest. Even with heavy usage, the GalaxyS24 Ultra easily lasts an entire day withplenty of charge left in the tank. Whenusing the phone sparingly, you can easilyget two days of usage out of a singlecharge. Charging times aren’t the fastestamong Android’s with a full chargetaking around 75 minutes, and a 50%charge in 28 minutes.Samsung Galaxy S24 Ultra featuresa 200-megapixel primary rear camera,28|A P R I L2024|W W W.T H A T S M A G S.C O MW WW.T H A T S M A G S.C O M | A P R I L 2024 | 29a 12-megapixel ultra-wide camera, a 10-megapixel telephoto camera, and a 50-megapixel telephoto camera. On the front, you get a 12-megapixel camera for your selfies and video calls. That’s mostly the same as the Galaxy S23 Ultra, except that you now get a new 5x telephoto camera, replacing the 10x telephoto camera in the previous generation model.The 50-megapixel sensor can deliver high quality images at 10x zoom. The primary 200-megapixel camera, the same as last year’s model, remains a great tool to capture images. Its smooth camera interface means this takes minimal effort to complete. Shots look rich and colors are vibrant under almost every lighting condition. The night mode feature also helps in capturing high quality images in the dark.Overall, the S24 Ultra is similar to the S23 Ultra released last year. However, the new anti-reflective glass andtitanium frame will be things to check out, but the S23 Ultra comes with almost exactly the same camera setup. Forthose on older series Galaxy models, the Galaxy S24 Ultra is a serious upgrade. For those looking more upmarket, the Galaxy Z Fold 5 or iPhone 15 Pro Max could be decent alternatives, albeit at a higher pricepoint.The Samsung Galaxy S24 Ultra is a true ultra device, and for those looking for the best Android smartphone on the market, look no further. A flawless display, AI-powered features and powerful processor take care of the necessities, and it still boasts top of the range cameras. It is also one of the most long-lasting smartphones on the market with seven years of security updates and seven generations of OS updates included.。
RapidFinder
USER BULLETINRapidFinder™ Express Software v2.0 and SDS Software v1.4.2.1Publication Part Number 4480998 Revision CSUBJECT:Installing RapidFinder™ Express Software v2.0 and SDSSoftware v1.4.2.1Overview . . . . . . . . . . . . . . . . . . . . . . . . . . . . . . . . . . . . . . . . . . . . . . . . . . . . . . . . . . . . . . . . . 1Required kits. . . . . . . . . . . . . . . . . . . . . . . . . . . . . . . . . . . . . . . . . . . . . . . . . . . . . . . . . . . . . . 1Install the software (full installation) . . . . . . . . . . . . . . . . . . . . . . . . . . . . . . . . . . . . . . . . 2Upgrade from a previous version . . . . . . . . . . . . . . . . . . . . . . . . . . . . . . . . . . . . . . . . . . . . 2Prepare to run RapidFinder™ Express Software v2.0 . . . . . . . . . . . . . . . . . . . . . . . . . . . 2Minimum computer requirements. . . . . . . . . . . . . . . . . . . . . . . . . . . . . . . . . . . . . . . . . . . 3Computer resolution requirements . . . . . . . . . . . . . . . . . . . . . . . . . . . . . . . . . . . . . . . . . . 3 OverviewThis user bulletin lists the steps and requirements for installing RapidFinder™ ExpressSoftware v2.0 on your system or for upgrading from from RapidFinder™ ExpressSoftware v1.2 to RapidFinder™ Express Software v2.0.If your computer does not have RapidFinder™ Express Software v1.2 installed, use theRAPIDFINDER EXPRESS V2.0, 7500 FAST RQS CD to perform a full installation of thesoftware.If you have the 7500 Fast Food Pathogen Detection System Package, use theRAPIDFINDER EXPRESS V2.0, 7500 FAST RQS CD to upgrade from RapidFinder™Express Software v1.2 to RapidFinder™ Express Software v2.0.If your computer already has RapidFinder™ Express Software v1.2 installed, you canuse either the RAPIDFINDER EXPRESS V2.0, 7500 FAST RQS CD or the downloadableupgrade installer available at /us/en/home/technical-resources/software-downloads/rapidfinder-express-software.html .Note: You can view files generated by RapidFinder v1.2 software after you installRapidFinder™ Express Software v2.0.Required kitsCheck the shipped materials. The MicroSEQ® pathogen detection kits, 7500 Real TimePCR Systems Spectral Calibration Kit I, and 7500 Real Time PCR Systems SpectralCalibration Kit II are not provided with the system when you purchase RapidFinder™Express Software.Installing RapidFinder™ Express Software v2.0 and SDS Software v1.4.2.1Install the software (full installation)Install the software (full installation)Note: If a previous version of the RapidFinder™ Express Software is installed on yourcomputer, proceed to “Upgrade from a previous version”.1.Plan the installation. If you are installing a new instrument, uncrate and place theinstrument.2.Insert the RAPIDFINDER™ EXPRESS V2.0, 7500 FAST RQS CD into the computer.The installer will begin automatically. If the installer does not begin automatically:a.Open the RAPIDFINDER™ EXPRESS V2.0, 7500 FAST RQS CD in WindowsExplorer.b.Navigate to the Setup folder and double-click on setup.exe.Note: If a dialog window appears stating “You must be logged in withAdministrator rights to install RapidFinder™ Express Software v2.0”, clickOK, then right-click on setup.exe and select Run as administrator.3.Follow the on-screen instructions to install RapidFinder™ Express Software v2.0and SDS Software v1.4.2.1.Upgrade from a previous version1.Navigate to Applied Biosystems SDS Documents.2.Archive your SDS data.3.Insert the RAPIDFINDER™ EXPRESS V2.0, 7500 FAST RQS CD into the computer.orDownload the upgrade installer and run it.For more information on obtaining the upgrade installer, go to http:///us/en/home/technical-resources/software-downloads/rapidfinder-express-software.html.In both cases, the installer will begin automatically. If the installer does not beginautomatically:a.Open the RAPIDFINDER™ EXPRESS V2.0, 7500 FAST RQS CD or Image inWindows Explorer.b.Navigate to the Setup folder and double-click on setup.exe.Note: If a dialog window appears stating “You must be logged in withAdministrator rights to install RapidFinder™ Express Software v2.0”, clickOK, then right-click on setup.exe and select Run as administrator.4.Follow the on-screen instructions to install RapidFinder™ Express Software v2.0and SDS Software v1.4.2.1.2RapidFinder™ Express Software v2.0 User BulletinInstalling RapidFinder™ Express Software v2.0 and SDS Software v1.4.2.1Prepare to run RapidFinder™ Express Software v2.0 Prepare to run RapidFinder™ Express Software v2.01.Check the halogen lamp (refer to the Applied Biosystems® 7300/7500/7500 Fast Real-Time PCR System Installation and Maintenance Guide (PN 4378657). If lamp usage is> 1750 hours, change the lamp.during installation. The next run will not start if lamp usage equals or exceeds2.Ensure that all calibrations are up to date.For new instruments, verify that pure-dye calibration with FAM™, VIC®, NED™,and Cy®5 dyes was performed. Otherwise, contact your Field Service Engineer.For more information on calibration, refer to the Applied Biosystems® 7300/7500/7500(PN 4378657).Fast Real-Time PCR System Installation and Maintenance Guide™The minimum computer requirements for a 7500 Fast System with RapidFinder™Express Software v2.0 and SDS Software v1.4.2.1 are:• 2.9 gigahertz processor•16 gigabytes RAM•Intel® Core i7-4600M processor•256 gigabytes hard drive7 SP1 (32– or 64–bit)•Microsoft® Windows®®Computer resolution requirementsSet the Screen Resolution to a minimum vertical resolution of 800 pixels with TrueDisplaySettings).Color (32 bit) (Start Menu Control Panel3 RapidFinder™ Express Software v2.0 User BulletinFor support visit /support or email ************************13 March 2015For testing of Food and Environmental samples only.The information in this guide is subject to change without notice.DISCLAIMERTO THE EXTENT ALLOWED BY LAW, LIFE TECHNOLOGIES AND/OR ITS AFFILIATE(S) WILL NOT BE LIABLE FOR SPECIAL, INCIDENTAL, INDIRECT, PUNITIVE, MULTIPLE OR CONSEQUENTIAL DAMAGES IN CONNECTION WITH OR ARISING FROM THIS DOCUMENT, INCLUDING YOUR USE OF IT.NOTICE TO PURCHASER: DISCLAIMER OF LICENSEPurchase of this software product alone does not imply any license under any process, instrument or other apparatus, system, composition, reagent or kit rights under patent claims owned or otherwise controlled by Life Technologies Corporation, either expressly, or by estoppel.TRADEMARKSAll trademarks are the property of Thermo Fisher Scientific and its subsidiaries unless otherwise specified. Microsoft and Windows are trademarks of Microsoft Corporation. Cy is a trademark of GE Healthcare UK, Ltd. Intel is a registered trademark of Intel, Inc.© 2015 Thermo Fisher Scientific Inc. All rights reserved.。
MIDAS IV 自动气象观测系统用户说明书

21153/2000Midas IV AWOSReliable Weather Information for Small Airports Olli Tevä, M.Sc. (Eng.)Product Manager Surface W eather Division Vaisala Helsinki FinlandMIDAS IV is an inte-grated airport weather observing system pro-viding meteorological data acquisition, vali-dation, calculation and storage for pilots and air-traffic con-trollers. Designed for flexibility and reliabili-ty, and based on ob-ject-oriented software architecture, the MIDAS IV system is also ideal for small air-ports.aisala’s MIDAS IV Automatic W eather Observing System has proven its capa-bilities many times over in large airports. No airport has been too complex; no needs too challenging. The MIDAS IV has offered a new level of performance and ease-of-use.Regardless of airport size, the MIDAS IV is always the right size and grows in tandem with future challenges and changes.Scalable and flexible systemNow, the MIDAS IV concept has been modified to better meet the needs of small air-ports. The software packages have been chopped into small-er functions enabling the build-ing of small systems.At the airport, the MIDAS IV system’s basic building blocks are Vaisala’s sensors for wind, temperature, humidity,pressure, rain, solar radiation,Vcloud height and visibility. At the Air Traffic Control (ATC) and Met Office, the basic building blocks are the physical workstations and software modules for the various func-tions, including weather view-ing, weather report editing, maintenance and communica-tion interface to the other sys-tems.In both large and small MIDAS IV systems, the sen-sors, data loggers, communica-tion methods, PC software and hardware modules are the same; only their number varies. The systems are built in such a way that the parts used in a small system can still be used when the system is upgraded. The system can be upgraded so that either the number of meas-ured weather data at the air-port, or the number of work-stations at the ATC, can be in-creased, or both.Proven productThe MIDAS IV is the result of over twenty years’ experience in the field, offering a reliable and versatile design that meets the needs of customers world-wide. The MIDAS IV has been specifically designed to utilize the latest sensors and computer technology available, thereby ensuring superior accuracy and performance in the meas-urement and reporting of the ICAO/WMO formatted avia-tion weather data.Several recommendations and standards have been used as guidelines when designing the MIDAS IV system. These stan-dards must also be considered when designing an actual air-port system. The most com-monly used standards are as follows:•ICAO Annex 3, 10, 14 for data processing and report-ing practices•WMO No. 306, Manual on codes for coded meteorologi-cal reports22153/2000I。
Netscape Communicator 4.78和4.76软件说明书
Netscape CommunicatorNetscape Communicator, standard edition, is a group of related tools for working and communicating over the Internet.In Netscape Communicator 4.78 and 4.76, these tools include:* Netscape Navigator[tm] - find and view information on the World Wide Web* Netscape Messenger - send and receive e-mail* Netscape Composer - create and publish Web pagesRequirementsBelow are the required software and disk space requirements for installing and running Netscape Communicator.Operating SystemsThe basic Solaris[tm] software end-user cluster (SUNWCuser) must be installed before you install Netscape Communicator.Netscape Communicator software 4.78 and 4.76 runs on the Solaris Operating Environment for SPARC[tm] and Intel Platform Editions, with Solaris versions 2.6, 7, and 8.You can install Netscape Communicator on a Common Desktop Environment (CDE) or OpenWindows[tm] desktop.Disk Space RequirementsYou need 20 Mbytes free disk space to install the Netscape Communicator software. Downloading InstructionsSolaris 2.6, 7, and 8 Operating EnvironmentCurrently, Netscape Communicator is available for download in English only. Documentation from Netscape is also provided in English only.After ensuring you have enough disk space and reviewing your selections, select the version that corresponds to your platform from those listed below. Before the download starts, a dialog box appears, enabling you to choose the location where you want to download the Netscape Communicator file.Note - Make sure the location exists before you download Netscape.When the file has finished downloading, continue with the installation instructions that follow.Netscape Communicator 4.78 and 4.76SPARC Platform Edition:Global - uses 128-bit encryption with S/MIMEIntel Platform Edition:Global - uses 128-bit encryption with S/MIMEExtracting Netscape CommunicatorAfter downloading the Netscape Communicator package, follow the steps below to install Netscape Communicator:1. Become the root user by typing su, then type your root password.2. Change to the directory where you downloaded the compressed version of Netscape Communicator:# cd3. Check the name of the downloaded Netscape Communicator file.If the Netscape file does not have a .Z suffix, your browser has uncompressed the Netscape file automatically. Use the following command to extract its files.# tar -xf NetscapeIf the Netscape file has a .Z suffix, your browser did not uncompress the Netscape file automatically. Use the following command to uncompress and extract its files.# zcat Netscape.Z | tar -xf -Installing Netscape Communicator With pkgadd1. If you are not root already, become the root user by typing su, then type your root password.2. Change to the installation directory where the compressed version of Netscape Communicator was extracted: Note - When you execute the next step, the Netscape Communicator package will be installed in the /opt/NSCPcom directory on your workstation. If you currently have a version of Netscape Communicator on your workstation and this version came with your Solaris install (bundled), installing this download version (unbundled) will place two versions of Netscape Communicator on your workstation. The version of Netscape Communicator bundled with Solaris would be installed at /usr/dt/appconfig/netscape. If you do not want two versions of Netscape Communicator on your workstation, it is recommended that you remove the older versionbefore installing the new downloaded version. To remove the old version, run the command "pkgrm NSCPcom" as superuser.3. Install Netscape Communicator by typing:# pkgadd -d `pwd` NSCPcom4. Exit superuser by typing exit at the prompt.Adding Netscape Communicator to your PATHDetermine where your PATH variable is set, and add the Netscape Communicator directory to your path. The path may be set in the .dtprofile, .login, or .cshrc file.Add an entry to your PATH for the directory in which Netscape Communicator is installed. For example, if Netscape Communicator were installed in the default directory, you would add /opt/NSCPcom to your PATH.Starting Netscape CommunicatorThis section describes methods for starting Netscape Communicator from the command line, from within CDE, and from within the OpenWindows environment.To start Netscape Communicator 4.78 from within CDEClick the Web Browser icon.On Solaris 7 and 8 Operating Environment, this is a planet Earth icon on the left of the Front Panel.An entry for the directory where Netscape Communicator 4.78 or 4.76 is installed must be included in your $PATH if you want Netscape Communicator 4.78 or 4.76 to be your default browser. In Solaris Operating Environment and prior releases the default is the HotJava[tm] browser. In the Solaris 8 Operating Environment, the default browser is Netscape 4.7. See your system administrator if you need help.To start Netscape Communicator from within OpenWindows1. Start File Manager and open the folder where you installed Netscape Communicator.2. Double-click on the icon with the Netscape Communicator executable.。
- 1、下载文档前请自行甄别文档内容的完整性,平台不提供额外的编辑、内容补充、找答案等附加服务。
- 2、"仅部分预览"的文档,不可在线预览部分如存在完整性等问题,可反馈申请退款(可完整预览的文档不适用该条件!)。
- 3、如文档侵犯您的权益,请联系客服反馈,我们会尽快为您处理(人工客服工作时间:9:00-18:30)。
44
l
lexical and a syntactic analyzer. The former does morphological analysis as well in order to keep the size of the vocabulary at a minimum. The syntactic module represents a top-down, basically LL(1) algorithm augmented by attributes for initiating semantic processing. Semantic interpretation is based on a recta-level object description that provides a clue to the implementation of relations in the lorm of different steps in producing geometrical constructions [Ale 89]. Intersentential reference is resolved by building a symbol table. The range of syntactic and semantic coverage can be illustrated by the examples below.
Pick a point. L a b e l the p o i n t b y ~A. D r a w a c i r c l e a r o u n d p o i n t -A. P i c k a p o i n t ~B on the circle. D r a w r a d i u s ~A-B. P i c k a p o i n t -C o u t s i d e the circle. C o n s t r u c t t r i a n g l e ~A~B~C. I n s c r i b e a c i r c l e ~q in the t r i a n g l e . Find a point ~P that is i n s i d e the t r i a n g l e a n d o u t s i d e c i r c l e -q. From point ~P, draw a circle with r a d i u s ~A~B. Label the intersections of the c i r c l e s b y ~D a n d -E. C o n n e c t the p o i n t s of i n t e r s e c t i Байду номын сангаас n . C r e a t e the h e x a g o n - A - B - C - P - D ~ E .
Abstract
THALES is a software package for plane geometry constructions, supplied with a natural language interlace. Using THALES requires no knowledge of a programming language. The interface is capable of processing practically all kinds of instructions within the subset of plane geometry English. The "static semantic" module has been generated on the basis of a high-level attribute specification. Transportability, modifiability and generality -- the key issues of natural language interface design -- are investigated in the project note. The notion of specifiability is introduced to replace the three features mentioned above. 1. Introduction* Natural language interfaces represent one of the most common applications of natural language processing. In the eighties, not only a considerable increase in natural language interface refinement has been achieved, but also methods for design and evaluation have been worked out [Mart 83, Schr 881. One might think that a natural language interface of the nineties would be properly described in terms ol throe parameters, viz., (i) transportability (ii) modifiability by the user Off) generality Our experience with THALES shows that none of these features is attainable in the near future. Rather, natural language interfaces based on welldefined subsets of languages and supplemented with possibly lull semantics appear to be real candidates for applications in the following years. Requirements for transportability and generality run counter to the need to supply the interface with as full semantics as possible. Modifiability by the user can be maintained at a price that is hardly worth paying.
If one lets the user tailor the interface to his/her needs, that natural language interlace should provide this possibility by relaxing syntax or semantics. We do not consider this a real ahernative. Neither does modifiability in the form of substitution of one expression by another on the basis of their semantic identity seem to be a realization of what the term "modifiability by the user" suggests (Cf. [JAKE 88]). However, there appear to be different parts of natural language interlace design that may be reused in other applications. We shrill refer to this possibility by the term "specifiability" -- a feature that merits thorough consideration. 2. A n O v e r v i e w of THALES THALES is a program package fbr plane geometry constructions. The constructions are carried out as series of instructions lormulated in English. Through a menu system, it is possible to save constructions and parts of constructions lot some later application, the constructions may be inserted into other applications. The instructions can be stored and edited as normal ASCII files. A number of examples covering the majority of tasks related to plane geometry are supplied to help the teacher or student in teaching or learning plane geometry. Manipulating objects during constructions is also supported without the risk of running into ambiguities in the course of reference resolution.
K. FABRICZ