SIM900_SIM800-SIM5320系列软件升级介绍
5320玩机教程及问题解答总汇(转自塞班论坛)

Nokia 5320 介绍与基础1、Nokia 5320 详细参数网说明:/find-products/products/nokia-5320-xpressmusic/specifications系统说明:Symbian 9.3 Series 60第3版FP2 其中Symbian 9.3为系统版本,Series 60第3版为界面版本(即平时简称的S60v3),FP2为特征包(即升级版2)。
2、5320 行水划分基本可分为:国行(5320XM)、国行(5320DI)、移动心机、联通定制机、水货五种其中,水货包括港版、亚太、欧版等以硬件区分,国行(5320XM)和移动心机一样,无前置摄像头,无3G模块;国行(5320DI)、联通定制机和水货一样,有前置摄像头,有3G模块,可支持联网WCDMA网络,支持3G 视频通话。
所以行水的简单区分从有无前置摄像头即可看出。
另外无论行水,5320皆不具备wifi模块,皆不具备GPS模块行货保修状态验证:/get-support-and-software/online-warranty-check-o13、刷机介绍刷机即更新手机固件,刷机的目的主要是厂家为解决老版本系统中的BUG推出的补丁程序,一般是解决反应速度慢、音量小、短信模版、死机、显示亮度等等,还有些是为了增强原机型的功能,比如增加数码变焦、像框种类、图像的编辑能力等等,在不改变手机硬件的情况下提升其功能,但新版本不一定是最稳定版本,如6.103和5.16都因为有问题被nokia下架了硬件相同可以互刷,判断方法:在手机待机桌面输入*#0000#,查看硬件类型,只要RM类型相同,都可互刷系统,联通定制机和水货应为RM-409,国行和心机应为RM-416。
其他版本很少见,如RM-417的,是拉丁美洲的机型,可以刷RM-409的固件。
目前论坛中也出现玩机爱好者DIY的刷机固件,此类固件可能作了某些优化,但并非官方固件,刷机请自行负责推荐刷机教程:/viewthread.php?tid=4051116&bbsid=236&page=1#pid567020254、5320 应用程序及多媒体格式5320支持多种应用程序,主要包括:sis、sisx(Symbian软件)、jar、jad(Java软件)、swf(flash软件)、wgz(安装卸载同sis软件,但基本要求联网使用)5320也支持多种游戏格式,包括:sis、sisx(Symbian游戏)、jar、jad(Java游戏,国产游戏常见)、swf(flash游戏,但不能太大)、N-gage(需NG平台支持)以及各模拟游戏——目前较成功的模拟器包括GB、GBC、GBA、FC、SFC、MD等模拟器,甚至于windows3.1亦可模拟,只是效果不佳5320支持大部分主流视频格式,自带的RealPlayer播放器支持3GP,FLV,MP4,RM 和RMVB(最大支持QVGA,15fps,320kbps),WMV(只支持WMV9(VC-1编码),256kbps,15fps,QVGA),鉴于解码器的效率问题,视频尺寸应限制在320×240上下,帧数在15~30之间;其他视频格式可通过安装第三方播放器扩展,比如coreplayer,coreplayer支持绝大多数格式的视频,对divx,xvid的支持可以说很不错的,这两个也是mp4、avi格式常用的视频编码。
SIM900A模块资料汇总GSM(GPRS)模块

SIM900A模块资料汇总GSM(GPRS)模块ATK-SIM900A模块支持RS232串口和LVTTL串口,并带硬件流控制。
支持5V~24V的超宽工作范围,使得本模块可以非常方便与您产品进行连接,从而给产品提供包括语音、短信和GPRS数据传输等功能。
SIM900A模块资料如截图:SIM900A模块原理图截图:SIM900A模块资料汇总截图:SIM900A模块资料具体说明:1.模块原理图:模块原理图和封装库2.程序源码:此目录包含所有正点原子STM32源码,分库函数和寄存器两个版本,请使用与开发板对应的源码即可。
3.配套软件:包括CH340 USB串口驱动,串口调试助手,汉字Unicode互换工具等开发过程中常用软件4.SIM900A模块资料:SIM900A模块自身的一些官方资料5.芯片数据手册:模块使用到的芯片的数据手册6.SD卡根目录文件:使用正点原子STM32开发板发送中文短信需要把这个文件夹下面内容复制到SD卡根目录7.其他参考资料:一些网络资料8.DF文件:•TK-SIM900A GSM(GPRS)模块用户手册_V1.1.pdf 这个文档非常重要,是模块介绍•ATK-SIM900A模块使用说明_ANxx.pdf 这个文档有几个版本,对应不同开发板。
•ATK-SIM900(A)模块DTMF解码功能_AN1415.pdf:DTMF解码功能说明文档•ATK-SIM900(A)模块彩信功能_AN1414.pdf:彩信功能说明文档•ATK-SIM900(A)模块升级说明_AN1413.pdf :模块升级说明文档•ATK-SIM900A GSM模块常见问题汇总_20140805.pdf:这个文档是模块使用过程中常见问题解答。
电路项目的主要芯片及数据手册电路相关文件电路图文件ATK-SIM900A模块原理图.rar 描述:SIM900A模块原理图教程SD卡根目录文件.rar描述:SD卡根目录文件源代码程序源码+配套软件.zip描述:程序源码+配套软件其他文件其他资料.zip描述:见文档截图展示。
SimaPro 9.0升级至SimaPro 9.1更新说明书
Update instructions SimaPro 9.0 to SimaPro 9.1ColophonTitle :Update instructions SimaPro 9.0 to SimaPro 9.1Written by:PRé ConsultantsMichiel Oele, Ruba Dolfing FanousReport version: 1.1Date:June 2020Language:EnglishAvailability: PDFCopyright: © 2020 PRé Consultants bv. All rights reserved.PRé grants the right to distribute and print the unchanged PDF version ofthis manual for non-commercial purposes only.Parts of the manual may be reproduced in other work only after permissionand if a clear reference is made that PRé is the author.Phone: +31 33 4504010Email: *******************Website: Contents1I NTRODUCTION (3)2U PDATING THE S IMA P RO SOFTWARE (3)2.1 U PDATING THE S IMA P RO DATABASE SERVER (MULTI-USER VERSIONS ONLY) (3)2.2 P ROCEDURE FOR UPDATING SINGLE-USER AND MULTI-USER CLIENT (4)3U PDATING THE DATABASE (4)3.1 D ATABASE UPDATE (4)3.2 I NSTALLING THE UPDATE DATABASE (5)3.3 I MPORTING THE UPDATE DATABASE (6)3.4 A PPENDING SUBSTANCES (8)3.5 U PDATING O BSOLETE LINKS IN YOUR PROJECTS TO ECOINVENT 3.6 (8)4C ONTACT U S (11)2Update Instructions31 IntroductionThis document describes how to update your current software and database from SimaPro 9.0 to the new SimaPro 9.1. In the “What’s new in SimaPro 9.1” document, you will find information about the changes in the data, methods and software.You will find detailed instructions below. Please read these carefully. Should you still have questions, please contact your local SimaPro partner or the PRé helpdesk by email at *******************. You may also contact us by phone at +31-33-4504010.A summary of the update procedureThe update procedure can be summarised as follows:1. Software update : Update your SimaPro 9.0 single-user or multi-user client software to SimaPro 9.0. For multi-user licenses, you may also need to update the SimaPro database server.2. Database update : Import the update database which includes the new and updated data and methods.2 Updating the SimaPro software2.1 Updating the SimaPro database server (multi-user versions only )Single user vs. multiuserIf you are working with a single user SimaPro license – please start with section 2.2! Updating the database server is only relevant for multi-user licenses.We recommend that multi-user updates are done by your network administrator. Please begin by updating the SimaProdatabase server. It is important to note that the defined Aliases remain intact after the update. To update the SimaPro database server:1. Check which version of the SimaPro database server is currently running. If you are working with SimaProDatabase Server 9.0.0.49 (or later) – you can skip this section and go straight to 2.2. For example, the screenshot below shows version 9.1.0.2.2.If you are still working with a version earlier than 9.0.0.49, download the server installation fileSetupServer910.exe to the machine running the SimaPro database server.3.Right-click SetupServer910.exe and select ‘Run as administrator’ to start the installation.4.Follow the instructions in the setup wizard. You may be asked for your SimaPro registration name and code. Thecurrent SimaPro database server software will be uninstalled and then replaced with the latest software. Note that your database(s) will not be uninstalled!Next, all SimaPro 9.0 multi-user clients have to be updated to SimaPro 9.1. This is explained in the next section.2.2Procedure for updating single-user and multi-user clientThe procedure for updating the single-user and multi-user SimaPro client software is as follows:1.Download the SimaPro installation file SetupSimaPro910.exe to each computer that runs the SimaPro single-useror SimaPro multi-user client.2.Double-click SetupSimaPro910.exe to start the installation. Follow the instructions in the setup wizard. You may beasked for your SimaPro registration name and code. The current SimaPro software will be uninstalled and then replaced with SimaPro 9.1. Note that your database(s) will not be uninstalled!Next, proceed with the database update procedure.3Updating the database3.1Database updateThis chapter describes how to update your database. The update process consists of four parts:1.Installing the update database that contains the new data.2.Importing the update database into your SimaPro database(s).3.Doing an append action to merge synonyms in the substance list.4.Updating obsolete links in your projects.These steps are described in detail in the following sections. In Box 1 and 2 you will find tips for updating multi-user licences and an overview of the default database locations. You have to follow the database update procedure for each SimaPro database that you want to update.Updating SimaPro ClassroomOwners of an educational Classroom licence do not have “local server” database access, but should request a*********************************************************************.Wewillincludefurther instructions on how to update.Please note that any changes you have made in the library entries or in the original methods supplied in the Methods library will be lost during the update. Processes, product stages or methods that you have added (for example by copying) to the libraries that are to be updated will still be there. Contact us for assistance if you wish to keep your changes.4Update InstructionsBox 1. Updating a database in a multi-user environmentIn a multi-user environment, updating a database directly on the database server is very slow due to additional network traffic. If you have one of the professional multi-user licences, you can also do the database update locally on a (fast) PC with the SimaPro client installed. This is much quicker.To do that, login as Manager and check under Tools, User Management that no users are logged into the SimaPro database. If so, you can close SimaPro. Locate the database on the server’s hard drive (see Box 2 for default locations) and copy the database (a set of 77 numbered *.NX1 files) to your local hard drive. In the “Open SimaPro Database” window, choose “Local server”, browse to the d irectory you copied the database to. Continue with the update instructions in section 3.2. After updating, copy the database back to its original location on the server.Box 2. Default directoriesSimaPro installs updates in the default database directory if no other location is chosen. The default directory depends on the version of Windows where your database server is running:∙Windows 7, Windows 8, Windows 10, Windows 2008 server, Windows 2012 server:C:\Users\Public\Documents\SimaPro\Database\∙Windows 2003 server: C:\Documents and Settings\All Users\Shared Documents\SimaPro\DatabaseIf you have a multi-user version and cannot find the database in one of the default directories, open the SimaPro database server. In the list of aliases you can see the location(s) of the database directories that are being used.3.2Installing the update databaseDownload SetupUpdateDatabase910.exe and double-click the file to install the “Update910” database. You have to do this on each computer with SimaPro single user installed. For the multi-user, one installation is sufficient.The “Update910” database will be installed in the default directory (see Box 2 above). Follow the instructions in the setup wizard. This process will install the update database on your computer, but it will not yet update the active databases.Multi-user version: since we recommend doing the database update locally, the update database does not have to be installed in one of the locations (directory aliases) defined in the SimaPro database server. Instead, you can do the update on a local hard drive and then copy your updated database back to the server (see Box 1).If you notice any older update databases (named Update802, Update805, Update810 or similar) and you are sure you already imported these updates, you can delete these with Windows Explorer to free up disk space and avoid confusion. To avoid deleting useful databases by accident, please open each database before deleting it to check for any projects that need to be kept.563.3 Importing the update databaseFollow these steps to import the new data:1. Start SimaPro 9.1. If you have a multi-user SimaPro licence, log in as Manager. Make sure no other users arelogged in at this moment, because the database will be locked during import. During the update process, users cannot log in to SimaPro.2. Check if the database you want to update is open in SimaPro. The database name is found in the blue bar at thetop of the SimaPro window. If the database is not open, go to File> Open SimaPro Database and select the database you want to update (the database you usually work in).3. Go to File > Import SimaPro Database. Click “Yes ” to continue when the message below appears.4. The “Import SimaPro Database” dialogue box will appear:5. Click “Browse ”. The update database (Update910) will appear in the “Open Database” dialogue box (in multi -userversions, the field “S erver” is also shown).Update Instructions7If you do not see the “Update910” database, click the “Browse” button in the Open database window. Browse to the directory where you installed the update database, select the “Update910” database (see Box 2 for the default directory) and click “OK”.6.Click “Open”. You will see the libraries that need to be imported. Click “Select all” at the bottom left of the window. Next, click “Import ”.7.The data will be scanned and an overview will be generated of all the data that are added or replaced. We recommend that you save this overview.8.Click “OK ” to start the import process. Before data importing starts, the program will prompt you to make a backup.After clicking “OK ”, select the folder you want the save to backup file in (for example, the default directory; see Box 2). Note: if you click “Cancel ”, the update procedure is stopped.9.The data in the update database will now be imported into the existing database. This step can take a lot of time and thus requires patience (especially when it hits 96%) - forcing SimaPro to shut down risks database damage !10. After the import is successfully completed, your data libraries and methods should be updated (quick check: youshould now have ecoinvent 3.6).Box 3. Import errorsShould SimaPro report any import errors, please save the log file and make screenshots if possible. The overview of issues in the log file may help you to find out what went wrong. For assistance, please send an email to the SimaPro *******************************************************************************.We appreciate it if you could include the results of the database check, which can be done via File > SimaPro Database Management > Check Database.3.4Appending substancesThe next step is to do an “append substances” action to convert some old substance names in your database to the latest substance naming convention in SimaPro. If you do not do this, mismatches between life cycle inventory and impact assessment data may occur, leading to incorrect LCA results. The replacements are defined in the append file that is installed with the update database.Appending merges two synonymous substance names into one. For example, CO2 needs to be appended to Carbon dioxide, the latter being the name used in the most recent version of SimaPro and in the impact assessment methods. Without appending CO2 to Carbon dioxide, any use of the substance named CO2 in processes will not show in the impact assessment results.1.Go to the “Substances” section under “General Data” in the LCA Explorer screen.2.Click “Append”. A new window will open.3.Click “Load” on the right hand side and select the append file: “AppendSubstances910.xlsx”. The append file isfound in the same directory as the update database (see Box 2 for default directories).4.Click “Append” on the right hand side of the window. After a final confirmation, the substances will be appended.Depending on the size of your database, this may take some time.3.5Updating Obsolete links in your projects to ecoinvent 3.6Since the ecoinvent 3.5 library will be replaced by the updated 3.6 library, the majority of links to ecoinvent 3.5 will be updated automatically to ecoinvent 3.6. However, a number of processes from ecoinvent 3.5 are no longer supported and are considered obsolete.How can I tell which processes are now obsolete?The quickest way to review the obsolete processes is by checking the 'Obsolete' sub-categories in the ecoinvent 3.6 libraries (Material/Others/Obsolete, Energy/Others/Obsolete, etc..). In the Documentation tab of those processes, the Comment field states that the process is no longer part of the ecoinvent 3 database (see screenshot below). If you select any of those processes and click on ' Used by', you will get an overview of the projects which are using the selected obsolete process.In addition, if you calculate a process or product stage that is or contains an obsolete process, you will get a warning message. The warning message indicates which process(es) are obsolete, and you can then replace them using the replacement files (if possible) or manually.8Update InstructionsSince you may have used some of these obsolete processes in your projects, PRé has created special replacement files to allow you to change most of these obsolete links from ecoinvent 3.5 to the correct processes in ecoinvent 3.6 in a fast and easy way.With this update, the following replacements files are available:1.Replace EI 3.x to 3.6 APOS library2.Replace EI3.x to 3.6 Consequential library3.Replace EI 3.x to 3.6 Cut off libraryPlease note that using the replacement files does not replace all obsolete processes. Some processes are disaggregated into more specific products or regions; in these specific cases the users should really judge themselves which activity is the best replacement. SimaPro will generate a warning when you make a calculation and finds that an obsolete process is still being used in your model. In that case, you need to manually replace the process with a process that is more suitable.Obsolete processes not included in the replacement filesPlease review the spreadsheet ‘List of Obsolete Processes without Replacement ei 3.5 to 3.6’ to check the reason why the ecoinvent 3.5 activity does not exist in ecoinvent 3.6 anymore.In summary, it is recommended to first use the replacement files to replace as many links as possible. After that, if you receive a message while calculating in SimaPro that your model includes obsolete processes, you can replace those manually. How to do that is further explained in the sections below.93.5.1Using the replacement file sFollow the next steps for replacing the obsolete links in your project using one of the replacement files. You can also refer to this video for general instructions on using the tool: Projects to Libraries Links Manager.1.Open a project in your updated database. This can be any project.2.Go to Tools>Projects to Libraries Links Manager.3.Select the project(s) of which you want to change links (press Ctrl-A to select all projects and Ctrl-Shift-A todeselect). You can use the filter to select project by (part of the) name.4.Select the ecoinvent libraries where you want to replace the links. Note:make sure that these ecoinvent librariesare also selected in the Libraries section in SimaPro.5.Click “Scan”.6.View the links found by clicking on the tab “Links”.7.Click on the “Import replacements” button.8.Select the appropriate Replacement file which can be found in the database directory (see Box 2) and click “Open”.9.Check the links which are going to be replaced in the column “Replace name”. Note: It is possible that there are noreplacements found. That means that projects you selected do not contain links that can be replaced using the replacement files. Nevertheless, there may still be some links that need to be replaced manually.10.Store your links in order to be able to check afterwards. It is also possible to add new replacement links yourself.11.Click “Replace” to replace the links to the chosen library. You will get a message how many links are replaced to thechosen library.3.5.2Manual replacement (or creating your own replacement file)Once you determine that your project(s) still contain obsolete links, you can replace these manually by selecting an alternative process in the relevant process/ product stages records. You can also use the Projects to Libraries Links Manager to manually replace multiple links that were not replaced using replacement files (please also refer to this video for an example)1.Go to Tools>Projects to Libraries Links Manager.2.Select the ecoinvent libraries where you want to replace the links. Note:make sure that these ecoinvent librariesare also selected in the Libraries section in SimaPro.3.Click “Scan”.4.View the links found by clicking on the tab “Links”. The column “Child name” shows the library.5.Double click any of the empty cells you want to replace under the column “Replace name”.6. A dialogue box will open in which you can choose an alternative link in the preferred library. Use the function“Show as list” on the right hand side of the screen to list all links. Filter the links from the preferred library by entering the suffix of that library in the filter box at the bottom of your screen.7.Choose t he preferred link and click “Select”.8.You will get a message ‘* links referencing the same product. Use the selected replacement for them too?’ Theseare the same links which are used in different projec ts or within projects. Choose “Yes” to replace all links. If you click “No” only the selected link will be replaced.9.Click “Replace” to replace the links. If you want to replace all links at once and you did not finish the work, you canexport the already selected links to Excel and import it at a later stage by clicking “Export replacements” and saving your replacement file.You have now finished the update procedure. Repeat for any other database you wish to update.10Update Instructions4Contact UsPlease contact us or your local partner if you have questions about new features in the SimaPro software or database, or if you have any other questions related to the update.∙SimaPro Help Center: https:///∙Email: *******************∙Phone: +31-33-450401011。
5320刷机教程
喜欢心机的朋友可以无视本贴。
直接跳过!本贴只是教大家如何干掉心机。
无聊的问题请不要再给我发信息!!谢谢!!!敬告:由于凤凰不支持低刷,本人提供的为4.13版本刷机包,只本的手机进行刷机;若手机版本高于4.13,请务必找到和您手机否则出错请自负。
顺便说一句,看懂了以后再刷!!看不懂的话建议还是别自己刷QUOTE:澄清几点大家对凤凰2008刷机的误解以及如何备份问题有不懂的地方请点击这里查看。
肯定对你有帮助!!!记得顶一QUOTE:之前看到不少关于刷心机成国行的帖子。
不过还是有不少朋友本贴详细把刷机细节、刷机软件写了出来,并附有链接地址。
希刷机有风险,各位机油请谨慎。
请在阅读全文以后在进行刷机!!!温馨小贴士:由于网络延迟的问题,请后台打开等图片加载完以后再阅读。
目前已有不少机油刷机成功,请在刷机成功后不要忘记顶我一下。
各位还有什么不懂得,请跟帖,我会尽量回复的。
其实有些问题完全可以在帖子里找到答案,再次提醒,请仔细全文,里面已经有很详细QUOTE:安装前说几句:刷机呢,最重要的就是安装凤凰2008,好多机油刷机失败主要原因就是你没有成功安凤凰2008,在这我建议您在刷机时选择一台系统较新的电脑,或者你不怕麻烦的话还会出现这样那样五花八门的问题了。
切记切记!!!刷机很简单,只要数据线接触良好,电脑不死机,按照教程操作是100%成功的。
即使万一刷成砖头,也可以到维修手机的店子用50——100元人民币就能刷活。
无须注:想学习用凤凰刷机的朋友可以按本贴步骤从第1步到第16步演习操作,只要在后一步不按下Refurbish 键是不会进入刷机的,无论在此期间出什么错误,对手机都无任请放心大胆的实践!QUOTE:5320国行4.13版本技术通告:此刷机包只适用于国行或者心机5320 (RM-416)1.这个版本的软件改善了软件的整体稳定性2.解决了英汉字典中,中文翻译不正确的问题;3.解决了在发送短信息时若将收件人增加到多于20人时,短信自动转换成彩信的问题4.解决了在使用扬声器播放音乐时,有噪音的问题;QUOTE:注:本文部分内容参考至散落的煙灰特此声明其他内容均为原创,转载时请声明,查找资料,编排版面花了5个小时,请尊重个人成果。
5G网规网优系统应用软件使用手册

大唐移动5G网规网优系统应用软件V1.0用户使用手册目录1使用前准备工作 (1)1.1前台部署 (1)1.1.1前台包(Tomcat)解压 (1)1.1.2war包(版本)解压(rar包同理) (3)1.1.3kernel包解压 (4)1.1.4相关配置文件修改 (5)1.2地图数据部署.............................................................................. 错误!未定义书签。
1.3后台版本部署 (10)1.4TotalProgram配置 (12)1.5启动Radar后前台 (12)1.5.1启动后台 (12)1.5.2启动前台 (13)1.5.3MR FTP服务器的连接配置 (14)2登录平台介绍 (15)3数据导入 (17)3.1地图解析grid_prase (17)3.1.1五米精度地图预处理(kernel_grid_parse的前置工作) (17)3.1.2运行radartools生成altitude和Projection (19)3.2路测数据导入 (23)3.3天线数据导入 (24)3.4扫频数据导入 (25)3.5告警数据 (26)3.5.1导入告警库 (26)3.5.2导入告警信息 (31)3.6其他数据导入 (31)3.6.1建筑数据导入 (31)3.6.2区域图层导入 (32)3.6.3栅格数据导入 (33)4计算区域的规划 (34)4.1区域县界的导入 (34)4.2手动划分计算区域的操作: (35)5覆盖仿真任务 (39)5.1任务创建 (40)5.1.1传播模型校正 (40)5.1.2场强计算 (41)5.1.3全部统计 (41)5.1.4渲染图生成 (42)5.1.5生成3D图 (42)5.1.6计划任务.单站仿真 (44)5.1.6.1导入单站仿真数据 (44)5.1.6.2解析单站仿真数据 (45)5.2仿真结果查看 (45)5.2.1覆盖图查看 (45)5.2.2覆盖统计结果查看 (49)5.3其他 (55)5.3.1分段颜色渲染 (55)附录 (56)27.1 Radar升级的基本操作 (56)27.1.1 Radar版本(war包)的升级 (56)27.1.2 TP版本升级(TotalProgram.exe) (56)27.1.3 后台jar升级(radar-trans.jar) (56)27.2 ...................................................................................................... 错误!未定义书签。
手机模块SIM5320应用经验
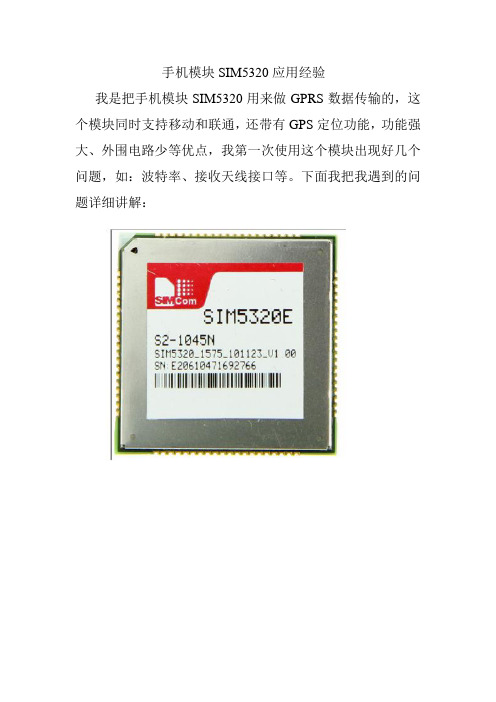
手机模块SIM5320应用经验
我是把手机模块SIM5320用来做GPRS数据传输的,这个模块同时支持移动和联通,还带有GPS定位功能,功能强大、外围电路少等优点,我第一次使用这个模块出现好几个问题,如:波特率、接收天线接口等。
下面我把我遇到的问题详细讲解:
1.模块SIM5320模块供电采用4.1V,如果单片机采用5V供电可以稳压4.8V用二极管1N4007降压
0.7V(4.8-0.7=4.1V),如果单片机采用3.3V供
电可以稳压4.0V用二极管1N4007降压0.7V(4.0
-0.7=3.3V)。
2.通讯可以直接使用RXD和TXD就可以了,但模块默认波特率是115200,如果需要更改波特率可以
发送更改波特率命令,但下次重启模块后又要重
新设置波特率。
模块的RXD和TXD接口电压是1.8V,
要做好接口电平转换问题。
3.接收天线接口:天线接口要求比较苛刻,处理不好直接影响模块工作,具体要求如下:
注:模块信号不好时会出现发指令不回复,或暂
时死机现象,等一阵子可能恢复正常。
4.模块控制采用AT+指令方式,详细可以参照SIM5320资料,这里就不详细讲解了。
5.工作原理图:。
SIM900A模块单片机

SIM900A模块单片机SIM900A模块是一种常用的GSM/GPRS通信模块,可以用于单片机与移动通信网络的连接,实现远程监控、远程控制、短信通知等功能。
本文将介绍SIM900A模块的基本原理、使用方法以及常见问题解决方案。
一、SIM900A模块的基本原理。
SIM900A模块是基于GSM/GPRS技术的通信模块,可以实现单片机与移动通信网络的连接。
它具有GSM和GPRS双模式,支持全球四频段,可以在全球范围内使用。
SIM900A模块可以通过串口与单片机进行通信,实现短信发送、接收、电话呼叫、网络连接等功能。
SIM900A模块内部集成了GSM/GPRS通信模块、SIM卡接口、天线接口、电源管理电路等部分。
它可以通过AT指令进行控制,与单片机通信时,只需要发送相应的AT指令即可完成各种功能的操作。
SIM900A模块还具有丰富的接口,可以与各种外部设备连接,如传感器、继电器等,实现更多的应用场景。
二、SIM900A模块的使用方法。
1. 硬件连接。
使用SIM900A模块时,首先需要将SIM卡插入SIM卡接口,并连接天线。
接着将SIM900A模块的串口引脚与单片机的串口引脚相连,同时连接电源和地线。
在连接时需要注意电源的稳定性,以免影响SIM900A模块的正常工作。
2. 软件编程。
在单片机的程序中,需要通过串口向SIM900A模块发送AT指令,以实现各种功能的操作。
例如,发送短信可以使用AT+CMGS指令,接收短信可以使用AT+CMGR指令,呼叫电话可以使用ATD指令,挂断电话可以使用ATH指令,建立GPRS连接可以使用AT+CGATT指令等。
通过编写相应的程序,可以实现单片机与SIM900A模块的通信,从而实现各种功能的操作。
3. 功能测试。
在完成硬件连接和软件编程后,需要进行功能测试,以验证SIM900A模块的正常工作。
可以通过发送短信、接收短信、呼叫电话、建立GPRS连接等操作,检查SIM900A模块的各项功能是否正常。
h3c 5320I fat AP升级及配置方法

H3C 5320 FIT AP 转换成FAT AP 及配置方法第一部分:将fit ap 转换成fat ap1.下载AP升级包去h3c官网下载H3C使用游客账号以合作伙伴方式登录。
账号名yx800 密码是012301232.搭建tftp 环境在要升级的AP上配置VLAN1 接口地址和电脑的地址在同一个段,电脑和AP接到同一个poe交换机上。
3.升级应用程序文件在命令行的用户视图下,执行tftp get命令从TFTP服务器上下载应用程序文件wa5300-fat.ipe到AP上并保存为名为wa5300-fat.ipe的文件:<H3C>tftp 192.168.200.55 get wa5300-fat.ipe wa5300-fat.ipewa5300-fat.ipe already exists. Overwrite it? [Y/N]:yPress CTRL+C to abort.% Total % Received % Xferd Average Speed Time Time Time CurrentDload Upload Total Spent Left Speed100 35.0M 100 35.0M 0 0 516k 0 0:01:09 0:01:09 --:--:-- 597kWriting file...Done.在命令行的用户视图下,执行boot-loader命令将下载的应用程序文件wa5300-fat.ipe设置为主启动文件:<H3C>boot-loader file flash:/wa5300-fat.ipe mainVerifying the file flash:/wa5300-fat.ipe on the device.....Done.H3C WA5530 images in IPE:wa5300-fat-boot.binwa5300-fat-system.binThis command will set the main startup software images. Continue? [Y/N]:yAdd images to the device.File flash:/wa5300-fat-boot.bin already exists on the device.File flash:/wa5300-fat-system.bin already exists on the device.Overwrite the existing files? [Y/N]:yDecompressing file wa5300-fat-boot.bin to flash:/wa5300-fat-boot.bin....Done. Decompressing file wa5300-fat-system.bin toflash:/wa5300-fat-system.bin.............Done.Verifying the file flash:/wa5300-fat-boot.bin on the device...Done.Verifying the file flash:/wa5300-fat-system.bin on the device...Done.The images that have passed all examinations will be used as the main startup so ftware images at the next reboot on the device.Decompression completed.You are recommended to delete the .ipe file after you set startup software images for all slots.Do you want to delete flash:/wa5300-fat.ipe now? [Y/N]:y重启FAT AP,重启后可以使用display version命令查看FAT AP的版本,确认已经升级成功。
诺基亚5320XM刷机(凤凰刷机详解)
刷机有风险!!!刷机请谨慎!!!刷机前一定要做好充分的知识储备和心理准备,本教程只提供参考,自己不小心刷坏的概不负责闲来无事刷了一下机,从国行4.13刷到06.103,其实我的5320XM是移动定制的心机,当初买的时候不懂没辨别出来,软件版本才3.08,有不少BUG而且心里很不爽就自己刷到了国行4.13,4.13虽然也有点老但是比较稳定的系统版本,后面的5.16以及我要刷的06.103也存在部分BUG未解决,但是手痒就刷了。
一旦刷到06.103如果没有备份其他低版本系统的PM308文件的话,决不能降级!!!否则必挂,会有网络锁,再次刷机、强刷也无法解决,必须送客服用专用的工具解锁!!!所以考虑刷至06.103之前先用JAF备份现有系统版本的PM308文件,以防万一(我没有备份此文件,因为不管这个版本咋样都不打算降级了,闲再装个JAF麻烦,而且有些机子备份了也没用,降级后还会出现网络锁)。
只要不是刷到06.103均可以用JAF降级而且不会有网络锁,本次所用的凤凰刷机无法用于降级,只能平刷和升级!!!降级必成砖!!!工具:凤凰刷机软件(Phoenix Service Software 2010.24.008.43820-zh)这是别人破解以及汉化的版本,直接安装就可以了,会安装到C盘,无法更改路径(最好也别改安装路径),安装后半段360会报毒~~直接无视~~刷机包:1.5320_Nokia_firmware_RM-416_CareDP_7.0_SW06.103(主刷机包)2.5320_Nokia_firmware_RM-416_CHINA_06.103_v7.02(刷机补丁包,就是根据主刷机包做的,仅仅含有的Code比主刷机包多,我所用的Code就在这个包里)先安装主刷机包,再安装补丁包,安装主刷机包的时候会有安装路径选择,默认C盘,建议不动,否则凤凰可能识别不了其路径,再安装补丁包的时候会自动安装到主刷机包所安装的位置此版本的凤凰自带各种刷机的驱动无需安装诺基亚的PC套件、NSU等,如果已经安装了PC 套件也无需卸载,我的就没有卸载;相同硬件的不同Code可以互刷,但是不同硬件的决不能互刷,否则百分百刷成砖头!!!所谓硬件相同即是RIM-XXX相同即可,我的是RIM-416,只要是RIM-416的不同Code系统版本我都可以刷,这回我刷的是0579519国行蓝色。
SIM900A模块用户手册
SIM900A模块⽤户⼿册User ManualYIXIN_SIM900A模块⽤户⼿册⾼性能 GSM/GPRS模块⽬录1.模块简介 (1)1.1 模块资源图 (1)1.2 模块硬件资源详解 (2)2.模块使⽤ (6)2.1 使⽤前准备 (6)2.2 AT指令简介 (7)2.3 拨打/接听电话 (10)2.3.1 拨打电话 (11)2.3.2 接听电话 (13)2.4 短信的读取和发送 (14)2.4.1 英⽂短信的读取 (15)2.4.2 英⽂短信的发送 (16)2.4.3 中英⽂短信的读取 (17)2.4.4 中英⽂短信的发送 (19)2.5 GPRS通信 (21)2.5.1 TCP连接 (24)2.5.2 UDP连接 (29)2.5.3 GPRS通信注意事项 (34)1.模块简介YIXIN_SIM900A_V8(V8是版本号,下⾯均以YIXIN_SIM900A表⽰该产品)是⼀款⾼性能⼯业级的GSM/GPRS模块(开发板)。
YIXIN_SIM900A模块采⽤SIMCOM 公司的⼯业级双频GSM/GPRS模块:SIM900A,⼯作频段双频:900/1800MHz,可以低功耗实现语⾳、短信、彩信、数据和传真信息的传输。
YIXIN_SIM900A模块⽀持RS232串⼝和TTL串⼝,TTL串⼝⽀持3.3V/5V系统,⽀持6V-18V的宽⼯作电压范围,⼯作温度为-40℃⾄+85℃。
1.1 模块资源图YIXIN_SIM900A模块(开发板)接⼝丰富,功能完善,尤其适⽤于需要语⾳/短信/GPRS数据服务的各种领域,其资源图如下图所⽰:1从上图可以看出,YIXIN_SIM900A模块(开发板)功能齐全、接⼝丰富,模块(开发板)尺⼨(不算天线部分)为83mm*53mm,并带有安装孔,⾮常⼩巧,可⽅便嵌⼊到各种产品设计中。
1.2 模块硬件资源详解1.2.1 SIM900A(GSM/GPRS)模块(U5)YIXIN_SIM900A所选择的GSM模块为SIMCOM公司的SIM900A模块,该模块采⽤SMT封装形式,其性能稳定,外观精巧,性价⽐⾼。
5320原厂维修图纸 官方拆机教程

o 永远使用诺基亚提供的备件。
o 检查有可能引起简单故障的器件的接点与焊点(例如:焊接的接口或开关)。如果有需要请重焊(只限于可
进行无铅焊接的维修中心)。
o 清洁焊接后残留的助焊剂。
o 使用标准的螺丝力矩进行手机装配(留意服务手册的指引)。
o 一直都要使用我们的设备来测试手机是否正常。例如客户投诉充电功能,就请使用自己的充电器进行测试,
o 如果自己想熟悉和了解诺基亚产品,请到/ 主页,进入服务与支持-->移动电话选
T
HTU
UH
HU
UH
HU
UH
择相应手机型号。下载并阅读产品指南或用户说明书。
o 在开始维修之前,请进入 ESD 防静电区域并使用 ESD 防静电带。
o 使用手套来避免油污和指纹。
Copyright © 2008 NOKIA Corporation. All rights reserved.
PAGE 7 (18)
NMP/CMO Sales and Marketing Customer Care China
GTM Technical Training
Training Group
CONFIDENTIAL
5. 主板器件分布图
5320XpressMusic RM-416 器件分布图
二级焊接元器件
Ver 1.0 Hao Mingxiong
2008.08.01
注意:此部分只作为此产品一、二级维修中心可更换主要器件位置的简单说明,并不作为维 修上的指引。因为所有的 BGA 的器件都不可以在一、二级维修中心更换。所以当遇到无法解 决的故障时,请送三级维修中心。
Copyright © 2008 NOKIA Corporation. All rights reserved.
GSM_GPRS_SIM900

SIM900 系列产品广泛应用在物联网领域,而语音功能已经成为物联网产品发展 的主 题趋势。由此,芯讯通和第三方伙伴合作,将 TTS 内嵌在模块内。实现自动语音播 放的功能,大大节省了客户的外围硬件成本,减少了额外开发时间,实现语音相关 产品的快速上市,提升产品的竞争力。
3.1.1 应用场景 车载系统:语音导航、行驶记录仪、车内诊断、短信播报等功能使得司机在驾车过 程中获取信息从而解放驾驶者的双手和双眼,提高驾车安全性。 智能仪器:能够提供自然流畅的语音播报功能的电子仪表,可以在较危险的场合应 用,以提高便捷度,增加安全系数。
URC 提示 没有检测到干扰
+SJDR: NO JAMMING 或 检测到干扰
+SJDR: JAMMING DETECTED
参数说明 <n> 0: 关闭干扰检测
1: 开启干扰检测
<mode> 0: 通过查询命令查询当前状态; 1: 通过串口 URC 周期上报干扰状态(周期为 3 秒); 2: 通过 GPIO 口电平变化上报干扰状态; 3: 通过串口 URC 周期上报干扰状态(周期为 3 秒), 通过 GPIO 口电平变化上报干扰状态。
干扰检测则是根据通讯协议中当受到干扰后某些状态和参数会发生变化的特点, 通过实验和总结使得无线模块能够检测到这样的干扰。当 SIM900 模块进入干扰区 后,能够快速的检测到干扰的存在并通过 URC 或者 GPIO 电平的变化上报给用户, 提醒用户当前的网络状态是被干扰的状态,对于安防等多个领域有着十分重要的作 用和意义。
4.1.1 应用场景
支持 SSL 协议的 SIM900 系列产品可以广泛的运用在电子商务领域,例如物流 PDA 终端、手持支付 POS 终端、移动办公设备等对数据安全性要求高的产品中。例 如在手持 POS 机中,当用户通过该 POS 机刷卡进行网上支付的过程中,所有的信息 流如果不进行加密直接传输,则很容易造成安全信息的泄漏,而此类信息通过 SSL 加密之后,即使这些安全信息被截获,也是加密的报文,从而保证了信息的安全传 输。
5320常见问题及解决方法
怎么把SIM卡里的号码复制到手机啊?答:主菜单--名片夹--选项--SIM卡名片--SIM卡电话薄--选项--标记--全部标记--选项---复制至名片夹;即可复制到手机里面!请问怎样格机?答:格机有二种方法:1、软格:在手机上输入*#7370# 之后要求你输入锁码,初始密码是:12345,如果你更改过手机密码,那就是更改后的密码(不是SIM卡密码),之后出现白屏,只显示NOKIA字样,2~3分钟后格机完成,重新输入时间。
2、硬格:先关机,在开机的时候按住拨号键、“*”键、“3”键,打开电源直到“NOKIA”字样出现(此过程不能松开任何一个按键)。
稍稍等几秒直至出现“Formating……/”字样,这时方可松开以上按键。
过几分钟,系统格式化完成,手机自动重启并进入待机画面。
以上格机需要注意:保持电量绝对充足,格机途中不能企图关机,不能插充电器等。
一般以软格为先。
(记得格机前一定先备份好自己要的数据资料等)怎样设置彩信?答:1、设置—连接—承载方式—彩信—选项—新建或编辑接入点:连接名称:移动彩信数据承载方式:分组数据接入点名称:cmwap用户名:无提示输入密码:否密码:无鉴定:普通主页:http//2、信息—选项—设置—彩信:使用的接入点:移动彩信(刚才建立的连接)这部机子短信不能全删?只能一条一条删?答:进入收件箱—选项—标记—标记全部—选项—删除;即可删除全部短信息。
怎样设置GPRS上网?答:上网设置:设置-连接—承载方式—WAP服务-选项-新建或编辑接入点连接名称:cmwap(可以随便取)数据承载方式:分组数据接入点名称:cmwap用户名:无提示输入密码:否密码:无鉴定:安全主页:然后再按下选项,选高级设置网络类型:IPv4手机IP地址:自动域名服务器:自动代理服务器地址:10.0.0.172代理端口号码:80用Easy RealMedia转换视频文件,怎样设置?答:用Easy RealMedia参数设置如下:固定码率:200视频模式:SharpestImage视频编码:RealVideo8音频模式:Music, 设定FPS:15音频编码:32KbpsStereoMusic-RA8调整画面大小:240x320需要说明的是:固定码率的上限不能高过350kbps,可以在140—300之间选择,码率越大效果越好,可是空间也会越大。
手机模块SIM5320应用经验
手机模块SIM5320应用经验我是把手机模块SIM5320用来做GPRS数据传输的,这个模块同时支持XXX和XXX,还带有GPS定位功能,功能强大、外围电路少等优点,我第一次使用这个模块出现好几个问题,如:波特率、接收天线接口等。
下面我把我遇到的问题详细讲解:
1.模块SIM5320模块供电采用4.1V,如果单片机采
用5V供电可以稳压4.8V用二极管1N4007降压
0.7V(4.8-0.7=4.1V),如果单片机采用3.3V供
电可以稳压4.0V用二极管1N4007降压0.7V(4.0
-0.7=3.3V)。
2.通讯可以直接使用RXD和TXD就可以了,但模块
默认波特率是,如果需要更改波特率可以
发送更改波特率命令,但下次重启模块后又要重
新设置波特率。
模块的RXD和TXD接口电压是1.8V,。
SIM900系列模块AT应用了解
一般性AT指令
模块开机后应该执行下面初始化流程
AT
// 测试串口通讯是否正常
OK
AT+CPIN?
// 查询是否检测到SIM卡
+CPIN: READY
OK
AT+CSQ
// 查询信号质量
// 该参数一般建议设备比较固定的应用,如车载、跟踪器、
OK
手持设备等,在动态过程中小区切换、网络覆盖强弱等
因素,CSQ值将不停上报,可能会影响客户的判断。
+CSQN: 12,0
+CSQN: 14,0
+CSQN: 16,0
首先说误码率(ber),其范围0~7,待机状态下如果查询CSQ也存在误码率,只能说客户的产
// // 如果是固定波特率,模块重启也会上报这些信息。
一般性AT指令
AT+IPR固定波特率
SIM900系列模块所有软件版本出厂默认自适应波特率,客户初次使用使用可以根据mcu端波 特率固定模块波特率。 AT+IPR=? +IPR: (),(0,1200,2400,4800,9600,19200,38400,57600,115200) OK
注意: 若查询返回+CREG: 0,5,则表示SIM卡处于漫游状态。目前国内移动或联通的SIM 卡,在中国大陆地区使用不会显示漫游状态,主要是因为同一个运营商的SIM卡在其运 营商覆盖的网络环境下,不会因为区域不同显示漫游状态。
一般性AT指令
AT+CREG网络注册信息
IIII RDY +CFUN: 1 +CPIN: READY +CREG: 0 +CREG: 2 +CREG: 1,“144F”,“C3E9” +CGREG: 0 Call Ready +CGREG: 1,“144F”,“C3E9”
M系列路由器软件升级方法

M系列路由器软件升级方法(来源:港湾网络作者:)路由器的软件升级,包括BOOTROM软件和主体程序软件的升级。
注意:请勿轻易进行路由器的软件升级,如确实有必要,最好在技术支持人员的指导下进行。
另外在进行软件升级时,请注意保证程序软件的完整和有效性,且BOOTROM软件和主体软件的版本必须匹配。
对程序文件进行软件升级,有两种办法,一种是在路由器上电自检时,在BOOTROM的提示下升级主体程序软件,分别可以从网口和串口下载程序软件;另一种办法是在路由器运行时用TFTP下载BOOTROM 和主体程序软件。
一、上电自检时升级主体软件和BOOTROM软件上电自检时,不支持BOOTROM软件的升级,BOOTROM软件的升级只能在主体软件运行后进行。
升级主体软件有两种方法,一是通过网口升级,二是通过console口(以下简称串口)升级。
一般情况下,建议使用网口升级主体软件,因为主体软件比较大,用串口下载速度比较慢。
但在特殊需要的情况下也可以使用串口来完成主体软件的升级工作。
通过网口升级主体软件通过网口下载时,需要启动FTP服务器,并通过指定的ETH端口(主控板上的ETH口)和FTP服务器相连,在FTP服务器上建立用户名和口令都为“drv”的帐户(注:用户名和口令可自由设定,系统缺省为“drv”)。
BootRom启动时,屏幕上提示如下:UART OKLINE OKBooting...BootRom version: VER1.1Press any key to stop auto-boot...此时,按“回车键”停止自动引导过程,进入主菜单:MAIN MENU1. Boot from flash2. Boot from serial port3. Boot from net port4. Set bootrom password5. Clear application password6. Clear system configuration7. RebootEnter your choice:选“3”,进入网口操作子菜单:NET SUBMENU1. Download HOS to flash2. Download HOS to sdram and run3. Change boot parameter4. Exit to main menuEnter your choice:如果需要,选“3”改变引导参数配置,包括FTP服务器IP地址和下载文件路径名等。
手机模块SIM5320应用经验
手机模块SIM5320应用经验
当的话会影响GPRS信号的接收质量,需要注意以下几点:天线要选用符合要求的天线,不能使用普通的天线。
天线接口要做好防静电保护,避免因静电而损坏模块。
天线接口要做好防水处理,避免因进水而损坏模块。
4.GPS定位功能:模块支持GPS定位,但需要注意以下
几点:
GPS定位需要在室外进行,避免遮挡影响信号接收。
GPS定位需要等待一定时间,才能获取到有效的定位信息。
GPS定位需要使用符合要求的天线,否则会影响定位质量。
总之,使用手机模块SIM5320进行GPRS数据传输需要
注意很多细节问题,但只要注意好这些问题,就能充分发挥其功能优势,实现稳定可靠的数据传输。
5320刷机必知
注意:1、刷机前请用多途径备份电话本。
2:选择网速快的时段刷机,个人推荐在早上7-8点左右升级。
3:个人建议刷机时取出存储卡。
4:把手机情景模式设置为标准模式,设置转移呼叫(全部转移到别的电话或手机上,以免升级过程中有电话打入)。
个人建议使用报废的SIM卡。
因为即使设置了转移呼叫,但短信息是没办法转移的。
如果是强刷模式就把SIM卡取出来就可以了。
5:确保你的PC连上互联网。
6:推荐使用电脑后机箱USB接口。
7:数据线连接切记选择PC套件模式。
(数据模式会转为U盘,无法更新)8:升级过程中保证手机电量充足,个人建议插上直充。
关于备份的问题:除电话号码外,其他资料不要备份.因为恢复后容易产生错误.导致软件不能随机启动,甚至不能正常开机我在使用凤凰刷机的时候把SIM卡以及内存卡都取出来了,在这里我要强调一下,为了提高刷机的成功率,刷5320手机一定要下载最新的凤凰2008最新版本,有些版本不支持5320,最新版的凤凰2008版本号为Phoenix_2008_44_5_v2(我找了好几天才找到的)刷机前先下载一个诺基亚5320USB驱动文件,安装方法也很简单只要把主文件夹system32覆盖到C:WINDOWSsystem32就可以了。
再次强调:刷机前请仔细阅读教程,完全吃透了以后再下手。
这样会降低我们刷机出错的机率。
如果你真的不幸还是刷新失败了,那么,请按照下面的方法来做,相信一定可以刷新成功!一、判断是否刷新失败有很多刷失败了的玩家反应,当刷新进行到95%-98% 的时候是最容易出错的。
这时候如果你的电脑上弹出了图一的这个窗口,那么很不幸的,你也刷新失败了。
*_*![[/quote]我们可以点一下“重试”试试,不过一般是没什么反应的了。
拔下手机的数据线,手机已经不能开机!二、再刷机既然刷机已经失败,那么我们唯一可以做的,就是想办法补救了。
不过不要灰心,要想见彩虹,总得经历一番风雨;要想刷成功,总要多试几次。
使用SIM800A替换SIM900A 模块的注意事项 V151112

使用SIM800A替换SIM900A 模块的注意事项---2015/11/12SIM800A 模块是SIMCOM 基于MT6261芯片平台设计的新一代GSM/GPRS SIM800A 模块介绍工业模块,该模块可以用于直接替换SIM900A 模块。
SIM800A 是一歀性价比更具有竞争力的GSM/GPRS 工业模块,提供了更多:的功能接口: 如可配置双串口,PCM 音频接口,以及USB 接口等,同时支持蓝牙功能。
经对比测试, SIM800A 在低功耗和抗静电干扰性能方面,较SIM900A 有更好的提升。
本文档主要提示“SIM900A ”和“SIM800A”的引脚接口差异:“SIM800A 硬件设计手册”更多SIM800A 的设计参数细节, 建议参与阅 SIM800A_硬件设计手册“SIM800 Series_AT Command Manual ”,以及更多相关系列的“SIM800A 模块应用手册”2SIM800A 与SIM900A 功能上的差异功能SIM800A SIM900A 蓝牙功能支持(特定版本)不支持PCM/SPI接口全都支持(可复用)只支持SPI中断功能部分GPIO可配置为中断所有GPIO都可配置为中断USB 接口支持不支持USB调试下载端口USB接口调试DEBUG_TXD/RXDCSD通讯功能不支持支持射频同步信号支持(GPIO11可复用)不支持注意:由于两模块平台不同,音频参数也不相同,需要另行调整。
详细请参考“SIM900ASIM800A音频调试文档”。
3SIM800A 与SIM900A 引脚定义上的差别引脚编号SIM800A SIM900A 2GND NC23KPLED NC24VBUS NC27USB_DP DBG_TXD28USB_DM DBG_RXD53[1]ANT_BT GND注[1]:SIM800A的蓝牙功能默认为关闭状态,可以直接替换SIM900A,即在模快的脚接地的情况下不可开启蓝牙否则损伤模块PIN53脚接地的情况下,不可开启蓝牙,否则损伤模块。
SIM900A GSM 模块使用
SIM900A GSM 模块使用sim900agsm模块使用sim900agsm模块使用1.gsm的了解2.sim900a------at指令集的介绍3.4.传送英文短信的操作方式1.gsm:二代的移动通信:作用:通讯行业移动电话,远程控制,传送短信等比如:智能家居:物联网:1.无线(wifi)2.大的城市3.gsm1.电话卡和信号2.产生通信费用3.sim900a串口通信的gsm模块at指令集me:移动设备dte:数据终端设备特别注意:at做为结尾,以contrary做为结尾3中指令集基础指令集s参数指令集拓展指令集基础指令集和扩展指令集基础指令集atx代表的就是命令扩展指令集at+x代表的是命令1.查询指令at+设置指令at+>2.执行指令at+3.打电话:1.基本指令at:检测gsm与否已经准备好2.设备的连接3.开机操作按下开机键:按下,等候信号闪光---3秒闪光一次5.操作方式基本指令at查询运营商:at+cops?查询信号强度:at+csq打电话操作atdxxxxxxxx摆电话athcontrary接电话atacontrary重播atdl发短信英文短信:设置短信的格式:ascii码格式at+cmgf=1contrary3.传送短信的地址号码at+cmgs=”156****3982”输出传送的内容(ctrlz)(0x1a)1a查阅短信at+cmgl=”all”“recunread”,“+86156****9105”加载短信:at+cmgr=短信编号3.at查询运营商:at+cops?查询信号强度:at+csq打电话操作atd10010;摆电话athcontrary接电话atacontrary发短信at+cmgf=1回车4.传送短信的地址号码at+cmgs=”156****6158”输入发送的内容(ctrlz)查询短信at+cmgl=”all”读取短信:at+cmgr=短信编号 (0x1a)1a。
- 1、下载文档前请自行甄别文档内容的完整性,平台不提供额外的编辑、内容补充、找答案等附加服务。
- 2、"仅部分预览"的文档,不可在线预览部分如存在完整性等问题,可反馈申请退款(可完整预览的文档不适用该条件!)。
- 3、如文档侵犯您的权益,请联系客服反馈,我们会尽快为您处理(人工客服工作时间:9:00-18:30)。
1.SIM900系列软件升级
1.SIM800系列软件升级
1.SIM800系列软件升级
1.SIM800系列软件升级
1.SIM800系列软件升级
1.SIM800系列软件升级
1.SIM800系列软件升级
1.SIM800系列软件升级
1.SIM800系列软件升级
1.SIM800系列软件升级
1.SIM5320系列软件升级
1、下载前需要先给SIM5320安装驱动,在将SIM5320USB插入电脑是,会提示新硬件安装软件,请 根据提示安装。2、每个升级软件包中都有一个升级工具,只要将SIM5320插入电脑,该工具运行, 他就会自动选择,通讯口以及软件,只需要按开机就可以了。
1.SIM5320系列软件升级
SIM900/SIM800/SIM5320 系列软件升级介绍
Changling.liu 2012.10.31
课程大纲
1. SIM900系列软件升级 2. SIM800系列软件升级 3. SIM5320系列软件升级
1.SIM900系列软件升级
1.SIM900系列软件升级
1.SIM900系列软件升级
1.SIM5320系列软件升级
1.SIM5320系列软件升级
1.SIM5320系列软件升级
谢谢!大家 请大家指正错误
