Nachos实验10设计并实现具有二级索引地文件资料系统
Nachos实验10设计并实现具有二级索引的文件系统

实验目的Nachos系统原有的文件系统只支持单级索引,最大能存取NumDirect * SectorSize 的大小的文件,本次试验的目的:理解文件系统的组织结构扩展原有的文件系统,设计并实现具有二级索引的文件系统。
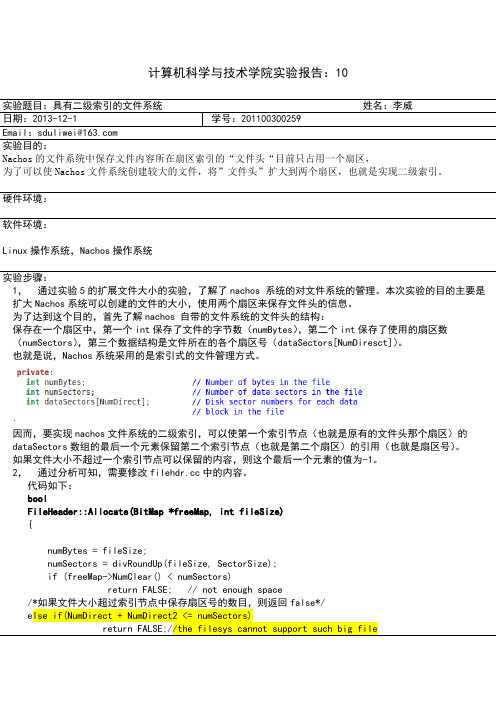
实验环境linux操作系统,Nachos操作系统实验分析已知在文件头的定义中描述了:#define NumDirect ((SectorSize - 2 * sizeof(int)) / sizeof(int))为了说明方便,经过实际计算,NumDirect = 30.二级索引的文件系统的filehdr首先,通过观察 Nachos原有的filehdr (即上图左边的部分),可知 Nachos的单级索引的文件系统最大只支持存取29个扇区大小的文件。
为了扩展二级索引,取数组的最后一个dataSectors[29]作为存取新的dataSectors 数组块的索引,定义 dataSectors[0] - dataSectors[28] 存取数据所在的块号,dataSectors[29] ==-1表示无二级索引块,为正值表示二级索引dataSectors2所在的索引块。
当文件超过原dataSectors 数组所能能够存取的大小28的时候,通过bitmap为文件头的dataSectors2分配空间,返回的 Sector号存在 dataSectors[29]中。
fileSys每次读取filehdr的时候,仍然只读取原 filehdr,如果想要访问和修改dataSectors2中的内容,贝U 在filehdr中先通过dataSectors[29]获取到dataSectors2 的扇区号,通过调用 synchDisk ->ReadSector(dataSectors[lastlndex], (char *)dataSectors2) ,读入 dataSectors2 的内容,然后再进行dataSectors数组29-62号所对应的数据块的读取。
Nachos实验报告10
计算机科学与技术学院实验报告:10实验题目:具有二级索引的文件系统姓名:李威日期:2013-12-1 学号:201100300259Email:sduliwei@实验目的:Nachos的文件系统中保存文件内容所在扇区索引的“文件头“目前只占用一个扇区,为了可以使Nachos文件系统创建较大的文件,将”文件头”扩大到两个扇区,也就是实现二级索引。
硬件环境:软件环境:Linux操作系统,Nachos操作系统实验步骤:1,通过实验5的扩展文件大小的实验,了解了nachos 系统的对文件系统的管理。
本次实验的目的主要是扩大Nachos系统可以创建的文件的大小,使用两个扇区来保存文件头的信息。
为了达到这个目的,首先了解nachos 自带的文件系统的文件头的结构:保存在一个扇区中,第一个int保存了文件的字节数(numBytes),第二个int保存了使用的扇区数(numSectors),第三个数据结构是文件所在的各个扇区号(dataSectors[NumDiresct])。
也就是说,Nachos系统采用的是索引式的文件管理方式。
因而,要实现nachos文件系统的二级索引,可以使第一个索引节点(也就是原有的文件头那个扇区)的dataSectors数组的最后一个元素保留第二个索引节点(也就是第二个扇区)的引用(也就是扇区号)。
如果文件大小不超过一个索引节点可以保留的内容,则这个最后一个元素的值为-1。
2,通过分析可知,需要修改中的内容。
代码如下:boolFileHeader::Allocate(BitMap *freeMap, int fileSize){numBytes = fileSize;numSectors = divRoundUp(fileSize, SectorSize);if (freeMap->NumClear() < numSectors)return FALSE; // not enough space/*如果文件大小超过索引节点中保存扇区号的数目,则返回false*/else if(NumDirect + NumDirect2 <= numSectors)return FALSE;//the filesys cannot support such big file/*toNextNode 是保留第二个索引节点的扇区号*/int toNextNode=NumDirect-1; //toNextNode is the Sector number of the second node of the filehd//if the second node is not needed, then dataSector[toNextNode]=-1if(numSectors < toNextNode){for (int i = 0; i < numSectors; i++)dataSectors[i] = freeMap->Find();//为文件分配扇区dataSectors[toNextNode] = -1;}//If the numSectors excends the rage of dataSectors,else{for (int i = 0; i < toNextNode; i++)dataSectors[i] = freeMap->Find();dataSectors[toNextNode] = freeMap->Find();//找一个空闲的扇区,作为第二个扇区,索引节点//this is the content,i.e.filehdr of the allocated sectors, of the second nodeint dataSectors2[NumDirect2];for (int i = 0; i < numSectors - NumDirect; i++)dataSectors2[i] = freeMap->Find();//为文件分配扇区//the fefault synchDisk->WriteSector do not include the second node//so write back the new build nodesynchDisk->WriteSector(dataSectors[toNextNode], (char *)dataSectors2); }return TRUE;/*revised*/}voidFileHeader::Deallocate(BitMap *freeMap){/*toNextNode 是保留第二个索引节点的扇区号*/int toNextNode= NumDirect - 1;// test if has the second nodeif(dataSectors[toNextNode]==-1){for (int i = 0; i < numSectors; i++){ASSERT(freeMap->Test((int) dataSectors[i])); // ought to be marked!freeMap->Clear((int) dataSectors[i]);}}//has a second node, then find it, then clean the bitmap, thenelse{//clear the first n-1 bit,remain the toNextNodeint i=0;for ( ; i < toNextNode; i++){ASSERT(freeMap->Test((int) dataSectors[i])); // ought to be marked!freeMap->Clear((int) dataSectors[i]);}int dataSectors2[NumDirect2];synchDisk->ReadSector(dataSectors[toNextNode], (char *)dataSectors2);freeMap->Clear((int) dataSectors[toNextNode]);//clear the toNextNodefor( ; i < numSectors; i++)freeMap->Clear((int) dataSectors2[i-toNextNode]);//toNextNode==the number of filehdr item }}intFileHeader::ByteToSector(int offset){ASSERT(offset<=numBytes);/*toNextNode 是保留第二个索引节点的扇区号*/int toNextNode = NumDirect - 1; //test if offset excedes the first nodeif(offset / SectorSize < toNextNode)return(dataSectors[offset / SectorSize]);else{int dataSectors2[NumDirect2];synchDisk->ReadSector(dataSectors[toNextNode], (char *)dataSectors2);return (dataSectors2[offset / SectorSize - toNextNode]);}}voidFileHeader::Print(){/*revised*/int i, j, k;/*toNextNode 是保留第二个索引节点的扇区号*/int toNextNode = NumDirect - 1;char *data = new char[SectorSize];//test if there is a second nodeif(dataSectors[toNextNode] == -1){printf("FileHeader contents. File size: %d. File blocks:\n", numBytes); for (i = 0; i < numSectors; i++)printf("%d ", dataSectors[i]);printf("\nFile contents:\n");for (i = k = 0; i < numSectors; i++) {synchDisk->ReadSector(dataSectors[i], data);for (j = 0; (j < SectorSize) && (k < numBytes); j++, k++) {if ('\040' <= data[j] && data[j] <= '\176') // isprint(data[j])printf("%c", data[j]);elseprintf("\\%x", (unsigned char)data[j]);}printf("\n");}}// If there is a secondary index,// first read in the dataSectors2 from the Disk.// Then, deallocate the data blocks for this file.// At last, deallocate the block that dataSector2 locates.else{int dataSectors2[NumDirect2];synchDisk->ReadSector(dataSectors[toNextNode], (char *)dataSectors2);//1, print the filedre itemsprintf("FileHeader contents. File size: %d. File blocks:\n", numBytes);for (i = 0; i < toNextNode; i++)printf("%d ", dataSectors[i]);for(; i < numSectors; i++)printf("%d ", dataSectors2[i - toNextNode]);printf("\nFile contents:\n");//2,print the content of the first node pointedfor (i = k = 0; i < toNextNode; i++) {synchDisk->ReadSector(dataSectors[i], data);for (j = 0; (j < SectorSize) && (k < numBytes); j++, k++) {if ('\040' <= data[j] && data[j] <= '\176') // isprint(data[j])printf("%c", data[j]);elseprintf("\\%x", (unsigned char)data[j]);}printf("\n");}//3,print the content of the second node pointedfor( ; i < numSectors; i++) {synchDisk->ReadSector(dataSectors2[i - toNextNode], data);for (j = 0; (j < SectorSize) && (k < numBytes); j++, k++) {if ('\040' <= data[j] && data[j] <= '\176') // isprint(data[j])printf("%c", data[j]);elseprintf("\\%x", (unsigned char)data[j]);}printf("\n");}}delete [] data;/*revised*/}boolFileHeader::AppSectors(BitMap *freeMap, int appFileSize){/*revised*/if(appFileSize <= 0)return false;int restFileSize = SectorSize * numSectors - numBytes;if(restFileSize >= appFileSize){numBytes += appFileSize;return true;}else{int moreFileSize = appFileSize - restFileSize;if(freeMap->NumClear()< divRoundUp(moreFileSize, SectorSize))return FALSE;else if(NumDirect + NumDirect2 <= numSectors + divRoundUp(moreFileSize, SectorSize)) return FALSE;int i = numSectors;numBytes += appFileSize;numSectors += divRoundUp(moreFileSize, SectorSize);/*toNextNode 是保留第二个索引节点的扇区号*/int toNextNode = NumDirect-1; //test if has the second nodeif(dataSectors[toNextNode] == -1){//test if need the second nodeif(numSectors < toNextNode)for( ; i < numSectors; i++)dataSectors[i] = freeMap -> Find();//need the second nodeelse{for( ; i< toNextNode ; i++)dataSectors[i]= freeMap ->Find();dataSectors[toNextNode] = freeMap ->Find();int dataSectors2[NumDirect2];for ( ; i < numSectors ; i++)dataSectors2[i - toNextNode] = freeMap->Find();synchDisk->WriteSector(dataSectors[toNextNode], (char *)dataSectors2);}}/** If before appending, there is already a secondary index*///First read the dataSectors2 from the Disk.//Then, append the file size.//At last, write back the secondary index block into the sector,else{int dataSectors2[NumDirect2];synchDisk->ReadSector(dataSectors[toNextNode], (char *)dataSectors2);for( ; i < numSectors; i++)dataSectors2[i-toNextNode] = freeMap -> Find();//the var toNextNode==the number of int that synchDisk->WriteSector(dataSectors[toNextNode], (char *)dataSectors2);//the fefault synchDisk}}return TRUE;/*revised*/}运行结果:首先运行命令 ./nachos –f 格式化Nachos磁盘然后运行 ./nachos –ap test/big big 若干次,知道出现提示,文件太大不能再追究为止。
nachos系统实验报告:实验二
实验二一.实验目的将nachos 中的lock 和condition 类的实现补充完整,并利用这些同步机制实现两个基础功能。
二.实验内容1) 实现syncy.h 中的Lock 和Condition 类,并利用这些同步机制将实验一中所双向有序链表类修改成可以在多线程线程环境下运行。
2) 实现一个线程安全的Table 。
Table 有一个固定大的Entery 数组。
3) 实现一个大小受限的BoundBuffer ,可以完成读.写功能,其中读写的size 可以超过设定的buffer 大小,当读的东西太快或写的太慢时,就将其挂起。
当buffer 里重新有写的空间或读的空间时在将其线程放入就绪队列中。
三.实验结果1.锁机制的实现 **因为lock 和condition 都有两个版本,所以当调用取得锁和释放锁的函数时我 用的是GetLock()和ReleaseLock(),而不是lock->Acquire(),Condition 同理用的是Signal ()和Wait ()。
这些函数会根据运行程序时输入的参数来决 定用哪个版本的锁或者不用锁。
a)主要代码分析 Lock 类的主要成员{public : void Acquire(); // 得到锁 void Release(); // 解放锁private: Thread *LockedThread ; // 用于储存现在拥有 lock 的线程 LockStatus status ; // 表示此时lock 的状态(Busy ,Free ) List *queue // 用于保存挂起的 线程}Lock 类中Acquire 函数得到锁,如果此时别的线程拥有锁,则此时线程被 挂起放在queue 队列中,直到有人释放锁时,Release 函数将queue 中的一 个线程加入就绪队列,每次只能由一个线程得到锁。
Condition 类主要成员{ public: void Wait(LockO *conditionLock); void Signal(LockO *conditionLock); private:List *queue ; char* name;}Condition 类的所有操作都在线程得到锁时进行操作,且运行其函数时,都 先检测 lock 是否被currentThread 锁拥有。
Nachos之开发文件系统
Nachos之开发⽂件系统内容⼀:总体概述这次实习都过扩展⽂件系统以及添加相应的系统调⽤,帮助我们理解⽂件在磁盘中实际的存储⽅式,⽬录、⽂件头和⽂件之间的关系,以及控制台和⽂件读写之间的关系。
概念主要涉及到了inode的实现⽅式,多级索引,多级⽬录等。
【⽤简洁的语⾔描述本次lab的主要内容;阐述本次lab中涉及到的重要的概念,技术,原理等,以及其他你认为的最重要的知识点。
这⼀部分主要是看⼤家对lab的总体的理解。
要求:简洁,不需要⾯⾯俱到,把重要的知识点阐述清楚即可。
】要求:具体Exercise的完成情况第⼀部分:⽂件系统的基本操作Exercise 1:Filesys.h 从filesys.h的注释中,我们可以看到,nachos使⽤了两套⽂件系统,⼀个是基于unix(linux)本⾝的⽂件系统的类似于包装函数,另⼀个是需要我们实现的真正的⽂件系统,现在的nachos⽂件系统有很多限制,⽐如说,这个⽂件系统不⽀持多层的⽂件⽬录,⽽是只有root⽬录,⽽且由于系统启动的限制,标记磁盘使⽤情况的bitmap和⽬录分别在sector 0, sector 1。
这样就限制了可以使⽤的磁盘的⼤⼩和可以创建的⽂件的数量,就像其它⼤多数⽂件系统⼀样,nachos需要⽀持初始化⽂件系统,创建⽂件,打开⽂件,删除⽂件,打印⽬录中的⽂件,打印⽂件信息。
⽽这个⽂件系统中关键的数据结构就是前⾯所说的空闲区表,和根⽬录。
下⾯具体来看需要实现的这些函数的初步实现。
创建⽂件系统的时候⾸先查看是不是已经被“格式化”了,也就是是不是已经存在了⽂件系统,如果不存在的话,那么先要创建并初始化前⾯经常提到的bitmap和⽬录,⽽因为这两个数据结构本⾝也需要存储在⽂件中,所以⾸先标记宏定义的0号和1号sector是已经被占⽤了的,但是在nachos中实际上bitmap和根⽬录也是⽂件,同样需要⽂件头来管理,于是0号和1号实际上存储的分别是bitmap和根⽬录的⽂件头,⽽真正的bitmap和根⽬录需要⽂件头接着使⽤allocate函数来分配,并且writeback,向分配出的两个块写回到⽂件中,完成之后,打开这两个⽂件并将初始化后的bitmap和⽬录写⼊到这两个⽂件。
操作系统nachos课程设计实验报告
一题目project1:实现nachos操作系统的project1中的join()方法,condition2 类,Alarm类,Communicator类,PriorityScheduler类和Boat类project2:实现nachos操作系统的project2中的creat open read write close unlink 文件系统调用,修改UserProcess.readVirtualMemory和UserProcess.writeVirtualMemory使操作系统能够运行多用户程序,实现exec join exit系统调用,实现LotteryScheduler类二实验目的熟悉nachos操作系统,深入理解操作系统内核了解用户程序的加载过程以及多用户进程的内存分配机制三实验要求完成nachos,提交设计文档和你的代码四实验说明,程序代码及测试结果Project1:1 join()要求实现join()方法,注意,其他线程没必要调用join函数,但是如果它被调用的话,也只能被调用一次。
join()方法第二次调用的结果是不被定义的,即使第二次调用的线程和第一次调用的线程是不同的。
无论有没有被join,一个进程都能够正常结束(a)设计思想当线程B执行A.join()时,将B放入A的等待队列,直到A完成时,唤醒在等待队列中的所有线程,因此需要实现join()方法和修改finish方法(b)源代码public void join(){Lib.debug(dbgThread, "Joining to thread:" + toString());Lib.assertTrue(this!=currentThread);Lib.assertTrue(join_counter == 0);join_counter++;boolean status=Machine.interrupt().disable();if (this.status != statusFinished) {waitQueue.waitForAccess(KThread.currentThread());currentThread.sleep();}Machine.interrupt().restore(s tatus);}public static void finish(){Lib.debug(dbgThread, "Finishing thread:" +currentThread.toString());Machine.interrupt().disable();Machine.autoGrader().finishingCurrentThread();Lib.assertTrue(toBeDestroyed == null);toBeDestroyed= currentThread;currentThread.status = statusFinished;KThread thread= currentThread().waitQueue.nextThread();if (thread!= null){thread.ready();}sleep();}(c)程序截图线程1每次执行打出执行的次数,每次执行过后放弃cpu,线程2 打出successful,线程2 执行thread1.join().通过截图可以看出代码正确2 Condition2通过使用开关中断提供原子性来直接实现条件变量,我们利用信号量提供了一个简单的实现方式,你的工作就是不直接使用信号量提供相同的实现(你或许使用锁,即使它们也间接的使用了信号量)。
nachos实验报告

nachos实验报告nachos实验报告一、引言操作系统是计算机系统中的核心软件之一,它负责管理计算机的硬件资源和提供各种服务。
为了更好地理解操作系统的原理和设计,我们在课程中进行了一系列的实验,其中之一就是使用nachos操作系统进行实验。
本报告将对我们在nachos实验中的学习和体验进行总结和分享。
二、nachos简介nachos是一个教学用的操作系统,它是为了帮助学生更好地理解操作系统的原理和设计而开发的。
nachos的设计简单、模块化,易于理解和扩展。
通过使用nachos,我们可以深入了解操作系统的各个组成部分,如进程管理、内存管理、文件系统等,并通过实验来加深对这些概念的理解。
三、实验一:进程管理在第一个实验中,我们学习了进程管理的基本原理和实现。
通过使用nachos,我们可以创建和管理多个进程,并学习它们之间的通信和同步机制。
我们了解了进程的状态转换、进程调度算法以及进程间通信的方法,如共享内存和消息传递等。
通过实验,我们更深入地理解了进程管理的重要性和挑战。
四、实验二:内存管理在第二个实验中,我们学习了内存管理的原理和实现。
nachos提供了虚拟内存的支持,我们可以通过设置页表和实现页面置换算法来管理内存。
我们了解了内存分页和分段的概念,以及常见的页面置换算法,如FIFO、LRU等。
通过实验,我们深入了解了内存管理的工作原理和性能优化方法。
五、实验三:文件系统在第三个实验中,我们学习了文件系统的原理和实现。
nachos提供了一个简单的文件系统接口,我们可以通过创建、读取和写入文件来学习文件系统的操作。
我们了解了文件系统的组织结构,如目录、文件和索引节点等,并学习了文件系统的一致性和恢复机制。
通过实验,我们更好地理解了文件系统的工作原理和性能优化方法。
六、实验四:网络通信在第四个实验中,我们学习了网络通信的原理和实现。
nachos提供了一个简单的网络模拟器,我们可以创建和管理多个网络节点,并通过网络进行通信。
Nachos二级索引文件系统解题报告周景博

Nachos二级索引文件系统解题报告这里我讲一下自己扩充nachos二级文件索引的解题过程。
做一道试验题,总会遇到很多问题,而在解决问题的同时,也是提高能力的过程。
这里我大体上记录了自己在做二级索引时所遇的几个问题,以及自己的解决过程,算是一个总结。
一、初步总体思路我的思路是这样,要新建一个subfilehdr的文件,subfilehdr具有原来的filehdr的十分相似,但是在subfilehdr中无须记录文件长度,索引subfilehdr可以记录31个sector(我就是直接将filehdr的内容直接拷过去,然后修改的)。
然后我修改了filehdr里的内容。
我的想法是将filehdr里的dataSectors[]的每一个数组里都存放一个指向下一个文件头的指针,就是每一个dataSectors都存放一个subfilehdr文件头。
1、开始我写出的源代码的关键部分如下:内存分配的方法Allocate(BitMap *freeMap, int fileSize)改写的关键代码如下:subHeader *sub_hdr= new subHeader;/filesys/:62: 错误:forward declaration of ‘struct FileHeader’: In member function ‘bool FileHeader::Allocate(BitMap*, int)’::46: 错误:‘numSectors’ 在此作用域中尚未声明:51: 错误:‘dataSectors’ 在此作用域中尚未声明:53: 错误:‘numBytes’ 在此作用域中尚未声明我考虑这可能是没有加载的问题,所以反复修改了中的内容,并尝试了#include 加载中可能遇到的错误,但是最终也没能解决这个问题。
后来我才注意到,我是将filehdr中的内容直接拷到subfilehdr中的,因此可能宏定义的问题。
所以我把subfilehdr中的#ifndef FILEHDR_H#define FILEHDR_H改为了#ifndef FILEHDR_L#define FILEHDR_L这样,make之后就不会报错了。
操作系统的课程设计Linux二级文件资料系统设计完整篇.doc

操作系统的课程设计Linux二级文件资料系统设计1操作系统课程设计报告专业:软件工程学号:姓名:马提交日期:2017/1/10【设计目的】1、通过一个简单多用户文件系统的设计,加深理解文件系统的内部功能和内部实现2、结合数据结构、程序设计、计算机原理等课程的知识,设计一个二级文件系统,进一步理解操作系统3、通过对实际问题的分析、设计、编程实现,提高学生实际应用、编程的能力【设计内容】为Linux系统设计一个简单的二级文件系统。
要求做到以下几点:1.可以实现下列几条命令:login 用户登录dir 列目录create 创建文件delete 删除文件open 打开文件close 关闭文件read 读文件write 写文件cd 进出目录2.列目录时要列出文件名,物理地址,保护码和文件长度3.源文件可以进行读写保护【实验环境】C++DevCpp【设计思路】本文件系统采用两级目录,其中第一级对应于用户账号,第二级对应于用户帐号下的文件。
另外,为了简便文件系统未考虑文件共享,文件系统安全以及管道文件与设备文件等特殊内容。
首先应确定文件系统的数据结构:主目录、子目录及活动文件等。
主目录和子目录都以文件的形式存放于磁盘,这样便于查找和修改。
用户创建的文件,可以编号存储于磁盘上。
如:file0,file1,file2…并以编号作为物理地址,在目录中进行登记。
结构体:typedef struct /*the structure of OSFILE*/{int fpaddr; /*file physical address*/int flength; /*file length*/int fmode; /*file mode:0-Read Only;1-Write Only;2-Read and Write; 3-Protect;*/char fname[MAXNAME]; /*file name*/} OSFILE; //存放重要信息typedef struct /*the structure of OSUFD*/{char ufdname[MAXNAME]; /*ufd name*/OSFILE ufdfile[MAXCHILD]; /*ufd own file*/}OSUFD; //用户下面的文件typedef struct /*the structure of OSUFD'LOGIN*/{char ufdname[MAXNAME]; /*ufd name*/char ufdpword[8]; /*ufd password*/} OSUFD_LOGIN;typedef struct /*file open mode*/{int ifopen; /*ifopen:0-close,1-open*/int openmode; /*0-read only,1-write only,2-read and write,3-initial*/ }OSUFD_OPENMODE;主要的函数说明:void LoginF(); /*LOGIN FileSystem用户登录*/void DirF(); /*Dir FileSystem列目录*/void CdF(); /*Change Dir改变目录*/void CreateF(); /*Create File创建文件*/void DeleteF(); /*Delete File删除文件*/void ModifyFM(); /*Modify FileMode修改*/void OpenF(); /*Open File打开文件*/void CloseF(); /*Close File关闭文件*/void ReadF(); /*Read File读文件*/void WriteF(); /*Write File写文件*/void QuitF(); /*Quit FileSystem离开文件系统*/void help();其他重要函数:void clrscr() //清屏int ExistD(char *dirname) /*Whether DirName Exist,Exist-i,Not Exist-0*/ int ExistF(char *filename) /*Whether FileName Exist,Exist-i,Not Exist-0*/ int FindPANo() /*find out physical address num*/void SetPANo(int RorW) /*Set physical address num,0-read,1-write*/void InputPW(char *password) /*input password,use '*' replace*/char *ltrim(char *str) /*remove the heading blanks.去除左空白*/char *rtrim(char *str) /*remove the trailing blanks.去除右空白*/int WriteF1() /*write file相当于置换文件*/程序流程说明:整体流程:各部分功能流程:Open:N NY操作系统的课程设计Linux二级文件资料系统设计1第2页【源程序清单】Open:void OpenF() /*Open File*/{printf("\n\nC:\\%s>",strupr(dirname)); //显示当前路径int fcoun, i; //定义两个整形变量char fname[MAXNAME], fmode[25]; //定义两个字符串变量int fmod; //文件模式printf("\nPlease input FileName:");gets(fname); //接收打开文件的文件名ltrim(rtrim(fname)); //去除左右空白if(ExistF(fname){ //不存在printf("\nError.文件名\'%s\'不存在\n", fname);wgetchar=1;} else { //存在i=ExistD(username); //获取用户物理信息for(int a=0; a {if(strcmp(fname, ufd[i]->ufdfile[a].fname)==0) //找到文件{fcoun=a;break;}}ifopen[i][fcoun].ifopen=1; //将文件状态置为打开状态printf("Please input OpenMode(0-Read Only, 1-Write Only, 2-Read and Write,3-Protect):");//打开文件模式gets(fmode); //获取模式fmod=atoi(fmode); //将字符串转换为整型ifopen[i][fcoun].openmode=fmod; //将文件的模式置为OpenModeprintf("\nOpen Successed");wgetchar=1;}}Delete:void DeleteF() /*Delete File*/{printf("\n\nC:\\%s>",strupr(dirname)); //显示路径char fname[MAXNAME], str[50], str1[50]; //定义三个字符串变量int i, k, j;int fpaddrno1; //记录文件物理地址块号if(strcmp(strupr(ltrim(rtrim(dirname))), "")==0){ //判断主目录是否为空printf("\nError.请确认您要删除的是否在用户目录下!\n");wgetchar=1;}if(strcmp(strupr(dirname), strupr(username))!=0){ //判断用户是否在用户目录下printf("\nError.您只能删除修改自己用户目录下的文件哦!\n");wgetchar=1;} else {printf("\nPlease input FileName:");gets(fname); //接收删除的文件名ltrim(rtrim(fname)); //去除文件名的左右空白i=ExistF(fname); //用户文件位置if(i>=0){k=ExistD(username); //获取用户所在存储位置if(ifopen[k][i].ifopen==1){//文件状态处于打开状态,不许删除printf("\n Error.\'%s\' 处于打开状态!请先关闭哟!\n", fname); wgetchar=1;} else {if(ufd[k]->ufdfile[i].fmode==3){ //保护文件,不可删除printf("\nError.\'%s\'处于被保护状态!请先关闭哟!\n", fname);wgetchar=1;} else {fpaddrno1=ufd[k]->ufdfile[i].fpaddr; //获取文件的物理地址块号fpaddrno[fpaddrno1]=0; //回收物理地址块号for(j=i; jufd[k]->ufdfile[j]=ufd[k]->ufdfile[j+1]; //将j+1位置为j}strcpy(str , "c:\\osfile\\file\\");itoa(fpaddrno1, str1, 10); //将整数转化为字符串strcat(str, str1);strcat(str, ".txt"); //连接remove(str); //删除物理文件fcount[k--]; //文件个数减一。
Nachos系统调用实习报告
Nachos系统调用实习报告在本次实习中,我参与了Nachos系统的开发与优化工作。
Nachos是一款开源的嵌入式操作系统,旨在提供安全、高效和可靠的计算环境。
通过实习,我希望能够更深入地理解操作系统的内部机制,提升我的系统编程技能,并且在实际项目中运用所学知识。
在进行系统调用设计时,遇到了参数传递的问题。
经过研究,我们决定采用寄存器传递参数,并优化了寄存器的使用方式,提高了调用效率。
在实现文件系统时,遇到了读写性能的问题。
我们通过对文件系统进行优化,包括缓存机制、文件分割等手段,有效地提高了读写性能。
在多任务调度中,遇到了任务优先级冲突的问题。
我们通过引入任务调度器,实现了任务的动态优先级调整,解决了冲突问题。
团队合作:在实习期间,我与团队成员积极沟通,共同解决了许多问题。
我们经常进行技术讨论,分享解决方案,共同优化系统性能。
这种团队合作的方式让我收获颇丰。
在实习过程中,我运用了所学的操作系统知识,如进程管理、文件系统、设备驱动等,对Nachos系统进行优化。
同时,我还学习了汇编语言、C语言以及嵌入式开发的相关知识,并将其应用到实际项目中。
这些知识的应用让我对操作系统有了更深入的理解。
通过实习,我更加深入地理解了操作系统的内部机制和实现方法。
我学会了如何在实际项目中运用所学知识,提高了我的系统编程技能。
我认识到团队合作的重要性,学会了如何与他人协作解决问题。
我认识到自我学习和持续进步的重要性,需要在工作中不断学习和提升。
对某些专业知识掌握不够深入,需要进一步学习。
在解决问题时,有时过于急躁,需要更加耐心地思考和分析问题。
通过本次实习,我更加深入地理解了操作系统的内部机制和实现方法,提高了我的系统编程技能和解决问题的能力。
我也认识到团队合作的重要性,学会了如何与他人协作解决问题。
这些经验和收获将对我未来的学习和工作产生积极的影响。
在过去的六个月中,我有幸在XYZ科技公司的Nachos团队实习,专注于文件系统的开发与优化。
nachos设计报告

系统调用与用户空间管理设计设计目标:实现多种系统调用( 如:fork 、exec 、exit 、join 、open 、read 、 write...) 和用户进程空间管理。
构造一个基本的用户命令解释程序从而可在N achos 上并发执行多道用户程序。
构造可分页置换用户进程的虚拟内存。
设计背景:首先分析一下nachos的系统调用,进程空间管理以及内存管理时如何实现的。
这一部分设计三个文件夹的操作,userprog、threads以及test目录。
首先分析一下系统调用的实现原理。
nachos定义了11个系统调用函数,涉及到对线程的管理以及输入输出。
这11个系统调用全部在syscall.h文件中声明,在st art.s之中实现。
分析start.s以及所发的实验指导书等等很容易知道,系统调用的参数是存到4到7号寄存器之中的,系统调用号放到2号寄存器,若是有返回值也是放到2号寄存器之中的。
从start.s可以看到,每一个系统调用都有一个sysca ll指令操作,.globl Halt.ent HaltHalt:addiu $2,$0,SC_Haltsyscallj$31.end Halt而我们分析(541行)可以知道,该操作引发了一个SyscallExcepti on,case OP_SYSCALL:RaiseException(SyscallException, 0);在的RaiseException进行处理,voidMachine::RaiseException(ExceptionType which, int badVAddr){DEBUG('m', "Exception: %s\n", exceptionNames[which]);// ASSERT(interrupt->getStatus() == UserMode);registers[BadVAddrReg] = badVAddr;DelayedLoad(0, 0);// finish anything in progressinterrupt->setStatus(SystemMode);ExceptionHandler(which);// interrupts are enabled at this pointinterrupt->setStatus(UserMode);}涉及的操作有保存当前的指令地址,延迟加载,然后进入了内核态,接着就是处理异常。
nachos 实验报告

nachos 实验报告
《Nachos 实验报告》
在计算机科学领域,操作系统是一个非常重要的概念。
它是计算机系统的核心组成部分,负责管理计算机的资源并提供用户和应用程序之间的接口。
为了更好地理解操作系统的工作原理,我们进行了一项名为Nachos的实验。
Nachos是一个用于教学目的的操作系统内核。
它是在加州大学伯克利分校开发的,旨在帮助学生学习操作系统的基本概念和原理。
在这个实验中,我们使用Nachos来深入了解操作系统的各个方面,包括进程管理、内存管理、文件系统和网络通信等。
首先,我们学习了Nachos的基本结构和架构。
它由多个模块组成,每个模块负责不同的功能。
通过阅读Nachos的源代码和文档,我们逐渐理解了操作系统内核的组成和工作原理。
接着,我们进行了一系列的实验,来探索Nachos的各种功能。
我们实现了进程管理模块,通过创建和调度多个进程来理解进程的概念和调度算法。
我们还实现了内存管理模块,通过分配和释放内存来了解内存管理的重要性。
此外,我们还实现了文件系统和网络通信模块,以便更好地理解操作系统对外部设备和网络的支持。
通过这些实验,我们不仅加深了对操作系统的理解,还提高了编程和调试的能力。
Nachos实验让我们从理论知识转化为实际操作,让我们更加深入地理解了操作系统的工作原理。
总的来说,Nachos实验为我们提供了一个宝贵的学习机会,让我们对操作系统有了更深入的了解。
通过这个实验,我们不仅学到了知识,还培养了解决问题
的能力和团队合作精神。
希望未来能够继续深入研究操作系统,为计算机科学领域做出更多的贡献。
实验十索引的实验报告
实验十索引及数据库安全一、实验目的(1)理解索引的概念与类型。
(2)掌握使用企业管理器创建与维护索引的方法。
(3)掌握T-SQL语句创建与维护索引的方法。
二、实验内容说明:在所有索引文件名取名时,请各位同学在所给定的文件名后加上下划线及学号后四位数字构成自己的实验索引文件名。
如:stu_index_20031101. (一)索引索引分为两种:聚簇索引和非聚簇索引。
每张表只能有一个聚簇索引,并应该。
创建索引时的缺省设置是非聚簇索引。
1、使用企业管理器创建、管理索引(1)创建索引1)为student表创建一个以sno为索引关键字的惟一聚簇索引。
(若原已有请删除,索引名为sno_index)方法一:(提示:选择表后击鼠标右键,选“所有任务”->“管理索引”)基本步骤:方法二:(提示:选择表后击鼠标右键,选“设计表”->“索引/键”)基本步骤:2)为student表创建以sname,sex为索引关键字的非聚簇索引(对sname以升序来排列,sex以降序排列,并设置填充因子为70%)。
索引名为:ss_index。
基本步骤:(2)重命名索引将索引文件student重新命名为sno_index1。
基本步骤:(3)删除索引将索引文件sno_index1删除。
基本步骤:右击删除即可2、使用T-SQL语句创建、管理索引(1)创建索引1)为SC表创建一个非聚集索引grade_index,索引关键字为grade,升序,填充因子为80%。
(提示:with fillfactor=)T-SQL语句:create index grade_indexon SC(grade)with fillfactor=802)为SC表创建一个惟一性聚集索引sc_index,索引关键字为sno,cno。
提示:用alter table命令也可以删除原有的聚集索引约束或用企业管理器删除。
方法1:用alter table命令创建sc_index索引。
NachOS实验报告(4个全)
NachOS实验报告(4个全)四川大学操作系统课程设计报告学院:软件学院专业:软件工程专业年级:08级组编号:组成员:提交时间:2010年6月24日指导教师评阅意见:.. . . .指导教师评阅成绩:::实验项目一项目名称:开发Shell程序试验背景知识Shell此处的shell是指命令行式的shell。
文字操作系统与外部最主要的接口就叫做shell。
shell是操作系统最外面的一层。
shell管理你与操作系统之间的交互:等待你输入,向操作系统解释你的输入,并且处理各种各样的操作系统的输出结果。
shell提供了你与操作系统之间通讯的方式。
这种通讯可以以交互方式(从键盘输入,并且可以立即得到响应),或者以shell script(非交互)方式执行。
shell script是放在文件中的一串shell和操作系统命令,它们可以被重复使用。
本质上,shell script是命令行命令简单的组合到一个文件里面。
Shell基本上是一个命令解释器,类似于DOS下的。
它接收用户命令(如ls等),然后调用相应的应用程序。
较为通用的shell有标准的Bourne shell (sh)和C shell (csh)。
交互式shell和非交互式shell交互式模式就是shell等待你的输入,并且执行你提交的命令。
这种模式被称作交互式是因为shell与用户进行交互。
这种模式也是大多数用户非常熟悉的:登录、执行一些命令、签退。
当你签退后,shell 也终止了。
shell也可以运行在另外一种模式:非交互式模式。
在这种模式下,shell不与你进行交互,而是读取存放在文件中的命令,并且执行它们。
当它读到文件的结尾,shell也就终止了。
实验目的:Shell是一个命令处理器(command processor)——是一个读入并解释你输入的命令的程序,它是介于使用者和操作系统之核心程序(kernel)间的一个接口。
它是一个交互性命令解释器。
Nachos系统调用实习报告

系统调用实习报告善良的大姐姐目录一:总体概述自lab4我们完成了虚拟内存的实习,可以运行用户程序之后,我们就考虑加入系统调用。
即,用户程序可以通过特定的系统调用,陷入Nachos内核,从而完成特定的目标。
本次lab一共要求完成10个系统调用,包括两大部分,文件系统相关——Create,Open,Close,Read,Write;用户程序相关——Exec,Fork,Yield,Join,Exit。
需要在阅读和理解源码的基础上,知道系统调用的执行流程,进一步修增源代码,实现新增的系统调用功能。
二:任务完成情况任务完成列表(Y/N)具体Exercise的完成情况Exercise 1:源代码阅读任务:阅读与系统调用相关的源代码,理解系统调用的实现原理。
完成情况:1.概述:1)定义了每个系统调用对应的系统调用号2)声明了每个系统调用2.概述:对系统陷入进行处理。
1)从machine的2号寄存器读入系统调用号2) 执行对应的操作代码(需要自己完成)3) (如果需要)将返回值写回Machine 的2号寄存器3.概述:当用户程序执行一个系统调用的时候,将参数放入2号寄存器,然后跳转到执行。
以Halt 为例:4. 总结当用户希望执行一条系统调用的时候: 1) 在用户程序中调用2) 当这条语句被OneInstruction 函数解析执行时,会判断出这是一条系统调用,转入3) 在中找到系统调用对应的入口(可能需要自己增加),将系统调用号放入machine的2号寄存器,并转入4) 在中,读出2号寄存器中的系统调用号,执行对应操作 5) 必要时,将返回值写回2号寄存器,并注意,将PC 前进。
6) 指令回到用户程序系统调用的下一条继续执行。
系统调用完成。
为了执行一条系统调用,我们需要完成的部分:1) 自己写一个用于测试的用户程序的.c 文件,并修改test 的Makefile ,使得用户程序能够被Nachos 系统执行。
2) 因为本次lab 需要写的系统调用,在中都已经写好了,因此我们不需要修改。
文件检索实验报告模板

文件检索实验报告模板1. 实验目的本实验主要目的是通过设计并实现文件检索系统,了解和掌握文件检索的基本原理和技术,以及对文件进行建立索引并进行关键字检索的方法。
2. 实验环境- 操作系统:Windows 10- 开发工具:Python 3.9.2- 依赖库:PyQt5, Whoosh3. 实验过程3.1 数据准备首先,我们在本地选择一些文本文件作为实验的数据集,包括文章、新闻、报告等。
这些文件将被用于建立索引和进行关键字检索。
3.2 文件索引在系统中,我们使用Whoosh库来建立文件的索引。
首先,我们需要定义文件的索引结构,包括文件名、路径、内容等字段。
然后,我们通过遍历数据集中的所有文件,将文件的这些信息添加到索引中。
3.3 关键字检索通过Whoosh库提供的API,我们可以方便地进行关键字检索。
用户可以在系统界面中输入关键字,并点击搜索按钮进行检索。
系统会根据用户输入的关键字查询索引,并返回匹配的文件列表。
3.4 界面设计为了方便用户使用,我们设计了一个简单的图形界面。
用户可以通过界面中的输入框输入关键字,并点击搜索按钮进行检索。
搜索结果将以列表形式展示在界面中的另一个窗口中,用户可以选择点击某一项来打开对应的文件。
4. 实验结果经过实验,我们成功地建立了文件的索引并实现了关键字检索功能。
用户可以通过输入关键字来搜索他们感兴趣的文件,并且可以通过点击搜索结果来打开对应的文件。
实验结果表明,我们设计的文件检索系统能够满足用户的需求,并具有良好的检索性能。
5. 实验总结通过本次实验,我们深入了解了文件检索的原理和技术,并实践了文件检索系统的设计与实现。
实验过程中,通过使用Whoosh库,我们学会了如何建立文件索引和进行关键字检索。
同时,通过设计简单的图形界面,我们使文件检索系统更加易用和友好。
实验结果表明,我们成功完成了实验目标,并取得了满意的效果。
然而,我们也发现了一些不足之处。
首先,我们的文件检索系统只能处理文本文件,并不能处理其他类型的文件。
二级索引查找数据过程
二级索引查找数据过程二级索引是一种常用的数据结构,用于加快数据访问的速度。
而索引查找是在数据库中查找数据时常用的一种方法。
在本文中,我们将详细介绍二级索引的定义、使用场景以及查找数据的过程。
一、二级索引的定义和作用(150字)二级索引是数据库中的一种数据结构,用于加快数据的查找速度。
它是在数据表中创建的一个另外的数据结构,用于存储列值与它们在表中对应行的关系。
与主索引不同的是,二级索引并不是按照数据表的物理顺序来存储数据,而是根据索引列的值来组织数据。
二级索引的作用是提高数据库中数据的查找效率,特别是在大数据量的情况下。
通过使用二级索引,数据库可以更快地定位到需要的数据,并减少全表扫描的开销。
二、二级索引的使用场景(200字)二级索引通常在满足以下条件时使用:1. 经常需要按照某一列进行条件查询的场景。
如果一个表中的数据量非常庞大,且经常需要按照某个特定的列进行查询,那么可以通过创建对应列的二级索引来加快查询速度。
2. 需要加速排序操作的场景。
在某些情况下,数据库需要对表的某一列进行排序操作。
通过创建二级索引,可以将这个操作的时间复杂度从O(nlogn)降低到O(logn)。
3. 进行连接查询的场景。
在数据库中,经常需要进行多表连接查询。
通过使用二级索引,可以减少连接查询的执行时间。
三、二级索引查找数据的过程(1200-1650字)二级索引查找数据的过程可以分为以下几个步骤:1. 打开二级索引文件。
数据库在执行二级索引查找时,首先需要打开对应的二级索引文件。
这个文件通常包含了列值和对应行的指针。
2. 定位索引列的值。
根据查询条件中的索引列的值,数据库可以根据二级索引文件查找到对应的记录的位置。
这个位置通常被记录为一个指针,指向数据文件中对应行的位置。
3. 获取对应行的数据。
通过之前定位到的指针,数据库可以直接读取数据文件中对应行的数据。
4. 返回结果。
数据库将获取到的数据返回给用户,并根据需要进行进一步的处理。
二级索引的基本原理
二级索引的基本原理
二级索引是数据库中的一种索引类型,它不是直接建立在表的数据上,而是建立在已存在的一级索引之上。
以下是二级索引的基本原理:
1.一级索引:
-在数据库表中,通常会有一个主键(Primary Key)或唯一索引(Unique Index),这是一级索引。
一级索引直接映射到表中的数据记录。
2.二级索引的建立:
-二级索引是在一级索引之上建立的。
它不直接指向数据记录,而是指向一级索引的位置。
在二级索引中,每个索引项关联到一级索引的某个位置。
3.加速查询:
-当执行查询时,数据库系统首先使用二级索引快速定位到一级索引的位置,然后再通过一级索引快速定位到实际的数据记录。
这样可以加速查询过程。
4.减少存储开销:
-由于二级索引不直接存储数据记录,而是存储对一级索引的引用,因此相比直接在数据记录上建立索引,可以减少存储开销。
5.维护和更新:
-当数据表中的数据发生变化时,系统需要维护一级索引和相应的二级索引。
这确保了索引的实时性,但也增加了数据更新时的开销。
6.适用场景:
-二级索引适用于那些需要在查询时快速定位到一级索引的场景,但又不想直接在数据记录上建立索引的情况。
这在大型数据库中尤为常见。
总体而言,二级索引的基本原理是在一级索引之上建立的一种索引结构,通过层层引用的方式提高查询效率,同时减少了存储开销。
- 1、下载文档前请自行甄别文档内容的完整性,平台不提供额外的编辑、内容补充、找答案等附加服务。
- 2、"仅部分预览"的文档,不可在线预览部分如存在完整性等问题,可反馈申请退款(可完整预览的文档不适用该条件!)。
- 3、如文档侵犯您的权益,请联系客服反馈,我们会尽快为您处理(人工客服工作时间:9:00-18:30)。
实验目的Nachos系统原有的文件系统只支持单级索引,最大能存取NumDirect * SectorSize的大小的文件,本次试验的目的:理解文件系统的组织结构扩展原有的文件系统,设计并实现具有二级索引的文件系统。
实验环境linux操作系统,Nachos操作系统实验分析已知在文件头的定义中描述了:#define NumDirect ((SectorSize - 2 * sizeof(int)) / sizeof(int))为了说明方便,经过实际计算,NumDirect = 30.二级索引的文件系统的filehdr首先,通过观察Nachos原有的filehdr(即上图左边的部分),可知Nachos的单级索引的文件系统最大只支持存取29个扇区大小的文件。
为了扩展二级索引,取数组的最后一个dataSectors[29]作为存取新的dataSectors数组块的索引,定义dataSectors[0] - dataSectors[28]存取数据所在的块号,dataSectors[29] == -1表示无二级索引块,为正值表示二级索引dataSectors2所在的索引块。
当文件超过原dataSectors数组所能能够存取的大小28的时候,通过bitmap为文件头的dataSectors2分配空间,返回的Sector号存在dataSectors[29]中。
fileSys每次读取filehdr的时候,仍然只读取原filehdr,如果想要访问和修改dataSectors2中的内容,则在filehdr中先通过dataSectors[29]获取到dataSectors2的扇区号,通过调用synchDisk -> ReadSector(dataSectors[lastIndex], (char *)dataSectors2),读入dataSectors2的内容,然后再进行dataSectors数组29-62号所对应的数据块的读取。
因为本次实验是在实验5的基础上进行更改的,即支持文件的扩展,这就要求不仅要有读取dataSectors2数组的方法,还要可以重新写入dataSectors2的方法。
实现方法也就是首先如果需要访问dataSectors2,那么首先调用synchDisk -> ReadSector (dataSectors[lastIndex], (char *)dataSectors2),读入dataSectors2的内容,然后进行各种应用程序的读写操作,最后调用synchDisk -> WriteSector (dataSectors[lastIndex], (char *)dataSectors2),将更改后的结果写回。
由分析可知,文件系统的二级索引功能的扩展只针对filehdr,所有的修改的都只在中进行,连头文件filehdr.h也不涉及。
关键源代码及注释——在头文件中添加dataSectors2的大小定义:#define NumDirect2 (SectorSize / sizeof(int))更改MaxFileSize:#define MaxFileSize ((NumDirect + NumDirect2)* SectorSize)转向进行说明,所有函数体中绿色部分均为本次实验的注释(建议看Allocate和Deallocate 就好了,其他的原理类似,appSectors涉及实验5的部分):// //省略无数责任声明//// @LiZhen 17/11/09//// Extends the file system to double the max file size that// Nachos can store#include "copyright.h"#include "system.h"#include "filehdr.h"Allocate//----------------------------------------------------------------------// FileHeader::Allocate// Initialize a fresh file header for a newly created file.// Allocate data blocks for the file out of the map of free disk blocks.// Return FALSE if there are not enough free blocks to accomodate// the new file.//// "freeMap" is the bit map of free disk sectors// "fileSize" is the bit map of free disk sectors//// @LiZhen 17/11/09//// Extends the file system to double the max file size that// Nachos can store// Current max file size of Nachos file system is// (NumDirect + NumDirect2) * SectorSize//// If the dataSectors[NumDirect - 1] == -1, no secondary index. // otherwise, use the dataSecotrs[NumDirect - 1] to stroe the// pointer to the secondary index block -- dataSectors2[].//----------------------------------------------------------------------boolFileHeader::Allocate(BitMap *freeMap, int fileSize){numBytes = fileSize;numSectors = divRoundUp(fileSize, SectorSize);if (freeMap->NumClear() < numSectors)return FALSE; // not enough spaceelse if(NumDirect + NumDirect2 <= numSectors)return FALSE;//not enough pointer space//First figure out the current length of dataSectors//dataSectors array index ranges from 0 to lastIndex-1int lastIndex=NumDirect-1;//If do not need the secondary index,//do not change the original code except//assign dataSectors[lastIndex] = -1if(numSectors < lastIndex){for (int i = 0; i < numSectors; i++)dataSectors[i] = freeMap->Find();dataSectors[lastIndex] = -1;}//If the numSectors excends the rage of dataSectors,//first handle the first 0--lastIndex-1 as before.//Then, ask bitmap to allocate a new sector to stroe//the Secondary index block -- dataSectors2.//At last, write back the secondary index block into the sector.else{for (int i = 0; i < lastIndex; i++)dataSectors[i] = freeMap->Find();dataSectors[lastIndex] = freeMap->Find();int dataSectors2[NumDirect2];//secondary index blockfor (int i = 0; i < numSectors - NumDirect; i++)dataSectors2[i] = freeMap->Find();synchDisk->WriteSector(dataSectors[lastIndex], (char *)dataSectors2); }return TRUE;}AppSectors//---------------------------------------------------------//FileHeader::AppSectors//@LiZhen 10/31/2009// In lab5// add appFileSize more bytes in the current file// refresh the bitmap to show the allocating changes.//@LiZhen 17/11/09// In lab10// Handle the reading and writing of the dataSectors2// if needed.//---------------------------------------------------------boolFileHeader::AppSectors(BitMap *freeMap, int appFileSize){if(appFileSize <= 0)return false;int restFileSize = SectorSize * numSectors - numBytes;// printf("the moreFileSize is %d\n",moreFileSize);// printf("the appFileSize is %d\n",appFileSize);if(restFileSize >= appFileSize){numBytes += appFileSize;return true;}else{int moreFileSize = appFileSize - restFileSize;if(freeMap->NumClear()< divRoundUp(moreFileSize, SectorSize))return FALSE;else if(NumDirect + NumDirect2 <= numSectors + divRoundUp(moreFileSize, SectorSize)) return FALSE;int i = numSectors;numBytes += appFileSize;numSectors += divRoundUp(moreFileSize, SectorSize);/*** In lab10**///First figure out the current length of dataSectors//dataSectors array index ranges from 0 to lastIndex-1int lastIndex = NumDirect-1;/** If before appending, there is no secondary index*/if(dataSectors[lastIndex] == -1){//If after being appended, new dataSecoters do NOT need the secondary index,//do not change the original code.if(numSectors < lastIndex)for( ; i < numSectors; i++)dataSectors[i] = freeMap -> Find();//If after being appended, new dataSecoters DO need the secondary index, //first handle the first 0--lastIndex-1 as before.//Then, ask bitmap to allocate a new sector to stroe//the Secondary index block -- dataSectors2.//At last, write back the secondary index block into the sector.else{for( ; i< lastIndex ; i++)dataSectors[i]= freeMap ->Find();dataSectors[lastIndex] = freeMap ->Find();int dataSectors2[NumDirect2];for ( ; i < numSectors ; i++)dataSectors2[i - lastIndex] = freeMap->Find();synchDisk->WriteSector(dataSectors[lastIndex], (char *)dataSectors2);}}/** If before appending, there is already a secondary index*///First read the dataSectors2 from the Disk.//Then, append the file size.//At last, write back the secondary index block into the sector,else{int dataSectors2[NumDirect2];synchDisk->ReadSector(dataSectors[lastIndex], (char *)dataSectors2);for( ; i < numSectors; i++)dataSectors2[i-lastIndex] = freeMap -> Find();synchDisk->WriteSector(dataSectors[lastIndex], (char *)dataSectors2);}return TRUE;}Deallocate//----------------------------------------------------------------------// FileHeader::Deallocate// De-allocate all the space allocated for data blocks for this file.//// "freeMap" is the bit map of free disk sectors//// @LiZhen 17/11/09// Deallocate the dataSectors2 if needed.//----------------------------------------------------------------------voidFileHeader::Deallocate(BitMap *freeMap){int lastIndex = NumDirect - 1;// If there is no secondary index,// handle it as original.if(dataSectors[lastIndex]==-1){for (int i = 0; i < numSectors; i++){ASSERT(freeMap->Test((int) dataSectors[i])); // ought to be marked!freeMap->Clear((int) dataSectors[i]);}}// If there is a secondary index,// first read in the dataSectors2 from the Disk.// Then, deallocate the data blocks for this file.// At last, deallocate the block that dataSector2 locates.elseint i=0;for ( ; i < lastIndex; i++){ASSERT(freeMap->Test((int) dataSectors[i])); // ought to be marked!freeMap->Clear((int) dataSectors[i]);}int dataSectors2[NumDirect2];synchDisk->ReadSector(dataSectors[lastIndex], (char *)dataSectors2); freeMap->Clear((int) dataSectors[lastIndex]);for( ; i < numSectors; i++)freeMap->Clear((int) dataSectors2[i-lastIndex]);}}ByteToSectors//----------------------------------------------------------------------// FileHeader::ByteToSector// Return which disk sector is storing a particular byte within the file. // This is essentially a translation from a virtual address (the// offset in the file) to a physical address (the sector where the// data at the offset is stored).//// "offset" is the location within the file of the byte in question//// @LiZhen 17/11/09// Handle the reading and writing of the dataSectors2// if needed.//----------------------------------------------------------------------intFileHeader::ByteToSector(int offset){int lastIndex = NumDirect - 1;if(offset / SectorSize < lastIndex)return(dataSectors[offset / SectorSize]);{int dataSectors2[NumDirect2];synchDisk->ReadSector(dataSectors[lastIndex], (char *)dataSectors2); return (dataSectors2[offset / SectorSize - lastIndex]);}}Print//----------------------------------------------------------------------// FileHeader::Print// Print the contents of the file header, and the contents of all// the data blocks pointed to by the file header.//// @LiZhen 17/11/09// Handle the reading and writing of the dataSectors2// if needed.//----------------------------------------------------------------------voidFileHeader::Print(){int i, j, k;int lastIndex = NumDirect - 1;char *data = new char[SectorSize];// If there is no secondary index,// handle it as original.if(dataSectors[lastIndex] == -1){printf("FileHeader contents. File size: %d. File blocks:\n", numBytes);for (i = 0; i < numSectors; i++)printf("%d ", dataSectors[i]);printf("\nFile contents:\n");for (i = k = 0; i < numSectors; i++) {synchDisk->ReadSector(dataSectors[i], data);for (j = 0; (j < SectorSize) && (k < numBytes); j++, k++) {if ('\040' <= data[j] && data[j] <= '\176') // isprint(data[j])printf("%c", data[j]);elseprintf("\\%x", (unsigned char)data[j]);}printf("\n");}}// If there is a secondary index,// first read in the dataSectors2 from the Disk.// Then, deallocate the data blocks for this file.// At last, deallocate the block that dataSector2 locates.else{int dataSectors2[NumDirect2];synchDisk->ReadSector(dataSectors[lastIndex], (char *)dataSectors2);printf("FileHeader contents. File size: %d. File blocks:\n", numBytes);for (i = 0; i < lastIndex; i++)printf("%d ", dataSectors[i]);for(; i < numSectors; i++)printf("%d ", dataSectors2[i - lastIndex]);printf("\nFile contents:\n");for (i = k = 0; i < lastIndex; i++) {synchDisk->ReadSector(dataSectors[i], data);for (j = 0; (j < SectorSize) && (k < numBytes); j++, k++) {if ('\040' <= data[j] && data[j] <= '\176') // isprint(data[j])printf("%c", data[j]);elseprintf("\\%x", (unsigned char)data[j]);}printf("\n");}for( ; i < numSectors; i++) {synchDisk->ReadSector(dataSectors2[i - lastIndex], data);for (j = 0; (j < SectorSize) && (k < numBytes); j++, k++) {if ('\040' <= data[j] && data[j] <= '\176') // isprint(data[j])printf("%c", data[j]);elseprintf("\\%x", (unsigned char)data[j]);}printf("\n");}}delete [] data;}没有进行任何更改的函数void FileHeader::FetchFrom(int sector)void FileHeader::WriteBack(int sector)int FileHeader::FileLength()调试记录编译好Nachos之后,在终端敲入一下命令:[student@localhost lab10]$ ./nachos –D得到运行结果(请一扫而过):Bit map file header:FileHeader contents. File size: 128. File blocks:2File contents:\1f\0\0\0\0\0\0\0\0\0\0\0\0\0\0\0\0\0\0\0\0\0\0\0\0\0\0\0\0\0\0\0\0\0\0\0\0\0\0\0\0\0\0\0\0\ 0\0\0\0\0\0\0\0\0\0\0\0\0\0\0\0\0\0\0\0\0\0\0\0\0\0\0\0\0\0\0\0\0\0\0\0\0\0\0\0\0\0\0\0\0\0\ 0\0\0\0\0\0\0\0\0\0\0\0\0\0\0\0\0\0\0\0\0\0\0\0\0\0\0\0\0\0\0\0\0\0\0\0\0Directory file header:FileHeader contents. File size: 200. File blocks:3 4File contents:\0\0\0\0\0\0\0\0\0\0\0\0\0\0\0\0\0\0\0\0\0\0\0\0\0\0\0\0\0\0\0\0\0\0\0\0\0\0\0\0\0\0\0\0\0\0 \0\0\0\0\0\0\0\0\0\0\0\0\0\0\0\0\0\0\0\0\0\0\0\0\0\0\0\0\0\0\0\0\0\0\0\0\0\0\0\0\0\0\0\0\0\0 \0\0\0\0\0\0\0\0\0\0\0\0\0\0\0\0\0\0\0\0\0\0\0\0\0\0\0\0\0\0\0\0\0\0\0\0\0\0\0\0\0\0\0\0\0\0\0\0\0\0\0\0\0\0\0\0\0\0\0\0\0\0\0\0\0\0\0\0\0\0\0\0\0\0\0\0\0\0\0\0\0\0 \0\0\0\0\0\0\0\0\0\0\0\0\0\0\0\0\0\0\0\0\0\0\0\0\0\0Bitmap set:0, 1, 2, 3, 4,Directory contents:No threads ready or runnable, and no pending interrupts.Assuming the program completed.Machine halting!Ticks: total 5400, idle 5060, system 340, user 0Disk I/O: reads 10, writes 0Console I/O: reads 0, writes 0Paging: faults 0Network I/O: packets received 0, sent 0Cleaning up...然后在终端中敲入如下代码,将big文件复制到Nachos中:[student@localhost lab10]$ ./nachos -cp test/big big并执行append命令13次左右:[student@localhost lab10]$ ./nachos -ap test/big big最后显示结果(关键部分加粗显示,其余部分一扫而过):[student@localhost lab10]$ ./nachos -DBit map file header:FileHeader contents. File size: 128. File blocks:2File contents:\ff\ff\ff\ff\ff\1f\0\0\0\0\0\0\0\0\0\0\0\0\0\0\0\0\0\0\0\0\0\0\0\0\0\0\0\0\0\0\0\0\0\0\0\0\0\0\0 \0\0\0\0\0\0\0\0\0\0\0\0\0\0\0\0\0\0\0\0\0\0\0\0\0\0\0\0\0\0\0\0\0\0\0\0\0\0\0\0\0\0\0\0\0\0\0\0\0\0\0\0\0\0\0\0\0\0\0\0\0\0\0\0\0\0\0\0\0\0\0\0\0\0\0\0\0\0\0\0\0\0\0Directory file header:FileHeader contents. File size: 200. File blocks:3 4File contents:\1\0\0\0\5\0\0\0big\0\0\0\0\0\0\0\0\0\0\0\0\0\0\0\0\0\0\0\0\0\0\0\0\0\0\0\0\0\0\0\0\0\0\0\0\ 0\0\0\0\0\0\0\0\0\0\0\0\0\0\0\0\0\0\0\0\0\0\0\0\0\0\0\0\0\0\0\0\0\0\0\0\0\0\0\0\0\0\0\0\0\0\ 0\0\0\0\0\0\0\0\0\0\0\0\0\0\0\0\0\0\0\0\0\0\0\0\0\0\0\0\0\0\0\0\0\0\0\0\0\0\0\0\0\0\0\0\0\0\0\0\0\0\0\0\0\0\0\0\0\0\0\0\0\0\0\0\0\0\0\0\0\0\0\0\0\0\0\0\0\0\0\0\0 \0\0\0\0\0\0\0\0\0\0\0\0\0\0\0\0\0\0\0\0\0\0\0\0\0\0Bitmap set:0, 1, 2, 3, 4, 5, 6, 7, 8, 9, 10, 11, 12, 13, 14, 15, 16, 17, 18, 19, 20, 21, 22, 23, 24, 25, 26, 27, 28, 29, 30, 31, 32, 33, 34, 35, 36, 37, 38, 39, 40, 41, 42, 43, 44,Directory contents:Name: big, Sector: 5FileHeader contents. File size: 4760. File blocks:6 7 8 9 10 11 12 13 14 15 16 17 18 19 20 21 22 23 24 25 26 27 28 29 30 31 32 33 34 36 37 38 39 40 41 42 43 44File contents:big file big file big file big file big file \abig file big file big file big file big file \abig file big file big file big filebig file \abig file big file big file big file big file \abig file big file big file big file big file \abig file big file big file******省略无数big file*****file big file big file big file big file \abig file big file big file big file big file \abig file big file big file big file bigfile \a***end of file***\aNo threads ready or runnable, and no pending interrupts.Assuming the program completed.Machine halting!Ticks: total 54400, idle 52750, system 1650, user 0Disk I/O: reads 50, writes 0Console I/O: reads 0, writes 0Paging: faults 0Network I/O: packets received 0, sent 0Cleaning up...运行分析Bitmap set:0, 1, 2, 3, 4, 5, 6, 7, 8, 9, 10, 11, 12, 13, 14, 15, 16, 17, 18, 19, 20, 21, 22, 23, 24, 25, 26, 27, 28, 29, 30, 31, 32, 33, 34, 35, 36, 37, 38, 39, 40, 41, 42, 43, 44,首先看bitmap,它应该显示出当前那些扇区号被占用了。
