格兰仕微波炉蒸鱼操作方法
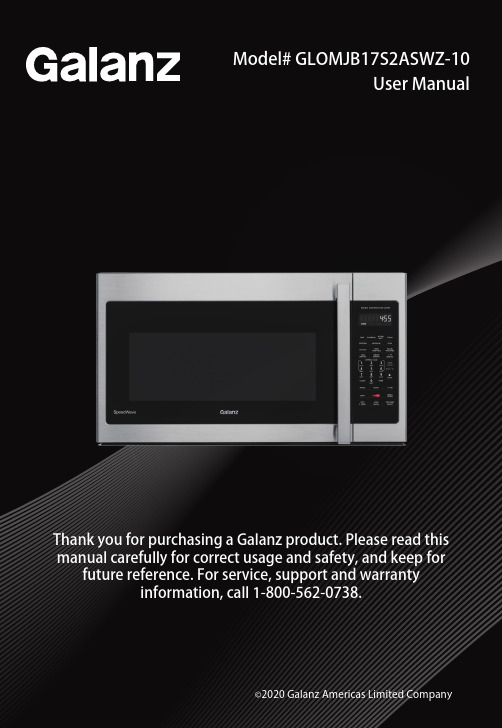
Galanz微波炉用户手册说明书
211111111121212131414141414151515161616 3Precautions to avoid possible exposure to excessive microwave energy: . . . . . . . . . . . . . . . . . . . . . . . . . . . . . . . . .3Important Safety Instructions . . . . . . . . . . . . . . . . . . . . . . . . . . . . . . . . . . . . . . . .. . . . . . . . . . . . . . . . . . . . . . . . . . . . . . . . . . .3Unpacking instructions . . . . . . . . . . . . . . . . . . . . . . . . . . . . . . . . . . . . . . . . . . . . . . . . . . . . . . . . . . . . . . . . . . . . . . . . . . . . . . . .4Grounding Instructions . . . . . . . . . . . . . . . . . . . . . . . . . . . . . . . . . . . . .. . . . . . . . . . . . . . . . . . . . . . . . . . . . . . . . . . . . . . . . . . .5Cookware and cooking materials . . . . . . . . . . . . . . . . . . . . . . . . . . . . . . . . . . . . . . . . . . . . . . . . . . . . . . . . . . . . . . . . . . . . 6Materials you can use . . . . . . . . . . . . . . . . . . . . . . . . . . . . . . . . . . . . . . . . . . . . . . . . .. . . . . . . . . . . . . . . . . . . . . . . . . . . . . 6Materials to be avoided . . . . . . . . . . . . . . . . . . . . . . . . . . . . . . . . . . . . . . . . . . . . . . . . . . . . . . . . . . . . . . . . . . . . . . . . . . . 6FEATURES . . . . . . . . . . . . . . . . . . . . . . . . . . . . . . . . . . . . . . . . . . . . . . . . . . . . . . . . . . . . . . . . . . . . . . . . . . . . . . . . 7Package contents . . . . . . . . . . . . . . . . . . . . . . . . . . . . . . . . . . . . . . . . . . . . . . . . . . . . . . . . . . . . . . . . . . . . . . . . . . . . . . . . . . . . .7Microwave oven . . . . . . . . . . . . . . . . . . . . . . . . . . . . . . . . . . . . . . . . . . . . . . . . . . . . . . . . . . . . . . . . . . . . . . . . . . . . . . . . . . . . . . .7CONTROL PANEL . . . . . . . . . . . . . . . . . . . . . . . . . . . . . . . . . . . . . . . . . . . . . . . . . . . . . . . . . . . . . . . . . . . . . . . . . . . . . . .8ACCESSORIES INSTRUCTION . . . . . . . . . . . . . . . . . . . . . . . . . . . . . . . . . . . . . . . . . . . . . . . . . . . . . . . . . . . . . . . . . . . .9Cautions . . . . . . . . . . . . . . . . . . . . . . . . . . . . . . . . . . . . . . . . . . . . . . . . . . . . . . . . . . . . . . . . . . . . . . . . . . . . . . . . . . . . . . . . . . . . Name of accessories . . . . . . . . . . . . . . . . . . . . . . . . . . . . . . . . . . . . . . . . . . . . . . . . . . . . . . . . . . . . . . . . . . . . . . . . . . . . . . . . . . .Preparation before using . . . . . . . . . . . . . . . . . . . . . . . . . . . . . . . . . . . . . . . . . . . . . . . . . . . . . . . . . . . . . . . . . . . . . . . . . . .. . . . 109910SETTING UP YOUR MICROWAVE OVEN . . . . . . . . . . . . . . . . . . . . . . . . . . . . . . . . . . . . . . . . . . . . . . . . . . .OPERATION INSTRUCTION . . . . . . . . . . . . . . . . . . . . . . . . . . . . . . . . . . . . . . . . . . . . . . . . . . . . . . . . . . .11Setting up your microwave oven . . . . . . . . . . . . . . . . . . . . . . . . . . . . . . . . . . . . . . . . . . . . . . . . . . . . . . . . . . . . . . . . . . . . . 10Setting the Clock . . . . . . . . . . . . . . . . . . . . . . . . . . . . . . . . . . . . . . . . . . . . . . . . . . . . . . . . . . . . . . . . . . . . . . . . . . . . . . . . . .. . Setting the Timer . . . . . . . . . . . . . . . . . . . . . . . . . . . . . . . . . . . . . . . . . . . . . . . . . . . . . . . . . . . . . . . . . . . . . . . . . . . . . . . . . . . Express Cooking . . . . . . . . . . . . . . . . . . . . . . . . . . . . . . . . . . . . . . . . . . . . . . . . . . . . . . . . . . . . . . . . . . . . . . . . . . . . . . . . . . . . Microwave Cooking . . . . . . . . . . . . . . . . . . . . . . . . . . . . . . . . . . . . . . . . . . . . . . . . . . . . . . . . . . . . . . . . . . . . . . . . . . . . . . . . Roast Cook . . . . . . . . . . . . . . . . . . . . . . . . . . . . . . . . . . . . . . . . . . . . . . . . . . . . . . . . . . . . . . . . . . . . . . . . . . . . . . . . . . . . . . . . . Sensor Cook . . . . . . . . . . . . . . . . . . . . . . . . . . . . . . . . . . . . . . . . . . . . . . . . . . . . . . . . . . . . . . . . . . . . . . . . . . . . . . . . . . . . . . . . . AirFry Cook . . . . . . . . . . . . . . . . . . . . . . . . . . . . . . . . . . . . . . . . . . . . . . . . . . . . . . . . . . . . . . . . . . . . . . . . . . . . . . . . . . . . . . . . Convection . . . . . . . . . . . . . . . . . . . . . . . . . . . . . . . . . . . . . . . . . . . . . . . . . . . . . . . . . . . . . . . . . . . . . . . . . . . . . . . . . . . . . . . . .Microwave+Convection . . . . . . . . . . . . . . . . . . . . . . . . . . . . . . . . . . . . . . . . . . . . . . . . . . . . . . . . . . . . . . . . . . . . .. . . . .. . . .Steam Cook . . . . . . . . . . . . . . . . . . . . . . . . . . . . . . . . . . . . . . . . . . . . . . . . . . . . . . . . . . . . . . . . . . . . . . . . . . . . . . . . . . . . . . . . .Weight Defrost . . . . . . . . . . . . . . . . . . . . . . . . . . . . . . . . . . . . . . . . . . . . . . . . . . . . . . . . . . . . . . . . . . . . . . . . . . . . . . . . . . . . . . Time Defrost . . . . . . . . . . . . . . . . . . . . . . . . . . . . . . . . . . . . . . . . . . . . . . . . . . . . . . . . . . . . . . . . . . . . . . . . . . . . . . . . . . . . . . . 1LB Defrost . . . . . . . . . . . . . . . . . . . . . . . . . . . . . . . . . . . . . . . . . . . . . . . . . . . . . . . . . . . . . . . . . . . . . . . . . . . . . . . . . . . . . . . . .Auto Cook . . . . . . . . . . . . . . . . . . . . . . . . . . . . . . . . . . . . . . . . . . . . . . . . . . . . . . . . . . . . . . . . . . . . . . . . . . . . . . . . . . . . . . . . . . Use the Light . . . . . . . . . . . . . . . . . . . . . . . . . . . . . . . . . . . . . . . . . . . . . . . . . . . . . . . . . . . . . . . . . . . . . . . . . . . . . . . . . . . . . . . . Use the Vent Fan . . . . . . . . . . . . . . . . . . . . . . . . . . . . . . . . . . . . . . . . . . . . . . . .. . . . . . . . . . . . . . . . . . . . . . . . . . . . . . . . . . . . . Use the Turntable . . . . . . . . . . . . . . . . . . . . . . . . . . . . . . . . . . . . . . . . . . . . . . . . . . . . . . . . . . . . . . . . . . . . . . . . . . . . . . . . . . . Add Time . . . . . . . . . . . . . . . . . . . . . . . . . . . . . . . . . . . . . . . . . . . . . . . . . . . . . . . . . . . . . . . . . . . . . . . . . . . . . . . . . . . . . . . . . . Child Lock . . . . . . . . . . . . . . . . . . . . . . . . . . . . . . . . . . . . . . . . . . . . . . . . . . . . . . . . . . . . . . . . . . . . . . . . . . . . . . . . . . . . . . . . . . .CLEAN AND CARE . . . . . . . . . . . . . . . . . . . . . . . . . . . . . . . . . . . . . . . . . . . . . . . . . . . . . . . . . . . . . . . . . . . . . .17Cleaning the outside of your microwave . . . . . . . . . . . . . . . . . . . . . . . . . . . . . . . . . . . . . . . . . . . . . . . . . . . . . . . . . . . . . 17Cleaning the inside of your microwave . . . . . . . . . . . . . . . . . . . . . . . . . . . . . . . . . . . . . . . . . . . . . . . . . . . . . . . . . . . . . . . 17Cleaning and replacing the lters . . . . . . . . . . . . . . . . . . . . . . . . . . . . . . . . . . . . . . . . . . . . . . . . . . . . . . . . . . . . . . . . . . . . 18Changing the light bulbs . . . . . . . . . . . . . . . . . . . . . . . . . . . . . . . . . . . . . . . . . . . . . . . . . . . . . . . . . . . . . . . . . . . . . . . . . . . . 19TROUBLESHOOTING . . . . . . . . . . . . . . . . . . . . . . . . . . . . . . .. . . . . . . . . . . . . . . . . . . . . . . . . . . . . . . . . . . . . .21SPECIFICATIONS . . . . . . . . . . . . . . . . . . . . . . . . . . . . . . . . . . . . . . . . . . . . . . . . . . . . . . . . . . . . . . . . . . . . . . .21PRODUCT WARRAMTY . . . . . . . . . . . . . . . . . . . . . . . . . . . . . . . . . . . . . . . . . . . . . . . . . . . . . . . . . . . . . . . . . . . . . .22WARRAMTY REGISTRATION . . . . . . . . . . . . . . . . . . . . . . . . . . . . . . . . . . . . . . . . . . . . . . . . . . . . . . . . . . . .23IMPORTANT SAFETY INSTRUCTIONS . . . . . . . . . . . . . . . . . . . . . . . . . . . . . . . . . . . . . . . . . . . . . . . . .SAVE THESE INSTRUCTIONS413Cooking utensils may become hot because of heat transferred from the heated food. Potholders may be needed to handle the utensil.14Do not cover or block any openings on the appliance.15Do not store or use this appliance outdoors. Do not use this product near water, for example, near a kitchen sink, in a wet basement, near a swimming pool, or similar locations.16Do not operate this appliance if it has a damaged cord or a plug, if it is not working properly, or if it has been damaged or dropped.17Do not immerse the cord or plug in water. Keep the cord away from heated surfaces. Do not let the cord hang over the edge of a table or counter.18Use only thermometers which are speci cally designed for use in microwave ovens.19Be certain the glass tray and roller rings are in place when you operate the oven.20This appliance should be serviced only by quali ed service personnel. Contact the nearest authorized service facility for examination, repair, or adjustment.21When cleaning surfaces of the door and oven that come together on closing the door, use only mild, nonabrasive soaps, or detergents applied with a sponge or soft cloth.22VENTILATING HOODS:a) Clean Ventilating Hoods Frequently-Grease should not be allowed to accumulate on hood or lter.b) When aming foods under the hood, turn the fan on.23Use care when cleaning the vent-hood lter. Corrosive cleaning agents, such as lye-based oven cleaners, may damage the lter.24252627To reduce the risk of re and electric shock, install only above electric cooking equipment. If the over-the-cooktop microwave oven is intended to be used with either a gas or electric range, the following words or the equivalent shall be included: Suitable for use above both gas and electric cooking equipment.Unpacking instructionsCarefully remove the microwave from the box. Save the box as it may make installation easier.1Remove all packing materials from inside the oven cavity. However, DO NOT REMOVE THE WAVEGUIDE COVER, which is located on the right side in the oven cavity. Make sure that you have all items from the ‘’Package contents’’ on page 7. Read and save the instructions.2Remove the feature sticker from the outside of the door, if there is one.3Check the oven for any damage, such as misaligned or bent door, damaged door seals and sealing surfaces, broken or loose door hinges and latches, and dents inside the cavity or on the door. If there is any damage, do not operate the oven and contact your dealer.See the Installation Guide for more information.This device complies with Part 15 of the FCC Rules. Operation is subject to the following two conditions: (1) this device may not cause harmful interference, and (2) this device must accept any interference received, including interference that may cause undesired operation.Please note that changes or modi cations of this product is not expressly approved by the party responsible for compliance could void the user's authority to operate the equipment.”Section15.105 Class B NOTE: This equipment has been tested and found to comply with the limits for a Class B digital device, pursuant to Part 15 of the FCC Rules. These limits are designed to provide reasonable protection against harmful interference in a residential installation. This equipment generates, uses and can radiate radio frequency energy and, if not installed and used in accordance with the instructions, may cause harmful interference to radio communications. However, there is no guarantee that interference will not occur in a particular installation.If this equipment does cause harmful interference to radio or television reception, which can be determined by turning the equipment o and on, the user is encouraged to try to correct the interference by one or more of the following measures:-- Reorient or relocate the receiving antenna.-- Increase the separation between the equipment and receiver.-- Connect the equipment into an outlet on a circuit di erent from that to.SAVE THESE INSTRUCTIONS 5a) The marked electrical rating of the cord set or extension cord should be at least as great as the electrical rating of the appliance.b) The extension cord must be a grounding-type 3-wire cord, and the longer cord should be arranged so that it will not drape over the counter top or table top where it can be pulled on by children or tripped over unintentionally.c) If it is necessary to use an extension cord, use only a 3-wire extension cord that has a 3-blade grounding plug, and a 3-slot receptacle that will accept the plug on the appliance. The marked rating of the extension cord shall be equal to or greater than the electrical rating of the appliance.Notes •If you have any questions about the grounding or electrical instructions, consult a quali ed electrician or service person. •Galanz does not accept any liability for damage to the oven or personal injury resulting from failure to observe the electrical connection procedures.Radio or TV interferenceShould there be any interference caused by the microwave oven to your radio or TV, make sure that the microwave oven is on a di erent circuit. Relocate the radio or TV as far away from the oven as feasible or check the position and signal of the receiving antenna.GROUNDING INSTRUCTIONSThis appliance must be grounded. In the event of an electrical short circuit, grounding reduces the risk of electric shock by providing an escape wire for the electric current. This appliance is equipped with a cord having a grounding wire with a grounding plug. The plug must be plugged into an outlet that is properly installed and grounded.WarningImproper use of the grounding plug can result in a risk of electric shock. Consult a quali ed electrician or serviceman if the grounding instructions are not completely understood or if doubt exists as to whether the appliance is properly grounded.Electrical requirementsThe electrical requirements are a 120 volt 60 Hz, AC only, 20 amp outlet. It is recommended that a separate circuit serving only the oven be provided. The oven is equipped with a 3-prong grounding plug. It must be plugged into a wall receptacle that is properly installed and grounded.Power Supply Cord 1 A short power supply cord is provided to reduce the risks resulting from becoming entangled in or tripping over a longer cord.2Longer cord sets or extension cords are available and may be used if care is exercised in their use.3If a long cord or extension cord is used:Cookware and cooking materialsWarningPersonal Injury HazardTightly-closed containers could explode. Closed containers should be openedand plastic pouches should be pierced before cooking.Cookware and other materials must t on the turntable. Always use oven mitts or pot holders because cookware may become hot.Refer to the Materials you can use and Materials to be avoided tables as a guide, then test before using.Cookware and Materials Test:1Fill a microwave-safe container with 1 cup (250 ml) of cold water, along with the cookware or materials in question.2Cook on maximum power for one minute. Do not exceed one minute cooking time.3Carefully feel the cookware or material. If the empty cookware or material is warm, do not use it for microwave cooking.Materials you can useMATERIAL REMARKSAluminum foil Use as shielding only. Small, smooth pieces can be used to cover thin parts of meat or poultry to prevent overcooking. Arcing can occur if the foil is wrinkled or too close to oven walls. The foil should be at least 1 inch (2.5 cm) away from oven walls.Browning dish Follow the manufacturer’s instructions. The bottom of the browning dish must be at least 3/16-in.(5mm) above the turntable. Incorrect usage may cause the turntable to break.Dinnerware Use microwave-safe only. Follow the manufacturer's instructions. Do not use cracked or chipped dishes.Glass jars Always remove the lid. Use only to heat food until just warm. Most glass jars are not heat resistant and may break.Glassware Use heat-resistant oven glassware only. Make sure there is no metallic trim. Do not use cracked or chipped dishes.Oven cooking bags Follow the manufacturer’s instructions. Do not close with a metal tie. Make slits to allow steam to escape.Paper plates andcups Use for short–term cooking/warming only. Do not leave the oven unattended while cooking.Paper towels Use to cover food for reheating and absorbing fat. Use with supervision for short-term cooking only.Parchment paper Use as a cover to prevent splattering or a wrap for steaming.Plastic Use only if labeled “Microwave Safe.” Follow the manufacturer’s instructions. Some plastic containers soften as the food inside gets hot. “Boiling bags” and tightly closed plastic bags should be slit, pierced, or vented, as indicated on the package.Plastic wrap Use microwave-safe only. Use to cover food during cooking to retain moisture. Do not allowplastic wrap to touch food.Thermometers Use microwave-safe only (such as meat and candy thermometers).Wax paper Use as a cover to prevent splattering and retain moisture.Materials to be avoidedMATERIAL REMARKSAluminum tray May cause arcing. Use a microwave-safe dish instead.Food carton withmetal handle May cause arcing. Use a microwave-safe dish instead.Metal or metaltrimmed utensils Metal shields the food from microwave energy. The metal trim may cause arcing.Metal twist ties May cause arcing and could cause a re in the oven.Paper bags May cause a re in the oven.Plastic foam Plastic foam may melt or contaminate the liquid inside when exposed to high temperature.Wood Wood will dry out when used in the microwave oven and may split or crack.SAVE THESE INSTRUCTIONS6FEATURES7Features•7 AirFry Programs•7 auto-cook settings•11 variable power level•1000 watts of power•Press number pad to express cooking•Exhaust fan with four speeds•Hidden vent•LED lighting•Child lock•12.8-inch glass turntable• 1.7 Cu.Ft. over-the-range microwave oven•Air Fry Kit•Steam Kit•Turntable(with ring)•Installation Hardware•Grease Filter•Exhaust Damper•Installation Guide•User GuidePackage contentsMicrowave oven1. Door Safety Lock System2. Oven Window3. Plastic Roller Ring4. Plastic Shaft5. Control Panel6. Glass Turntable7. Air Fry Kit8. Steam Kit15432678CONTROL PANEL8#ITEM DESCRIPTION1Display The display includes a clock and indicators to tell you time of day, cookingtime settings and cooking functions selected.2Cook Menus Press to set auto cooking and sensor cooking programs.3Time Defrost Use to set defrost program based on time.4Weight Defrost Use to set defrost program based on weight.Press to defrost frozen food quickly.Press number pads to enter cooking time, power level, weight or temperatureand you can set express cooking program by pressing 1~6 pad.5 1 LB DefrostNumber Pad6TimerPress once to temporarily stop cooking, or twice to cancel cooking altogether,and use to set child lock.Press to set timer function.7Clock Press to set clock time.8Start Press to start the oven.Micro9Roast Press this button to start roast program.11121310+1 Min Press to add time.Conv Press to set convection cooking program.15161714AirFryLight On/OMicro + ConvPress to set AirFry cooking program.Press to set the controls of the light outside the oven.Press to set microwave and convection cooking program.Vent 4 Speed Press this button to change vent speed.1918Turntable On/O Press to turn on/o the turntable..181319Stop/CancelPress to set microwave cooking program.ACCESSORIES INSTRUCTION9Accessories InstructionMulti-function Steam Kit QZ2550DA Around 0.6Gal (2.5L)10.2×6.4 in. (258mm×163mm)1.1LB (0.5kg)4°F to 248°F(-20℃-120℃)Air Fry KitQJ876S/10.63×3.94 in. (270mm×100mm)1.6lb (0.7kg)<500°F (260℃)Product Name Model Number Volume Dimension(D×H)Net Weight Temperture Name of accessoriesPreparation before using•AirFry Pan•Seal Ring•Base12345Please check all the components. Please do not use if any component is missing or damaged.Please make sure the screw on the carry handle is tight before using. Please tighten the screw if it is loose. Please make sure the silica ring is properly tted. Please do not use the steam kit without the silica ring. Please clean the steam kit after using.Please carefully read the instruction before using this steam kit.Notes•Please always use the steam kit with water.•Please only use the airfry kit in convection, roast and airfry programs.•Stainless steel lid •Steam kit base •Steam basket •Silica ringUsing the LightThis feature is designed for the convenience of doing things outside the oven. To turn on the light at the bottom of the oven, press LIGHT ON/OFF buttonPress LIGHT ON/OFF buttonDisplay Once HIGH Twice LOW 3 timesOFFUsing the Vent FanYour oven can be used as a range hood. When it is turned on, the fan motor starts ltering out smoke, odors, and grease generated from cooking.In standby mode, the vent fan is manually control, continuous press VENT 4 SPEED can choose ve cycle gears:Auto CookIn standby mode, press the SOUP, POPCORN, or BEVERAGE button once. Use number button “1”,”2” or "3" to select food weight or servings. Press START button to con rm.123Press the SOFTEN/MELT button once, the display will show “PRESS 1--SOFTEN BUTTER 2--MELT BUTTER 3--SOFTEN ICE CREAM 4--SOFTEN CHEESE”.Use number pad to select food type, the display shows “PRESS 1--STICK 2—STICKS” or shows “PRESS 1--4oz 2--8oz”.Use number pad to select food serving or weight. Press START button to con rm.1234Menu Press numberWeight/ServingTime SOUP1 1 bowl2:30 2 2 Bowls 3:40 33 Bowls 4:50 POPCORN1 3.5 oz 2:0523 oz 1:50 BEVERAGE 11 cup 1:302 2 cups 2:40 33 cups3:50Menu Press Number Press number Weight/ServingTime SOFTEN BUTTER 1 1 1 stick 1:20 2 2 sticks 1:40 MELT BUTTER 2 1 1 stick 1:20 2 2 sticks 1:40 SOFTEN ICE CREAM 3 1 4 oz 2 8 oz 0:45 SOFTEN CHEESE41 4 oz 1:00 28 oz1:30For Soup, Popcorn, or Beverage:For Soften Butter, Melt Butter, Soften Ice Cream, or Soften Cheese:150:30Cleaning the outside of your microwaveExteriorThe outside surface is precoated steel and plastic. Clean the outside with mild soap and water, then rinse and drywith a soft cloth. Do not use any type of household or abrasive cleaner.DoorWipe the window on both sides with a damp cloth to remove any spills or spatters. Metal parts will be easier tomaintain if wiped frequently with a damp cloth. Avoid the use of spray and other harsh cleaners as they may stain, streak, or dull the door surface.Control panelIf the control panel is dirty, open the microwave door before cleaning. Wipe the panel with a cloth dampenedslightly with water only. Dry with a soft cloth. Do not scrub or use any sort of chemical cleaners. Close the door and press Stop to clear any buttons you may have pressed.Cleaning the inside of your microwaveInteriorWipe with a soft cloth and warm water. Do not use abrasive or harsh cleaners or scouring pads. For baked-on food, use baking soda or a mild soap, then rinse thoroughly with hot water.Waveguide coverThe waveguide cover is located on the ceiling inside the microwave cavity. It is made from mica so requires special care. Keep the waveguide cover clean to assure good microwave performance. Carefully wipe with a damp cloth any food spatters from the surface of the cover immediately after they occur. Built-up splashes may overheat and cause smoke or possibly catch re. DO NOT REMOVE THE WAVEGUIDE COVER.Removing odorsOccasionally, a cooking odor may remain in the microwave. To remove, combine one cup water, grated peel andjuice of one lemon, and several whole cloves in a two-cup glass measuring cup. Boil for several minutes using 100% power, then let it cool in the microwave. Wipe the interior with a soft cloth.Turntable and turntable supportRemove the turntable and turntable support and wash them in mild, sudsy water. For stubborn stains, use a mildcleanser and non-abrasive scouring sponge. You can also wash them in the top rack of a dishwasher.The turntable motor shaft is not sealed, so excess water or spills should be wiped up immediately.1723WARRANTY REGISTRATIONOPERATION INSTRUCTIONS Please mail this warranty card to the address below within 30 days of purchase.Galanz Americas, 55 Challenger Road, Suite 503, Ridge eld Park, NJ 07660.NameAddressCityState ZIPPhoneEmail Model NumberPurchase Location PLEASE PRINT CLEARLY.Serial NumberYou must attach a copy of your purchase receipt to validate your registration.。
最新整理微波炉版清蒸鲈鱼的做法配方详细步骤与图解.docx
最新整理微波炉版清蒸鲈鱼的做法配方详细步骤与图解
所需食材
主料:
鲈鱼
532g
辅料:
蒸鱼豉油
适量
*盐
3g
黄酒
3ml大葱
10g
生姜
10g
小米椒
3根胡萝卜
半根
做法如下共13个
*步骤
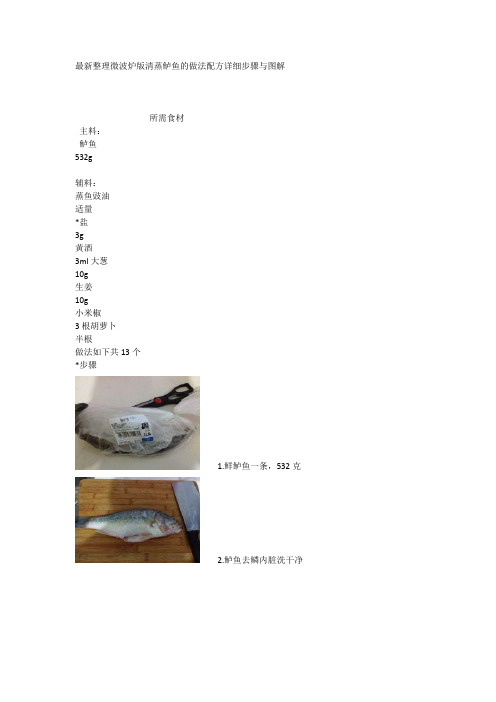
1.鲜鲈鱼一条,532克
2.鲈鱼去鳞内脏洗干净
3.切下鱼头和鱼尾,鱼腹部改刀成大约1厘米宽的扇形,鱼肚子不要切断,将鲈鱼用盐和黄酒腌制20分钟入味
4.葱姜切丝码入盘中
5.蒸霸底盆放入三分之一的清水
6.将笼屉放入,鱼头摆前方中心位置,鱼尾在鱼头后面摆好,鱼身体摆成扇形,摆成孔雀开屏的样子。
微波炉蒸鱼 - 美食杰
微波炉蒸鱼
栏目:微波炉
工艺:微波
口味:咸鲜味
难度:简单
烹饪时间:10
主料:鲻鱼:1条
辅料:小葱:少许、蒸鱼豉油:适量、姜:适量、料酒:适量、食盐:适量、水:少许
步骤:
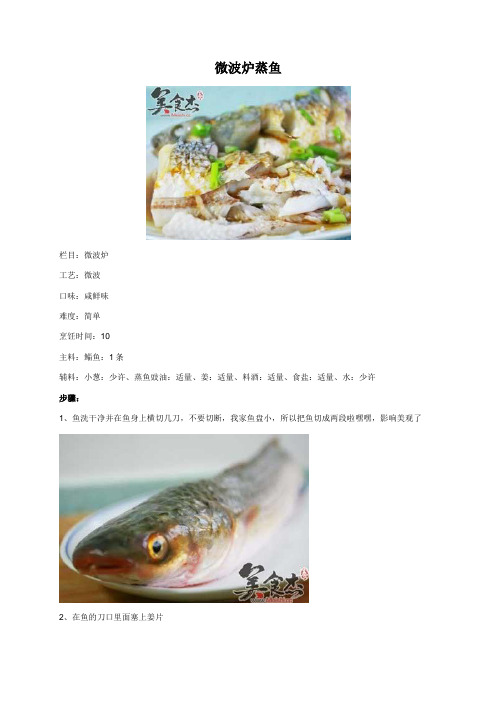
1、鱼洗干净并在鱼身上横切几刀,不要切断,我家鱼盘小,所以把鱼切成两段啦嘿嘿,影响美观了
2、在鱼的刀口里面塞上姜片
3、鱼盘子里撒点料酒,再加一点水,用保鲜纸包上,并在保鲜膜上扎几个洞,避免爆开
4、我用的是微波炉的自动蒸鱼功能,6分钟,由于自动功率通常比较小,所以我自己又加了2分钟,总共8分钟
5、好了以后拿出来,去掉保鲜膜,直接浇入李锦记的蒸鱼豉汁,撒上葱碎,就大功告成了
点击查看更多相关菜谱
美食杰()作为美食菜谱分享聚合平台,尊重创作及版权,更多原创菜谱,可查询原作者博客ID,或登陆美食杰网站浏览,感谢关注。
格兰仕微波炉说明书 (5)
格兰仕微波炉说明书1. 引言格兰仕微波炉是一款高性能、多功能的家用厨房电器。
本说明书将为用户提供详细的操作指引和使用说明,帮助用户安全地操作和充分利用微波炉的功能。
在使用本微波炉之前,请务必仔细阅读本说明书,并按照说明书中的操作规范使用微波炉。
2. 安全注意事项•请勿将金属物品放入微波炉内加热,以免引发火灾或其他安全事故。
•使用时,请确保微波炉的通风口畅通,避免堵塞导致过热。
•当微波炉出现故障或异常情况时,请立即停止使用,并联系售后服务中心处理。
•请勿让儿童独自操作微波炉,使用时请有成年人在旁边进行监护。
•请勿将易燃物品放置在微波炉附近,以免引发火灾。
•使用微波炉时,请勿直视微波辐射,以免对眼睛造成伤害。
3. 功能介绍格兰仕微波炉具有以下主要功能:3.1 加热功能格兰仕微波炉具有高效的加热功能,可迅速加热食物和饮料。
通过微波加热技术,可以在短时间内将食物加热至理想温度,节省时间和能源。
3.2 烹饪功能除了加热功能外,格兰仕微波炉还具有烹饪功能,可以通过预设的烹饪程序实现单一或多道菜肴的烹饪。
用户只需选择适当的烹饪模式和时间,微波炉将自动完成烹饪过程。
3.3 解冻功能格兰仕微波炉还具有解冻功能,可帮助用户快速解冻食材。
用户只需将需要解冻的食材放入微波炉内,并选择适当的解冻模式,微波炉将在短时间内将食材解冻至适宜的状态。
3.4 定时关机功能格兰仕微波炉还具有定时关机功能,用户可以设置微波炉在一定时间后自动关闭,便于用户合理控制加热和烹饪时间,防止过度加热。
4. 使用指南4.1 准备工作在开始使用格兰仕微波炉之前,请确保以下准备工作已经完成:•将微波炉放置在平稳的台面上,确保微波炉稳定不会滑动。
•插上电源线,并确保电源稳定可靠。
•清洁微波炉内部和外部的杂质和污渍。
4.2 加热食物以下是使用格兰仕微波炉加热食物的步骤:1.打开微波炉门,将需要加热的食物放置在微波炉的转盘上。
2.可根据需要选择合适的加热模式和时间。
格兰仕微波炉使用说明书
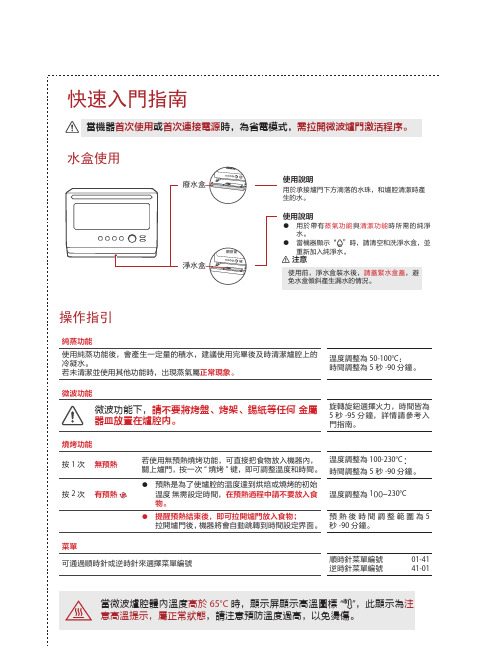
燒烤功能 按 1 次 無預熱
按 2 次 有預熱
若使用無預熱燒烤功能,可直接把食物放入機器內, 温度調整為 100-230°C:
關上爐門,按一次 “ 燒烤 ” 键,即可調整温度和時間。 時間調整為 5 秒 -90 分鐘。
ቤተ መጻሕፍቲ ባይዱ
● 預熱是為了使爐腔的温度達到烘焙或燒烤的初始 温度 無需設定時間,在預熱過程中請不要放入食 物。
快速入門指南
當機器首次使用或首次連接電源時,為省電模式,需拉開微波爐門激活程序。
水盒使用
廢水盒
淨水盒
觀察窗
使用說明 用於承接爐門下方滴落的水珠,和爐腔清潔時產 生的水。
使用說明 ● 用於帶有蒸氣功能與清潔功能時所需的純淨
水。 ● 當機器顯示“ ”時,請清空和洗淨水盒,並
重新加入純淨水。 注意
使用前,淨水盒裝水後,請蓋緊水盒蓋,避 免水盒傾斜產生漏水的情況。
操作指引
純蒸功能
使用純蒸功能後,會產生一定量的積水,建議使用完畢後及時清潔爐腔上的 冷凝水。 若未清潔並使用其他功能時,出現蒸氣屬正常現象。
温度調整為 50-100°C: 時間調整為 5 秒 -90 分鐘。
微波功能
微波功能下,請不要將烤盤、烤架、錫紙等任何 金屬 器皿放置在爐腔内。
旋轉旋鈕選擇火力,時間皆為 5 秒 -95 分鐘,詳情請參考入 門指南。
温度調整為 100-230°C
● 提醒預熱結束後,即可拉開爐門放入食物;
預熱後時間調整範圍為 5
拉開爐門後,機器將會自動跳轉到時間設定界面。 秒 -90 分鐘。
菜單 可通過順時針或逆時針來選擇菜單編號
順時針菜單編號 逆時針菜單編號
01-41 41-01
當微波爐腔體內溫度高於 65°C 時,顯示屏顯示高溫圖標 “ ”,此顯示為注 意高溫提示,屬正常狀態,請注意預防溫度過高,以免燙傷。
微波炉版清蒸鲈鱼【精品海鲜吃法教学】
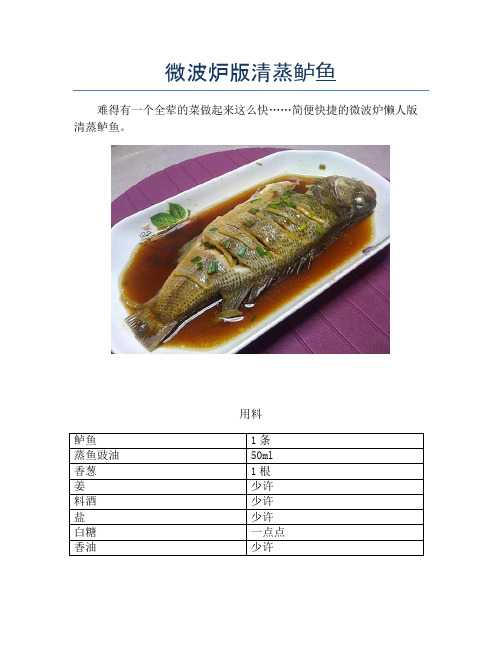
腌过的鱼冲洗干净,盘底放点姜丝(可防止鱼沾盘),其他码在鱼身上和塞在鱼肚中。
4
鱼身淋上料酒,加入与料酒差不多量的水,使盘子里有汤。(微波炉会蒸干水分,所以要多加一点水,如果全加料酒会酒味过重。啤酒更佳)
5
撒上葱花,盖上保鲜膜,用尖刀或牙签扎几个气孔,以防保鲜膜涨破。
6
从微波炉里拿出来,趁热淋上几滴香油、蒸鱼豉油,用筷子挑一点白糖溶入汤汁中,开吃~~
小贴士
葱花出炉后再撒也可以。
微波炉火力不可太大,否则容易烤化保鲜膜。
我用的李锦记蒸鱼豉油,千万别看瓶子上的说明加100ml,会齁死的= =白糖的作用是中和一下料酒的苦味,用筷子挑一点即可。
微波炉版清蒸鲈鱼
难得有一个全荤的菜做起来这么快……简便快捷的微波炉懒人版清蒸鲈鱼。
用料
鲈鱼
1条
蒸鱼豉油
50ml
香葱
1根
姜
少许
料酒
少许
盐
少许
白糖
Байду номын сангаас一点点
香油
少许
微波炉版清蒸鲈鱼的做法
1
1斤左右的鲈鱼一条,洗干净后两面肉厚的地方划几道,抹上盐、料酒腌制几分钟。
2
腌鱼的同时处理其他材料,姜切丝,香葱切成葱花。
格兰仕微波炉使用说明
格兰仕微波炉使用说明引言格兰仕微波炉是一款先进的厨房电器,以其快速、方便和节能的特点在市场上广受欢迎。
本文档将为您提供格兰仕微波炉的详细使用说明,帮助您正确操作和充分利用微波炉的功能。
安全注意事项在使用格兰仕微波炉之前,请务必阅读以下安全注意事项,以确保您和家人的安全: 1. 请将微波炉放置在平稳的、通风良好的台面上,远离水源和易燃物。
2. 请勿在微波炉内加热密闭的容器或食物,以避免压力积聚导致爆炸。
3. 请勿在微波炉中加热易燃物、金属器皿、泡沫塑料或以纸质封装的食物。
4. 请勿使用损坏的插头或电源线连接微波炉。
5. 使用时请勿触摸炉内的加热物体,以免烫伤。
6. 请勿在微波炉内存放易碎物品,以避免炉内碎片飞溅。
快速使用指南1.将需要加热的食物放置在微波炉的转盘上,并确保食物与炉壁之间有足够的空间。
2.打开微波炉的门,并将所需的时间和功率设置输入到控制面板上。
3.关闭微波炉的门,并按下“开始”按钮开始加热过程。
4.加热完成后,使用热防护手套打开微波炉的门,取出食物。
5.在使用完毕后,请清洁微波炉的内部和外部。
功能详解1. 连续加热格兰仕微波炉具有连续加热功能,可以连续多次加热食物。
只需按下“连续加热”按钮,输入所需加热的时间和功率,微波炉将会按照您的设置连续加热食物。
2. 解冻功能格兰仕微波炉的解冻功能可以根据食物的重量和种类来自动调整解冻时间和功率。
只需按下“解冻”按钮,输入食物的重量,微波炉将会自动设置合适的解冻时间和功率。
3. 快速启动如果您只是想快速加热一份食物而不需要进行精确的时间和功率设置,可以使用格兰仕微波炉的快速启动功能。
只需按下“快速启动”按钮,微波炉将会自动使用默认的时间和功率进行加热。
4. 多级烹饪格兰仕微波炉支持多级烹饪,可以先以一定的功率加热食物,然后自动切换到另一种功率进行进一步加热。
只需按下“多级烹饪”按钮,输入所需的时间和功率,微波炉将会按照您的设置自动执行多级烹饪。
格兰仕光波炉食谱
格兰仕光波炉食谱格兰仕光波炉是一种高效、安全、功能强大的厨房电器。
它利用光波照射食物,迅速加热食材,同时保持食物的营养成分和口感。
在本篇文档中,我们将为您分享一些格兰仕光波炉的食谱,希望能为您的烹饪体验带来新的灵感和乐趣。
1. 蒸鲈鱼食材:•新鲜鲈鱼一条•姜片适量•酱油适量•料酒适量•盐适量•葱花适量•胡椒粉适量步骤:1.鲈鱼用清水洗净。
2.在盘子上放姜片、酱油、料酒、盐和一些胡椒粉均匀涂抹在鱼身上,尤其是腹腔。
3.将处理好的鲈鱼放入格兰仕光波炉中,以高火(800W)蒸煮3分钟。
4.取出鲈鱼,撒上葱花即可。
这道蒸鲈鱼不仅操作简单,而且在格兰仕光波炉的照射下,鱼肉会更加鲜嫩,保持了鱼的原汁原味。
2. 红烧狮子头食材:•猪肉馅500克•葱姜蒜末适量•鸡蛋1个•面包糠适量•料酒适量•盐适量•生抽适量•糖适量•胡椒粉适量步骤:1.将猪肉馅放入大小合适的容器中,加入葱姜蒜末、盐、料酒、生抽、糖和胡椒粉,搅拌均匀。
2.将搅拌好的肉馅分成大小均匀的团,再在面包糠中裹上一层。
3.将处理好的狮子头放入格兰仕光波炉中,以高火(800W)烤15分钟。
4.取出狮子头,撒上葱花即可。
格兰仕光波炉可以均匀加热狮子头,让它们外焦里嫩,口感更好。
3. 蒜蓉空心菜食材:•空心菜适量•蒜末适量•盐适量•鸡精适量•食用油适量步骤:1.将空心菜洗净,切成合适大小的段。
2.在有盖的容器中加入适量的食用油和蒜末,用格兰仕光波炉高火(800W)烤20秒。
3.取出容器,加入空心菜和适量的盐、鸡精,搅拌均匀。
4.将处理好的空心菜放回格兰仕光波炉,以中火(500W)炖煮2分钟即可。
格兰仕光波炉可以快速炖煮空心菜,保持其营养和口感。
4. 煎鸡蛋三明治食材:•面包2片•鸡蛋2个•黄油适量•生菜叶适量•火腿片适量•盐适量•黑胡椒粉适量步骤:1.将面包片放入烤盘中,放入格兰仕光波炉中,以高火(800W)烤40秒,翻面再烤40秒。
2.取出面包片,涂上黄油。
格兰仕微波炉使用方法
格兰仕微波炉使用方法
微波炉是现代厨房中常见的厨房电器之一,它可以快速加热食物,烹饪和解冻食物。
格兰仕微波炉作为一款常见的微波炉品牌,使用简单方便,但是正确的使用方法可以更好地发挥其功能,延长使用寿命。
下面将为大家介绍格兰仕微波炉的使用方法。
首先,使用前需要确保微波炉的内部和外部都是干净的。
清洁微波炉时,可以使用温和的清洁剂和湿布,不要使用腐蚀性强的清洁剂,以免对微波炉造成损害。
接下来,将食物放置在微波炉的转盘上,并选择合适的加热时间和功率。
不同的食物需要不同的加热时间和功率,一般来说,加热时间越长,食物会越热,但是也要注意不要过度加热,以免食物变质。
在选择加热时间和功率时,可以参考食物包装上的指导或者格兰仕微波炉的使用说明书。
在使用微波炉加热食物时,可以在食物表面覆盖一层保鲜膜或者盖子,以防止食物溅出,同时也可以保持食物的湿润度。
另外,可以在食物旁边放置一杯水,可以帮助食物更均匀地加热。
在加热过程中,可以适当地将食物搅拌一下,以确保食物受热均匀。
如果需要加热大块的食物,可以将其切成小块,或者在加热过程中翻转食物,以便更均匀地加热。
另外,在使用微波炉时,要注意不要在其中加热密封的容器或者封闭的食物,以免产生压力造成爆炸。
同时,也要避免在微波炉中加热易燃物品,以免引发火灾。
最后,在使用完微波炉后,要及时清洁微波炉的内部,以防止食物残渣滋生细菌,同时也可以延长微波炉的使用寿命。
总之,正确的使用方法可以更好地发挥格兰仕微波炉的功能,延长使用寿命,同时也可以保证食物的加热效果和食品安全。
希望以上内容对大家有所帮助,谢谢阅读!。
格兰仕微波炉使用方法
格兰仕微波炉使用方法微波炉是现代厨房中常见的一种厨具,它能够快速加热食物,为我们的生活带来了极大的便利。
格兰仕微波炉作为一种常见的家用微波炉品牌,受到了许多家庭的青睐。
为了更好地使用格兰仕微波炉,下面将为大家介绍一些使用方法。
首先,使用格兰仕微波炉前需要确保微波炉处于干燥状态。
在使用微波炉之前,务必检查微波炉的内部和外部是否干净,以确保食物不会受到污染。
同时,还需检查微波炉的电源线是否连接牢固,以免在使用过程中出现安全隐患。
其次,格兰仕微波炉具有多种加热模式,如解冻、加热、烹饪等。
在使用微波炉时,需要根据食物的种类和数量选择合适的加热模式。
一般来说,解冻模式适用于需要解冻的食物,而加热模式适用于已经煮熟的食物。
在选择加热模式时,还需根据食物的重量和材质来确定加热时间,以确保食物能够均匀加热。
另外,格兰仕微波炉还配备了定时器功能,可以根据需要设置加热时间。
在使用微波炉时,可以根据食物的特点和个人口味来设置加热时间,以确保食物的口感和温度达到理想状态。
在设置加热时间时,建议先从较短的时间开始,逐渐调整到合适的时间,以免食物过热或加热不足。
最后,使用格兰仕微波炉时需要注意安全问题。
在加热食物时,应使用微波炉专用的容器,并确保容器具有微波透明性,以免发生爆炸或食物受损。
在使用微波炉时,还需避免使用金属容器或金属制品,以免引发火灾或损坏微波炉。
另外,使用微波炉时,应保持微波炉周围的通风良好,以免微波炉过热或引发安全事故。
总的来说,格兰仕微波炉是一种功能强大、使用方便的厨具,能够为我们的生活带来极大的便利。
在正确使用格兰仕微波炉的前提下,我们可以享受到美味的食物,提高生活质量。
希望以上介绍的使用方法能够帮助大家更好地使用格兰仕微波炉,让我们的生活更加便利和美味。
galanz微波炉使用方法
galanz微波炉使用方法Galanz微波炉使用方法。
Galanz微波炉是一款功能强大、操作简单的家用电器,能够为我们的生活带来极大的便利。
正确的使用方法不仅可以延长微波炉的使用寿命,还能够确保食物的加热效果和安全性。
下面将为大家介绍Galanz微波炉的正确使用方法。
首先,使用微波炉之前,要先仔细阅读产品说明书,了解微波炉的各个功能键的作用和使用方法。
不同型号的微波炉可能功能键的布局和使用方法有所不同,因此要根据自己所使用的型号来进行操作。
其次,清洁微波炉是非常重要的。
在使用微波炉之前,要确保微波炉内部是干净的,没有食物残渣或者油污。
使用后,要及时清洁微波炉内部,避免油污积累或者食物残渣影响微波炉的使用效果。
清洁时,可以使用湿布蘸取少量洗洁精擦拭微波炉内外部。
接下来,我们来介绍如何正确使用微波炉加热食物。
首先,将食物放置在微波炉专用的容器中,然后放入微波炉内。
在加热食物之前,要先将食物进行搅拌均匀,确保食物受热均匀。
在设定加热时间和加热功率时,要根据食物的种类和数量来进行合理的设定,以免造成食物过热或者加热不均匀的情况。
此外,在使用微波炉加热食物时,要注意不要使用金属容器或者金属餐具,以免引起火花或者损坏微波炉。
同时,要避免使用密封的容器,以免在加热时产生过大的压力,导致容器破裂。
最后,使用微波炉时要注意安全。
加热食物时,要小心烫伤,使用隔热手套或者毛巾取出加热好的食物。
在清洁微波炉时,要确保微波炉已经断电,并等待微波炉完全冷却之后再进行清洁操作。
总的来说,正确的使用方法和注意事项能够确保微波炉的使用效果和安全性。
希望大家在使用Galanz微波炉时,能够按照以上方法进行操作,为自己和家人带来更多的便利和美味。
如何用微波炉做清蒸鱼的方法
如何用微波炉做清蒸鱼的方法
清蒸鱼是一道很美味的菜肴,能保持鱼的原汁原味,学习简单的做法,用微波炉就能做出美味的清蒸鱼啦。
下面是店铺为你整理的微波炉清蒸鱼的做法,不放一起动手试试吧!
微波炉清蒸鱼食材准备
微波炉清蒸鱼做法步骤
1.花鲢鱼买回洗净,盐/葱/姜/料酒腌制10分钟
2.在腌制料味后的花鲢鱼上覆盖一层保鲜膜
3.放入微波炉,选择蒸鱼的功能键,8分钟即可
4.最后装盘即可
清蒸鱼的营养价值
鲢鱼能提供丰富的胶质蛋白,即能健身,有能美容,是女性滋养肌肤的理想食品。
它对皮肤粗糙、脱屑、头发干脆易脱落等症均有疗效,是女性美容不可忽视的佳肴。
鱼的营养价值很高,蛋白质含量约为15%-20%,而脂肪含量却不高,仅为1%-10%,蛋白质易为人体消化吸收,可利用率高达95%以上。
鱼肉中还含有多种人体必需的氨基酸,维生素A、B1、B2、D和矿物质。
鱼肉中含有的不饱和脂肪酸和鱼鳞中含有的卵磷脂,可预防动脉硬化,降低血脂,促进血液循环,抑制血小板凝集,减少脑血栓的形成和心肌梗塞,降低胆固醇,具有健脑作用。
格兰仕微波炉使用方法
格兰仕微波炉使用方法微波炉作为现代家庭厨房中不可或缺的电器之一,给我们的生活带来了极大的便利。
格兰仕微波炉作为一款优质的家电产品,其使用方法也是非常简单易懂的。
下面就让我们来详细了解一下格兰仕微波炉的正确使用方法吧。
首先,当您使用格兰仕微波炉之前,请务必仔细阅读产品说明书,了解产品的基本参数、功能特点以及安全使用方法。
这样可以避免因为误操作而造成不必要的损失。
接下来,让我们来了解一下格兰仕微波炉的基本操作步骤。
首先,打开微波炉门,将食物放入微波炉内部,并确保食物容器符合微波炉使用的安全标准。
然后,关闭微波炉门,选择合适的加热时间和加热功率,这取决于您所加热的食物种类和重量。
在设置好加热时间和加热功率后,按下启动按钮,微波炉就会开始工作了。
在使用格兰仕微波炉的过程中,还需要注意一些使用注意事项。
首先,不要在微波炉内加热密封的容器或食物,因为这样会导致压力升高而引起爆炸。
其次,在使用微波炉加热食物时,建议不要完全密封食物容器,以免产生过高的压力。
另外,在加热液体食物时,也要特别注意避免产生超压,以免造成烫伤或其他意外。
除了上述的基本操作步骤和注意事项外,格兰仕微波炉还具有一些特殊的功能,如快速解冻、一键烹饪等。
这些功能可以根据不同的需求来选择使用,从而更好地满足您的厨房需求。
在使用格兰仕微波炉时,还需要注意定期进行清洁和维护工作。
在清洁微波炉内部时,可以使用温和的清洁剂和湿布进行擦拭,同时要避免使用腐蚀性强的化学品。
另外,定期清理微波炉的风扇和排气口,可以保持微波炉的散热效果,延长产品的使用寿命。
总的来说,格兰仕微波炉作为一款优质的家电产品,其使用方法非常简单易懂。
只要您按照产品说明书上的操作步骤和注意事项进行正确使用,相信您一定能够享受到微波炉带来的便利和舒适。
希望本文所介绍的格兰仕微波炉使用方法对您有所帮助,谢谢您的阅读。
格兰仕微波炉使用说明书
格兰仕微波炉使用说明书
一、操作方法
1、若设置的烹调时间短于二分钟,则先将“定时器”旋转至超过三分钟位置, 再回旋到所需烹调时间的位置。
2、当微波炉不需要急需工作时,应将“定时器”旋转到“0”(关闭)位置,以免微波如空载运行损坏机器。
3、在烹调过程中,打开炉门可暂停烹调程序,再关紧炉门,微波炉会自动启动剩余烹调程序;若旋转“定时器”到“0”位置可取消当前烹调程序,并发出一声铃响。
二、微波烹调
1、先将“定时器”旋转到“0”位置。
2、将盛放食物的合适器皿放在墙体内底板剧中位置后关紧炉门。
3、旋转“功能选择器”到“中火”位置。
4、旋转“定时器”到“5”位置,微波炉即开始工作。
三、光波烹调
1、先将“定时器”旋转到“0”位置。
2、将盛放食物的合适器皿放在腔体内底板居中位置后关紧炉门。
3、旋转“功能选择器”到“光波”位置。
4、旋转“定时器”到“6”位置,微波炉即开始工作。
四、组合烹调
1、先将“定时器”旋转到“0”位置。
2、将盛放食物的合适器皿放在腔体内底板居中位置后关紧炉门。
3、旋转“功能选择器”到“组合1” “组合2”或“组合3”任一位置。
4、旋转“定时器”到“15”位置,微波炉即开始工作。
- 1、下载文档前请自行甄别文档内容的完整性,平台不提供额外的编辑、内容补充、找答案等附加服务。
- 2、"仅部分预览"的文档,不可在线预览部分如存在完整性等问题,可反馈申请退款(可完整预览的文档不适用该条件!)。
- 3、如文档侵犯您的权益,请联系客服反馈,我们会尽快为您处理(人工客服工作时间:9:00-18:30)。
格兰仕微波炉蒸鱼操作方法
格兰仕微波炉蒸鱼的操作方法如下:
步骤1:选择适合的鱼片。
将鱼片洗净,用厨房纸巾擦干水分。
步骤2:准备适量的调料。
你可以根据个人口味选择葱姜蒜、盐、酱油、料酒等调料。
步骤3:选择合适的蒸鱼器皿。
确保它能适应你选择的鱼片和微波炉的尺寸。
步骤4:在蒸鱼器皿中均匀撒上少许盐,将鱼片码放在上面。
步骤5:在鱼片上均匀撒上葱姜蒜末以及适量的料酒。
这些调料可以增添鱼片的味道。
步骤6:轻轻撒上一些酱油。
酱油可以提升鱼肉的鲜味。
步骤7:将蒸鱼器皿放入格兰仕微波炉中。
步骤8:选择合适的时间和功率。
根据你选择的鱼片的厚度和微波炉的功率来确定最佳的蒸鱼时间和功率。
步骤9:关闭微波炉的门,按下开始按钮开始蒸煮。
步骤10:蒸鱼煮熟后,小心取出蒸鱼器皿。
使用厨房防烫手套可以避免烫伤。
步骤11:在上菜前,可以撒上一些葱花或香菜点缀。
以上就是格兰仕微波炉蒸鱼的操作方法。
请注意,具体操作步骤可能会因不同的机型和个人口味而有所变化,请根据你所使用的微波炉和个人喜好进行调整。
