交换机命令
交换机配置常用命令
aptech2950(conf-if)#no shut
aptech2950(conf-if)#exit
aptech2950(conf)line vty 0 4 设置0-4 个用户可以telnet远程登陆
把“config.text”拷入系统的“running-configure”: copy flash: config.text system : running-configure
把配置模式重新设置密码存盘,密码恢复成功。
13:交换机telnet远程登录设置:
switch>en
switch#configure terminal
3:交换机命名 hostname routera 以routerA为例
router > enable
router #configure terminal
router(conf)#hostname routerA
routera (conf)#
4:配置使能口令 enable password cisco 以cisco为例
show running-configure 查看交换机当前起作用的配置信息
show interface fastethernet 0/1 察看交换机1接口具体配置和统计信息
show mac-address-table 查看mac地址表
show mac-address-table aging-time 查看mac地址表自动老化时间
9:交换机恢复出厂默认恢复命令
switch> enable
交换机基本配置命令汇总大全
交换机基本配置命令汇总大全一、交换机基本操作:1.1进入特权模式Switch>enableSwitch#1.2返回用户模式Switch#exitPress RETURN to get started!Switch>二、配置模式:全局配置模式[主机名(config)#]:配置交换机的整体参数2.1子模式:1.线路配置模式[主机名(config-line)#]:配置交换机的线路参数2.接口配置模式[主机名(config-if)#]:配置交换机的接口参数2.2进入、退出全局配置模式Switch#configure terminalSwitch(config)#exitSwitch#2.3进入、退出线路配置模式Switch(config)#line console0Switch(config-line)#exitSwitch(config)#2.4进入、退出接口配置模式Switch(config)#interface fastEthernet0/1Switch(config-if)#exitSwitch(config)#2.5从子模式下直接返回特权模式Switch(config-if)#endSwitch#三、交换机操作帮助:Ø支持命令简写(按TAB键将命令补充完整)Ø在每种操作模式下直接输入“?”显示该模式下所有的命令Ø命令空格“?”显示命令参数并对其解释说明Ø“字符?”显示以该字符开头的命令Ø命令历史缓存:(Ctrl+P)显示上一条命令,(Ctrl+N)显示下一条命令Ø错误提示信息四、交换机显示命令:Ø显示交换机硬件及软件的信息Switch#show versionØ显示当前运行的配置参数Switch#show running-configØ显示保存的配置参数Switch#show configure五、常用交换机flash中的命令:5.1将当前运行的配置参数复制到flashSwitch#write memoryBuilding configuration...[OK]Switch#5.2清空flashSwitch#delete flash:config.textSwitch#5.3交换机重新启动:Switch#reloadSystem configuration has been modified.Save?[yes/no]:n Proceed with reload?[confirm]5.4配置交换机主机名:Switch(config)#hostname S2126G-1S2126G-1(config)#5.5配置交换机口令:1)配置交换机的登陆密码S2126G(config)#enable secret level10star“0”表示输入的是明文形式的口令2)配置交换机的特权密码S2126G(config)#enable secret level150star“0”表示输入的是明文形式的口令六、常用交换机配置命令:6.1为交换机分配管理IPS2126G(config)#interface vlan1S2126G(config-if)#ip address{IP address}{IP subnetmask}[secondary]6.2将接口启用S2126G(config-if)#no shutdown6.3将接口关闭S2126G(config-if)#shutdown6.4配置接口速率S2126G(config-if)#speed[10|100|auto]6.5配置接口双工模式S2126G(config-if)#duplex[auto|full|half]七、显示接口状态:S2126G#show interface八、测定目的端的可达性:S2126G>ping{IP address}九、从TFTP服务器下载配置参数:S2126G#copy tftp startup-config十、管理交换机MAC地址表:10.1查看MACS2126G#show mac-address-table10.2配置MACS2126G(config)#mac-address-table aging-time<10-1000000> 10.3查看MACS2126G#show mac-address-table aging-time十一、VLAN的配置:11.1添加一个VLANS2126G(config)#vlan<1-4094>S2126G(config-vlan)#11.2为VLANS2126G(config-vlan)#name名字十二、将交换机端口分配到VLAN12.1配置Port VLANSwitch(config-if)#switchport access vlan<1-4094>12.2配置Tag VLANSwitch(config-if)#switchport mode trunk1)配置本地(native)VLANSwitch(config-if)#switchport trunk native vlan<1-4094> Native VLAN即PVID,默认情况下每个trunk口的native VLAN是12)从主干链路中清除VLANSwitch(config-if)#switchport trunk allowed vlanexcept vlan-list注:VLAN1不可被清除3)在主干链路中允许所有VLANSwitch(config-if)#switchport trunk allowed vlan all4)向主干链路中加入VLANSwitch(config-if)#switchport trunk allowed vlanadd vlan-list12.3VLAN1.显示全部的VLAN:Switch#show vlan2.显示单独的VLAN:Switch#show vlan id<1-4094>十三、RSTP的配置:13.1启用生成树:S2126G(config)#spanning-tree13.2配置交换机优先级:S2126G(config)#spanning-tree priority<0-61440>“0”或“4096”的倍数(RSTP BPDU该值后12bit全0)13.3配置交换机端口优先级:S2126G(config-if)#spanning-tree port-priority<0-240>“0”或“16”的倍数(RSTP BPDU该值后4bit全0)13.4生成树helloS2126G(config)#spanning-tree hello-time<1-10>13.5生成树的验证:Switch#show spanning-treeSwitch#show spanning-tree interface<接口名称><接口编号>十四、三层交换机路由功能:14.1开启三层交换机的路由功能Switch(config)#ip routing14.2开启端口的三层路由功能Switch(config)#interface fastethernet0/1Switch(config-if)#no switchport(这样就可以为某一端口配置IP)Switch(config-if)#ip address192.168.1.1255.255.255.0 Switch(config-if)#no shutdown。
华为路由器交换机配置命令大全
华为路由器交换机配置命令大全华为路由器交换机配置大全本文提供XXX路由器交换机的配置命令,包括计算机命令和交换机命令。
一、计算机命令以下是一些常用的计算机命令:shutdown-hnow;关机init 0;关机logout;用户注销login;用户登录ifconfig;显示IP地址ifconfig eth0 netmask;设置IP地址ifconfig eht0 netmask down;禁用IP地址route add 0.0.0.0 gw;设置网关route del 0.0.0.0 gw;删除网关route add default gw;设置网关route del default gw;删除网关route;显示网关ping;发ECHO包;远程登录二、XXX路由器交换机配置命令以下是一些常用的XXX路由器交换机配置命令:Quidway]dis cur;显示当前配置Quidway]display n;显示当前配置Quidway]display interfaces;显示接口信息Quidway]display vlan;显示vlan信息Quidway]display n;显示版本信息Quidway]super password;修改特权用户密码Quidway]sysname;交换机命名Quidway]XXX;进入接口视图Quidway]interface vlan x;进入接口视图Quidway-Vlan-interface x]ip address 10.65.1.1 255.255.0.0;配置VLAN的IP地址Quidway]Ip route-static 0.0.0.0 0.0.0.0 10.65.1.2;静态路由=网关Quidway]rip;rip协议Quidway]local-user ftpQuidway]user-interface vty 0 4;进入虚拟终端S3026-ui-vty0-4]n-mode password;设置口令模式首先,这篇文章需要进行重新排版和编辑,以便更清晰地传达信息。
华为路由器交换机常用命令
华为路由器交换机常用命令一、设备管理命令1.登录管理命令- ssh [ip地质] -p [端口号]:通过SSH协议登录设备。
- telnet [ip地质]:通过Telnet协议登录设备。
- logout:退出设备。
2.用户管理命令- display current-configuration:显示当前设备配置信息。
- save:保存当前配置。
- undo save:取消保存的配置。
- super:切换到超级用户模式。
- user-interface console 0:配置控制台终端的参数。
- user-interface vty 0 4:配置远程登录终端的参数。
3.设备操作命令- reboot:重启设备。
- reset saved-configuration:恢复出厂配置。
- display version:显示设备的硬件和软件版本信息。
- display device:显示设备的基本信息。
- display interface[接口名称]:显示指定接口信息。
- display ip routing-table:显示IP路由表信息。
二、网络配置命令1.IP配置命令- interface [接口名称]:进入指定接口。
- ip address [IP地质] [子网掩码]:配置接口IP地质。
- undo ip address:取消接口IP地质配置。
- ip route-static [目标网络] [子网掩码] [下一跳地质]:配置静态路由。
- undo ip route-static [目标网络] [子网掩码] [下一跳地质]:取消静态路由配置。
2.VLAN配置命令- vlan [VLAN ID]:创建指定VLAN。
- quit:退出VLAN配置模式。
- interface vlan [VLAN ID]:进入指定VLAN接口。
- ip address [IP地质] [子网掩码]:为VLAN接口配置IP地质。
交换机常用配置命令大全
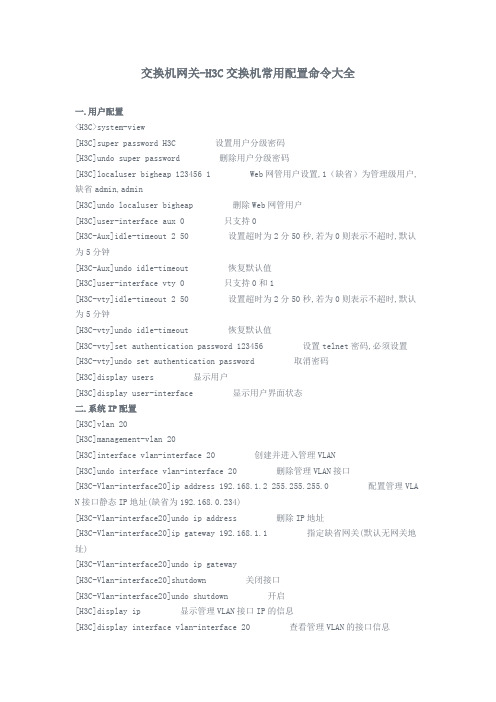
交换机网关-H3C交换机常用配置命令大全一.用户配置<H3C>system-view[H3C]super password H3C 设置用户分级密码[H3C]undo super password 删除用户分级密码[H3C]localuser bigheap 123456 1 Web网管用户设置,1(缺省)为管理级用户,缺省admin,admin[H3C]undo localuser bigheap 删除Web网管用户[H3C]user-interface aux 0 只支持0[H3C-Aux]idle-timeout 2 50 设置超时为2分50秒,若为0则表示不超时,默认为5分钟[H3C-Aux]undo idle-timeout 恢复默认值[H3C]user-interface vty 0 只支持0和1[H3C-vty]idle-timeout 2 50 设置超时为2分50秒,若为0则表示不超时,默认为5分钟[H3C-vty]undo idle-timeout 恢复默认值[H3C-vty]set authentication password 123456 设置telnet密码,必须设置[H3C-vty]undo set authentication password 取消密码[H3C]display users 显示用户[H3C]display user-interface 显示用户界面状态二.系统IP配置[H3C]vlan 20[H3C]management-vlan 20[H3C]interface vlan-interface 20 创建并进入管理VLAN[H3C]undo interface vlan-interface 20 删除管理VLAN接口[H3C-Vlan-interface20]ip address 192.168.1.2 255.255.255.0 配置管理VLA N接口静态IP地址(缺省为192.168.0.234)[H3C-Vlan-interface20]undo ip address 删除IP地址[H3C-Vlan-interface20]ip gateway 192.168.1.1 指定缺省网关(默认无网关地址)[H3C-Vlan-interface20]undo ip gateway[H3C-Vlan-interface20]shutdown 关闭接口[H3C-Vlan-interface20]undo shutdown 开启[H3C]display ip 显示管理VLAN接口IP的信息[H3C]display interface vlan-interface 20 查看管理VLAN的接口信息<H3C>debugging ip 开启IP调试功能<H3C>undo debugging ip三.DHCP客户端配置[H3C-Vlan-interface20]ip address dhcp-alloc 管理VLAN接口通过DHCP方式获取IP地址[H3C-Vlan-interface20]undo ip address dhcp-alloc 取消[H3C]display dhcp 显示DHCP客户信息<H3C>debugging dhcp-alloc 开启DHCP调试功能<H3C>undo debugging dhcp-alloc四.端口配置[H3C]interface Ethernet0/3[H3C-Ethernet0/3]shutdown[H3C-Ethernet0/3]speed 100 速率,可为10,100,1000和auto(缺省)[H3C-Ethernet0/3]duplex full 双工,可为half,full和auto(缺省) 光口和汇聚后不能配置[H3C-Ethernet0/3]flow-control 开启流控,默认为关闭[H3C-Ethernet0/3]broadcast-suppression 20 设置抑制广播百分比为20%,可取5,10,20,100,缺省为100,同时组播和未知单播也受此影响[H3C-Ethernet0/3]loopback internal 内环测试[H3C-Ethernet0/3]loopback external 外环测试,需插接自环头,必须为全双工或者自协商模式[H3C-Ethernet0/3]port link-type trunk 设置链路的类型为trunk,可为access (缺省),trunk[H3C-Ethernet0/3]port trunk pvid vlan 20 设置20为该trunk的缺省VLAN,默认为1(trunk线路两端的PVID必须一致)[H3C-Ethernet0/3]port access vlan 20 将当前access端口加入指定的VLAN [H3C-Ethernet0/3]port trunk permit vlan all 允许所有的VLAN通过当前的t runk端口,可多次使用该命令[H3C-Ethernet0/3]mdi auto 设置以太端口为自动监测,normal(缺省)为直通线,a cross为交叉线[H3C]link-aggregation Ethernet 0/1 to Ethernet 0/4 将1-4口加入汇聚组,1为主端口,两端需要同时配置,设置了端口镜像以及端口隔离的端口无法汇聚[H3C]undo link-aggregation Ethernet 0/1 删除该汇聚组[H3C]link-aggregation mode egress 配置端口汇聚模式为根据目的MAC地址进行负荷分担,可选为 in gress,egress和both,缺省为both[H3C]monitor-port Ethernet 0/2 将该端口设置为镜像端口,必须先设置镜像端口,删除时必须先删除被镜像端口,而且它们不能同在一个端口,该端口不能在汇聚组中,设置新镜像端口时,新取代旧,被镜像不变[H3C]mirroring-port Ethernet 0/3 to Ethernet 0/4 both 将端口3和4设置为被镜像端口,both为同时监控接收和发送的报文,inbound表示仅监控接收的报文,outbou nd表示仅监控发送的报文[H3C]display mirror[H3C]display interface Ethernet 0/3<H3C>reset counters 清除所有端口的统计信息[H3C]display link-aggregation Ethernet 0/3 显示端口汇聚信息[H3C-Ethernet0/3]virtual-cable-test 诊断该端口的电路状况五.VLAN配置[H3C]vlan 2[H3C]undo vlan all 删除除缺省VLAN外的所有VLAN,缺省VLAN不能被删除[H3C-vlan2]port Ethernet 0/4 to Ethernet 0/7 将4到7号端口加入到VLAN2中,此命令只能用来加access端口,不能用来增加trunk或者hybrid端口[H3C-vlan2]port-isolate enable 打开VLAN内端口隔离特性,不能二层转发,默认不启用该功能[H3C-Ethernet0/4]port-isolate uplink-port vlan 2 设置4为VLAN2的隔离上行端口,用于转发二层数据,只能配置一个上行端口,若为trunk,则建议允许所有VLAN通过,隔离不能与汇聚同时配置[H3C]display vlan all 显示所有VLAN的详细信息S1550E支持基于端口的VLAN,通过创建不同的user-group来实现,一个端口可以属于多个user-group,不属于同一个user-group的端口不能互相通信,最多支持50个user-group [H3C]user-group 20 创建user-group 20,默认只存在user-group 1[H3C-UserGroup20]port Ethernet 0/4 to Ethernet 0/7 将4到7号端口加入到VLAN20中,初始时都属于user-group 1中[H3C]display user-group 20 显示user-group 20的相关信息六.集群配置S2100只能作为成员交换机加入集群中,加入后系统名改为"集群名_成员编号.原系统名"的格式.即插即用功能通过两个功能实现: 集群管理协议MAC组播地址协商和管理VLAN协商[H3C]cluster enable 启用群集功能,缺省为启用[H3C]cluster 进入群集视图[H3C-cluster]administrator-address H-H-H name switch H-H-H为命令交换机的MAC,加入switch集群[switch_1.H3C-cluster]undo administrator-address 退出集群[H3C]display cluster 显示集群信息[H3C]management-vlan 2 集群报文只能在管理VLAN中转发,同一集群需在同一个管理VLAN中,需在建立集群之前指定管理VLAN<H3C>debugging cluster七.QoS配置QoS配置步骤:设置端口的优先级,设置交换机信任报文的优先级方式,队列调度,端口限速[H3C-Ethernet0/3]priority 7 设置端口优先级为7,默认为0[H3C]priority-trust cos 设置交换机信任报文的优先级方式为cos(802.1p优先级,缺省值),还可以设为dscp方式(dscp优先级方式)[H3C]queue-scheduler hq-wrr 2 4 6 8 设置队列调度算法为HQ-WRR(默认为WR R),权重为2,4,6,8[H3C-Ethernet0/3]line-rate inbound 29 将端口进口速率限制为2Mbps,取1-28时,速率为rate*8*1024/125,即64,128,192...1.792M;29-127时,速率为(rate-27)*1024,即2M,3M,4M...100M,千兆时可继续往下取,128-240时,速率为(rate-115)*8*1024,即104 M,112M,120M...1000M[H3C]display queue-scheduler 显示队列调度模式及参数[H3C]display priority-trust 显示优先级信任模式八.系统管理[H3C]mac-address blackhole H-H-H vlan 1 在VLAN1中添加黑洞MAC[H3C]mac-address static H-H-H interface Ethernet 0/1 vlan 1 在VLAN1中添加端口一的一个mac[H3C]mac-address timer aging 500 设置MAC地址表的老化时间为500s[H3C]display mac-address[H3C]display arp[H3C]mac-address port-binding H-H-H interface Ethernet 0/1 vlan 1 配置端口邦定[H3C]display mac-address port-binding[H3C]display saved-configuration[H3C]display current-configuration<H3C>save[H3C]restore default 恢复交换机出厂默认配置,恢复后需重启才能生效[H3C]display version<H3C>reboot[H3C]display device[H3C]sysname bigheap[H3C]info-center enable 启用系统日志功能,缺省情况下启用[H3C]info-center loghost ip 192.168.0.3 向指定日志主机(只能为UNIX或LI NUX,不能为Windows)输出信息,需先开启日志功能,缺省关闭[H3C]info-center loghost level 8 设置系统日志级别为8,默认为5.级别说明: 1.emergencies 2.alerts 3.critical 4.errors 5.warnings 6.notifications rma tional 8.debugging<H3C>terminal debugging 启用控制台对调试信息的显示,缺省控制台为禁用<H3C>terminal logging 启用控制台对日志信息的显示,缺省控制台为启用<H3C>terminal trapping 启用控制台对告警信息的显示,缺省控制台为启用[H3C]display info-center 显示系统日志的配置和缓冲区记录的信息[H3C]display logbuffer 显示日志缓冲区最近记录的指定数目的日志信息[H3C]display trapbuffer 显示告警缓冲区最近记录的指定数目的日志信息<H3C>reset logbuffer 清除日志缓冲区的信息<H3C>reset trapbuffer 清除告警缓冲区的信息九.网络协议配置NDP即是邻居发现协议,S1550E只能开启或关闭NDP,无法配置,默认有效保留时间为180 s,NDP报文发送的间隔60s[H3C]ndp enable 缺省情况下是开启的[H3C-Ethernet0/3]ndp enable 缺省情况下开启[H3C]display ndp 显示NDP配置信息[H3C]display ndp interface Ethernet 0/1 显示指定端口NDP发现的邻居信息<H3C>debugging ndp interface Ethernet 0/1HABP协议即Huawei Authentication Bypass Protocol,华为鉴权旁路协议,是用来解决当交换机上同时配置了802.1x和HGMPv1/v2时,未经授权和认证的端口上将过滤HGMP报文,从而使管理设备无法管理下挂的交换机的问题。
华为交换机设备基础命令大全,拿走不谢!
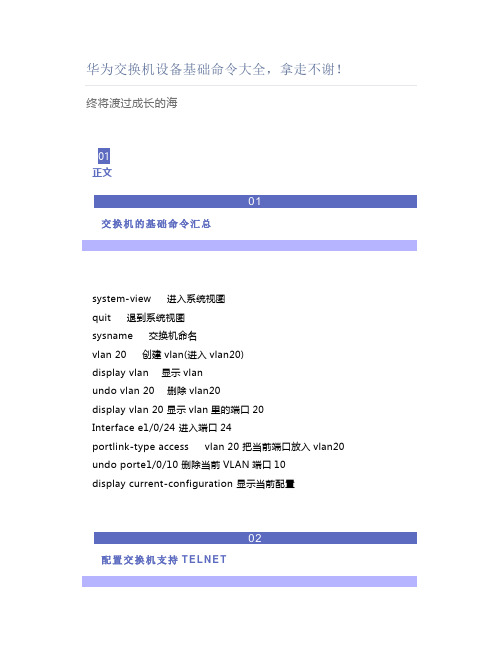
华为交换机设备基础命令大全,拿走不谢!终将渡过成长的海01正文01交换机的基础命令汇总system-view 进入系统视图quit 退到系统视图sysname 交换机命名vlan 20 创建vlan(进入vlan20)display vlan 显示vlanundo vlan 20 删除vlan20display vlan 20 显示vlan里的端口20Interface e1/0/24 进入端口24portlink-type access vlan 20 把当前端口放入vlan20 undo porte1/0/10 删除当前VLAN端口10display current-configuration 显示当前配置02配置交换机支持TE L N E Tinterfacevlan 1 进入VLAN1ip address192.168.3.100 255.255.255.0 配置IP地址user-interfacevty 0 4 进入虚拟终端authentication-modepassword (aut password) 设置口令模式setauthentication password simple 222 (set aut pass sim 222) 设置口令userprivilege level 3(use priv lev 3) 配置用户级别dispcurrent-configuration (disp cur) 查看当前配置display ipinterface 查看交换机VLANIP配置resetsaved-configuration(reset saved) 删除配置(必须退到用户模式)reboot重启交换机03跨交换机V L AN的通讯在sw1上:vlan 10建立VLAN 10interfacee1/0/5 进入端口5Portdefault vlan 10 把端口5加入vlan10vlan 20建立VLAN 20interfacee1/0/15 进入端口15portdefault vlan 20 把端口15加入VLAN20interfacee1/0/24 进入端口24portlink-type trunk 把24端口设为TRUNK端口port trunkpermit vlan all 所有端口都能经过此路径在SW2上:vlan 10建立VLAN 10interfacee1/0/20 进入端口20portdefault vlan 10 把端口20放入VLAN10interfacee1/0/24 进入端口24portlink-type trunk 把24端口设为TRUNK端口port trunkpermit vlan all (port trunk permit vlan 10 只能为vlan10使用)24端口为所有VLAN使用displayinterface e1/0/24 查看端口24是否为TRUNKundo porttrunk permit vlan all 删除该句04路由器的基础命令汇总dispaly version 显示系统软件版本及硬件信息system-view 切换到系统视图quit 返回interface +接口进入接口视图ip address +IP +mask 配置IP和子网掩码return 返回用户视图<Ctrl+Z> 返回用户视图sysname R1 修改路由器名称为R1display current-configuration 查看路由器当前配置dispaly interface +接口查看路由器接口的状态信息save 保存当前配置display ip interface brief 查看接口与IP相关摘要信息display ip routing-table 查看路由表05t e l ne t远程登陆配置user-interface vty 0 4 进入0~4前五个的VTY用户界面进行整体配置authentication-mode password 设置验证方式为密码user privilege level 3 设置用户登陆级别aaa 进入aaa视图local-user admin password cipher hello privilege level 3在aaa视图下设置账号密码和用户级别local-user admin service-type telnet 配置该用户接入类型为aaaq 退回到用户视图user-interface vty 0 4 进入到VTY用户视图authentication-mode aaa 设置验证方式aaa06配置S te l ne t配置SSHserver:rsalocal-key-pair create 生成本地RSA主机密钥对display rsa local-key-pair public 查看本地密钥对中的公钥信息user-interface vty 0 4 进入VTY用户视图authentication-mode aaa 设置用户验证方式为aaa授权验证方式protocol inbound ssh 指定VTY用户只支持sshq 返回到系统视图aaa 进入aaa视图local-user huawei1 password cipher huawei1 创建用户和设置用户密码local-user huawei1 service-type ssh 配置本地用户接入类型为sshq 退回到用户视图ssh user huawei1 authentication-type password新建ssh用户指定ssh用户认证方式为passwordaaa 进入aaa视图local-user huawei1 privilege level 3 设置huawei1用户级别为3级别范围0~15stelnet server enable 开启ssh功能display ssh user-information huawei1 查看ssh用户配置信息不指定用户默认查看所有用户display ssh server status 查看ssh服务器全局配置信息07S TP配置和选路规则stp enable 在交换机上启用STPstp mode stpdis stp 查看stp配置dis stp brief 查看接口摘要信息stp priority 4096 修改交换机优先级为4096stp root primary 设置交换机为主根交换机stp root secondary 命令配置备份交换机display stp interface Ethernet 0/0/2 查看e0/0/2接口的开销值int e0/0/2stp cost 2000 配置接口e0/0/2的带价值为2000stp timer forward-delay 3000 修改STP的ForwardDelay时间为3000cs也就是30sstp bridge-diameter 3 命令设置网络的直径为3stp mode rstp 启用RSTP使用RSTP可以缩短收敛时间int e0/0/1stp edged-port enable 配置接口e0/0/1为边缘端口不参与生成树的计算08配置MS TP多实例stp region-configuration 进入MST域视图region-name huawei 配置MST域名为huaweirevision-level 1 配置MSTP的修订级别为1instance 1 vlan 10 指定VLAN10映射到MSTI1active region-configuration 激活MST域配置display stp region-configuration 查看交换机上当前生效的MST域配置信息dis stp instance 0 brief 查看实例0中的生成树状态和统计的摘要信息stp instance 2 priority 0 配置交换机成位实例2中的根交换机09R I P路由协议配置rip 创建开启协议进程network + ip 对指定网段接口使能RIP功能IP地址是与路由器直连的网段debugging rip 1 查看RIP定期更新情况terminal debuggingterminal monitor 在屏幕上显示debug信息undo debugging rip 1undo debug all 命令关闭debug调试功能在上面的配置基础上配置RIP2rip 进入子视图模式version 2 配置版本或者直接配置rip 1version 2network + ip10O S P F单区域配置ospf 1 进入ospf视图1代表进程号area 0 创建区域并进入OSPF区域视图,输入要创建的区域ID,骨干区域即区域0network +IP +匹配码display ospf interface 命令查看OSPF接口通告是否正确、display ospf peer 查看OSPF邻居状态display ip routing-table protocol ospf 查看OSPF路由表11配置O S P F区域明文认证ospf 1area 1authentication-mode simple plain huawei plain是口令以明文方式显示authentication-mode md5 1 huawei 配置区域密文认证12配置链路认证int g0/0/1ospf authentication-mode md5 1 huawei 在一条链路中的两个接口配置要相同13配置抑制接口ospf 1silent-interface GigabitEthernet 0/0/1 禁止接口g0/0/1接收和发送ospf报文14技巧对多个接口配置接口抑制ospf 1silent-interface all 抑制所有接口undisplay ip routing-table 10.0.1.1 查看10.0.1.1所在网段的路由条目15基于接口修改int g0/0/0ospf network-type p2mp 修改ospf的网络类型为多到多点ospf network-type broadcast 修改ospf的网络类型为广播ospf dr-priority 100 修改g0/0/0接口的DR优先级为100reset ospf process 重启ospf进程ospf cost 1000 修改ospf的开销值为1000ospf timer hello 20 修改HELLO计时器为20sospf timer dead 80 修改dead计时器为80sospf 1preference 110 修改ospf优先级为110值越大优先级越低16路由引入ospf 1import-route rip 1 在ospf进程中引入ripdefault-route-advertise always 在ospf进程中引入默认路由ripimport-route ospf 1 在rip进程中引入ospfimport-route ospf cost 3 ospf 引入rip时配置开销值default-route originate 在RIP进程中发布默认路由17v r r p(虚拟路由器冗余协议)基本配置int g0/0/0vrrp vrid 1 virtual-ip 172.16.1.254创建VRRP备份组,备份组号为1,配置虚拟IP为172.16.1.254vrrp vrid 1 priority 120 修改优先级为120display vrrp 查看vrrp信息display vrrp briefdisplay vrrp interface g0/0/0 查看VRRP的工作状态18配置V R RP多备份组int g0/0/0vrrp vrid 1 virtual-ip 172.16.1.254创建VRRP备份组,备份组号为1,配置虚拟IP为172.16.1.254vrrp vrid 1 priority 120 修改优先级为120vrrp vrid 2 virtual-ip 172.16.1.253创建VRRP备份组,备份组号为2,配置虚拟IP为172.16.1.253int g0/0/0vrrp vrid 1 virtual-ip 172.16.1.254创建VRRP备份组,备份组号为1,配置虚拟IP为172.16.1.254vrrp vrid 2 virtual-ip 172.16.1.253创建VRRP备份组,备份组号为2,配置虚拟IP为172.16.1.253vrrp vrid 2 priority 120 修改优先级为120vrrp vrid 2 preempt-mode disable 开启非抢占方式19配置V R RP的跟踪接口及认证int g0/0/1vrrp vrid 1 track interface GigabitEthernet 0/0/0 reduced 50监视上行接口G0/0/0,当此接口断掉时,裁减优先级50,使优先级为70 vrrp vrid 1 authentication-mode md5 huawei 认证配置20配置基本的访问控制表acl 2000 创建一个编号型ACL,基本ACL的范围是2000~29999rule 5 permit source 1.1.1.1 0指定规则ID为5,允许数据源地址为1.1.1.1的报文通过,反掩码全为0,即精确匹配rule 10 deny source any 指定ID为10,拒绝任意源地址的数据包通过display acl all 查看设备上所有的访问控制列表。
[进阶阅读] 交换机&路由器命令大全(带中文注释)
![[进阶阅读] 交换机&路由器命令大全(带中文注释)](https://img.taocdn.com/s3/m/38bd7806e87101f69e3195ff.png)
基本访问控制列表:
router(config)#access-list permit|deny
router(config)#interface ;default:deny any
router(config-if)#ip access-group in|out ;defaultut
router(config-router)#negihbor ;点对点帧中继用。
帧中继命令:
router(config)#frame-relay switching ;使能帧中继交换
router(config-s0)#encapsulation frame-relay ;使能帧中继
switch(config-if)#switchport access vlan 2 ;当前端口加入vlan 2
switch(config-if)#switchport mode trunk ;设置为干线
switch(config-if)#switchport trunk allowed vlan 1,2 ;设置允许的vlan
switch#exit ;返回命令
交换机VLAN设置:
switch#vlan database ;进入VLAN设置
switch(vlan)#vlan 2 ;建VLAN 2
switch(vlan)#no vlan 2 ;删vlan 2
switch(config)#int f0/1 ;进入端口1
router#reload ;重新引导
路由器文件操作:
router#copy running-config startup-config ;保存配置
(完整版)华为交换机命令大全
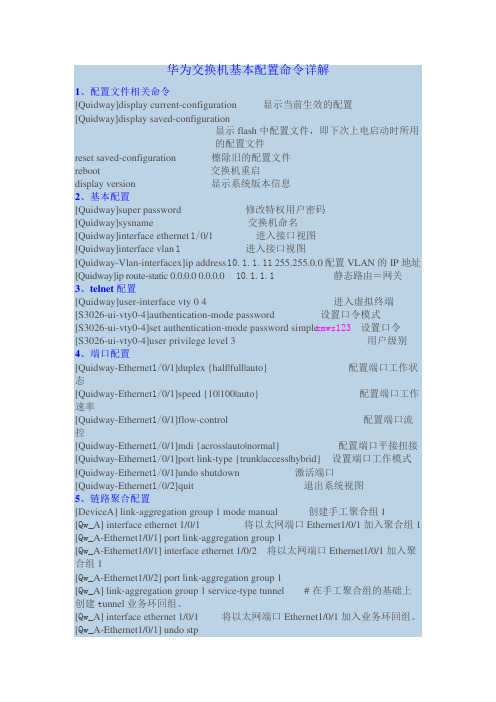
华为交换机基本配置命令详解1、配置文件相关命令[Quidway]display current-configuration 显示当前生效的配置[Quidway]display saved-configuration显示flash中配置文件,即下次上电启动时所用的配置文件reset saved-configuration 檫除旧的配置文件reboot 交换机重启display version 显示系统版本信息2、基本配置[Quidway]super password 修改特权用户密码[Quidway]sysname 交换机命名[Quidway]interface ethernet 1/0/1 进入接口视图[Quidway]interface vlan 1进入接口视图[Quidway-Vlan-interfacex]ip address 10.1.1.11 255.255.0.0配置VLAN的IP地址[Quidway]ip route-static 0.0.0.0 0.0.0.0 10.1.1.1静态路由=网关3、telnet配置[Quidway]user-interface vty 0 4 进入虚拟终端[S3026-ui-vty0-4]authentication-mode password 设置口令模式[S3026-ui-vty0-4]set authentication-mode password simple xmws123设置口令[S3026-ui-vty0-4]user privilege level 3 用户级别4、端口配置[Quidway-Ethernet1/0/1]duplex {half|full|auto} 配置端口工作状态[Quidway-Ethernet1/0/1]speed {10|100|auto} 配置端口工作速率[Quidway-Ethernet1/0/1]flow-control 配置端口流控[Quidway-Ethernet1/0/1]mdi {across|auto|normal} 配置端口平接扭接[Quidway-Ethernet1/0/1]port link-type {trunk|access|hybrid} 设置端口工作模式[Quidway-Ethernet1/0/1]undo shutdown 激活端口[Quidway-Ethernet1/0/2]quit 退出系统视图5、链路聚合配置[DeviceA] link-aggregation group 1 mode manual 创建手工聚合组1[Qw_A] interface ethernet 1/0/1 将以太网端口Ethernet1/0/1加入聚合组1 [Qw_A-Ethernet1/0/1] port link-aggregation group 1[Qw_A-Ethernet1/0/1] interface ethernet 1/0/2 将以太网端口Ethernet1/0/1加入聚合组1[Qw_A-Ethernet1/0/2] port link-aggregation group 1[Qw_A] link-aggregation group 1 service-type tunnel # 在手工聚合组的基础上创建t unnel业务环回组。
华为交换机基本切换的命令行
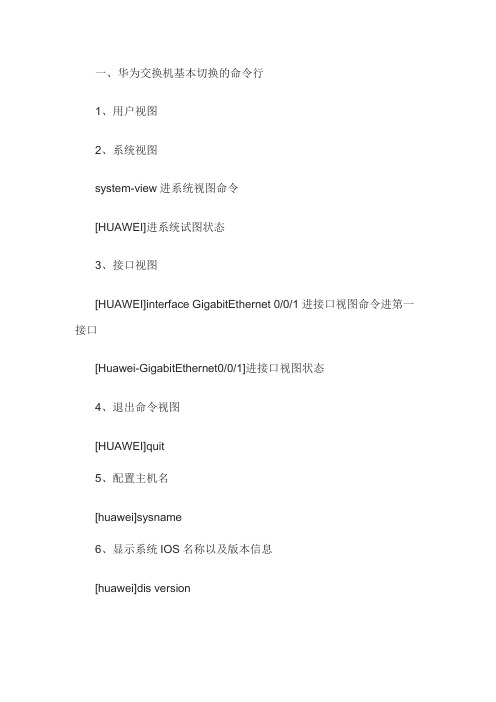
一、华为交换机基本切换的命令行1、用户视图2、系统视图system-view进系统视图命令[HUAWEI]进系统试图状态3、接口视图[HUAWEI]interface GigabitEthernet 0/0/1进接口视图命令进第一接口[Huawei-GigabitEthernet0/0/1]进接口视图状态4、退出命令视图[HUAWEI]quit5、配置主机名[huawei]sysname6、显示系统IOS名称以及版本信息[huawei]dis version7、查看交换机当前配置信息[huawei]display current-configuration8、显示已保存的配置信息[huawei]display saved-configuration9、保存当前配置信息save10、删除已保存的配置信息#reset saved-configuration11、进入接口视图[huawei]interface g0/0/1[huawei-GigabitEthernet]12、配置接口类型[huawei-GigabitEthernet]port link-type access [huawei-GigabitEthernet]port default vlan 213、shutdown命令用来关闭当前接口。
14、undo shutdown命令用来开启当前接口。
15、display interface命令用来查看接口当前运行状态和接口统计信息16、display interface brief命令用来查看接口状态和配置的简要信息。
17、display ip interface brief命令用来查看接口与IP相关的简要信息,包括IP地址、子网掩码、物理链路和协议的Up/Down状态以及处于不同状态的接口数目。
二、划分vlanvlan 2quitintervlan 2ip add 192.168.1.254 24 quitvlan 3quitintervlan 3ip add 192.168.2.254 24 quitinter g0/0/1port link-type access port default vlan 2 quitinter g0/0/2port link-type trunk port trunk all vlan 2 to 3 quit。
交换机常用命令汇总

交换机常用命令汇总华为1、查看交换机当前配置displaycur2、从特权模式进入全局模式(配置模式)sys3、修改交换机名称sysname4、创建Vlan10(创建后自动进入vlan)vlan10quit〃退出vlan5、给VIan配置IP地址interfaceVlanif10ipaddress192.168.30.12 55.255.255.0dhcpselectglobaldhcpenableundodhcenable〃关闭DHCP6、将端口3加入VIanlO进入端口3:interfaceGigabitEthernet0/0/3portlink-typeaccessportdefaultvlan107、配置IP地址池ippool10gateway-list192.168.10.1network192.168.10.1mask255.255.255.0excluded-ip-address192.168.10.2192.168.10.99〃排除IP不参与DHCPexcluded-ip-address192.168.10.200192.168.254〃排除IP不参与DHCPdns-list2.2.2.25.5.5.5〃删除IP地址池:undoippool105、保存配置save6、查看Vlan网关dispipintbrief7、检查OSPF视图下的配置dispcurconfigospf8、查看IP所在端口disparp∣inip9、查看MaC地址所在交换机端口dispmac-add∣inmac地址10、查看交换机里面MaC地址信息dispmac-add Il s进入该端口interfacegigabitethernet0/0/112、disth进入端口后查看端口配置13、nslook-up查看网页地址14、displayiprouting-table显示路由表信息15、显示VLANdiSPlayVlan17、删除Vlan20UndOVlan20清除告警clearalamindexno-trap24、重启交换机reboot 18、 查看全部报警displayalamall 20、开启端口undoshutdown 21、删除undo 22、关闭shutdown 23、退出当前模式返回上一级quit19、25、调试信息显示terminalmonitor26、双电源查看displaypower27、显示cpu信息displaycpu28、查看子卡运行状态displaydevice29、查看设备复位情况displayreboot-info30、查看设备温度displaytemperatureall32、查看内存占用情况displaymemory-usage。
交换机配置命令大全
(config)#enable secret level 1 0 star 配置远程登陆密码为star
(config)#enable secret level 15 0 star 配置特权密码为star
(config-vlan)#name vlanname 命名VLAN为vlanname
(config-if)#switchport access vlan 10 将该端口划入VLAN10中
某端口的接口配置模式下进行
(config)#interface vlan 10 进入VLAN 10的虚拟端口配置模式
端口安全
(config)# interface fastethernet 0/1 进入一个端口
(config-if)# switchport port-security 开启该端口的安全功能
1.配置最大连接数限制
(config-if)# switchport port-secruity maxmum 1 配置端口的最大连接数为1,最大连接数为128
(config-if)#no shutdown 开启该端口
(config-if)#switchport access vlan 10 将该端口划入VLAN10中,用于VLAN
(config-if)#switchport mode trunk 将该端口设为trunk模式,用于Tag vlan
(config-if)# ip address 192.168.1.1 255.255.255.0
(config-if)# no shutdown
三层交换机路由协议
常见交换机配置命令
交换机常用命令及配置(cisco)switch> 用户模式1.进入特权模式enableswitch> enableswitch#2.进入Setup模式setupswitch> enableswitch#setup3.进入全局配置模式configure terminalswitch> enableswitch#configure terminalswitch(conf)#4.交换机命名hostname (以switch01 为例)switch> enableswitch#configure terminalswitch(conf)#hostname switch01switch01(conf)#5.配置密文密码enable secret (以123 为例)switch> enableswitch#configure terminalswitch(conf)# enable secret1236.配置明文密码enable password (以456 为例)switch> enableswitch#configure terminalswitch (conf)# enable password45611.设置虚拟端口的IP地址、网关等(以vlan 1为例)switch> enableswitch#configure terminalswitch(conf)# interface vlan 1switch(conf-if)# ip address192.168.1.254 255.255.255.0//配置交换机端口ip 和子网掩码switch (conf-if)#no shutdown //激活端口switch (conf-if)#exit //退出到上层配置模式switch (conf)#ip default-gateway192.168.1.254 //设置网关地址为什么要设置虚拟端口?虽然PC和交换机都可以配IP地址,但PC上的IP地址是绑定到以太网接口,交换机上的IP地址是绑定到VLAN。
交换机路由器常用命令
交换机路由器常用命令交换机和路由器是网络中非常重要的设备,熟练掌握它们的常用命令对于网络管理和故障排除至关重要。
下面为您介绍一些交换机和路由器常用的命令。
一、交换机常用命令1、`enable` 命令这个命令用于进入特权模式。
在特权模式下,可以执行更多高级的配置和管理操作。
2、`configure terminal` 命令输入此命令后,可以进入全局配置模式,对交换机的整体参数进行设置。
3、`interface` 命令通过`interface` 加上接口类型和编号,例如`interface ethernet0/1` ,可以进入特定接口的配置模式,对该接口的参数进行详细配置。
4、`vlan` 命令`vlan` 相关的命令用于创建、删除和配置 VLAN(虚拟局域网)。
比如`vlan 10` 创建 VLAN 10 ,`name VLAN10` 为 VLAN 10 命名。
5、`show vlan` 命令用于查看交换机上已创建的VLAN 信息,包括VLAN 编号、名称、端口成员等。
6、`show interfaces` 命令此命令可以查看交换机各个接口的状态、速率、双工模式等详细信息。
7、`port trunk allowpass vlan` 命令在配置 trunk 链路时,使用该命令允许特定的 VLAN 通过 trunk 链路。
8、`spanningtree` 命令用于配置生成树协议,防止网络环路。
例如`spanningtree moderstp` 可以设置生成树的模式为快速生成树。
二、路由器常用命令1、`enable` 命令同样用于进入特权模式。
2、`configure terminal` 命令进入全局配置模式。
3、`interface` 命令例如`interface fastethernet 0/0` ,进入特定的接口配置模式。
4、`ip address` 命令为接口配置 IP 地址,如`ip address 19216811 2552552550` 。
交换机命令大全
2960>e n ;第一次密码为空2960h#co nf t;进入全局配置模式2960(conf ig)#h ostna me sw a ;设置交换机名2960(conf ig)#e nable secr et aa a ;设置特权加密口令为 aa a2960(co nfig)#enab le pa sswor d aax;设置特权非密口令为 aax2960(con fig)#lineconso le 0;进入控制台口(Rs232)2960(conf ig-li ne)#p asswo rd aa;设置登录口令aa2960(con fig-l ine)#login;登录要求口令验证2960(con fig-l ine)#linevty 0 4 ;进入虚拟终端virtu al tt y2960(co nfig-line)#pass worda ;设置登录口令a2960(con fig-l ine)#login;登录要求口令验证2960(con fig-l ine)#exit;返回上一层2960(co nfig)#exit;返回上一层2960#s h run;看配置信息2960#e xit ;返回命令配置Vl an新建一个Vla n的命令Switc h>ena ble 进入特权模式Swit ch#co nfigu re te rmina l 进入全局配置模式Swi tch (confi g)# v lan v lan-i d 创建一个Vlan或者进入Vl an配置模式Sw itch(conf ig-vl an)#namevlan-name给Vlan命名(取消设置:no name)Sw itch(conf ig-vl an)#mtu m tu-si ze 设置最大通讯量(取消设置:no m tu) Switc h (co nfig-vlan)#remo te-sp an 开启远程流量监控(关闭:no remo te-sp an) Switc h (co nfig-vlan)# end回到特权模式S witch#show vlan查看当前配置Swi tch#c opy r unnin g-con fig s tartu p con fig 保存配置删除Vla n的命令Switc h>ena ble 进入特权模式Swit ch#co nfigu re te rmina l 进入全局配置模式Swi tch (confi g)# n o vla n vla n-id删除Vl anS witch (con fig)# end回到特权模式Sw itch#showvlanbrief查看删除情况Swi tch#c opy r unnin g-con fig s tartu p con fig 保存配置端口加入特定Vlan的命令S witch>enab le 进入特权模式Switc h#con figur e ter minal进入全局配置模式Swit ch (c onfig)# in terfa ce in terfa ce-id进入端口配置Swi tch (confi g-if)# swi tchpo rt mo de ac cess将接口的模式设为访问模式Sw itch(conf ig-if)# sw itchp ort a ccess vlan vlan-id 将端口加入指定的Vla n(恢复端口默认配置:defa ult i nterf ace i nterf ace-i d)S witch (con fig-i f)# e nd 回到特权模式Swi tch#s how r unnin g-con fig i nterf ace i nterf ace-i d 查看端口模式S witch#show inte rface s int erfac e-idswitc hport查看端口详细配置Swit ch#co py ru nning-conf ig st artup-conf ig 保存配置批量端口加入特定Vla n的命令int r angefa0/1 - 10swi tchpo rt acces s V Lan V2将特定端口设为tru nk2960-01(conf ig)#d efaul t int erfac e fas tEthe rnet0/1 端口恢复默认值2960-01(co nfig)#inte rface fast ether net0/1 进入端口模式2960-01(co nfig-if)#s witch portmodetrunk设置端口为trun k模式2960-01(con fig-i f)#sw itchp ort n onego tiate将接口设置为不协商模式2960-01(confi g-if)end2960-01#wr启用sn mpS witch>enab le 进入特权模式Switc h#con figur e ter minal进入全局配置模式Swit ch (c onfig)# sn mp-se rvercommu nitystrin g [vi ew vi ew-na me] [ro |rw] [acces s-lis t-num ber](关闭snmp: no s nmp-s erver)(删除团体字符: nosnmp-serve r com munit y str ing)配置snmp团体字符并开启snmp 代理服务Stri ng: 团体口令字符(所有SN MP命令中只有设置团体口令的s nmp-s ervercomm unity是必须的,其它的都是可选的.)Vie w: vi ew 可以用于限定哪些MIB分支不能用本commu nity-strin g存取预先用snmp-serv er vi ew定义ro | rw:ro获得M IB对象信息;rw获得并可以修改MIB对象信息acces s-lis t-num ber:访问列表号Swit ch (c onfig)#acc ess-l ist a ccess-list-numb er {d eny |per mit}sourc e [so urce-wildc ard]配置拒绝或者允许访问s nmp代理服务的IP地址,访问列表号为上一步指定的列表号Switc h (co nfig)#end回到特权模式Swit ch#sh ow ru nning-conf ig 查看配置S witch#copy runn ing-c onfig star tup-c onfig保存配置cis co2960口令恢复交换机口令恢复的步骤⒈串口线连接到到交换机的conso le口。
华为交换机常见命令
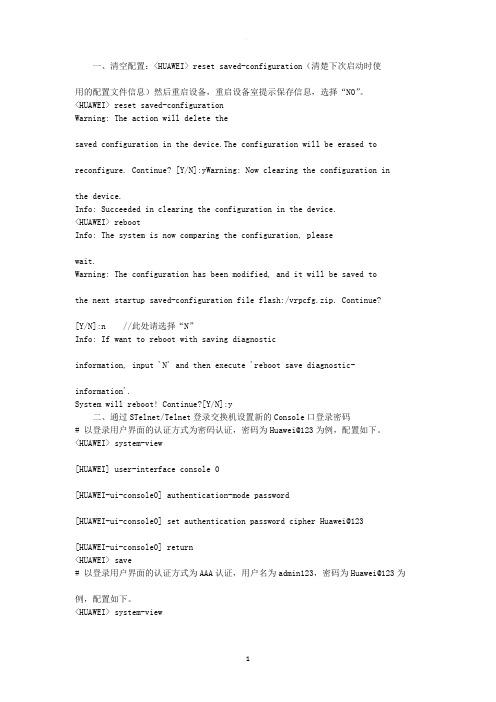
一、清空配置:<HUAWEI> reset saved-configuration(清楚下次启动时使用的配置文件信息)然后重启设备,重启设备室提示保存信息,选择“NO”。
<HUAWEI> reset saved-configurationWarning: The action will delete thesaved configuration in the device.The configuration will be erased to reconfigure. Continue? [Y/N]:yWarning: Now clearing the configuration inthe device.Info: Succeeded in clearing the configuration in the device.<HUAWEI> rebootInfo: The system is now comparing the configuration, pleasewait.Warning: The configuration has been modified, and it will be saved tothe next startup saved-configuration file flash:/vrpcfg.zip. Continue?[Y/N]:n //此处请选择“N”Info: If want to reboot with saving diagnosticinformation, input 'N' and then execute 'reboot save diagnostic-information'.System will reboot! Continue?[Y/N]:y二、通过STelnet/Telnet登录交换机设置新的Console口登录密码# 以登录用户界面的认证方式为密码认证,密码为Huawei@123为例,配置如下。
交换机命令行复制到另一台交换机
交换机命令行复制到另一台交换机
要将一个交换机的命令行复制到另一台交换机,可以使用以下步骤:
1. 登录到第一台交换机的命令行界面。
2. 输入命令 "show running-config" ,然后按 Enter键。
这将显示该交换机的当前运行配置。
3. 选中所需的命令行文本。
可以使用鼠标拖选或者键盘组合键(Ctrl+A)来选中全部文本。
4. 复制选中的文本。
可以使用右键菜单中的 "复制"选项,或者使用键盘组合键(Ctrl+C)。
5. 登录到第二台交换机的命令行界面。
6. 将复制的命令行文本粘贴到第二台交换机上。
可以使用右键菜单中的 "粘贴"选项,或者使用键盘组合键(Ctrl+V)。
请注意,由于不同交换机的操作系统和命令行界面可能不同,因此复制命令有时可能会有所差异。
请根据具体的交换机型号和操作系统版本进行相应的调整和操作。
- 1、下载文档前请自行甄别文档内容的完整性,平台不提供额外的编辑、内容补充、找答案等附加服务。
- 2、"仅部分预览"的文档,不可在线预览部分如存在完整性等问题,可反馈申请退款(可完整预览的文档不适用该条件!)。
- 3、如文档侵犯您的权益,请联系客服反馈,我们会尽快为您处理(人工客服工作时间:9:00-18:30)。
交换机的基本命令有以下四种:
一、模式命令:
1. 用户模式:Switch>
2. 特权模式:Switch>enable
Switch#
3. 全局配置模式:Switch#config terminal
Switch(config)#
4. 接口配置模式:Switch(config)#interface fastethernet0/1 Switch(config-if)#
5. Line模式:Switch(config)#line console 0
Switch(config-line)#
二、特权模式下的命令:
1. 查看机MAC地址:Switch#show mac-address-table
2. 发现(CDP):
Switch#showcdp
Switch#showcdp interface fastethernet0/1
Switch#showcdp neighbors
Switch#showcdp neighbors detail
Switch#showcdp entry
3. 保存机配置:
Switch#copy running-config startup-config或者Switch#write 4. 恢复交换机出厂值:
Switch#erase startup-config
Switch#reload
三、全局配置模式下的命令:
1. 配置主机名:Switch(config)#hostname Sw1
Sw1(config)#
2、设置登陆台密码:Switch(config)#line console 0
Switch(config-line)#password 密码
Switch(config-line)#login
3. 使能口令:Switch(config)#enable Password 密码
4. 加密保存的使能口令:Switch(config)#enable secret 密码
5. 配置IP地址:
Switch(config)#interface vlan 1
Switch(config-if)#ip address IP地址网关
Switch(config-if)#no shutdown
6. 配置交换机网关:Switch(config)#ip default-gateway 网关
四、VLAN配置命令:
1. 创建vlan命令:
a) 全局配置模式下:
Switch(config)#vlan 2
Switch(config)#name v2
Switch(config)#mtu数值
Switch(config)#end
b) Vlan数据库下:
Switch#vlan database
Switch#vlan 2 name v2
Switch#vlan 2 mut数值
Switch#exit
2. 删除vlan命令:
a) 全局配置模式下:
Switch(config)#no vlan 2
Switch(config)#end
b) Vlan数据库下:
Switch#novlan 2 name v2
Switch#exit
3. 在vlan中添加端口:
Switch#config terminal
Switch(config)#interface f0/1(端口)
Switch(config-if)#Switchport mode access
Switch(config-if)#switchport access vlan 2
Switch(config-if)#end
一次将多个端口添加到vlan中:
Switch#config terminal
Switch(config)#interface range f0/1 - 5(端口)
Switch(config-if)#switchport access vlan 2
Switch(config-if)#end
注:switch#showvlanbiref(查看vlan信息)
4. 配置vlan trunk:
1. 配置接口为trunk命令:
Switch(config)# interface f0/1(端口)
Switch(config-if)#Switchport mode trunk
2. 配置接口为动态协商模式的命令:
Switch(config)# interface f0/1(端口)
Switch(config-if)#switchport mode dynamic desirable/auto 3. 从trunk中删除vlan:
Switch(config)# interface f0/1(端口)
Switch(config-if)#Switchport trunk allowed vlan remove 2 4. 在trunk中添加vlan:
Switch(config)# interface f0/1(端口)
Switch(config-if)#Switchport trunk allowed vlan add 2
分享。