计算机网络实验1
实验一、网络认识实验

EIA/TIA-232 EIA/TIA-449 X.121 V.24 V.35 HSSI
RJ-45 注意: 插脚引线不同于 典型网中用到的RJ-45
区分不同的WAN串行连接器
端接用户 设备 DTE 连接到路由器
CSU/ DSU
服务商
DCE
EIA/TIA-232
EIA/TIA-449
V.35
X.21
移动用户
分部
公司总部
因特网
LAN的物理层实现
• 物理层实现多种多样
• 有些物理层实现方式支持多种物理介质
数据链路层 (MAC子层) 10Base2 10Base5 10BaseT
802.3
10BaseF 802.3u 说明了100mb (快速) 以太网规范
物理层
DIX 标准
802.3 说明了10mb 以太网规范
位, 1个停止位, 不设流量控制
这是通过控制口的一种管外管理方式
AUX端口用于调制解调器的远程连接访问
当主机与router的console口用反转线连好后,启动 Window系统里的HyperTerminal程序即可对router 进行连接,其配置如下: 1.Bps:9600 2.Data bits:8 3.Parity:None (奇偶校验) 4.Stop bits:1 5.Flow control:none (流量控制)
以太网介质比较
10BaseT
双工型介质接口 连接器 (MIC) ST
区分不同的连接类型
ISO 8877 (RJ-45) 连接器和插孔比电话连接 器RJ-11和插孔略大 AUI 连接器是DB15
光纤连接器接口
计算机网络实验报告(6篇)

计算机网络实验报告(6篇)计算机网络实验报告(通用6篇)计算机网络实验报告篇1一、实验目的1、熟悉微机的各个部件;2、掌握将各个部件组装成一台主机的方法和步骤;3、掌握每个部件的安装方法;4、了解微型计算机系统的基本配置;5、熟悉并掌握DOS操作系统的使用;6、掌握文件、目录、路径等概念;7、掌握常用虚拟机软件的安装和使用;8、熟悉并掌握虚拟机上WINDOWS操作系统的安装方法及使用;9、掌握使用启动U盘的制作和U盘安装windows操作系统的方法;10、了解WINDOWS操作系统的基本配置和优化方法。
二、实验内容1.将微机的各个部件组装成一台主机;2.调试机器,使其正常工作;3.了解计算机系统的基本配置。
4.安装及使用虚拟机软件;5.安装WINDOWS7操作系统;6.常用DOS命令的使用;7.学会制作启动U盘和使用方法;8.WINDOWS7的基本操作;9.操作系统的基本设置和优化。
三、实验步骤(参照实验指导书上的内容,结合实验过程中做的具体内容,完成此项内容的撰写)四、思考与总结(写实验的心得体会等)计算机网络实验报告篇2windows平台逻辑层数据恢复一、实验目的:通过运用软件R-Studio_5.0和winhe_对误格式化的硬盘或者其他设备进行数据恢复,通过实验了解windows平台逻辑层误格式化数据恢复原理,能够深入理解并掌握数据恢复软件的使用方法,并能熟练运用这些软件对存储设备设备进行数据恢复。
二、实验要求:运用软件R-Studio_5.0和winhe_对电脑磁盘或者自己的U盘中的删除的数据文件进行恢复,对各种文件进行多次尝试,音频文件、系统文件、文档文件等,对简单删除和格式化的磁盘文件分别恢复,并检查和验证恢复结果,分析两个软件的数据恢复功能差异与优势,进一步熟悉存储介质数据修复和恢复方法及过程,提高自身的对存储介质逻辑层恢复技能。
三、实验环境和设备:(1)Windows _P 或Windows 20__ Professional操作系统。
计算机网络(实验一_网络命令使用和网络服务配置)
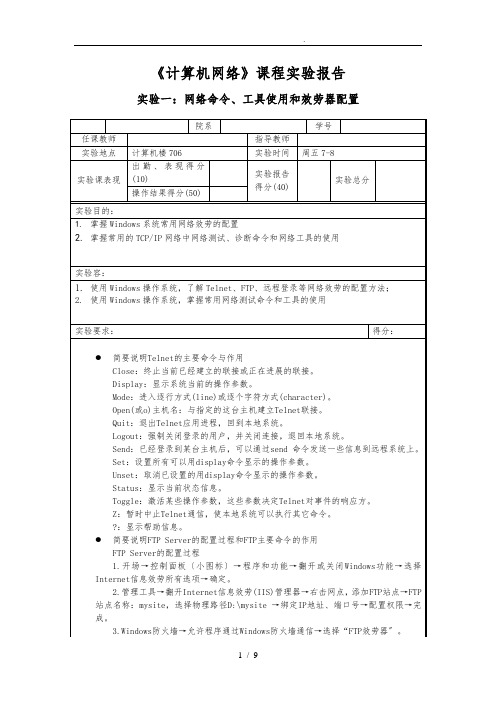
《计算机网络》课程实验报告实验一:网络命令、工具使用和效劳器配置FTP主要命令的作用●写出几个你所熟悉的网络测试命令●简要说明效劳器远程登录的开启和登录账户的建立步骤1.开场→控制面板〔小图标〕→程序和功能→翻开或关闭Windows功能→选择Telnet效劳器、客户端所有选项→确定,稍微等几分钟。
2.管理工具→计算机管理→本地用户和组→用户→添加用户→组→RemoteDesktop user右键→添加到组,添加新建立的用户。
3.计算机右键→属性→远程设置→选择〞仅允许运行使用网络级别身份验证的远程桌面的计算机连接〞→确定。
4.开场→远程桌面连接→输入远程主机IP地址→连接→输入用户名、密码→确定。
实验过程中遇到的问题如何解决的?〔10分〕得分:问题1:无法成功远程桌面连接。
解决过程:检查自己的 telnet 配置,检查无误;检查目标计算机的配置,remote desktop service 效劳被禁用。
配置目标计算机:将目标计算机remote desktop service 效劳启动类型更改为手动,并启用该效劳。
问题2:无法启动ftp站点。
解决过程:错误提示“可能有其他进程占用了设置的端口〞,但使用netstat命令并没有发现这一现象,重新设置端口问题还是没有解决,最终使用netsh winsock reset重置了网络设置,重启后问题解决。
open 连接到制定 IP。
quit 退出 telnet。
容二:〔20分〕得分:说明利用Telnet进展应用层协议〔HTTP或SMTP或POP3〕实验过程。
1.翻开 DOS 命令界面2.输入 telnet .mircosoft. 803.ctrl+] 进入命令模式4.键入 set localecho 并回车5.键入 GET /HTTP/1.16.Host: .mircosoft. 并回车 2 次容三:〔20分〕得分:简要说明FTP Server的配置过程和FTP主要命令的作用,实验过程截图1.开场→控制面板〔小图标〕→程序和功能→翻开或关闭 Windows 功能→选择Internet信息效劳所有选项→确定,稍微等几分钟。
计算机网络实践实验报告
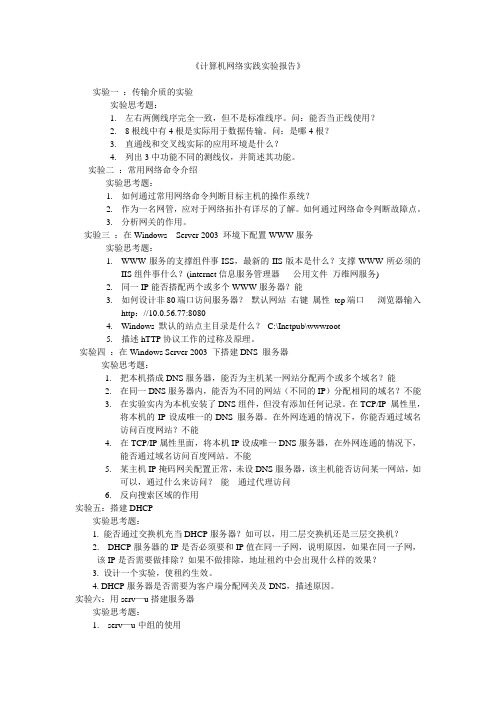
《计算机网络实践实验报告》实验一:传输介质的实验实验思考题:1.左右两侧线序完全一致,但不是标准线序。
问:能否当正线使用?2.8根线中有4根是实际用于数据传输。
问:是哪4根?3.直通线和交叉线实际的应用环境是什么?4.列出3中功能不同的测线仪,并简述其功能。
实验二:常用网络命令介绍实验思考题:1.如何通过常用网络命令判断目标主机的操作系统?2.作为一名网管,应对于网络拓扑有详尽的了解。
如何通过网络命令判断故障点。
3.分析网关的作用。
实验三:在Windows Server 2003 环境下配置WWW服务实验思考题:1.WWW服务的支撑组件事ISS,最新的IIS版本是什么?支撑WWW所必须的IIS组件事什么?(internet信息服务管理器公用文件万维网服务)2.同一IP能否搭配两个或多个WWW服务器?能3.如何设计非80端口访问服务器?默认网站右键属性tcp端口浏览器输入http://10.0.56.77:80804.Windows 默认的站点主目录是什么?C:\Inetpub\wwwroot5.描述hTTP协议工作的过称及原理。
实验四:在Windows Server 2003 下搭建DNS 服务器实验思考题:1.把本机搭成DNS服务器,能否为主机某一网站分配两个或多个域名?能2.在同一DNS服务器内,能否为不同的网站(不同的IP)分配相同的域名?不能3.在实验实内为本机安装了DNS组件,但没有添加任何记录。
在TCP/IP 属性里,将本机的IP设成唯一的DNS 服务器。
在外网连通的情况下,你能否通过域名访问百度网站?不能4.在TCP/IP属性里面,将本机IP设成唯一DNS服务器,在外网连通的情况下,能否通过域名访问百度网站。
不能5.某主机IP掩码网关配置正常,未设DNS服务器,该主机能否访问某一网站,如可以,通过什么来访问?能通过代理访问6.反向搜索区域的作用实验五:搭建DHCP实验思考题:1. 能否通过交换机充当DHCP服务器?如可以,用二层交换机还是三层交换机?2. DHCP服务器的IP是否必须要和IP值在同一子网,说明原因,如果在同一子网,该IP是否需要做排除?如果不做排除,地址租约中会出现什么样的效果?3. 设计一个实验,使租约生效。
计算机网络实验1_传输时延与传播时延的比较

实验一传输时延与传播时延的比较一、实验名称:传输时延与传播时延的比较二、实验目的1.深入理解传输时延与传播时延的概念以及区别2.掌握传输时延与传播时延的计算方法三、实验环境1.运行Windows Server 2003 /XP操作系统的PC机一台。
2.java虚拟机,分组交换Java程序10km 1mbps 100bytes 0.840ms 10km 512kbps 500bytes 7.849ms 10km 1mbps 1kbytes 15.669ms 10km 10mbps 1bytes 0.840ms 10km 100mbps 1bytes 0.120ms 100km 1mbps 100bytes 0.440ms 1000km 1mbps 100bytes 3.660ms 10km 10mbps 1kbytes 1.160ms 100km 100mbps 1kbytes 0.440ms 100km 100mbps 100bytes 0.370ms 1000km 100mbps 500bytes 3.620ms100km 100mbps 500bytes 0.400ms1000km 512mbps 500bytes 11.389ms1000km 1mbps 500bytes 7.579ms1000km 10mbps 500bytes 3.980ms1000km 1mbps 100bytes 4.379ms1000km 1mbps 1kbytes 11.597ms1000km 512mbps 1kbytes 19.199ms1000km 10mbps 1kbytes 4.379ms1000km 100mbps 1kbytes 3.660ms10km 512mbps 1kbytes 15.669ms10km 512mbps 100bytes 1.600ms10km 1mbps 500bytes 4.040ms10km 10mbps 500bytes 0.440ms10km 100mbps 500bytes 0.080ms1000km 512kps 100bytes 5.139ms100km 512kps 100bytes 1.920ms100km 1mbps 100bytes 1.160ms100km 1mbps 500bytes 4.359ms100km 10mbps 500bytes 0.760ms100km 100mbps 500bytes 0.400ms100km 10mbps 100bytes 0.440ms100km 10mbps 1kbytes 1.160ms100km 100mbps 1kbytes 0.440ms100km 512kps 1kbytes 15.989ms100km 512kps 500bytes 8.169ms五、实验结果分析1、当Rate和Packet一定时,length越长,时延越长。
计算机网络实验_实验1 网络实验入门_

4
北航计算机网络实验
网络地址与端口号转换 NAPT技术 目前被大量使用的是网络地址与端口号转换
NAPT技术 (Network Address and Port Translation)。 该技术在NAT 转换表中将传输层的端口号也 利用上,以便更加有效地利用 NAT 路由器上 有限的上网 IP 地址。 这样,就可以使多个拥有本地专用地址的主机 ,共用一个 NAT 路由器上的上网 IP 地址, 可以同时与因特网上的主机进行通信。
5
北航计算机网络实验
网络地址与端口号转换 NAPT
NAPT技术利用传输层端口号进行地址转换。在 NAT路由器中维护如下的一个地址、端口号对照表。
如图,虽然只有一个公网地址,但利用不同的公网 端口号,可以实现将不同的内网本地源地址和本地源 端口号对转换为不同的公网源地址和公网源端口号对。
使多个本地专用地址的主机能够共用一个上网 IP 地 址,同时上网。
报文分析软件的工作原理
网卡有四种工作模式
广播模式:在该模式下,网卡能够接收网络中的广播报文 组播模式:在该模式下,网卡能够接收网络中的组播报文 直接模式:在该模式下,网卡只能接收与自身硬件地址相
匹配的单播报文 混杂模式:在该模式下,网卡能够接收网络中的所有报文
网卡的缺省工作模式包括:广播模式和直接模式 报文分析软件的工作原理
注册登录 在注册登录北航MOOC网络实验课程后,
就可以直接访问在线网络实验平台
3
北航计算机网络实验
实验设备
实验设备共有12组 每组有4台PC,2台路由器,2台交换机,1台组
计算机网络实验报告-实验一:双绞线的制作精选全文完整版
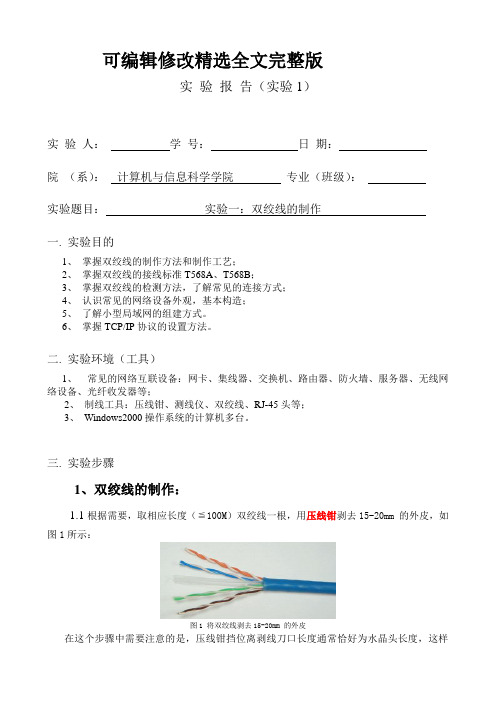
可编辑修改精选全文完整版实验报告(实验1)实验人:学号:日期:院(系):计算机与信息科学学院专业(班级):实验题目:实验一:双绞线的制作一. 实验目的1、掌握双绞线的制作方法和制作工艺;2、掌握双绞线的接线标准T568A、T568B;3、掌握双绞线的检测方法,了解常见的连接方式;4、认识常见的网络设备外观,基本构造;5、了解小型局域网的组建方式。
6、掌握TCP/IP协议的设置方法。
二. 实验环境(工具)1、常见的网络互联设备:网卡、集线器、交换机、路由器、防火墙、服务器、无线网络设备、光纤收发器等;2、制线工具:压线钳、测线仪、双绞线、RJ-45头等;3、Windows2000操作系统的计算机多台。
三. 实验步骤1、双绞线的制作:1.1根据需要,取相应长度(≦100M)双绞线一根,用压线钳剥去15-20mm 的外皮,如图1所示:图1 将双绞线剥去15-20mm 的外皮在这个步骤中需要注意的是,压线钳挡位离剥线刀口长度通常恰好为水晶头长度,这样可以有效避免剥线过长或过短。
若剥线过长看上去肯定不美观,另一方面因网线不能被水晶头卡住,容易松动;若剥线过短,则因有保护层塑料的存在,不能完全插到水晶头底部,造成水晶头插针不能与网线芯线完好接触,影响线路的质量。
1.2按照T568B标准将相互缠绕在一起的线缆逐一解开并把几组线缆依次地排列好并理顺,排列的时候应该注意尽量避免线路的缠绕和重叠;图2 按T568B标准理线通常双绞线的制作有二种接线标准,即EIA/TIA布线标准中规定的T568A和T568B标准。
其中,T568B标准是100M局域网中常用的接线方式。
T568B标准如下图表所示:脚位 1 2 3 4 5 6 7 8颜色橙白橙绿白蓝蓝白绿褐白褐表1-1-2 T568B标准T568A标准如下图表所示:脚位 1 2 3 4 5 6 7 8颜色绿白绿橙白蓝蓝白橙褐白褐表1-1-3 T568A标准1.3 把线缆依次排列好并理顺压直之后,应该细心检查一遍,确认无误后用压线钳的剪线刀口把线缆顶部裁剪整齐。
计算机网络实验1
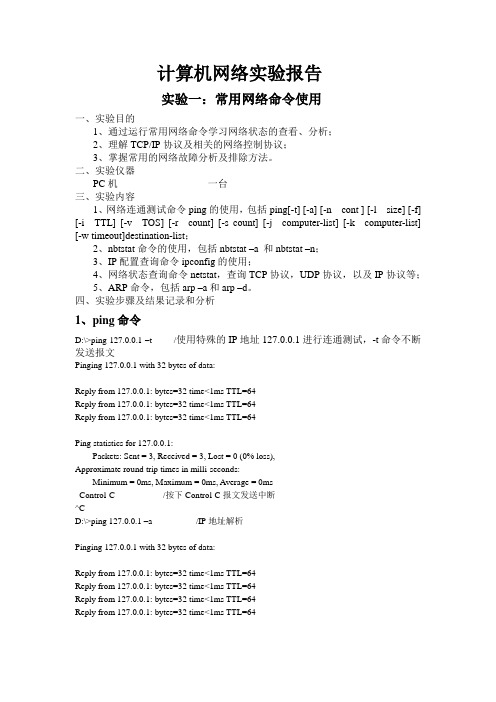
计算机网络实验报告实验一:常用网络命令使用一、实验目的1、通过运行常用网络命令学习网络状态的查看、分析;2、理解TCP/IP协议及相关的网络控制协议;3、掌握常用的网络故障分析及排除方法。
二、实验仪器PC机一台三、实验内容1、网络连通测试命令ping的使用,包括ping[-t] [-a] [-n cont ] [-l size] [-f] [-i TTL] [-v TOS] [-r count] [-s count] [-j computer-list] [-k computer-list] [-w timeout]destination-list;2、nbtstat命令的使用,包括nbtstat –a 和nbtstat –n;3、IP配置查询命令ipconfig的使用;4、网络状态查询命令netstat,查询TCP协议,UDP协议,以及IP协议等;5、ARP命令,包括arp –a和arp –d。
四、实验步骤及结果记录和分析1、ping命令D:\>ping 127.0.0.1 –t /使用特殊的IP地址127.0.0.1进行连通测试,-t命令不断发送报文Pinging 127.0.0.1 with 32 bytes of data:Reply from 127.0.0.1: bytes=32 time<1ms TTL=64Reply from 127.0.0.1: bytes=32 time<1ms TTL=64Reply from 127.0.0.1: bytes=32 time<1ms TTL=64Ping statistics for 127.0.0.1:Packets: Sent = 3, Received = 3, Lost = 0 (0% loss),Approximate round trip times in milli-seconds:Minimum = 0ms, Maximum = 0ms, Average = 0msControl-C /按下Control-C报文发送中断^CD:\>ping 127.0.0.1 –a /IP地址解析Pinging 127.0.0.1 with 32 bytes of data:Reply from 127.0.0.1: bytes=32 time<1ms TTL=64Reply from 127.0.0.1: bytes=32 time<1ms TTL=64Reply from 127.0.0.1: bytes=32 time<1ms TTL=64Reply from 127.0.0.1: bytes=32 time<1ms TTL=64Ping statistics for 127.0.0.1:Packets: Sent = 4, Received = 4, Lost = 0 (0% loss), Approximate round trip times in milli-seconds:Minimum = 0ms, Maximum = 0ms, Average = 0msD:\>ping 127.0.0.1 -n 4 /发送4份回应报文Pinging 127.0.0.1 with 32 bytes of data:Reply from 127.0.0.1: bytes=32 time<1ms TTL=64Reply from 127.0.0.1: bytes=32 time<1ms TTL=64Reply from 127.0.0.1: bytes=32 time<1ms TTL=64Reply from 127.0.0.1: bytes=32 time<1ms TTL=64Ping statistics for 127.0.0.1:Packets: Sent = 4, Received = 4, Lost = 0 (0% loss), Approximate round trip times in milli-seconds:Minimum = 0ms, Maximum = 0ms, Average = 0msD:\>ping 127.0.0.1 –l 4 /发送数据大小为4bytes的回应报文Pinging 127.0.0.1 with 4 bytes of data:Reply from 127.0.0.1: bytes=4 time<1ms TTL=64Reply from 127.0.0.1: bytes=4 time<1ms TTL=64Reply from 127.0.0.1: bytes=4 time<1ms TTL=64Reply from 127.0.0.1: bytes=4 time<1ms TTL=64Ping statistics for 127.0.0.1:Packets: Sent = 4, Received = 4, Lost = 0 (0% loss), Approximate round trip times in milli-seconds:Minimum = 0ms, Maximum = 0ms, Average = 0msD:\>ping 127.0.0.1 –f /发送不分段的标志Pinging 127.0.0.1 with 32 bytes of data:Reply from 127.0.0.1: bytes=32 time<1ms TTL=64Reply from 127.0.0.1: bytes=32 time<1ms TTL=64Reply from 127.0.0.1: bytes=32 time<1ms TTL=64Reply from 127.0.0.1: bytes=32 time<1ms TTL=64Ping statistics for 127.0.0.1:Packets: Sent = 4, Received = 4, Lost = 0 (0% loss), Approximate round trip times in milli-seconds:Minimum = 0ms, Maximum = 0ms, Average = 0msD:\>ping 127.0.0.1 -i 5 /生存时间设置为5Pinging 127.0.0.1 with 32 bytes of data:Reply from 127.0.0.1: bytes=32 time<1ms TTL=64Reply from 127.0.0.1: bytes=32 time<1ms TTL=64Reply from 127.0.0.1: bytes=32 time<1ms TTL=64Reply from 127.0.0.1: bytes=32 time<1ms TTL=64Ping statistics for 127.0.0.1:Packets: Sent = 4, Received = 4, Lost = 0 (0% loss),Approximate round trip times in milli-seconds:Minimum = 0ms, Maximum = 0ms, Average = 0msD:\>ping 127.0.0.1 -v 2 /设置服务类型为类型2Pinging 127.0.0.1 with 32 bytes of data:Reply from 127.0.0.1: bytes=32 time<1ms TTL=64Reply from 127.0.0.1: bytes=32 time<1ms TTL=64Reply from 127.0.0.1: bytes=32 time<1ms TTL=64Reply from 127.0.0.1: bytes=32 time<1ms TTL=64Ping statistics for 127.0.0.1:Packets: Sent = 4, Received = 4, Lost = 0 (0% loss),Approximate round trip times in milli-seconds:Minimum = 0ms, Maximum = 0ms, Average = 0msD:\>ping 127.0.0.1 -r 2 /记录字段中发出和返回报文的路由,大小为2 Pinging 127.0.0.1 with 32 bytes of data:Reply from 127.0.0.1: bytes=32 time<1ms TTL=64Route: 127.0.0.1Reply from 127.0.0.1: bytes=32 time<1ms TTL=64Route: 127.0.0.1Reply from 127.0.0.1: bytes=32 time<1ms TTL=64Route: 127.0.0.1Reply from 127.0.0.1: bytes=32 time<1ms TTL=64Route: 127.0.0.1Ping statistics for 127.0.0.1:Packets: Sent = 4, Received = 4, Lost = 0 (0% loss),Approximate round trip times in milli-seconds:Minimum = 0ms, Maximum = 0ms, Average = 0msD:\>ping 127.0.0.1 -r 14 / /记录字段中发出和返回报文的路由,大小为14Bad value for option -r, valid range is from 1 to 9. /大小规定为1到9,14为错值,不运行D:\>ping 127.0.0.1 -s 2 转发次数为2Pinging 127.0.0.1 with 32 bytes of data:Reply from 127.0.0.1: bytes=32 time<1ms TTL=64Timestamp: 127.0.0.1 :Reply from 127.0.0.1: bytes=32 time<1ms TTL=64Timestamp: 127.0.0.1 :Reply from 127.0.0.1: bytes=32 time<1ms TTL=64Timestamp: 127.0.0.1 :Reply from 127.0.0.1: bytes=32 time<1ms TTL=64Timestamp: 127.0.0.1 :Ping statistics for 127.0.0.1:Packets: Sent = 4, Received = 4, Lost = 0 (0% loss),Approximate round trip times in milli-seconds:Minimum = 0ms, Maximum = 0ms, Average = 0msD:\>ping 127.0.0.1 -s 5 /转发次数为5Bad value for option -s, valid range is from 1 to 4. /转发次数过大,转发次数应在1到4之间D:\>ping 127.0.0.1 –w /以毫秒为单位指定超时间隔Value must be supplied for option -w. /数值不对,没有运行2、nbtstat命令D:\>nbtstat –a /查获TCP/IP上的NETBIOS信息本地连接:Node IpAddress: [10.10.5.243] Scope Id: [] /本地IP地址为:10.10.5.243Displays protocol statistics and current TCP/IP connections using NBT(NetBIOS over TCP/IP).NBTSTA T [ [-a RemoteName] [-A IP address] [-c] [-n][-r] [-R] [-RR] [-s] [-S] [interval] ]-a (adapter status) Lists the remote machine's name table given its name-A (Adapter status) Lists the remote machine's name table given itsIP address.-c (cache) Lists NBT's cache of remote [machine] names and their I addresses-n (names) Lists local NetBIOS names.-r (resolved) Lists names resolved by broadcast and via WINS-R (Reload) Purges and reloads the remote cache name table-S (Sessions) Lists sessions table with the destination IP addresses-s (sessions) Lists sessions table converting destination IP //nbtstat的系列命令解释addresses to computer NETBIOS names.-RR (ReleaseRefresh) Sends Name Release packets to WINS and then, starts RefeshRemoteName Remote host machine name.IP address Dotted decimal representation of the IP address.interval Redisplays selected statistics, pausing interval secondsbetween each display. Press Ctrl+C to stop redisplayingstatistics.D:\>nbtstat -n本地连接:Node IpAddress: [10.10.5.243] Scope Id: [] /本地IP地址为:10.10.5.243NetBIOS Local Name TableName Type Status/名字类型状态---------------------------------------------ZHUJI <00> UNIQUE RegisteredMSHOME <00> GROUP RegisteredZHUJI <20> UNIQUE Registered3、ipconfig命令D:\>ipconfig /显示网络TCP/IP协议的具体配置信息Windows IP ConfigurationEthernet adapter 本地连接:Connection-specific DNS Suffix . : /连接特定的DNS后缀IP Address. . . . . . . . . . . . : 10.10.5.243 /IP地址Subnet Mask . . . . . . . . . . . : 255.255.255.192 /子码掩码Default Gateway . . . . . . . . . : 10.10.5.193 /默认网关C:\Documents and Settings\Administrator>ipconfig /allWindows IP ConfigurationHost Name . . . . . . . . . . . . . . . : ZHUJI /主机名Primary Dns Suffix . . . . . . . : /主DNS后缀Node Type . . . . . . . . . . . . . . .: Unknown /节点类型IP Routing Enabled. . . . . . . . : No /启用IP路由WINS Proxy Enabled. . . . . . .: No /WINS代理已启用DNS Suffix Search List. . . . . .: /DNS后缀搜索列表Ethernet adapter 本地连接:Connection-specific DNS Suffix . : Description . . . . . . . . . . . : Realtek RTL8168/8111 PCI-E Gigabit Ethernet NICPhysical Address. . . . . . . . . : 00-1F-D0-B8-3F-5A /物理地址Dhcp Enabled. . . . . . . . . . . . . . . : Yes /启用DHCPAutoconfiguration Enabled . . . . : Yes /自动配置已启用IP Address. . . . . . . . . . . . : 10.10.5.243 /IP地址Subnet Mask . . . . . . . . . . . : 255.255.255.192 /子网掩码Default Gateway . . . . . . . . . : 10.10.5.193 /默认网关DHCP Server . . . . . . . . . . . : 172.16.3.161 /DHCP服务器DNS Servers . . . . . . . . . . . : 202.103.243.112 /DNS服务器202.193.64.33Lease Obtained. . . . . . . . . : 2010年6月20日星期日12:43:26Lease Expires . . . . . . . . . . : 2010年6月20日星期日13:43:26D:\>ipconfig all /显示与TCP/IP协议相关的所有细节Error: unrecongnized or incomplete command line.USAGE:ipconfig [/? | /all | /renew [adapter] | /release [adapter] |/flushdns | /displaydns | /registerdns |/showclassid adapter |/setclassid adapter [classid] ]whereadapter Connection name(wildcard characters * and ? allowed, see examples) Options:/? Display this help message/all Display full configuration information./release Release the IP address for the specified adapter./renew Renew the IP address for the specified adapter./flushdns Purges the DNS Resolver cache./registerdns Refreshes all DHCP leases and re-registers DNS names/displaydns Display the contents of the DNS Resolver Cache./showclassid Displays all the dhcp class IDs allowed for adapter./setclassid Modifies the dhcp class id.The default is to display only the IP address, subnet mask anddefault gateway for each adapter bound to TCP/IP.For Release and Renew, if no adapter name is specified, then the IP addressleases for all adapters bound to TCP/IP will be released or renewed.For Setclassid, if no ClassId is specified, then the ClassId is removed.Examples:> ipconfig ... Show information.> ipconfig /all ... Show detailed information> ipconfig /renew ... renew all adapters> ipconfig /renew EL* ... renew any connection that has itsname starting with EL> ipconfig /release *Con* ... release all matching connections,eg. "Local Area Connection 1" or"Local Area Connection 2"4、netstat命令D:\>netstat /网络查询Active ConnectionsProto Local Address Foreign Address State/原本地地址外交部地址状况TCP ZHUJI:2539 222.218.47.116:http TIME_W AIT5、ARP命令D:\>arp –a /显示所有接口的当前ARP缓存表Interface: 10.10.5.243 --- 0x2Internet Address Physical Address Type10.10.5.193 00-1b-8f-79-95-64 dynamic10.10.5.195 00-23-54-df-ad-d2 dynamicD:\>arp –d /删除指定的IP地址项实验总结:本次实验室计算机网络的第一次实验,是对常用网络命令参数的使用的基本了解,在经过计算机网络理论课的学习之后,对与计算机网络有了一定的认识,在这次实验中,经过输入各种网络命令,加深了我对每个命令功能的理解,而且也对计算机的TCP/IP协议和各种网络参数有了初步的了解。
计算机网络实验实验报告1

计算机网络实验实验报告1一、实验目的本次计算机网络实验的主要目的是深入理解计算机网络的基本原理和技术,通过实际操作和观察,掌握网络配置、数据传输、协议分析等方面的知识和技能,提高对计算机网络的综合应用能力。
二、实验环境1、硬件环境:计算机若干台,具备以太网卡。
网络交换机、路由器等网络设备。
网线若干。
2、软件环境:Windows 操作系统。
Wireshark 网络协议分析工具。
网络配置工具(如 ipconfig 命令)。
三、实验内容与步骤1、网络拓扑结构搭建利用网线将计算机与交换机连接,构建简单的星型网络拓扑结构。
检查物理连接是否正常,确保网络设备的指示灯显示正常。
2、 IP 地址配置打开计算机的网络设置,手动配置 IP 地址、子网掩码、网关等参数。
使用 ipconfig 命令查看配置是否成功,验证网络连接的有效性。
3、网络连通性测试使用 ping 命令测试不同计算机之间的连通性。
记录测试结果,分析可能存在的连接问题并进行排查。
4、数据捕获与协议分析在一台计算机上安装并运行 Wireshark 工具。
启动捕获网络数据包,进行网络通信操作,如访问网站、发送文件等。
停止捕获后,对捕获的数据包进行分析,查看数据包的源地址、目的地址、协议类型等信息。
5、网络服务配置与测试配置一台计算机作为 Web 服务器,安装 Web 服务软件(如 IIS 或Apache)。
在其他计算机上通过浏览器访问该 Web 服务器,验证 Web 服务的可用性。
四、实验结果与分析1、网络拓扑结构搭建与 IP 地址配置成功搭建了星型网络拓扑结构,计算机与交换机之间的物理连接正常。
手动配置的 IP 地址能够正确生效,通过 ipconfig 命令显示的网络参数与设定值一致。
2、网络连通性测试在进行 ping 测试时,大部分计算机之间能够正常通信,少数出现丢包现象。
经过检查,发现是网线接触不良导致,更换网线后问题解决。
3、数据捕获与协议分析通过 Wireshark 捕获到了丰富的网络数据包,包括 TCP、UDP、HTTP 等常见协议。
Computer Networks(计算机网络)实验

Lab 1Part 1: Intro LabSTEPS•Start up your favorite web browser, which will display your selected homepage. •Start up the Wireshark software. You will initially see a window•To begin packet capture, select the Capture pull down menu and select Options. This will cause the “Wireshark: Capture Options” window to be displayed•You can use most of the default values in this window, but uncheck “Hide capture info dialog” under Display Options. The network interfaces (i.e., the physical connections) that your computer has to the network will be shown in the Interface pull down menu at the top of the Capture Options window. In case your computer has more than one active network interface (e.g., if you have both a wireless and a wired Ethernet connection), you will need to select an interface that is being used to send and receive packets (mostly likely the wired interface). After selecting the network interface (or using the default interface chosen by Wireshark), click Start. Packet capture will now begin - all packets being sent/received from/by your computer are now being captured by Wireshark!•Once you begin packet capture, a packet capture summary window will appear. This window summarizes the number of packets of various types that are being captured, and (importantly!) contains the Stop button that will allow you to stop packet capture. Don’t stop packet capture yet.•While Wireshark is running, enter the URL: /wireshark-labs/INTRO-wireshark-file1.html and have that page displayed in your browser. In order to display this page, your browser will contact the HTTP server at and exchange HTTP messages with the server in order to download this page, as discussed in section 2.2 of the text. The Ethernet frames containing these HTTP messages will be captured by Wireshark.•After your browser has displayed the INTRO-wireshark-file1.html page, stop Wireshark packet capture by selecting stop in the Wireshark capture window. This will cause the Wireshark capture window to disappear and the main Wireshark window to display all packets captured since you began packet capture. You now have live packet data that contains all protocol messages exchanged between your computer and other network entities! The HTTP message exchanges with the web server should appear somewhere in the listing of packets captured. But there will be many other types of packets displayed as well. Even though the only action you took was to download a web page, there were evidently many other protocols running on your computer that are unseen by the user. We’lllearn much more about these protocols as we progress through the text! For now, you should just be aware that there is often much more going on than “meet’s the eye”!•Type in “http” (without the quotes, and in lower case – all protocol names are in lower case in Wireshark) into the display filter specification window at the top of the main Wireshark window. Then select Apply (to the right of where you entered “http”). This wil l cause only HTTP message to be displayed in the packet-listing window.•Select the first http message shown in the packet-listing window. This should be the HTTP GET message that was sent from your computer to the HTTP server. When you select the HTTP GET message, the Ethernet frame, IP datagram, TCP segment, and HTTP message header information will be displayed in the packet-header window3 . By clicking plusand-minus boxes to the left side of the packet details window, minimize the amount of Frame, Ethernet, Internet Protocol, and Transmission Control Protocol information displayed. Maximize the amount information displayed about the HTTP protocol. (Note, in particular, the minimized amount of protocol information for all protocols except HTTP, and the maximized amount of protocol information for HTTP in the packet-header window).•Exit WiresharkQuestions1、List up to 10 different protocols that appear in the protocol column in the unfiltered packet-listing window in step 7 above.EAP、NBNS、UDP、LLMNR、ARP、ICMPV6、SSDP、DHCPV6、TCP、IGMPV22. How long did it take from when the HTTP GET message was sent until the HTTP OK reply was received? (By default, the value of the Time column in the packetlisting window is the amount of time, in seconds, since Wireshark tracing began. To display the Time field in time-of-day format, select the Wireshark View pull down menu, then select Time Display Format, then select Time-of-day.)So the time is 20:17:16:703005000 – 20:17:16:275189000 = 0.427816(seconds)3. What is the Internet address of the (also known as)? What is the Internet address of your computer?So the IP address of the is 128.119.245.12, and the IP address of my computer is 172.19.4.142.4. Print the two HTTP messages displayed in step 9 above. To do so, select Print from the Wireshark File command menu, and select “Selected Packet Only” and “Print as displayed” and then click OK.The first HTTP messages:The second HTTP messages:Part 2: HTTP Lab1.The Basic HTTP GET/response interactionSTEPS•Start up your web browser.•Start up the Wireshark packet sniffer, as described in the Introductory lab (but don’t yet begin packet capture). Enter “http” (just the letters, not the quotation marks) in the display-filter-specification window, so that only captured HTTP messages will be displayed later in the packet-listing window. (We’re only interested in the HTTP protocol here, and don’t want to see the clutter of all captured packets).•Wait a bit more than one minute (we’ll see why shortly), and then begin Wireshark packet capture.•Enter the following to your browser /wireshark-labs/HTTP-wireshark-file1.html Your browser should display the very simple, one-line HTML file.•Stop Wireshark packet capture.Before we answer these questions, there are the HTTP messages.Questions1. Is your browser running HTTP version 1.0 or 1.1? What version of HTTP is the server running?Both of them are 1.12. What languages (if any) does your browser indicate that it can accept to the server?zh-CN3. What is the IP address of your computer? Of the server?The IP address of my computer is 172.19.49.122. The IP address of the server is 128.119.245.12.4. What is the status code returned from the server to your browser?2005. When was the HTML file that you are retrieving last modified at the server?Wed ,01 Apr 2015 13:14:19 GMT6. How many bytes of content are being returned to your browser?128 bytes7. By inspecting the raw data in the packet content window, do you see any headers within the data that are not displayed in the packet-listing window? If so, name one. No.2.The HTTP CONDITIONAL GET/response interactionSTEPS•Start up your web browser, and make sure your browser’s cache is cleared, as discussed above.•Start up the Wireshark packet sniffer•Enter the following URL into your browser /wireshark-labs/HTTP-wireshark-file2.html Your browser should display a very simple five-line HTML file.•Quickly enter the same URL into your browser again (or simply select the refresh button on your browser)•Stop Wireshark packet capture, and enter “http” in the display-filter-specification window, so that only captured HTTP messages will be displayed later in thepacket-listing window.•(Note: If you are unable to run Wireshark on a live network connection, you can use the http-ethereal-trace-2 packet trace to answer the questions below; seefootnote 1. This trace file was gathered while performing the steps above on one of the author’s computers.)Questions8. Inspect the contents of the first HTTP GET request from your browser to the server. Do you see an “IF-MODIFIED-SINCE” line in the HTTP GET?No9. Inspect the contents of the server response. Did the server explicitly return the contents of the file? How can you tell?Yes. Because we can see a line of “Line-based text data: text/html” and thecontent below the line.10. Now inspect the contents of the second HTTP GET request from your browser to the server. Do you see an “IF-MODIFIED-SINCE:” line in the HTTP GET? If so, what information follows the “IF-MODIFIED-SINCE:” header?Yes. Wed, 01 Apr 2015 05:59:01 GMT11. What is the HTTP status code and phrase returned from the server in response to this second HTTP GET? Did the server explicitly return the contents of the file? Explain.304 Not Modified. No, because the content have been in the cache.3.Retrieving Long DocumentsSTEPS•Start up your web browser, and make sure your browser’s cache is cleared, as discussed above.•Start up the Wireshark packet sniffer•Enter the following URL into your browser /wireshark-labs/HTTP-wireshark-file3.html Your browser should display the rather lengthy US Bill of Rights. •Stop Wireshark packet capture, and enter “http” in the display-filter-specification window, so that only captured HTTP messages will bedisplayed.•(Note: If you are unable to run Wireshark on a live network connection, you can use the http-ethereal-trace-3 packet trace to answer the questions below; seefootnote 1. This trace file was gathered while performing the steps above on one of the author’s computers.)Questions12. How many HTTP GET request messages were sent by your browser?Just one.13. How many data-containing TCP segments were needed to carry the single HTTP response?Four.14. What is the status code and phrase associated with the response to the HTTP GET request?200 ok15. Are there any HTTP status lines in the transmitted data associated with a TCP induced “Continuation”?No.4. HTML Documents with Embedded ObjectsSTEPS•Start up your web browser, and make sure your browser’s cache is cleared, as discussed above.•Start up the Wireshark packet sniffer • Enter the following URL into yourbrowser /wireshark-labs/HTTP-wireshark-file4.html Your browser should display a short HTML file with two images. These two images are referenced in the base HTML file. That is, the images themselves are notcontained in the HTML; instead the URLs for the images are contained in the downloaded HTML file. As discussed in the textbook, your browser will have to retrieve these logos from the indicated web sites. Our publisher’s logo is retrieved from the web site. The image of our book’s cover is stored at the server.•Stop Wireshark p acket capture, and enter “http” in the display-filter-specification window, so that only captured HTTP messages will be displayed.•(Note: If you are unable to run Wireshark on a live network connection, you can use the http-ethereal-trace-4 packet trace to answer the questions below; seefootnote 1. This trace file was gathered while performing the steps above on one of the author’s computers.)Questions16. How many HTTP GET request messages were sent by your browser? To which Internet addresses were these GET requests sent?There are four HTTP GET request messages were sent by my browser.One for the HTML:128.119.245.12One for an object: 165.193.140.14Two for another object: 128.119.240.90. The first time it get a 302 Found, then it send a GET message again. In the Last it get a 200 OK.17. Can you tell whether your browser downloaded the two images serially, or whether they were downloaded from the two web sites in parallel? Explain.Parallel. We can see that the second request is send just after the first request is sent, rather than waiting for the reception of the first image.5.HTTP AuthenticationSTEPS•Make sure your browser’s cache is cleared, as discussed above, and close down your browser. Then, start up your browser• Start up the Wireshark packet sniffer• Enter the following URL into your browser /wireshark-labs/protected_pages/HTTP-wiresharkfile5.html Type the requested user name and password into the pop up box.• Stop Wireshark packet capture, and enter “http” in the display-filter-specification window, so that only captured HTTP messages will be displayed later in the packet-listing window.• (Note: If you are unable to run Wireshark on a live network connection, you can use the http-ethereal-trace-5 packet trace to answer the questions below; seefootnote 1. This trace file was gathered while performing the steps above on one of the author’s comput ers.)Questions18. What is the server’s response (status code and phrase) in response to the initial HTTP GET message from your browser?401 Authorization Required。
计算机网络实验教程 第1章 网络基础实验

实验思考题
▪ 通过本实验,你的体会是什么? ▪ 思考如果你的计算机要连接到互联网,需要哪些网
络参数? ▪ 思考什么时候使用直通线,什么时候使用交叉线。 ▪ 什么是用户模式、特权模式和全局配置模式? ▪ 根据家中的无线路由器说明和步骤,配置无线网络。 ▪ 配置PC-B防火墙,同时阻止PC-A访问PC-B的
第1章 网络基础实验
1
实验简要介绍
▪ 本章实验是学生接触计算机网络的基础实验。
▪ 通过本实验,实验者能够: ➢ 了解常见的计算机网络设备; ➢ 了解网络中心布局和规划; ➢ 掌握网络基本命令的使用; ➢ 掌握网线的制作和使用网线实现两台计算机通信; ➢ 掌握使用交换机组建小型局域网; ➢ 掌握如何组建无线网络。
6
实验步骤
▪ 参观网络中心,认识常用的网络设备 ▪ 常用网络命令的使用 ▪ 制作双绞线 ▪ 运行Packet Tracer软件,在逻辑工作区放入一台交
换机和一台工作站PC,配置交换机,组建小型交换 网络 ▪ 配置PC的IPv4地址并验证连通性,配置PC的无线 网卡,配置无线路由器,使用手机登录到无线网络 ▪ 配置主机PC-B的防火墙,测试防火墙是否生效,配 置R1为SSH Server,在R2上远程SSH登录R1,在 PC上远程SSH登录R1
• 客户机预装WindowsXP或Windows 7 • 服务器预装Windows2003及以上系统 • 无线路由器 • 手机
• 实验所需软件
• packet tracer6.2
4
实验原理
▪ 通过让学生参观学校网络中心,对网络有个初步认 识,帮助学生认识计算机网络以及了解网络设备。 通过网络基本工具的使用,能够使用网络工具诊断 常见的网络故障,理解常见的网络传输介质双绞线, 并学会网线的制作。通过交换机组建局域网,帮助 学生掌握什么是计算机网络,对计算机网络有具体 的认识。
计算机网络技术基础实验

计算机网络技术基础实验实验一:网络拓扑结构的搭建与测试实验目的:1. 理解计算机网络的基本拓扑结构。
2. 学会使用网络设备搭建基本的网络拓扑。
3. 掌握网络测试的基本方法。
实验环境:1. 计算机若干台。
2. 交换机或路由器。
3. 网线若干。
4. 网络测试工具,如Wireshark。
实验步骤:1. 根据实验要求,设计网络拓扑图。
2. 使用网线将计算机、交换机和路由器连接起来,搭建网络拓扑。
3. 配置各计算机的IP地址、子网掩码和网关。
4. 使用网络测试工具,如Wireshark,进行数据包捕获和分析。
5. 测试网络连通性,使用ping命令检查网络设备间的连通状态。
实验结果:1. 网络拓扑图。
2. 网络配置参数。
3. 网络测试结果,包括数据包捕获和分析报告。
实验二:TCP/IP协议栈的理解和应用1. 理解TCP/IP协议栈的层次结构和功能。
2. 掌握TCP/IP协议栈中各层协议的作用和特点。
3. 学会使用网络命令工具分析网络通信过程。
实验环境:1. 配置好的网络环境。
2. 网络命令工具,如ipconfig, ifconfig, netstat等。
实验步骤:1. 学习TCP/IP协议栈的层次结构。
2. 配置网络环境,确保网络通信正常。
3. 使用网络命令工具查看网络配置信息。
4. 分析网络通信过程中的数据包,理解各层协议的作用。
实验结果:1. TCP/IP协议栈层次结构的描述。
2. 网络配置信息的截图或记录。
3. 网络通信过程中的数据包分析报告。
实验三:网络安全基础实验目的:1. 了解网络安全的基本概念和重要性。
2. 学会使用基本的网络安全工具和方法。
3. 掌握网络安全防护的基本策略。
实验环境:1. 网络环境。
2. 安全工具,如防火墙、杀毒软件、加密工具等。
1. 学习网络安全的基本概念。
2. 配置网络安全工具,如防火墙规则、杀毒软件等。
3. 模拟网络攻击,如DDoS攻击、SQL注入等。
4. 分析攻击过程,学习如何防护和应对。
计算机网络实验报告

计算机网络实验报告计算机网络实验报告1一、实验目的1. 掌握几种常用的网络命令,通过使用这些命令能检测常见网络故障2. 理解各命令的含义,并能解释其显示内容的意义二、实验内容1. 运行 Windows 常用的网络命令,ipconfig、ping、netstat、nbtstat、arp、route、 net、tracert2. 利用子网掩码、实现子网的划分3. 了解 VRP 的各种视图及各视图下的常用命令三、实验原理、方法、手段该实验通过执行一些常用的网络命令,来了解网络的状况、性能,并对一些网络协议能更好的理解。
下面介绍一下实验中用到的网络命令:1. ipconfig 命令该命令显示IP 协议的具体配置信息,命令可以显示网络适配器的物理地址、主机的IP 地址、子网掩码以及默认网关等,还可以查看主机名、DNS 服务器、节点类型等相关信息。
2. ping 命令该命令用于测试网络联接状况以及信息发送和接收状况。
3. netstat 命令该命令用于检验网络连接情况,它可以显示当前正在活动的网络连接的详细信息。
4. nbtstat 命令该命令用于查看本地计算机或远程计算机上的NetBIOS 的统计数据,显示协议统计情况以及当前TCP/IP 的连接所使用NETBIOS 情况,运用NETBIOS,可以查看本地计算机或远程计算机上的NETBIOS 名字列表。
5. arp 命令使用ARP 命令,你能够查看本地计算机或另一台计算机的ARP 高速缓存中的当前内容,也可以用人工方式输入静态的网卡物理地址/IP 地址对,使用这种方式为缺省网关和本地服务器等常用主机进行这项操作,有助于减少网络上的信息量。
6. route 命令ROUTE 命令用于显示、人工添加和修改路由表项目。
7. net 命令net 命令是WIN 系列里面最有用的网络方面的命令之一,它不是一个命令,而是一组命令。
8. tracert 命令Tracert 使用很简单,只需要在tracert 后面跟一个IP 地址或URL,tracert 会在进行相应的域名转换的。
计算机网络实验报告-实验1-传输介质
实验名称:传输介质【一】实验目的1.熟悉网络实验室环境,认识常用传输介质及其测试工具。
2.制作双绞线(UTP):直连线的制作,交叉线的制作。
3.连通性测试。
【二】实验内容及原理双绞线:作为一种传输介质它是由二根包着绝缘材料的细铜线按一定的比率相互缠绕而成。
实验室用的为超五类双绞线,由四对相互缠绕的线对构成,共八根线。
两根线双绞是因为这种相互缠绕改变了电缆原有的电子特性。
这样不但可以减少自身的串扰,也可以最大程度上防止其它电缆上的信号对这对线缆上的干扰。
【三】实验主要仪器设备(1)五类非屏蔽双绞线。
(2)RJ-45接头。
(3)夹线钳。
(4)(4)网络测线仪。
【四】实验步骤、数据记录及总结分析一、实验过程描述:(一)用双绞线夹线钳(当然也可以用其他剪线工具)把五类双绞线的一端剪齐(最好先剪一段符合布线长度要求的网线),然后把剪齐的一端插入到夹线钳用于剥线的缺口中,注意网线不能弯,直插进去,直到顶住夹线钳后面的挡位,稍微握紧压线钳慢慢旋转-圈(无须担心会损坏网线里面芯线的包层,因为剥线的两刀片之间留有一定距离,这距离通常就是里面4对芯线的直径),让刀口划开双绞线的保护胶皮,拔下胶皮。
(二)剥除外包层后即可见到双绞线网线的4对8条芯线,并且可以看到每对的颜色都不同。
每对缠绕的两根芯线是由一种染有相应颜色的芯线加上一条只染有少许相应颜色的白色相间芯线组成。
四条全色芯线的颜色为:棕色、橙色、绿色、蓝色。
先把4对芯线一字并排排列,然后再把每对芯线分开(此时注意不跨线排列,也就是说每对芯线都相邻排列),并按统一的排列顺序(如左边统一为主颜色芯线,右边统一为相应颜色的花白芯线)排列。
注意每条芯线都要要拉直,并且要相互分开并列排列,不能重叠。
然后用夹线钳垂直于芯线排列方向剪齐(不要剪太长,只需剪齐即可)。
自左至右编号的顺序我们定为“1-2-3-4-5-6-7-8”(三)左手水平握住水晶头(塑料扣的-面朝F,开口朝右),然后把剪齐,并列排列的8条芯线对准水晶头开口并排插人水晶头中,注意一定要使各条芯线都插到水晶头的底部,不能弯曲(因为水晶头是透明的,所以从水晶头有卡位的一面可以清楚地看到每条芯线所插人的位置)。
网络实验一:对等网的实验

2010-10-28
计算机网络实验教程
控制面板”窗口中双击“网络和拨号连接” 第2步:在“控制面板”窗口中双击“网络和拨号连接” 步 图标,出现如图2.13所示的对话框。 所示的对话框。 图标,出现如图 所示的对话框
图2.13
2010-10-28
Hale Waihona Puke 计算机网络实验教程第3步:选中“本地连接”图标,单击右键弹出快捷菜单,选 步 选中“本地连接”图标,单击右键弹出快捷菜单, 属性”选项,打开“本地连接属性”对话框,如图2.14 择“属性”选项,打开“本地连接属性”对话框,如图 所示。 所示。
图2.14
2010-10-28
计算机网络实验教程
第4步:单击“安装”按钮,出现如图 步 单击“安装”按钮,出现如图2.15所示的对 所示的对 话框。在打开的“选择网络组件类型” 话框。在打开的“选择网络组件类型”列表框中选择 客户” 然后单击“添加”按钮; “客户”,然后单击“添加”按钮;
图2.15
2010-10-28
计算机网络实验教程
⑵安装网络客户 Microsoft网络客户组件允许计算机访问 网络客户组件允许计算机访问 Microsoft网络上的资源。在对等网络中,用户的目 网络上的资源。 网络上的资源 在对等网络中, 的是共享Microsoft网络资源。因此,在Windows 网络资源。 的是共享 网络资源 因此, 2000对等网中,需把网络客户设置成“Microsoft 对等网中, 对等网中 需把网络客户设置成“ 网络客户端” 具体设置步骤如下: 网络客户端”。具体设置步骤如下: 设置/控制面板 第1步:依次选择“开始 设置 控制面板”选项; 步 依次选择“开始/设置 控制面板”选项;
制作双绞线。 制作双绞线。 把网卡插入计算机的空余插槽中, 把网卡插入计算机的空余插槽中,然后用螺钉固定在 机箱上。 机箱上。 把网线的两端的水晶头分别插入网卡的RJ-45接口中 把网线的两端的水晶头分别插入网卡的 接口中 和集线器的RJ-45接口中。 接口中。 和集线器的 接口中
实验1计算机网络

网卡的缺省工作模式包括:广播模式和直接模式 报文分析软件的工作原理
将网卡的接收模式设置为混杂模式 利用计算机的网卡截获相连网络上的数据报文,
并进行解析。
3
Wireshark抓包软件的使用 机器的Wireshark软件已经安装和配置 好了,可直接使用; 在桌面上点击Wireshark快捷方式,选 capture ->start 开始进行抓包。
4
5
实验1.5 报文分析软件介绍和使用
报文分析软件 本课程最重要的实验分析手段
利用报文分析软件在相关链路上截获报文; 利用该软件分析报文格式和协议交互机制。 常用的软件有Sniffer、Wireshark和Ethereal 等。
2
报文分析软件的工作原理
网卡有四种工作模式
广播模式:在该模式下,网卡能够接收网络中的广播报文 组播模式:在该模式下,网卡能够接收网络中的组播报文 直接模式:在该模式下,网卡只能接收与自身硬件地址相
- 1、下载文档前请自行甄别文档内容的完整性,平台不提供额外的编辑、内容补充、找答案等附加服务。
- 2、"仅部分预览"的文档,不可在线预览部分如存在完整性等问题,可反馈申请退款(可完整预览的文档不适用该条件!)。
- 3、如文档侵犯您的权益,请联系客服反馈,我们会尽快为您处理(人工客服工作时间:9:00-18:30)。
点击“还原默认值”按钮
实验二 交换机堆叠
在某学校的一栋大楼里,网络设备机房有 多台S2126G交换机,为了方便管理和节省 IP地址,网络管理员决定采用堆叠方式进 行连接,现要在交换机上做适当配置.
http://210.38.223.15:8080
http://210.38.223.16:8080
//第五组设备
//第六组设备
管理服务器
Console线连接
PC机
第2块网卡
PC机
第1块网卡
…….
(6台)
PC机
接入交换机 表示网线
配置模式
用户模式 特权模式 Red-Giant> Red-Giant #
1
2
3
4
5
6
其中的一组设备
二层交换机 二层交换机 三层交换机 三层交换机 路由器 路由器
实验室的拓扑
http://210.38.223.11:8080 http://210.38.223.12:8080 http://210.38.223.13:8080 http://210.38.223.14:8080 //第一组设备 //第二组设备 //第三组设备 //第四组设备
实验报告格式
1、实验目的:名称、实验要求、日期等 2、实验内容:实验所用设备、实验环境、 实验拓扑结构等 3、实验过程:记录实验步骤、实验结果 4、实验过程中碰到的问题,如何解决
如何进行远程管理?
telnet 交换机IP地址
telnet 192.168.0.11
为实现远程管理,要对交换机配置IP地址
SwitchA>enable 14 //进入特权模式 Password student switchA# configure terminal //进入全局配置模式 switchA(config)# interface vlan 1 //进入管理接口配置模式 switchA(config-if)# ip address 192.168.0.11 255.255.255.0 switchA(config-if)# no shutdown //开启交换机管理接口 switchA(config-if)# end switchA# show ip interface //验证交换机的IP是否已配置,管理接口是否已开启 switchA# write memory
switcБайду номын сангаасA
UP UP DOWN DOWN
switchB
背景知识
交换机的扩展(增加端口数量,扩大局域网规模) (1)堆叠:用随机配的堆叠线进行连接,形成一个环。连 接后多个交换机整合成一个 DOWN UP switchA
UP
DOWN
switchB switchB
UP
DOWN
(2)级联:用普通端口连接,设置trunc模式
全局模式
接口配置模式
Red-Giant(config)#
Red-Giant(config-if)#
VLAN模式
Swicth (config-vlan)#
不同模式下有不同命令 在进入各种模式后,可输入EXIT退至上一级, 输入END直接退至特权模式
实验一
假设某学校的网络管理员第一次在设备 机房对交换机进行了初次配置后,他希望 以后在办公室或出差时也可以对设备进 行远程管理,现要在交换机上做适当配置, 使他可以实现这一愿望.
配置前验证
SwitchA# show vlan
先配置SwitchA
SwitchA#configure terminal SwitchA(config)# member 1 //配置设备号为1 SwitchA(config)# device-priority 10 //配置优先级为10,取值 范围为1-10,默认值为1,优先级最高的交换机将成为堆叠主机 SwitchA# show member //验证堆叠主机的配置
telnet 192.168.0.11
telnet 192.168.0.11 无法登录的原因
由于实验交换机没有接入网络,必须用网线连接PC机和 交换机 将超级终端关闭,禁用”本地连接1”,启用”本地 连接2” 看测试PC机的IP地址与交换机的IP地址是否在同一网 段
通过console口访问交换机
用堆叠电缆将两台二层交换机连接起来 重启交换机
SwitchA# reload //只有重启才能生效
验证
SwitchA# show vlan SwitchA# show ip interface 两台PC分别接到两个堆叠交换机中,正确配置PC的IP后,验 证PC间能否Ping通
取消交换机堆叠
SwitchA#configure terminal SwitchA(config)# no device-priority member 1
