android usb mass storage 新增盘符
如何实现Linux下的U盘(USB Mass Storage)驱动 v0.4
如何实现Linux下的U盘(USB Mass Storage)驱动How to Write Linux USB MSC (Mass Storage Class) Driver版本: 0.4作者: crifan联系方式:green-waste (at) 版本历史目录1正文之前 (6)1.1本文目的 (6)1.2阅读此文所需要的前提知识 (7)1.3声明 (7)2USB基本知识 (8)2.1USB的硬件 (8)2.2USB相关的协议 (8)2.3USB相关的软件实现 (8)3USB Mass Storage大容量存储的基本知识 (9)3.1USB Mass Storage相关的协议 (13)3.1.1USB Mass Storage相关协议简介 (14)3.1.1.1USB MSC Control/Bulk/Interrupt (CBI) Transport (14)3.1.1.2USB MSC Bulk-Only (BBB) Transport (15)3.1.1.2.1为何USB MSC中Bulk-only Transport被叫做 BBB (15)3.1.1.2.2为何已经有了CBI,又再弄出个BBB (15)3.1.1.3USB MSC UFI Command Specification (16)3.1.1.4USB MSC Bootability Specification (16)3.1.1.5USB MSC Compliance Test Specification (17)3.1.1.6USB Lockable Storage Devices Feature Specification (17)3.1.1.7USB MSC USB Attached SCSI Protocol (UASP) (17)3.1.1.7.1已有SCSI协议,为何还要再弄一个UASP (17)3.1.2USB MSC的各个协议之间关系总结 (19)3.1.3U盘与USB中的Class,Subclass和Protocol的对应关系 (20)3.1.3.1bInterfaceClass=0x08=Mass Storage (21)3.1.3.2bInterfaceSubClass=0x06=SCSI Transparent (21)3.1.3.3bInterfaceProtocol=0x50=Bulk Only Transport (21)3.2USB Mass Storage相关的软件实现 (22)4实现U盘驱动的整个流程是什么样的 (23)5Linux系统下,USB驱动的框架已经做了哪些事情 (24)6Linux下实现U盘驱动,自己需要做哪些事情以及如何做 (25)7引用文章 (26)图表图表 1 U盘 (6)图表 2 USB Mass Storage Framework (9)图表 3 PC和U盘 (10)图表 4 PC和U盘的芯片内部结构 (10)图表 5 PC和U盘的内部逻辑框图 (11)图表 6 PC和USB MSC设备 (12)图表 7 USB MSC的分类 (12)图表 8 USB Storage Class Protocol Relation (19)图表 9 SubClass Codes Mapped to Command Block Specifications (21)图表 10 Mass Storage Transport Protocol (21)图表 11 USB数据流向图 (23)缩写1 正文之前1.1 本文目的关于U盘,估计大家都用过。
天语-阿里云os-W800手机U盘模式不能识别解决方法

1.电脑上插入USB数据线,选择U盘模式
2.“我的电脑”点击右键->选择“属性”,系统属性界面点击“硬件”,继续点击“设备管
理器”,可以看到有黄色惊叹号显示的“AndroidNet Remote NDIS Device”,如图
3.选择“AndroidNet Remote NDIS Device”,右键选择“更新驱动程序”,如图
4.在弹出框里选择“从列表或指定位置安装(高级)”,并选择下一步,如图
5.选择“不要搜索。
我要自己选择安装的驱动程序(D)。
”,选择下一步
6.在弹出的“硬件更新向导”界面安装选择上选择“USB Mass Storage Device”,选择下一
步,如图
7.安装成功后,电脑右下方片刻更新驱动后,刷新我的电脑,即可以看到U盘
的盘符。
AndroidN获取外置SD卡或挂载U盘路径的方法
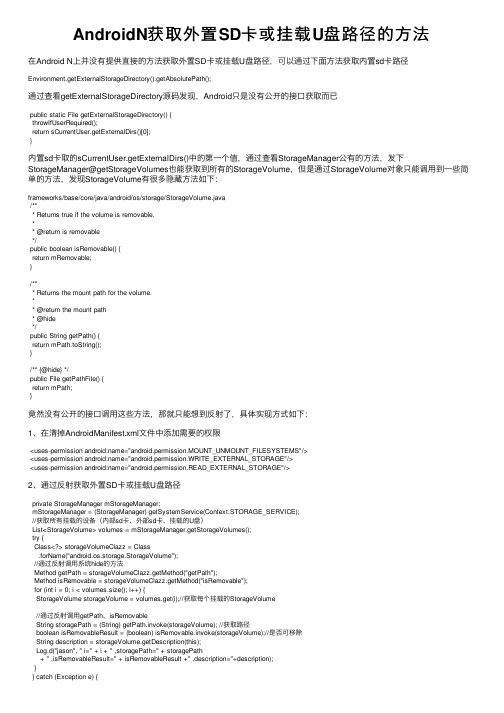
AndroidN获取外置SD卡或挂载U盘路径的⽅法在Android N上并没有提供直接的⽅法获取外置SD卡或挂载U盘路径,可以通过下⾯⽅法获取内置sd卡路径Environment.getExternalStorageDirectory().getAbsolutePath();通过查看getExternalStorageDirectory源码发现,Android只是没有公开的接⼝获取⽽已public static File getExternalStorageDirectory() {throwIfUserRequired();return sCurrentUser.getExternalDirs()[0];}内置sd卡取的sCurrentUser.getExternalDirs()中的第⼀个值,通过查看StorageManager公有的⽅法,发下StorageManager@getStorageVolumes也能获取到所有的StorageVolume,但是通过StorageVolume对象只能调⽤到⼀些简单的⽅法,发现StorageVolume有很多隐藏⽅法如下:frameworks/base/core/java/android/os/storage/StorageVolume.java/*** Returns true if the volume is removable.** @return is removable*/public boolean isRemovable() {return mRemovable;}/*** Returns the mount path for the volume.** @return the mount path* @hide*/public String getPath() {return mPath.toString();}/** {@hide} */public File getPathFile() {return mPath;}竟然没有公开的接⼝调⽤这些⽅法,那就只能想到反射了,具体实现⽅式如下:1、在清掉AndroidManifest.xml⽂件中添加需要的权限<uses-permission android:name="android.permission.MOUNT_UNMOUNT_FILESYSTEMS"/><uses-permission android:name="android.permission.WRITE_EXTERNAL_STORAGE"/><uses-permission android:name="android.permission.READ_EXTERNAL_STORAGE"/>2、通过反射获取外置SD卡或挂载U盘路径private StorageManager mStorageManager;mStorageManager = (StorageManager) getSystemService(Context.STORAGE_SERVICE);//获取所有挂载的设备(内部sd卡、外部sd卡、挂载的U盘)List<StorageVolume> volumes = mStorageManager.getStorageVolumes();try {Class<?> storageVolumeClazz = Class.forName("android.os.storage.StorageVolume");//通过反射调⽤系统hide的⽅法Method getPath = storageVolumeClazz.getMethod("getPath");Method isRemovable = storageVolumeClazz.getMethod("isRemovable");for (int i = 0; i < volumes.size(); i++) {StorageVolume storageVolume = volumes.get(i);//获取每个挂载的StorageVolume//通过反射调⽤getPath、isRemovableString storagePath = (String) getPath.invoke(storageVolume); //获取路径boolean isRemovableResult = (boolean) isRemovable.invoke(storageVolume);//是否可移除String description = storageVolume.getDescription(this);Log.d("jason", " i=" + i + " ,storagePath=" + storagePath+ " ,isRemovableResult=" + isRemovableResult +" ,description="+description);}} catch (Exception e) {Log.d("jason", " e:" + e);}以上这篇Android N获取外置SD卡或挂载U盘路径的⽅法就是⼩编分享给⼤家的全部内容了,希望能给⼤家⼀个参考,也希望⼤家多多⽀持。
USB Mass Storage Support用户指南说明书
USB Mass Storage Support ..............................................................................................Section 1 Introduction...........................................................................................1-11.References................................................................................................1-12.Abbreviations............................................................................................1-13.Supported Controllers...............................................................................1-14.Introduction...............................................................................................1-15.Operating Systems....................................................................................1-16.LUN support..............................................................................................1-27.Minimum size under windows...................................................................1-2Section 2Memory Targets....................................................................................2-31.Memories Supported.................................................................................2-32.Dataflash card...........................................................................................2-3Section 3Frequently Asked Questions.................................................................3-51.How to use my USB Mass Storage Device under Windows 98SE ?........3-52.How can I disconnect my Mass Storage Device ?....................................3-53.I can't see the "Safe Disconnect" icon in the System Tray !.....................3-54.My device is enumerated but I can't see it under Linux !..........................3-65.Procedure for support 40 Invalid block per 1024 block.............................3-6Section 1Introduction1. References Universal Serial Bus Specification, revision2.0Universal Serial Bus Class Definition for Communication Devices, version 1.1USB Mass Storage Overview, revision 1.2USB Mass Storage Bulk Only, revision 1.02. Abbreviations USB: Universal Serial BusVID: Vendor IdentifierPID: Product IdentifierLUN: Logical Unit Number3. SupportedControllersAT89C5130/31A & AT8xC5122D4. Introduction The aim of this document is to support the developer for Mass Storage Application.5. OperatingSystems The following OSs support the USB Mass Storage Device class:•Linux: USB mass storage is available in kernel 2.4 or later •USB mass storage is available in Mac OS 9/X or later •Windows XP: native driver•Windows 2000: native driver•Windows Me: native driver•Windows 98SE: Vendor specific driver requiredIntroductionsupport In order to support multiple LUN, please verify that you have correctly intalled the latest 6. LUNservice pack of your OS. Multiple LUN will works on:•Windows XP SP1 or more•Windows 2000 SP4 or moresize7. MinimumThe minimum number of sectors to declare in order to be recognized by windows is 8.under windowsSection 2Memory Targets1. MemoriesSupported2. Dataflash cardDo not remove card during read/write action Because of the low write speed in dataflash, the Operating System can report an error when writing a file, but the file is correctly written. In case of failure, format the data flash using the Operating System tools.3. DataflashBecause of the low write speed in dataflash, the Operating System can report an error when writing a file, but the file is correctly written. In case of failure, format the data flash using the Operating System tools.SupplierRefTypeManuf, Dev Code (hex)Capacity (MB)Supported bydriver Samsung MT29F2G08AACWG Nand Flash 2C, DA 2561x2KB,2x2KB Samsung K9K1G08U0A Nand Flash EC, 79, xx, C01281x512B Atmel AT45DB642DataFlash -81x512B Atmel AT45DB321DataFlash -41x512BAtmelAT45DB002 AT45DB004 AT45DB008DataFlash Card-Section 3 Frequently Asked Questions1.How to use myUSB MassStorage Deviceunder Windows98SE ?There is no native driver to support USB Mass Storage in Windows 98SE. Atmel pro-vides drivers derivated from the SDK/DDK Microsoft example. For ATMEL products, we deliver this driver. The mass_storage_driver_for_Win98SE.zip file is in \Atmel\c5131-mass-storage-complete-x_x_x\doc folder.This driver is composed of 3 files:•atusbms.inf file•atusbms.sys file•atusbms.pdr fileThe atusbms.sys and atusbms.pdr files are the system drivers for Windows 98SE.The .inf file describes the driver to load for your application. The application is recog-nized using the Vendor ID (VID) and Product ID (PID). Because you will use your own VID/PID in the final application, you have to modify the .inf file with the corresponding VID/PID. After driver installation :atusbms.inf is located in C:\windows\inf\atusbms.sys is located in c:\windows\system32\drivers\atusbpdr.pdr is located in c:\windows\system\iosubsys\2. How can Idisconnect myMass StorageDevice ?Under Windows, each Mass Storage device appears in the System Tray. Click on the corresponding icon in order to safely disconnect your USB device.3. I can't see the"SafeDisconnect" iconin the SystemTray !There are 2 conditions for that:•be under Windows 2000 Professional, server•use a composite Mass Storage device (mass storage + mouse for example)In such situation, no icon will appear in the System Tray. It's a bug from Microsoft. Please refers to this page:/default.aspx?scid=kb;en-us;841880&Product=win2000Frequently Asked QuestionsTo solve this problem, use the Hotfix from Microsoft.4.My device isenumerated but I can't see it under Linux !Check with the USBview tool that your device is correctly enumerated.The Linux kernel requires a Master Boot Record (MBR) and a Partition Boot Record (PBR). In root mode ("su" command), launch the fdisk tool for your device "fdisk /dev/sdx" (x is the number of your device), erase all existing partitions, and create a new partition. By default, this partition will use a Linux file system. You can change it to a FAT12 or FAT16 in order to be recognized by every OS.$ su Password:# fdisk /dev/sdx Command : dnumber of the partition (1-4) : 1Command : dnumber of the partition (1-4) : 2Command : dnumber of the partition (1-4) : 3Command : dnumber of the partition (1-4) : 4Command : n e Extendedp Primary partition pFirst cylinder ():Last cylinder():Command: tNumber of the partition: 1Code Hex : 6Command: w5. Procedure for support 40 Invalid block per1024 block1) You must modify the number of free blocks in the file "nf_drv.h" :/* Number maximum of free block per zone */ #define NB_FREE_MAX (24+20)This variable increases the size of XDATA, and this one must be less than 2048 bytes.Change the MAX_FILE_FRAGMENT_NUMBER variable in "nf_drv.h" to reduce the xdata size.#define MAX_FILE_FRAGMENT_NUMBER ((Byte)140) /* The maximum number authorized2) if the Nand Flash has been used with a firmware generated with other NB_FREE_MAX value, you must reinitialize the NF : - modify in "config.h" the option format at TRUE :#define NF_FULL_CHIP_ERASE TRUEFrequently Asked Questions- include the new value of NB_FREE_MAX- compile, load and start the firmware- format the NF via the player menuAt this step the NF correct, and you can change this option to FALSE.3) You must format the NFDisclaimer: The information in this document is provided in connection with Atmel products. No license, express or implied, by estoppel or otherwise,to any intellectual property right is granted by this document or in connection with the sale of Atmel products. EXCEPT AS SET FORTH IN ATMEL’S TERMS AND CONDI-TIONS OF SALE LOCATED ON ATMEL’S WEB SITE, ATMEL ASSUMES NO LIABILITY WHATSOEVER AND DISCLAIMS ANY EXPRESS, IMPLIED OR STATUTORY WARRANTY RELATING TO ITS PRODUCTS INCLUDING, BUT NOT LIMITED TO, THE IMPLIED WARRANTY OF MERCHANTABILITY, FITNESS FOR A PARTICULAR PURPOSE, OR NON-INFRINGEMENT. IN NO EVENT SHALL ATMEL BE LIABLE FOR ANY DIRECT, INDIRECT, CONSEQUENTIAL, PUNITIVE, SPECIAL OR INCIDEN-TAL DAMAGES (INCLUDING, WITHOUT LIMITATION, DAMAGES FOR LOSS OF PROFITS, BUSINESS INTERRUPTION, OR LOSS OF INFORMATION) ARISING OUT OF THE USE OR INABILITY TO USE THIS DOCUMENT, EVEN IF ATMEL HAS BEEN ADVISED OF THE POSSIBILITY OF SUCH DAMAGES. Atmel makes no representations or warranties with respect to the accuracy or completeness of the contents of this document and reserves the right to make changes to specifications and product descriptions at any time without notice. Atmel does not make any commitment to update the information contained herein. Unless specifically providedot-herwise, Atmel products are not suitable for, and shall not be used in, automotive applications. Atmel’sAtmel’s products are not intended, authorized, or warranted for use as components in applications intended to support or sustain life.Atmel CorporationAtmel Operations2325 Orchard Parkway San Jose, CA 95131Tel: 1(408) 441-0311Fax: 1(408) 487-2600Regional HeadquartersEuropeAtmel SarlRoute des Arsenaux 41Case Postale 80CH-1705 Fribourg SwitzerlandTel: (41) 26-426-5555Fax: (41) 26-426-5500AsiaRoom 1219Chinachem Golden Plaza 77 Mody Road Tsimshatsui East Kowloon Hong KongTel: (852) 2721-9778Fax: (852) 2722-1369Japan9F, Tonetsu Shinkawa Bldg.1-24-8 ShinkawaChuo-ku, Tokyo 104-0033JapanTel: (81) 3-3523-3551Fax: (81) 3-3523-7581Memory2325 Orchard Parkway San Jose, CA 95131Tel: 1(408) 441-0311Fax: 1(408) 436-4314Microcontrollers2325 Orchard Parkway San Jose, CA 95131Tel: 1(408) 441-0311Fax: 1(408) 436-4314La Chantrerie BP 7060244306 Nantes Cedex 3, France Tel: (33) 2-40-18-18-18Fax: (33) 2-40-18-19-60ASIC/ASSP/Smart CardsZone Industrielle13106 Rousset Cedex, France Tel: (33) 4-42-53-60-00Fax: (33) 4-42-53-60-011150 East Cheyenne Mtn. Blvd.Colorado Springs, CO 80906Tel: 1(719) 576-3300Fax: 1(719) 540-1759Scottish Enterprise Technology Park Maxwell BuildingEast Kilbride G75 0QR, Scotland Tel: (44) 1355-803-000Fax: (44) 1355-242-743RF/AutomotiveTheresienstrasse 2Postfach 353574025 Heilbronn, Germany Tel: (49) 71-31-67-0Fax: (49) 71-31-67-23401150 East Cheyenne Mtn. Blvd.Colorado Springs, CO 80906Tel: 1(719) 576-3300Fax: 1(719) 540-1759Biometrics/Imaging/Hi-Rel MPU/High Speed Converters/RF DatacomAvenue de Rochepleine BP 12338521 Saint-Egreve Cedex, France Tel: (33) 4-76-58-30-00Fax: (33) 4-76-58-34-80e-mail********************Web Site© Atmel Corporation 2005. All rights reserved. Atmel ®, logo and combinations thereof, are registered trademarks, and Everywhere You Are ® are the trademarks of Atmel Corporation or its subsidiaries. Other terms and product names may be trademarks of others.。
爱国者平板电脑使用说明书
4
外围设备导致爱国者标准部件损坏或产生故障的 � 非正常原因(包括不良的电源环境、异物进入设备、运输、移动、磕碰等)造成的设 备不能正常工作或部件损坏及故障 � 不可抗力:所有地震、火灾等自然灾害或意外事故(被盗、丢失等)等不可抗力因素引 起的设备不能正常工作或部件损坏及故障 � 因使用自编或第三方软件导致产品不能正常工作 � 计算机病毒感染导致产品不能正常工作 � 下述违章操作造成的产品故障: ---带电插拔主机电源或其它附属设备 ---自行拆卸、修理、安装 ---自行性能升级 ---使用指定之外的零件、附属品、消耗品
阳光服务
郑重承诺: 爱国者电子科技有限公司 爱国者电子科技有限公司郑重承诺: � 本产品的三包服务承诺期限自购买之日起生效,日期以正式购机发票日期为准,您接 受服务的凭证为正式购机发票和信息填写完整并经爱国者电子科技或经销商盖章的有 效三包凭证。 � 产品的三包服务期限:“爱国者”平板电脑产品实行十五天保换,一年保修。服务期 限如有变更恕不另行通知,以所购买产品自带的三包凭证和说明书内容为准。 � 所购产品在三包服务期限内正常使用和维护情况下,由于本机元器件所引发之故障, 经爱国者电子科技技术人员检测确定后,可以享受免费服务。 � 七日内免费退货:自产品三包服务承诺生效之日起七日内(含),如果产品出现故障, 您可以选择维修,更换或退货。 “爱国者阳光服务承诺 ”的情况: 不能享受 不能享受“ 爱国者阳光服务承诺” 由下列原因导致的产品故障,爱国者恕不提供本承诺中的阳光服务: � 非爱国者产品及部件 � 超过保修期的 � 使用了未经爱国者认可(以随机附赠的《用户使用手册》装箱单为准)的扩展部件或准。 Nhomakorabea2
环保说明
根据电子产品污染防治管理办法及相关标准( SJ/T11363-2006SJ/T11363-2006)进行表述
安国工具不认盘之修改VID PID使工具认到盘符的方法

安国工具不认之修改VID PID使
工具认到盘符
此方法是用于插入U盘在我的电脑中有盘符出现,但工具认不到盘符信息。
解决方法如下:
方法一:更改量产工具的VID、PID。
步骤:
1、插入U盘
2、右击我的电脑,点击出来的对话框中的“管理”项。
3、点击上述步骤出来的“计算机管理”对话框中的“设备
管理器”项。
如下图所示:
4、在右边框找到“通用串行总线控制器”双击它,出现下
列图示:
5、找到所插的U盘那项“USB Mass Storage Device”项,
双击它。
出现如下图所示:
6、点击出来的属性对话框中的“详细信息”,即可出现此
U盘的VID、PID。
(如此U盘VID是:058F,PID是1234)。
7、打开MP工具,找到设定中的“U盘信息设定”项,把
工具上的VID、PID改为上述步骤得到的VID、PID值。
8、点击“确定”后关闭工具,并拔出U盘。
9、重新打开工具,并插入U盘即可认到。
方法二:使用QCTool 来批量更改U盘VID、PID。
1、打开安国“QCTool.exe”工具,在设置选项中“U盘信
息”栏钩上“修改U盘信息”,并填上与MP工具相同的
VID、PID。
如图所示:
2、在“检测选项”中不能钩上“检测VID/PID”。
如图所
示:
3、点击“确定”按钮后点“开始”。
运行完后,拔出U盘,
打开工具插入U盘,MP即可认到U盘信息。
更多详情请登录 --专业的U盘制造商。
USB Mass Storage学习笔记
USB Mass Storage学习笔记-STM32+FLASH实现U盘一、内容概述采用STM32内部自带USB控制器外加大页NAND FLASH K9F1G08U0A实现一个128M的U盘。
1、STM32的USB控制器STM32F103的MCU自带USB从控制器,符合USB规范的通信连接;PC 主机和微控制器之间的数据传输是通过共享一专用的数据缓冲区来完成的,该数据缓冲区能被USB外设直接访问。
这块专用数据缓冲区的大小由所使用的端点数目和每个端点最大的数据分组大小所决定,每个端点最大可使用512字节缓冲区,最多可用于16个单向或8个双向端点。
USB模块同PC主机通信,根据USB规范实现令牌分组的检测,数据发送/接收的处理,和握手分组的处理。
整个传输的格式由硬件完成,其中包括CRC的生成和校验。
每个端点都有一个缓冲区描述块,描述该端点使用的缓冲区地址、大小和需要传输的字节数。
当USB模块识别出一个有效的功能/端点的令牌分组时,(如果需要传输数据并且端点已配置)随之发生相关的数据传输。
USB模块通过一个内部的16位寄存器实现端口与专用缓冲区的数据交换。
在所有的数据传输完成后,如果需要,则根据传输的方向,发送或接收适当的握手分组。
在数据传输结束时,USB模块将触发与端点相关的中断,通过读状态寄存器和/或者利用不同的中断来处理。
USB的中断映射单元:将可能产生中断的USB事件映射到三个不同的NVIC 请求线上:(1)USB低优先级中断(通道20):可由所有USB事件触发(正确传输,USB复位等)。
固件在处理中断前应当首先确定中断源。
(2)USB高优先级中断(通道19):仅能由同步和双缓冲批量传输的正确传输事件触发,目的是保证最大的传输速率。
(3)USB唤醒中断(通道42):由USB挂起模式的唤醒事件触发。
图 1、USB设备框图2、大页NAND K9F1G08Nand flash 以页为单位读写数据,而以块为单位擦除数据。
Android手机SD卡分区完整教程

Android手机SD卡分区完整教程
Android手机SD卡分区完整教程
先需要软件PartitionManager9.0,把TF卡插入读卡器后,运行PM软件。
选择盘符,一般读卡器上的TF卡盘符显示为B...,且为最后一个盘符。
我这里演示的是V880自带的.2G卡。
鼠标右键选中TF卡,选择"移动/ 调整分区大小。
按需调整第三个选择"free space after"选项里面的空间,即即将分配给EXT2分区的大小,我这里约900M,再点确定。
看见没有?原来一个分区变为2个了!
右键新分出的分区,点击"创建分区"。
出现新界面后,选择"主分区"-"EXT2分区格式"。
这里千万别错了,其它不用动。
点确定继续操作。
完成后点PM软件左上角的"钩钩",继续。
完成后即可把卡拔出放入手机了。
USB MASS STORAGE INTERFACE用户手册与安装指南说明书

USB MASS STORAGE INTERFACE User Manual and Installation Guide USB-1662-FADAL9182 Independence Ave. Chatsworth, CA 91311Phone: 1-800-342-3475 Table of Contents`1)Introduction (5)2)Requirements (5)3)Installation Guide (5)4)Baud Rate (7)5)HELP General (8)a)HELP,1 (9)b)HELP,2 (10)c)HELP,3 (11)d)HELP,4 (12)e)HELP,5 (13)6)DIR Command General (14)a)DIR (14)b)DIR,1 (14)c)DIR,N (14)7)TA Command (15)8)PU Command General (15)a)PU,0 (15)b)PU,1 (15)c)PU,2 (16)d)PU,3 (16)e)PU,4 (16)f)PU,5 (16)Page 29)DNC(X) Command General (17)a)DNC Command (17)b)DNC Mid Tape Start Command (17)c)DNCX Command (18)d)DNCX Mid Tape Start Command (18)10)Set DATE Command (18)11)Set TIME Command (19)12)DE Command (19)13)CD Command (19)14)VW Command (19)Page 3Index of FiguresFigure 1 Help Command Top Menu (8)Figure 2 Help Menu Dir Commands (9)Figure 3 Help Menu TA Command (10)Figure 4 Punch Tape Commands (11)Figure 5 DNC and DNCX Help Menu (12)Figure 6 Utilities Help Menu (13)Page 41)IntroductionThe USB Mass Storage Device is a USB to RS-232 bridge. The device is a USB Ver-2.0 and is a mass storage device class that has a ‘full speed’ transfer rate of 12.0Mbit/sec to an RS-232 port configurable from 2400 to 115.2K BAUD to the VMC control. The device implements the ‘Elm Chan’ file system and is FAT32. The device also supports time and calendar stamps in addition to the ability to display up to 32-character file names. The file system can support up to a 2TB storage device. A 16GB USB Stick is included in the kit.The USB Box has a default setting of 9600 Baud, upon powerup with no USB Stick installed. To set it r to a Baud Rate of 38400 plug the USB Stick in first and then power on. It will read the INI file on the USB Stick and set itself to that baud rate. You can change the Baud rate of the USB Stick using any text editor. 2)RequirementsThe USB Mass Storage device will work with any FADAL CNC control version with an RS-232 port available at the rear of the FADAL VMC. The Version of the VMC software indicates the maximum allowable BAUD to be used for data transfer. The maximum BAUD rate of the VMC can also be found using the VMC ‘MU’ command, go to the ‘Change Device’ menu to determine the maximum BAUD rate.VMC Version BAUD Rates:Version-1 Maximum BAUD 2400Version-2 Maximum BAUD 4800Version–3 Maximum BAUD 9600Version-4 Maximum BAUD 115.2KVersion-5 Maximum BAUD 115.2KPage 53)Installation guideAttach gray power cable to +5VCpower supply.Remove DB25 Connector from right side and plug in Port A cable. Install gender changer to side wall. Plug in Port B cable.Install 15ft cable from USB box to Pendant. Install USB connector.Plug +5VDC, USB Drive, VMC Port A and CPU Port B.QUESTIONS? Call us at 1-800-342-3475 or visit Page 64)Baud RateThe USB Mass Storage device is by default 38400 Baud using the ‘CD, 10” command. The device requires the correct ‘CD#’ be used for proper operation. If the CNC does not have the 38400 BAUD rate available, the device BAUD rate can be changed. The maximum BAUD rate can be determined by executing the ‘MU’ command from the CNC pendant Go to the ‘Change BAUD’ page for a list of available CNC Baud rates.There is a configuration file in the root directory on the USB Flash drive named ‘ITSCNC.INI’. This file can be opened with any text editor such as ‘Note Pad’ and edit the line ‘BAUD’ and change to the desired BAUD rate. Once the file has been changed and saved to the Flash drive, eject the device from the PC and plug the Flash drive into the USB device. When the Yellow LED starts to blink the device is ready. From the VMC pendant enter the appropriate ‘CD#’ command.An example of the ITSCNC.INI file BAUD settings are as follows:BAUD = 38400The following illistrates the order of operation to execute a USBCNC command:1. Enter the CD, Change Device, command for the USB connected to machine (example: CD, 10).2. Type in the USB command desired, ending the entry with a + sign and not an Enter Key.3. Wait for command to be processed.4. Command terminates after the BYE command.The BAUD rate is set from the pendant utilizing the ‘CD’ command. The available BAUD rates are listed in Table-1.Page 7Page 85) HELP GeneralThe ‘HELP’ command is a very basic command. It only requires communications with the VMCcontrol. It does not require extensive resources from the microcontroller such as USB drivers or a file system to be operational. It is a very good tool during installation if there are complications because it only sends text strings stored in flash to the VMC serial port it can be easily diagnosed.All ‘HELP’ commands will always have the current software version in the heading. Because of VMC display limitations it was necessary to implement multiple ‘HELP’ menus. There are five ‘HELP’ menus including the top menu and can each be accessed by a parameter in the USB + commands. The top ‘HELP’ menu usage is as follows:Usage:CD,10 <ENTER>HELP+Figure 1 Help Command Top Menua)HELP,1The ‘HELP,1+’ command is for all DIR’ commands. Because of the VMC display limitations there only be 16 lines by 64 characters. 60 of the characters are used for the FAT32 file names, time and date. The ‘DIR+’ command will display the entire contents of the current flash directory. At the end on the directory listing there will be the number of files and how many pages that can be indexed.Usage:CD,10 <ENTER>HELP,1+`Figure 2 Help Menu Dir CommandsThe ‘DIR+’ will display all contents of the current directory in Fat32 format including time and date. At the end of the directory the number of files will be displayed along with the number of pages.Usage:CD,10 <ENTER>DIR,+Page 9Page 10The ‘DIR,1+’ command displays the first page of the directory files in the current directory.Usage:CD,10 <ENTER>DIR,1+The ‘DIR,N+’ the N parameter will display the N-TH page of the directory. The ‘DIR’ commanddisplays the total number of pages in the current directory.Usage:CD,10 <ENTER>DIR,N+b) HELP,2The ‘HELP,2+’ command is for tape reader input.The ‘TA,<filename>’ command will load the CNC file from the flash drive to VMC memory. Upon completion of transmission the USB creates a check sum at the end of the file and is sent to the VMC at the end of transmission.Usage:CD,10 <ENTER>HELP,2+Figure 3 Help Menu TA CommandPage 11c) HELP,3The ‘HELP,3+’ command is for tape punch program. There are six different ‘PU’ command parameters.Usage:CD,10 <ENTER>HELP,3+Figure 4 Punch Tape CommandsThe ‘PU,0<filename>+’ Save program and tooling data to file.The ‘PU,1<filename>+’ Save tooling data only to file.The ‘PU,2<filename>+’ Program data only to file name.The ‘PU,3<filename>+’ Save all programs to file name.The ‘PU,4<filename>+’ Save parameters and backlash to file name.The ‘PU,5<filename>+’ Save all axis survey data to file name.Page 12d) HELP,4The ‘HELP,4+’ commands are for all DNC and DNCX functions.Usage:CD,10 <ENTER>`HELP,4+Figure 5 DNC and DNCX Help MenuThe ‘DNC,<filename>+’ DNC filename.The ‘DNC,<filename>,?+’ DNC filename mid tape start.The ‘DNCX<filename>+’ DNC XMODEM protocol.The ‘DNCX<filename>,?+’ DNC XMODEM protocol mid tape start.Page 13e) HELP,5The ‘HELP,5+’ commands are utilities for the RTC time and date. There are file management utilities that allow you to change directories, delete files and view programs.Usage:CD,10 <ENTER>HELP,5+Figure 6 Utilities Help MenuThe ‘TIME+’ Sets the RTC time and is battery backed up.The ‘DATE+’ Sets the RTC date and is battery backed up.The ‘DE<filename>+’ Deletes file name.The ‘CD,<dirname>+’ Changes to dirname directory.The ‘VW,<filename>+’ View the filename contents.6)DIR Command GeneralThe DIR commands are viewing all file names in the current directory. Because of the VMC display limitations there only be 16 lines by 64 characters. 60 of the characters are used for the FAT32 file names, time and date. The ‘DIR+’ command will display the entire contents of the current flash directory. At the end on the directory listing there will be the number of files and how many pages that can be indexed.a)DIRThe ‘DIR+’ will display all contents of the current directory in Fat32 format including time and date. At the end of the directory the number of files will be displayed along with the number of pages.Usage:CD,10 <ENTER>DIR,+b)DIR,1The ‘DIR,1+’ command displays the first page of the directory files in the current directory.Usage:CD,10 <ENTER>DIR,1+c)DIR,NThe ‘DIR,N+’ the N parameter will display the N-TH page of the directory. The ‘DIR’ command displays the total number of pages in the current directory.Usage:CD,10 <ENTER>DIR,N+Page 147)TA CommandThe TA command is used for transferring G-Code programs from the Flash drive to the VMC memory. This transfer also includes a check sum at the end of the file.Usage:TA,<FILENAME>+8)PU Command GeneralThe PU commands are used for transferring G-Code programs from the VMC to the Flash drive. Depending on the parameter sent with the PU command transfers may include other information including tool allocation, survey data and tool offsets the transfer also includes a check sum at the end of the file.a)PU,0The ‘PU,0,<filename>’ command saves the current G-Code program including tool location and tool offset information to filename on the flash drive. The ‘PU,0’ command also creates a check sum at the end of the file and is sent to the VMC at the end of transmission.Usage:CD,10 <ENTER>PU,0,<FILENAME>+b)PU,1The ‘PU,1<filename>’ saves tool location and tool offset information only. No G-Code program is saved. The ‘PU,1’ command does not creates a check sum.Usage:CD,10 <ENTER>PU,1,<FILENAME>+Page 15c)PU,2The ‘PU,2,<filename>’ command this saves the current G-Code program only and with no tool location or tool offset information. This transfer also includes a check sum at the end of the file.Usage:CD,10 <ENTER>PU,2,<FILENAME+>+d)PU,3This PU command saves all the G-Code programs from the VMC library to the USB. No tool or survey information is stored. This transfer also includes a check sum at the end of the file.Usage:CD,10 <ENTER>PU,3,<FILENAME>+e)PU,4Saves all VMC parameter settings including pre-set ball screw backlash values only.Usage:CD,10 <ENTER>PU,4,<FILENAME>+f)PU,5Saves all VMC survey information from all axis controllers.Usage:CD,10 <ENTER>PU,5,<FILENAME>+Page 169)DNC(X) Command GeneralDNC command (Direct Numerical Control). This function does not check for data error(s). The command transfers a G-Code program from the flash drive to the VMC. The VMC then directly executes the program. The DNC command transfers a G-Code program without any error checking.DNCX command (Direct Numerical Control using the XMODEM protocol). This function performs data error checking. The command transfers a G-Code program from the flash drive to the VMC with error checking. If using the DNCX command and an error occurs the packet will be sent again until no errors are detected in the packet.a) DNC CommandDirect Numerical Control command. This function does not check for data error(s). The command transfers a G-Code program from the flash drive to the VMC. The VMC then directly executes the program. Usage:CD,10 <ENTER>DNC,< FILENAME >+b)DNC Mid Tape Start CommandDNC command (Direct Numerical Control) with string search argument. This is the same command as DNC except the G-Code will begin execution at the located string. This command is useful for the case where a tool has been broken and instead of starting at the beginning of the G-Code program the user can start execution at the line where the tool damage occurred.Usage:CD,10 <ENTER>DNC,< FILENAME >,<string>+String: Points to where the DNC will begin execution of the programPage 17c)DNCX CommandUsed for drip feed function with error checking. Packets are 132 bytes with an ending calculated check sum. The control recalculates the check sum and compares it to the received check sum. If they successfully compares the control will issue an “ACK’ character and the next packet will be sent. Other wise an “NACK’ will re-sent the packet. If the ‘NACK’ reoccurs 10- times the transfer will be terminated with the ‘BYE’ command.Usage:CD,10 <ENTER>DNCX,< FILENAME >+d)DNCX Mid Tape Start CommandDNCX command (Direct Numerical Control using XMODEM protocol) with string search argument.This is the same command as DNCX except the G-Code will begin execution at the located string. This command is useful for the case where a tool has been broken and instead of starting at the beginning of the code the user can start execution at the line where the tool damage occurred.Usage:CD,10 <ENTER>DNCX,< FILENAME >,<string>+String: Points to where the DNCX will begin execution of the program10)Set DATE CommandSet current time. The time is only used when a file is written to the flash drive and is an attribute of the file name.Usage:CD,10 <ENTER>DATE,<XX/YY/ZZZZ>+Parameters: XX is the two-digit monthYY is the two-digit dayZZZZ is the four-digit yearPage 1811)Set TIME CommandSet current time. The time is only used when a file is written to the flash drive and is an attribute of the file name.Usage:CD,10 <ENTER>TIME,<HH:MM:AM/PM>+Parameters: HH is the two-digit hourMM is the two-digit minutesAM/PM is a two character entry12) DE CommandDelete a file from the current directory. This command is non reversable and permanently removes the specified file in the current directory.Usage:CD,10 <ENTER>DE,< FILENAME >+13)CD CommandA directory is a logical section of a file system used to hold files. The ‘CD’ command is used to change into a subdirectory from the default root directory.Usage:CD,10 <ENTER>CD,< FILENAME >+14)VW CommandView a program on the flash drive in text format. This viewer is not editable and is used for viewing only.CD,10 <ENTER>VW,< FILENAME >+Page 1915)Warning – Characters not allowed in Filename.The file system used is a FAT32. The file name convention is 32.3, meaning the file name can have up to thirty-two characters with a three-character extension.NOTE: Any characters that are not on the FADAL VMC keyboard cannot be used for file name entry.The following characters cannot be used in the file name:1) Lower case alpha characters 'a-z'2) Underscore character '_'3) White space character ' '4) Period character '.'5) Plus character '+'6) Forward slash '/'7) Backward slash '\'8) Colon ':'9) Asterisk '*'10) Question Mark '?'11) Double quote '"'12) Less than sign '<'13) Greater than sign '>'14) Vertical bar '|'Page 20。
usb mass storage大容量存储的基本知识

USB Mass Storage(大容量存储)是一种通用的接口标准,允许USB设备(如U盘、移动硬盘、某些数码相机和手机)在计算机上显示为一个可移动的磁盘驱动器。
以下是一些关于USB Mass Storage的基本知识:1. 接口协议:USB Mass Storage使用USB(Universal Serial Bus)接口进行通信,这是一种高速、易于使用的连接标准。
2. 设备类型:支持USB Mass Storage的设备包括但不限于USB闪存驱动器、外部硬盘、读卡器(如SD卡读卡器)、以及一些带有内置存储的设备(如数码相机和智能手机)。
3. 工作原理:当USB Mass Storage设备连接到计算机时,它会被识别为一个块设备,这意味着数据是以固定大小的块(通常为512字节或更大的倍数)进行读写操作的。
这种机制使得操作系统可以像对待本地硬盘一样处理这些设备。
4. 文件系统支持:USB Mass Storage设备通常需要格式化并挂载一个文件系统,如FAT32、exFAT或NTFS,以便在不同操作系统之间进行数据交换。
5. 操作系统兼容性:大多数现代操作系统,包括Windows、macOS和Linux,都内置了对USB Mass Storage设备的支持。
6. 设备枚举和配置:当USB Mass Storage设备插入计算机时,会经历一个设备枚举过程,包括设备识别、配置设置和驱动程序加载等步骤。
7. 数据传输:数据传输通过USB总线进行,速度取决于USB版本(如USB 1.1、USB 2.0、USB 3.0等)和设备本身的速度限制。
8. 电源管理:USB Mass Storage设备通常从主机(即计算机)获取电源,但某些高功率设备可能需要外接电源。
9. 安全性和可靠性:使用USB Mass Storage设备时需要注意数据的安全性和可靠性,包括定期备份数据、防止病毒和恶意软件感染,以及避免在设备未正确卸载的情况下拔出设备。
超强Android系统SD卡分区教程-加速你的Android系统
强烈分享分区软件 Acronis Disk Director Suite 10 通过读卡器给SD卡分三区的方法Acronis Disk Director Suite 10 中文免注册版 68MB下载地址:/groups/@g165358/259136.topic第一步、安装 Acronis Disk Director Suite 10 中文免注册版第二步、将SD卡插入读卡器,读卡器再插进电脑USB接口第三步、打开我的电脑,选择SD卡盘符鼠标右键选择格式化(FAT32)不要选择快速格式化第四步、打开电脑里面的控制面板选择管理工具选择计算机管理现在看左边,选择储存 -> 磁盘管理现在看右边,看到你的 SD卡分区没?鼠标放在你的 SD卡那个分区上,鼠标右键呼出菜单,选择删除磁盘分区,OK第五步、打开 Acronis Disk Director Suite 10你现在实际应该选择的分区顺序和大小是:分第一个分区“FAT32”格式大小选择,你的卡的总容量 xxxxMB 减 580MB,得出来的就都是FAT32的空间容量分第二个分区“EXT3”格式大小选择,580MB-96MB(EXT3这个分区,300-499MB都可以,但注意不要超过499MB)一般来说这个分区大小在四百多MB,这个分区分的时候需要注意,这个区分完后剩余的空间大小不能超过96MB,推荐剩余94.13M,留给最后的一个分区就行了分第三个分区“Linux交换”格式大小嘛,最后的都是它的咯,推荐94.13M以上分区的时候,你之前划拨的空间与出来以后显示大小,肯定数字上有出入,这个正常,不去管它,你只要确认你分出来以后的大小就行了!下面的第18步之前,你要确认你分的区是上面说的三个区,且 ETX3格式分区没有超过499MB、Linux交换格式分区没有超过96MB(或者说94.13MB),1.点选已删除分区的SD卡,创建新的分区2.勾选要分区的SD卡。
分区 镜像安装Android教程
分区、镜像安装Android教程2626整理自好啊网手机内卡分区连接方法:USB连接电脑、手机上的设置--常规设置--USB连接模式--大容量模式--选择 My storage。
(连接之后,我的电脑可见有新的移动磁盘)手机外卡分区连接方法:USB连接电脑、手机上的设置--常规设置--USB连接模式--大容量模式--选择 storage Card。
(连接之后,我的电脑可见有新的移动磁盘)读卡器分区连接方法:把SD卡插到读卡器,在插到电脑的USB接口。
(连接之后,我的电脑可见有新的移动磁盘)外卡SD卡主分区安卓视频小教程下载:/file/t8ec6bdf82注意:分区前请把要分区的卡的东西备份好了,丢失概不负责。
一般分区两种,主分区和逻辑分区。
一层:主分区的方法(一层和三层配合为主分区镜像安卓)启动文件里的STARTUP.TXT文件里面的挂点,Set kernel zImageSet ramsize 180*1024*1024Set mtype 1626Set ramaddr 0x50000000Set kernelcrc 1Set CMDLINE "rootdelay=2 root=/dev/mmcblk1p2 init=/init"boot外置卡主分区:1p2内置卡主分区:0p2二层:逻辑分区方法(二层和三层配合为逻辑分区镜像安卓)逻辑分区也就是扩展分区启动文件里的STARTUP.TXT文件里面的挂点,Set kernel zImageSet ramsize 180*1024*1024Set mtype 1626Set ramaddr 0x50000000Set kernelcrc 1Set CMDLINE "rootdelay=2 root=/dev/mmcblk1p2 init=/init" boot外置卡逻辑分区:1p6内置卡逻辑分区:0p6三层:镜像安卓的方法软件下载:分区工具:DG341Std_x86.zip镜像工具:Symantec_Ghost.zip(也就是克隆软件)主分区的方法图一:用分区工具打开,一般都是这样的,把之前有的分区全部删掉。
黑莓os 5.0 工程模式下开启U盘功能-大容量模式

黑莓os 5.0 工程模式下开启U盘功能-大容量模式黑莓OS 5.0下和电脑连接时不能显示出U盘的分区,内存和媒体卡都识别不出,即使手机内存设置中已经选择了大容量模式。
其原因就是手机工程模式中大容量模式已被关闭。
下面来介绍一下在工程模式中开启大容量模式的方法,让电脑能够识别出手机的内存和媒体卡。
工作的内容就是两部分:1、进入工程模式;2、开启大容量模式1、开启工程模式(方法是在"help me”界面下输入“工程模式解锁码1.1 首先在BB9000的主屏幕上同时按下alt+shift+H,调出"he lp me” 界面。
(shift键在我的键盘上是为"aA",即是大小写转换键)1.2 注意该界面中所显示的三项数据:系统程序版本(App V ersion)、PIN和运行时间(Uptime)1.3 打开网页将上面的三组数据填入表格中,点击"Generate”计算解锁码。
(我权限不能传网址。
这个地方这个解锁码可以用berrybox算,自己去下一个就是,berrybox0.37,也是个黑莓常用的电脑管理软件了)PS1:其中程序版本填写需要注意,比如我的版本是5.0.0.771 (1301),那么填写时注意771和后面括号间应该有一个空格,另外空格和括号必须是英文格式的,不要写错。
PS2:Duration是工程模式的持续时间,建议选择1天,工程模式一旦生效,它会取代"HELP ME"界面,这个就是它取代的时间长度。
.1.4 在步骤1.1的"help me”页面下输入步骤1.3得到的解锁码,即可进入工程模式。
PS:输入时注意字符和数字的切换。
如果输入不成功则退出重新填写,但需注意,再次进入"help me”时运行时间已经改变,需要根据新的数据重新计算解锁码。
2、修改相关设置(这里强调工程模式下有大量的调整参数,本文仅指导大容量模式的修改,因修改其他内容而引起的问题,概不负责)2.1 在工程模式的首页菜单下(Engineering Screen Contents),依次进入OS Engineering Screens >> USB >> USB Port Information,如果没有开启大容量模式,那么此页面第四行信息,应该显示的是Mass Storage(MS)ISABLED,按下轨迹球修改,选择Toggle MS,该项变为Mass Storage(MS):ENABLED,(大容量存储:可用),修改完毕后,可按下返回键一路返回,退出工程模式2.2 确保手机的选项-内存中已开启“大容量存储模式”,将手机连接到电脑后即可检测到内存和媒体卡了。
朗科科技 K210移动硬盘 使用指南

声 明本产品《用户手册》所包含的内容均受到《中华人民共和国著作权法》 及其他相关法律、法规的保护。
未经深圳市朗科科技有限公司(以下简称 “N e t a c (朗科)公司”)同意或者授权,任何组织或者个人均不得以 任何手段或形式对其进行修改、篡改或使用。
OnlyDiskTM、酷贝 TM、iMuzTM 和TM 是 Netac(朗科)公司的商标。
®、优盘 ®、U - S A F E ® 和优芯 ® 是 N e t a c (朗科)公司的注册商标。
N e t a c (朗科)公司对以上注册商标享有注册商标专用权。
在所规定的支持保修范围内,Netac (朗科)公司履行承诺的保修 服务。
本产品不保证兼容所有类型的电脑及操作系统。
对于因此原因在 使用本产品过程中可能造成的损失,N e t a c (朗科)公司不承担相关责 任。
如发生任何争议,应按中华人民共和国的相关法律解决。
N e t a c (朗科)公司随时可能因软件升级对手册的内容进行更新, 恕不另行通知。
但是,所有这些更改都将纳入手册的新版本中。
最新版本 的用户手册请访问 Netac(朗科)公司网站 查 询,或致电 Netac(朗科)公司免费客户服务热线 800-830-3662 垂询。
执行标准:Q/Netac 0072.5 英寸加密型移动硬盘 K210目 录 一 简 介1.1 主要性能指标 1.2 产品示意图 1.3 与电脑连接 1.4 对系统的要求二 工具包的安装 三 使用方法3.1 Windows 98/Me/2000/XP/Server 2003 3.2 Mac OS 9.x/X 及更高版本 3.3 Linux 2.4.x 及更高版本四 加密盘专用工具4.1 进入加密盘 4.2 管理工具五 格式化工具的使用 六 注意事项 七 技术规范 八 常见问题解答 九 联系 Netac(朗科)公司一 简 介1感谢您购买 N e t a c (朗科)公司的 2 . 5 英寸加密型移动硬盘(K 2 1 0 )。
创建分区教程手机操作方法

创建分区教程手机操作方法
创建分区的步骤因手机型号和操作系统而有所不同。
下面是一个通用的示例:
1. 打开手机的设置应用。
你可以在应用列表中找到这个图标,通常是一个齿轮或者一个齿轮加上一个小工具图标。
2. 在设置中,向下滚动,找到存储(Storage)或者储存空间(Storage)选项。
点击进入。
3. 在存储选项中,你可能会看到当前的存储使用情况。
如果你的手机支持创建分区,你会看到一个类似“分区管理”(Manage partitions)的选项。
点击进入。
4. 在分区管理中,你将看到当前的存储分区情况。
如果你的手机还没有分区,你可能会看到一个表示可用存储空间的矩形。
5. 点击添加新分区(Add new partition)或者类似的选项。
6. 你可以选择新分区的大小。
通常来说,你可以选择分区大小的百分比或者选择一个具体的数值来设置。
7. 选择完分区大小后,点击确定或者类似选项来创建分区。
8. 你可以给分区起一个名称,这样你就可以更好的区分不同的分区。
点击确定或者类似选项完成分区命名。
9. 现在,你的手机应该已经成功创建了一个新的分区。
你可以在分区管理中查看你的新分区,以及现有的分区。
请注意,这只是一个示例。
不同手机品牌和操作系统会有不同的细节和布局。
centos上打开usb的mass storage协议的方法 -回复

centos上打开usb的mass storage协议的方法-回复标题:在CentOS 上打开USB 的Mass Storage 协议摘要:本文将介绍如何在CentOS 操作系统上打开USB 的Mass Storage 协议。
通过一步一步的指导,读者将了解如何检测和识别USB 存储设备、加载相关驱动程序并挂载设备。
同时,还会讨论一些常见问题和解决方法,以帮助读者更好地处理与USB 存储设备相关的问题。
1. 确认USB 设备的连接状态要在CentOS 上打开USB 的Mass Storage 协议,首先要确认USB 设备的连接状态。
请按照以下步骤操作:1.1. 插入USB 设备:将USB 存储设备插入CentOS 的USB 端口。
1.2. 查看设备信息:打开终端窗口,执行以下命令:shelllsusb该命令将显示当前连接到计算机上的USB 设备的详细信息。
如果USB 设备被正确连接且被操作系统识别,应该能够在命令输出中看到相关设备信息。
2. 加载USB Mass Storage 驱动程序加载USB Mass Storage 驱动程序是使用USB 存储设备之前的必要步骤。
为了加载该驱动程序,您可以按照以下步骤操作:2.1. 查看系统内核模块是否加载了`usb-storage` 模块:shelllsmod grep usb-storage如果该命令没有任何输出,说明`usb-storage` 模块尚未加载。
2.2. 执行以下命令以加载`usb-storage` 模块:shellsudo modprobe usb-storage这将加载并激活USB Mass Storage 驱动程序。
3. 挂载USB 存储设备完成上述步骤后,您可以挂载USB 存储设备以在CentOS 中访问该设备上的文件。
请按照以下步骤执行:3.1. 创建一个新的目录用于挂载USB 存储设备。
例如,我们可以创建一个名为`/mnt/usb` 的目录:shellsudo mkdir /mnt/usb3.2. 查看设备的分区信息:shellsudo fdisk -l该命令将显示所有连接到计算机的存储设备的分区信息。
添加一个新盘符(用来放A最安全)

添加一个新盘符(用来放A最安全)
--------------------------------------------------------------------------------
把上面的内容用记事本另存为 .cmd扩展名的文件,双击就会出现一个O盘,再次双击就会关
闭O盘。
你可以在O盘里放一些不想让别人看到的东东,怎么样?呵呵,把这个文件放到你
的U盘中吧!
原理:
1、MD E:/RECYCLED/UDrives.{25336920-03F9-11CF-8FD0-00AA00686F13}>NUL
在E盘创建一个文件夹,别人都无法打开,隐藏的。
2、SUBST O: E:/RECYCLED/UDrives.{25336920-03F9-11CF-8FD0-00AA00686F13}
创建一个虚拟磁盘:O,指向目录。
3、SUBST /D O:
删除O盘。
[O盘是出来了!可是无论我怎么双击那个命令脚本,O盘始终都在,不会消失啊!怎么办
把第一次编辑好的文件删除重新在编辑一次。
就可以]
[为什么我的“另存为”里面没有.Cmd?因为你新建的是文本文件。
里面肯定没有Cmd
自己写进去就是']
偷偷放黄片吧哈哈
——————————————————————————
————————————————如果上面的不能创建O盘
如果上面的代码不能删除O盘
把代码部分保存为bat文件即可。
U盘弹出USBMassStora...

U盘弹出USBMassStora...U盘弹出USB Mass Storage Device时出问题,现在无法停止“通用卷”设备,请稍候再停止该设备Windows XP使用过程中大家是不是经常遇见"现在无法停止‘通用卷’设备。
请稍候再停止该设备"的问题?经常插上u盘,mp3,移动硬盘等设备,想要安全删除它时经常会出现图上的无用提示!有些情况关掉相应窗口,刷新几次就可以安全删除!不过大多数情况是我们不得不强行拔出!第一种方法:一个国外的十分小巧实用的软件,只有191KB,叫unlocker,十分好用!这个软件能解锁USB连接设备!就能实现100%安全删除USB连接了!,该软件还可以删除一些不能删除的文件和文件夹^_^(附件有下载)第二种方法:我们只需要把系统的预览功能关掉,这种问题就不会再出现了,操作办法是:双击我的电脑-工具-文件夹选项-常规-任务-使用windows传统风格的文件夹,然后点击应用-确定就行了.这样就ok了!第三种方法:先关闭存在于移动设备上的打开文件。
进其他硬盘分区做简单操作例如“复制”“粘贴”等,然后就可停止了。
把"rundll32.exe"进程结束,也可以正常删除。
方法:同时按下键盘的"Ctrl"+"Alt"+"Del"组合键,这时会出现"任务管理器"的窗口,单击"进程"标签,在"映像名称"中寻找"rundll32.exe"进程(如果有多个"rundll32.exe"进程,全部关闭即可。
),选择"rundll32.exe"进程,然后点击"结束进程",这时会弹出"任务管理器警告",这时为了让用户确定是否关闭此进程,点击"是"即关闭了"rundll32.exe"进程。
- 1、下载文档前请自行甄别文档内容的完整性,平台不提供额外的编辑、内容补充、找答案等附加服务。
- 2、"仅部分预览"的文档,不可在线预览部分如存在完整性等问题,可反馈申请退款(可完整预览的文档不适用该条件!)。
- 3、如文档侵犯您的权益,请联系客服反馈,我们会尽快为您处理(人工客服工作时间:9:00-18:30)。
android usb mass storage 新增盘符
市面上的android手机很多都内置sd卡,比如我自己三星 i9020也是内置sd卡。
那个时候对内置sd卡是个什么鬼东西,也不太清楚。
只知道能用,插上usb线能够往里面拷点动作片之类的。
之后联想三星等很多手机的官方rom都同时支持内外sd卡。
比如我后来的i9070。
内置sd的最大好处,以我拙劣的眼光来看应该是给厂商省了一张标配的sd卡。
把emmc里面多余的空间,分出一个区。
虚拟成sd卡。
出厂的时候一宣传,自带sd卡。
其实自带个毛啊。
把机器拆了都没sd卡。
后来由于工作需要,自己也要研究一下同时支持内置和外置sd卡。
后来想想这个其实也很简单。
不过当时网上也没有相关资料,全靠自己摸着石头过河,在source insight里到处打滚。
关键在于享受过程。
要同时有两个sd卡,首先插上usb 进入usb mass storage的时候,电脑上应该显示两个盘符。
要做到这个就得改gadget驱动里面的android.c文件,里面有很多初始化函数,包括mtp、ptp、mass_storage。
重点就是mass_storage,其它的都是一些辅助,后面修修剪剪也就过去了。
原版是这样:
[cpp]view plaincopyprint?
1.static int mass_storage_function_init(struct android_usb_function *f,
2. struct usb_composite_dev *cdev)
3.{
4. struct mass_storage_function_config *config;
5. struct fsg_common *common;
6.int err;
7.
8. config = kzalloc(sizeof(struct mass_storage_function_config),
9. GFP_KERNEL);
10. if (!config)
11. return -ENOMEM;
12.
13. config->fsg.nluns = 1;
14. config->fsg.luns[0].removable = 1;
15.
16. common = fsg_common_init(NULL, cdev, &config->fsg);
17. if (IS_ERR(common)) {
18. kfree(config);
19. return PTR_ERR(common);
20. }
21.
22. err = sysfs_create_link(&f->dev->kobj,
23. &common->luns[0].dev.kobj,
24. "lun");
25. if (err) {
26. kfree(config);
27. return err;
28. }
29.
30. config->common = common;
31. f->config = config;
32. return 0;
33.}
改动之后是这样:
[cpp]view plaincopyprint?
1.static int mass_storage_function_init(struct android_usb_function *f,
2. struct usb_composite_dev *cdev)
3.{
4. struct mass_storage_function_config *config;
5. struct fsg_common *common;
6.int err;
7.
8. config = kzalloc(sizeof(struct mass_storage_function_config),
9. GFP_KERNEL);
10. if (!config)
11. return -ENOMEM;
12.
13. //config->fsg.nluns = 1;
14. config->fsg.nluns = 2;
15. //config->fsg.luns[0].removable = 1;
16. config->fsg.luns[0].removable = 1;
17. config->fsg.luns[1].removable = 1;
18.
19. common = fsg_common_init(NULL, cdev, &config->fsg);
20. if (IS_ERR(common)) {
21. kfree(config);
22. return PTR_ERR(common);
23. }
24.
25. err = sysfs_create_link(&f->dev->kobj,
26. &common->luns[0].dev.kobj,
27. "lun");
28. err = sysfs_create_link(&f->dev->kobj,
29. &common->luns[1].dev.kobj,
30. "lun2");
31. if (err) {
32. kfree(config);
33. return err;
34. }
35.
36. config->common = common;
37. f->config = config;
38. return 0;
39.}
其实也就一件事情,在mass_storage_function_config添加了一个lun。
后面会继续说到接下来的修改,包括分区表,vold相关,还有mountservice。
