AT2201产品安装手册剖析
JVS-2201A使用手册

智能视频服务器JVS-2201A用户手册智能视频服务器JVS-2201A(入侵检测)用户手册第1页目录1、产品介绍 (3)1.1.产品概述 (3)1.2.产品功能 (3)基本功能: (3)压缩功能: (3)入侵人物识别: (4)网络功能: (4)1.3.产品指标 (5)电气指标: (5)机械指标: (5)环境指标: (5)1.4.版本配套表 (5)2、设备安装 (5)2.1.设备附件及功能 (5)2.2.前面板接口说明 (6)2.3.后面板接口说明 (6)2.4.报警输入连接说明 (7)2.5.报警输出连接说明 (7)3、设备配置 (8)3.1.软件配置说明 (8)4、设备管理 (11)4.1.设备默认信息 (11)4.2.恢复出厂设置 (11)4.3.升级 (11)5、性能指标 (12)6、常见故障处理 (12)1、产品介绍1.1.产品概述智能视频服务器(JVS-2201A)是新一代的视频监控产品,它集视频采集、视频压缩、视频分析、网络传输等功能为一体,由一个简单的设备来完成以往需要由PC主机加视频压缩卡(或者采集卡)组成的系统才能完成的功能。
该设备可以广泛应用于周界防范等视频监控,需要对入侵者进行特殊的判别并报警。
1.2.产品功能基本功能:1、采用嵌入式实时多任务操作系统(RTOS)和嵌入式处理器,完全脱离PC平台,更加稳定可靠。
2、独创的智能视频分析技术,并与高效能的数字信号处理器(DSP)完美结合。
3、多级用户权限管理,保证系统安全。
4、提供一个RS-485接口,可以控制云台和镜头。
5、提供1个开关量输入和1个开关量的输出接口,支持本地入侵设备探测报警和网络报警联动,也可以控制监控现场的设备开关。
6、内置看门狗模块,具备异常重起,彻底杜绝死机。
7、安装方便,可以上机架、堆叠。
压缩功能:1、单路视频可进行实时每秒25帧CIF分辨率的独立硬件压缩,视频压缩采用H.264压缩标准,相同视频质量的情况下,比现有MPEG-4产品的视频码流降低50%以上。
莫克A V2201系列极小型x86嵌入式计算机产品说明书

P/N: 1802022010015 *1802022010015*V2201 SeriesQuick Installation GuideVersion 3.3, April 2023Technical Support Contact Information/support2023 Moxa Inc. All rights reserved.OverviewThe Moxa V2201 Series ultra-compact x86 embedded computer is based on the Intel® Atom™ E3800 Series processor, features the most reliable I/O design to maximize connectivity, and supports dual wireless modules, making it suitable for a diverse range of communication applications. The computer’s thermal design ensures reliable system operation in temperatures ranging from -40 to 85°C, and wireless operation in temperatures ranging from -40 to 70°C with a special purpose Moxa wireless module installed. The V2201 Series supports Proactive Monitoring function for device I/O status monitoring and alerts, system temperature monitoring and alerts, and system power management. Closely monitoring the system status makes it easier to recover from errors and provides the most reliable platform for your applications.Package ChecklistBefore installing the V2201, verify that the package contains the following items:•V2201 embedded computer•Terminal block to power jack converter•Wall mounting kit•Quick installation guide (printed)•Warranty cardNOTE Notify your sales representative if any of the above items are missing or damaged.V2201 Panel LayoutThe following figures show the panel layouts of the V2201-W models. In the “non -W” models, the five antenna connectors will not be installed during production.Front PanelRight PanelLeft PanelLED IndicatorsThe following table describes the LED indicators located on the front panel of the V2201.LED Name Status Function Power Green Power is on and computer is functioning normally.Off Power is offUser Defined Red Event has occurred Off No alert mSATA Yellow Blinking: Data is being transmittedOff Not connected / No data transmissionSD Card Yellow Blinking: Data is being transmittedOff Not connected / No data transmissionWireless 1 Green Steady On: Link is OnBlinking: Data is being transmittedOff Not connectedWireless 2 Green Steady On: Link is OnBlinking: Data is being transmittedOff Not connectedLAN 1 Yellow Steady On: 1000 Mbps Ethernet linkBlinking: Data is being transmittedGreen Steady On: 100 Mbps Ethernet linkBlinking: Data is being transmittedLED Name Status FunctionOff 10 Mbps Ethernet link or LAN is not connectedLAN 2 Yellow Steady On: 1000 Mbps Ethernet linkBlinking: Data is being transmittedGreen Steady On: 100 Mbps Ethernet linkBlinking: Data is being transmittedOff10 Mbps Ethernet link or LAN is not connectedTx 1 Green Blinking: Data is being transmittedOff Not connectedTx 2 Green Blinking: Data is being transmittedOff Not connectedRx 1 Yellow Blinking: Data is being transmittedOff Not connectedRx 2 Yellow Blinking: Data is being transmittedOff Not connectedNOTE The Mini PCIe card’s LED behavior depends on the moduleInstalling the Wireless ModulesThe V2201 has two Mini PCIe sockets on the rear panel. One socket only supports USB signals using the MC9090, MC7354, or MC7354 Mini PCIe cards. The other socket supports standard USB and PCIe signals.STEP1: Loosen the four screws located at the middle of the rear panel and open the cover.STEP 2: Insert the wireless module card at an angle.STEP 3: Push the wireless module card down and fasten it with the two screws included with the product.The V2201 has the following two Mini PCIe sockets.Socket 1: USB signal, for 3G/LTE Mini PCIe card (Sierra Wireless MC9090, MC7304, or MC7354). NOTE: The cellular card heat sink is installed in socket 1. Socket 2: Standard USB + PCIe signals, for Wi-Fi Mini PCIe card (SparkLAN WPEA-252NI).STEP 4: Connect the corresponding wireless module cards to connectors of the Mini PCIe sockets.The following five connectors are available:No. 1 & No. 3:For the Wi-Fi Mini PCIe card No. 2 & No. 4:For the 3G/LTE Mini PCIe card No. 5:For the GPS moduleSTEP 5: Replace the rear cover.You can also purchase and install external antennas from Moxa. Contact a Moxa sales representative for information.After installing the wireless modules and wireless external antennas, the computer should appear as follows:Installing the V2201DIN-rail MountingThe DK-DC50131 die-cast metal kit (shipped only with V2201-E4-W-T-LX; to be purchased separately for all other models), enables easy and robust installation of the V2201. Use the six M4*6L FMS screwsincluded to attach the DIN-rail mounting kit to the side panel of theV2201.Installation:STEP 1:Insert the upper lip of the DIN rail intothe DIN-rail mounting kit.STEP 2:Press the V2201 towards the DIN railuntil it snaps into place.Removal:STEP 1:Pull down the latch on themounting kit with a screwdriver.STEP 2 & 3:Use the screwdriver to pry theV2201 slightly forward away fromthe DIN rail, and then lift theV2201 upwards to remove it fromthe DIN rail.STEP 4:Press the recessed button on the spring-loaded bracket to lock it into position untilthe next time you need to install theV2201 on to a DIN rail.Wall or Cabinet MountingThe V2201 computers (with the exclusion of the V2201-E4-W-T-LX model) come with two metal brackets for attaching to a wall or the inside of a cabinet. Four screws (Phillips truss headed, M3*6L, and nickel plated with Nylok®) are included in the kit.Step 1:Use two screws for eachbracket and attach the bracketto the rear of the V2201.Step 2:Use two screws on each side toattach the V2201 to a wall orcabinet.The product package does notinclude the four screws requiredfor attaching the wall-mountingkit to the wall or cabinet; theyneed to be purchasedseparately. We recommendusing standard M3*5L screws.Connector DescriptionPower ConnectorConnect the 9 to 36 VDC LPS or Class 2 power line to the V2201’s terminal block. If the power is supplied properly, the Power LED will light up. The OS is ready when the Ready LED glows a solid green.Grounding the V2201Grounding and wire routing help limit the effects of noise due to electromagnetic interference (EMI). Run the ground connection from the grounding screw (M4) to the grounding surface prior to connecting the power.SG:The Shielded Ground (sometimes calledProtected Ground) contact is the right most oneon the 3-pin power terminal block connector when viewed from the angle shown here.Connect the SG wire to an appropriate grounded metal surface.HDMI OutputsThe V2201 comes with a type A HDMI female connector on the front panel to connect an HDMI monitor.The screw hole above the HDMI connector is used to attach a custom lock to the HDMI connector; a custom lock is needed since the shape of different HDMI connectors are not the same. Please contact a Moxa sales representative for details. Before Attaching the LockAfter Attaching the LockEthernet PortsThe 10/100/1000 Mbps Ethernet ports use RJ45 connectors.Pin 10/100 Mbps 1000 Mbps1 ETx+ TRD(0)+2 ETx- TRD(0)-3 ERx+ TRD(1)+4 – TRD(2)+5 – TRD(2)-6 ERx- TRD(1)-7 – TRD(3)+8 – TRD(3)-Serial PortsThe serial ports use DB9 connectors. Each port can be configured by software for RS-232, RS-422, or RS-485. The pin assignments for the ports are shown in the following table:Pin RS-232 RS-422 RS-485(4-wire)RS-485(2-wire)1 DCD TxDA(-) TxDA(-) –2 RxD TxDB(+) TxDB(+) –3 TxD RxDB(+) RxDB(+) DataB(+)4 DTR RxDA(-) RxDA(-) DataA(-)5 GND GND GND GND6 DSR – – –7 RTS – – –8 CTS – – –SD SlotThe V2201 has an SD slot for storage expansion. The SD slot allows users to plug in an SD 3.0 standard SD card. To install an SD card, gently remove the outer cover from the left, and then insert the SD card into the slot.Mini SIM SlotThe V2201 has a Mini SIM slot for 3G/LTE wireless Internet connections. To install a Mini SIM card, gently remove the outer cover from the left, and insert the card into the slot.USB HostsThe V2201 has 1 USB 3.0 and 2 USB 2.0 Type-A connectors. 2 USB 2.0 ports are located on the front panel, and 1 USB 3.0 port is on the right panel. The port supports keyboard and mouse and can also be used to connect a Flash drive for storing additional data.Audio InterfaceThe audio output of the V2201 is combined with the HDMI connector.DI/DOThe V2201 comes with four digital inputs and four digital outputs on a 2 x 5 terminal block.Reset ButtonPress the “Reset Button” on the left side panel of the V2201 to reboot the system automatically. Real-time ClockThe V2201’s real-time clock is powered by a lithium battery. Westrongly recommend that you do not replace the lithium battery without help from a qualified Moxa support engineer. If you need to change the battery, contact the Moxa RMA service team.Powering on the V2201To power on the V2201, connect the “terminal block to power jack converter” to the V2201’s DC terminal block (located on the sidepanel), and then connect the 9 to 36 VDC power adapter. The computer is automatically switched on once the power adapter is plugged in. If it does not, press the Power Button to turn on the computer. Note that the Shielded Ground wire should be connected to the top pin of the terminal block. It takes about 30 seconds for the system to boot up. Once the system is ready, the Power LED will light up.Connecting the V2201 to a PCPower on the V2201 computer after connecting a monitor, keyboard, and mouse, and verifying that the power source is ready. Once the operating system boots up, the first step is to configure the Ethernet interface. The factory default settings for the V2201’s LANs are shown below (W7E uses DHCP):Default IP AddressNetmaskLAN 1 192.168.3.127 255.255.255.0 LAN 2 192.168.4.127255.255.255.0- 11 - Configuring the Ethernet Interface Linux OSIf you use the console cable to configure network settings for the first time, use the following commands to edit the interfaces file:#ifdown –a //Disable LAN1~LAN2 interface first, before you reconfigure the LAN settings. LAN1 = eth0, LAN2 = eth1// #vi /etc/network/interfaces //check the LAN interface first//After the boot setting of the LAN interface has been modified, use the following commands to immediately activate the LAN settings: #sync; ifup –a W7E OSSTEP 1: Go to Start → Control Panel → Network and Internet → Viewnetwork status and tasks → Change adapter setting.STEP 2: In the Local Area Connection Properties screen, click InternetProtocol (TCP/IP) and then select Properties. Select InternetProtocol Version 4, and then click Properties.STEP 3: Click OK after inputting the proper IP address and netmask.NOTERefer to the V2201 user’s manuals for additional configuration information.。
普联技术有限公司万兆上联三层网管交换机安装手册说明书

安装手册Enterprise Networking Solution万兆上联三层网管交换机万兆上联三层网管PoE交换机全万兆三层网管交换机 TL-SH5654/TL-SH5654F/TL-SH5452TL-SH5428/TL-SH5428F TL-SH5210PB/TL-SH5428PETL-ST5008F声明Copyright ©2022 普联技术有限公司版权所有,保留所有权利未经普联技术有限公司明确书面许可,任何单位或个人不得擅自仿制、复制、誊抄或转译本手册部分或全部内容,且不得以营利为目的进行任何方式(电子、影印、录制等)的传播。
为普联技术有限公司注册商标。
本手册提及的所有商标,由各自所有人拥有。
本手册所提到的产品规格和资讯仅供参考,如有内容更新,恕不另行通知。
除非有特殊约定,本手册仅作为使用指导,所作陈述均不构成任何形式的担保。
I声明相关文档安装手册简介《安装手册》主要介绍交换机的硬件特性、安装方法以及在安装过程中应注意事项。
本手册包括以下章节:第1章:产品介绍。
简述交换机的基本功能特性并详细介绍外观信息。
第2章:产品安装。
指导交换机的硬件安装方法以及注意事项。
第3章:硬件连接。
指导交换机与其他设备之间的连接及注意事项。
第4章:配置指南。
指导通过WEB登录、本地登录、远程登录配置交换机和云管理交换机。
附录A:常见故障处理。
附录B:技术参数规格。
附录C:连接SFP/SFP+端口补充说明。
II相关文档III阅读对象阅读对象 本手册适合下列人员阅读:网络工程师网络管理员约定 在本手册以下部分,所有视图仅为示意说明,请以实际机型为准,如无特别说明,均以TL-SH5428机型为例介绍,所提到的交换机是指万兆或万兆上联三层网管交换机。
本手册采用了如下几种醒目标志来表示操作过程中应该注意的地方,这些标志的目录第1章 产品介绍 ———————————011.1 产品简介 (01)1.2 产品外观 (01)第2章 产品安装 ———————————082.1 物品清单 (08)2.2 安装注意事项 (08)2.3 安装工具准备 (10)2.4 产品安装 (10)第3章 硬件连接 ———————————123.1 连接RJ45端口 (12)3.2 连接SFP/SFP+端口 (12)3.3 连接Console端口 (12)3.4 连接电源线 (13)3.5 设备初始化 (14)3.6 安装后检查 (14)第4章 配置指南 ———————————154.1 WEB登录 (15)4.2 本地登录 (16)4.3 远程登录 (17)4.4 云管理 (18)附录A 常见故障处理 —————————20附录B 技术参数规格 —————————21附录C 连接SFP/SFP+端口补充说明 ——22IV目录01三层网管交换机安装手册产品介绍第1章 产品介绍1.1 产品简介普联技术有限公司自主研发设计的万兆系列三层网管交换机,支持静态路由和动态路由RIP协议,提供完备的安全防护机制、完善的QoS策略和丰富实用的VLAN功能等,性能优良,管理友好,完全可以满足用户对更高带宽、更强性能、性价比高的需求,可应用于中小型企业网、校园网络、酒店、网吧等使用场景。
普联全千兆Web网管交换机安装手册说明书
安装手册全千兆Web网管交换机Enterprise Networking SolutionTL-SG2048TL-SG2226/TL-SG2218TL-SG2024/TL-SG2016TL-SG2024D/TL-SG2016D TL-SG2422F/TL-SG2414F全千兆Web网管PoE交换机TL-SG2226PE/TL-SG2226P TL-SG2218PE/TL-SG2218P TL-SG2024MP声明Copyright © 2020 普联技术有限公司版权所有,保留所有权利未经普联技术有限公司明确书面许可,任何单位或个人不得擅自仿制、复制、誊抄或转译本手册部分或全部内容,且不得以营利为目的进行任何方式(电子、影印、录制等)的传播。
为普联技术有限公司注册商标。
本手册提及的所有商标,由各自所有人拥有。
本手册所提到的产品规格和资讯仅供参考,如有内容更新,恕不另行通知。
除非有特殊约定,本手册仅作为使用指导,所作陈述均不构成任何形式的担保。
I声明相关文档除本安装手册外,我们还提供以下文档的电子版本。
如需获取最新产品资料,请登心,我们将为您提供技术支持服务。
安装手册简介《全千兆Web网管交换机安装手册》主要介绍交换机的硬件特性、安装方法以及在安装过程中应注意事项。
本手册包括以下章节:第1章:产品介绍。
简述交换机的基本功能特性并详细介绍外观信息。
第2章:产品安装。
指导交换机的硬件安装方法以及注意事项。
第3章:硬件连接。
指导交换机与其他设备之间的连接及注意事项。
第4章:登录Web管理界面。
指导通过Web登录配置交换机。
附录A:常见故障处理。
附录B:技术参数规格。
II相关文档附录C:连接SFP端口补充说明。
本手册适合下列人员阅读:网络工程师网络管理员约定在本手册以下部分,如无特别说明,均以TL-SG2226机型为例介绍,所提到的交换机是指全千兆Web网管交换机。
本手册采用了如下几种醒目标志来表示操作过程中应该注意的地方,这些标志的III阅读对象目录第1章 产品介绍 ———————————011.1 产品简介 (01)1.2 产品外观 (02)第2章 产品安装 ———————————092.1 物品清单 (09)2.2 安装注意事项 (09)2.3 安装工具准备 (11)2.4 产品安装 (11)第3章 硬件连接 ———————————133.1 连接至RJ45端口 (13)3.2 连接SFP端口 (13)3.3 连接电源线 (14)3.4 设备初始化 (14)3.5 安装后检查 (14)第4章 登录Web管理界面 ———————15附录A 故障处理 ———————————16附录B 技术参数规格 —————————17附录C 连接SFP端口补充说明 —————18IV目录01全千兆Web网管交换机安装手册产品介绍第1章 产品介绍1.1 产品简介普联技术有限公司全新开发推出的Web网管交换机,采用高性能硬件和软件平台,提供灵活、高性价比的全千兆端口,支持802.1Q VLAN、端口监控、端口汇聚、QoS等常用功能,易于管理维护,适用于校园、酒店及企业园区网络接入应用场景。
Moxa V2201 Series 产品说明书

V2201SeriesIntel®Atom®E3800DIN-rail computer with2mini PCIe expansion slots forwirelessFeatures and Benefits•Intel Atom®E3800Series processor with three performance options•Dual mini-PCIe sockets for wireless modules,supports Wi-Fi,3G,LTE,andGPS1•-40to85°C system operating temperature(-40to70°C with LTE moduleinstalled)1•Variety of interfaces:2serial ports,2Ethernet LAN ports,4DIs,4DOs,SD,USB,HDMI,wireless•EN61000-6-2and EN61000-6-4certification2;meets EMC standard forheavy industry•Up to5Grms anti-vibration protection and100g/11ms anti-shock protection•Ready-to-run Debian8,Windows Embedded Standard7,and Windows10Embedded IoT Enterprise2016LTSB platforms•Moxa Proactive Monitoring utility for system hardware health monitoring•Moxa Smart Recovery utility to recover system from boot failure(W7E only)CertificationsIntroductionThe V2201Series ultra-compact x86embedded computer is based on the Intel®Atom™E3800Series processor,features the most reliable I/O design to maximize connectivity,and supports dual wireless modules,making it suitable for a diverse range of communication applications.1The computer’s thermal design ensures reliable system operation in temperatures ranging from-40to85°C(-40to70°C with a special purpose Moxa wireless module installed).The V2201Series supports“Moxa Hardware Monitoring”for device I/O status monitoring and alerts,system temperature monitoring and alerts,and system power management.Monitoring system status closely makes it easier to recover from errors and provides the most reliable platform for your applications.Applications•Remote Terminal Unit(RTU)•Data acquisition•M2M communication(smart gateway)•Digital signage•Factory automation •In-vehicle monitor/data logger(transportation)•Programmable router•Energy usage optimization•Predictive maintenance•Asset management1.Wireless modules must be purchased separately.2.Passed with AC/DC adapter.AppearanceLeft Side View Right Side ViewFront ViewSpecificationsComputerCPU V2201-E1Series:Intel Atom®Processor E3815(Single core,512K cache,1.46GHz)V2201-E2Series:Intel Atom®Processor E3826(Dual core,1M cache,1.46GHz)V2201-E4Series:Intel Atom®Processor E3845(Quad core,2M cache,1.91GHz) System Memory Pre-installed4GB DDR3LSystem Memory Slot SODIMM DDR3/DDR3L slot x1Supported OS Linux Debian8(Linux kernel v4.1)Windows Embedded Standard7(WS7E)32-bitWindows Embedded Standard7(WS7E)64-bitStorage Slot mSATA slots x1SD3.0(SDHC/SDXC)socket x1Computer InterfaceEthernet Ports Auto-sensing10/100/1000Mbps ports(RJ45connector)x2Serial Ports RS-232/422/485ports x2,software selectable(DB9male)USB2.0USB2.0hosts x2,type-A connectorsUSB3.0USB3.0hosts x1,type-A connectorsDigital Input DIs x4Digital Output DOs x4Expansion Slots mPCIe slot x2Video Output HDMI x1,HDMI connector(type A)Wi-Fi Antenna Connector RP-SMA x2Cellular Antenna Connector SMA x2Number of SIMs1SIM Format MiniGPS Antenna Connector SMA x1Digital InputsIsolation3K VDCConnector Screw-fastened Euroblock terminalDry Contact On:short to GNDOff:openI/O Mode DISensor Type Dry contactWet contact(NPN or PNP)Wet Contact(DI to COM)On:10to30VDCOff:0to3VDCDigital OutputsConnector Screw-fastened Euroblock terminalCurrent Rating200mA per channelI/O Type SinkVoltage24to30VDCLED IndicatorsSystem SD slots x1Power x1Storage x1Programmable x1Wireless Signal Strength Cellular/Wi-Fi x2LAN1per port(10/100/1000Mbps)Serial2per port(Tx,Rx)Serial InterfaceBaudrate50bps to115.2kbpsFlow Control RTS/CTS,XON/XOFF,ADDC®(automatic data direction control)for RS-485,RTSToggle(RS-232only)Isolation N/AParity None,Even,Odd,Space,MarkStop Bits1,1.5,2Serial SignalsRS-232TxD,RxD,RTS,CTS,DTR,DSR,DCD,GNDRS-422Tx+,Tx-,Rx+,Rx-,GNDRS-485-2w Data+,Data-,GNDRS-485-4w Tx+,Tx-,Rx+,Rx-,GNDPower ParametersInput Voltage9to36VDCPower Connector Terminal block(for DC models)Power Consumption(Max.)2000mA@9VDCPower Consumption18W(max.)Physical CharacteristicsHousing AluminumIP Rating IP30Dimensions(with ears)178x52.5x120.2mm(7.01x2.07x4.73in) Dimensions(without ears)150x48.8x120.2mm(5.91x1.92x4.73in) Weight940g(2.09lb)Installation DIN-rail mounting,Wall mounting(with optional kit) Environmental LimitsOperating Temperature E1/E2models:-40to85°C(-40to185°F)E4models:-40to70°C(-40to158°F)Storage Temperature(package included)-40to85°C(-40to185°F)Ambient Relative Humidity5to95%(non-condensing)Standards and CertificationsEMC EN55032/24,EN61000-6-2/-6-4EMI CISPR32,FCC Part15B Class AEMS IEC61000-4-2ESD:Contact:6kV;Air:8kVIEC61000-4-3RS:80MHz to1GHz:20V/mIEC61000-4-4EFT:Power:2kV;Signal:2kVIEC61000-4-5Surge:Power:2kV;Signal:1kVIEC61000-4-6CS:10VIEC61000-4-8PFMFSafety EN60950-1,UL508,UL60950-1Shock IEC60068-2-27Vibration IEC60068-2-64DeclarationGreen Product RoHS,CRoHS,WEEEMTBFTime408,275hrsStandards Telcordia(Bellcore),GBWarrantyWarranty Period3yearsDetails See /warrantyPackage ContentsDevice1x V2201Series computerInstallation Kit Wall-mounting kit(all models except V2201-E4-W-T-LX)DIN-rail mounting kit(V2201-E4-W-T-LX)1x wall-mounting kitCable1x terminal block to power jack converter Documentation1x document and software CD1x quick installation guide1x warranty cardDimensionsOrdering InformationModel Name CPU Memory(Default)mSATA(Default)SD Card Slots USIM SlotAntennaConnectorsOperating Temp.V2201-E1-T Intel Atom®E38154GB8GB1(Optional)1–-40to85°CV2201-E2-T Intel Atom®E38264GB8GB1(Optional)1–-40to85°CV2201-E4-T Intel Atom®E38454GB8GB1(Optional)1–-40to70°CV2201-E1-W-T Intel Atom®E38154GB8GB1(Optional)15-40to85°CV2201-E2-W-T Intel Atom®E38264GB8GB1(Optional)15-40to85°CV2201-E4-W-T Intel Atom®E38454GB8GB1(Optional)15-40to70°CV2201-E1-T-LX Intel Atom®E38152GB8GB1(Optional)1–-40to85°CV2201-E1-T-W7E Intel Atom®E38154GB8GB1(Optional)1–-40to85°CV2201-E4-W-T-LX Intel Atom®E38454GB32GB16GB15-40to70°CAccessories(sold separately)Power AdaptersPWR-24270-DT-S1Power adapter,input voltage90to264VAC,output voltage24V with2.5A DC loadPower CordsPWC-C7AU-2B-183Power cord with Australian(AU)plug,2.5A/250V,1.83mPWC-C7CN-2B-183Power cord with two-prong China(CN)plug,1.83mPWC-C7EU-2B-183Power cord with Continental Europe(EU)plug,2.5A/250V,1.83mPWC-C7UK-2B-183Power cord with United Kingdom(UK)plug,2.5A/250V,1.83mPWC-C7US-2B-183Power cord with United States(US)plug,10A/125V,1.83mAntennasANT-GPS-OSM-05-3M BK Active GPS antenna,26dBi,1572MHz,L1band antenna for GPSANT-WDB-ARM-02 2.4/5GHz,omni-directional rubber duck antenna,2dBi,RP-SMA(male)Wi-Fi Wireless ModulesV2201Wi-Fi mini card SparkLAN WPEA-252NI Wi-Fi mini card,4black screwsDIN-Rail Mounting KitsDK-DC50131DIN-rail mounting kit,6screws©Moxa Inc.All rights reserved.Updated Jan22,2020.This document and any portion thereof may not be reproduced or used in any manner whatsoever without the express written permission of Moxa Inc.Product specifications subject to change without notice.Visit our website for the most up-to-date product information.。
大华全数字对讲系统安装指导手册【智慧安防产品及解决方案】

大华楼宇对讲安装调试指导手册(内部版)1浙江大华技术股份有限公司2015年11月26日目录一、系统的介绍和产品的组成 (4)二、施工用线及注意事项 (5)三、系统接线技术要求 (6)四、设备安装篇 (7)4.1确定所需安装的产品、辅件等是否到位 (7)4.1门口机和室内机安装方式 (7)五、调试篇 (10)5.1全数字系统布线 (10)5.1.1门口机 (10)5.1.2数字室内机 (11)5.1.3小区联网的布线 (11)5.2 H700平台对应门口机和室内机配置 (11)5.2.1 门口机IP设置 (11)5.2.2 门口机设置 (11)5.2.3 SIP服务器配置 (13)25.2.4数字室内机调试 (16)5.3 H500平台对应门口机和室内机配置 (17)5.3.1 门口机设置 (17)5.3.2 数字室内机调试 (19)5.4平台配置 (21)5.4.1 H700平台配置 (21)5.4.2 H500平台配置 (22)3一、系统的介绍和产品的组成1. 系统介绍大华楼宇可视对讲系统为大华品牌下专为中国住宅小区设计的智能楼宇系统,该系统是大华融合了安防领域多年积累的经验,采用CAT5E(网线)传输技术推出的最新一代智能楼宇可视对讲系统,与传统的网线可视对讲系统相比,在工程设计、布线、安装、调试各个环节均作了创新设计,引入“工程导向”的设计理念,超越了行业中常规的系统模式,带给客户最佳的性价比和使用体验。
2.系统的组成系统图如下:4二、施工用线及注意事项1.系统施工用线设备接交换机按组网要求国标CAT5E 超5类线不得超过100米,超过100米用光纤传输。
在施工时请按照我公司提供的示意图布线和布管。
5三、系统接线技术要求1、大华智网楼宇对讲包括半数字和全数字所有RJ-45头线序都是(标准的T568B)压接顺序规则网口插座引脚(原理图) 1 2 3 4 5 6 7 8 水晶头引脚 1 2 3 4 5 6 7 8 颜色白橙橙白绿蓝白蓝绿白棕棕用于连接端子的引线不能剥得太长,端子锁紧后不应有铜线外露,端子螺丝必须拧紧;安装线接口的塑料外皮剥离长度应规范操作,即不可裸露铜线过短造成接触不良,也不可裸露铜线过长以免短路造成设备的毁坏,影响系统的正常工作。
Victaulic唯特利管道产品安装、维护和测试手册说明书

Auto Drain 自S动lee排v水e 套管
Ball Drip 球形滴Plu阀n柱ge塞r
供W水at主er管Su控p制pl阀y Main Control
Valve
系统主管排水阀
System Main Drain Valve
注Ch水ar管g路e 球阀 Line Ball
Valve
报A警la测rm试T球es阀t Ball Valve
步骤 2a:如果已安装 746-LPA 系列干式加速器,请确认隔离球阀已关闭。 步骤 2b:如果已安装 746-LPA 系列干式加速器,请打开 1/4 转排气球阀。 第 3 步: 确认报警测试球阀已关闭。 第 4 步: 开启压缩机或打开空气维护配管组件(AMTA)上的快充球阀,向系统中充气。至少将系统充气至 13 psi/90 kPa/0.9 Bar。 第 5 步: 当系统压力达到约 10 psi/69 kPa/0.7 Bar 且自动排气阀不再释放任何水气时,向上拉起 776 系列低压执行机构的自动排气套管。 说明:自动排气螺钉应密封并保持在设置(“向上”)位置。 第 6 步: 系统空气压力建立后,关闭空气维护配件组件(AMTA)上的快充球阀。 第 7 步: 打开空气维护配件组件(AMTA)上的慢充球阀。说明:慢充球阀未打开可能会因系统压力下降,导致因系统泄露而引起的阀门误工作。 第 8 步: 打开注水管路球阀。让水流过自动排水管。 第 9 步: 向上拉起自动排水套管,直到螺钉处于设置(“向上”)位置为止。核实注水管路压力表确实有压力。 步骤 9a:如果安装的是 746-LPA 系列干式加速器,请关闭 1/4 转排气球阀。 步骤 9b:如果已安装 746-LPA 系列干式加速器,请打开隔离球阀。这样便可设定加速器。 第 10 步: 打开供水主管排水阀。 第 11 步: 缓慢打开供水主管控制阀,直到水流稳定地从打开的供水主管排水阀流出为止。 第 12 步: 水流稳定后,关闭供水主管排水阀。 第 13 步: 将供水主管控制阀完全打开。 第 14 步: 确认所有阀门都处于正常工作位置(请参阅下表)。
ks2201说明书(新)

KS2201型UV水质COD在线监测仪(09新款)安装使用说明书目录一、产品原理二、产品特点三、功能简介四、技术参数和使用环境五、安装说明六、操作使用说明七、标准溶液调校和测定操作八、日常维护和检查九、故障处理十、注意事项十一、售后须知一、 产品原理COD 化学需氧量是指在一定的条件下,氧化1升水样中还原性物质所消耗的氧化剂的量(以氧量计算,用mg/l 表示)。
化学需氧量反映了水中受还原性物质污染程度。
传统的COD 标准法测定是采用回流消解滴定法,该法消解时间长(2个小时),耗能大,试剂费用高,效率低,容易造成二次污染。
UV 法是纯物理的光学方法,是利用大部分有机物在紫外254nm 处有吸收的特性,将水样经过紫外光的照射,从吸光度的大小来判断水质污染的程度。
UV 法和COD 在水质组分比较稳定的情况下,吸光度和COD 有比较好的相关性。
二、 产品特点UV 水质在线监测仪与其他在线COD 监测仪相比,具有如下优点: 1、可以实现连续监测; 2、无需专人维护;3、紫外光源稳定,并且采用双波长回路,减少误差,确保测量值稳定、准确无误;4、可以自动清洗;可以自动校准;5、结构紧凑,易于操作。
三、 功能简介1、监测仪采用32位工业级ARM 处理器, 功耗低,稳定性可靠。
2、监测仪采用一体化真彩触摸屏。
所有设置和操作功能通过触摸屏完成。
3、测量原理是基于紫外光谱法。
流通池中的水路被氙灯的紫外光照射。
紫外光的某些组份通过流通池而被吸收,从而检测和分析出来。
然后,根据比尔-朗伯(Beer-Lambert)定律,以不饱和有机分子在UV254nm 处的吸收为基础,测量出这种光的吸收量。
[]⎪⎭⎫⎝⎛⋅=Iout Iin k C log 其中[]C : 样品浓度k : 吸收系数(每种分子具有不同的吸收系数)Iin: 入射光光强度Iout: 透射光光强度.该值取决于被测水的吸收样本的浓度。
浊度或者悬浮固体粒子通过双波长原理进行补偿。
ATC32201-MLG160MLG110零件手册070225

ATC32201执行标准:MT 687-1997MLG-110G MLG-132G MLG-160G PARTS MANUAL零件手册CCN :ATC32201DATE :2007.02 ISSUR :02欢迎您使用上海埃尔特压缩空气系统工程有限公司生产的各种型号的螺杆压缩机AIR-TEC有权对产品进行修改和改进,不负有对已出厂产品进行修改和改进的义务型号:机组编号:ATC32201目录INDEX第一章SECTION 1 引言INTRODUCTION概述GENERAL说明DESCRIPTION备件推荐表的说明DESCRIPTION FOR RECOMMENDED SPARE PARTS 如何使用本零件手册HOW TO USE THIS PARTS MANUAL如何定购零件HOW TO ORDER PARTS第二章SECTION 2零件图目录及零件PARTS LIST第三章SECTION 3备件推荐表RECOMMENDED SPARE PARTSATC32201概述GENERAL这本零件手册供用户向本公司订购零件和了解本公司螺杆式产品时作参考。
购买本公司生产的螺杆式压缩机零部件时,请参照本手册的说明,同本公司备件部门接洽联系。
随着我公司生产技术的发展,本零件手册的内容将逐步修改和补充,恕不另行通知。
This manual is prepared as an aid in identifying and ordering parts in the SIRC compressor.To purchase spare parts refer to section of “how to order parts” and contact to our Spare parts department.With the development of our products, the content of this manual is subject to change without notice.说明DESCRIPTION本手册的零件图图解了我公司螺杆式压缩机的各种系统部件,组件和零件。
热泵冷暖 热水产品安装手册讲解
7
搬运与吊装
搬运 主机搬运 •严禁重物堆叠 •搬运时候不可过度倾斜 •不要将重物堆放在主机表面,容易造成主 机钣金件变形及表面划痕。 •搬运过程中,机组的倾斜不可大于15度, 防止机组翻倒, •严禁将机组侧卧、倒立.
海立睿能热泵冷暖/热水产品
安装手册
1
目录
公司简介
……………………………………………………… 03
适用规范
……………………………………………………… 04
安装注意事项 ……………………………………………………… 05
使用注意事项 ……………………………………………………… 06
安装前期工作 ……………………………………………………… 07
5
使用注意事项
请不要将任何物体插入机组的出风口; 机组内装有高速旋转的风扇,有可能导致严重的伤害。
请不要自己修理或对机组进行任何部分改造; 有可能会引起机组不能正常工作或者事故。 请定期对水过滤器进行清洗; 若水过滤器堵塞,会导致机组出现保护或不能正常工作。 请将线控器放在儿童不能触及的地方; 避免由误操作导致机组不能正常运转。 对机组进行清洁时,应停止运转并切断电源; 在机组运转时切勿进行清洁工作,否则会引起事故。 在雷雨天气,请关掉机组,切断电源; 雷电可能会损坏机组。 发现异常情况时,请停止机组运行,切断电源,并与经销商联系; 在异常情况下工作,可能会引起触电或火灾等事故。 机组需要移装时,请与经销商或专业安装人员联系; 如果安装不当,可能导致机组不能正常工作、引起安全事故。 请您在操作本机前,仔细阅读本说明书; 说明书上有正确操作本机的说明。
产品安装手册全数字系统

产品安装手册目录一、概述 (3)1.1、系统概述 (3)1.2、设计、安装标准 (4)1.3、设计概述 (4)1.4、安装、施工、测试、验收和售后服务备案 (4)二、安装说明 (4)2.1、智能开关、窗帘控制器、智能插座 (4)2.2、遥控器 (9)2.3、无线/红外转发器 (13)2.4、电话远程控制器 (14)2.6、智能网关系统 (15)2.7、可视对讲系统其他设备(全数字系统) (22)三、调试与验收 (33)四、服务 (34)一、概述在方便用户的前提下我们为用户和服务商提供波创智能家居系统《施工手册》。
此手册以设计、安装、施工、售后服务为目标制定,使之符合不同用户的实际应用。
1.1、系统概述现在,人类刚刚进入一个崭新的世纪。
回顾人类发展的历程,可以清楚的发现,人类一直在追求用科技来改善自身的生活,这中间,便利和健康是大家始终追求的重要目标。
这种追求使人类在智能化生活的道路上创造了许多奇迹。
特别是电脑和网络的出现,使智能化生活由梦想开始变成现实,激发了人类对便利生活的更高要求。
智能化正走入我们的现实生活。
智能一词最早出现在建筑行业,这注定了智能化生活与房地产的渊源关系。
近年来,国内大多数房地产商都打出智能小区、智能住宅等概念,为楼盘的促销提供了很好的卖点,迄今,智能化有成为中高档楼盘的基本配置的趋势。
微软总裁比尔.盖兹对未来家居有一个精辟的描述:“未来家居将由钢筋、混凝土、高科技芯片和软件组成”。
宽带接入和家居智能网关技术的应用,以及两项技术的有机结合,开始成为住宅楼宇和小区的重要技术特征。
宽带接入和家居智能化解决方案将成为房产的重要增值因素。
宽带技术为家居智能网关技术的发展提供了更大的应用平台,使家居智能化技术的应用得到了质的飞跃。
结合Internet技术、无线通讯技术,人们无论身处何时何地,都可以调整家居环境、控制家电设备。
波创家居智能产品正是在这种万事俱备的形势下应运而生。
家居智能产品,其主要功能是为家居环境、家电设备提供一个共享的接入中心,实现对家居环境及其设备的智能管理、远程管理、集中管理和资源共享。
华信慧业视频监控配置安装

注意:XP系统需要在
防火墙的安全里添加 列外
单机版软件配置
安装客户端软件
安装后会在桌面
生成两个图标,一个 是“vs本地客户端 3.1”另一个就是检 测设备ip地址的软件 “vs设备检测”
单机版软件配置
登录客户端软件 先点击客户端,
ቤተ መጻሕፍቲ ባይዱ
在进入 “设置”
选择“本地登录”
单机版软件配置
添加设备一定要 采用超级 用户 登录 用户名: 密 码: admin admin
2. 视频输入接口
3. UTP接口 4. 485线接口 5. 电源插口
1
2
3
4
5
目
录
一.产品概述 二. 安装前的准备工作
三. 单机版软件配置
四. 网络版软件配置 五. 权限的设置 六. 设备安装应注意的问题
安装前的准备工作
1.准备 首先准备一台电脑和一根网络交叉线,厂里要提供规划好的 视频服务器的 IP地址。 2.默认值 视频服务器出厂IP地址为192.168.1.100将准备好的网络交叉
单机版软件配置
设备信息的设置 设置井场名
称和云台解码器 协议。
单机版软件配置 入侵检测
自动学习设置 首先点击你要布防 井场的窗口,在选择右 方的“报警操作” -> “入侵检测”画勾,点 击应用即可,也可以在 窗口上直接点击右键选 择“重新学习” ,窗口 的左上角会显示“学习 中”字样。
注意:云台进行过操作后必 须要进行重新学习。
同时可以设 置分组循环的时 间间隔。
目
录
一.产品概述 二. 安装前的准备工作 三. 单机版软件配置
四. 网络版软件配置
五. 权限的设置 六. 设备安装应注意的问题
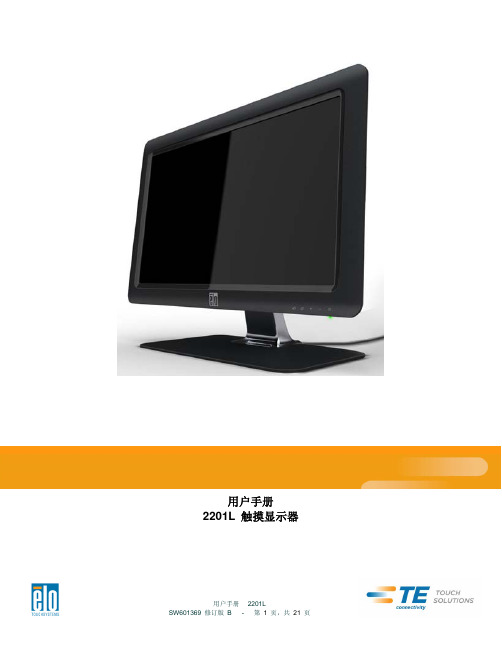
2201l 触摸显示器 使用手册说明书

使用者手册2201L 觸摸顯示器SW601370 Rev L版權所有© 2021 ELO T ouch Solutions。
保留所有權利。
未經ELO Touch Solutions 的書面許可,不得以任何形式或方法(包括但不限於電子、磁性、光學、化學方法或手册等)複製、傳輸或改編本出版物的任何部分,不得將其儲存到擷取系統,不得將其翻譯成任何語言或電腦語言。
免責告示本文件中的訊息有可能在未通知的情况下進行變更。
ELO Touch Solutions對本出版物的內容不提供任何形式的陳述或擔保,並且特別宣告拒絕對有特定目的適銷性或適用性提供任何默示擔保。
ELO Touch Solutions保留對本出版物進行修訂並對其內容不斷進行變更,而不將這樣的修訂和變更通知任何人的權利。
商標告示ELO Touch Solutions、IntelliTouch、iTouch、和(標誌)是ELO Touch Solutions集團公司及其許可方的商標。
Windows 為Microsoft 集團公司的商標。
本文件中出現的其他產品名稱可能是其各自公司的商標或注册商標。
ELO Touch Solutions對除自有商標以外的其他商標不享有任何權益。
目錄第 1 章–簡介 (4)第 2 章–安裝 (5)第 3 章–安裝 (9)第 4 章–操作 (10)第 5 章–技術支援 (14)第 6 章–安全與維護 (15)第7 章–法規訊息 (16)第8 章–擔保訊息 (19)第 1 章–簡介產品說明新的觸摸顯示器集ELO Touch Solutions的可靠效能和觸摸技術與顯示屏設計領域的最新進展於一身。
這種功能組合可在使用者與觸摸顯示屏之間提供自然的訊息流動。
此觸摸顯示器帶有一個24 位彩色有源矩陣薄膜晶體管LCD 面板,提供了優异的顯示效能。
其全HD 解析度1920x1080 適合顯示圖形和影像。
其LED 背光可極大降低功率消耗並消除汞的使用(相比於CCFL 背光面板)。
V2201系列计算机兼容性指南说明书

V2201 SeriesComponent Compatibility GuideA list of peripheral components suitable for use with the V2201 Series computers2019/02/19 Version 2.3© 2019 Moxa Inc. All rights reserved.Copyright Notice©2018 Moxa Inc.All rights reserved.TrademarksThe MOXA logo is a registered trademark of Moxa Inc.All other trademarks or registered marks in this manual belong to their respective manufacturers.DisclaimerInformation in this document is subject to change without notice and does not represent a commitment on the part of Moxa.Moxa provides this document as is, without warranty of any kind, either expressed or implied, including, but not limited to, its particular purpose. Moxa reserves the right to make improvements and/or changes to this manual, or to the products and/or the programs described in this manual, at any time.Information provided in this manual is intended to be accurate and reliable. However, Moxa assumes no responsibility for its use, or for any infringements on the rights of third parties that may result from its use.This document might contain unintentional technical or typographical errors. Changes are periodically made to the information herein to correct such errors, and these changes are incorporated into new editions of the publication.Technical Support Contact Information/supportMoxa AmericasToll-free: 1-888-669-2872 Tel: +1-714-528-6777 Fax: +1-714-528-6778 Moxa China (Shanghai office) Toll-free: 800-820-5036Tel: +86-21-5258-9955Fax: +86-21-5258-5505Moxa EuropeTel: +49-89-3 70 03 99-0 Fax: +49-89-3 70 03 99-99 Moxa Asia-Pacific Tel: +886-2-8919-1230 Fax: +886-2-8919-1231Moxa IndiaTel: +91-80-4172-9088 Fax: +91-80-4132-10451. IntroductionThis document lists hardware components that are proven to provide the performance listed in the specification when used with the Moxa V2201 Series embedded computers, or computers that share basic design features with the V2201 Series. Moxa computers come with multiple peripheral options and are engineered to work with components having different hardware specifications. This flexibility could sometimes lead to compatibility issues. When used with the V2201 Series embedded computers, peripherals from one manufacturer may not work as well as the ones made by another manufacturer. Moxa provides this list of V2201 Series-compatible components, so that users can be certain of a reliable performance from the V2201 Series, when used with the components listed in this document.2. Testing MethodsTo validate that a component meets the Moxa standards for quality and performance, the following five key compatibility tests are run:∙Ambient temperature burn-in∙Low temperature hard start∙Heat/humidity burn-in∙Cyclic high-low temperature burn-in∙Vibration testAmbient Temperature Burn-InThe component is mounted on to a V2201 computer and put through a series of stress tests at an ambient temperature of around 25˚C, for a specified period of time. The duration of the test is determined based on the class of peripherals being tested.Low Temperature Hard StartThe component is mounted on to an unpowered V2201 computer and then the system is booted up at an extremely low temperature. The designated low temperature value depends on the computer model being tested.Heat/Humidity Burn-InThe component is mounted on to a V2201 computer, placed in a temperature- andhumidity-controlled enclosure, and then put through the burn-in test for a specified period of time. The temperature, humidity, and time targets vary depending on the specification of the computer model used in the test.Cyclic High-Low Temperature Burn-InThe component is mounted on to a V2201 computer, placed in a temperature controlled enclosure, and then put through the burn-in test wherein the temperature is cyclically varied from very high to very low and back again, over a specified period of time. The target temperature range and the duration of the test can vary depending on the specification of the computer model used in the test. Vibration TestThe component is mounted on to a V2201 computer that is bound inside an electromagnetic vibrator, and then put through random vibration tests along three orthogonal axes: longitudinal, transverse, and vertical. The vibration tests are compliant with the EN50155/IEC61373 vibration standards.3. Storage EnduranceStorage media, such as SSDs, CF cards, SD cards, Disk on Module, and CFast, are composed of different electrical components. The main electrical components in these storage media, the NAND-flash memory and NAND-flash controller, impact the storage endurance and lifespan of the storage media.NAND-Flash Memory EnduranceNAND-flash memories have a limit on the number of times they can be programmed and erased (P/E). The P/E cycle as well as the erase count of a NAND-flash memory can be used to determine this limit. For example, an SLC (single-level cell) flash memory has a 60,000 P/E cycle, an MLC (multi-level cell) flash memory has a 3,000 P/E cycle, and TLC NAND flash memories have P/E cycle values up to 1,000. Each flash memory type has a different endurance level, which is why the storage lifespan is based on the flash memory type. Storage that uses SLC type flash memory could have the best endurance level compared with the MLC type storage. SLC storage usually comes with a 5-year OEM warranty (the actual warranty period depends on the original manufacturer). MLC storage only comes with a 1- to 3-year warranty. The major differences between SLC and MLC are: (a) The SLC NAND flash has a lifespan that is around 20 times that of an MLC, and (b) The price can differ by a factor of 4 to 5. The SLC type of storage is recommended for systems that are expected to have high reliability, and for applications that need to frequently write data to a storage medium.Terabytes Written (TBW)TBW is the unit used to evaluate SSD endurance. In actual applications, storage is used for routine operations and data access. Therefore the physical P/E cycle is not appropriate for describing the total rewritable data capacity. The management efficiency of the storage controller also affects the total rewritable data capacity result. For these reasons, Joint Electron Device Engineering Council(JEDEC) has defined a standard for SSD endurance evaluation called JESD218, which uses TBW to measure the endurance of the storage memory. By referring to this TBW value, users can easily estimate the storage specification and select a suitable storage for real-life use cases. For example, when routine operations need a maximum of 20 GB and the expected storage lifespan is 3 years, the total rewritable data demand would be 21.9 TBW (20 GB x 365 x 3). In this case, a storage that has more than 21.9 TBW will meet the requirement. We recommend selecting a storage media with a TBW that is greater than the calculated value.4. Declaration for Liability ExclusionThe specifications, warranty terms, and liability of items listed in this guide are the sole responsibility of the original manufacturers. Moxa does not take any responsibility in this regard. Please visit the manufacturers’ official websites for up-to-date product information before purchasing the components.5. Compatible ComponentsPeripheral components that have been tested and found suitable for use with the V2201 Series computers are listed in this section. The following table lists the Test Codes and their descriptions:。
2201L 触摸显示器 用户手册说明书
用户手册2201L 触摸显示器版权所有© 2011 T yco Electronics。
保留所有权利。
未经 Tyco Electronics 的书面许可,不得以任何形式或方法(包括但不限于电子、磁性、光学、化学方法或手册等)复制、传输或改编本出版物的任何部分,不得将其存储到检索系统,不得将其翻译成任何语言或计算机语言。
免责声明本文档中的信息有可能在未通知的情况下进行更改。
Tyco Electronics 对本出版物的内容不提供任何形式的陈述或担保,并且特别声明拒绝对有特定目的适销性或适用性提供任何默示担保。
Tyco Electronics 保留对本出版物进行修订并对其内容不断进行变更,而不将这样的修订和变更通知任何人的权利。
商标声明Elo TouchSystems、IntelliTouch、iTouch、Tyco Electronics 和 TE(徽标)是 Tyco Electronics 集团公司及其许可方的商标。
Windows 为 Microsoft 集团公司的商标。
本文档中出现的其他产品名称可能是其各自公司的商标或注册商标。
Tyco Electronics 对除自有商标以外的其他商标不享有任何权益。
目录第 1 章 – 简介 (4)第 2 章 – 安装 (5)第 3 章 – 安装 (9)第 4 章 – 操作 (10)第 5 章 – 技术支持 (14)第 6 章 – 安全与维护 (15)第 7 章 – 法规信息 (16)第 8 章 – 担保信息 (19)第 1 章 – 简介产品说明新的触摸显示器集 Elo TouchSystems 的可靠性能和触摸技术与显示屏设计领域的最新进展于一身。
这种性能组合可在用户与触摸显示屏之间提供自然的信息流动。
此触摸显示器带有一个 24 位彩色有源矩阵薄膜晶体管 LCD 面板,提供了优异的显示性能。
其全 HD 分辨率 1920x1080 适合显示图形和图像。
洗碗机产品安装模块培训手册

5、将洗碗机推进厨具预留的空格内
把随机附带的底脚滑槽C分别垫在洗碗机两侧的底脚处(底脚滑槽 可以避免直接推拉洗碗机导致底脚损坏地板,同时也可以在推拉洗碗 机时省力)
将洗碗机推进厨具预留的空格内。
嵌入式洗碗机的安装要求-全嵌式洗碗机
2.贴到橱柜底 部外侧边缘 8cm范围内
嵌入式洗碗机的安装要求-全嵌式洗碗机
安装步骤:
1、装饰板安装在门体上,将洗碗机放入橱柜中 2、调节门体弹簧的紧张程度,使门体可以在开门时停在随意位置 3、调节各底脚,保证洗碗机水平 4、安装与厨具统一的踢脚板
安装过程中所需的工具
嵌入式洗碗机的安装要求-全嵌式洗碗机
安装附件如图示
A1:ST4×25螺钉 A:ST4×16螺钉
安装过程中所需的工具
嵌入式洗碗机的安装要求-半嵌式洗碗机
安装附件如图示
A1:ST4×25螺钉 A:ST4×16螺钉
B:固定板
C:底脚滑槽
D:孔塞(支撑块) E:定位块
F:上下装饰条
G:防水塑料纸
嵌入式洗碗机的安装要求-半嵌式洗碗机
1、装饰板安装前的准备工作
按照洗碗机配套说明书和安装手册的内容,准备一块符合整体厨具外观统一要求的装 饰板。洗碗机控制面板高度为115mm,如果厨房装修要求修改面板高度,可以通过在控制 面板的下部添加装饰条C(随机附带)的方式来增加高度,每个装饰条增加7.5mm高度
1、安装环境和位置要求:
环境:使用环境温度:5~40℃;使用自来水,其他水容 易出现生锈\堵塞\不卫生现象;水压为0.03~0.6Mpa 范围以内,水压过低导致进水过慢而报警,过高时易导 致连接部位漏水
位置:洗碗机应当安装在远离热源,无积水的环境中, 最好附近有单独的进水口、电源插座和下水道口,这 些接口位置应当在洗碗机旁边的厨具下部与墙面的空 隙中,而不要留在洗碗机的正后方,防止与机器冲突, 出现问题。进出水口与机器的水平距离不要超过1M: 由于进水管和排水管的长度均为2M,在独立式安装时, 排水管必须抬高40~100cm,安装后出水管成弧形,因 此有效安装距离在1M左右。
- 1、下载文档前请自行甄别文档内容的完整性,平台不提供额外的编辑、内容补充、找答案等附加服务。
- 2、"仅部分预览"的文档,不可在线预览部分如存在完整性等问题,可反馈申请退款(可完整预览的文档不适用该条件!)。
- 3、如文档侵犯您的权益,请联系客服反馈,我们会尽快为您处理(人工客服工作时间:9:00-18:30)。
智能视频服务器
AT2201DH(入侵检测)
用户安装
说明
哈尔滨华信慧业科技有限公司
目录
一.安装前的准备工作……………………………………………………………….错误!未定义书签。
1.安装前的准备………………………..……………………………………………………….错误!未定义书
签。
2.服务器的默认值 (3)
3.登录视频服务器设备进行配置 (3)
4.配置IP (4)
5.保存配置 (4)
二. 网络版软件配置 (5)
1.准备 (5)
2.组的分配 (6)
3.网络客户端安装登陆 (6)
4.添加视频服务器IP到中心服务器 (6)
5.网络模式选择 (8)
三.单机版软件配置 (9)
1.客户端安装登陆 (9)
2.添加视频服务器IP (9)
四.视频服务器入侵报警的设置.............................................................. .11
1.入侵检测的设置 (11)
2.井场联动报警的设置 (11)
五.权限的设置 (13)
1.超级用户admin密码的修改 (13)
2. 新增用户的设置 (14)
六.设备安装应注意的问题....................................................................…….. 错误!未定义书签。
一.安装前准备工作:
1.准备:
首先准备一台电脑和一根网络交叉线,厂里要提供规划好的视频服务器的IP地址。
2.默认值:
视频服务器出厂默认IP地址是192.168.1.100,将准备好的网络交叉线,把智能视频服务器和配置用的电脑直接连接。
同时把电脑的IP地址设置为192.168.1.XXX,注意XXX不能为100,否则会和视频服务器重复冲突。
3.登录视频服务器设备进行配置:
打开IE(建议采用FireFox),在地址栏输入视频服务器的IP地址,默认为192.168.1.100,登录设备,用户名和密码都为admin,如下图:
4.配置IP:
进入视频服务器配置页面,点击左侧“管理菜单”->“系统操作”->“IP地址”,输入新的IP地址、网关、中心服务器IP地址、数据服务器IP地址如图:
以上地址都要在工程安装初期计划好,否则会造成IP地址的重复而影响整个网络。
5.保存配置:
修改电脑的IP地址,保证电脑的IP地址和刚才设置的视频服务器IP地址在同一个网段,然后重新在IE地址栏输入新的视频服务器IP地址,登录设备,用户名和密码都为admin,然后点击“管理菜单”->“系统维护”->“保存配置”,在页面的右边点击“保存”,完成以上步骤后,就可以把视频服务器断电,安装到井场上,同时记录下此台视频服务器的IP地址,如图:
二. 网络版软件配置:
1.准备:
首先要建立一个中心服务器,安装中心服务器软件(vssversetup2-0-10),对所有视频服务器进行管理,要保证中心服务器和数据(转发)服务器工作正常,并记录中心服务器的IP地址。
然后,打开IE在地址栏输入视频服务器的IP地址,进入视频服务器的IP配置,将中心服务器的IP地址填入服务器的IP地址和转发服务器的IP地址栏,如图:
2.组分配:
在工程安装初期,需要计划好工作组编号,建议一个增压站(转运站)采用一个组编号,组编号从1开始,并在以后的客户端登录过程中,要正确输入用户组编号,否则就会出现工作混乱。
3.网络客户端安装登陆:
安装并运行客户端软件(VSLocalClient.exe3-1-0-28),根据说明书的要求,登录中心服务器,并配置正确的数据(转发)服务器IP地址以及配置正确的组编号,点击“yes”后登陆,如图:
4.添加视频服务器IP到中心服务器:
添加设备一定要采用超级用户登录,超级用户为“admin”, 默认密码为“admin”,进入客户端主页面后,点击右下角“设置”->“设备登记”->“获取设备序列号”,如下图:
如果输入视频服务器IP地址后,在空白处增加视频服务器信息,说明视频服务器能够正常工作,这时就要把视频服务器的序列号复制下来,点击“添加”粘贴刚才复制的视频服务器序列号,点击“确定”
然后就可以回到主界面等待视频服务器注册上来了,如图:
5.网络模式选择:
为了保证网络工作有效,每个客户端都要设置正确的网络模式,如果数据(转发)服务器工作正常,就需要配置成“数据转发服务器”模式,具体方法如下:点击“设置”->“设备列表”->“默认网络模式”->勾选“UDP(通过数据转发服务器)”->“Yes”->“退出”回到
主界面,配置完毕,可以正常使用了,如图:
三.单机版软件配置:
1.客户端安装登陆:
安装并运行客户端软件(VSLocalClient.exe3-1-0-28),点击设置,选择本地登录,用户名和密码都是admin,如图:
2.添加视频服务器IP:
进入客户端页面,点击右下角“设置”->“设备列表”->点击设备添加->输入视频服务器的IP地址,点击“确定”如图:
服务器了,这样单机版的设备就添加完毕,如下图:
四.视频服务器入侵报警的设置:
1.入侵检测的设置:
首先进入客户端页面,点击你要布防井场的窗口,在选择右方的“报警操作”->“功能操作”->“入侵检测”画勾,点击应用就可以了,窗口上会显示“学习中”的字样,也可以直接点击窗口,右键“重新学习”如下图:
2.井场联动报警的设置:
先进入客户端的主界面,然后点击设备列表里的井场,右键选择“本地设置”->“入侵检测处理”->“联动类型”->联动类型里面选择“发送语音文件”->“发送语音文件选择”->“警告语音1”点击保存就设置好了,如下图:
井场联动报警设置好后返回主界面,将井场的入侵检测都布防好以后,点击界面下方的报警复位,这样入侵报警就布防好了。
当有人或车辆进入井场时,井场就会自动发送一段语音文件来警
告进入井场的人,同时监控人员也会听见报警声,如图:
五.权限的设置:
1.超级用户admin密码的修改:
首先进入视频监控的主页面,点击右下角“设置” -> “用户”->“设置密码”进行密码修改就可以了,注意网络版的一定要进入“0组”修改,如图:
2.新增用户的设置:
先要设置用户的级别,选择“用户级别”—>“用户级别编号”—>“用户级别名称”如“站长”,在把他的权限范围画上勾,然后选择“更多权限”进入,在把要赋予的权限选上即可,这样“站长”这个级别的用户就设置好了,如图:
接下来还要设置站长这个级别的用户,比如加一个李伟站长,选择“用户”—>“添加”—>“用户名”—>“密码”—>
“用户级别”点击完成,就可以了,如图:
六.设备安装应注意的问题:
1. 井场的水泥杆子应尽量与油井成45度角立起,摄像机避免逆光。
2. 网络要稳定,各网线插头要插紧插牢。
3. 各井场视频服务器IP地址要在本网段内,切忌IP地址冲突。
4. 视频服务器上的485线接口“A”为“+”“B”为“-”。
5. 用户用网络模式登陆时一定要选择“UDP(通过数据转发服务器)”即是网络版软件配置里的6项。
6. 当用户进行过云台操作后,一定要对视频服务器进行重新学习,重新学习要避免晚上进行。
7.在AT2201DH与其它设备连接前,请确认已经断开电源,务必不要
带电插拔。