使用QUARTUS II做FPGA开发全流程,傻瓜式详细教程
第2章_Quartus_II开发环境的使用
第2章_Quartus_II开发环境的使用Quartus II是一款由英特尔公司开发的集成电路设计软件,广泛应用于数字电路设计和可编程逻辑设备(PLD)的开发环境。
本章将介绍Quartus II开发环境的使用方法,并详细讲解其主要功能和操作流程。
首先,打开Quartus II软件,点击“文件”菜单,然后选择“新建项目”选项。
在出现的对话框中,输入项目名称和存储位置,并选择FPGA芯片型号。
点击“下一步”按钮,然后选择项目类型(一般为“普通VHDL项目”或“普通Verilog项目”),点击“下一步”按钮即可完成项目创建。
接下来,我们需要向项目中添加源文件。
点击“项目”菜单,然后选择“添加文件”选项。
在出现的对话框中,选择需要添加的源文件,点击“确定”按钮。
如果项目中有多个源文件,可以重复操作多次。
在项目中添加源文件后,我们需要进行编译。
点击“编译”菜单,然后选择“编译项目”选项。
Quartus II将对项目中的源文件进行语法检查和综合,并生成目标设备可执行文件。
接下来,我们需要进行功能仿真。
点击“工具”菜单,然后选择“RTL仿真器”选项。
在出现的对话框中,选择仿真源文件和仿真时长,点击“确定”按钮。
Quartus II将对源文件进行仿真,并生成波形图。
波形图生成后,我们可以对设计进行优化。
点击“工具”菜单,然后选择“组合逻辑优化器”选项。
在出现的对话框中,选择设计文件和优化选项,点击“确定”按钮。
Quartus II将对设计进行优化,并生成优化后的电路文件。
优化后的设计可以进行布局布线。
点击“工具”菜单,然后选择“物理编译器”选项。
在出现的对话框中,选择物理约束和布局布线选项,点击“确定”按钮。
Quartus II将根据物理约束对设计进行布局布线,并生成布局布线后的电路文件和报告。
布局布线完成后,我们可以进行时序分析。
点击“工具”菜单,然后选择“时序分析器”选项。
在出现的对话框中,选择设计文件和时钟约束,点击“确定”按钮。
明德扬点拨FPGA高手进阶第二章QuartusII技巧2.1FPGA开发流程

明德扬点拨FPGA高手进阶第二章QuartusII技巧2.1FPGA开发流程第二章Quartus II技巧2.1 FPGA开发流程FPGA的设计流程就是利用EDA开发软件和编程工具对FPGA芯片进行开发的过程。
典型FPGA的开发流程一般如图4.1.1所示,包括功能定义/器件选型、设计输入、功能仿真、综合优化、综合后仿真、实现、布线后仿真、板级仿真以及芯片编程与调试等主要步骤。
1.功能定义/器件选型在FPGA设计项目开始之前,必须有系统功能的定义和模块的划分,另外就是要根据任务要求,如系统的功能和复杂度,对工作速度和器件本身的资源、成本、以及连线的可布性等方面进行权衡,选择合适的设计方案和合适的器件类型。
一般采用自顶向下的设计方法,把系统分成若干个基本模块,各模块功能相互独立并能协调工作。
好的系统结构,可以使系统高效稳定、减少资源、节省研发时间,是FPGA的最重要技巧。
但这要求设计师具有丰富的FPGA研发经验,能够从众多方案评估优劣,然后挑选适合的方案。
明德扬给出的FPGA学习步骤,先经过大量的基础案例训练,再逐步学习模块划分技术。
器件选型同样需要设计师具有丰富的FPGA研发经验,在项目启动时,就能够评估到整个项目所需要的资源、速度、功耗等。
但业界更通常的做法,先在开发板的基础上,完成所有功能的设计,得到该项目所需要的资源、速度、功耗等信息,从而再做器件造型,最后完成硬件的设计。
2.设计输入设计输入是将所设计的系统或电路以开发软件要求的某种形式表示出来,并输入给EDA工具的过程。
常用的方法有硬件描述语言(HDL)和原理图输入方法等。
原理图输入方式是一种最直接的描述方式,在可编程芯片发展的早期应用比较广泛,它将所需的器件从元件库中调出来,画出原理图。
这种方法虽然直观并易于仿真,但效率很低,且不易维护,不利于模块构造和重用。
更主要的缺点是可移植性差,当芯片升级后,所有的原理图都需要作一定的改动。
明德扬不推荐这个方法,玩一玩可以,但做项目就太不方便了。
使用QuartusII创建FPGA基础工程
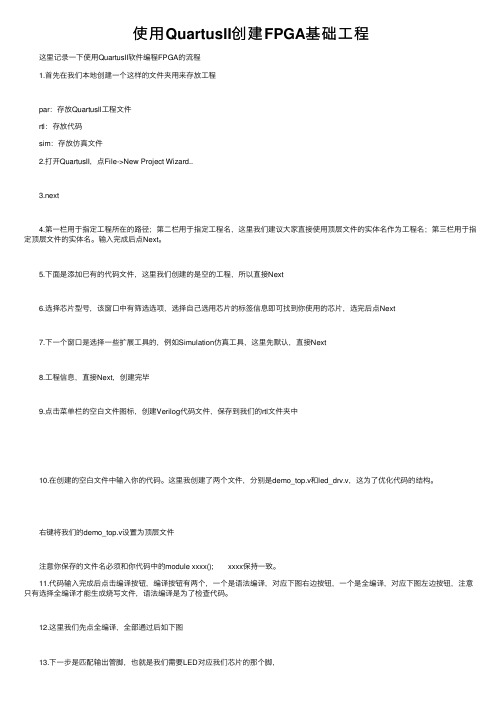
使⽤QuartusII创建FPGA基础⼯程 这⾥记录⼀下使⽤QuartusII软件编程FPGA的流程 1.⾸先在我们本地创建⼀个这样的⽂件夹⽤来存放⼯程 par:存放Quartusll⼯程⽂件 rtl:存放代码 sim:存放仿真⽂件 2.打开QuartusII,点File->New Project Wizard.. 3.next 4.第⼀栏⽤于指定⼯程所在的路径;第⼆栏⽤于指定⼯程名,这⾥我们建议⼤家直接使⽤顶层⽂件的实体名作为⼯程名;第三栏⽤于指定顶层⽂件的实体名。
输⼊完成后点Next。
5.下⾯是添加已有的代码⽂件,这⾥我们创建的是空的⼯程,所以直接Next 6.选择芯⽚型号,该窗⼝中有筛选选项,选择⾃⼰选⽤芯⽚的标签信息即可找到你使⽤的芯⽚,选完后点Next 7.下⼀个窗⼝是选择⼀些扩展⼯具的,例如Simulation仿真⼯具,这⾥先默认,直接Next 8.⼯程信息,直接Next,创建完毕 9.点击菜单栏的空⽩⽂件图标,创建Verilog代码⽂件,保存到我们的rtl⽂件夹中 10.在创建的空⽩⽂件中输⼊你的代码。
这⾥我创建了两个⽂件,分别是demo_top.v和led_drv.v,这为了优化代码的结构。
右键将我们的demo_top.v设置为顶层⽂件 注意你保存的⽂件名必须和你代码中的module xxxx(); xxxx保持⼀致。
11.代码输⼊完成后点击编译按钮,编译按钮有两个,⼀个是语法编译,对应下图右边按钮,⼀个是全编译,对应下图左边按钮,注意只有选择全编译才能⽣成烧写⽂件,语法编译是为了检查代码。
12.这⾥我们先点全编译,全部通过后如下图 13.下⼀步是匹配输出管脚,也就是我们需要LED对应我们芯⽚的那个脚,· 在Location中选择对应的引脚,sys_clk是我们晶振的输⼊ 14.选完后再全编译⼀次,编译通过后选择菜单栏的烧写,如下图 点击Add File..,选择你的.sof⽂件,⼀般是在par/output_files⽬录下 15.选择你的下载器 16.勾选Program/Configure,然后点击Start开始下载 17.这种⽅式下载的程序只会保存在芯⽚内部,掉电就会丢失,我们还需要⽣成另外⼀个.jic⽂件下载到与FPGA配套的FLASH芯⽚中,这样重新上电程序才会⾃动运⾏ 18.⽣成.jic⽂件,⾸先点击File->Convert Programming Files.. 19.⾸先修改“programming file type”为【JTAG Indirect ConfigurationFile (.jic)】;然后修改“Configuration device”为【EPCS64】(更具你的FLASH芯⽚型号);然后选中窗⼝中的“Flash Loader”点击右边的【Add Device..】 选择你的芯⽚型号 选择你的.sof⽂件,⽤于转换.jic⽂件 点击Generate ⽣成.jic⽂件 这样便是成功了 20.下载.jic⽂件到Flash芯⽚中,重新进⼊下载功能 添加.jic⽂件 勾选Program/Configure,然后点击Start开始下载,下载成功后重新通电即可。
QuartusII软件使用及设计流程

时序优化
时序分析
在Quartus II中进行时序分析,确保设计满足时序要求,找出关键 路径并优化。
延迟调整
通过调整逻辑单元的时序参数,减小关键路径的延迟,提高时钟频 率。
布局优化
合理安排逻辑单元的位置,减小信号传输延迟,提高时序性能。
面积优化
优化算法
采用高效的算法和优化策略,减小设计规模, 降低面积成本。
低功耗硬件选择
选择低功耗硬件器件和IP核,从硬件层面降低功 耗。
06
Quartus II实际应用案 例
数字钟设计案例
总结词
数字钟设实现数字钟的原理图 设计和编程。
详细描述
首先,在Quartus II软件中创建一个新的工程,选择合适的FPGA芯片型号。然后,使 用原理图输入方式设计数字钟电路,包括分频器、计数器、译码器等模块。接着,进行 仿真测试以确保设计正确。最后,将设计文件下载到FPGA芯片中,完成数字钟的硬件
保存配置
完成配置后,保存配置文件以便以后使用。
许可证激活与验证
获取许可证文件
从Altera官网或授权合作伙伴处获取Quartus II软件 的许可证文件。
激活许可证
运行许可证激活程序,输入许可证文件中的激活码进 行激活。
验证许可证
启动Quartus II软件,验证许可证是否有效,确保软 件正常使用。
完成串口通信的硬件实现。
THANKS FOR WATCHING
感谢您的观看
Quartus II软件中提供了大量的IP核,用户可以直接调用这些IP核进行设计, 避免了重复造轮子,提高了设计效率。
IP核定制
对于一些特殊需求,用户可以通过定制IP核的方式实现。Quartus II软件提供了 IP核定制工具,用户可以根据需求对IP核进行修改和定制,以满足特定设计要求。
使用QUARTUS II做开发全流程,傻瓜式详细教程
QUARTUS II开发流程1:打开QuartusII 软件
2:如果下图所视,新建一个工程。
3:出现下图对话框,点Next
4:选择你的工程存放路径和工程名字,注意:工程名字一定要和“实体名字一样”。
填好后点Next
5:如果是一个全新的工程,就点Next
6:下图对话框是选择器件。
根据目标板的处理器而定
7:例如我们选择了Cyclone II 家簇
8:点Next
9:新建工程完成,点Finish
10:新建一个文档
11:根据你的输入方式选择,例如我们这里选择Vhdl
12:输入你要编写的程序
13:确认没有问题了,就保存一下
14:保存名要和实体名一样
15:然后在编译
16:配置管脚
17:根据目标板的管脚分配I/O,分配好I/O 后,在编译一次
18:下载程序
19:下载模式的选择
20:如图中Program/Configure 打勾,在点Start
东理电子 Easy-FPGA开发板
东理电子。
Quartus II 7.2 的使用过程
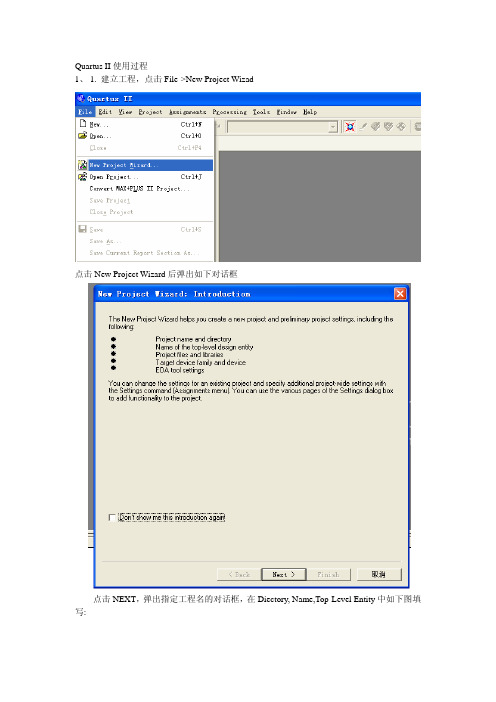
Quartus II使用过程1、1. 建立工程,点击File->New Project Wizad点击New Project Wizard后弹出如下对话框点击NEXT,弹出指定工程名的对话框,在Diectory, Name,Top-Level Entity中如下图填写:点击Next按钮,出现添加工程文件的对话框:在这里我们先不用管它,直接按Next进行下一步,选择FPGA器件的型号:在Family下拉筐中,我们选择MAX II系列FPGA,然后在“Available devices:”中根据核心板的FPGA型号选择FPGA型号,注意在Filters一栏选上“Show Advanced Devices”以显示所有的器件型号。
执行下一步出现对话框:在相应位置处都选择NONE,点击NEXT进入工程的信息总概对话框:按Finish按钮即完成一个项目的建立。
2.建立顶层图执行File->New,弹出新建文件对话框:选择"Block Diagra m|Schematic File”按OK即建立一个空的顶层图3.添加逻辑元件(Symbol)双击顶层图图纸的空白处,弹出添加元件的对话筐:在Libraries里寻找所需要的逻辑元件,如果知道逻辑元件的名称的话,也可以直接在Name一栏敲入名字,右边的预览图即可显示元件的外观,按OK后鼠标旁边即拖着一个元件符号,在图纸上点击左键,元件即安放在图纸上。
在图纸上分别添加非门(not)、输入(input)、输出(output)二个symbol,如图所示:连线,将鼠标移到symbol连线端口的那里,鼠标变成连线,按下左键拖动鼠标到另一个symbol的连线端。
本例中,这三个symbol的连线如下图所示:分别双击input和output symbol的名字“pin_ name", "pin_ namel",将它们的名字改为a,b.在工具栏上点击Start Analysis&Synthesis,出现如下对话框。
quartus_ii__fpga烧写教程i.ii
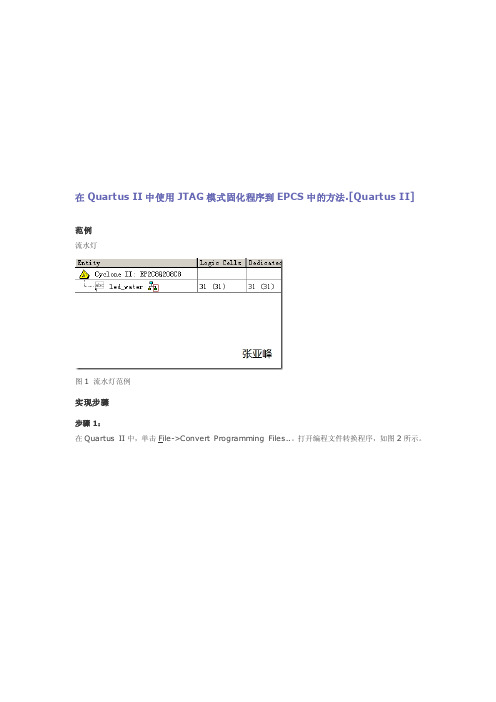
在Quartus II中使用JTAG模式固化程序到EPCS中的方法.[Quartus II]范例流水灯图1 流水灯范例实现步骤步骤1:在Quartus II中,单击File->Convert Programming Files..。
打开编程文件转换程序,如图2所示。
图2 编程文件转换程序界面在此界面中。
在Programming file type:标签后选择JTAG Indirect Configuration File (.jjc);在C onfiguration device:标签后选择你所使用的EPCS型号,此外我选择EPCS4。
在Input file to conv ert方框中,单击Flash Leader,再单击Add Device..,如图3一样选择EP2C8(请根据自己的FPG A型号自行选择);单击SOF Data,再单击Add File..,选择Quartus II编译后的sof文件。
配置完成界面如图4所示。
图3 Add Device图4 配置完成界面单击Generate,开始生成jjc文件。
成功界面如图5。
图5 成功界面关闭Convert Programming Files界面,进入下一步骤。
步骤2:在Quartus II中,单击Tools->Programmer,进入下载界面,如图6所示。
图6 下载界面在此界面,单击Hardware Setup,选择下载线缆。
双击选择Usb-Blas te r,如图7所示。
图7 选择Usb-Blaster回到下载界面,单击led_water.sof,再单击Change File..,选择刚才转换的output_file.jjc。
添加完成后,安装图8所示勾选选项,选择jjc文件。
图8 选择jjc文件单击Start,开始下载。
下载完成后,请点击复位键或者重启开发板,就会看见固化的程序了。
友情提示:EPCS擦写次数有限(请自行查询),请尽量采用JTAG模式下载sof文件测试程序。
QuartusII教程(完整版)
QuartusII教程(完整版)Quartus II 的使用 (1)1 工程建立 (1)2 原理图的输入 (4)3 文本编辑(verilog) (14)4 波形仿真 (17)Quartus II 的使用在这里,首先用最简单的实例向读者展示使用Quartus II软件的全过程。
进入WINDOWS XP后,双击Quartus II图标,屏幕如图1.1所示。
图 1.1 Quartus II 管理器1.1 工程建立使用New Project Wizard,可以为工程指定工作目录、分配工程名称以及指定最高层设计实体的名称。
还可以指定要在工程中使用的设计文件、其它源文件、用户库和EDA 工具,以及目标器件系列和器件(也可以让Quartus II 软件自动选择器件)。
建立工程的步骤如下:(1)选择File菜单下New Project Wizard ,如图1.2所示。
图 1.2 建立项目的屏幕(2)输入工作目录和项目名称,如图1.3所示。
可以直接选择Finish,以下的设置过程可以在设计过程中完成。
图 1.3 项目目录和名称(3)加入已有的设计文件到项目,可以直接选择Next,设计文件可以在设计过程中加入,如图1.4所示。
图 1.4 加入设计文件(4)选择设计器件,如图1.5所示。
图 1.5 选择器件(5)选择第三方EDA综合、仿真和时序分析工具,如图1.6所示。
图 1.6 选择EDA 工具(6)建立项目完成,显示项目概要,如图1.7所示。
图 1.7 项目概要1.2 原理图的输入原理图输入的操作步骤如下:(1)选择File 菜单下New ,新建图表/原理图文件,如图1.8 所示。
图 1.8 新建原理图文件(2)在图1.9的空白处双击,屏幕如图1.10所示:(3)在图1.10的Symbol Name 输入编辑框中键入dff后,单击ok按钮。
此时可看到光标上粘着被选的符号,将其移到合适的位置(参考图1.11)单击鼠标左键,使其固定;(4)重复(2)、(3)步骤,给图中放一个input、not、output 符号,如图1.11所示;在图1.11中,将光标移到右侧input 右侧待连线处单击鼠标左键后,再移动到D触发器的左侧单击鼠标左键,即可看到在input和D触发器之间有一条线生成;图1.9 空白的图形编辑器图1.10 选择元件符号的屏幕图1.11 放置所有元件符号的屏幕(5)重复(4)的方法将DFF和output连起来,完成所有的连线电路如图1.12所示;(6)在图1.12中,双击input_name使其衬低变黑后,再键入clk,及命名该输入信号为clk,用相同的方法将输出信号定义成Q;如图1.13所示。
简述quartus ii软件开发流程

简述quartus ii软件开发流程下载温馨提示:该文档是我店铺精心编制而成,希望大家下载以后,能够帮助大家解决实际的问题。
文档下载后可定制随意修改,请根据实际需要进行相应的调整和使用,谢谢!并且,本店铺为大家提供各种各样类型的实用资料,如教育随笔、日记赏析、句子摘抄、古诗大全、经典美文、话题作文、工作总结、词语解析、文案摘录、其他资料等等,如想了解不同资料格式和写法,敬请关注!Download tips: This document is carefully compiled by theeditor.I hope that after you download them,they can help yousolve practical problems. The document can be customized andmodified after downloading,please adjust and use it according toactual needs, thank you!In addition, our shop provides you with various types ofpractical materials,such as educational essays, diaryappreciation,sentence excerpts,ancient poems,classic articles,topic composition,work summary,word parsing,copy excerpts,other materials and so on,want to know different data formats andwriting methods,please pay attention!简述Quartus II软件开发流程Quartus II是Altera公司(现已被Intel收购)推出的一款强大的FPGA(Field-Programmable Gate Array)和CPLD(Complex Programmable Logic Device)设计工具,它提供了从设计输入到硬件部署的一整套集成开发环境。
FPGA设计及QUARTUS_II教程
FPGA设计及QUARTUS_II教程在进行FPGA设计之前,需要先了解FPGA的基本结构和原理,掌握硬件描述语言(HDL)的基本知识。
常用的HDL语言包括VHDL和Verilog,它们用于描述数字系统的结构和行为。
在FPGA设计过程中,通常包括以下几个步骤:1.设计规划:确定需求和功能,对设计进行整体规划和分析。
2.模块设计:根据设计需求,将设计分解为多个模块并进行详细设计。
3.模块仿真:使用仿真工具对各个模块进行功能验证,确保设计的正确性。
4.综合和优化:使用综合工具将HDL代码转换为逻辑门电路,并对其进行优化。
5.布局布线:将综合后的逻辑门电路映射到FPGA芯片上,并进行布局布线操作。
6.静态时序分析:对布局布线后的设计进行静态时序分析,确保设计满足时序要求。
QUARTUS II是一款常用的FPGA设计软件,由Intel公司开发。
它提供了丰富的开发工具和资源,可用于设计、仿真、综合和验证FPGA设计。
QUARTUS II支持VHDL和Verilog等HDL语言,具有强大的综合和优化功能,并提供了直观的图形界面和丰富的调试工具。
QUARTUSII教程通常包含以下内容:1.软件安装和配置:介绍QUARTUSII软件的安装和配置过程,包括选择适合的版本、设置路径和环境变量等。
2.工程创建和管理:介绍如何创建和管理QUARTUSII工程,包括添加文件、设置工作目录和文件关系等。
4.设计流程:详细介绍FPGA设计的各个步骤和操作,包括模块设计、仿真、综合、布局布线和验证等。
5.高级特性:介绍QUARTUSII软件的高级功能和特性,包括时序分析、时钟域管理和约束等。
6.项目实例:提供一些实际的FPGA设计项目实例,让读者通过实践来掌握QUARTUSII的使用技巧和方法。
总之,FPGA设计及QUARTUSII教程是帮助读者快速入门和掌握FPGA设计和QUARTUSII软件的重要资源,通过学习和实践可以提升设计能力和项目开发效率。
QuartusII软件使用及设计流程

(3)编辑输入信号并保存文件。在图1-22中单击 “Name”下方的“A”,即选中该行的波形。在本 例中将输入信号“A”设置为时钟信号,单击工具 栏中的 按钮,弹出“Clock”对话框,此时可以 修改信号的周期、相位和占空比。设置完后单击 “OK”按钮,输入信号“A”设置完毕。同理设置 其他输入信号“B”,最后单击保存文件按钮 , 根据提示完成保存工作,如图1-23所示。同时, 为了方便读者熟悉其他波形编辑工具的使用,在 图1-24中标注了其他波形编辑工具的功能。
Quartus II软件及其使用
Quartus II使用及设计流程
QuartusⅡ是Altera公司推出的新一代开发软件,适合于 大规模逻辑电路设计。 QuartusⅡ支持多种编辑输入法,包括图形编辑输入法, VHDL、Verilog HDL和AHDL的文本编辑输入法,符号 编辑输入法,以及内存编辑输入法。 QuartusⅡ与MATLAB和DSP Builder结合可以进行基于 FPGA的DSP系统开发,是DSP硬件系统实现的关键EDA 工具,与SOPC Builder结合,可实现SOPC系统开发。
(4)第三方工 具选择。 如图1-7所示, 用户可以选择所 用到的第三方工 具,比如 ModleSim、 Synplify等。在 本例中并没有调 用第三方工具所示。建立的工程的名称、选择的器件和 选择的第三方工具等信息,如果无误的话就可 以单击“Finish”按钮,弹出如图1-9所示的窗口, 在资源管理窗口可以看到新建的工程名称 half_add。
(2)选择元件。在原理图编辑窗中的任何一个位置上双
击鼠标的左键将跳出一个元件选择窗。
参数可设置的强函数元件库
MAX+plus库
基本逻辑元件库
基本逻辑元件库中的元件
实验一_QuartusII的使用

实验一_QuartusII的使用引言:Quartus II是一款由美国Intel公司开发的FPGA设计软件,广泛应用于数字集成电路设计和原型验证。
本实验将介绍Quartus II的基本使用方法,包括项目创建、设计输入、约束设置、编译与仿真等。
一、环境准备二、项目创建1.启动Quartus II软件,选择"File" -> "New Project Wizard"创建新项目。
在弹出的对话框中,选择项目的存储位置和名称,并选择合适的目标设备和设计流程。
点击"Next"进入下一步。
2.在第二步中,选择项目的项目类型和是否要添加预定义的IP (Intellectual Property)核。
IP核是现成的、可重用的模块,可以简化设计。
根据自己的需求进行选择,点击"Next"。
3.在第三步中,选择顶层设计文件的命名,并点击"Next"。
5.在第五步中,对项目的设置进行回顾,并点击"Finish"完成项目创建。
三、设计输入1.双击项目中的顶层设计文件,打开Design Entry工具。
在Design Entry工具中,可以通过图形界面或者Verilog/VHDL语言进行设计输入。
a.如果选择使用图形界面,可以在左侧工具栏中选择需要的元件,然后在设计区域中拖拽放置,最终形成需要的电路结构。
b.如果选择使用Verilog/VHDL语言,可以在设计区域中输入相应的代码,然后进行语法检查。
2.在设计完成后,可以使用编译按钮对设计进行编译。
编译过程中,Quartus II会对设计进行分析、优化和进行布线等操作,生成逻辑网表。
四、约束设置1.双击项目中的顶层设计文件,打开Design Constraints工具。
在Design Constraints工具中,可以设置时钟频率、信号约束、引脚约束等。
Quartus_II使用教程-完整实例(可打印修改)
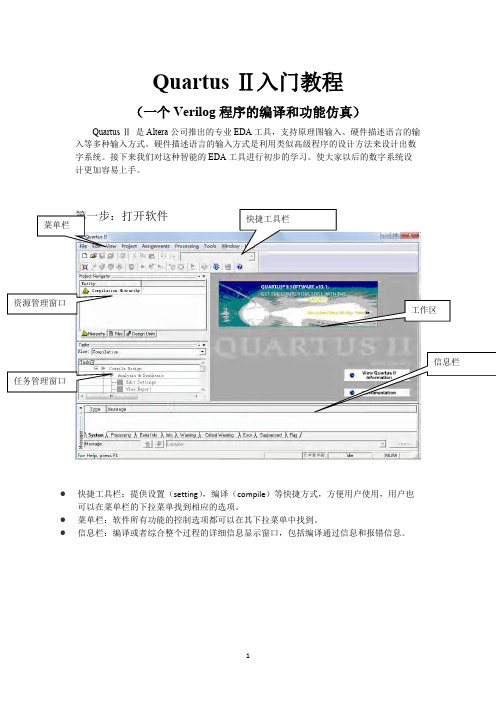
Quartus Ⅱ入门教程(一个Verilog 程序的编译和功能仿真)Quartus Ⅱ 是Altera 公司推出的专业EDA 工具,支持原理图输入、硬件描述语言的输入等多种输入方式。
硬件描述语言的输入方式是利用类似高级程序的设计方法来设计出数字系统。
接下来我们对这种智能的EDA 工具进行初步的学习。
使大家以后的数字系统设计更加容易上手。
●快捷工具栏:提供设置(setting ),编译(compile )等快捷方式,方便用户使用,用户也可以在菜单栏的下拉菜单找到相应的选项。
●菜单栏:软件所有功能的控制选项都可以在其下拉菜单中找到。
●信息栏:编译或者综合整个过程的详细信息显示窗口,包括编译通过信息和报错信息。
第二步:新建工程(file>new Project Wizard )1工程名称:2添加已有文件(没有已有文件的直接跳过next )3 选择芯片型号(我们选择MAX3000A 系列下的EPM3256AQC208-10芯片)(注:如果不下载到开发板上进行测试,这一步可以不用设置)4 选择仿真,综合工具(第一次实验全部利用quartus 做,三项都选None ,然后next)5 工程建立完成(点finish)第三步:添加文件(file>new> VHDL file ),新建完成之后要先保存。
第四步:编写程序以实现一个与门和或门为例,Verilog 描述源文件如下:module test(a,b,out1,out2);input a,b;Output out1,out2;assign out1=a&b;assign out2=a | b;endmodule 然后保存源文件;第五步:检查语法(点击工具栏的这个按钮(start Analysis & synthesis ))点击确定完成语法检查第六步:(锁定引脚,点击工具栏的(pin planner ))(注:如果不下载到开发板上进行测试,引脚可以不用分配)双击location为您的输入输出配置引脚。
QuartusII使用入门及FPGA设计流程
第3章Quartus II使用入门及FPGA设计流程Quartus II可编程逻辑开发软件是Altera公司为其FPGA/CPLD芯片设计推出的专用开发工具,是Altera公司最新一代功能更强的EDA开发软件,可完成从设计输入,综合适配,仿真到下载的整个设计过程。
Quartus II提供了一个完整的多平台开发环境,它包含FPGA和CPLD整个设计阶段的解决方案。
Quartus II集成环境包括以下内容:系统级设计,嵌入式软件开发,可编程逻辑器件设计、综合、布局和布线,验证和仿真。
Quartus II也可以直接调用Synplify Pro、ModelSim等第三方EDA 工具来完成设计任务的综合与仿真。
Quartus II与MATLAB和DSP Builder结合可以进行基于FPGA的DSP系统开发,方便快捷。
Quartus II还内嵌SOPC Builder,可实现SOPC系统的开发。
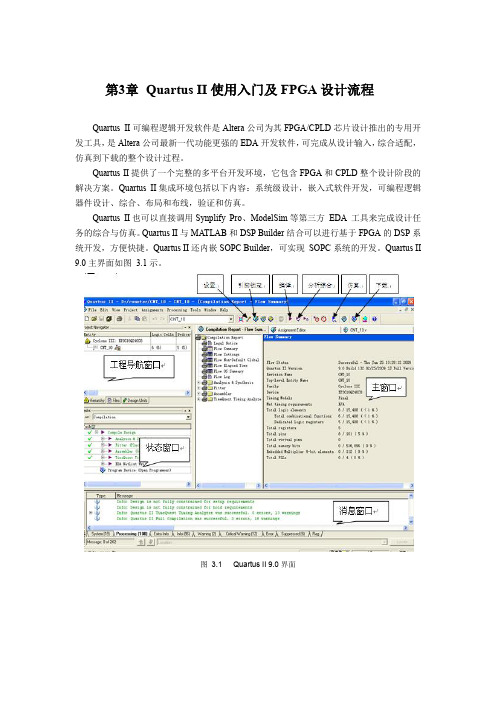
Quartus II 9.0主界面如图3.1示。
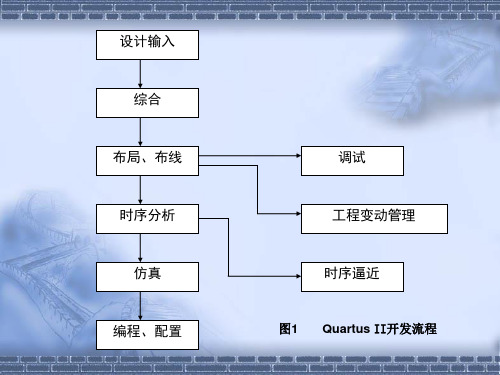
图 3.1 Quartus II 9.0界面3.1 Quartus II 基本设计流程Quartus II 设计的主要流程包括创建工程、设计输入、分析综合、编译、仿真验证、编程下载等,其一般流程如图 3.2所示。
下面以硬件描述语言输入法设计计数器为例,说明Quartus II 的设计流程。
3.1.1 创建工程使用Quartus II 设计电路被称作工程。
Quartus II 每次只进行一个工程,并将该工程的全部信息保存在同一个文件夹中。
开始一项新的电路设计,首先要创建一个文件夹,用以保存该工程的所有文件。
之后便可通过Quartus II 的文本编辑器编辑Verilog 源文件并存盘。
3.1.2 设计输入Quartus II 中包含原理图输入和硬件描述语言输入两种方法。
(1)原理图输入原理图输入的优点是,设计者不必具有诸如编译技术、硬件描述语言等新知识就能迅速入门,完成较大规模的电路系统的设计,且具有直观,易于理解的特点,适合于初学者使用。
FPGA设计及QUARTUS_II教程
FPGA设计及QUARTUS_II教程FPGA(Field Programmable Gate Array)设计是指通过对FPGA芯片的编程来实现特定电路的功能。
FPGA芯片是一种可编程的逻辑芯片,它由一系列可配置的逻辑单元和可编程的互连网络组成,可以被编程为实现任意的数字电路。
QUARTUS II是美国Altera公司开发的一款FPGA设计软件,被广泛应用于FPGA设计领域。
QUARTUS II提供了直观的图形化界面,支持多种编程语言(如VHDL和Verilog),并具有强大的仿真和调试功能。
下面介绍FPGA设计的基本流程以及QUARTUSII的使用方法。
1.确定设计需求:首先,需要明确设计的功能以及性能要求。
对于复杂的设计,可以将其分解为多个模块,每个模块实现一个特定的功能。
2. 编写设计代码:使用VHDL或Verilog等编程语言,根据设计需求编写代码。
设计代码描述了电路的逻辑功能和数据流动。
3.进行功能仿真:在QUARTUSII中创建一个新的项目,导入设计代码,并进行仿真。
仿真可以验证设计的正确性以及性能是否达到要求。
4.进行综合和布局布线:在QUARTUSII中选择综合和布局布线选项,将设计代码综合为FPGA可以理解的底层逻辑,并进行布局布线,将逻辑单元和互连网络进行物理连接。
6.进行硬件调试:通过FPGA芯片提供的调试接口,可以对设计进行硬件调试。
QUARTUSII提供了丰富的调试工具,如信号波形查看器和时序分析器,可以帮助快速定位和修复问题。
通过学习FPGA设计及QUARTUSII的教程,可以了解FPGA的基本原理和设计流程,掌握QUARTUSII软件的使用方法,从而能够独立完成FPGA 设计项目。
同时,还需要不断实践和积累经验,才能逐渐成为一名优秀的FPGA工程师。
QuartusII软件操作
Quartus II 软件操作
第二步 根据电路图综合电路 电路图输入到CAD系统之后,许多CAD工具会对其进行处
理。流程的第一步是使用综合工具,将电路图编译成逻辑表 达式,然后,电路综合的下一步是工艺映射,通过使用可用 的逻辑元件,确定每个逻辑表达式如何在目标芯片中实现。
使用编译器。选择Processing/Compile tool 命令,打 开对应窗口,共包括四个模块。分析与综合模块执行 Quartus II 中的综合步骤,它产生逻辑元件组成的一个电路。 装配模块(Fitter)模块决定芯片上各电路元件的精确布局。 其中综合模块产生的每个元件都将在芯片上实现。每个模块 也可以单独运行。也可以使用其他命令启动编译。编译完成 时,可以查看编译报告。出现错误时,点击错误信息,可以 突出显示错误出现的位置。
Quartus II 软件操作
第三步 对设计的电路进行仿真 Quartus II包含仿真工具,它
们用于仿真已设计电路的行为功能。 在电路仿真之前,必须先创建输入 波形文件。
1) 使用波形编辑器。 选择File/New命令,在弹出的对 话框中选择Vector Waveform File 选项,单击OK按钮。将文件 命名为example_schematic.vwf并保 存。
Quartus II 软件操作
① 功能仿真 选择Assignments/settings命令,打开settings窗口。
在该窗口的左面,单击Simulator项,在弹出的窗口中,选 择fuctional选项作为仿真模式。为了完成仿真器的设置, 需要选择Processing/Generate functional simulation Netlist命令。 Quartus II根据测试输入,产生 example_schematic.vwf文件中定义的输出。选择 Processing/start simulation(或使用快捷图标),开始 运行电路的功能仿真。仿真结束之后, Quartus II指出仿 真完成,并给出仿真报告。
- 1、下载文档前请自行甄别文档内容的完整性,平台不提供额外的编辑、内容补充、找答案等附加服务。
- 2、"仅部分预览"的文档,不可在线预览部分如存在完整性等问题,可反馈申请退款(可完整预览的文档不适用该条件!)。
- 3、如文档侵犯您的权益,请联系客服反馈,我们会尽快为您处理(人工客服工作时间:9:00-18:30)。
My First FPGA Design Tutorial101 Innovation DriveSan Jose, CA 95134(408) 544-7000TU-01002-1.0Copyright © 2007 Altera Corporation. All rights reserved. Altera, The Programmable Solutions Company, the stylized Altera logo, specific device des-ignations, and all other words and logos that are identified as trademarks and/or service marks are, unless noted otherwise, the trademarks and service marks of Altera Corporation in the U.S. and other countries. All other product or service names are the property of their respective holders. Al-tera products are protected under numerous U.S. and foreign patents and pending applications, maskwork rights, and copyrights. Altera warrants performance of its semiconductor products to current specifications in accordance with Altera's standard warranty, but reserves the right to make changes to any products and services at any time without notice. Altera assumes no responsibility or liability arising out of the ap-plication or use of any information, product, or service described herein except as expressly agreed to in writing by AlteraCorporation. Altera customers are advised to obtain the latest version of device specifications before relying on any published in-formation and before placing orders for products or services.Printed on recycled paperContentsHow to Contact Altera (v)Typographic Conventions (v)Introduction............................................................................................................................................1–1 Design Flow......................................................................................................................................1–1 Before You Begin..............................................................................................................................1–2 What You Will Learn.......................................................................................................................1–2 Get Started..............................................................................................................................................1–3 Design Entry...........................................................................................................................................1–6 Add a PLL Megafunction..............................................................................................................1–14 Add a Multiplexer..........................................................................................................................1–25 Assign Cyclone III Device and Pins.............................................................................................1–32 Compile Your Project (36)Program the Device.............................................................................................................................1–39 Verify in Hardware.............................................................................................................................1–43 Next Steps.............................................................................................................................................1–43ContentsAbout this TutorialThis tutorial provides comprehensive information that will help youunderstand how to create an Altera® FPGA design and run it on yourdevelopment board.How to ContactAlteraFor the most up-to-date information about Altera products, refer to thefollowing table.TypographicConventionsThis document uses the typographic conventions shown below.Information Type Contact (1)T echnical support /mysupport/T echnical training /training/custrain@Product literature /literature/Altera literature services literature@FTP site Note to table:(1)You can also contact your local Altera sales office or sales representative.Visual Cue MeaningBold Type with InitialCapital LettersCommand names, dialog box titles, checkbox options, and dialog box options areshown in bold, initial capital letters. Example: Save As dialog box.bold type External timing parameters, directory names, project names, disk drive names,filenames, filename extensions, and software utility names are shown in boldtype. Examples: f MAX, \qdesigns directory, d: drive, chiptrip.gdf file.Italic Type with Initial CapitalLettersDocument titles are shown in italic type with initial capital letters. Example: AN75: High-Speed Board Design.Italic type Internal timing parameters and variables are shown in italic type.Examples: t PIA, n + 1.Variable names are enclosed in angle brackets (< >) and shown in italic type.Example: <file name>, <project name>.pof file.Typographic Conventions My First FPGA Design Tutorial Initial Capital Letters Keyboard keys and menu names are shown with initial capital letters. Examples:Delete key, the Options menu.“Subheading Title”References to sections within a document and titles of on-line help topics areshown in quotation marks. Example: “T ypographic Conventions.”Courier type Signal and port names are shown in lowercase Courier type. Examples: data1,tdi, input. Active-low signals are denoted by suffix n, e.g., resetn.Anything that must be typed exactly as it appears is shown in Courier type. Forexample: c:\qdesigns\tutorial\chiptrip.gdf. Also, sections of anactual file, such as a Report File, references to parts of files (e.g., the AHDLkeyword SUBDESIGN), as well as logic function names (e.g., TRI) are shown inCourier.1.,2.,3., anda.,b.,c., etc.Numbered steps are used in a list of items when the sequence of the items is important, such as the steps listed in a procedure.■●•Bullets are used in a list of items when the sequence of the items is not important. v The checkmark indicates a procedure that consists of one step only.1The hand points to information that requires special attention.c The caution indicates required information that needs special consideration and understanding and should be read prior to starting or continuing with the procedure or process.w The warning indicates information that should be read prior to starting orcontinuing the procedure or processesr The angled arrow indicates you should press the Enter key.f The feet direct you to more information on a particular topic.Visual Cue Meaning1.My First FPGA DesignIntroduction Welcome to Altera and the world of programmable logic! This tutorialwill teach you how to create a simple FPGA design and run it on yourdevelopment board. The tutorial takes less than an hour to complete. Thefollowing sections provide a quick overview of the design flow, explainwhat you need to get started, and describe what you will learn.Design FlowThe standard FPGA design flow starts with design entry usingschematics or a hardware description language (HDL), such asVerilog HDL or VHDL. In this step, you create the digital circuit that isimplemented inside the FPGA. The flow then proceeds throughcompilation, simulation, and programming and verification in the FPGAhardware (see Figure1–1).Figure1–1.Design FlowThis tutorial guides you through all of the steps except for simulation.Although it is not covered in this document, simulation is very importantto learn, and there are entire applications devoted to simulating hardwaredesigns. There are two types of simulation, RTL and timing. RTL (orfunctional) simulation allows you to verify that your code ismanipulating the inputs and outputs appropriately. Timing (or postplace-and-route) simulation verifies that the design meets timing andfunctions appropriately in the device.1See “Next Steps” on page1–43 for links to further informationabout simulation.May 2007IntroductionBefore You BeginThis tutorial assumes the following prerequisites:■You generally know what an FPGA is. This tutorial does not explainthe basic concepts of programmable logic.■You are somewhat familiar with digital circuit design and electronicdesign automation (EDA) tools.■You have installed the Altera® Quartus® II software on yourcomputer. If you do not have the Quartus II software, you candownload it from the Altera web site at /download.■You have an Altera Cyclone® III Starter Board (or equivalent) onwhich you will test your project. Using a development board helpsyou to verify whether your design is really working.■You have gone through the quick start guide and/or the gettingstarted user guide for your development kit. These documentsensure that you have:●Installed the required software.●Determined that the development board functions properly andis connected to your computer.●Installed the USB-Blaster™ driver, which allows you to programthe FPGA on the development board with your own design.What You Will LearnIn this tutorial, you will perform the following tasks:■Create a design that causes LEDs on the development board to blink at aspeed that is controlled by an input button—This design is easy to createand gives you visual feedback that the design works. Of course, youcan use your Cyclone III board to run other designs as well. For theLED design, you will write Verilog HDL code for a simple 32-bitcounter, add a phase-locked loop (PLL) megafunction as the clocksource, and add a 2-input multiplexer megafunction. When thedesign is running on the board, you can press an input switch tomultiplex the counter bits that drive 4 output LEDs.My First FPGA Design■Become familiar with Quartus II design tools—This tutorial will notmake you an expert, but at the end, you will understand basicconcepts about Quartus II projects, such as entering a design using aschematic editor and HDL, compiling your design, anddownloading it into the FPGA on your development board.■Develop a foundation to learn more about FPGAs—For example, you cancreate and download digital signal processing (DSP) functions ontoa single chip, or build a multi-processor system, or create anythingelse you can imagine all on the same chip. You don’t have to scourdata books to find the perfect logic device or create your own ASIC.All you need is your computer, your imagination, and the Cyclone IIIStarter Board.For information about Altera training classes (both on-line and inperson), go to the Altera web site at /etraining/ orcontact your local Altera sales representative.Get Started You begin this tutorial by creating a new Quartus II project. A project is aset of files that maintain information about your FPGA design. TheQuartus II Settings File (.qsf) and Quartus II Project File (.qpf) files are theprimary files in a Quartus II project. To compile a design or make pinassignments, you must first create a project.1.In the Quartus II software, select File > New Project Wizard. TheIntroduction page opens. See Figure1–2.Get StartedFigure1–2.New Project Wizard: Introduction2.Click Next.3.Enter the following information about your project:a.What is the working directory for this project? Enter adirectory in which you will store your Quartus II project filesfor this design, for example, c:\altera\my_first_fpga.1File names, project names, and directories in the Quartus IIsoftware cannot contain spaces.b.What is the name of this project? Type my_first_fpga.c.What is the name of the top-level design entity for thisproject? Type my_first_fpga_top. See Figure1–3.Altera Corporation 1–5Figure 1–3.Project Information d.Click Finish.1The wizard has several other pages after this one; however, for this tutorial you do not need to make changes to these pages. For more information on the options available in these pages, refer to the Quartus II Handbook .4.When prompted, choose Yes to create the my_first_fpga project directory.Congratulations! You just created your first Quartus II FPGA project. See Figure 1–4.Figure1–4.my_first_fpga ProjectDesign Entry In the design entry phase, you use RTL or schematic entry to create thelogic to be implemented in the device. You also make pin assignments,including pin placement information, and timing constraints that mightbe necessary for building a functioning design.In the design entry step you create a schematic or Block Design File (.bdf)that is the top-level design. You will add library of parameterizedmodules (LPM) functions and use Verilog HDL code to add a logic block.When creating your own designs, you can choose any of these methodsor a combination of them.1.Choose File > New > Block Diagram/Schematic File (seeFigure1–5) to create a new file, Block1.bdf, which you will save asthe top-level design.Altera Corporation 1–7Figure 1–5.New BDF 2.Choose File > Save As and enter the following information (see Figure 1–6).●File name: my_first_fpga_top ●Save as type:Block Diagram/Schematic File (*.bdf)Figure1–6.Saving the BDF3.Click Save. The new design file appears in the Block Editor (seeFigure1–7).Altera Corporation 1–9Figure 1–7.Blank BDF4.Add HDL code to the blank block diagram by choosing File > New> Verilog HDL File (see Figure 1–8).Figure1–8.New Verilog HDL File5.Click OK to create a new file Verilog1.v, which you will save assimple_counter.v.6.Select File > Save As and enter the following information (seeFigure1–9).●File name:simple_counter.v●Save as type: Verilog HDL File (*.v, *.vlg, *.verilog)Altera Corporation 1–11Figure 1–9.Saving the Verilog HDL FileThe resulting empty file is ready for you to enter the Verilog HDLcode.7.Type the following Verilog HDL code into the blanksimple_counter.v file (see Figure 1–10).1If you are reading this document as a PDF file, you can copythe code from the PDF and paste it into the blank file.// This is an example of a simple 32 bit up-counter called simple_counter.v // It has a single clock input and a 32-bit output port module simple_counter (input clock , output reg [31:0] counter_out); always @ (posedge clock)// on positive clock edge begin counter_out <= #1 counter_out + 1;// increment counter endendmodule// end of module counterFigure1–10.simple_counter.v8.Save the file by choosing File > Save, pressing Ctrl + s, or byclicking the floppy disk icon.9.Choose File > Create/Update > Create Symbol Files for CurrentUpdate to convert the simple_counter.v file to a Symbol File (.sym).You use this Symbol File to add the HDL code to your BDFschematic.The Quartus II software creates a Symbol File and displays a message(see Figure1–11).Figure1–11.Symbol File Created10.Click OK.11.To add the simple_counter.v symbol to the top-level design, clickthe my_first_fpga_top.bdf tab.Altera Corporation 1–1312.Choose Edit > Insert Symbol .13.Double-click the project directory, which shows the newly createdsimple_counter symbol, and select it by clicking it’s icon.1You can also double-click in a blank area of the BDF to openthe Symbol dialog boxFigure 1–12.Adding the Symbol to the BDF14.Click OK .15.Move the cursor to the BDF grid; the symbol image moves with thecursor. Click to place the simple_counter symbol onto the BDF.You can move the block after placing it by simply clicking anddragging it to where you want it and releasing the mouse button toplace it. See Figure 1–13.Figure1–13.Placing the Symbol16.Press the Esc key or click an empty place on the schematic grid tocancel placing further instances of this symbol.1Save your project regularly.Add a PLL MegafunctionMegafunctions, such as the ones available in the LPM, are pre-designedmodules that you can use in FPGA designs. These Altera-providedmegafunctions are optimized for speed, area, and device family. You canincrease efficiency by using a megafunction instead of writing thefunction yourself. Altera also provides more complex functions, calledMegaCore® functions, which you can evaluate for free but require alicense file for use in production designs.This tutorial design uses a PLL clock source to drive a simple counter. Tocreate the clock cource, you will add a pre-built LPM megafunctionnamed ALTPLL.1.Choose Edit > Insert Symbol or click Add Symbol on the toolbar().2.Click Megawizard Plug-in Manager. The MegaWizard® Plug-InManager appears (see Figure1–14).Altera Corporation 1–15Figure 1–14.MegaWizard Plug-In Manager 3.Click Next .4.In MegaWizard Plug-In Manager [page 2a], specify the following selections (see Figure 1–15):a.Choose I/O > ALTPLL . b.Under Which device family will you be using?, choose Cyclone III .c.Under Which type of output file do you want to create?, choose Verilog HDL . d.Under What name do you want for the output file?, type pll at the end of the already created directory name. e.Click Next.Figure1–15.MegaWizard Plug-In Manager [page 2a] Selections5.In the MegaWizard Plug-In Manager [page 3 of 12] window, makethe following selections (see Figure1–16):a.Confirm that General>Which device family will you beusing? is Cyclone III.b.Under Which device speed grade will you be using?, type 8.c.Under What is the frequency of the inclock0 input?, type 50.d.Ensure that the units are MHz (default).e.Click Next.Altera Corporation 1–17Figure 1–16.MegaWizard Plug-In Manager [page 3 of 12] Selections6.Turn off all options on MegaWizard page 4. As you turn them off,pins disappear from the PLL block’s graphical preview. SeeFigure 1–17.Figure1–17.MegaWizard Plug-In Manager [page 4 of 12] Selections7.Click Next.8.At the top of the wizard, click the tab 2. Output Clocks to jump topage 7.9.Under Clock division factor, use the up/down arrows or enter 10.See Figure1–18.Altera Corporation 1–19Figure 1–18.MegaWizard Plug-In Manager [page 7 of 12] Selections10.Click Finish .11.The wizard displays a summary of the files it creates (seeFigure 1–19). Click Finishagain.Figure1–19.Wizard-Created FilesThe Symbol window opens, showing the newly created PLLmegafunction. See Figure1–20.Altera Corporation 1–21Figure 1–20.pll Symbol12.Click OK and place the pll symbol onto the BDF to the left of thesimple_counter symbol. See Figure 1–21.Figure 1–21.Place the pll Symbol13.Move the mouse so that the cursor (also called the selection tool) isover the pll symbol’s c0 ouput pin. The orthogonal node tool(cross-hair) icon appears.14. Click and drag a bus line from the c0 output to thesimple_counter clock input. This action ties the pll output to the simple_counter input (see Figure1–22).Figure1–22.Draw a Bus Line from pll to simple_counter15.Add an input pin and an output bus with the following steps:a.Choose Edit > Insert Symbol.b.Under Libraries, double-click quartus/libraries/ directory >primitives > pin> input.c.Click OK. See Figure1–23.1If you need more room to place symbols, you can use the vertical and horizontal scroll bars at the edges of the BDFwindow to view more drawing space.Altera Corporation 1–23Figure 1–23.Input Pin Symbol d.Place the new pin onto the BDF so that it is touching the input to the pll symbol. e the mouse to click and drag the new input pin to the left; notice that the ports remain connected as shown in Figure 1–24.Figure 1–24.Connecting Input Pin f.Change the pin name by double-clicking pin_name and typing CLOCK_50 (see Figure 1–25). This pin corresponds to the development board’s CLOCK_50 input pin, which is connectedto the Cyclone III FPGA on the board.Figure1–25.Change Input Pin Nameing the Orthoganal Bus tool, draw a bus line from thesimple_counter output port.h.Right-click the new output bus line and choose Properties.i.Type counter[31..0] as the bus name (see Figure1–26). Thenotation [X..Y] is the Quartus II method for specifying the buswidth in BDF schematics, where X is the most significant bit(MSB) and Y is the least significant bit (LSB).Figure1–26.Change Output Bus Namej.Click OK. Figure1–27 shows the BDF.Altera Corporation1–25Figure 1–27.BDFAdd a MultiplexerThis design uses a multiplexer to route the simple_counter output to the LED pins on the development board. You will use the MegaWizard Plug-In Manager to add the multiplexer, lpm_mux . The design multiplexes two variations of the counter bus to four LEDs on the development board. 1.Choose Edit > Insert Symbol . 2.Click Megawizard Plug-in Manager . 3.Click Next .4.Choose Installed Plug-Ins > Gates > LPM_MUX .5.Choose Cyclone III as the device family and name the output file counter_bus_mux (see Figure 1–28).6.Click Next.Figure1–28.Selecing lpm_mux7.Under How many ‘data’ inputs do you want?, select 2 inputs(default).8.Under How ‘wide’ should the data input and result output be?,select 4 (see Figure1–29).Altera Corporation1–27Figure 1–29.lpm_mux Settings9.Click Next .10.Click Finish . The Symbol window appears (see Figure 1–30).Figure1–30.lpm_mux Symbol11.Click OK.12.Place the counter_bus_mux symbol below the existing symbolson the BDF. See Figure1–31.Altera Corporation1–29Figure 1–31.Place the lpm_mux Symbol13.Add input buses and output pins to the counter_bus_mux symbolas follows:a.Using the Orthoganal Bus tool, draw bus lines from the data1x[3..0] and data0x[3..0] input ports. b.Draw a bus line from the result[3..0] output port.c.Right-click the bus line connected to data1x[3..0] and choose Properties .d.Name the bus counter[26..23], which selects only those counter output bits for this input bus.e.Click OK .f.Right-click the bus line connected to data0x[3..0] and choose Properties. the bus counter[24..21], which selects only thosecounter output bits for this input bus.h.Click OK. Figure1–32 shows the renamed buses.Figure1–32.Renamed counter_bus_mux Bus Lines14.Choose Edit > Insert Symbol.15.Under Libraries, double-click quartus/libraries/ directory >primitives > pin> output (see Figure1–33).Figure1–33.Choose an Output Pin16.Click OK.17.Place this output pin so that it connects to the counter_bus_muxresult[3..0] bus output line.18.Rename the output pin as LED[3..0] as described in steps 13 c andd. With this name, it corresponds to the output pins LED0 throughLED3 on the board, which are connected to the Cyclone III FPGA (see Figure1–34).Altera Corporation1–31Figure 1–34.Rename the Output Pin19.Attach an input pin to the multiplexer select line using an input pin:a.Choose Edit > Insert Symbol .b.Under Libraries , double-click quartus/libraries/ directory > primitives > pin > input .c.Click OK .20.Place this input pin below counter_bus_mux .21.Connect the input pin to the counter_bus_mux sel pin.22.Rename the input pin as KEY[0] (see Figure 1–35).Figure1–35.Adding the KEY[0] Input PinYou have finished adding symbols to your design.1You can add notes or information to the project as text using thethe Text tool on the toolbar (indicated with the A symbol). Forexample, you can add the label “OFF = SLOW, ON = FAST” tothe KEY[0] input pin and add a project description, such as“My First FPGA Project.”Assign Cyclone III Device and PinsIn this section, you will assign a specific Cyclone III FPGA device to thedesign and make pin assignments. To assign the device, perform thefollowing steps.1.Choose Assignments > Device.2.Under Family, choose Cyclone III.3.Under Available devices, choose EP3C25F324C8 as the device. SeeFigure1–36.Altera Corporation1–33Figure 1–36.Specify the Cyclone III Device4.Click OK .5.Choose Processing > Start > Start Analysis & Elaboration in preparation for assigning pin locations.6.Click OK in the message window that appears after analysis and elaboration completes.To make pin assignments that correlate to the KEY[0] and CLOCK_50 input pins and LED[3..0] output pin, perform the following steps.1.Choose Assignments > Pins , which opens the Pin Planner, aspreadsheet-like table of specific pin assignments. The Pin Planner shows the design’s six pins. See Figure 1–37.Figure1–37.Pin Planner2.In the Location column next to each of the six node names, add theFineLine® BGA (FBGA) coordinates (pin numbers) as shown inTable1–1.Table1–1.Location Pin SettingsRow Node Name Location1KEY[0]F12CLOCK_50V93LED[0]P134LED[1]P125LED[2]N126LED[3]N9My First FPGA DesignDouble-click in the Location column for any of the six pins to open adrop-down list. You can select the pin from this list. Alternatively, you cantype the location. For example, if you type F1 and press the Enter key, theQuartus II software fills in the correct PIN_F1 location name for you. Thesoftware also keeps track of corresponding FPGA data such as the I/Obank and Vref group. Each bank has a distinct color, which correspondsto the top-view wire bond drawing in the upper right window. SeeFigure1–38.1As a shortcut, drag and drop the pin from the FPGA pin diagraminto the pin table. Make sure that you select the correct pinswhen using this method.For Cyclone III devices, unused I/O pins default to tri-stated inputs. Youcan change this setting using the Unused Pins tab in the Device and PinOptions dialog box. Refer to Quartus II Help for more information aboutthis option and how to use it.1Altera provides board reference manuals and schematics for alldevelopment boards. These documents provide completeinformation about the pinouts for the devices on the boards. Altera Corporation 1–35Compile Your ProjectFigure 1–pleted Pin PlanningYou are finished creating your Quartus II design!Compile YourProject After creating your design you must compile it. Compilation converts the design into a bitstream that can be downloaded into the FPGA. The mostimportant output of compilation is an SRAM Object File (.sof ), which youuse to program the device. The software also generates other report filesthat provide information about your code as is compiles.1If you want to store SOFs in memory devices (such as flash orEEPROMs), you must first convert the SOF to a file typespecifically for the targeted memory device.Now that you have created a complete Quartus II project and entered all assignments, you can compile the design.Altera Corporation 1–37My First FPGA Designv In the Processing menu, chooseStart Compilation or click the Play button on the toolbar ().1If you are asked to save changes to your BDF, click Yes .While compiling your design, the Quartus II software provides usefulinformation about the compilation (see Figure 1–39).Figure 1–pilation MessagesWhen compilation is complete, the Quartus II software displays amessage. Click OK to close the message box.Compile Your Project1The Quartus II Messages window displays many messagesduring compilation. In this exercise, you did not create anytiming constraints. Therefore, the Quartus II software issues twocritical warnings:Critical Warning: SDC file not found: ‘my_first_fpga_top.sdc’Critical Warning: Timing requirements not metThe second warning is displayed because no timingrequirements were made, therefore, they could not be met. Forthis tutorial project, you can ignore these warnings. However,setting timing requirements is a critical part of creatingsuccessful designs. For more information on setting timingrequirements, refer to Quartus II Help and/or the Alteraetraining courses mentioned in “Next Steps” on page1–43.The software provides the compilation results in the Compilation Reporttab as shown in Figure1–40.Figure1–pilation Report。
