solaris操作系统
Solaris 10是什么

--Solaris 10是什么------------------提起Solaris,在人们印象中可能是这样一个场景:在拥挤阴暗的机房里,一个笨重的Sun SPARC服务器的屏幕上滚动着神秘的字符。
除了专门的服务器管理人员,没有人知道它在做什么。
对于大多数读者来说,Solaris有一副让人难以接近的冰冷的面孔。
而且,在这冰冷的面孔背后,还有不菲的价格。
所有这些,都让人不敢接近它,于是,Solaris成了深闺中的宠儿,神秘而娇嫩。
然而,随着Solaris 10的发布,“深闺中的宠儿”向大众走来,渴望技术人员能了解它、掌握它、使用它。
那么,Solaris到底是什么呢?简单地说,Solaris是一种操作系统。
通过计算机操作系统可以控制计算机,可以听音乐、玩游戏、上网聊天和看新闻,还可以在操作系统上开发游戏软件,搭建网站,为大家提供新闻服务。
在这个领域中,有读者熟悉的微软公司的Windows 操作系统,还有被众多自由软件爱好者喜爱的Linux操作系统。
而刚刚发布的Solaris 10到底能给我们带来些什么呢?首先,Solaris 10已经改变了冰冷的面孔,换了一副招人喜爱的样子。
Solaris 10的桌面已经窗口化和菜单化。
新的Java控制台界面使人感觉更加亲近和舒适。
在这里,用户可以通过单击图标来上网浏览和发送邮件,也可以打开StarSuite7写文档和其他应用程序。
这一切和微软的Windows非常相似。
有些读者可能知道,以前的Solaris只能安装在Sun公司的SPARC平台的计算机上,是无法安装在普通用户家中的计算机的。
但是,现在的Solaris 10拥有了专门针对普通用户计算机的x86版,它支持目前的大多数台式计算机,而且其安装界面可以选择中文,一般用户也可以轻松安装。
其次,在应用软件方面,Solaris 10不再是仅仅能运行服务器端的软件,还有大量的客户端的软件可以供桌面用户选择安装。
用户可以方便地使用系统自带的浏览器软件进行上网、发送邮件和文字处理。
Solaris操作系统的备份与恢复
Solaris 操作系统的备份与恢复对于UNIX 平台,一般的灾难恢复准备工作包括维护服务器配置的详细信息。
例如,在系统信息中,您需要保留用于备份和恢复的方法的打印件。
如果使用ufsdump 将操作系统备份到本地连接的磁带机上,则要保留的信息包括所有备份文件系统、文件系统的备份顺序,以及备份磁带、操作系统级别、修补程序级别、磁盘分区、文件系统布局、第三方驱动程序等信息。
Solaris 9 和10 操作系统发行版提供了一种新的安装功能,称为“ Flash 安装”。
通过Flash 安装,您可以在一个系统(称为“主系统”)上创建Solaris 操作系统的一个引用安装。
然后,可以在任意数量的系统(称为“克隆系统”,与主系统具有相同的体系结构)上复制该安装,将其作为新的安装。
虽然Flash 安装旨在克隆主计算机,但我进行了一些测试,发现Flash 安装对于灾难恢复也非常有用。
本文档介绍了我使用flar 命令备份系统,然后使用磁带上的备份恢复系统的过程。
本测试使用了磁盘系统为RSMArray 2000 的Sun Enterprise 4000 服务器,该服务器运行的是安装了最新簇修补程序的Solaris 8 操作系统。
其中有两个16 GB 的内部磁盘。
一个安装了原始操作系统,另一个用于测试操作系统的恢复。
计算机上连接了数字线性磁带(Digital Linear Tape, DLT) 7000 磁带机。
过程1. 创建归档之前,使计算机处于单用户模式。
执行此操作有两个原因:第一,虽然可以随时运行flarcreate ,但最好还是在系统不繁忙的情况下运行此命令。
第二,使用flarcreate 命令时,从归档中排除多个文件系统会遇到问题。
(可在Solaris 9 操作系统中找到一些解决此问题的修补程序。
)在单用户模式下,flarcreate 仅归档那些在mnttab 中具有条目的文件系统。
# init 0ok> boot -s2. 以超级用户身份登录。
Solaris操作系统简介

Solaris 简介
Solaris是一种计算机操作系统,它是由Sun Microsystems公司生产的,它是基于Intel 和Sparc处理器的一种操作系统。SUN公司一直掌握着大型UNIX工作站市场,随着90年代 Internet的发展,SPARC/Solaris系统也被广泛地应用于Web站点上。Sun主要强调自己系统 的稳定性,它的设计是面向网络的。它的高可用性指的是如果有了问题此系统不用停机即可 修改错误。它的稳定性甚至可以和IBM十分著名的MVS大型机操作系统一样,每个可能出错 的环节都进行了检查。此操作系统也提供了远程控制的功能。它是为网络计算而设计的,作 为第一个也是最成功的一个网络服务器系统,它在网络功能上花费了不少功夫;在网络安全 方面它支持IPsec,Kerberos,AMI和智能卡。SUN为Solaris提供了三个扩展: Easy Access Server:是用于为同时运行了Windows NT系统的企业级服务器而设计的; Enterprise Server:是为可靠商业运行环境而设计的,支持集簇功能; Internet Service Provider (ISP) Server:这就是一个典型的网站服务器; 因为SUN开发了独立于平台的JAVA语言,因此在所有的操作系统中均包括JAVA虚拟机和 JDK,Solaris代替了SunOS,后者在许多SUN的机器上仍然在使用。
2.5.3 光盘驱动器 光盘不需要volcheck命令支持,退出光盘可以用eject cdrom来实现。 如果光盘不能自动mount,或者卷管理器不可用,可以用以下命令实现: - mkdir /tmp/cdrom - mount -F hsfs /dev/dsk/c0t6d0s0 /tmp/cdrom - (Work with CD mounted on /tmp/cdrom) - umount /tmp/cdrom - eject /dev/dsk/c0t6d0s0 2.5.4 可擦写光盘驱动器 在solaris8下可以使用可擦写光盘,这是solaris 8下的一个工具,可以刻录iso的镜像, 可以用mkisofs命令来将solaris系统做成镜像文件。 例子: #! /bin/sh # ./nfscd <PARAMETER1> <PARAMETER2> # PARAMETER1 = Application ID # PARAMETER2 = from where # # ./nfscd SunNetManager /net/center2000/export/pkg/SUNWsnm # set Umask umask 022 # Remove old image rm /data/disk.img # Create image mkisofs -A $1 -d -l -L -o /data/disk.img -P "Sun Microsystems" -p "Solaris SPARC" -r -R -J -V "$1" -v $2 # Burn cdrw -i /data/disk.img (我没有试过,如果有尝试成功的朋友可以共享以下) 2.5.5 USB存储设备 现在很多新的设备都有USB的接口,所以很多USB的存储设备可以在sun的机器上使用。
SOLARIS操作系统常用命令

%chgrp -R bin dir1
将目录dir1,及其下所有文件和子目录,改为 bin 工作组。
14、date 相当于DOS的date
只输入date就显示当前的工作站时间,如果有root超级用户权限,加上参数可以修改 工作站的时间。
将目录 dir1,及其下所有文件和子目录的所有权,改为使用者 user 所有。
13、chgrp 改变文件或目录的工作组所有权
格式:chgrp [-R] groupname name
name 可为文件名或目录名
例如:
%chgrp sbsrms file1
例如:
%su user 进入使用者 user 的帐号
passwrod: 输入使用者 user 的密码
16、passwd 更改用户口令
例如:
%passwd rms 更改用户rms的口令
17、exit 退出终端操作
18、shutdown 超级用户root才有权执行,关闭Solaris操作系统
12、chown 改变文件或目录的所有权
格式:chown [-R] username name
name 可以是文件名或目录名。
例如:
%chown user file1
将文件 file1 的所有权,改为使用者 user 所有。
%chown -R user dir1
13、chgrp 改变文件或目录的工作组所有权 8
14、date 相当于DOS的date 8
15、su <用户名> 9
16、passwd 更改用户口令 9
17、exit 退出终端操作 9
solaris 操作系统中pkgadd用法
Solaris操作系统是一个广泛使用的UNIX操作系统,它具有强大的功能和稳定的性能。
其中一个常用的工具是pkgadd,它是Solaris操作系统中用于安装软件包的命令。
在本文中,我将向您介绍pkgadd的用法和一些常见的操作。
首先,pkgadd命令用于将软件包安装到Solaris系统中。
安装软件包是管理系统和应用程序的重要步骤,因此了解pkgadd命令的用法对于系统管理员和开发人员来说至关重要。
要使用pkgadd命令,您需要先获取要安装的软件包。
这些软件包通常以.pkg文件的形式提供。
一旦您获得了软件包,您可以使用以下命令来安装它:pkgadd -d package_name在上述命令中,-d选项指定了要安装的软件包的路径或位置,package_name表示软件包的名称。
例如,如果您的软件包位于/opt/pkg目录下,并且名称为example.pkg,那么命令将是:pkgadd -d /opt/pkg/example.pkg在运行pkgadd命令之后,系统将提示您进行一些设置和确认。
您可以按照屏幕上的提示进行操作,例如选择安装目录、确认安装选项等。
一旦您完成了这些设置,系统将开始安装软件包。
另外,pkgadd命令还有一些常用的选项,可以根据您的需求进行使用。
以下是一些常见的选项:- s:指定软件包的存储位置。
例如,pkgadd -d /opt/pkg/example.pkg -s /var/spool/pkg,将软件包安装到/var/spool/pkg目录下。
- n:执行安装时不提示用户确认。
这在批量安装多个软件包时非常有用。
- v:显示详细的安装过程信息。
这对于调试和故障排除非常有帮助。
除了安装软件包,pkgadd命令还可以用于其他操作,如升级软件包、删除软件包等。
要升级软件包,可以使用以下命令:pkgadd -d package_name -u在上述命令中,-u选项表示升级软件包。
类似地,要删除软件包,可以使用以下命令:pkgrm package_name在这种情况下,pkgrm命令用于删除指定的软件包。
Solaris8操作系统安装

Solaris8操作系统安装说明:安装Solaris8前请确认:(1) 确认服务器的光驱可用。
(2) 确定工作站主机名(hostname):工作站的主机名是一个字符串,例如:ZZNODE-TEST等,这个名字在安装过程中要用到。
(3) 获得工作站的IP地址和子网掩码:确认服务器所在网段是否属于一个子网,并获得当前服务器的IP地址和子网掩码。
如果有网关,还要获得工作站的网关IP地址。
这些信息在安装过程中要用到。
1. 打开Sun工作站电源开关,把Solaris 8安装光盘Software 1 of 2放进光驱内,出现开机画面时,按下<Stop+A>组合键(即按住<Stop>键的同时再按<A>键,<Stop>键位于Sun键盘的左上方),出现“OK”提示符后,输入“boot cdrom”并回车,系统将从光驱启动进行Solaris8操作系统的安装。
2. 首先出现安装程序的语言选项:Select a Language0. English1. French2. German3. Italian4. Japanese5. Korean6. Simplified Chinese7. Spanish8. Swedish9. Traditional ChinesePlease make a choice (0-9) , or press h or ? for help:选择 6 Simplified Chinese。
3. 然后出现Select a Locale的选项:Select a Locale0. Simplified Chinese EUC1. Simplified Chinese GBK2. Simplified Chinese UTF-83. Go Back to Previous ScreenPlease make a choice (0-3) , or press h or ? for help:选择0 Simplified Chinese EUC。
Oracle Solaris 11 操作系统更新指南说明书
Oracle® Enterprise Manager Ops CenterUpdating Y our Oracle Solaris 11 Operating System12c Release 3 (12.3.0.0.0)E60020-01June 2015This guide provides an end-to-end example for how to use Oracle Enterprise ManagerOps Center.IntroductionOracle Solaris 11 uses a different update mechanism than earlier versions of theoperating system. Oracle Solaris 11 uses packages to update the operating system andany non-global zones. The packages are part of an Image Packaging System (IPS) thatis integrated with the ZFS file system. The ZFS integration automatically creates analternate boot environment every time an operating system is installed or updated.You can quickly and easily create an alternate boot environment when needed, andmanage existing boot environments. Creating an alternate boot environment providesa safe method of testing an update before deploying it to your live environment.The global zone is the default operating system and has control over all the processes.A global zone always exists even when no other zones are configured. The global zoneis used for systemwide administrative control. Non-global zones, or simply zones, areconfigured inside the global zone.You can patch zones that run on a supported configuration. When you update theglobal zone or the Oracle Solaris 11 operating system, depending on the IPS packagesetting, the non-global zones are also updated. If the package setting is to update thenon-global zones, then the non-global zones are also updated.A boot environment is created, whenever you update or make any changes to OracleSolaris 11 operating system.This example describes how you can update a boot environment by creating severalprofiles and plans and include them in a larger deployment plan to consistently applyupdates to Oracle Solaris 11 operating system.You will create a boot environment profile for Oracle Solaris 11 operating system, aprofile for updating Oracle Solaris 11, create a deployment plan for updating OracleSolaris 11 operating system, and then apply the deployment plan.See Related Articles and Resources for links to related information and articles.What You Will NeedYou will need the following to update an Oracle Solaris 11 operating system:■The operating system that is being updated must be agent-managed.■Enterprise Controller and a Proxy Controller installed on an Oracle Solaris 11operating system.■Oracle Solaris 11 Software Update Library must have latest packages.■An Update Admin and a Plan/Profile Admin role to create a Profile.Updating an Oracle Solaris 11 Operating SystemComplete the following actions to update your Oracle Solaris 11 operating system:■Create a Profile for Boot Environment for Oracle Solaris11 Operating System ■Create a Profile for Updating Oracle Solaris 11 Operating System■Create a Deployment Plan for Updating Oracle Solaris 11 Operating System ■Apply the Deployment Plan for Updating Oracle Solaris 11 Operating SystemCreate a Profile for Boot Environment for Oracle Solaris11 Operating SystemThe steps to create a profile for boot environment for Oracle Solaris 11 operating system are:1.Click Plan Management, then expand Profiles and Policies. Click BootEnvironments option.2.Click Create Profile from the Actions pane to start the Create Profile for BootEnvironments wizard. Enter the following information.■Name: Enter the name of the profile■Description: (Optional) Enter the description of the profile■Subtype: Select Solaris 11 for the subtype3.Click Next to specify the boot environment parameters. Enter the followinginformation.■BE Policy: Select Create a New Boot Environment when needed■Boot Environment Name: Select Auto-generate a unique Boot Environment name.Click Next to display the summary for the boot environment profile.4.Click Finish to create the profile for boot environment for Oracle Solaris 11operating system.After the profile is created, you can view the profile for the boot environment for Oracle Solaris 11 operating system in the center pane.Create a Profile for Updating Oracle Solaris 11 Operating SystemThe steps to create a profile for updating an Oracle Solaris 11 operating system are:1.Click Plan Management in the Navigation pane.2.Click Update Profiles under Profiles and Policies hierarchy.3.Click New Profile in the Actions pane to start the Create OS Update Profilewizard. Enter the following information.■Name: Enter the name of the profile■Type: Enter the type as Solaris 11■Description: (Optional) Enter the description of the profileUse the Search Criteria to search the category you want to upgrade. Click Upgrade icon.Click Create OS Update Profile to create the profile.After the profile is created, you can view the profile in the center pane.Create a Deployment Plan for Updating Oracle Solaris 11 Operating System The steps to create a deployment plan for updating an Oracle Solaris 11 operating system are.1.In the Navigation pane, under Plan Management, expand Deployment Plans.Click Update Solaris 11 OS option.2.Click Create Plan from Template in the Actions Pane.3.Enter a plan name and the plan description. Select the Failure Policy as Stop atfailure.4.Each step has a drop-down menu of available actions in the Associated Profiles /Deployment Plan field. On the Update OS step, select the profile that you have just defined, and then click Save.5.The created deployment plan now appears under the Deployment Plan branch ofPlan Management drawer of Navigation pane.Apply the Deployment Plan for Updating Oracle Solaris 11 Operating SystemAfter you create the deployment plan, you must select the target asset to run the deployment plan.1.Click Plan Management, then expand Deployment plans. Click Update Solaris 11OS.2.Select the deployment plan that you just created and click Apply DeploymentPlan in the Actions pane.The Select Target Assets window is displayed.3.Select the target assets and click Add to Target List. Select Apply the plan withminimal interaction and click Next.plan. Click Next.Mode and click Next to skip the Pre Install Script.6.Click Next to display the Create a Boot Environment Summary.7.Click Next to view the Update OS Summary.8.Click Next to Schedule the job. Select Now to execute the deployment plan on theselected target and click Apply.The job runs to execute the deployment plan.You can view the boot environment in the center pane.What’s Next?You can update an alternate boot environment by deploying a Software Deployment / Update deployment plan and selecting the alternate boot environment as the target. Related Articles and ResourcesFor more information on updating your Oracle Solaris 11 operating systems, see the following:The following chapters in the Oracle Enterprise Manager Configure Reference and Oracle Enterprise Manager Operate Reference contain more information:■Asset Management■Hardware Management■OS Provisioning■Oracle Enterprise Manager Ops Center Concepts Guide■Oracle Solaris 11 documentation at/technetwork/documentation/solaris-11-192991.html■For end-to-end examples, see the workflows and how to documentation in the library. For deployment tasks, go to /cd/E59957_01/nav/deploy.htm and for operate tasks go to/cd/E59957_01/nav/operate.htm. Documentation AccessibilityFor information about Oracle's commitment to accessibility, visit the Oracle Accessibility Program website at/pls/topic/lookup?ctx=acc&id=docacc.Access to Oracle SupportOracle customers that have purchased support have access to electronic support through My Oracle Support. For information, visit/pls/topic/lookup?ctx=acc&id=info or visit/pls/topic/lookup?ctx=acc&id=trs if you are hearing impaired.Oracle Enterprise Manager Ops Center Updating Your Oracle Solaris 11 Operating System , 12c Release 3 (12.3.0.0.0)E60020-01Copyright © 2007, 2015, Oracle and/or its affiliates. All rights reserved.This software and related documentation are provided under a license agreement containing restrictions on use and disclosure and are protected by intellectual property laws. Except as expressly permitted in your license agreement or allowed by law, you may not use, copy, reproduce, translate, broadcast, modify, license, transmit, distribute, exhibit, perform, publish, or display any part, in any form, or by any means. Reverse engineering, disassembly, or decompilation of this software, unless required by law for interoperability, is prohibited.The information contained herein is subject to change without notice and is not warranted to be error-free. If you find any errors, please report them to us in writing.If this is software or related documentation that is delivered to the U.S. Government or anyone licensing it on behalf of the U.S. Government, then the following notice is applicable:U.S. GOVERNMENT END USERS: Oracle programs, including any operating system, integrated software, any programs installed on the hardware, and/or documentation, delivered to U.S. Government end users are "commercial computer software" pursuant to the applicable Federal Acquisition Regulation and agency-specific supplemental regulations. As such, use, duplication, disclosure, modification, and adaptation of the programs, including any operating system, integrated software, any programs installed on the hardware, and/or documentation, shall be subject to license terms and license restrictions applicable to the programs. No other rights are granted to the U.S. Government.This software or hardware is developed for general use in a variety of information management applications. It is not developed or intended for use in any inherently dangerous applications, including applications that may create a risk of personal injury. If you use this software or hardware in dangerous applications, then you shall be responsible to take all appropriate fail-safe, backup, redundancy, and other measures to ensure its safe use. Oracle Corporation and its affiliates disclaim any liability for any damages caused by use of this software or hardware in dangerous applications. Oracle and Java are registered trademarks of Oracle and/or its affiliates. Other names may be trademarks of their respective owners.Intel and Intel Xeon are trademarks or registered trademarks of Intel Corporation. All SPARC trademarks are used under license and are trademarks or registered trademarks of SPARC International, Inc. AMD, Opteron, the AMD logo, and the AMD Opteron logo are trademarks or registered trademarks of Advanced Micro Devices. UNIX is a registered trademark of The Open Group.This software or hardware and documentation may provide access to or information about content, products, and services from third parties. Oracle Corporation and its affiliates are not responsible for and expressly disclaim all warranties of any kind with respect to third-party content, products, and services unless otherwise set forth in an applicable agreement between you and Oracle. Oracle Corporation and its affiliates will not be responsible for any loss, costs, or damages incurred due to your access to or use of third-party content, products, or services, except as set forth in an applicable agreement between you and Oracle.。
Solaris 10操作系统商品说明书

Introducing Predictive Self-HealingThe Solaris™ 10 Operating System (OS) introduces a new architecture for building anddeploying systems and services capable of Predictive Self-Healing. This technology enables Sun™ systems to accurately predict component failures and mitigate many serious problems —before they actually occur. Solaris Fault Manager and Solaris Service Manager are the two main components of Predictive Self-Healing. Solaris Fault Manager receives data relating to hardware and software errors and automatically diagnoses the underlying problem. Once diagnosed, Solaris Fault Manager automatically responds by offlining faulty components. Solaris Service Manager makes services, rather than processes, into first-class citizens, permitting automatic self-healing. Base Solaris services have service descriptions which include full dependency information for start, stop, and restart; applications can easily be converted to run under Solaris Service Manager.Maximizing availabilityPredictive Self-Healing is designed to maximize the availability of the system and application services by automatically diagnosing, isolating, and recovering from faults. This helps to not only reduce hardware failures but also to reduce the impact of application failures,leading to increased system and application availability. •Reducing Hardware Failures—A self-healing system automatically diagnoses problems, and the results can be used to trigger auto-mated reactions such as dynamically taking a CPU,regions of memory, and I/O devices off line before these components can cause system failures. Solaris Fault Manager isolates and disables faulty components, and helps ensure continuous service even before admin-istrators know there is a problem. In addition, remote service agents can retrieve informa-tion from Sun that is vital to diagnosing the underlying root cause of the failure. •Reducing the Impact of Service Failures—If an application service should fail, the built-in service restart mechanism in the Solaris 10 OS automatically restarts the application or service. This mechanism also extends into Sun Cluster software failover environments for even higher availability.Automatic diagnosis and recoveryfrom failuresWith Solaris Fault Manager, the system auto-matically diagnoses faulty components, a function that in some cases can reduce analysis time from days to seconds. Once diagnosed, the system can quickly take corrective action and automatically restore application services. This powerful technology ensures that business-critical applications and essential system services can continue uninterrupted in the event of software failures, major hardware component failures, and even software misconfiguration problems.<Highlights•Maximized system and serviceavailability through predictivediagnosis and isolation of faultycomponents•Automatic diagnosis of failedcomponents and automaticrestart of failed services inmilliseconds•Simplified administration modelfor managing services, reducingcost of ownership•Fast and easy repair of problemswith links to knowledge articles•Scalable architecture can berapidly upgraded and adapted tonew problems — without requiringdowntimeCustomers can now deliver higher levels of availability and application services while minimizing downtime and associated adminis-trative costs. Reduced downtime can potentially save companies $10,000 to $6 million per hour for mission-critical environments.Simplified administrationSolaris Service Manager reduces complexity by abstracting problem diagnosis and services in a manner that is transparent to users and applications. It simplifies common administrative tasks, speeds system boot, and significantly reduces human errors associated with system failures that can lead to service downtime and inefficient management of the system.Admin-istrative tasks such as enabling and disabling services and changing properties are simplified and secure, with an undo capability to revert changes. In addition, service information is stored in a central repository,making the systems easier to manage and maintain. Self-healing technology can also help improve the productivity of support staff. They can now spend much less time investigating and resolving issues,resulting in a higher ratio of supported systems per individual. Plus, a self-healing system can lead to reduced administration costs — systems that perform many complex tasks without user intervention require staff with less expertise, experience, and salary.Fast and easy repairSolaris Fault Manager issues easy-to-understand diagnosis messages that link to knowledge articles at /msg. By providing system administrators with unique event IDs, they can access detailed information in knowledge articles, which describe what failure occurred and what the system did to fix it. These knowl-edge articles guide system administrators through any tasks that require human interven-tion, including repairs, and explain predicted or detected problems using clear language and links to repair procedures and documentation —all of which greatly reduces the complexity of repairing the system.Scalable and flexible architectureThe scalable architecture of Sun’s Predictive Self-Healing technology can be rapidly evolved to new problems and updated as new diagnosis and availability technologies are added to the system. Most future updates can be dynamically loaded and unloaded from the system while it is running and can be upgraded on the fly without requiring downtime or losing previous diagnosis data.ConclusionWith businesses operating around the clock and demanding uninterrupted service, service availability is of paramount importance. Predictive Self-Healing delivers the next generation of availability technology today, including features that keep systems and services running and simple for administrators. Over time, a rapidly evolving ecosystem of self-healing components can help provide consistent, easy-to-use, and always-available Sun systems.©2005 Sun Microsystems, Inc. All rights reserved. Sun, Sun Microsystems, the Sun logo, Solaris, the Solaris logo, and The Network is the Computer are trademarks or registered trademarks of Sun Microsystems, Inc. in theUnited States and other countries. Information subject to change without notice.11/05Sun Microsystems, Inc.4150 Network Circle, Santa Clara, CA 95054 USA Phone 1-650-960-1300 or 1-800-555-9SUN Web 2。
Solaris 10x86 操作系统安装配置
安装
节点 1 和 2:安装 Solaris OS 5.10
1 安装操作系统 2 安装时,网络设置:
节点 1:ent0 和 ent1 设置如下: eth0: IP 地址:143.168.1.31 网络掩码: 255.255.0.0 默认网关:143.168.1.1 eth1: IP 地址:172.16.1.31 网络掩码: 255.255.0.0
在节点 1 和 2:UDP 参数设置
1 UDP 参数设置:
# ndd /dev/udp udp_xmit_hiwat # ndd /dev/udp udp_recv_hiwat
2 # ndd -set /dev/udp udp_xmit_hiwat 65536
# ndd -set /dev/udp udp_recv_hiwat 65536
节点 1 和 2:设置用户等价性
1 因为此操作要用网络。所以在配置网络后进行。 使用 rsh 方法: [root@solrac1 /]# touch /etc/hosts.equiv [root@solrac1 /]# chmod 600 /etc/hosts.equiv [root@solrac1 /]# chown root:root /etc/hosts.equiv
在节点 1 和 2:修改内核参数
1 set noexec_user_stack=1 set semsys:seminfo_semmni=100 set semsys:seminfo_semmns=1024 set semsys:seminfo_semmsl=256 set semsys:seminfo_semvmx=32767 set shmsys:shminfo_shmmax=4294967295 set shmsys:shminfo_shmmin=1 set shmsys:shminfo_shmmni=100 set shmsys:shminfo_shmseg=10
Solaris操作系统介绍

文件系统
/etc/ftpd/ftpusers:定义root用户FTP权限。
/etc/default/login:定义root用户远程
主要的系统配置文件
telnet登录权限。 /etc/rc2.d目录
Solaris在启动时,会 自动执行以大写S开头的所有脚本文件,并且按 文件名称顺序由小到大依次执行。 以大写字母K开头的文件:Solaris在关闭时,会 自动执行以大写K开头的所有脚本文件,并且按 文件名称顺序
l:右移一格
0:将游标放在一行的开始 $:将游标放在一行的结尾 w(小写):将游标移动到下一个单词 b:将游标移动到前一个单词
vi常用命令
在文件中移动
(:将游标放在当前句子的开始处
):将游标放在下一句子的开始处
:后翻页 Ctrl+B:前翻页 G:将游标放在文件的最后一行,xG表示游标 所要移动到的行号(x表示数字) :x:将游标放在x所指定的行上( x表示数字)
Solaris操作系统介绍
课程目标
◇ 了解Solaris操作系统的基础知识
◇ 了解Solaris操作系统的文件系统及
用户和用户组管理
◇ 掌握Solaris操作系统的常用命令 ◇ 掌握vi编辑器的使用
课程内容
◇ 第一章 Solaris操作系统简介
◇ 第二章 Solaris之用户和用户组管理 ◇ 第三章 Solaris之文件操作
文件操作
常用命令
cat:连续显示文本 more:以分页方式查看文件内容 tail
:可以显示文件的最后部分 head:显示文件头部 cp:文件拷贝 mv:文件移动 rm:文件删除 find:寻找文件
常用命令
文件操作
chmod:改变文件读写执行权限
SOLARIS_10_安装步骤

SOLARIS_10_安装步骤Solaris 10 是美国甲骨文公司开发的一种类Unix操作系统,本文将介绍在计算机上安装Solaris 10 的详细步骤。
以下是Solaris 10 安装的步骤:步骤一:准备工作1. 确定计算机配置和系统要求:首先,确保计算机满足Solaris 10 的最低硬件要求。
要求包括最低处理器速度、内存容量和硬盘空间等。
3.准备安装介质:将ISO镜像文件刻录到光盘或者USB闪存驱动器上。
步骤二:启动计算机1.将安装介质插入计算机,并重启计算机。
2. 确保计算机的BIOS已设置为从光盘或USB设备启动。
根据计算机型号,按F2、F12或Del键进入BIOS设置界面,并选中光盘或USB设备作为启动设备。
3.保存BIOS设置并重启计算机。
步骤三:选择安装模式1. 在计算机启动时,将会弹出Solaris 10 的安装程序界面。
首先,选择安装语言。
2.接下来,选择“常规安装”或“自定义安装”模式。
常规安装模式适用于大多数用户,自定义安装模式提供更多的安装选项。
步骤四:对安装组件进行配置1. 在常规安装模式下,选择“整个磁盘”或“仅限一个分区”来确定Solaris 10 的安装位置。
在自定义安装模式下,可以手动选择安装位置和分区。
2.选择“快速安装”或自定义分区大小。
快速安装模式会根据默认设置自动分区,自定义分区则允许手动设置分区大小。
3.分配磁盘空间:确定文件系统的大小和类型。
可以选择ZFS、UFS 或者一种组合。
步骤五:选择安装软件包1.根据自己的需求和系统资源,选择安装软件包。
可以选择安装图形界面、服务器组件、开发工具和其他应用程序等。
2.点击“安装”或“下一步”开始安装所选择的软件包。
步骤六:设置系统配置1.配置网络连接:根据自己的需求,选择IP地址、子网掩码和网关等网络配置信息。
2.设置主机名和域名:给计算机设置一个唯一的主机名和域名。
3.配置时区:选择合适的时区。
4. 设置 root 密码:设置 root 用户的密码。
VMware Workstation下安装Solaris 10操作系统史上最详细
Solaris 10操作系统是行业领先的UNIX 平台。
它不但把Sun的企业级技术与x86平台结合起来,还提供了跟Linux几乎一样的GNU环境。
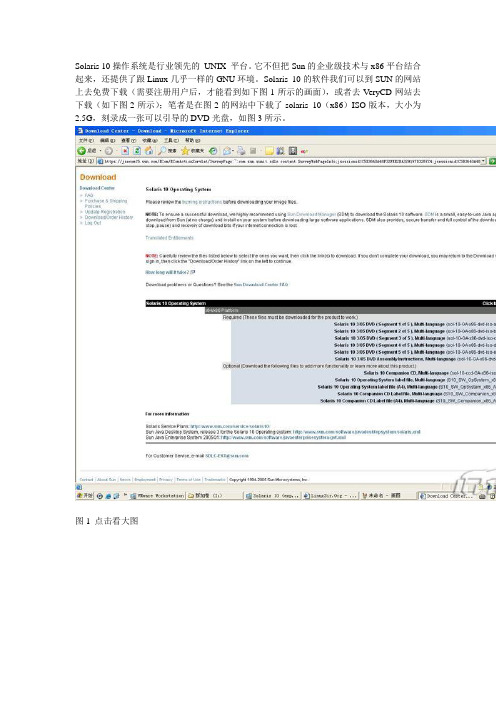
Solaris 10的软件我们可以到SUN的网站上去免费下载(需要注册用户后,才能看到如下图1所示的画面),或者去VeryCD网站去下载(如下图2所示);笔者是在图2的网站中下载了solaris 10(x86)ISO版本,大小为2.5G,刻录成一张可以引导的DVD光盘,如图3所示。
图1 点击看大图图2 点击看大图图3 点击看大图由于本文是在windows虚拟机环境下来安装Solaris 10系统,因此在这里简单说一下虚拟机软件;我们知道在Windows平台上比较流行的虚拟机软件有两个,VMware Workstation 和VirtualPC。
其中前者由VMware公司开发,后者则属于微软公司。
目前使用的最新VMware Workstation软件是5.0版,笔者就是在VMware Workstation 5环境下安装Solaris 10系统的;采用windows 2003 Server,使用的是Dell 4700 PC机来进行安装操作的。
有关VMware Workstation 5软件的新特性,软件的下载以及安装说明等网上有许多介绍的文章,由于文章篇幅有限,在这里就不多说了。
为了让大家能正确地安装操作系统,在安装之前,对PC机的系统要求和建议要有所了解。
1、安装Solaris 10 OS 的基本系统,PC机要求见下表1:表1 点击看大图也就是我们在机器中安装Solaris 10操作系统,PC机硬件必须满足以下要求:PC机内存需要128 MB 或更大,磁盘空间需要12 GB 或更大,CPU处理器速度(主频)120 MHz 或更高(并且要具有硬件浮点)。
Solaris 10 Operating System DVD 或Solaris 10 Software - 1 CD 上的Solaris 安装程序可以使用图形用户界面(GUI) 来运行,或者,使用桌面会话或控制台会话作为交互式的文本安装程序来运行。
Solaris操作系统基线核查

检查点列表
序号
检查点描述
配置方法
1
是否按用户分配帐号责任到人
为用户创建账号:
#useradd username #创建账号
#passwd username #设置密码
修改权限: #chmod 750 directory #其中750为设置的权限,可根据实际情况设置相应的权限,directory是要更改权限的目录) 使用该命令为不同的用户分配不同的账号,设置不同的口令及权限信息等。
修改/etc/ssh/sshd_config文件,将PermitRootLogin yes改为PermitRootLogin no,重启sshd服务。
重启sshd服务:Solaris10以前:#/etc/init.d/sshd stop #/etc/init.d/sshd start Solaris10: #svcadm disable ssh #svcadm e nable ssh
27
检查/var/adm/wtmpx权限设置
修改文件权限为644 #chmod 644 /var/adm/wtmpx
检查项分类
日志审计
检查项名称
检测cron日志记录是否符合规范
风险值
1
等级
低危
检查方法
在/etc/default/cron中存在配置CRONLOG=yes则符合,否则不符合。
截图:说明符合或不符合
截图:说明符合或不符合
检查点列表
序号
检查点描述
配置方法
11
Solaris 10 采用静态口令认证技术的设备,口令至少应包括的字母数量
在 /etc/default/passwd 文件设置 MINALPHA=2
- 1、下载文档前请自行甄别文档内容的完整性,平台不提供额外的编辑、内容补充、找答案等附加服务。
- 2、"仅部分预览"的文档,不可在线预览部分如存在完整性等问题,可反馈申请退款(可完整预览的文档不适用该条件!)。
- 3、如文档侵犯您的权益,请联系客服反馈,我们会尽快为您处理(人工客服工作时间:9:00-18:30)。
pkgadd -d /cdrom/cdrom0/Product /SUNWTcl pkgrm SUNWTcl
pkgrm:卸载软件包
#
pkginfo:查询软件包 (pkgchk –lp /filename)
#
pkginfo –l |grep SUNWTcl
补丁维护
补丁就是一些替换现存的文件和目录的文件目录集合。补 丁纠正应用程序的错误或增加功能。 Patch编号
文件系统管理
fsck磁盘检测纠错工具
系统每次启动时都会自动运行fsck。如果发现错误,会尝试自动修复, 如果错误非常严重,需要人工修复。这时要进入系统单用户模式,然 后对错误磁盘执行:
#fsck
/dev/dsk/c0t0d0s0
newfs创建文件系统
# newfs /dev/rdsk/c0t2d0s0
rm:删除文件须为空。 mv:更改文件名;移动文件和目录; ln:将一个文件连接到另外的文件上 dd:用指定大小的块拷贝一个文件
- dd if=/dev/fd0 of=disk.img bs=1440k 备份软盘 - dd if=/dev/dsk/c1t0d0s2 of=/dev/dsk/c1t3d0s2 bs=10240k 两个硬盘 对拷
文件系统是一种通常驻留在磁盘上的某一部分的数据 结构。Solaris是一种层次化文件系统。它由一系列相 互关联的文件组成,同时可以允许用户以一种很容易 找到某个特定文件的方式来组织文件。 在一个标准的Solaris系统中.每一个用户都具有自己 的一个目录(宿主目录),在这个目录下用户可以随意 创建自己的新子目录,另外还可以再将子目录分为若 干个子目录。通过这种方式,用户可以将文件结构扩 展到任意的层次以满足自己的需要。
在使用某设备上的文件系统之前,必须将该设备上的 文件系统挂接( mount )到根文件系统的某个目录上 , 此目录称为挂接点(mount point)。此时该设备上的 文件系统相当于该目录的延伸,对该目录的操作就等 于对该设备文件系统的操作。使用完该设备的文件系 统后,还要将它卸出(umount)。
不加参数的mount显示系统目前已经挂接的文件系统 要挂接在/etc/vfstab中已有的某个文件系统:
# mount /export/home # umount /dev/dsk/c0t3d0s7 # umount /export/home
umount卸载文件系统
或
设备管理
UNIX中常用存储设备: 软盘、硬盘、CD-ROM 设备的使用:
系统启动过程
启动有四个阶段
Boot PROM 阶段 Boot program 阶段 Kernel 初始化阶段 /sbin/init 阶段
系统启动过程
自检、显示系统信息、读取启动设备的0扇 区、在启动设备寻找启动程序、加载启动 程序、启动内核、运行/sbin/init 读取/etc/inittab文件,Init程序执行 /sbin/rc*脚本。
#groupadd –g 100 sun #useradd –g sun –d /home/sun –m –s /bin/sh sun #groupdel sun #userdel –r sun
useradd命令增加用户
groupdel命令删除用户组
userdel命令删除用户
Solaris文件系统
系统运行级别
系统运行级别有8种分别为: 0 进入PROM状态(OK状态) 1 管理状态(所有文件系统都挂上的单用户模式,禁止其 他用户登录) 2 多用户模式(没有网络文件共享服务) 3 多用户模式(有网络文件共享服务) 4 未使用 5 退出操作系统并关机 6 重新启动机器 S,s 单用户模式
改变系统运行级别
#who |
wc -l
定向:将一个程序的标准输出存成一个文件。
#who>who.log
ls:列出自己目录下的内容
ls –a:列出所有的文件 ls –l: 列出详细的文件信息 ls –c:按时间顺序显示文件和目录
cat:显示或设置文件
#cat filename #cat file1 file2>file3
shutdown用于改变操作系统运行级别 命令格式:
shutdown [ -y ] [ -g seconds ] [ -i init-state ] [message] y 系统提示是否重启时默认回答为YES g 过多长时间改变当前的运行级别 i 改变之后的运行级别 message 给所有登录用户的信息
一些概念
宿主目录:每一次用户刚登录到系统时的目录。 工作目录:指当前所在目录。 绝对路径名:总是以一个斜杠(/),即根目录的名 称开始,用户可以通过追踪一个从根目录,经过 其中所有的中间目录,一直到某个文件的方式来 建立该文件的绝对路径名。 相对路径名:追踪的是从工作目录到文件的路径。 该路径名是相对于工作目录的。
route add 192.0.2.32/27 somegateway route -n
route:用于配置和查询路由信息
netstat:用于查询系统网络信息
netstat -r netstat -an
网络、主机和路由参数设置
/etc目录下的四个文本文件:networks、 hosts、gateways,defaulrouter分别存放 网络、主机、路由列表、缺省路由。
Solaris操作系统基础
北京润汇科技有限公司 2009年1月
课程内容
系统概述 安装操作系统 启动过程 基本管理命令 图形用户界面 其他
Solaris概述
Sun公司推出的在工作站上运行的操作系统, UNIX的一个版本。 Solaris的特点:
同时支持多个用户
同时支持多个任务 提供了具有内在安全性的层次化文件系统 图形用户界面
格式:find path-name-list expression
hostname: 显示用户正在使用的计算机名称。 id:显示用户的系统标识。 pwd:显示当前工作目录的路径名。 uname:显示操作系统的信息,得到当前的系统名称。 who:当前用户的登录标识。
软件包管理
pkgadd:安装软件包
网络管理
ifconfig:用于配置和查询网络地址
Ifconfig hme1 plumbs/unplumbs Ifconfig hme1 up/down ifconfig hme1 1.2.3.4 netmask 255.0.0.0 up Ifconfig –a hme 百兆网卡; ce 千兆网卡; ge 千兆光纤卡
存储设备的使用
mount
步骤:创建一目录;执行mount命令,将设备挂接到该 目录上; 命令格式:/etc/mount [-v] [-r] [-f fstyp] special directory 将设备从文件系统中卸出; 格式: umount 设备文件 或者 umount 挂接目录
umount
选项:
halt使系统进入0运行级别 poweroff 关闭系统并切断电源 reboot 重新启动系统
Solaris基本管理命令
文件操作 进程管理 消息查询 软件包管理 补丁管理 文件系统管理 用户管理 网络管理 性能管理
文件操作
管道(|)和定向(>)
管道:将一个程序的标准输出作为另一个程序的标准输入。
每个补丁都有编号。例如补丁号为101945,版本是34的话,这个 补丁的目录名就是101945-34. # patchadd 105160-01 # patchrm 105633-06 # showrev -p
patchadd:安装补丁
Patchrm:删除补丁
检查系统的补丁
用户管理
groupadd命令增加用户组
networks:存放网络列表,文件每行表示一个
网络,由三个域构成:name(网络正式名称) number(网络号) aliases(网络别名) e.g.: mingzi 129.9 bieming
网络、主机和路由参数设置
hosts:存放主机列表。每行表示一个主机,由
以 下 三 个 域 构 成 : address( 主 机 IP 地 址 ) name(主机的正式名称 ) aliases(主机别名) eg:129.6.114.201 xyw01 intess114 - defaulrouter:文件内容是缺省路由的地址 #cat /etc/defaultrouter 172.16.255.254
文件操作
cp: 复制文件
#cp -i source-file destination-file(directory)
file:检查文件类型
#file term.ad term.ad:ASCII text
#gzip file.txt #gzip –d file.txt.gz
gnuzip (gzip):压缩或展开文件 man:显示系统文档中的页面内容 mkdir:创建一个目录
#mkdir /home/alex/literature
more:在一个满屏里展示一个文件。当显示的数据达到满屏时 输出暂停。
文件操作
grep:从一个或多个文件中搜索包含指定字符串信息 的内容,并显示相关行。
#grep ‘credit’ memo
#cd /home/alex/literature #pwd /home/alex/literature
cd:更换目录
chmod:改变文件存取许可。 chown:改变文件或目录的所有者。