Spring的XML配置文件的十二个最佳方法实践
Spring配置定时器(注解+xml)方式—整理

Spring配置定时器(注解+xml)⽅式—整理⼀、注解⽅式1. 在Spring的配置⽂件ApplicationContext.xml,⾸先添加命名空间1 xmlns:task="/schema/task"2 /schema/task3 /schema /task/springtask3.1.xsd42. 最后是我们的task任务扫描注解1<task:annotation-driven/>3. spring扫描位置1<context:annotation-config/>2<context:component-scan base-package="com.test"/>4.写⾃⼰的定时任务1 @Component //import ponent;2public class MyTestServiceImpl implements IMyTestService {3 @Scheduled(cron="0/5 * * * * ? ") //每5秒执⾏⼀次4public void myTest(){5 System.out.println("进⼊测试");6 }7 }♦注意:定时器的任务⽅法不能有返回值(如果有返回值,spring初始化的时候会告诉你有个错误、需要设定⼀个proxytargetclass的某个值为true)⼆、XML⽅式1.在spring配置⽂件中创建bean,创建schedule1<bean id="schedule"class="org.springframework.scheduling.quartz.SchedulerFactoryBean">3<property name="triggers">4<list>5<ref bean="testTrigger"/>6</list>7</property>8</bean>2. 在spring配置⽂件中创建bean,创建你的triggers1<bean id="testTrigger"class="org.springframework.scheduling.quartz.CronTriggerBean">3<property name="jobDetail" ref="testJobDetail"/>4<property name="cronExpression" value="0 1/5 * * * ?"/>5</bean>3. 在spring配置⽂件中创建bean,指定定时器作⽤在那个类那个⽅法上⾯1<bean id="testJobDetail"class="org.springframework.scheduling.quartz.MethodInvokingJobDetailFactoryBean">3<property name="targetObject" ref="targetTestService"/>4<property name="targetMethod" value="timerTest"/>5</bean>♦注明:把定时器作⽤在targetTestService对象中的timerTest⽅法上⾯4. 当然还得把你作⽤的对象交Spring来管理,所以在spring配置⽂件中创建作⽤类的 bean1<bean id="targetTestService" class=".service.TargetTestService" scope="prototype"></bean>♦这是时间的设置规则org.springframework.scheduling.quartz.CronTriggerBean允许你更精确地控制任务的运⾏时间,只需要设置其cronExpression属性。
springmvc框架搭建之xml配置说明(spring4+hibernate4)
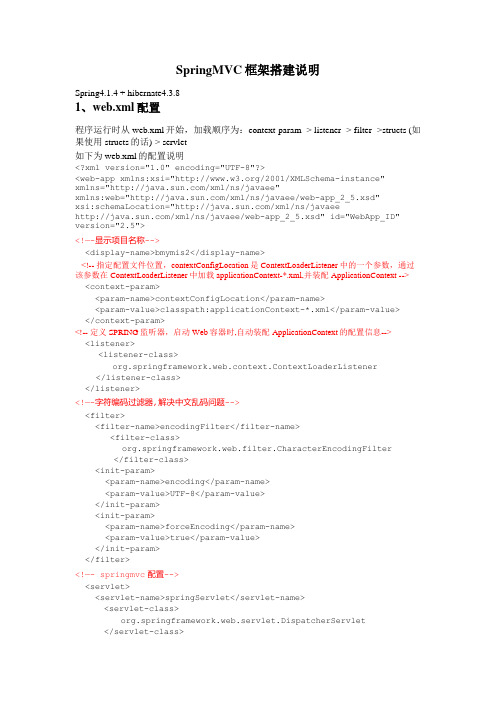
SpringMVC框架搭建说明Spring4.1.4 + hibernate4.3.81、web.xml配置程序运行时从web.xml开始,加载顺序为:context-param -> listener -> filter ->structs (如果使用structs的话)-> servlet如下为web.xml的配置说明<?xml version="1.0" encoding="UTF-8"?><web-app xmlns:xsi="/2001/XMLSchema-instance"xmlns="/xml/ns/javaee"xmlns:web="/xml/ns/javaee/web-app_2_5.xsd"xsi:schemaLocation="/xml/ns/javaee/xml/ns/javaee/web-app_2_5.xsd" id="WebApp_ID" version="2.5"><!—-显示项目名称--><display-name>bmymis2</display-name><!-- 指定配置文件位置,contextConfigLocation是ContextLoaderListener中的一个参数,通过该参数在ContextLoaderListener中加载applicationContext-*.xml,并装配ApplicationContext --> <context-param><param-name>contextConfigLocation</param-name><param-value>classpath:applicationContext-*.xml</param-value></context-param><!-- 定义SPRING监听器,启动Web容器时,自动装配ApplicationContext的配置信息--><listener><listener-class>org.springframework.web.context.ContextLoaderListener </listener-class></listener><!—-字符编码过滤器,解决中文乱码问题--><filter><filter-name>encodingFilter</filter-name><filter-class>org.springframework.web.filter.CharacterEncodingFilter</filter-class><init-param><param-name>encoding</param-name><param-value>UTF-8</param-value></init-param><init-param><param-name>forceEncoding</param-name><param-value>true</param-value></init-param></filter><!—- springmvc配置--><servlet><servlet-name>springServlet</servlet-name><servlet-class>org.springframework.web.servlet.DispatcherServlet </servlet-class><init-param><param-name>contextConfigLocation</param-name><param-value>classpath*:/spring-mvc.xml</param-value></init-param><load-on-startup>1</load-on-startup> //容器启动时首先初始化该servlet </servlet><servlet-mapping><servlet-name>springServlet</servlet-name><url-pattern>/</url-pattern> //表示所有页面都由springmvc处理</servlet-mapping><!—-浏览器输入到项目名,默认打开如下配置页面--><welcome-file-list><welcome-file>/web/login.jsp</welcome-file></welcome-file-list><!—-错误跳转页面--><error-page><error-code>404</error-code><location>/404.html</location></error-page></web-app>2、applicationContext-common.xml配置:<?xml version="1.0" encoding="UTF-8"?><beans xmlns="/schema/beans"xmlns:context="/schema/context"xmlns:xsi="/2001/XMLSchema-instance"xmlns:tx="/schema/tx"xmlns:aop="/schema/aop"xsi:schemaLocation="/schema/beans/schema/beans/spring-beans-4.0.xsd/schema/context/schema/context/spring-context-4.0.xsd/schema/aop/schema/aop/spring-aop-4.0.xsd/schema/tx/schema/tx/spring-tx-4.0.xsd"><!-- 加载资源文件其中包含变量信息,必须在Spring配置文件的最前面加载,即第一个加载--><context:property-placeholder location="classpath:application.properties"/><!—-扫描包路径选项,使用annotation 自动注册bean,并保证@Required,@Autowired的属性被注入,有了该配置,那么<context:annotation-config/>这个配置就可以省略(以下配置包含了<context:annotation-config/>配置)--><context:component-scan base-package="xxx.xxx.xxx"/><!-- 数据源配置,使用应用内的DBCP数据库连接池 --><bean id="dataSource" class="mons.dbcp.BasicDataSource"destroy-method="close"><!-- 定义数据库连接池数据源bean destroy-method="close"的作用是当数据库连接不使用的时候,就把该连接重新放到数据池中,方便下次使用调用--><property name="driverClassName" value="${jdbc.driverClassName}"/><property name="url" value="${jdbc.url}"/><property name="username" value="${ername}"/><property name="password" value="${jdbc.password}"/></bean><!—Hibernate的注解配置 --><bean id="sessionFactory"class="org.springframework.orm.hibernate4.LocalSessionFactoryBean"><property name="dataSource" ref="dataSource"/><property name="hibernateProperties"><props><prop key="hibernate.hbm2ddl.auto">${hibernate.hbm2ddl.auto}</prop><prop key="hibernate.dialect">${hibernate.dialect}</prop><prop key="hibernate.show_sql">${hibernate.show_sql}</prop></props></property><property name="packagesToScan" value="xxx.xxx.xxx.model" /></bean><!-- 配置Hibernate事务管理器 --><bean id="transactionManager"class="org.springframework.orm.hibernate4.HibernateTransactionManager"> <property name="sessionFactory" ref="sessionFactory"/></bean><!-- 配置事务异常封装 --><bean id="persistenceExceptionTranslationPostProcessor"class="org.springframework.dao.annotation.PersistenceExceptionTranslationPost Processor"/><!-- 声明式容器事务管理 ,transaction-manager指定事务管理器为transactionManager --> <tx:advice id="txAdvice" transaction-manager="transactionManager"><tx:attributes><tx:method name="add*" propagation="REQUIRED"/><tx:method name="get*" propagation="REQUIRED"/><tx:method name="*" read-only="true"/></tx:attributes></tx:advice><aop:config expose-proxy="true"><!-- 只对业务逻辑层实施事务 --><aop:pointcut id="txPointcut"expression="execution(*xxx.xxx.xxx.service..*.*(..))"/><!-- Advisor定义,切入点和通知分别为txPointcut、txAdvice --><aop:advisor pointcut-ref="txPointcut" advice-ref="txAdvice"/> </aop:config></beans>3、application.properties配置jdbc.driverClassName=org.postgresql.Driverjdbc.url=jdbc:postgresql://ip:5432/数据库名ername=postgresjdbc.password=123hibernate.dialect=org.hibernate.dialect.PostgreSQLDialecthibernate.show_sql=truehibernate.format_sql=false4、spring-mvc.xml配置<?xml version="1.0"encoding="UTF-8"?><beans xmlns="/schema/beans"xmlns:context="/schema/context"xmlns:mvc="/schema/mvc"xmlns:p="/schema/p"xmlns:xsi="/2001/XMLSchema-instance"xmlns:tx="/schema/tx"xsi:schemaLocation="/schema/beans/schema/beans/spring-beans-3.0.xsd/schema/context/schema/context/spring-context-3.0.xsd/schema/mvc/schema/mvc/spring-mvc-3.0.xsd/schema/tx/schema/tx/spring-tx-4.0.xsd"><!-- 启用spring mvc 注解 --><mvc:annotation-driven><!-- 自动扫描且只扫描@Controller --><context:component-scan base-package="xxx.xxx.xxx "use-default-filters="false"></context:component-scan><!-- 定义JSP文件的位置 --><beanclass="org.springframework.web.servlet.view.InternalResourceView Resolver"><property name="prefix"value="/jsp/"/><property name="suffix"value=".jsp"/></bean><!-- 容器默认的DefaultServletHandler处理所有静态内容与无RequestMapping处理的URL--> <mvc:default-servlet-handler/><!-- 定义无需Controller的url<->view直接映射 --><mvc:view-controller path="/"view-name="login"/></beans>。
Spring中注解配置与xml配置分析

虽然 2.0 版本发布以来,Spring 陆续提供了十多个注解,但是提供的这些注解只是为了在某些情况下简化 XML 的配置,并非要取代 XML 配置方式。这一点可以从 Spring IoC 容器的初始化类可以看出:ApplicationContext 接口的最常用的实现类是 ClassPathXmlApplicationContext 和 FileSystemXmlApplicationContext,以及面向 Portlet 的 XmlPortletApplicationContext 和面向 web 的 XmlWebApplicationContext,它们都是面向 XML 的。Spring 3.0 新增了另外两个实现类:AnnotationConfigApplicationContext 和 AnnotationConfigWebApplicationContext。从名字便可以看出,它们是为注解而生,直接依赖于注解作为容器配置信息来源的 IoC 容器初始化类。由于 AnnotationConfigWebApplicationContext 是 AnnotationConfigApplicationContext 的 web 版本,其用法与后者相比几乎没有什么差别
也可以单独显式地来启用某个注解处理器,而且可以给处理器添加拦截器:
<be.factory.annotation.AutowiredAnnotationBeanPostProcessor"/>
<bean class="monAnnotationBeanPostProcessor"/>
<mvc:annotation-driven />
当然了也可以使用如下的方式显式地加载:
spring XML优化配置12招
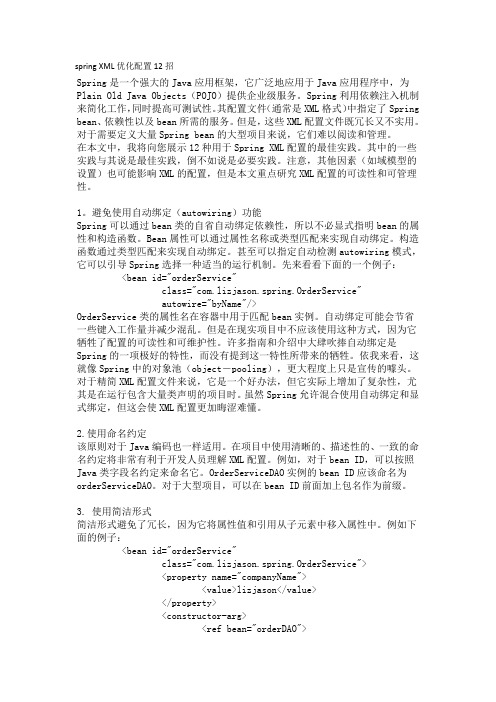
spring XML优化配置12招Spring是一个强大的Java应用框架,它广泛地应用于Java应用程序中,为Plain Old Java Objects(POJO)提供企业级服务。
Spring利用依赖注入机制来简化工作,同时提高可测试性。
其配置文件(通常是XML格式)中指定了Spring bean、依赖性以及bean所需的服务。
但是,这些XML配置文件既冗长又不实用。
对于需要定义大量Spring bean的大型项目来说,它们难以阅读和管理。
在本文中,我将向您展示12种用于Spring XML配置的最佳实践。
其中的一些实践与其说是最佳实践,倒不如说是必要实践。
注意,其他因素(如域模型的设置)也可能影响XML的配置,但是本文重点研究XML配置的可读性和可管理性。
1。
避免使用自动绑定(autowiring)功能Spring可以通过bean类的自省自动绑定依赖性,所以不必显式指明bean的属性和构造函数。
Bean属性可以通过属性名称或类型匹配来实现自动绑定。
构造函数通过类型匹配来实现自动绑定。
甚至可以指定自动检测autowiring模式,它可以引导Spring选择一种适当的运行机制。
先来看看下面的一个例子:<bean id="orderService"class="com.lizjason.spring.OrderService"autowire="byName"/>OrderService类的属性名在容器中用于匹配bean实例。
自动绑定可能会节省一些键入工作量并减少混乱。
但是在现实项目中不应该使用这种方式,因为它牺牲了配置的可读性和可维护性。
许多指南和介绍中大肆吹捧自动绑定是Spring的一项极好的特性,而没有提到这一特性所带来的牺牲。
依我来看,这就像Spring中的对象池(object-pooling),更大程度上只是宣传的噱头。
Spring中加载xml配置文件的几种方式

项目中一个需求就是所有的功能都是插件的形式装入系统,这就需要利用Spring去动态加载某一位置下的配置文件,就总结了下Spring中加载xml配置文件的方式, xml是最常见的spring 应用系统配置源。
Spring中的几种容器都支持使用xml装配bean,包括:XmlBeanFactory,ClassPathXmlApplicationContext,FileSystemXmlApplicationContext,XmlWebApplicationContext,.....一: XmlBeanFactory 引用资源1.Resource cr = new ClassPathResource("applicationContext.xml");BeanFactory bf=new XmlBeanFactory(cr);UserDao userDao = (UserDao)bf.getBean("userDao");二: ClassPathXmlApplicationContext 编译路径使用ClassPathXmlApplicationContext对象获取,必须把applicationContext.xml放置到类的加载路径中,也就是Src下面1.ApplicationContext factory=new ClassPathXmlApplicationContext("classpath:appcontext.xml");// src目录下的2.ApplicationContext context = new ClassPathXmlApplicationContext("applicationContext.xml"); UserDao userDao = (UserDao)context.getBean("userDao");3.ApplicationContext context = new ClassPathXmlApplicationContext(new String[]{"applicationContext-oracle.xml","applicationContext.xml"});UserDao userDao = (UserDao)context.getBean("userDao");// src/conf 目录下的4.ApplicationContext factory=new ClassPathXmlApplicationContext("conf/appcontext.xml");5.ApplicationContext factory=new ClassPathXmlApplicationContext("file:G:/Test/src/appcontext.xml");三: FileSystemXmlApplicationContext用文件系统的路径必须把applicationContext.xml放置到工程目录下面,也就是项目路径的下面1.ApplicationContext factory=newFileSystemXmlApplicationContext("src/appcontext.xml");//使用了classpath: 前缀,作为标志, 这样,FileSystemXmlApplicationContext 也能够读入classpath下的相对路径没有classpath的话就是从当前的工作目录2.ApplicationContext factory=newFileSystemXmlApplicationContext("classpath:appcontext.xml");3.ApplicationContext factory=newFileSystemXmlApplicationContext("file:G:/Test/src/appcontext.xml");4.ApplicationContext factory=newFileSystemXmlApplicationContext("G:/Test/src/appcontext.xml");四: XmlWebApplicationContext是专为Web工程定制的。
详解SpringAop实例之xml配置
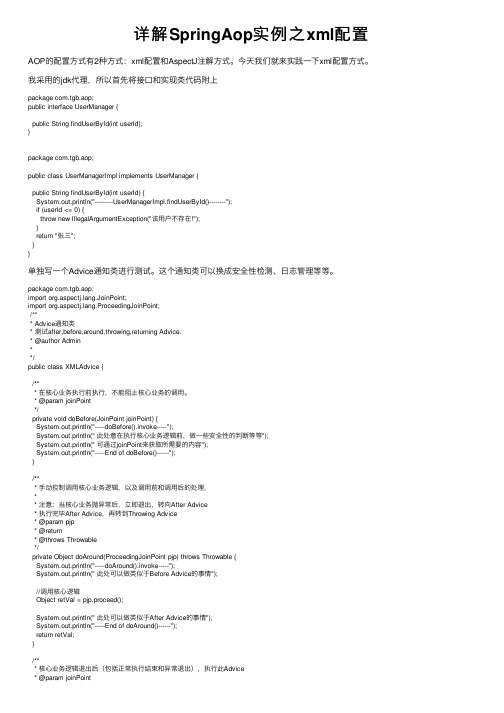
详解SpringAop实例之xml配置AOP的配置⽅式有2种⽅式:xml配置和AspectJ注解⽅式。
今天我们就来实践⼀下xml配置⽅式。
我采⽤的jdk代理,所以⾸先将接⼝和实现类代码附上package com.tgb.aop;public interface UserManager {public String findUserById(int userId);}package com.tgb.aop;public class UserManagerImpl implements UserManager {public String findUserById(int userId) {System.out.println("---------UserManagerImpl.findUserById()--------");if (userId <= 0) {throw new IllegalArgumentException("该⽤户不存在!");}return "张三";}}单独写⼀个Advice通知类进⾏测试。
这个通知类可以换成安全性检测、⽇志管理等等。
package com.tgb.aop;import ng.JoinPoint;import ng.ProceedingJoinPoint;/*** Advice通知类* 测试after,before,around,throwing,returning Advice.* @author Admin**/public class XMLAdvice {/*** 在核⼼业务执⾏前执⾏,不能阻⽌核⼼业务的调⽤。
* @param joinPoint*/private void doBefore(JoinPoint joinPoint) {System.out.println("-----doBefore().invoke-----");System.out.println(" 此处意在执⾏核⼼业务逻辑前,做⼀些安全性的判断等等");System.out.println(" 可通过joinPoint来获取所需要的内容");System.out.println("-----End of doBefore()------");}/*** ⼿动控制调⽤核⼼业务逻辑,以及调⽤前和调⽤后的处理,** 注意:当核⼼业务抛异常后,⽴即退出,转向After Advice* 执⾏完毕After Advice,再转到Throwing Advice* @param pjp* @return* @throws Throwable*/private Object doAround(ProceedingJoinPoint pjp) throws Throwable {System.out.println("-----doAround().invoke-----");System.out.println(" 此处可以做类似于Before Advice的事情");//调⽤核⼼逻辑Object retVal = pjp.proceed();System.out.println(" 此处可以做类似于After Advice的事情");System.out.println("-----End of doAround()------");return retVal;}/*** 核⼼业务逻辑退出后(包括正常执⾏结束和异常退出),执⾏此Advice* @param joinPoint*/private void doAfter(JoinPoint joinPoint) {System.out.println("-----doAfter().invoke-----");System.out.println(" 此处意在执⾏核⼼业务逻辑之后,做⼀些⽇志记录操作等等");System.out.println(" 可通过joinPoint来获取所需要的内容");System.out.println("-----End of doAfter()------");}/*** 核⼼业务逻辑调⽤正常退出后,不管是否有返回值,正常退出后,均执⾏此Advice* @param joinPoint*/private void doReturn(JoinPoint joinPoint) {System.out.println("-----doReturn().invoke-----");System.out.println(" 此处可以对返回值做进⼀步处理");System.out.println(" 可通过joinPoint来获取所需要的内容");System.out.println("-----End of doReturn()------");}/*** 核⼼业务逻辑调⽤异常退出后,执⾏此Advice,处理错误信息* @param joinPoint* @param ex*/private void doThrowing(JoinPoint joinPoint,Throwable ex) {System.out.println("-----doThrowing().invoke-----");System.out.println(" 错误信息:"+ex.getMessage());System.out.println(" 此处意在执⾏核⼼业务逻辑出错时,捕获异常,并可做⼀些⽇志记录操作等等");System.out.println(" 可通过joinPoint来获取所需要的内容");System.out.println("-----End of doThrowing()------");}}只有Advice还不⾏,还需要在application-config.xml中进⾏配置:<?xml version="1.0" encoding="UTF-8"?><beans xmlns="/schema/beans"xmlns:xsi="/2001/XMLSchema-instance"xmlns:aop="/schema/aop"xmlns:tx="/schema/tx"xsi:schemaLocation="/schema/beans /schema/beans/spring-beans-2.0.xsd /schema/aop /schema/aop/spring-aop-2.0.xsd/schema/tx /schema/tx/spring-tx-2.0.xsd"><bean id="userManager" class="erManagerImpl"/><!--<bean id="aspcejHandler" class="com.tgb.aop.AspceJAdvice"/>--><bean id="xmlHandler" class="com.tgb.aop.XMLAdvice" /><aop:config><aop:aspect id="aspect" ref="xmlHandler"><aop:pointcut id="pointUserMgr" expression="execution(* com.tgb.aop.*.find*(..))"/><aop:before method="doBefore" pointcut-ref="pointUserMgr"/><aop:after method="doAfter" pointcut-ref="pointUserMgr"/><aop:around method="doAround" pointcut-ref="pointUserMgr"/><aop:after-returning method="doReturn" pointcut-ref="pointUserMgr"/><aop:after-throwing method="doThrowing" throwing="ex" pointcut-ref="pointUserMgr"/></aop:aspect></aop:config></beans>编⼀个客户端类进⾏测试⼀下:package com.tgb.aop;import org.springframework.beans.factory.BeanFactory;import org.springframework.context.support.ClassPathXmlApplicationContext;public class Client {public static void main(String[] args) {BeanFactory factory = new ClassPathXmlApplicationContext("applicationContext.xml");UserManager userManager = (UserManager)factory.getBean("userManager");//可以查找张三userManager.findUserById(1);System.out.println("=====我==是==分==割==线=====");try {// 查不到数据,会抛异常,异常会被AfterThrowingAdvice捕获userManager.findUserById(0);} catch (IllegalArgumentException e) {}}}结果如图:值得注意的是Around与Before和After的执⾏顺序。
Spring中基于XML的AOP配置详解
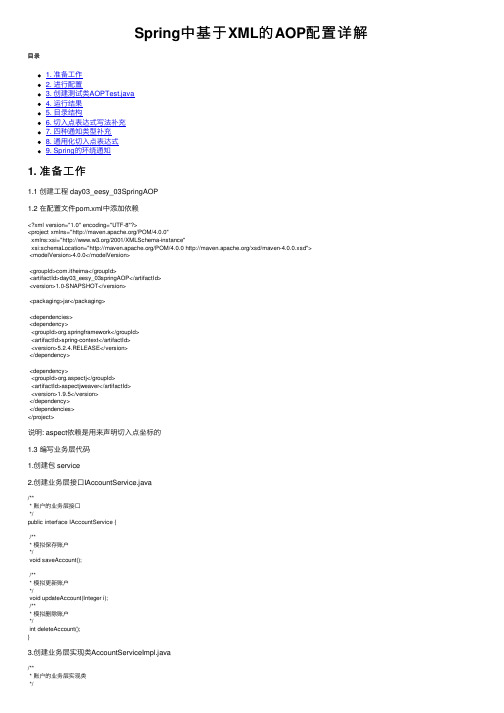
Spring中基于XML的AOP配置详解⽬录1. 准备⼯作2. 进⾏配置3. 创建测试类AOPTest.java4. 运⾏结果5. ⽬录结构6. 切⼊点表达式写法补充7. 四种通知类型补充8. 通⽤化切⼊点表达式9. Spring的环绕通知1. 准备⼯作1.1 创建⼯程 day03_eesy_03SpringAOP1.2 在配置⽂件pom.xml中添加依赖<?xml version="1.0" encoding="UTF-8"?><project xmlns="/POM/4.0.0"xmlns:xsi="/2001/XMLSchema-instance"xsi:schemaLocation="/POM/4.0.0 /xsd/maven-4.0.0.xsd"><modelVersion>4.0.0</modelVersion><groupId>com.itheima</groupId><artifactId>day03_eesy_03springAOP</artifactId><version>1.0-SNAPSHOT</version><packaging>jar</packaging><dependencies><dependency><groupId>org.springframework</groupId><artifactId>spring-context</artifactId><version>5.2.4.RELEASE</version></dependency><dependency><groupId>org.aspectj</groupId><artifactId>aspectjweaver</artifactId><version>1.9.5</version></dependency></dependencies></project>说明: aspect依赖是⽤来声明切⼊点坐标的1.3 编写业务层代码1.创建包 service2.创建业务层接⼝IAccountService.java/*** 账户的业务层接⼝*/public interface IAccountService {/*** 模拟保存账户*/void saveAccount();/*** 模拟更新账户*/void updateAccount(Integer i);/*** 模拟删除账户*/int deleteAccount();}3.创建业务层实现类AccountServiceImpl.java/*** 账户的业务层实现类*/public class AccountServiceImpl implements IAccountService {public void saveAccount() {System.out.println("执⾏了保存");}public void updateAccount(Integer i) {System.out.println("执⾏⼒更新");}public int deleteAccount() {System.out.println("执⾏了删除");return 0;}}4.创建⽇志类该类为⽤于记录⽇志的⼯具类,它⾥⾯提供了公共的代码(通知)Logger.java/*** ⽤于记录⽇志的⼯具类,它⾥⾯提供了公共的代码*/public class Logger {/*** ⽤于打印⽇志,计划让其在切⼊点⽅法执⾏之前执⾏(切⼊点⽅法就是业务层⽅法)*/public void printLog(){System.out.println("Logger类中的printLog⽅法开始记录⽇志了");}}2. 进⾏配置创建配置⽂件 bean.xml先添加包含AOP的约束,后添加配置<?xml version="1.0" encoding="UTF-8"?><beans xmlns="/schema/beans"xmlns:xsi="/2001/XMLSchema-instance"xmlns:aop="/schema/aop"xsi:schemaLocation="/schema/beans/schema/beans/spring-beans.xsd/schema/aop/schema/aop/spring-aop.xsd"><!--配置Spring的IOC,把service对象配置进来--><bean id="accountService" class="com.itheima.service.impl.AccountServiceImpl"></bean><!--Spring中基于XML的AOP配置步骤1.把通知Bean也交给Spring来管理2.使⽤aop:config标签表明开始AOP的配置3.使⽤aop:aspect标签表明配置切⾯id属性: 是给切⾯提供唯⼀标识ref属性: 是指定通知类bean的id4.在aop:aspect标签的内部使⽤对应的标签来配置通知的类型我们现在的⽰例是让Logger类的printLog⽅法在切⼊点⽅法执⾏之前执⾏, 所以是前置通知aop:before : 表⽰配置前置通知method属性: ⽤于指定Logger类中哪个⽅法是前置通知pointcut属性: ⽤于指定切⼊点表达式,该表达式的含义指的是对业务层中哪些⽅法增强切⼊点表达式的写法:关键字: execution(表达式)表达式:访问修饰符返回值包名.包名.包名...类名.⽅法名(参数列表)标准的切⼊点表达式:public void com.itheima.service.impl.AccountServiceImpl.saveAccount()--><!--配置Logger类--><bean id="logger" class="com.itheima.utils.Logger"></bean><!--配置AOP--><aop:config><!--配置切⾯--><aop:aspect id="logAdvice" ref="logger"><!--配置通知的类型,并且建⽴通知⽅法和接⼊点⽅法的关联--><aop:before method="printLog" pointcut="execution(public void com.itheima.service.impl.AccountServiceImpl.saveAccount())"></aop:before> </aop:aspect></aop:config></beans>说明: 切⼊点表达式最好按软件的提⽰写,⾃⼰直接⼿写在测试时容易报错3. 创建测试类AOPTest.java/*** 测试AOP的配置*/public class AOPTest {public static void main(String[] args) {//1.获取容器ApplicationContext applicationContext = new ClassPathXmlApplicationContext("bean.xml");//2.获取对象IAccountService accountService = (IAccountService) applicationContext.getBean("accountService"); accountService.saveAccount();}}4. 运⾏结果5. ⽬录结构6. 切⼊点表达式写法补充6.1 介绍<!-- 切⼊点表达式的写法:关键字: execution(表达式)表达式:访问修饰符返回值包名.包名.包名...类名.⽅法名(参数列表)标准的切⼊点表达式:public void com.itheima.service.impl.AccountServiceImpl.saveAccount()访问修饰符可以省略:void com.itheima.service.impl.AccountServiceImpl.saveAccount()返回值可以使⽤通配符,表⽰任意返回值* com.itheima.service.impl.AccountServiceImpl.saveAccount()包名可以使⽤通配符,表⽰任意包,但是⼜⼏级包,就需要写⼏个 *.* *.*.*.*.AccountServiceImpl.saveAccount()包名可以使⽤..表⽰当前包及其⼦包* *..AccountServiceImpl.saveAccount()类名和⽅法名都可以使⽤*来实现通配* *..*.*()参数列表:可以直接写数据类型:基本类型直接写名称 int引⽤类型写包名.类名的⽅式 ng.String可以使⽤通配符表⽰任意类型,但是必须有参数可以是使⽤..表⽰有⽆参数均可,有参数可以是任意类型全通配写法:* *..*.*(..)实际开发中切⼊点表达式的通常写法:切到业务层实现类下的所有的⽅法* com.itheima.service.impl.*.*(..)-->6.2 在bean.xml中表⽰<?xml version="1.0" encoding="UTF-8"?><beans xmlns="/schema/beans"xmlns:xsi="/2001/XMLSchema-instance"xmlns:aop="/schema/aop"xsi:schemaLocation="/schema/beans/schema/beans/spring-beans.xsd/schema/aop/schema/aop/spring-aop.xsd"><!--配置Spring的IOC,把service对象配置进来--><bean id="accountService" class="com.itheima.service.impl.AccountServiceImpl"></bean><!--Spring中基于XML的AOP配置步骤1.把通知Bean也交给Spring来管理2.使⽤aop:config标签表明开始AOP的配置3.使⽤aop:aspect标签表明配置切⾯id属性: 是给切⾯提供唯⼀标识ref属性: 是指定通知类bean的id4.在aop:aspect标签的内部使⽤对应的标签来配置通知的类型我们现在的⽰例是让Logger类的printLog⽅法在切⼊点⽅法执⾏之前执⾏, 所以是前置通知aop:before : 表⽰配置前置通知method属性: ⽤于指定Logger类中哪个⽅法是前置通知pointcut属性: ⽤于指定切⼊点表达式,该表达式的含义指的是对业务层中哪些⽅法增强切⼊点表达式的写法:关键字: execution(表达式)表达式:访问修饰符返回值包名.包名.包名...类名.⽅法名(参数列表)标准的切⼊点表达式:public void com.itheima.service.impl.AccountServiceImpl.saveAccount()访问修饰符可以省略:void com.itheima.service.impl.AccountServiceImpl.saveAccount()返回值可以使⽤通配符,表⽰任意返回值* com.itheima.service.impl.AccountServiceImpl.saveAccount()包名可以使⽤通配符,表⽰任意包,但是⼜⼏级包,就需要写⼏个 *.* *.*.*.*.AccountServiceImpl.saveAccount()包名可以使⽤..表⽰当前包及其⼦包* *..AccountServiceImpl.saveAccount()类名和⽅法名都可以使⽤*来实现通配* *..*.*()参数列表:可以直接写数据类型:基本类型直接写名称 int引⽤类型写包名.类名的⽅式 ng.String可以使⽤通配符表⽰任意类型,但是必须有参数可以是使⽤..表⽰有⽆参数均可,有参数可以是任意类型全通配写法:* *..*.*(..)实际开发中切⼊点表达式的通常写法:切到业务层实现类下的所有的⽅法* com.itheima.service.impl.*.*(..)--><!--配置Logger类--><bean id="logger" class="com.itheima.utils.Logger"></bean><!--配置AOP--><aop:config><!--配置切⾯--><aop:aspect id="logAdvice" ref="logger"><!--配置通知的类型,并且建⽴通知⽅法和接⼊点⽅法的关联--><aop:before method="printLog" pointcut="execution(* com.itheima.service.impl.*.*(..))"></aop:before> </aop:aspect></aop:config></beans>6.3 在测试类AOPTest.java中测试/*** 测试AOP的配置*/public class AOPTest {public static void main(String[] args) {//1.获取容器ApplicationContext applicationContext = new ClassPathXmlApplicationContext("bean.xml");//2.获取对象IAccountService accountService = (IAccountService) applicationContext.getBean("accountService"); accountService.saveAccount();accountService.updateAccount(1);accountService.deleteAccount();}}6.4 运⾏结果7. 四种通知类型补充7.1 在Logger.java类中添加⽅法/*** ⽤于记录⽇志的⼯具类,它⾥⾯提供了公共的代码*/public class Logger {/*** 前置通知*/public void beforePrintLog(){System.out.println("前置通知:Logger类中的printLog⽅法开始记录⽇志了");}/*** 后置通知*/public void afterReturningPrintLog(){System.out.println("后置通知:Logger类中的printLog⽅法开始记录⽇志了");}/*** 异常通知*/public void afterThrowingPrintLog(){System.out.println("异常通知:Logger类中的printLog⽅法开始记录⽇志了");}/*** 最终通知*/public void afterPrintLog(){System.out.println("最终通知:Logger类中的printLog⽅法开始记录⽇志了");}}7.2 在bean.xml中进⾏配置<?xml version="1.0" encoding="UTF-8"?><beans xmlns="/schema/beans"xmlns:xsi="/2001/XMLSchema-instance"xmlns:aop="/schema/aop"xsi:schemaLocation="/schema/beans/schema/beans/spring-beans.xsd/schema/aop/schema/aop/spring-aop.xsd"><!--配置Spring的IOC,把service对象配置进来--><bean id="accountService" class="com.itheima.service.impl.AccountServiceImpl"></bean><!--配置Logger类--><bean id="logger" class="com.itheima.utils.Logger"></bean><!--配置AOP--><aop:config><!--配置切⾯--><aop:aspect id="logAdvice" ref="logger"><!--配置前置通知: 在切⼊点⽅法执⾏之前执⾏--><aop:before method="beforePrintLog" pointcut="execution(public void com.itheima.service.impl.AccountServiceImpl.saveAccount())"></aop:before><!--配置后通知: 在切⼊点⽅法正常执⾏之后执⾏; 他和异常通知只能执⾏⼀个--><aop:after-returning method="afterReturningPrintLog" pointcut="execution(public void com.itheima.service.impl.AccountServiceImpl.saveAccount())"></aop:after-returning><!--配置异常通知: 在切⼊点⽅法执⾏产⽣异常之后执⾏; 他和后置通知只能执⾏⼀个--><aop:after-throwing method="afterThrowingPrintLog" pointcut="execution(public void com.itheima.service.impl.AccountServiceImpl.saveAccount())"></aop:after-throwing> <!--配置最终通知: ⽆论切⼊点⽅法是否正常执⾏他都会在其后⾯执⾏--><aop:after method="afterPrintLog" pointcut="execution(public void com.itheima.service.impl.AccountServiceImpl.saveAccount())"></aop:after></aop:aspect></aop:config></beans>7.3 在测试类AOPTest.java中运⾏/*** 测试AOP的配置*/public class AOPTest {public static void main(String[] args) {//1.获取容器ApplicationContext applicationContext = new ClassPathXmlApplicationContext("bean.xml");//2.获取对象IAccountService accountService = (IAccountService) applicationContext.getBean("accountService");accountService.saveAccount();}}7.4 运⾏结果8. 通⽤化切⼊点表达式⽤于解决在bean.xml⽂件中配置通知时多次写切⼊点表达式的问题使⽤ aop:pointcut标签,在bean.xml中进⾏配置8.1 在aop:aspect标签内部使⽤aop:pointcut<?xml version="1.0" encoding="UTF-8"?><beans xmlns="/schema/beans"xmlns:xsi="/2001/XMLSchema-instance"xmlns:aop="/schema/aop"xsi:schemaLocation="/schema/beans/schema/beans/spring-beans.xsd/schema/aop/schema/aop/spring-aop.xsd"><!--配置Spring的IOC,把service对象配置进来--><bean id="accountService" class="com.itheima.service.impl.AccountServiceImpl"></bean><!--配置Logger类--><bean id="logger" class="com.itheima.utils.Logger"></bean><!--配置AOP--><aop:config><!--配置切⾯--><aop:aspect id="logAdvice" ref="logger"><!--配置前置通知: 在切⼊点⽅法执⾏之前执⾏--><aop:before method="beforePrintLog" pointcut-ref="pt1"></aop:before><!--配置后通知: 在切⼊点⽅法正常执⾏之后执⾏; 他和异常通知只能执⾏⼀个--><aop:after-returning method="afterReturningPrintLog" pointcut-ref="pt1"></aop:after-returning><!--配置异常通知: 在切⼊点⽅法执⾏产⽣异常之后执⾏; 他和后置通知只能执⾏⼀个--><aop:after-throwing method="afterThrowingPrintLog" pointcut-ref="pt1"></aop:after-throwing><!--配置最终通知: ⽆论切⼊点⽅法是否正常执⾏他都会在其后⾯执⾏--><aop:after method="afterPrintLog" pointcut-ref="pt1"></aop:after><!--配置切⼊点表达式 id属性⽤于指定表达式的唯⼀标识, expression属性⽤于指定表达式的内容此标签写在app:aspect标签内部,只能当前切⾯使⽤。
Spring中xml的配置
Spring中xml的配置(摘抄)出自:1、value元素<value/>元素通过字符串来指定属性或构造器参数的值。
<bean id="myDataSource" detroy-method="close"class="mons.dbcp.BasicDataSource"><property name="driverClassName"><value>com.mysql.jdbc.Driver</value></proerpty><property name="url"><value>jdbc:mysql://localhost:3306/mydb</value></property><property name="username"><vlaue>root</value></property></bean>2、idref元素idref元素用来将容器内其它bean的id传给<constructor-arg/>或<property/>元素,同时提供错误难功能。
<bean id="theTargetBean" class="..."/><bean id="theClientBean" class="..."><property name="targetName"><idref bean="theTargetBean" /></property></bean>等同于:<bean id="theTargetBean" class="..." /><bean id="theClientBean" class="..."><property name="targetName"><value>theTargetBean</value></bean>使用idref标记允许容器在部署时验证所被引用的bean是否存在。
Spring在xml配置文件或annotation注解中运用SpringEL表达式
Spring在xml配置⽂件或annotation注解中运⽤SpringEL表达式Spring EL⼀:在Spring xml 配置⽂件中运⽤ Spring ELSpring EL 采⽤ #{Sp Expression Language} 即 #{spring表达式}1:运⽤E L表达式的配置⽂件如下:[html]1. <?xml version="1.0" encoding="UTF-8"?>2. <beans xmlns="/schema/beans"3. xmlns:xsi="/2001/XMLSchema-instance"4. xmlns:context="/schema/context"5. xsi:schemaLocation="/schema/beans6. /schema/beans/spring-beans-3.0.xsd7. /schema/context8. /schema/context/spring-context-3.0.xsd">9.10. <!-- more bean definitions for data access objects go here -->11.12. <bean id="book" class="com.myapp.core.spel.xml.Book">13. <property name="name" value="Effective Java" />14. <property name="pages" value="300"/>15. </bean>16.17. <bean id="person" class="com.myapp.core.spel.xml.Person">18. <property name="book" value="#{book}" />19. <property name="bookName" value="#{}"/>20. </bean>21. </beans>在person bean 的配置中, 属性 book 引⽤了 book bean 通过EL表达式 形式是:<property name="book" value="#{book}" /> 相当于 在person bean中注⼊ book person属性中的bookName属性注⼊了 book bean中的 name的值2:测试以上配置:Book类:[java]1. package com.myapp.core.spel.xml;2.3. public class Book {4. private String name ;5. private int pages;6.7. public String getName() {8. return name;9. }10. public void setName(String name) {11. = name;12. }13. public int getPages() {14. return pages;15. }16. public void setPages(int pages) {17. this.pages = pages;18. }19.20. }Person类:[java]1. package com.myapp.core.spel.xml;2.3. public class Person {4. private Book book;5.6. private String bookName;7.8.9. public void setBook(Book book) {10. this.book = book;11. }12.13. public Book getBook(){14. return this.book;15. }16.17. public String getBookName(){18. return this.bookName;19. }20.21. public void setBookName(String bookName) {22. this.bookName = bookName;测试类:[java]1. package com.myapp.core.spel.xml;2.3. import org.springframework.context.ApplicationContext;4. import org.springframework.context.support.ClassPathXmlApplicationContext;5.6. public class MainTest {7. public static void main(String[] args) {8.9. ApplicationContext context = new ClassPathXmlApplicationContext("resource/spel.xml");10.11. Person person = (Person)context.getBean("person");12.13. System.out.println(person.getBookName());14.15. System.out.println(person.getBook().getPages());16. }17. }输出结果:[plain]1. 三⽉ 18, 2013 5:17:18 下午 org.springframework.context.support.AbstractApplicationContext prepareRefresh2. INFO: Refreshing org.springframework.context.support.ClassPathXmlApplicationContext@11e831: startup date [Mon Mar 18 17:17:18 CST 2013]; root of context hierarchy3. 三⽉ 18, 2013 5:17:18 下午 org.springframework.beans.factory.xml.XmlBeanDefinitionReader loadBeanDefinitions4. INFO: Loading XML bean definitions from class path resource [resource/spel.xml]5. 三⽉ 18, 2013 5:17:18 下午 org.springframework.beans.factory.support.DefaultListableBeanFactory preInstantiateSingletons6. INFO: Pre-instantiating singletons in org.springframework.beans.factory.support.DefaultListableBeanFactory@498b39: defining beans [book,person]; root of factory hierarchy7. Effective Java8. 300⼆:注解中使⽤ EL1:x m l中配置,扫描含有注解的包;[html]1. <?xml version="1.0" encoding="UTF-8"?>2. <beans xmlns="/schema/beans"3. xmlns:xsi="/2001/XMLSchema-instance"4. xmlns:context="/schema/context"5. xsi:schemaLocation="/schema/beans6. /schema/beans/spring-beans-3.0.xsd7. /schema/context8. /schema/context/spring-context-3.0.xsd">9.10. <!-- more bean definitions for data access objects go here -->11.12.13. <context:component-scan base-package="com.myapp.core.spel.annotation" />14.15.16. </beans>2:相应的类:Book类:[java]1. package com.myapp.core.spel.annotation;2.3. import org.springframework.beans.factory.annotation.Value;4. import ponent;5.6. @Component("book")7. public class Book {8.9. @Value("Effective Java")10. private String name ;11.12. @Value("300")13. private int pages;14.15. public String getName() {16. return name;17. }18. public void setName(String name) {19. = name;20. }21. public int getPages() {22. return pages;23. }24. public void setPages(int pages) {25. this.pages = pages;在book的属性中 注⼊了值。
Spring解析xml的方式(一)
Spring解析xml的⽅式(⼀)基于Spring相关的配置信息,使⽤IntelliJ IDEA ⼯具创建⼀个Spring⼯程,在使⽤得pom.xml中仅仅需要增加依赖为spring-context的依赖包即可,打开依赖关系图可以看到在spring-context包中集成了spring-aop、spring-beans、spring-core、spring-expression这四个主要的包。
依赖信息如下:<dependency><groupId>org.springframework</groupId><artifactId>spring-context</artifactId><version>5.2.8.RELEASE</version></dependency>在操作项⽬时搭配⽇志系统进⾏直观的了解其操作和启动相关的类信息情况。
<dependency> <groupId>org.slf4j</groupId> <artifactId>slf4j-api</artifactId> <version>1.7.10</version></dependency><dependency> <groupId>ch.qos.logback</groupId> <artifactId>logback-classic</artifactId> <version>1.1.2</version></dependency><dependency> <groupId>ch.qos.logback</groupId> <artifactId>logback-core</artifactId> <version>1.1.2</version></dependency>对于spring加载配置信息的⽅式,传统的使⽤的是通过加载spring.xml⽅式进⾏。
springMVC配置(XML配置详解)
springMVC配置(XML配置详解)原⽂出⾃:web.xml配置:servlet><servlet-name>dispatcher</servlet-name><servlet-class>org.springframework.web.servlet.DispatcherServlet</servlet-class><init-param><description>加载/WEB-INF/spring-mvc/⽬录下的所有XML作为Spring MVC的配置⽂件</description><param-name>contextConfigLocation</param-name><param-value>/WEB-INF/spring-mvc/*.xml</param-value></init-param><load-on-startup>1</load-on-startup></servlet><servlet-mapping><servlet-name>dispatcher</servlet-name><url-pattern>*.htm</url-pattern></servlet-mapping>这样,所有的.htm的请求,都会被DispatcherServlet处理;初始化 DispatcherServlet 时,该框架在 web 应⽤程序WEB-INF ⽬录中寻找⼀个名为[servlet-名称]-servlet.xml的⽂件,并在那⾥定义相关的Beans,重写在全局中定义的任何Beans,像上⾯的web.xml中的代码,对应的是dispatcher-servlet.xml;当然也可以使⽤<init-param>元素,⼿动指定配置⽂件的路径;dispatcher-servlet.xml 配置:<?xml version="1.0" encoding="UTF-8"?><beans xmlns="/schema/beans"xmlns:xsi="/2001/XMLSchema-instance"xmlns:mvc="/schema/mvc"xmlns:p="/schema/p"xmlns:context="/schema/context"xmlns:aop="/schema/aop"xmlns:tx="/schema/tx"xsi:schemaLocation="/schema/beans/schema/beans/spring-beans-3.0.xsd/schema/context/schema/context/spring-context-3.0.xsd/schema/aop/schema/aop/spring-aop-3.0.xsd/schema/tx/schema/tx/spring-tx-3.0.xsd/schema/mvc/schema/mvc/spring-mvc-3.0.xsd/schema/context/schema/context/spring-context-3.0.xsd"><!--使Spring⽀持⾃动检测组件,如注解的Controller--><context:component-scan base-package="com.minx.crm.web.controller"/><bean id="viewResolver"class="org.springframework.web.servlet.view.InternalResourceViewResolver"p:prefix="/WEB-INF/jsp/"p:suffix=".jsp" /></beans>第⼀个Controller:package com.minx.crm.web.controller;import org.springframework.stereotype.Controller;import org.springframework.web.bind.annotation.RequestMapping;@Controllerpublic class IndexController {@RequestMapping("/index")public String index() {return "index";}}@Controller注解标识⼀个控制器,@RequestMapping注解标记⼀个访问的路径(/index.htm),return "index"标记返回视图(index.jsp);注:如果@RequestMapping注解在类级别上,则表⽰⼀相对路径,在⽅法级别上,则标记访问的路径;从@RequestMapping注解标记的访问路径中获取参数:Spring MVC ⽀持RESTful风格的URL参数,如:@Controllerpublic class IndexController {@RequestMapping("/index/{username}")public String index(@PathVariable("username") String username) {System.out.print(username);return "index";}}在@RequestMapping中定义访问页⾯的URL模版,使⽤{}传⼊页⾯参数,使⽤@PathVariable 获取传⼊参数,即可通过地址:http://localhost:8080/crm/index/tanqimin.htm 访问;根据不同的Web请求⽅法,映射到不同的处理⽅法:使⽤登陆页⾯作⽰例,定义两个⽅法分辨对使⽤GET请求和使⽤POST请求访问login.htm时的响应。
Spring实战之使用XML方式管理声明式事务操作示例
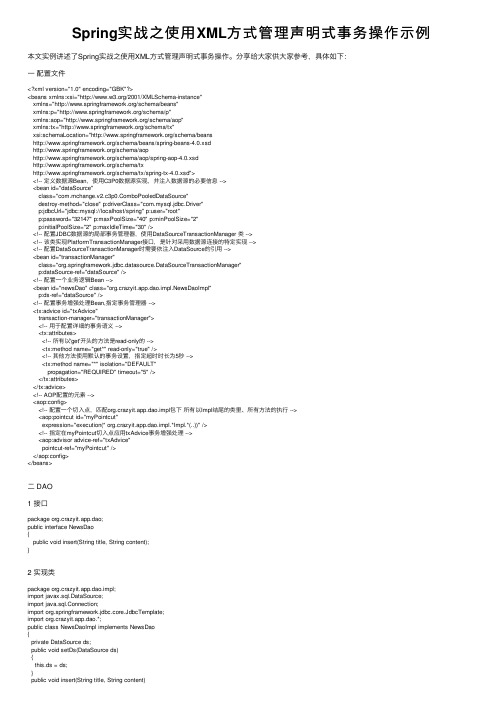
Spring实战之使⽤XML⽅式管理声明式事务操作⽰例本⽂实例讲述了Spring实战之使⽤XML⽅式管理声明式事务操作。
分享给⼤家供⼤家参考,具体如下:⼀配置⽂件<?xml version="1.0" encoding="GBK"?><beans xmlns:xsi="/2001/XMLSchema-instance"xmlns="/schema/beans"xmlns:p="/schema/p"xmlns:aop="/schema/aop"xmlns:tx="/schema/tx"xsi:schemaLocation="/schema/beans/schema/beans/spring-beans-4.0.xsd/schema/aop/schema/aop/spring-aop-4.0.xsd/schema/tx/schema/tx/spring-tx-4.0.xsd"><!-- 定义数据源Bean,使⽤C3P0数据源实现,并注⼊数据源的必要信息 --><bean id="dataSource"class="boPooledDataSource"destroy-method="close" p:driverClass="com.mysql.jdbc.Driver"p:jdbcUrl="jdbc:mysql://localhost/spring" p:user="root"p:password="32147" p:maxPoolSize="40" p:minPoolSize="2"p:initialPoolSize="2" p:maxIdleTime="30" /><!-- 配置JDBC数据源的局部事务管理器,使⽤DataSourceTransactionManager 类 --><!-- 该类实现PlatformTransactionManager接⼝,是针对采⽤数据源连接的特定实现 --><!-- 配置DataSourceTransactionManager时需要依注⼊DataSource的引⽤ --><bean id="transactionManager"class="org.springframework.jdbc.datasource.DataSourceTransactionManager"p:dataSource-ref="dataSource" /><!-- 配置⼀个业务逻辑Bean --><bean id="newsDao" class="org.crazyit.app.dao.impl.NewsDaoImpl"p:ds-ref="dataSource" /><!-- 配置事务增强处理Bean,指定事务管理器 --><tx:advice id="txAdvice"transaction-manager="transactionManager"><!-- ⽤于配置详细的事务语义 --><tx:attributes><!-- 所有以'get'开头的⽅法是read-only的 --><tx:method name="get*" read-only="true" /><!-- 其他⽅法使⽤默认的事务设置,指定超时时长为5秒 --><tx:method name="*" isolation="DEFAULT"propagation="REQUIRED" timeout="5" /></tx:attributes></tx:advice><!-- AOP配置的元素 --><aop:config><!-- 配置⼀个切⼊点,匹配org.crazyit.app.dao.impl包下所有以Impl结尾的类⾥、所有⽅法的执⾏ --><aop:pointcut id="myPointcut"expression="execution(* org.crazyit.app.dao.impl.*Impl.*(..))" /><!-- 指定在myPointcut切⼊点应⽤txAdvice事务增强处理 --><aop:advisor advice-ref="txAdvice"pointcut-ref="myPointcut" /></aop:config></beans>⼆ DAO1 接⼝package org.crazyit.app.dao;public interface NewsDao{public void insert(String title, String content);}2 实现类package org.crazyit.app.dao.impl;import javax.sql.DataSource;import java.sql.Connection;import org.springframework.jdbc.core.JdbcTemplate;import org.crazyit.app.dao.*;public class NewsDaoImpl implements NewsDao{private DataSource ds;public void setDs(DataSource ds){this.ds = ds;}public void insert(String title, String content){JdbcTemplate jt = new JdbcTemplate(ds);jt.update("insert into news_inf"+ " values(null , ? , ?)", title , content);// 两次插⼊的数据违反唯⼀键约束jt.update("insert into news_inf"+ " values(null , ? , ?)", title , content);// 如果没有事务控制,则第⼀条记录可以被插⼊// 如果增加事务控制,将发现第⼀条记录也插不进去。
spring中读取xml配置文件、获取bean
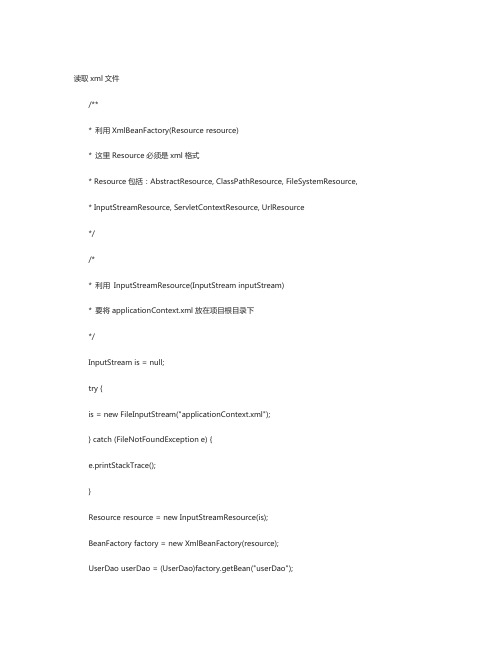
读取xml文件/*** 利用XmlBeanFactory(Resource resource)* 这里Resource必须是xml格式* Resource包括:AbstractResource, ClassPathResource, FileSystemResource, * InputStreamResource, ServletContextResource, UrlResource*//** 利用InputStreamResource(InputStream inputStream)* 要将applicationContext.xml放在项目根目录下*/InputStream is = null;try {is = new FileInputStream("applicationContext.xml");} catch (FileNotFoundException e) {e.printStackTrace();}Resource resource = new InputStreamResource(is);BeanFactory factory = new XmlBeanFactory(resource);UserDao userDao = (UserDao)factory.getBean("userDao");/** 利用Properties* 要将bean.properties放在类路径--源文件夹(src)目录下*/具体见1.利用ClassPathXmlApplicationContext可以从classpath中读取XML文件(1) ApplicationContext context = newClassPathXmlApplicationContext("applicationContext.xml");UserDao userDao = (UserDao)context.getBean("userDao");(2) ClassPathXmlApplicationContext resource = new ClassPathXmlApplicationContext(new String[]{"applicationContext-ibatis-oracle.xml","applicationC ontext.xml","applicationContext-data-oracle.xml"});BeanFactory factory = resource;UserDao userDao = (UserDao) factory.getBean("userDao");2. 利用ClassPathResource可以从classpath中读取XML文件Resource cr = new ClassPathResource("applicationContext.xml");BeanFactory bf=new XmlBeanFactory(cr);UserDao userDao = (UserDao)bf.getBean("userDao");加载一个xml文件org.spring framewonfig.PropertyPlaceholderConfigurer不起作用3.利用XmlWebApplicationContext读取从Web应用程序的文件架构中,指定相对位置来读取定义文件。
springMVC配置文件详解
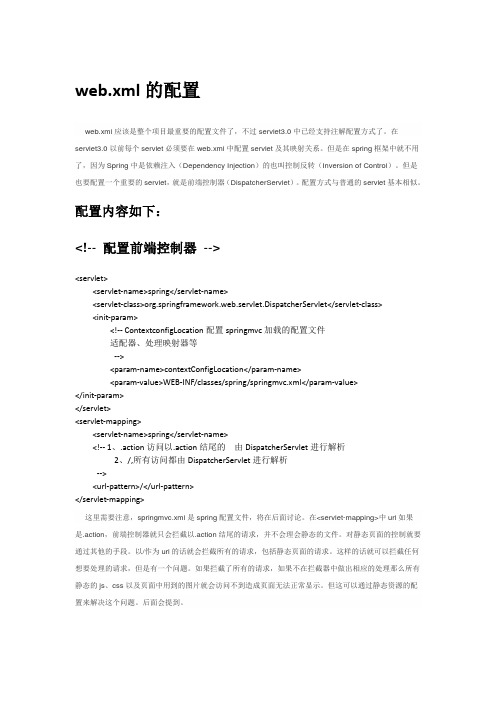
web.xml的配置web.xml应该是整个项目最重要的配置文件了,不过servlet3.0中已经支持注解配置方式了。
在servlet3.0以前每个servlet必须要在web.xml中配置servlet及其映射关系。
但是在spring框架中就不用了,因为Spring中是依赖注入(Dependency Injection)的也叫控制反转(Inversion of Control)。
但是也要配置一个重要的servlet,就是前端控制器(DispatcherServlet)。
配置方式与普通的servlet基本相似。
配置内容如下:<!-- 配置前端控制器--><servlet><servlet-name>spring</servlet-name><servlet-class>org.springframework.web.servlet.DispatcherServlet</servlet-class><init-param><!-- ContextconfigLocation配置springmvc加载的配置文件适配器、处理映射器等--><param-name>contextConfigLocation</param-name><param-value>WEB-INF/classes/spring/springmvc.xml</param-value></init-param></servlet><servlet-mapping><servlet-name>spring</servlet-name><!-- 1、.action访问以.action结尾的由DispatcherServlet进行解析2、/,所有访问都由DispatcherServlet进行解析--><url-pattern>/</url-pattern></servlet-mapping>这里需要注意,springmvc.xml是spring配置文件,将在后面讨论。
日志logback-spring.xml配置
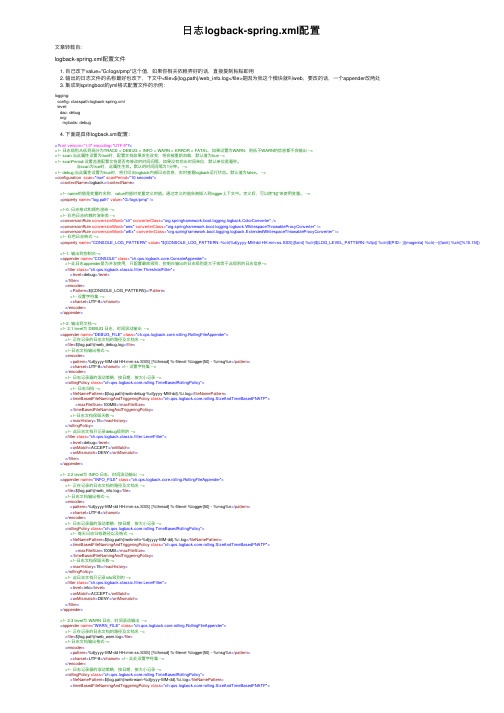
⽇志logback-spring.xml配置⽂章转载⾃:logback-spring.xml配置⽂件1. ⾃⼰改下value="G:/logs/pmp"这个值,如果你相关依赖弄好的话,直接复制粘贴即⽤2. 输出的⽇志⽂件的名称最好也改下,下⽂中<file>${log.path}/web_info.log</file>是因为我这个模块就叫web,要改的话,⼀个appender改两处3. 集成到springboot的yml格式配置⽂件的⽰例:logging:config: classpath:logback-spring.xmllevel:dao: debugorg:mybatis: debug4. 下⾯是具体logback.xml配置:<?xml version="1.0" encoding="UTF-8"?><!-- ⽇志级别从低到⾼分为TRACE < DEBUG < INFO < WARN < ERROR < FATAL,如果设置为WARN,则低于WARN的信息都不会输出 --><!-- scan:当此属性设置为true时,配置⽂档如果发⽣改变,将会被重新加载,默认值为true --><!-- scanPeriod:设置监测配置⽂档是否有修改的时间间隔,如果没有给出时间单位,默认单位是毫秒。
当scan为true时,此属性⽣效。
默认的时间间隔为1分钟。
--><!-- debug:当此属性设置为true时,将打印出logback内部⽇志信息,实时查看logback运⾏状态。
默认值为false。
--><configuration scan="true" scanPeriod="10 seconds"><contextName>logback</contextName><!-- name的值是变量的名称,value的值时变量定义的值。
关于Spring的xml文档的简单实用配置
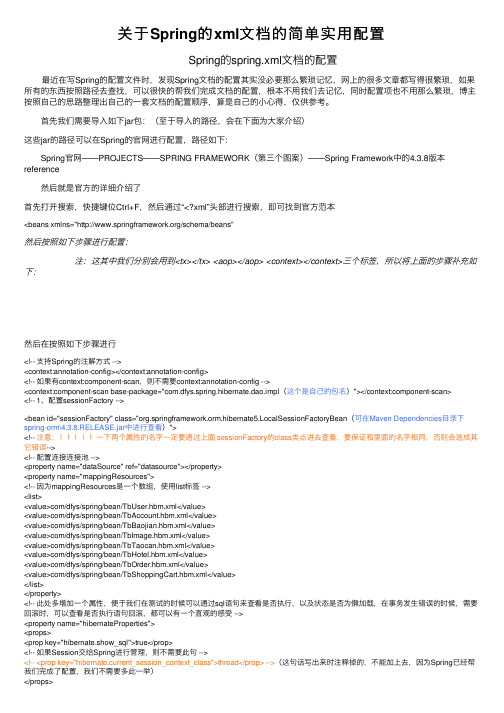
关于Spring的xml⽂档的简单实⽤配置 Spring的spring.xml⽂档的配置 最近在写Spring的配置⽂件时,发现Spring⽂档的配置其实没必要那么繁琐记忆,⽹上的很多⽂章都写得很繁琐,如果所有的东西按照路径去查找,可以很快的帮我们完成⽂档的配置,根本不⽤我们去记忆,同时配置项也不⽤那么繁琐,博主按照⾃⼰的思路整理出⾃⼰的⼀套⽂档的配置顺序,算是⾃⼰的⼩⼼得,仅供参考。
⾸先我们需要导⼊如下jar包:(⾄于导⼊的路径,会在下⾯为⼤家介绍)这些jar的路径可以在Spring的官⽹进⾏配置,路径如下: Spring官⽹——PROJECTS——SPRING FRAMEWORK(第三个图案)——Spring Framework中的4.3.8版本reference 然后就是官⽅的详细介绍了⾸先打开搜索,快捷键位Ctrl+F,然后通过“<?xml”头部进⾏搜索,即可找到官⽅范本<beans xmlns="/schema/beans"然后按照如下步骤进⾏配置: 注:这其中我们分别会⽤到<tx></tx> <aop></aop> <context></context>三个标签,所以将上⾯的步骤补充如下:然后在按照如下步骤进⾏<!-- ⽀持Spring的注解⽅式 --><context:annotation-config></context:annotation-config><!-- 如果有context:component-scan,则不需要context:annotation-config --><context:component-scan base-package="com.dfys.spring.hibernate.dao.impl(这个是⾃⼰的包名)"></context:component-scan><!-- 1、配置sessionFactory --><bean id="sessionFactory" class="org.springframework.orm.hibernate5.LocalSessionFactoryBean(可在Maven Dependencies⽬录下spring-orm\4.3.8.RELEASE.jar中进⾏查看)"><!-- 注意:⼀下两个属性的名字⼀定要通过上⾯ sessionFactory的class类点进去查看,要保证和⾥⾯的名字相同,否则会造成其它错误--><!-- 配置连接连接池 --><property name="dataSource" ref="datasource"></property><property name="mappingResources"><!-- 因为mappingResources是⼀个数组,使⽤list标签 --><list><value>com/dfys/spring/bean/TbUser.hbm.xml</value><value>com/dfys/spring/bean/TbAccount.hbm.xml</value><value>com/dfys/spring/bean/TbBaojian.hbm.xml</value><value>com/dfys/spring/bean/TbImage.hbm.xml</value><value>com/dfys/spring/bean/TbTaocan.hbm.xml</value><value>com/dfys/spring/bean/TbHotel.hbm.xml</value><value>com/dfys/spring/bean/TbOrder.hbm.xml</value><value>com/dfys/spring/bean/TbShoppingCart.hbm.xml</value></list></property><!-- 此处多增加⼀个属性,便于我们在测试的时候可以通过sql语句来查看是否执⾏,以及状态是否为懒加载,在事务发⽣错误的时候,需要回滚时,可以查看是否执⾏语句回滚,都可以有⼀个直观的感受 --><property name="hibernateProperties"><props><prop key="hibernate.show_sql">true</prop><!-- 如果Session交给Spring进⾏管理,则不需要此句 --><!-- <prop key="hibernate.current_session_context_class">thread</prop> -->(这句话写出来时注释掉的,不能加上去,因为Spring已经帮我们完成了配置,我们不需要多此⼀举)</props></property></bean><!-- 2、配置连接池 --><bean id="datasource" class="mons.dbcp2.BasicDataSource"(可在Maven Dependencies⽬录下commons-dbcp2\2.1.1.jar中进⾏查看)><property name="driverClassName" value="com.mysql.jdbc.Driver"></property><property name="url" value="jdbc:mysql://localhost:3306/mydb?useSSL=true"></property><property name="username" value="root"></property><property name="password" value="123456"></property></bean><!-- 3、sessionFactory 创建session对象,⽤来连接数据库,所以增设⼀个property属性,然后再来连接我们所获取的表格对应的bean对象,所以在增加⼀个property属性--><!-- 然后回到1中进⾏补充完成 --><!-- 4、事务管理器 --><!-- 配置Spring的事务管理的类 --><bean id="txManager" class="org.springframework.orm.hibernate5.HibernateTransactionManager"(可在Maven Dependencies⽬录下spring-orm\4.3.8.RELEASE.jar中进⾏查看)><!-- 事务是通过Session进⾏开启和提交,Session需要使⽤Session Factory创建,所以需要sessionFactory对象 --><property name="sessionFactory" ref="sessionFactory"></property></bean><!-- 5、事务管理的具体⽅法的说明和配置 --><tx:advice id="txAdvice" transaction-manager="txManager"><tx:attributes><!-- 对所有以get开头⽅法进⾏事务优化为只读 --><!-- <tx:method name="get*" read-only="true"/> --><!-- 对所有的⽅法进⾏事务的开启和提交 --><tx:method name="*"/></tx:attributes></tx:advice><!-- 6、使⽤AOP将事务的管理HIbernateTransactionManager植⼊到dao层 --><aop:config><aop:pointcut id="dao_point_cut" expression="execution(* com.dfys.spring.hibernate.dao.*.*(..))"/>(这⾥的*都代表这泛指,括号中的“..”也泛指参数,有或者没有都可以)<!-- 配置事务的开始、提交、回滚的⼀个建议,,,类似aop:before aop:after --><aop:advisor advice-ref="txAdvice" pointcut-ref="dao_point_cut"/></aop:config></beans>配置完成。
Spring装配Bean教程之XML安装配置bean详解

Spring装配Bean教程之XML安装配置bean详解前⾔众所周知在Spring刚出现的时候,XML是描述配置的主要⽅式,在Spring的名义下,我们创建了⽆数⾏XML代码。
在⼀定程度上,Spring成为了XML的同义词。
现在随着强⼤的⾃动化配置和Java代码的配置出现,XML不再是唯⼀选择,也不应该是⾸选,学习XML配置,更多⽤于维护已有的XML的配置。
下⾯话不多说了,来⼀起看看详细的介绍吧。
创建XML配置规范在使⽤XML配置前,需要创建⼀个新的配置规范,就像JavaConfig需要我们创建带有 @Configuration注解的类,⽽在XML配置中,需要创建⼀个新的XML配置⽂件,并且要以<beans>元素为根。
<?xml version="1.0" encoding="UTF-8"?><beans xmlns="/schema/beans";xmlns:xsi="/2001/XMLSchema-instance";xmlns:context="/schema/context";xsi:schemaLocation="/schema/beans/schema/beans/spring-beans.xsd/schema/context"></beans>可以看出基本的XML配置就已经⽐JavaConfig复杂很多。
⽤来装配bean的最基本的XML元素包含在spring-beans模式中,在上⾯这个XML⽂件中,它被定义为根命名空间。
<beans>是该模式中过的⼀个元素,它是所有Spring配置⽂件的根元素。
声明⼀个简单的<bean>使⽤spring-beans模式中的另外⼀个元素:<bean>,该元素类似于JavaConfig中的 @Bean注解。
SpringXML配置和注解配置
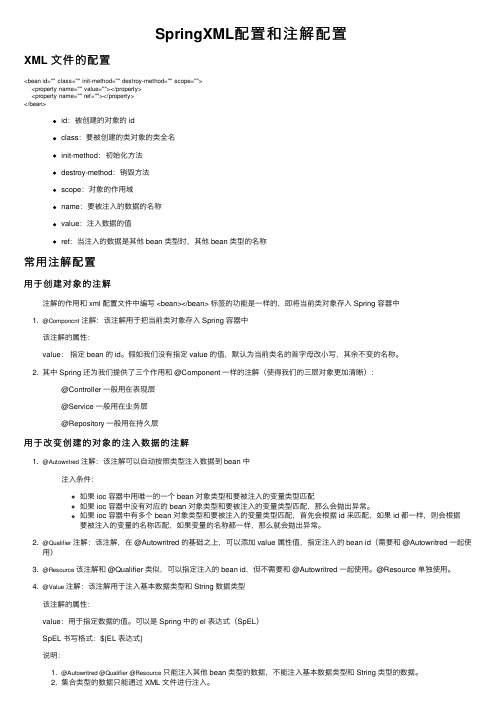
SpringXML配置和注解配置XML ⽂件的配置<bean id="" class="" init-method="" destroy-method="" scope=""><property name="" value=""></property><property name="" ref=""></property></bean>id:被创建的对象的 idclass:要被创建的类对象的类全名init-method:初始化⽅法destroy-method:销毁⽅法scope:对象的作⽤域name:要被注⼊的数据的名称value:注⼊数据的值ref:当注⼊的数据是其他 bean 类型时,其他 bean 类型的名称常⽤注解配置⽤于创建对象的注解注解的作⽤和 xml 配置⽂件中编写 <bean></bean> 标签的功能是⼀样的,即将当前类对象存⼊ Spring 容器中1. @Componcnt注解:该注解⽤于把当前类对象存⼊ Spring 容器中该注解的属性:value:指定 bean 的 id。
假如我们没有指定 value 的值,默认为当前类名的⾸字母改⼩写,其余不变的名称。
2. 其中 Spring 还为我们提供了三个作⽤和 @Component ⼀样的注解(使得我们的三层对象更加清晰):@Controller ⼀般⽤在表现层@Service ⼀般⽤在业务层@Repository ⼀般⽤在持久层⽤于改变创建的对象的注⼊数据的注解1. @Autowritred注解:该注解可以⾃动按照类型注⼊数据到 bean 中注⼊条件:如果 ioc 容器中⽤唯⼀的⼀个 bean 对象类型和要被注⼊的变量类型匹配如果 ioc 容器中没有对应的 bean 对象类型和要被注⼊的变量类型匹配,那么会抛出异常。
- 1、下载文档前请自行甄别文档内容的完整性,平台不提供额外的编辑、内容补充、找答案等附加服务。
- 2、"仅部分预览"的文档,不可在线预览部分如存在完整性等问题,可反馈申请退款(可完整预览的文档不适用该条件!)。
- 3、如文档侵犯您的权益,请联系客服反馈,我们会尽快为您处理(人工客服工作时间:9:00-18:30)。
spring是一个强大的Java应用框架,它广泛地应用于Java应用程序中,为Plain Old Java Objects(POJO)提供企业级服务。
Spring利用依赖注入机制来简化工作,同时提高可测试性。
其配置文件(通常是XML格式)中指定了 Spring bean、依赖性以及bean所需的服务。
但是,这些XML配置文件既冗长又不实用。
对于需要定义大量Spring bean的大型项目来说,它们难以阅读和管理。
在本文中,我将向您展示12种用于Spring XML配置的最佳实践。
其中的一些实践与其说是最佳实践,倒不如说是必要实践。
注意,其他因素(如域模型的设置)也可能影响XML的配置,但是本文重点研究XML配置的可读性和可管理性。
1。
避免使用自动绑定(autowiring)功能Spring 可以通过bean类的自省自动绑定依赖性,所以不必显式指明bean的属性和构造函数。
Bean属性可以通过属性名称或类型匹配来实现自动绑定。
构造函数通过类型匹配来实现自动绑定。
甚至可以指定自动检测autowiring模式,它可以引导Spring选择一种适当的运行机制。
先来看看下面的一个例子:Java代码1.<bean id="orderService"2. class="com.lizjason.spring.OrderService"3. autowire="byName"/>OrderService 类的属性名在容器中用于匹配bean实例。
自动绑定可能会节省一些键入工作量并减少混乱。
但是在现实项目中不应该使用这种方式,因为它牺牲了配置的可读性和可维护性。
许多指南和介绍中大肆吹捧自动绑定是Spring的一项极好的特性,而没有提到这一特性所带来的牺牲。
依我来看,这就像Spring 中的对象池(object-pooling),更大程度上只是宣传的噱头。
对于精简XML 配置文件来说,它是一个好办法,但它实际上增加了复杂性,尤其是在运行包含大量类声明的项目时。
虽然Spring允许混合使用自动绑定和显式绑定,但这会使XML配置更加晦涩难懂。
2.使用命名约定该原则对于Java编码也一样适用。
在项目中使用清晰的、描述性的、一致的命名约定将非常有利于开发人员理解XML配置。
例如,对于bean ID,可以按照Java 类字段名约定来命名它。
OrderServiceDAO实例的bean ID应该命名为orderServiceDAO。
对于大型项目,可以在bean ID前面加上包名作为前缀。
3. 使用简洁形式简洁形式避免了冗长,因为它将属性值和引用从子元素中移入属性中。
例如下面的例子:Java代码1.<bean id="orderService"2. class="com.lizjason.spring.OrderService">3. <property name="companyName">4. <value>lizjason</value>5. </property>6. <constructor-arg>7. <ref bean="orderDAO">8. </constructor-arg>9. </bean>可以使用简洁形式将上述代码重写为:Java代码1.<bean id="orderService"2. class="com.lizjason.spring.OrderService">3.4. <property name="companyName"5. value="lizjason"/>6. <constructor-arg ref="orderDAO"/>7. </bean>简洁形式自1.2版本起就可以使用。
注意,对于<ref local="...">,没有简洁形式。
简洁形式不但可以节约键入工作量,而且可以使XML配置文件更清晰。
当一个配置文件中定义了大量的类时,它可以显著提高可读性。
4. 对于构造函数参数匹配,类型比下标好当构造函数含有一个以上同种类型的参数,或者属性值的标签已经被占用时,Spring允许使用从0开始的下标来避免混淆。
例如:Java代码1.<bean id="billingService"2. class="com.lizjason.spring.BillingService">3. <constructor-arg index="0" value="lizjason"/>4. <constructor-arg index="1" value="100"/>5. </bean>利用type属性来编写会更好一些,如下:Java代码1.<bean id="billingService"2. class="com.lizjason.spring.BillingService">3. <constructor-arg type="ng.String"4. value="lizjason"/>5. <constructor-arg type="int" value="100"/>6. </bean>使用index可以减少一些代码,但是与type属性相比,它更易于出错且难于阅读。
只有在构造函数参数不明确的时候,才应该使用index。
5. 尽可能重用已定义的beanSpring 提供了一种类似于继承的机制来减少配置信息的复制并简化XML配置。
定义一个子类,它就可以从父类那里继承配置信息,而父类实际上成为子类的一个模板。
这就是大型项目中所谓的重用。
只需在父类bean中设置abstract=true,然后在子bean中指定parent引用。
例如:Java代码1.<bean id="abstractService" abstract="true"2. class="com.lizjason.spring.AbstractService">3. <property name="companyName"4. value="lizjason"/>5. </bean>6.7. <bean id="shippingService"8. parent="abstractService"9. class="com.lizjason.spring.ShippingService">10. <property name="shippedBy" value="lizjason"/>11. </bean>ShippingService类从abstractService类继承companyName属性的值——lizjason。
如果一个bean没有指定类或工厂方法,那么这个bean便是抽象的。
6. 在导入时,首选通过ApplicationContext来汇编bean定义像Ant脚本中的导入一样,Spring的import元素对于汇编模块化的bean定义来说是很有用的。
例如:Java代码1.<beans>2. <import resource="billingServices.xml"/>3. <import resource="shippingServices.xml"/>4. <bean id="orderService"5. class="com.lizjason.spring.OrderService"/>6. <beans>然而,相对于使用import在XML配置中进行预汇编,通过ApplicationContext 来配置这些bean则显得更加灵活。
使用 ApplicationContext的话,XML配置也更易于管理。
可以向ApplictionContext构造函数传递一组bean定义,如下:Java代码1.String[] serviceResources =2. {"orderServices.xml",3. "billingServices.xml",4. "shippingServices.xml"};5. ApplicationContext orderServiceContext = new6. ClassPathXmlApplicationContext(serviceResources);7. 使用id作为bean标识符可以指定一个id或名称来作为bean标识符。
虽然使用id不能提高可读性,但是它可以利用XML分析程序来对bean引用进行验证。
如果由于XML IDREF的约束而不能使用某个id,那么可以使用名称来作为bean的标识符。
XML IDREF的约束是:id必须以字母(或者XML规范中定义的标点符号)开头,后面是字母、数字、连字符、下划线、冒号或句点。
实际上,很少会遇到XML IDREF约束问题。
8. 在开发阶段使用依赖性检查(dependency-check)可以在bean定义中为dependency-check属性设置一个非默认值,比如simple、objects或all,以便容器进行依赖性检查。
当需要显式或通过自动绑定设置bean 的全部属性(或某类属性)时,依赖性检查便显得很有用。
Java代码1.<bean id="orderService"2. class="com.lizjason.spring.OrderService"3. dependency-check="objects">4. <property name="companyName"5. value="lizjason"/>6. <constructor-arg ref="orderDAO"/>7. </bean>在这个例子中,容器确保为orderService bean设置的属性不是primitives或collections。