十月结晶吸奶器说明书
韩国吸奶器说明书

韩国吸奶器说明书使用时注意事项1.基本事项(1)母乳挤奶器应为个人卫生使用物品,注意使用二手物品或者租凭物品时会引起交叉感染的危险!(2)为防止母乳本体逆流阻挡器里残留的母乳并根据说明书清洗和交换(3)请注意在多人环境下同使用该物品将引起卫生问题(4)在电动母乳挤奶器关闭电源前继续使用途中如有引起昏睡或睡意的现象应及时关闭电源(5)因在奶瓶中装满母乳将会引起逆流等危险现象,请注意不要在奶瓶中挤满母乳!(6)刚使用母乳挤奶器时将会感觉少许不适之处(疼痛),继续使用继续感到疼痛或乳头部分受伤,出血等问题发生时,请立刻向医生请求治疗。
2.逆流时措施事项(1)本母乳挤奶器在使用逆流阻挡器之下将100%有效阻挡母乳逆流现象。
请注意管理物品卫生,使用前将逆流阻挡器分拆出来单独清洗并消毒之后再晾干!(2)因未使用逆流防止器而引起的逆流问题将由消费者本人有偿承担(3)当确认母乳倒流时请立刻停止所有动作,先从漏斗开始把软管分开和把母乳清除掉。
(4)当怀疑母乳将会发生逆流时,请立刻停止使用,并与该物品购买处的相关人员联系,检查清楚后再使用3.物品安全(1)请保持物品干燥状态,绝对禁止让水或其他液体浸泡。
(2)请不要与发热物品或花焰放在一起(3)请不要摔落物品(4)已有损伤的物品请绝对不要使用4.用电安全(1)连接适配器和分开适配器时请注意保持双手的干爽(2)请只使用本物品提供的适配器(3)如果被水沾湿时,请接受检查后再使用(4)请不要在泡澡或淋浴是使用5. 应中断母乳哺乳时(1)患有威胁生命的疾病时(2)慢性疾病或自身身体受到限制时(3)产后患有忧郁症并在服药期间时@如有以上相同情况时,请不要进行母乳哺乳,并尽快接受医生的诊断或商谈6. 图一,周围温度范围图二,相对湿度范围图三,大气压范围7. 吸奶器的用途(1)让小孩能更方便地吃到母乳(2)以防母乳的不足,可提前挤奶进行保管(3)因乳房淤血(乳腺炎) 应尽快挤出母乳时(4)因需要工作或与小孩长时间分开的情况时(5)因乳头下陷而导致无法给小孩亲自喂乳时8. 乳嘴使用时的注意事项(1)这里包含的奶嘴行为新生儿s阶段(0~3)使用可能(2)初次使用时请用沸水进行5分钟以上的消毒,晾干后使用。
育儿知识-作为聪明的麻麻,吸奶器必须赶紧用起来
作为聪明的麻麻,吸奶器必须赶紧用起来'各位妈妈们应该对吸奶器不陌生,但也有不少麻麻质疑,我又不用上班,为啥不让宝宝自己吸?买也是麻烦事,贴身东西不好试;晒单推荐帖太杂乱,get不到要点。
今天育姐就筛选了几个妈妈们最关心的问题,看完你就有答案啦!育姐主张,吸奶器并不能代替宝宝亲喂,只有当宝宝不能亲自吸奶的时候才需要用到,但为什么吸奶器还是很有必要的呢?因为就算你是全职妈妈,下面这些情况你们也总会遇到的:1.宝宝因为早产儿等原因体力太弱还没有学会吸吮,但neinei这口粮不喝可不行,必须挤出来喝奶瓶呀~2.在初期哺乳阶段,涨奶是大多数母乳妈妈产后的必经之路,有时宝宝吃不了那么多或者宝宝吃的不及时,用吸奶器吸出来才能缓解这种无法言说的痛苦啊~3.有些妈妈的乳头太大或太小甚至内陷,小宝宝吃奶太困难了,用外力吸出来才能保证不断粮呀~4.宝宝遇到特殊情况需要暂停哺乳或者妈妈正在服用药物需要暂停哺乳,利用吸奶器可以维持充足的泌乳量,不至于以后需要哺乳时没有neinei啦~5.职场妈妈必备,就算是全职妈妈也总有需要离开宝宝外出的时候,离开三小时宝宝可就饿得嗷嗷叫啦,所以提前用吸奶器吸出奶水,即使妈妈不在家,宝宝也不用饿肚子啦~6.宝宝把妈妈乳头吸破的现象常有发生,但就算破了还是要喂奶呀!而吸奶器就可以在妈妈乳头破裂的时候派上用场,减少刺激和疼痛……这些情况你敢说你哺乳期间绝对不会遇到吗?所以呀,在育姐看来,就算你是全职妈妈,吸奶器也绝对是一个锦上添花的神器啊!不少麻麻在买吸奶器时后,说奶水反而越来越少了。
其实这是因为妈妈们没有找到增加乳量的正确方法。
想要增加乳量,需要做两件事情。
一是需要在吸奶之前按摩乳房刺激泌乳,二是每次吸奶都要排空乳房。
因为我们的咪咪可是很智能的,乳量是按需调节的,吸的越多,乳汁分泌得越多。
如果乳量比较大,宝宝每次喝不完又不用吸奶器清空乳房,积攒在乳房内,奶水当然会越来越少啦!奶水少的妈妈们也是同理,奶水是越吸越多的,如果宝宝不能经常吸吮,用好吸奶器说不定就是你的好帮手哦!手动吸奶器方便携带,价格也比较低。
使用打奶器的流程
使用打奶器的流程简介打奶器是一种用于将母乳或奶粉喂给婴儿的设备。
使用打奶器可以方便地调节喂奶速度和量,确保婴儿获得足够的营养。
本文档将介绍使用打奶器的详细流程。
步骤1.准备工作–洗手:在开始使用打奶器前,务必洗手并保持手部卫生。
–清洁打奶器:将打奶器的所有零件进行清洁,确保其干净卫生。
可以使用温水和洗涤剂清洗,并用清洁刷清洁难以清洗的部分。
–准备被喂婴儿的奶瓶:根据婴儿的需求,准备好相应的奶瓶(母乳储存瓶或奶粉瓶)。
–无菌操作:在接触奶瓶和打奶器的过程中,要注意保持无菌操作,避免细菌感染的风险。
2.组装打奶器–将打奶器的各个零件组装在一起。
通常包括嘴头、连接管、阀门和奶瓶。
3.安置婴儿–将婴儿安置在舒适的位置上,如婴儿床或婴儿躺椅。
4.开始使用打奶器–打开打奶器的电源开关(如果是电动打奶器)或准备好手动打奶器。
–将奶瓶放置在适当的位置,并将打奶器连接到奶瓶的嘴头。
5.调节喂奶速度和量–根据婴儿的需要以及医生或护士的建议,调节打奶器的喂奶速度和量。
–对于电动打奶器,通常可以通过旋钮或按钮来调节喂奶速度。
–对于手动打奶器,可以通过手指轻轻按压奶瓶的底部来控制喂奶速度。
6.开始喂奶–将打奶器的嘴头轻轻放在婴儿的嘴唇上,并确保嘴唇完全包住嘴头。
–按下电动打奶器的启动按钮(或开始用手操作手动打奶器)。
–观察婴儿的吞咽动作,确保婴儿能够正常吸食奶液。
7.调整姿势–在喂奶过程中,可以调整婴儿的姿势,确保婴儿处于舒适的状态。
–可以将婴儿稍微倾斜、支撑头部或给予背部轻拍等。
8.观察反应–在喂奶过程中,密切观察婴儿的表情和反应。
–如果婴儿出现不适的表现,如吐奶、呛奶、痛苦等,应立即停止使用打奶器并咨询医生的建议。
9.喂奶结束–当婴儿吃饱或喂奶结束时,停止打奶器的操作。
–关闭电动打奶器的电源开关(或停止手动打奶器的操作)。
–将打奶器从奶瓶上取下,拆解并清洁。
注意事项•使用打奶器前,务必阅读打奶器的使用说明书并按照说明书操作。
BRAUN 电子钳型洁奶器-SatinShave Prestige Dual-中文说明书
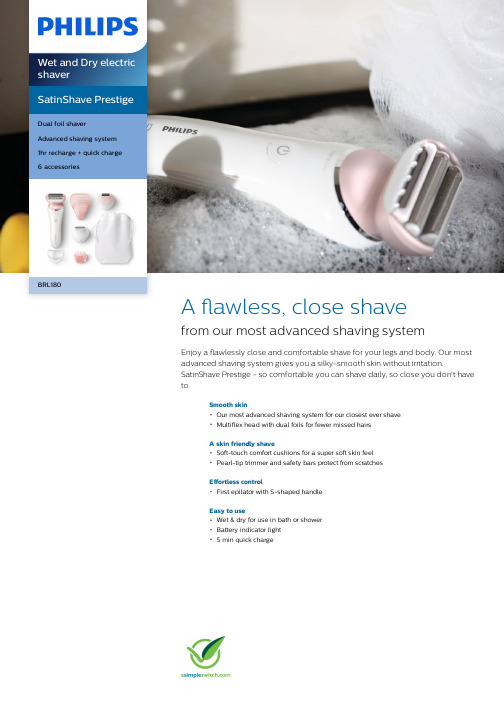
SatinShave PrestigeDual foil shaverAdvanced shaving system1hr recharge + quick charge6 accessoriesBRL180A flawless, close shavefrom our most advanced shaving systemEnjoy a flawlessly close and comfortable shave for your legs and body. Our mostadvanced shaving system gives you a silky-smooth skin without irritation.SatinShave Prestige - so comfortable you can shave daily, so close you don't haveto.Smooth skinOur most advanced shaving system for our closest ever shaveMultiflex head with dual foils for fewer missed hairsA skin friendly shaveSoft-touch comfort cushions for a super soft skin feelPearl-tip trimmer and safety bars protect from scratchesEffortless controlFirst epilator with S-shaped handleEasy to useWet & dry for use in bath or showerBattery indicator light5 min quick chargeHighlightsOur most advanced systemThe flexing curved blades are 75% more efficient than traditional ladyshave blades*.Under the protective foil, they follow your contours for our closest ever shave.Multiflex head with dual foilsAs you guide the shaver over your body, the multiflex head with floating foils and flexing neck moves with you to keep optimal skincontact. The dual shaving foils ensure there are fewer hairs missed.Soft-touch comfort cushionsThe soft-touch comfort cushions either side of the shaving head deliver a smooth pass and a gentle skin feel, especially in curvy areas.Pearl-tips and safety barsThe rounded pearl tip trimmer and the safety bars under trimmer protect your skin from scratches for a comfortable shave.Wet & dry useFor a gentle and comfortable use during your shower or bath routine with anti slip grip for optimal wet & dry use.Battery indicator lightBattery indicator light shows when your shaver is charging, full or low battery.Ergonomic S-shaped handleThe ergonomic S-shaped handle is easy to steer for maximum control and better reach with natural and precise movements, all over your body.Quick charge5 minute quick charge for a full shave.Philips Green LogoPhilips Green Products can reduce costs,energy consumption and CO2 emissions. How?They offer a significant environmentalimprovement in one or more of the Philips Green Focal Areas – Energy efficiency,Packaging, Hazardous substances, Weight,Recycling and disposal and Lifetime reliability.SpecificationsAccessoriesSmall shaving head Bikini trimmer head Bikini trimmer comb Travel capSkin stretcher cap Pouch: Basic pouch Cleaning brush Ease of useWet and dry useCordlessHandle: ErgonomicBattery indicator: Battery low, Batterycharging, Battery fullPerformanceShaving head: Dual foil shaver, Advancedshaving system, Flexing head and foilsSkin care features: Soft-touch comfortcushions, Rounded pearl tip trimmers, SafetybarsPowerBattery Type: Lithium-ionUsage time: 1 hourCharging: Rechargeable, 5 min quick charge, 1hour charging timeT echnical specificationsVoltage: 15VMaterial foil: NickelNumber of shaving foils: 2© 2019 Koninklijke Philips N.V.All Rights reserved.Specifications are subject to change without notice. Trademarks are the property of Koninklijke Philips N.V. or their respective owners.Issue date 2019‑07‑02 Version: 2.3.1EAN: 08 71010 37566 51 。
elvie 吸乳器 说明书

Instructions for Use 说明手册使用說明Instrucciones de uso Bedienungsanleitung Manuel d’instructions Handleiding ManualMake sure you charge Elvie Pump and download the app. 请确认在下载app前给吸乳器充电請確保Elvie Pump已充電,並且已下載APP。
Asegúrate de cargar Elvie Pump y de instalar la aplicación.Bitte laden Sie Elvie Pump auf und laden Sie die App herunter.Prenez soin de charger Elvie Pump et téléchargez l’application.Zorg ervoor dat je Elvie Pump oplaadt en de app downloadt.Kom ihåg att ladda Elvie Pump och ladda ned appen.Page 4183246607488102LanguageEnglish 简体中文繁體中文EspañolDeutschFrançaisNederlandsSvenskaBattery low4. WarrantyElvie Pump is backed by a limited manufacturer’s warranty against any defects in materials and/or workmanship: the Hub for two (2) years and the washable components for 90 days from the date of original purchase. Defects discovered within the warranty period should be reported to Chiaro Technology Limited, “Chiaro”.This warranty is provided free of charge and is separate to any rights provided under consumer laws or regulations in the country of purchase. It does not exclude, limit or affect any consumer rights or legal claims arising from national laws on the sale of consumer products. This warranty is governed by and constructed under the laws in which the product purchase took place.Chiaro reserves the right to a period of investigation to establish the cause of the defect and may exercise its discretion in determining whether or not to replace free of charge.This warranty does not cover cosmetic deterioration or damage caused by general wear and tear, physical or natural destruction, accident, misuse, neglect or other external causes. Any attempt to take the Hub apart will invalidate this warranty.The warranty does not cover purchases from non-authorized resellers.Any warranty claims must be supported with reasonable evidence, including proof of date of purchase, alongside these warranty conditions. Chiaro must be notified of any defects. We will then provide you with a Return Merchandise Authorization number, which must be displayed on the outside packaging. In the event that Chiaro decides to provide a replacement, any replacement will not extend the life of this warranty.This is a single-user product. Use by more than one person may present a health risk and voidsthe warranty.Please keep your proof of purchase in the event that you need to contact customer care.5.Product specificationsVacuum range:Power:Battery capacity and type: Size:Weight:Bluetooth info:Operation temperature: Transport/storage temperature: Operation humidity: Transport/storage humidity: Ambient pressure:Infrared details:40 to 220 mmHg5v DC, 3A max1460mAh Lithium polymer128mm x 110mm x 68mm / 5in x 4.3in x 2.7in225g / 7.9ozBluetooth v5 (Bluetooth Low Energy). Range up to 10m +5 to +30°C / +41 to +86°F-20 to +60°C / -4 to +140°F15 to 90%15 to 90%90 to 106 kPaPeak frequency: 319THz, Radiant power: 55mW5.1 Technical specifications5.2 Transport, storage and disposalTransportWhile traveling, use the Charging Cable provided and pair with the appropriate power source for your current location. Please check with the airline prior to travel for advice on carrying and using Elvie Pump while flying.Temperature: -20 to +60°C / -4 to +140°FRelative humidity: 15 to 90%StorageTemperature: -20 to +60°C / -4 to +140°FRelative humidity: 15 to 90%Ambient pressure: 90 to 106 kPaDisposalElvie Pump contains a rechargeable lithium polymer battery. Please dispose of the Hub at a designated collection point for the recycling of waste electrical and electronic equipment.The appropriate disposal of Elvie Pump will help conserve natural resources and ensure that it is recycled in a manner that protects human health and the environment. For more information about where you can drop off your waste for recycling, please contact your local authority or where you purchased your product.5. Product specifications5.3 EMC adviceDeclaration for Electromagnetic Compatibility (EMC): For information use only.FCC Statement: This device complies with part 15 of the FCC rules. Operation is subject to the following two conditions: (1) This device may not cause harmful interference, and (2) this device must accept any interference received, including interference that may cause undesired operation. This equipment has been tested and found to comply with the limits for a Class B digital device, pursuant to part 15 of the FCC Rules. These limits are designed to provide reasonable protection against harmful interference in a residential installation.This equipment generates, uses and can radiate radio frequency energy, and if not installed and used in accordance with the instructions, may cause harmful interference to radio communications. However, there is no guarantee that interference will not occur in a particular installation.If this equipment does cause harmful interference to radio or television reception, which can be determined by turning the equipment off and on, the user is encouraged to try to correct the interference by one or more of the following measures:• Reorient or relocate the receiving antenna• Increase the separation between the equipment and receiver• Connect the equipment into an outlet on a circuit different from that to which the receiver is connected• Consult the dealer or an experienced radio/TV technician for helpStacking: This device should not be used adjacent to or stacked with other equipment. And if adjacent or stacked use is necessary, this device should be observed to verify normal operation in the configuration in which it will be used.FCC Radiation Exposure Statement: This equipment complies with FCC radiation exposure limits set forth for an uncontrolled environment. This transmitter must not be co-located or operating in conjunction with any other antenna or transmitter.Caution: The user is cautioned that changes or modifications not expressly approved by the party responsible for compliance could void the user’s authority to operate the equipment.Manufactured and Distributed by Chiaro T echnology LimitedModel number: EP01Document number: EP-S-0005Revision number: 106. Safety6.1 Warnings• This is a single-user product. Use by more than one person may present a health risk and voids the warranty• It is recommended you consult with a licensed healthcare professional before using Elvie Pump if you have an active implanted device that would be affected by a magnetic field(e.g. pacemaker, implantable cardioverter defibrillator)• Inspect for damage, clean and sterilize washable components that come into contact with your breast and breast milk prior to first use• Clean all parts that come into contact with your breast and breast milk, and inspect for damage after every use• During normal use, areas of the Elvie Pump may warm up. If your pumping environment is at the upper operating temperature limit (+30°C / +86°F) for the maximum session time (40 minutes), the temperature of the Breast Shield may reach up to +43°C / +109°F• The black semicircle on the base of the Hub uses infrared (IR) energy to monitor the milk volume in the bottle when Elvie Pump is pumping. Ensure the black semicircle does not come into direct contact with skin while Elvie Pump is pumping• Do not store wet or damp parts, as mold may develop• Do not immerse the Hub in water or other liquids. Wipe with a clean, damp cloth• This product contains small parts and a cable that may present a hazard. Keep out of reach of children• Only use Elvie manufactured parts with Elvie Pump, including the Charging Cable• It is recommended to use an adaptor compatible with both IEC 60601-1 and your regional power source• Do not drop or insert any foreign object into any openings on the Hub and always close the Charging Cap after charging• Never operate an Elvie Pump if it has been damaged, is not working properly, or has been dropped into water. If damage is found, immediately discontinue use• If the package appears damaged or tampered with before use, do not use and contact our Customer Care team• Elvie Pump and its components are not heat-resistant. Keep away from heat sources• Do not use flammable materials while using Elvie Pump or connecting Elvie Pump to a charger • Elvie Pump should not be used while lying down or engaging in strenuous exercise or activities with risk of harm• Do not use Elvie Pump while sleeping or overly drowsy• Do not wear Elvie Pump when not pumping• Do not attempt to reset Elvie Pump during use• Do not use Elvie Pump when driving or operating heavy machinery• Elvie Pump uses Bluetooth technology. Please follow airline rules for the use of portable electronic devices when flying. Furthermore, high altitudes, including while in a pressurized aircraft cabin, will affect the performance of Elvie Pump• Always break the seal around your nipple before removing Elvie Pump from your breast• Do not pump until after giving birth as breast pumping can induce labor• Portable and mobile frequency communications equipment can affect the breast pump• Only use Elvie Pump for its intended use as described in this manual6.2 Precautions• Elvie Pump will not work when connected to the charger; always disconnect Elvie Pump from the charger and close port• Always ensure all parts are completely dry before assembling• Do not place the Hub in the fridge or freezer• Contact your healthcare professional if you express minimal or no milk, or if expression is painful • For assistance with correct Breast Shield sizing and comfort, please see section 2.4 or talk to a lactation consultant or breastfeeding specialist• Discontinue use if you notice a loss of power or if the fully charged battery lasts for less than two hours of continuous use. The battery is not replaceable• Wash your hands thoroughly with soap and water before touching Elvie Pump, its components or your breasts, and avoid touching the inside of the Bottle or Lid• Only use drinking-quality tap water or bottled water for cleaning components that come into contact with milk• Do not use harsh chemicals to clean the Breast Shield, Bottle, Valve, Spout or Seal• If stored at minimum or maximum storage temperatures (see section 5.2), when removing from storage, please allow 24 hours for the pump to reach normal operating temperatures before use• Do not expose Elvie Pump or its components to direct sunlightNote: Please visit for the full list of troubleshooting including Alerts, warnings and factory reset for Elvie Pump电量低4. 保修Elvie Pump对任何材料/工艺损坏提供有限的制造商保修:自购买之日起,泵结构可享两 (2) 年保修,可清洗零部件可享 90 天保修。
优哈吸奶器说明书

优哈吸奶器说明书
吸奶器安装之前要先洗干净双手,把吸奶器的白色的阀门,就是亮面朝下,从下面卡入泵里面,如果白色的阀门没有安装正确或者是掉了,吸奶器都是不能正常使用的,把泵身放在奶瓶上,顺时针的方向,轻轻旋转,让它和奶瓶的品口吻合,但是不能扭的太紧,把硅胶隔膜放在泵身上用手乡下按压,让边沿完全贴合吻合,如果组件有点湿润会更容易组装,把把手有叉的那边装在隔膜下面,轻轻按住可以卡住,把按摩护垫仔细的插入泵身中,保证边沿贴合,把盖子放在泵身上,可以把奶瓶插入底座里面,这样可以安装的更加牢固。
吸奶器正确使用知识点总结
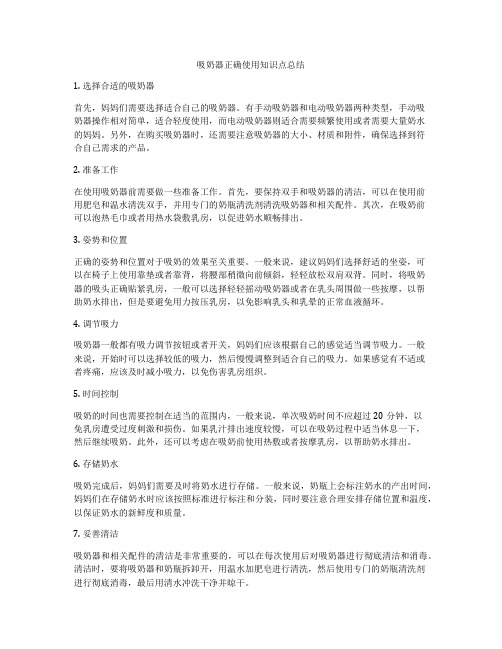
吸奶器正确使用知识点总结1. 选择合适的吸奶器首先,妈妈们需要选择适合自己的吸奶器。
有手动吸奶器和电动吸奶器两种类型,手动吸奶器操作相对简单,适合轻度使用,而电动吸奶器则适合需要频繁使用或者需要大量奶水的妈妈。
另外,在购买吸奶器时,还需要注意吸奶器的大小、材质和附件,确保选择到符合自己需求的产品。
2. 准备工作在使用吸奶器前需要做一些准备工作。
首先,要保持双手和吸奶器的清洁,可以在使用前用肥皂和温水清洗双手,并用专门的奶瓶清洗剂清洗吸奶器和相关配件。
其次,在吸奶前可以泡热毛巾或者用热水袋敷乳房,以促进奶水顺畅排出。
3. 姿势和位置正确的姿势和位置对于吸奶的效果至关重要。
一般来说,建议妈妈们选择舒适的坐姿,可以在椅子上使用靠垫或者靠背,将腰部稍微向前倾斜,轻轻放松双肩双背。
同时,将吸奶器的吸头正确贴紧乳房,一般可以选择轻轻摇动吸奶器或者在乳头周围做一些按摩,以帮助奶水排出,但是要避免用力按压乳房,以免影响乳头和乳晕的正常血液循环。
4. 调节吸力吸奶器一般都有吸力调节按钮或者开关,妈妈们应该根据自己的感觉适当调节吸力。
一般来说,开始时可以选择较低的吸力,然后慢慢调整到适合自己的吸力。
如果感觉有不适或者疼痛,应该及时减小吸力,以免伤害乳房组织。
5. 时间控制吸奶的时间也需要控制在适当的范围内,一般来说,单次吸奶时间不应超过20分钟,以免乳房遭受过度刺激和损伤。
如果乳汁排出速度较慢,可以在吸奶过程中适当休息一下,然后继续吸奶。
此外,还可以考虑在吸奶前使用热敷或者按摩乳房,以帮助奶水排出。
6. 存储奶水吸奶完成后,妈妈们需要及时将奶水进行存储。
一般来说,奶瓶上会标注奶水的产出时间,妈妈们在存储奶水时应该按照标准进行标注和分装,同时要注意合理安排存储位置和温度,以保证奶水的新鲜度和质量。
7. 妥善清洁吸奶器和相关配件的清洁是非常重要的,可以在每次使用后对吸奶器进行彻底清洁和消毒。
清洁时,要将吸奶器和奶瓶拆卸开,用温水加肥皂进行清洗,然后使用专门的奶瓶清洗剂进行彻底消毒,最后用清水冲洗干净并晾干。
子初吸奶器的操作方法
子初吸奶器的操作方法
子初吸奶器的操作方法如下:
1. 组装:将吸头和吸管组装在手柄上,确保吸头和吸管处于正确的位置,然后将瓶子插入手柄底部。
2. 洗净:用温水和肥皂清洗所有需要使用的零部件,然后用干净的毛巾或纸巾擦干净。
3. 准备:找到一张安静、舒适、放松的地方,坐下来准备使用吸奶器。
4. 调节:调节吸奶器的吸力和速度,将吸头和乳头贴合,然后开始吸奶。
5. 存储:将吸出的奶倒入干净的奶瓶中,并注意标记日期和时间,然后放在冰箱里保存。
6. 清洁:使用后,用温水清洗所有零部件,然后晾干或用干净的毛巾擦干。
需要注意:使用前和使用后,要特别注意清洁卫生,以保证母乳的安全。
同时,如果吸奶时感到疼痛或不适,要立即停止使用。
十月结晶吸奶器说明书
十月结晶吸奶器说明书Swing使用建议;1.初次使用请将主机、软管、罩口以外的塑料配件消毒后使用,可以蒸汽消毒,微波炉消毒,煮沸消毒,建议时间不要超过3分钟,也可以热水烫10-15分钟。
软管和罩口在高温下很容易变形损坏,请特别注意不要高温消毒。
罩口在正常的使用情况下寿命大约为2-3个月。
2.吸奶时软管不进奶水的,一周只需清洗2次左右,甩干后使用,如有水气,可以让马达空转3-15分钟排水气4. 刚开始使用的时候建议边按摩乳房边吸奶,这样可以更好的帮助奶块疏散,与舒适罩口更好的贴合使用,逐渐的吸奶干净,这点很重要。
5.每次使用前后建议都检查下配件是否都安装好了,活塞和小白片是否贴合了。
每次用后,活塞和小白片也要及时清洗,否则容易挤压粘性物质造成奶水倒流进入机器。
特别提醒~:黄色活塞开口方向不得与喇叭口方向一致,否则容易导致奶水回流。
建议黄色活塞开口方向与喇叭口方向保持90度。
黄色活塞不用大力套上,只用轻轻套就可以了,原则是你套上以后,用大拇指稍用力就可轻松地取下就可以。
小白片要保证清洁,平顺的安装在黄色活塞上。
使用中,主机和软管尽量不要放在过低的位置,尽量能高于或者平行于乳房的位置。
使用中发现有奶水进入软管,要立即关机,将奶水从软管中甩出再使用。
如果奶水进入了主机,要按后边的方法进行清洗。
使用方法:?按ON开启电源,开机即为刺激奶阵的模式,整个过程约为2分钟左右?通过- +可以调整适合自己的吸力?乳汁开始有流出,可以按水滴按扭进入吸奶模式?吸奶过程中可以通过- +可以调整适合自己的吸力?吸奶结束按扭关闭电源常见问题:造成奶水逆流有以下几个因素1.吸奶姿势不当,或者是吸奶的罩杯正好对的位置不好2.有过奶水逆流情况,但是没有及时清洁,马达堵塞3.配件损耗或者是没有安装好,比如说罩口是否变形了,活塞是否没有及时清理,小白片是否有裂开,软管是否没有按紧等等多方面4.建议清洁完善,注意。
SAMPO BY-W1018BL吸乳器 说明书

2 各部名稱3 本機特點吸乳要點及注意事項 安裝方法 電池安裝7操作說明8清潔注意事項10 故障排除12 緊急處理方法456 5 安裝步驟 5 注意事項 6 電池安裝步驟 8 注意事項 10 無法啟動時 10 無法吸乳時 11 吸力不足 13按摩與集乳的雙模式選擇低噪音設計防逆流閥門設計按摩矽膠乳墊設計 有效按摩乳房方便攜帶及雙重供電設計5安裝步驟注意事項在使用本機之前,應仔細閱讀下列事項及使用說明,閱後並請妥為收存,以備將來參考: 本機請勿置於雨中、濕氣中或避免陽光直射及遠離其他會產生熱能的裝置。
本機請使用AC電源變壓器,才能得到最佳效果。
0使用本機的工作溫度為25~30C。
長期不使用本機時,應取出電池以避免電池放置過久導致漏液。
本機應隨時保持潔淨,使用完應馬上清洗。
當本機出現故障情況時,應請合格的維修人員進行維修:請勿擅自拆下任何蓋子、內部裝置或調校內部裝置,請交由本公司專業人員進行維修。
如於剛生產完後,出乳較少階段欲使用電動吸乳器,請依醫生、護士指導使用 請依個人體質設定吸力大小,以最舒適的吸力完成吸乳動作。
請勿過度吸乳,預防乳房受傷。
1. 將乳頭連接墊片(1)置入吸乳罩(2)中,使之緊密結合。
2. 將防溢流裝置(7)垂直推到底置入吸乳罩中。
3. 將防逆閥(3)放在吸乳罩下面。
4. 將吸乳罩與奶瓶(4)相結合。
5. 將矽膠連結管(8)一端接入在防溢流裝置上方的連接孔(5) ,另一端與主機後方的出風口(9)連結即完成組裝。
(6)為手動洩氣閥,不可漏裝或遺失,否則會洩氣而無吸力功能。
吸乳前請依個人體質設定吸力大小,且檢查所有部件是否正確密合。
請依個人體質設定吸力大小,以最舒適的吸力完成吸乳動作。
本機請使用AC電源變壓器,才能得到最佳效果71.將組裝完成的主機體與吸乳罩,接上A C電源變壓器(或安裝電池)。
2.按壓 電源鍵(1),綠燈點亮,表示已進入開機狀態。
3.選擇吸乳模式:按壓T1/T2(4),T1橘燈(第一段舒適催乳按摩模式-全自動吸、停、放吸乳)T2紅燈(第二段強力吸乳模式-全自動吸、停、放吸乳)4. 吸力調整:按+(2)增加吸力,按-(3)減少吸力,計8段吸力大小調 整,依個人體質輕鬆調整。
贝能吸奶器使用方法

贝能吸奶器使用方法
贝能吸奶器的使用方法如下:
1. 准备工作:将吸奶器组装好,清洗并消毒所有接触乳汁的部件,保证卫生。
2. 姿势:选择一个舒适的坐姿,使乳房和吸奶器可以自然贴合。
3. 开始吸奶:将吸奶器的吸入口正确贴合在乳房上,确保与乳头对齐。
启动吸奶器,开始吸奶。
4. 调节强度:根据个人舒适程度,选择合适的吸奶强度和频率。
逐渐增加吸奶的强度,但不要过度刺激乳房。
5. 吸奶时间:根据个人体验和需要,一般每次吸奶时间为15-30分钟。
6. 换乳:当一侧乳奶已经吸尽或吸奶无效时,可以换另一侧乳房继续吸奶。
7. 完成吸奶:当乳奶已经完全被吸尽或吸奶时间达到预定时间后,停止吸奶器并将吸奶器从乳房上取下。
8. 清洗消毒:将吸奶器拆解,清洗并消毒各个部件,保持卫生。
注意事项:
- 在吸奶前先进行清洗和消毒,确保卫生。
- 吸奶时保持舒适的姿势,不要弯腰或过度用力。
- 吸奶器的吸力和频率要逐渐增加,但不要过度刺激乳房。
- 吸奶时间一般为15-30分钟,不要过长或过短。
- 吸奶器需要定期清洗和消毒,保持卫生。
时蔻摇奶器说明书

时蔻摇奶器说明书
摘要:
一、产品简介
二、产品特点
三、使用方法
四、注意事项
五、清洁与保养
六、售后服务
正文:
一、产品简介
时蔻摇奶器是一款高品质的母乳喂养辅助工具,旨在为宝宝提供更营养、更舒适的母乳。
本产品通过创新的摇动设计,帮助妈妈轻松实现母乳保鲜、混合奶喂养等功能。
摇奶器采用优质材料制造,安全无毒,易于清洗,是妈妈们喂养宝宝的好帮手。
二、产品特点
1.创新摇动设计:本产品采用独特的摇动方式,使母乳在短时间内快速均匀冷却,达到保鲜效果。
2.安全无毒:摇奶器全部采用食品安全级材料制造,确保宝宝使用安全。
3.易于清洗:本产品可拆卸部分便于清洗,避免细菌滋生。
4.便携设计:轻巧的体积和可握的设计,让妈妈随时随地都能使用。
三、使用方法
1.将母乳或混合奶倒入摇奶器;
2.关闭摇奶器上盖;
3.按照宝宝需求,选择适当的摇动速度和时间;
4.打开上盖,倒入奶瓶或直接喂养宝宝。
四、注意事项
1.使用前请务必阅读说明书;
2.请勿将摇奶器放入水中浸泡或冲洗;
3.请勿使用锐器刮伤产品表面;
4.长时间不使用时,请将摇奶器清洗干净后存放。
五、清洁与保养
1.每次使用后,用清水冲洗干净摇奶器;
2.定期用酒精棉片擦拭表面,确保清洁;
3.严禁使用有害化学清洁剂清洗。
六、售后服务
1.本产品自购买之日起,享受一年内免费维修;
2.如有任何疑问,请随时联系售后服务人员;
3.请妥善保存购买凭证,以便享受售后服务。
CounterAct UR10 产品安全指南说明书

Product Safety Guide020-123456-02 CounterAct UR10Important Safety InformationRead this document carefully before installing or operating CounterAct UR10. Store the document in a location close to CounterAct UR10 for future reference.Product documentationFor installation, setup, and user information, see the product documentation available on the Christie website. Read all instructions before using or servicing this product.1. Access the documentation from the Chrsitie website:•Go to this URL: https:///ur102. On the product page, select the model and switch to theDownloads tab.Related documentationAdditional information on this product is available in the following documents.• CounterAct UR10 Installation and Setup Guide (P/N: 020-123456-00) • CounterAct UR10 User Guide (P/N: 020-123456-01)Model namesChristie CounterAct UR10 consists of the following models: • CounterAct UR10-B • CounterAct UR10-WNotationLearn the hazard and information symbols used in the product documentation.Danger messages indicate a hazardous situation which, if not avoided, could result in death or serious injury.Warning messages indicate a hazardous situation which, if not avoided, could result in death or serious injury.Caution messages indicate a hazardous situationwhich, if not avoided, could result in minor or moderate injury.Notice messages indicate a hazardous situation which, if not avoided, may result in equipment or property damage.Information messages provide additionalinformation, emphasize or provide a useful tip.Product labelsLearn about the labels that may be used on the product. Labels on your product may be yellow or black and white.General hazardsHazard warnings also apply to accessories once they are installed in a Christie product that is connected to power.Electrical HazardMandatory actionConsult the user guide.Unplug before opening.Wear a full face shield.Always wear gloves before servicingDo not touch the device with wet handsWear a safety helmet before servicingElectrical labelsIndicates the presence of a protective earthground.Additional safety labelsRisk of falling objects, make sure the ceiling is capable to bear 3 times as the weight of the product.Avoid direct exposure to the light sourceIndicates possible optical radiation emitted fromthe product.Indoor use onlyImportant safeguardsTo prevent personal injury and to protect the device from damage, read and follow these safety precautions.Safety and warning guidelinesWarning! If not avoided, the following could result in death or serious injury.•Read the instruction manual thoroughly before first use.Follow all the safety information. • Ensure the voltage given on the rating label or in theinstruction manual complies with the power supply.•Christie CounterAct products with patented Care222technology are not for use as or for medical devices.Caution!If not avoided, the following could result in minor or moderate injury.• Do not stare at the operating light source or direct thebeam at other people or animals. • UV-C HAZARD! UV-C emitted from this product. Avoideye and skin exposure to the unshielded product. Follow all installation and operation instructions.• Do not open the housing of the product withoutauthorization. Do not insert any objects or fingers into the housing interior. • Fire hazard! Do not cover the product / lampshade e. g.with paperboard or textiles.Notice. If not avoided, the following could result in property damage.• Do not install the product in the electric circuit loop witha dimmer or a dimmer switch. • All internal components of the product cannot be repairedby the user; Do not carry out maintenance work without permission • For indoor use only! Do not expose the product to rain orwet conditions. • The operating ambient temperature of the product is 0 -40°C.Installation safety and warning guidelinesDanger! If not avoided, the following could result in death or serious injury.• Risk of electric shock! Disconnect power beforeinstallation.• The product shall be installed by qualified electrician andwired in accordance with the latest IEE electrical regulations. • Make sure the product is grounded.Warning! If not avoided, the following could result in death or serious injury.• Risk of falling objects! Always wear a safety helmetbefore installation. • Tighten the bolts, nuts and all fastening sets. Do notover-tighten these fastening sets. • Make sure the ceiling is capable to bear 3 times as theweight of the product. • Make sure the product is securely installed.Caution! If not avoided, the following could result in minor or moderate injury.• Wear gloves to prevent hand injury during the installationof the brackets and bolts. • To avoid personal hazard and product damage, keep thechildren or pets away from the product and its accessories during assembly.AC power safety precautionsDanger! If not avoided, the following could result in death or serious injury.• Ensure the voltage given on the rating label / in theinstruction manual complies with the power supply.• Make sure the product is grounded.• Power supply system should be equipped with SPD(Surge protection Device) accordance with electrical regulations.UV-C lamp module safety precautionsCaution! If not avoided, the following could result in minor or moderate injury.• UV-C emitted from this product, avoid eye and skinexposure to the light source. • are authorized to disassemble or replace the UV-Cmodule. • Use protective eye wear and gloves when handling thelamp module. • Mercury is included, if a lamp breaks, ventilate the roomfor more than 20 mins and then remove the part with wearing gloves. • Keep the children or pets away from the UV-C module.Service and maintenance safety guidelinesDanger! If not avoided, the following could result in death or serious injury.• The product shall be maintained by Christie qualifiedtechnicians and wired in accordance with the latest IEEelectrical regulations. • Risk of electric shock! Disconnect power before servicing. • Make sure the product is grounded.• Risk of electric shock! Do not touch the product with wethands, always wear gloves before servicing.Warning! If not avoided, the following could result in death or serious injury.• Risk of falling objects! Always wear a safety helmetbefore servicing. • Tighten the bolts, nuts and all fastening sets. Do notover-tighten these fastening sets. • Make sure the product is securely installed.Caution! If not avoided, the following could result in minor or moderate injury.• PERSONAL INJURY HAZARD! Eye damage may resultfrom directly viewing the light produced by the lamp in this product. Always turn off the lamp before performing maintenance or service. • UV-C emitted from this product, always wear a faceshield and gloves before service and maintenance. • Mercury is included, if a lamp breaks, ventilate the roomfor more than 20 mins and then remove the part with wearing gloves.Power requirementsLearn about the power requirements for CounterAct UR10.Technical supportTechnical support for Christie Cinema products is available at: • **********************************• +1-877-334-4267• Christie Professional Services: +1-800-550-3061 or*********************** Technical support for Christie Enterprise products is available at:• North and South America: +1-800-221-8025 or************************************• Europe, Middle East, and Africa: +44 (0) 1189 778111 or******************************** • Asia Pacific (********************************):• Australia: +61 (0)7 3624 4888 • China: +86 10 6561 0240 • India: +91 (80) 6708 9999 • Japan: 81-3-3599-7481 • Singapore: +65 6877-8737 •South Korea: +82 2 702 1601• Christie Professional Services: +1-800-550-3061 or***********************。
太古热汽乳醫汽蜜器说明书
READ THIS BOOKThis operator’s book has important information for the use and safe operation of this machine. Read this book care-fully before starting the machine. Keep this book and tell all operators to read the book. If you do not follow the instructions, you can cause an injury or damage equipment,furniture or buildings.For new books write to: Pacific2259 S. SheridanMuskegon, MI 49442-6252Carefully inspect all components to ensure that there is no concealed freight damage. If such damage is discovered,file a “CONCEALED DAMAGE REPORT” immediately with the delivering carrier.The contents of this manual are based on the latest product information available at the time of publication. Pacific Steamex reserves the right to make changes or improve-ments to its machines without notice.FOR YOUR CONVENIENCE, RECORD THE MACHINE MODEL AND SERIAL NUMBER:MODEL _______________________________SERIAL NUMBER _______________________PART NUMBER _________________________DATE PURCHASED_______________________OPERATING & MAINTENANCEINTRODUCTION INSTRUCTIONSPOLISHERSSea Ray 170Sea Ray 175Sea Ray 200Sea Ray 205PX-170PX-175PX-200PX-205IMPORTANT SAFETY INSTRUCTIONSTo assure the safe operation of this machine, you must read and understand all warnings and instructions in this book. If you do not understand, ask your supervisor.READ ALL INSTRUCTIONS BEFORE USING THIS MACHINEWARNING : To reduce the risk of fire, electric shock, or injury:1.You must be trained to operate this machine. This machine is to be operated for its intended use only.2.Do not operate this machine unless it is completely assembled.3.Always use a three-wire electrical system connected to the electrical ground. For maximum protection against electrical shock, use a circuit that is protected by a ground fault circuit interrupter. Consult your electrical contractor.4.To prevent electric shock, always remove the electrical plug from the electrical outlet before doing any repairs or mainte-nance and when leaving the machine unattended.5.To prevent electric shock, keep the machine surface dry. Do not subject to rain. Store the machine in a dry building area.Clean the machine with a dry cloth only.6.Machines can cause an explosion when near flammable materials and vapors. Do not use this machine with or near fuels,grain dust, solvents, thinners, or other flammable materials. Do not use flammables to clean this machine.7. A qualified or authorized person must do maintenance and repairs.8.To prevent damage to the power cord, do not move this machine over the power cord. Always lift the power cord over the machine. Do not pull or carry cord, use cord as a handle, close a door on cord, or pull cord around sharp edges or corners.Keep cord away from heated surfaces.9.Do not use with damaged cord or plug. If the machine is not working as it should, has been dropped, damaged, left outdoors, or dropped into water, return it to a service center.This machine must be grounded. If it should malfunction or break down,grounding provides a path of least resistance for electric current to reduce the risk of electric shock. This machine is equipped with a cord having an equip-ment-grounding conductor and grounding plug. The plug must be inserted into an appropriate outlet that is properly installed and grounded in accor-dance with all local codes and ordinances.WARNING - Improper connection of the equipment-grounding conductor can result in a risk of electric shock. Check with a qualified electrician or service person if you are in doubt as to whether the outlet is properly grounded.Do not modify the plug provided with the machine - if it will not fit the outlet,have a proper outlet installed by a qualified electrician.This machine is for use on a nominal 120-volt circuit, and has a grounded plug that looks like the plug illustrated in figure A. A temporary adapter that looks like the adapter illustrated in figures B and C may be used to connect this plug to a 2-pole receptacle as shown in figure B if a properly grounded outlet is not available. The temporary adapter should be used only until a properly grounded outlet (figure A) can be installed by a qualified electri-cian. The green colored rigid ear, lug, or the like extending from the adapter must be connected to a permanent ground such as a properly grounded outlet box cover. Whenever the adapter is used, it must be held in place by a metal screw.NOTE: In Canada, the use of a temporary adapter is not permitted by the Canadian Electrical CodeEXTENSION CORDSUse only three-wire 12/3 or larger gauge approved extension cords that have three-prong grounding type plugs and three-pole receptacles that accept the appliance’s plug. Replace or repair any damaged cords or plugs.When servicing, refer to authorized person only. Use only identical replace-ment parts.Grounding InstructionsNOTE:Do not use adapters shown in figures B & C in CanadaOPERATING PROCEDURESWARNING! For the safe operation of this machine fol-low the instructions given in this manual and the train-ing given by your supervisor. Failure to do so can result in personal injury and/or damage to machine and prop-erty!DO NOT OPERATE MACHINE IN AN EXPLOSIVE ENVIRONMENT!This machine is intended for commercial use. PREPARATIONTo prepare the machine for operation, make sure it is of correct voltage and properly assembled.Your new floor machine operates in the normal side to side motion of a conventional single disc machine. Be prepared before starting by removing all obstructions or other ob-stacles in the area to be cleaned. Check the proper applica-tion recommendations and procedures found on the label of your cleaning or finish container. IF IN DOUBT, CALL YOUR SUPERVISOR .WARNING! NEVER USE THIS MACHINE WITH FLAMMABLE OR EXPLOSIVE MATERIAL!For Scrubbing or Polishing:Select the correct floor pad or brush (your supplier can help you). If in doubt, ask your supervisor.NEVER OPERATE THE MACHINE WITHOUT THE FLOOR PAD OR BRUSH INSTALLED!To properly attach the brush, UNPLUG THE FLOOR MACHINE, place the handle in the vertical position, then tilt the machine back until the handle rests on the floor. Straddle the handle, facing the motor, and grasp the brush with the block toward you. Place the brush or pad clutch plate over the three lugs on the motor drive adapter. Twist the brush right to lock it into position. To remove the brush, UNPLUG THE MACHINE and follow the same procedure as above, but by twisting the brush off with a firm jerk to the left. Remove the brush or pad driver when the ma-chine is not in use. This will help prevent brush damage and reduce wobble problems.OPERATIONPlug the machine’s power cable into a properly grounded outlet (see Safety Instructions). Next, adjust the handle height to a comfortable position.Pull out on the “Watch Dog” Safety Lock button and start the machine by depressing either the left or right switch levers.Both hands should be placed on the handle when the ma-chine is in operation. The machine will glide sideways over the floor by a slight raising and lowering of the handle. Raise the handle slightly to go to the right. Lower the handle slightly to go left. Releasing the switch lever stops the machine at once.MAINTENANCEAFTER EACH USE: Store the machine in a clean dry area. Wipe the entire machine and cord down with a clean cloth. Remove the pad or brush and clean thoroughly. Wrap the machine’s electrical cord onto the handles and the cord hook provided. CHECK the cord and plug for nicks, cuts or damage. Report these to your supervisor for correction. WARNING! Always disconnect the machine’s electri-cal plug from the electrical outlet before performing any service, maintenance, pad changing or inspection of the machine.MOTOR: The motor is lubricated for life under normal use. No oiling or greasing is necessary. However, if the machine is used in dusty areas or is used for spray buffing, the motor should be cleaned. Blowing the motor out with compressed air or with the exhaust from a vacuum is sug-gested. Keeping the motor clean will allow the clear pas-sage of air for ventilation and prevent overheating. If you have any questions regarding the maintenance of your floor machine, ASK YOUR SUPERVISOR.PX and SEA RAY Model PolishersPX and SEA RAY Parts ListHOUSINGPrior toMOTOR PARTS LISTforPX & Sea Ray Single Speed PolishersAC MOTOR ILLUSTRATIONW ARRANTY POLICYPOLISHER MODELS PX & SEA RAYThe Pacific Steamex Inc. Polisher has been manufactured, tested and inspected in accordance with specific engineering requirements and is WARRANTED to be free from defects in workmanship and materials as follows:Three (3) years parts, One (1) year labor - AC Motor and Gear Unit, except motor switches, capacitors and flex couplings which have a one (1) year waranty.Three (3) years parts, One (1) year labor - CastingsOne (1) year parts and labor - All other components unless excluded below.This warranty extends to the original user/purchaser and only when used, operated and maintained in accordance with Pacific Steamex Inc. Operating and Maintenance instructions.This warranty does not apply to the following wear parts and accessories of the machine including:Part Number Part Name502421 Cord Assembly, Black502422 Cord Assembly, Yellow509781 Wheel, 5”503711 Handle Grip, Grey481202 Bumper, 17”481203 Bumper, 20”Nor does it apply to damage or failure caused by improper use, abuse or neglect. Warranty credit or replacement of return parts including motors, etc., is subject to incoming inspection of those items.To secure repair under this warranty, the following procedure should be taken:•The inoperative machine or warranted parts must be delivered to the authorized dealer with shipping and delivery charges prepaid. If unable to locate the Dealer, you may contact Pacific Steamex Inc. at the address listed herein for the location of the nearest Pacific Steamex Inc. repair center or agent or for other instructions pertaining to your warranty difficulty.•Upon compliance with the above warranty procedure, all warranted repairs would be completed at no additional charge or cost to the user.•Only Pacific Steamex Inc. or its authorized dealers and agents may make no charge warranty repairs on this product. All others do so at their own risk.This warranty limits Pacific Steamex Inc. liability to the repair of the product and/or warranted parts replacement and does not include incidental or consequential damages arising from the use of a Pacific Steamex Inc. machine whether defective or not.This warranty is in lieu of all other expressed or implied warranties and is extended to the original purchaser/user.2259 SheridanMuskegon, Michigan 49442Ph: (800) 968-1332 Fax: (231) 773-1642。
Philips Avent 电子母乳吸合器致谢班说明书

BreastfeedingessentialsClassicSCD282/00Breastfeeding made easyAvent Breast careExpress comfortably, store, feed and protect your nipples with the Philips Avent Breastfeeding essentials set.ExpressElectronic breast pump remembers your personal rhythmStoreMilk storage cupsSealing discsFeedBottles clinically proven to reduce colicCareMoisturising nipple creamBreast shell setUnique four layered construction for maximum drynessHighlightsElectronic breast pumpOnly the Philips Avent electric breast pump has a unique memory feature that learns and continues your personal pumping rhythm for maximum comfort. The breast pump also has unique active massage cushions, which are designed to help stimulate natural let-down.Bottles clinically provenUnique anti-colic system consists of thePhilips Avent teat and adaptor ring allowing air to flow into the bottle instead of your baby's tummy for better digestion.*Milk storage cupsIdeal for storing breast milk: Thanks to the adaptor that is compatible with Philips Avent breast pumps and teats, you can express your milk directly into the cup and feed your baby from the same cup. Cups are pre-sterilised/ready to use, easy to label, leak proof, can be used in a fridge/freezer and are dishwasher safeMoisturising nipple creamHypoallergenic for mother and baby.Moisturises and softens dry or sensitivenipples. Easy to apply and no need to remove before breastfeeding.Breast shell setThe ultra-soft breast shells are worn inside your bra to protect your nipples from chafing and to collect excess breast milkDisposable breast padsUnique four layered construction for maximum dryness: 1. Ultra-soft top layer with nippleindent — keeps breast dry at all times 2. Ultra-absorbent layer, cushioned for extra comfort 3.Ultra-absorbent core — draws in moisture to guard against embarrassment 4. Ultrabreathable outer layer — helps avoid sore nipples. Anti-slip with adhesive tape — keeps pad in placeSealing discsConvert all Philips Avent bottles into milk storage containers.SpecificationsCountry of originEUWhat is included Electronic Breast Pump: 1 Classic Bottle 9 oz: 2 pcs Classic Bottle 4 oz: 1 pcs Extra-soft slow flow teat: 2 pcsNewborn teat travel pack: 1 pcsStorage Cup (180 ml/6 oz): 10 pcsMilk storage cup adapter: 2 pcsMilk storage cup lid: 10 pcsSealing disc for milk storage: 1 pcsMoisturising Nipple Cream: 1 pcsBreast Shell: 6 pcsDisposable breast pad: 40 pcsGuide to breastfeeding DVD: 1 pcsDevelopment stagesStages: 0–6 months* *A clinical study showed that at two weeks of age,babies showed less fussing than babies fed withanother bottle. (Study conducted by the Institute ofChild Health, London. 2008.)© 2019 Koninklijke Philips N.V.All Rights reserved.Specifications are subject to change without notice. Trademarks are the property of Koninklijke Philips N.V. or their respective owners.Issue date 2019‑04‑30 Version: 4.2.1。
飞利浦新安怡手动吸乳器 SCF310 88说明书
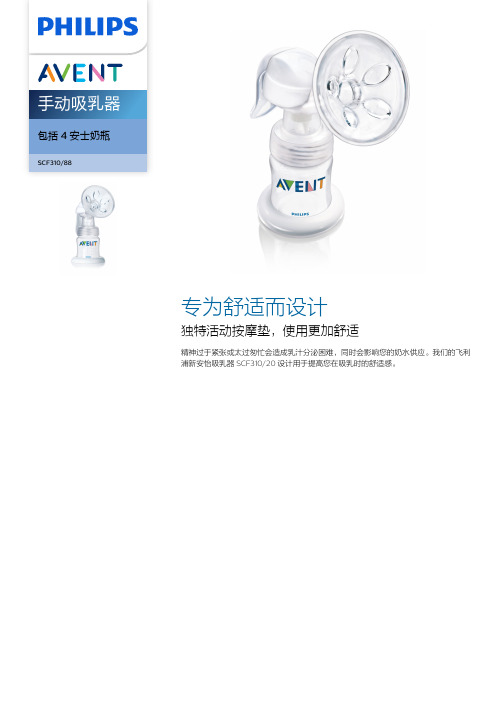
手动吸乳器
包括 4 安士奶瓶
SCF310/88
专为舒适而设计
独特活动按摩垫,使用更加舒适
精神过于紧张或太过匆忙会造成乳汁分泌困难,同时会影响您的奶水供应。
我们的飞利
浦新安怡吸乳器 SCF310/20 设计用于提高您在吸乳时的舒适感。
手动吸乳器SCF310/88规格
发育阶段
阶段: 孕期, 0 至 6 个月
包装内物品
Extra soft newborn flow nipple: 1 pcs 母乳储存杯(125 毫升/4 安士): 1 pcs 奶瓶架/漏斗盖: 1 pcs Sealing disc for milk storage: 1 pcs
新生儿奶嘴旅行盒: 1 pcs
备件: 2 pcs
手动吸乳器: 1 pcs
Material
不含双酚 A*
原产地(中国)
中国
© 2021 Koninklijke Philips N.V.
保留所有权利。
规格如有更改,恕不另行通知。
所有商标是 Koninklijke Philips N.V. 或它们各自所有者的财产。
发行日期 2021‐06‐08版本: 1.0.1
EAN: 06 94726 54058 57 。
九阳 酸奶机 SN10W01 使用说明书
故障及处理方法
故障现象
发热盘不加热 指示灯不亮 发热盘不加热 指示灯亮
产生原因
1、电源没有接通 2、电源线损坏 发热盘损坏 1、发酵时间太短
解决方法
1、检查电源是否接通 2、送指定的售后服务部进行维修 送指定的售后服务部进行维修 1、按要求延长发酵时间 2、室温太低时,发酵内加入4060℃的温水;牛奶温度太低时 适当延长发酵时间 3、按要求加发酵剂或纯牛奶 1、按要求控制发酵时间 2、更换原料
温水
调配好 的原料
酸奶机
奶盒放入发 酵箱中并加 水至水位线
盖好盖,开始发酵 (SN10W01A/SN10W01EC 需设置发酵时间)
(图二) (3)通电时间一般为8-12小时(SN10L01A/SN10L01EC需进行 功能和时间设置,详见[操作说明];SN10W01A/SN10W01EC/ SN-10W05无需进行设置,接通电源后自动完成制奶过程);
完成后牛奶没 有发酵成酸奶
2、室温、牛奶温度太低 3、没有加发酵剂或纯酸牛奶
完成后酸牛奶 异味太重
1、发酵时间过长 2、原料过期、变质
小贴士: �加入配料前请检查其是否过期、变质; 发酵剂的添加量按照发酵剂的使用说明; 用奶粉冲制牛奶时,请按照市售奶粉标示的比例冲泡; 豆浆煮熟后或奶粉冲制的牛奶一定要等温度冷却至40℃以下时方可加入发酵剂 或纯酸奶。
调配好 的原料
酸奶机
盖好盖,开始发酵 (SN10W01A/SN10W01EC 需设置发酵时间)
九阳酸奶机
型 号:S N 1 0 W 0 1 A SN10W01EC SN10L01A SN10L01EC SN-10W05
维修服务保证
产 品如有故障,请与本公司的特约维修 网 点 或 客 户 服 务 中 心 联 系 。 1 、九阳酸奶机实行一年保修期。 2 、保修期的起始日期以产品发票日期为 准 。 3 、下列情况之一者,不属于保修范围: ■消费者使用、保管、维护不当造成 损 坏 。 ■非本公司指定维修部自行装拆修理 而 造 成 损 坏 。 ■发票型号与维修产品型号不符或者 有 涂 改 。 ■无有效发票。 ■因不可抗拒力造成损坏。 ■将酸奶机用于商业用途。 4 、 不属于保修范围内的产品,本公司客户服务中心仍热情为您服务。
- 1、下载文档前请自行甄别文档内容的完整性,平台不提供额外的编辑、内容补充、找答案等附加服务。
- 2、"仅部分预览"的文档,不可在线预览部分如存在完整性等问题,可反馈申请退款(可完整预览的文档不适用该条件!)。
- 3、如文档侵犯您的权益,请联系客服反馈,我们会尽快为您处理(人工客服工作时间:9:00-18:30)。
十月结晶吸奶器说明书
Swing使用建议;
1.初次使用请将主机、软管、罩口以外的塑料配件消毒后使用,可以蒸汽消毒,微波炉消毒,煮沸消毒,建议时间不要超过3分钟,也可以热水烫10-15分钟。
软管和罩口在高温下很容易变形损坏,请特别注意不要高温消毒。
罩口在正常的使用情况下寿命大约为2-3个月。
2.吸奶时软管不进奶水的,一周只需清洗2次左右,甩干后使用,如有水气,可以让马达空转3-15分钟排水气
4. 刚开始使用的时候建议边按摩乳房边吸奶,这样可以更好的帮助奶块疏散,与舒适罩口更好的贴合使用,逐渐的吸奶干净,这点很重要。
5.每次使用前后建议都检查下配件是否都安装好了,活塞和小白片是否贴合了。
每次用后,活塞和小白片也要及时清洗,否则容易挤压粘性物质造成奶水倒流进入机器。
特别提醒~:黄色活塞开口方向不得与喇叭口方向一致,否则容易导致奶水回流。
建议黄色活塞开口方向与喇叭口方向保持90度。
黄色活塞不用大力套上,只用轻轻套就可以了,原则是你套上以后,用大拇指稍用力就可轻松地取下就可以。
小白片要保证清洁,平顺的安装
在黄色活塞上。
使用中,主机和软管尽量不要放在过低的位置,尽量能高于或者平行于乳房的位置。
使用中发现有奶水进入软管,要立即关机,将奶水从软管中甩出再使用。
如果奶水进入了主机,要按后边的方法进行清洗。
使用方法:?按ON开启电源,开机即为刺激奶阵的模式,整个过程约为2分钟左右?通过- +可以调整适合自己的吸力?乳汁开始有流出,可以按水滴按扭进入吸奶模式?吸奶过程中可以通过- +可以调整适合自己的吸力?吸奶结束按扭关闭电源
常见问题:
造成奶水逆流有以下几个因素1.吸奶姿势不当,或者是吸奶的罩杯正好对的位置不好2.有过奶水逆流情况,但是没有及时清洁,马达堵塞3.配件损耗或者是没有安装好,比如说罩口是否变形了,活塞是否没有及时清理,小白片是否有裂开,软管是否没有按紧等等多方面4.建议清洁完善,注意。