骆驼燃气热水器说明书
燃气热水器使用方法
燃气热水器使用方法燃气热水器使用方法一、安装和检查1.安装前,请仔细阅读产品使用说明书,并确认安装地点符合《燃气安全法》、《国家标准》及本厂生产技术条件的要求。
2.安装时,应注意热水器距火焰、易燃物质有足够的安全距离;严禁装在可能受到潮湿、污浊空气污染或高温环境影响的地方。
3.检查安装连接,是否符合说明书要求,根据实际情况采用相应的安装措施。
4.安装完毕后,必须拧紧所有管路连接处,避免漏气。
5.连接水路时,必须加装止回阀,以防引起热水器漏水。
6.安装完毕后,应进行整套燃气设备的气、水试验,确保安全可靠。
二、使用说明1.开机前,应先用合适的容器盛放冷水,并将冷水连接管路的止回阀打开,以免损坏热水器。
2.接通电源后,按动开关,燃气热水器开始工作,即可得到热水。
3.热水器在使用中,应定期清洗,以保持其内部的清洁,防止结垢、污垢,以免影响使用效果。
4.如果热水器长时间不使用,应将燃气供应关闭,热水器内部保持清洁,并定期检查,以免影响使用效果。
5.热水器在使用时,应注意控制水温,以免因水温过高而受伤。
6.如果热水器在使用中出现故障,应立即关闭电源,并及时联系专业人员进行维修。
三、安全操作注意事项1.使用前,必须检查热水器的安全阀、燃气阀及温度调节阀是否完好,以免受损。
2.在使用中,应定期检查热水器的安全阀、燃气阀及温度调节阀,确保其功能正常。
3.热水器的安全阀、燃气阀及温度调节阀不可拆卸,调试,以免发生危险。
4.热水器的燃气接口应定期检查,以免漏气,严禁使用不正规的燃气管道。
5.如果发现热水器有漏气现象,应立即关闭燃气供应,并及时联系专业人员进行维修。
6.热水器的连接管路应定期检查,检查时应特别注意,管道应无漏水、动摇现象,以免发生危险。
7.定期检查热水器的点火器是否正常,以免燃气燃烧不良。
8.如遇长时间不使用,应关闭热水器的燃气阀,以免发生燃气泄漏,造成不必要的损失。
9.热水器在使用时,应注意控制水温,以免造成烫伤。
用户操作使用手册 turboMAG classic即热式燃气热水器
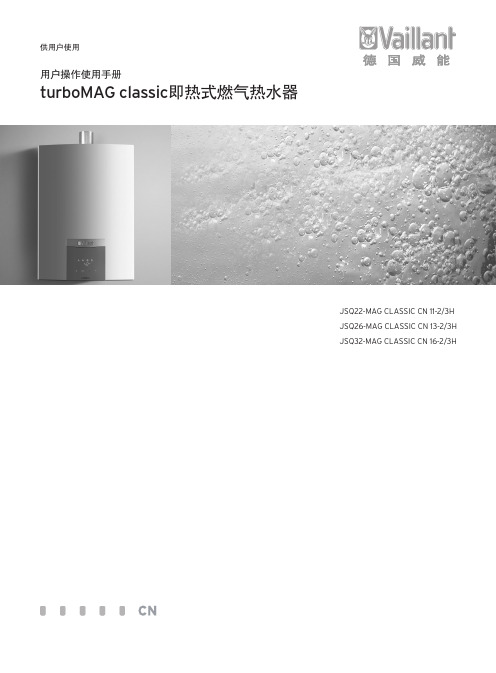
供用户使用用户操作使用手册turboMAG classic即热式燃气热水器JSQ22-MAG CLASSIC CN 11-2/3HJSQ26-MAG CLASSIC CN 13-2/3HJSQ32-MAG CLASSIC CN 16-2/3H目录供用户使用用户操作使用手册turboMAG classic即热式燃气热水器目录概述 (3)功能与特点 (3)1 阅读提示 (3)1.1 文件保管 (3)1.2 符号说明 (3)1.3 设备类型 (3)2 安全性 (4)3 各部零件名称 (5)3.1 外观图 (5)3.2 内部结构图 (5)3.3 操作面板 (5)4 运行 (5)4.1 运行使用前准备 (5)4.2 使用方法 (6)4.2.1 点火 (6)4.2.2 水温调节 (6)4.2.3 故障检修 (7)4.2.3.1 非故障状况 (7)4.2.3.2 故障代码 (8)4.2.3.3 安全装置动作时处理方法 (9)4.2.4 关机 (9)4.2.5 防冻 (10)4.2.5.1 防冻注意事项 (10)4.2.6 检查与维护 (11)4.2.6.1 检查与维护注意事项 (11)4.2.6.2 检查事项 (11)4.2.6.3 检查与保养方法 (11)概述产品特点阅读提示1概述turboMAG classic CN 11-2/3H,13-2/3H和16-2/3H 热水器是即连即用设备。
只需要连接到水/气管道、烟道和主电源上即可使用。
可为一个或多个用水点供应热水,如,盥洗池、淋浴装置和浴缸。
该热水器必须与排气烟道连接,燃烧所需空气来自室内,烟气由内置的风机经过烟道把废气排到室外。
本机器仅适合安装在海拔2500米以下的地区。
为您安装设备的技术人员将根据技术参数表检查您的燃气类型是否匹配(参阅25页,安装手册第8部分)。
功能与特点1. 外型美观时尚外观造型,体积小巧,结构紧凑,触控式按键,大尺寸显示屏,操作方便,高质膜内注塑装饰板,简约时尚。
燃气热水器使用说明书
常见问题01,02,03火焰检测上发生异常,不能正常点火或点火立即被安全切断。
可能是因外界影响导致。
按室内温度控制器的电源/重新启动按钮,重新启动。
确认燃气阀是否打开异常现象持续时,请与当地代理店或售后服务中心联系04锅炉内的水温传感器发生异常停止锅炉的运转,请与当地代理店或售后服务中心联系05过热传感线发生短路或地震感知装置启动(发生地震时启动)异常现象持续时,请与当地代理店或售后服务中心联系06不能感知锅炉内送、排风机的转速异常现象持续时,请与当地代理店或售后服务中心联系07排风机回转数不符合标准,导致外壳内进异物导致送、排风机转速过高,烟筒安装在风压带,风大导致,需改变烟筒的安装位置。
清除烟筒弯曲部位结露产生的冷凝水请与当地代理店或售后服务中心联系08室内温度调节器的连接线过长(10m以上)或与高压线、电话线接触会导致小心施工,勿使用电线绝缘层受损。
不得与AC220V电线和配线管混放特殊情况时,用特殊配线重新施工请与当地代理店或售后服务中心联系95,98锅炉内的缺水时会显示开放型缺水时会自动补水后,正常启动锅炉(确认供水阀是否开启)仍未解除故障时,请与当地代理店或售后服务中心联系(但密闭型的情况时补水后请把手动补水阀关闭)96过热安全装置启动,为保证安全,锅炉处于停止状态于此同时,循环泵运转,降低取暖水温度仍未解除故障时,请与当地代理店或售后服务中心联系97燃气泄漏时通过数字显示,告知燃气泄露。
此项技术未瑰都啦咪锅炉独有技术。
此时,关闭给气阀,打开窗户通风换气。
切勿打开其它电源开关和使用引火性强的火柴、打火机。
禁止点火严禁使用其他电器,有爆炸的危险燃气泄露警报提醒时,利用外部电话通知,燃气公司人员或当地代理店或售后服务中心,及时解决问题(燃气配管连接部位用肥皂水时常进行检查)。
燃气热水器技术服务手册说明书
JSQ25-CX313燃气热水器技术服务手册目录燃气热水器技术服务手册........................................................................错误!未定义书签。
1 整机概述 (1)1.1按键 (1)1.2显示 (1)1.3产品特色 (8)1.4规格与技术参数 (10)2 部件名称 (11)3.拆装程序 (14)4 操作方法、电控功能............................................................................错误!未定义书签。
4.1显示界面见下图:.....................................................................错误!未定义书签。
4.2、菜单项说明:..........................................................................错误!未定义书签。
4.3、参数设置操作说明:..............................................................错误!未定义书签。
4.4、按键操作说明:......................................................................错误!未定义书签。
4.5、系统状态显示说明:..............................................................错误!未定义书签。
4.6、步进电机驱动说明:..............................................................错误!未定义书签。
燃气热水器使用说明书及安全指南

燃气热水器使用说明书及安全指南燃气热水器使用说明书及安全指南随着生活水平的提高,人们对生活品质的要求也越来越高,热水器作为一个家庭必备的家电,受到了大家的普及和欢迎。
而其中较为常见的燃气热水器,其高效、快速、环保等特点,也让其成为了人们购买的首选。
那么,接下来我们就来一起学习一下燃气热水器的使用说明书及安全指南。
使用说明书:一、产品描述本产品为燃气热水器,主要使用天然气或液化气作为燃料源,通过其内部的燃烧室将燃料燃烧,产生的热量加热水流,从而供应热水。
二、产品参数1. 燃料类型:天然气/液化气2. 加热功率:12kW-40kW3. 水压:0.025MPa-0.8MPa4. 热水温度:20℃-75℃5. 安全装置:漏电保护、气阀保护、过热保护6. 安装方式:垂直安装/水平安装三、产品使用方法1. 安装本产品必须由专业人士进行安装,未经授权的人员不得进行安装。
在选择安装地点时,应选择通风、干燥、离墙面一定距离的位置,以确保燃气热水器的正常使用。
2. 启动在启动前,应检查燃气管路及其它附件是否完好。
当确认无损后,将燃气主管处于开启状态,按下启动按钮即可启动热水器。
启动时,应保持通风良好,切忌在封闭环境下启动。
启动后,应观察指示灯及温度显示器,如异常闪烁或数值不正常,请立即停机,检查问题并解决。
3. 使用本产品具有简洁易懂的控制面板,用户可以通过控制面板来控制燃气热水器的开关,调节温度等操作。
当使用完毕后,请及时关闭燃气主管并关闭热水器,以保证安全。
四、特别提示1.此燃气热水器为燃气家电,使用时需要注意燃气的安全问题。
2.在使用过程中,应保持室内通风良好,切勿将燃气热水器放置在封闭、潮湿的环境下。
3.使用过程中切勿强行拆卸燃气热水器,维修或更换部件请联系专业维修人员。
4.如燃气热水器长时间未使用,请关闭燃气主管,以免漏气。
安全指南:1. 安全常识燃气热水器使用天然气或液化气作为燃料源,其具有易燃、易爆等危险性。
燃气热水器使用说明

燃气热水器使用说明燃气热水器使用说明一、前言燃气热水器是我们日常生活中非常常见的热水设备之一。
它通过燃烧燃气来加热水,并可以提供家庭用热水的需求。
为了保证用户的安全使用和延长热水器的使用寿命,我们向您提供详细的燃气热水器使用说明。
请您仔细阅读并按照说明操作。
二、安装与使用环境1.在安装燃气热水器之前,请确保使用环境通风良好,室内空气流通,以确保燃气燃烧顺畅,排放废气。
2.选择安装位置时,请选择固定、稳定的地方,并保持周围空间开阔,便于日常使用和维修。
3.热水器使用的燃气应选择合格的燃气,并确保燃气管道安装合格、无漏气。
三、燃气热水器使用步骤1.打开冷热水进水阀:确认进水管道无阻塞,打开热水器上的冷热水进水阀。
2.打开煤气阀门:确认煤气管道无漏气,打开热水器侧面的煤气阀门。
3.点火:将开关拨至点火(PILOT)位置,按下点火按钮,开始点火。
4.预热:等待数分钟,燃烧器开始燃烧,热水器开始预热。
5.调节温度:根据需要,将热水器上的温度旋钮调至所需温度位置,等待热水达到所需温度。
6.使用热水:打开热水出水阀,可使用热水。
四、注意事项1.燃气热水器只能用于加热和供应家庭热水,不能用于其他用途。
2.操作燃气热水器时,请遵循本使用说明书并按照正确的步骤操作。
3.避免热水溅到身体或触摸热水器外壳,以免烫伤。
4.热水器在使用过程中会产生一定的温度和压力,请避免手部、身体靠近出水口,以免造成伤害。
5.燃气热水器日常维护应定期清洗,确保燃烧器工作顺畅,预防故障发生。
6.如遇到燃气热水器故障,应立即停止使用,并联系专业维修人员进行维修。
五、故障排除若燃气热水器出现以下故障情况,请停止使用,并联系专业人员进行维修:1.无法点火或点火不成功。
2.燃烧火焰不稳定或火焰颜色异常。
3.出水温度异常,无法达到所需温度。
4.有异常声音或异味。
5.其他无法正常使用的情况。
六、使用期限及注意事项1.燃气热水器的使用寿命一般为8-10年,超过该期限应更换新机。
燃气热水器使用说明书

燃气热水器使用说明书一、产品介绍燃气热水器是一种以燃气为能源,通过热水器系统将冷水加热至设定温度的家用热水设备。
本产品具有高效、安全、环保等多种优点,可满足日常生活中的热水需求。
二、安全注意事项为确保您的安全以及燃气热水器的正常使用,请您务必遵循以下操作指引:1. 在安装之前,确保燃气热水器固定牢靠,避免因不稳造成意外伤害。
2. 检查燃气管道是否完好无损,避免出现气体泄露的情况。
3. 在热水器周围保持良好的通风,避免积聚有害气体。
4. 使用并定期更换合格的防火器具,确保应急情况下的安全。
5. 使用过程中,请勿将易燃物品放置在燃气热水器附近。
6. 不要将任何金属物体接触到燃气热水器的表面,以免发生触电事故。
7. 定期清洁燃气热水器的表面,确保机身无尘、无异味。
三、使用方法1. 打开天然气阀门,确保燃气供应充足。
2. 开启燃气热水器的电源开关,使其开始供电。
3. 调整热水器的设定温度,根据实际需要设定合适的热水温度。
4. 拧开热水器的水阀,待热水从水龙头流出时,即可正常使用。
四、温馨提示1. 燃气热水器在使用过程中会产生一定的噪音,属于正常现象,请放心使用。
2. 请不要长时间连续使用燃气热水器,适当休息可以延长其使用寿命。
3. 如遇到燃气热水器故障或异常情况,切勿自行拆卸或修复,应立即联系专业人员进行维修。
五、保养与维护1. 定期清洁燃气热水器的过滤器和进气口,以保证其正常通风和供气。
2. 定期检查燃气热水器的接线是否松动,如有问题请及时修复。
3. 使用一段时间后,建议进行清洗和排污处理,以保持热水器内部的卫生和水质清洁。
4. 长时间不使用时,建议关闭燃气热水器的电源开关,并切断燃气供应。
六、技术参数1. 产品型号:XXXXX2. 输入功率:XXXXX3. 额定供热负荷:XXXXX4. 最高加热温度:XXXXX5. 燃气源压力:XXXXX6. 水流量:XXXXX七、客户服务如您在使用过程中遇到任何问题或需要了解更多信息,请随时联系我们的客户服务部门。
燃气热水器正确使用方法简易版
The Daily Operation Mode, It Includes All The Implementation Items, And Acts To Regulate Individual Actions, Regulate Or Limit All Their Behaviors, And Finally Simplify Management Process.编订:XXXXXXXX20XX年XX月XX日燃气热水器正确使用方法简易版燃气热水器正确使用方法简易版温馨提示:本操作规程文件应用在日常的规则或运作模式中,包含所有的执行事项,并作用于规范个体行动,规范或限制其所有行为,最终实现简化管理过程,提高管理效率。
文档下载完成后可以直接编辑,请根据自己的需求进行套用。
各种燃气灶具如果使用不当,常易发生燃气泄漏事故,所以熟悉家用燃气灶具的正确使用方法是十分必要的.1. 是调节风门。
所有燃气灶具都必须注意调节火焰和风门大小,使燃烧火焰呈蓝色锥体,火苗稳定;因为风门过大,空气量太多,火不易点着;风门太小,易产生红火和不完全燃烧。
对于带熄火保护装置的燃气灶,风门调节比例为:一只直接连通小炉头的风门要尽量关小,另一只通向外圈的风门打开扇面的三分之一即可。
2.是正确点火。
带熄火保护装置的燃气灶具点火时,按下按钮,打开开关出现火苗后,不能马上松开,至少要按下开关3秒以上方能松开。
3.是定期保养。
爱护灶具,保持灶面清洁,燃烧器上的火孔易被稀饭、菜汤、药汁、灰尘等污物阻塞,应随时去污,擦掉水渍,定期用小铁丝疏通灶具炉头上的通气孔,防止堵塞,对热电耦要经常用细沙皮打磨,将堆积在热电耦上的氧化物或影响传热的污渍清除干净,以保持灶具清洁、煤气畅通,保持其良好的受热状态。
4.是经常检查。
经常检查旋塞阀(金属管与橡胶管接头处的阀门)的密封性能,要及时上油;经常检查联接软管是否有龟裂老化现象,发现问题及时更换新胶管;长时间燃烧后,灶具温度较高,要防止滴烧冷却水,以免使灶面漆皮脱落。
【推荐下载】燃气热水器使用方法须知 如何使用燃气热水器

[键入文字]
燃气热水器使用方法须知如何使用燃气热水器
随着科技的不断发展,人们的生活越来越便利、舒适,燃气热水器的使用让人们在寒冷的冬季也能感受的温暖。
不过现在还是有些人对燃气热水器不是很了解,也不知道要怎么使用燃气热水器。
下面小编就为大家讲解一下燃气热水器使用方法须知以及如何使用燃气热水器。
随着科技的不断发展,人们的生活越来越便利、舒适,燃气热水器的使用让人们在寒冷的冬季也能感受的温暖。
不过现在还是有些人对燃气热水器不是很了解,也不知道要怎么使用燃气热水器。
下面小编就为大家讲解一下燃气热水器使用方法须知以及如何使用燃气热水器。
燃气热水器使用方法须知
1. 燃气热水器使用前要先将其插头插入电源为220V的插座上,然后再把燃气热水器上的燃气管道开关打开。
2. 接下来就要将燃气热水器面板上的电源开关打开,此时数显屏上会显示燃气热水器里的水温度,还有活力大小。
3. 要控制燃气热水器里的水温大小,可在燃气热水器上调节,拨动控制开关。
4. 在使用燃气热水器时,要知道水龙头的冷热出水情况,一般水龙头都有蓝色和红色的标志,蓝色代表冷水,红色代表热水。
通过扳动水龙头手柄可调节出水温度,还有热水、冷水的出水。
如何使用燃气热水器
1. 在使用燃气热水器时一定要按照严格的使用说明书来操作,使用前要先将通水的开关打开,然后再开气,使用完要先关气再关水。
2. 在淋浴时,一定要开排气扇或开窗通风,因为燃气热水器在使用过程中需要一定量的空气,若浴室空气不足,那会导致缺氧或者一氧化碳中毒现象。
因此不能太长时
1。
燃气热水器使用说明

燃气热水器使用说明一、燃气热水器的基本结构和工作原理1.基本结构:燃气热水器主要由燃气系统、热水系统、燃烧系统和控制系统组成。
其中,燃气系统包括燃气进气阀、燃气调节阀和燃烧器;热水系统包括热水出水管和热水储存器;燃烧系统包括点火电极、燃烧室和烟囱;控制系统包括点火控制器和温控器。
2.工作原理:当用户打开热水龙头时,温控器感应到水流,并通过点火控制器点火。
燃气燃烧器点火后,产生燃烧,加热热水。
当热水温度达到设定的温度时,燃烧器停止工作,停止加热。
二、安全使用注意事项1.安装:燃气热水器的安装应由具备相关资质的专业人士进行。
安装时必须按照产品说明书和国家相关标准要求进行操作,确保通风良好、燃烟排放顺畅、管道连接牢固。
2.燃气管道:燃气热水器的燃气进气管道和燃气调节阀必须和热水器的负压阀连接,并确保管道无泄漏。
使用时检查燃气管道连接是否牢固,如发现泄漏要立即关闭燃气阀门,并及时通知售后服务中心。
3.通风要求:燃气热水器的安装位置必须有良好的通风条件,避免燃烧产生的废气积聚导致安全事故。
燃气热水器需要有独立的烟囱排烟,烟囱出口应保持通畅,不得有异物堵塞。
4.使用环境:燃气热水器应安装在干燥、通风、阴凉、不易积尘的地方,避免阳光直射和高温环境。
5.点火操作:使用燃气热水器前,确保燃气阀门关闭,燃气进气阀门打开。
点火时将热水龙头调至最小流量,然后轻轻按下点火按钮,点火成功后可以慢慢调节水流大小。
三、使用维护注意事项1.定期清洗:燃气热水器使用一段时间后,由于水质中的杂质和水垢的存在,会影响热交换效果。
定期进行清洗热水器的热水储存器和热水出水管,可以延长热水器的使用寿命。
2.定期检查:定期检查燃气热水器的燃气管道连接是否牢固、烟道是否畅通、点火电极是否损坏等,及时排除隐患,确保安全使用。
3.防冻保护:在冬季寒冷的地区使用燃气热水器时,要注意对热水器进行防冻处理。
可以采用加厚保温材料包裹热水储存器,确保热水器内部不会结冰。
燃气热水器安全操作规程
燃气热水器安全操作规程
1. 引言
本安全操作规程适用于使用燃气热水器的人员,旨在保证使用
燃气热水器时的安全性和有效性。
2. 设备选择和安装
2.1 选择合适的燃气热水器,确保其符合国家标准和相关安全
要求。
2.2 请由专业人员进行燃气热水器的安装和调试,确保安全可靠。
3. 燃气阀操作
3.1 在使用燃气热水器前,请检查燃气阀是否关闭。
3.2 使用燃气热水器时,确保燃气阀处于打开状态;停止使用后,请关闭燃气阀。
4. 火源点火
4.1 使用火柴或电火花点火器等工具点火,避免使用明火点火。
4.2 点火时,请确保手指远离点火口,避免被火焰烫伤。
5. 温度调节
5.1 使用燃气热水器前,请调整好合适的温度。
5.2 在使用燃气热水器过程中,不得随意调整温度,以免造成烫伤或其他安全事故。
6. 定期维护
6.1 定期清洁燃气热水器的外部和内部,保持通风良好。
6.2 定期检查燃气热水器的燃烧器和燃气管道是否正常,如发现问题请及时修理或更换。
7. 注意事项
7.1 使用燃气热水器时,应保持通风良好,避免阻塞燃气外排口。
7.2 使用燃气热水器过程中,如发现燃气味道异常或其他异常情况,请立即停用并联系专业维修人员。
以上为燃气热水器安全操作规程,希望以上规程能够为大家使用燃气热水器提供安全的指导和帮助。
如有疑问或问题,请及时咨询专业人员。
燃气热水器正确使用方法通用版

操作规程编号:YTO-FS-PD962燃气热水器正确使用方法通用版In Order T o Standardize The Management Of Daily Behavior, The Activities And T asks Are Controlled By The Determined Terms, So As T o Achieve The Effect Of Safe Production And Reduce Hidden Dangers.标准/ 权威/ 规范/ 实用Authoritative And Practical Standards燃气热水器正确使用方法通用版使用提示:本操作规程文件可用于工作中为规范日常行为与作业运行过程的管理,通过对确定的条款对活动和任务实施控制,使活动和任务在受控状态,从而达到安全生产和减少隐患的效果。
文件下载后可定制修改,请根据实际需要进行调整和使用。
各种燃气灶具如果使用不当,常易发生燃气泄漏事故,所以熟悉家用燃气灶具的正确使用方法是十分必要的.1. 是调节风门。
所有燃气灶具都必须注意调节火焰和风门大小,使燃烧火焰呈蓝色锥体,火苗稳定;因为风门过大,空气量太多,火不易点着;风门太小,易产生红火和不完全燃烧。
对于带熄火保护装置的燃气灶,风门调节比例为:一只直接连通小炉头的风门要尽量关小,另一只通向外圈的风门打开扇面的三分之一即可。
2.是正确点火。
带熄火保护装置的燃气灶具点火时,按下按钮,打开开关出现火苗后,不能马上松开,至少要按下开关3秒以上方能松开。
3.是定期保养。
爱护灶具,保持灶面清洁,燃烧器上的火孔易被稀饭、菜汤、药汁、灰尘等污物阻塞,应随时去污,擦掉水渍,定期用小铁丝疏通灶具炉头上的通气孔,防止堵塞,对热电耦要经常用细沙皮打磨,将堆积在热电耦上的氧化物或影响传热的污渍清除干净,以保持灶具清洁、煤气畅通,保持其良好的受热状态。
4.是经常检查。
燃气热水器正确使用方法范本(2篇)
燃气热水器正确使用方法范本燃气热水器是现代家庭不可或缺的家电设备之一,它可以为我们提供热水,方便我们的日常生活。
为了确保燃气热水器的正常使用和安全,下面是燃气热水器正确使用方法范本,帮助您正确操作燃气热水器。
1. 安装与维护:- 在安装燃气热水器前,请与专业的供气和燃气热水器安装工作人员进行沟通和安装。
确保燃气热水器的安装符合相关的安全标准和规定,不得擅自改动或拆卸。
- 定期检查燃气热水器的燃气供应管道和排烟管道是否完好无损,如有发现破损或老化需要及时更换。
- 燃气热水器使用过程中,建议每隔一段时间清洗燃气热水器的燃烧室和水箱,确保燃烧和加热系统的正常运作。
2. 启动与关闭:- 在使用燃气热水器之前,请确保燃气开关和电源开关处于关闭状态,以避免燃气泄漏和电气问题。
- 启动燃气热水器前,请将冷水龙头打开,使冷水能够顺畅进入热水器。
- 打开燃气开关,并使用火柴或打火机点燃燃气热水器的火焰,然后将调节旋钮调整到所需的温度。
等待一段时间,热水器即可开始加热水。
- 当需要关闭燃气热水器时,先关闭燃气开关,然后关闭电源开关,最后关闭冷水龙头。
3. 温度设置:- 燃气热水器上一般都有温度调节旋钮,根据自己需要调节温度,避免水温过高或过低。
- 在调节热水温度时,应先将热水龙头打开,等待水温稳定后再进行调节,以避免热水突然变热或变冷对皮肤造成伤害。
4. 使用过程中的注意事项:- 在使用燃气热水器时,应保持通风良好的环境,确保室内空气流通,避免一氧化碳中毒。
- 使用燃气热水器时,不要将可燃物品放置在燃烧器附近,以防止火灾发生。
- 在洗澡或使用热水时,应保持有人在场,并确保燃气热水器正常运作,避免出现意外情况。
- 当长时间不使用燃气热水器时,应关闭燃气和电源开关,以节省能源并保证安全。
5. 定期维护与清洁:- 定期请专业技术人员对燃气热水器进行维护和检修,确保燃气热水器运行正常,并排除潜在的故障风险。
- 每隔一段时间,可以使用专用的清洗剂对燃气热水器进行清洗和除垢,以保持热水器内部的卫生和热水质量。
燃气热水器正确使用方法正式样本
文件编号:TP-AR-L3957There Are Certain Management Mechanisms And Methods In The Management Of Organizations, And The Provisions Are Binding On The Personnel Within The Jurisdiction, Which Should Be Observed By Each Party.(示范文本)编制:_______________审核:_______________单位:_______________燃气热水器正确使用方法正式样本燃气热水器正确使用方法正式样本使用注意:该操作规程资料可用在组织/机构/单位管理上,形成一定的管理机制和管理原则、管理方法以及管理机构设置的规范,条款对管辖范围内人员具有约束力需各自遵守。
材料内容可根据实际情况作相应修改,请在使用时认真阅读。
各种燃气灶具如果使用不当,常易发生燃气泄漏事故,所以熟悉家用燃气灶具的正确使用方法是十分必要的.1. 是调节风门。
所有燃气灶具都必须注意调节火焰和风门大小,使燃烧火焰呈蓝色锥体,火苗稳定;因为风门过大,空气量太多,火不易点着;风门太小,易产生红火和不完全燃烧。
对于带熄火保护装置的燃气灶,风门调节比例为:一只直接连通小炉头的风门要尽量关小,另一只通向外圈的风门打开扇面的三分之一即可。
2.是正确点火。
带熄火保护装置的燃气灶具点火时,按下按钮,打开开关出现火苗后,不能马上松开,至少要按下开关3秒以上方能松开。
3.是定期保养。
爱护灶具,保持灶面清洁,燃烧器上的火孔易被稀饭、菜汤、药汁、灰尘等污物阻塞,应随时去污,擦掉水渍,定期用小铁丝疏通灶具炉头上的通气孔,防止堵塞,对热电耦要经常用细沙皮打磨,将堆积在热电耦上的氧化物或影响传热的污渍清除干净,以保持灶具清洁、煤气畅通,保持其良好的受热状态。
4.是经常检查。
燃气热水器使用指南

燃气热水器使用指南引言燃气热水器以其快速加热、节能环保的特点,成为现代家庭中不可或缺的热水供应设备。
本使用指南旨在帮助用户了解燃气热水器的基本构造、安装要求、使用方法、日常维护及常见故障处理,确保用户能够安全、高效地使用燃气热水器。
第一章:产品概述1.1产品特点-快速加热:燃气热水器能够在短时间内提供大量热水。
-节能环保:相比电热水器,燃气热水器的能源利用率更高。
-恒温出水:通过恒温控制技术,保证出水温度的稳定性。
1.2产品组成-燃气控制阀:控制燃气的供应。
-燃烧室:燃气与空气混合燃烧的区域。
-热交换器:将燃烧产生的热量传递给水。
-安全阀:防止水压过高。
-温度调节器:控制出水温度。
1.3产品规格和型号-型号A:适用于小型家庭,功率较低。
-型号B:适用于中型家庭,功率适中。
-型号C:适用于大型家庭,功率较高。
1.4能效等级和环境适应性-能效等级:所有型号均达到国家能效标准。
-环境适应性:适用于多种气候条件,包括高温和低温环境。
1.5保修信息-保修期限:自购买之日起,整机保修一年。
-保修范围:包括所有制造缺陷和材料缺陷。
-保修服务:请联系授权服务中心。
第二章:安装要求2.1安装环境-通风良好:确保安装位置有良好的通风条件。
-远离易燃物:避免安装在易燃、易爆物品附近。
-稳固的墙体:安装位置应有足够的承重能力。
2.2安装步骤1.检查配件:确认所有配件齐全。
2.定位:根据说明书确定安装位置。
3.固定:使用膨胀螺栓将热水器固定在墙上。
4.连接燃气管:确保燃气管道连接牢固,无泄漏。
5.连接水管:将进水管和出水管与热水器连接。
6.检查:安装完成后,检查所有连接处是否漏水、漏气。
第三章:使用方法3.1开机前检查-检查燃气阀门:确保燃气阀门处于开启状态。
-检查水压:确保水压正常。
-检查电源:确保电源连接正常。
3.2操作步骤1.打开燃气阀门:确保燃气供应。
2.打开进水阀门:确保有水流通过。
3.调节温度:根据需要调节出水温度。
燃气热水器使用说明书

®MODEL 750TO REDUCE THE RISK OF FIRE, ELECTRIC SHOCK, OR IN-JURY TO PERSONS, OBSERVE THE FOLLOWING:e this unit only in the manner intended by the manufacturer.If you have questions, contact the manufacturer at the address or telephone number listed in the warranty.2.Before servicing or cleaning unit, switch power off at service panel and lock the service disconnecting means to prevent power from being switched on accidentally. When the service disconnecting means cannot be locked, securely fasten a promi-nent warning device, such as a tag, to the service panel.3.Installation work and electrical wiring must be done by a quali-fied person(s) in accordance with all applicable codes and stan-dards, including fire-rated construction codes and standards.4.Sufficient air is needed for proper combustion and exhausting of gases through the flue (chimney) of fuel burning equipmentto prevent backdrafting. Follow the heating equipment manufacturer’s guideline and safety standards such as those published by the National Fire Protection Association (NFPA),and the American Society for Heating, Refrigeration and Air Conditioning Engineers (ASHRAE), and the local code authori-ties.5.When cutting or drilling into wall or ceiling, do not damage electrical wiring and other hidden utilities.6.Ducted fans must always be vented to the outdoors.7.If this unit is to be installed over a tub or shower, it must be marked as appropriate for the application and be connected to a GFCI (Ground Fault Circuit Interrupter) - protected branch circuit.8.Never place a switch where it can be reached from a tub or shower.9.To reduce the risk of electrical shock, do not use this fan with any solid-state speed control.10. Not for use in kitchens.11. Do not install in a ceiling insulated to a value greater than R-40.1.For general ventilating use only. Do not use to exhaust hazard-ous or explosive materials and vapors.2.To avoid motor bearing damage and noisy and/or unbalanced impellers, keep drywall spray, construction dust, etc. off power unit.3.Please read specification label on product for further informa-tion and requirements.FAN / LIGHT / NIGHT LIGHT COMBINATION VENTILATORFOR BEST RESULTSWhen installing the Exhaust Fan/Light in a new construction site,install housing during the rough-in construction of the building.The blower unit, reflector and grille should be installed after the finished ceiling is in place.PLANNING DUCTWORK AND WIRINGDUCTWORKe 4" round duct.2.Plan duct run from discharge opening of fan to the outside. For best fan performance, make duct run as short as possible and use minimum number of elbows.e optional Broan ducting accessories as needed.WIRINGPlan to run 120 VAC house wiring (with ground) from power source,through wall switch, to junction box in housing. For separate con-trol of fan, light, night light, three wall switches are required and five conductors are needed between the wall switch box and the fan’s junction box.IMPORTANT: Use wire suitable for 90o C.::bathroomsource .comCall 1-800-667-8721 anywhere in the US and Canada -INSTALLATION IN ANEW CONSTRUCTION SITEPREPARATION1.Refer to Figure 1. Remove power unit/blower assembly fromhousing.A.Unplug power unit.B.Remove screw (located next to plug-in receptacle) which holdspower/blower unit mounting plate in place. Save screw.C.Lift mounting plate at end near the plug-in receptacle until blowerwheel clears the scroll.D. Remove plate by pulling its tabs out of slots in housing. Setpower/blower unit aside until needed. MOUNTING THE HOUSINGMOUNTNG USING MOUNTING TABSRefer to Figure 2.1.Locate fan housing next to ceiling joist.e wood screws (not provided) to loosely attach housing toceiling joist through the keyhole slots in mounting tabs.3.Adjust housing so that it will be flush with finished ceiling. Forthe grille to fit properly, the housing’s rim must not extend be-yond finished ceiling surface.4.When housing is properly adjusted, tighten screws in slots. MOUNTING USING HANGER BARSRefer to Figure 3.1.Insert hanger bars in slots provided in housing.2.Locate fan housing between joists so that the bottom of thehousing is even with the planned finished ceiling. Extend the hanger bars to the joists.e screws or nails (not provided) to secure hanger bars toceiling joists.INSTALLING DUCTWORK1.Refer to Figure2. Place duct collar over flanges at dischargeopening of fan. Secure collar by snapping tabs into slots in flanges.2.Run 4" round duct from fan’s discharge opening to the outsideand terminate.3. Connect duct to fan’s duct collar.WIRINGAll wiring must comply with local codes and unit must be prop-erly grounded.1.Run 120vAC house wiring (with ground) from wall switches tofan location. See Figure 4.2.Insert and secure an approved box connector into wiring en-trance hole.3.Pull wires through box connector and into junction box. Tightenbox connector.4.Refer to Figure 4. Connect white wires from the fan and lightreceptacles to white (neutral) wire from the supply. Connect black wire to wire from fan switch. Connect red wire to wire from light switch. Connect yellow wire to wire from night light switch.5.Connect the green (or bare) ground wire to the green groundlead.POWER/BLOWER UNIT INSTALLATION1.Refer to Figure 1. Place power/blower unit into housing so thatmounting plate’s tabs insert into slots in housing.2.Press other end of mounting plate down until it is firmly seatedover scroll and plug-in receptacles.3.Secure mounting plate to housing with provided screw.4.Insert motor plug into junction box receptacle. COMPLETING INSTALLATION1.Insert lamp plug into junction box receptacle and secure reflec-tor assembly to motor frame with wing nut provided.2.Insert lamp (100 watt maximum for light - 7 watt maximum fornight light) into the socket.NOTE: Lamp must be purchased separately.3.Insert the grille assembly’s mounting springs into the slots onboth sides of the housing by squeezing the springs together.4.Press grille assembly firmly into place against the ceiling.INST ALLA TION IN EXISTING CONSTRUCTIONPLANNINGReview “INSTALLATION IN A NEW CONSTRUCTION SITE” and follow all instructions which apply to your installation. LOCATION: Locate fan between ceiling joists.WIRING AND DUCTING: Plan ducting and wiring BEFORE pro-ceeding with installation.CAUTION: Check area above planned location to be sure that: 1.Ducting can be installed or that area is sufficient for properventing.2.Wiring can be run to the planned location.3.No wiring or other obstruction might interfere with installation.INSTALLATION1.The fan must be mounted between ceiling joists. Decide whereyou want to locate the fan, and then determine where the near-est joists are.2.Locate the joists. Drill a starter hole in the ceiling between thejoists.3.To exactly locate the edge of joist, saw a line from hole to joist.4.Refer to page 1. Remove power/blower unit from housing.e the housing pan as a template to mark cutout: place pancentered between joist and trace around pan.6.Make cutout along outside of marked line.7.Refer to Figure 6. Install 2 x 4 cleats to both ceiling joists. Insome cases it may be necessary to use more than a single cleat on one side. The distance between cleats must be at least 9 1 / 8" but not more than 10".8.Remove side wiring knockout and insert and secure an ap-proved box connector into the wiring entrance hole.e pliers to bend both mounting tabs as flush as possible tothe side of the housing.10. Install duct collar.11. String wiring through box connector and connect 4" flexibleduct to duct collar.12. Carefully push ductwork and wiring back into cutout. Placehousing into cutout.13. Use wood screws to secure housing to cleats through fourholes in housing’s pan. make sure pan is flush to finished ceil-ing.14. Install Power/Blower Unit and complete installation.®MODEL 750USE AND CAREUSE AND CAREWARNING: DISCONNECT ELECTRICAL POWER SUPPLY AND LOCK OUT SERVICE PANEL BEFORE RELAMPING, CLEAN-ING, OR SERVICING THIS UNIT.RELAMPINGPull grille assembly away from ceiling.Squeeze the grille assembly’s mounting springs together, and remove grille asembly from housing to expose socket for relamping.Insert lamp (100 watt maximum for light - 7 watt maximum for night light) into the socket. NOTE: Lamp must be purchased separately.Replace grille assembly flat against the ceiling after relamping.CLEANINGPull grille assembly away from ceiling.Squeeze the grille assembly’s mounting springs together, and remove grille asembly from housing for cleaning.Clean grille and lens assembly using a mild soap and water solu-tion. Assemblies with wood frames should not be immersed.Replace grille assembly flat against the ceiling after cleaning.MOTOR LUBRICATIONThe motor is permanently lubricated. Do not oil or disassemble motor.SERVICE PARTSWARRANTYBROAN-NUTONE ONE YEAR LIMITED WARRANTYBroan-NuTone warrants to the original consumer purchaser of its products that such products will be free from defects in materials or workmanship for a period of one year from the date of original purchase.THERE ARE NO OTHER WARRANTIES, EXPRESS OR IMPLIED, INCLUDING, BUT NOT LIMITED TO, IMPLIED WARRANTIES OF MERCHANTABILITY OR FITNESS FOR A PARTICU-LAR PURPOSE.During this one-year period, Broan-NuTone will, at its option, repair or replace, without charge, any product or part which is found to be defective under normal use and service.THIS WARRANTY DOES NOT EXTEND TO FLUORESCENT LAMP STARTERS AND TUBES.This warranty does not cover (a) normal maintenance and service or (b) any products or parts which have been subject to misuse, negligence, accident, improper maintenance or repair (other than by Broan-NuTone), faulty installation or installation contrary to recommended installation instruc-tions.The duration of any implied warranty is limited to the one-year period as specified for the express warranty. Some states do not allow limitation on how long an implied warranty lasts, so the above limitation may not apply to you.BROAN-NUTONE’S OBLIGATION TO REPAIR OR REPLACE, AT BROAN-NUTONE’S OPTION,SHALL BE THE PURCHASER’S SOLE AND EXCLUSIVE REMEDY UNDER THIS WARRANTY.BROAN-NUTONE SHALL NOT BE LIABLE FOR INCIDENTAL, CONSEQUENTIAL OR SPECIAL DAMAGES ARISING OUT OF OR IN CONNECTION WITH PRODUCT USE OR PERFOR-MANCE. Some states do not allow the exclusion or limitation of incidental or consequential damages,so the above limitation or exclusion may not apply to you.This warranty gives you specific legal rights, and you may also have other rights, which vary from state to state. This warranty supersedes all prior warranties.To qualify for warranty service, you must (a) notify Broan-NuTone at the address stated below or telephone: 1-800-637-1453, (b) give the model number and part identification and (c) describe the nature of any defect in the product or part. At the time of requesting warranty service, you must present evidence of the original purchase date.Broan-NuTone LLC, 926 West State Street, Hartford, WI 53027 (1-800-637-1453)KEY PART NO.DESCRIPTION 161736-000Power Unit Assembly 286933-000Motor332787-000Motor Isolation Mount 432788-000Ground Clip 55901A-000Blower Wheel 663007-000Push Nut785974-000Reflector Assembly 885950-000Lamp Socket Assembly 930652-000Duct Adapter Assembly 1044388-000Hanger Bar110871B-000Grille & Lens Assembly 1285968-000Grille & Spring Assembly 1361738-000Lens140444A-000Grille Spring (2 req.)1516133-000Wing Nut1610034-000Fan Receptacle 1736892-000Light Receptacle 1889248-000Reflector* Not shown assembled.Order replacement parts by “PART NO.” - not by “KEY NO.”5/02part no. 6174099043077CBroan at bathroom ::accessories U N L I M I T E D。
热水器说明书
热水器说明书热水器说明书1. 简介热水器是一种家庭电器,主要用于加热水,提供给用户洗澡、洗衣等日常生活使用的热水。
它是现代生活中非常重要的设备之一,为人们带来了便利和舒适。
2. 安全使用须知为了确保您的安全和正常使用,使用热水器时需要注意以下事项:2.1 安装与维修- 请在使用前确保热水器已经正确安装并连接好。
- 如果发现热水器存在任何故障或异常,请不要自行修理,而是与专业维修人员联系。
2.2 电源和电力- 请确保热水器使用的电源符合国家标准,并连接到有效接地线上。
- 在插拔电源时,请确保手干燥,以防触电。
2.3 温度调节- 在调节热水器的温度时,请谨慎操作,避免烫伤。
- 建议根据需要选择适宜的温度,不要将温度过高,以免造成烫伤。
2.4 维护和清洁- 在清洁热水器时,请先切断电源并等待热水器完全冷却。
- 可采用柔软的湿布轻轻擦拭外壳,绝对不能用水直接冲洗。
- 定期检查并清理水管,以确保热水器正常供水。
3. 功能和操作说明作为一种家用电器,热水器拥有多种功能供用户使用,以下是常见的一些功能和操作说明:3.1 开关机- 热水器通常配备有开关按钮,用户可通过按下开关按钮实现开机和关机的操作。
3.2 温度调节- 大多数热水器都具备温度调节功能,用户可以根据需要选择适宜的水温。
- 通过旋转温度调节旋钮或按下温度调节按钮,可以进行温度的微调。
3.3 自动保温- 部分热水器具备自动保温功能,用户在使用过程中可以选择将热水器设定为自动保温状态,以保持水温恒定。
3.4 定时功能- 一些高级热水器还可以设置定时功能,用户可以预先设置热水器在指定时间自动开启或关闭,以满足个人需求。
4. 故障排除与维修在使用热水器的过程中,可能会遇到一些故障或异常情况,以下是一些常见问题的解决方法:4.1 无法加热水或水温不足- 请检查热水器的电源是否正常连接。
- 检查热水器的温度是否设置正确。
- 确认冷水进水管道是否被堵塞。
4.2 漏水问题- 检查热水器的进水管道和出水管道是否连接牢固。
拓驰速热热水器说明书

拓驰速热热水器说明书
1、上电:接通电源,鸣响一声,此时左边数码管显示当前胆内的实际温度及下方“热水温度”字点亮。
2、开关键:该键功能为强制开机/关机键,该键被按下时,开机与关机会循环切换,且鸣响一声;
3、按下开关键,如内胆水温低于“设置温度”,则进入加热工作状态,两动态光圈开始闪亮;
4、当水温升至设置温度后,动态光圈二只亮中间一点,不闪动,动态光圈一闪动不变。
5、“调温-”:该键每有效动作一次,蜂鸣器鸣响一声,右边数码管从高度数以每5度一次的递减,直到30度,胆内水温到此设置值后,自动停止加热工作。
6、“调温+”:该键每有效动作一次,蜂鸣器鸣响一声,右边数码管从低度数以每5度一次的递增;
7、直到75度,胆内水温到此设置值后,自动停止加热工作。
热水器、热浴器和炉子说明书

INTRODUCTIONThe Carlin Technical Support Team developed this OEM specification book. It is the result of extensive laboratory testing in cooperation with the listed original equipment manufacturers. We feel this will be perhaps your most valuable reference guide when servicing today's modern oil fired heating equipment. Before making any change to the setup outlined in this book, we recommend that you contact the Carlin Technical Service Hot Line or the appliance manufacturer.This book is intended to be a setup guide. The air settings listed are only a starting point. It is critical that all oil fired heating equipment be installed using combustion efficiency test equipment and the burners be set to the appliance manufacturers recommended settings.For your convenience this guide was compiled in alphabetical order. This book is updated on an annual basis. However, application approvals are being added on a weekly basis currently. As a result, if the application you are looking for is not listed in this book, please call the Carlin Technical Service Hot Line for assistance.The Carlin Technical Support Team is committed to providing the finest customer service in the industry. If you should have any questions regarding this book or any Carlin product PLEASE give us a call.** Note: OEM burners sent with the Carlin PSC motor may be equipped with a standard blank air shutter.You can reach the Carlin Technical Support Team on the Carlin Technical Service Hot Line at 1-800-989-2275.HAGOB-SOLID ES -SOLID H -HOLLOW P -SOLID SS -SEMI SOLID W -ALL PURPOSEH -HOLLOW B -SOLID AR -SPECIAL SOLID NOZZLE MANUFACTURERS AND SPRAY PATTERNSDELAVANA -HOLLOW DANFOSSSTEINENAB -SEMI SOLID MONARCHR -SOLIDNS -HOLLOW PLP -SEMI SOLIDSS -SEMI SOLIDS -SOLID AS -SOLIDAH -HOLLOW W -ALL PURPOSE*Discontinued1/8"1/8"3/16"'T'1/16" 13/64"3/64"3/64"ENGINEERING INFORMATIONWhen you clean or replace a burner blower wheel it's important that you maintain the proper gap between the motor rabbet and the blower wheel rim.The diagram and chart below are designed to help you maintain the proper gaps.Correct Spacings for Motor/ Blower WheelFor example, if you install the blower wheel incorrectly, two things may happen: (1) on the EZ and 99FRD, you may come in contact with the pressure augmenter and create other damage or noise when the burner is operating; and (2) on all models, you may alter the burner's designed air flow.G3B EZ-Gas Oil Burner Model Elite EZ-1, 2, 399FRD, CRD*Gas Burner Model'T'100CRD 102CRD 3/8"200CRD*201GAS 7/16"301GAS 601GAS 1/8"3/16"11/16" of shaft protruding beyond fan hub201, 301CRD 500, 501CRD* 600*, 601CRD 702GAS 702G/O700*, 701CRD 3/16"3/16"1/8"3/16"3/16"800*, 801CRD 1050, 1150FFD 702CRD 3/64"3/16"3/64"40Electrode SettingsCoupling Length for Current and Discontinued BurnersCombustion Air Requirements for #2 Fuel1. Ventilation Air for Unconfined Spacesa.In unconfined spaces in buildings of conventional frame, brick, or stone construction, infiltration normally is adequate.b.If the unconfined space is within a building without sufficient air because of tight construction, the air for ventilation shall be obtained from outdoors. Under these conditions a permanent opening to the outside having a total free area of at least one square inch per 5000 Btu per hour (28 sq. in. per gallon per hour).2.Ventilation Air for Confined Spacesa.All air from inside the building. The confined space must have two openings, one near the top and one near the bottom. Each opening must have at least 1 sq. in. of free area per 1000 Btu per hour (140 sq. in. per gallon per hour).b.Taking ventilation air from inside and combustion air from outside the building. The confined space must have two openings, one near the top and one near the bottom. Each opening must have at least 1 sq. in. of free area per 1000 Btu per hour (140 sq. in. per gallon per hour). In addition, there must be one opening connecting to the outdoors. This opening must have at least 1 sq. in. per 10,000 Btu per hour (14 sq. in. per gallon per hour).c.All air from outside the building. The confined space must have two openings, one near the top and one near the bottom. Each opening must have at least 1 sq. in. of free area per 4000 Btu per hour (35 sq. in. per gallon per hour) if vertical ducts are used. If horizontal ducts are used, each opening must have at least 1 sq. in. of free area per 2000 Btu per hour (70 sq. in. per gallon per hour).3.Louvers, Grilles, and Screensa.In calculating free area consideration must be given to the blocking effect of louvers, grilles and screens that protect these openings.b.Screens used cannot be smaller than ¼ inch (6.3 mm) mesh and easily accessible for cleaning.c.If louvers and grilles are used and the free area through them is known it must be used in calculating the size of the opening. If the free area is not known, it may be assumed that wood louvers will have 20-25% free area and metal louvers have 60-70% free area.INTRODUCTIONThe Carlin Application Engineering Team has developed this OEM Specification Guide to assist you in the selection,set-up and servicing of Carlin Power Gas Burners.It is the result of considerable laboratory and/or field testing with the appliances listed.We hope you will find this material to be a valuable reference tool when servicing today's modern gas-fired equipment.Before making any changes to the set-up outlined in this booklet, we strongly recommend that you contact the Carlin Technical Service Hotline. Note:This data is intended to be a set-up guide only.The air settings listed are only a starting point.It is critical that all gas-fired heating equipment be installed using combustion efficiency test equipment and the burners be set to the appliance manufacturers' recommended settings.For your convenience,this guide is arranged by heat exchanger manufacturers in alphabetical order.This book is updated periodically as reprinting is needed.However, new application data is being added on a regular basis.As a result,if the application you are looking for is not listed in this book,please call the Carlin Technical Service Hot Line for assistance.The Carlin Technical Support Team is committed to providing the finest customer service in the industry.If you should have any questions regarding the set-up data contained in this book or have a question on any Carlin products, PLEASE give us a call. You can reach the Carlin Technical Support Team on the Carlin Technical Service Hot Line at 1-800-989-2275.。
- 1、下载文档前请自行甄别文档内容的完整性,平台不提供额外的编辑、内容补充、找答案等附加服务。
- 2、"仅部分预览"的文档,不可在线预览部分如存在完整性等问题,可反馈申请退款(可完整预览的文档不适用该条件!)。
- 3、如文档侵犯您的权益,请联系客服反馈,我们会尽快为您处理(人工客服工作时间:9:00-18:30)。
骆驼燃气热水器说明书
骆驼燃气热水器说明书
一、产品概述
骆驼燃气热水器是一种高效、安全、可靠的家用热水设备。
采用先进的燃气加热技术,能够在短时间内提供大量热水,满足家庭的各种需求。
骆驼燃气热水器以其卓越的性能、智能化的操作和优雅的外观设计而备受用户喜爱。
二、主要特点
1. 高效节能:骆驼燃气热水器采用先进的燃烧控制技术,热效率高达96%,有效节约燃气资源,降低使用成本。
2. 安全可靠:骆驼燃气热水器内置多重安全保护措施,如过热保护、防干烧保护和热水防倒流装置等,确保用户使用过程中的安全。
3. 智能化操作:骆驼燃气热水器配备智能控制系统,可以根据用户的需求自动调节水温,并具备定时开关机功能,让您的生活更加便捷。
4. 优雅外观:骆驼燃气热水器采用时尚简约的外观设计,符合现代家居风格,为您的家庭增添美感。
三、使用方法
1. 针对新用户:
(1)首次使用前,请确保燃气热水器供气稳定,气源管道连接正确。
(2)按下电源开关,燃气热水器将自动点火,并开启加热状态。
(3)使用调节按钮调节所需水温。
热水器可根据温度设定自动保持水温恒定。
2. 针对老用户:
(1)开启燃气阀门,按下电源开关即可开始使用。
(2)如需调节水温,可通过调节按钮进行调整。
(3)使用结束后,请关闭燃气阀门,以确保安全。
四、保养与维修
1. 保养:
(1)每隔三个月,请使用软布清洁燃气热水器表面,避免油污、尘埃等物质附着。
(2)定期检查热水器的防雾装置和防倒流装置是否正常,如发现异常,请及时维修或更换。
2. 维修:
(1)如燃气热水器出现故障,请勿自行拆卸或维修,以免造成二次损坏。
(2)请立即联系售后服务中心,我们将竭诚为您提供维修服务。
五、注意事项
1. 请勿将燃气热水器用于其他非热水设备,避免造成事故。
2. 请勿长时间连续使用热水器,以免给设备和管道带来负担。
3. 请勿在高温、潮湿或易爆炸的环境下使用燃气热水器,以确保使用
安全。
4. 如需更换燃气热水器配件,请使用原厂配件,确保产品的正常运行。
六、总结
骆驼燃气热水器凭借其高效节能、安全可靠、智能化操作和优雅外观
等特点,成为家庭热水设备的首选之一。
我们将一如既往地致力于提供最优质的产品和最满意的售后服务,让每一位用户享受到舒适便捷的生活体验。
