1.1- EBS R12.1.1 升级12.1.3 数据库升级 11.2.0.3
EBS R12.1.1安装手册 for Linux_x86
For RHEL5.0 x86
作者: 邮箱: 创建日期: 最后更新: 版本:
action825 action825@ 2011-1-17 2011-1-17 1.0
目录
1 安装前的系统准备...................................................................................................................2 1.1 安装说明.......................................................................................................................2 1.2 安装文档.......................................................................................................................2 1.3 操作系统版本...............................................................................................................2 1.4 磁盘空间要求...............................................................................................................2 1.5 内核要求.......................................................................................................................2 1.6 要求安装的包...............................................................................................................2 1.7 软件要求.......................................................................................................................3 1.8 内核设置.......................................................................................................................4 1.9 DNS 参数修改................................................................................................................4 1.10 验证主机名...............................................................................................................4 1.11 修改资源限制参数...................................................................................................5 1.12 安装补丁...................................................................................................................5 1.13 创建用户和组...........................................................................................................5 1.14 准备安装介质...........................................................................................................5
oracle ebs r12.1.1 for linux X64 数据库及应用启动说明

[root@paleonode1 ~]# mount /dev/sdc2 /u1 ‘/加载数据库挂在/u1下[root@paleonode1 ~]# mount /dev/sdb3 /u2 ‘/加载数据库挂在/u2下[root@paleonode1 ~]# su oravis ‘/切换用户oravis[oravis@paleonode1 root]$ pwd ‘/查看当前目录/root[oravis@paleonode1 root]$ cd ~ ‘/进入根[oravis@paleonode1 ~]$ ls ‘/查看内容db oradiag_oravis[oravis@paleonode1 ~]$ pwd ‘/查看当前目录路径/u1/VIS/visora[oravis@paleonode1 ~]$ cd db ‘/进入db目录[oravis@paleonode1 db]$ ls ‘/查看当前目录内容apps_st tech_st[oravis@paleonode1 db]$ cd tech_st ‘/进入tech_st目录[oravis@paleonode1 tech_st]$ cd 11.1.0 ‘/进入11.1.0目录[oravis@paleonode1 11.1.0]$ ls ‘/查看当前目录内容[oravis@paleonode1 11.1.0]$ . ./PROD_paleonode1.env ‘/运行环境变量[oravis@paleonode1 11.1.0]$ cd appsutil ‘/进入appsutil目录[oravis@paleonode1 appsutil]$ cd scripts ‘/进入脚本目录[oravis@paleonode1 scripts]$ cd PROD_paleonode1 ‘/进入PROD_paleonode1目录[oravis@paleonode1 PROD_paleonode1]$ ls ‘/查看当前目录内容adautocfg.sh addbctl.sh adexecsql.pl adpreclone.pl adstrtdb.sqladchknls.pl addlnctl.sh adlsnodes.sh adstopdb.sql[oravis@paleonode1 PROD_paleonode1]$ addbctl.sh start ‘/启动数据库You are running addbctl.sh version 120.1Starting the database PROD ...addbctl.sh: exiting with status 0 ‘/启动数据库结束后。
PDMS数据库的升级步骤(详细)
PDMS数据库升级教程如下:如果需要把PDMS11.5的项目数据升级到PDMS12.0项目,需要执行以下的步骤。
第一步:把PDMS11.5的项目数据升级到PDMS11.6项目,具体请参考以下的步骤:1.请您确保没有用户访问当前需要升级的项目2.清理驻留用户(Expunge - all user processes)3.对所有数据库执行DICE(Database Integrity Check)操作看是否报错,如果有报错请及时修复,然后才进行下一步。
Utilities> Integrity Check4.对需要升级的项目进行备份5.以FREE权限用户登录,进入monitor模块,打开命令行输入:$M D:\AVEVA\PDMS11.6.SP4\PDMSUI\dra\upgrade\upgradeMac(请注意:如果安装的PDMS版本和路径不同请自行修改。
)项目升级的方式,详细请查看随机安装的文档PDMS User Bulletin11.6的第2.5 Upgrading from PDMS 11章节。
第二步:把PDMS11.6的项目数据升级到PDMS12.0项目,具体请参考以下的步骤:6.请您确保没有用户访问当前需要升级的项目7.进入11.6的Admin模块,清理驻留用户(Expunge - all user processes)8.对所有数据库执行DICE(Database Integrity Check)操作看是否报错,如果有报错请及时修复,然后才进行下一步。
Utilities> Integrity Check9.对需要升级的项目进行备份10.将项目的环境变量添加至12.0的evars文件中,并以FREE权限用户登录12.0,进入monitor模块,打开命令行输入:$M D:\AVEVA\Plant\PDMS12.0.SP6\PDMSUI\dra\upgrade\upgradeMac(请注意:如果安装的PDMS版本和路径不同请自行修改。
案例客服数据库RAC升级11.2.0.1升级11.2.0.4

一.准备工作1. 所需补丁可以到ORACLE官网上下载11204 for Redhat Linux的补丁,补丁号为8202632,文件名为p1*******_112040_Linux-x86-64_1of7.zip、p1*******_112040_Linux-x86-64_2of7.zip和p1*******_112040_Linux-x86-64_3of7.zip (包含clusterware和software)。
3、备份备份两实例下的oracle_base ,以便出问题后恢复。
tar zcvf /oracle/ora11.tar.gz /oracle/ora11二、GRID升级1、grid安装预检查./runcluvfy.sh stage -pre crsinst -upgrade -n wzsxdb01,wzsxdb02 -rolling -src_crshome $ORACLE_HOME -dest_crshome /oracle/ora11/11.2.0/grid -dest_version 11.2.0.4.0 -fixup -fixupdir /tmp -verbose以下是检查明细:grid预检查.txt(1)检查: 用户"grid" 的等同用户节点名状态------------------------------------ ------------------------wzsxdb02 失败wzsxdb01 失败结果:PRVF-4007 : 用户"grid" 的等同用户检查失败ERROR:等同用户在所有指定的节点上都不可用验证无法继续解决方法:ssh wzsxdb02 date不成功,于是手工重新建立SSH用户等效性配置:node1:$ mkdir ~/.ssh$ chmod 700 ~/.ssh$ ssh-keygen -t rsa$ ssh-keygen -t dsanode2:$ mkdir ~/.ssh$ chmod 700 ~/.ssh$ ssh-keygen -t rsa$ ssh-keygen -t dsanode1:$ cat ~/.ssh/id_rsa.pub >> ~/.ssh/authorized_keys$ cat ~/.ssh/id_dsa.pub >> ~/.ssh/authorized_keys$ ssh wzsxdb02 cat ~/.ssh/id_rsa.pub >> ~/.ssh/authorized_keys$ ssh wzsxdb02 cat ~/.ssh/id_dsa.pub >> ~/.ssh/authorized_keys$ scp ~/.ssh/authorized_keys wzsxdb02:~/.ssh/authorized_keys(2)正在检查主目录"/oracle/ora11/11.2.0/grid" 中的Oracle 补丁程序"9413827 或9706490"。
oracle升级操作流程

数据库版本升级操作手册目录备份数据库 (3)升级Oracle软件 (3)修改ORACLE_HOME (13)升级实例 (14)手工使用脚本升级实例 (15)升级遇到问题的解决办法 (17)检查升级后的版本信息和无效对象 (17)附录 (19)本文用于指导oracle数据库由版本11.2.0.1.0升级到版本11.2.0.3.0升级步骤如下:➢备份数据库➢升级oracle 软件➢修改ORACLE_HOME➢升级实例➢检查升级后的版本信息和无效对象备份数据库由于oracle升级存在一定风险,所以在升级前一定要对已有数据进行备份。
1、停掉所有使用数据库的相关程序,以及数据库。
2、对数据库文件进行冷备份。
备份后的文件可转存到异机或在本地存放。
升级Oracle软件1、获取oracle升级软件p1*******_112030_Linux-x86-64_1of7.zip 及p1*******_112030_Linux-x86-64_2of7.zip。
2、将其上传到数据库服务器的/tmp/目录下并解压。
unzip p1*******_112030_Linux-x86-64_1of7.zipunzip p1*******_112030_Linux-x86-64_1of7.zip3、解压后,会在当前目录下生成一个database目录。
4、切换到oracle用户,执行oracle升级脚本。
5、s u - oracle/tmp/database/runInstaller6、不需要进行任何更改,直接点击下一步。
7、选择跳过软件更新,点击下一步。
8、选择升级现有数据库,点击下一步。
9、语言选择简体中文和英语,点击下一步。
10、选择企业版,并点击下一步。
11、Oracle基目录无需更改,软件位置需要更改为新的位置,这样可以减少宕机时间,是oracle所推荐的方法。
如下图我们将软件安装位置选择为/home/oracle/oracle11g3,修改后,点击下一步。
商务套件EBSEBusinessSuite研发战略和路线图

可行的组织结构图
增强的劳动力管理
HR 自助服务
员工全景视图有助于全面了解人才。 9 宫格矩阵和人才备注特性。 从单一页面启动相应的人才管理操作。主动识别潜能,采取行动以培养和留住人才。
第 II 阶段
In-Memory Cost Management
第 II 阶段 — 离散和流程制造客户
Inventory Management 手动桌面库存记录交易并跟踪余额
Mobile Supply Chain Applications仅射频/条形码提高现有事务的准确性,降低延迟
Oracle Warehouse Management仓库管理通过完整的任务管理实施真正的“执行系统”
2009 年 12 月
2010 年
8 月
2012 年 11 月
Oracle E-Business Suite 支持时间表
11.5.10 和 12.1 最新支持政策
11.5.10
12.0
12.1
2007 2008 2009 2010 2011 2012 2013 2014 2015 2016 2017 2018
标准
持续
标准
持续
2013 年 11 月
2012 年 1 月
2015 年 1 月
2014 年 5 月
2017 年 5 月
GA
GA
2010 年 11 月
扩展
12.2 GA 将从新的支持时间表开始
2007 年 1 月
2009 年 5 月
扩展
扩展
标准
有关发布的更多信息,请参见 MOS Doc ID 1495337.1
Oracle数据库12c升级指南说明书

Trouble-free Upgrade to Oracle Database 12c with Real Application TestingKurt EngeleiterPrincipal Product ManagerSafe Harbor StatementThe following is intended to outline our general product direction. It is intended for information purposes only, and may not be incorporated into any contract. It is not a commitment to deliver any material, code, or functionality, and should not be relied upon in making purchasing decisions. The development, release, and timing of any features or functionality described for Oracle’s products remains at the sole discretion of Oracle.Program Agenda▪Oracle Database Upgrades▪Validating Upgrades with Real Application Testing ▪Two Upgrade Use Cases:‒Consolidation into Multi-Tenant‒Database In-Memory▪Customer StoriesOracle Database UpgradesWhy Upgrade to Database 12c? •Database Consolidation to Multitenant–Ease management–Standardize on most recent version–Simplify future upgrades•Database In-Memory–Real time analytics•Migration to a new environment–Hardware / Software•Take advantage of other new database featuresValidating Upgradeswith Real Application TestingDatabase Upgrade Testing - Why•Every customer has a unique environment–Hardware configuration–Application use of the database•Upgrade testing in your environment provides validation ofperformance and correctness–Validates your unique hardware and software stack–Assures most important databases / applications perform to meet SLAsReal Application Testing provides real-workload testing solution that is comprehensive & easy-to-use for system change assessmentResponse Time TestingLoadTestingComprehensiveTestingSolutionSQL Performance Analyzer DatabaseReplayRealApplicationTestingReal Application Testing – Two Complementary SolutionsSQL Performance Analyzer •Helps users predict the impact of system changes on SQL workload response time•Low overhead capture of SQL workload to SQL Tuning Set (STS) on production system•Build different SQL trials (experiments) of SQL statements performance by test execution •Analyzes performance differences•Offers fine-grained performance analysis on individual SQL•Integrated with STS, SQL Plan Baselines, & SQL Tuning Advisor to form an end-to-end solutionAnalysis ReportCompareSQL PerformanceSQL plans + stats SQL plans + stats Pre-change Trial Post-change TrialSQL WorkloadSTSSPA Report1 2 345Database Replay •Database load and performance testing with real production workloads–Production workload characteristicssuch as timing, transactiondependency, think time, etc., fullymaintained•Identify and remediate application scalability and concurrency problems in multitenant and non-CDB databases •Allows scheduling, scaleup, subsetting, of multiple workloads•Concurrent database replay available for 11.2.0.2 and above, MOS Note: 1453789.1Database Upgrade Testing Best Practices•Always use SPA first–Unit test before load test•Capture and replay a manageable amount of time – e.g. 1 to 2 hours •Key metric for Database Replay is DB Time•Capture SQL Tuning Sets during capture and replay for additional validation•Use Enterprise Manager 12c with the latest DB Plugin–Implements best practices–Wizards guide you through the capture and replay process–Long term repository for storing and analyzing test results*Check MOS Note 560977.1 for recommended patch bundlesDB Time Definition•Total time in database calls by foreground sessions •Includes–CPU time –IO time–Active wait (non-idle wait) time•Basic unit for Oracle performance analysisCPUI/O WaitDB TimeDatabase Consolidation Into MultitenantDatabase Workload Compatibility: Challenges•Applications have different workload profiles –CPU–Memory –Storage –Network •Will my Multitenant database handle peak workloads and co-exist? •Is there enough headroom? •How do I minimize risk? •Use Real Application Testing to assess Multitenantworkload compatibility and conduct capacity planning ✓✗✓ ✓Using SPA in Multitenant EnvironmentCRM DW ERP HCMValidate SQL performance forconsolidated database:•Capture SQL workload foreach database in STS•Execute SPA for all workloadstogether in consolidatedenvironment•Identify errors & SQLregressions•Review response time•RemediateERP STSCRM STSHCM STSDWSTSSALESHRERPCRMMultitenant Load Testing: Use Consolidated DB Replay•Capture workload on different databases that needs to co-exists concurrently •Works for schema consolidation and Pluggable Databases•Use scaleup, subsetting, scheduling of multiple workloads•Use for schema and CDB consolidation •Identify and remediate inter-application scalability and concurrency problems •Available for 11.2.0.2 and above, MOS Note: 1453789.1TestCapture Process ReplayAnalysis & ReportingProductionReplay DriverClientsStorage StorageMultitenant Load Testing: Use Consolidated Database ReplayWindows DB 10.2 Capture 1Capture 2Capture 3Production SystemsCRM- DB1 HCM-DB2 DW-DB3DirectoriesAIXDB 9.2.0.8 HP-UX DB 11gMay: Month-end Close June15: Daily PeakJune 18: DW - ETL…CDB – DB12cReplay on CDBCapture 1Capture 2Capture 3Test SystemConsolidated Replay DirectoryDirectoriesHow to Test For Consolidation•If consolidating a few databases–Use SPA–Use Consolidated Replay•If consolidating a large number of databases–Identify databases with similar workload profiles–Categorize them into small, medium and large–Scale up each category with workload scheduling and Consolidated ReplayUse Case Example•Move to new platform and consolidate to multitenant databaseCapture SQL Tuning Sets on each databaseCapture Workload on each database with Database ReplayUpgrade Database to12cConfigure PDBsRun SPA TestRun Database ReplayTarget1 Node, 4 CPU, 16 GB MemoryProduction2 Nodes with 2 CPUs, 8 GB MemoryCapture Production WorkloadDatabase 1 Database 2•Capture SQL for each database into SQL Tuning Sets for SPA test •Capture workloads for Database ReplayOn Test System•Install Database 12c with Multitenant configuration•Restore production backups into individual PDBs and run upgrade scripts•Run SPA–Convert captured production STS into trial 1–Execute SPA trial 2 on each PDB–Evaluate results–Remediate any regressions before database replayConsolidated Database SPA - Execution Plans Unchanged•For consolidation into multitenant,most SQL should have unchangedexecution plan•For OLTP workload- ‘Buffer Gets’ isbest metric•Most SQL also have unchangedperformanceTest System – Consolidated Replay •Execute Consolidated Replay on test system–Remap captured TNS connections to individuals PDBs –Run Consolidated Replay–Evaluate resultsConsolidated Database Replay Result•Replay ‘user calls’ identical tocapture – same amount ofdatabase work was done•DB Time slightly reduced•Conclusion: Upgraded andconsolidated databaseperformance matches sourceStress Test with Workload Scheduling•Consolidated Database Replay also includes workload scheduling •Workload peaks can be aligned to maximize stress on replay systemUpgrading to Database In-MemoryOracle Database In-MemoryBoth row and column in-memory formatsSimultaneously active and transactionally consistentensuring access to freshest dataEliminates manual tuning and expensive analytic indexesUnique Dual-Format ArchitectureColumn FormatMemoryRow Format MemoryAnalyticsOLTPSales Sales Up-to-date analyticsOptimizing Transaction and Query Performance Row Format Databases versus Column Format DatabasesRow ▪Transactions run faster on row format –Insert or query a sales order–Fast processing few rows, many columnsColumn▪Analytics run faster on column format–Report on sales totals by state–Fast accessing few columns, many rows ORDERSALESSALESSTATEOracle 12c: Stores Data in Both Formats SimultaneouslySimple Implementation1.Upgrade to database 12.1.0.2 (or higher)2.Configure Memory Capacity‒inmemory_size = XXX GB3.Configure tables or partitions to be in memory ‒alter table | partition … inmemory;4.Drop analytic indexes to speed up OLTPUse Case Example•Upgrade to database 12.1.0.2 and Database In-MemoryRun In-MemoryAdvisorCapture SQLTuning SetCapture Workload withDatabase ReplayUpgrade Database to12cConfigureDatabase In-Memory UsingAdvisor OutputRun SPA TestRunDatabaseReplayProduction TestUpgrade and Testing Steps•Run Database In-Memory Advisor in existing database 11.2 environment•Capture SQL Tuning Set•Capture workload with Database Replay•In test environment–Upgrade database and implement Database In-Memory Advisor recommendations–Run SPA trial–Run Database Replay–Evaluate resultsRun Oracle Database In-Memory Advisor•New In-Memory Advisor •Analyzes existing DB workloadvia AWR & ASH repositories•Provides list of objects that would benefit most from being populated into IM column store•Works on database versions 11.2 and aboveObject TypeObjectEstimated In-Memory Size EstimatedAnalyticPerformance Improve mentTable SALES.ORDERS 2.19 GB 9.3X TableSALES.LINEITEM1.03 GB5.2XPartition SALES.PRODUCTS.201404 415 MB 4.3X Sub-partitionSALES.PRODUCTS.20140330200 MB2.7XCapture Production Workload•Capture SQL into a SQL Tuning Set •Capture workload for Database ReplayConfigure In-Memory on Test System•Restore production database•Upgrade to database 12.1.02 or higher•Set init.ora parameter inmemory_size to size In-Memory column store•Restart database•Execute SQL script from In-Memory Advisor to configure objects In-MemoryValidate In-Memory ConfigurationEnterprise Manger 12c In-Memory Central Object map – displaysrelative sizes of objectsIn-MemoryObject Table – Listsdetails of segmentsloaded In-MemorySPA – Look for Expected Plan Changes•Convert production STS to trial 1•Execute trial SPA trial 2•Produce comparison report•Best metric for analytic queryworkload is ‘Elapsed Time’•Analytic SQL have changedexecution plan with plan line‘Table Access In Memory Full’•SQL are benefitting from In-MemoryIdentify Plan Change Improvements Real Time SQL MonitoringExecute Database Replay•Validate concurrency and loadimprovement for consolidatedworkload•Database Replay trial results:•User calls identical – same workloadwas executed•DB Time substantially reduced•SuccessDatabase In-Memory DB Time ImprovementDatabase 11.2.0.4 Database 12.1.0.2 + In-MemoryCustomer Case StudiesSumitomo Heavy Industries,Ltd. Database Upgrade ProjectUsing RAT & GG VeridataCustomer ProfileCompany Name: Sumitomo Heavy Industries, Ltd.Head Office: ThinkPark Tower, 1-1 Osaki 2-chome, Shinagawa-ku, Tokyo 141-6025, JapanFounded: November 20, 1888Incorporated: November 1, 1934Capital: JPY 30,871,650,000 (as of March 31, 2014) Employees: Consolidated: 17,941 (as of March 31, 2014)Annual Revenue: Consolidated: JPY 615,270,000,000(for the 2013 Fiscal Year)Challenge & SolutionDatabase Upgrade 9i /10g -> 11gR2Solution•Perform application test with completely the same workload using Oracle Real Application Testing •Automate the Performance management using Diagnostics Pack & Tuning Pack•Guarantee data consistency after testing on new environment using Oracle GoldenGate Veridata •Use Oracle GoldenGate for minimizing downtime and fallback plan (under proposing)Challenge •Aim to reduce costs to around $2.5 M to 30-50% •Upgrading in parallel in a short period of time about 30DB •The data migration in a short period of time large-scale DB and Mission-Critical DB environment, to minimize business downtime •Standardizing method for migrating and upgrading multiple databases efficiently •Performing and automating application test by DBA for minimize costSolution ArchitectureArchitecture•1st step: Measure the SQL Elapsed timeCheck the workload consistency by using Veridata•2nd step: Check whether the new database has been created successfully by using Veridata•3rd step: Compare the whole throughput and workload between the production and the new production by using RATPerformanceTest Performance and Consistency TestProduction (9i) Test (9i)Test (11g)Veridata Server New Production(11g)1st Step3rd StepDatabaseConfiguration Test2nd StepVeridata ServerSumitomo Heavy Industries, Ltd.30DBs Upgrade, reduce the verification Cost to take advantage of support toolsCustomer ProfileName: Sumitomo Heavy Industires, Ltd.(http://www.shi.co.jp/english/)Location: Tokyo (Japan)Industry: manufacturing IndustryEmployees: 17,961Oracle Products•Oracle Real Application Testing (RAT)•Oracle Diagnostics Pack /Oracle Tuning Pack (Diag/Tuning) •Oracle GoldenGate Veridata(Veridata)•Oracle GoldenGate (GG) CUSTOMER PERSPECTIVE“I heard that Other Oracle Customer has efficiently implementedDB upgrade, to take advantage of tools(RAT, GG etc).Therefore ,We accept the Challenge!!”Engineer / Takayuki Okoshi INFORMATION SYSTEMS DEVELOPMENT DEPT.Sumitomo Heavy Industries Business Associates, Ltd.CHALLENGES/OPPORTUNITIES• Upgrading in parallel in a short period of time about 30DB •Aim to reduce costs to around $2.5 M to 30-50% •Establishing an upgrade method utilizing a tool for efficient operation while ensuring the quality• The data migration in a short period of time large-scale DB environment, to minimize business downtime• Adopt the DB performance improvement technique method RESULTS•RAT realized the accurate verification and efficient online processing performance•Diag/Tuning realized the performance improvement technique method•Veridata realized the data validation of the old and new environment accurate and efficiently to a large extent•To maintain business continuity, used GG to data migrate on the Critical DBs.。
oracle-RAC-11.2.0.3-升级至11.2.0.4
Linux-RAC升级11.2.0.3至11.2.0.4一、上传及解压相关文件 (2)二、创建GI和DB软件目录(新) (2)三、安装升级GI软件 (2)四、安装升级DB软件 (12)五、修改环境变量 (25)六、升级结果验证 (27)6.1验证环境变量是否生效 (27)6.2验证数据库所有组件是否成功升级 (27)七、关闭数据库关闭CRS重启服务器 (31)一、上传及解压相关文件将11204版的grid以及oracle软件上传至服务器。
并在合适的位置进行解压,得到database 以及grid文件夹。
二、创建GI和DB软件目录(新)mkdir -p /data/11.2.0.4/grid/basemkdir -p /data/11.2.0.4/grid/crsmkdir -p /data/11.2.0.4/oracle/appchown grid:oinstall /data/11.2.0.4/grid/basechown grid:oinstall /data/11.2.0.4/grid/crschown -R oracle:oinstall /data/11.2.0.4/oracle/appchmod -R 775 /data/11.2.0.4/chown -R grid:oinstall /oracle_new三、安装升级GI软件停止数据库实例节点一脚本执行情况:[root@linux1 ~]# sh /oracle/app/11.2.0/grid/rootupgrade.sh Performing root user operation for Oracle 11gThe following environment variables are set as:ORACLE_OWNER= gridORACLE_HOME= /oracle/app/11.2.0/gridEnter the full pathname of the local bin directory: [/usr/local/bin]: The contents of "dbhome" have not changed. No need to overwrite. The contents of "oraenv" have not changed. No need to overwrite. The contents of "coraenv" have not changed. No need to overwrite.Entries will be added to the /etc/oratab file as needed by Database Configuration Assistant when a database is created Finished running generic part of root script.Now product-specific root actions will be performed.Using configuration parameter file: /oracle/app/11.2.0/grid/crs/install/crsconfig_paramsCreating trace directoryUser ignored Prerequisites during installationInstalling Trace File AnalyzerCRS-2791: Starting shutdown of Oracle High Availability Services-managed resources on 'linux1'CRS-2673: Attempting to stop 'ora.crf' on 'linux1'CRS-2673: Attempting to stop 'ora.mdnsd' on 'linux1'CRS-2677: Stop of 'ora.crf' on 'linux1' succeededCRS-2673: Attempting to stop 'ora.gipcd' on 'linux1'CRS-2677: Stop of 'ora.mdnsd' on 'linux1' succeededCRS-2677: Stop of 'ora.gipcd' on 'linux1' succeededCRS-2673: Attempting to stop 'ora.gpnpd' on 'linux1'CRS-2677: Stop of 'ora.gpnpd' on 'linux1' succeededCRS-2793: Shutdown of Oracle High Availability Services-managed resources on 'linux1' has completed CRS-4133: Oracle High Availability Services has been stopped.ASM 升级已在第一个节点上初始化。
oracle ebs 应用服务器安装过程详细步骤
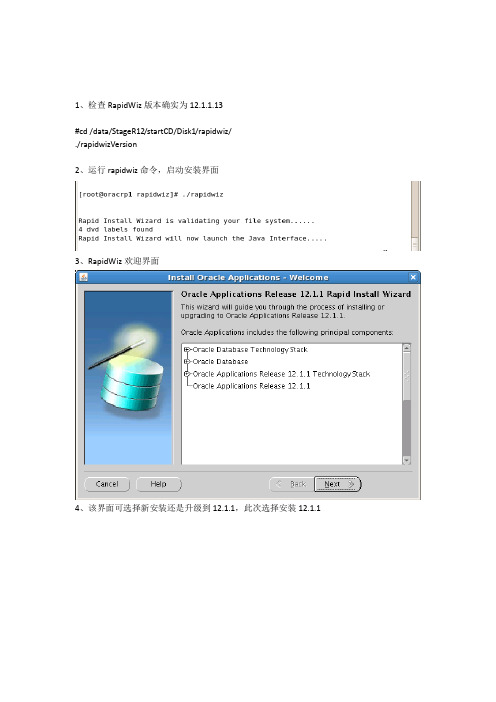
1、检查RapidWiz版本确实为12.1.1.13#cd /data/StageR12/startCD/Disk1/rapidwiz/./rapidwizVersion2、运行rapidwiz命令,启动安装界面3、RapidWiz欢迎界面4、该界面可选择新安装还是升级到12.1.1,此次选择安装12.1.15、该界面用于输入Oracle Support网站用户账号及密码,此次不输入跳过6、该界面可创建安装选项,还是加载已有安装选项文件,此次选新建7、该界面可选择将来ERP系统运行时用到的网络端口,Port Pool是端口偏移量。
此次选默认值08、该界面可选择安装数据库类型,例如Vision Demo演示数据库,还是Fresh空数据库;以及安装到哪个服务器的哪个目录下选择Fresh空数据库定义数据库名为TEST,更改OS User为之前创建的oratest,并设置安装的Base目录为/data/TEST9、点击上图中的Edit Paths可进入该界面,查看或更改Oracle Home或数据文件的安装目录。
此次安装没有更改10、点击Next后安装界面报错11、根据查看安装日志,发现是因为/oracle/TEST目录不存在,因此手工创建/oracle/TEST目录,并分配至oratest用户,同时chmod设置为dba组用户具备读写权限Component Licensing是按模块设置许可。
此次选后者13、该界面是选择具体模块许可。
按项目组要求及软件合同,分别对以下模块安装许可。
14、安装针对中国特有功能15、对软件添加简体中文(Simplified Chinese),考虑未来可能安装其它语种,因此更改数据库字符集(Database character set)为UTF8。
Default territory(默认地区)不要改16、该界面设置应用服务安装到哪个服务器、操作系统用户及安装目录17、点击上图中Edit Paths可查看更改应用服务组件的安装目录,此次无需更改,点击Cancel18、再次确认安装涉及的数据库服务器节点以及应用服务器界节点。
ebs R12.1.1-AIX安装手册
汉得信息技术有限公司EBS 系统安装手册Oracle Applications R12 Based On AIX-64System作者: 郭磊创建日期: 2009年2月23日 最后更新: 2009年2月23日 控制码: 版本: 1.0审批签字:客户项目负责人Copy Number _____文档控制修改记录日期作者版本修改参考2009-02-23 郭磊 1.0审阅姓名职位分发拷贝. 姓名地点1234目录EBS系统安装手册1作者:郭磊 (1)审批签字: 1文档控制 (2)修改记录2审阅2目录3安装概述 (4)安装前的系统准备 (5)安装12.1.1PROD环境 (7)已解决的问题 (17)安装概述安装环境:AIX-Based Systems AIX 6.1安装模块:ERP安装过程:1、安装 Applications R12 PROD环境* 安装是基于一台AIX P550主机, 单节点安装。
安装前的系统准备安装介质安装R12 for AIX-64,需用到R12安装介质中的11张DVD设置和检查主机网络和X Window系统检查主机名 hostname ( ebs ) 【vi /etc/hosts】检查IP地址 ifconfig (192.168.101.243)检查域名服务器 /etc/hosts文件/etc/hosts 设置如下127.0.0.1 localhost.localdomain localhost192.168.101.243 erpprodORACLE 的Rapid Install工具是图形化安装工具,主机Linux系统必须安装X Windows。
在终端运行 xhost +命令,以免OUI无法连接X Server。
检查操作系统版本和安装补丁检查操作系统版本AIX6(6.1),需要的补丁如下:AIX 6 (6.1) IZ10223 (TL 0)系统资源限制参数设置操作系统对用户能够使用的资源加以限制,在文件/etc/security/limits 修改资源信息增加如下内容:applprod:fsize = -1core = -1cpu = -1data = -1rss = -1stack = -1nofiles = -1oraprod:fsize = -1core = -1cpu = -1data = -1rss = -1stack = -1nofiles = -1安装JdkR12中的Apache需要使用Jdk1.5.0(以包含在EBS按照介质中,无需单独按照)查看java版本命令Java -versionIBM XL C/C++ Runtime UtilitiesThe XL C/C++ Enterprise Edition V8.0 for AIX, Runtime Environment and Utilities is available from the IBM Web site. Download and install the XL C/C++ runtime utilities and any prerequisites安装需要在xl c/cpp完成后,才能进行。
OracleEBSR12(12.1.3)InstallationLinux(64bit)

OracleEBSR12(12.1.3)InstallationLinux(64bit)Oracle EBS R12 (12.1.3) Installation Linux(64 bit)ContentsObjective. 31 Download & Unzip. 3Download. 3Unzip. 3MD5 Checksums. 42 Pre-Install Task. 5Disk Space. 5Specific Software Requirements. 5RPM (6)JDK. 8OS User & Group. 113 Installation process. 12Export Display. 12./rapidwiz. 12Add Env parameter to .bash_profile file. 26Set Start and Stop shell for APP and DB. 27Default DB & Apps password. 27R12 Directory Structure. 284 After Installation process. 29Register for ZHS license. 29Patch( also for some application and database bugs). 305 After Installation process(Chinese Version). 32安装和升级前 (32)安装和升级时 (33)安装和升级后 (33)6 Upgrade to 12.1.3. 36Download patch 9239090. 36Documents. 36Installation process. 377 After Upgrade. 39Autoconfig. 39Preclone. 408 Issues & Solutions. 40ObjectiveStep by Step instructions to install Oracle Applications R12(12.1.1) on Oracle Enterprise Linux 5 are described in this article. This is a single node installation, meaning that the database, all product directories and AD core directories, and all servers (concurrent processing, forms, and Web) are installed on a single node under one common APPL_TOP.The database node and the Applications node can be installed on the same machine. This type of installation is generally used for small systems or for demonstration purposes. More commonly, the database node is installed on one machine, and the Applications node on another machine. This provides improved manageability, scalability, and performance.This document will take Linux 64 bit platform as example. And my hardware configuration isItem ConfigurationCPU 2 * Intel(R) Xeon(R) X56702.93GHzRAM 6 GDisk Space/u01 300 GB/u02 200 GB/ 100 GB1 Download & UnzipDownload(NOTE: Choose proper platform and 32 bit/64 bit download files)Download Tips:Use the following command for Batch download, firstly collect all URLs required and put it in a text file, say download.txt, one URL on a line wget -i download.txt(-i means Read URLs from file.)UnzipCreate stage area - for downloaded installation pack, just unzip all zip files under stage area directory StageR12, eg.unzip B53824-01_1of4.zip -d /u02/ StageR12unzip B53824-01_2of4.zip -d /u02/ StageR12… …After unzip, File Path in StageR12 like following,Also create a directory to store patch files, then as follows showing:MD5 ChecksumsStrongly suggest you perform MD5 check against the stage area.The md5 checksums for the staged directory structure can be used to validate the software integrity. Do this by running the md5sum program against the stage area using the oracle created checksum file. Note for can observe you have any problem with your stage ornot(Corrupted zip etc)MD5 Checksums for R12.1.1 Rapid Install Media (Doc ID 802195.1)2 Pre-Install TaskDisk SpaceFile System Space Requirements for Standard InstallationNode Space Required35 GB (50 GB on HP-UX Itanium)Applications node file system(includes OracleAS 10.1.2 OracleHome, OracleAS 10.1.3 OracleHome, COMMON_TOP,APPL_TOP,and INST_TOP)55 GBDatabase node file system (Freshinstall)208 GB (210 GB on HP-UX Itanium)Database node file system (VisionDemo Database)Stage area(unzipped files)47 GBThe total space required for a standard system (not including the stage area) is 85 GB for a fresh install with a production database, and 233 GB for a fresh install with a Vision Demo database.You can use below Unix command to check disk spacedf –hSpecific Software RequirementsThe following maintenance tools must be installed on machine, and their locations specified both in the PATH of the account that runs Rapid Install and in the PATH of the accounts that will own the database tier and application tier file systems.Operating System Required Maintenance ToolsLinux x86ar, gcc, g++, ld, ksh, make, X DisplayServerLinux x86-64ar, gcc, g++, ld, ksh, make, X DisplayServerHP-UX Itanium ar, cc, aCC, make, X Display ServerHP-UX PA-RISC ar, cc, aCC, make, X Display ServerIBM AIX on Power Systems (64-bit)ar, cc, aCC, make, X Display ServerMicrosoft Windows Server (32-bit)ar, cc, ld, linkxlC, make, X DisplayServerSun Solaris SPARC (64-bit)ar, ld, make, X Display ServerRPMPer Note: 761566.1First, you should check your Linux Kernel, to determine your linux version, enter:uname –rSo my Linux is Linux 6, For Linux 6, Required Packages isGA (6.0) or higher of Oracle Linux 6 is requiredopenmotif21-2.1.30-11.EL6.i686 (32-bit)1xorg-x11-libs-compat-6.8.2-1.EL.33.0.1.i386 (32-bit)The following packages must be installed from the Oracle Linux 6 distribution media:binutils-2.20.51.0.2-5.11gcc-4.4.4-13.el16.x86_64gcc-c++-4.4.4-13.el16.x86_64glibc-2.12-1.7.el6.i686 (32-bit)glibc-2.12-1.7.el6.x86_64glibc-common-2.12-1.7.el6.x86_64glibc-devel-2.12-1.7.el6.i686 (32-bit)glibc-devel-2.12-1.7.el6.x86_64libgcc-4.4.4-13.el6.i686libgcc-4.4.4-13.el6.x86_64libstdc++-devel-4.4.4-13.el6.i686libstdc++-devel-4.4.4-13.el6.x86_64libstdc++-4.4.4-13.el6.i686libstdc++-4.4.4-13.el6.x86_64make-3.81-19.el6.x86_64gdbm-1.8.0-36.el6.i686gdbm-1.8.0-36.el6.x86_64libXp-1.0.0-15.1.el6.i686libXp-1.0.0-15.1.el6.x86_64libaio-0.3.107-10.el6.i686libaio-0.3.107-10.el6.x86_64libgomp-4.4.4-13.el6.x86_64sysstat-9.0.4-11.el6.x86_64util-linux-ng-2.17.2-6.el6.x86_64unzip-5.52-3.0.1.el5.x86_642compat-libstdc++-296-2.96-144.el6.i686compat-libstdc++33-3.2.3-69.el6.i686Additionally, the following RPMs are required for the database tier running 11gR2 (users must upgrade the bundled 11gR1 DB to 11gR2 either before or after installing 12.1) on the database tier:compat-libstdc++-33-3.2.3-69.el6.x86_64elfutils-libelf-devel-0.148.1-el6.x86_64kernel-uek-headers-2.6.32-100.28.5.el6.x86_64libaio-devel-0.3.107-10.el6.x86_64unixODBC-2.2.14-11.el6.i686unixODBC-devel-2.2.14-11.el6.i686unixODBC-2.2.14-11.el6.x86_64unixODBC-devel-2.2.14-11.el6.x86_64xorg-x11-utils-7.4-8Note:1: The openmotif package version must be 2.1.30 (for example, openmotif-2.3.3-1 is not supported).2: This unzip package (available from EL 5 distribution) is only required for purposes of running Rapid Install to unzip the required EBS files as part of the installation.Be sure you have above rmp on your system, you can use below command to check whether RPM packages are installed or notrpm -qa --queryformat "%{NAME}-%{VERSION}.%{RELEASE} (%{ARCH})\n" | grep gccq = querya = allWhat’s the RPM:The Red Hat Package Manager (RPM) is a toolset used tobuild and manage software packages on UNIX systems. Distributed withthe Red Hat Linux distribution and its derivatives (CentOS is 100%compatible rebuild of the Rehat Enterprise Linux).The RPM files represent application or package that you can install onLinux system.JDKJDK 6 is bundled with Oracle E-Business Suite version 12.1.1. You do NOT need to install the JDK separately./etc/hostsFor Oracle Linux 4, 5 and 6, and Red Hat Enterprise Linux 4 and 5:Verify that the /etc/hosts file is formatted as follows:127.0.0.1 localhost.localdomain localhost[ip_address] [node_name].[domain_name] [node_name]/etc/sysconfig/networkVerify that the /etc/sysconfig/network file is formatted as follows:HOSTNAME=[node_name].[domain_name]/etc/sysconfig/networking/profiles/default/networkIf the /etc/sysconfig/networking/profiles/default/network file exists, remove it.If you changed any files in the previous steps, restart the system./etc/sysctl.confEdit the /etc/sysctl.conf file to configure your kernel settings. After editing the file, use the "sysctl -p" command or restart the system to invoke the new settings.Note: If the current value for any parameter is higher than the value listed in the following table, then do not change the value of that parameter.The following table lists the kernel settings for Oracle Linux 4, 5 and 6, Red Hat Enterprise Linux AS/ES 4 and 5, and SUSE Linux Enterprise Server 9 and 10:1: set using the following entry in the /etc/sysctl.conf file: kernel.sem = 256 32000 100 1422: On the server running the EBS Database, this kernel parameter must be the lesser of half the size of the physical memory (in bytes) and 42949672953: values recommended for the local port range may need to be adjusted according to the specific needs of the user's environment in order to avoid port conflicts./etc/security/limits.confOpen the /etc/security/limits.conf file and change the existing values for "hard" and "soft" parameters as follows. Restart the system after making changes.Note: If the current value for any parameter is higher than the value listed in this document, then do not change the value of that parameter.* hard nofile 65535* soft nofile 4096* hard nproc 16384* soft nproc 2047/etc/resolv.confAdd or update the following entries to these minimum settings in the/etc/resolv.conf file on each server node:options attempts:5options timeout:15OS Library Patch for Oracle HTTP Server(on Oracle Linux 5, RHEL 5 and Oracle Linux 6 only)Download and apply the patch 6078836 from My Oracle Support to fix an issue with the Oracle HTTP Server (missing libdb.so.2) bundled with the E-Business Suite technology stack.Note that this patch (which includes a required operating system library) must be applied before installing Oracle E-Business Suite. Without this patch, after installation, HTTP Server cannot start.Link to Motif library in Oracle Application Server 10.1.2 (on Oracle Linux 5 and RHEL 5 only)Perform the following command (as root on your system) to update a required link to a Motif library prior to relinking or patching the 10.1.2 Application Server Oracle Home:# unlink /usr/lib/libXtst.so.6# ln -s /usr/X11R6/lib/libXtst.so.6.1 /usr/lib/libXtst.so.6OS User & GroupGenerally for PROD instance, we need create two OS user for installation, one user is used to manage DB, the other is used to manage Apps.Since our instance is a TEST instance, so for simple, we just create one user to manage DB and Apps, Here we use ‘oracle’ as user, use ‘oinstall’ as group.# groupadd oinstall -g 2000# useradd -g oinstall -u 2000 oracle# chown -R oracle:oinstall /u01/oraclechown changes the user and/or group ownership of each given file.-R, operate on files and directories recursively3 Installation processExport DisplayTo ensure we have a graphical installation process, we can export server to our local linux which have X window system. If your server have installed X window, then you can ignore this step.(ptian) ptian- env | grep ALTDISPLAYALTDISPLAY=:50(First, in our local linux, Check our local linux’s host and port)(ptian) ptian- ssh admin@admin@'s password:Last login: Thu May 31 21:32:49 2012 from 10.182.114.9(SSH to server which we intend to install EBS)[admin@bej301441 ~]$ export DISPLAY=:50./rapidwizIf you intend to use standard installation mode, you need login as root user.[root@bej301441 rapidwiz]#cd /u02/StageR12/startCD/Disk1/rapidwiz[root@bej301441 rapidwiz]# ./rapidwizRapid Install Wizard is validating your file system......4 dvd labels foundRapid Install Wizard will now launch the Java Interface.....NextNext, then no need to fill the Email, Next againDefault Oracle EBS PortsPort numbers can be modified during installation or may be automatically incremented by x during installation where x is a number 1 to 100 (typical less than 10). Port number ranges are often a grouping of 3, 4, 5, or 6 contiguous ports in the specified range.Another case, for fresh installation, as follows:Note the languages and character set chosen, as follows:Then for Vision Demo or Fresh install, will pop up below to checkWill spend almost 3 hours belowAdd Env parameter to .bash_profile file.bash_profile is a bash shell that is started when login.For DB user, Modify /.bash_profile, add your DB env file path into it, eg.. /u01/oracle/mc3yd213/db/tech_st/11.1.0/mc3yd213_bej301441.envFor Apps user, Modify /.bash_profile, add your Apps env file path into it, eg.u01/oracle/mc3yd213/apps/apps_st/appl/APPSmc3yd213_bej301441.envSet Start and Stop shell for APP and DBCreate stopAPP.sh and startAPP.sh under APP owner home (like /home/applmgr) to stop and start EBS, as follows: stopAPP.sh file:source .appadstpall.sh apps/appsstartAPP .sh file:source .appadstrtal.sh apps/appsAslo change owner to applmgr of stopAPP.sh and startAPP .sh.Create stopDB.sh and stopDB.sh under oracle owner home (like /home/oracle) to stop and start EBS, as follows: stopDB.sh file:source .oraaddlnctl.sh stop PRODstartDB.sh file:source .oraaddlnctl.sh start PRODaddbctl.sh startAslo change owner to oracle of stopDB.sh and startDB .sh.Then we can use these four files to stop/start the DB/APP。
11GRAC11.2.0.1升级11.2.0.3

11GRAC11.2.0.1升级11.2.0.311G RAC 双节点11.2.0.1升级到11.2.0.3目录一、GI 升级 (1)1. 升级前准备 (1)2. 常见问题及解决办法 (1)a. 问题1: (1)b. 问题2: (1)c. 问题3: (3)d. 问题4: (3)3. GI升级过程及详细图解 (3)4. GI升级后验证 (12)二、升级rdbms (12)1. 升级oracle software (12)2. Oracle database升级 (20)3. rdbms升级后验证 (25)4. 升级结束 (26)一、GI 升级1.升级前准备需要软件p1*******_112030_Linux-x86-64_3of7.zip解压[grid@test01 temp]$ unzip p1*******_112030_Linux-x86-64_3of7.zip[grid@test01 temp]$ cd grid/[grid@test01 grid]$ pwd/temp/grid/[grid@test01 grid]$ ./runcluvfy.shstage -pre crsinst -upgrade-n test01,test02-rolling -src_crshome $ORACLE_HOME -dest_crshome $ORACLE_HOME -dest_version 11.2.0.3.0 -fixup -fixupdir /tmp -verbose2.常见问题及解决办法a.问题1:/u01/app/11.2.0/grid test01 /u01 3.8643GB 5.5GB failed 解决方法:整理磁盘b.问题2:Checking for Oracle patch "9413827" in home "/u01/app/grid/11.2".Node Name Applied Required Comment--------------------------------------------------------------------------------------------------------------------------------- test02 missing 9413827 failedtest01 missing 9413827 failed解决方法:打补丁9413827如果集群的管理用户和数据库管理用户是在同一个用户下,那么需要改变一下环境变量,使用命令. oraenv授权(双节点)[root@test01 ~]# chown -R grid:oinstall /u01/app/grid/11.2/ 备份一下(双节点)[grid@test01 ~]$cp -rf $ORACLE_HOME/OPatch $ORACLE_HOME/OPatch_bk解压(双节点)[grid@test01 tmp]$ unzip p9413827_112010_Linux-x86-64.zip -d $ORACLE_HOME看一下版本(双节点)[grid@test01 11.2]$ $ORACLE_HOME/OPatch/opatch versionOPatch Version: 11.2.0.3.0OPatch succeeded.集群1节点操作[***************]$srvctlstophome-o$ORACLE_HOME-s /tmp/dex -n test01解锁[root@test01 ~]# /u01/app/grid/11.2/crs/install/rootcrs.pl -unlockSuccessfully unlock /u01/app/grid/11.2备份[grid@test01~]$ /u01/app/grid/11.2/9413827/custom/scripts/prepatch.sh -dbhome $ORACLE_HOME/u01/app/grid/11.2/9413827/custom/scripts/prepatch.sh completed successfully.打补丁[grid@test01 ~]$ cd /u01/app/grid/11.2/9413827/[grid@test01 9413827]$ /u01/app/grid/11.2/OPatch/opatch napply -local -oh $ORACLE_HOME -id 9413827[grid@test019413827]$ custom/server/9413827/custom/scripts/postpatch.sh -dbhome $ORACLE_HOME[root@test01 ~]# /u01/app/grid/11.2/crs/install/rootcrs.pl -patch-----------------------------------------------------------------------------------2012-05-28 14:59:52: Parsing the host name2012-05-28 14:59:52: Checking for super user privileges2012-05-28 14:59:52: User has super user privilegesUsing configuration parameter file:crs/install/crsconfig_paramsCRS-4123: Oracle High Availability Services has been started.查看下状态[grid@test01 OPatch]$ ./opatch lsinventory[grid@test01 ~]$ crsctl stat res -t------------------------------------------------------------------------------------------------------------ora.prod.db1 ONLINE ONLINE test01 Open2 ONLINE ONLINE test02 Open-------------------------------------------------------------------------------------------------------------如果出现如下这种状况,升级另外一个节点,步骤同节点1-------------------------------------------------------------------------------------------------------------ora.prod.db1 ONLINE ONLINE test01 Open2 ONLINE ONLINE test02--------------------------------------------------------------------------------------------------------------至此为止,补丁完成c.问题3:Check: Kernel parameter for "shmmni"Node Name Current Configured Required Status Comment ---------------------------------------------------------------------------------------------------------test02 4096 unknown 4096 failed Configured value too low.test01 4096 unknown 4096 failed Configured value too low.解决方法:[root@test01 ~]# /tmp/CVU_11.2.0.3.0_grid/runfixup.shResponse file being used is :/tmp/CVU_11.2.0.3.0_grid/fixup.responseEnable file being used is :/tmp/CVU_11.2.0.3.0_grid/fixup.enableLog file location: /tmp/CVU_11.2.0.3.0_grid/orarun.logSetting Kernel Parameters...The value for shmmni in response file is not greater than value of shmmni for current session. Hencenot changing it.d.问题4:Checking all nodes to make sure that search entry is " " as found on node "test02"All nodes of the cluster have same value for 'search'Checking DNS response time for an unreachable nodeNode Name Status---------------------------------------------------------------------------test02 failedtest01 failed解决方法:在dns服务器中加入缺少的域或者将/etc/resolv.conf中多余的查找域删除再次验证[grid@test01 grid]$./runcluvfy.shstage -pre crsinst -upgrade -n test01,test02-rolling -src_crshome $ORACLE_HOME -dest_crshome $ORACLE_HOME -dest_version 11.2.0.3.0 -fixup -fixupdir /tmp -verbose待所有问题解决后,开始升级安装3.GI升级过程及详细图解unset ORACLE_HOMEunset ORACLE_BASEunset ORACLE_SID ./runInstaller节点1执行脚本如下图:[root@test01 ~]# /u01/app/11.2.0/grid/rootupgrade.sh节点2执行脚本如下图:[root@test02 ~]# /u01/app/11.2.0/grid/rootupgrade.sh最后一步报错可忽略,点Skip跳过。
ORACLEEBSR12(总帐配置)

ORACLEEBSR12(总帐配置)EBS R12 总帐模块流程配置⽬录1总帐设置前要做的步骤 (3)1.1定义总帐职责 (3)1.2定义⽤户 (3)1.3定义组织地点 (3)1.4定义B USINESS G ROUP、L EGAL E NTITY (4)2正式设置步骤 (5)2.1定义科⽬表(C HART OF A CCOUNTS,COA) (5)2.1.1定义值集 (5)2.1.2定义科⽬表结构 (5)2.1.3导⼊/录⼊值 (7)2.2定义交叉验证规则(可选,跳过此步骤) (7)2.3定义科⽬表映射(可选,跳过此步骤) (7)2.4定义说明性弹性域(可选,跳过此步骤) (8)2.5定义会计期间 (8)2.5.1定义期间类型 (8)2.5.2定义会计⽇历 (8)2.5.3定义事务处理⽇历 (特定条件下必需,跳过此步骤) (9)2.6定义币种相关 (10)2.6.1定义币种 (10)2.6.2定义币种汇率及汇率类型 (可选) (10)2.7定义⽇记帐来源 (11)2.8定义⽇记帐类别 (12)2.9定义冲销⽅法 (12)2.10会计科⽬管理设置 (13)2.10.1定义法⼈实体 (13)2.10.2会计科⽬设置 (14)2.10.3会计选项设置 (17)2.11定义预置⽂件 (29)2.12打开会计期 (30)3总帐设置测试 (31)3.1创建⽇记帐分录 (31)1总帐设置前要做的步骤1.1定义总帐职责N:System Administrator: Security>Responsibility>Define1.2定义⽤户N:System Administrator: Security>User>Define1.3定义组织地点N:Global Super HRMS Manager: Work Structures>Location定义组织地点。
1.4定义Business Group、Legal EntityN:Global Super HRMS Manager: Work Structures>Organization>Description这⼀步骤定义Business Group 及Legal Entity,⾸先在组织分类⾥选择―Business Group‖,保存后点击―Other‖,选择―Business Group Info.‖,填写必需字段。
EBS R12.2.8 安装指南 V1.10

EBS R12.2.8 安装指南EBS R12.2.8安装指南文档作者: 许铭创建日期: 2012年11月12日更新日期: 2018年10月14日文档编码: EBS R12.2.8安装指南.DOC当前版本: 版本1.9审批签字:<审批者 1><审批者2>文档控制 修改记录审阅分发目录文档控制 (2)目标 (9)假设 (10)术语 (10)L INUX 服务器先期准备 (11)操作系统版本 (11)操作系统 安装过程 (11)第一次启动 (21)操作系统需要的补丁 (24)ORACLE 公司发布的专用补丁 (25)安装JAVA (25)参数设置 (26)创建用户及组 (26)操作系统补丁 (27)操作系统链接设置 (28)网络设置 (28)安装程序包 (29)目录构架规划 (30)安装软件 (30)目标系统目录构架 (30)安装介质整理 (31)unzip StartCD (31)Create the Stage Area (31)安装ORACLE EBS R12.2.0 (37)Process oraInventory (37)安装R12.2.0 (37)COLD BACKUP (55)前置DB 补丁 (55)Process adop config (57)datafile autoextend on (57)中文补丁包 (58)注册中文语言 (58)维护多语言表 (59)中文补丁包 (59)R12.2.0COLD BACKUP (61)R12.2.5 (62)Upgrade Database to 11.2.0.4 (62)Apply Required Database Patches (71)Apply Consolidated Seed Table Upgrade Patch (Required) (72)Apply the Latest AD and TXK Delta Release Update Packs (72)Perform Pre-Update Steps (Conditional) (79)R12.2.5 US patch 19676458 V77840 (79)R12.2.5 ZHS patch 19676458 V77925 (79)P RE C LONE (81)DB (81)APP (81)Shutdown APP and DB (82)R12.2.5COLD BACKUP (83)R12.2目录体系 (84)R12.2.5克隆TEST8010 (85)PreClone (85)冷备份 (85)传输到新服务器 (85)环境恢复 (85)DB克隆 (86)APP克隆 (88)修改服务进程数量 (92)检查当前服务进程数量及端口 (92)增加服务进程 (92)检查当前服务进程数量及端口 (94)重新AUTOCFG (94)配置Apache代理负载均衡 (95)删除Apache 代理负载均衡 (97)删除服务进程 (98)U PGRADE TO 12.2.6 (99)U PGRADE TO 12.2.6S ECTION 1 PREPARATION UPGRADE FWM TO 11.1.1.9 100Check version (100)ETCC check 2016-08-02 (101)ETCC FIX DB 2016-08-02 PSU (109)ETCC FIX DB 2016-08-02 DB patch (110)Upgrade FMW Section 1: Overview (112)Upgrade FMW Section 2: Perform Oracle WebTier Upgrade For Oracle E-Business Suite Release 12.2 (115)Upgrade FMW Section 3: Perform Post-Upgrade Tasks (121)U PGRADE TO 12.2.6S ECTION 2 OBSOLETE PRODUCTS IN 12.2.6 (135)U PGRADE TO 12.2.6S ECTION 3U PGRADE DB TO 11.2.0.4 OR HIGHER (136)U PGRADE TO 12.2.6S ECTION 4A PP PATCH AND DB INIT PARAMETER (137)APP (137)DB (137)U PGRADE TO 12.2.6S ECTION 5A PPLY C ONSOLIDATED S EED T ABLE U PGRADEP ATCH (R EQUIRED) (138)U PGRADE TO 12.2.6S ECTION 6A PPLY THE L ATEST AD AND TXK D ELTA R ELEASE U PDATE P ACKS (139)U PGRADE TO 12.2.6S ECTION 7P ERFORM P RE-U PDATE S TEPS(C ONDITIONAL) (140)U PGRADE TO 12.2.6S ECTION 8A PPLY O RACLE E-B USINESS S UITE 12.2.6 R ELEASE U PDATE P ACK (141)Path B Existing Customers (Release 12.2.2, 12.2.3, 12.2.4 or 12.2.5) upgrading to Oracle E-Business Suite 12.2.6 Release Update Pack (141)Prepare (141)Patch R12.2.6 21900901 BASE (141)Patch R12.2.6 21900901 ZHS (141)Patch R12.2.6 21900901 ONLINE help (141)Patch AD C 24432372 for mobile phone (142)Complete the patching cycle (142)Synchronize file systems (142)R12.2.6 ENV Check (143)R12.2.6COLD BACKUP (144)U PGRADE D ATABASE TO 12.1.0.2 (145)Verify software versions (145)Install Techstack Database 12.1.0.2 BASE (145)Install Techstack Database 12.1.0.2 EXAMPLE (152)Oracle Recommended Patches -- Oracle Database (155)Apply additional 12.1.0.2 RDBMS patches (161)Create nls/data/9idata directory (169)Install JRE 6 or 7 (170)Ensure Applications patching cycle is complete (170)Drop SYS.ENABLED$INDEXES (conditional) (170)Remove the MGDSYS schema (conditional) (170)Shutdown 11.2.0.4 DB and cold backup datafile (170)Upgrade the database instance (170)Perform patch post-install instructions (172)Natively compile PL/SQL code (optional) (172)Start the new database listener (conditional) (172)Run adgrants.sql (173)Grant create procedure privilege on CTXSYS (173)Compile invalid objects (173)Set CTXSYS parameter (173)Validate Workflow ruleset (174)Deregister the current database server (conditional) (174)Using AD package (174)Implement and run AutoConfig (174)Gather statistics for SYS schema (176)Create the new MGDSYS schema (conditional) (176)FIX AD_ZD_PREP package for adop (176)Apply post-upgrade WMS patches (conditional) (177)Create Demantra privileges (conditional) (177)Re-create custom database links (conditional) (177)Restart Applications server processes (177)Synchronize Workflow views (177)CHECK Version (178)P RE C LONE (180)DB (180)APP (180)Shutdown APP and DB (181)12.2.8DB ETCC PATCH FOR 12.1.0.2.180927 (182)Replace DB ETCC 20180927 (182)R12.2.8DB PSU AND ETCC PATCH (183)PSU 20180717 (183)ETCC 20180927 (184)DB Patch 2850016 for AD 10 and TXK 10 (186)更新OJVM (187)R12.2.8P ERFORM O RACLE W EB T IER U PGRADE FOR O RACLE E-B USINESS S UITE R ELEASE 12.2 (188)Ensure Oracle E-Business Suite patching cycle is complete (188)Start new online patching cycle (188)Source the patch edition environment file (188)R12.2 Web tire 11.1.1.9.0 (188)R12.2.8W EBTIER P ERFORM P OST-U PGRADE T ASKS (193)Start WebLogic Admin Server from the patch file system (193)Run Post Patching tasks (193)R12.2.8W EBTIER C UT O VER T O N EWLY U PGRADED P ATCH F ILES YSTEM (196)R12.2.8W EBTIER S YNCHRONIZE R UN AND P ATCH F ILE S YSTEMS. 197 R12.2.8AD10 AND TXK10 (198)CHECK DB parameter (198)P ath B — Existing Release 12.2 customers (below AD-TXK Delta 10 codelevel) (198)R12.2.8RUP PATCH 26787767 (201)R12.2.8ZHS PATCH (202)R12.2.8ONLINE HELP 26787780 (203)R12.2.8ADOP FINALIZE CUTOVER CLEANUP FS_CLONE (204)R12.2.8减少服务进程数量作为种子 (205)PRE CLONE (216)DB Preclone (216)APP Preclone (216)R12.2.8COLD BACKUP FOR CLONE (217)R12.2.8克隆DEV8080 (219)PreClone (219)冷备份 (219)传输到新服务器 (219)环境恢复 (219)DB克隆 (219)APP克隆 (223)R12.2四节点 (229)GRID 安装 12.1.0.1 或者 12.2.0.1 (229)DB 安装 12.1.0.2 (229)DB EXAMPLE安装 12.1.0.2 (229)DB EBS patch (229)DB EBS Config (229)复制备份文件到 ASM (229)重建控制文件在ASM中 (230)DB autocfg (231)DB 手工转RAC (233)基础验证 (233)创建 RAC 数据字典 (233)DB 手工转RAC (234)EBS DB1节点生成CONTEXT_FILE (237)EBS DB2节点生成CONTEXT_FILE (238)两个节点 分别修改CONTEXT_FILE (239)DB1 清理已注册节点信息 (239)DB1 DB2 分别重新注册节点信息 (239)DB1 DB2 分别重使用新环境变量 (240)APP1 clone (240)APP1 preclone (243)APP1 备份应用 (243)APP1 进入启动状态 (244)APP1 服务上 配置APP1 APP2 SSH等效性 (244)恢复APP2 应用 (245)APP2节点克隆 追加模式 (245)APP1 节点配置 (248)APP2 节点配置 (249)patch FS注册 (250)ERROR LIST (252)未解决和已解决问题 (253)未解决的问题 (253)已解决的问题 (253)简述ORACLE EBSR12.2.5及中文补丁包安装过程目标EBS版本是Oracle Application R12.2.5目标DB版本是Oracle Database Enterprise 11.2.0.4测试机型号 DELL AlinceWare AUROLA R3 i7-2600K3.4=>5.0G/16G/500G OS 1.5T BCK 1T SSD Working术语Linux 服务器先期准备操作系统版本OEL AS6U6 X86-64 操作系统 安装过程一定要去掉UEK第一次启动操作系统需要的补丁copy OEL CDROM to /BCK/ISOvi /etc/yum.repos.d/public-yum-ol6.repoORACLE 公司发布的专用补丁download from https:///projects/compat-oracle/files/Enterprise_Linux/ openmotif21-2.1.30-11.EL6.i686.rpmxorg-x11-libs-compat-6.8.2-1.EL.33.0.1.i386.rpmdownload from /repo/OracleLinux/OL6/latest/x86_64/ oracle-rdbms-server-11gR2-preinstall-1.0-9.el6.x86_64.rpm安装JAVA参数设置内核参数系统资源限制 vi /etc/security/limits.conf创建用户及组操作系统补丁OS Library Patch for Oracle HTTP Server (on Oracle Linux 5 and RHEL 5only)Link to Motif library in Oracle Application Server 10.1.2 (on OracleLinux 5 and RHEL 5 only)操作系统链接设置网络设置安装程序包目录构架规划 安装软件/ins/12.2目标系统目录构架安装介质整理安装目录: /12.2.ins/INS ZIP 目录: /12.2.ins/zipunzip StartCDCreate the Stage Area自动解开相关压缩包安装ORACLE EBS R12.2.0Process oraInventory安装R12.2.0# root usercd /12.2.ins/INS/startCD/Disk1/rapidwiz ./rapidwiz。
oracle ebs R12 在linux 安装 12.1.1升级 安装中文语言包
ORACLE EBS R12.1.2 安装报告作者: 庞叶松创建日期: Jul 09, 2010最后更新: Jul 12, 2010控制码: 1.0版本: 1.0审批签字:项目经理HAND项目经理Copy Number _____文档控制修改记录日期作者版本修改参考审阅姓名职位分发拷贝姓名地点1234目录文档控制 ................................................................................................................................... i i 安装前的系统准备 . (1)安装EBS Release 12.1.1 (6)安装EBS Release 12.1.1 ZHS语言 (18)安装EBS Release 12.1.2 RUP (20)运行测试 (21)遇到的问题及解决方案 (22)安装前的系统准备安装文档Applications release 12.1 for LINUX 5.4 x64的安装应拥有以下文档:1.Oracle@ Applications Installation Guide : Using Rapid Install Release 12.12.Oracle Applications Installation and Upgrade Notes Release 12 (12.1) for LINUXx86-64【761566.1】Oracle Applications NLS Release Notes Release 12.1操作系统版本Oracle EBS R12支持的Redhat 32-bit、64-bit包括:(查看命令uname -r)32-bit:Red Hat Enterprise Linux 4-Update 4 or higher(32-bit)Red Hat Enterprise Linux 5-Update 1 or higher(32-bit)64-bit:Red Hat Enterprise Linux 4-Update 4 or higher(64-bit)Red Hat Enterprise Linux 5-Update 1 or higher(64-bit)操作系统RPM包需求oracle EBS R12.1针对Redhat 5.4 x64-bit必须的rpm包如下:•openmotif21-2.1.30-11.EL5.i386• xorg-x11-libs-compat-6.8.2-1.EL.33.0.1.i386上述两个包下载地址为:/projects/compat-oracle/files/Enterprise_Linux/•gcc-4.1.2-14.el5.x86_64•gcc-c++-4.1.2-14.el5.x86_64•glibc-2.5-18.i686 (32-bit)•glibc-2.5-18.x86_64•glibc-common-2.5-18.x86_64•glibc-devel-2.5-18.i386 (32-bit)•glibc-devel-2.5-18.x86_64•libgcc-4.1.2-14.el5.i386•libgcc-4.1.2-14.el5.x86_64•libstdc++-devel-4.1.2-14.el5.i386•libstdc++-devel-4.1.2-14.el5.x86_64 •libstdc++-4.1.2-14.el5.i386•libstdc++-4.1.2-14.el5.x86_64•make-3.81-1.1.x86_64•gdbm-1.8.0-26.2.1.i386•gdbm-1.8.0-26.2.1.x86_64•libXp-1.0.0-8.1.el5.i386•libXp-1.0.0-8.1.el5.x86_64•libaio-0.3.106-3.2.i386•libaio-0.3.106-3.2.x86_64•libgomp-4.1.2-14.el5.x86_64•sysstat-7.0.0-3.el5.x86_64•util-linux-2.13-0.45.el5.x86_64•compat-libstdc++-296-2.96-138.i386 •compat-libstdc++-33-3.2.3-61.i386 •compat-libstdc++-33-3.2.3-61.x86_64 •elfutils-libelf-devel-0.125-3.el5.x86_64 •elfutils-libelf-devel-static-0.125-3.el5.x86_64 •libaio-devel-0.3.106-3.2.x86_64 •unixODBC-2.2.11-7.1.i386•unixODBC-devel-2.2.11-7.1.i386 •unixODBC-2.2.11-7.1.x86_64 •unixODBC-devel-2.2.11-7.1.x86_64•kernel-headers-2.6.18-8.el5.x86_64操作系统软件需求确认以下工具已经安装,PATH变量包含其路径•ar•gcc•g++•ksh•ld•linux32•make•X Display ServerKernel设置修改/etc/sysctl.conf文件,使参数立即生效(重启服务器或sysctl –p)# add for EBSkernel.sem =256 32000 100 142kernel.shmall =2097152kernel.shmmax =2147483648kernel.shmmni =4096kernel.msgmax =8192kernel.msgmnb =65535kernel.msgmni =2878fs.file-max =131072net.ipv4.ip_local_port_range =1024 65000net.core.rmem_default =262144net.core.rmem_max =4194304net.core.wmem_default =262144net.core.wmem_max =262144设置和检查hosts检查服务器的/etc/hosts文件,相对应的hostname 和 domainname的解析是否正确127.0.0.1 loopback localhost192.168.2.10 ebs安全设置修改/etc/security/limits.conf#add for EBS* hard nofile 65535* soft nofile 4096* hard nproc 16384* soft nproc 2047系统软件需求安装oracle EBS Release R12.1包括英文系统和简体中文语言包。
ORACLE_11.2.0.1.0_升级到11.2.0.4.0操作步骤
ORACLE 11.2.0.1.0 升级到11.2.0.4.0操作步骤升级目的测试环境的所有数据库版本升级到 11.2.0.4.0 保证和生产库一致,避免测试过程中数据库版本不一致导致的程序问题。
操作步骤1、关闭数据库和监听lsnrctl stopsqlplus / as sysdbashutdown immediate;host emctl stopdbconsole;2、安装新版数据库(11.2.0.4.0)设置ORALCE_BASEvi ~/.bash_profile设置原:ORALCE_BASE=/u01/app/oracle新:ORALCE_BASE=/u02/app/oraclesource ~/.bash_profile创建目录和设置ORACLE_HOME权限mkdir -p $ORACLE_HOME ;chown -R oracle:oinstall $ORACLE_HOMEchmod -R 755 $ORACLE_HOMEcd /home/oracle/database && ./runInstaller开始安装新版数据库安装程序取消监听配置跳过监听配置启动升级助手 DBUA,,选择需要升级的数据库点击YES,后升级过程可能比较久,耐心等待。
,如果升级过程中出现问题,我们可以关闭数据库后,重新运行dbua 来重新升级上次失败的组件升级完成。
3、验证数据库版本Select version FROM Product_component_version Where SUBSTR(PRODUCT,1,6)='Oracle';select * from v$version;若升级后,出现对象无效问题建议如下操作-- oracle 11g升级@?/rdbms/admin/catupgrd.sql -- 时间大概是30-40分钟STARTUP@?/rdbms/admin/utlu112s.sql@?/rdbms/admin/catuppst.sql@?/rdbms/admin/utlrp.sql@?/rdbms/admin/dbupgdiag.sql注意事项1、若存在多个数据库实例,注意进行实例切换,如: export ORACLE_SID=orcl 或 exportORACLE_SID=test2、数据库软件安装前会对系统环境条件进行检查,须将提示的问题进行解决,不然SWAP空间不足。
Oracle11.2.0.1升级到11.2.0.4

Oracle11.2.0.1升级到11.2.0.4系统环境:Linux standby 2.6.32-573.el6.x86_64 #1 SMP Wed Jul 1 18:23:37 EDT 2015 x86_64x86_64x86_64 GNU/Linux1. 讲补丁包上传到 oracle server ,解压、安装[root@standby database]#unzip p1*******_112040_Linux-x86-64_1of7.zip -d /tmp&& unzip p1*******_112040_Linux-x86-64_2of7.zip -d /tmp2. 检查当前版本SQL> select * from v$version;BANNER-------------------------------------------------------------------------------- Oracle Database 11g Enterprise Edition Release 11.2.0.1.0 - 64bit ProductionPL/SQL Release 11.2.0.1.0 - ProductionCORE 11.2.0.1.0 ProductionTNS for Linux: Version 11.2.0.1.0 - ProductionNLSRTL Version 11.2.0.1.0 – ProductionSQL> set linesize 150SQL> set pagesize 9999SQL> col comp_name format a40SQL> SELECT COMP_NAME, VERSION, STATUS FROM SYS.DBA_REGISTRY;COMP_NAME VERSION STATUS---------------------------------------- ------------------------------ -------- OWB 11.2.0.1.0 VALIDOracle Application Express 3.2.1.00.10 VALIDOracle Enterprise Manager 11.2.0.1.0 VALIDOLAP Catalog 11.2.0.1.0 VALIDSpatial 11.2.0.1.0 VALIDOracle Multimedia 11.2.0.1.0 VALIDOracle XML Database 11.2.0.1.0 VALIDOracle Text 11.2.0.1.0 VALIDOracle Expression Filter 11.2.0.1.0 VALIDOracle Rules Manager 11.2.0.1.0 VALIDOracle Workspace Manager 11.2.0.1.0 VALIDOracle Database Catalog Views 11.2.0.1.0 VALIDOracle Database Packages and Types 11.2.0.1.0 VALIDJServer JAVA Virtual Machine 11.2.0.1.0 VALIDOracle XDK 11.2.0.1.0 VALIDOracle Database Java Packages 11.2.0.1.0 VALIDOLAP Analytic Workspace 11.2.0.1.0 VALIDOracle OLAP API 11.2.0.1.0 VALID18 rows selected.3. 检查磁盘空间(system 必须要最少 10m)(新home最少4.7GB)SQL> select a.tablespace_name, round(a.total_size) "total_size(mb)",round(a.total_size) - round(b.free_size,3) "unsed_size(mb)", round(b.free_size,3) "free_size(mb)",round(b.free_size/total_size *100,2) ||'%' free_ratefrom(select tablespace_name,sum(bytes) /1024/1024 total_size from dba_data_filesgroup by tablespace_name) a,(select tablespace_name,sum(bytes)/1024/1024 free_sizefrom dba_free_spacegroup by tablespace_name) bwhere a.tablespace_name=b.tablespace_name(+);4.为数据库做冷备份RMAN>run {shutdown immediate;startup mount;allocate channel c1 type disk;allocate channel c2 type disk;backup full tag=’full_bak' database format '/home/oracle/full_cold_%d_%s.bak'; alter database open;}RMAN> list backup;数据库正常关闭后,还需要备份Oracle主目录,目的还是为了升级失败时,能够还原出数据库软件到升级前的版本。
Oracle 11gR2升级从11.2.0.3到11.2.0.4
本文档是使用新的ORACLE_HOME的方式进行升级1.安装11.2.0.4软件2.升级前的检查升级之前,以oracle用户登录到主机,并使用11.2.0.3的环境变量。
需要在11.2.0.3环境的数据库中执行下列操作:首先要确认数据库可以在11.2.0.3环境下正常启动、运行。
2.1.将升级预检查脚本拷贝到临时目录说明:此为准备步骤,升级前提前执行完成;升级过程中不需要执行。
将11.2.0.4 ORACLE Home中的预升级检查工具(utlu112i.sql文件)拷贝到升级中使用的一个临时目录,该文件在$ORACLE_HOME/rdbms/admin目录:mkdir $HOME/workcd $HOME/workcp /oracle11g/app/oracle/product/11.2.0/dbhome_1/rdbms/admin/utlu112i.sql ./ 2.2.执行升级预检查脚本utlu112i.sql说明:此为准备步骤,升级前提前执行完成;升级过程中再执行一遍以确认最终状态。
说明:使用源Oracle Home。
cd $HOME/work$ sqlplus '/ as sysdba'set time onspool upgrade_info.log@utlu112i.sqlspool off;执行预检查脚本将生成日志文件upgrade_info.log,该文件记录了当前数据库升级到11.2.0.4在参数、配置、表空间、组件等方面需要关注的问题,需要根据这些提示信息调整11.2.0.3数据库以为升级做好准备。
清空回收站:purge dba_recyclebin;2.3. 升级前检查数据库的完整性a.确认所有Oracle提供的数据库组件/对象的状态是“VALID”编译失效对象,用sys用户编译,执行多次直到失效对象不再变化。
注意:SYS和SYSTEM用户不能有INV ALID对象。
- 1、下载文档前请自行甄别文档内容的完整性,平台不提供额外的编辑、内容补充、找答案等附加服务。
- 2、"仅部分预览"的文档,不可在线预览部分如存在完整性等问题,可反馈申请退款(可完整预览的文档不适用该条件!)。
- 3、如文档侵犯您的权益,请联系客服反馈,我们会尽快为您处理(人工客服工作时间:9:00-18:30)。
EBS R12.1.1 升级12.1.3 数据库升级 11.2.0.3安装说明书编制:长安铃木信息系统课王川2012-11-21目录目录 (2)1 概述 (5)1.1升级内容 (5)1.2准备的补丁 (5)2 升级应用 (6)2.1停止应用。
(6)2.2ADADMIN进入维护模式 (7)2.3追加补丁 (9)2.4执行DB节点应用CODE LEVEL (9)2.5追加应用补丁 (10)3 升级数据库 (10)3.1升级数据库准备 (10)3.2创建NLS/DA TA/9IDATA目录 (13)3.3安装数据库补丁 (13)3.4P REPARE U PGRADE (14)3.5执行DBUA (14)3.6初始化参数文件和监听文件 (19)3.6.1 参数文件 (19)3.6.2 监听文件 (19)3.6.3 运行脚本 (20)4 初始化数据库节点 (20)4.1应用层生成生成新的APPSUTIL (20)4.2生成数据库上下文文件 (20)5 ADADMIN重建权限和同义词 (21)6 分别重启数据库和应用。
(22)7 校验升级结果。
(22)文档版本记录版本编号变更内容变更人日期EBS R12.1.1 Enterprise5.7 64bit安装说明书1概述1.1 升级内容1、应用从R12.1.1升级到R12.1.3。
2、数据库升级到11.2.0.3。
1.2 准备的补丁1、APP升级补丁p1*******_R12.BIV.B_R12_GENERIC.zipp1*******_R12.TXK.B_R12_GENERIC.zipp1*******_R12.TXK.B_R12_GENERIC.zipp8919489_R12.TXK.B_R12_GENERIC.zipp8919489_R12.TXK.B_R12_zhs.zipp9062910_12.1.0_R12_GENERIC.zipp9151516_R12.ECX.B_R12_GENERIC.zipp9239089_R12.AD.B_R12_LINUX.zipp9239090_R12_LINUX_1of6.zipp9239090_R12_LINUX_2of6.zipp9239090_R12_LINUX_3of6.zipp9239090_R12_LINUX_4of6.zipp9239090_R12_LINUX_5of6.zipp9239090_R12_LINUX_6of6.zipp9239090_R12_zhs.zipp9239095_R12_GENERIC.zipp9583541_R12.TXK.B_R12_GENERIC.zipp9738085_R12.TXK.B_R12_GENERIC.zipp9817770_R12.ATG_PF.B_R12_LINUX.zipp9852070_R12.TXK.B_R12_GENERIC.zipp9868229_R12.BOM.C_R12_GENERIC.zipp9966055_R12.FND.B_R12_GENERIC.zip2、数据库升级到11.2.0.3的安装包p1*******_112030_Linux-x86-64_1of7.zip…p1*******_112030_Linux-x86-64_7of7.zip3、数据库补丁p1*******_112030_Linux-x86-64.zipp1*******_112030_Linux-x86-64.zipp1*******_112030_Linux-x86-64.zipp1*******_112030_Generic.zipp1*******_112030_Linux-x86-64.zipp1*******_112030_Generic.zipp1*******_112030_Generic.zipp4247037_112030_Generic.zipp9858539_112030_Generic.zip2升级应用2.1 停止应用。
[root@test ~]# su - appdemo[appdemo@test ~]$ cd $INST_TOP/admin/scripts/[appdemo@test scripts]$ ./adstpall.sh apps/apps查看是否停止完成ps -ef | grep appdemo[appdemo@test scripts]$ ps -ef | grep appdemoroot 19111 19086 0 10:12 pts/1 00:00:00 su - appdemo appdemo 19112 19111 0 10:12 pts/1 00:00:00 -bashroot 19240 19204 0 10:13 pts/2 00:00:00 su - appdemo appdemo 19241 19240 0 10:13 pts/2 00:00:00 -bash appdemo 19886 19241 0 10:15 pts/2 00:00:00 ps -ef appdemo 19887 19241 0 10:15 pts/2 00:00:00 grep appdemo2.2 ADADMIN进入维护模式直接进入维护模式1、Patch 9239089以orademo用户创建目录$ORACLE_HOME/appsutil/admin[orademo@test ~]$ mkdir -p $ORACLE_HOME/appsutil/admin拷贝adgrants.sql到目录$ORACLE_HOME/appsutil/admin[orademo@test admin]$ cp /src/patch/to1213/9239089/admin/adgrants.sql $ORACLE_HOME/appsutil/admin在目录下执行SQLPLUS,后面写参数”APPS”[orademo@test admin]$ cd $ORACLE_HOME/appsutil/admin[orademo@test admin]$ lsadgrants.sql[orademo@test admin]$ lltotal 56-rwxr-xr-x 1 orademo dba 53060 Nov 21 10:26 adgrants.sql[orademo@test admin]$ sqlplus / as sysdbaSQL*Plus: Release 11.1.0.7.0 - Production on Wed Nov 21 10:27:19 2012Copyright (c) 1982, 2008, Oracle. All rights reserved.Connected to:Oracle Database 11g Enterprise Edition Release 11.1.0.7.0 - 64bit ProductionWith the Partitioning, OLAP, Data Mining and Real Application Testing optionsSQL> @adgrants.sql APPSAPPDEMO用户在9239089目录下执行adpatch,完成补丁。
Orademo用户执行SQLPLUS,修改参数,重启数据库。
alter system set "_disable_fast_validate"=TRUE2、Patch 9239090进入9239090备注:中间遇到报错,按以下方式排除:Relink Advanced Supply Chain Planning executables (for SLES 10, Oracle Linux/RHEL 5.4 or higher and Oracle Linux 6 only)During the relink phase of the installation of EBS Release 12 (12.1.1) on SLES 10, Oracle Linux/RHEL 5.4 (Update 4 or higher) or Oracle Linux 6 failures will result while relinking the Advanced Supply Chain Planning (ASCP) executables MSO, MSC, MSR and FEM. To fix this problem, users are required to replace the following line under the Linux section of the $AD_TOP/bin/adrelinknew.sh:CPP_LDFLAGS=' -L$(ORACLE_HOME)/lib -L$(ORACLE_HOME)/lib/stubs -lclntsh'CPP_LDFLAGS=' -L$(ORACLE_HOME)/lib -L$(ORACLE_HOME)/lib/stubs -lclntsh -Wl,--noinhibit-exec' 然后在adadmin中relink3、进入9239090_ZHS目录,运行adpatch。
2.3 追加补丁按以下顺序:9239095981777099660552.4 执行DB节点应用code levelStep1:应用用户appdemo运行autoconfig,生成appsutil.zip$cd /u01/demo/appdemo/inst/apps/demo_test/admin/scripts$./adautocfg.sh$perl $AD_TOP/bin/admkappsutil.plStep2:拷贝appsutil.zip到数据库节点cd /u01/demo/appdemo/inst/apps/demo_test/admin/out/拷贝appsutil.zip到DB节点Step3:数据库应用autoconfigorademo用户解压appsutil.zip$cd $ORACLE_HOME$unzip -o appsutil.zip运行autoconfig[orademo@test 11.1.0]$ cd appsutil[orademo@test appsutil]$ lsadmin clone demo_test.xml html java log out perl sql templatebin conf_demo.txt driver install jre media outbound scripts temp[orademo@test appsutil]$ cd scripts/[orademo@test scripts]$ lsdemo_test[orademo@test scripts]$ cd demo_test/[orademo@test demo_test]$ lsadautocfg.sh adchknls.pl addbctl.sh addlnctl.sh adexecsql.pl adlsnodes.sh adpreclone.pl adstopdb.sql adstrtdb.sql[orademo@test demo_test]$ ./adautocfg.shStep4:DB、APP层执行preclone操作DB层执行preclone操作:$cd /u01/demo/orademo/db/tech_st/11.1.0/appsutil/scripts/demo_test $perl adpreclone.pl dbTierAPP层执行preclone操作:$ cd /u01/demo/appdemo/inst/apps/demo_test/admin/scripts$perl adpreclone.pl appsTier2.5 追加应用补丁顺序执行:11g Release 2 interoperability patch for Release 12.1 (9062910)12.1 TXK Delta 3 patch (8919489)p8919489_R12.TXK.B_R12_zhs958354191515169868229101637531107156997380859852070126866103升级数据库3.1 升级数据库准备1、进入升级包目录,安装数据库代码。
