wireshark 实验 DHCP
wireshark抓包实验报告
wireshark抓包实验报告Wireshark抓包实验报告1. 实验简介本次实验旨在通过使用Wireshark软件进行网络抓包,深入了解网络通信过程中的数据传输和协议交互。
通过分析抓包数据,我们可以了解网络流量的组成、协议的运作方式以及网络安全的相关问题。
2. 实验准备在进行实验之前,我们需要准备一台运行Wireshark软件的计算机,并连接到一个网络环境中。
Wireshark是一款开源的网络协议分析工具,可以在各种操作系统上运行。
安装并配置好Wireshark后,我们就可以开始进行抓包实验了。
3. 实验步骤3.1 启动Wireshark打开Wireshark软件,选择需要抓包的网络接口。
Wireshark会监听该接口上的所有网络流量,并将其显示在界面上。
3.2 开始抓包点击“开始”按钮,Wireshark开始抓取网络数据包。
此时,我们可以看到界面上实时显示的数据包信息,包括源地址、目标地址、协议类型等。
3.3 过滤抓包数据由于网络流量非常庞大,我们可以使用过滤器来筛选出我们感兴趣的数据包。
Wireshark提供了丰富的过滤器选项,可以根据协议、源地址、目标地址等条件进行过滤。
3.4 分析抓包数据选中某个数据包后,Wireshark会显示其详细信息,包括协议分层、数据字段等。
通过分析这些信息,我们可以了解数据包的结构和内容,进一步了解网络通信的细节。
4. 实验结果与讨论在实验过程中,我们抓取了一段时间内的网络流量,并进行了分析。
通过对抓包数据的观察和解读,我们得出了以下几点结果和讨论:4.1 协议分层在抓包数据中,我们可以清晰地看到各种协议的分层结构。
从物理层到应用层,每个协议都承担着不同的功能和责任。
通过分析协议分层,我们可以了解协议之间的关系,以及它们在网络通信中的作用。
4.2 数据传输过程通过分析抓包数据,我们可以追踪数据在网络中的传输过程。
我们可以看到数据包从源地址发送到目标地址的路径,了解中间经过的路由器和交换机等设备。
Wireshark抓包实例分析
Wireshark抓包实例分析通信工程学院010611班赖宇超01061093一.实验目的1.初步掌握Wireshark的使用方法,熟悉其基本设置,尤其是Capture Filter和Display Filter 的使用。
2.通过对Wireshark抓包实例进行分析,进一步加深对各类常用网络协议的理解,如:TCP、UDP、IP、SMTP、POP、FTP、TLS等。
3.进一步培养理论联系实际,知行合一的学术精神。
二.实验原理1.用Wireshark软件抓取本地PC的数据包,并观察其主要使用了哪些网络协议。
2.查找资料,了解相关网络协议的提出背景,帧格式,主要功能等。
3.根据所获数据包的内容分析相关协议,从而加深对常用网络协议理解。
三.实验环境1.系统环境:Windows 7 Build 71002.浏览器:IE83.Wireshark:V 1.1.24.Winpcap:V 4.0.2四.实验步骤1.Wireshark简介Wireshark(原Ethereal)是一个网络封包分析软件。
其主要功能是撷取网络封包,并尽可能显示出最为详细的网络封包资料。
其使用目的包括:网络管理员检测网络问题,网络安全工程师检查资讯安全相关问题,开发者为新的通讯协定除错,普通使用者学习网络协议的相关知识……当然,有的人也会用它来寻找一些敏感信息。
值得注意的是,Wireshark并不是入侵检测软件(Intrusion Detection Software,IDS)。
对于网络上的异常流量行为,Wireshark不会产生警示或是任何提示。
然而,仔细分析Wireshark 撷取的封包能够帮助使用者对于网络行为有更清楚的了解。
Wireshark不会对网络封包产生内容的修改,它只会反映出目前流通的封包资讯。
Wireshark本身也不会送出封包至网络上。
2.实例实例1:计算机是如何连接到网络的?一台计算机是如何连接到网络的?其间采用了哪些协议?Wireshark将用事实告诉我们真相。
DHCP完整过程详解及Wireshark抓包分析
DHCP完整过程详解及Wireshark抓包分析DHCP,Dynamic Host Configuration Protocol,动态主机配置协议,简单来说就是主机获取IP地址的过程,属于应⽤层协议。
DHCP采⽤UDP的68(客户端)和67(服务器)端⼝进⾏通信。
【过程】DHCP过程主要为DHCP Discover-->DHCP Offer-->DHCP Request-->DHCP Ack四个过程。
通过Wireshark抓取DHCP获取IP过程的数据报⽂。
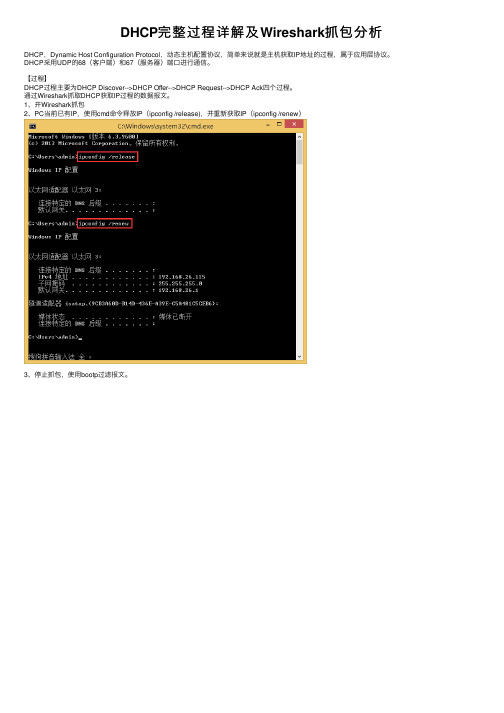
1、开Wireshark抓包2、PC当前已有IP,使⽤cmd命令释放IP(ipconfig /release),并重新获取IP(ipconfig /renew)3、停⽌抓包,使⽤bootp过滤报⽂。
4、可以看到图中的5个报⽂,其中DHCP Release报⽂为PC释放IP时发出的报⽂。
获取IP时,PC会发送DHCP Discover⼴播报⽂,由于当前PC没有IP,故源IP为0.0.0.0;特别要注意到的是,PC会随机出⼀个Transaction ID,如果之后收到的Offer报⽂中的Transaction ID与PC模拟出的不同,PC会将该Offer报⽂直接丢弃。
DHCP Offer报⽂DHCP Request报⽂DHCP Ack报⽂【模拟服务器发送Offer报⽂的过程及注意事项】1、保证服务器与客户端的连通性2、准备好⼀个Offer报⽂(可编辑)3、使⽤Wireshark抓取客户端发出的Discover报⽂,确定当前客户端随机出的Transaction ID4、更改Offer报⽂中的Transaction ID与Discover报⽂中⼀致5、使⽤发包软件发送Offer报⽂注:Transaction ID【地址租期】DHCP服务器提供的每个IP地址都有相应的租⽤期,在Offer报⽂中的IP Address Lease Time中可以看到。
实验7_使用Wireshark分析DHCP协议

实验7_使用Wireshark分析DHCP协议DHCP(Dynamic Host Configuration Protocol)是一种网络协议,用于动态分配IP地址、子网掩码、默认网关、DNS服务器等网络配置信息给计算机设备。
在本实验中,我们将使用Wireshark工具来分析DHCP协议的工作流程和数据包的结构。
首先,我们需要准备一个局域网环境,并在其中设置一个DHCP服务器和至少一个客户端设备。
DHCP服务器负责为客户端设备分配IP地址和其他网络配置信息。
客户端设备在启动时会发送DHCP请求,以获取分配给它的IP地址和其他配置信息。
使用Wireshark进行DHCP协议分析的步骤如下:1. 打开Wireshark软件,并选择适当的网络接口进行抓包。
在“捕获”选项卡中,选择正确的网络接口,然后点击“开始”按钮开始抓包。
2.在客户端设备上,启动DHCP服务发现过程。
客户端将发送一个DHCP发现广播消息,以寻找可用的DHCP服务器。
3. 在Wireshark中,我们可以看到DHCP发现消息的数据包。
可以通过在过滤器栏中输入“bootp”或“dhcp”来过滤只显示与DHCP相关的数据包。
4.DHCP服务器接收到DHCP发现消息后,会回复一个DHCP提供消息。
该消息包含了DHCP服务器可以提供给客户端的IP地址和其他配置信息。
5.客户端接收到DHCP提供消息后,会发送一个DHCP请求消息,以确认接受DHCP服务器提供的配置信息。
6.DHCP服务器接收到DHCP请求消息后,会发送一个DHCP确认消息,将IP地址和其他配置信息分配给客户端。
7. 在Wireshark中,我们可以查看这些DHCP消息的详细信息。
可以看到每个消息的源IP地址、目的IP地址、消息类型、配置选项等。
8.客户端设备在接收到DHCP确认消息后,将使用分配给它的IP地址和其他配置信息来配置自己的网络连接。
通过分析DHCP协议的数据包,我们可以了解到DHCP协议的工作流程和数据包的结构。
实验15 DHCP服务器配置及原理实验(参考答案)

实验15 DHCP服务器配置及原理实验1 实验目的通过实验,掌握DHCP服务器配置及工作原理。
2 实验环境VMware及windows 2003系统WireShark3 实验原理3.1 DHCP简介DHCP(Dynamic Host Configuration Protocol)提供了一种简便的方法,能够自动地为网络中没有IP地址的主机分配IP地址、子网掩码等信息,不再需要手动进行配置,大大减轻了网络管理员的工作量,因此得到了广泛的应用。
3.2 DHCP客户端获得IP地址的过程客户机从DHCP服务器获得租约的简要步骤是:初始化→选择→请求→绑定。
1、初始化当DHCP客户计算机启动时,其IP地址并没有任何设置。
然后它将DHCP DISCOVER 消息发送给本地子网。
DHCP DISCOVER包含客户介质访问控制(MAC)地址及客户系统名称。
MAC地址是所有网卡保存的唯一地址。
通过在消息中使用MAC地址,客户确保能在网络上唯一地被识别。
2、选择DHCP服务器从客户计算机收到DHCP DISCOVER消息后,将通过DHCP OFFER信息作出反应。
DHCP OFFER信息包含有客户计算机的MAC地址,提供了TCP/IP地址,子网掩码以及DHCP服务器的IP地址,它以广播的方式送到客户计算机。
DHCP服务器发送DHCP OFFER 信息之后仍暂时保留发送给客户计算机的地址,并等待要获得该地址的客户的确认信息。
如果在引导期间DHCP客户没有从DHCP服务器接收到DHCP OFFER消息,它将每隔五分钟与DHCP服务器试着进行五次通信。
其中四次重试间隔时间分别为2、4、8、16秒,另一次则在0-100毫秒之间的任意间隔。
3、请求当DHCP客户接收到DHCP OFFER消息时,要决定使用哪一条消息,因为网络上有可能有多个DHCP服务器,客户可能收到不止一条DHCP OFFER消息。
一般情况下,客户计算机使用第一条接到的信息。
wireshark DHCP DNS 抓包分析

Using WireShark for DHCP capture andDNS capture0921282109B04The configuration of the WireSharkThe WireShark interface in Linux is as above.The capture is done in the lab, in an café house as well as in the dorm. The connection to cafe is wireless connection, in the lab thelaptop is allocated to a public IP address and in dorm, where it iswired connection, the laptop is allocated to a private IP address, while the router’s IP is 192.168.1.1.While with wired connection, the interface selected is eth0,with wireless connection, the interface selected is eth 2.When capturing DHCP packet, the configuration of capture is as follows:When capturing DNS message, the configuration is as follows:●The procedure of captureClick on the third button to While capturing, click thethird start capture. button to stop.●DHCP analysisAfter input and in cmd ,,Release the link and rebuild the link using DHCP protocol.The five messages that the Wireshark packed are release, discover, offer, request and ACK. It can be inferred from the picture above that the source port number is 68 and the destination port number is 67. And the destination is a DHCP server as well as a router. The server’s IP address is 192.168.1.1(which is a private IP address used by a router) and the host’s IP address is 192.168.1.100(which is also a private IP address).1.Discover messageThe client broadcasts messages on the physical subnet to discover available DHCP servers. Network administrators can configure a local router to forward DHCP packets to a DHCP server from a different subnet. This client-implementation creates a User Datagram Protocol (UDP) packet with the broadcast destination of 255.255.255.255 or the specific subnet broadcast address.field value meaning2.Transaction ID an integer For client to match response4.Your IPaddress 0.0.0.0 The client is waiting to beassigned for an IP address, so thisis all 0.5.Next serverIP address 0.0.0.0 The server’s IP address isunknown.6.t=53 DHCP type =DHCP discoveryCompare with the example in the lectureExcept for the mac address and the transaction ID all fields are the same.2.Offer messageWhen a DHCP server receives an IP lease request from a client, it reserves an IP address for the client and extends an IP lease offer by sending a DHCPOFFER message to the client. This message contains the client's MAC address, the IP address that the server is offering, the subnet mask, the lease duration, and the IP address of the DHCP server making the offer.The server determines the configuration based on the client's hardware address as specified in the CHADDR (Client Hardware Address) field. Here the server, 192.168.1.1, specifies the IP address in the YIADDR (Your IP Address) field.field value meaning2 Transaction ID an integer For client to match response3 Client IP address 0.0.0.0 Only field if the client isBOUND, REVEW, orREBIND, so it’s all 0.4 Your IP address 192.168.1.100 The client is offered with anIP address5 Next server IP address 0.0.0.0 The server’s IP address is inoption 546 t=53 DHCP type =DHCP offer Compare with the example in the lectureExcept for the mac address, the next server IP address and the transaction ID all fields are the same. The next IP address that captured is all zero because the server IP is in the 54 flag.3.Request messageIn response to the offer Client requests the server. The client replies DHCP request, unicast to the server, requesting the offered address. A client can receive DHCP offers from multiple servers, but it will accept only one DHCP offer. Based on the Transaction ID field in the request, servers are informed whose offer the client has accepted. When other DHCP servers receive this message, they withdraw any offers that they might have made to the client and return the offered address to the pool of available addresses. In some cases DHCP request message is broadcast, instead of being unicast to a particular DHCP server, because the DHCP client has still not received an IP address. Also, this way one message can let all other DHCP servers know that another server will be supplying the IP address without missing any of the servers with a series of unicast messages.field value meaning2 Transaction IDan integerFor client to match response4 Your IP address0.0.0.0The client is still waiting for an IP address so it is all 05 Next server IP address 0.0.0.0 The server’s IP address is in option 546 t=53DHCP type =DHCP request 7 t=54 Server’s identifier is 192.168.1.1 8 t=50 Re quested IP address is 192.168.1.100Compare with the example in the lectureExcept for the mac address and the transaction ID all fields are the same.4.ACK messageWhen the DHCP server receives the DHCPREQUEST message from the client, the configuration process enters its final phase. The acknowledgement phase involves sending a DHCPACK packet to the client. This packet includes the lease duration and any other configuration information that the client might have requested. At this point, the IP configuration process is completed.field value meaning2 TransactionIDan integer For client to match response3 Client IPaddress 0.0.0.0 Only field if the client isBOUND, REVEW, orREBIND, so it’s all 0.4 Your IPaddress 192.168.1.100 The client is allocated withthe address6 t=53 DHCP type =DHCP request7 t=54 Server’s identifier is 192.168.1.18 t=1 Subnet mask 255.255.255.09 t=3 Router is 192.168.1.110 T=6 Domain name serverThe server’s IP address is in option 54Compare with the example in the lecturecomparefield12 3 4f8fdea2e f8fdea2e f8fdea2e f8fdea2e TransactionID0.0.0.0 0.0.0.0 0.0.0.0 0.0.0.0 Client IPaddress0.0.0.0 192.168.1.100 0.0.0.0 192.168.1.100 Your IPaddress●DHCP sequenceThe Domain Name System (DNS) is a hierarchical distributed naming system for computers, services, or any resource connected to the Internet or a private network. It associates various information with domain names assigned to each of the participating entities.A Domain Name Service translates queries for domain names (which are meaningful to humans) into IP addresses for the purpose of locating computer services and devices worldwide.Input in the broserThere are 2 DNS messages, the host asks for and the server send back the address of server.1.query1 Frame address3 Port number DNS port: 53 src port: 48376The DNS port is 53 and the port of the host is a random number. 4 DNS ID 4a 36Correlate querieswithresponses.5 Flags 01 00 This is a message that the host send to server, so it is a quire.6 Question section1 The number of availablequestion is 1 (the question is at the end of the message)7 Answer section 0These three ars in answer section. This is a query message, so the three are all 0.8Authority section9 Additional section2.answer1 Frame address2 Destination ipaddress 192.168.1.112 The private IP in the localnetwork that the router allocatedit to the laptop. Which is also thehost.3 Port number src port: 53dst port: 48376 The DNS port is 53 and the port of the host is a random number.4 DNS ID 4a 36 Correlate queries withresponses.5 Flags 81 80 The server can de recursivequery and the message is aresponce.6 Questionsection 1 The number of availablequestion is 1 (the question is atthe end of the message)7 Questionsection 1 The same as the previousmessage sent.8 Answer section 7 There are 7 IPAddress for google server.9 Authoritysection0 No Authority section。
(网络安全技术)DHCP 攻防实验

R1(config-line)#password mashiming
R1(config)#username mashiming privilege 15 password 123456 //请把用户名mashiming改成学生本人名字的全拼,密码自行设置
Router1(dhcp-config)#exit
Router1(config)#ip dhcp excluded-address 192.168.249.1 192.168.249.89 //该范围内的ip地址不能分配给客户端(作为其他的用途一些比如说网络服务器,打印机等)
R1(config)#line vty 0 4
Switch(config)#interface range ethernet 0/0 – 3 //
设置端口范围
Switch(config-if-range)#switchport port-security //启动port-secerity
Switch(config-if-range)#switchport port-security maximum 2 //设置最大Mac地址数量为2
5.在计算机A上运行ipconfig /renew,或者在网卡上禁用,然后开启.
6.攻击第二波:在计算机B上打开伪装DHCP服务:
7.在计算机A上运行ipconfig /renew
8.开启KALI的路由转发功能并关闭icmp redirect的发送功能。
9.在KALI开始抓包,捕获到PCA telnet登录192.168.205.2的单向数据包
Switch(config)#ip dhcp snooping verify mac-address//检测非信任端口收到的DHCP请求报文的源MAC和CHADDR字段是否相同,以防止DHCP耗竭攻击,该功能默认即为开启
《计算机网络》实验一 使用Wireshark分析IP协议

一、实验目的及要求:1、分析IP协议,熟知IP协议数据包各个字段的含义与作用;2、分析IP数据报分片,熟悉IP数据包的传递方式。
二、实验设备:与因特网连接的计算机,操作系统为Windows,安装有Wireshark、IE浏览器等软件。
三、实验原理:1、DHCP(动态主机配置协议)报文说明:(1)DHCP-DISCOVER:DHCP客户端广播发送的,用来查找网络中可用的DHCP服务器。
(2)DHCP-OFFER:DHCP服务器用来响应客户端的DHCP-DISCOVER请求,并为客户端指定相应配置参数。
(3)DHCP-REQUEST:DHCP客户端广播发送DHCP服务器,用来请求配置参数或者续借租用。
(4)DHCP-ACK:DHCP服务器通知客户端可以使用分配的IP地址和配置参数。
(5)DHCP-NAK:DHCP服务器通知客户端地址请求不正确或者租期已过期,续租失败。
(6)DHCP-RELEASE:DHCP客户端主动向DHCP服务器发送,告知服务器该客户端不再需要分配的IP地址。
(7)DHCP-DECLINE:DHCP客户端发现地址冲突或者由于其它原因导致地址不能使用,则发送DHCP-DECLINE报文,通知服务器所分配的IP地址不可用。
(8)DHCP-INFORM:DHCP客户端已有IP地址,用它来向服务器请求其它配置参数2、pingPING(Packet Internet Groper),因特网包探索器,用于测试网络连接量的程序。
Ping是工作在TCP/IP网络体系结构中应用层的一个服务命令,主要是向特定的目的主机发送ICMP (Internet Control Message Protocol因特网报文控制协议)Echo请求报文,测试目的站是否可达及了解其有关状态。
四、实验内容和步骤:1、用300字左右,描述你对IP协议的认识;IP协议,即互联网协议(Internet Protocol),是互联网技术的核心组成部分,它定义了数据如何在互联网中传输。
wireshark实验报告
wireshark实验报告Wireshark实验报告引言:Wireshark是一款网络封包分析软件,被广泛应用于网络安全、网络管理和网络故障排除等领域。
本篇实验报告将介绍Wireshark的基本原理、实验环境和实验过程,并通过实验结果分析其应用价值。
一、Wireshark的基本原理Wireshark基于网络抓包技术,能够捕获网络通信过程中的数据包,并对其进行解析和分析。
它支持多种网络协议,包括以太网、无线局域网、传输控制协议(TCP)、用户数据报协议(UDP)等。
Wireshark通过监听网络接口,将捕获到的数据包以图形化界面的形式呈现给用户,方便用户进行深入分析。
二、实验环境本次实验使用的环境是一台运行Windows操作系统的个人电脑,安装了最新版本的Wireshark软件。
实验中使用了一个虚拟网络环境,包括两台虚拟机,分别运行着Windows和Linux操作系统。
三、实验过程1. 安装Wireshark:首先,将Wireshark软件下载到本地,并按照安装向导进行安装。
安装完成后,打开Wireshark程序。
2. 设置捕获接口:在Wireshark界面上方的工具栏中,选择“捕获选项”按钮。
在捕获选项对话框中,选择需要捕获的网络接口,点击“开始”按钮开始抓包。
3. 进行通信测试:在虚拟机中进行网络通信测试,例如在Windows虚拟机中打开浏览器,访问一个网站。
同时,在Linux虚拟机中执行ping命令,向外部主机发送数据包。
4. 分析捕获的数据包:在Wireshark界面中,可以看到捕获到的数据包以列表的形式展示出来。
通过点击某个数据包,可以查看其详细信息,包括源IP地址、目标IP地址、协议类型等。
5. 过滤和统计功能:Wireshark还提供了强大的过滤和统计功能,可以根据需要筛选和分析数据包。
例如,可以根据源IP地址过滤出特定的数据包,或者统计某个协议的使用情况。
四、实验结果分析通过对捕获的数据包进行分析,我们可以得到一些有价值的结果。
计算机网络实验DHCP报告

计算机网络——实验一DHCP⚫ 学号:⚫班级:⚫姓名:一、为了观察DHCP运行情况,执行相关命令,捕获DHCP相关信息。
执行命令前相关信息如下:具体操作如下:1、打开Windows命令提示符应用程序,输入“ipconfig /release”,该命令将释放当前IP地址,这样主机IP地址就变成0.0.0.0。
2、启动Wireshark数据包嗅探器,开始捕获数据包。
3、返回Windows命令提示符,输入“ipconfig /renew”。
这将指示主机获取网络配置,包括新的IP地址。
本次实验中,主机获取的IP地址为192.168.1.161。
4、等待“ipconfig /renew”结束,再次输入相同命令“ipconfig /renew”。
5、第二个“ipconfig /renew”命令结束后,输入“ipconfig /release”命令将先前分配的IP地址释放给计算机。
6、最后,输入“ipconfig /renew”,再次为计算机分配IP地址。
7、停止Wireshark数据包捕获。
二、相关问题1、DHCP信息是通过UDP还是TCP发送的?UDP2、绘制一个定时数据报,说明客户机和服务器之间第一个由四个数据包组成的 Discover/Offer/Request/ACK DHCP 交换的顺序。
指出每个数据包的源端口号和目的端口号。
这些端口号是否与本实验作业中给出的示例相同?顺序为:Discover——Offer——Request——ACK3、主机的链路层地址是什么?4、DHCP Discover报文与 DHCP Requst报文有何不同?同时Discover报文没有以下两项:5、在前四组(发现/提供/请求/返回)DHCP 报文中,每组的事务标识(Transaction-ID)值是什么?第二组(请求/ACK)DHCP 信息中的事务标识(Transaction-ID)值是什么?事务标识(Transaction-ID)字段的作用是什么?区分不同组的DHCP,避免不同组的DHCP信息接受混乱。
Wireshark对DHCP建立过程进行抓包分析
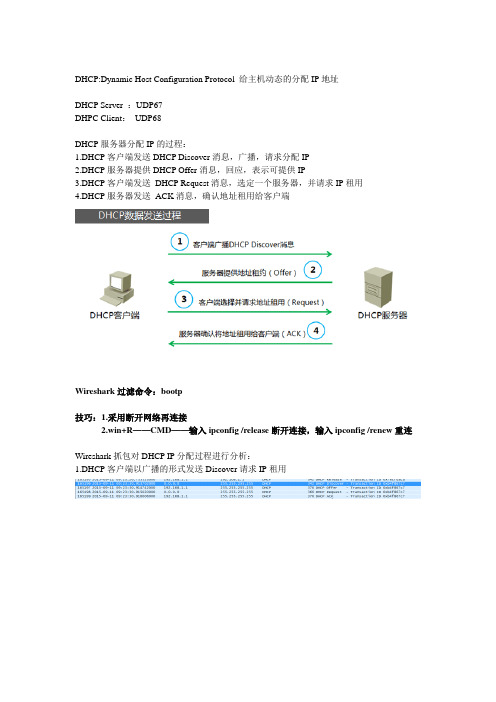
DHCP:Dynamic Host Configuration Protocol 给主机动态的分配IP地址DHCP Server :UDP67DHPC Client:UDP68DHCP服务器分配IP的过程:1.DHCP客户端发送DHCP Discover消息,广播,请求分配IP2.DHCP服务器提供DHCP Offer消息,回应,表示可提供IP3.DHCP客户端发送DHCP Request消息,选定一个服务器,并请求IP租用4.DHCP服务器发送ACK消息,确认地址租用给客户端Wireshark过滤命令:bootp技巧:1.采用断开网络再连接2.win+R——CMD——输入ipconfig /release断开连接,输入ipconfig /renew重连Wireshark抓包对DHCP IP分配过程进行分析:1.DHCP客户端以广播的形式发送Discover请求IP租用2.范围内的DHCP服务器接收到discover请求后,会向客户端发出DHCP Offer报文作为回应,该报文包含该DHCP服务器可向DHCP客户端提供的IP地址以及该DHCP服务器自己的IP地址信息3.DHCP客户端会选择最先接收到的DHCP Offer进行处理,并以广播的形式发送DHCP Request报文,该报文会加入对应DHCP服务器的地址以及所需要的IP4.DHCP服务器接收到DHCP Request报文后,会判断报文中的服务器IP是否与自己相同。
如果不同,不做任何处理,只清除相应的IP分配记录;如果相同,服务器会向客户端发送ACK报文,确认可以使用,并且附上相应的租期。
5.DHCP客户端接收到ACK信息后,会检查该IP是否能够使用,如果可以就直接使用该IP并使用租期自动启用延续过程。
如果发现IP已被使用,则发送DHCP Decline报文告知服务器禁用该IP然后重新发起Discover。
6.当租期不到1/2左右时候,如果还要继续使用该IP,客户端会自动向服务器发起续租请求报文Request报文,服务器会向客户端发送ACK报文确认。
Wireshark抓包实例分析
Wireshark抓包实例分析通信工程学院 010611班赖宇超 01061093一(实验目的1.初步掌握Wireshark的使用方法,熟悉其基本设置,尤其是Capture Filter 和Display Filter的使用。
2.通过对Wireshark抓包实例进行分析,进一步加深对各类常用网络协议的理解,如:TCP、IP、SMTP、POP、FTP、TLS等。
UDP、3.进一步培养理论联系实际,知行合一的学术精神。
二(实验原理1.用Wireshark软件抓取本地PC的数据包,并观察其主要使用了哪些网络协议。
2.查找资料,了解相关网络协议的提出背景,帧格式,主要功能等。
3.根据所获数据包的内容分析相关协议,从而加深对常用网络协议理解。
三(实验环境1.系统环境:Windows 7 Build 71002.浏览器:IE83.Wireshark:V 1.1.24.Winpcap:V 4.0.2四(实验步骤1.Wireshark简介Wireshark(原Ethereal)是一个网络封包分析软件。
其主要功能是撷取网络封包,并尽可能显示出最为详细的网络封包资料。
其使用目的包括:网络管理员检测网络问题,网络安全工程师检查资讯安全相关问题,开发者为新的通讯协定除错,普通使用者学习网络协议的第1页,共12页相关知识……当然,有的人也会用它来寻找一些敏感信息。
值得注意的是,Wireshark并不是入侵检测软件(Intrusion Detection Software,IDS)。
对于网络上的异常流量行为,Wireshark不会产生警示或是任何提示。
然而,仔细分析Wireshark撷取的封包能够帮助使用者对于网络行为有更清楚的了解。
Wireshark不会对网络封包产生内容的修改,它只会反映出目前流通的封包资讯。
Wireshark本身也不会送出封包至网络上。
2.实例实例1:计算机是如何连接到网络的,一台计算机是如何连接到网络的,其间采用了哪些协议,Wireshark将用事实告诉我们真相。
计算机网络实验-使用Wireshark分析IP协议

实验三使用Wireshark分析IP协议一、实验目的1、分析IP协议2、分析IP数据报分片二、实验环境与因特网连接的计算机,操作系统为Windows,安装有Wireshark、IE等软件。
三、实验步骤IP协议是因特网上的中枢。
它定义了独立的网络之间以什么样的方式协同工作从而形成一个全球户联网。
因特网内的每台主机都有IP地址。
数据被称作数据报的分组形式从一台主机发送到另一台。
每个数据报标有源IP地址和目的IP 地址,然后被发送到网络中。
如果源主机和目的主机不在同一个网络中,那么一个被称为路由器的中间机器将接收被传送的数据报,并且将其发送到距离目的端最近的下一个路由器。
这个过程就是分组交换。
IP允许数据报从源端途经不同的网络到达目的端。
每个网络有它自己的规则和协定。
IP能够使数据报适应于其途径的每个网络。
例如,每个网络规定的最大传输单元各有不同。
IP允许将数据报分片并在目的端重组来满足不同网络的规定。
表1.1 DHCP报文DHCP-RELEASE DHCP客户端主动向DHCP服务器发送,告知服务器该客户端不再需要分配的IP地址DHCP-DECLINE DHCP客户端发现地址冲突或者由于其它原因导致地址不能使用,则发送DHCP-DECLINE报文,通知服务器所分配的IP地址不可用DHCP-INFORM DHCP客户端已有IP地址,用它来向服务器请求其它配置参数图3.1 DHCP报文1、使用DHCP获取IP地址(1)打开命令窗口,启动Wireshark。
(2)输入“ipconfig /release”。
这条命令会释放主机目前的IP地址,此时,主机IP地址会变为0.0.0.0(3)然后输入“ipconfig /renew”命令。
这条命令让主机获得一个网络配置,包括新的IP地址。
(4)等待,直到“ipconfig /renew”终止。
然后再次输入“ipconfig /renew” 命令。
(5)当第二个命令“ipconfig /renew” 终止时,输入命令“ipconfig /release” 释放原来的已经分配的IP地址(6)停止分组俘获。
用Wireshark抓取arp、snmp、icmp、dhcp等报文的方法
1.ARP 基础知识学习1.1.ARP 协议的概念ARP ,即地址解析协议,实现通过IP得知其物理地址。
在CP/IP网络环境下,每个主机分配了一个32位的IP地址,这种互联网地址是在网际范围表示主机的一种逻辑地址。
为了让报文在物理线路上的传输,必须知道对方目的主机的物理地址。
这样就存在把IP地址变成物理地址的转换问题。
一以太网环境为例,为了正确的向目的主机传送报文,就必须将主机的32位IP地址转换成48位的以太网的地址。
这就需要在互联层有一组服务将IP地址转换成物理地址,这组协议就是ARP协议。
1.2 ARP 协议实现的基本功能在以太网协议中,同一局域网中的一台主机要和另一台主机进行直接通信,必须知道目标主机的MAC地址。
而在TCP/IP协议栈中,网络层和传输层只关心目标主机的IP地址。
这就导致再以太网中使用IP协议时,数据链路层的以太网协议连接到上层IP协议提供的数据中,只包含目的的IP地址。
于是需要一种方法,更具目的主机的IP的地址,获取其MAC 地址。
这就是ARP协议要做的事。
所谓地址解析(address resolution)就是主机再发送阵前将目标地址转换成目标MAC地址的过程。
另外,当发送主机和目标及不在同一个局域网时,即便知道目的主机的MAC地址,两者也不能直接通信,必须有路由转发才行。
所以此时,发送主机通过ARP协议获得的将不是目的主机的真实MAC地址,而是一台可以通往局域网外地路由器的某个端口的MAC 地址。
于是此后发送主机发送目的和主机的所有帧,都将发往该路由,通过他向外发送。
这种情况成为ARP代理(ARP Proxy).1.3 工作的原理每台装有TCP/IP协议的电脑里都有一个ARP缓存表,表里IP与MAC地址是一一对应的。
例如,主机A (192.168.1.5)主机B(192.168.1.1)发送数据.当发送数据时,主机A 会在自己的ARP缓存表中查找是否有目标IP地址。
DHCP欺骗攻击实验

DHCP欺骗攻击实验DHCP(Dynamic Host Configuration Protocol)是互联网工程任务组(IETF)标准的一个用于配置网络设备的协议,它允许网络管理员自动分配和管理IP地址。
然而,DHCP协议也面临着安全威胁,其中一种常见的攻击是DHCP欺骗攻击。
DHCP欺骗攻击是指黑客通过伪装成可信任的DHCP服务器,发送虚假的DHCP响应消息来获取目标主机的网络配置信息,进而实施进一步的攻击。
这种攻击手法可能导致网关、域名服务器和IP地址更改,最终影响网络服务的正常运行。
为了更好地理解DHCP欺骗攻击,我进行了一次实验来模拟攻击场景。
实验环境:- 操作系统:Kali Linux(攻击者)和Windows 10(受害者)- 主机A: Kali Linux主机,安装DHCP服务器模拟器- 主机B: Windows 10主机,模拟受害者实验步骤:步骤1:首先,我们需要配置一个DHCP服务器模拟器,以便能够监听网络中的DHCP请求并发送虚假的DHCP响应。
在Kali Linux上,我使用了一个名为“Yersinia”的工具。
步骤2:在Kali Linux主机上,使用以下命令安装Yersinia工具:```sudo apt-get install yersinia```步骤3:启动Yersinia工具。
在终端中运行以下命令:```yersinia -G```步骤4:选择“DHCP”选项来配置DHCP服务器模拟器。
然后选择“Listen DHCP replies”选项,以便能够监听DHCP请求,并发送虚假的DHCP响应。
步骤5:在Windows 10主机上,启动命令提示符,并执行以下命令来释放当前的IP地址:```ipconfig /release```步骤6:然后,执行以下命令来通过DHCP请求获取新的IP地址:```ipconfig /renew```步骤7:此时,Yersinia工具将拦截到主机B的DHCP请求,并发送一个伪造的DHCP响应。
DHCP报文分析
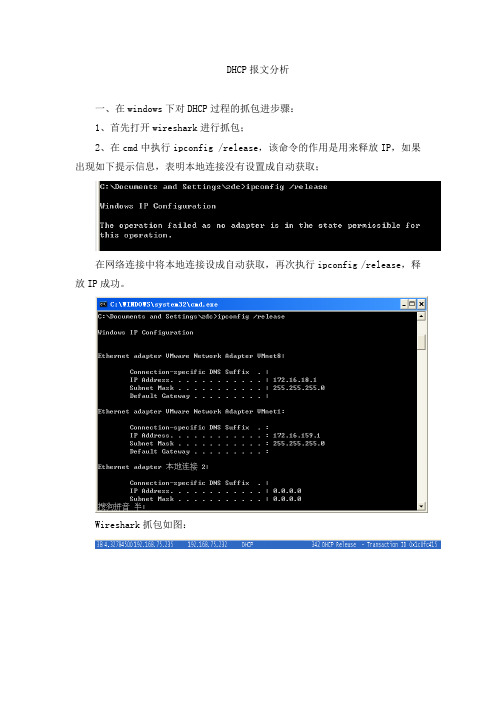
DHCP报文分析一、在windows下对DHCP过程的抓包进步骤:1、首先打开wireshark进行抓包;2、在cmd中执行ipconfig /release,该命令的作用是用来释放IP,如果出现如下提示信息,表明本地连接没有设置成自动获取;在网络连接中将本地连接设成自动获取,再次执行ipconfig /release,释放IP成功。
Wireshark抓包如图:3、执行命令ipconfig /renew,发起一个DHCP过程,分析从这里开始。
DHCP通常有Discover、Offer、Request、Ack四个阶段,wireshark抓包如下:此外还有重新登陆和更新租约,这里不作解释。
二、DHCP 协议的报文格式如下,括号内为长度: OP(1) Htype(1) Hlen(1)Hops(1)Transaction ID(4)Seconds(2)Flags(2)Ciaddr (4)Yiaddr (4)Siaddr (4)Giaddr (4)Chaddr (16)Sname (64)File (128)Options (variable )下面结合在windows 下对DHCP 过程的抓包进行分析:I 、现在,客户机没有地址,它就会发出一个DHCP Discover 报文,该报文是广播报文,所有的具有DHCP Server 功能的服务器都会收到该报文。
dhcp有8种类型的报文,每种报文的格式相同,只是报文中的某些字段取值不同。
dhcp报文格式基于bootp(引导程序协议)的报文格式Bootstrap Protocol(Discover) 表明发送的是Discover报文。
1、Message type(opt):消息类型,为1时表示是Client的请求,为2时表示是Server的应答;2、Hardware type(Htype):Client 的网络硬件地址类型,0x01表示Client 的网络硬件是10MB的以太网类型(Ethernet);3、Hardware address length(Hlen):Client 的网络硬件地址长度,6表示Client 的网络硬件地址长度是6bytes(即以太网类型的6 bytes的MAC地址);注:MAC地址,也叫硬件地址,是由48比特/bit长(6字节/byte,1byte=8bits),16进制的数字组成.0-23位叫做组织唯一标志符(organizationally unique,是识别LAN(局域网)节点的标识。
wireshark练习及答案lab-dhcp
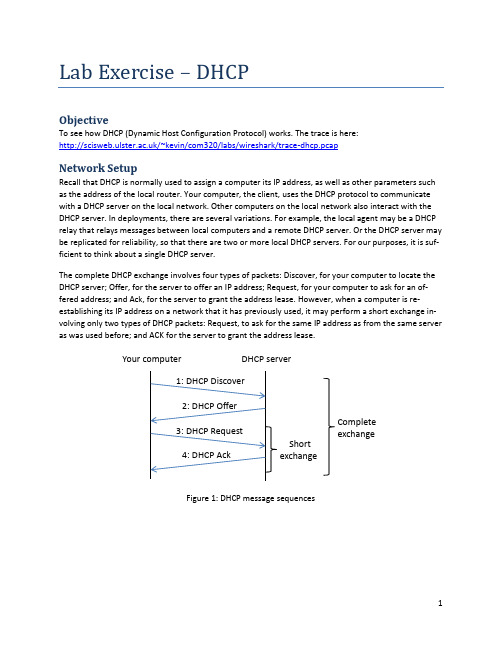
Lab Exercise – DHCPObjectiveTo see how DHCP (Dynamic Host Configuration Protocol) works. The trace is here: /~kevin/com320/labs/wireshark/trace-dhcp.pcap Network SetupRecall that DHCP is normally used to assign a computer its IP address, as well as other parameters such as the address of the local router. Your computer, the client, uses the DHCP protocol to communicate with a DHCP server on the local network. Other computers on the local network also interact with the DHCP server. In deployments, there are several variations. For example, the local agent may be a DHCP relay that relays messages between local computers and a remote DHCP server. Or the DHCP server may be replicated for reliability, so that there are two or more local DHCP servers. For our purposes, it is suf-ficient to think about a single DHCP server.The complete DHCP exchange involves four types of packets: Discover, for your computer to locate the DHCP server; Offer, for the server to offer an IP address; Request, for your computer to ask for an of-fered address; and Ack, for the server to grant the address lease. However, when a computer is re-establishing its IP address on a network that it has previously used, it may perform a short exchange in-volving only two types of DHCP packets: Request, to ask for the same IP address as from the same server as was used before; and ACK for the server to grant the address lease.Figure 1: DHCP message sequencesYour computer DHCP serverShortexchange Complete exchangeStep 1: Capture a TraceProceed as follows to renew your IP address and gather a trace of DHCP traffic. Note, however, that the following procedure will not work in the unlikely case that your computer’s IP address is statically a s-signed. Alternatively, you may use a supplied trace. Take care not to perform this lab remotely, since when you tell your computer to shut down and restart its network interface you will lose connectivity!unch Wireshark and start a capture with a filter of “(udp port 67) or (udp port 68)”.There is no shorthand to indicate DHCP, so we filter traffic using the UDP ports reserved forDHCP. (Note, in the display filter on main screen you can also type udp.port==67 II udp.port==68)Figure 2: Setting up the capture options2.When the capture is started, release and renew your IP address with the command given below.This procedure may cause your computer to lose network connectivity temporarily, and depend-ing on the operating system it may disrupt network connections. To minimize the disruption,close any programs that are using remote servers and enter the commands into a local window.Windows: T ype the command “ipconfig /release” followed by “ipconfig/renew”.(See figure below.)If on Linux: Find the name of the main network interface by typing “ifconfig” and observing the output.The interface may be called “eth0” or something else. Now use the “dhclient” command to first r e-lease the leased IP address and then to renew the lease. Type, for example, “sudodhclient –reth0” to do the release followed by “sudodhclient eth0” to renew the lease.Figure 5: Releasing and renewing the IP address on Windows 3.Once you have captured some DHCP traffic, stop the capture.Step 2: Inspect the TraceIn this step and the steps that follow, we will inspect only the short DHCP exchange described above. This is because the traffic you have captured can vary widely across settings. You may have as few as two DHCP packets on a quiet network or many DHCP packets on a busy network (especially if a class is running this lab!). The details of DHCP packets may vary depending on how the computers implement DHCP. There may be multiple packets of a single kind in an exchange due to replicated servers, and dif-ferent types of DHCP packets too.Look for the shortDHCP exchange (of a DHCP Request packet followed by a DHCP Ack packet) in your trace. Select the DHCP Request packet, and observe the protocol stack to see how DHCP messages are carried. The link protocol is likely Ethernet, and the next higher protocol is IP. Then comes UDP, so each DHCP message is carried in a UDP packet. On top of UDP, Wireshark is likely to say BOOTP (Bootstrap Protocol) instead of DHCP. This is a bit confusing, but DHCP is implemented as an extension of an older protocol called BOOTP. You can think of the BOOTP section as the DHCP header and message. An exam-ple window is shown below.Figure 3: Capture of DHCP packets, showing details of a DHCP RequestExpand the BOOTP (DHCP) section (using the “+” expander or icon) to look at the details of a DHCP Re-quest message. There are many fields, and we will only point out a few rather than cover them all. These fields are carried in all DHCP messages, though they have different values in different messages.∙The message begins with a Message Type. It is a Boot Request, which is used for all DHCP mes-sages sent from your computer to a DHCP server.∙After a few fields there is a Transaction ID field. All DHCP packets in a specific exchange betweena client and server carry the same transaction ID; that is how both ends know that the packetsbelong to the exchange rather than another concurrent DHCP operation.∙There are several IP address fields. These fields are used to carry IP addresses such as the one that the computer is being assigned.∙There is a Magic Cookie field. It carries a value that indicates the rest of the message contains a series of DHCP Options. That is, this really is a DHCP message, not a BOOTP message.∙Each DHCP option is self-contained, with a type code saying what it represents, along with a length and value. The first option is DHCP Message Type, which says what kind of DHCP message is being carried. The other options vary with the type of DHCP message. For example, a DHCPRequest will have aRequested IP Address option to ask for a specific address, which a DHCP Ack will have a IP Address Lease Time option to say for how long the IP address is being assigned.Now select a DHCP Ack packet and compare the BOOTP fields. We will ask questions about these fields in the next section, but for now want you to observe that the DHCP Ack has the same overall format, but different values for the fields and carries different DHCP options.You can browse the options for DHCP Requests and Acks to learn about DHCP. You can see, for example, how long the IP address is assigned by the server, whether seconds, minutes, hours or days.You will also see the other configuration parameters that are assigned by the DHCP server, such as the IP address of the domain name server and router, the subnet mask, the domain name for the host, and more.You can also try to make out the whole sequence of DHCP messages that is exchanged for your network setup. If may be as simple as the short exchange of Request and Ack, or it may be the complete ex-change of Discover, Offer, Request and Ack. It may have additional messages such as Release, and it may have multiple of the messages (e.g., two or more Offers or Acks) due to multiple local DHCP servers. Complicating the exchange with your computer is that the trace may capture concurrent DHCP traffic from other local computers. You can use the Transaction IDs to separate the different exchanges, and look at the Ethernet source address to see which DHCP messages were sent by your computer. It is likely that other DHCP traffic is mixed in with your exchange.Step 3: Details of DHCP MessagesSpend time understanding DHCP. Note the position of the Ethernet, IP, UDP, and BOOTP protocol block. Answer the following questions based on your examination of the BOOTP/DHCP fields for both the DHCP Request and DHCP Ack. Answers on next page.1.What are the two values of the BOOTP Message Type field?2.How long is the Transaction ID field? Say whether it is likely that concurrent DHCP operationsdone by different computers will happen to pick the same Transaction ID.3.What is the name of the field that carries the IP address that is being assigned to the client?Youwill find this field filled in on the DHCP Ack, as that message is completing the assignment.4. What is the value of the Magic Cookie that stands for DHCP?5.The first DHCP option is DHCP Message Type. What option value stands for this type?6.DHCP Requests will typically have a Client Identifier option. Look at the value of this option. Howdoes it identify the client? Take a guess.7.DHCP Acks will typically have a Server Identifier option. Look at the value of this option. Howdoes it identify the server? Take a guess.8.What option value stands for the Requested IP Address option? And for the IP Address LeaseTime option?9.How does the recipient of a DHCP message know that it has reached the last option?Step 3: Answers to details of DHCP MessagesFigure 1: Structure of a DHCP message1. The two values are Boot Request (1) and Boot Reply (2).2. The Transaction ID is 4 bytes long. Thus it is very unlikely that there will be collisions in a relative-ly small number of concurrent DHCP operations (until that number approaches 216!)3.The “Your (client) IP address” field carries the IP address being leased to the client. 4.The DHCP magic cookie value is 0x63825363. 5. The option value of 53 stands for DHCP Message Type.6. It is typical for the Client Identifier to carry the Ethernet address of the client, but possible to use some other kind of identifier (e.g., hostname, serial number).7. It is typical for the Server Identifier to carry the IP address of the DHCP server, but possible to use some other kind of identifier.8. The option value of 50 stands for Requested IP Address and the value of 51 stands for IP Address Lease Time.9. The end of the DHCP options is identified with a DHCP option called End with value 255. Ether-net IP header UDP header BOOTP fields DHCP Op-tionsStep 4: DHCP Message AddressingNow we will look at how DHCP messages are addressed to computers at the UDP, IP and Ethernet layers. This is interesting because DHCP is used to assign IP addresses – a computer requesting a DHCP address may neither have its own IP address nor know the IP address of the DHCP server.Start by selecting a DHCP Request packet and looking at its UDP details in the middle Wireshark panel. We will only look at the DHCP Request message to keep things simple, as the details of addressing differ for other DHCP messages. Answers on next page.1.What port number does the DHCP client use, and what port number does the DHCP server use?Ports matter because UDP messages are addressed using ports. Both of these port numbers are on the Request in the source and destination port fields (and you will also see them on the Ack). Now look at the IP addresses in the IP protocol header of the packet for the next question. Do not look inside the BOOTP fields for the DHCP parameters, as we care about how DHCP messages are addressed at lower protocol layers. When the request is sent, your computer has no IP address and may not even know the IP address of the DHCP server, so the IP addressing differs from a routine IP packet.2.What source IP address is put on the Request message?It is a special value meaning “this hoston this network” used for initialization.3.What destination IP address is put on the Request message? It is also a reserved value designedto reach the DHCP server wherever it is on the local network.Finally, look at the Ethernet addresses for the next question.4.What source Ethernet address is put on the Request message, and what destination Ethernetaddress is put on the Request message? One of these addresses is a reserved address. Looking at the addressing should help you to understand why your computer may record the DHCP traf-fic of other local computers in your trace. Since the IP addressing is not yet established, many DHCP messages are sent to all computers on the local network. This makes sure every computer receives DHCP messages intended for them, but it poses a difficulty: one computer may receive DHCP messages intended for another computer.5.How does a computer work out whether a DHCP message it receives is intended as a reply to itsDHCP Request message, and not a reply to another computer? Hint: if you are not sure then go over the fields you inspected previously in Step 2 above.Step 4: Answers to DHCP Message Addressing1. The DHCP client (your computer) uses UDP port 68 and the DHCP server uses UDP port 67.2. The source IP address is 0.0.0.0. It is a special address used during address initialization.3. The destination IP address is 255.255.255.255. It is the broadcast address, which means the mes-sage is intended for all computers on the network. (It is not possible to use a more restricted subnet broadcast, e.g., 192.168.255.255, as the subnet mask is not yet known by the client.)4. The source Ethernet addres s is simply your own computer’s Ethernet address, since that is a l-ready assigned to your NIC. The destination Ethernet address is ff:ff:ff:ff:ff:ff, the reserved broadcast Ethernet address, so that the packet reaches all computers on the local network.5. The DHCP messages in a single exchange carry the same Transaction ID. Thus a computer looks for a DHCP reply such as an Ack with a Transaction ID that matches the value it placed on the earlier DHCP message such as a Request. (This is in addition to any Ethernet address filtering: if the reply is un-icast then it will have the computer’s Ethernet address as its destination.)。
抓包工具Wireshark分析DHCP协议

抓包⼯具Wireshark分析DHCP协议Wireshark分析DHCP协议⼀,动态主机配置协议DHCP1,DHCP简介DHCP(Dynamic Host Configuration Protocol),动态主机配置协议,是⼀个应⽤层协议。
当我们将客户主机ip地址设置为动态获取⽅式时,DHCP服务器就会根据DHCP 协议给客户端分配IP,使得客户机能够利⽤这个IP上⽹。
DHCP的前⾝是BOOTP协议(Bootstrap Protocol),BOOTP被创建出来为连接到⽹络中的设备⾃动分配地址,后来被DHCP取代了,DHCP⽐BOOTP更加复杂,功能更强⼤。
后⾯可以看到,在⽤Wireshark过滤显⽰DHCP包,需要输⼊过滤条件BOOTP,⽽不是DHCP,但或许是因为我使⽤的Wireshark版本是⽐较旧的1.12.9,没有在新版本中尝试过,也许可以输⼊DHCP 让其只显⽰DHCP包。
2,DHCP的实现DHCP的实现分为4步,分别是:第⼀步:Client端在局域⽹内发起⼀个DHCP Discover包,⽬的是想发现能够给它提供IP的DHCP Server。
第⼆步:可⽤的DHCP Server接收到Discover包之后,通过发送DHCP Offer包给予Client端应答,意在告诉Client端它可以提供IP地址。
第三步:Client端接收到Offer包之后,发送DHCP Request包请求分配IP。
第四步:DHCP Server发送ACK数据包,确认信息。
⼆,利⽤Wireshark抓取DHCP包1,分析要想抓取到DHCP包,先要保证有可⽤的DHCP服务器,然后将主机IP地址获取⽅式设置为⾃动获取。
如果主机在抓包之前已经联⽹,需要先断开主机的⽹络连接,然后再连接⽹络。
在cmd下使⽤命令ipconfig来完成⽹络断开与连接的过程:ipconfig/release 断开主机当前的⽹络连接ipconfig /renew 请求连接⽹络在cmd中可以使⽤ipconfig /?查看各参数的含义:(1)ipconfig /release断开当前的⽹络连接,主机IP变为0.0.0.0,主机与⽹络断开,不能访问⽹络。
wireshark实验DHCP

wireshark实验DHCPWireshark Lab: DHCP Version: 2.02007 J.F. Kurose, K.W. Ross. All Rights ReservedComputer Networking: A Top-down Approach, 4th edition.In this lab, we’ll take a quick look at DHCP.Recall that DHCP is used extensively in corporate, university andhome-network wired and wireless LANs to dynamically assign IP addresses to hosts (as well as to configure other network configuration information).This lab is brief, as we’ll only examine the DHCP packets captured by a host. If you also have administrative access to your DHCP server, you may want to repeat this lab after making some configuration changes (such as the lease time). If you have a router at home, you most likely can configure your DHCP server. Because many linux/Unix machines (especially those that serve many users) have a static IP address and because manipulating DHCP on such machines typically requires super-user privileges, we’ll only present a Windows ver sion of this lab below.DHCP ExperimentIn order to observe DHCP in action, we’ll perform several DHCP-related commands and capture the DHCP messagesexchanged as a result of executing these commands. Do the following1:1.Begin by opening the Windows Command Prompt application (which can befound in your Accessories folder). As shown in Figure 1, enter “ipconfig /release”. The executable for ipconfig is in C:\windows\system32. This command releases your current IP address, so that your host’s IP address bec omes0.0.0.0.1If you are unable to run Wireshark live on a computer, you can download the zip file/wireshark-labs/wireshark-traces.zip and extract the file dhcp-ethereal-trace-1. The traces in this zip file were collected by Wireshark running on one of the author’s computers, while performing the steps indicated in the Wireshark lab. Once you have downloaded the trace, you can load it into Wireshark and view the trace using the File pull down menu, choosing Open, and then selecting the dhcp-ethereal-trace-1 trace file. You can then use this trace file to answer the questions below.2.Start up the Wireshark packet sniffer, as described in the introductory Wiresharklab and begin Wireshark packet capture.3.Now go back to the Windows Command Prompt and enter “ipconfig /renew”.This instructs your host to obtain a network configuration, including a new IPaddress. In Figure 1, the host obtains the IP address 192.168.1.1084.Wait until the “ipconfig /renew” has terminated. Thenenter the same command“ipconfig /renew” again.5.When the second “ipconfig /renew” terminates, enter the command“ipconfig/release” to release the previously-allocated IP address to your computer.6.Finally, enter “ipconfig /renew” to again be allocated an IP address for yourcomputer.7.Stop Wireshark packet capture.Figure 1 Command Prompt window showing sequence of ipconfig commands that you should enter.Now let’s take a look at the resulting Wireshark window. To see only the DHCP packets, enter into the filter field “bootp”. (DHCP derives from an older protocol called BOOTP. Both BOOTP and DHCP use the same port numbers, 67 and 68. To see DHCP packets in the current version of Wireshark, you need to enter “bootp” and not “dhcp” in the filter.) We see fro m Figure 2 that the first ipconfig renew command caused four DHCP packets to be generated: a DHCP Discover packet, a DHCP Offer packet, a DHCP Request packet, and a DHCP ACK packet.Figure 2 Wireshark window with first DHCP packet –theDHCP Discover packet – expanded.What to Hand In:You should hand in a screen shot of the Command Prompt window similar to Figure 1 above. Whenever possible, when answering a question below, you should hand in a printout of the packet(s) within the trace that you used to answer the question asked. Annotate the printout to explain your answer. To print a packet, use File->Print, choose Selected packet only, choose Packet summary line, and select the minimum amount of packet detail that you need to answer the question.Answer the following questions:1.Are DHCP messages sent over UDP or TCP?2.Draw a timing datagram illustrating the sequence of the first four-packetDiscover/Offer/Request/ACK DHCP exchange between the client and server. For each packet, indicated the source and destination port numbers. Are the portnumbers the same as in the example given in this lab assignment?3.What is the link-layer (e.g., Ethernet) address of your host?4.What values in the DHCP discover message differentiate this message from theDHCP request message?5.What is the value of the Transaction-ID in each of the first four(Discover/Offer/Request/ACK) DHCP messages? What are the values of theTransaction-ID in the second set (Request/ACK) set of DHCP messages? What is the purpose of the Transaction-ID field?6. A host uses DHCP to obtain an IP address, among otherthings. But a host’s IPaddress is not confirmed until the end of the four-message exchange! If the IPaddress is not set until the end of the four-message exchange, then what values are used in the IP datagrams in the four-message exchange? For each of the fourDHCP messages (Discover/Offer/Request/ACK DHCP), indicate the source anddestination IP addresses that are carried in the encapsulating IP datagram.7.What is the IP address of your DHCP server?8.What IP address is the DHCP server offering to your host in the DHCP Offermessage? Indicate which DHCP message contains the offered DHCP address.9.In the example screenshot in this assignment, there is no relay agent between thehost and the DHCP server. What values in the trace indicate the absence of a relay agent? Is there a relay agent in your experiment? If so what is the IP address ofthe agent?10.In the example screenshots in this assignment, the host requests the offered IPaddress in the DHCP Request message. What happens in your own experiment?11.Explain the purpose of the lease time. How long is the lease time in yourexperiment?12.What is the purpose of the DHCP release message? Does the DHCP server issuean acknowledg ment of receipt of the client’s DHCP request? What would happen if the client’s DHCP release message is lost?。
基于Wireshark的DHCP网络故障定位分析

基于Wireshark的DHCP网络故障定位分析辛伟伟;郝继升;张成【摘要】针对在一个网络中出现多个DHCP(动态主机配置协议)服务器时,导致Client(客户端)的网络故障,分析了在eNSP(企业网络仿真平台)上模拟DHCP服务器为客户端动态分配IP地址的过程,并利用Wireshark(网络封包分析软件)工具捕获和分析DHCP数据包来定位网络故障.【期刊名称】《延安大学学报(自然科学版)》【年(卷),期】2018(037)001【总页数】3页(P34-36)【关键词】DHCP协议;eNSP模拟器;Wireshark软件;交换机【作者】辛伟伟;郝继升;张成【作者单位】延安大学数学与计算机科学学院,陕西延安716000;延安大学数学与计算机科学学院,陕西延安716000;西安医学院,陕西西安710021【正文语种】中文【中图分类】TP393随着Internet的飞速发展,越来越多的设备接入互联网。
这些设备在网络中要实现通信,就需要给每个设备配置一个IP地址、子网掩码、网关地址和DNS(域名解析系统)[1]。
为方便用户快速地接入和退出网络、提高IP地址资源的利用率和管理效率,DHCP协议应运而生。
DHCP(动态主机设置协议)是一个局域网的网络协议,采用客户/服务器(C/S)架构,使用UDP协议工作,主要用于动态指派IP地址给DHCP客户端以及便于网络管理员对所有计算机的管理[2]。
eNSP(企业网络仿真平台)是一款由华为提供的免费的、可扩展的、图形化操作的网络仿真工具平台[3],主要针对企业网路由器、交换机等网络设备进行硬件模拟,完美呈现真实设备实景,让用户有机会在没有真实设备的情况下模拟网络环境、学习网络技术和分析网络故障。
Wireshark(前身为Ethereal)是一个免费开源的网络数据包分析软件[4]。
它的功能是抓取网络数据包,并尽可能显示出最为详细的网络数据包数据。
本文主要分析了在一个网络中出现多台DHCP服务器时,客户端如果获取到伪DHCP服务器分配的IP地址,将无法正常连接网络资源。
- 1、下载文档前请自行甄别文档内容的完整性,平台不提供额外的编辑、内容补充、找答案等附加服务。
- 2、"仅部分预览"的文档,不可在线预览部分如存在完整性等问题,可反馈申请退款(可完整预览的文档不适用该条件!)。
- 3、如文档侵犯您的权益,请联系客服反馈,我们会尽快为您处理(人工客服工作时间:9:00-18:30)。
Wireshark Lab: DHCP Version: 2.0© 2007 J.F. Kurose, K.W. Ross. All Rights ReservedComputer Networking: A Top-down Approach, 4th edition.In this lab, we’ll take a quick look at DHCP.Recall that DHCP is used extensively in corporate, university andhome-network wired and wireless LANs to dynamically assign IP addresses to hosts (as well as to configure other network configuration information).This lab is brief, as we’ll only examine the DHCP packets captured by a host. If you also have administrative access to your DHCP server, you may want to repeat this lab after making some configuration changes (such as the lease time). If you have a router at home, you most likely can configure your DHCP server. Because many linux/Unix machines (especially those that serve many users) have a static IP address and because manipulating DHCP on such machines typically requires super-user privileges, we’ll only present a Windows version of this lab below.DHCP ExperimentIn order to observe DHCP in action, we’ll perform several DHCP-related commands and capture the DHCP messages exchanged as a result of executing these commands. Do the following1:1.Begin by opening the Windows Command Prompt application (which can befound in your Accessories folder). As shown in Figure 1, enter“ipconfig /release”. The executable for ipconfig is in C:\windows\system32. This command releases your current IP address, so that your host’s IP address becomes0.0.0.0.1If you are unable to run Wireshark live on a computer, you can download the zip file/wireshark-labs/wireshark-traces.zip and extract the file dhcp-ethereal-trace-1. The traces in this zip file were collected by Wireshark running on one of the author’s computers, while performing the steps indicated in the Wireshark lab. Once you have downloaded the trace, you can load it into Wireshark and view the trace using the File pull down menu, choosing Open, and then selecting the dhcp-ethereal-trace-1 trace file. You can then use this trace file to answer the questions below.2.Start up the Wireshark packet sniffer, as described in the introductory Wiresharklab and begin Wireshark packet capture.3.Now go back to the Windows Command Prompt and enter “ipconfig /renew”.This instructs your host to obtain a network configuration, including a new IPaddress. In Figure 1, the host obtains the IP address 192.168.1.1084.Wait until the “ipconfig /renew” has terminated. Then enter the same command“ipconfig /renew” again.5.When the second “ipconfig /renew” terminates, enter the command“ipconfig/release” to release the previously-allocated IP address to your computer.6.Finally, enter “ipconfig /renew” to again be allocated an IP address for yourcomputer.7.Stop Wireshark packet capture.Figure 1 Command Prompt window showing sequence of ipconfig commands that you should enter.Now let’s take a look at the resulting Wireshark window. To see only the DHCP packets, enter into the filter field “bootp”. (DHCP derives from an older protocol called BOOTP. Both BOOTP and DHCP use the same port numbers, 67 and 68. To see DHCP packets in the current version of Wireshark, you need to enter “bootp” and not “dhcp” in the filter.) We see from Figure 2 that the first ipconfig renew command caused four DHCP packets to be generated: a DHCP Discover packet, a DHCP Offer packet, a DHCP Request packet, and a DHCP ACK packet.Figure 2 Wireshark window with first DHCP packet – the DHCP Discover packet – expanded.What to Hand In:You should hand in a screen shot of the Command Prompt window similar to Figure 1 above. Whenever possible, when answering a question below, you should hand in a printout of the packet(s) within the trace that you used to answer the question asked. Annotate the printout to explain your answer. To print a packet, use File->Print, choose Selected packet only, choose Packet summary line, and select the minimum amount of packet detail that you need to answer the question.Answer the following questions:1.Are DHCP messages sent over UDP or TCP?2.Draw a timing datagram illustrating the sequence of the first four-packetDiscover/Offer/Request/ACK DHCP exchange between the client and server. For each packet, indicated the source and destination port numbers. Are the portnumbers the same as in the example given in this lab assignment?3.What is the link-layer (e.g., Ethernet) address of your host?4.What values in the DHCP discover message differentiate this message from theDHCP request message?5.What is the value of the Transaction-ID in each of the first four(Discover/Offer/Request/ACK) DHCP messages? What are the values of theTransaction-ID in the second set (Request/ACK) set of DHCP messages? What is the purpose of the Transaction-ID field?6. A host uses DHCP to obtain an IP address, among other things. But a host’s IPaddress is not confirmed until the end of the four-message exchange! If the IPaddress is not set until the end of the four-message exchange, then what values are used in the IP datagrams in the four-message exchange? For each of the fourDHCP messages (Discover/Offer/Request/ACK DHCP), indicate the source anddestination IP addresses that are carried in the encapsulating IP datagram.7.What is the IP address of your DHCP server?8.What IP address is the DHCP server offering to your host in the DHCP Offermessage? Indicate which DHCP message contains the offered DHCP address.9.In the example screenshot in this assignment, there is no relay agent between thehost and the DHCP server. What values in the trace indicate the absence of a relay agent? Is there a relay agent in your experiment? If so what is the IP address ofthe agent?10.In the example screenshots in this assignment, the host requests the offered IPaddress in the DHCP Request message. What happens in your own experiment?11.Explain the purpose of the lease time. How long is the lease time in yourexperiment?12.What is the purpose of the DHCP release message? Does the DHCP server issuean acknowledgment of receipt of the client’s DHCP request? What would happen if the client’s DHCP release message is lost?。
