惠普服务器说明书HP_ProLiant_BL20p
HP ProLiant服务器系列驱动器密钥引导实用程序指南说明书
HP drive key boot utility for ProLiant serversIntroduction (2)Replacement for the floppy drive (2)BIOS support for USB devices (2)Operating system support for USB devices (2)Usage for the drive key boot utility (3)Installing the web component (4)Maintaining system firmware images (11)Supported servers and devices (13)Additional Information (14)IntroductionThe HP drive key boot utility is a Smart Component that can be downloaded from the HP website to create a bootable drive key. Some ProLiant servers support the ability to boot a drive key in the system BIOS. For those products, this Smart Component can also be used to make the drive key capable of flashing firmware or booting floppy images that already exist. This white paper focuses on uses that would be beneficial to the customer for booting a drive key, and details the process for implementing those uses.Replacement for the floppy driveSome ProLiant servers do not include a floppy drive as a standard component, or may not offer a floppy drive as an option. As HP transitions to a floppy-less ProLiant server, other utilities and devices will become available that will allow the customer to do those tasks that used to be accomplished using a floppy drive. The drive key is a logical replacement for a floppy drive because it is small,easy to transport, supports various capacities, and in many cases, does not require a separate driver under the operating system.BIOS support for USB devicesThe system BIOS (ROM) requires additional functionality to support initializing and booting a USB drive key, as well as any other USB device. This is termed “legacy USB support” by HP. Basically, the system BIOS will attempt to boot the drive key as a mass storage device, thereby enabling the full capacity of the device. However, most drive key devices do not come properly formatted, meaning there is nothing for the system to boot. This is similar to attempting to boot a blank floppy diskette. The system BIOS would support initializing and booting that device, but no boot files are available to execute. The HP drive key Smart Component lands bootable files that the system BIOS can execute. This means that to boot a drive key, the server requires system BIOS support, as well as drive key support.The system BIOS will handle booting and executing files from the drive key until an operating system loads and the USB driver is loaded. At this point, the system BIOS is no longer involved in the support for the device.Operating system support for USB devicesNot all operating systems support USB drive key or USB devices. Check with the operating system vendor to determine if that specific OS supports USB devices. There are different levels of support by the vendor. Some operating systems load a USB driver once the OS installation is complete and the kernel has loaded. Other operating systems include support for use of USB devices during installation. For example, Microsoft® Windows® 2000 Server does not natively support generic USB devices during installation, but does support generic USB devices during runtime. “Native USB support” means that the OS supports those devices inherently, and does not require additionaldrivers/firmware for support. Since Windows 2000 does not natively support generic USB, a usercan only insert a USB drive key and use it at runtime, once the installation is complete. However, a drive key cannot be used during installation for any use, such as providing an updated driver during the F6 prompt. HP provides some alternatives for some operating systems to allow customers to useUSB devices during installation. For more information on this and other related topics, refer to the USB ProLiant homepage.Usage for the drive key boot utilityHP supports the use of a drive key as a premier method of transporting data, flashing firmware, and deploying operating systems. HP developed the drive key boot utility primarily to provide a newer method to maintain system firmware. On previous servers, the method of flashing firmware consisted of downloading an image to a floppy diskette from either the SmartStart CD or from the HP website. Each floppy diskette contained the firmware image for a single component (ROM, iLO, Smart Array controllers, etc.). See figure 1, below.Figure 1. Firmware flash using floppy diskettesML350 G4More recently, HP released an online version (meaning it runs when the server is up) of a ROM flash utility that allowed customers to setup a single server as an image repository. Each server ran a component that would communicate with the master server and receive updates as necessary. In this application, each component is flashed independently, and a reboot is still required for the new firmware image to become active. This is still a supported and efficient method of maintaining firmware images.HP also released an offline version of the ROM flash utility, meaning it requires the server to be shut down. The benefit of the offline ROM flash utility is that all components are flashed at the same time, increasing the speed to maintain firmware images. This utility is packaged on the Firmware Maintenance CD and includes firmware images updated at a certain point in time. If a newer (or older) image is available that is desired for flash, there is no method currently to download the image and create a custom CD.With the drive key boot utility, one of the primary features is the ability to flash and maintain system firmware. The drive key creates a boot environment and loads the offline ROM flash utility. By using this utility on a drive key, the user is able to control what firmware images are desired for flashing. Figure 2 shows how flashing firmware has transitioned from using floppy diskettes to using a drive key.Figure 2. Flashing firmware using HP drive key boot utilityDL380 G4DL360 G4ML370 G4ML350 G4Another feature of the drive key boot utility, is the ability to boot a floppy image that already exists. This allows the drive key to behave as a potential replacement for a floppy, depending upon the image being used. HP does not test the various images that could be used with this feature, but does test and support that the imaging engine is working properly. This feature should be sanity tested in each datacenter to ensure compatibility with your environment. There are some known cases where this feature does not work. For example, there is no support for booting a series of floppy images. This means that if your application consists of a series of floppies, this feature will not work for your environment because it only supports the capability to boot a single image at a time. Currently, there is no support for creating a ROMPaq diskette and booting the image on the drive key. This is a current limitation of the floppy emulation software.Installing the web componentTo install the web component, go to and download the image to a client. Oncedownloaded, run the file and install the application to the client by extracting the downloaded file. This will install an application to the client machine that can be run to make the drive key bootable.Running the applicationThe application includes a series of menu screens that will prompt the user for input on how to format the drive key. A radio button will be selected on each page, by default, to guide the user on on HP recommendations.Insert the drive key and run the application by going to the extracted directory and running hpdkbu.exe. This is the drive key boot utility executable file, and will load the welcome screen shown in Figure 3.Click Next to go to the next screen.Figure 3. Welcome screenFrom the Drive Letter dropdown menu, select the drive being used for the drive key. The drive letter you select refers to the drive that the running operating system has assigned to the drive key. Click Next.Figure 4. Select drive in use for drive key.The Task screen allows the user to select what task they would like to perform using the drive key boot utility. There are three options:• Create New or Replace Existing Configuration: If this option is selected, the contents of the drive key will be completed erased, and you can select a checkbox item that will back up the contents on the drive key to a file. This can be restored at a later time, if desired, and requires the exact same type and capacity drive key, but it does not have to be the exact same physical drive key.• Add Configuration to Existing Key: An example when this might be preferred is when a user wants to add a new floppy image to the boot choices.• Backup / Restore: This feature will restore the data from the file (see option 1 above) to the drive key.After you make your selection, click Next.Figure 5. Task selectionThe next screen is the Filesystem screen. The drive key does not have to be reformatted, but there are some operating systems that may not work properly with the filesystem that is on the drive key by default. For this reason, it is recommended that you select Create New Filesystem.After you make your selection, click Next.Figure 6. Filesystem selectionThe following menu provides the utility with information on drive geometry,and allows the user to select whether or not a partition is desired. The recommended path is to create a primary partition because this is the most compatible with the majority of operating systems. The user can also select not create a partition. This will allocate all available space on the key without creating a partition.Once Next is clicked, the drive key will be formatted and the boot environment will be created for the drive key. The user can select the Back tab at any point prior to this screen without modifying the data on the drive key. Once the next screen is shown, the drive key is formatted.After you make your selection, click Next.Figure 7. Drive Geometry SelectionThe following screen will prompt the user for what usage model they plan to use. There are two options:• HP Firmware Flash Package: This option will prepare the drive key for firmware flashing using the Offline ROM Flash utility as described in this document. This is the recommended usage for the boot utility.• Floppy Image: This option will add a floppy image and place it in the boot menu on the drive key. If this option is selected, the user will be required to provide the floppy to image. In the Short name field, the user should input a unique short name (8 or less characters) to type at the boot menu to boot the image. In the Long name field, the user should input a verbose one-line description to distinguish the floppy image from others.After making your selection, click Next.Figure 8. Configuration ScreenIf the previous steps were completed properly, the user will be prompted with a completion screen. Figure 9. Completion ScreenThe drive key is now capable of flashing firmware, but still requires offline ROM flash components from the HP website.Maintaining system firmware imagesTo maintain system firmware images, run the application to make the drive key capable of flashing firmware. This will make the drive key bootable and install the application to flash firmware. Proceed to and go to Support and Drivers. Select the server that you wish to maintain firmware and download the Offline ROM Flash component for each component you wish to flash. Supported components consist of system firmware, integrated Lights-Out, Smart Array controllers, and hard drives. Download the components for all devices to the drive key and place the image in the components’ directory.NoteThis utility uses the Offline ROM Flash components that correspond to theOffline ROM flash utility. This utility is supported on most ProLiant servers.However, the system BIOS does not support the ability to boot the drive keyon every server. Reference the “Supported servers and devices” section ofthis document to ensure that the servers and components you wish to flashfirmware from a drive key actually support booting the drive key.Once the drive key is bootable, capable of flashing firmware ,and the components are downloaded, the drive key can be inserted into the supported server. Power on the server and the utility will be loaded as shown in figure 10, below. By default, the area that shows “System ROM” (on figure 10, below), will display all firmware for which the utility finds a newer version and will also display the currently installed version. Select the Available Firmware tab to display all supported components that are capable of being flashed. Once ready to flash firmware, click Update Now and all components will be flashed at the same time. Then click Exit.The drive key can be removed and the system can be rebooted via a power cycle. A power cycle is required for the new firmware images to take effect. Simply rebooting the server may not load the new firmware images.Figure 10. HP drive key boot utility firmware update utility menuIf the component that is desired for flash does not show up on the detected components screen, select the Components tab. This will display all component images that are on the drive key and available for firmware flash. Verify that the component is actually available, meaning the correct image was downloaded. This will also display the current and available versions of firmware. If the firmware version is the latest, it will not show up on the home screen because it does not need to be flashed.Supported servers and devicesAll ProLiant servers do not support booting a USB drive key. Refer to the USB homepage for additional information on what servers support this functionality, and what minimum ROM is required for this support.The Offline ROM flash utility currently supports the ability to flash system BOIS, Integrated Lights-Out (iLo) firmware, Smart Array controllers, and hard drives. Other components may release components for offline firmware flash. Refer to the software and drivers section of to determine if there is a ROM flash component available for the device you wish to flash.The HP server team works closely with the HP desktop team to ensure that the drive key devices they support work on ProLiant servers. However, we cannot guarantee that every HP branded drive key will work properly in every ProLiant server. Part numbers for supported devices are available on the product QuickSpecs and are listed on the USB home page. Please refer to these documents for supported part numbers.Since there are various implementations for USB devices, not all USB devices work properly with ProLiant servers. Due to fast-changing roadmaps and the number of USB vendors, HP only claims support for HP branded drive key devices listed on the QuickSpecs and USB homepages. There is nothing in the drive key boot utility that prevents a different vendor drive key from working. However, HP cannot guarantee complete integration of the drive key boot utility with non-supported devices.Additional InformationPlease refer to the USB home page at/products/servers/platforms/usb-support.html for additionalfor additional information regarding USB support on HP ProLiant servers.© 2004 Hewlett-Packard Development Company, L.P. The information containedherein is subject to change without notice. The only warranties for HP products andservices are set forth in the express warranty statements accompanying suchproducts and services. Nothing herein should be construed as constituting anadditional warranty. HP shall not be liable for technical or editorial errors oromissions contained herein.Microsoft and Windows are U.S. registered trademarks of Microsoft Corporation.374482-001, 7/2004。
HPE ProLiant服务器安装与启动服务说明书
Service overviewHPE Installation and Startup of HPE ProLiant servers provides for the installation of your new HPE ProLiant server and eligible operating system. This service will assist you in bringing your new HPE ProLiant server and operating system into operation in a timely and professional manner.Service benefitsThis service provides a trained HPE service specialist to perform an installation that meets HPE quality standards, for:• Delivery of the service at a mutually scheduled time convenient to your organization• Helps you effectively utilize HPE products from the knowledge gained during on-site delivery of the service• Custom installation as detailed in “Delivery specifications’’ or in a Statement of Work (SOW)• Verification prior to installation that all service prerequisites are metService feature highlights• Service planning• Service deployment• Installation verification tests (IVTs)• Customer orientation sessionHPE Installation and Startup of HPE ProLiant servers HPE Support ServicesData sheetTable 1. Service featuresFeature Delivery specificationsService planning An HPE service specialist will confirm with the Customer that the prerequisites have been met and schedule the delivery of theservice at a time mutually agreed upon by HPE and the Customer, which shall be during local HPE standard business hoursexcluding HPE holidays, unless otherwise agreed by HPE. Any services provided outside of HPE standard business hours may besubject to additional charges.Service deployment The deployment activities will include:Hardware• Installation of the server: Unpacking the server, inspecting it for damage, and installing it according to the product specifications(If the server is part of a rack system, it will be inserted into the rack.)• Installation of hardware options: System hardware options purchased with the system will be installed at the same time• Physical connection of the product to a LAN, as appropriate• Consolidation of all packaging material and notification to the Customer that the materials are ready for removalSoftwareInstallation of one eligible Operating System. Eligible Operating Systems are defined below:• For Microsoft® Windows Server®:–Installation of the operating system and the appropriate network protocols, as required–Creation of a Windows Server account with up to three user accounts–Creation and setup of one Windows Server file share on a local disk–For ProLiant DL380 Packaged Cluster only, installation and configuration of Microsoft Cluster software according to theproduct installation guide• For Linux® server operating systems:*–Installation of the operating system and the appropriate network protocols, as required–Installation of HPE drivers, as applicable–Creation of a Linux server account with up to three user accountsThe supported Linux distributions for installation as part of this service are Red Hat® Enterprise Linux (RHEL) and SUSE LinuxEnterprise Server (SLES).*For systems with multiple servers per chassis, one operating system (OS) image will be installed on one server node within thechassis. If an established HPE Insight Cluster Management Utility (CMU) or Microsoft WDS environment exists with a functionalPXE boot environment and server provisioning capabilities to load an OS image, then the HPE installation engineer will load oneOS image to all server nodes within the chassis.Enable remote support to allow for automatic case creation for hardware failures, and for proactive deliverables provided underapplicable service levels. This enablement is for supported devices only and is conditional on the existence of a foundationalHPE remote support application already established in the Customer’s server environment.For more information on remote support, go to /services/getconnected.Installation verification tests (IVTs)HPE will run the appropriate installation verification tests required for this service, such as Power-On Self-Tests (POSTs) specificto the product being installed, verification of product operation, and verification that the current device software and firmwareare loaded.Customer orientation session Upon completion of the deployment activities, the HPE service specialist will provide an orientation session, up to one hour, on theproduct and/or technology, to include information on basic hardware product usage and hardware features.Service eligibilityThe Customer must meet the following prerequisites for the delivery of this service:• Have a new HPE ProLiant server and a supported version of Microsoft or Linux operating system and valid licenses• Have no earlier version of the operating system installed on the new HPE ProLiant server for which this service is to be applied• Have all cabling and network connections installed and functionalService limitationsExcluded from this service are activities such as, but not limited to, the following:• Service deployment on hardware not covered by an HPE warranty or HPE support agreement• Service deployment on hardware covered by a third-party maintenance contract• Operating system provisioning with a third-party or customized software tool• Installation of ineligible operating systems or more than one operating system• Planning, design, implementation, or assessment of the Customer’s overall SAN or fabric architecture• Services that, in the opinion of Hewlett Packard Enterprise, are required due to unauthorized attempts by non-HPE personnel to install, repair, maintain, or modify hardware, firmware, or software• Site inspection activities such as a comprehensive analysis of the Customer facility’s power, cooling humidity, airborne contaminant, vibration levels, and determination of whether the data center’s raised floor has sufficient structural capability to accommodate the weight of newly installed equipment• Environmental compliance or site preparation• External cabling• Application integration or integration of third-party products or peripherals not included with the system• Assembly of external storage devices• Assembly of racks or other computer room site preparation• Software training, troubleshooting, repair, tuning, or customization• Any services not clearly specified in this documentCustomer responsibilitiesThe Customer will:• Contact an HPE specialist within 90 days of date of purchase to schedule the delivery of the service• Coordinate service deployment on third-party-maintained products (if applicable) with Hewlett Packard Enterprise• Designate a person from the Customer’s staff who, on behalf of the Customer, will grant all approvals, provide information, and otherwise be available to assist HPE in facilitating the delivery of this service• Ensure that all service prerequisites as identified under “Service eligibility’’ are met• Ensure that all site preparation, power supply compatibility requirements, network cabling and configuration, and other specified service prerequisites, as listed in the “Service eligibility” section have been met• Allow Hewlett Packard Enterprise full and unrestricted access to all locations where the service is to be performed• Provide a suitable work area for delivery of the service, including access to an outside telephone line, power, and any network connections required• Be responsible for all data backup and restore operationsGeneral provisions/other exclusionsHPE reserves the right to charge, on a time and materials basis, for any additional work over and above this service package pricing that may result from work required to address service prerequisites or other requirements that are not met by the Customer.HPE reserves the right to reprice this service if the Customer does not schedule and provide for subsequent delivery within 90 days of purchase.HPE’s ability to deliver this service is dependent upon the Customer’s full and timely cooperation with HPE, as well as the accuracy and completeness of any information and data the Customer provides to HPE.Travel charges may apply; please consult your local office.Learn more at /services/support Data sheet© Copyright 2005, 2007, 2014, 2016–2017 Hewlett Packard Enterprise Development LP. The information contained herein is subjectto change without notice. The only warranties for Hewlett Packard Enterprise products and services are set forth in the express warrantystatements accompanying such products and services. Nothing herein should be construed as constituting an additional warranty.Hewlett Packard Enterprise shall not be liable for technical or editorial errors or omissions contained herein.This data sheet is governed by the Hewlett Packard Enterprise current standard sales terms, which include the supplemental data sheet,or, if applicable, the Customer’s purchase agreement with Hewlett Packard Enterprise.Microsoft and Windows Server are either registered trademarks or trademarks of Microsoft Corporation in the United States and/or othercountries. Red Hat is a registered trademark of Red Hat, Inc. in the United States and other countries. Linux is the registered trademarkMake the right purchasedecision. Chat with ourpresales specialists.。
HP ProLiant 机架式和塔式服务器产品系列指南
2
产品系列指南 | HP ProLiant 机架式和塔式服务器
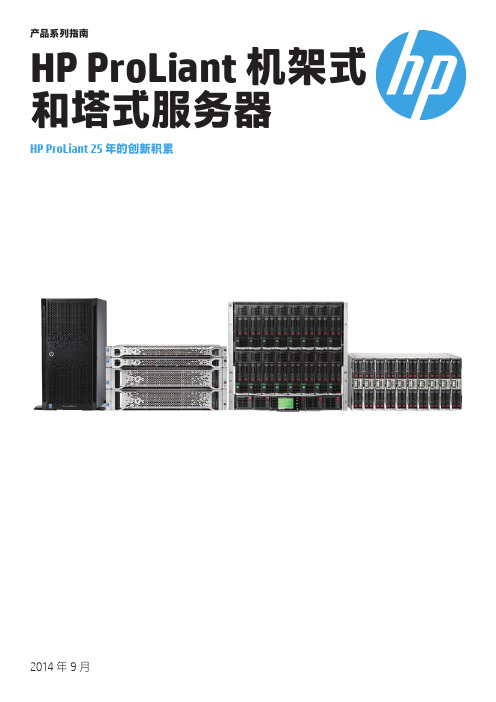
HP ProLiant 机架式和塔式服务器和新的 Gen9 型号
为了不断实现我们行业领先的计算创新的愿景,惠普推出了 HP ProLiant Gen9 产品组合。 HP ProLiant Gen9 产品组合构建于 25 年的创新以及久经考验的特性和功能基础之上,经 过专门设计,通过更高的单位功率单位价格的计算能力提高经济性,以满足当今市场的新 需求。
例如,为移动办公员工和客户群提供支持已不再是 IT 的一个选项,而是一项必然需求。不 过,对于受到复杂的孤岛化基础设施限以及响应速度缓慢,并最终降低了工作效率和客户满 意度。
弥补这些差距需要一些新颖独特的方法。一些能将计算、存储和网络融合到共享资源池中 的方法。这种新方法还必须使用软件定义的技术实现日常任务自动化,进而节约数不尽的 时间。当然,这种方法必须是云就绪的,以实现快速变更、无缝扩展,以及永不停机的访 问。借助这种计算模型:
帮助加快过渡到基础设施即服务 (IaaS) 和混合云,加快了 IT 服务交付速度。
HP ProLiant Gen9 能够带来更多好处
ProLiant Gen9 采用了更多新技术和改进,可帮助您每次以适当的经济性为适当的工作负载 选择适当的计算能力,这些新技术和改进包括:
• 增加计算能力及降低多项工作负载的总拥有成本 (TCO)
1 HP OneView 预计将于 2014 年末在 DL 和 BL 服 务器中提供对 ProLiant Gen9 的支持。 2 惠普内部分析。DL380Gen9与DL380G7的比较。 系统功率的信息来源是 IDC Qualified Performance Indicator(IDC 合格性能指标)。性能取自 SPECint_ rate_base2006 行业基准。计算结果:性能/功 率,2014 年 8 月。 3 内部分析。DL380 Gen9 与 DL380 G6 的比较。 尺寸分别取自 Gen9 和 G6 的 DL380 QuickSpecs。 性能取自 SPECint_rate_base2006 行业基准。 计算结果:性能/(长度/宽度)/144,2014 年 8 月。 4 内部性能实验室测试,使用 Iometer 和配备 RAID 0、4k 随机读取、Microsoft® Windows® 2012 R2 的 HP Smart Array P840;正在通过 FW 中的变更 进行测试。数字为截至 2014 年 7 月 21 日的最 新数字。 5 HP SmartCache 性能通过受控环境下的等效控 制器实现。美国德克萨斯州休斯顿 HP Smart Storage 工程师截至 2014 年 5 月 18 日发表于 内部 SmartCache 维基网页。 6 基于 Demartek 测试。上一版本的 10 Gb 与配备 HP Virtual Connect FlexFabric 20/40 的 20 Gb 进 行比较。
HP ProLiant Storage Server 用户手册说明书
HP ProLiant Storage Server用户指南部件号:378128-AA5第5版:2005年9月法律信息和注意事项Copyright©2005Hewlett-Packard Development Company,L.P.对于本材料,Hewlett-Packard公司不做任何担保,包括(但不限于)对特定用途的适销性和适用性的暗示性保证。
对于此处包含的错误,或是与此材料的供应、性能或使用相关的偶发性或继发性损坏,Hewlett-Packard公司均不承担任何责任。
本文档包含受版权保护的所有权信息。
未经Hewlett-Packard公司事先书面许可,不得影印、复制本文档的任何部分或将其翻译成其它语言。
本文档包含的信息可能随时更改,恕不另行通知。
HP产品和服务的明示担保声明中说明了对此类产品和服务的仅有担保。
不应将此处的任何内容视作附加担保。
HP公司对本文档包含的技术性或编辑性错误或遗漏之处不承担任何责任。
Microsoft®、Windows®和Windows NT®是Microsoft Corporation在美国的注册商标。
UNIX®是The Open Group的注册商标。
Hewlett-Packard公司对本文档包含的技术性或编辑性错误或遗漏之处不承担任何责任。
信息按"原样"提供,不附有任何形式的保证。
如有更改,恕不另行通知。
Hewlett-Packard公司产品的明示性有限担保声明中说明了对此类产品的担保。
不应将此处的任何内容视作附加的担保。
HP ProLiant Storage Server用户指南目录关于本指南 (9)适用读者 (9)准备事项 (9)相关文档资料 (9)约定 (9)文档约定 (10)文本标记 (10)设备标记 (11)获得帮助 (12)HP技术支持 (12)HP硬件支持服务 (12)HP授权的经销商 (13)有帮助的网站 (13)1概述 (15)2存储服务器配置 (21)通过网络部署存储服务器 (21)IP网络连接和安装要求 (21)收集配置信息 (22)存储服务器服务说明DVD上的Windows多语言用户界面22WebUI配置 (23)方法1:远程浏览器(使用主机名称) (24)步骤 (24)方法2:直接连接 (25)步骤 (25)快速启动向导配置 (26)步骤 (26)完成基本安装 (27)完成系统配置 (27)群集设置 (28)3存储管理概述 (29) (29)存储管理元件 (29)HP ProLiant Storage Server用户指南iii存储管理示例 (29)物理存储元件 (30)阵列 (31)容错 (32)联机备件 (33)逻辑存储元件 (33)逻辑驱动器(LUN) (34)分区 (34)卷 (35)文件系统元件 (36)文件共享元件 (36)Volume Shadow Copy Service概述 (36)使用存储元件 (36)群集服务器元件 (37)4默认的存储配置 (39)用于100系列HP ProLiant Storage Servers的存储..39物理配置 (39)2-HDD配置 (39)4-HDD配置 (41)关于300系列500系列ProLiant存储服务器的存储.43物理驱动器配置 (43)默认启动顺序 (44)A符合规定和安全 (45)联邦通信委员会声明 (45)A类设备 (45)B类设备 (45)标有FCC徽标的产品的认证合格声明(仅限于美国) (46)修改 (46)电缆 (46)符合激光声明 (46)国际声明 (47)加拿大声明(Avis Canadien) (47)A类设备 (47)B类设备 (47)欧盟声明 (47)BSMI声明 (48)日本声明 (48)韩国声明A&B (49)A类设备 (49)B类设备 (49)安全 (49)电池替换声明 (49)iv中国台湾电池回收声明 (50)电源线 (50)日本电源线声明 (50)静电释放 (51)防止静电释放 (51)接地方法 (51)废弃电子和电器设备(WEEE)规程 (52)捷克声明 (52)丹麦声明 (52)荷兰声明 (52)英国声明 (53)爱沙尼亚声明 (53)芬兰声明 (54)法国声明 (54)德国声明 (54)希腊声明 (55)匈牙利声明 (56)意大利声明 (56)拉托维亚声明 (57)立陶宛声明 (57)波兰声明 (57)葡萄牙声明 (58)斯洛伐克声明 (58)斯洛文尼亚声明 (59)西班牙声明 (59)瑞典声明 (60)索引 (61)HP ProLiant Storage Server用户指南v图列表1快速启动向导窗口 (25)2"快速启动向导"的配置查看窗口 (27)3存储管理过程示例 (30)4从物理驱动器配置阵列 (31)5数据块(B1-B12)的RAID0(数据条带化)(S1-S4) (32)62个阵列(A1,A2)和跨5个物理驱动器的5个逻辑驱动器(L1至L5) (34)vi表列表1文档约定 (10)2型号快速参考(ML110) (16)3型号快速参考(DL100) (17)4型号快速参考(ML350至ML370) (18)5型号快速参考(DL380至DL585) (19)6配置信息 (22)7RAID方法概述 (33)8100系列2-HDD配置 (40)9100系列4-HDD配置 (42)10ProLiant300和500系列服务器HDD配置 (43)HP ProLiant Storage Server用户指南viiviii关于本指南适用读者本书供具有下列经验的专业技术人员使用:•Microsoft®管理过程•系统和存储配置准备事项在安装HP ProLiant Storage Server之前,HP建议您先获取适用读者部分所列内容的相关补充文档资料。
HP ProLiant BL20p第四代(G4)服务器 说明书
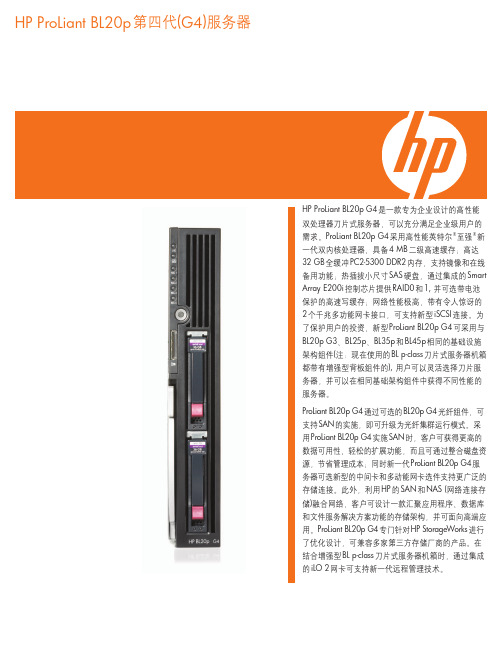
HP ProLiant BL20p第四代(G4)服务器HP ProLiant BL20p G4是一款专为企业设计的高性能双处理器刀片式服务器,可以充分满足企业级用户的需求。
ProLiant BL20p G4采用高性能英特尔®至强®新一代双内核处理器、具备4 MB二级高速缓存;高达32 GB全缓冲PC2-5300 DDR2内存,支持镜像和在线备用功能;热插拔小尺寸SAS硬盘,通过集成的SmartArray E200i控制芯片提供RAID0和1, 并可选带电池保护的高速写缓存;网络性能极高,带有令人惊讶的2个千兆多功能网卡接口,可支持新型iSCSI连接。
为了保护用户的投资,新型ProLiant BL20p G4可采用与BL20p G3、BL25p、BL35p和BL45p相同的基础设施架构组件(注:现在使用的BL p-class刀片式服务器机箱都带有增强型背板组件的), 用户可以灵活选择刀片服务器,并可以在相同基础架构组件中获得不同性能的服务器。
ProLiant BL20p G4通过可选的BL20p G4光纤组件,可支持SAN的实施,即可升级为光纤集群运行模式。
采用ProLiant BL20p G4实施SAN时,客户可获得更高的数据可用性、轻松的扩展功能,而且可通过整合磁盘资源,节省管理成本;同时新一代ProLiant BL20p G4服务器可选新型的中间卡和多动能网卡选件支持更广泛的存储连接。
此外,利用HP的SAN和NAS (网络连接存储)融合网络,客户可设计一款汇聚应用程序、数据库和文件服务解决方案功能的存储架构,并可面向高端应用。
ProLiant BL20p G4专门针对HP StorageWorks进行了优化设计,可兼容多家第三方存储厂商的产品。
在结合增强型BL p-class刀片式服务器机箱时,通过集成的iLO 2网卡可支持新一代远程管理技术。
全新特性使用全新的64位英特尔至强双核处理器,标配全新的Smart Array E200i SAS阵列控制器,支持SFF SAS 硬盘和新型多功能网卡,新一代远程管理iLO 2可支持虚拟VLAN和虚拟KVM。
惠普网络服务器磁盘阵列应用手册
惠普网络服务器磁盘阵列应用手册磁盘阵列磁盘阵列是通过硬件或管理软件将两个或更多的硬盘结合在一起,对于服务器而言是一个或多个逻辑硬盘。
计算机所能看到就是存储空间和剩余的可用空间,不能看到存储空间是如何在磁盘上存放。
通常我们使用SCSI磁盘做磁盘阵列,目前IDE设备也可以采用阵列技术,但技术水平仍然较低,所以多用于低端的客户机或低端服务器使用。
从性能角度考虑,最好不要在阵列中将多种SCSI设备混合使用。
通过使用惠普的磁盘阵列卡可以配置出各种RAID盘,也可以使用部分网络操作系统实现阵列的配置,但由于运行阵列软件需要占用大量的CPU和内存资源,所以软件阵列会使服务器的性能降低很多。
为什么要使用磁盘阵列?在评价一个服务器的性能的时候,我我们经常使用一个概念就是木桶原则,在中国南方常用一种木制的水桶,一个木桶一般采用几木板拼接而成,如果将这个概念引入到服务器中时可以认为计算机的各部分组件是木桶的各块板子,如果木桶的板子高低不同时,决定这个木桶的最高水位却是由最低的木板决定。
因此在网络服务器的性能评定时,所有部件中性能最低的设备决定了服务器的最高性能。
那么哪些设备性能较低呢?现在,我们来分析一下一个网络服务器在运行过程中核心组件的性能参数,INTEL PⅢ CPU1000MB/SSDRAM 内存800MB/SAGP显卡532~1000MB/S硬盘80MB/S从上面的列表中可以看出,硬盘是网络服务器瓶颈所在,许多人也都有这种感觉,当我们使用鼠标点击某个应用程序时,屏幕上出现一个小沙漏,硬盘的红灯不停的闪烁,这是因为我们需要大量的从硬盘读取的相应的程序或数据,而今天硬盘读写速度限制了我们的程序的快速执行。
为什么会这样呢?因为今天我们无论使用IDE硬盘还是普通的SCSI 硬盘,在每一时刻只能对计算机内部的一块硬盘进行读或者写的操作,现在的硬盘理论上可以支持到每秒80MB的速率,但在实际运行时往往是达不到的,较好的情况下恒定读写速率可以达到每秒20MB左右,这已经是一个非常理想的指标了,但与CPU和内存的IO 速率相比是在是太低了。
HP ProLiant 机架式和塔式服务器产品系列指南

为何选择惠普机架式和塔式服务器? 为了满足不断增长的业务需求,HP ProLiant 机架式和塔式服务器通过提供更高的计算和 存储容量、规模合理的计算能力和灵活的选择,以及更低廉的计算能耗和占地空间,重新 定义了计算经济性。借助 HP ProLiant 机架式和塔式服务器,您可以通过更快捷的计算、内 存和 I/O 性能,结合更高的存储和网络性能(包括更低的延迟),加速实现业务成果。
• 必须确保 IT 运维,将其基础设施定位为经济高效并有利于未来增长,同时满足系统性能 的关键性能指标。
• 技术基础设施专家需要降低复杂性,更深入地了解系统性能,以及保证能够更高效地管 理系统,以释放资源。
• 企业高管必须获得工作负载优化的性能,以取得更出色的成效,以便快速响应新商机,进 而获得更大的竞争优势。
• HP Smart Socket 指南 — 简化了访问,便捷的处理器更新 • HP SmartDrives — 简化了监控,减少了数据丢失,更优秀的可维护性 • HP SmartMemory — 提高了性能、可管理性和效率;缩短了停机时间;降低了能源成本 • HP Flexible Network 适配器 — 方便的配置,快捷的可维护性 • HP ProLiant 3D Sea of Sensors — 降低了能源成本 • HP iLO 4 Management — 快捷的部署,简化了管理 • HP OneView1 — 通过自动化配置和生命周期管理、更快捷的虚拟机 (VM) 配置,以及能够
HP ProLiant 塔式服务器(ML 产品系列) ProLiant 塔式产品组合集成了经过简化而全面的管理套件和业界领先的支持,能够带来更 多业务价值,可帮助提高 IT 人员的工作效率,并加快服务交付速度。此外,塔式生态系统 提供了全面而规模合理的融资方案、服务交付和渠道网络组合,能够大幅加快 IT 运维速度, 还使您的 IT 能够更加快捷高效地响应业务需求。
HP服务器系统配置手册

XXXXXXX主机存储配置手册XXXXX2004年12月23日目录1 WINDOWS SERVER 2003系统配置 (3)1.1服务器分区配置 (3)1.2主机命名及IP地址配置 (4)1.3活动目录配置 (4)1.4W INDOWS SERVER 2003配置 (5)2 杀毒软件配置 (5)3 存储系统配置 (7)4 双机容错系统配置 (7)4.1D ATAWARE软件资源规划 (7)4.1.1 心跳线设置 (7)4.1.2 Ywzx-server1作为活动服务器配置 (8)4.1.3 Ywzx-server2作为活动服务器配置 (10)1Windows Server 2003系统配置1.1 服务器分区配置1.文件服务器硬盘分区在服务器上,各配有一块36G热插拔硬盘,分成两个分区,文件格式为NTFS,分区如下:●分区1(C盘):10GB,做系统盘使用;●分区2(D盘):24GB,用来安装应用程序和存储一些服务器自身数据用;D盘建立目录:D:\Program Files 用于安装应用软件;D:\backup\drivers and tools\ 用于存放服务器驱动和常用工具;D:\backup\system_bak 用于存放系统备份文件;2.病毒、网管服务器分区配置1.服务器硬盘分区在服务器上,配有一块80GB IDE硬盘,分成三个分区,文件格式为NTFS,分区如下:●分区1(C盘):10GB,做系统盘使用;●分区2(D盘):25GB,用来安装应用程序;●分区2(E盘):45GB,用来存储备份数据;2.建立目录:D:\Program Files 用于存放应用程序E:\backup\drivers and tools 用于备份各种驱动程序及常用工具E:\backup\tools\ 用于备份常用工具1.2 主机命名及IP地址配置1.3 活动目录配置基本域配置:1.4 Windows server 2003配置设置密码安全策略策略管理工具->域安全策略->安全设置->帐户策略->密码策略启用“密码必须符合复杂性要求”设置“密码最小长度值”:8位帐户密码设置将不用的帐户全部禁掉;将Win2003系统自建帐户“Administrator”设置复杂的密码,建议使用8位以上、各种字符组成的密码。
HP BL20p刀片服务器安装图解
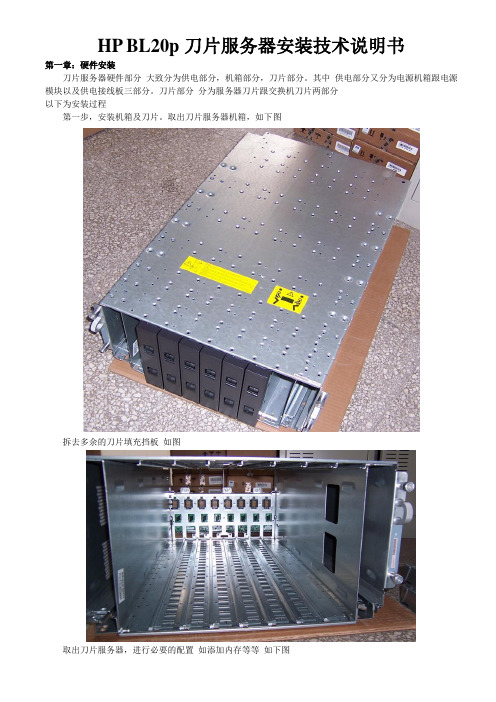
HP BL20p刀片服务器安装技术说明书第一章:硬件安装刀片服务器硬件部分大致分为供电部分,机箱部分,刀片部分。
其中供电部分又分为电源机箱跟电源模块以及供电接线板三部分。
刀片部分分为服务器刀片跟交换机刀片两部分以下为安装过程第一步,安装机箱及刀片。
取出刀片服务器机箱,如下图拆去多余的刀片填充挡板如图取出刀片服务器,进行必要的配置如添加内存等等如下图HP BL20p刀片服务器标配为双路XEON 3.16G CPU,2GB内存,没有硬盘。
根据需要扩展到4GB内存。
整体安装完成后再扩展硬盘。
配置完成后将刀片服务器插入到机箱中如下图一共可以安装8片刀片服务器,安装完成后,将刀片交换机插入至机箱两侧的交换机位,全部安装完成后,如下图交换机接入后,可选的扩展交换机的背部网络接口,如下图然后将硬盘接入到刀片服务器内,由于空间限制,每个刀片只能扩展两块SCSI硬盘,默认为RAID1模式。
安装完成后,如下图至此,刀片机箱以及刀片服务器安装完成。
第二步,安装供电部分。
取出供电机箱以及标配的四个供电模块。
注:此供电机箱最多支持6个供电模块,为双路供电,左侧三个负责为1-4号刀片服务器供电,右侧三个负责5-8号刀片服务器。
供电模块可以热插拔。
但必须保证每路至少有一个供电模块在工作。
将供电模块按照每路两个插入到供电机箱中,如下图此电源支持智能管理,在背部面板上,使用附件中提供的RJ45接口的专用数据线将电源机箱的数据信号接口连接到服务器机箱的电源管理接口(RJ45接口)。
如下图连接一个。
电源机柜的总线路输出至Basbar上面,然后,分出三个输出,将其中一个连接到服务器机柜上。
如下图连接OK后将所有开关打开,一共两处,分为电源机箱上面,如下图以及Basbar上面,如下图硬件安装部分,就完成了。
需要注意的是。
此服务器提供了比较周全的冗余设计。
双路交换机提供冗余。
以及电源机柜双路输入(需要两个Basbar进行输入),每个服务器机柜也是双路电源输入。
(售后服务)HPPML系列服务器上机架操作方法

(售后服务)HPPML系列服务器上机架操作方法
HP的ML系列塔式服务器,如果要上机架,不像DL那种纯机架式那么方便,需要再单独购买机架转换套件,各个ML服务器的机架转换套件的选件号是不壹样的,具体型号的机架选件号见下列图表:
下面以HPML572G2服务器为例说明如何利用转换套件上机架.首先确认机架的套件组成,ML570G2上的机架套件有如下组成部分:
如何将机架套件加到服务器上?
1.加服务器导轨,首先将导轨的4个空洞对准服务器上相应的位置,然后将导轨向前推,直到固定好
2.为了更好的将服务器移动到机架上,HP建议将电源从服务器上卸下来,上到机架上之后再装载上
首先将电源上固定电源的螺丝卸掉
拔掉电源
3.接下来于服务器上安装线缆管理臂支架,将支架固定于服务器后面,拧紧螺丝
4.当下将服务器上到机架上,机架上应已安装上导轨,具体于机架上如何安装导轨,请参阅关联的用户手册
首先,将机架上的内部滑轨拉出来,直到最后无法继续拉动
找俩个人将服务器抬起来,将装于服务器上的导轨和伸出的滑轨对接
5.将服务器推进滑轨内,当快推进到前面板时,按下导轨按钮,以便整个服务器能推进去放置到机架上
6.拧紧前面板螺丝,以便固定好
7.下面于机架上安装线缆管理臂。
首先要将管理臂的支架安装于服务器后面,请参考前面。
然后将有螺丝眼的管理臂的支架于机架上对好,然后上好螺丝
8.将管理臂的另壹头跟接于服务器上的支架连接,拧紧螺丝
9.将电源重新安装到服务器上,固定好机架跟导轨上的所有螺丝
所有安装工作完成.(完)。
HP用户指南说明书

User Guide© Copyright 2015 Hewlett-Packard Development Company, L.P.Intel is a trademark of Intel Corporation in the U.S. and other countries and is used under license.The information contained herein is subject to change without notice. The only warranties for HP products and services are set forth in the express warranty statements accompanying such products and services. Nothing herein should be construed as constituting an additional warranty. HP shall not be liable for technical or editorial errors or omissions contained herein.First Edition: May 2015Document Part Number: 826302-001Product noticeThis guide describes features that arecommon to most models. Some featuresmay not be available on your computer.Software termsBy installing, copying, downloading, orotherwise using any software productpreinstalled on this computer, you agree tobe bound by the terms of the HP End UserLicense Agreement (EULA). If you do notaccept these license terms, your soleremedy is to return the entire unusedproduct (hardware and software) within 14days for a refund subject to the refundpolicy of your place of purchase.For any further information or to request afull refund of the computer, please contactyour local point of sale (the seller).Safety warning noticeplace the computer directly on your lap or obstruct the computer air vents. Use the computer only ona hard, flat surface. Do not allow another hard surface, such as an adjoining optional printer, or a softsurface, such as pillows or rugs or clothing, to block airflow. Also, do not allow the AC adapter tocome into contact with the skin or a soft surface, such as pillows or rugs or clothing, during operation.The computer and the AC adapter comply with the user-accessible surface temperature limits definedby the International Standard for Safety of Information Technology Equipment (IEC 60950).iiiiv Safety warning noticeProcessor configuration setting (select models only)IMPORTANT:Select computer models are configured with an Intel® Pentium® N35xx/N37xx seriesor a Celeron® N28xx/N29xx/N30xx/N31xx series processor and a Windows® operating system. Ifyour computer is configured as described, do not change the processor configuration setting inmsconfig.exe from 4 or 2 processors to 1 processor. If you do so, your computer will not restart. Youwill have to perform a factory reset to restore the original settings.vvi Processor configuration setting (select models only)Table of contents1 Getting to know your computer (1)Right side (1)Left side (2)Display (3)Top (4)TouchPad (4)Buttons (5)Bottom (6)Labels (7)2 Using TouchPad gestures (8)Using TouchPad gestures (8)Tapping (8)Scrolling (10)3 Using the action keys (12)Using the action keys (12)4 Power and Battery (13)Factory-sealed battery (13)Charging the Battery (13)5 More HP resources (14)More HP resources (14)6 Electrostatic Discharge (15)Index (16)viiviii1Getting to know your computerRight sideComponent Description(1)Power light ●White: Computer is on.●Blinking white: Computer is in Sleep mode.●Off: The computer is off.(2)Audio-out (headphone)/Audio-in(microphone) jack Connects optional powered stereo speakers, headphones, earbuds, a headset, or a television audio cable. Also connects an optional headset microphone. This jack does not support optional microphone-only devices. WARNING!To reduce the risk of personal injury, adjust the volume before putting on headphones, earbuds, or a headset.NOTE:When a device is connected to the jack, the computer speakers are disabled.NOTE:Be sure that the device cable has 4-conductor connector that supports both audio-out (headphone) and audio-in (microphone).(3)USB 2.0 port Connects optional USB devices, such as a keyboard,mouse, external drive, printer, scanner or USB hub.(4)USB 3.0 charging (powered) port Connects an optional USB device, such as a keyboard,mouse, external drive, printer, scanner or USB hub.Standard USB ports will not charge all USB devices or willcharge using a low current. Some USB devices requirepower and require you to use a powered port.NOTE:USB charging ports can also charge select cellphones and MP3 players, even when the computer is off. (5)HDMI port Connects an optional video or audio device, such as a high-definition television, any compatible digital or audiocomponent, or a high-speed High-Definition MultimediaInterface (HDMI) device.Right side1Left sideComponent Description(1)Security cable slot Attaches an optional security cable to the computer.NOTE:The security cable is designed to act as adeterrent, but it may not prevent the computer from beingmishandled or stolen.(2)Power connector Connects an AC adapter.(3)AC adapter light●White: The AC adapter is connected and the batteryis charged.●Amber: The AC adapter is connected and thebattery is charging.●Off: The computer is using battery power.(4)SIM slot (select models only)Supports a wireless subscriber identity module (SIM).(5)Memory card reader Reads optional memory cards that store, manage, share,or access information.To insert a card:▲Hold the card label-side up, with connectors facingthe slot, insert the card into the slot, and then pushin on the card until it is firmly seated.To remove a card:▲Press in on the card it until it pops out.2Chapter 1 Getting to know your computerDisplayComponent Description(1)WLAN antennas*Send and receive wireless signals to communicate with wirelesslocal area networks (WLANs).NOTE:The position of the WLAN antennas may differ,depending on model.(2)WWAN antennas*Send and receive wireless signals to communicate withWWANs.NOTE:The antennas are not visible from the outside of thedevice. For optimal transmission, keep the areas immediatelyaround the antennas free from obstructions. For wirelessregulatory notices, see the section of the Regulatory, Safety,and Environmental Notices that applies to your country orregion.(3)Internal microphone Records sound.(4)Webcam Records video, captures still photographs, and allows videoconferences and online chat by means of streaming video.(5)Webcam light On: The webcam is in use.(6)Internal display switch Turns off the display or initiates Sleep if the display is closedwhile the power is on.NOTE:The display switch is not visible from the outside of thecomputer.*The antennas, IR emitters (select models only), and sensors are not visible from the outside of the computer. For optimaltransmission, keep the areas immediately around the antennas, IR emitters, and sensors free from obstructions. For wirelessregulatory notices, see the section of the Regulatory, Safety, and Environmental Notices that applies to your country orregion.Display3TopTouchPadComponent Description(1)TouchPad zone Moves the on-screen pointer and selects or activates itemson the screen.4Chapter 1 Getting to know your computerButtonsComponent Description(1)Power button●When the computer is off, press the button to turn onthe computer.●When the computer is in the Sleep state, press thebutton briefly to exit Sleep.●When the computer is on and you want to lock thescreen, press the power button until you see the sign-in screen appear. Pressing the power button duringscreen-lock mode turns off the computer.●When the computer is on and you want to turn it off,press and hold the powerTop5Component Description(1)Speakers (2)Produce sound. 6Chapter 1 Getting to know your computerThe labels affixed to the computer provide information you may need when you troubleshoot system problems or travel internationally with the computer.IMPORTANT:All labels described in this section will be affixed to the bottom of the computer.For help finding these locations, refer to Getting to know your computer on page 1●Service label—Provides important information, including the following:Component(1)Product name(2)Serial number(3)Product part number(4)Warranty period(5)Model description (select models only)Have this information available when you contact support.●Regulatory label—Provides regulatory information about the computer.●Wireless certification label or labels—Provide information about optional wireless devices andthe approval markings of some of the countries or regions in which the devices have beenapproved for use. If your computer model includes one or more wireless devices, one or more certification labels are included with your computer. You may need this information whentraveling internationally.Labels72Using TouchPad gesturesA TouchPad allows you to control the pointer on the screen using your fingers.Using TouchPad gesturesThe TouchPad supports a variety of gestures that let your fingers tap and scroll to manipulate itemson the desktopTappingTo make an on-screen selection, use the Tap function on the TouchPad.●Tap one finger on the TouchPad zone to make a selection.8Chapter 2 Using TouchPad gestures●Tap two fingers on the TouchPad zone to bring up a context-sensitive menu.Using TouchPad gestures9ScrollingScrolling is useful for moving up, down, or sideways on a page or image. Scrolling to the left or theright with two fingers will scroll the screen, if there is more content viewable to either side, or willmove back and forth through web browser history.To scroll, place two fingers slightly apart on the TouchPad, and then drag them across the TouchPadin an up, down, left, or right motion.NOTE:Scrolling speed is controlled by finger speed.10Chapter 2 Using TouchPad gesturesTo scroll between open tabs in Chrome, slide three fingers left or right on the TouchPad.Using TouchPad gestures113Using the action keysUsing the action keysFor more information on action keys and keyboard shortcuts, go to https:///chromebook/answer/183101?hl=en.Icon Key Descriptionesc esc is a key that interacts with other keys to activate the computer's functions.Back Go to the previous page in your browser history.Forward Go to the next page in your browser history.Reload Reload your current page.Full screen Open your page in full-screen mode.Display apps Displays open apps.NOTE:Pressing this button in conjunction with ctrl takes a screenshot.Brightness down Decreases the screen brightness incrementally as long as you hold down thekey.Brightness up Increases the screen brightness incrementally as long as you hold down thekey.Mute Mutes speaker sound.Volume down Decreases speaker volume incrementally as long as you hold down the key.Volume up Increases speaker volume incrementally as long as you hold down the key.Power button●When the computer is off, press the button to turn on the computer.●When the computer is in the Sleep state, press the button briefly to exitSleep.●When the computer is on and you want to lock the screen, press thepower button until you see the sign-in screen appear. Pressing the powerbutton during screen-lock mode turns off the computer.●When the computer is on and you want to turn it off, press and hold thepower button.12Chapter 3 Using the action keys4Power and BatteryFactory-sealed batteryThe battery[ies] in this product cannot be easily replaced by user themselves. Removing or replacingthe battery could affect your warranty coverage. If a battery is no longer holding a charge, contactsupport.When a battery has reached the end of its useful life, do not dispose of the battery in generalhousehold waste. Follow the local laws and regulations in your area for battery disposal. Charging the Battery1.Connect the power adapter to the computer.2.Verify that the battery is charging by checking the AC adapter light. This light is located on thecomputer's left side, next to the power connector.AC adapter light StatusWhite The AC adapter is connected and the battery is charged.Amber The AC adapter is connected and the battery is charging.Off The computer is using battery power.3.While the battery is charging, keep the AC adapter connected until the AC adapter light turnswhite.Factory-sealed battery135More HP resourcesMore HP resourcesYou have already used Setup Instructions to turn on the computer and locate this guide. For product details, how-to information, and more, use this table.Resource ContentsSetup Instructions●Overview of computer setup and features.Help and SupportFor U.S. support, go to /go/contactHP. For worldwide support, go to/country/us/en/wwcontact_us.html.● A broad range of how-to information and troubleshooting tips.Safety & Comfort GuideGo to /ergo.●Proper workstation setup.●Guidelines for posture and work habits that increase yourcomfort and decrease your risk of injury.●Electrical and mechanical safety information.Worldwide supportTo get support in your language, go to /country/us/en/ wwcontact_us.html.●Chat online with an HP technician.●Email support.●Find support telephone numbers.●Locate HP service center locations.Regulatory, Safety and Environmental NoticesThis guide is provided in the box.●Important regulatory notices.Limited Warranty*This guide is provided in the box, or go to/go/orderdocuments.●Specific warranty information about this computer.*You can find the expressly provided HP Limited Warranty applicable to your product located with the user guides on yourcomputer and/or on the CD/DVD provided in the box. In some countries/regions, HP may provide a printed HP LimitedWarranty in the box. For countries/regions where the warranty is not provided in printed format, you may request a printedcopy from /go/orderdocuments or write to:●North America: Hewlett-Packard, MS POD, 11311 Chinden Blvd., Boise, ID 83714, USA●Europe, Middle East, Africa: Hewlett-Packard, POD, Via G. Di Vittorio, 9, 20063, Cernusco s/Naviglio (MI), Italy●Asia Pacific: Hewlett-Packard, POD, P.O. Box 200, Alexandra Post Office, Singapore 911507When you request a printed copy of your warranty, please include your product number, warranty period (found on yourservice label), name, and postal address.IMPORTANT:Do NOT return your HP product to the addresses above. For U.S. support, go to /go/contactHP. For worldwide support, go to /country/us/en/wwcontact_us.html.14Chapter 5 More HP resources6Electrostatic DischargeElectrostatic discharge is the release of static electricity when two objects come into contact—forexample, the shock you receive when you walk across the carpet and touch a metal door knob.A discharge of static electricity from fingers or other electrostatic conductors may damage electroniccomponents. To prevent damage to the computer, damage to a drive, or loss of information, observethese precautions:●If removal or installation instructions direct you to unplug the computer, unplug it after beingproperly grounded and before removing a cover.●Keep components in their electrostatic-safe containers until you are ready to install them.●Avoid touching pins, leads, and circuitry. Handle electronic components as little as possible.●Use nonmagnetic tools.●Before handling components, discharge static electricity by touching an unpainted metal surfaceof the component.●If you remove a component, place it in an electrostatic-safe container.If you need more information about static electricity or assistance with component removal orinstallation, contact support.15IndexAAC adapter lightidentifying2action keys12back12brightness down12brightness up12esc12forward12full screen12mute12power button12volume down12volume up12audio-in (microphone) jack, identifying1audio-out (headphone) jack, identifying1Bbattery bay7buttonspower5Ccomponentsbottom6display3left side2right side1top4connector, power2Eelectrostatic discharge15Hheadphone (audio-out) jack1 Iintegrated webcam light, identifying3internal display switch3 internal microphones, identifying 3Jjacksaudio-in (microphone)1audio-out (headphone)1Llabels7regulatory7service7wireless certification7WLAN7lightsAC adapter2power1webcam3Mmemory card reader, identifying2memory card, identifying2microphone (audio-in) jack,identifying1NNext window12PportsHDMI1USB1USB 3.0 charging (powered)1power button, identifying5power connector, identifying2power lights1product name and number,computer7Rregulatory informationregulatory label7wireless certification labels7Sscrolling TouchPad gesture10security cable slot, identifying2serial number7serial number, computer7service labelslocating7SIM slot, identifying2slotsmemory card reader2security cable2SIM2speakers, identifying6Support14TTouchPad gesturesscrolling10TouchPad zone, identifying4traveling with the computer7UUSB 3.0 charging (powered) port,identifying1USB ports, identifying1Wwebcam light, identifying3webcam, identifying3wireless certification label7WLAN antennas, identifying3WLAN device7WLAN label7WWAN antennas, identifying316Index。
惠普服务管理器 9.20 版安装指南说明书

HP Service Manager适用于 Windows®和 UNIX®操作系统软件版本:9.20安装指南文档发行日期:2010 年 6 月软件发行日期:2010 年 6 月法律声明随产品和服务提供的货品质量保证声明中阐明了 HP 产品和服务的唯一担保。
本文所含信息不得视为构成额外担保。
HP 对于本文所包含的技术、编辑错误或遗漏概不负责。
此处包含的信息如有更改,恕不另行通知。
受限权利声明机密计算机软件。
必须具有 HP 的有效许可证才能拥有、使用或复制。
按照 FAR 12.211 和 12.212,并根据供应商的标准商业许可的规定,“商业计算机软件”、“计算机软件文档”和“商品技术数据”的使用权属于美国政府。
商业项目根据供应商的标准商业许可授权给美国政府使用。
版权声明© 版权所有 1996-2010 Hewlett-Packard Development Company, L.P.商标声明Java™ 是 Sun Microsystems,Inc. 在美国的商标。
Microsoft® 和 Windows® 是 Microsoft Corporation 在美国的注册商标。
Oracle® 是 Oracle Corporation 和/或其附属机构的注册商标。
UNIX® 是 The Open Group 的注册商标。
2文档更新本文档的标题页包含了下列标识信息:• 软件版本号,用于指示软件版本。
• 文档发行日期,该日期在每次更新文档时改变。
• 软件发行日期,用于指示该软件版本的发行日期。
要查看最新的更新或验证您所使用的文档是否为最新版本,请访问:/selfsolve/manuals此站点要求您以 HP Passport 用户的身份注册和登录。
要注册 HP Passport ID,请访问:/passport-registration.html或在“HP Passport”登录页面上单击“New users - please register”链接。
惠普服务器维护手册

HP PC服务器维护手册目录第1章硬件状态指示灯1.1HP ProLiant DL580 G7指示灯状态:nb没有启动系统处于未启动状态内存板组成部分以及指示灯状态Item Description Status1释放锁2弹出杆3旋转开关4可移动的绿色 = 可以拔该内存板不亮 = 系统在加电状态不可以拔掉该内存板5DIMM 1 LED绿色 = DIMM 已经安装了橙色 = DIMM 故障或者降级橙色闪烁 = DIMM 配置错误不亮 = DIMM 没有安装6DIMM 2 LED绿色 = DIMM 已经安装了橙色 = DIMM 故障或者降级橙色闪烁 = DIMM 配置错误不亮 = DIMM 没有安装7DIMM 3 LED绿色 = DIMM 已经安装了橙色 = DIMM 故障或者降级橙色闪烁 = DIMM 配置错误不亮 = DIMM 没有安装8DIMM 4 LED绿色 = DIMM 已经安装了橙色 = DIMM 故障或者降级橙色闪烁 = DIMM 配置错误不亮 = DIMM 没有安装橙色闪烁 = 该内存板的 DIMM 遇到了以下的内存错误一个不应该拆除的内存板的开关被打开了在系统运行状态下尝试插入一个内存板但是失败了热插拔电源指示灯Item Description1电源 LED 主电源2故障 LED 主电源3电源 LED 冗余电源4故障 LED 冗余电源PowerLED 绿色Failure LED 橙色Status灭灭 2 个电源都没有交流电输入灭亮没有交流电到该电源或者电源故障包括电压过高或者温度过高闪烁灭有交流电 / 标准输出状态亮灭直流输出电源正常灭闪烁电源故障热插拔风扇指示灯Status绿色 = 正常状态橙色 = 故障不亮 = 没有电源活动 LED 指示灯1联机LED 指故障LED 指条件1.2HP ProLiant DL380 G7指示灯状态:成分标识项目描述状态1个网卡链路/活动的网络连接闪光绿色=网络链接和活动关闭=没有连接到网络;如果停电,观后面板的RJ - 45发光二极管的状态2帽帽状况确定,见“系统洞察显示组合”3安培安培模式现状绿色=启用琥珀=故障闪烁琥珀=无效的配置关闭=及模式禁用-所有其他发光二极管关闭=正常琥珀=故障详细信息的激活后面板和按钮Code Component Status01电源线系统板到电源线 : 线有故障或者线没有安装04风扇板电源线风扇板电源或者信号线没有安装05内存板基本内存错误内存板 1 没有安装或者存在不正确的内存配置06SAS 背板电源线SAS 背板或者线没有安装08系统锁指出了一个没有在代码 01 到 07 所包含的故障t1Processor 1不支持Processor 1 不支持,更换一个系统支持的处理器 .t2Processor 2不支持Processor 2 不支持,更换一个系统支持的处理器 .t3Processor 3不支持Processor 3 不支持,更换一个系统支持的处理器 ..t4Processor 4不支持Processor 4 不支持,更换一个系统支持的处理器 .P1Processor 1没有安装Processor 1 没有安装,需要重新启动系统 , 安装处理器 1. 如果处理器 4 安装了并且系统正在启动 , P1 代码和 Port 84/85 将显示 1 秒钟以表示系统正在启动U1PPM 1 没有安装处理器 1 没有安装 PPM1 ,需要安装U2PPM 2 没有安装处理器 2 没有安装 PPM2 ,需要安装U3PPM 3 没有安装处理器 .3 没有安装 PPM3 ,需要安装U4PPM 4 没有安装处理器 4 没有安装 PPM4 ,需要安装A0Pre POST 代码Standby 模式P5电源电源没有输出信号_5电源背板电源背板没有 5V 电压输出33电源背板电源背板没有电压输出15调压器主板的电压调整器没有电压输出Ut Vtt 调整器Vtt 没有电源输出5U PPM 故障PPM 没有电源输出nb没有启动系统处于未启动状态内存板组成部分以及指示灯状态Item Description Status1释放锁2弹出杆3旋转开关4可移动的绿色 = 可以拔该内存板不亮 = 系统在加电状态不可以拔掉该内存板5DIMM 1 LED绿色 = DIMM 已经安装了橙色 = DIMM 故障或者降级橙色闪烁 = DIMM 配置错误不亮 = DIMM 没有安装6DIMM 2 LED绿色 = DIMM 已经安装了橙色 = DIMM 故障或者降级橙色闪烁 = DIMM 配置错误不亮 = DIMM 没有安装7DIMM 3 LED绿色 = DIMM 已经安装了橙色 = DIMM 故障或者降级橙色闪烁 = DIMM 配置错误不亮 = DIMM 没有安装13Hot-plug RAID 热插拔RAID绿色 = RAID 模式LED橙色 = 降级的 RAID 模式橙色闪烁 = 不正确的 AMP 高级内存保护模式不亮 = 没有配置成 RAID 模式14内存板状态指示灯灭 = 没有电源 - 内存板 locking switch 没有锁定或者内存配置不正确 .绿色 = 正常状态绿色闪烁 = 内存板正在重建橙色闪烁 = 该内存板的 DIMM 遇到了以下的内存错误一个不应该拆除的内存板的开关被打开了在系统运行状态下尝试插入一个内存板但是失败了热插拔电源指示灯Item Description1电源 LED 主电源2故障 LED 主电源3电源 LED 冗余电源4故障 LED 冗余电源PowerFailure LED 橙色StatusLED绿色灭灭 2 个电源都没有交流电输入灭亮没有交流电到该电源或者电源故障包括电压过高或者温度过高闪烁灭有交流电 / 标准输出状态亮灭直流输出电源正常灭闪烁电源故障热插拔风扇指示灯Status绿色 = 正常状态橙色 = 故障不亮 = 没有电源活动 LED 指示灯1联机LED 指示灯2故障LED 指示灯3条件灭灭灭存在以下一种或多种情况:1、驱动器未配置为阵列的一部分;2、驱动器已配置为阵列的一部分,但它是当前未被访问或重建的更换驱动器;3、驱动器已配置为联机备用驱动器;如果驱动器连接到阵列控制器,则可以联机更换驱动器;灭灭琥珀色由于硬盘驱动器故障或子系统通信故障,驱动器已置为脱机状态;需要更换驱动器;亮、灭或闪烁亮灭驱动器处于联机状态且以配置为阵列的一部分;如果阵列的配置已考虑容错,阵列中其它所有驱动器都处于联机状态,并且接收到故障前兆警报或正在升级驱动器容量,则可以联机更换驱动器;亮或闪烁闪烁灭禁止卸下驱动器;驱动器正在重建或正在扩展容量;亮灭灭禁止卸下驱动器;该驱动器正被访问,但1它尚未配置为阵列的一部分; 2它是更换的驱动器且尚未开始重建; 3它在POST期间旋转加速亮、灭或闪烁亮或灭闪烁已接收到该驱动器的故障前兆警报;请尽快更换驱动器1.3HP ProLiant DL980 G7指示灯状态内存板组成部分以及指示灯状态橙色 = 降级 mirrored 模式橙色闪烁 = 不正确的 AMP 高级内存保护模式不亮 = 没有配置成 Mirrored 模式绿色 = RAID 模式13Hot-plug RAID 热插拔 RAIDLED橙色 = 降级的 RAID 模式橙色闪烁 = 不正确的 AMP 高级内存保护模式不亮 = 没有配置成 RAID 模式14内存板状态指示灯灭 = 没有电源 - 内存板 locking switch 没有锁定或者内存配置不正确 .绿色 = 正常状态绿色闪烁 = 内存板正在重建橙色闪烁 = 该内存板的 DIMM 遇到了以下的内存错误一个不应该拆除的内存板的开关被打开了在系统运行状态下尝试插入一个内存板但是失败了热插拔电源指示灯Color Description1.绿系统电源指示灯;此指示灯在系统加电和12V系统电源可用的条件下稳定的闪烁;此电源主要供应蓄电池充电器并且为缓存提供补充电源.2.绿辅助电源指示灯;此指示灯在检测到电压时稳定闪烁;辅助电源用于保存高速缓存内的数据和有电源线连接时候的有电源供应产生的可用信息;3.橙电池健康指示灯,阐明指示灯模式,查看下列表格4.绿BBWC状态指示灯,阐明指示灯模式,查看下列表格热插拔风扇指示灯 Status绿色 = 正常状态橙色 = 故障不亮 = 没有电源指示灯3模式指示灯4模式 解释 每两秒闪烁一次 系统掉电,缓存数据丢失尚未被写入驱动器;恢复系统功率及早防止数据丢失;可行的延长数据存储时间就是延长辅助电源的使用时间,通过指示灯2显示;在辅助电源保存数据;单独一个满电电池能保存数据通常至少两天;电池寿命也取决于缓存模块的尺寸;闪两次停止 想得到进一步关于控制装置的信息,请在HP 网站参照quickspecs一秒闪一次 电池组是低于最低水平,并正在充电;功能要求的电池如写入高速缓存,容量扩展,条带大小迁移,和RAID 迁移暂时不可用,直到充电完成;充电过程需要15分钟,两个小时之间,视电池的初始容量;常亮 电池完全充电,并张贴写数据存储在缓存;不亮 电池完全充电,也没有张贴写数据缓存一秒闪一次 一秒闪一次 交替的绿色和黄色闪烁模式指出缓存微控制器是执行在启动加载器和接收新的代码从主机控制器常亮 有短路整个电池的终端或在电池包;bbwc 特征被禁用,直到电池组更换;预期寿命的电池包通常超过三年;每两秒闪烁一次有一个开放的电路整个电池的终端或在电池包;bbwc 特征被禁用,直到电池包更换;预期寿命的电池包通常超过三年;第2章常见硬件部件故障处理2.1硬盘故障的处理方法硬盘红灯通常是硬盘故障灯告警的表示SCSI硬盘红灯可能被管理工具选中或者故障,提示硬盘可能已经出现异常情况或者故障,为了保证数据安全,首先建议尽可能备份重要数据,并且不要轻易插拔硬盘,避免误操作导致数据风险;2.2RAID卡故障的处理方法。
惠普产品使用指南说明书

使用指南©Copyright 2015 HP Development Company, L.P.Bluetooth 是其所有人所擁有的商標,Hewlett-Packard Company 已取得授權使用。
Intel 和 Pentium 是 Intel Corporation 在美國和其他國家/地區的商標。
AMD 是 Advanced Micro Devices, Inc. 的商標。
SD 標誌是其所有人的商標。
Microsoft 和 Windows 是 Microsoft 集團的商標。
本文件包含的資訊可能有所變更,恕不另行通知。
HP 產品與服務的保固僅列於隨產品及服務隨附的明確保固聲明中。
本文件的任何部份都不可構成任何額外的保固。
HP 不負責本文件在技術上或編輯上的錯誤或疏失。
如需 DTS 專利,請參閱。
已取得 DTS Licensing Limited 授權製造。
DTS、DTS 符號以及 DTS 連同其符號皆為註冊商標,且 DTS Studio Sound 為 DTS, Inc. 的商標。
©DTS, Inc. 保留所有權利。
第一版:2015 年 11 月文件編號:839283-AB1產品聲明本使用指南說明大部分機型最常用的功能。
有些功能可能無法在您的電腦上使用。
此電腦可能需要升級和/或單獨購買硬體和/或 DVD 光碟機,用以安裝Windows 7 軟體並充分利用 Windows 7的功能。
如需詳細資訊,請前往/en-us/windows7/get-know-windows-7。
若要存取最新的使用指南,請前往/support,然後選取您所在的國家/地區。
選取驅動程式與下載,然後依照畫面上的指示繼續執行。
軟體條款透過安裝、複製、下載或以其他方式使用本電腦預先安裝的任何軟體產品,即表示您同意接受 HP 使用者授權合約(EULA) 條款之約束。
如果您不接受這些授權條款,可於 14 天內退回完整未使用的產品(含硬體與軟體),並依據經銷商的退款原則取得全額退款,此為唯一補償形式。
HP ProLiant BL2x220c G7刀片服务器
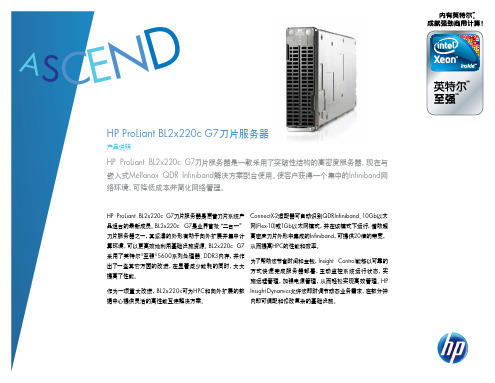
借助HP ProLiant BL2x220c G7刀片服务器, 您可以获得灵活的高性能 网络连接:
• 个节点配有一个嵌入式单端口Mellanox QDR Infiniband/Flex-10网络适配 每 器, 可大幅降低数据中心的Infiniband网络连接成本。 • NC543i网络控制器支持惠普独有的Virtual Connect Flex-10技术以及QDR Infiniband。 网络功能改进包括自动检测功能, 可确定服务器需要采用哪些 定制功能 (Infiniband或以太网) 。 • 虽然所有数据和管理流量是通过一个位于某服务器节点上的单一中间板连 接器传送的, 但每个服务器节点相互独立工作, 且有各自的操作系统和工作 负载。 大幅提高您的数据中心性能
处理器和内存 处理器类型 处理器 英特尔®至强®5600系列 X5670 X5660 X5650 E5640 E5620 L5640 L5630 处理器核心 处理器数量 最高处理器速度 每个42U机箱的处理器数量 内存类型 标配内存 最大内存 存储 硬盘类型 支持的硬盘 扩展插槽 部署 外形机箱 网络连接 冗余电源 保修 — 年(部件/人工/现场) 管理 半高刀片 嵌入式NC543i和NC362i网络控制器 电源机箱 3/3/3 集成Lights-Out 3 非热插拔SATA或SSD SATA: 250GB或120GB SSD: 64GB或32GB 无 6个或4个 每节点2个, 每服务器4个 2.93GHz 256 PC3-10600 DDR3 RDIMM和UDIMM 每个节点24GB 每个节点96GB
© 2010 Hewlett-Packard Development Company, L.P. 本文所含信息如有更改, 恕不另行通知。 惠普产品与服务的全部保修条款在此类产品和服务附带的保修声明中均已列明, 本文中的任何信息均不构成额外的保修条款。 惠普对于本文中所包含的技术或编辑错误、 遗漏概不负责。 Intel和Xeon是Intel Corporation在美国及其它国家/地区的商标。 4AA3-0928CHP, 2010年10月制
HP_ProLiant_服务器系列_-_前面板指示灯说明书
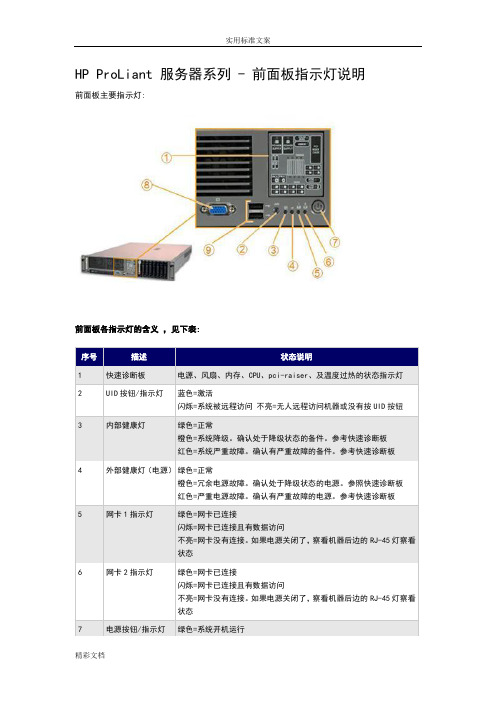
HP ProLiant 服务器系列 - 前面板指示灯说明前面板主要指示灯:前面板各指示灯的含义,见下表:序号描述状态说明1 快速诊断板电源、风扇、内存、CPU、pci-raiser、及温度过热的状态指示灯2 UID按钮/指示灯蓝色=激活闪烁=系统被远程访问不亮=无人远程访问机器或没有按UID按钮3 内部健康灯绿色=正常橙色=系统降级。
确认处于降级状态的备件。
参考快速诊断板红色=系统严重故障。
确认有严重故障的备件。
参考快速诊断板4 外部健康灯(电源)绿色=正常橙色=冗余电源故障。
确认处于降级状态的电源。
参照快速诊断板红色=严重电源故障。
确认有严重故障的电源。
参考快速诊断板5 网卡1指示灯绿色=网卡已连接闪烁=网卡已连接且有数据访问不亮=网卡没有连接。
如果电源关闭了,察看机器后边的RJ-45灯察看状态6 网卡2指示灯绿色=网卡已连接闪烁=网卡已连接且有数据访问不亮=网卡没有连接。
如果电源关闭了,察看机器后边的RJ-45灯察看状态7 电源按钮/指示灯绿色=系统开机运行橙色=系统关机但电源正常连接不亮=电源线没有连接或电源故障8 VGA接口9 两个USB接口快速诊断板:快速诊断板指示灯的含义,见下表:编号描述状态1 Online Spare memory 指示灯绿=保护模式开启琥珀色闪烁=内存配置错误琥珀色=内存失败注 :HP [ Systems Insight Display ] 的指示灯表现出了主板的布局。
系统内置指示灯和内部健康灯结合确认故障当前面板的内部健康灯亮红灯或是黄灯时,表示此时服务器可能发现了一个故障,可以结合前面板的内部健康灯和 [ Systems Insight Display ] 指示灯,指示出服务器的当前状态。
Mirrored memory ( 绿 ) 绿镜象内存配置已启用且状态。
正常Overtemperature ( 琥珀色 ) 琥珀色温度预报警。
红温度报警Riser interlock ( 琥珀色 ) 红PCI 扩展笼未接或不牢固。
HP ProLiant MicroServer 产品说明书
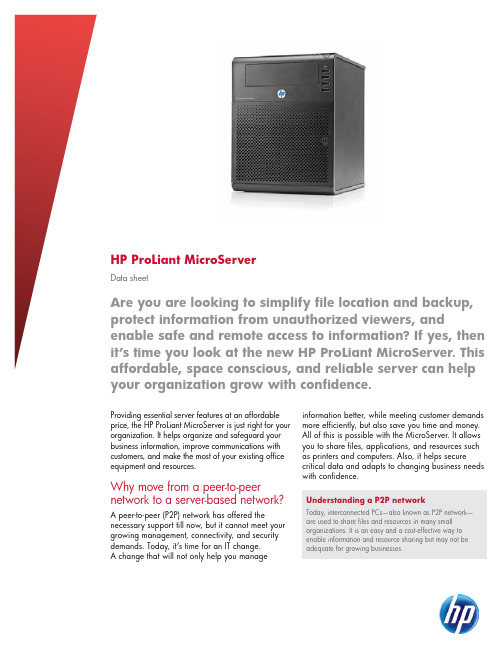
HP ProLiant MicroServerData sheetProviding essential server features at an affordable price, the HP ProLiant MicroServer is just right for your organization. It helps organize and safeguard your business information, improve communications with customers, and make the most of your existing office equipment and resources. Why move from a peer-to-peer network to a server-based network? A peer-to-peer (P2P) network has offered the necessary support till now, but it cannot meet your growing management, connectivity, and security demands. Today, it’s time for an IT change. A change that will not only help you manage information better, while meeting customer demands more efficiently, but also save you time and money. All of this is possible with the MicroServer. It allows you to share files, applications, and resources such as printers and computers. Also, it helps secure critical data and adapts to changing business needs with confidence.Are you are looking to simplify file location and backup, protect information from unauthorized viewers, and enable safe and remote access to information? If yes, then it’s time you look at the new HP ProLiant MicroServer. This affordable, space conscious, and reliable server can help your organization grow with confidence.Understanding a P2P networkToday, interconnected PCs—also known as P2P network—are used to share files and resources in many smallorganizations. It is an easy and a cost-effective way toenable information and resource sharing but may not beadequate for growing businesses.systems such as Microsoft® Windows® Server 2008 R2 Foundation, Microsoft Windows Server 2008 R2 Standard Edition, and Red Hat 5.Step up to your first server network with the MicroServerShare: Compared to a distributed P2P network of PCs, the MicroServer centralizes all files in a single location. This means that you can now work faster and with improved security for your critical information. The MicroServer enables sharing of hardware devices, streamlines management, and drives down operating costs.Secure: By centralizing company information in one location, the MicroServer lets you control access to sensitive files, including financial information and employee records. Offering support for reliable storage (RAID 1 and 0) and backups, the MicroServer protects your important data.• Packed with all the essential server features, the MicroServer is a perfect first server• Designed for growth, you can add memory, hard drives and peripherals with lesser effort• Suited for an ergonomic working environment, it offers a low acoustic level of 21 DBA• Intended for small and micro organizations—its compact design fits easily within your work space Proven HP ProLiant reliability and support• Leveraging 20+ years of server experience, HP now offers a simplified solution for small and micro businesses—HP ProLiant MicroServer.• Offering a worldwide network of HP trained service professionals—you can take advantage of HP services and support.2Technical specificationsHP ProLiant MicroServerClick here to view the HP ProLiant MicroServer video.3Get connected/go/getconnectedCurrent HP driver, support, and security alertsdelivered directly to your desktopExpandability and enhanced data security• ECC memory reduces the likelihood of memorycorruption and proactively addresses security risksto protect critical business information.• RAID 0 and RAID 1 helps prevent data lossand enhances reliability around the clock. TheMicroServer protects your data like never before.• Up to 4 LFF SATA pluggable hard disks and upto 8 GB of memory allows you to expand yourbusiness with confidence and lesser investment.HP Financial ServicesLeasing from HP Financial Services offers affordable,easy-to-understand alternatives, and enables you tomeet your IT needs without getting bogged downby a multitude of purchasing worries. In most cases,you can take advantage of one-stop shopping forfinancing of hardware, software, installation, andmaintenance services.A few options are available, including a leasearrangement with an end-of-term fair market valuepurchase option. A finance lease, where you own theIT equipment at the end of the lease period, is alsooffered. Streamlined procedures are designed to movethe process along quickly. Our basic lease agreementis just one page long.In addition to innovative financing, we also offerequipment trade-in and asset recovery programs tohelp you cost-effectively manage your IT solution fromacquisition to retirement.For more information on these services, visit:/go/hpfinancialservices© Copyright 2010 Hewlett-Packard Development Company, L.P. The information contained herein is subject to change without notice. The onlywarranties for HP products and services are set forth in the express warranty statements accompanying such products and services. Nothing hereinshould be construed as constituting an additional warranty. HP shall not be liable for technical or editorial errors or omissions contained herein.AMD is a trademark of Advanced Micro Devices, Inc. Microsoft and Windows are U.S. registered trademarks of Microsoft Corporation.Red Hat 5 is a trademark of Red Hat, Inc.4AA2-4495ENW, Created August 2010Share with colleagues。
- 1、下载文档前请自行甄别文档内容的完整性,平台不提供额外的编辑、内容补充、找答案等附加服务。
- 2、"仅部分预览"的文档,不可在线预览部分如存在完整性等问题,可反馈申请退款(可完整预览的文档不适用该条件!)。
- 3、如文档侵犯您的权益,请联系客服反馈,我们会尽快为您处理(人工客服工作时间:9:00-18:30)。
HP ProLiant BL20p第三代(G3)刀片式服务器HP是业界刀片服务器的领导者,不断推出新的刀片服务器技术。
全新的ProLiantBL20p G3是一个高性能的双路刀片服务器,可以充分满足企业级用户的需求。
BL20p G3采用了高性能的Intel 3.6GHz/800MHz Xeon处理器,带有1MB的二级缓存,并支持SAN存储功能,支持高达8GB的DDR2内存扩充,网络性能极高,带有令人惊讶的4个千兆以太网卡接口。
为了保护用户的投资,全新的BL30p G3可以与BL20p G2, BL30p, and BL40p共用基础架构组件。
用户可以灵活选择刀片服务器,并可以在相同基础架构组件中获得不同性能的服务器。
通过可选的BL20p G3光纤组件,即可升级为光纤集群运行模式。
在以光纤模式运行时,可以有效的改善系统的可用性,可以轻松扩展存储容量,并可以可靠的管理存储系统。
HP具有丰富的SAN和NAS产品供客户选择。
采用双端口的2GB速率的光纤卡为BL20p G3与HP存储设备提供高速的连接链路。
高性能•Intel®Xeon™处理器,支持扩展内存64位技术,采用800MHz前端数据总线•高达3.6 GHz处理器带有1MB二级缓存•400MHz DDR-II内存,4个内存插槽支持多达8GB内存•Ultra 320 Smart Array 6i, 可选128MB带有电池保护功能的缓存管理性•支持远程管理功能iLO可选配件•BL20p G3光纤通道适配卡,支持冗余SAN连接模式全新设计•四个集成的10/100/1000网卡产品编号说明368328-B21标配一个Intel Xeon™ 3.6GHz处理器(支持2个), 1MB二级回写缓存,1024MB内存361411-B21标配两个Intel Xeon™ 3.6GHz处理器(支持2个), 1MB二级回写缓存,2048MB内存,以及双端口光纤通道适配器347955-B21标配一个Intel Xeon™ 3.4GHz处理器(支持2个), 1MB二级回写缓存,1024MB内存347954-B21标配两个Intel Xeon™ 3.4GHz处理器(支持2个), 1MB二级回写缓存,2048MB内存,以及双端口光纤通道适配器347957-B21标配一个Intel Xeon™ 3.2GHz处理器(支持2个), 1MB二级回写缓存,1024MB内存347956-B21标配两个Intel Xeon™ 3.2GHz处理器(支持2个), 1MB二级回写缓存,2048MB内存,以及双端口光纤通道适配器标准配置(刀片式服务器)ProLiant BL20p G3刀片式服务器处理器Intel Xeon™处理器3.6 GHz/800 MHz–1MBIntel Xeon™处理器3.4 GHz/800 MHz–1MBIntel Xeon™处理器3.2 GHz/800 MHz–1MB升级能力可升级至双处理器高速缓存内存1MB二级高速缓存芯片组Intel E7520芯片组内存标配1024 MB或2048 MB双路交叉存取PC3200 DDR2 SDRAM, 工作频率400MHz (根据机型而定)最大8GB注:内存必须成对安装。
网络适配器总计5个网络适配器:4个NC7781 PCI-X千兆网卡(内嵌式), 支持WOL和PXE1个10/100 iLO网卡,专用于管理注:要利用全部4个网卡,必须使用带增强背板的BL p-class刀片式服务器机箱(281404-B22)可管理性集成的Lights-Out (iLO) 高级管理软件包(ASIC在系统板上)内部存储容量硬盘驱动器标配不提供最大内部存储293.6GB (内置驱动器盒) (2 x 146.8 GB Wide Ultra320, 1"驱动器)BL20p G3上的光纤通道将ProLiant BL20p G3连接到SAN需要以下部件:1.ProLiant BL 20p G3, 安装有双端口光纤通道适配器•BL20p G3双端口光纤通道适配器兼容新的ProLiant BL20p G3 (不能用于ProLiant BL20pG2或BL30p)•每个双端口光纤通道夹层卡为每个刀片式服务器提供冗余光纤通道连接•支持至多2Gb/s并向后兼容现有的1Gb/s的光纤通道设备•使用QLogic芯片组•套件包括2个小型可插拔收发器,带有LC连接器,用于安装到接线板2(Patch Panel 2)或GbE2互连交换机中(带有GbE2存储连接套件)•可以订购安装有双端口光纤通道适配器的ProLiant BL20p G3, 也可以单独订购双端口光纤通道适配器套件(选件)2A.BL p-Class接线板2 (带有光纤通道端口)互连选件•支持以太网和光纤通道信号传输•以太网信号从RJ-45接线板2后端输出;光纤通道信号从RJ-45接线板2前端输出每个RJ-45接线板2的前端有8个光纤通道小型可插拔(SPF)收发器插槽(每个刀片式服务器机箱配置有16个光纤通道连接); 用于插入BL20p G3双端口光纤通道包含的SPF收发器或2B.BL p-Class C-GbE2或F-GbE2互连套件,以及可选的GbE2存储连接套件•支持局域网信号整合和BL20p G3光纤通道信号的传输•局域网的以太网信号和SAN光纤通道信号通过专用的模块化互连模块,从GbE2互连交换机(带有GbE2存储连接套件选件)的后端输出•每个GbE2互连交换机的前端有8个光纤通道小型可插拔(SPF)收发器插槽(每个刀片式服务器机箱配置有16个光纤通道插槽)•BL20p G3双端口光纤通道适配器包含SPF收发器以及3.兼容SAN (存储局域网络)•经过最优化,适用于StorageWorks阵列:HSG80 (MA8000, EMA 12000, EMA 16000); Enterprise EVA 5000 V2; EVA 3000; XP48, 128, 512, 1024;HP StorageWorks MSA 1000•兼容指定的第三方SAN (详情请参阅刀片存储网站:/products/servers/proliant-bl/p-class/storage.html)扩展插槽没有PCI插槽,所有特性均为集成特性I/O线缆连接器:(2)个USB端口,(1)个视频端口,(1)个iLO端口,以及(1)个内核调试端口所有3.2GHz机型均配有(1)根线缆,用于连接刀片式服务器前端,辅助第1个刀片式服务器进行部署和故障排除此QuickSpec的选件部分列出了经过测试的USB设备(键盘,鼠标,软驱)诊断线缆连接器(1)个iLO端口和(1)个内核调试端口每个刀片式服务器机箱配有2根诊断线缆,用于连接刀片式服务器前端,辅助进行故障排除标准配置(刀片式服务器机箱和互连设备) (续)ProLiant BL p-Class刀片式服务器机箱和互连设备ProLiant BL p-Class刀片式服务器机箱6U (10.5英寸), 19英寸宽可容纳多达8个ProLiant BL20p G3刀片式服务器每个刀片式服务器机箱有10个插槽,其中8个插槽用于安装刀片式服务器2个外侧托架用于互连模块(RJ-45接线板, RJ-45接线板2, GbE互连交换机,或GbE2互连交换机)刀片式服务器插入刀片式服务器机箱背板内,以提供电力和数据连接注:根据所选择的BL20p G3机型,可能需要带增强背板组件的ProLiant BL p-Class刀片式服务器机箱。
注:刀片式服务器机箱升级套件(354100-B21)包含增强背板组件,并可现场升级刀片机箱,支持特定的BL20p G3机型,为机箱提供一个物理iLO端口。
刀片式服务器管理模块与每个BL p-Class 6U刀片式服务器机箱后端连接,用于报告所有服务器的事件,并提供资产和清单信息。
ProLiant BL p-Class电源要求冗余200V-240V AC, 30安培单相,适用于北美和全球冗余380-415V 20A三相5线,全球冗余-48VDC±10%ProLiant BL p-Class互连交换机选件根据BL20p、BL20p G2、BL20p G3和BL40p服务器的组合情况,互连交换机可将每个服务器机箱的网络电缆最多减少为原来的32分之一。
每个互连(每个套件包括两个交换机)交换机(每个机箱2个)可将多达16个内部服务器网络(网卡)端口减少为6个外部端口(4个位于架式互连设备的后端,2个位于交换机的前端面板)。
(每个BL p-Class刀片式服务器这样,共计可为每个服务器机箱提供12个外部端口。
机箱需要两个互连交换机GbE2互连套件(C-GbE2和F-GbE2)针对需要1000 Mbps网络适配器整合(千兆以太网),支持高级网络特性、包括高达第7层交换,BL20p G3光纤或两个RJ-45接线板)通道转接端口,以及10千兆以太网带宽连接的应用。
未来的GbE2互连交换机升级选件支持第3-7层交换和10千兆以太网扩展。
•ProLiant BL p-Class F-GbE2互连套件包括2个GbE2互连交换机和2个QuadSX互连模块,为每个刀片式服务器机箱提供八个(8) LC 1000 SX和四个(4)RJ-45 10/100/1000 T/TX/T外部端口。
•ProLiant BL p-Class C-GbE2互连套件包括2个GbE2互连交换机和2个QuadT2互连模块,为每个刀片式服务器机箱提供十二个(12)RJ-45 10/100/1000 T/TX/T外部端口。
•使用C-GbE2或F-GbE2互连套件时,BL20p G3光纤通道端口需要可选的ProLiant BL p-Class GbE2存储连接套件(321745-B21)。
GbE互连套件(C-GbE和F-GbE)适用于需要100Mbps网络适配器(快速以太网)整合的应用。
•ProLiant BL p-Class F-GbE互连套件包括2个GbE互连交换机和2个DualTSX互连模块,为每个刀片式服务器机箱提供四个(4) LC 1000 SX和八个(8) RJ-45 10/100 T/TX外部端口。
•ProLiant BL p-Class C-GbE互连交换机包括2个GbE互连交换机和2个QuadT互连模块,为每个刀片式服务器机箱提供四个(4)RJ-45 10/100/1000 T/TX/T和八个(8) RJ-45 10/100 T/TX外部端口。
还包括(每个互连交换机):•一个(1) RS-232 DB-9前面板带外管理端口•冗余交叉连接(crosslink)端口用于连接2个互连交换机•冗余电源输入和板载冗余风扇•利用配置保持功能实现热插拔和热拆卸,无需布线/重新布线•开机、管理以及每个端口状态和速度LED指示器•复位/电源按钮瞬间切换•HP ProLiant BL互连交换机管理程序和用户文档记录CD•全部预先配置,支持快速部署和直接运行ProLiant BL互连交换机管理系统和工具:功能全面的基于Web和可编写脚本命令行(CLI)的界面、密码保护的多级用户帐户、Telnet、SNMP、BootP客户端、端口镜像、基于端口的VLAN和VLAN标记、兼容EtherChannel的多端口中继、简单网络时间协议、生成结构(spanning tree)协议、广播/多点传送暴控制、流控制、人性化可读取/可写入配置文档、TFTP客户端、IP地址安全限制、速度和双向模式的自动MDI/MDIX、自动协调和自动察觉,等等。
