海尔服务手册
海尔XPB70/80/85-0713S服务手册
653、、、3产安、品装安外概要安外要点安外和新外特线点
53、、3安、装安外要安外点安外 外 线
7、定时器时序表
洗涤定时器时间程序
0°
15min±2min
a
S1
b
17s±12s
a S2
b
a1 a2 b1
a a3 a4
S3
b
b3 b4
310°
洗涤定时器
图9
4
853、、、3常安、见装 安外故要 安外障点 安外分析外 线
2 1
限位
图14
13
10、零部件分解图
1
2
3
4
6
5
7
8
15 9
10
14
16
11
12 17
30 31
35 36
29
32 33 34
37 39
38
43 42 44
48
45 46
40
47
41
49
50
51
19
52
20
21 23
24 25 26
27 28
22
14
53
55
57 59 58
56-1 56-2
62
顺序拆卸后,再安装新的轴承座。 按9.4条的方法卸下脱水桶 用剪钳剪断轴承座内衬卡爪并取出 安装新的轴承座及轴承座内衬 轴承座为嵌入件,必须将轴承座内衬的爪部对准桶的孔后压入,应使用合适的工
具,要在四周均匀的施加压力 嵌入轴承座后,从双连桶外侧确认爪部是否安装到位(图13)
正确
错误
图13
12
9.8 制动片的粘贴 9.8.1 制动片的种类
海尔 LW-139A 立卧组合冷冻微冻柜 服务手册

下载网址:技术培训/支持-培训资料-冷柜-产品知识-LW-139A 服务手册技术支持邮箱:zhlgkjsb@LW-139A立卧组合冷冻微冻柜服务手册型号:LW-139A目录1.产品特点介绍 (3)2.产品外观结构及内部结构特征图 (3)3.产品部件结构名称 (4)4.产品改进介绍 (4)5.产品详细技术数据 (4)6.产品使用及日常维护保养知识 (5)7.电路图及电气连接示意图 (6)8.工作原理及参数………………………………………………………………………………..7-89.产品的安装及维护和维修 (9)10.产品爆炸图 (9)11.爆炸图明细…………………………………………………………………………….……10-111.1产品功能以及特点① 汇集立式冷柜和卧式冷柜结构优点于一身国际首创,已申请国际PCT专利,外型美观大方。
② 上箱、下箱独立设计,食品存取方便。
③ 产品满足ST气候类型要求,下箱微冻设计,箱内温度≤-5℃,适用于肉类、鱼类食品的短期保鲜贮存;上箱具有冷冻功能,箱内温度≤-18℃,适用于冷冻食品的长期储存,保持食品原有营养成份及风味。
1.2产品型号含义LW - 139 A第一次改进产品此型号冷柜的有效容积;立卧组合柜;二、产品外观结构及内部结构特征图LW-139A外观图LW-139A部件结构名称四、产品改进介绍本产品是在出关美国产品LW145AW的基础上,进行了升级改进,更适合在国内使用。
1、制冷剂更改为R600a;2、适用于ST气候类型,并增加防露管,防凝露。
3、采用国内三扁插头,电源线有CCC证书。
4、压机更改为L88CY,温控器使用WFPFE30L-L防爆温控器5、增加机舱护罩,压机底板喷粉避免小孩划伤六、产品使用及日常维护保养知识6.1 产品使用安装方面和日常使用中维护关键保养知识均同普通冷柜 6.2 特殊点说明:A、LW-139A 底脚为不可调,附图,B、下抽屉取出后的安装方法:先将抽屉盒放置到下门体的滑竿上,抽屉盒放平稳,然后以滑竿上的滑轮为接触点,沿着滑道推入箱体中。
青岛海尔特种电冰柜 BC BD-379HB 379HBN 379HBN(家电下乡)冷冻柜售后服务手册
下载网址:技术培训/支持-培训资料-冷柜-产品知识-冷冻柜系列技术支持邮箱:zhlgkjsb@冷冻柜售后服务手册型号:BC/BD-379HB/379HBN/379HBN(家电下乡)手册编号:LG081225J001V0母本型号: BC/BD-379H手册编号:青岛海尔特种电冰柜有限公司2008.12.25目录――――――――――――――――――――――――――1.目录------------------------------------------------------------------------------------12.产品型号字母含义------------------------------------------------------------------23.产品外观特征------------------------------------------------------------------------24.与母本型号差异---------------------------------------------------------------------35.制冷循环透视图---------------------------------------------------------------------42.产品型号字母含义 (1)BC/BD-379HB(1)BC/BD-379HBN3.产品外观特征4.本型号差异4.1. BC/BD-379HB母本型号为BC/BD-379H,是BC/BD-379H的能耗提升。
与母本型号差异为,能耗贴不同,其它完全相同。
具体为:能耗贴更换为BC/BD-379HB 能耗贴,改后的能耗贴专用号为0070507951。
4.2. BC/BD-379HBN母本型号为BC/BD-379H。
是BC/BD-379H的能耗提升。
与母本型号差异为,能耗贴不同,其它完全相同。
海尔电器洗衣机用户手册.pdf_1702007001.034938说明书

1) 0:15 - 0:15 2) 0,050 - 0,050 3) 4,0 - 4,0
1 Suitable programme for running at night: it takes longer, but is extremely quiet.
1
3. Close the lid of the dispenser for rinse aid. a The lid clicks into position.
9001642829 (020407) SBH4EAX14E
*9001642829*
How to use your appliance
1. Load the tableware.
tate freely.
Only clean tableware that is suitable for dish-
2. Add detergent.
Hardness mmol/l range
Setting value
Medium Medium Medium Hard Hard Hard
Soft
0 - 1.1
H00
Soft
1.2 - 1.4 H01
1.5 - 1.8 1.9 - 2.1 2.2 - 2.9 3.0 - 3.7 3.8 - 5.4 5.5 - 8.9
Programme
1) Duration [h:min] 2) Energy [kWh] 3) Water [l]
Intensive 70°
1) 2:05 - 2:15 2) 1,300 - 1,400 3) 11,5 - 14,0
Auto 45-65°
1) 1:40 - 2:45 2) 0,900 - 1,500 3) 7,0 - 15,5
海尔服务管理-Haier客户服务工作手册

其它广告创意及制作:创意小时+ (实际外付成本×17.65)+8.7%税
定期服务项目及工作时间
项目
工作内容 提交时间
会议记录
会后48小时
书面报告(重要会议)
每周工作进程 截止至上周五各项工作进展动态清单
每周一
媒体监测 (200家平面媒体,网络行业广告剪报,2000年3月15日开始监测,4月开始提供下列报告)
Haier客户服务工作手册
目录
客户服务原则 服务范围界定 工作程序与流程 工作时间与收费标准 定期服务项目及工作时间 常用工作表
2020/11/8
DDB客户服务原则
☺ 客户是合作伙伴,长期合作,共同发展 ☺ 公司高层垂直管理Haier客户服务工作 ☺ 专题客户服务组提供随时随地联络与专业服务 ☺ 具有服务国际客户经验的国际、国内专业人才负责
广告工作时间
在获得客户书面工作布署之后,恒美承诺按以下时间表完成工作:
工作项目
媒体 媒体策划方案
媒体排期表/全国 媒体排期表/地方 平面设计与出片制作:
工作日期/天
5-10个工作日 5个工作日 2个工作日
创意概念 文案+平面设计稿 完稿 分色打样
软片
广播及TVC创意: 紧急情况下DDB将配合客户要求加急工作
2020/11/8
工作程序
文件存档管理 所有Haier批准签字的创意版权归Haier所有。DDB应将广告涉及的模特形象、
租片等商务法律文件整理,并提交Haier存档。 DDB对所有Haier签字确认的创意进行复制,交客户存档。 DDB保存所有会议记录和经Haier签字确认的文件(包括媒体计划,创意设计
谢谢大家!
海尔星级服务手册

海尔星级服务手册Contents 目录一.顾客服务文化篇1)服务理念 2)服务模式二.服务标准及相关案例篇1)随叫随到2)到了就好3)创造感动4)信息增值三.星级服务规范篇1) 顾客服务模式2) 服装仪容标准3) 上门服务规范4) 服务规范用语及禁语四.服务技巧及相关法律法规篇1)三包规定 2)消法海尔集团商流本部顾客服务推进部五. 服务创新篇1) 全程管家3652) 神秘顾客,服务暗访1、服务理念, 海尔人就是要创造感动创造感动~就是对工作充满激情,就是不断满足用户个性化需求,就是用“心”工作~对产品用心~对用户用心。
海尔人一直在创造感动~对于顾客服务人员来说更应如此~用服务创造感动~用感动赢取定单,最终赢取用户的忠诚度,创造海尔顾客服务市场第一美誉度,正如一海尔顾客服务文化篇国际著名咨询公司兰德公司专家所言:“在海尔国际化进程中,一定会以一个不断创造感动、极具凝聚力和创新变革的品牌形象,启动美好未来!”工厂制造产品~心灵创造品牌。
带走您的烦恼~留下我的真诚。
, 用户永远是对的1995年,海尔提出星级服务,宗旨是用户永远是对的.即用户就是企业的衣食父母,只要能够不断给用户提供最满意的产品和服务,用户就会给企业带来做好的效益.2、服务模式 , 您的满意就是我们的工作标准在海尔,技术检验合格的产品不一定是合格产品,只, 五个一有用户满意的产品才是合格产品.因为用户不满意,产品一张服务名片卖不出去,企业就没有利润可言.所以,用户的满意就是一副鞋套海尔的工作标准,不能对用户说:“不”. 一块垫布一块抹布一站式产品通检服务, 用户的抱怨是我们的最好礼物用户抱怨的内容,正是我们工作改善的方向;如果能及时消除这些抱怨,就是真正增加了企业的资产., 一站式产品通检服务: , 对内“一票到底”的流程,“对外一站”到位的服务人员为用户提供一个产品的售后服务完毕后~不但要对此产品进行全面的通检、维护~同时主动对用服务户家中其它海尔家电问寒问暖~对用户提出的需求、建议一票到底的跟踪解决~直到用户满意。
海尔洗衣机用户手册说明书

12 1-25503A
SCREW TSEI
13 1-11533
HEX NUT
14 EAC0100G63A
PLASTIC COVER ASSY M2
15 1-22323A
SELF-TAPPING SCREW
16 1-9841
WASHER,PLAIN d6 ZINC.
17 1-9641
WASHER
Désignation
1
X
M12X35 8.8 A2J
1
X
SONAR VERSION
1
X
COBERT. INF. GRUPO MIS. TORNILLO AUTORR. Transformador 100/230V Transformador Transformador 230/230V Transformador 100/230V TAPÓN CASQUETE NEGRO TORNILLOS M5
1 EAA0263G07A
J-TYPE BRAKE PEDAL
1 EAA0372G98A
ALU BRAKE PEDAL 2 SWICTHES
2 EAC0060G00A
VIBRATORY SYSTEM HOLES CUP
3 EAC0060G02A
FLANGES PROTECTION
4 EAM0006G01A
LCBS-2-6-01 3
Entretoise
Distanciador
,M4X10 M/F 1
VIS CB RONDELLE
Tornillo ARANDELA
M4 x 6 1
UNI 7687
Ø 4,2 1
X
X
X
X
海尔 SCD-189GB 209GB 229GB 卧式透明门冷藏冷冻柜 服务手册

下载网址:技术培训/支持-培训资料-冷柜-产品知识-SCD系列技术支持邮箱:******************卧式透明门冷藏冷冻柜服务手册型号:SCD-189GB/209GB/229GB手册编号(专用号):0070506305一、产品功能及特点:该系列冷柜使用高抗热反射钢化玻璃门,展示效果佳,冷柜分为冷藏微冻室、冷冻室。
通过一个温控器控制制冷系统,使冷藏微冻室、冷冻室达到所需要储藏温度,ST气候类型设计及一机二室三温多用途设计。
产品特点1.冷柜分为冷藏微冻室、冷冻室,一机二室三温多用途设计,为用户提供全新功能!2.机仓底部带双排丝管冷凝器,散热高效,外观整洁美观。
3.高抗热反射钢化玻璃门,展示效果佳,保温性能强,坚固耐用。
4.玻璃门上带门锁,可靠的按纽不锈钢门锁,坚固耐用,使用方便、安全。
5.内胆采用扣胆结构,外观严实美观,不易渗水。
6.本系列冷柜适合在18℃~38℃的环境下使用,用来冷藏或贮存冷冻食品。
7.底置定向脚轮、万向脚轮相结合,牢固可靠,可方便推动。
9.独特的旋转式排水塞设计,化霜水可方便排除。
10. 全无氟设计,更节能。
更环保。
产品型号含义:SCD-189GB/209GB/229GBS – 玻璃透明门冷柜CD – 冷藏冷冻双温柜189/209/229 - 总有效容积为189L/209L/229LG - 无氟B – 改进序号,第二次改进。
二、产品外观图三、产品结构特征图:四、 产品改进及使用说明4.1 产品改进说明该系列冷柜是在06年无氟产品SCD-189GA/209GA/229GA的基础上进行改进,重新进行系统匹配,优化性能,极好地满足了用户的需求。
4.2温控原理:采用机械温控,通过温控器感温探头感受内胆下端(蒸发器倒数1、2圈之间)温度,来控制压缩机的开停(冷开:-24℃;冷关:-31℃),从而使柜内温度达到设定温度。
4.3接通电源:接通电源进行试运行,若半小时后有明显降温感觉,表示冷柜工作正常。
海尔集团的企业文化 员工服务手册

25万份精华管理资料,2万多集管理视频讲座25万份精华管理资料,2万多集管理视频讲座25万份精华管理资料,2万多集管理视频讲座25万份精华管理资料,2万多集管理视频讲座精品资料网(二服务标准及相关案例篇25万份精华管理资料,2万多集管理视频讲座25万份精华管理资料,2万多集管理视频讲座25万份精华管理资料,2万多集管理视频讲座精品资料网(25万份精华管理资料,2万多集管理视频讲座三星级服务规范篇25万份精华管理资料,2万多集管理视频讲座25万份精华管理资料,2万多集管理视频讲座精品资料网()专业提供企管培训资料25万份精华管理资料,2万多集管理视频讲座4.4服装仪容检查标准 4.5服务人员的十大基本用语☺您好,给您添麻烦了☺请您稍候☺对不起,让您久等了☺真对不起☺是的,我知道了☺能让我听一下您的意见吗?☺请您原谅☺谢谢您☺您看这样可以吗?☺再见精品资料网()专业提供企管培训资料25万份精华管理资料,2万多集管理视频讲座四服务技巧及相关法律法规篇)专业提供企管培训资料25万份精华管理资料,2万多集管理视频讲座25万份精华管理资料,2万多集管理视频讲座25万份精华管理资料,2万多集管理视频讲座25万份精华管理资料,2万多集管理视频讲座25万份精华管理资料,2万多集管理视频讲座25万份精华管理资料,2万多集管理视频讲座精品资料网(25万份精华管理资料,2万多集管理视频讲座五 服务创新篇海尔星级服务的每次升级和创新都走在了同行业的前列。
我们认为服务也是营销,只有通过持续性推出亲情化的、能够满足用户潜在需求的服务新举措,才能拉开与竞争对手的距离,形成差异化的服务,提升海尔服务形象,最终创造用户感动,实现与用户的零距离。
25万份精华管理资料,2万多集管理视频讲座精品资料网()25万份精华管理资料,2万多集管理视频讲座精品资料网()专业提供企管培训资料。
海尔 SC-260 400(EMS) 服务手册
下载网址:技术培训/支持--产品知识-SC系列技术支持邮箱:******************立式冷藏柜服务手册型号:SC-260(EMS)/400(EMS)手册编号:0070505917一、产品功能及特点1.1 产品功能以及特点功能:SC-260(EMS)/400(EMS)产品分别是在SC-260/400产品基础上进行改进:增加EMS-55控制器,取代传统的温控器;增加门磁簧开关,增加压缩机排气管感温探头和箱内感温探头。
特点:1.中空透明玻璃门,透明度高,保温性能好,耐冲击;2.箱内温度0~7.2℃,温度可调节;3.直立式外观,可调搁物架,存取食物方便;4.柜内照明,贮藏物品更清晰;5.箱内采用风冷冷却,使柜内温度更均匀;6.大灯箱,展示效果强,两侧可展示品牌图案,广告效果更佳;7.前护罩带有上吹风结构,更有效的防止玻璃门凝露;8.外挂式复合板蒸发器,恒温保湿效果好。
9.EMS电子控温,自动保持柜内温度达到要求。
10.门磁簧开关控制内风机开停,有效的解决开门噪音大。
11.EMS自动检测柜子、系统、零部件的故障,并报警维修。
12.压缩机、风机分时启动,开门超时报警,非正常营业状态调温等功能可高效的实现节能。
1.2 冷柜型号含义SC-260(EMS)/400(EMS)SC:S- “商用”汉语拼音缩写,C-“冷藏柜”汉语拼音缩写;260/400:此型号冷柜的总容积;EMS:采用EMS电子控温。
二、产品外观结构及内部结构特征图三、产品部件结构名称SC-260(EMS)/400(EMS)结构图四、产品使用说明及产品改进介绍本产品是在SC-260/400基础上,更改如下:1.去掉温控器,换成EMS控制器,自动控制箱内温度,无需人为调整。
2.增加与EMS配套的门磁簧开关,开门,内风机停;关门,内风机运行,并对开门状态进行显示,开门超时将报警、自动切断电源。
3.增加与EMS配套的压机冷凝器感温探头,对压机的排气温度实时监控。
海尔冰箱用户手册说明书
Seagate FireCuda 游戏扩展坞用户手册单击这里以访问本文档的最新在线版本。
您还将找到最新的内容,以及可扩展的说明、更轻松的导航和搜索功能。
. . . . . . . . . . . . . . . . . . . . . . . . . . . . . . . . . . . . . . . . . . . . . . . . . . . . . . . . . . . . . . . . . . . . . . . . . . . . . . . . . . . . . . . .. . . . . . . . . . . . . . . . . . . . . . . . . . . . . . . . . . . . . . . . . . . . . . . . . . . . . . . . . . . . . . . . . . . . . . . . . . . . . . . . . . . . . . . . . . . . . . . . . . . . . . . . . . . . . . . . . . . . . . . . . .. . . . . . . . . . . . . . . . . . . . . . . . . . . . . . . . . . . . . . . . . . . . . . . . . . . . . . . . . . . . . . . . . . . . . . . . . . . . . . . . . . . . . . . . . . . . . . . . . . . . . . . . . . . . . . . . . . . . . . . . . .. . . . . . . . . . . . . . . . . . . . . . . . . . . . . . . . . . . . . . . . . . . . . . . . . . . . . . . . . . . . . . . . . . . . . . . . . . . . . . . . . . . . . . . . . . . . . . . . . . . . . . . . . . . . . . . . . . . . . . . . . .. . . . . . . . . . . . . . . . . . . . . . . . . . . . . . . . . . . . . . . . . . . . . . . . . . . . . . . . . . . . . . . . . . . . . . . . . . . . . . . . . . . . . . . . . . . . . . . . . . . . . . . . . . . . . . . . . . . . . . . . . . . . . . . . . . . . . . . . . . . . . . . . . . . . . . . . . . . . . . . . . . . . . . . . . . . . . . . . . . . . . . . . . . . . . . . . . . . . . . . . . . . . . . . . . . . . .. . . . . . . . . . . . . . . . . . . . . . . . . . . . . . . . . . . . . . . . . . . . . . . . . . . . . . . . . . . . . . . . . . . . . . . . . . . . . . . . . . . . . . . . . . . . . . . . . . . . . . . . . . . . . . . . . . . . . . . . . .. . . . . . . . . . . . . . . . . . . . . . . . . . . . . . . . . . . . . . . . . . . . . . . . . . . . . . . . . . . . . . . . . . . . . . . . . . . . . . . . . . . . . . . . . . . . . . . . . . . . . . . . . . . . . . . . . . . . . . . . . .. . . . . . . . . . . . . . . . . . . . . . . . . . . . . . . . . . . . . . . . . . . . . . . . . . . . . . . . . . . . . . . . . . . . . . . . . . . . . . . . . . . . . . . . . . . . . . . . . . . . . . . . . . . . . . . . . . . . . . . . . . . . . . . . . . . . . . . . . . . . . . . . . . . . . . . . . . . . . . . . . . . . . . . . . . . . . . . . . . . . . . . . . . . . . . . . . . . . . . . . . . . . . . . . . . . . .. . . . . . . . . . . . . . . . . . . . . . . . . . . . . . . . . . . . . . . . . . . . . . . . . . . . . . . . . . . . . . . . . . . . . . . . . . . . . . . . . . . . . . . . . . . . . . . . . . . . . . . . . . . . . . . . . . . . . . . . . .. . . . . . . . . . . . . . . . . . . . . . . . . . . . . . . . . . . . . . . . . . . . . . . . . . . . . . . . . . . . . . . . . . . . . . . . . . . . . . . . . . . . . . . . . . . . . . . . . . . . . . . . . . . . . . . . . . . . . . . . . .. . . . . . . . . . . . . . . . . . . . . . . . . . . . . . . . . . . . . . . . . . . . . . . . . . . . . . . . . . . . . . . . . . . . . . . . . . . . . . . . . . . . . . . . . . . . . . . . . . . . . . . . . . . . . . . . . . . . . . . . . . . . . . . . . . . . . . . . . . . . . . . . . . . . . . . . . . . . . . . . . . . . . . . . . . . . . . . . . . . . . . . . . . . . . . . . . . . . . . . . . . . . . . . . . . . . .. . . . . . . . . . . . . . . . . . . . . . . . . . . . . . . . . . . . . . . . . . . . . . . . . . . . . . . . . . . . . . . . . . . . . . . . . . . . . . . . . . . . . . . . . . . . . . . . . . . . . . . . . . . . . . . . . . . . . . . . . .. . . . . . . . . . . . . . . . . . . . . . . . . . . . . . . . . . . . . . . . . . . . . . . . . . . . . . . . . . . . . . . . . . . . . . . . . . . . . . . . . . . . . . . . . . . . . . . . . . . . . . . . . . . . . . . . . . . . . . . . . . . . . . . . . . . . . . . . . . . . . . . . . . . . . . . . . . . . . . . . . . . . . . . . . . . . . . . . . . . . . . . . . . . . . . . . . . . . . . . . . . . . . . . . . . . . .. . . . . . . . . . . . . . . . . . . . . . . . . . . . . . . . . . . . . . . . . . . . . . . . . . . . . . . . . . . . . . . . . . . . . . . . . . . . . . . . . . . . . . . . . . . . . . . . . . . . . . . . . . . . . . . . . . . . . . . . . .. . . . . . . . . . . . . . . . . . . . . . . . . . . . . . . . . . . . . . . . . . . . . . . . . . . . . . . . . . . . . . . . . . . . . . . . . . . . . . . . . . . . . . . . . . . Contents1欢迎使用包装内容最低系统要求视图2使用入门连接电源连接到计算机设置 FireCuda 游戏扩展坞3使用 Toolkit 自定义 RGB 以及更多内容自定义 RGB 颜色设置启动备份计划(仅限 Windows )设置镜像文件夹4格式化和分区(可选)选择文件系统格式格式化说明5从您的计算机安全移除设备Windows Mac 6常见问题解答. . . . . . . . . . . . . . . . . . . . . . . . . . . . . . . . . . . . . . . . . . . . . . . . . . . . . . . . . . . . . . . . . . . . . . . . . . . . . . . . . . . . . . . . . . . . . . . . . . . . . . . . . . . . . . . . . . 端口. . . . . . . . . . . . . . . . . . . . . . . . . . . . . . . . . . . . . . . . . . . . . . . . . . . . . . . . . . . . . . . . . . . . . . . . . . . . . . . . . . . . . . . . . . . . . . . . . . . . . . . . . . . . . . . . . . 操作系统. . . . . . . . . . . . . . . . . . . . . . . . . . . . . . . . . . . . . . . . . . . . . . . . . . . . . . . . . . . . . . . . . . . . . . . . . . . . . . . . . . . . . . . . . . . . . . . . . . . . . . . . . . . . . . . . . . 最低可用磁盘空间:. . . . . . . . . . . . . . . . . . . . . . . . . . . . . . . . . . . . . . . . . . . . . . . . . . . . . . . . . . . . . . . . . . . . . . . . . . . . . . . . . . . . . . . . . . . . . . . . . . . . . . . . . . . . . . . . . . 前面. . . . . . . . . . . . . . . . . . . . . . . . . . . . . . . . . . . . . . . . . . . . . . . . . . . . . . . . . . . . . . . . . . . . . . . . . . . . . . . . . . . . . . . . . . . . . . . . . . . . . . . . . . . . . . . . . . 上一步. . . . . . . . . . . . . . . . . . . . . . . . . . . . . . . . . . . . . . . . . . . . . . . . . . . . . . . . . . . . . . . . . . . . . . . . . . . . . . . . . . . . . . . . . . . . . . . . . . . . . . . . . . . . . . . . . . 在这里开始. . . . . . . . . . . . . . . . . . . . . . . . . . . . . . . . . . . . . . . . . . . . . . . . . . . . . . . . . . . . . . . . . . . . . . . . . . . . . . . . . . . . . . . . . . . . . . . . . . . . . . . . . . . . . . . . . . 注册您的设备. . . . . . . . . . . . . . . . . . . . . . . . . . . . . . . . . . . . . . . . . . . . . . . . . . . . . . . . . . . . . . . . . . . . . . . . . . . . . . . . . . . . . . . . . . . . . . . . . . . . . . . . . . . . . . . . . . 下载 Toolkit . . . . . . . . . . . . . . . . . . . . . . . . . . . . . . . . . . . . . . . . . . . . . . . . . . . . . . . . . . . . . . . . . . . . . . . . . . . . . . . . . . . . . . . . . . . . . . . . . . . . . . . . . . . . . . . . . . 安装 Toolkit . . . . . . . . . . . . . . . . . . . . . . . . . . . . . . . . . . . . . . . . . . . . . . . . . . . . . . . . . . . . . . . . . . . . . . . . . . . . . . . . . . . . . . . . . . . . . . . . . . . . . . . . . . . . . . . . . . 同时兼容 Windows 和 Mac . . . . . . . . . . . . . . . . . . . . . . . . . . . . . . . . . . . . . . . . . . . . . . . . . . . . . . . . . . . . . . . . . . . . . . . . . . . . . . . . . . . . . . . . . . . . . . . . . . . . . . . . . . . . . . . . . . 针对 Windows 优化性能. . . . . . . . . . . . . . . . . . . . . . . . . . . . . . . . . . . . . . . . . . . . . . . . . . . . . . . . . . . . . . . . . . . . . . . . . . . . . . . . . . . . . . . . . . . . . . . . . . . . . . . . . . . . . . . . . . 针对 macOS 优化性能. . . . . . . . . . . . . . . . . . . . . . . . . . . . . . . . . . . . . . . . . . . . . . . . . . . . . . . . . . . . . . . . . . . . . . . . . . . . . . . . . . . . . . . . . . . . . . . . . . . . . . . . . . . . . . . . . . 了解更多. . . . . . . . . . . . . . . . . . . . . . . . . . . . . . . . . . . . . . . . . . . . . . . . . . . . . . . . . . . . . . . . . . . . . . . . . . . . . . . . . . . . . . . . . . . . . . . . . . . . . . . . . . . . . . . . . . 通过 Finder 窗口退出. . . . . . . . . . . . . . . . . . . . . . . . . . . . . . . . . . . . . . . . . . . . . . . . . . . . . . . . . . . . . . . . . . . . . . . . . . . . . . . . . . . . . . . . . . . . . . . . . . . . . . . . . . . . . . . . . . 通过桌面退出444444445667889991111111112121212121313141414141415. . . . . . . . . . . . . . . . . . . . . . . . . . . . . . . . . . . . . . . . . . . . . . . . . . . . . . . . . . . . . . . . . . . . . . . . . . . . . . . . . . . . . . . . . . . . . . . . . . . . . . . . . . . . . . . . . . . . . . . . . . . . . . . . . . . . . . . . . . . . . . . . . . . . . . . . . . . . . . . . . . . . . . . . . . . . . . . . . . . . . . . . . . . . . . . . . . . . . . . . . . . . . . . . . . . . . . . . . . . . . . . . . . . . . . . . . . . . . .. . . . . . . . . . . . . . . . . . . . . . . . . . . . . . . . . . . . . . . . . . . . . . . . . . . . . . . . . . . . . . . . . . . . . . . . . . . . . . . . . . . . . . . . . . . . . . . . . . . . . . . . . . . . . . . . . . . . . . . . . .. . . . . . . . . . . . . . . . . . . . . . . . . . . . . . . . . . . . . . . . . . . . . . . . . . . . . . . . . . . . . . . . . . . . . . . . . . . . . . . . . . . . . . . . . . . . . . . . . . . . . . . . . . . . . . . . . . . . . . . . . . . . . . . . . . . . . . . . . . . . . . . . . . . . . . . . . . . . . . . . . . . . . . . . . . . . . . . . . . . . . . . . . . . . . . . . . . . . . . . . . . . . . . . . . . . . .. . . . . . . . . . . . . . . . . . . . . . . . . . . . . . . . . . . . . . . . . . . . . . . . . . . . . . . . . . . . . . . . . . . . . . . . . . . . . . . . . . . . . . . . . . . . . . . . . . . . . . . . . . . . . . . . . . . . . . . . . .所有用户Windows Mac 7Regulatory Compliance China RoHS Taiwan RoHS . . . . . . . . . . . . . . . . . . . . . . . . . . . . . . . . . . . . . . . . . . . . . . . . . . . . . . . . . . . . . . . . . . . . . . . . . . . . . . . . . . . . . . . . . . . . . . . . . . . . . . . . . . . . . . . . . . 问题:我的文件传输速度很慢. . . . . . . . . . . . . . . . . . . . . . . . . . . . . . . . . . . . . . . . . . . . . . . . . . . . . . . . . . . . . . . . . . . . . . . . . . . . . . . . . . . . . . . . . . . . . . . . . . . . . . . . . . . . . . . . . . 问题:我的计算机只有 USB-C 端口. . . . . . . . . . . . . . . . . . . . . . . . . . . . . . . . . . . . . . . . . . . . . . . . . . . . . . . . . . . . . . . . . . . . . . . . . . . . . . . . . . . . . . . . . . . . . . . . . . . . . . . . . . . . . . . . . . 问题:我必须对 USB 设备使用 USB 集线器. . . . . . . . . . . . . . . . . . . . . . . . . . . . . . . . . . . . . . . . . . . . . . . . . . . . . . . . . . . . . . . . . . . . . . . . . . . . . . . . . . . . . . . . . . . . . . . . . . . . . . . . . . . . . . . . . . 问题:提供的 USB 电缆太短. . . . . . . . . . . . . . . . . . . . . . . . . . . . . . . . . . . . . . . . . . . . . . . . . . . . . . . . . . . . . . . . . . . . . . . . . . . . . . . . . . . . . . . . . . . . . . . . . . . . . . . . . . . . . . . . . . 问题:我收到了文件传输错误消息. . . . . . . . . . . . . . . . . . . . . . . . . . . . . . . . . . . . . . . . . . . . . . . . . . . . . . . . . . . . . . . . . . . . . . . . . . . . . . . . . . . . . . . . . . . . . . . . . . . . . . . . . . . . . . . . . . 问题:计算机中未显示硬盘图标. . . . . . . . . . . . . . . . . . . . . . . . . . . . . . . . . . . . . . . . . . . . . . . . . . . . . . . . . . . . . . . . . . . . . . . . . . . . . . . . . . . . . . . . . . . . . . . . . . . . . . . . . . . . . . . . . . 问题:我的桌面上未显示硬盘图标15151515161616161717181818欢迎使用包装内容®®Seagate FireCuda游戏扩展坞电源适配器USB 3.0 电缆(USB micro-B 转 USB-A)快速入门指南最低系统要求端口您可以使用 USB-A(USB 3.0 或 USB 2.0)端口将 Seagate 设备连接到计算机。
海尔冷藏食品准备桌面服务、安装和照顾手册说明书

Refrigerated Sandwich/Salad Prep TableService, Installation and Care ManualPlease read this manual completely before attempting to install or operate this equipment. Notify carrier of damage! Inspect all components immediately. See page 2.IMPORTANT INFORMATIONREAD BEFORE USEPLEASE SAVE THESE INSTRUCTIONSService and Installation Manual2 RECEIVING & INSPECTING EQUIPMENT (2)SPECIFICATIONS (3)INSTALLATION (4)OPERATION (5)MAINTENANCE (7)WIRING DIAGRAM (9)All rights reserved. Reproduction without written permission is prohibited.The serial numbers of all self-contained refrigerators and freezers is located inside the unit on the left hand panel near the top.Always have the serial number of your unit available when calling for parts or service.This manual covers standard units only. If you have a custom unit, consult the customer service department at the number listed on the last page.Even though most equipment is shipped crated, care should be taken during unloading so the equipment is not damaged while being moved into the building.1. Visually inspect the exterior of the package and skid or container. Any damage should be noted and reportedto the delivering carrier immediately.2. If damaged, open and inspect the contents with the carrier.3. In the event that the exterior is not damaged, yet upon opening, there is concealed damage to the equipment,notify the carrier. Notification should be made verbally as well as in written form.4. Request an inspection by the shipping company of the damaged equipment. This should be done within 10 days from receipt of the equipment.5. Be certain to check the compressor compartment housing and visually inspect the refrigeration package. Besure lines are secure and base is still intact.6. Freight carriers can supply the necessary damage forms upon request.7. Retain all crating material until an inspection has been made or waived.Service and Installation Manual3Service and Installation Manual4LocationUnits represented in this manual are intended for indoor use only. Be sure the location chosen has a floor strong enough to support the total weight of the cabinet and contents. A fully loaded unit can weigh as much as 1500 pounds. Reinforce the floor as necessary to provide for maximum loading. For the most efficient refrigeration, be sure to provide good air circulation inside and out .Inside cabinetDo not pack the units so full that air cannot circulate. The refrigerated air is discharged at the top rear of the unit. It is important to allow for proper air flow from the top rear to the bottom of the unit. Obstructions to this air flow can cause evaporator coil freeze ups and loss of temperature or overflow of water from the evaporator drain pan. The shelves have a rear turn up on them to prevent this. However, bags and other items can still be located to the far rear of the cabinet. Air is brought into the evaporator coil with fans. Prevent obstruction by locating large boxes and tall stacks of product to the outlet or inlet of air flow.Outside cabinetBe sure that the unit has access to ample air. Avoid hot corners and locations near stoves and ovens. It is recommended that the unit be installed no closer than 2" from any wallLevelingA level cabinet looks better and will perform better because the doors will line up with the frames properly; the cabinet will not be subject to undue strain and the contents of the cabinet will not move around on the shelves. Use a level to make sure the unit is level from front to back and side to side. Units supplied with legs will haveadjustable bullet feet to make the necessary adjustments. If the unit is supplied with casters, no adjustments areavailable. Ensure the floor where the unit is to be located is level.StabilizingAll models are supplied with casters for your convenience, ease of cleaning underneath and for mobility. It is very important, however, that the cabinet be installed in a stable condition with the front wheels locked while in use.Should it become necessary to lay the unit on its side or back for any reason, allow at least 24 hours before start-up so as to allow compressor oil to flow back to the sump. Failure to meet this requirement can cause compressor failure and unit damage.Unit repairs will not be subject to standard unit warranties due to improper installation procedures.Electrical connectionRefer to the amperage data on page 3, the serial tag, your local code or the National Electrical Code to be sure the unit is connected to the proper power source. A protected circuit of the correct voltage and amperage must be run for connection of the line cord or permanent connection to the unit.The ON/OFF switch must be turned to OFF and the unit disconnected from the power source whenever performing service, maintenance functions or cleaning the refrigerated area.Service and Installation Manual5Do not throw items into the storage area. Failure to heed these recommendations could result in damage to the interior of the cabinet.Refrigerated cabinetsTemperature range for the internal cabinets is 28° F to 50° F for all food prep, undercounter and worktop refrigerator units; and -11° F to -1° F for undercounter and worktop freezers. Food Prep units should operate with pans in place. Operating without pans and/or pan covers in place will decrease the efficiency and may damage the unit due to continuous running.Continuous opening and closing of the door will prevent the unit’s ability to maintain optimum refrigeration temperature.Top section is not intended for overnight storage. Product should be removed from pans. Pans can remain in cabinet while empty. Defrosting:Every 6 hours, the unit will turn off to let the ice on the evaporator coil clear up. The control will display the defrost symbol. When the coil temperature reaches the terminal temperature or after 20 minutes (whichever comes first), the unit will turn on again. On/Off Switch:An on/off switch is located on the front of the bottom panel and on the condenser compartment door for the Pizza prep tables. When the unit is on, the switch will glow green.SOLID-STATE THERMOSTAT DESCRIPTIONSTo display target set point. In programming mode, select a parameter or confirm an operation.T o start a manual defrostTo see the last temperature alarm occurrence. In programming mode, it browses the parametercodes or increases the display valueT o see the last temperature alarm occurrence. In programming mode, it browses the parameter codes or decreases the display valueKEY COMBINATIONT o lock & unlock the keyboard T o enter in programming modeT o return to the room temperature display62. MAIN FUNCTIONS2.1 HOW TO VIEW THE SET POINT1. Push and immediately release the SET key. The display will show the set point value.2. Push and immediately release the SET key or wait for 5 seconds to display the sensor value again.2.2 HOW TO CHANGE THE SET POINT1. Push the SET key for more than 2 seconds to change the set point value.2. The value of the set point will be displayed and the LED starts blinking.3. To change the set value, push the or key within 10s.4. To set a new point value, push the SET key again or wait 10s. 2.3 HOW TO START A MANUAL DEFROST Push the key for more than 2 seconds and a manual defrost will start 2.4 HOW TO LOCK THE KEYBOARD 1. Keep pressed the and keys for more than 3s.2. The “POF ” message will be displayed and the keyboard will be locked. At this point, it will be possible only to see the set point or the MAX or Min temperature stored.3. If a key is pressed more than 3s, the ”POF ” message will be displayed. 2.5 HOW TO UNLOCK THE KEYBOARD Keep pressed the and keys together for more than 3s until the “Pon ” message is displayed. 3. ALARM SIGNALSHOW TO VIEW THE ALARM AND RESET THE RECORDED ALARM 1. Push the or key to display the alarm signals.2. When the signal is displayed, hold the SET key until the “rst ” message is displayed, and push the SET key again. The “rst” message will start blinking and the normal temperature will be displayed again.Service and Installation Manual7The power switch must be turned to OFF and the unit disconnected from the power source whenever performing service, maintenance functions or cleaning the refrigerated area.Refrigerated cabinetsThe interior and exterior can be cleaned using soap and warm water. If this is not sufficient, try ammonia and water or a nonabrasive liquid cleaner. When cleaning the exterior, always rub with the "grain" of the stainless steel to avoid marring the finish.Do not use an abrasive cleaner because it will scratch the stainless steel and plastic and can damage the breaker strips and gaskets.Cleaning the Condenser CoilThe condenser coil requires regular cleaning and the recommendation is every 90 days. In some instances, you may find that there is a large amount of debris and dust or grease accumulated prior to the time frame of 90 days. In these cases the condenser coil should be cleaned every 30 days.If the build-up on the coil consists of only light dust and debris, the condenser coil can be cleaned with a simple brush. Heavier dust build-up may require a vacuum or even compressed air to blow through the condenser coil.If heavy grease is present, there are de-greasing agents available for refrigeration use and specifically for the condenser coils. The condenser coil may require a spray with the de-greasing agent and then blown through with compressed air.Failure to maintain a clean condenser coil can initially cause high temperatures and excessive run times. Continuous operation with dirty or clogged condenser coils can result in compressor failures. Neglecting the condenser coil cleaning procedures will void any warranties associated with the compressor or cost to replace the compressor.Never use a high- pressure water wash for this cleaning procedure as water can damage the electrical components located near or at the condenser coil.In order to maintain proper refrigeration performance, the condenser fins must be cleaned of dust, dirt andgrease regularly. It is recommended that this be done at least every three months. If conditions are such that the condenser is totally blocked in three months, the frequency of cleaning should be increased. Clean the condenser with a vacuum cleaner or stiff brush. If extremely dirty, a commercially available condenser cleaner may be required.Stainless Steel Care and CleaningT o prevent discoloration of rust on stainless steel, there are several important steps to be taken. First, we need to understand the properties of stainless steel. Stainless steel contains 70-80% iron which will rust. It also contains 12-30% chromium which forms an invisible passive film over the steel ’s surface which acts as ashield against corrosion. As long as the protective layer is intact, the metal is still stainless. If the film is broken or contaminated, outside elements can begin to breakdown the steel and begin to form rust of discoloration.Proper cleaning of stainless steel requires soft cloths or plastic scouring pads. NEVER USE STEEL PADS, WIRE BRUSHES OR SCRAPERS!Service and Installation Manual8Cleaning solutions need to be alkaline based or non-chloride cleaners. Any cleaner containing chlorides will damage the protective film of the stainless steel. Chlorides are also commonly found in hard water, salts, and household and industrial cleaners. If cleaners containing chlorides are used, be sure to rinse repeatedly and dry thoroughly upon completion.Routine cleaning of stainless steel can be done with soap and water. Extreme stains or grease should be cleaned with a non-abrasive cleaner and plastic scrub pad. It is always good to rub with the grain of the steel. There are also stainless steel cleaners available which can restore and preserve the finish of the steels protective layer. Early signs of stainless steel breakdown can consist of small pits and cracks. If this has begun, clean thoroughly and start to apply stainless steel cleaners in attempt to restore the passivity of the steel.Never use an acid based cleaning solution !Many food products have an acidic content which can deteriorate the finish. Be sure to clean the stainless steel surfaces of ALL food products. Common acidic items include tomatoes, peppers and other vegetables.Gasket MaintenanceGaskets require regular cleaning to prevent mold and mildew build up and also to keep the elasticity of the gasket. Gasket cleaning can be done with the use of warm soapy water. Avoid full strength cleaning products on gaskets as this can cause them to become brittle and prevent proper seals. Also, never use sharp tools or knives to scrape or clean the gasket which could possibly tear the gasket and rip the bellows.Gaskets can easily be replaced and don ’t require the use of tools or authorized service persons. The gaskets are "Dart" style and can be pulled out of the groove in the door and new gaskets can be "pressed" back into place.Doors/HingesOver time and with heavy-use doors, the hinges may become loose. If it is noticed that the door is beginning to sag, it may become necessary to tighten the screws that mount the hinge brackets to the frame of the unit. If the doors are loose or sagging, this can cause the hinge to pull out of the frame which may damage both the doors and the door hinges. In some cases, this can require qualified service agents or maintenance personnel.Drain MaintenanceEach unit has a drain located inside the unit which removes the condensation from the evaporator coil and evaporates it into an external condensate evaporator pan. Each drain can become loose or disconnectedfrom moving or bumping the drain. If you notice excessive water accumulation on the inside of the unit, be sure the drain tube is connected from the evaporator housing to the condensate evaporator drain pan. If water is collected underneath the unit, you may want to check the condensate evaporator drain tube to be sure it is still located inside the drain pan. The leveling of the unit is important as the units are designed to drain properly on a level surface. If your floor is not level, this can also cause drain problems. Be sure all drain lines are free of obstructions. Typically, food product is found blocking drain lines causing water to back up and overflow the drain pans.Service and Installation ManualMODEL: PSU48-129Service and Installation Manual MODEL: PSU48-1210。
海尔BCD-130EN电冰箱维修手册- BCD-130EN 服务手册
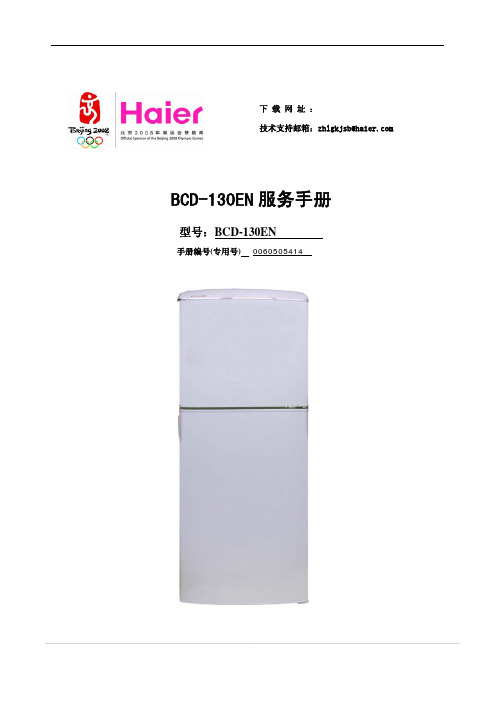
下 载 网 址 :技术支持邮箱:zhlgkjsb@型号:BCD-130EN手册编号(专用号)0060505414BCD-130EN 服务手册第一章 产品规格一、产品的主要功能和特点1.超大冷藏室,可贮存大量的水果、蔬菜等,为现代化的生活带来了方便。
2.采用直冷式设计,保持食品水份,水果蔬菜保温保鲜不串味.3.采用平背式结构,外观整洁美观.二、产品的衍生关系和通用性在BCD-130H TB的基础上进行改进,箱体加高50mm,制冷系统重新设计,桶式蒸发器改贴敷式,冷冻内胆重新设计。
.第二章 安全预防措施一、该冰箱使用交流220V/50Hz电源若电压波动范围较大(超过176~242V的范围),有可能造成冰箱不启动,控制板和压缩机烧坏,或压缩机工作声音异常等故障,此时必须加装750W以上的自动稳压器配合使用。
二、必须使用独立专用插座并进行可靠接地本冰箱的电源线配有三线(接地)插头,与标准三线(接地)插座匹配。
在任何情况下,切勿切除或拆除电源线的第三插脚(接地)。
冰箱安装到位后,插头应可接触,以方便插拔。
警示!电源线插头应保持与插座牢固接触,否则可能导致火灾。
三、不要损坏电源线1、切忌以拉扯电源线的方式拔出冰箱插头,一定要紧紧握住插头,从插座中直接拔出。
2、不要让箱体压住电源线或人为踩踏电源线。
3、将冰箱移离墙壁时,请小心谨慎,切勿滚压或损坏电源线。
四、当电源线损坏时当电源线出现破损或插头出现磨损时,切勿使用。
电源线磨损或损坏,必须到厂家指定的维修点更换。
五、有煤气等易燃气体泄漏时1、关闭气体泄漏的阀门。
2、打开门窗。
3、不要拔或插冰箱等电器件的插头。
六、以下情况请拔下电源插头1、清洁及维修前。
2、更换损坏的灯泡时。
七、冰箱内严禁放入易燃、易爆的危险品,及强腐蚀性的酸、碱等。
八、本产品为家用电冰箱,按国家标准的规定,家用电冰箱只适用于储藏食品,不能用于其他用途,如储藏血液、药品和生物制品等。
九、在冰箱附近,切勿存放或使用汽油及其它易燃物品,以免引起火灾。
海尔电子洗衣机用户手册说明书

Setting the water softening sys-
H02
tem
H03
1. Press .
H04
2. To open the basic settings, press
H05
for 3 seconds.
H06
a The display shows Hxx.
H07
a The display shows .
Programme
1) Duration [h:min] 2) Energy [kWh] 3) Water [l]
Intensive 70°
1) 2:05 - 2:15 2) 1.300 - 1.400 3) 11.5 - 13.5
Auto 45-65°
1) 1:40 - 2:45 2) 0.900 - 1.500 3) 7.0 - 15.5
gether and lift
1
the coarse filter
out .
Cleaning spray arms
1. Unscrew the upper spray arm and
2
pull down to remove .
1
2
5. Clean the filter elements under running water.
6. Re-assemble the filter system.
7. Insert the filter system into the appliance and turn the coarse filter clockwise. Make sure that the arrow markings match up.
海尔 BCD-586WS 服务手册

下 载 网 址 : 技术支持邮箱:zhlgkjsb@haier.com BCD-586WS服务手册型号:BCD-586WS 手册编号(专用号) 0060505414 第一章 产品规格功能和特点 1. 根据您的喜好,制作适合您的冰块。
2. -2℃- +3℃之间,利于储存熟食。
3. 有可滑动搁物架,更方便物品的存放及取用,且可实现90度开门取出。
4. 箱内温度及环境温度条件自动调整到最佳制冷效果。
5. 华的内部外部设计。
全风冷制冷系统,深冷速冻。
7. 顶部前端设有风幕,即可减少开门时冷气损失,又可使冷藏室冷气更均匀,有更好的保鲜效8. 断冰箱内的温度,并进行预制冷,使化霜前后箱内温度没有较大幅度的改变,利于食品的压缩机寿命长。
触摸按键,大屏幕LCD 显示。
11.果蔬菜的保鲜时间,有效去除冰箱异味。
道,抽拉省力流畅。
13一、产品的主要制冰功能内设自动制冰机,可冰温室熟食区设计冷藏室底部的熟食盒温度可控制在可滑动搁物架设计,取物更方便冷藏室设计人工智慧不需要人为调节,冰箱根据超薄、超大、超豪华设计超薄尺寸、超大容积、大冷藏、大冷冻、豪6. 无氟无霜,风幕技术冷藏室果。
化霜预制冷化霜前判保鲜。
9. 设压缩冷凝机组,风机散热,制冷效果佳,10. 开门报警, 维C 保鲜维C 保鲜技术的应用,可有效延长水12. 抽屉带滚珠滑.型号及解释B C D – 586 W S二、产品的衍生关系和通用性 本产品是全新开发的产品,采用真正的不锈钢门体,高贵时尚;采用电子控制,可按照用户的需求来调节冷藏室和冷冻室的温度;在冷藏室底部设有独特的熟食区,可将温度控制在-2℃-+3℃;冷冻室用户的需求来制作冰块。
设有自动制冰机,可根据. 第二章 安全预防措施一、该冰箱使用交流220V/50Hz 电源若电压波动范围较大(超过176~242V 的范围),有可能造成冰箱不启动,控制板和压缩机烧坏,或压缩标准三线(接地)插座匹配。
海尔 BCD-258 278WBSV 型号电冰箱 服务手册

BCD-258/278WBSV型号电冰箱服务手册型号: BCD-258/278WBSV(风冷、不锈钢外观)手册编号(专用号)目录1、目录 (1)2、产品特点及型号定义 (2)3、产品宣传点、卖点 (3)4、产品外观结构特征 (3)5、产品部件结构名称 (4)6、产品使用说明及产品改进介绍 (4)7、产品主要技术参数 (5)8、案例预防措施、产品使用及日常维护保养知识 (5)9、原理图及线路图 (6)10、具体控制、工作原原理及参数 (9)11、制冷循环透视图与平面图 (13)12、安装和拆卸工艺 (14)13、典型故障及解决措施、常见问题咨询 (18)14、爆炸图 (20)15、爆炸图明细 (21)二、产品特点及型号定义2.1产品的主要功能和特点1、三门不锈钢新外观,时尚豪华,满足现代高薪家庭需求。
2、全频技术:集变频、降噪、节能、速冻等技术于一身,且互相促进,性能更加优越。
冰箱根据箱内温度与设定温度的比较,自动调节变频压缩机的工作效率,使冰箱一直处于最优状态。
3、全温区:温度可以在10到-18度之间调节,0度条件下可以延长水果、蔬菜的保鲜期,也可以存放短期内准备食用的生鱼片等生鲜食品;当温度设置在0到-10度之间时,可作为冷藏室使用;当设置在-18度时,可作为冷冻室使用;全温区供您选择使用,可满足各种存放需求。
4、变温室多温区保鲜:独创变温室(10到-18度保鲜温区),可以设置0度保鲜,可以设置冷藏储物,可以设置-7度软冷冻即时切,还可以设置-18度冷冻,使用方便。
5、人工智慧,自动调温:在人工智慧状态下,本系列冰箱随环境温度变化而自动调节温度档位,无需人为调节,便能达到最佳制冷效果。
6、超温报警:具有超温报警功能,便于及时掌握冰箱的异常状态。
7、假日功能:在您外出度假时,冰箱以低能耗运行,确保冷藏室无异味,同时保证软冷冻和冷冻食品的正常存储。
8、LCD显示:采用LCD动态液晶显示冰箱的运行情况。
海尔 ZWQ71236SE 洗衣机 用户手册说明书

安全資訊請在安裝和使用本機之前,仔細閱讀所提供的指示。
對於安裝和使用錯誤所造成的人身傷害或損害,製造商概不負責。
務必將說明書擺放在安全可觸及的地方,以便將來參考。
兒童和易受傷者安全事項•8 歲 (含) 以上之兒童、身體官能或心智能力衰退者,或是經驗與使用知識缺乏者,在負責其安全的人員在旁看護或指示本機的使用方法,並讓他們了解可能之危險的情況下,方可使用本機。
•勿讓孩童將本機當成玩具。
•在本機運作過程中,請務必讓 3 歲以下的孩童遠離本機。
•將所有包裝放在兒童不易觸及之處,並妥善丟棄。
•將洗衣劑放在兒童不易觸及的地方。
•打開本機門蓋時,請讓兒童和寵物遠離門蓋。
•不得由兒童在無人監督的情況下進行清潔與使用者維護。
一般安全須知•請勿變更本機的規格。
•勿超過 7 公斤的衣物量上限 (參閱「程序表」章節)。
•插座連接處進水點的操作水壓必須介於 0.5 巴 (0.05 兆帕) 和8 巴 (0.8 兆帕)。
•底座的通風開口 (如果適用) 絕對不能被地毯、地墊或任何地板的遮蓋物堵塞。
•請使用隨附的新軟管組件,或是「授權服務中心」所提供的新軟管組件來連接本機和主水管。
•嚴禁重覆使用老舊的軟管組件。
•如果主電源線已損壞,則必須由製造商、其維修代理商或類似的合格人員更換,以避免發生觸電危險。
•在進行任何保養前,請先停止本機,並從電源插座將電源插頭拔下。
•請勿使用高壓噴霧和/或蒸汽來清潔洗碗機。
•以濕布清潔本機。
僅限使用中性清潔劑。
請勿使用研磨性產品、研磨性清潔抹布、溶劑或金屬物體。
2安全信息安裝•請卸除所有包裝和搬運用螺栓。
•將搬運用螺栓存放在安全的場所。
將來如果要移動本機,必須將滾筒上鎖以避免內部損傷。
•移動本機時務必小心,因為器具很重。
請務必使用安全手套,並穿上有包覆性的鞋子。
•本機若受損,請勿安裝或使用。
•請按照本機隨附的安裝指示進行安裝。
•請勿在溫度低於 0°C,或在會暴露於風雨的環境中安裝或使用本機。
- 1、下载文档前请自行甄别文档内容的完整性,平台不提供额外的编辑、内容补充、找答案等附加服务。
- 2、"仅部分预览"的文档,不可在线预览部分如存在完整性等问题,可反馈申请退款(可完整预览的文档不适用该条件!)。
- 3、如文档侵犯您的权益,请联系客服反馈,我们会尽快为您处理(人工客服工作时间:9:00-18:30)。
用户永远是对的 1995年,海尔提出星级服务,宗旨是用户永远是对的.即用户就是企业的衣食父母,
只要能够不断给用户提供最满意的产品和服务,用户就会给企业带来做好的效益.
您的满意就是我们的工作标准
在海尔,技术检验合格的产品不一定是合 格产品,只有用户满意的产品才是合格产 品.因为用户不满意,产品卖不出去,企业就 没有利润可言.所以,用户的满意就是海尔 的工作标准,不能对用户说:“不”.
2、服务模式
五个一 一张服务名片 一副鞋套 一块垫布 一块抹布 一站式产品通检服务 一站式产品通检服务: 服务人员为用户提供一个产品的售后服务完毕后,不
但要对此产品进行全面的通检、维护,同时主动对用 户家中其它海尔家电问寒问暖,对用户提出的需求、 建议一票到底的跟踪解决,直到用户满意。
用户的抱怨是我们的最好礼物
用户抱怨的内容,正是我们工作改善的方 向;如果能及时消除这些抱怨,就是真正增 加了企业的资产.
对内“一票到底”的流程,“对外 一站”到位的服务
海尔在流程再造中为用户带来更多的满 意而实行的“一票到底”的流程,以“实 现一站”到位的服务.“一站到位式服务” 即只找一个SBU就可解决用户全部需求 的服务.“一票到底”即为完成一个定单, 有一个SBU自始至终负责全过程的流程 整合.
2、到了就好
“到了就好”就是上门后能够迅速而准确的判断故障原因,排除故障,手到病除, 一次服务到位,这是对服务技术水平方面的要求。只有“到了就好”,保证一次 服务到位,迅速排除用户机器故障才能更好的满足用户需求,减少因为机器故障 带给用户的不便和烦恼。
正面网点:天津双晶网点 服务人员:冯连江 天津用户程怀波于1997年9月购海尔丽达XQG50-8洗衣机,使用过程中因噪音大、
1、随叫随到
所谓“随叫随到”,就是以用户要求的时间为标准,及时快捷地为用户提供服务。 对服务商来说,就是服务商及服务人员的响应速度问题。用户要求的时间就是我 们的工作的标准。在用户发出服务请求信息后,能否在最短的时间内和用户取得 联系或到达用户家中(或用户要求的其它地点),是我们能否做到“随叫随到” 的关键。
海尔星级服务手册
海尔集团商流本部顾客服务推进部
一 海尔顾客服务文化篇
服务理念
– 海尔人就是要创造感动
创造感动,就是对工作充满激情;就是不断满足用户个性化需求;就是用“心” 工作,对产品用心,对用户用心。海尔人一直在创造感动,对于顾客服务人员来 说更应如此,用服务创造感动,用感动赢取定单,最终赢取用户的忠诚度,创造海尔 顾客服务市场第一美誉度,正如国际著名咨询公司兰德公司专家所言:“在海尔国际 化进程中,一定会以一个不断创造感动、极具凝聚力和创新变革的品牌形象,务效果的标准就是看我 们每一次为用户提供服务是否做到了“随叫随 到、到了就好、创造感动、信息增值”。简要 概括为“随叫随到、到了就好、创造感动、信 息增值”四个标准。它成为今后检验服务人员 工作质量的标准。服务人员必须以此为准绳, 做好今后的服务工作。只有严格地按照这四个 标准,及时、高效地给用户提供服务,才能有 效提升海尔品牌忠诚度、美誉度,实现市场第 一美誉度的目标。
3、创造感动
创造感动指的是,我们提供的服务必须要超出用户的期望值,不单单能 够使用户感到满意,还要能够触动用户的情感,使其成为海尔的忠诚用 户。他要求我们必须要给用户提供“意外的惊喜”,使其在内心深处产 生对海尔品牌的依赖感、信任感。从而强化用户与海尔之间的情感联系, 提高海尔品牌的忠诚度、美誉度。
网点: 北京凯达隆商贸有限公司(手机网点) 2003年9月30日,家住北京东城区东直门内小街豁口的海尔手机用户陈君
拨打北京客户服务热线电话,报修手机出现故障。北京客户服务中心自 动派工给北京凯达隆商贸有限公司,该网点立即电话联系用户,得知: 用户外出摔伤同时手机出现故障,现用户在家卧床休息等待手术。由于 手机产品较为特殊,无上门服务业务,用户只是抱着试试看的态度拨打 了热线电话。了解到用户的特殊情况后,凯达隆网点从用户的角度考虑, 打破手机不上门服务的常规,立刻安排网点服务人员上门,取回了手机, 并于第二天-十月一日国庆节一早,将维修好的手机送回了用户手中。 用户倍受感动,并拨打了北京工贸服务热线电话,对网点提出了表扬。 10月16日上午,网点拨打电话询问用户手机使用情况,得知陈先生在北 京积水潭医院做手术后,马上派工作人员带着果品等礼物表示慰问,陈 先生被深深地感动了,激动地说:“海尔的售后服务让我心服口服, 创造用户感动的关键在于服务的质量、范围高于用户的期望值,给用户 意外的惊喜。北京凯达隆商贸有限公司根据用户受伤不能送修的情况, 打破常规提供上门服务。并且在得知用户做手术的消息后,主动到医院 探望。这些特殊的服务措施,大大高于用户的期望值,给了用户意外的 惊喜,因此才使得用户被深深地感动了。
机器移位等故障,2000年6月8日用户拨打售后服务电话,请海尔售后人员上门修理。 工单被派至天津天青网点,该网点先后分别指派服务人员胡守军、张鹏、陈文林 上门为用户提供服务。几次修理之后,机器只是暂时好一些,但很快又恢复原状。 无奈之下用户于2002年6月3日再一次拨打了我们的服务电话,这一次接到派工的 是天津双晶网点。服务人员冯连江师傅上门,以其过硬娴熟的技术,很快就发现 了机器故障的根源是三角架螺丝松动、配重块松动,调整三角架及配重块螺栓, 整机器正常。并快速排除了机器故障。用户写信对此进行了表扬,他被冯师傅精 湛的技艺所折服。原来认为海尔售后服务维修技术不高的观点,被彻底改变。 天津双晶的冯连江凭借高超、娴熟的维修技术,将别人有解决的难题一步解决到 位。冯师傅真正做到了“到了就好”,不但为用户机器排除了故障,还挽回了用 户对我们的信任。
网点:成都工贸绵阳进力维修部 服务人员:刘长青 青岛客户服务中心网站9月26日接到绵阳用户陈先生反馈洗衣机出现自动断电问题
的邮件。用户发出邮件的时间是当天上午12点01分,绵阳进力维修部接到派工后, 迅速于12点07分与用户取得电话联系,取得用户详细地址。网点维修人员迅速于 12点32分与用户取得联系,并于12点50分到达用户家中(本地维修人员上门路程 约18公里)。12点54分四川省维修中心对该用户进行了电话回访;13点40分维修 人刘长青已将故障排除,一站式通检到位,并向用户详细咨询讲解使用方法。 (后经落实,原来产品正常,是用户家的插座问题)当天的16:26分,陈先生的 第二封邮件发到客户服务中心网站,表达了对海尔速度的叹服和对服务人员的感 谢。 从用户发出求助信号到服务人员到达用户家中,仅用了49分钟,在不到一个小时 的时间里用户的难题得到了解决。这个案例可以作为“随叫随到”的最好诠释