冷藏箱使用说明书
医用冷藏箱的使用流程讲解

医用冷藏箱的使用流程讲解1. 温度调节•打开冷藏箱,可以看到温度调节面板,通常位于冷藏箱的前面或顶部。
•调节温度可以使用旋钮、按钮、触摸屏等不同的控制方式,根据冷藏箱的型号而定。
•通常,医用冷藏箱的温度范围可调节为2℃-8℃,请根据需要将温度调节到适当的范围。
2. 冷藏物品的储存•在将冷藏物品放入冷藏箱之前,确保其外包装完整,没有破损或渗漏。
•将冷藏物品平放或竖立放入冷藏箱。
•确保物品之间有足够的空间,以允许空气流通。
•避免将过大或过多的物品放入冷藏箱,以免影响空气循环和温度分配。
3. 温度监测•监测医用冷藏箱的温度是非常重要的,可以确保储存的物品在安全的温度范围内。
•冷藏箱中通常有温度显示屏或指示灯,用于显示当前的温度。
•定期检查温度显示器,并确保温度持续在设定的范围内。
•如果温度超出了设定的范围,通常会有警报器或报警器提醒用户。
4. 清洁和维护•定期清洁医用冷藏箱是维护其正常运行和延长使用寿命的重要步骤。
•首先,确保冷藏箱断电并取出所有储存物品。
•使用中性清洁剂和柔软的布或海绵,擦拭冷藏箱的内部和外部表面。
•不要使用酒精、溶剂、氨水等腐蚀性或有刺激性的清洁剂。
•定期检查冷藏箱的密封件是否完好,并更换破损或老化的密封件。
5. 常见问题解决5.1 温度过高或过低•如果冷藏箱的温度过高或过低,首先请检查温度控制是否正确设定。
•如果设定正确而温度仍然异常,可能是由于以下原因:–供电问题:请检查冷藏箱是否正确连接了电源,并确保电源稳定。
–冷藏物品摆放问题:请确保冷藏物品没有堵住冷风循环通道。
–故障:如果以上检查都没有解决问题,可能是冷藏箱故障,需要联系维修服务商进行维修。
5.2 警报或报警器响起•当冷藏箱的温度超出设定的范围时,警报或报警器可能会响起。
•在警报或报警器响起时,请首先检查温度显示器是否显示异常温度。
•如果显示器显示正常,可能是以下原因导致警报或报警器响起:–电源故障:请检查冷藏箱是否正确连接了电源,并确保电源正常供电。
平台式冷藏柜 冷冻柜 使用说明书
5. 废弃处理............................................................................................................................................6
为达到最佳性能:
* 请勿将冷藏柜/冷冻柜摆放在炉子、烤架或其它会产 生高温的设备附近。
* 摆放位置应坚实,足以承受设备重量。
* 应避免将本机安装在不允许滴水的场所。采用并排 或背靠背安装方式(可能是与其它厂商的产品一起安 装)时,由于两台机器之间可能会出现冷凝,从而导 致冷凝水滴落到地板上。
* 请勿将本机暴露在直射阳光或高温下。
6. 电气连接 ...........................................................................................................................................2
7. 排水管连接 ........................................................................................................................................2
[a] 显示故障代码的故障....................................................................................................................6
[b] 不显示故障代码的故障................................................................................................................6
大金冷藏箱LXE10D说明书

实验二 常用电子元器件的测量一.实验目的1. 掌握用万用表测量电阻、电容、二极管、三极管及检测元件性能的好坏2. 进一步熟悉低频信号发生器、交流毫伏表、直流稳压电源、双踪示波器的使用,并通过测试一个实验电路理解电阻、电容、电感、二极管等元器件在电路中的作用。
二.实验原理㈠固定电阻1.固定电阻器的主要参数固定电阻器的主要参数是标称阻值、允许误差和额定功率。
(1)标称阻值和允许误差电阻器上标志的阻值叫标称值,而实际值与标称值的偏差,除以标称值所得的百分数叫电阻的误差,它反映了电阻器的精度。
不同的精度有一个相应的误差,表2-1列出了常用电阻器的允许误差等级(精度等级)。
表2-1 常用电阻器允许误差的等级允许误差 ±0.5% ±1% ±2%±5% ±10% ±20% 级别 005 01 02Ⅰ Ⅱ Ⅲ类型精密型普通型目前固定电阻器大都为I 级或II 级普通电阻,而III 级很少,都能满足一般应用的要求,02、01、005级的精密电阻器,一般用于测量仪器,仪表及特殊设备电路中。
国家有关部门规定了阻值系列作为产品的标准,表2-2是普通电阻器系列表。
表中的标称值可以乘以10n,例如,4.7这个标称值,就有0.47Ω、4.7Ω、47Ω、470Ω、4.7K Ω……。
选择阻值时必须在相应等级的系列表中进行。
表 2–2 电阻器系列及允许误差E241.0 1.1 1.2 1.3 1.5 1.6 1.82.0 2.2 2.4 2.73.0 3.3 3.6 3.94.3 4.75.1 5.66.2 6.87.58.29.1E121.0 1.2 1.5 1.82.2 2.73.3 3.94.75.66.8 8.2E61.0 1.52.23.34.7 6.8各系列允许误差E24-5% E12-10% E6-20%(2)电阻器的额定功率电阻器长时间工作允许所加的最大功率叫额定功率。
特拉玛冷藏箱操作指南说明书
Operating instructionsThis document is part of the product.READ ALL INSTRUCTIONS BEFORE USING THIS PRODUCT.Truma CoolerPortable Fridge / FreezerModelsSingle Zone ModelsC36 / C44 / C60 / C73 / C105Dual Zone Models C69 DZ / C96 DZTable of ContentsTrademark information (2)Scope of delivery (2)Intended Use (2)Prohibited use (2)Important product information (4)Operating instructionsProduct features (5)Control panel Single Zone (5)Control Panel Dual Zone (5)Turning the appliance on/off (5)Temperature setting (6)Temperature unit setting (6)Battery protect voltage setting (6)Bluetooth setting (6)Multi voltage system / Emergency Override (6)AC/DC, USB connection, fuse andemergency override in front (6)DC connection in the back (7)Two way opening and removable lid (7)Remove the lid (7)Attach the lid (7)Truma Cooler App Instructions (8)Cleaning (8)Troubleshooting (8)Fault indicator (9)Technical Data (10)“Truma Cooler” MANUFACTURER’S LIMITED WARRANTY.......................................................................... 11Intended UseThe appliance is designed for cooling and freez-ing foods.The product is designed for camping and other mobile use.This mobile appliance can be used in household and similar applications such as• staff kitchen areas in shops, offices and oth-er working environments• farm houses• clients in hotels, motels and other residential type environments• bed and breakfast type environments• catering and similar non-retail applications The cooler is designed to be operated from:• 12 V or 24 V DC on-board power supply of a vehicle or recreational vehicle• 12 V or 24 V DC auxiliary battery• 100 V - 240 V AC power supply (50 - 60 Hz) Prohibited useThe product is not designed• to be exposed to rain or wet environment,• to be used as a household refrigerator• to store chemicals and other non-food products,• to be used for medical transportation Safety instructionsSafety symbols and signal wordsThis is the safety alert symbol. This symbol alerts you to potential hazards that can kill or hurt you and others.indicates a hazardous situation which, if not avoided, could result in death or serious injury.indicates a hazardous situation which, if not avoided, could result in minor or moderate injury.Other important information or tipsTruma CoolerTrademark information Truma Cooler referred to as Cooler below.Scope of delivery2• Risk of injury.Do not operate the Cooler if it is visiblydamaged.• Risk of electrical shock.Do not use this product if any of the elec-trical cables, connections and plugs aretrapped, worn, frayed or otherwise dam-aged. Always check cables for mechanicaldamage, cuts in the insulation, and heat/moisture damage before use.–When positioning the appliance, ensure the supply cord is not trapped or damaged.• Risk of injury.Repairs of the product should only be per-formed by a suitably qualified and authorized person (experts) using original manufacturer parts.Experts are persons who, based ontheir specialist instruction and training, their knowledge and experience with Truma prod-ucts and the relevant standards, can carryout the necessary work properly and identify potential hazards.Poor or faulty repairs could be dangerousand will void the warranty.• Risk of suffocation.Do not allow children or pets to climb inside the appliance.• Risk of injury.This appliance is not intended for use by per-sons (including children) with reduced physi-cal, sensory or mental capabilities, or lackof experience and knowledge, unless theyhave been given supervision or instructionconcerning use of the appliance by a person responsible for their safety.• Risk of injury.This appliance is not intended for use by chil-dren without supervision. Children should be supervised to ensure that they do not playwith the appliance.• Risk of electrical shock.Do not expose the appliance to rain.The power connection must be especiallyprotected against moisture and wetness.Protect the appliance from moisture andnever put it in the water. Protect the appli-ance from salty air.• Risk of electrical shock.Do not handle electrical connections withwet hands.• Risk of electrical shock.Do not locate multiple portable socket-out-lets or portable power supplies at the rear of the appliance.• Risk of electrical shock and fire.Do not place electrical items in theappliance.• Risk of injury.The Cooler must be secured appropriatelywhen it is transported in a vehicle. National rules and regulations must be observed.Do not drop the appliance. If the appliancefalls down, have it checked by an expert.• Risk of injury.Do not store dangerous items inside theappliance, such as e.g. spray cans, aerosolcans, explosives, and/or flammable liquids / propellants.• Risk of injury.Any alteration to the appliance or its controls can cause unforeseen serious hazards andwill void the warranty.• Risk of fire.The use of wrong cable cross sections ordamaged cables can lead to fire.• For best performance operate the appli-ance in environments whereunder theambient temperature is +10 °C / 50 °F to+32 °C / 89 °F. Beyond these temperaturesperformance will drop and power consump-tion increase. Do not operate the appliancein environments where the and max. ambi-ent temperature exceeds +43 °C / 109 °F.• Protect the appliance against open flames and hot surfaces.• Do not fill appliance with water or other liquid for longer periods because the wateracts as a breeding ground for bacteria. Also beware of melting ice when the temperature inside the appliance is not low enough. Food stored in the appliance shall be stored in ap-propriate containers.• If your appliance has been turned off or lost power with food stored inside, exercise cau-tion and do not consume the food.• Do not attempt to remove frost from the appliance with a scraper or knife. Seriousdamage to the cooling system could occur.34• The appliance may make more noise if oper-ated on a surface lean of over 15°, but thisshould not have an effect on refrigeration.• When using the appliance ensure the circuit being used has a fuse or circuit breaker.The recommended size for DC 12 V is 10 A, DC 24 V is 5 A.• Make sure that the voltage data on the type plate matches the existing power supply.Incorrect mains supply can damage the ap-pliance. This is especially important for ACgenerators that can generate voltage spikes.• If your appliance is plugged in to a DC ve-hicle socket, ensure that you disconnectfrom power when the vehicle is not in use to prevent battery drainage.• Never disconnect the appliance by pulling the cable instead of the plug.• Buildup of heat in a vehicle can be extreme.The appliance will shut down at extremetemperatures if cooling is not possible.• The Cooler must not be used at very dusty locations (e.g. at the beach), as dust and and sand grains could be sucked in and damage the appliance.• Changes or modifications not expresslya pproved by the party responsible for com-pliance could void the user’s authority to op-erate the equipment.• This appliance complies with Part 15 of the FCC Rules and with Industry Canada license-exempt RSS standard(s). Operation is sub-ject to the following two conditions:–(1) this appliance may not cause harmfulinterference, and–(2) this appliance must accept any interfer-ence received, including interference thatmay cause undesired operation. Important product information• The appliance requires good ventilation, es-pecially around the vents of the refrigerator.Ensure at all times that there is sufficientventilation so that the heat that arises during operation does not build up. Make sure that the appliance is sufficiently far away fromwalls and other objects so that the air cancirculate. Ensure that the ventilation open-ings are not covered.• The lower the ambient temperature, the lower the power usage. In order to maximise efficiency keep the appliance in a cool loca-tion out of direct sunlight.• Do not allow a large amount of ice to build up on the inside walls as this may impaircooling. Defrost by turning the appliance off, allowing the ice to melt and wipe out thewater or remove the drain plug.• It is recommended to operate the appliance on a flat surface, but it will operate at angles up to 30º.• Damage may occur if the DC cable supply is not appropriately sized. This will causelow voltage. The table below provides rec-ommended cable sizing from battery toappliance:5Product featuresFig. 112345678910111213Control panel Single Zone(C30 / C36 / C44 / C60 / C73 / C105)Fig. 2Control Panel Dual Zone(C69 DZ / C96 DZ)Fig. 3Turning the appliance on/off• Plug in the AC or the DC power cable. If the appliance does not start automatically, press the power switch to turn on the appli-ance. The LED display on the control panel will turn on and the interior temperature is displayed. • Press the power switch for three seconds to switch off the appliance. The system will remember the previous set-tings when power is off. If the power sup-ply is cut off or disconnected, the appliance will switch off automatically and once the power supply is restored it will automatically switch back on.Operating instructionsTemperature settingTemperature setting range –22 °C to +10 °C(-8 °F to + 50 °F) in each compartment• Press the “switch compartments / mode”button and use the “temperature set-tings” buttons to increase or decrease thetemperature.• Press the “Switch compartments / Mode”button again to change the temperature set-ting in the second compartments (only Dual zone models).• Press the “turbo switch” button for Turbo mode to increase the speed of the compres-sor. This setting can be used when you need to cool products quicker.Temperature unit setting• Press the “Switch compartments / Mode”button two times to switch between °F / °Cfor single zone models and three times fordual zone models. °F or °C will be shown at the display. Then press the “temperature set-tings” buttons to change.• For the dual zone model, press “+” for three seconds, and you can switch off the cooling function of the compartment on the left. Also press “-” for three seconds, you can switchoff the cooling function of the compartment on the right. Press the same button again for three seconds to re-start refrigeration in the corresponding compartment.Battery protect voltage setting • Press the “Switch compartments / Mode”button one more time after change °F or °C, to enter battery protect voltage setting. Then press the “temperature settings” buttons tochoose HI, MED or LO of protect level.Bluetooth setting• Press the “Switch compartments / Mode”button one more time after battery protectvoltage setting, to enter Bluetooth activity.Then press “temperature settings” buttonsto choose ON or OFF.• Press the “Switch compartments / Mode”button and “+” button for three seconds, atMulti voltage system / Emergency OverrideAC/DC, USB connection, fuse and emergency override in frontFig. 467FuseThe fuse (6.3 A) may only bereplaced by an expert.Emergency Override SwitchFor normal operation the switch is in the “NOR-MAL USE” position. If an electronic control or display board failure occurs, slide the switch to “EMERGENCY OVERRIDE” position. In this case, the cooler runs with full cooling capacity and may freeze.DC connection in the backFig. 5The second DC socket allows the optimal use in every position.Two way opening and removable lid Remove the lidOpen the lid, push it over the aiming positionand remove it (all models).Fig. 6Fig. 7Attach the lidPut the lid on the side of the box and press it down firmly (all models).On the following models the lid can also be put on the opposite side of the box. (C60 / C69 DZ /C73 / C96 DZ / C105)Fig. 88Truma Cooler App InstructionsTo control your Truma Cooler with your smart-phone you can use the Truma Cooler smart-phone app of Truma.Activate the Bluetooth function of the appliance (see “Bluetooth setting” on page 6)Activate the Bluetooth function of your phone and then download the Truma Cooler smart-phone app from Google Play or Apple App Store.When you open the app you will see picture A . Then you can click “Add device” to search the appliance, then you will see the available equip-ment, as shown in B.A B CFig. 9When you click for example the equipment CCP-36F9 to connect the appliance, finally you will see picture C which means connect successful.Or if you do not choose to click “Add device” but to choose to scan the individual QR code which is delivered with the appliance for con-necting, then will directly enter to picture C .Now linked to your appliance, you can:• Easily switch between appliances.• Adjust your appliances temperature from –22 °C to +10 °C (-8 °F to + 50 °F).• Check current temperature.• Choose from Celsius and Fahrenheit tem-perature scales.• Turn your appiance on and off.• Turn Turbo modes on and off.• Choose battery voltage protection mode. • Monitor battery voltage.• Show the fault reason automatically.• Customize your refrigerator name.CleaningDissconnect the appliance fromthe power supply before cleaning.Clean the appliance inside and outside with a clean damp cloth every week. If it is dirty, use baking soda (sodium bicarbonate) dissolved in lukewarm water to clean the appliance.Do not use abrasive products, detergents, soap or hard objects to clean as these can damage your refrigerator.After cleaning, wipe out with a clean damp cloth and dry carefully.Never clean the appliance under running water or in dish water.Do not store products inside appliance if the ap-pliance is not on.Do not store the appliance if it is wet inside or without leaving the lid open.TroubleshootingThe appliance is not turning on• Check whether the appliance has been turned on.• Check the power supply (try a different pow-er source/vehicle/socket).• Check whether the plug and the socket have a good connection.Low refrigeration performance• Too much product has been placed inside the appliance.• There is too much warm product inside the appliance.• The lid is unlatched or open.• The lid seal is broken.• Poor ventilation. Make sure that the appli-ance is sufficiently far away from walls and other objects so that the air can circulate. Ensure that the ventilation openings are not covered.• The ambient temperature is too high.• The temperature setting is too high.Can hear the sound of running water from inside the appliance• This is normal, due to the flow of refrigerant inside the appliance.Unusual noise when refrigerator is working• The refrigerator is not placed on a level surfaceIf none of the above solves your issue please contact the Truma Service Center (855-558-7862). Fault indicatorPlease note that the fault indicator will always be green if normal. When flashing, it willchange to orange color.If these measures do not remedy the malfunction, contact your dealership, Truma Service or one of our authorized Service Partners.9Technical Data10Truma Gerätetechnik GmbH & Co. KG (“Truma”)“Truma Cooler” MANUFACTURER’S LIMITED WARRANTY(September 2014)This limited warranty pertains solely to the “Truma C ooler” (Single Zone Models C36, C44,C60, C73, C105 and Dual Zone Models C69 DZ and C96 DZ) the “Product”) manufactured byT ruma and sold through its affiliates and dealers in North America.Truma warrants subject to the below stated condi-tions that the Product will be free from defects in material and workmanship, and will perform in ac-cordance with the technical specifications set forth in the description of the Product for a period of twelve (12) months for newly manufactured parts from the original date of purchase. The original purchaser is advised to register the Product within two (2) months of purchase at in order to receive an extended warranty of an additional twelve (12) months. This limited war-ranty shall only apply if the Product was properly installed according to the installation instructions provided and in compliance with applicable codes.During the warranty period, Truma will repair or re-place, at its own discretion and costs, the defective Product or parts or components of such Product reported to Truma and which Truma determines was defective due to a warranty defect. Costsof diagnosis for a warranty defect are borne by Truma. Other costs of diagnosis are not included in this warranty. At the discretion of Truma, the re-placement of the Product or parts or components thereof (i) may be newly manufactured, (ii) maybe assembled from new or serviceable used parts that are equivalent to new parts in performance, or (iii) may have been previously installed.The customer shall not attempt to repair the Product or resolve the problem without the prior consent of T ruma. Any attempt by the customer to repair the Product or resolve the problem without the prior consent of T ruma will void this warranty.This limited warranty does not cover any defects attributable in whole or in part to (i) non-Truma products and services and / or alterations of out-of-specification supplies, (ii) accidents, misuse, negligence or failure of the customer to follow instructions for the proper use, care and cleaning of the Product, (iii) damages caused in gas pres-sure regulation systems due to foreign substances in the gas (i.e. oil, plasticizers), (iv) external fac-tors (e.g., fire, flood, severe weather), (v) failure of proper transport packaging, or (vi) failure by the purchaser to comply with Truma’s installation and user manual regarding the Product.All warranty claims must be reported to T ruma’s authorized warranty service center in the United States:T ruma Corp Service Center,2800 Harman Drive, Elkhart, IN 46514,toll free: (855) 558-7862, fax. (574) 538-2426, *********************,The purchaser shall provide the following information regarding the potential warranty claim (i) serial number of the defective device, (ii) proof of purchase, (iii) purchaser’s contact information. EXCEPT AS EXPRESSL Y STATED AND SET FORTH HEREIN, THERE ARE NO WARRANTIES OR REPRESENTATIONS, EXPRESS OR IMPLIED, CONCERNING THE PRODUCT AND NO SUCH WARRANTIES OR REPRESENTATIONS SHALL BE IMPLIED UNDER ANY APPLICABLE LAW, IN EQUITY OR OTHERWISE, INCLUDING WITHOUT LIMITATION, A WARRANTY OF MERCHANTABILITY, A WARRANTY OF FITNESS FOR A PARTICULAR PURPOSE, OR ANY OTHER WARRANTY WHICH MAY BE IMPLIED UNDER COMMON LAW OR UNDER THE UNIFORM COMMERCIAL CODE OF ANY STATE OR OTHER J URISDICTION OF THE UNITED STATES OF AMERICA.Unless further limited herein, the entire liabilityof Truma and the customer’s exclusive remedyfor damages from any cause related to or arising out of a warranty defect, regardless of the formof action, whether in contract or in tort, will not exceed the amount of the purchase price foreach purchase order for the Product which is the subject matter or directly related to the causes of action asserted.Unless prohibited under applicable state law, inno event will Truma, its agents, subcontractors, affiliates, suppliers and employees be liable for (a) any incidental, indirect, special or consequential damages, including, but not limited to, loss of use, revenue, profits or savings, substitute rental or for any other reason, even if Truma knew or should have known of the possibility of such losses or damages, (b) claims, demands or actions against the customer by any person, except as providedby applicable law.11ManufacturingTruma GerätetechnikGmbH & Co. KGWernher-von-Braun-Straße 12 D - 85640 Putzbrunn Germany Sales & ServiceTruma Corp2800 Harman DriveElkhart, IN 46514USAToll Free 1-855-558-7862Fax 1-574-538-2426*********************492-1··1/219·©In case you encounter any problems, please contact the Truma ServiceCenter at 855-558-7862 or one of our authorized service partners. For details see .Please have the model number and serial number (see type plate) handy when you call.。
冷藏柜设备操作说明书
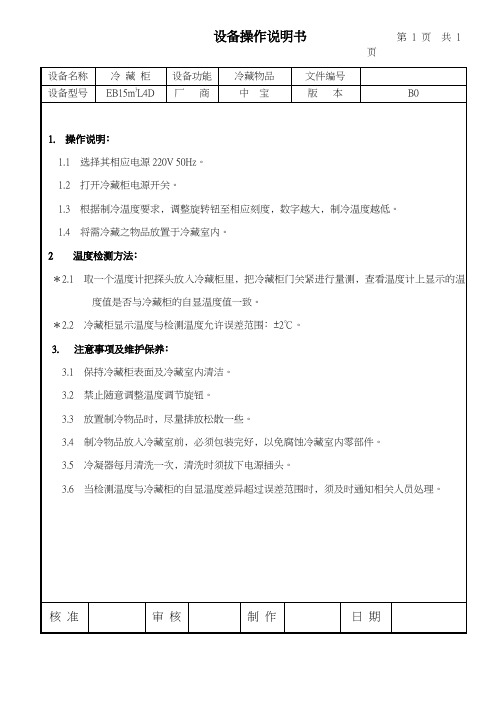
*2.2冷藏柜显示温度与检测温度允许误差范围﹕±2℃。
3.注意事项及维护保养﹕
3.1保持冷藏柜表面及冷藏室内清洁。
3.2禁止随意调整温度调节旋钮。
3.3放置制冷物品时﹐尽量排放松散一些。
设备操作说明书第1页共1页
设备名称
冷藏柜
设备功能
冷藏物品
文件编号
设备型号
EB15m3L4D
厂商
中宝
版本
B0
1.操作说明﹕
1.1选择其相应电源220V 50Hz。
1.2打开冷藏柜电源开关。
1.3根据制冷温度要求﹐调整旋转钮至相应刻度﹐数字越大﹐制冷温度越低。
1.4将需冷藏之物品放置于冷藏室内。
2温度检测方法﹕
3.4制冷物品放入冷藏室前﹐必须包装完好﹐以免腐蚀冷藏室内零部件。
3.5冷凝器每月清洗一次﹐清洗时须拔下电源插头。
3.6当检测温度与冷藏柜的自显温度差异超过误差范围时﹐须及时通知相关人员处理。
核准
审核
制作
日期
医用冷藏箱操作SOP

医用冷藏箱操作SOP1.开机前检查1.1 电源电压:本设备使用220V交流电源,如果使用电压低于187V 或高于242V,需加装合适的自动稳压器配合使用;1.2 使用本医用冷藏箱,要求电源有低压空气断路器和漏电保护装置;1.3 必须使用专用独立插座并进行可靠接地,不得随意加长电源线长度,如确实需要加长,务必使用2.5mm2以上的铜芯导线,与电源插座相连接的墙壁内铜芯导线截面积也必须保证在4mm2以上;2.开机接通电源,打开机器后上部的电源开关至“|”状态(注:BYC-160/250/310 三个型号无电源开关,接通电源即可),控制器指示灯亮起,温控器显示屏会显示箱体内温度。
3.工作3.1 机器开启后,运行约30分钟后,箱体内的温度有明显下降,表示制冷系统工作正常。
3.2运行一段时间,待箱体内温度降至使用温度并稳定后,可以开始时放入物品,要分批次存放,等待上一次存放后箱内温度降到设定温度,再存放下一次。
3.3为了降低能耗,要尽量减少开门次数和缩短每次开门的时间。
3.4温度和湿度较高环境下,BYC-160/250/310需要开启玻璃门的电加热功能,玻璃门的电加热开关在机器的背面上部,“|”为开启状态。
4.数据4.1 机器正常工作后,需要调节机器的时钟,以便使机器的运行温度数据得以合适的保存,具体调节方式如下:同时按下下调键和强制除霜键5秒,进入时间参数值调节页面,默认页显示t(分)。
按上调键分别显示H(时)、d(日)、M(月)、y(年)对应参数。
选择需要调节的参数,按设定键数码管闪烁,通过按上调键或下调键对此参数进行调节,再按设定键保存当前参数值。
4.2 机器运行数据存储在温控器内,通过USB接口插入U盘,数码管显示uP,数据开始存储至优盘,数码管显示End时数据存储结束,取下优盘到电脑上查看即可,数据文件为.CSV格式,用EXCEL可以打开。
5.维护与保养5.1日常清洁·医用冷藏箱适合每月清洁一次。
冷藏箱使用说明20180502

45RF和40RF冷藏箱使用须知1、45RF冷藏箱技术参数外尺寸(长×宽×高,单位mm):13716×2550×2896①CICU985507~CICU985511内尺寸(长×宽×高,单位mm):13000×2400×2400②CICU986338~CICU986357内尺寸(长×宽×高,单位mm):12600×2400×2380③CICU991327~CICU991356内尺寸(长×宽×高,单位mm):12600×2400×2380内容积(L*W*H):68 m3最高允许运载货物限重:26000 kg自重(整备状态):7450kg(柴油800L,大约680KG)40RF冷藏箱技术参数外尺寸(长×宽×高,单位mm):12192×2438×2896内尺寸(长×宽×高,单位mm):11180×2260×2380内容积:55.46m3最高运载货物限重:26990kg自重(整备状态):7010kg(柴油800L,大约680KG)40尺双冷机技术参数①CICU9956992内尺寸(长×宽×高,单位mm):10760×2280×2430实测内容积:53.76 m3②CICU9956987内尺寸(长×宽×高,单位mm):10700×2250×2400实测内容积:53.29 m3温控范围:冬季制热可以到 +5℃;夏季制冷可以到-18℃;其它季节温度根据设定自动调节。
2、装货上班列前的检查冷藏箱上门提货前,要对冷机进行必要检测,开启冷机正常后,再检查箱体有无裂缝、孔洞、门封胶条、门附件与紧固件有无问题,有无漏冷气,箱完好无漏气,冷机运行正常后方可出行,注意:回程应操作二部代理要求:40RF机组端箱门也需要施加铅封,施铅封位置与门端一致。
低温冷藏箱操作规程
低温冷藏箱操作规程1. 目的为了规范冷藏箱的使用,特制订本规程。
2. 适用范围适用于本公司产品的存放。
3. 职责3.1使用人员需求严格按照本规程操作。
3.2适用人员负责仪器的保养维护。
3.3 质量部负责仪器的校验。
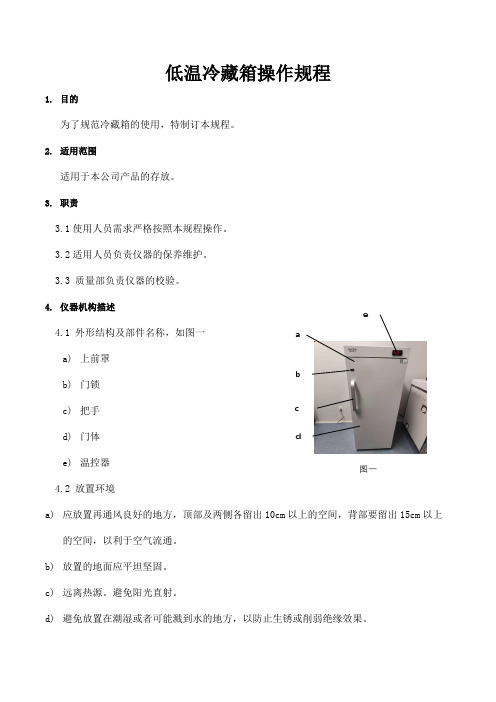
4. 仪器机构描述 4.1 外形结构及部件名称,如图一a) 上前罩b) 门锁c) 把手d) 门体e) 温控器4.2 放置环境a) 应放置再通风良好的地方,顶部及两侧各留出10cm 以上的空间,背部要留出15cm 以上的空间,以利于空气流通。
b) 放置的地面应平坦坚固。
c) 远离热源。
避免阳光直射。
d) 避免放置在潮湿或者可能溅到水的地方,以防止生锈或削弱绝缘效果。
a bc d e图一5.操作步骤5.1将低温保存箱的电源与插座(220V/50Hz)相连,此时先不要向冰箱内放置物品。
5.2待冰箱运行3h之后,确认温控器上显示的温度为-20±3℃。
再把物品放置其中。
5.3本低温保存箱再出厂时就被设置在-21℃,无需设定温度。
6.注意事项6.1本低温冷藏箱移动后,需静置30min后,方可将插头街道电源插座。
6.2放置的物品之间不应过于紧密,应留有适当间隙,以免影响空气循环。
6.3物品应当分类放置,避免不必要的长时间开门翻找,以减少冷气外溢,降低耗电量。
6.4请勿在箱顶上放置重物及带水的容器。
6.5请勿用湿手触摸冷藏箱的内壁及里面的物品,否则会冻伤皮肤。
7.维护保养与清洁7.1箱体表面请勿放置或悬挂较重物品,以免箱体变形。
7.2清洁前,请先切断电源,用软棉布沾少许无腐蚀的中性清洗剂擦拭内外表面,清洁后用干布擦干,切不可用有机溶剂、开水及洗衣粉等对箱体有害的物质。
7.3门封条极易粘上灰尘,要注意经常用温水擦洗。
7.4严禁用水冲洗本产品,勿用硬质刷洗品清洗本产品,以免引起电器件进水漏电。
7.5本产品停用前应拔下电源插头,彻底清洁箱内,用干抹布擦干,并打开箱门2-3天,使箱内干燥。
8.相关文件8.1《设备管理规程》8.2《状态标识管理规程》9.相关记录9.1《设备器具运行记录表》9.2《低温冷藏箱维护保养记录表》9.3《设备器具维修申请表》。
吸收式冷藏箱使用方法
吸收式冷藏箱使用方法一、冷藏箱基本介绍吸收式冷藏箱是一种便于携带和使用的冷藏设备,适用于户外野营、旅行和长途车行等场景。
它采用吸收式制冷技术,通过化学反应将热能转化为冷能,实现冷藏食品和饮料的效果。
二、使用前的准备1. 清洁冷藏箱:使用前应将冷藏箱内外进行清洁,以确保食品和饮料的卫生和安全。
2. 准备冷凝剂:吸收式冷藏箱需要添加冷凝剂,一般为水和盐的混合物。
根据冷藏箱的规格和使用需求,按照说明书中的比例准备好冷凝剂。
三、使用步骤1. 打开冷藏箱:将冷藏箱的盖子打开,确保冷藏箱内部干燥。
2. 添加冷凝剂:根据冷藏箱的容量,在指定的容器中按照比例准备好冷凝剂,然后将其倒入冷藏箱的冷凝剂槽中。
3. 连接电源:根据冷藏箱的型号,将电源线插入冷藏箱的电源插座,并将另一端插入家用电源插座。
4. 设置温度:通过控制面板或旋钮,按照需要将冷藏箱的温度设定为所需的冷藏温度。
一般来说,常见的温度范围为-18℃到10℃之间。
5. 放入食品和饮料:将要冷藏的食品和饮料放入冷藏箱中,注意不要超过冷藏箱的容量限制,以免影响制冷效果。
6. 关闭冷藏箱:将冷藏箱的盖子或门牢固关闭,确保密封性能良好,避免冷气泄漏。
四、使用注意事项1. 避免频繁开关:为了保持冷藏箱的制冷效果,尽量避免频繁开关冷藏箱,以免影响制冷效果。
2. 避免过载:不要将过多的食品和饮料放入冷藏箱中,以免超过冷藏箱的容量限制,影响制冷效果。
3. 维护冷凝剂:定期检查冷凝剂的浓度和状态,如有需要,及时更换或添加冷凝剂。
4. 清洁和保养:使用后应及时清洁冷藏箱内外部分,确保卫生和保养。
同时,也要定期检查冷藏箱的密封性能,确保制冷效果。
5. 避免长时间停电:如果长时间停电,尽量避免打开冷藏箱,以免冷气泄漏导致食品变质。
五、常见问题解答1. 冷藏箱是否需要预先制冷?吸收式冷藏箱无需预先制冷,直接使用即可。
2. 冷藏箱可以制冷多长时间?具体制冷时间取决于冷藏箱的型号和环境温度等因素,一般来说,制冷时间可达数小时至数天。
冷藏柜操作说明

冷藏柜操作说明一、冷藏柜概述冷藏柜是一种用于存储和保鲜食物的设备。
本操作说明将为您提供使用冷藏柜的详细步骤和注意事项,以确保您能正确地操作和维护冷藏柜,延长其使用寿命。
二、冷藏柜操作步骤1. 接通电源将冷藏柜的电源线插入电源插座,确保电源供应正常。
2. 控制面板设置冷藏柜的控制面板通常位于柜体上方或侧面,具体位置请参照您所使用冷藏柜的说明书。
按照以下步骤设置控制面板:a. 打开控制面板上的电源开关。
b. 根据需要,设置冷藏温度。
通常可以通过上下箭头键或旋钮进行调节,选择适宜的温度。
c. 如果冷藏柜提供了特殊功能,如快速冷冻或快速降温等,可根据使用要求进行设置。
d. 确保所需温度和功能设置完成后,关闭控制面板的电源开关。
3. 存储食物a. 打开冷藏柜的门。
b. 根据您的需要和食物种类,合理摆放食物。
注意不要将食物放置太过拥挤,以确保空气流通,并避免食物的过早腐败。
c. 如果冷藏柜提供了可调节的货架,可以按照需要进行调整,以适应不同尺寸和类型的食物。
d. 注意将易腐食物放置在较低的温度区域,以延长其保鲜期。
4. 定期清洁冷藏柜容易积累污垢和冰渍,定期清洁可以保持其卫生和正常运行。
注意以下步骤:a. 断开冷藏柜的电源插头,确保安全。
b. 使用柔软的湿布或海绵,加入适量中性洗涤剂清洁冷藏柜内外表面。
c. 清洁过程中避免水流进入控制面板或电器部件。
d. 使用干净的湿布将清洁剂残留物清洗干净。
e. 干燥后,重新连接电源插头。
5. 警告和注意事项a. 请勿将冷藏柜用于非指定用途。
b. 不要将已经过期或有异味的食物放入冷藏柜。
c. 避免长时间敞开冷藏柜的门,以保持内部温度稳定。
d. 冷藏柜不宜放置过重的物品,以免损坏货架或造成意外伤害。
e. 在清洁冷藏柜时,务必遵循相关操作规定,确保安全和有效。
三、维护保养建议1. 定期检查冷藏柜的电源线和插头,避免因损坏导致电器故障或安全事故。
2. 如发现冷藏柜运行异常,出现异常噪音或温度无法达到设定值,请及时联系维修人员进行检修。
冷藏柜操作规程

冷藏柜操作规程
《冷藏柜操作规程》
一、冷藏柜的开启与关闭
1. 打开柜门前,确认柜门上的冷藏柜温度已经达到所需温度。
2. 打开柜门时,应轻柔且缓慢,避免在操作过程中受伤或者损坏柜门。
3. 关闭柜门时,应确保柜门完全关闭,并且听到柜门锁定声音。
二、冷藏柜的物品存放
1. 将需要存放的物品整齐地放置在冷藏柜内,避免摆放混乱。
2. 不得将过期食品或易腐烂的食品放置在冷藏柜内。
3. 必须定期清理冷藏柜内的过期食品或者腐烂食品,以保持冷藏柜的卫生。
三、温度调节
1. 遵照冷藏柜上的调节按钮,调节冷藏柜的温度,以适应所需的物品保鲜。
2. 调节温度时,应按照指示依次操作,避免误操作导致冷藏柜温度失控。
四、清洁与维护
1. 定期对冷藏柜进行清洁,尤其是柜门的密封处和灯具的灰尘清理。
2. 定期检查冷藏柜的运行状态和温度控制系统,如有异常及时维修或更换零部件。
3. 对于冷藏柜内部的零部件和配件,如有损坏或者无法正常使
用,及时维修或更换。
以上就是关于冷藏柜操作规程的相关内容,大家在使用冷藏柜时,务必遵守规程,以确保冷藏柜的正常运行和食品的安全。
医用冷藏箱BPR-5V628 BPR-5V968使用说明书
医用冷藏箱使用说明书适用型号:BPR-5V628BPR-5V968设备使用期限:8年生产日期:见产品标签使用前请详细阅读此说明书注意保存,以便查阅2020-03-01编制2022-05-07修订济南鑫贝西生物技术有限公司目录前言 (2)1适用范围 (3)2工作环境 (3)3产品参数 (3)4产品性能 (3)5工作原理和产品结构 (4)6安装及使用说明 (5)7维护和保养 (10)8注意事项 (12)9标签说明 (14)10电磁兼容性 (15)11常见故障分析 (16)附件A电路原理图 (17)附件B装箱清单 (18)附件C保修凭证 (19)前言尊敬的用户:感谢您选购济南鑫贝西生物技术有限公司产品。
本产品名称为医用冷藏箱,以下简称:冷藏箱。
为了使您对本产品有更多的了解,并安全合理的使用产品,请在使用前仔细阅读使用说明书,本说明书的内容对您安全、正确的使用本机器非常重要!请妥善保管本说明书,以备随时查阅。
如果不按制造厂规定的方法来使用设备,则可能会损害设备所提供的防护。
在标有的情况下均需要查阅说明书,以便确认潜在危险的性质以及必须采取的任何应对措施。
1适用范围医用冷藏箱用于提供2℃~8℃储存环境,供医疗机构储存试剂等样本。
2工作环境a)仅适用于室内;b)环境温度:10℃~32℃;c)相对湿度:≤80%;d)电源:AC220V/50Hz;e)周围无强烈震动及腐蚀性气体存在;f)无阳光直接照射及其他冷热源的影响。
3产品参数产品名称医用冷藏箱型号BPR-5V628BPR-5V968容积628L968L温度范围2~8℃气候类型SN/N额定功率537W内部尺寸(宽×深×高)(mm)1100×454×13251100×684×1325外部尺寸(宽×深×高)(mm)1220×630×18851220×860×1885耗电量7.3kW·h/24h日光灯14W(LED)噪声<60dB(A)软件发布版本:BPR-LED-BUZ-V1.0.0.04产品性能4.1储藏温度冷藏箱温度设定为5℃,在稳定状态下,各测点的测点温度不应偏离2℃~8℃范围,箱内温度不应偏离3.5℃~6.5℃范围,箱内各测点的温度瞬时值不应小于0.5℃。
冷冻冷藏箱简易说明书
冷冻冷藏箱简易说明书安装环境:环境温度:16℃到32℃,希望的温度为18℃到25℃,必要时应使用空调系统。
环境湿度:低于75%Rh。
避开大量灰尘。
避开机械摇摆或震动。
冷藏冷冻箱工作位置海拔高度:低于2000m。
输入电压:220V10%以内。
禁止将冷藏冷冻箱安装在露天环境中。
当冷藏冷冻箱受到雨水淋湿时,有可能会导致漏电或触电事故。
由于冷藏冷冻箱对环境温度较为敏感。
假如安装在上述以外的其他环境下,冷藏冷冻箱不能正常运行。
请改善环境后使用。
禁止将冷藏冷冻箱安装在露天环境中。
当冷藏冷冻箱受到雨水淋湿时,有可能会导致漏电或触电事故。
安装场所:为了使冷藏冷冻箱正常运行并获得最佳性能水平,冷藏冷冻箱安装场所应符合下列条件:不能安装在狭小密闭的空间,放置房间的门体不能小于和低于本产品,至少应保证产品的正常进出,以避开机器发生故障时造成维护和修理困难,无法适时修复机器,造成储品的损坏。
安装处地面必需坚实平整。
通风良好,避开阳光直射。
不要与其它设备的插头共用一个插座,插头与插座坚固连接。
不要使电源线扭曲或受压。
假如要将电源线加长,加长线截面积不得小于2mm²,同时长度不长于3m。
使用前请检查工作电压,电压不稳定的地区应考虑使用适合电动机负载的稳压器稳压。
以保证正常输入电压稳定在220V10%,稳压器功率大于400W。
冷藏冷冻箱应保证牢靠接地。
假如电源插座装有接地线,使用前检查接地是否良好。
假如插座未装有接地线,则务必由专业的工程技术人员安装上接地线。
阔别辐射区域,并避开在其周边使用对辐射敏感设备。
不要通过煤气管道、供水管、电话线或避雷针等给冷藏冷冻箱接地,易引起触电。
安装后,电源插头必需可触及,便利在紧急情况下适时拔下电源线。
任何物品不得遮住冷藏冷冻箱的通风口。
使用前的准备:1.取下包装材料和包装带取下全部运输用包装材料和包装带。
未拆开包装前,要搬运冷藏冷冻箱,可使用叉车或夹包车。
若使用叉车,要从冷藏冷冻箱正面或背面木底托底部插入,移动箱体。
防疫冷藏箱(温度记录)使用说明

冷藏箱说明书1.产品描述该冷藏具有重量轻、保冷时间长、牢固耐用及备有供选择的蓄冷源,可使箱体内温度更低,保冷时间更长等优点。
同时该冷藏箱搭配一个温度记录仪,具有记录箱体内温度数据、及数据导出等功能。
用户可设置记录间隔、温度报警的上下限、记录仪时钟及记录仪和用户信息等属性,数据软件还具有数据分析的功能,可通过列表显示数据和绘制曲线分析图,对超温限报警点显示报警标志。
历史数据可以查询、保存、打印和以Word格式输出。
2.冷藏箱尺寸及性能型号HM-52冷源数12冷藏容积50L满负荷重量13kg容器V级坚固度连接器IV级内/外壁材料塑料隔热材料聚氨酯发泡保冷时间+43℃24小时3.冰排尺寸及性能冰排的技术与检测程序符合WHO标准:E5/IP2,E5/PROC/1◆冻固状态、厚度方向变形小于10%◆容积0.4L◆满足强度(1米高度跌落)实验要求4.冷藏方法把环保冰袋(注水冰排或者储能冰排)注水后平放在冰箱或冰柜中,冷冻12小时以上后放入移动冰箱中,置于药品、疫苗、食品等物品的上部或侧部,盖严上盖即可。
环境温度不高于40度的箱温可稳定在2~8℃以下长达约20小时,15度以下可以至少30个小时以上。
5.温度记录仪使用方法该冷藏箱配置的温度记录仪具备性能可靠、操作简单、功耗低、断电后数据不丢失、防水性能好等特点,LCD屏幕显示工作状态及温度数据,数据处理软件界面友好。
技术参数:1、供电电源:2.4Ah 3.6V 非充电电池一枚(当温度记录仪与计算机有效连接时,其电源由计算机通过USB接口供给)2、测温范围:传感器外置状况下:-40.0℃~70.0℃传感器内置状况下:-30.0℃~50.0℃3、测温精度:-20℃~20℃时±0.5℃;其余范围内±1℃4、温度分辨率:0.1℃5、记录周期:2秒~24小时可连续设置,或根据记录时长由记录仪自动分配6、传感器类型:NTC7、实时传输时间间隔:10秒至24小时可调8、记录容量:RC-30:3900点;RC-30A:8000点;RC-30B:16000点,产品标价是RC-30的,A再加50元,B再加100元。
冰柜使用说明书

冰柜使用说明书一、产品介绍冰柜是一种能够制冷储存食品和饮料的家电产品。
它采用先进的制冷技术,能够将物品保持在低温状态,延长其保鲜时间。
本使用说明书将向您介绍冰柜的安装、使用、注意事项等内容,帮助您正确使用冰柜,提供更好的储存体验。
二、安装步骤1. 打开冰柜包装箱,取出冰柜本体和附件。
2. 选择一个通风良好、水平放置的地方,避免阳光直射。
3. 将冰柜稳固地放置在地面上,确保四个脚底平稳地接触地面。
4. 将电源线插头插入插座,并确保供电正常。
5. 等待数小时,直至冰柜内部温度达到设定温度,即可开始使用。
三、使用方法1. 电源开关:位于冰柜本体的控制面板上,用于打开或关闭电源。
2. 温度控制:位于控制面板上的温度调节钮,可调节冰柜的工作温度。
适当的温度能够满足不同物品的储存需求。
3. 照明开关:位于控制面板上,用于打开或关闭冰柜的照明灯。
4. 储存方式:将要冷藏的食物和饮料按照大小和种类分别放置在不同的冷藏室。
5. 维护清洁:定期清理冰柜内的残留物和霜冻,以保持其工作效果。
请使用柔软的布料擦拭,勿用硬物刮擦冷藏室内壁。
6. 解冻方法:当冰柜内结冰达到一定程度时,可使用解冻功能进行解冻。
使用前请将冰柜内的物品取出,关闭电源,并等待冰融化。
切勿使用尖锐物体刮擦冰柜。
四、注意事项1. 请遵循冰柜的使用说明进行正确操作,防止对冰柜造成损坏。
2. 当冰柜长时间不使用时,请将电源开关关闭,并拔掉电源插头。
3. 在清洁冰柜时,请务必断电,并等待冷藏室回温再开始清洁。
4. 长时间不使用冰柜时,可以保留一些食物和饮料在冰柜内,以减少能源消耗。
5. 当冰柜遇到故障时,请勿私自修理,请联系专业客服人员进行维修。
6. 避免在潮湿、高温和多尘的环境中使用冰柜,以免影响其使用寿命。
五、售后服务本产品提供一年质保服务,质保期内的故障可享受免费维修。
若需维修服务,请联系售后服务中心,提供产品型号、购买日期和故障描述等信息,以便我们为您提供更好的服务。
冷藏箱使用操作规程

冷藏箱使用操作规程1、目的:建立冷藏箱使用操作规程,规范冷藏箱使用操作,确保冷藏箱运输药品质量。
2、依据:《药品经营质量管理规范》(国家总局13号令)等相关法律法规及公司制度。
3、范围:适用于公司冷藏箱的操作与管理4、责任:设备管理员及冷藏箱使用操作人员对本操作规程的实施负责5、内容:5.1冷藏箱使用5.1.1冷藏箱连接电源逆变接入库区电源,电源指示灯power键亮起。
5.1.2设定冷藏箱温控器温度为2℃。
如下图所示,按set键开始设定,按“▲”或“▼”直至温度显示为2℃即可。
待冷藏箱运行7小时温度达到平稳。
5.1.3将冷藏箱放进运输车。
5.1.4启动车辆发动机,将冷藏箱电源与点烟头连接。
放置温度记录仪探头在冷藏箱内,记录仪显示屏置于冷藏箱体门外固定。
5.1.5待温度稳定到0-5℃之间后开箱装货,将冷藏箱内温度探头放在冷藏箱中间隔断的侧边,最好放置在药品包装箱内。
5.1.6装货时间不超过20分钟。
夏季运输时应开启运输车辆空调。
5.1.7 关闭玻璃滑门和冷藏箱箱体门,冷藏箱装货完毕。
5.2冷藏箱清洁保养5.2.1清洁前拔掉电源插头5.2.2用软布或海绵蘸清水擦洗,可以使用无腐蚀性的中性洗涤剂。
禁止使用有机溶剂、碱性溶剂、沸水、洗衣粉等清洁冷藏箱。
5.2.3冷藏箱内胆结霜层厚度达5mm左右时,拔掉电源,打开箱体门化霜,化霜结束后用软布及时清理水渍。
5.3注意事项5.3.1冷藏箱箱体门不能打开超过90°。
5.3.3严禁私自拆卸,改造,禁止人为损坏制冷管路。
5.3.4清洁及维修冷藏箱前,或当冷藏箱出现故障或停电时,应拔下点烟头或者电源插头,至少保持间隔5分钟,才能再次接通点烟头或电源插头,以防因连续启动损坏压缩机。
Thermo King 单温度货物冷藏箱操作手册说明书
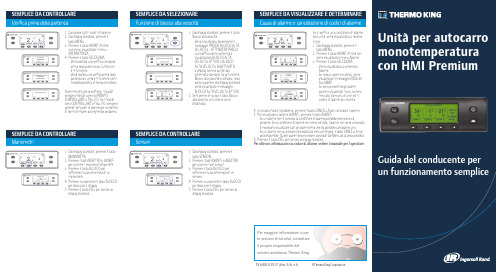
Semplice da Selezionare Funzione di blocco alta velocitàSemplice da controllareSensoriSemplice da viSualizzare e determinare Causa di allarme e cancellazione di codici di allarmePer maggiori informazioni o per le sessioni di tutorial, contattare il proprio responsabile del servizio assistenza Thermo King1. Dal display standard, premere il tasto Blocco alta velocità.• Verrà visualizzato brevemente il messaggio PROGR. BLOCCO ALTA VELOCITÀ - ATTENDERE PREGO.• La modifica verrà confermata visualizzando BLOCCO ALTA VELOCITÀ ATTIVO o BLOCCO ALTA VELOCITÀ DISATTIVATO.• Il display tornerà quindi allaschermata standard. Se la funzione Blocco alta velocità è attivata, nella parte superiore del display standard verrà visualizzato il messaggio BLOCCO ALTA VELOCITÀ ATTIVO.2. Se si preme di nuovo il tasto Blocco alta velocità, la funzione verrà disattivata.Se si verifica una condizione di allarme dell’unità, verrà visualizzata la relativa icona.1. Dal display standard, premere il tasto MENU.2. Premere il tasto AVANTI finché non viene visualizzato il menu Allarme.3. Premere il tasto SELEZIONA.• Verrà visualizzata la schermata Allarme.• Se nessun allarme è attivo, viene visualizzato il messaggio NESSUN ALLARME.• Se sono presenti degli allarmi, saranno visualizzati il loro numero (nel caso siano più di uno) ed il codice di allarme più recente.1. Dal display standard, premere il tasto SENSORI.2. Premere i tasti AVANTI o INDIETRO per scorrere i vari sensori.3. Premere il tasto BLOCCO per soffermarsi sulla schermata di un sensore.4. Premere nuovamente il tasto BLOCCO per sbloccare il display.5. Premere il tasto ESCI per tornare al display standard.2. Premere i tasti INDIETRO o AVANTI per scorrere i manometri disponibili.3. Premere il tasto BLOCCO per soffermarsi sulla schermata di un manometro.4. Premere nuovamente il tasto BLOCCO per sbloccare il display.5. Premere il tasto ESCI per tornare al display standard.TK 61003-8-PC-IT (Vers. 0, 01/13) ©Thermo King Corporation4. Una volta risolto il problema, premere il tasto CANCELLA per cancellare l’allarme.5. Per visualizzare l’allarme AVANTI, premere il tasto AVANTI.• Se un allarme non si cancella, la condizione di allarme potrebbe essere ancorapresente. Se la condizione di allarme non viene corretta, l’allarme non verrà cancellato. È necessario visualizzare tutti gli allarmi prima che sia possibile cancellarne uno.• Se un allarme non può essere cancellato dal menu principale, il tasto CANCELLA non sarà disponibile. Questi allarmi devono essere cancellati dai Menu ad accesso protetto.6. Premere il tasto ESCI per tornare al display standard.per ulteriori informazioni sui codice di allarme, vedere il manuale per l’operatore.1. Premere il tasto ON per accendere l’unità.• Il logo Thermo King verrà brevemente visualizzato durante l’avviamento del sistema.• Viene brevemente visualizzato il messaggio CONFIGURAZIONE SISTEMA - ATTENDERE PREGO in attesa che vengano stabilite le comunicazioni e l’unità si prepari al funzionamento.• In seguito viene brevemente visualizzato il display standard in cui vengono riportati il punto di riferimento e la temperatura della cella.• Viene visualizzato il messaggio AVV. MOTORE DIESEL quando il motore si preriscalda e si avvia. Nelle unità• Sul display verrà visualizzato brevemente il messaggio SBRINAMENTO, seguito da PROGRAMMAZIONESBRINAMENTO - ATTENDERE PREGO e quindi SBRINAMENTO INIZIATO.• L’indicatore a barra mostra una stima della percentuale di tempo rimanente per il completamento del ciclo di sbrinamento.1. Dal display standard, premere il tasto MENU per visualizzare il menu MODALITÀ.2. Quando viene visualizzato il menu MODALITÀ, premere il tasto SELEZIONA.• Verrà visualizzato il messaggio DISATTIVA MODALITÀ CYCLESENTRY o ATTIVA MODALITÀ CYCLESENTRY.3. Premere il tasto SELEZIONA per modificare la modalità.• La nuova modalità viene confermata per 10 secondi seguita dal messaggio LA NUOVA MOD. SISTEMA È (Cycle-Sentry o Modalità continua).4. Dopo che il display è tornato al menu Modalità, premere il tasto ESCI per tornare al display standard.5. Premere nuovamente il tasto SELEZIONA per far nuovamente funzionare l’unità nella modalità precedente.1. Dal display standard, premere il tasto PUNTO DI RIFERIMENTO.• Viene visualizzato il messaggioPUNTO DI RIFERIMENTO ATTUALE.2. Premere i tasti + o - per aumentare o ridurre il punto di riferimento.• Viene visualizzato il messaggio IL NUOVO PUNTO DI RIFERIMENTO SARÀ XX.3. Premere il tasto SÌ o NO.• Viene visualizzato il messaggio PROGR. NUOVO PUNTO DI RIFERIM. - ATTENDERE PREGO.• Viene visualizzato brevemente il messaggio IL NUOVO PUNTO DI RIFERIMENTO SARÀ XX.• Viene visualizzato il display standard con il nuovo punto di riferimento.NOTA: Il ciclo di sbrinamento termina automaticamente quando la serpentinadell’evaporatore raggiunge una temperatura predeterminata o quando scade il timer dello sbrinamento. Il ciclo di sbrinamento può essere concluso anche spegnendo e riavviando l’unità.1. Dal display standard, premere il tasto MENU.2. Premere il tasto AVANTI finché non viene visualizzato il menu Contaore.3. Premere il tasto SELEZIONA per accedere al menu Contaore.4. Premere i tasti AVANTI e INDIETRO per visualizzare i display del contaore.5. Premere il tasto ESCI per tornare al display standard.1. Collegare l’alimentazione con la tensione corretta alla presa di alimentazione dell’unità.2. Premere il tasto ON per accendere l’unità.• Il logo Thermo King verràbrevemente visualizzato durante l’avviamento del sistema.• Viene brevemente visualizzato il messaggio CONFIGURAZIONE SISTEMA - ATTENDERE PREGO in attesa che vengano stabilite le comunicazioni e l’unità si prepari al funzionamento.• In seguito viene brevementevisualizzato il display standard in cui vengono riportati i punti di riferimento e le temperature della cella.dotate di SmartPower, verrà visualizzato il messaggio ATTIV. MOTORE ELETTRICO se l’unità è collegata all’alimentazione di riserva.• Viene visualizzato il display standard in cui vengono riportati il punto di riferimento e la temperatura della cella mentre l’unità è in funzione.2. Premere il tasto OFF per spegnere l’unità.• L’unità si spegnerà immediatamente e verrà visualizzato brevemente il messaggio IL SISTEMA È IN SPEGNIM.• Verrà visualizzato il messaggio ATTIV. MOTORE ELETTRICO.• Viene visualizzato il display standard in cui vengono riportati i punti di riferimento e le temperature della cella mentre l’unità è in funzione.3. Premere il tasto OFF per spegnere l’unità. L’unità si spegnerà immediatamente e verrà visualizzato brevemente il messaggio IL SISTEMA È IN SPEGNIM.。
sinobelieve冷藏箱说明书
sinobelieve冷藏箱说明书
(1)使用前做好内、外检查,箱内如有他人存物,取出放好。
试验开关、调温手柄等是否灵活好用。
打开风顶(排气孔),插好温度计。
注意电源和铭牌上标称电压是否相符。
箱壳要接好地线,以防漏电。
(2)通电后指示灯亮,如加热指示红灯不亮应将调温旋钮顺时针方向转动至红灯发亮。
恒温箱如有辅助加热丝及鼓风马达,应将它们的开关都打开。
若时间充裕,可关掉主加热丝以延长其使用寿命。
(3)当箱内温度(由温度计读出)接近所需温度时,关掉辅助加热丝,只在主加热丝继续加热,箱内温度即将达到所需的温度时,反时针旋转调温旋钮使红灯刚灭,绿灯刚亮。
待红绿灯自动交替明灭时,表示箱内温度已处在恒温状态。
由温度计读数看是否为所需温度,如有偏差可稍调节调温旋钮。
(4)当箱内温度稳定在所需要温度后放入待干燥或待培养(保温)样品。
温度计指示最上层网架中心2/3面积的近似温度,所以样品尽量放在这个部位,其他层次和部位实际温度要偏高一些。
(5)使用完毕,关掉各个开关,并把调温旋钮反时针退回零位。
(6)要等箱内温度不很高时才可打开箱门,以防骤然降温造成玻璃门破裂。
(7)调温旋钮所指刻度并非箱内温度。
每次恒温后可把恒温温度及旋钮所指刻度对应记录,以后使用时作为参考,可以节省时间。